
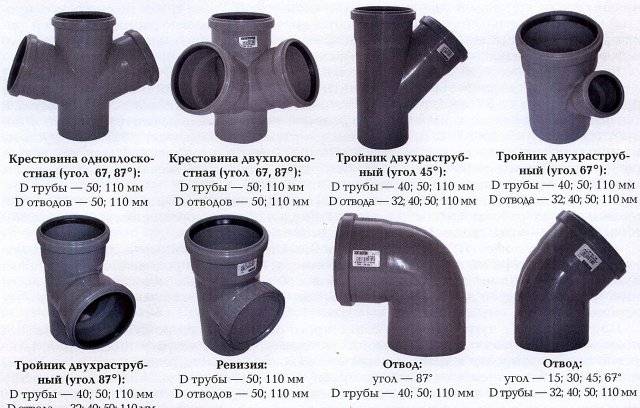
- Accounting and control
- HMS, aquastop, filter
- Mortise in horizontal system 110/50
- With factory cut
- With the help of a double
- With splitter and connecting fitting
- Working with cast iron and ceramic pipes
- Ventilated and non-ventilated riser
- Installing revisions
- How to connect a toilet to a sewer
- Best Answers
- As a conclusion
- Video - Replacing the sewer riser
- Mounting release
- How to install a sewer riser
- Mounting tool kit
- Features of choosing the diameter of sewer pipes
- Pipe diameter for series-connected plumbing fixtures
- How to dismantle a cast iron pipe
- The nuances of an integral connection
- in the bell
- Adhesive connection
- Space saving conduit box
Accounting and control
The selection and accounting unit consists of a shut-off valve, a coarse filter, a water meter and a check valve. Assembled as shown in the picture. Each of the devices indicates the direction of the water flow for it, it must be observed during assembly.

Selective-accounting water supply unit, assembly
The assembly is assembled with waterproofing of the joints with FUM tape and is also connected to the riser, having previously blocked the water; Remember to close the shut-off valve before supplying water.This is the only operation, and a short one, that requires turning off the water supply to the neighbors in the riser.
Separate meter units are needed for cold and hot water. It is highly desirable that the counters and valve handles be highlighted in color. The meter readings should be clearly readable without any additional operations (hatch removal, etc.), so it is often necessary to pre-assemble a part of an integral pipeline, sometimes of a rather bizarre configuration, to connect metering devices to the riser. In addition to pipes and a soldering iron, for this you will need transitional couplings from plastic to metal MPV - a threaded inner coupling. Plastic is connected to metering units using MRN - external threaded couplings.
The meters are sold sealed, but this does not mean that you can immediately call the water utility and pay for water according to consumption. The factory seal is for this (the Russian land is rich in craftsmen) so that no one gets into the meter and twists or files anything there. The factory seal must be protected; without it, the meter is considered unusable, as well as without a certificate for it.
When installing water meters, you need to declare to the water utility and call its inspector. You can use water before he arrives, the inspector does not need zero readings, he will write down the initial ones, seal the meter and drain the filter with his seal. Payment for water consumption will go after registration of metering devices.
HMS, aquastop, filter
Although the design of the HMS is non-separable and does not allow stealing water with its help, and this device is not subject to sealing, connecting the HMS to the meter is unacceptable: the meter impeller can become clogged with sludge. HMS with a flask filter is connected after metering devices; filter - immediately after HMS.An aquastop can be connected immediately after the filter, but if it is electrodynamic, the magnetic field of the HMS can cause its false operation, but it makes no sense to attribute the aquastop far from the riser: it does not react to a breakthrough before it.
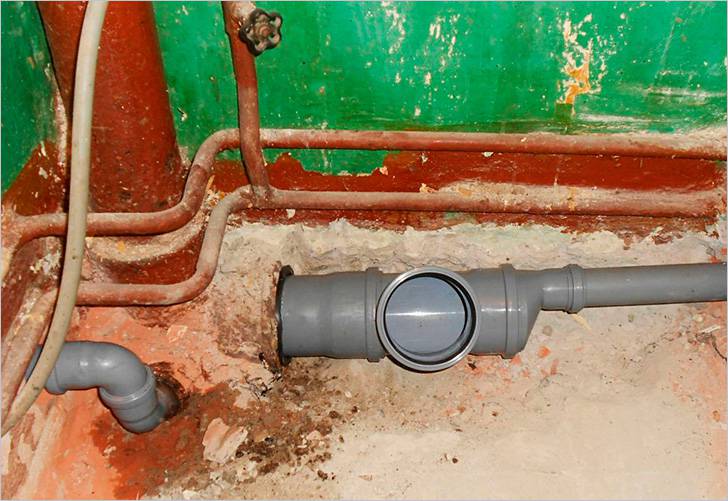
Mortise in horizontal system 110/50
This type of insert can be made in several ways. Depending on the situation, you can use any of the options described below, because. They are all field tested and guaranteed to work.
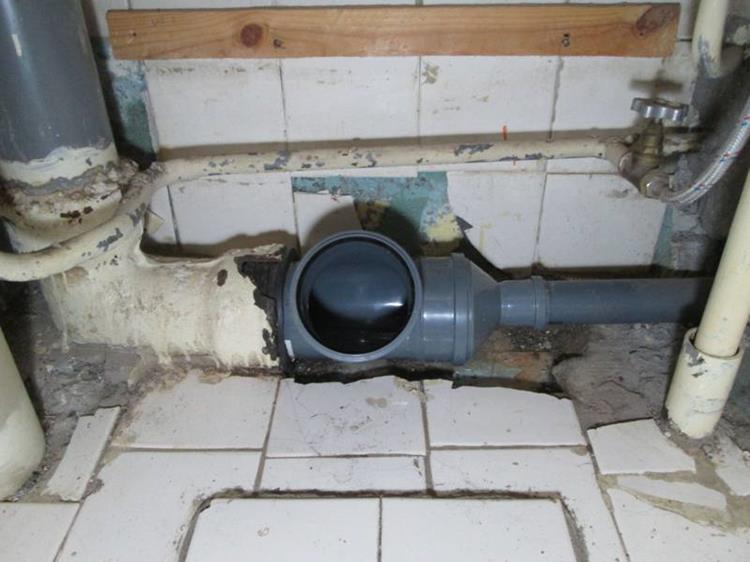
With factory cut
It is convenient to connect a drain with a diameter of 50 mm to a pipe of 110 mm using 110/50. To do this, according to the manufacturer's instructions, at the connection point you will need to drill hole diameter 57 mm. You can make a hole with a drill and a core drill. Next, the "tie-in" is installed in the mounting hole and tightened using the wrench supplied with the fitting.
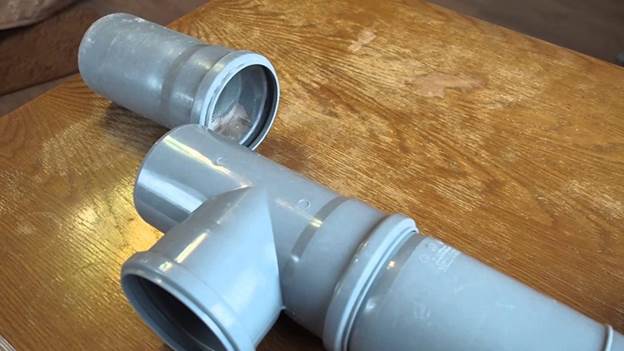
With the help of a double
The second option, in which you can do without a special mortise fitting, is to use a regular 110/50 double at 90 degrees, which is pre-cut lengthwise.
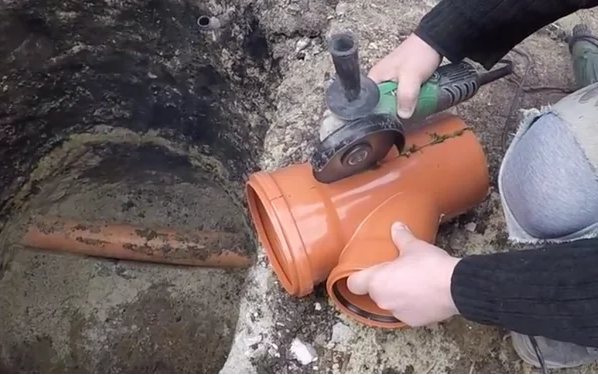
Correct fitting cut
It is necessary to prepare a hole in the main drain, where it is planned to connect an additional pipe. The diameter of the hole must be at least 50 mm and not more than 60. The shape of the hole should not be perfectly round, therefore, with this method, a grinder can be used to make it. The cut off part of the fitting is installed on the main pipe with an overlap and fixed with ordinary plumbing clamps. Raw rubber or sealant can be used as an insulator. This method is convenient because it does not require a complete cutting of the main pipe.
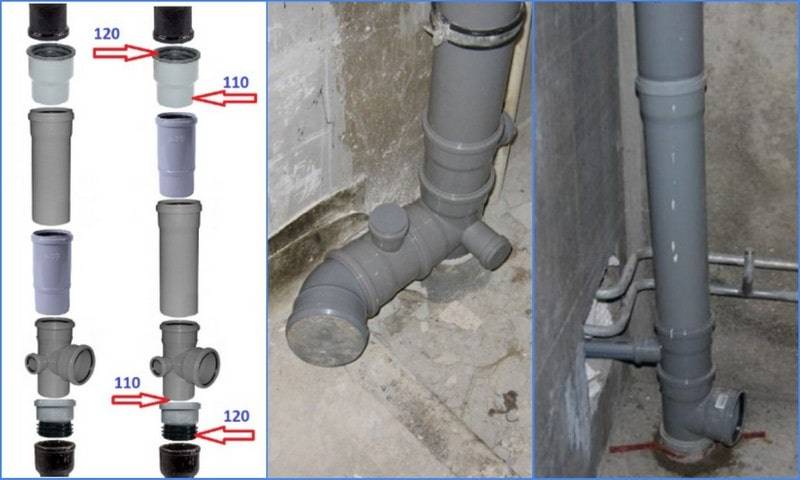
With splitter and connecting fitting
In the case when it is necessary to cut a pipe equal in diameter into the main drain, the two previous methods are not suitable. A splitter is required.
Splitter with expansion pipe
This method of inserting into a plastic pipe allows you to mount the splitter in a partially underground pipeline. The diameter of the connecting outlets of the splitter must be equal to the diameter of the main pipe, this requirement must also be met for the connecting fitting.
All that needs to be done is to cut a section from the main pipe equal in total to the length of the splitters and half the length of the connecting fitting. Next, clean the edges, grease with soapy water and install the fittings. First of all, the connecting element is installed and shifted so that it is possible to install the splitter. Then a splitter is put on the main pipe and the previously installed fitting is shifted back, connecting everything into a single sealed system.
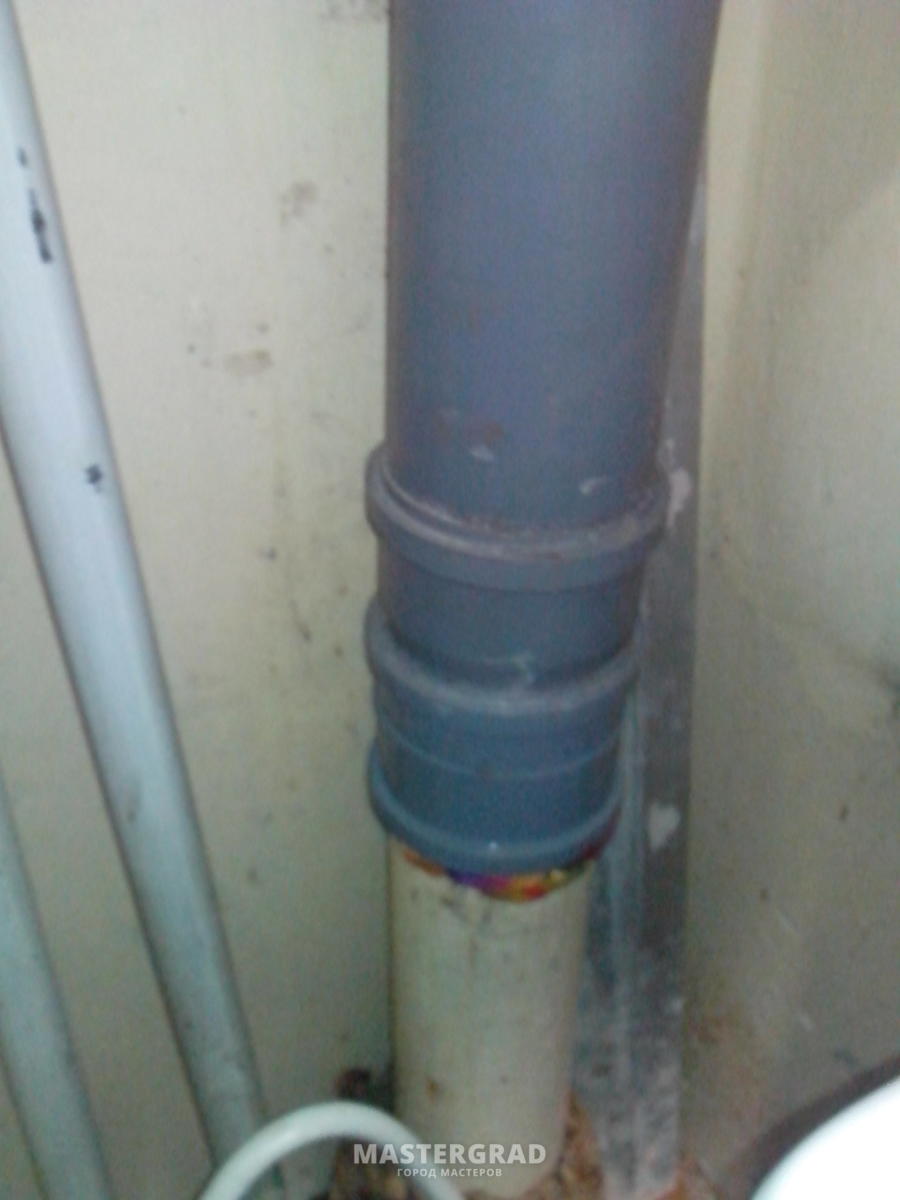
Working with cast iron and ceramic pipes
Since the methods of working with these types of pipes do not differ much, it is reasonable to study them together.
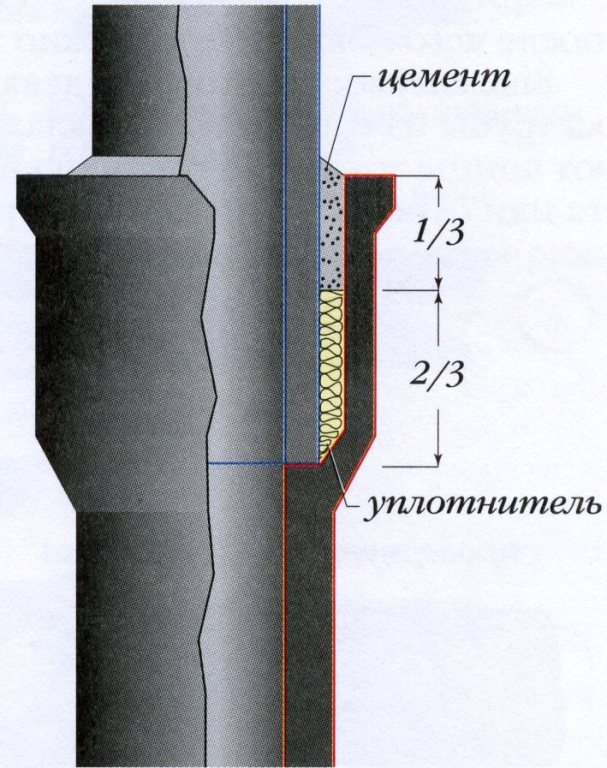
Similar pipes are also equipped with sockets, so they are simply inserted into each other. The junction turns out to be loose, and the gaps should be eliminated using ordinary tow. After that, you should use any waterproofing agent: silicone sealant, mastic or cement.
Most often, cement is used, which is associated with its cheapness. It is preferable to take a building material marked 400. In order to prevent cracking at the joint, it is necessary to wet a rag and tie it over your joint, and then moisten it. Since the cement absorbs liquid when it dries, a similar procedure is necessary.
Ventilated and non-ventilated riser
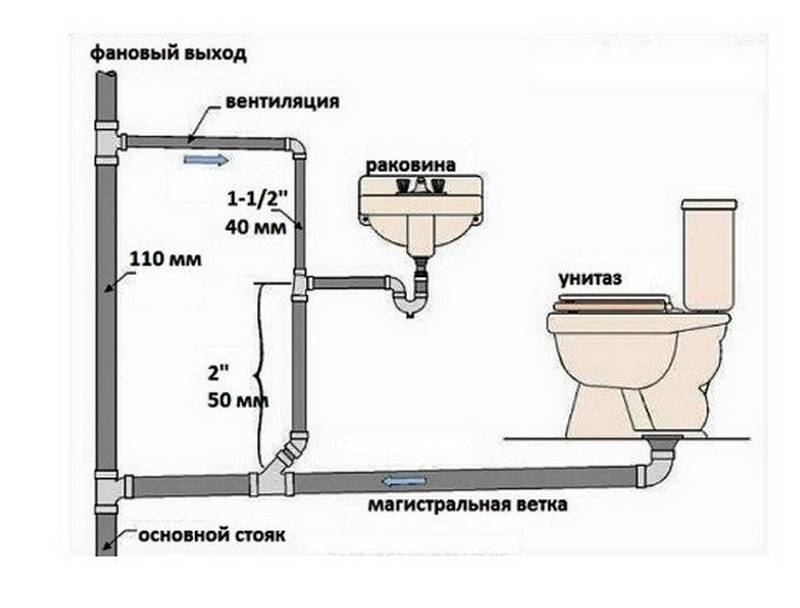
Sewer gases constantly accumulate in sewer systems. They can be toxic or explosive, and foul-smelling for sure. In order to prevent these gases from entering the premises through receivers, sanitary appliances are equipped with hydraulic seals. The gate is a bend in the pipe, inside of which there is water. Water does not let gases into the room.


With the intensive passage of wastewater through the riser, a vacuum is formed in it. If the vacuum exceeds the threshold limit, water from the hydraulic seals will be drawn into the riser - the so-called breakdown of the hydraulic seal will occur. Sewer gases, not meeting water, will freely enter the room.
To avoid rarefaction at the same time ensure the removal of sewer gases into the atmosphere allows the installation of a ventilation or fan pipe. The fan pipe is a continuation of the riser - it is displayed on the roof. A riser with a fan pipe is called ventilated, without a fan pipe - non-ventilated. A non-ventilated riser is also considered a riser equipped with a vent valve or a group of 4 or more risers, which are connected from above by a common pipeline without an exhaust part. The term "fan riser" is generally used at random.
The exhaust part of the riser is discharged through the roof or through the ventilation shaft. The height of the chimney above the roof should be:
- on flat and pitched unexploited roofs - at least 20 cm;
- above the edge of the ventilation shaft - not less than 10 cm;
- on exploited roofs - not less than 3m.
In addition, the distance between opening windows or balconies and the outlet of the ventilation pipe must be at least 4 m.
The diameter of the riser ventilation pipe must be equal to the diameter of the main pipe (8.2.16). If the chimney combines several risers, its diameter must be equal to the diameter of the largest riser from the combined group (8.2.17).
When laying in unheated attics, the exhaust pipe must be insulated.
Important: it is forbidden to install in mouth of exhaust pipe riser deflectors worsening traction - it will freeze in the first frost. If you can't install a ventilated riser, you can make it non-ventilated.
Installation of non-ventilated risers is allowed if:
If you cannot install a ventilated riser, you can make it non-ventilated. Installation of non-ventilated risers is allowed if:
- the ventilation mode of the external sewer network is maintained;
- the second flow rate of wastewater does not exceed the capacity of an unventilated riser of the corresponding height (see data on the throughput of unventilated risers in reference materials).
The number of storeys of the building does not play a role, although in the old version of SNiP there were slightly different requirements (SNiP 2.04.01-85). However, I strongly recommend that the riser be properly ventilated.
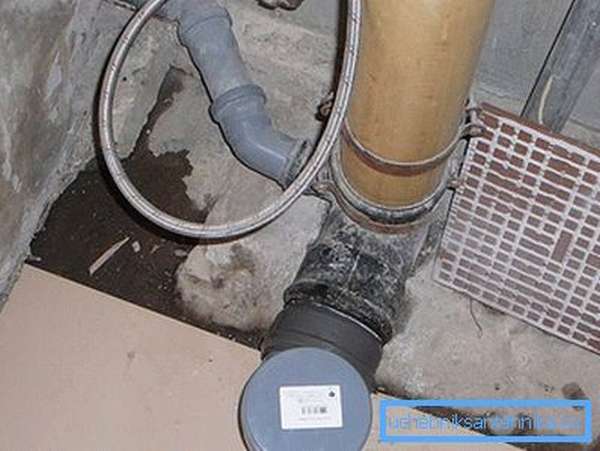
An unventilated riser should end with a revision or a cleaning hatch.
Installing revisions
The risers must be equipped with revisions. Revisions should be installed in the upper and lower floors (8.2.2), and with a height of more than 5 floors - every three floors (8.2.3). If the riser is indented, there must be a revision on the floor that is located above the riser indent.In a one-story private house, one revision is enough, in a two-story one too - (on the second floor).
The revision is located at a height of 1 meter above the floor. The storey side outlet must be under revision. The distance between the connection point and the revision is at least 150 mm.
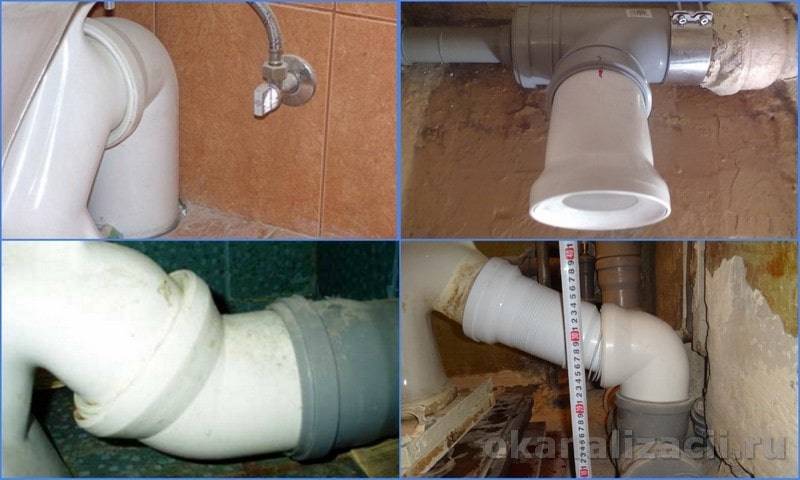
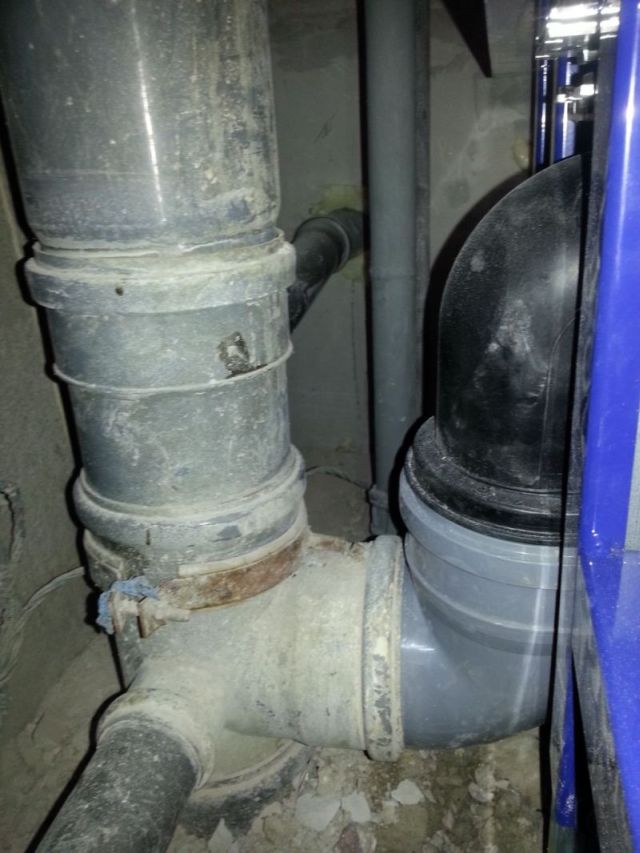
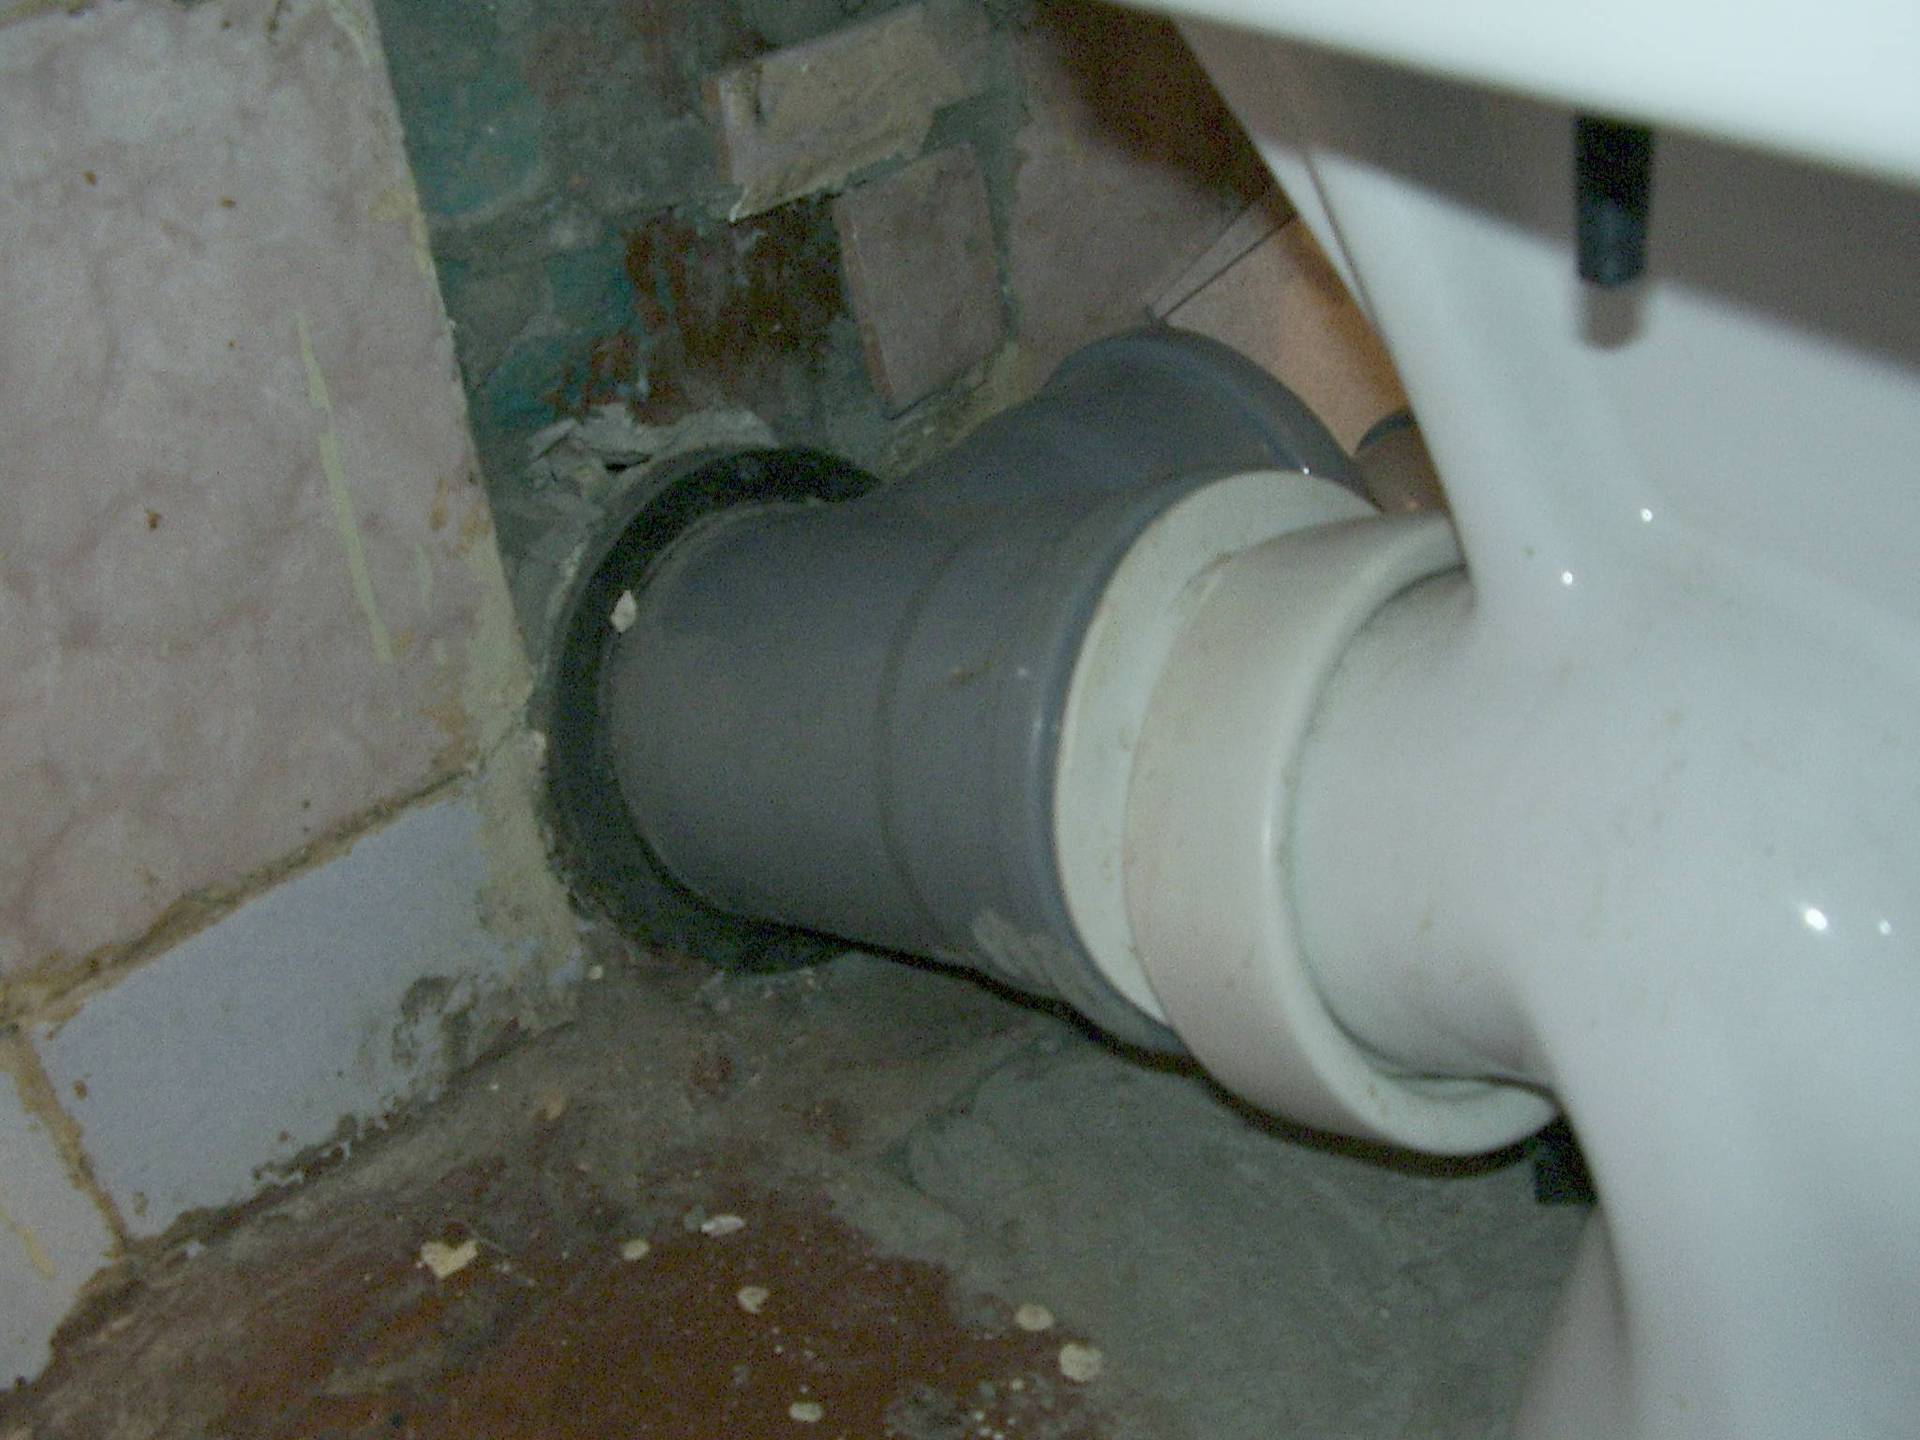
How to connect a toilet to a sewer
The outlet of the toilet bowl is standardized, and therefore there are no problems when buying a connecting pipe. Connecting the toilet causes difficulties when you need to connect the pipe to the sewer pipe. Typically, the sewer pipe has a diameter that is larger than the toilet outlet. Before installing the toilet, you need to consider what diameter the sewer inlet should be, and what, in addition to the toilet, will need to be included in the drain. In addition to the branch pipe, the connection also involves the use of adapters, cuffs and fittings.
Best Answers
Yaoza:
Here! Just problems due to the sewer pipe can be! I was so sick of the neighbors from below - I fill them and fill them. I changed the water pipes at the beginning - they complain. Then the sewer line came - but they didn’t want to change their tee (the one between the floors, into which my horizontal pipes and the riser itself enter), I just changed the pipes, inserted a new one into the old sewer tee. And it turned out that it was he who flowed - there was a crack between the floors. That's where it leaked. Then they had to change this tee anyway. Of course, the water in the sewer does not constantly flow, but when the upper floors are lowered, the water flows down + the circular centrifugal movement of water inside the pipe - that's what happens. that it gets into the pipe slot.
Galina Nikitina:
After our repair, water also flowed down from us, and when our neighbors from above drained the bath. It turned out that they didn’t put some thing like a pallet in our toilet bowl .. They did it - and there are no problems.


Winds:
Water from the can. riser (for example, the junction of the channel. The outlet to the toilet can be poorly sealed, and with a high pressure of water from the bathroom or when flushing the tank) get on the ceiling of the neighbors. You must clearly describe (or take a picture) the projection of the leak ..
with a chip in the channel. riser - water can gush from the fistula onto the wall and flow down.
Romance:
the neighbors accused us more than once of drowning them, they even came from the house, I’m not saying we are dry here, which means they are dry, but bl .. . how dry if the neighbors are still dripping. I personally climbed under the bath and checked in the toilet - it's dry! I sent it to the neighbors above, but no one listened to me. They drowned us more than once and the water has already done its job, found new passages
647 acc:
That's just the problem may be in the sewer pipe! ! ! I live in a panel five-story Khrushchev building, there are 20 apartments in the entrance, our riser is adjacent to 10 apartments. In 62 apartments on the first floor, it dripped from the ceiling, we live in 67 on the second floor. The cast-iron sewer tee between floors leaked. A locksmith from the housing department changed him in three apartments at once: in ours, 66 and 62. After his replacement, everything became normal. And before that, neighbors from 62 apartments also came to us that we were drowning them, but it was dry in our place.
Are her bones dry? The fact is that water can flow from the ceilings in its ceiling, gently flowing down the risers.Did you check it? Plumbers from the housing department of yours are simply too lazy to look, there is never a consequence without a reason. Well, or a cold riser leaked in the ceiling ... That the leak is in the ceiling, this is already a 100% option.
Raffi Baghdasaryan:
Cold water, hot water and sewage pipes pass through floors in floor slabs, in cold water and hot water sleeves this is according to SNiP y. Due to the negligence of the builders, sometimes they pass without sleeves and in contact with concrete, the pipes quickly rot. If the floor slab is hollow, then water can pass through the void and seep further from the riser. As for the sewer pipes, there may be a crack in the transition through the floors, which is also the reason for flooding.
As a conclusion
As a result, I would like to draw your attention to another important point - fire safety. The fact is that because of plastic, despite all its positive qualities, in the event of a fire, the flame can quickly spread throughout the house. To prevent this, protective cuffs are installed from a heat-resistant material that swells when heated.
This prevents the spread of fire not only inside, but also outside the riser.
Video - Replacing the sewer riser
Indentation in the sewer riser
Installed sewer line
Sewer riser assembly
Installed cuff
Compression adapter
Tools needed for the job
Preparation for dismantling
Dismantled cast iron
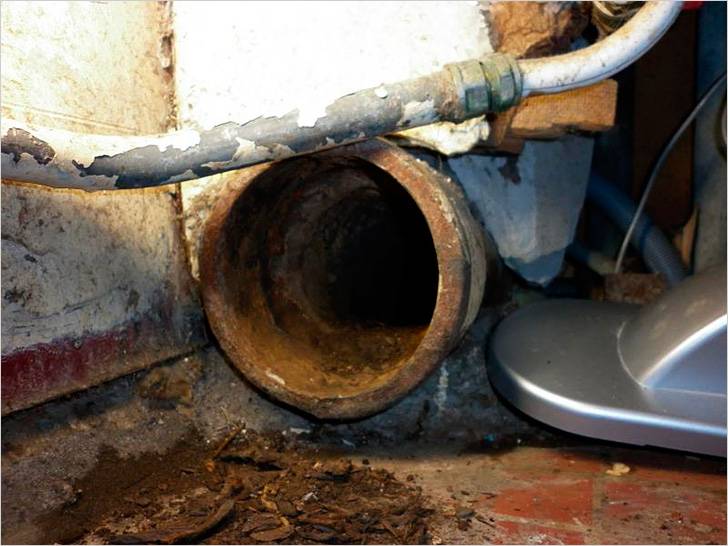
Old cast iron sewer
Tools needed for the job
Ways to connect to a horizontal collector
The structure of the sewer riser
Ways to connect to the riser
Sewer riser
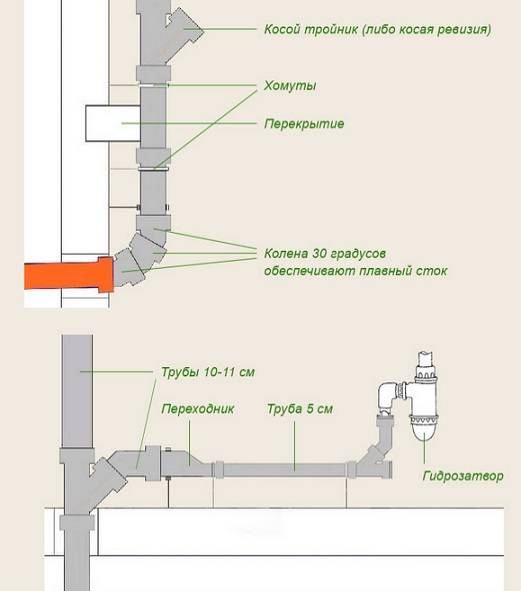
Mounting release
1. For him, it is better to mount a special hole during the construction of the house.If it is not there, then a hole is made in the foundation 200-250 mm wider than the diameter of the pipe itself.


2. Hole waterproofed using bituminous mastic.
3. Next, a special sleeve is inserted into it (a segment with a diameter of 20-40 mm more than the outlet pipe). It serves to prevent the destruction of the main pipeline. The sleeve should protrude from the foundation on both sides by 150 mm.
4. The outlet pipe is placed in the sleeve. The space between them is carefully filled with foam.
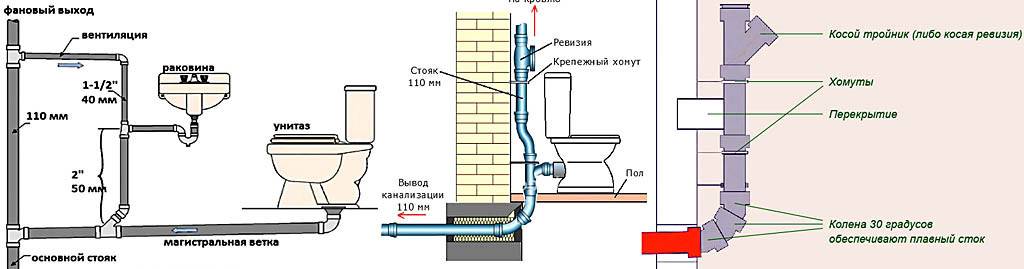
5. The sleeve is connected to the house sewer pipe oblique tee (tee 45°) and withdrawal .
How to install a sewer riser
- Choosing a place for a riser
- Riser indent
- Pipe selection
- Ventilated and non-ventilated riser
- How to install
- Passage through the ceiling
- Passage through the roof
In this article, I will talk in detail about choosing a place and installing a sewer riser in a country house.
Please note: if a number in brackets is indicated at the end of the sentence, this is the number of the corresponding paragraph of SP 30.1330.2012 "Internal water supply and sewerage". This document is updated edition of the relevant SNiP
If some norm is established by SP 31-106-2002 "Design and construction of engineering systems of single-family residential buildings", this will be stated explicitly.
The riser is the main element of the internal sewer network. The main task of the riser is the intake of wastewater from floor outlets and their diversion to a horizontal collector.
Mounting tool kit
The process of attaching a toilet to a sewer requires a preliminary assessment of the necessary materials.The choice of plumbing and connecting fittings depends on the type of sewer riser supply, the intended installation location of the toilet bowl and its type.
In addition to the equipment itself, when installing a toilet bowl with your own hands, you may need:
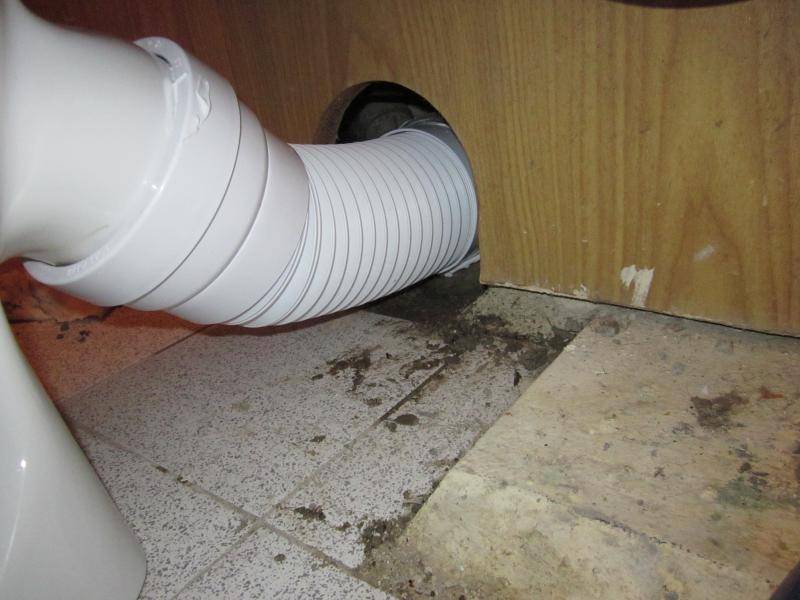
- Sewer corrugation.
- Plastic corners and adapters.
- Eccentric cuff.
- Silicone.
- Rubber seals and adapters.
- Saw for plastic pipes or a regular hacksaw for metal.
- Tape measure, pencil, hammer.
- Tools for dismantling elements of the old sewage system and fixing the toilet bowl to the floor.
To remove old cast-iron pipes, you may need a professional puncher and a grinder, but in such advanced cases it is better to invite specialists with their own tools to dismantle.
Features of choosing the diameter of sewer pipes
The question of what diameter of sewer pipes should be selected is one of the first in the design. Typically, pipes with a diameter of more than 100 millimeters are applicable for toilet drains, and up to 50 mm in the kitchen and bathroom.
The sewer pipe diameters have a large range of values due to two factors:
- The toilet bowl is a plumbing fixture, the features of which include the passage of a very large volume of water in a short period of time at the time of flushing. It may contain solid fractions, with which a pipe having a smaller diameter is more likely to clog.
- Despite the fact that a lot of water also drains when emptying the bath, the drain pipes are made much smaller in diameter. This is due to the fact that, according to the conditions of hydraulics, the permeability of the pipe is equal to the permeability provided by its narrowest point. And in the bathroom, the outlet has a disproportionately smaller diameter, in addition, it is blocked by a grate.This makes it impractical to mount a large diameter pipe in relation to the bath.
Pipe diameter for series-connected plumbing fixtures
What to do if there is a bidet in the toilet room in addition to the toilet? In this case, the diameter of the sewer pipe should by no means be increased to 150 or 200 mm. This is explained by the following formula: the permeability of the pipe depends on the square of its diameter.
That is, if we take a two-hundred-millimeter pipe, we get that its permeability is four times greater than a pipe with a diameter of one hundred millimeters. In addition, the situation is practically impossible when the drain from the toilet bowl and bidet is filled to the maximum.
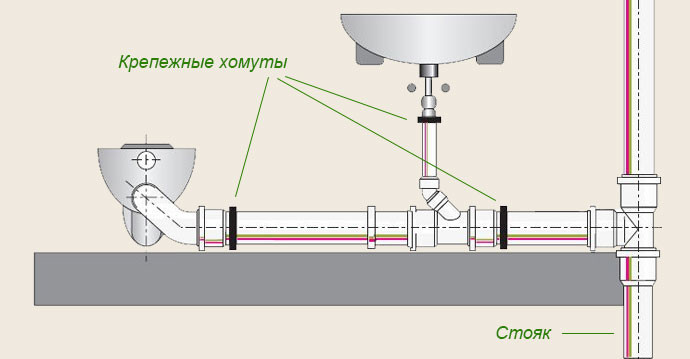
Scheme of the correct selection of pipe diameters in the direction of the flow of effluents to the riser
In other words, the diameters of sewer pipes - pipes for the toilet are taken more, not at all because a smaller diameter value will not allow the necessary volume of water to pass through.
It should be noted that in order to pass the required volume of wastewater, including solid fractions, the pipe must have an air gap
This is important because when the water front moves through the sewer, air is displaced, and it is under high pressure.
The vacuum created in the absence of an air gap in the pipe can squeeze out the water locks in all outlets, thereby causing a lot of trouble from the appearance of an unpleasant smell in the room to the need to wash plumbing fixtures.
How to dismantle a cast iron pipe
If the pipe is “welded” to the wall or floor with sulfur or aluminum, it will be very, very difficult to destroy such a coating.
To get started, you must first turn off the water supply to the apartment.Then you need to free the bathroom from unnecessary items that you can damage during work. This includes a sink, washing machine, laundry basket, and more.


Next, you need to disconnect the drain tank from the water supply and dismantle the toilet bowl itself. Problems can also arise here, since Soviet toilets were screwed to the floor to the conscience, in other words, tightly.
Try to unscrew the bolts that attach the toilet to the floor and remove it from its place. If you succeed, consider yourself half done.
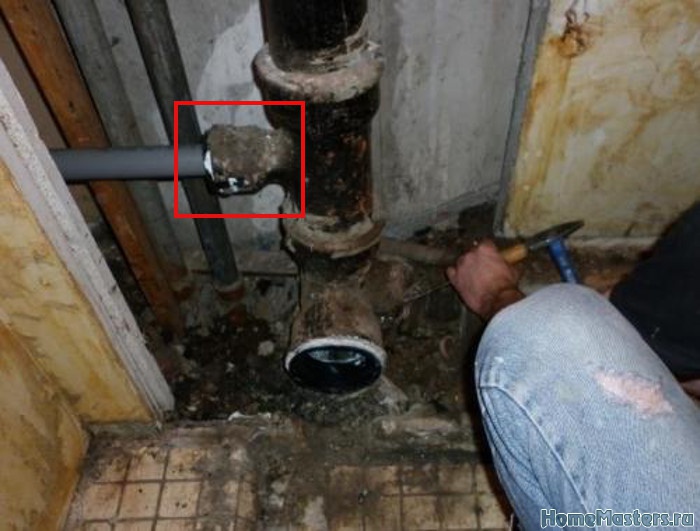
Now comes the turn of the pipes themselves. Cast iron, as you know, does not differ in particular strength, therefore, at some distance from the riser, you can simply break the old pipe with a hammer. It is much more difficult to remove the remnants of pipes from the old riser and clean them before installing new ones.
To dismantle pipes, you may need:
- Hammer with rubber or plastic tip.
- Chisel
- Burner or blowtorch
- Mask
Quite a strange combination, isn't it? However, a gas mask is necessary to comply with safety regulations if the joints of the sewer pipes in your bathroom are filled with sulfur.
The easiest way to remove sulfur is to heat it. However, when heated, the sulfur mass releases toxic substances into the air, which are extremely harmful to a person inhaling. That is why it is better to protect yourself in advance with a gas mask.
So, dismantling must begin at the place of greatest distance from the riser. Here, most craftsmen do not suffer with a burner, but simply break the pipe with a hammer. This is much easier, but can cause some complications.
Make sure that pieces of pipe do not fall into the sewer passage when broken.They can cause a serious blockage in the sewer, which will be much more difficult to get rid of than getting rid of old pipes.
With a hammer, you can destroy the pipe to the very cross, inserted into the riser. Here it is somewhat different and filled with gray much more.
To free the pipe and cross from the layer of sulfur, you need to heat it. The impact of a burner or a blowtorch can last for several hours, while harmful substances will be constantly released.
Before starting heating, isolate animals and households, cover furniture or other furnishings in the immediate vicinity of the riser, put on a gas mask.
During the heating process, you can easily chip off lumps of sulfur until the pipe is sufficiently clean. Now, the cross, inserted into the riser, must, if possible, be loosened and removed from the riser.
The dismantling of the old pipeline is carried out to the maximum. That is, pipes are removed as much as possible, and others are mounted in their place.
Connecting a new PVC pipe to an old cast iron riser will require some skill to work with. Please note that you must clean the junction as much as possible from the same sulfur and rust.
To facilitate the work, use a special coupling, which is specially designed for connecting cast iron pipe and PVC pipe.
If you have any questions, take a look at ours and ask them there. Our experts will help you understand the intricacies of good construction and repair.
The nuances of an integral connection
Depending on the technology used, permanent connections are divided into several types.
in the bell
The industry produces plastic pipes of various sizes. This installation resembles a children's designer.You can assemble almost any equipment, regardless of its complexity.
This technology is performed in a certain sequence:
- Joints are thoroughly cleaned, then equipped with rubber insulation.
- The smooth end is covered with silicone grease or liquid soap.
- The connection of sewer pipes must not have play. Insert them all the way and very tightly.
- The connection depth is determined by the notch made on the inserted pipe.
- The cylindrical structures are undocked by 1 cm. The largest penetration is taken as the basis.
Adhesive connection
PVC pipes are quite often combined with each other with a special composition. To do this, several operations are performed:


Space saving conduit box
The wall completely covers the utility part of the room, but significantly reduces the usable area. In order to save space, as well as for sheathing protruding risers, build a conspiracy box by hiding the sewer pipe. Making a frame for the box will be a little more difficult, as you have to tinker with the corners. A strong corner is easy to obtain from two ud-profiles fastened together, directed by the shelves at right angles.
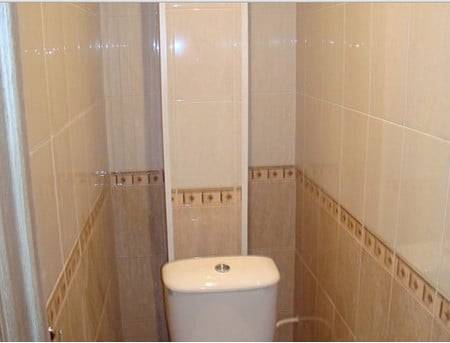
According to the arrangement of elements that need decoration, the protection system can be trihedral or tetrahedral. When there are many protruding parts below, and only a riser is located at the top, a multi-level box can be built. So there will be more space, an additional shelf for storing small things is formed.
Choose galvanized profiles for the frame. For a separate toilet, where the humidity is significantly less, it is allowed to use wooden blocks.


