- Choosing a new device
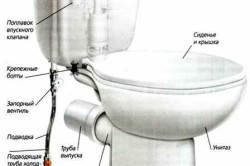
- Toilet installation
- Preparatory work before removing the toilet
- Safety measures before starting work
- general information
- Why it is worth installing a technical toilet during the repair
- Which device is suitable as a construction toilet?
- How to install temporary plumbing
- How to install a new toilet
- Installing a toilet bowl on taffeta
- Installing a toilet with glue
- Mounting the toilet on dowels
- Removing walls and floors
- Preparatory work before removing the toilet
- Is it possible to change the element without removing the toilet?
- How to remove the elastic adapter
- Do-it-yourself preparation for installation without removing the toilet
- The process of installing a new corrugation for the toilet
- Safety measures before starting work
- Repair work on the street
- Installing a temporary toilet
- Preparation for the dismantling of the toilet
- Preparatory stage
Choosing a new device
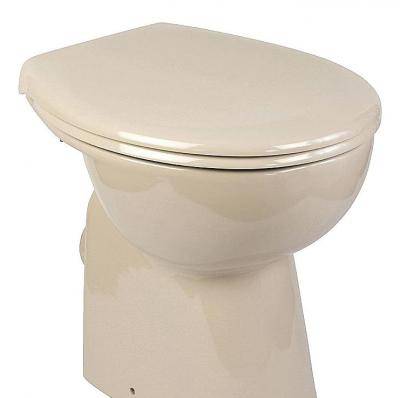
An old toilet to be installed Buying a more or less expensive double flush or single flush toilet is up to you, and it won't affect the quality of the installation process. Other things affect the quality of the installation:
The toilet bowl is installed on a flat plane. Usually it is installed on ceramic tiles
In this regard, the bottom of the device must be perfectly flat.
Pay attention to the angle at which the drain neck is located.There are two options
The first is 45°, the second is 90°. Now think about how the toilet will be connected to the sewer riser? If the socket of the sewer riser, which goes out to connect the toilet, is mounted on the riser in the form of an intermediate insert, then it will exit at an angle of 45 °. So, you need a toilet with a neck located at the same angle. In such a situation, it is extremely difficult to install a toilet bowl with a 90 ° drain neck, and for a non-specialist it is generally impossible. A 90° neck can be used in cases where the sewer outlet exits directly from the floor and is located at a similar angle to it. But when the sewer outlet is located in the floor at an angle of 90 °, it also allows you to install toilet bowls with a neck of 45 °. So if you have doubts about the desired neck angle, then you can safely buy a product with a forty-five-degree neck - you can't go wrong.
The drain tank has a hole for water supply. This hole can be located at the bottom, at the bottom of the drain tank, or it can be located at the top, on both sides. Considering that you are not making repairs, but the usual replacement of the toilet bowl, the outlet for supplying water to the drain tank has already been installed. Decide whether it will be convenient to connect a tank with a certain location of the water supply hole or whether you will have to use a long pipe for this.
Another point that concerns the dimensions of the device. Toilet bowls come in different lengths, and not every device will fit the bathroom in size, especially if the doors open into the room. Measure with a tape measure the distance from the edge of the open door to the wall of the sewer cup closest to them and subtract 15 cm from this.If the length of the toilet does not exceed the remaining distance, then it is right for you!
Toilet installation
When the toilet is removed, odors come out of the sewer. So that they do not distract from work, the sewer hole must be closed with something, for example, plugged with rags.
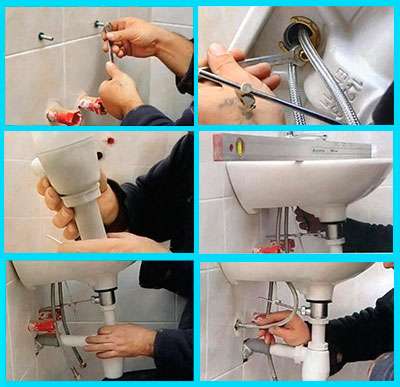
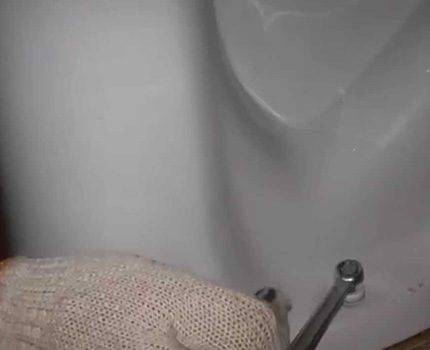
Do-it-yourself toilet installation continues with markings for dowels. To do this, the bowl is placed in the place where it should be installed, and the holes are marked. Drill holes according to this marking and insert dowels into the holes.
In some models, the holes are drilled at an angle. In this case, to install the toilet in the holes, it is necessary to drill at the same angle.
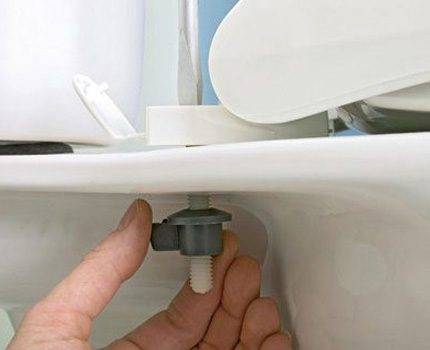
When the dowels are inserted, the bowl is put in place and connected to the cuff from the sewer socket. Then the screws are tightened, on which plastic washers are put on.
It is not right to immediately tighten the screws too much. First you need to lightly bait, and evaluate whether the installation is smooth. If not, then level it by substituting plastic linings under it. Only then can you tighten it.

To install the toilet bowl, you yourself need to assemble the barrel if it is delivered disassembled. Here everything is done according to the instructions that are attached by the manufacturer.
All moving parts must not come into contact with each other or the walls of the drain tank.
The next step is to install the drain tank on the bowl. Fasteners are usually made using bolts, which should be tightened evenly. When the installation is done, a cover is put on the tank and a button or drain lever is installed.
It is recommended to put a gasket between the bowl and the barrel. To prevent the gasket from moving, it is better to glue it with a sealant.
The final moment of self-installation of the toilet bowl is the connection of the liner.
When the eyeliner is connected, do not rush to turn on the water. First you need to check for damage to all components of the structure visually. And only when you are sure that everything looks normal, you can open the water, fill the reservoir and try to flush. If there are leaks, they need to be fixed.
Video:
Preparatory work before removing the toilet
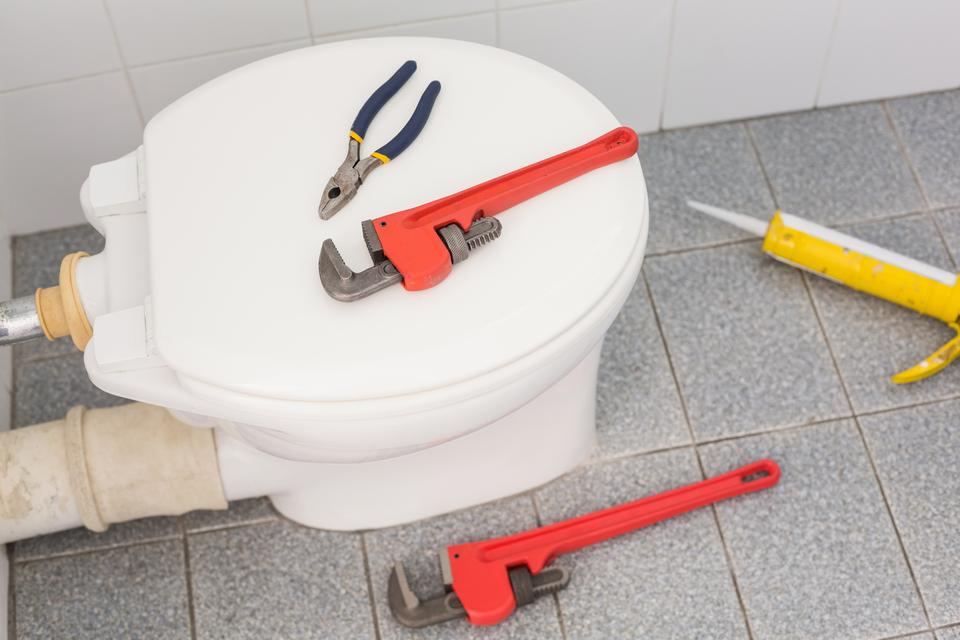
Dismantling the toilet and attaching a temporary plumbing fixture is not as difficult a task as it might seem. In order to dismantle the toilet bowl before its subsequent replacement, it is necessary to stock up on the following materials and tools:
- crowbar;
- wrenches of different sizes;
- pliers;
- rags needed to get rid of residual water;
- rubber gloves;
- disinfectant.
Dismantling the toilet should be sure to wear rubber gloves, this will help you avoid microtrauma and infections. Before starting work, the plumbing fixture must be thoroughly washed and treated with a disinfectant, for example, a chlorine solution. It can be rinsed with water with an antiseptic dissolved in it - the usual chlorine bleach.
Removal of plumbing should begin with shutting off cold water in the supply pipe. The remaining water in the tank must be drained and the sewage system made inactive. Water should not be used by oneself, and one should also warn the neighbors from above so that they refrain from water procedures for a while. After making sure that the supply valve is closed, you can start work.
Safety measures before starting work
When it is planned to replace the toilet bowl, there are doubts about the advisability of doing all the work with your own hands. In fact, you can handle the removal of the old and the installation of the new device on your own. The main thing is to do everything consistently, following the manufacturer's recommendations and following the advice of experienced craftsmen.


There are 3 work options:
- invite a plumber;
- invite a coven;
- do it yourself.
The first option is suitable when there is a scheduled repair and there is no time limit. Sometimes a plumber has to wait for weeks - he constantly has unforeseen circumstances.
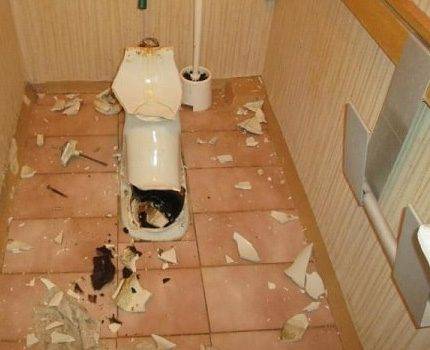
Inviting a covener can turn into even more expenses - it’s good if you come across an experienced master whose hands grow from the right place. Otherwise, it can destroy the entire bathroom.
Some coveners like to dismantle the toilet with a sledgehammer. It's fast and doesn't require much work - a couple of strokes and no toilet
The last option of independent work is the most profitable - you can get practical experience and money will be saved. Yes, major damage can be avoided.
If it was decided to gain practical experience in dismantling the toilet, then we must not forget about safety measures, because various tools can come in handy during the work.
Care should be taken to protect eyes, hands, other important organs and parts of the body. To do this, you need to wear special glasses, tight gloves, a face mask to protect the respiratory system. Clothing should completely cover the arms and legs so that sharp fragments do not accidentally damage the skin.
You may have to use a grinder - so you just can’t do without goggles and gloves
general information
Removing a toilet is a quick and easy process. The main thing is to be aware of what and how to do. Before dealing with the question of how to remove the toilet, you need to clarify how it can be installed. Today, a huge variety of types and types of toilet bowls are produced in shape, material, size, design and type of fasteners in place.
There are three types of toilet bowls depending on the installation method:
- Floor.
- Suspension.
- Attached.
In private apartments and residential buildings, in the vast majority, models of the first type are used. Therefore, this article will consider in detail the option - how to dismantle the floor-type toilet bowl. In new houses, side and suspended structures are often used. They are also popular in office and other commercial buildings.
In addition to the type of plumbing device itself, other important factors can affect the nature of the work:
- the location of the drain tank;
- finishing the floor in the toilet;
- San area. node;
- the nature of the drain and the location of the sewer pipes;
- type of water supply to the drain tank.
Do-it-yourself toilet dismantling can be divided into four stages:
- Preparatory - inspection, selection of tools and new plumbing equipment.
- Work with the water supply system.
- Direct dismantling, separation from sewerage.
- The final stage is the installation of a new toilet or temporary "preservation" of the network.
To carry out the work you will need the following tool:
- small crowbar;
- narrow chisel;
- a hammer;
- wrenches of various diameters;
- pliers;
- cloth rags or sponges;
- rubber gloves;
- disinfectant;
- a plug (the diameter must match the size of the sewer pipe) or a fabric gag.
If you change the device yourself, it is imperative to do all the work with rubber gloves, since when installing the toilet, you can get damaged and cause an infection. It is better to protect yourself from such troubles.

It is imperative to carry out work on the dismantling of the toilet with rubber gloves.
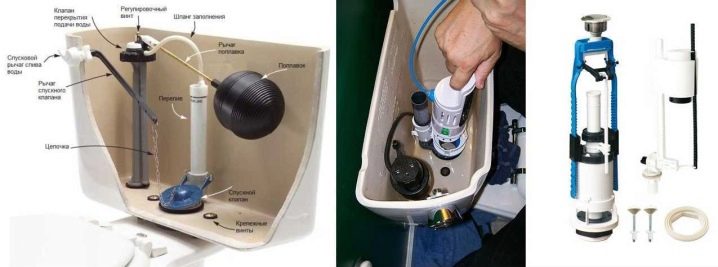
Why it is worth installing a technical toilet during the repair
Thanks to the presence of a construction bathroom, comfortable working conditions are created for people who have been in the area for repair work for a long time.
A team working at a particular facility spends far more than one hour there. Providing builders with the ability to meet natural human needs is an important point.


If the repair is carried out on the territory of a country house, the construction toilet makes it possible not to leave the working space.
In addition, repair activities involve pollution of the premises, the presence of a large amount of dirty water and other construction waste.
For example, over technical plumbing it is convenient to wash spatulas from cement, putty, dilute and pour paint.
Such a device is not of great value to the owner of an apartment or a house where repairs are being carried out. This reduces the risk of unnecessary material costs in case of working damage (splits, contamination) of parts of the toilet bowl, as well as the possibility of conflict situations between the team of workers and the customer.
Which device is suitable as a construction toilet?
It is better to choose a temporary device among cheap Russian-made options.The search for plumbing is carried out not only in specialized stores, but also on sites such as Yula, Avito, From Hand to Hand. The price ranges from 500 to 1000 rubles.
Important! Console toilets in plumbing stores are sold at a high price, but with careful selection, finding a cheap model is not difficult.?
The construction toilet does not meet all the taste requirements of the owners of the house, however, when choosing it, some parameters are taken into account:
- Convenience - in the conditions of repair, a console (attached) bathroom will become a compact option. They were first installed in public toilets, as cleaning with such plumbing was convenient. Attached models are distinguished by the fact that their tank with fittings, sewerage and water supply are hidden in the wall. Thanks to this device, the entire floor surface remains accessible for unhindered repair work.
- The presence of a flexible eyeliner. This is a strong corrugated pipe that connects the sewerage system and the outlet to the bowl. The flexible hose simplifies the assembly work associated with the installation, as it can increase in length. With its help, the outlet is connected to almost any type of sewer. Flexible piping is characterized by a shorter service life than conventional pipes. For connecting a technical device, this option is ideal, as it is sold at a low price.
Important! Flexible eyeliner is easy to pierce. Foreign objects falling on it during repair - the risk of serious damage
Also, all the characteristics of the device for a short period (the presence or absence of a step, the angle of the toilet bowl, floor or hanging, strong toilet seat, fittings) must correspond to the scale and duration of the repair.
How to install temporary plumbing
A temporary toilet is best installed without a flush tank. It will also be superfluous to connect it to the water supply.

In this case, flushing into the system is recommended using a bucket or pan.
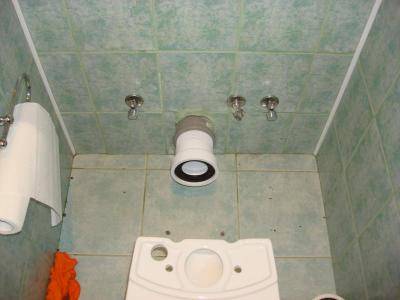
To sewerage technical toilet is joined by corrugation or flexible hose
With its help, the entire structure moves to another place without difficulty, which is extremely important during repairs.
Screwing to the floor is not required, since the temporary device is placed with the expectation that it will be dismantled after the repair is completed and replaced with another device. To achieve the stability of the plumbing fixture, a shield is placed under it. For strengthening, silicone is used, which, when dismantling the temporary toilet bowl, is easily cut with a knife.
Important! In order not to spoil the surface of the device, the outside of the cover is wrapped with cellophane and fixed with adhesive tape.
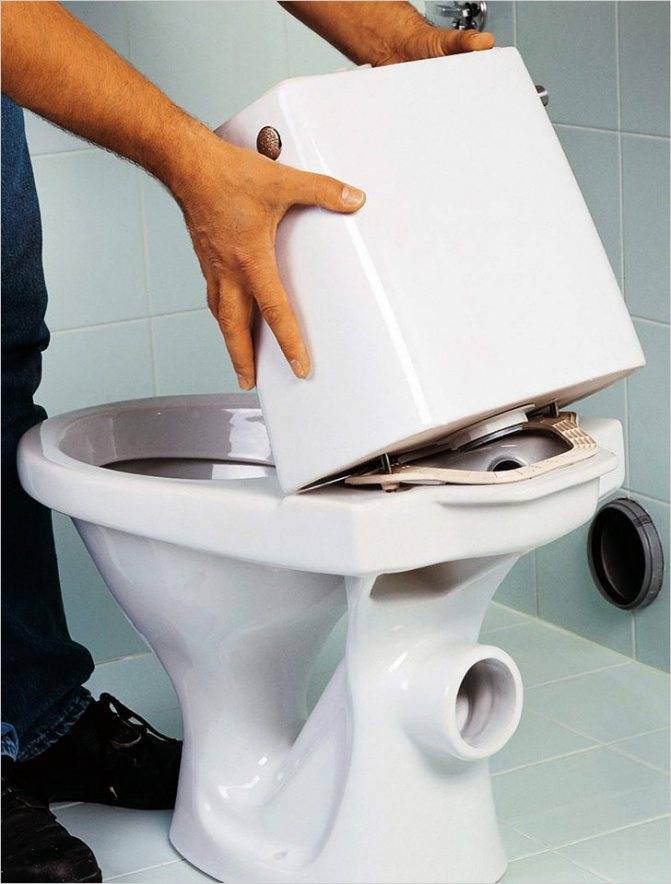
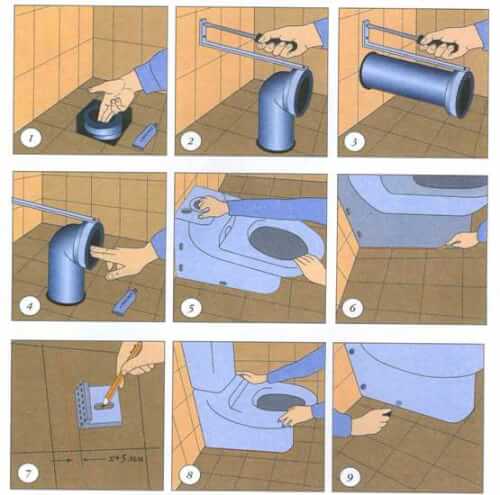
How to install a new toilet
Installing a toilet bowl on taffeta
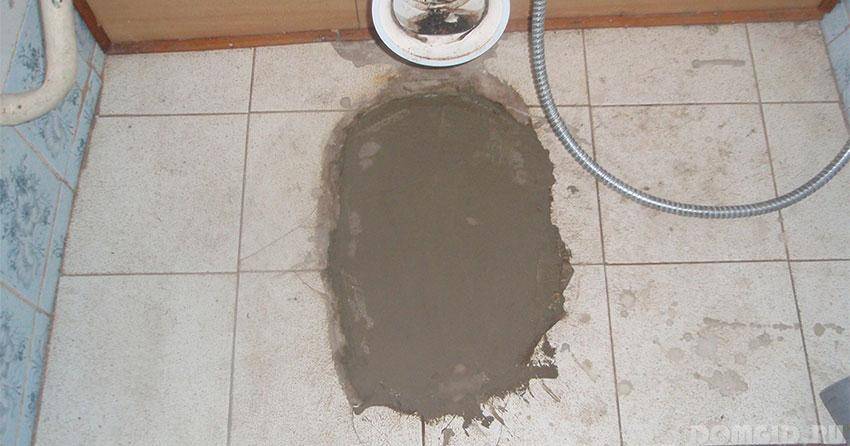
First, try putting it on taffeta. The so-called taffeta (profiled hardwood board) is laid under the base of the device so that it is slightly higher or flush with the floor covering. The wooden base should be fixed to the anchors and the resulting recess should be filled with ordinary cement mortar. After it hardens, you can begin to install the device itself. Now connect the outlet of the equipment to the fan pipe, and then to the socket of the sewer pipe. Treat all joints with sealant and seal with tow. After accurate installation, securely fasten the equipment with screws, be sure to place rubber washers under their heads. After installing the drain tank, you need to check the tightness of the entire system.If all is well, the device is ready to go. Note that this installation method is quite laborious, so let's look at another option.


Installing a toilet with glue
You can mount the toilet with an adhesive joint. Based on our experience, plumbing can be installed using epoxy adhesive. Before this, all contact surfaces must be carefully prepared. Clean and degrease them with a solvent, white spirit or plain acetone. Then we make them a little more rough and degrease again, then dry. Now, after connecting the toilet outlet and the sewer pipe, a thin but even layer of epoxy glue should be applied to the supporting surface. After that, the device is installed on a prepared place ahead of time and pressed to the floor. Now, after at least 12 hours of curing of the adhesive, it is ready to go. But there is a third way to install.
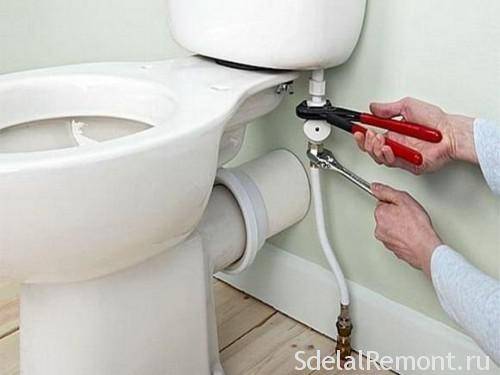
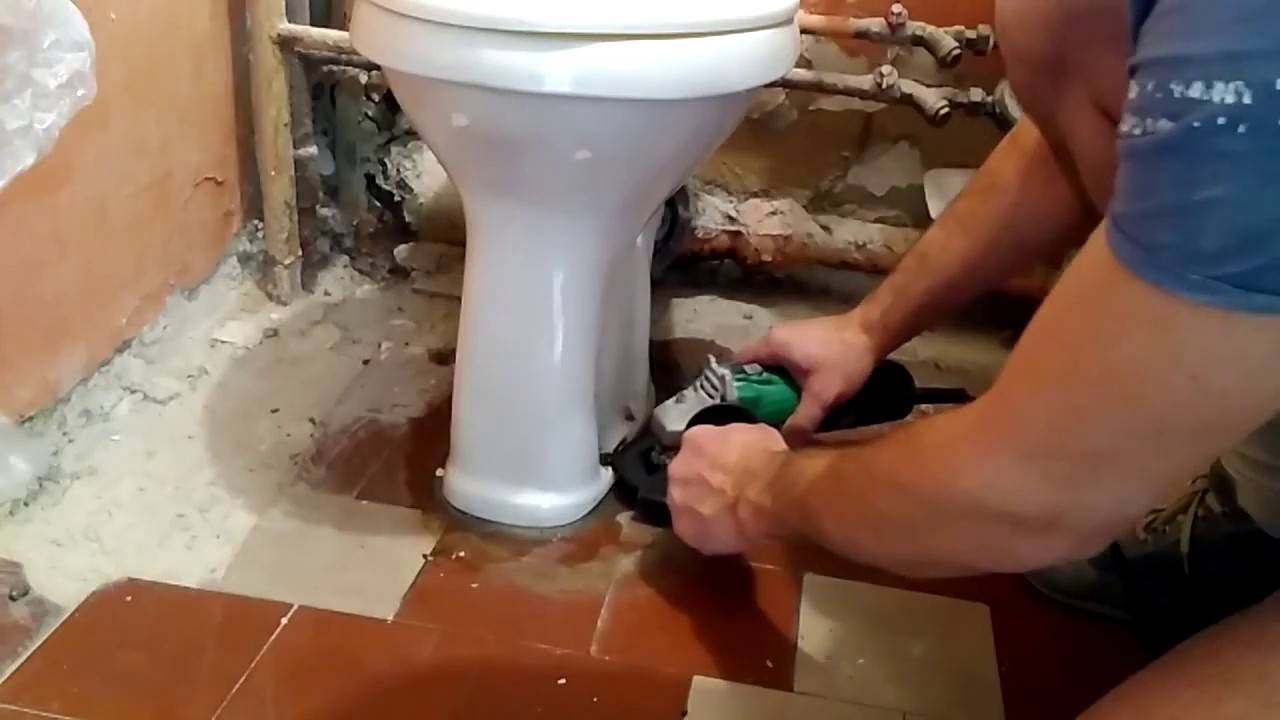
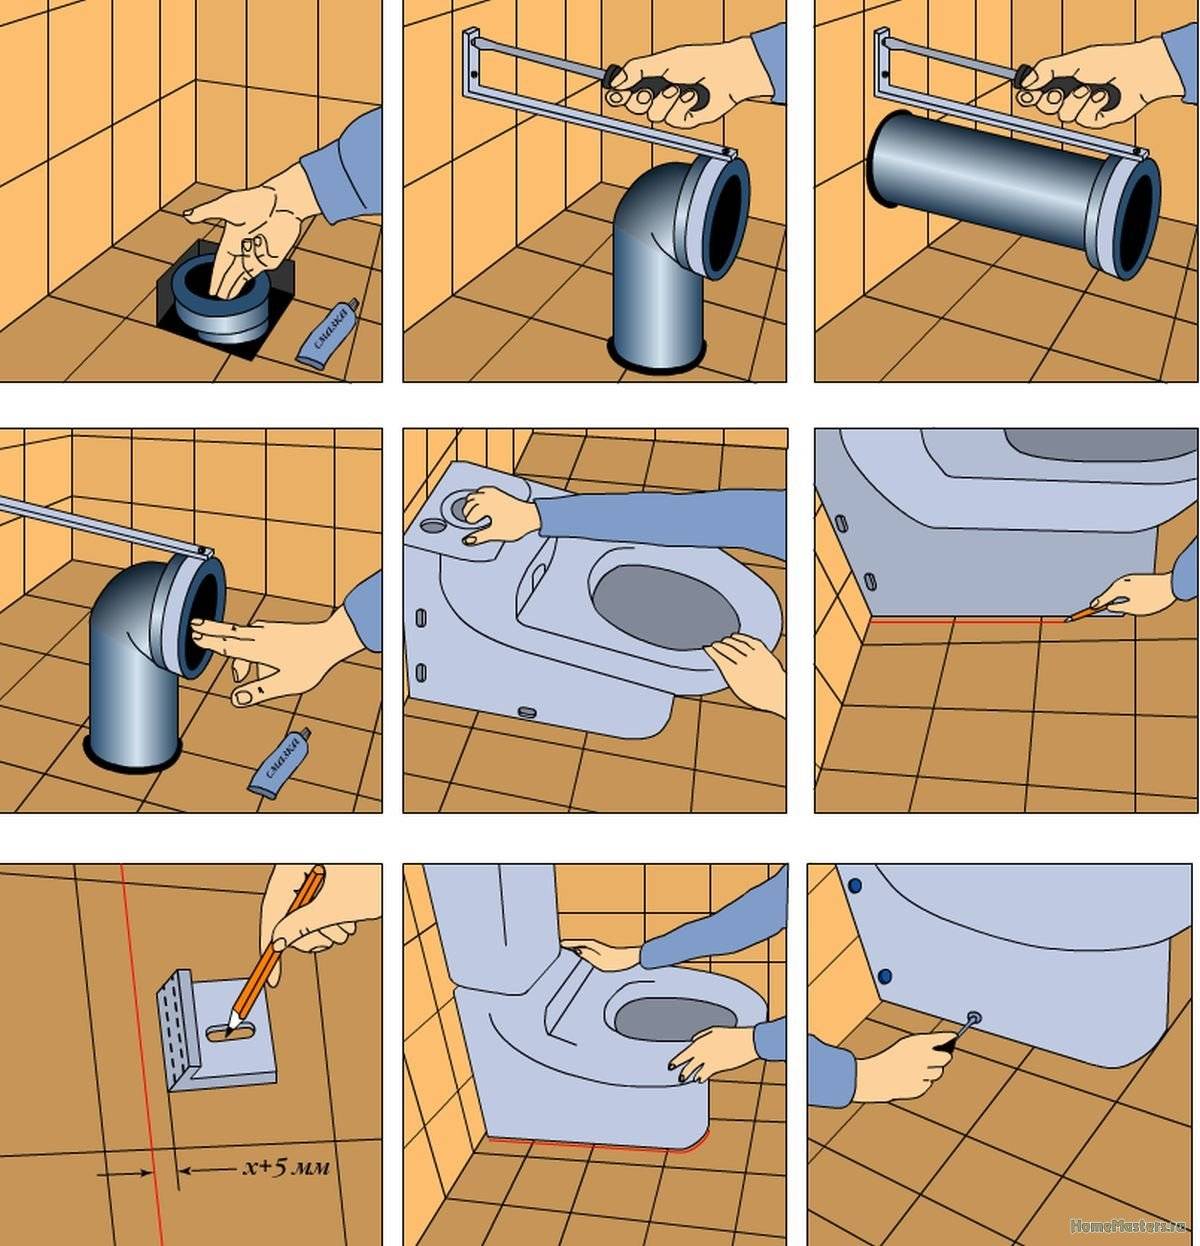
Mounting the toilet on dowels
Dowel mounting can be called the most practical installation method. We install the device at a distance of 10-15 cm from the actual socket of the sewer pipe. Then we insert your markers into the mounting holes, mark them and circle it at the base. Using a perforator or impact drill, we make holes in the intended places and hammer plastic dowels into them. Now we seal the corrugation, then wipe the pipe dry and do not spare the silicone on the rubber ribs, which is hidden in the sewer. Now we repeat the same from the other end of the corrugation. We connect to the drain, put the corrugation to the edge of the elastic on the outlet and insert it into the sewer.We lay a rubber gasket or a layer of silicone on the seat of your plumbing device. We fasten the device to the floor and remove excess silicone with a wet finger. Now the installation is finished.
Our recommendations are quite simple and accessible even to novice plumbers. The main thing is to carefully read the instructions, prepare everything you need ahead of time and not rush.
Removing walls and floors
Before finishing the walls, they must first be leveled. The floor also needs to be provided with a new screed, laying a layer of waterproofing materials.
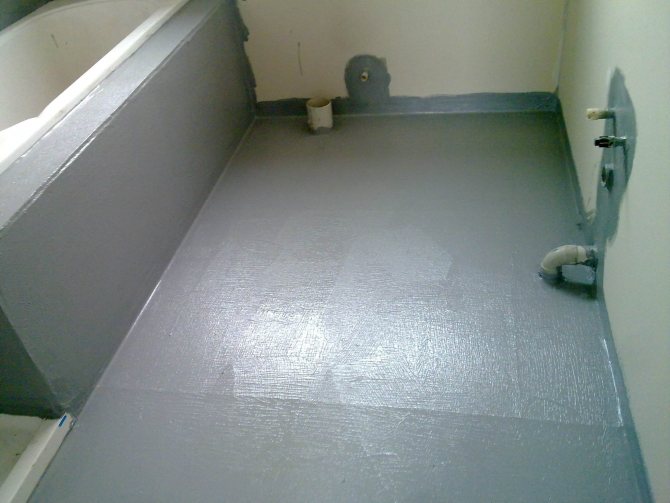
When the screed is dry, you can start laying the tiles:
Toilet floor tiles are usually laid in parallel rows, but can also be laid offset. Before proceeding with laying, with the help of a grinder or special nippers, recesses are made in the tiles for the pipes and the riser itself.
Laying tiles on the floor is carried out using standard technology using tile adhesive. They smear a section of the floor, after which trenches are formed, then tiles are laid. Already laid tiles must be tapped with a suitable tile hammer.
As soon as all the material is laid and all the joints are grouted, it's up to the wall cladding. As a cladding, tiles with a lighter shade are used than those laid on the floor.
Such actions will help visually expand the space, which is especially important in such a cramped room.
Lay tiles on walls that have already been previously leveled. Row stacking is controlled by a level
Plastic spacer crosses are assigned the role of ensuring identical tile joints.
Preparatory work before removing the toilet
Dismantling the toilet and attaching a temporary plumbing fixture is not as difficult a task as it might seem. In order to dismantle the toilet bowl before its subsequent replacement, it is necessary to stock up on the following materials and tools:
- crowbar;
- wrenches of different sizes;
- pliers;
- rags needed to get rid of residual water;
- rubber gloves;
- disinfectant.
Dismantling the toilet should be sure to wear rubber gloves, this will help you avoid microtrauma and infections. Before starting work, the plumbing fixture must be thoroughly washed and treated with a disinfectant, for example, a chlorine solution. It can be rinsed with water with an antiseptic dissolved in it - the usual chlorine-containing bleach.
Removal of plumbing should begin with shutting off cold water in the supply pipe. The remaining water in the tank must be drained and the sewage system made inactive. Water should not be used by oneself, and one should also warn the neighbors from above so that they refrain from water procedures for a while. After making sure that the supply valve is closed, you can start work.
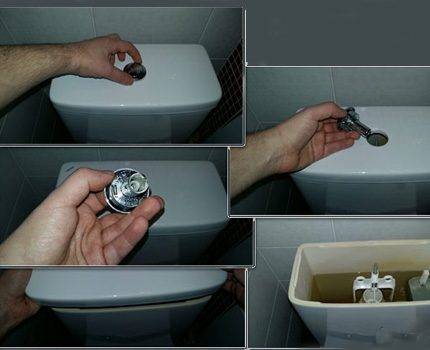
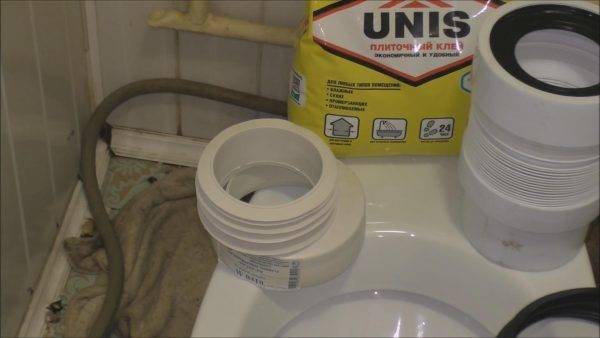
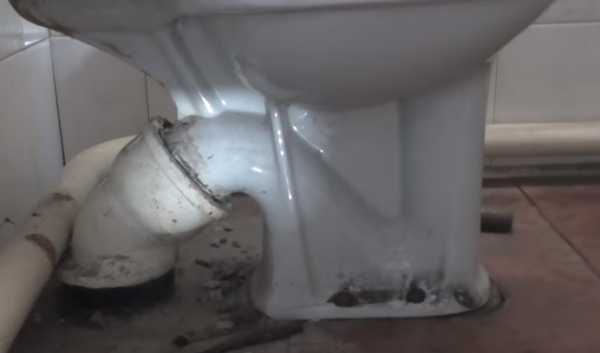
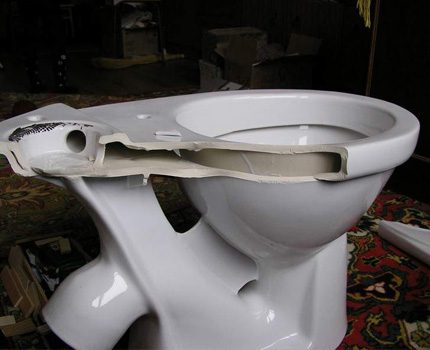
Is it possible to change the element without removing the toilet?
The elastic adapter has a minimum (at the highest degree of compression) and a limit (at the lowest degree of stretching) length. These dimensions determine the possibility of installing the element in each specific case. Consideration should be given to the position of the toilet in relation to the sewer inlet.
If the corrugation is maximally compressed, then it will not be possible to dismantle it without changing the position of the toilet bowl. The end, put on the toilet, comes on the pipe by an average of 5-6 cm.This means that the stretching element must be compressed by at least the same amount. Accordingly, if it is completely pulled together, it is impossible to remove it from the nozzle.
How to remove the elastic adapter
When dismantling, follow the following procedure:
- Disconnect the corrugation from the plumbing fixture.
- Lift it up to drain the remaining drains into the sewer.
- Disconnect the adapter from the inlet to the sewer pipe.
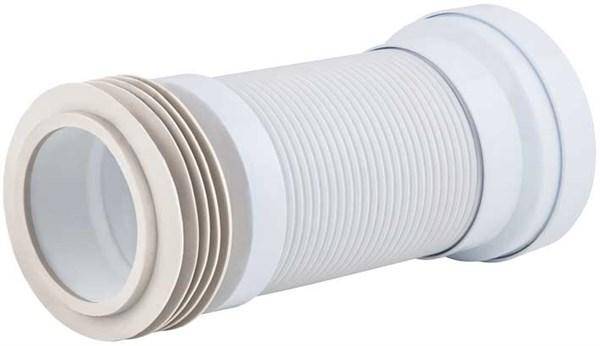
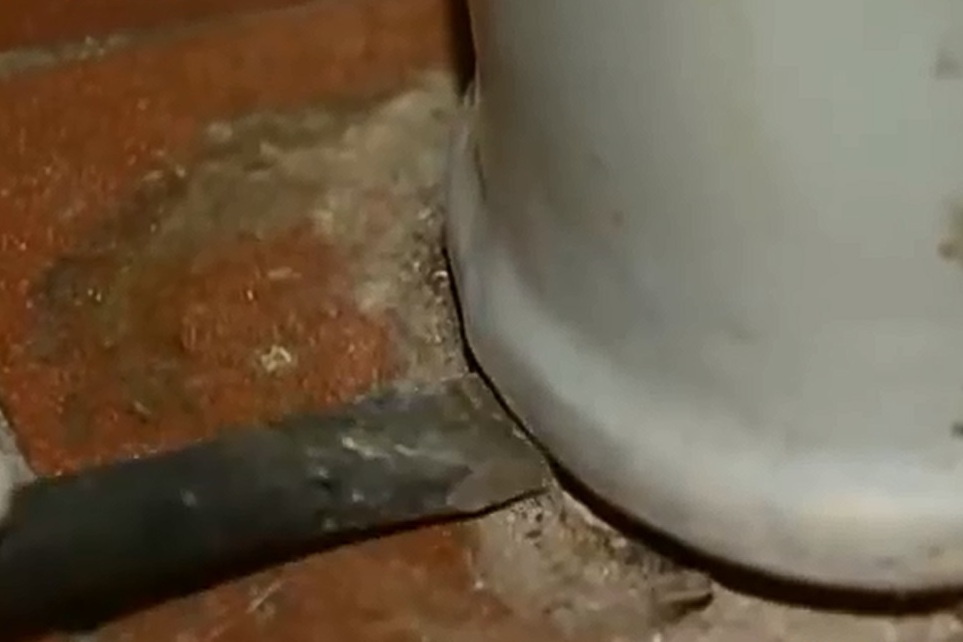
Photo 2
The easiest way to remove the corrugation is if it is stretched. If the toilet is too close to the sewer pipe and the corrugation is compressed as much as possible, you will need to remove the plumbing from the fixtures and move it a little.
Important! Before dismantling the old corrugation, you should empty the drain tank: turn off the tap and drain the remaining water from it. The adapter is first disconnected from the toilet so that it can be emptied of sewage residues
Do-it-yourself preparation for installation without removing the toilet
The service life of the corrugations and the absence of problems during the further operation of the plumbing fixture depend on how carefully the preparatory work was carried out before the start of the installation itself.
Pre-installation preparation includes some activities:
- A thorough cleaning of the internal and external surfaces of the elements mating with the corrugation is carried out - the outlet outlet of the toilet bowl and the socket of the inlet of the sewer pipe.
- After the dismantling of failed parts, particles of the old sealant, lime and grease deposits, and other pollution accumulated over a long time remain.
- After cleaning, all surfaces must be wiped dry.
- According to the instructions for use of the sealant, it may be necessary to degrease the faucet and toilet bowl with approved products.
Attention! The remaining particles of grease and dirt can cause leaks due to insufficient contact of the sealant with the nozzle and, as a result, a loose fit of the mating surfaces
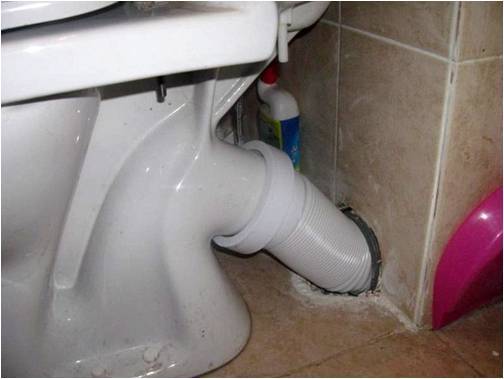
The process of installing a new corrugation for the toilet
If the preparatory stage was carried out completely and without violations of technology, the installation of a new corrugation will not cause difficulties.
Reference. When stretching the corrugation, you need to carefully monitor that its end does not jump out of the sewer pipe.


Sequencing:
- Lubricate the joint of the corrugation with the sewer socket with silicone.
- Insert the first end of the elastic adapter into the socket.
- Install the plumbing in place if its position has changed before.
- Put the second end of the corrugation on the outlet neck of the toilet bowl.
- Tie up the sagging corrugation using pre-prepared fasteners.
- The elements must not be moved until the sealant is completely dry.
Important! It is allowed to stretch the corrugation only during the installation process, since it is incredibly problematic to return it to its original position. In some cases, you can change the order of connecting the drain element: first to the toilet, then to the sewer
In some cases, you can change the order of connecting the drain element: first to the toilet, then to the sewer.
Safety measures before starting work
When it is planned to replace the toilet bowl, there are doubts about the advisability of doing all the work with your own hands. In fact, you can handle the removal of the old and the installation of the new device on your own.The main thing is to do everything consistently, following the manufacturer's recommendations and following the advice of experienced craftsmen.
There are 3 work options:
- invite a plumber;
- invite a coven;
- do it yourself.
The first option is suitable when there is a scheduled repair and there is no time limit. Sometimes a plumber has to wait for weeks - he constantly has unforeseen circumstances.
Inviting a covener can turn into even more expenses - it’s good if you come across an experienced master whose hands grow from the right place. Otherwise, it can destroy the entire bathroom.
Some coveners like to dismantle the toilet with a sledgehammer. It's fast and doesn't require much work - a couple of strokes and no toilet
The last option of independent work is the most profitable - you can get practical experience and money will be saved. Yes, major damage can be avoided.
If it was decided to gain practical experience in dismantling the toilet, then we must not forget about safety measures, because various tools can come in handy during the work.
Care should be taken to protect eyes, hands, other important organs and parts of the body. To do this, you need to wear special glasses, tight gloves, a face mask to protect the respiratory system. Clothing should completely cover the arms and legs so that sharp fragments do not accidentally damage the skin.
You may have to use a grinder - so you just can’t do without goggles and gloves
Repair work on the street
If it becomes necessary to repair a cast-iron pipe that is placed on the street, then you can use the same methods that were described above.However, it is desirable to make additional fixation of the joined cast-iron pipes so that deformations in the soil do not open cracks. If the pipe is adjacent to the septic tank, then the above methods may not work. The design of the septic tank is subject to seasonal fluctuations, and this can destroy the integrity of the repaired connection.
In this case, first of all, liquid glass is used, which is poured from above in large quantities with mastic, which is used for gluing joints in panel houses. In principle, the mastic on its own perfectly seals the cracks, therefore, if liquid glass is not available, then you can do without it. However, it is still better to seal with it, it is more reliable.
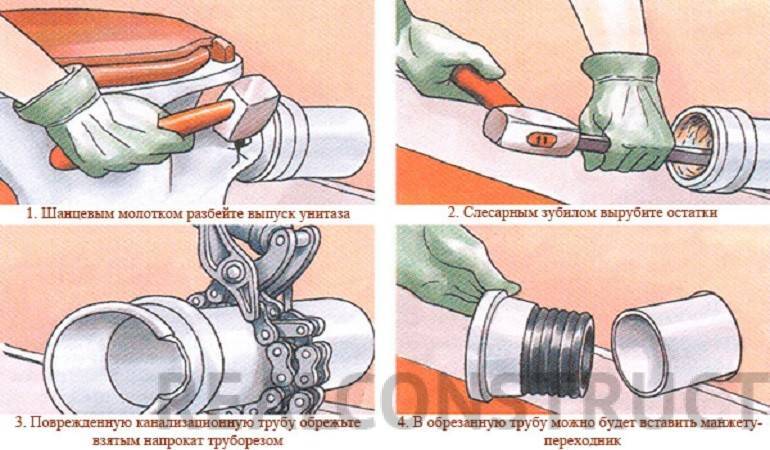
Almost all Soviet buildings are equipped with cast-iron sewer communications, since such pipes are durable and resistant to wear. But the cast iron pipeline requires the right approach to use and dismantling.
Unlike drain pipes, which can last for decades, connections inside a home may need to be replaced sooner. Also, interventions in the sewer system may be forced during the installation of washing equipment or redevelopment of the bathroom. To do it according to the rules, it is not necessary to call and wait for the master, all the work can be mastered by the owner himself, if he knows how to handle elementary tools. Dismantling the sewer should not take much time, but dismantling old products is more difficult. Let's figure out how to properly dismantle cast iron pipes.
Installing a temporary toilet
During repairs in the toilet, you can mount a temporary toilet.In this case, it is not necessary to resort to the help of professionals, you can do it yourself. You will need the most minimal set of tools and materials:
- toilet;
- Chipboard;
- self-tapping screws with washers;
- spanners;
- screwdrivers.
A temporary toilet is usually installed without a cistern. It will also be superfluous to connect it to the water supply. Flushing into the sewer in this case will be carried out by pouring the water collected into the bucket. For greater stability of the plumbing fixture, a shield or a piece of chipboard measuring 50 by 50 cm is placed under it, fixing it through the holes in the base of the toilet bowl with self-tapping screws with washers. You need to purchase self-tapping screws of the required length with hexagonal caps. If necessary, long self-tapping screws are cut with a grinder.


A temporary toilet is connected using a corrugation. This design makes it possible to quickly rearrange the plumbing to another place, in almost a minute, and also quickly put it in place. To make the toilet less dirty during repairs, it must be wrapped with polyethylene and the film fixed with adhesive tape, which must be glued only on polyethylene, since it will be quite difficult to remove the glue from the body. From above, the structure must be covered with a piece of plywood or chipboard.
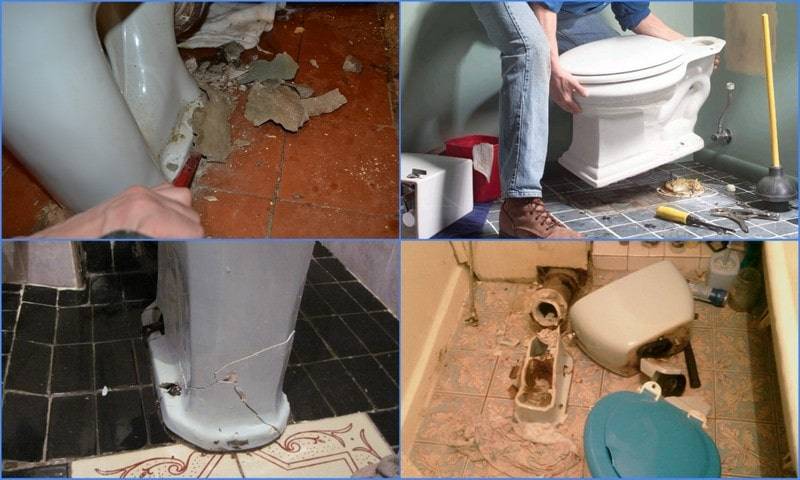
Preparation for the dismantling of the toilet
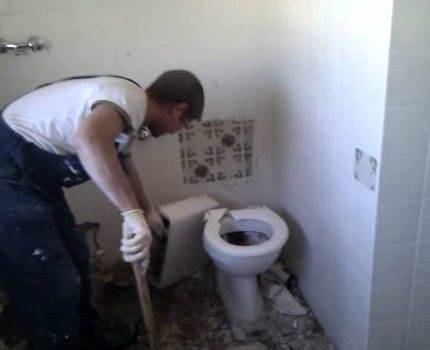
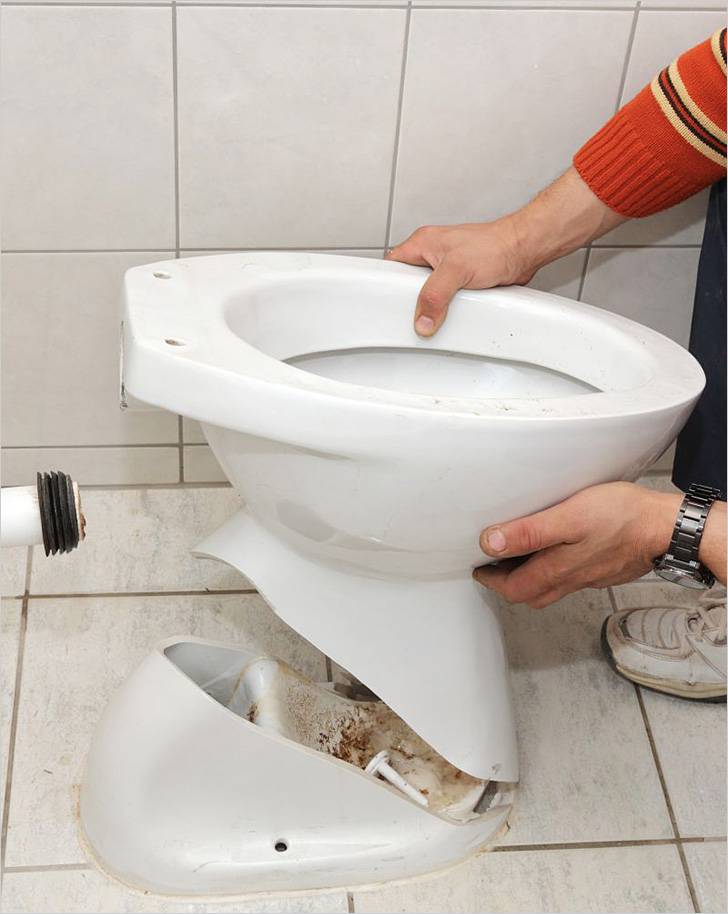
Before starting work, it is advisable to wash the toilet and treat it with any disinfectant. Or at least rinse with an aqueous solution of an antiseptic, for example, the usual "Whiteness". In any case, dismantling is best done with protective gloves to protect your hands from dirt and microtrauma. From the tools you need to prepare a crowbar and keys of different sizes. In addition, you will need a bucket and a lot of rags.
 Dismantling the old device is not the most pleasant experience, but without this it is impossible to install a new device
The working area must be completely free from unnecessary items. We remove everything that is in the immediate vicinity of the equipment. Sewerage must be inactive. Therefore, not only do we not use it ourselves, but we also warn our neighbors in advance about the work being carried out and ask them to do the same. Then we block the water supply suitable for the device and drain the water from the tank. Now you can proceed to the direct dismantling of the plumbing device.
Preparatory stage
Considering the question of how to change the toilet with your own hands, you should start with simple preparatory steps. Following them will make the process safer and more convenient.
The first thing to take care of before dismantling directly is a thorough flushing of the toilet bowl with a disinfectant. Both internal and external surfaces of the structure are processed. Dirt is removed from the joints, supply and discharge.
After washing and cleaning, you need to free all the space around the toilet from various objects. Be sure to free the floor from the rugs. The seat and lid are removed from the bowl itself. They are fixed with special plastic bolts or other similar fasteners.