- How to install on corner models
- Sliding Screen Design Options
- Features of plastic models
- Finishing the frame with ceramic tiles
- Additional Tips
- Features of sliding MDF panels
- Types and features of sliding screens
- How to install a screen under the bath - instructions
- How to fix the screen if it does not have viewing windows and sliding panels?
- How is the screen attached to the acrylic bath?
- How to choose?
- What are mirror screens made of?
- Installing a homemade screen
- Bath screen: design description
- 1 Types of screens for a bath
- We recommend to read
- Original faceplate for the screen
- Step-by-step instructions for making a stationary block screen
How to install on corner models
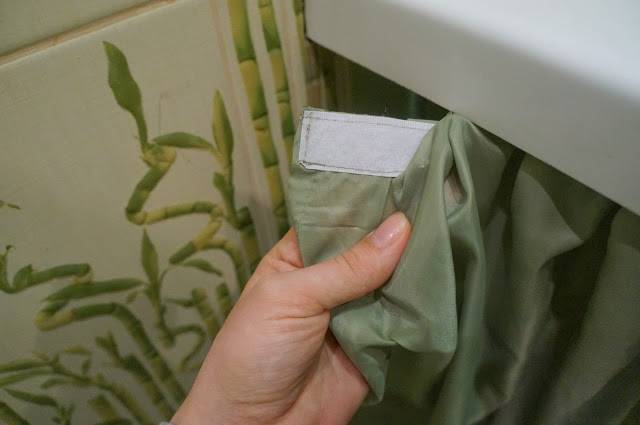
For corner baths, most often, fastening is provided not with self-tapping screws, but with special magnets and metal plates. Such magnets are initially attached to the legs of the font.
STEP 1. Height adjustment. Just as in the case of a rectangular model, we adjust the height of the legs based on the screen parameters.
STEP 2. How to fix the plates? On the reverse side of the panel, in places where the magnets will abut, we glue the metal plates from the kit onto double-sided tape or silicone sealant. During drying, you can fix them with ordinary tape.
STEP 3. Installation.We attach the front panel and check that the magnets grab the metal plates.
This mounting option is convenient in that the question: how to remove the screen and then put it back on does not arise. Everything is extremely simple, you need to make a little effort, pulling the panel towards you, you can just as easily return it to its place. The previous method is not so simple, there you will first need to unscrew the screws.
Sliding Screen Design Options
The external design of panels of this type can be very different. For example, models that are equipped with photo printing are very popular. Photo printing can be of two types: regular (2D) and volumetric (3D). The latter option creates the effect of the depth of space, which looks very stylish and original.
For rooms decorated in a minimalist style, it is recommended to select monochromatic options. The structure of the outer surface of monophonic models can be either glossy or matte.
Modern manufacturers offer customers the service of printing any image on a plastic screen, which will decorate the bathroom in any style.
Not only the panels of these products have a decorative design. The legs, which serve as a support, are also distinguished by an abundance of design solutions. Expensive designs are equipped with antique-style legs. The shape of these elements can be very different - from simple geometric shapes to animal paws.
Features of plastic models
Plastic shielding options are the most popular today. They are attractively priced and easy to install and operate.The service life of such panels can reach 10 years (provided that they are properly cared for). Plastic screens are resistant to moisture and do not rot over time.
Important advantages of the plastic frame are resistance to moisture, as well as the range of its colors.
The main advantage of panels made of this material is a variety of colors. This is due to the ease of production of products from polymers. The functionality of these screens may also differ. In specialized stores, you can buy plastic bath screens with shelves, sliding, solid, removable, folding, etc.
If desired, you can perform shielding yourself. This will require an inexpensive polymer lining. Such a panel does not require additional facing work, which has a positive effect on financial costs. To fix the plastic lining, it is necessary to mount a profile made of wood or metal.
Along with the advantages of a plastic frame, one drawback is characteristic - the fragility of the material.
The main disadvantage of plastic screens of any type is poor resistance to mechanical stress (shocks). When installing a plastic solid screen on your own, you need to take care of organizing a door for a bathtub for quick access to hidden communications. You can make a special door yourself or purchase it in a store.
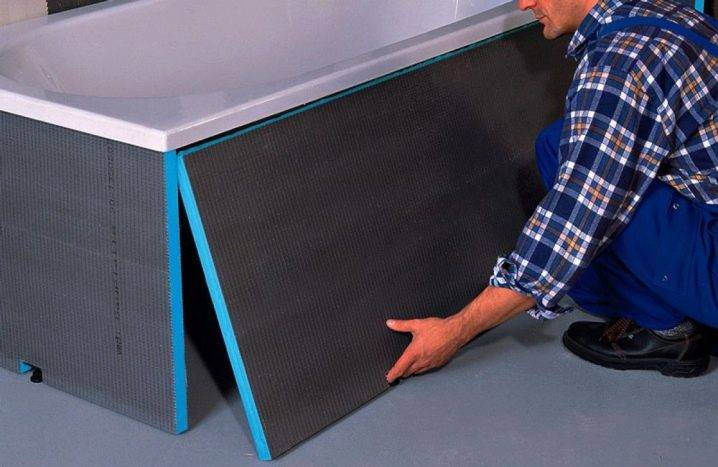
Finishing the frame with ceramic tiles
Dust the drywall with a primer before laying. Start laying tiles after the primer has dried (1 hour). When laying tiles, reaching the seam between the sheets, glue the seam with masking tape with a sickle.
After tiling, seal the joint between the screen tile and the tub wall and floor, not with grout, but with sealant (white or clear). The grout will not hold.
Additional Tips
- Before making a drywall screen under the bath, firmly fix the bath bowl to the walls;
- Before installing a plastic and metal bathtub, glue a sound insulator to the bottom of the bathtub to reduce the noise of pouring water;
- Try to make hatches, in places of access to the drain of the bath for technological work;
- Lay an insulating strip of Dichtungsband tape between the metal frame of the screen and the walls and floor of the bathroom.
Features of sliding MDF panels
MDF is a material that is made by pressing wood chips. Given the humidity of the bathroom, MDF screens are made using moisture-resistant impregnation. Special resins act as such impregnation.
The main advantages of moisture-resistant MDF structures are practicality and a rather long service life. Like polymer counterparts, these products are distinguished by a wide range of colors. As a decor, various drawings and patterns are applied to them. To enhance the moisture-resistant qualities, the surface of the MDF board is laminated with plastic films.
The plate of this material has a rather large mass, so the guides for it are made of durable metals. From screens made of other materials, MDF construction differs in that it often consists of 3 wings. Moreover, the middle sash is fixed, and the side doors open like in wardrobes. The most common sizes of MDF screens for a bath: 150, 160, 170, 180 cm.
When buying a sliding screen made of MDF, it is important to clarify whether the material is moisture resistant
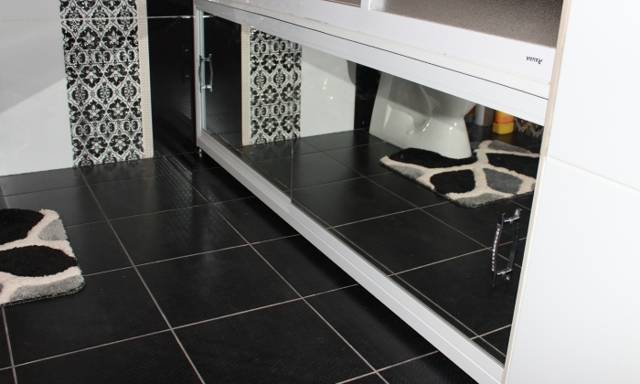
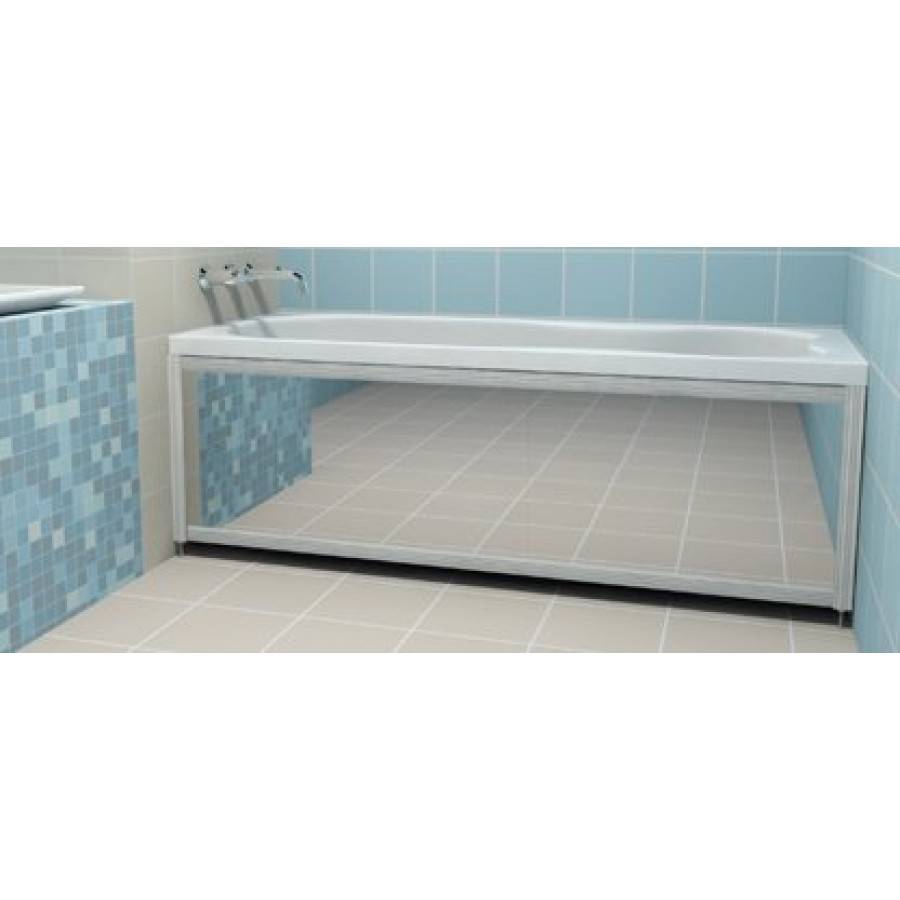
Types and features of sliding screens
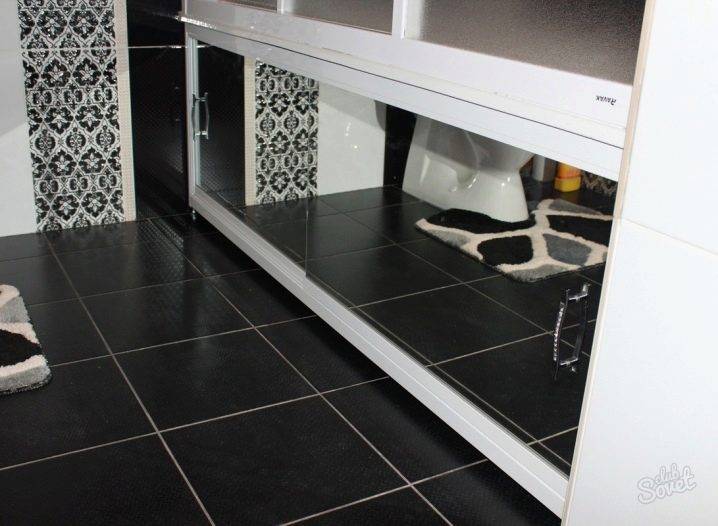
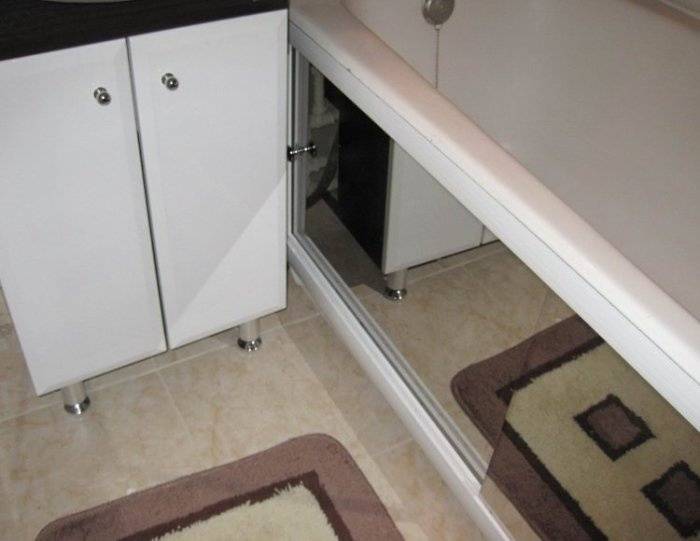
Although a sliding screen is more complex than a solid screen, it is still very easy to assemble and install. Dismantling the product is also easy. The simplest models are equipped with a plastic or aluminum frame, the upper and lower bars of which have a profile in the form of the letter Sh. Two or three plywood or plastic panels are installed in these grooves.

Aluminum profile W-shaped
More expensive models are equipped with a system of rollers, which are a transitional link between the frame and the ribs of the "doors". Such screens are more convenient to use, since it is much easier to move and extend panels in them.


Rollers allow you to open the doors easily and silently
In the middle price range, there are models made of inexpensive plastic and thin anodized aluminum tubes. Each of these types of materials has its own advantages and disadvantages. Plastic panels are fragile, but have an undeniable advantage: moisture resistance. Anodized aluminum frames are more durable but prone to corrosion. Rust develops in places of damage (scratches). It is very difficult to avoid their appearance, since the bathroom is a regularly used room.
Bath screen designs are designed taking into account the dimensions of this plumbing equipment. The standard length of the frames is 150-180 cm. The height is 56-58 cm. If necessary, such frames can be easily shortened by sawing off part of the upper and lower bars with a metal file. But to increase the length of the frame will not work.
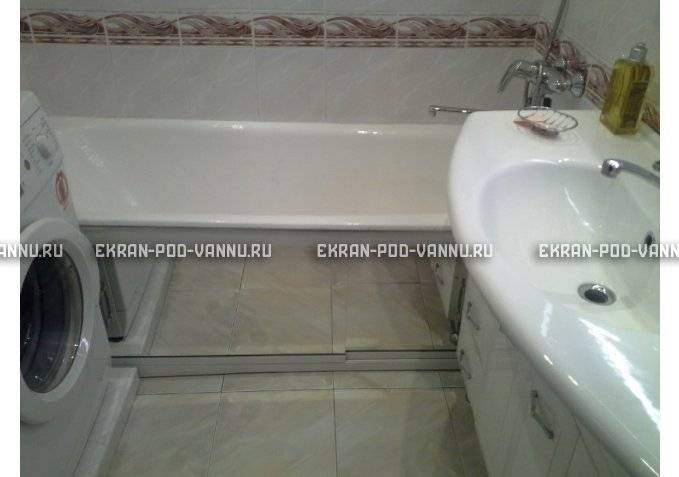
Sliding plastic and acrylic screens can be different: in the form of folding curtains, sliding panels and opening doors. The latter are used for models from a more massive material: MDF.
| Manufacturers | materials | Peculiarities | average price |
|
Alavann (Russia) | Plastic, acrylic coated eraser | Panels of different colors and shades, with photo printing | 3600 rub. |
|
Ravak Avocado (Czech Republic) | Acrylic | Figured form of screens | From 12 000 rub. |
|
Jacob Delafon (France) | Acrylic, plastic | Customization | From 11 000 rub. |


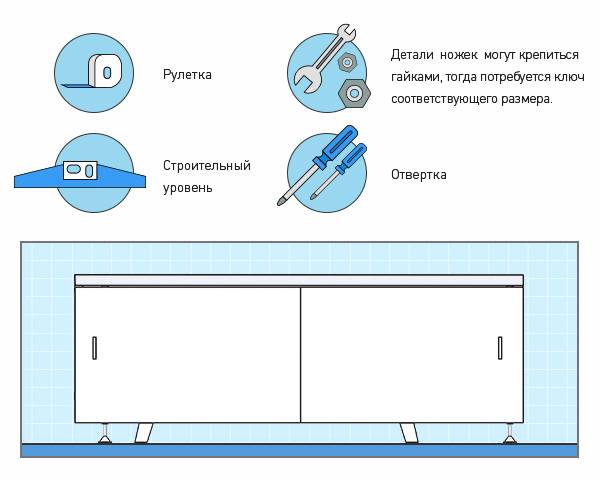
How to install a screen under the bath - instructions
The procedure will depend on the type of screen - sliding or solid without the possibility of access to communications without removing the panel. But both options will not cause problems if there is a ready-made screen with mounts included.
From the tools you will need the necessary minimum - a tape measure, a screwdriver, a building level. For models with height-adjustable legs, the parts of the adjustment mechanism can be fastened with nuts, then a wrench of the appropriate size is required.
First of all, make sure that the product is selected correctly - take measurements. Then follow the simple instructions:
How to fix the screen if it does not have viewing windows and sliding panels?
The installation procedure for such a product is even simpler - you do not need to insert moving parts into the grooves. It is enough to install the finished screen and fix it by placing it by surprise.
How is the screen attached to the acrylic bath?
To install and fix the screen in the bathroom with acrylic product the tool kit will be replenished with a drill.
Unlike cast iron, the acrylic bathtub itself serves as the basis for fixing the decorative panel. How to install the screen for acrylic bath and not damage it?
Having tried on the screen, drill holes in the acrylic for the studs. This must be done carefully, try not to damage the stiffeners of the product, this will weaken the design of the bath. After that, the decorative panel easily falls into place and is fixed with the supplied fasteners.
If the bath screen is made of MDF, organic glass or other materials, then the process itself is not much different from installing a plastic screen. The main stages of work are the same.
For the installation of screens, you do not need to call a specialist or contact familiar plumbers. This can be done at any time on your own, you just have to carefully study the model and read the simple instructions - in this article or supplied with the product.
How to choose?
The choice of screen depends, first of all, on the size of the bath itself and the room where it is installed. It is best to choose a full-length damper so that all areas are closed, this will ensure the greatest tightness and protection from moisture and dust. In addition, no extra plumbing details will be evident. For city apartments of a standard layout, the appropriate sizes are specially created. They may differ slightly by a couple of centimeters, this problem can be easily fixed by sealing the gaps with sealant, silicone or rubber sealant.
Removable screens or screens on legs are good for their lightness, they do not need to be fixed and mounted to the wall and floor. Such options can be used as a temporary partition. It is optimal to buy portable bath screens on metal adjustable legs made of plastic, PVC or aluminum.
For acrylic baths, it is most successful to select solid screens or deaf removable structures.They are suitable for all rectangular shapes, made of plastic or cast marble. Typically, such products have a white glossy shade that matches the surface of the bath itself. Many plumbing manufacturers produce their own screen partitions for the corresponding models.
For a traditional cast-iron bath, there is a choice of almost any ready-made or home-made screen, the main thing is that it reliably protects the floor and fits into the interior. Rigid stationary structures, for example, from profiles, drywall and tiles, will serve as an additional support for a heavy cast-iron bath
It is important to make a spacious opening in it, through which it will be convenient to penetrate to internal communications. It can be made in the form of a metal profile frame, a hole of the required length is cut in the drywall sheet, and a plywood, MDF or PVC shield can be used for the damper
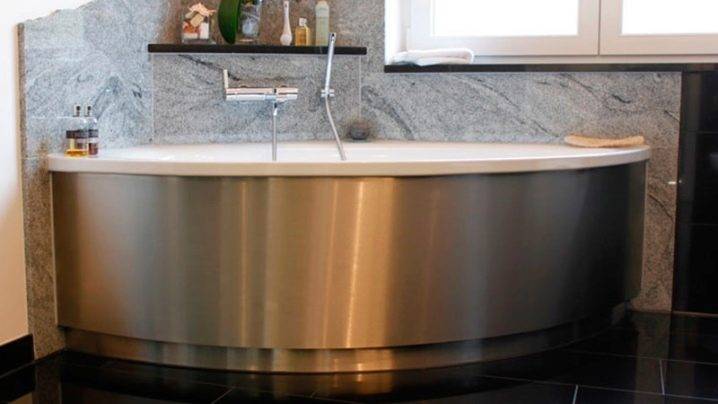
For non-standard bath shapes, such as corner baths, it is often not possible to find suitable screens for sale. Then they can be made according to individual projects. PVC panels are selected as materials, which are easy to cut, they are placed in corner or P-shaped profiles from aluminum, hinged or sliding doors are made. If you want to wash and at the same time have access to soap accessories: shampoos, gels, washcloths, then it is best to install screens with hinged doors, then you can get the items inside without getting out of the bath.


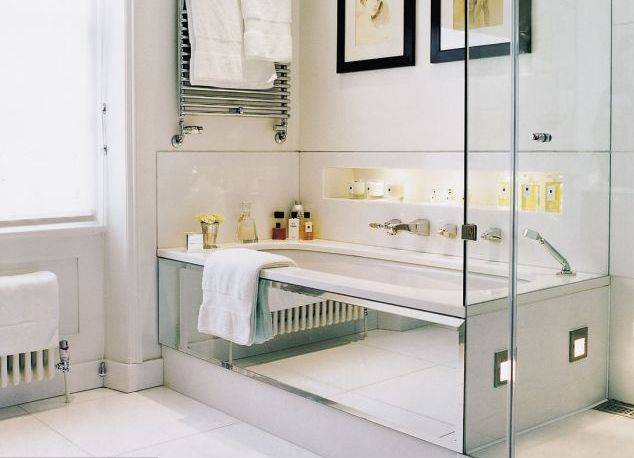
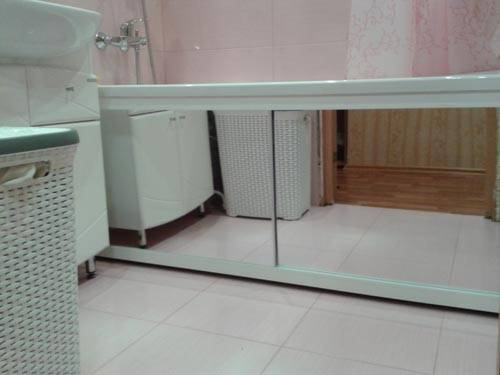
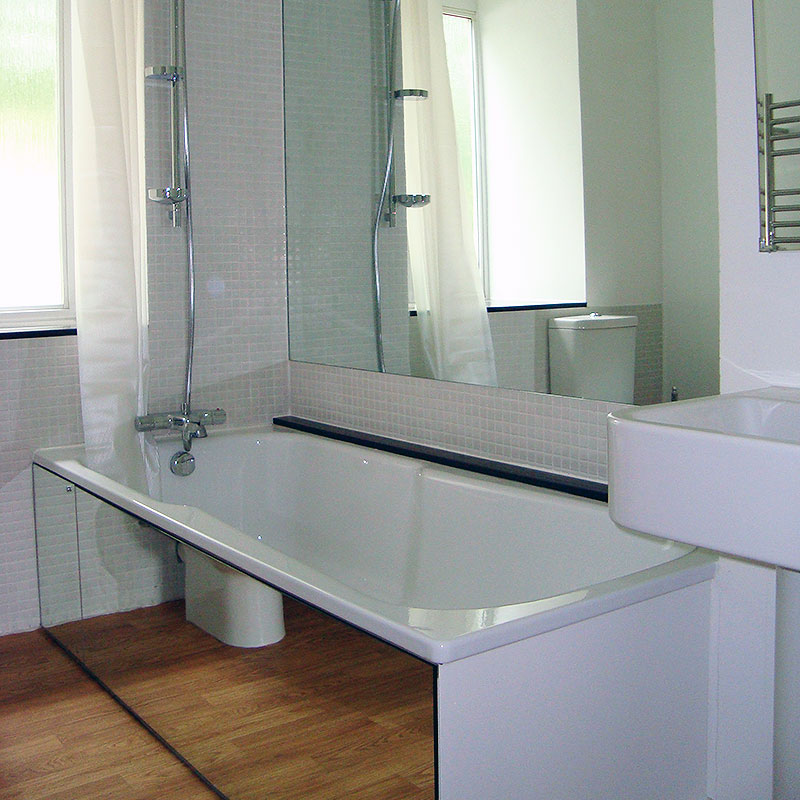
What are mirror screens made of?
The mirror screen is a structure consisting of a frame frame, inside of which rigid curtains with a mirror surface are fixed.Panels, depending on the design solution, can be solid or consist of several parts.
The main requirement for the material used to make the screen is moisture resistance and the ability to calmly endure temperature fluctuations. Mirror surfaces meet both of these criteria. They do not absorb moisture, are resistant to mold damage and, moreover, do not deform under the influence of temperature changes.
Image gallery Photos from
Spectacular appearance of the mirror surface
Ability to expand a small space
Design options for mirror screens
Options for the construction of mirror screens for the bath
When arranging bathrooms, it is recommended to use acrylic mirrors. They are most suitable for specific premises and are highly resistant to chemical attack.
The indisputable advantage of mirror screens is the ability to visually expand a small space, transforming even an unprepossessing interior.
In addition, acrylic surfaces are famous for their high impact resistance. They are five times stronger than glass mirrors. In fact, it is possible to break an acrylic reflective panel only with a lot of effort. Therefore, you should not worry that children or animals will accidentally break the fragile material and get hurt by its fragments.
As a reflective material, it is better to choose silver amalgam. Compared to its aluminum counterpart, silver amalgam is more resistant and durable.
Acrylic mirrors are smooth surfaces made of plexiglass, on which a layer of reflective amalgam is applied.
To cover the panels, you can use tinted and colored mirrors. To create them, a colored layer of amalgam is applied to the glass: golden, bronze, blue ...
The frame of the structure is assembled from aluminum profiles. They are inexpensive, light weight and easy to install. In addition, aluminum profiles do not rust, and wear out not so quickly.
Profiles for the frame can also be made of dense plastic.
It should be borne in mind that plastic, although it costs less than its aluminum counterpart, is significantly inferior to it in terms of quality characteristics.
The combinations of materials look interesting. For example: the bottom of the panel is made of metal, and the top is decorated with a mirror or glass.
To improve the decorative qualities of reflective surfaces, a backlight can be mounted along the perimeter of the panels or along their upper edge.
Contour lighting will gently distribute light, creating a pleasant environment in the bathroom, conducive to relaxation and relaxation.
The only drawback of mirror surfaces is that they always show the remnants of splashes and dried drops. Therefore, in order to maintain a presentable appearance, they should be regularly wiped with a cloth moistened with detergent.
Installing a homemade screen
Home-made screens, subject to high-quality installation, are more reliable and durable, and therefore many masters prefer this option. The most common method is the manufacture of a drywall screen and a metal profile, followed by tiling.As in the previous case, all bathroom finishing work must be completed, the space under the bowl must be cleared of dust and debris, communications are connected.
For installation you will need:
-
galvanized profile 75x40 mm and 60x27 mm;
-
moisture resistant drywall;
- level and ruler;
- self-tapping screws for metal;
- dowel-nails;
- drill with a set of drills;
- metal scissors.
Since this screen will be stationary, you need to take care of the availability of a technical hatch for the revision of communications under the bathroom. You can also make it yourself, but it is much easier to buy ready-made, because the cost of such products is very low. This will save you both the effort and time to make the screen. On sale, in addition to the usual ones, there are hatches for tiles, which, after facing, do not stand out at all against the background of the screen.
Step 1. Determine the location of the extreme rack of the frame. To do this, 1 cm retreat from the outer edge of the side towards the bathtub and put a mark. Next, the thickness of the drywall, guide profile, tile and adhesive layer is summed up, the value obtained is measured from the first mark and another mark is placed.
Determine the location of the extreme rack of the frame
markup
Step 2. Measure the exact distance from the floor to the edge of the bath and cut the rack profile according to the measurements. A section of the profile is applied to the wall at the level of the second mark, the vertical is set and a line is drawn with a marker to the very bottom.
Step 3. The profile is laid on the floor and one hole with a diameter of 6 mm is drilled in its lower and upper parts. Again, apply the rack to the wall and through the holes outline the location of the fasteners.
Profile attached to the floor
Step 4At the marked points, the tile is drilled with a spear-shaped drill with a diameter of 6 mm, after which the drill is inserted into the concrete, the puncher mode is turned on and they go deep into the wall for the length of the dowel.


Step 5 Install the profile in place, level it and fix it to the wall with dowel-nails. On the other hand, the baths do the same.
Step 6 Between the side posts, a horizontal guide is laid on the floor. It is also attached to the floor with dowel-nails in increments of 30-40 cm.
Step 7. In the upper part of the rack, a guide is fastened, folded from two profiles 60x27 mm. Profiles for reliability on the sides are fixed with self-tapping screws with press washers every 40-50 cm. The guide should be 30-40 mm below the rim of the bath.
Double profile
Profile fixed under the side
Step 8. Install intermediate racks. The lower edge of the racks is inserted into the groove of the guide, the upper edge is cut with scissors on the sides, leaving only the central part. This ensures a snug fit of the profile to the guide. The distance between the posts is approximately 30 cm.
The photo shows how to cut a profile for a rack
Trimming excess with metal scissors
Fastening of an intermediate rack from below
Mounting the intermediate column from above
Racks
Step 9. From the side where the drain is located, additional sections of the profile are attached to the frame, forming a frame for a technical hatch.
technical hatch
Step 10. The drywall sheet is cut exactly to size, if necessary, cutouts are made for water pipes. The canvas is applied to the frame and fixed with metal screws to each rack and both guides. Mounting step - about 15 cm.
Piping holes cut into drywall sheet
Fixing drywall
Foam blowing
The drywall surface must be primed before finishing.
Applying adhesive to tiles
Screen tiling
Bath screen: design description
Of greatest interest are such models that are easily installed, dismantled, and, if necessary, repaired.
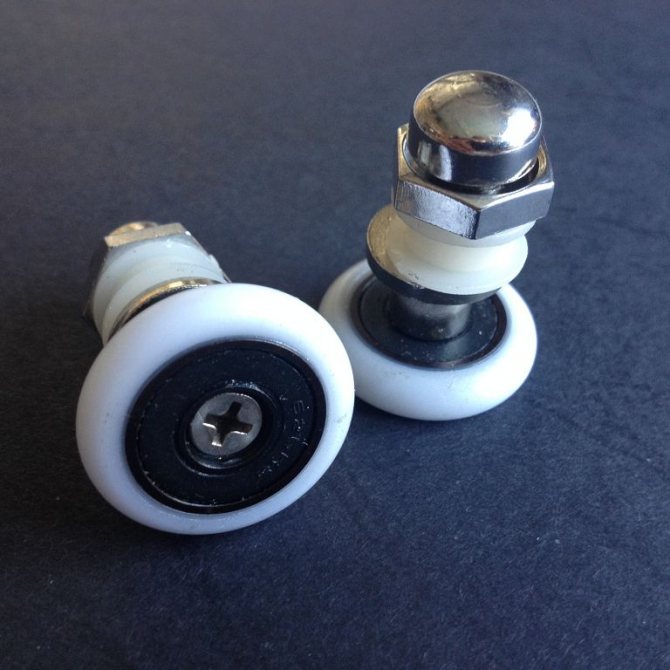
Most often, users pay attention to structures consisting of a rigid frame equipped with adjustable legs and movable plastic doors.
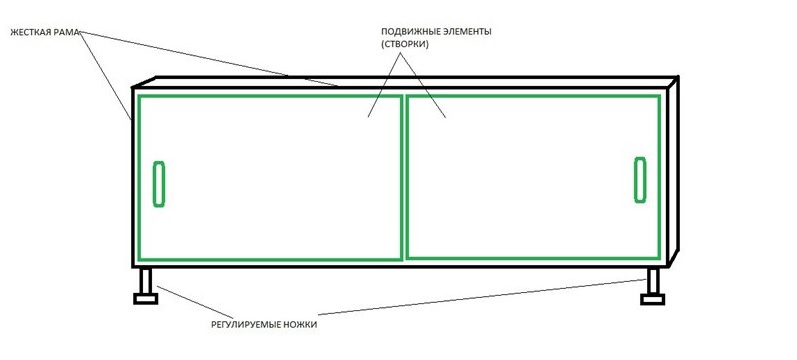
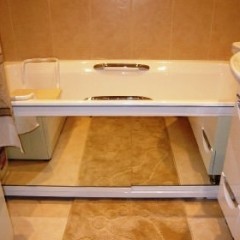
Typical bath screen design
The principle of installation of such a product is that the top of the frame rests against the side of the bath, while the fixation of the structure is ensured by lifting it into the spacer with the help of extendable leg bolts. The number of support legs can vary from 2 to 4. When choosing a sliding screen for a bathtub made of MDF, plastic or other material, it should be borne in mind that, as a rule, the following standard sizes are used in their manufacture:


- height - 500÷560 mm;
- length 1.7 m and 1.5 m.
1 Types of screens for a bath
But how is the screen attached? The answer to this question is quite easy, you just need to familiarize yourself with the information provided. Today, shopping centers offer a wide variety of designs for installation in the bathroom. But it should be noted that it is not always possible to choose the design of the desired size for certain parameters. In this case, the screen under the bath can be made independently. Here you should focus on the types of screens that can be:
- deaf;
- with sliding doors;
- with hinged doors;
- with accordion doors;
- with shelves.
Screen selection should primarily be based on the purpose to be achieved by installing it.So, the screen under the bath performs 3 main functions:
- improves interior design;
- masks plumbing communications;
- creates space for storing small household items.
A blank screen is the best solution for a spacious room where there is no question of organizing a working area. In addition, this design will serve as an additional support for the acrylic bath. But experts do not recommend hiding plumbing communications with a blank screen, because with the slightest breakdown or leakage, the structure will need to be destroyed.
 Acrylic bath mirror screen
We recommend to read
- Cold towel warmer: causes and solutions
- Typical bath sizes: how to choose and measure?
- Arrangement of ventilation in the bathroom + Video
In addition, acrylic is not considered a material with increased strength, so the walls or sides of the bathtub can react in the most unexpected way to repairs, cracking or breaking. Screens with doors that provide free access to the space under the bathroom are distinguished by high functionality.
Such ready-made designs can be purchased in stores. Most often they are made of plastic and are equipped with sliding doors on both sides of the shield. Today, many manufacturers sell screens complete with acrylic bathtubs. Installing this design is quite easy.
Original faceplate for the screen
Original faceplate for the screen
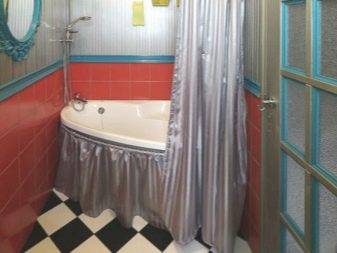
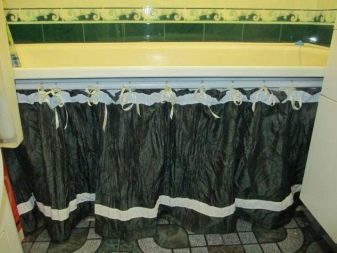
The screen under the bath can be made as a drapery or close-fitting of fabric and other similar materials. The main thing is to choose quick-drying polyester fiber fabrics.
- Polyester materials serve well in a wet room.
- Fabrics with a membrane structure prevent the formation of fungus, allowing the space under the bath to be ventilated.
- Waterproof nylon materials - ideal for screen sheathing.
- A good solution is to cover the frame with artificial leather.
- It is acceptable to install panels with any finishing solutions that can withstand dampness.
Step-by-step instructions for making a stationary block screen
First you need to consider the location of technical holes, prepare tools and materials. There is no problem to calculate the amount of materials. And from the tools you need an elementary set of a bricklayer, a tape measure, a square, a level and glue or a cement-sand mixture.
Basic masonry tools for masonry
Adhesive for foam blocks ST 21
The standard height of the bathtub is 56 cm, buy foam blocks measuring 30 × 60 cm with a thickness of 10 cm. Such masonry materials can be laid on edge, which greatly increases the stability of the structure and facilitates work.
Foam blocks
Foam concrete blocks: dimensions
If the blocks are slightly larger than the required size - no problem, they are perfectly cut with a hacksaw. If it is much lower, then you will have to put them on the edge in two rows in height. This is more difficult, it will be especially difficult to work with the last row.
Accurate cutting of foam blocks with a reciprocating saw
To do this, you can use bricks or the same foam blocks. The emphasis does not hurt for a cheap metal bath. Some manufacturers have learned to save so much that they make bathtubs from sheet steel a few tenths of a millimeter thick. There is no need to talk about any strength in these cases.
Strengthening the bottom with bricks
Step 1. Check the position of the tub.There are cases when plumbers made a mistake during its installation, problems should be corrected before finishing. In turn, check the position of all sides with a level, if necessary, align the position.
Checking the level of the installed bath
Step 2. Mark the location of the screen in such a way that the facing tile is right next to the edge of the bath. To do this, take a level, put it to the side of the bath in a strictly vertical position, make a mark on the floor. Make such measurements at least at three points along the length. Connect them with a thin line, it will indicate the position of the facing tile. Next, you should outline the lines for the location of the blocks. Add their thickness to the thickness of the adhesive (no more than 0.5 cm) and the thickness of the ceramic tile. Draw another well-marked line on the floor at this distance from the first with a felt-tip pen. On vertical walls, use a level to draw the same lines.
Step 3. Prepare the mortar and foam blocks. It is better to buy a dry mix, in terms of its characteristics it is much superior to self-prepared cement-sand. These adhesives are inexpensive and allow you to lay directly on existing ceramic tiles. It does not need to be torn off beforehand, notched with a grinder, etc.
Glue preparation
Step 4. Try on the foam block. At the top of the bath, it will have to be sawn off at an angle. Do this operation in several stages, each time repeating the fitting. Thus, you will be able to accurately adjust the dimensions of the block, which will positively affect the strength of the masonry.


Start laying, applying glue
Step 5. Apply glue around the perimeter of the foam block with a thickness of about 2 cm, set it in place, check the verticality with a level.Linearity is controlled by a line drawn on the floor. In the same way, continue lining the bathroom.
The process of laying the first row. Work is carried out according to the level
Sawing a groove
The second row hangs over the first
Installation of blocks vertically. A chamfer is sawn at the ends
Applying glue to the foam block
Laying must be vertical
Installing a small piece of foam block in the slot
Step 6. Remove construction debris, clean the adhesive from nearby ceramic tiles with a damp cloth. Leave the structure for one or two days to solidify the mass. Next, you can start laying the facing tiles.


