
- Soldering and insulating wires
- Stand
- If there are many fans
- Connecting cables
- Making a heat gun with your own hands
- Video: do-it-yourself electric gun for heating a garage
- Heat gun on diesel fuel and diesel fuel
- Video: multi-fuel heat gun
- gas heat gun
- Video: homemade gas heat gun
- Windmill from a cooler: instructions for converting a computer fan into a wind generator
- Mini wind generator from an old computer cooler
- Manufacturing technology
- We modernize the motor
- Impeller manufacturing
- How to make a fan from a conventional electric motor
- Self-manufacturing
- Modernization of an existing fan
- Creating a fan from a cooler
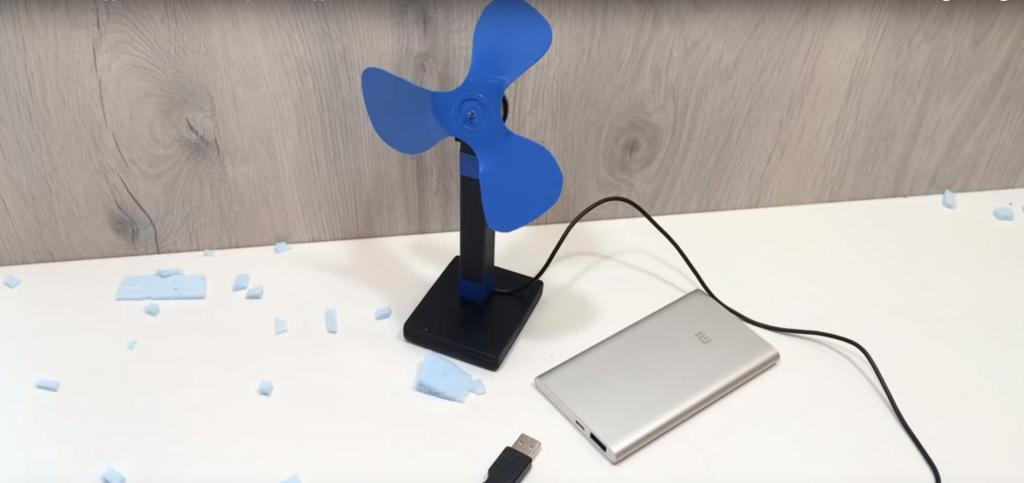
- USB fans: features
- Creating a fan from a cooler
- Completing a workflow
- How to make a centrifugal fan
- A vacuum cleaner
Soldering and insulating wires
Take the wires of the cooler and the USB cable, loosen about 10 mm of insulation and twist them so that the red wire connects to red and the black wire to black. Next, you will need a soldering iron to tin the twisted ends and thereby give strength to the connection. To do this, you need to do this:
- heat the soldering iron and prepare a piece of rosin or flux;
- attach twisted wires to rosin or soak in flux;
- melt a piece of solder or tin on the tip of the soldering iron;
- run the tip over the twisted wires if they are fluxed, or attach them to a piece of rosin and apply a little pressure with a hot tip.
This process is called tinning wires or do-it-yourself processing of contact points with red-hot tin. Rosin is needed so that the tin can better bond to the surface of the bare USB wire.
Now you need to isolate the conductors so that there is no short circuit when connected to the computer's USB connector. So, unwind a piece of electrical tape about 3-5 cm long and pass it between the soldered wires. Wrap one wire so that the tin-plated contact is securely insulated and no pieces of bare conductor are visible through the layers of electrical tape. Next, you need to cut off another piece of electrical tape and do the same with the second wire.
Stand
It's time to think about the fan stand you just made. You will need a piece of copper or aluminum wire. Take a piece of wire and bend it in the shape of the letter "P". Thread the ends through the bottom two bolt holes on the cooler. Bend the wire and thread the ends through the top holes. Now you can adjust the fan tilt level.
If there are many fans
You can make a whole battery of fans with your own hands. To assemble a fan from four or more coolers, you need to know how to properly connect them to a power source (computer USB connector), as well as how to connect these fans to each other.
Connecting cables
From the school physics course, we know that there are two types of connections - serial and parallel.
With the first type of connection, you need to take the red (positive) wire from the USB cable and connect it to the red wire of the first cooler, and connect the black wire of the first cooler to the red wire of the second cooler, and so on. The last one, black, is connected to a residential USB cable of the same color.
Parallel connection is much simpler: all the red wires are assembled in one twist, just like the black ones. The red wires connect to the red wire of the USB cable, and the black wires, respectively, to the black one. For greater contact reliability, it is necessary to make tinning and wrap the contact points with electrical tape, as described above.
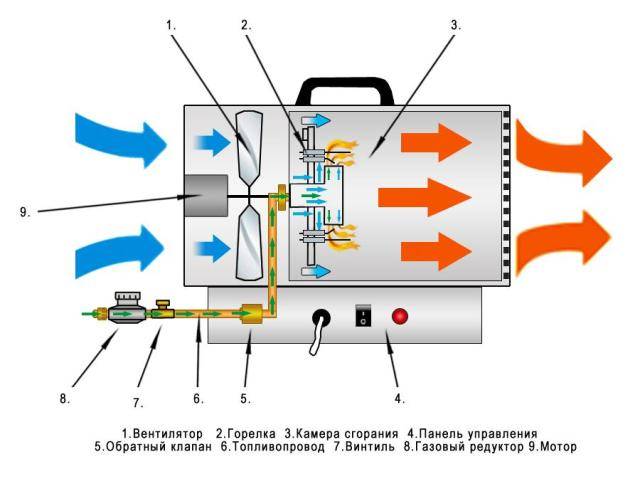
Making a heat gun with your own hands
The process of creating a homemade heat gun always begins with the manufacture of a frame from the corners, to which the body and other components will be attached. The next steps depend on the type of installation.
First, a diagram of the electrical circuit of the installation is drawn up. If the master does not have the relevant knowledge, he can use ready-made developments.
This is what it looks like circuit diagram drawing heat gun
An electric heat gun is made as follows:

Video: electric do-it-yourself cannon for heating garage
Heat gun on diesel fuel and diesel fuel
The manufacturing process consists of the following steps:
We draw the reader's attention to the fact that this heat gun operates according to the direct heating scheme, therefore it cannot be used in residential and other premises with the stay of people or animals.
To control the correctness of the assembly, it is advisable to invite a master from some auto repair shop.
The self-made model does not have a flame control sensor and an overheating protection system, so it cannot be left unattended during operation.
Video: multi-fuel heat gun
gas heat gun
This setup is made like this:
- A meter-long piece of pipe with a diameter of 180 mm is used as a body. In the absence of a finished pipe, it is made from galvanized sheet, fastening its edges with rivets.
- At the ends of the body, on the side, you need to cut out a hole - with a diameter of 80 mm (a pipe for the removal of heated air will be connected here) and 10 mm (a burner will be installed here).
- A combustion chamber is made from a meter-long piece of pipe with a diameter of 80 mm. It must be welded into the body exactly in the center, for which several plates must be used.
- Next, a disk is cut out of the steel sheet, which will be used as a plug. Its diameter must correspond to the diameter of the heat gun body (180 mm). A hole with a diameter of 80 mm is cut in the center of the disk - for the combustion chamber. Thus, a plug welded to the body on one side will close the gap between it and the combustion chamber. The plug must be welded from the side of the heated air supply.
- A pipe for supplying heated air is welded to a hole made in the body with a diameter of 80 mm.
- A burner with a piezoelectric element is installed in a 10 mm hole. Next, a gas supply hose is connected to it using a clamp.
- The manufacture of the heat gun is completed by installing a fan and connecting it and the piezo igniter to the power supply through a switch.
Video: homemade gas heat gun
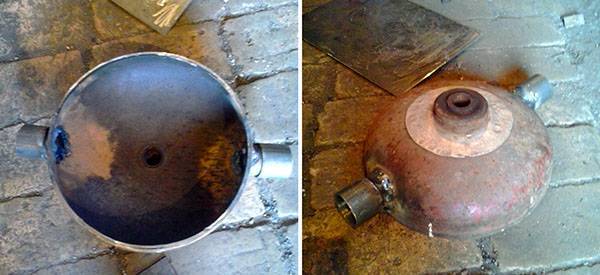
The easiest way to make such a heater is from an old gas cylinder.If it is not available, a thick-walled pipe with a diameter of 300–400 mm can also be used as the main blank - then the cover and bottom will need to be welded on their own (these elements are already available for the cylinder).


One of the options for a wood-fired heat gun is shown in the drawing:
Drawing of a general view of a heat gun with an indication of its main dimensions
As you can see, the body of the heat gun is divided into a furnace and an air chamber with inlet and outlet openings. The partition between them and the improvised lamellar radiator act as a heating element for the air passed through the chamber. The location of the radiator fins is shown in the sections.
Sections - frontal and horizontal, which show the internal structure of the gun
By attaching a corrugated hose to the outlet pipe of the air chamber, the user will be able to supply hot air to any point in the room.
The installation is made as follows:
An overly powerful fan is not required for this heat gun. It is enough to install a model for extracting a bathroom with a capacity of about 50 m 3 / h. You can use a fan from the stove of the car. If the room is very small, a cooler from a computer power supply is also suitable.
Windmill from a cooler: instructions for converting a computer fan into a wind generator
When it comes to wind turbines, the imagination draws serious high-power installations capable of supplying energy to entire cities. At the same time, it is quite possible to use this technology for applied, domestic purposes.This is useful for illustrating the issue, helping to assess the possibilities and prospects of wind energy in a simple and understandable example. The creation of small devices will not solve the problem of energy supply, but it can contribute to the development of technology and arouse interest in this way of generating electricity.
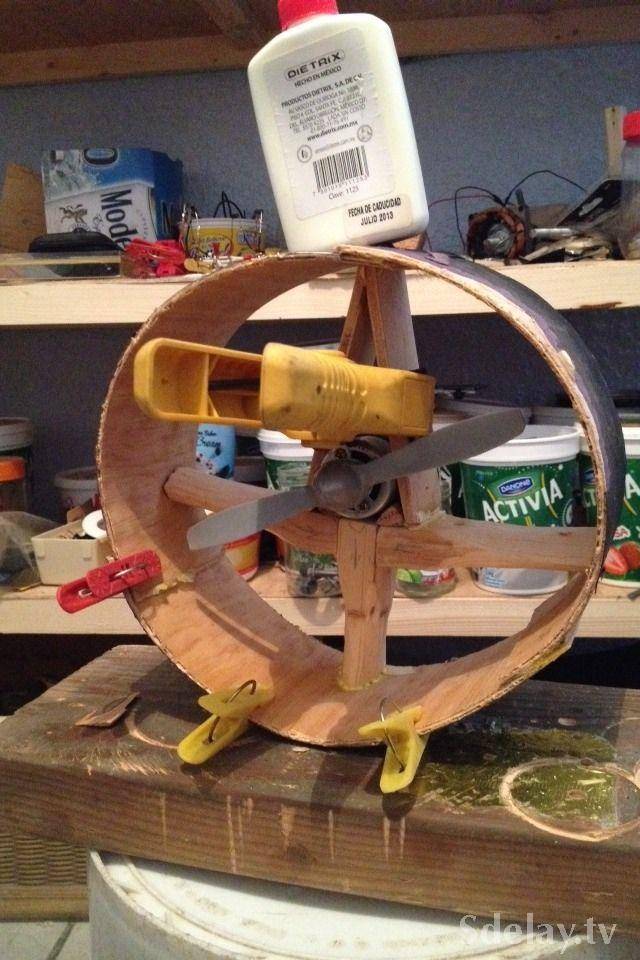
Mini wind generator from an old computer cooler
A small model of a wind generator, quite functional and capable of doing useful work, can be a failed computer fan. Almost any cooler will do, but it is best to choose the largest one, since the engine, as it is, is not suitable for generating electric current. The reason for this is that the windings of the motor are wound with double wire and in different directions, so it creates an alternating current.
The maximum that can be expected in the manufacture of a wind turbine from a computer cooler is the power of several LEDs, which require constant current. Therefore, it will be necessary to make a rectifier, which will also take a little power. Therefore, the engine without alterations is unable to light even a single LED. For modernization, you will need to make more powerful windings capable of delivering higher voltages.
Important! You should not expect to create a device that can charge a mobile phone battery or power a laptop. The energy obtained in this way is only enough to power the LED flashlight
The whole idea is useful precisely from an educational or cognitive point of view.
Manufacturing technology
To convert a computer fan into a wind generator, you will need to perform the following steps:
- upgrade the motor
- increase the size of the impeller;
- make a stand with the ability to rotate around its axis (wind settings).
Let's look at these steps in more detail:
We modernize the motor
In order to remake the engine, you will need to disassemble the cooler. This is done in the following way:
- the sticker is removed from the engine compartment cover in the central part of the cooler;
- the compartment cover is carefully removed;
- the retaining ring is removed, fixing the axis of the impeller;
- the impeller is removed.
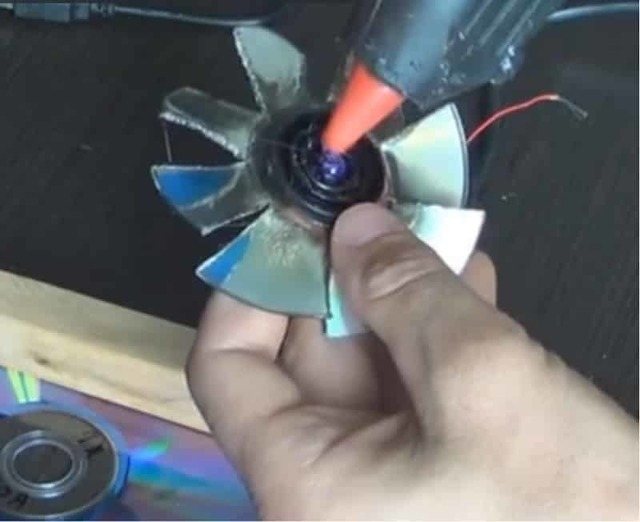
After that, free access to the motor windings appears. They must be removed, as they are not suitable for our purpose. The easiest way is to carefully cut them off and pull them out of the nests.
Then the windings are wound with a thinner wire. The number of turns should be the maximum that the stator can accommodate. The windings are wound at random - the first is clockwise, the second is against, then again clockwise and again against. This will provide AC power.
It would be nice to change the magnets to more powerful ones, for example, neodymium ones. This will significantly increase the generator power and stabilize the output voltage.
After that, wires are soldered to the terminals of the windings, to which the rectifier will subsequently be connected.
After completing these steps, the entire structure is assembled in the reverse order. A rectifier is assembled from 4 diodes, and this completes the engine upgrade.


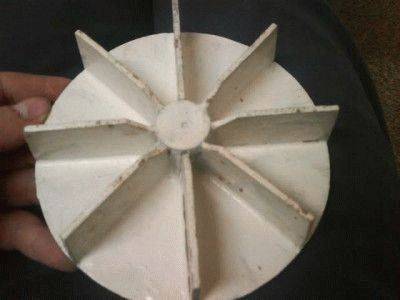
Impeller manufacturing
The blades on the cooler are good in size for cooling the insides of a computer, but they are too small to work as a wind wheel. In order to ensure the highest possible efficiency of interaction with wind currents, it is recommended to manufacture new blades.You will need to do the following:
- carefully cut off the old blades;
- make new ones from plastic bottles or other products;
- glue new blades on the impeller.
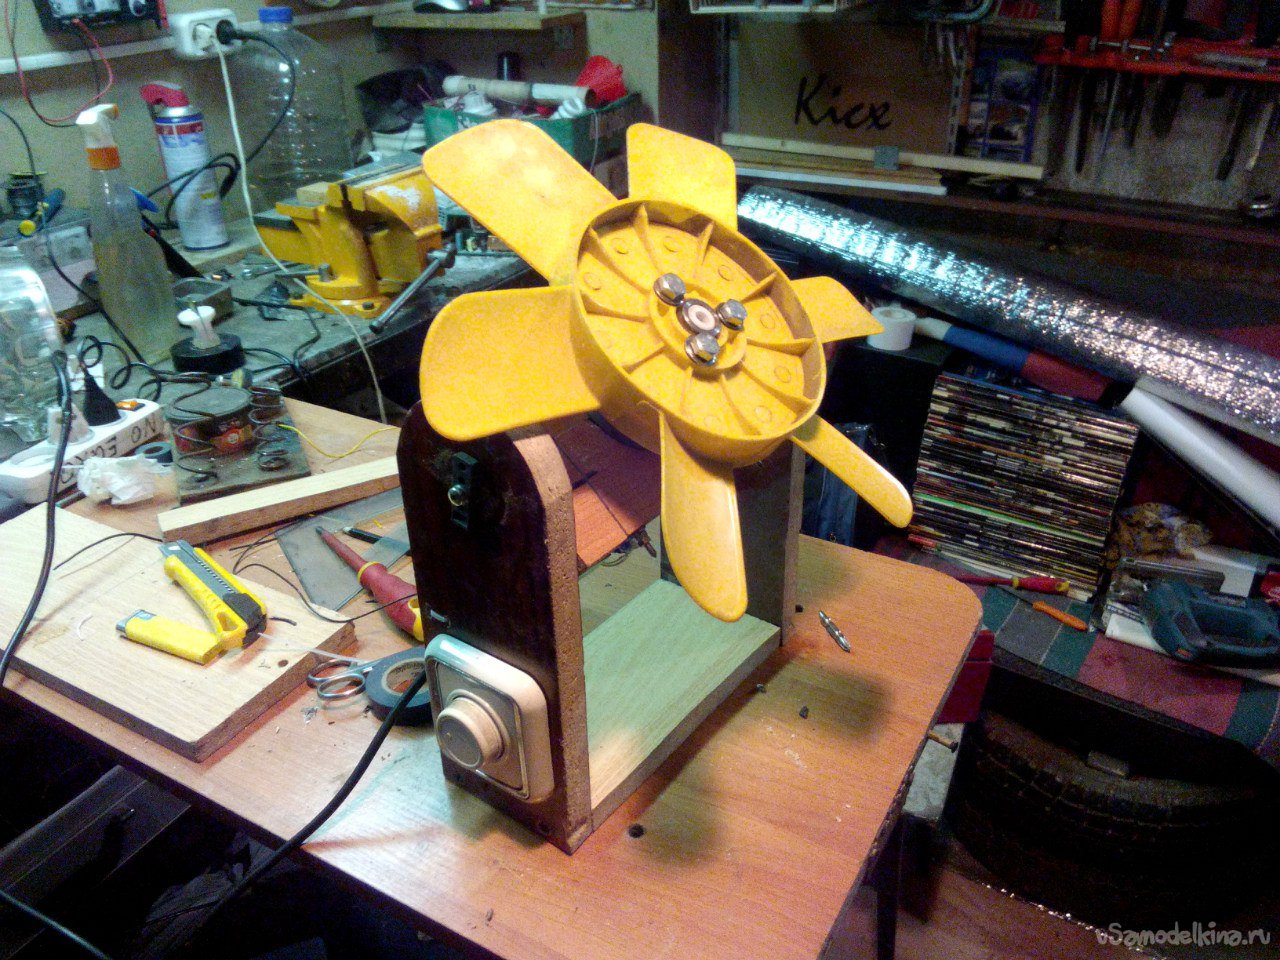
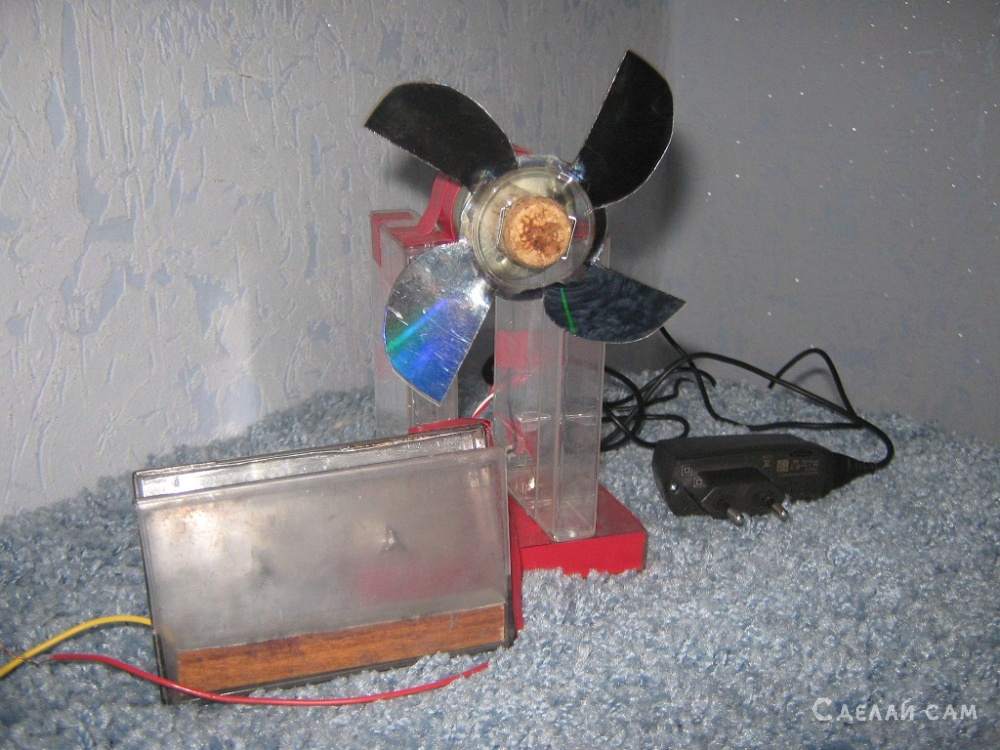
How to make a fan from a conventional electric motor
Probably the easiest and fastest way to get your own homemade fan assembly is to find a regular motor, which is most often found in toys.
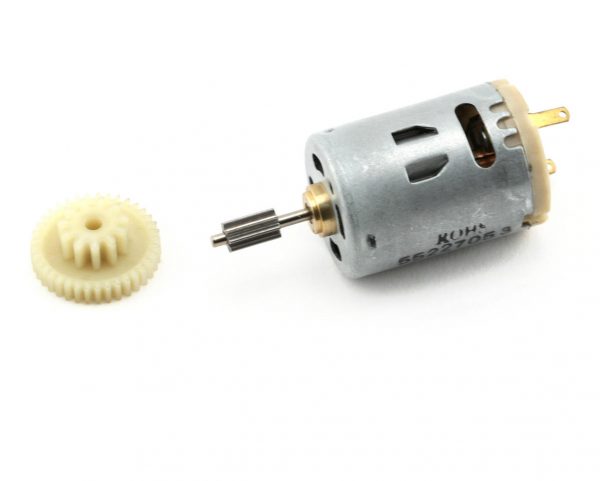
Standard electric motor from a toy
Ordering such a thing is not difficult. Moreover, today, without stopping for a minute, caravans of various knick-knacks from the Celestial Empire ply. And if not, then it’s enough to buy an inexpensive toy car and remove the motor from it.
But expect the impossible from such a device is definitely not worth it. Rather, it can only slightly drive air. But for a desktop model it will do. He will be able to blow the face of the person sitting at the computer.
For such a fan, you can use absolutely anything. The main parts will be:
- blades;
- motor;
- on/off button;
- stand;
- supply system.
Otherwise, the limit of the idea will be only within the boundaries of fantasy.
After the motor is ready for use, it makes sense to take care of the power. These can be batteries, as in the toy for which the motor was intended. But, of course, such energy will not last long. However, there is a plus - the device will remain compact and mobile.
The second option is mains power. But in this case, don't overdo it. Direct connection through the plug is a sure way to burn out the motor. So do not experiment, trying to spin the engine up to high speeds.On toys, electric motors are usually designed for 3-4.5 Volts, and the desire to give more rotation due to powerful energy sources, firstly, will quickly land the source (if it is a battery), and secondly, it will seriously reduce the life of the fan up to breakage. The motor will start to heat up, the brushes may melt.
But modern chargers convert the voltage in the network, reducing it to the specified parameters. You can find a power supply, including on sale, which is ideal for the motor.
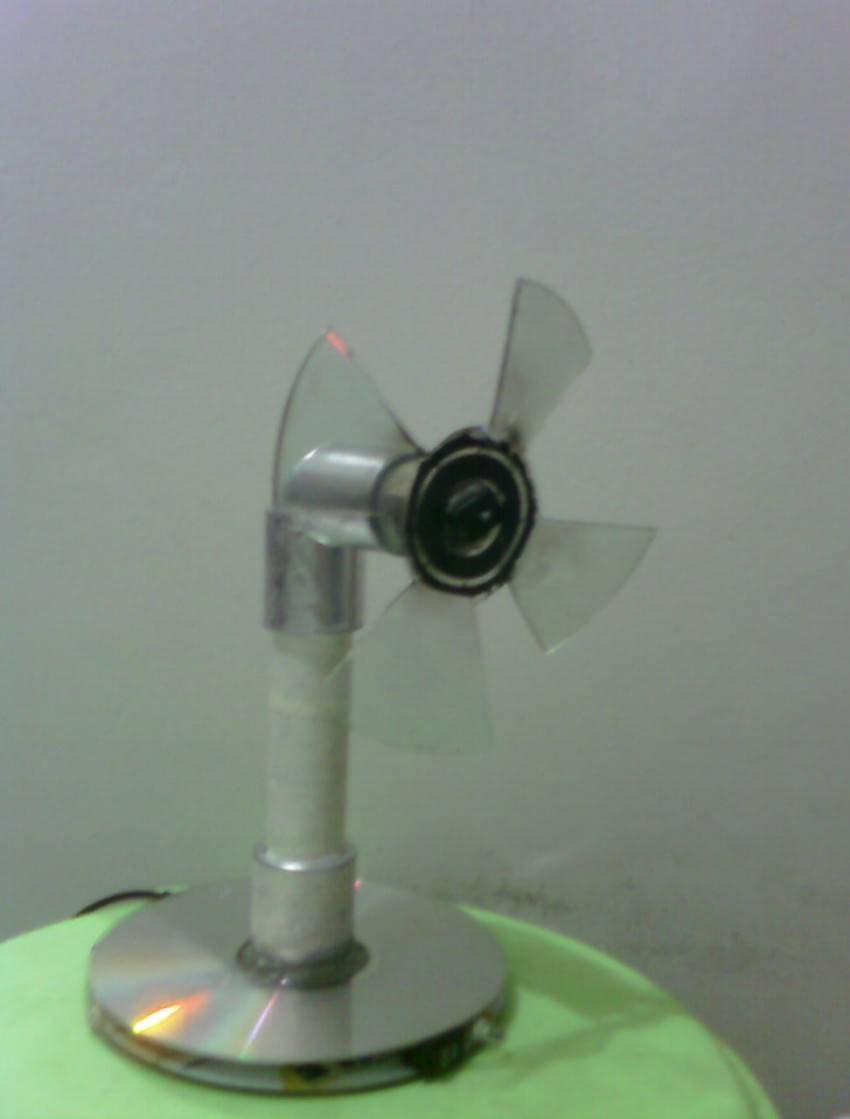
To create the blades, you can already take any material. The main thing is that it should be light. Due to the weakness of the motor, the less the blades weigh, the faster the rotations will be, and, therefore, the efficiency of the work.
- The easiest option is to take a cork from an ordinary plastic bottle, which will serve as a fastener for the blades. Make a hole in the bottle according to the size of the rotating axis of the electric motor.
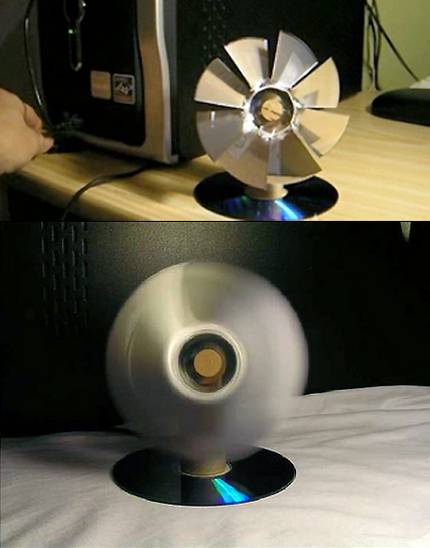
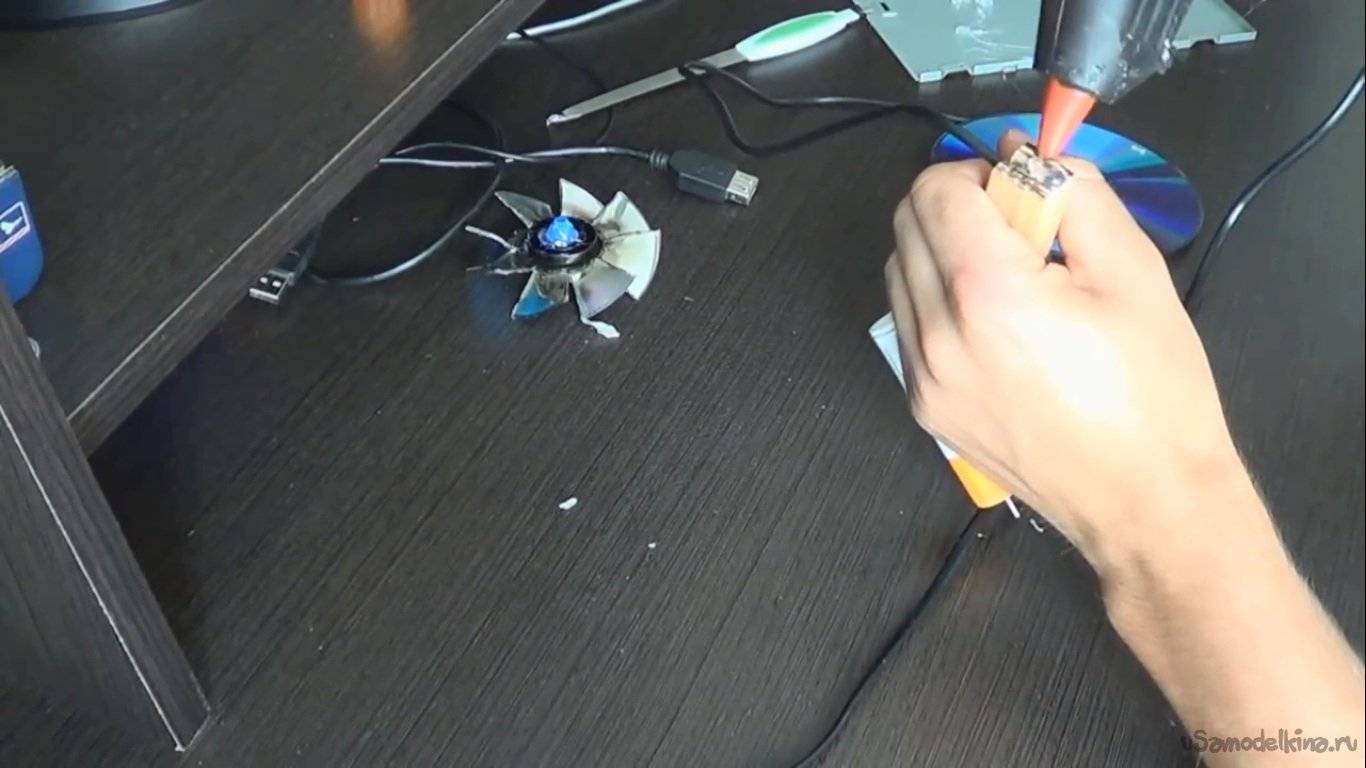
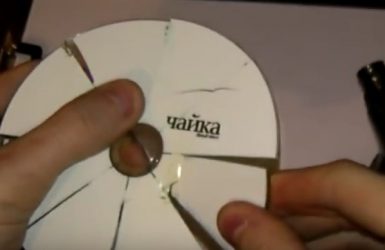
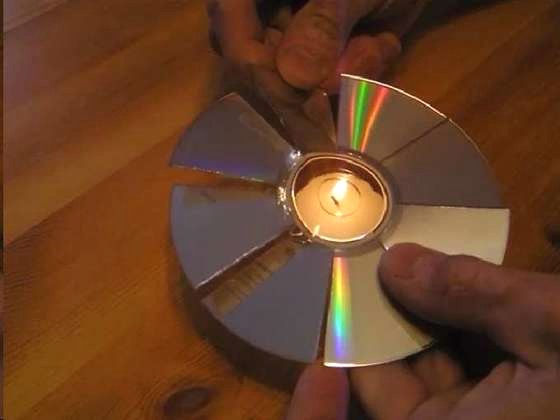
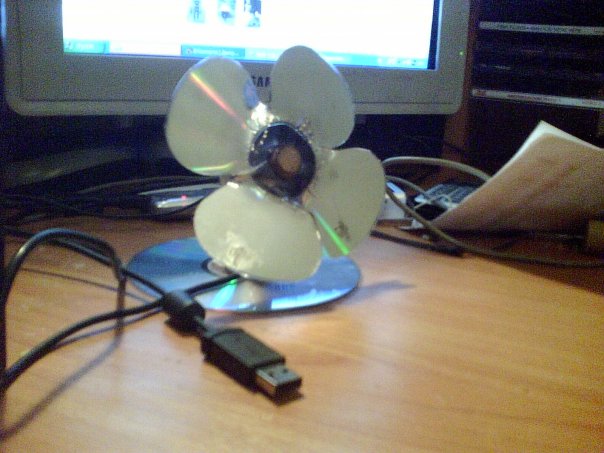
- Blades can be made from a regular CD. A hole is burned in the center according to the size of the cork from the bottle. The circumference of the disk is divided into 8 sectors. They are cut for some distance, but not to the center. After that, the disk must be heated with fire in order to easily bend the blades. For this, a lighter is suitable.
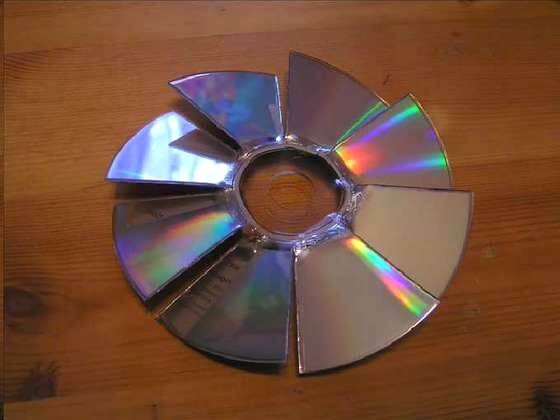
Creating Blades on CD
- You can attach the disc to the cork with glue. The second option - when a hole is burned in the middle for the cork - immediately connect the structure. The melted plastic will harden and hold firmly.
- After all this, the structure is interconnected. Wire is suitable for the stand. This is perhaps the easiest option. And for such a light device, you can’t imagine better. You can bend the skeleton in such a way as to discreetly hide the batteries there.Or carefully run the power supply wire going to the motor.
- The circuit should not always be closed if batteries are used, so a button must be fixed on the case. She is inexpensive. You can use it from the toy from which the motor was removed.
Another version of the propeller device is the use of paper, only thick. The method is even simpler, but less practical.
Self-manufacturing

First of all, you should decide on the functional purpose of the centrifugal fan. If it is necessary to ventilate a certain part of the room or equipment, the case can be made from improvised materials. To complete the boiler, you will need to use heat-resistant steel or make it from stainless steel sheets with your own hands.
First, the power is calculated and a set of components is determined. The best option would be to dismantle the snail from old equipment - a hood or a vacuum cleaner. The advantage of this manufacturing method is the exact match between the power of the power unit and the parameters of the hull. A snail fan is easily made by hand only for some applied purposes in a small home workshop. In other cases, it is recommended to purchase a ready-made model of an industrial type or take an old one from a car.
The procedure for making a centrifugal fan with your own hands.
Calculation of overall dimensions. If the device will be mounted in a limited space, special damper pads are provided to compensate for vibration.
Case manufacturing.In the absence of a ready-made structure, you can use sheets of plastic, steel or plywood
In the latter case, special attention is paid to sealing the joints.
Scheme of installation of the power unit. It rotates the blades, so you should choose the type of drive
For small structures, a shaft is used that connects the motor gearbox to the rotor. In powerful installations, a belt-type drive is used.
Fasteners. If the fan is installed on an external case, for example, a boiler, mounting U-shaped plates are made. With significant capacities, it will be necessary to make a reliable and massive base.
This is a general scheme by which you can make an exhaust functional centrifugal unit with your own hands. It may change depending on the availability of accessories.
It is important to comply with the requirements for sealing the housing, as well as to ensure reliable protection of the power unit from possible clogging with dust and debris.
In the video you can see the process of manufacturing a case from PVC sheets:
Modernization of an existing fan
Plastic bottles will come in handy in upgrading a store-bought fan. Practically free improvised means will help to significantly increase the performance of the device.


Let's look at how and by what method you can arrange a pleasant sea breeze in an apartment:
Image gallery
We have made parts designed to enhance the airflow. They will provide accelerated cooling of the space around.
Now you need to make the basis for fixing them:
Image gallery
After preparing the device, designed to enhance the performance of the fan, we proceed to the assembly and commissioning:
Image gallery
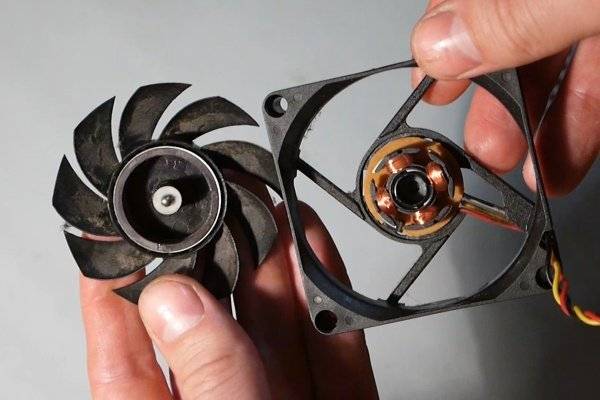
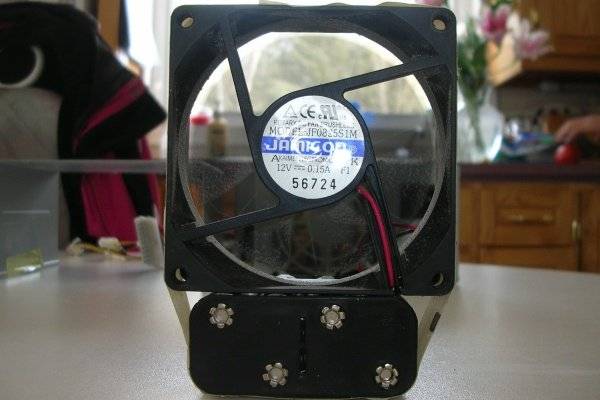
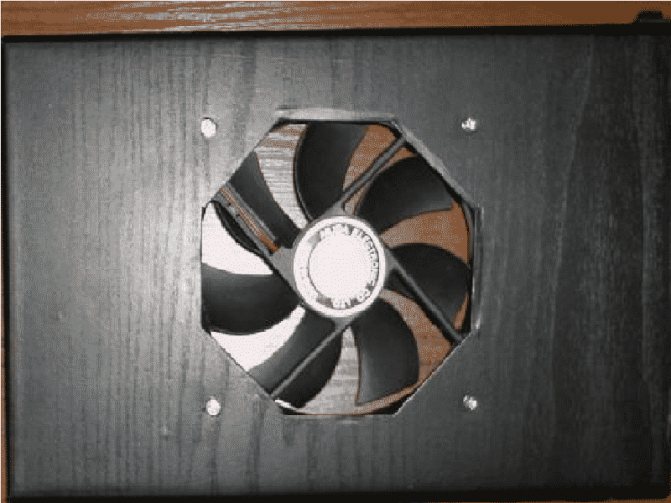
Creating a fan from a cooler
The easiest way to make a fan yourself is to use an unnecessary cooler (these are used in a computer as a cooling system for components).
Not surprisingly, this method is the simplest, because the cooler is just a small fan. It remains only to take a few simple steps to give it its final shape and performance.
The cooler itself is quite functional, but you need to prepare it for a non-standard way of using it:
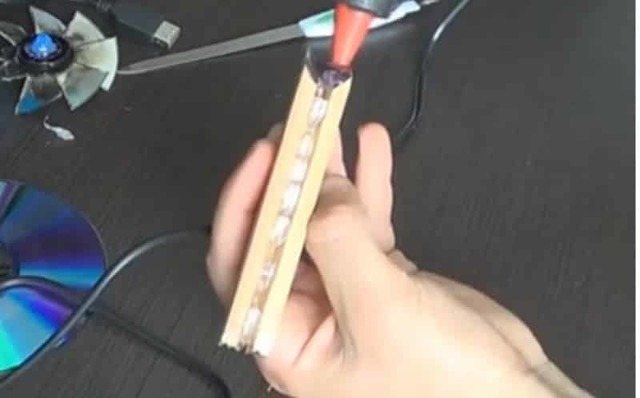
- Wires.
If the fan is located near the computer, an ordinary unnecessary USB cable will do. It needs to be cut and the insulation removed (same with the cooler wires):

We are only interested in two wires: red (plus) and black (minus). If there are other colors in the cooler or USB cable, feel free to cut them off and isolate them, because they are absolutely unnecessary and will only interfere.
- Compound.
After cleaning, the wires must be connected to each other (it is enough to twist them tightly with each other). Don't mix up the colors. This threatens with serious complications in the process of creating a fan.
For twisting, 10 mm length is enough. If necessary, it is allowed to clean most of the wire, this is not scary, but much more will have to be insulated.
- Safety.
Remember that proper insulation is the key to success and a guarantee that the computer or outlet will not short out. Bare wires should be sealed with electrical tape (only in the absence of power), and the thicker it is, the better.
There is no particular point in explaining what threatens the fall of "minus" to "plus".If the red and black wires come into contact during the transmission of electricity, not only the USB wire / port, but also the computer components may burn out.
In principle, computers are not afraid of such moments if they are equipped with protection against voltage surges. But when a wall socket is used, fixing the wiring in the apartment will be much more difficult than creating a small fan.
Therefore, seriously take care of the insulation of bare parts of the wires. Extra complexity is rarely needed.
- Final touches.
Do not forget that a computer cooler is very light, but at the same time very fast. Even with a voltage of 5 volts, its speed will be quite high. We consider this voltage for a reason: the cooler will perfectly cope with its task, and the operation will be as silent as possible.
Due to the small dimensions of the device, vibration and vibration may cause it to fall. This should not be allowed for the following reasons:
- such a cooler cannot cause lethal cuts even during operation, but there are no guarantees that the device will not jump up and fly off, for example, in the face;
- falling on a non-flat surface (on a pencil, pen, lighter), its blades can be damaged: fragments broken off at such a rotation speed can cause irreparable damage;
- other unforeseen circumstances.

Therefore, it is important to fix the cooler (with adhesive tape, glue) on some more stable surface: a box, a wooden block, a table
- Additional functions.
If desired, the finished fan can be updated externally, add a switch (so as not to pull out the cord every time), etc. But attention is also paid to a method that relatively well increases the efficiency of the device.


Simply cut off the top of a plastic bottle and glue it (wide hole) to the cooler frame. Thus, the air flow will be more precise and directed: the force of air movement will be stronger by about 20%, which is a pretty good indicator.
This completes the creation of the fan, and it is ready for full-fledged work.
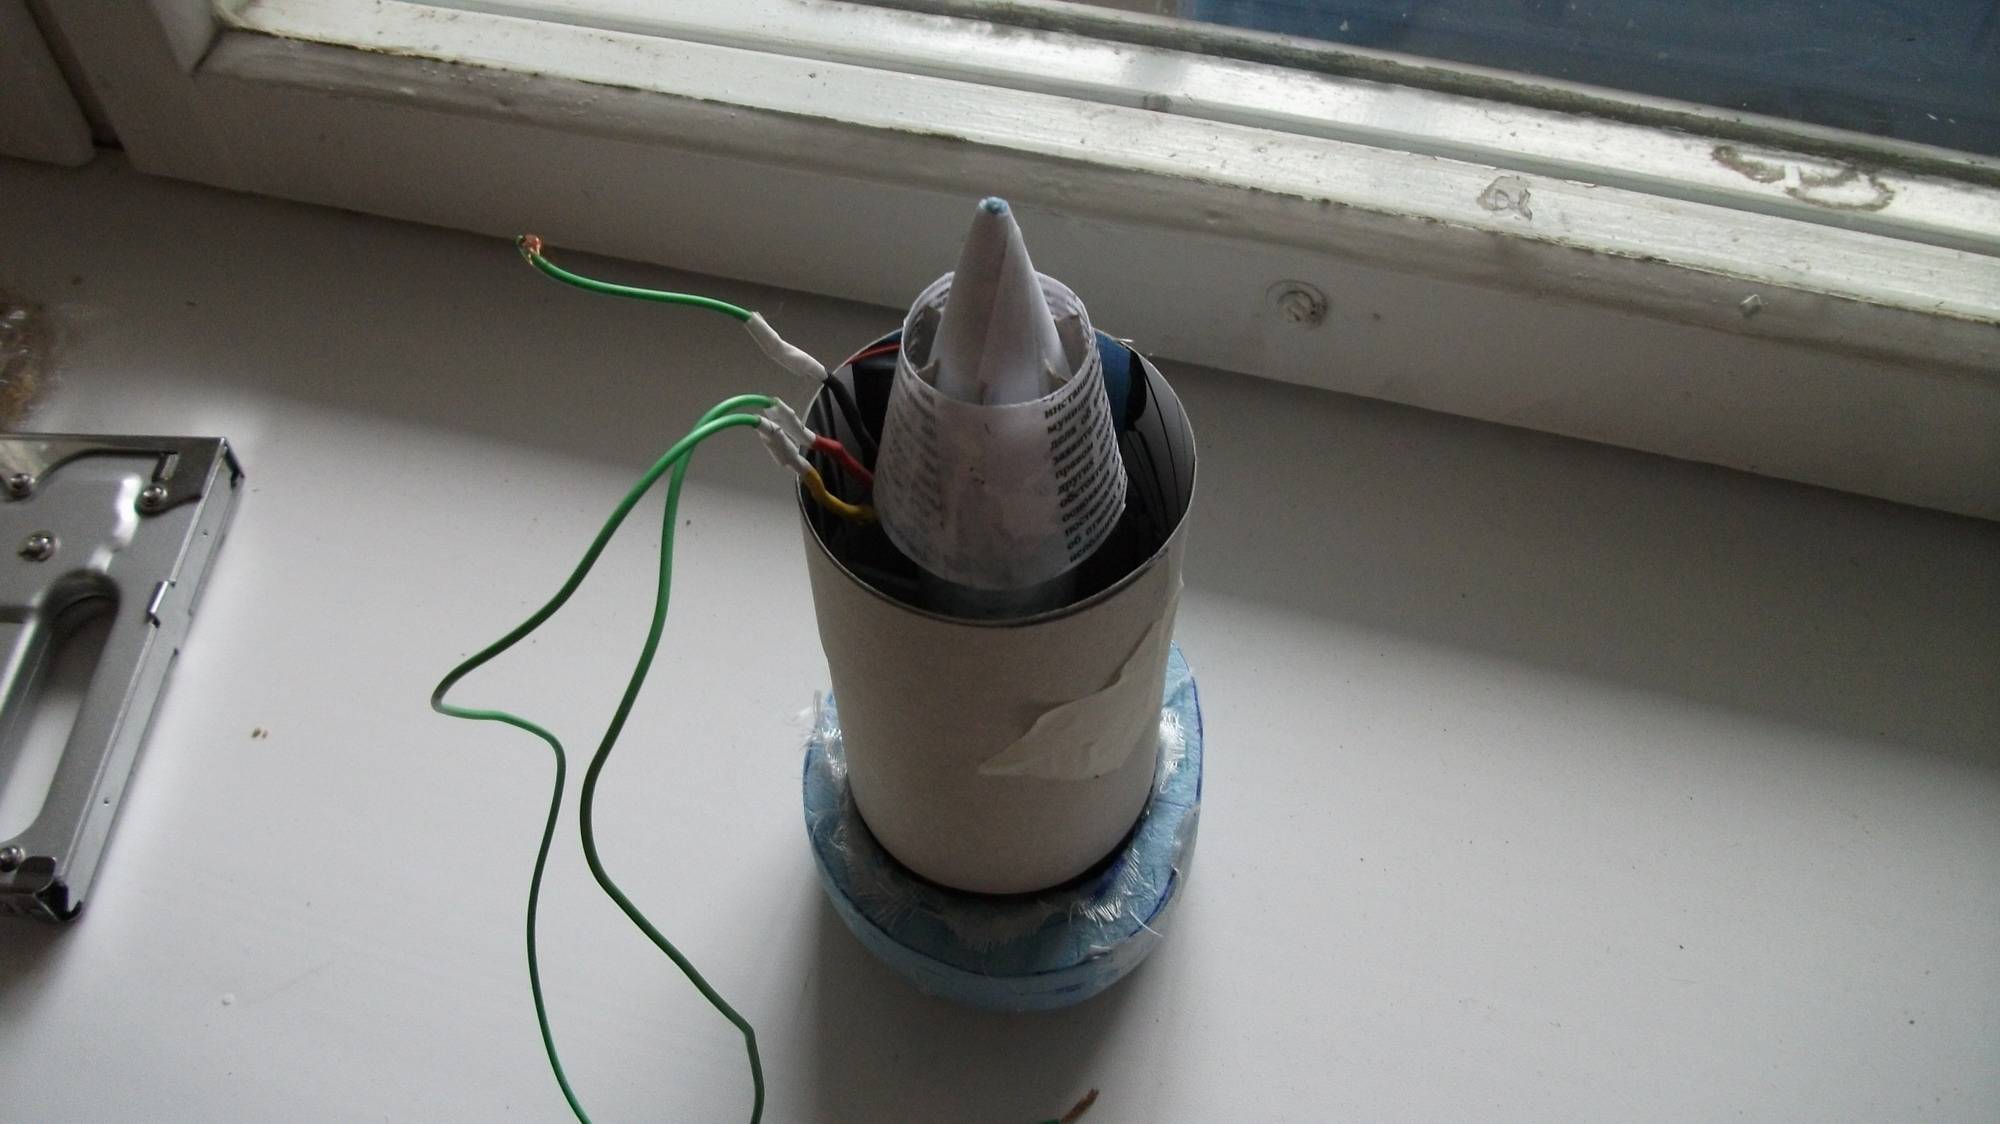
USB fans: features
Such a model will not be easy to make. This is a great option for individual cooling when working at a computer. Such a device is obtained with sufficient power, and also the energy consumption is not much higher. For the device of this design you will need:
USB fan drawing.
- a couple of CDs for a computer;
- cord with USB plug;
- wires;
- an old motor, these are usually installed on children's toys;
- wine cork;
- cylindrical cardboard;
- glue and scissors.
First of all, the disk is cut into blades. The power of the air flow depends on the presence of the blades, the more of them, the stronger it will blow, but the segments themselves should not be small.
Only one disk is cut, the second will be used as a stand.
They must face the same direction. When the disk with blades is ready, a cork is inserted into its center, and a hole is made in it.
In order to make the wire usable, the outer winding is removed from one end of the USB cable, under which there are 4 wires. Steam rooms can be separated, connected to the motor and insulated.
Creating a fan from a cooler
The easiest way to make a fan yourself is to use an unnecessary cooler (these are used in a computer as a cooling system for components).
Not surprisingly, this method is the simplest, because the cooler is just a small fan. It remains only to take a few simple steps to give it its final shape and performance.
The cooler itself is quite functional, but you need to prepare it for a non-standard way of using it:
- Wires.
If the fan is located near the computer, an ordinary unnecessary USB cable will do. It needs to be cut and the insulation removed (same with the cooler wires):

We are only interested in two wires: red (plus) and black (minus). If there are other colors in the cooler or USB cable, feel free to cut them off and isolate them, because they are absolutely unnecessary and will only interfere.
- Compound.
After cleaning, the wires must be connected to each other (it is enough to twist them tightly with each other). Don't mix up the colors. This threatens with serious complications in the process of creating a fan.
For twisting, 10 mm length is enough. If necessary, it is allowed to clean most of the wire, this is not scary, but much more will have to be insulated.
- Safety.
Remember that proper insulation is the key to success and a guarantee that the computer or outlet will not short out. Bare wires should be sealed with electrical tape (only in the absence of power), and the thicker it is, the better.
There is no particular point in explaining what threatens the fall of "minus" to "plus". If the red and black wires come into contact during the transmission of electricity, not only the USB wire / port, but also the computer components may burn out.
In principle, computers are not afraid of such moments if they are equipped with protection against voltage surges. But when a wall socket is used, fixing the wiring in the apartment will be much more difficult than creating a small fan.
Therefore, seriously take care of the insulation of bare parts of the wires. Extra complexity is rarely needed.
- Final touches.
Do not forget that a computer cooler is very light, but at the same time very fast. Even with a voltage of 5 volts, its speed will be quite high. We consider this voltage for a reason: the cooler will perfectly cope with its task, and the operation will be as silent as possible.
Due to the small dimensions of the device, vibration and vibration may cause it to fall. This should not be allowed for the following reasons:
- such a cooler cannot cause lethal cuts even during operation, but there are no guarantees that the device will not jump up and fly off, for example, in the face;
- falling on a non-flat surface (on a pencil, pen, lighter), its blades can be damaged: fragments broken off at such a rotation speed can cause irreparable damage;
- other unforeseen circumstances.
Therefore, it is important to fix the cooler (with adhesive tape, glue) on some more stable surface: a box, a wooden block, a table
- Additional functions.
If desired, the finished fan can be updated externally, add a switch (so as not to pull out the cord every time), etc. But attention is also paid to a method that relatively well increases the efficiency of the device.


Simply cut off the top of a plastic bottle and glue it (wide hole) to the cooler frame.Thus, the air flow will be more precise and directed: the force of air movement will be stronger by about 20%, which is a pretty good indicator.
This completes the creation of the fan, and it is ready for full-fledged work.
Completing a workflow
Cylindrical cardboard is tightly glued to the whole CD. Next, the body is attached to the opposite side of the cylindrical body, and the axle is inserted into the plug. It should enter the cork tightly, with effort. It remains to connect the manufactured fan with your own hands to the computer and check it. This product will not be able to last for a long time, but it may last for a season or even two.
Having studied these simple methods, everyone can make a fan with their own hands. The main thing is to have the desire and desire to invent something new.
Basically, spare parts for a homemade fan can be removed from an old computer processor, and you can also assemble more than just a fan from it.
How to make a centrifugal fan
From what has been said, the obvious way to carry out the plan is to remove the tangential fan from the hood, for example. Benefit: Silent operation is ensured. The manufacturer complies with the norms prescribed by the standards, so factory hood class devices are relatively quiet. We believe that for most readers this is not the best solution to the problem, let's continue our consideration.
A vacuum cleaner
Inside the vacuum cleaner there is a ready-made centrifugal fan. A big plus is that there is already a ready-made case, which must be mounted in the channel in place. Additional benefits include:
- The vacuum cleaner motor is designed for long-term operation. Spins the blade for days on end.The windings are often protected from overheating, in addition, air passes through the channels, cooling the stator.
- The motor of the vacuum cleaner is aimed at overcoming significant pneumoloads. When disassembling this housewife's assistant with your own hands, you will see a safety valve inside. Try to remove and blow with the force of the lungs. Does not work? And the engine does it jokingly! Clamp the inlet, or bend the hose in half. A click coming from the inside of the case indicates the operation. We believe that such a force is more than enough to ventilate the facility.
- Plus - suction power (in aerowatts) is indicated in the technical specifications, similar to the pressure generated. Thus, it is easy to calculate in advance by formulas whether the engine power is sufficient for the chosen task. Sometimes manufacturers are so kind that they indicate the flow rate, for example, 3 cubic meters per minute. Anyone can calculate: 180 cubic meters per hour. Due to the high power, the flow will be maintained despite the turns and bends of the duct.


