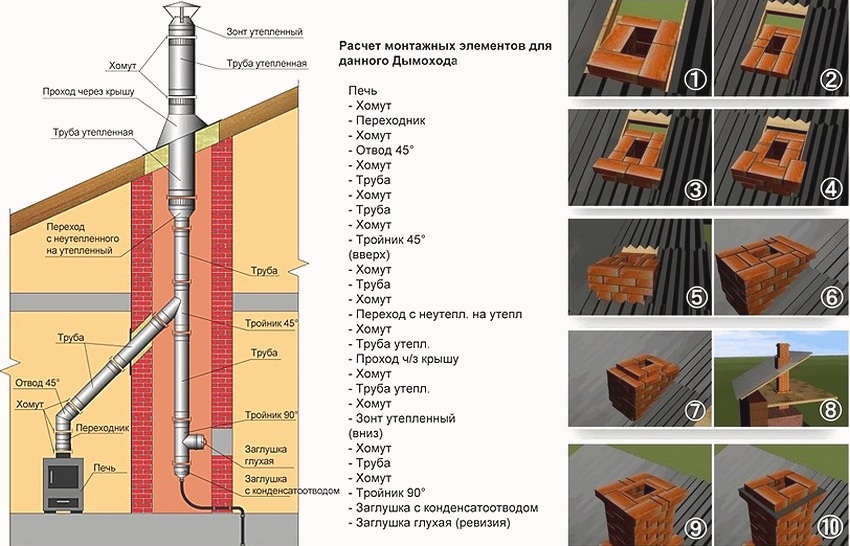
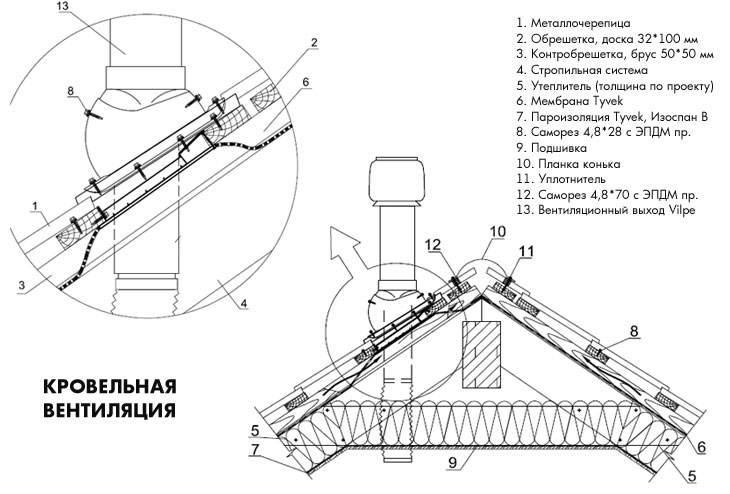
4 Node device
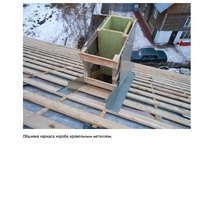
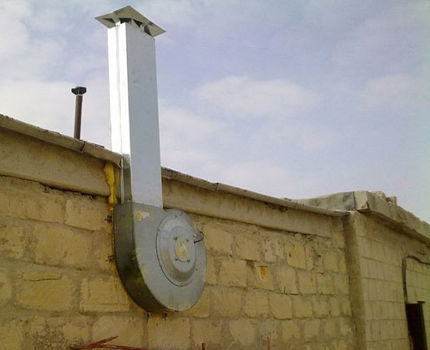
At the bottom of the pipe, with the help of a flange, an outlet channel is attached, and on top there is a deflector or a conventional protective umbrella. You can also consider the option with a heater, in the role of which mineral wool is used.
The modern market offers more advanced types of roof ventilation systems that correspond to a new level of quality. At the same time, in terms of design features and principle of operation, they practically do not differ from traditional solutions, but they have a lot of advantages.
Covers from the manufacturer "Vlipe Vent" are in special demand. The list of advantages of such products includes the following items:
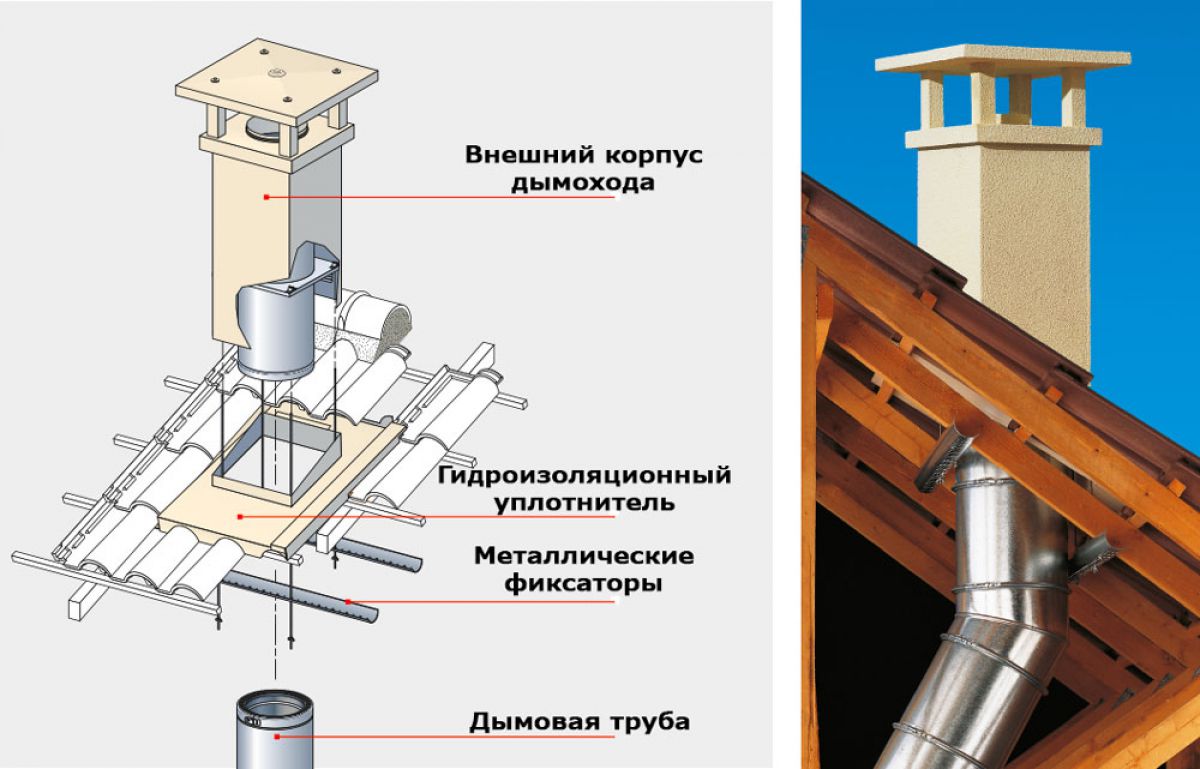
- 1. High quality workmanship. Pipe models available on the market are made from high quality materials. If the inner pipe is made of the best galvanized steel, then the outer one is made of reliable lightweight polypropylene.
- 2. Reliable fastening. To fix the element, a special pass-through element of the corresponding shape is used.
- 3. The height of the pipe is between 400mm and 700mm.
- 4. A seal is located at the bottom of the pipe, which allows it to be inserted into the air duct to a depth of up to 300 millimeters.
- 5. The inner diameter of the pipes is 110-250 mm.
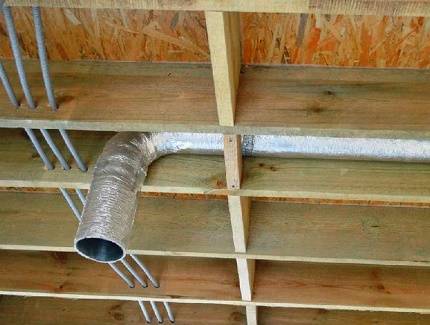
- 6. The ventilation outlet pipe is equipped with a special heat insulator, which prevents the possible formation of an ice plug in the cold season. In addition, good thermal insulation prevents condensation.
- 7. An electric fan can be installed on the ventilation outlets, which will create forced ventilation.
- 8. A hood with a deflector is the best protection against rain. In addition, it enhances traction.
In some circumstances, where a feed-through is not included and is purchased as an optional unit, the type and profile of the roofing must be carefully assessed to determine the optimum unit. A high-quality pass-through element will be the best solution for ensuring the versatility of the structure on any type of roof. Such products guarantee maximum stability and tightness of the ventilation outlet.
How to calculate everything correctly?
Ventilation calculations in many cases require special knowledge and the use of complex techniques. If there is a desire and the wallet allows, the creation of the project can be ordered from specialists. Fortunately, the garage is a small space with a simple configuration.
The dimensions of the ventilation openings are calculated by the formula:
Psech=Pgar×15
Wherein:
- Psech - cross-sectional area of the ventilation hole;
- Pgar - garage area;
- 15 - coefficient reflecting the size of the ventilation hole per unit area of the room.
Those. you need to multiply the area of \u200b\u200bthe garage by 15 mm. According to this simplified technique for a garage of 24 sq. m.(6*4) you will need an air inlet with a diameter of 360 mm. These calculations are very conditional, since the technique does not take into account the height of the room and its other features.


In practice, these indicators can be varied. For the garage discussed above with an area of 24 sq. m. in one particular case, two 150 mm pipes were successfully used on the inflow and one such pipe on the exhaust.
To increase the efficiency of natural ventilation, additional means can be used:
- The deflector is a special cap that is installed on the edge of the vertical section of the exhaust pipe in order to create a rarefied atmosphere inside the structure and accelerate the movement of air masses.
- The diffuser is a weather vane for the outer part of the supply pipe; wind pressure is used for its operation.
- An ordinary incandescent lamp - it is installed inside the exhaust pipe and heats the air flow, accelerating its movement.
These simple devices can significantly improve the quality of ventilation in the garage.
The following article will familiarize you with the general principles for calculating the power of ventilation systems, which we recommend that you read.
Features of garage ventilation
In the early days of motoring, cars needed a fenced-in shelter to carry out routine repairs. Later, cars became valuables that required protection from theft - a secure garage with a trespass-proof perimeter.
The experience of previous generations of car owners requires protecting the car, storing it in a garage box.
But the garage is good if it has ventilation.When you pull into a parking lot after driving for miles on rainy and snowy roads, the car brings moisture with it. The room for the car is traditionally small - moisture quickly saturates its atmosphere.
And if the volume of moist air in the garage is not changed 6 times per hour (preferably 10 times), then the car will certainly rust.
SNiP 21-02-99 sets the winter storage temperature of the machine at + 5 ° C if the box is heated. By the way, this SNiP also allows you not to heat the garage premises.
A temperature that is comfortable for the car owner (for example, + 15 ° C) in a winter garage is “uncomfortable” for the car due to the melting of ice and snow adhering to it. It is more rational to adhere to the normative 5оС.
The standard for air exchange in the garage is set according to ONTP 01-91 in the amount of 150 m3 / h for each parking space. Outwardly, the task is simple - to determine the diameter of the air ducts, set one for the supply, the second for the exhaust, and the atmosphere is renewed.
However, in the conditions of the cold climate of Russia, the supply and exhaust system in the indoor parking lot needs to be designed more closely.
For uniform ventilation of the garage room all year round, a combined system is most suitable. It does not depend on the weather and outside temperature.
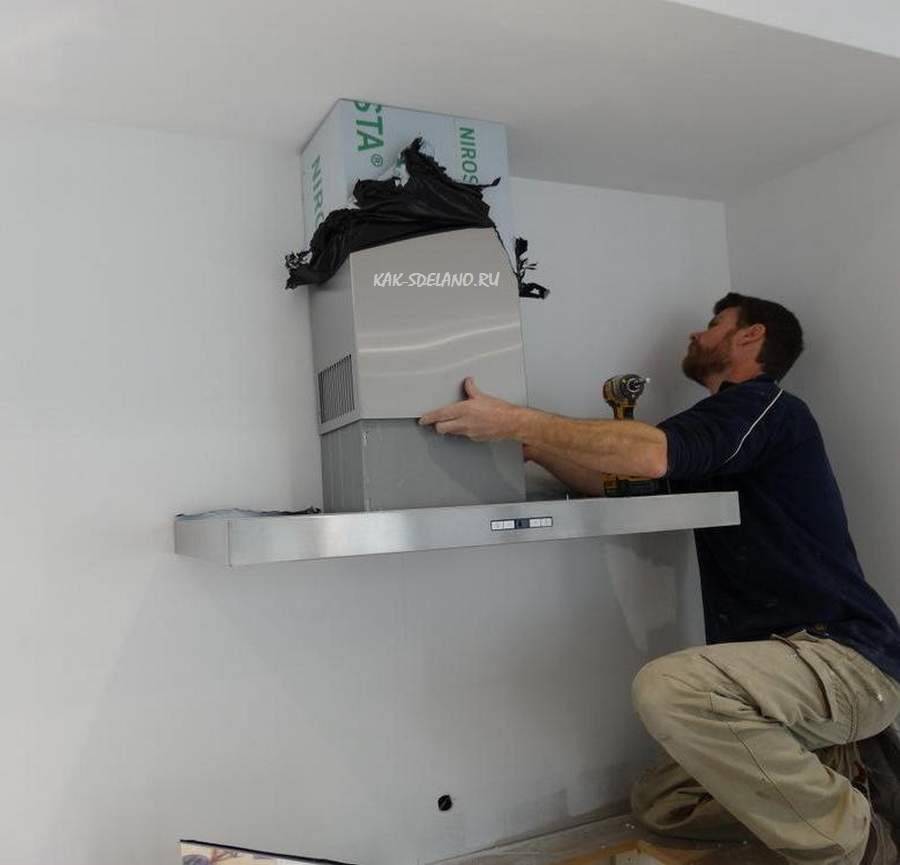
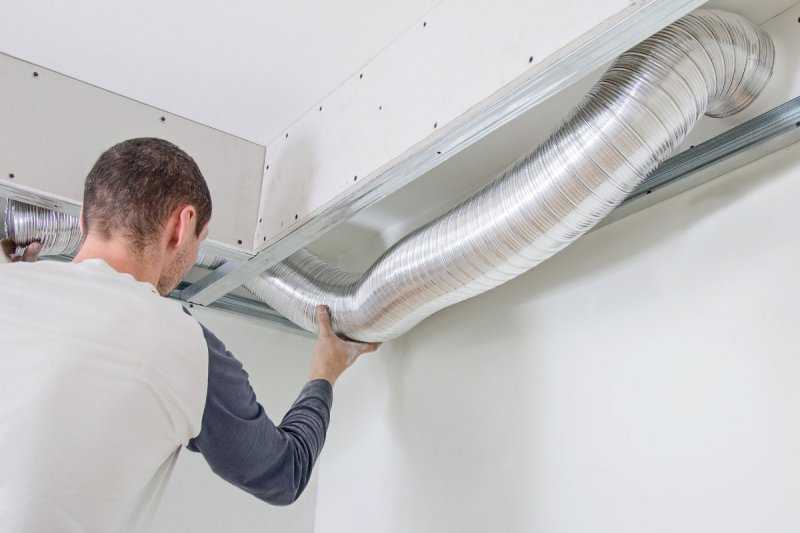
Mounting and installation of ventilation equipment
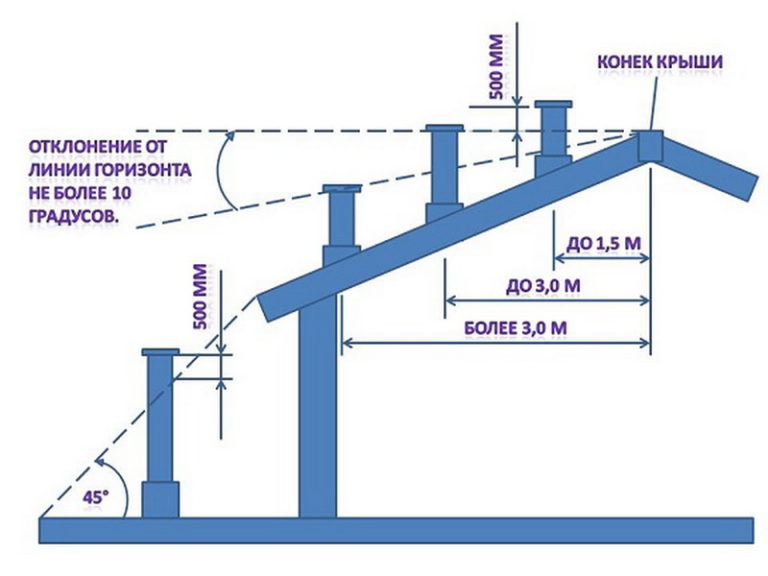
The installation of fans on roofs has its own characteristics depending on the type of roof and covering, the angle of the roof, the type of device and whether the device will work independently or in a system with air ducts. The mounting options are also different, the method of fixing the ventilating device is determined mainly by the dimensions. Despite the variety of installation options, general recommendations still exist.


 The device of the Systemmayer device
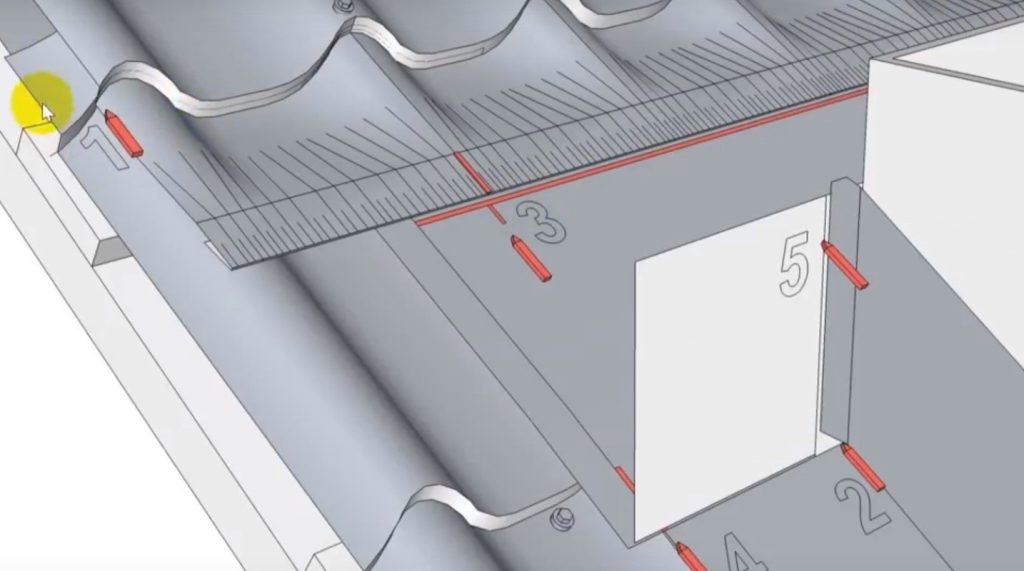
The sequence of work steps should be as follows:
- checking the glass for compliance with the fan model;
- preparation of a place for fixing a glass on the roof;
- installation of a check valve on the fan;
- pallet installation;
- installation on a fan glass with a valve;
- final assembly work;
- construction works.
Check valves are attached directly to the fan before installation, the transport screws are removed before assembly. The flaps of the valves must open freely - jamming is unacceptable. When attaching the valve, it must be suspended; a fan should not be placed on it in order to prevent distortion.
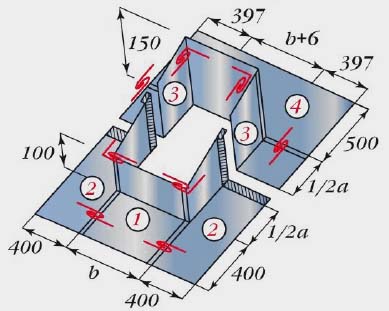
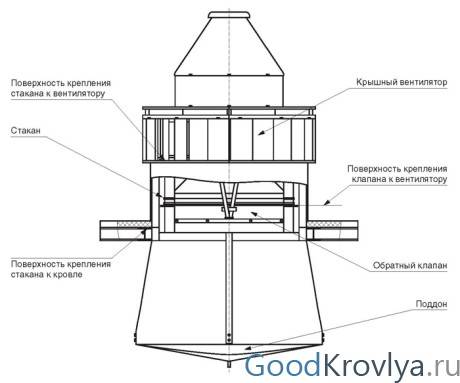
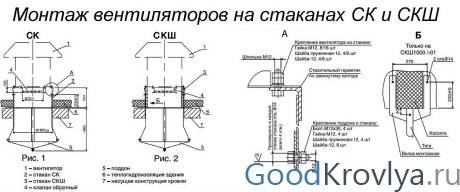
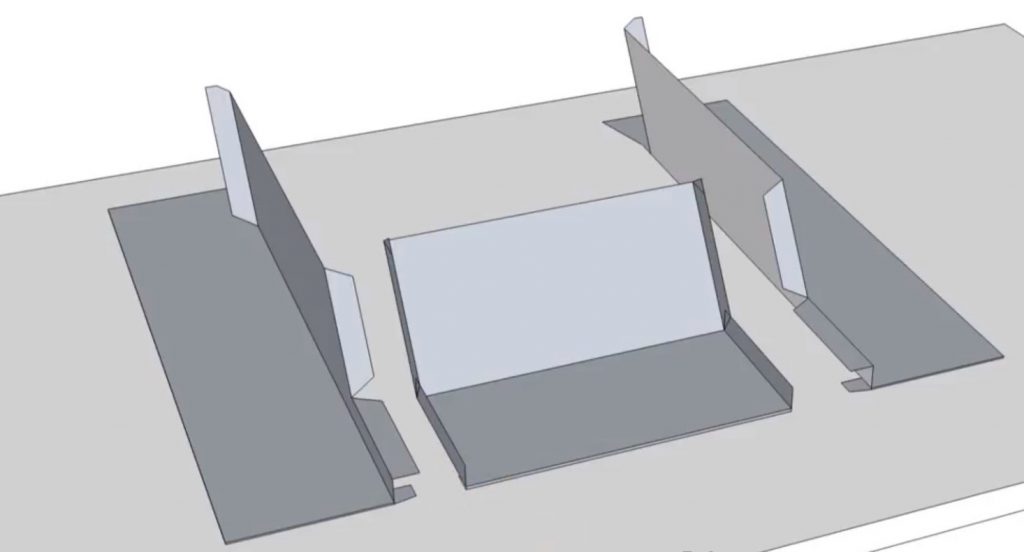
If the roof has a hard coating, a base is used to place the ventilation device - a glass made of galvanized steel or reinforced concrete, fixed on the roof. A glass installed strictly vertically must rest on the supporting structure of the roof; a hole is made in the roof for fastening. The glass can be installed on ventilation shafts and wells if they are made of brick or concrete.
 Installation of ventilation devices on the roof
Operating procedure:
- Before installing the glass, a pallet is installed that has a drain hole with a tap for draining condensate.
- Pallet rods are attached to the side walls of the glass with nuts, washers and bolts, for which holes are pre-drilled in the walls of the glass.
- The fan is attached to the glass using fasteners from the equipment kit on the studs welded to the glass. The size and number of studs are indicated in the appendix to the device passport.
- After assembling all structural elements, the gap between the top of the glass and the device to be installed must be filled along the contour with building sealant.
- The final stage of installing a fan on the roof is construction work - the final screed with a solution of sand and cement, laying out a layer of thermal and waterproofing, installing “skirts” and “aprons” made of galvanized high-quality steel along the contour of the glass with clamps.
In the case of installing a smoke exhaust fan with side discharge, it is necessary that the roof within a radius of two meters around the glass be made of non-combustible materials.
Installation requirements: all according to the law
When installing gas boilers, which have become popular due to inexpensive fuel, the requirements are imposed both on the boiler room itself, if the unit is located in a separate non-residential premises, and on the selection of places for all elements of the ventilation system.
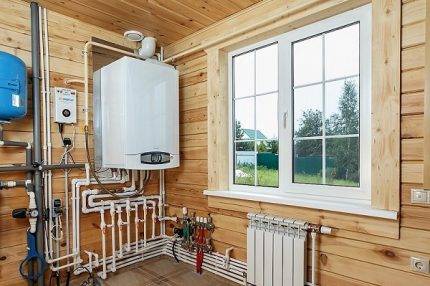
If a household gas boiler has a power of more than 30 kW, it must be installed in a separate room. It can be located both in a residential building and outside it.
For units whose power exceeds 150 kW, a separate building is erected or an extension is made to a residential building. Next to the boiler room, through the adjacent wall, there should be a non-residential premises.
The rules for ventilation and air conditioning are set out in SNiP 2.04.05-91. The main requirement concerns air exchange, which must be carried out in full at least 3 times per hour.
Be prepared for the supervision of representatives of the gas service, who will definitely check:
- the presence of a solid foundation and concrete floor;
- laid communications - water supply, sewerage, heating pipes;
- insulation of walls and gas outlet to prevent freezing during the cold period;
- area - at least 15 m³;
- ceiling height - 2.2 m and above;
- mandatory natural lighting - a window of at least 3 cm² for each cubic meter of boiler room volume.
To ensure natural ventilation, the window is equipped with a window, and a small gap is left under the front door for free air flow - about 2.5 cm high. Instead of a gap, door perforation is used - in the lower part adjacent to the floor or threshold, several holes are made with a diameter of about 2 cm .


If the extension door leads to the house, more precisely, to a non-residential room, then it is made of fire-resistant material with a high fire safety class.
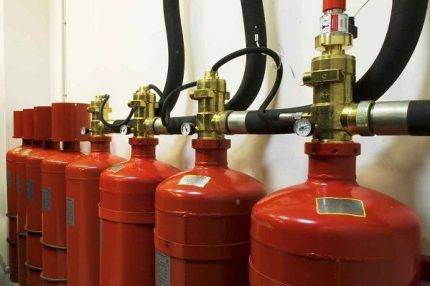
Often, not natural main gas, but liquefied gas cylinders are used as fuel. They must not be stored near the boiler
Another additional room is equipped for cylinders, and they are connected to the boiler by means of a fuel supply pipe.
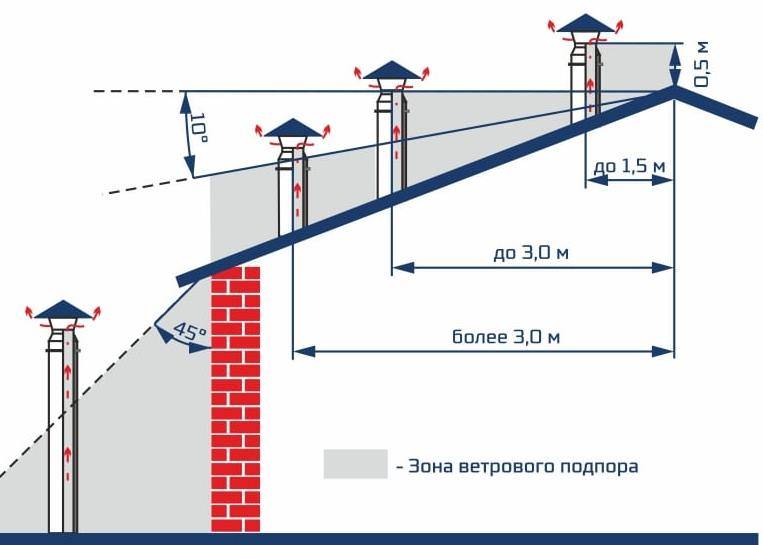
Requirements regarding chimneys and ventilation:
- the removal of gases and the supply of air are carried out through separate channels;
- the size of the ventilation window for air inflow is not less than 1/30 of the area of the boiler room;
- the boiler is installed at a minimum distance from the outlet of the chimney and the ventilation shaft;
- if a coaxial chimney is passed through a wall, then two holes are organized: the first is directly for the pipe, the second is for maintenance.
Ventilation ducts installed in a private house for a floor or wall-mounted gas boiler must always be open so that air is constantly circulated.
Ventilation device options
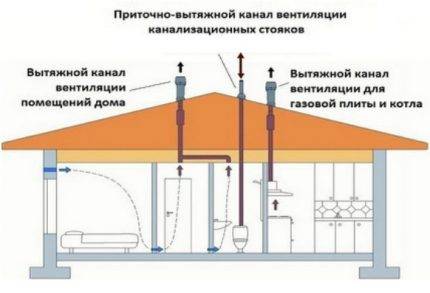
According to the principle of inducing air movement, all ventilation systems are divided into two types - natural and forced (they are also mechanical).
The term "natural ventilation" means that the air circulation inside the house occurs in a natural way, without the involvement of extraneous devices and mechanisms. The movement of air with this method of ventilation is provided by different pressures outside and inside the premises.
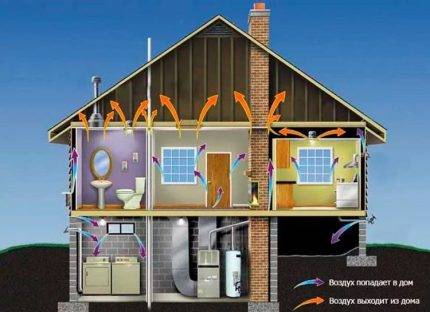
The inflow and outflow of air in natural ventilation schemes occurs without the participation of mechanical means - fans
In turn, natural ventilation can also be divided into 2 groups - it can be organized or unorganized.
Unorganized ventilation is carried out through natural holes and cracks in the walls of the house, floor, foundation, window openings and frames. With the advent of hermetic plastic windows and doors, natural air flow is provided through open vents, windows, balcony doors.
This type of ventilation does not require the cost of the device, but it does not provide full ventilation of the frame house, it leads to a significant loss of heat in the cold season.
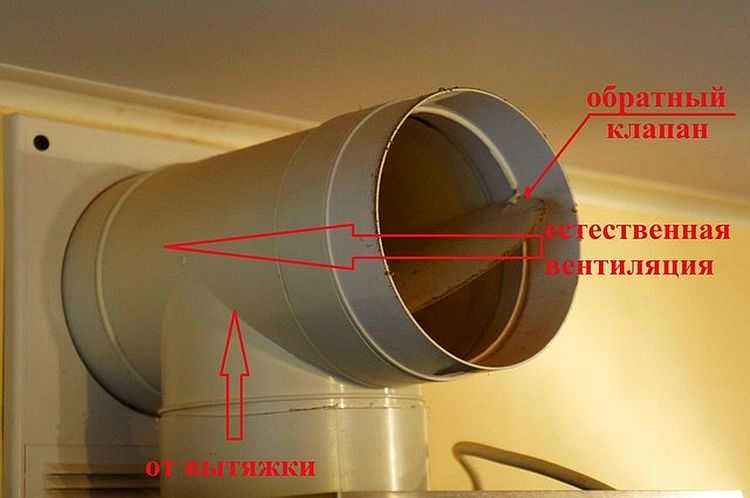
Installing a fan in an exhaust vent in a kitchen or bathroom turns natural ventilation into a combined category. Air will enter as usual, and will be drawn out using the mechanism
Organized natural ventilation is carried out through channels designed for this, equipped with supply valves. An excellent example of organized natural ventilation are multi-storey residential buildings that have been in operation since the Soviet period.
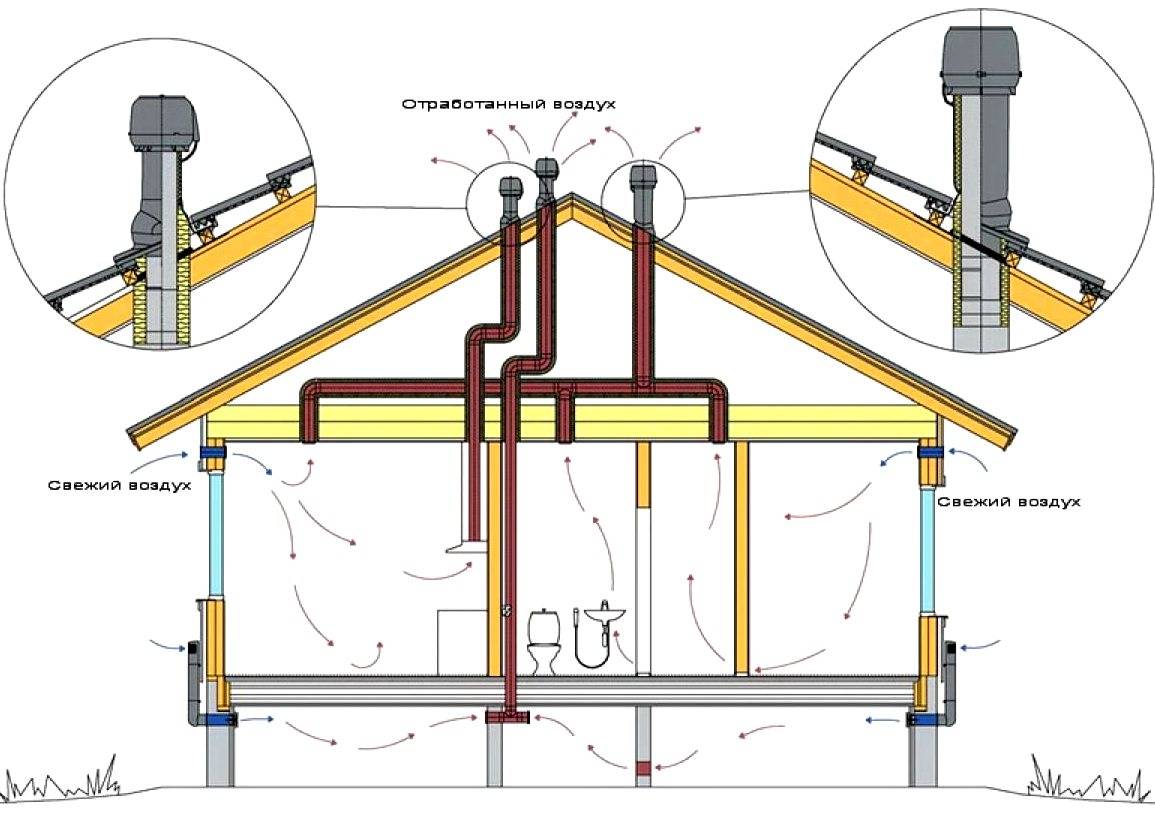


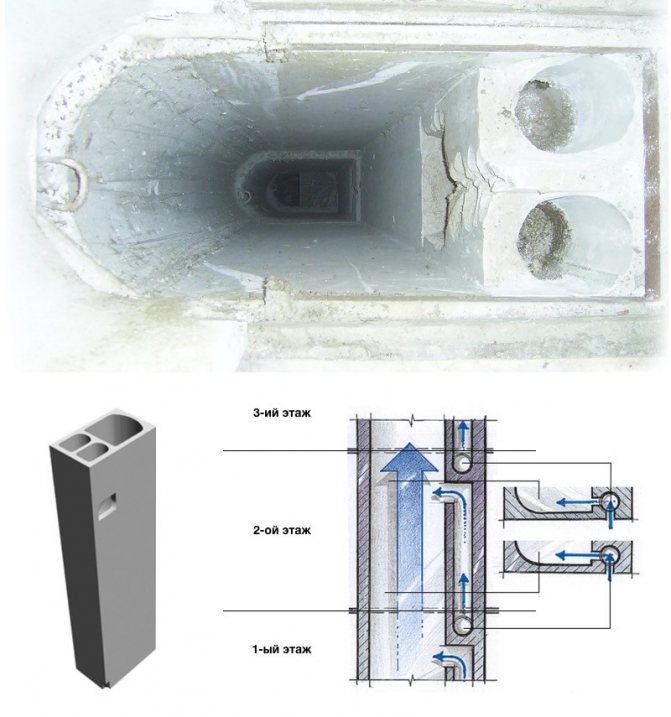


The inflow of air into them occurs through the cracks in the windows and vents, the hood - through the ventilation shaft and the outlets connected to it, located in the kitchen and toilet.
Both organized and unorganized natural ventilation system depends on the pressure difference inside and outside the object. However, in an organized type, it is also necessary to take into account the hydraulic losses at the turns of the air ducts.
In modern frame houses, this method of ventilation is not effective enough due to the increased humidity in the premises, due to the tightness of the building, in addition, it is too dependent on weather conditions and other related factors.
Unlike natural, forced (mechanical) ventilation is a controlled process that allows you to save heat and regulate the flow of air into the frame.
Forced ventilation can be divided into 3 groups:
- Exhaust.
- Supply.
- Supply and exhaust.
The principle of each type is clear from the name itself. Forced exhaust ventilation is based on the natural intake of fresh air into the building, while the exhaust of the used air is carried out using roof or wall fans.
 In exhaust systems, air enters naturally and is removed by a fan.
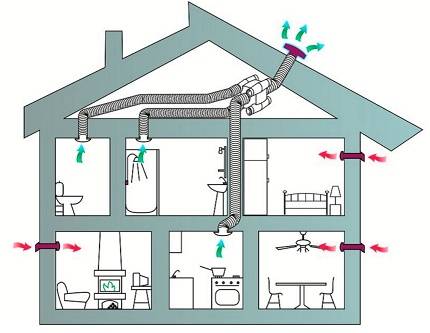
Forced forced ventilation is arranged according to the opposite principle - the air flow inside the frame is provided by fans built into the walls or into the air ducts. Exhaust air is discharged naturally through exhaust vents in kitchens and bathrooms.
The mechanical ventilation method provides a stable, weather-independent air supply and exhaust, such a system design allows you to achieve the most comfortable atmosphere inside the room, but requires accurate calculations when designing and subsequent configuration of the finished system.

A mechanical ventilation system is much more expensive and more complex than a natural one. And in the process of operation, it will require the cost of energy supply and maintenance. however, it is absolutely independent of the density and temperature of the air outside
In addition to this classification, ventilation systems can be divided by design, they can be ducted or ductless.
Conclusions and useful video on the topic
The video below describes what can happen if the ventilation duct is redesigned in violation of the integrity of its design. And although in the video we are talking about the fact of complete dismantling, but this does not play the essence. Since redevelopment is considered to be any change in the design of the ventilation box:


By hanging a cabinet or shelf on the surface of the ventilation duct, the owner of the premises will be able to more rationally use several tens of square centimeters of housing space. Sometimes this solution allows you to improve the aesthetic qualities of the room. And this is where all the advantages of changing the design of the ventilation duct end.
Therefore, you should not take rash actions, unauthorized change the design of common house property. Since there can be many more unpleasant moments than advantages.
Have you hung the cabinets on the ventilation duct and coordinated your actions with the housing inspection? Share your experience with other users - tell us about the difficulties you had to face, as well as how long it took you to complete all the necessary documents. If you still have questions, ask our experts and other site visitors in the comment box below the article.


