- How to make a blower from a trimmer with your own hands
- Assembly steps
- Bearing units
- How to make a press from a jack with your own hands?
- Which jack is suitable for our design
- Clamp system operation
- The role of the adjustable support beam
- Installing the return mechanism
- How does a sandblaster work?
- Assembly materials
- Air blower
- Do-it-yourself chip extractor from a vacuum cleaner
- Drafting a project
- "Cyclone" from a traffic cone
- How to use?
- Water filter
- Circuit Assembly
- Stages of work
- Fan unit
- Construction procedure
- Conclusions and useful video on the topic
How to make a blower from a trimmer with your own hands
A garden blower can be made not only from a vacuum cleaner, but also from a trimmer (a kind of lawn mower). This is a nozzle consisting of a housing in which a fan is installed. It is attached to the lawn mower bar and the engine is started. It is designed for cleaning garden paths and other surfaces.
It can be purchased or constructed independently, for example, from a floor fan:
- Disassemble the device.
- Fix the motor on the plastic base.
- Attach the rear protective grille with bolts.
- Attach the screw with a bolt (pre-make a hole in the center).
- Fix the front protective grille to the rim.
- Connect to streamer. The result is such a device.
This garden blower is powered by a fan, not a vacuum cleaner. But even this power is enough to clean garden paths. More detailed manufacturing instructions are shown in the video.
Assembly steps
Now that you have all the necessary parts, you can start assembling. Be sure to follow the instructions. For a more visual instruction, you can watch a video on how to make sandblasting with your own hands from a gas cylinder:
Prepare the tank: clean it thoroughly with special detergents to remove dirt and residues.
You will need to make several holes in the workpiece, one on top, used to fill the balloon with sand
It is important that the hole is the right size for the pipe. The second is from below, this is useful for attaching cranes.
Install the faucet as you see fit: by welding or by screwing onto an adapter.
A tee is attached to the crane
Next, you need to finish everything with a special tape for sealing.
Now valves and tees are being installed.

To prevent the device from being bulky and having to be carried by hand, you can design a special carriage for it. It can be easily made from various scraps and fittings.

Attach wheels to them and note that this design must support the weight of the cylinder. You can also see how to make sandblasting with your own hands using the drawings.


Finally, channels for transferring consumables and air are attached to the device.
- A tube is attached to the tap located at the bottom of the cylinder.
- Hoses of 15 millimeters are attached to the tee.
- A compressor is attached to the last hole at the tee.
- Finally, a sleeve with a gun is attached to the last hole.

If you have a desire to understand more carefully during the assembly process, you can watch a video on how to make sandblasting with your own hands.

Bearing units
 You can use ready-made bearing units of a self-aligning design.
They "forgive" errors in the alignment of the holes, in which conventional radial bearings will warp and overheat.
However, compared to conventional bearings, the cost of such units is much higher.
In addition, the dimensions of their bodies often do not allow maintaining the required center distance between the rotors.
To avoid misalignment, the sidewalls of the crusher body are used as axle boxes. Landing holes are bored in a machine with a four-jaw spindle, folding the parts together.


If it is not possible to make a housing with coaxial holes, you can choose double-row spherical bearings that are suitable in terms of load capacity.
How to make a press from a jack with your own hands?
The basis of this equipment is a reliable frame. It is made of channel or metal corners.
How to make a homemade press from a jack with your own hands, drawing
| Step | Description |
|---|---|
| The frame is used with a pressing force of up to 5 tons | 1 (stop beam from above); 2 (fasteners); 3 (jack up to 20 tons); 4 (spring mechanism); 5 (movable structure); 6 (stopper); 7 (adjustment device); 8 (transverse structure) ;9 (support legs). |
| Everything is secured | There are two options: with the help, which is more reliable. Has bolt-on mounting |
| Do-it-yourself hydraulic press from a jack bolted drawing | Here it is necessary to accurately calculate the press force |
| Beam mounting will be needed for greater rigidity | You can come up with a reference element yourself, depending on your imagination. The presence of a crossbar from below is mandatory, for rigidity. |
Advice! In the production of a hydraulic press from a jack, first of all, it is necessary to ensure the strength of the frame, it is on it that the load will be placed.
Which jack is suitable for our design
To date, the glass jack is most often used for the production of a hydraulic press. There are inexpensive devices that are able to squeeze out more than twenty tons.
Glass hydraulic jack
Note! But there is a problem in using such equipment, they are not able to function upside down.
It seems logical to fix the jack on the upper beam, and use the lower one as a support, but in this case the jack will have to be finalized.
Design modification:
- Option 1: install the tank and connect it to the jack filling hole with a silicone tube.
- Option 2: will require a new development of the jack itself.
Clamp system operation
To make a press from a hydraulic jack with your own hands, a rod is formed. Many masters claim that it is not convenient to use. We need a large area for the development of various, large molds and parts of large dimensions.
Ingots can be used as blocks, in which blind holes are made for strengthening with the main design of the press. If there are no financial opportunities, then the nodes can be made independently. In the beam, you need to make a hole where the heel of the jack should enter, with almost no gap.Then we make several holes for the return mechanism.
Beams are made with open edges
Then, in the upper part of the assembly, we weld a piece of pipe for planting a jack. We weld the lower part with the help of corners.
The role of the adjustable support beam
For fastening a portable beam, steel massive fingers are suitable. On the vertical part of the frame we make a series of round notches at different heights. The diameter of the notches must match the cross section of all bolts.
Support beam fixing
Installing the return mechanism
The last detail in the design of a hydraulic press is a return or spring mechanism. Here you can insert conventional springs for doors. The task can become much more difficult when using the headstock, since its own weight may not allow the spring mechanism to compress.
Increasing the number of springsAdvice! One option is to increase the number of springs to 6 or use more powerful parts.
If there is no upper block, it is recommended to fix the spring to the stem with a washer. If there is an excess length of the spring, you can arrange them in an inclined state.
How does a sandblaster work?
Against surfaces contaminated with rust or paint, there is a sure remedy - a sandblaster. It is universal and is used everywhere: both by auto mechanics and in the home workshop.

However, this machine is expensive and it is more expedient and reasonable to make it at home, if possible.

By itself, a do-it-yourself sandblaster requires for itself only a sufficiently powerful compressor, an electrical and crane system, as well as a tank into which abrasive material is placed, that is, sand or its analogues. To successfully cope with such a task, you will need to clearly follow the instructions and diagrams.


To store sand, a relatively small container is required. It is quite possible to do sandblasting with your own hands, even from a used empty fire extinguisher. It is worth noting that mainly the sandblasting machine is controlled with a gun.

Assembly materials
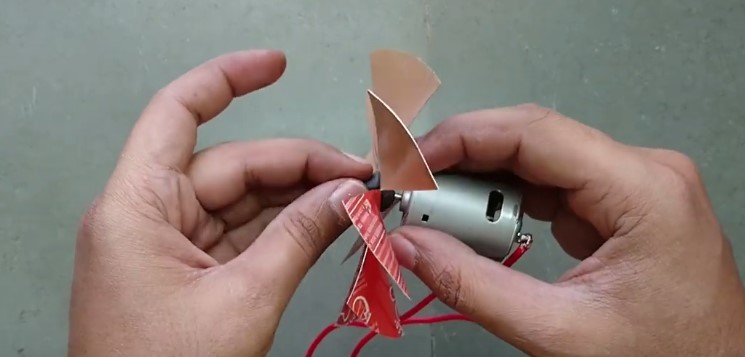
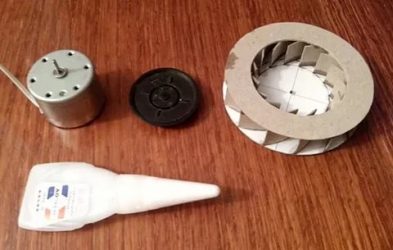
So, to assemble a robot vacuum cleaner, you need to deal with its components, let's go in order. It must move around the room itself, so motors are needed, depending on the final design, there should be from 2 to 4 of them, as well as the ability to switch the direction of rotation and speed, which means that you need a board to control the motors. If you are using DC motors, then you need a board with 4 transistors (H-bridge).
A homemade robot vacuum cleaner must detect collisions with walls and furniture. To do this, you need to provide obstacle sensors and limit switches on the "bumper". You also need the working body itself - a vacuum cleaner. At the same time, it must be designed for operation from low voltage direct current (for example, 12V).
In addition to a vacuum cleaner, you need a movable (rotating) brush that will clean the surface, raise the pile of the rug, and sweep away debris. This requires one or two more motors.
The system that will manage it all. The simplest version on Arduino. For such a task, any of the boards is suitable, in terms of size it is convenient to place the Nano or Pro mini option.
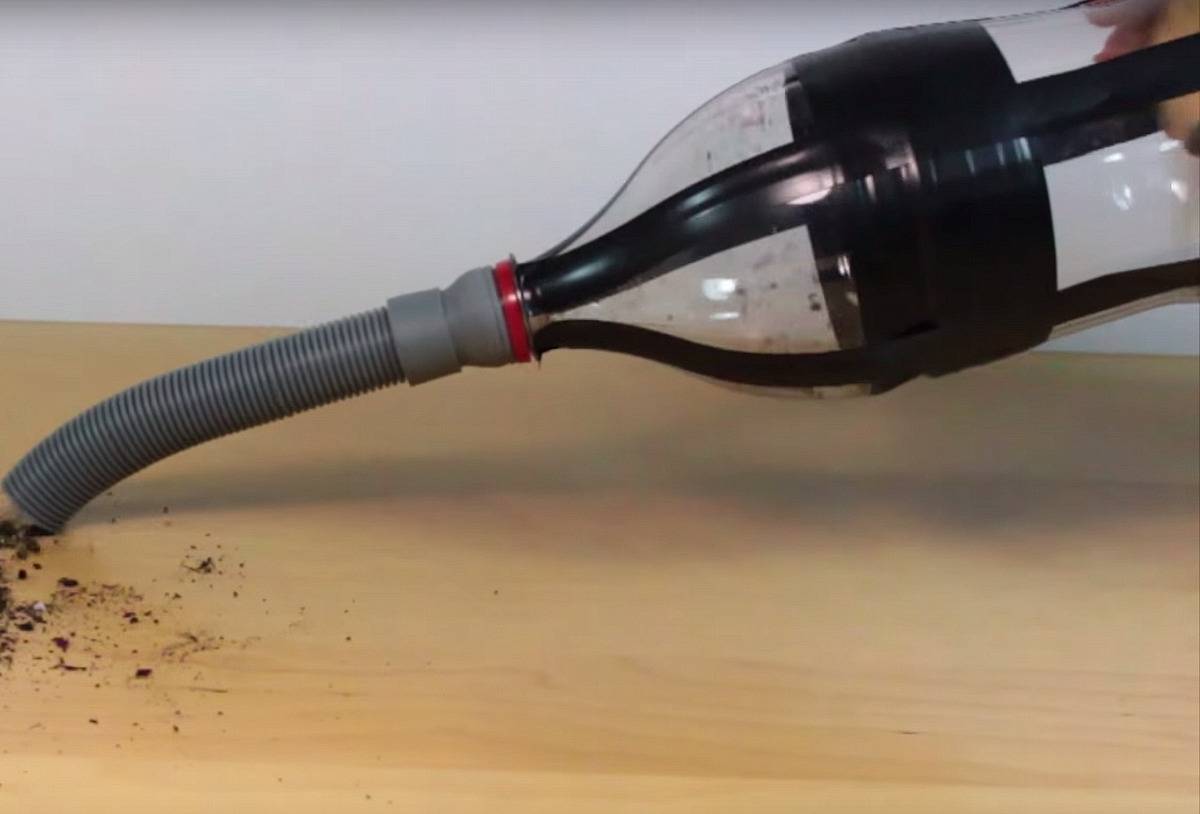
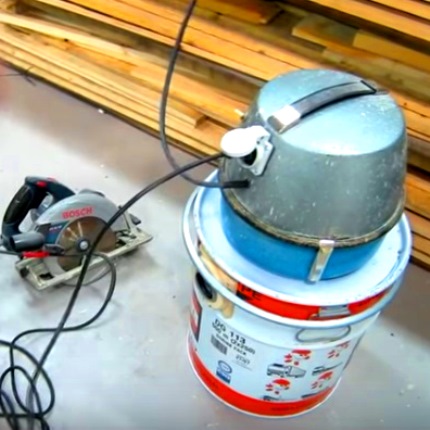
Air blower
From outdated models of vacuum cleaners, you can make modern devices with which children's pools or, for example, mattresses are inflated. Most of the more modern models have not only an inlet, but also an outlet. In order to make an air blower, you will need to connect an additional hose to the outlet of the vacuum cleaner. The end result is a strong air jet.

Air blower
Of course, before using the old vacuum cleaner in this way, it is worth thoroughly cleaning the container in which the dust was collected. This can be explained by the fact that for all the time when you were cleaning the house, a huge amount of dust particles accumulated in the device container, which at first glance may not be noticeable. Also, cleaning the container will have a positive effect on the condition of the engine, because dust in a small amount constantly gets inside it.
A device such as an air blower can be used to clean the paths of various types of debris. To do this, it is enough to install a special nozzle on the end of the hose, which will have a narrow hole.
Those owners of old home cleaning devices who have their own home workshop can use an air blower for a variety of purposes. With it, you can easily blow off the remaining dust from the surface that you are going to paint. Also an application option would be the collection of dust from metals or wood. In such a situation, an air blower becomes indispensable for removing chips, sawdust and other particles from the surfaces of furniture and other objects.
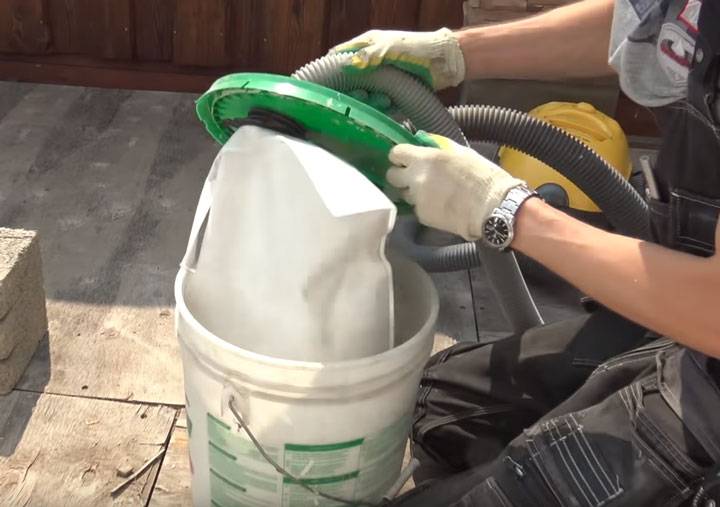
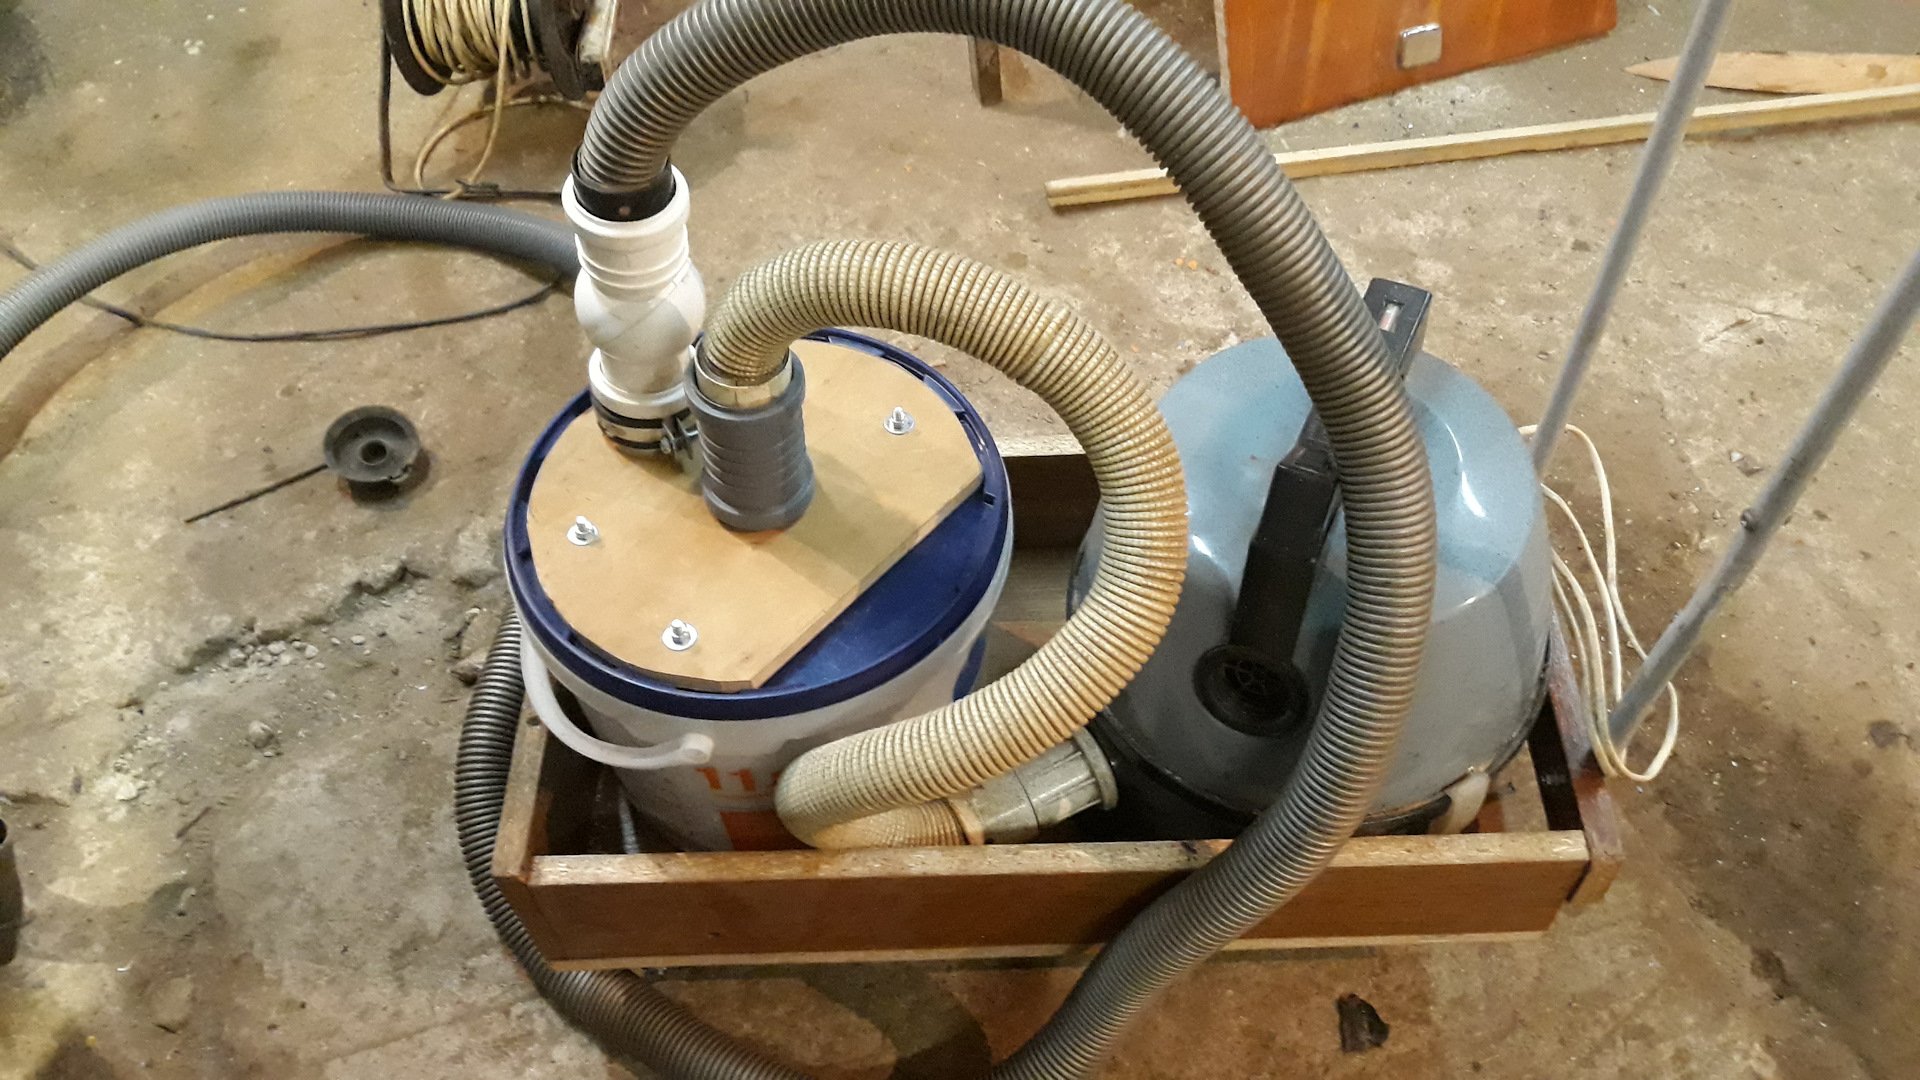
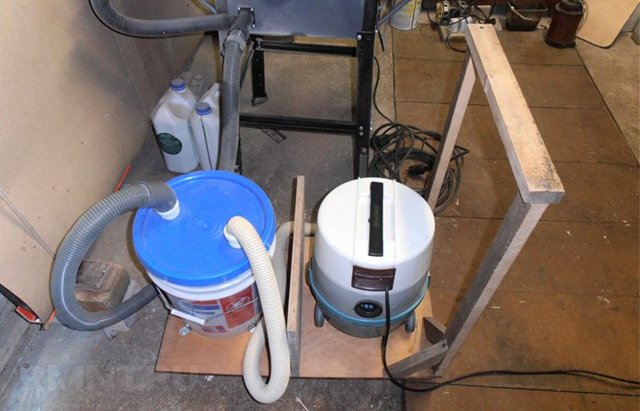
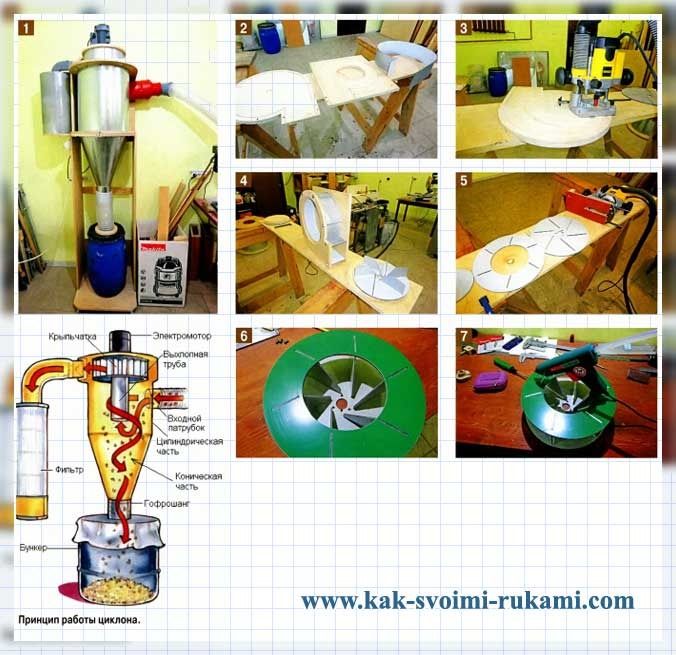
Do-it-yourself chip extractor from a vacuum cleaner
In the process of mechanical processing of various materials, the output is a large amount of waste, in the form of sawdust, chips and dust, which is quite difficult to remove manually. To simplify the procedure, a special device was created - a chip extractor. Specialized stores provide a wide range of these devices, which, however, can be made at home from an old vacuum cleaner, with your own hands.
Using a household vacuum cleaner as a chisel extractor will not bring the desired result, due to the small volume of the bin. But, the device can be upgraded by installing a special unit between a conventional vacuum cleaner and a machine hose that will supply chips. It is such a device that will play the role of an exhaust hood, a “cyclone” system and a bulk waste bin.
The principle of operation of the device is based on the following actions:
- during the operation of the vacuum cleaner, a vacuum is formed in the cyclone;
- the difference in external and internal pressure causes the mechanical suspension to enter the cyclone chamber;
- the inertia and weight of the waste separates it from the air stream and causes it to settle into a water tank below.

To design a chip blower, the first thing you need is the cyclone itself. This role can be played by a cover installed on top of the storage tank. Or two modules can simply be combined. To implement the latter option, the following materials and tools will be required:
- capacity of the required volume,
- fasteners (nuts, washers, screws),
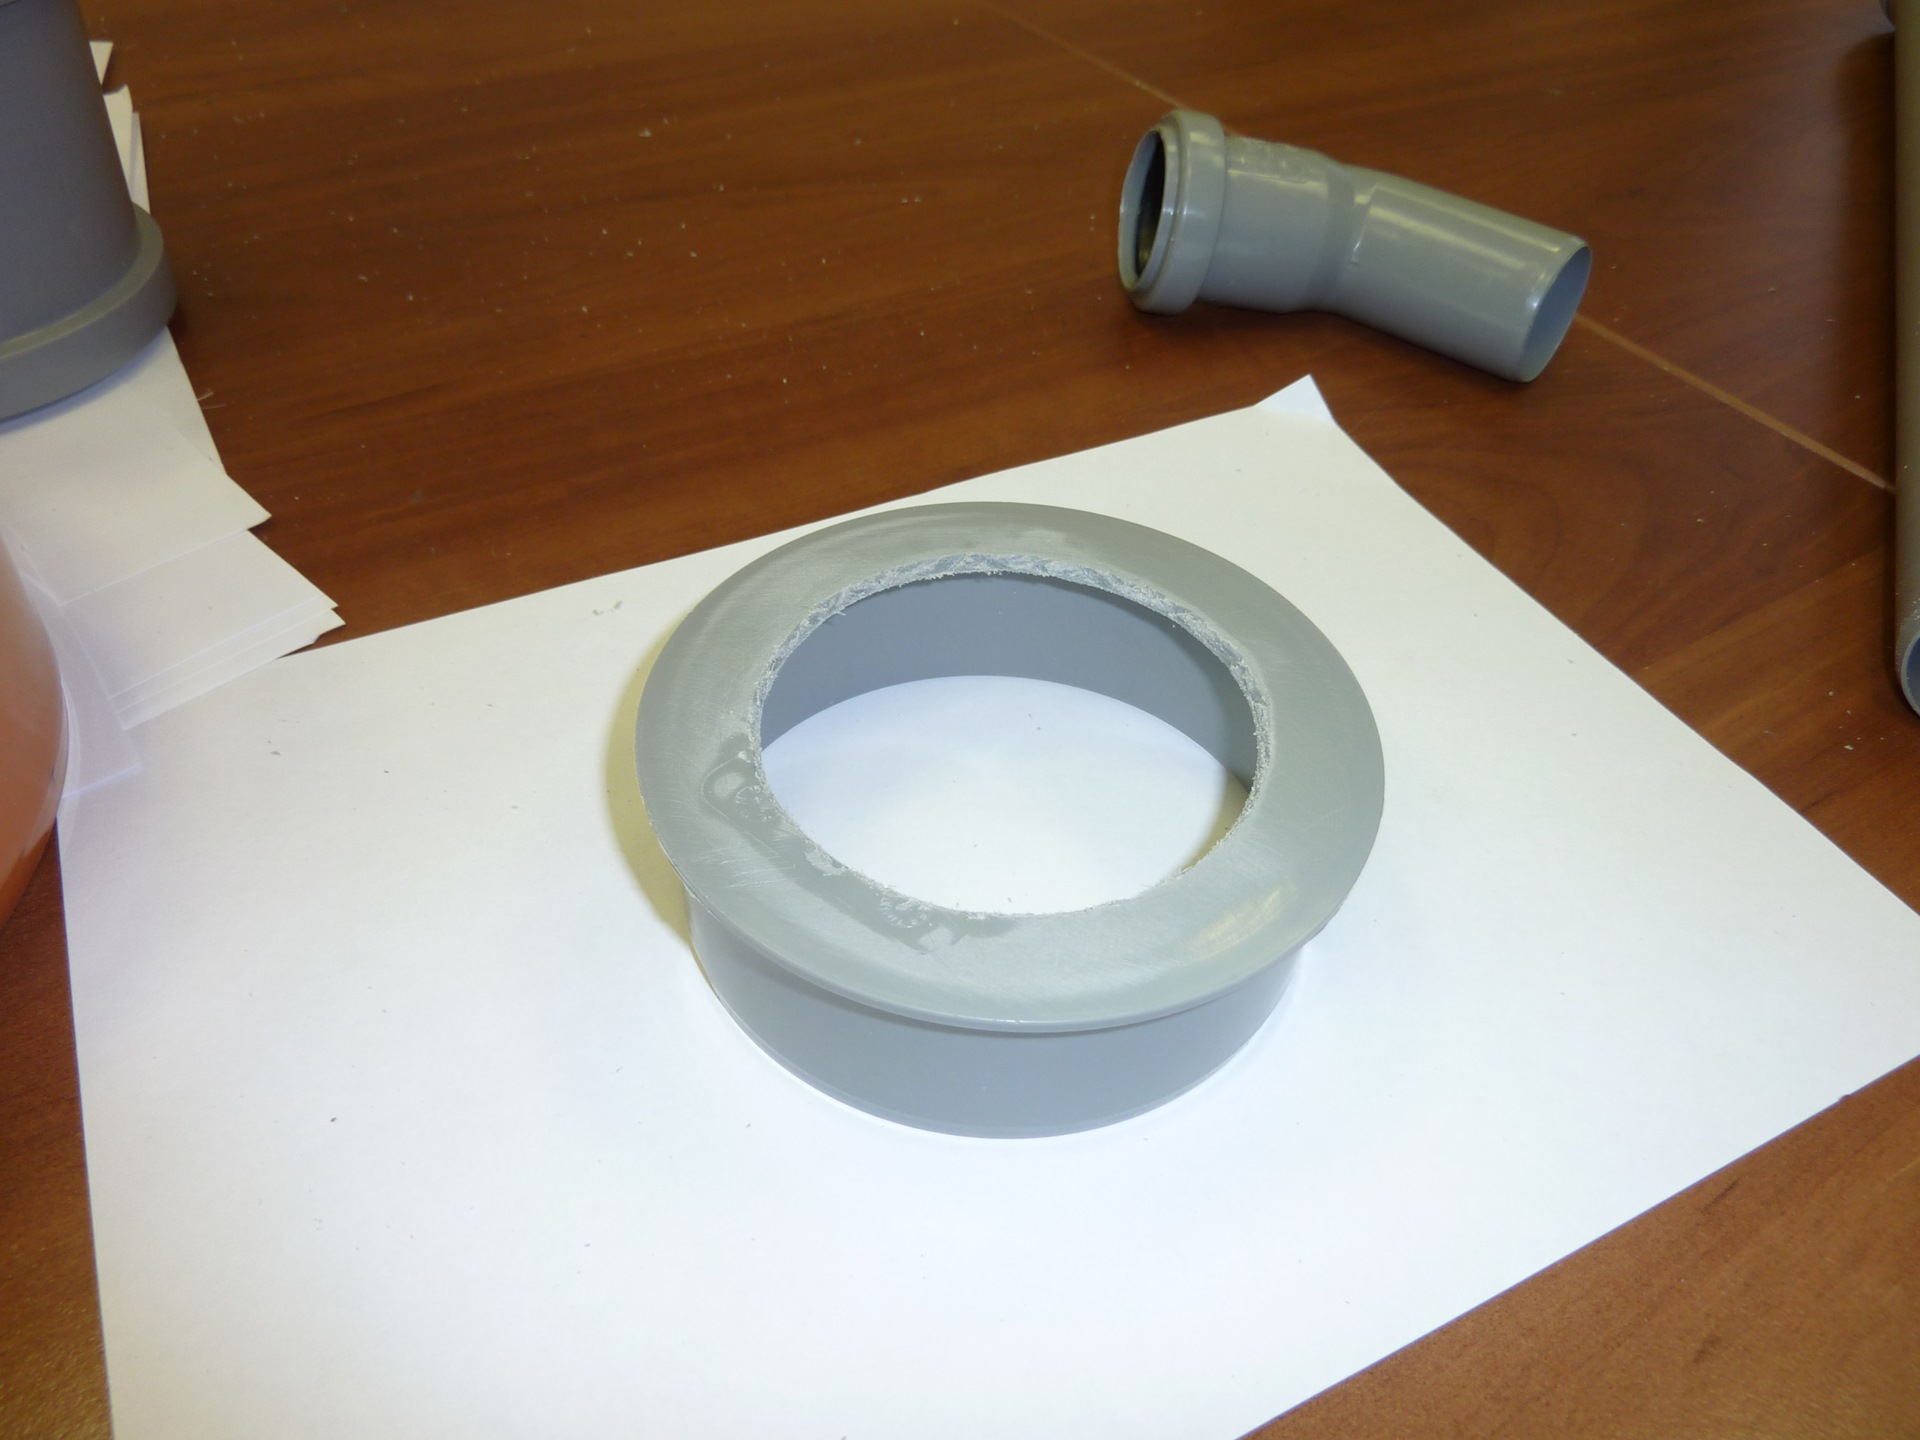
- a piece of pipe (you can use sewer, with cuffs),
- sealant,
- transitional coupling for connecting a pipe and a branch pipe.
The assembly of the device is carried out in several stages
On the side of the tank, a hole is made for the inlet pipe. It must be located tangent to the tank. The resulting gaps between the walls of the housing and the pipe are filled with mounting sealant.
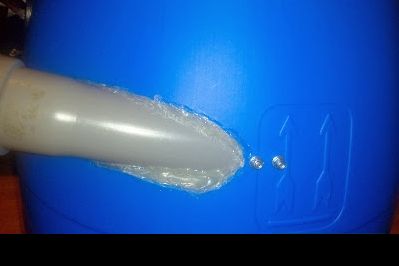
A hole is cut in the surface of the cover, where the adapter is inserted. The gaps are also carefully sealed.


The vacuum cleaner is attached to the upper hole of the chip extractor, and the pipe that removes the chips is connected to the side pipe.
The maximum degree of purification can be achieved by installing a nozzle in the upper part of the tank.
Drafting a project
For example, we determined that a two-shaft shredder with a low rotor speed is suitable for production tasks.
His project must include:
- choice of engine by power;
- calculation of the gear ratio of the gearbox and the choice of the factory model;
- determination of the diameter and length of the rotors (according to the size of the loading window);
- calculation of shafts for strength;
- choice of bearings.
To do this, you need a textbook "Machine Parts" for universities. You will also have to look into GOSTs for threaded connections, reference books on gearboxes, bearings, couplings and other assembly units.
This must be taken into account when assigning groove dimensions.
After calculations, it is necessary to perform the layout of the nodes on graph paper or in an editor such as AutoCAD, determine the dimensions of the body parts and the frame.
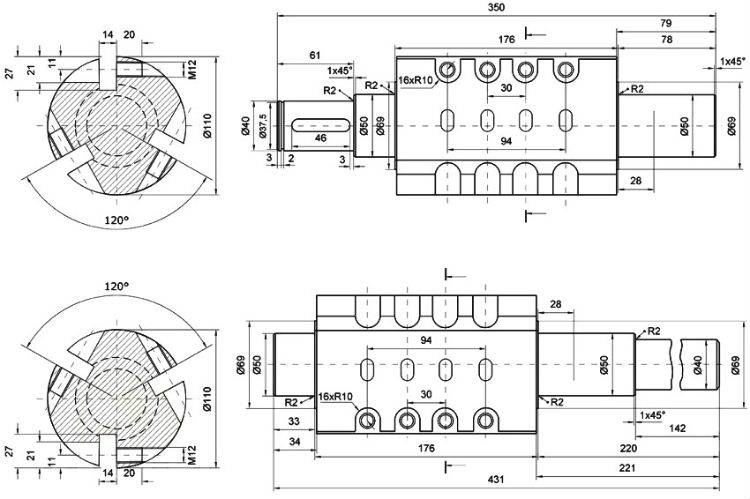
This task must be approached responsibly so as not to miss anything. Sometimes the protruding head of the "unaccounted" bolt leads to the fact that the car has to be redone. After that, detailing is done - a drawing of each part separately.
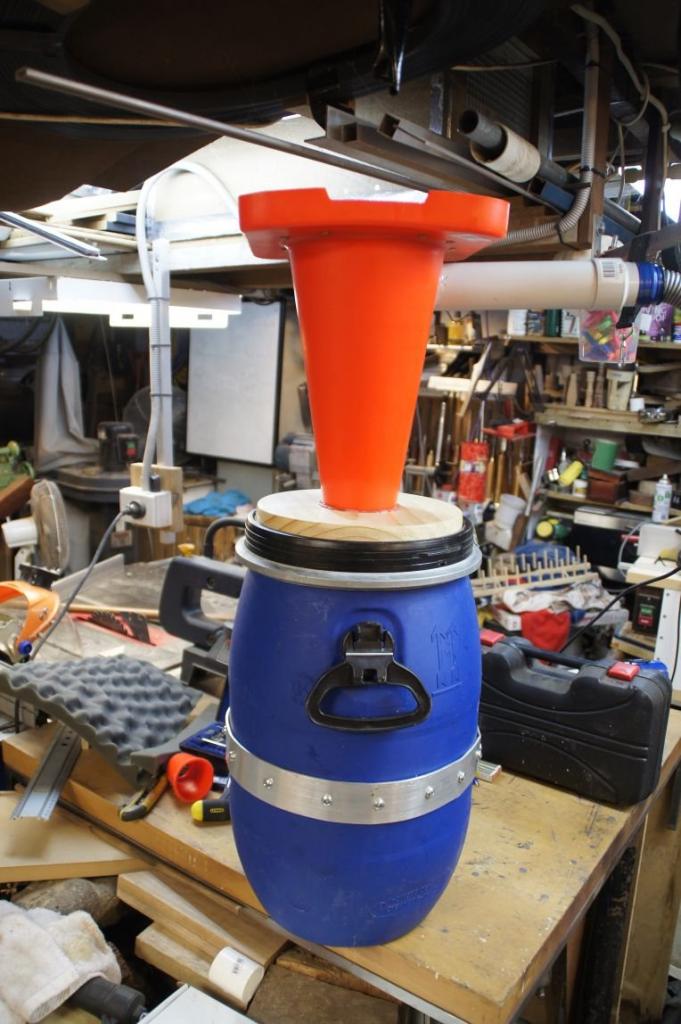
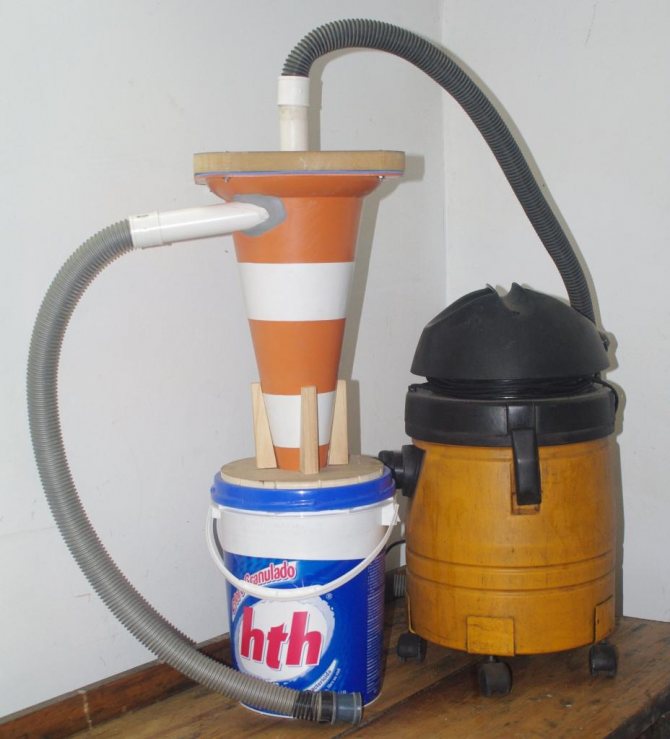
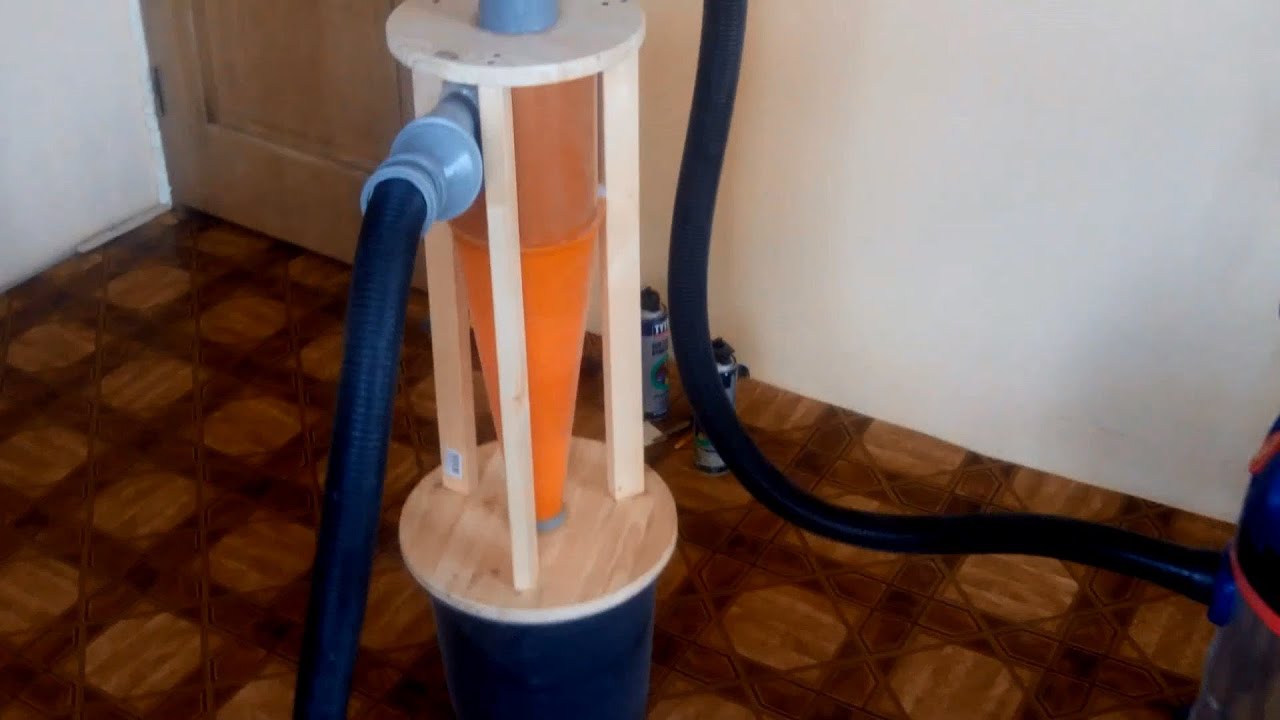
"Cyclone" from a traffic cone
View gallery
This is the original version for the manufacture of the filter. The methodology for developing a home-made "Cyclone" for a vacuum cleaner for concrete dust from a road cone consists of the following steps:
- Make a cover out of plywood. To do this, you need to cut a circle of the required diameter, in which you need to cut two holes. To complete this step, you will need a drill and wood crowns. One hole should be in the center, and the other should be at the edge.
- Insert a plastic pipe of suitable diameter into the opening made in the middle of the cover. The joint must be covered with glue or sealant.
- In the same way, insert a pipe into the second hole, on which you then need to put on a 45 ° elbow. Thanks to the last detail, the air should be twisted, since the plastic outlet will be inside the cone. The resulting joint is also glued.
- Cut off the bottom and tip of the cone with a hacksaw or saw, and then insert the device into a container in which concrete dust will accumulate. Treat the attachment point with sealant.
- Reinforce the cover on the back side with pieces of chipboard, which must be fixed with self-tapping screws.
Before work, it is advisable to check the home-made "Cyclone" for leaks. If everything is assembled correctly, dust will fall to the bottom of the container or settle on its walls during suction.
View gallery
How to use?
- The tube or hose is placed at one end to the aquarium soil as tightly as possible;
- The other end of such a device is lowered into a clean deep container located well below the level of the aquarium;
- To start the process of pumping out the liquid, it is necessary to create a vacuum in the tube, which occurs as a result of suction of air from the cavity of the equipment;
- As soon as the liquid enters the bucket to collect it, water with impurities begins to flow out of the aquarium under the weight of its weight;
- After this procedure, the drained liquid is settled so that the contaminants settle at the bottom of the container. After that, such settled water is separated from dirt and poured back into the aquarium.
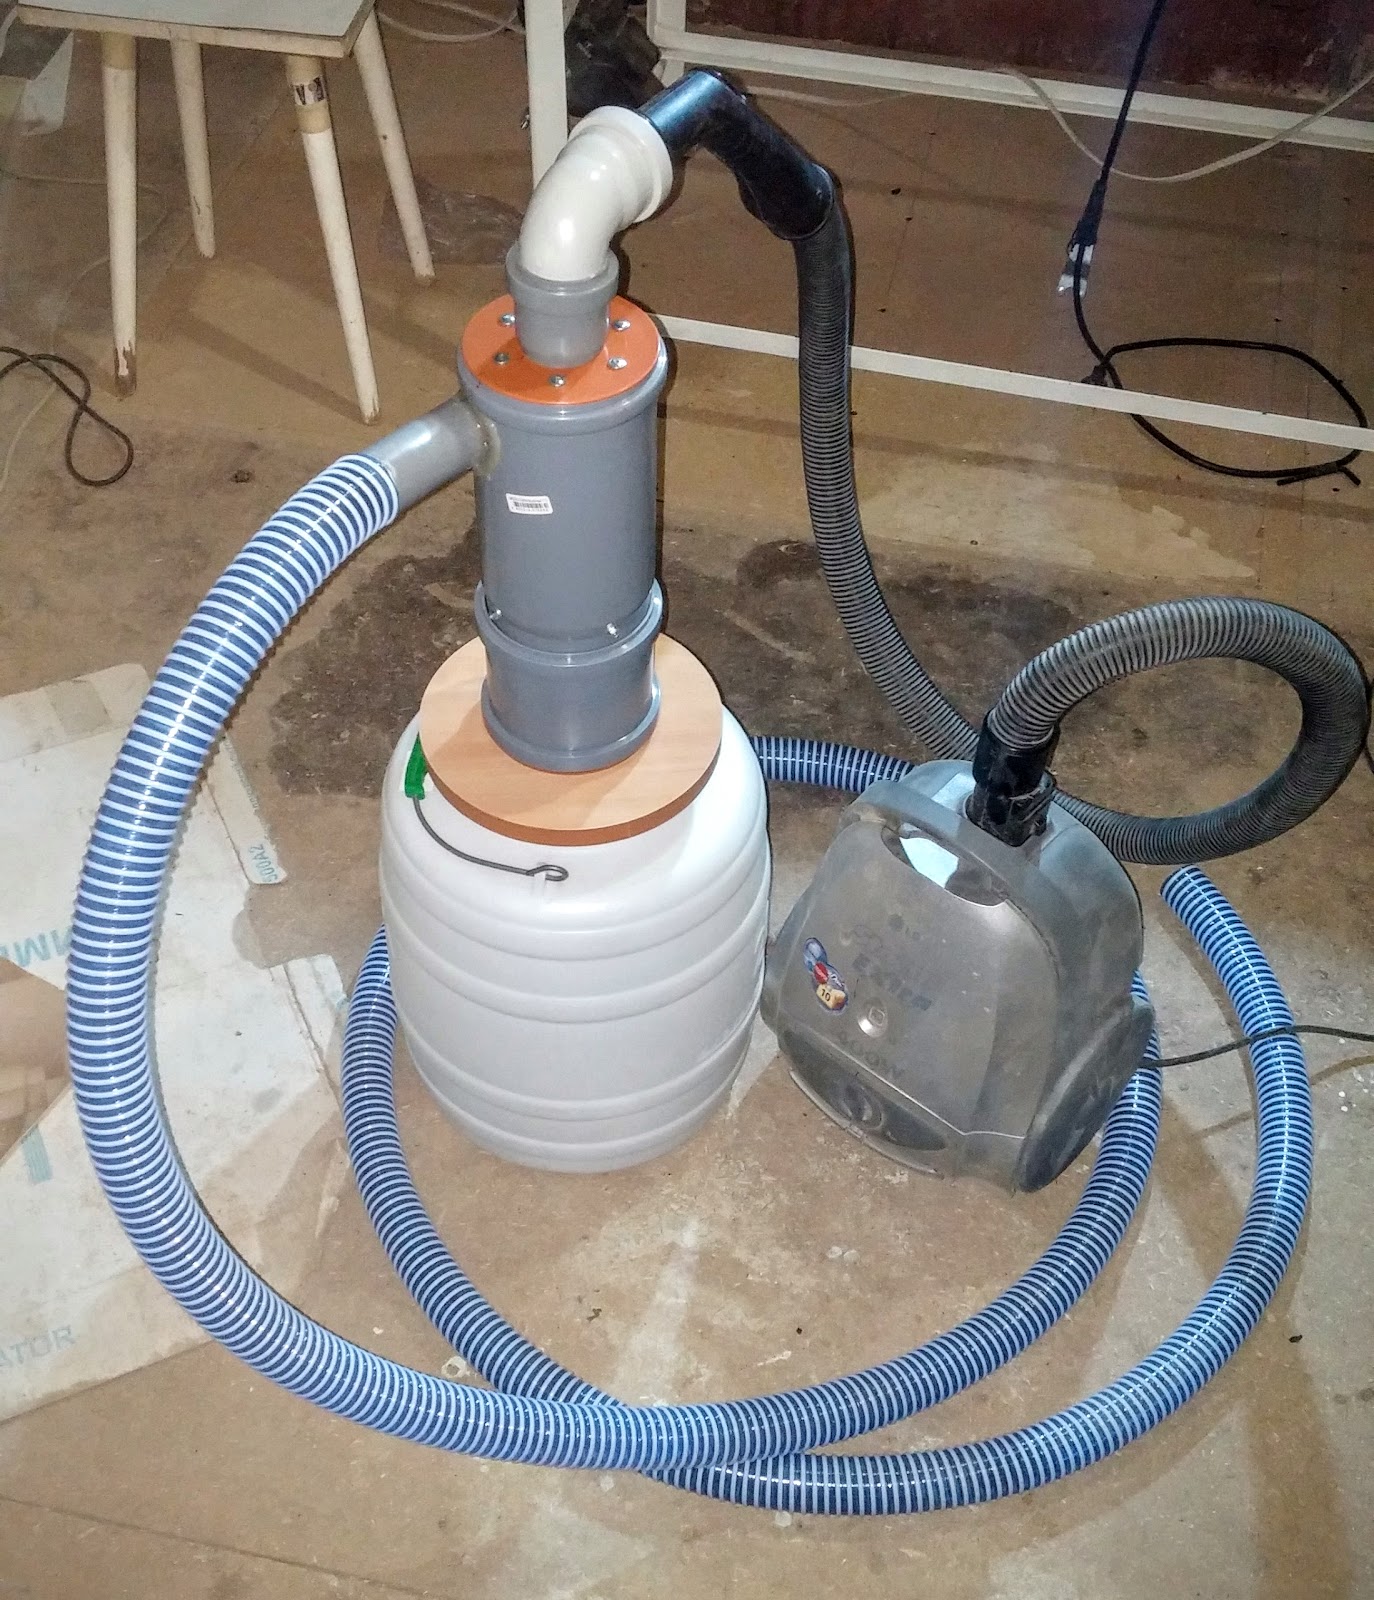
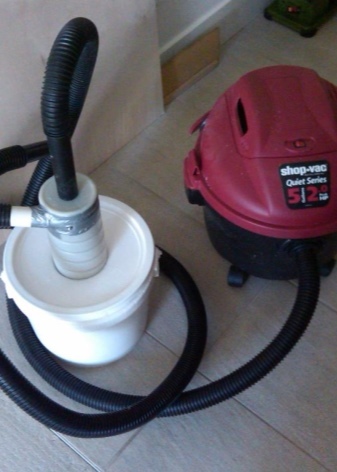
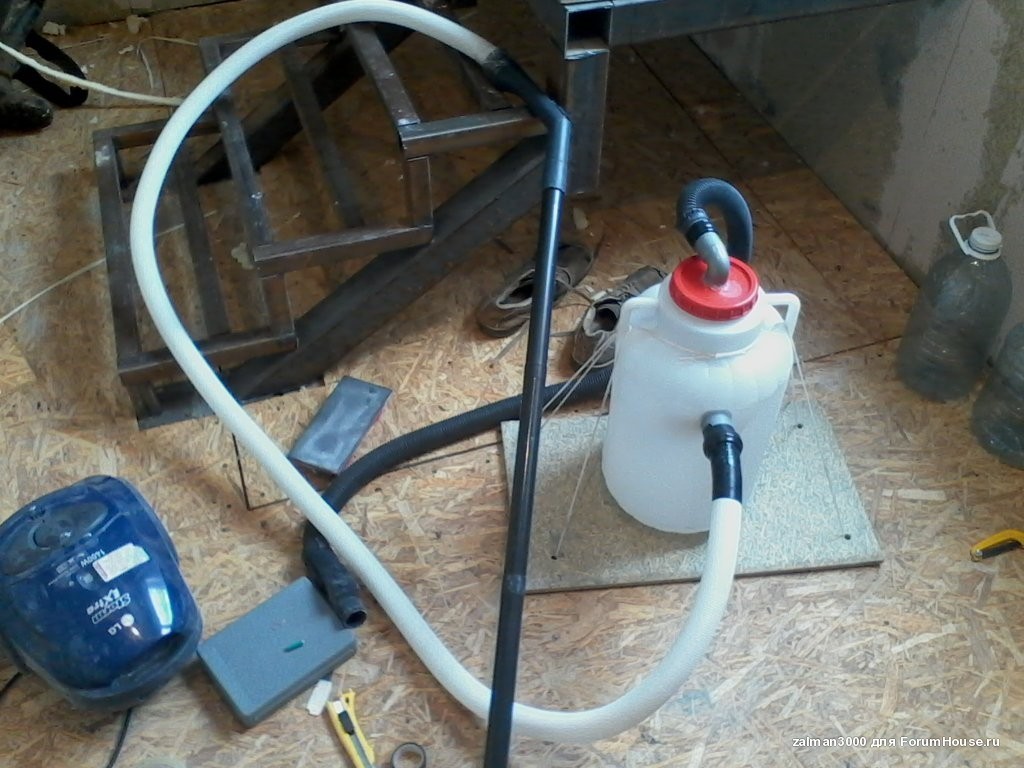
Water filter
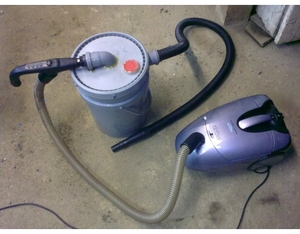 The device can also be assembled using a water filter for a vacuum cleaner. It is not difficult to assemble such a structure with your own hands, but it is necessary to protect the electrical appliance from moisture.
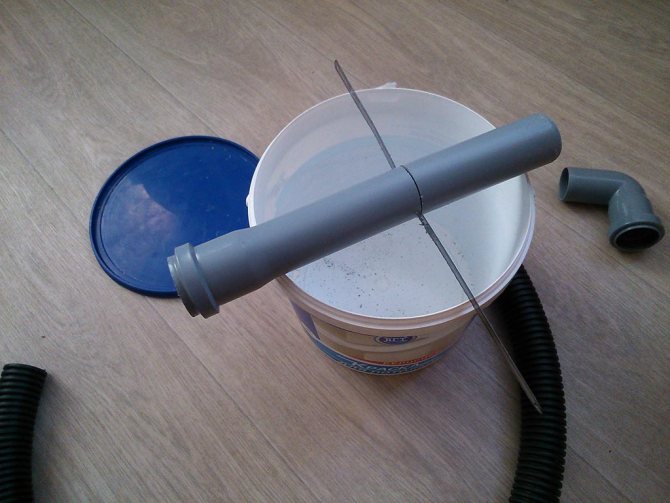
For assembly, you need a container with a lid with a volume of at least five liters. A plastic bucket would be ideal. The container is filled with water by a third. Two holes are made in the lid, into which pipes are inserted, it is best to use sewer pipes made of plastic with a diameter of 50 mm. The first tube is immersed in water almost to the very bottom, and the second, on the contrary, should be as far away from the water as possible.
A corrugation is connected to the tube immersed in water, which will be suctioned, the second corrugation is connected between the household appliance and the tube above the water. The water will absorb dust particles, thus keeping the air clean. Perfectly assembled vacuum cleaner with your own hands for the garage or garden.
Circuit Assembly
To make it convenient to move the compressor around the garage with your own hands for painting a car, it is important to securely fix all the elements of the circuit on a single base.


Having a certain amount of steel profile - a corner or a channel, you can weld a light frame, providing wheels on four sides. Such a frame is necessary when the receiver is constructed from a bulky tank or cylinder.


With the vertical orientation of the cylinder, you can do it even easier by welding the brackets of two wheels to the bottom, and opposite them - the heel so that the receiver stands straight. To move the unit from place to place, you will need to tilt the balloon from the vertical so that the heel comes off the floor.
The simplest solution is to take a piece of a thick board of suitable dimensions and fix the compressor, receiver and toggle switch on it using fasteners. The board can be used when the receiver is small (fire extinguisher cylinder, plastic canister).

When a do-it-yourself compressor is designed for painting, it is necessary to prevent dust from entering the system, which will reduce the quality of the paint layer. To prevent this from happening, the air intake must be protected with a gasoline coarse filter.

Stages of work
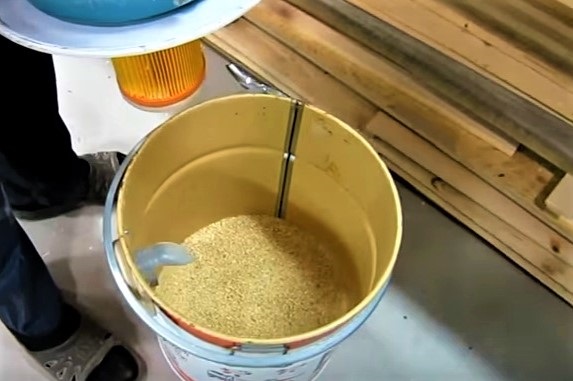
This method allows you to make a cyclone from an old vacuum cleaner. To do this, take a plastic container, for example, a bucket - you need to make a filter out of it. To do this, a lid is made of tin for the upper part of the container. There you also need to cut a hole for plastic pipes. They are inserted into the grooves at an angle. The direction of the tubes must match - either both clockwise, or both against it. Tightness is created by gluing the place where the tubes enter the container.
On the lower part of the bucket, with the help of bolts, a tin circle with a threaded pin sticking out in the middle is fastened. A regular filter from a minibus is put on it. This is necessary to clean the air.When the top lid of the container is closed, there should be a hole in the center for this pin, which will ensure that the bucket is tightly closed with a nut.
A motor from a vacuum cleaner with a pump and a switch is installed on the container lid. One of the holes is connected to the pump via a corrugated hose.
The motor must be bolted firmly to the cover so that it does not tip over during operation. All grooves for fastening on the bottom and on the lid of the container are processed with silicone or a glue gun to ensure sealing.
Fan unit
An industrial version of this type (Blizzard) has long been used in the economy by many people. But you can collect it on your own.
This snow blower is very reliable and does a great job.
It consists of a small number of parts:
- The knives perform two functions: they cut the snow and direct them towards the fan.
- The rotor with blades captures layers of stuck together snowflakes, spins them and pushes them out at high speed through a hole in the body.
- The pipe serves as a guide for the flow of ejected snow.
For the manufacture of such a unit, the following materials are needed:
- sheet iron 1-3 mm for the body and blades and 5-10 mm thick for the blades;
- shaft for the rotor;
- star;
- squares for the option on skis or wheelset;
- pipes for making handles.
Construction procedure
First make a body with knives. For this you need:
- Decide on the diameter of the fan and calculate the circumference using the well-known formula L=πD.
- To the value obtained, add an allowance of 1 cm in the case of using a welding machine and 2 cm when connecting the edges with bolts or rivets.
- Then you need to cut a strip of length L + (1 or 2 cm) of the required width from the sheet (for example, 10-15 cm).
- Bend the workpiece on the mandrel and weld it. Or drill holes in the overlap and connect in another way.
- Draw on the sheet a circle with a diameter D for the rear wall of the case and triangular-shaped knives with a rounding at one corner.
- Weld all blanks in place.
Execution of a rotating knot:
- A shaft 20–30 cm long is mounted on the bearing so that 5–6 cm peeks out on one side. For its manufacture, turner services may be required. If the household has the necessary part with a bearing, then you can use it.
- The center of the circle (rear wall) is determined and it is drilled with a drill, the caliber of which is 3-5 mm larger than the diameter of the shaft.
- The external dimensions of the bearing are measured and a glass is cut out of iron for it. It should be with paws to drill them and secure this part with screws.
- A glass is put on the bearing, and a pipe of a suitable diameter is pressed onto the shaft or mounted and clamped with screws.
- Blades are welded to it - plates of thick iron.
- The rotating assembly is fixed from the inside of the case so that 5-6 cm remain outside.
- An asterisk is welded onto this "tail".
At the very end, a pipe drawing is made and a blank is cut out, which is bent and welded. A hole is made on top of the body (in the center or slightly on the side). Then strengthen the pipe. It is desirable to make its top swivel so that you can direct the flow of snow where you want.
The entire structure is mounted on a frame (front) with skis or wheels. The chainsaw is strengthened, as in the previous ones.


Conclusions and useful video on the topic
Another option for a mini vacuum cleaner:
Features of the assembly and operation of homemade products:
Excellent replacement for the brand model of plastic buckets and plumbing pipes:
As you can see, it’s not so difficult to make a powerful building unit or a mini-vacuum cleaner on your own. The main thing is to be patient, study all the manufacturing steps and find some free time for a home experiment. And devices, as practice has proven, fully cope with their functions.
Please write your comments in the box below. Ask questions on obscure and controversial points, publish photos on the topic of the article. Tell us about how you assembled or upgraded the vacuum cleaner with your own hands, it is possible that your advice will be useful to site visitors.


