- Creating a pond from a film
- How to make a pond in the country with your own hands: step by step instructions
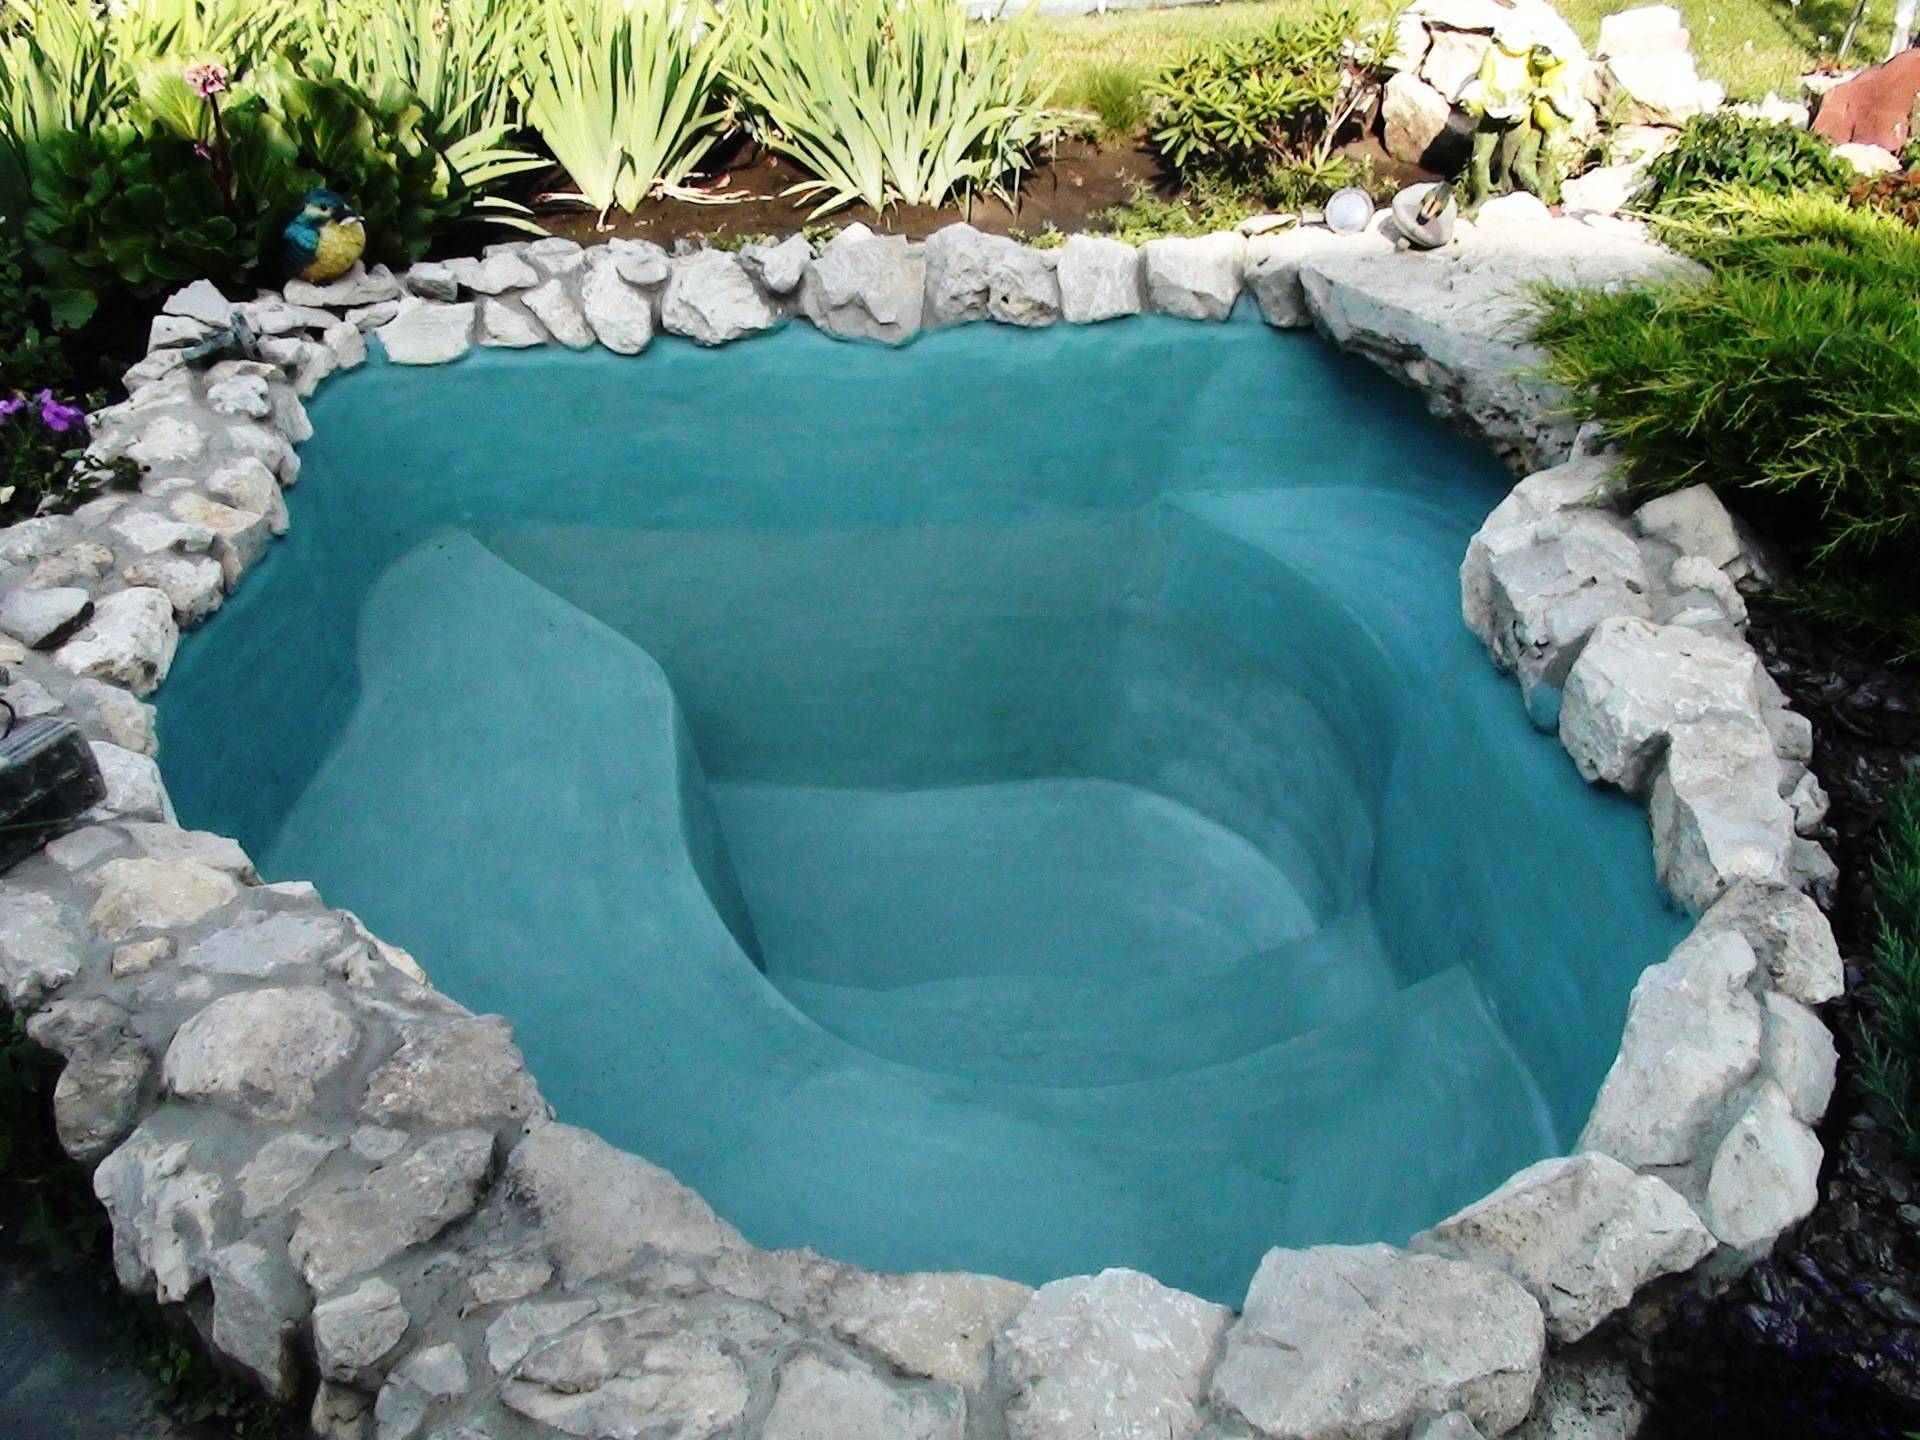
- concrete pond
- Tire pond
- Pond from a finished plastic container
- Pond from an old bath
- Pond in the soil from the film
- Do-it-yourself pond from a film.
- Do-it-yourself fish pond without film
- Peculiarities
- Construction technology
- Fish food
- Pond in the country for 1 hour
- Selecting the type of pond
- Do-it-yourself concrete pond in the country
- The basic principles of arranging a pond with your own hands
- Pond Creation Algorithm
- Seventh stage. We create an artificial reservoir
- We make a pond with a film
- First project: sides flush with the ground
- Second project: sides raised
- What kind of fish are bred in ponds
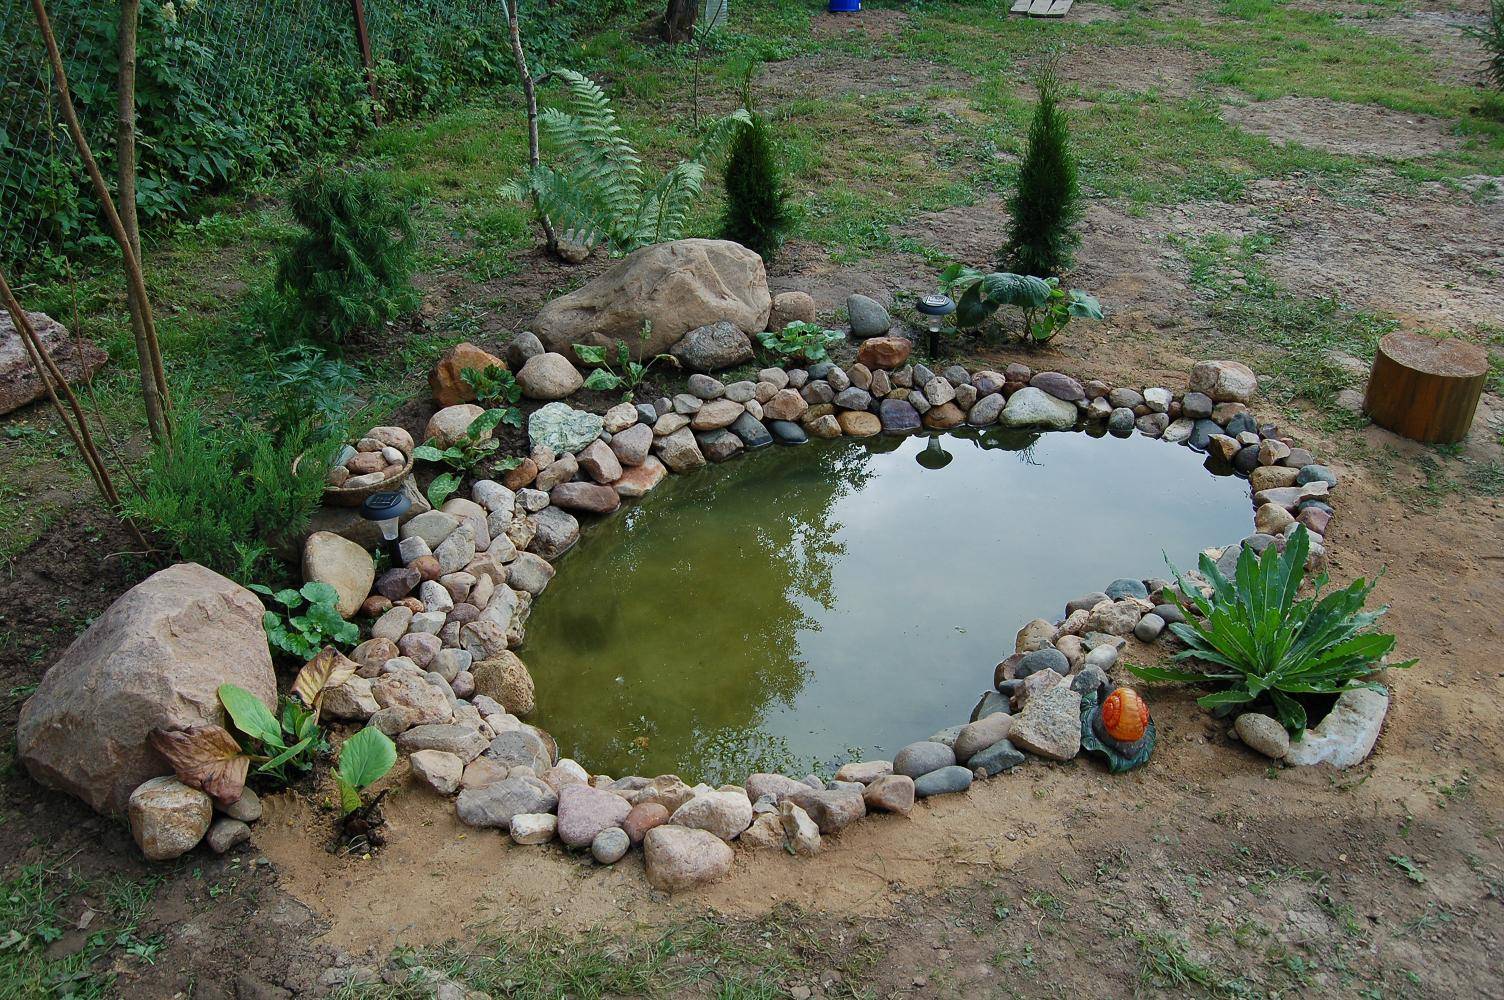
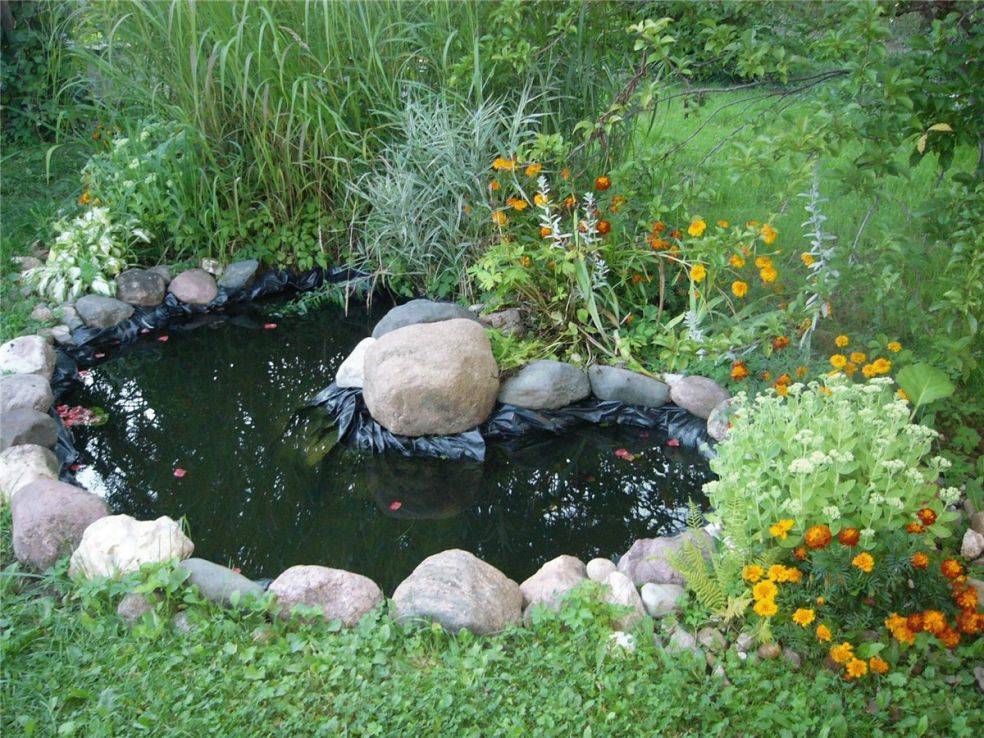
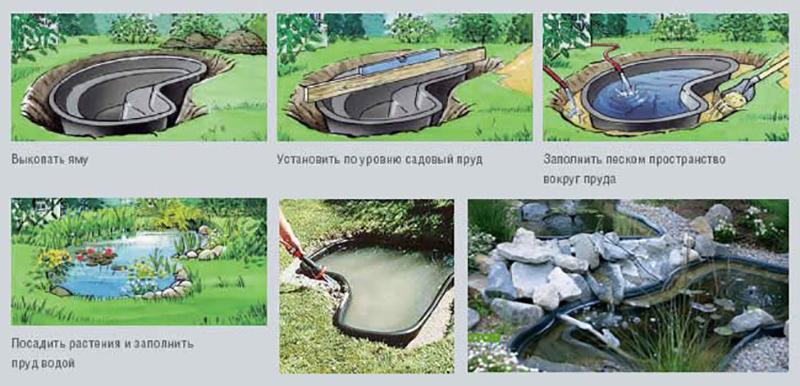
Creating a pond from a film
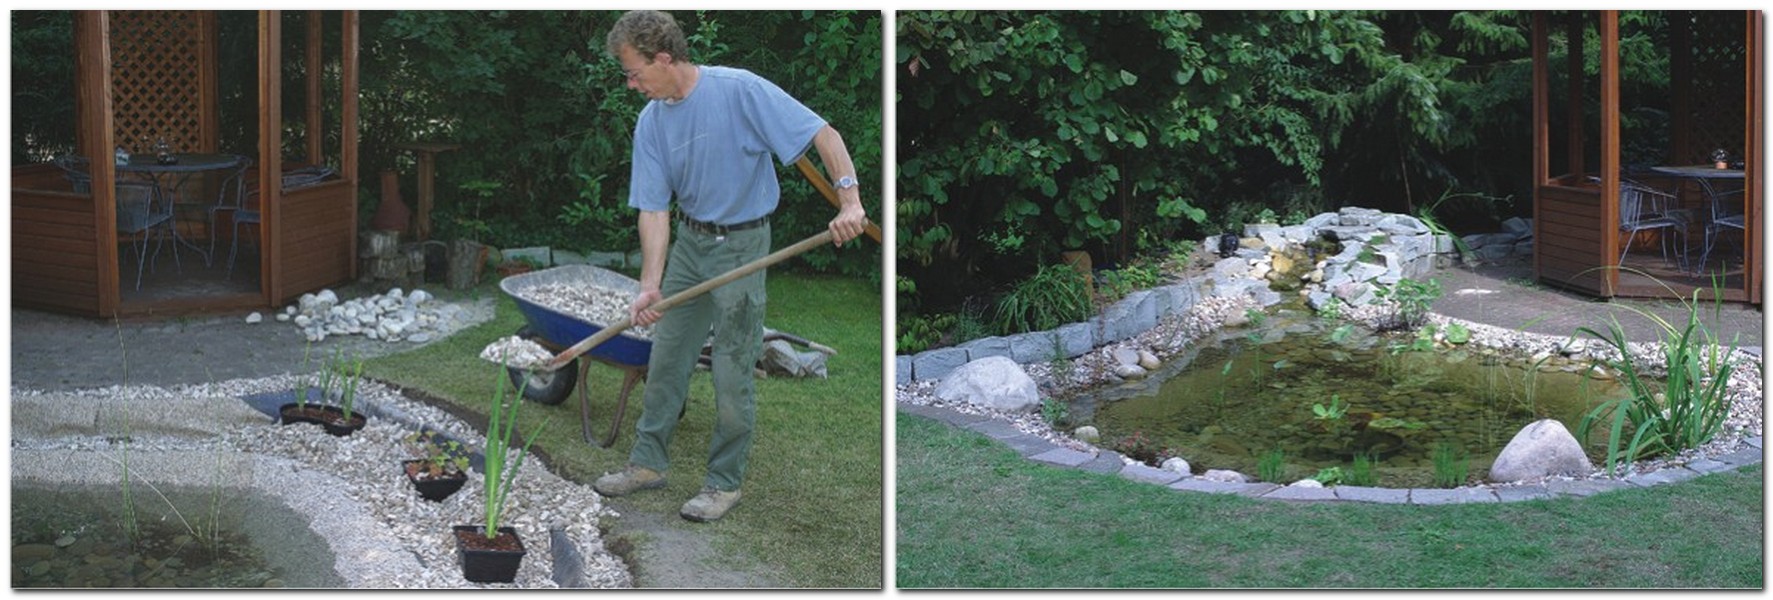
In addition to using traditional concrete pool construction techniques, you can use a step-by-step instruction explaining how to make an informal pond from PVC film or butyl rubber. The thickness of the roll material must be at least 0.5 mm. To glue the canvases, you can use special adhesives or tapes.
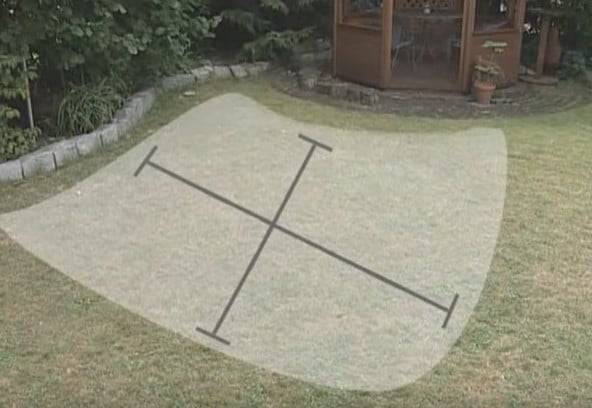
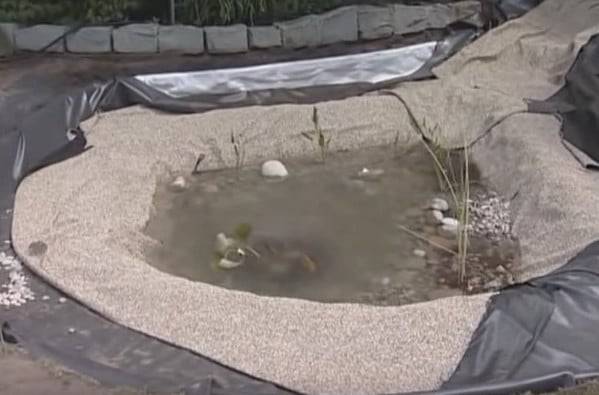
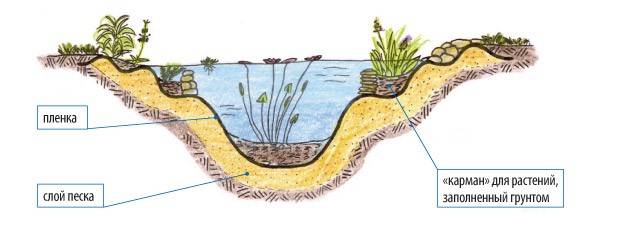
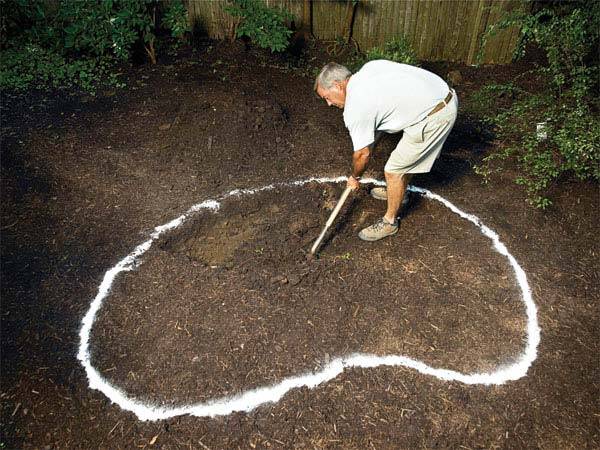
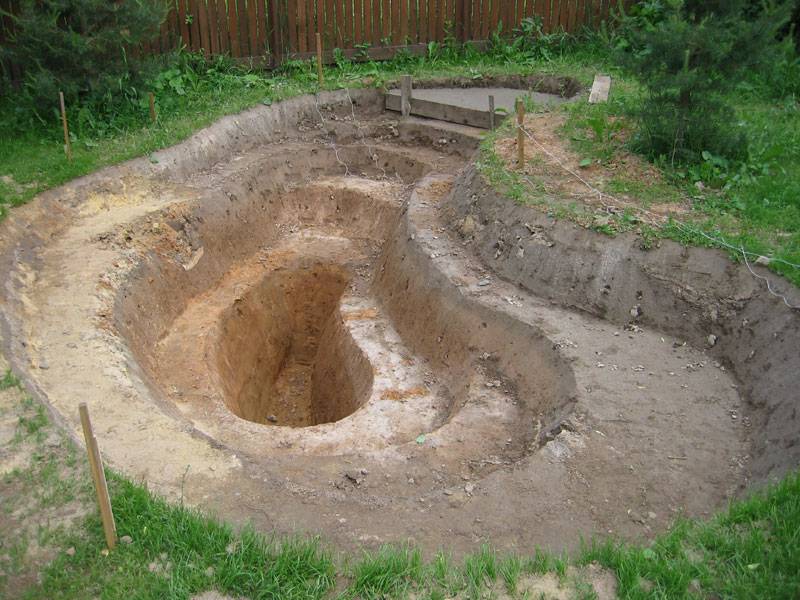
At the first stage of work, you need to draw a layout of the pit, and calculate the film consumption with a margin. When placing, make the necessary measurements for a flat shoreline.The walls can be made stepped, which will allow you to place pockets of soil on the terraces for planting plants. In small areas of the coast, it is better to choose a gentle form of the coast.
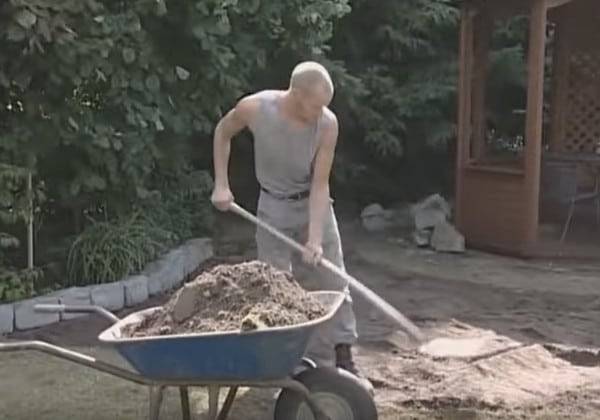
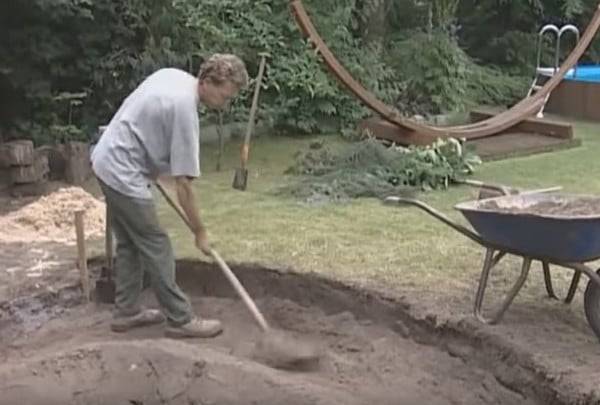
After marking, we begin to dig a pit in the direction from the banks to the center. The bottom and walls must be carefully leveled and the surface of the bottom and walls must be freed from sharp stones and roots that can damage the coating.
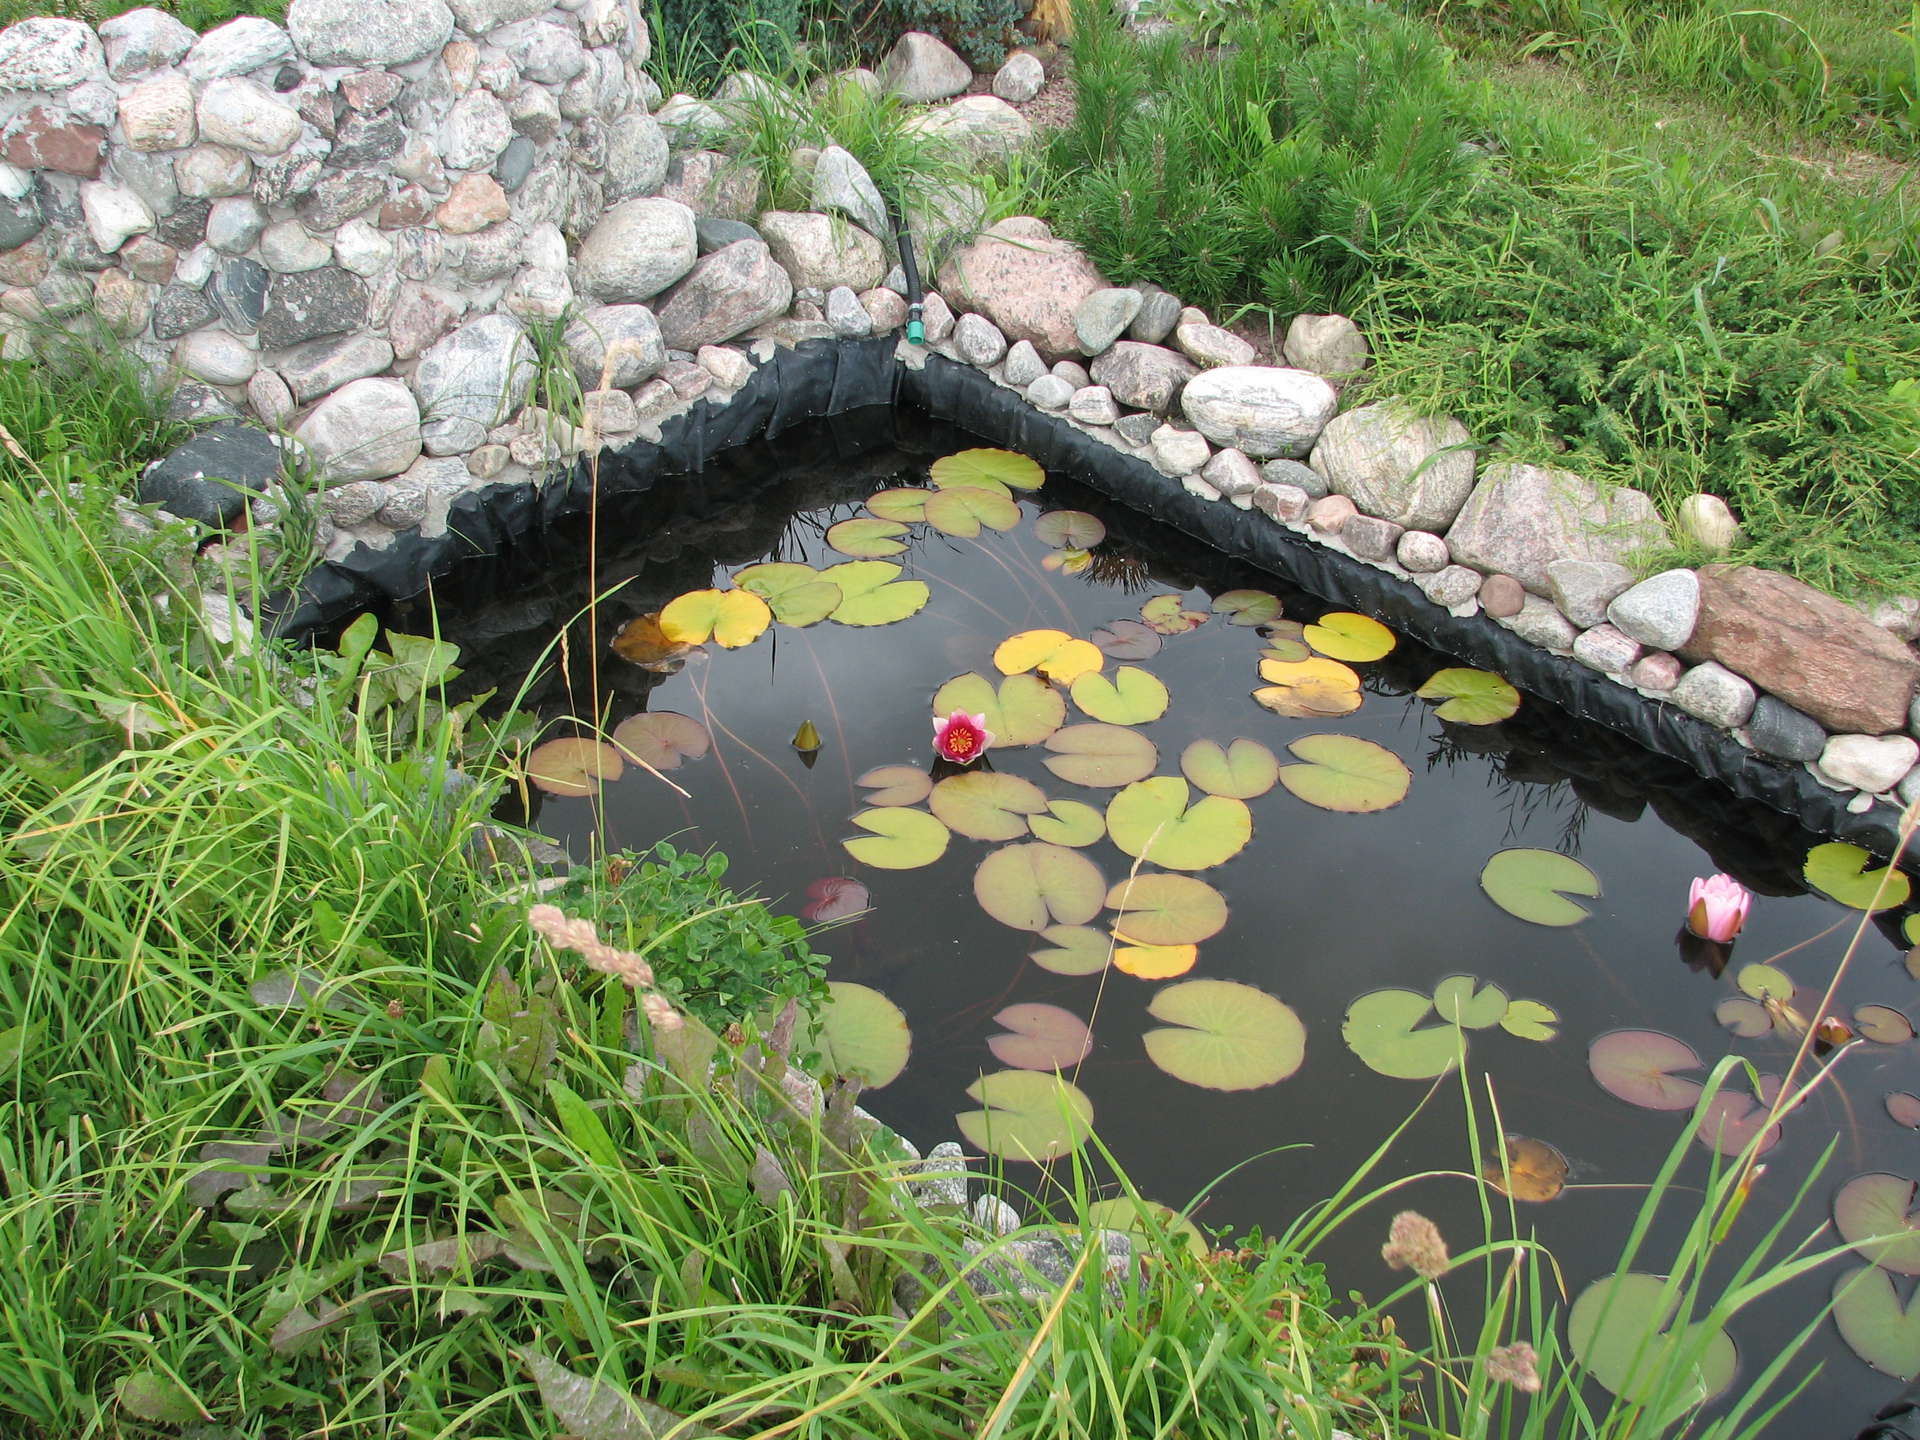
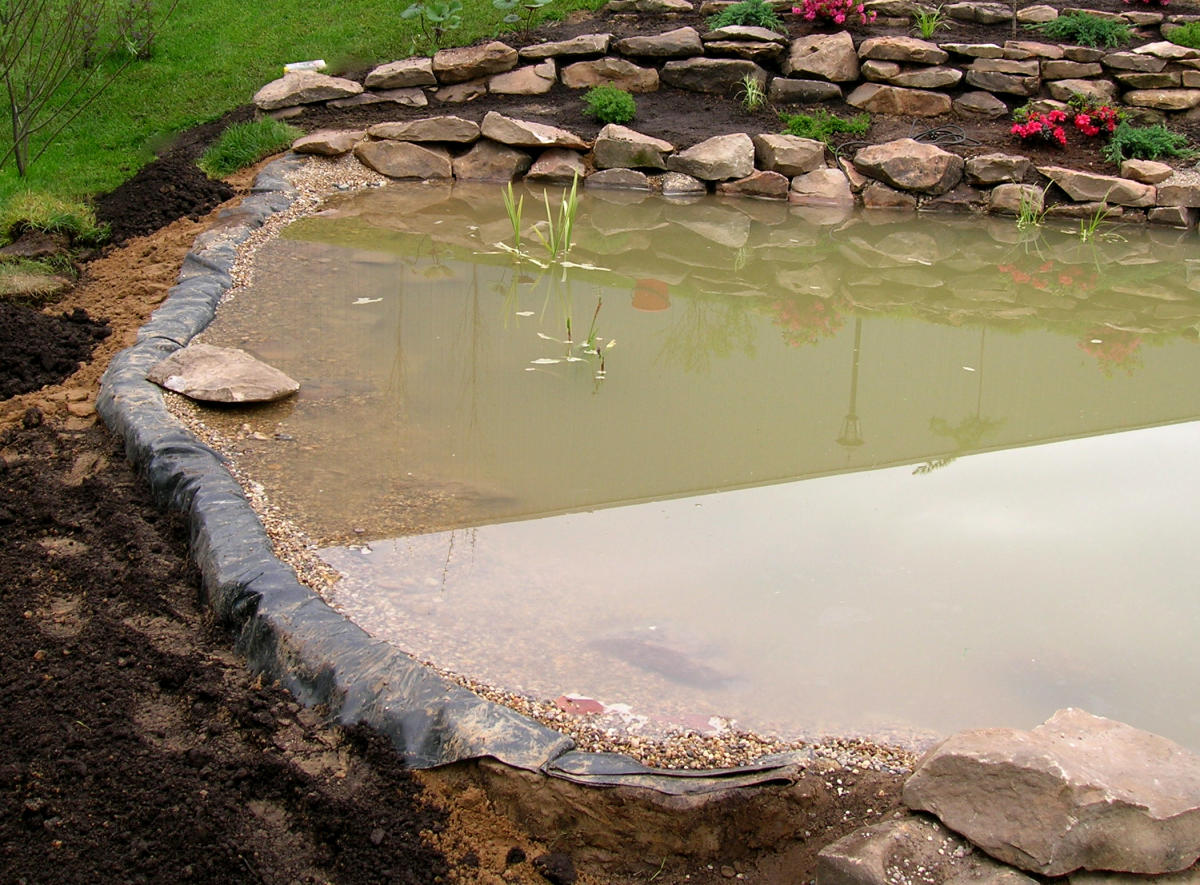
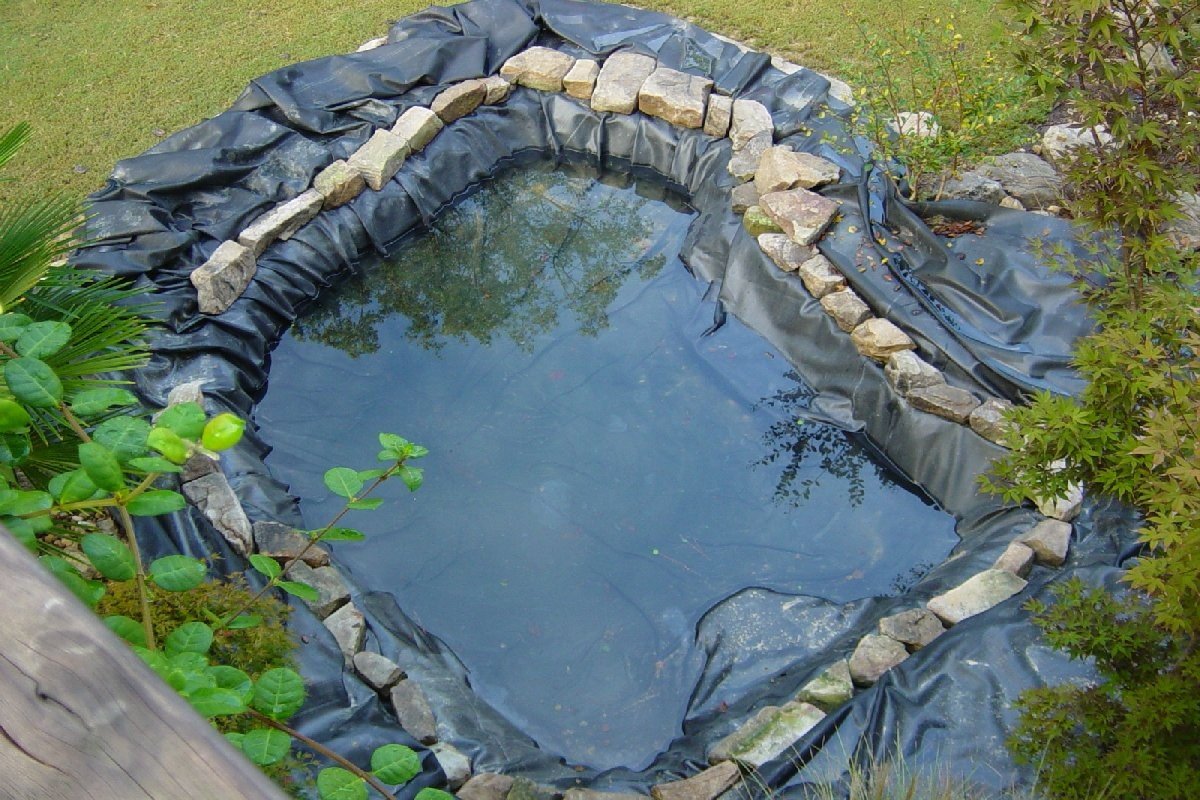
To fix the polymer web along the perimeter of the soil, a trench breaks through, after lining, the folds and edges are fixed with stones. Water is filled with a small jet directed to the center of the pit. After two days of shrinkage, the excess film can be cut off.
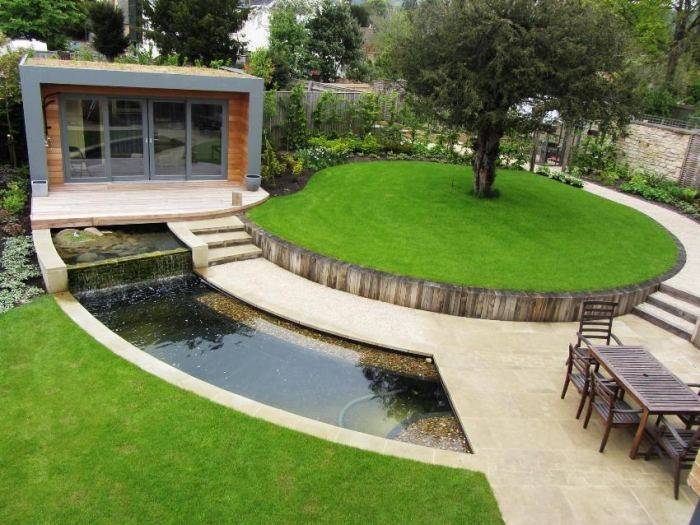
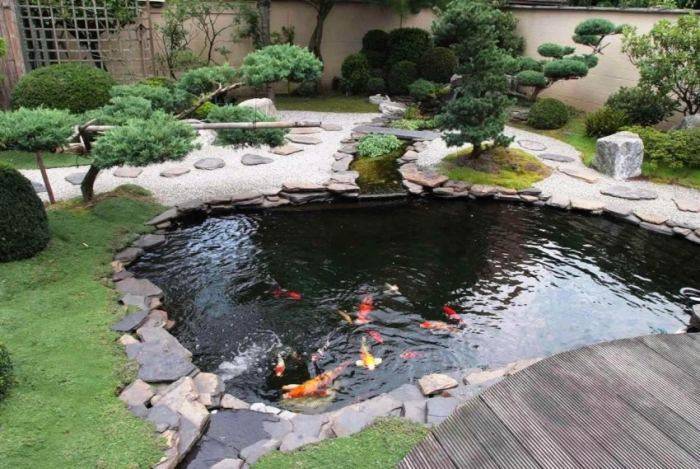
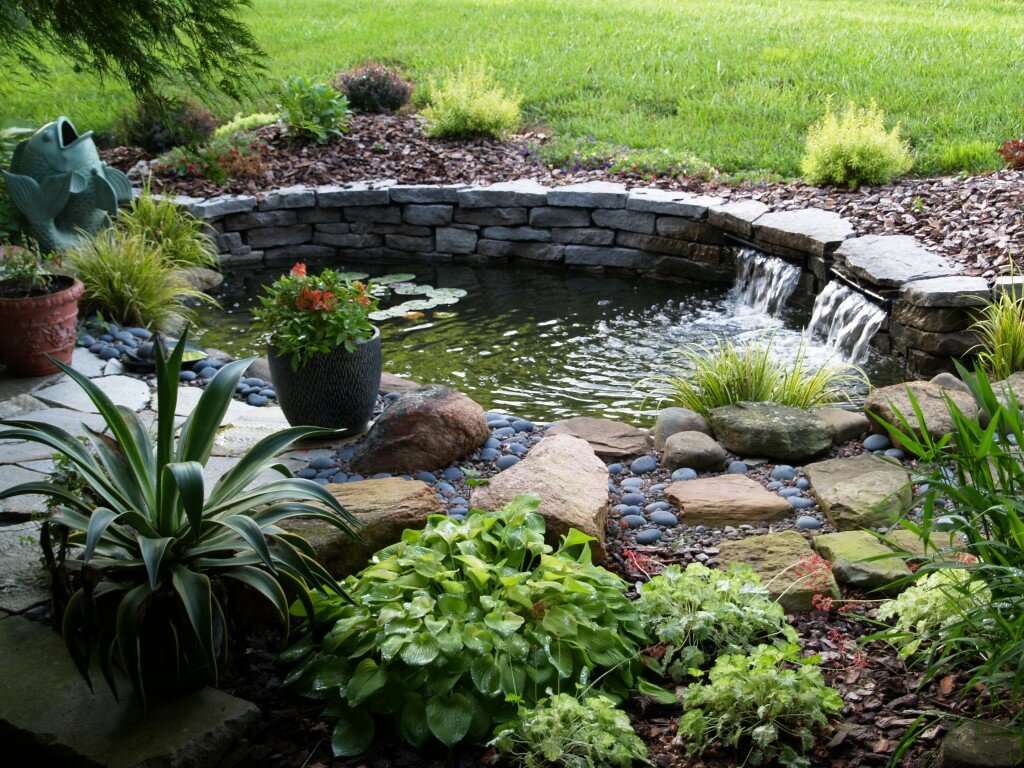
Securing the shores with stone ledges will reduce the level of pollution. The project can be enriched with decorative lining of the bottom, the construction of bridges and islands, the installation of additional equipment for water circulation and purification, pumps for waterfalls and original lighting.
How to make a pond in the country with your own hands: step by step instructions
To make an artificial pond in the country with your own hands, step-by-step instructions come in handy. Depending on the materials used, the sequence of actions is different. The most difficult thing is to make a concrete variety, so let's start with it.
concrete pond

Work is carried out in the following order:
- First, a breakdown of the area is performed. Drive in the pegs and pull the cords. Remove the fertile soil layer to a depth of 15-20 cm.
- Dig a pit of a given depth, length and width.
- Install the formwork and lay the reinforcing cage.
- Concrete mortar is prepared and poured into formwork structures.
- After a couple of weeks, the formwork is removed.
- Perform waterproofing, install the necessary equipment.
- Decorate the pond.


Tire pond
A mini-pond in the country is easy to make from car tires. To begin with, one side of the tire is cut off to form a shape, like a bowl without a bottom. The edge is treated with sandpaper. Next, dig a hole of a suitable size.

A prepared tire is installed in the pit. The gaps between the tire and the ground in a circle fall asleep and rammed. Sand is poured to the bottom, rammed and leveled. The resulting structure is covered with a dense polyethylene film laid in two layers. The edges of the material lead to the surface of the earth by 15-20 cm.
A layer of soil is poured around the reservoir to hide the film, and the banks are decorated with stones. Now it remains to pour water, plant ornamental plants in a circle.
Pond from a finished plastic container
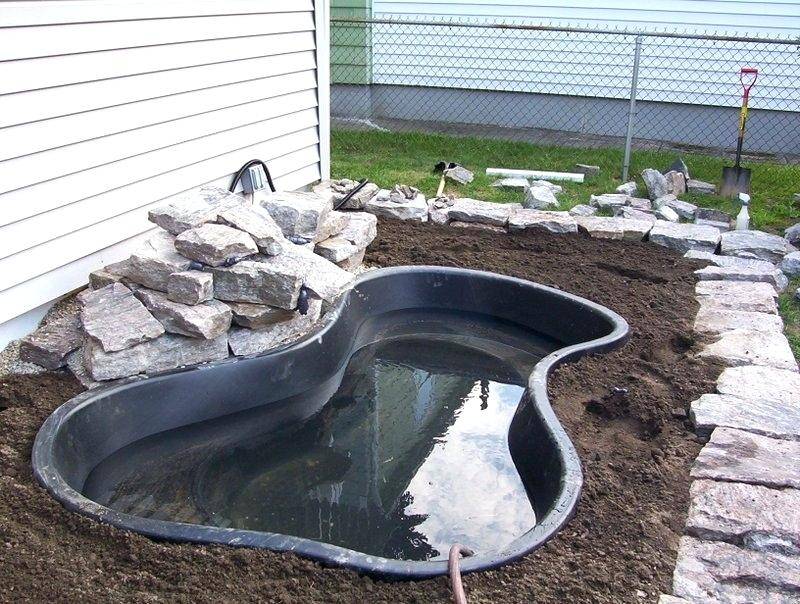
Having figured out how to make a pond out of tires, it is easy to understand the principle of constructing a reservoir from a plastic container. On sale there are ready-made molds made of fiberglass or polyvinyl chloride. With their help, a pond can be made in record time, and it will last up to 30 years.
Sequencing:
- First, the terrain is broken down using pegs and a stretched cord. Remove the fertile layer of soil.
- Then they dig a pit a little larger than the dimensions of the plastic mold.
- The prepared container is installed at the bottom of the pit, and the voids between the vertical walls and the edges of the pit are covered with soil and well rammed. During the installation process, the building level must be used so that there is no skew of the container in one direction.
- Now it remains to fill the form with water, plant ornamental plants around.
It is better to use a fiberglass bowl reinforced with rubber. This model is more reliable and maintainable. The only drawback of this method is the difficulty of transporting the bowl.
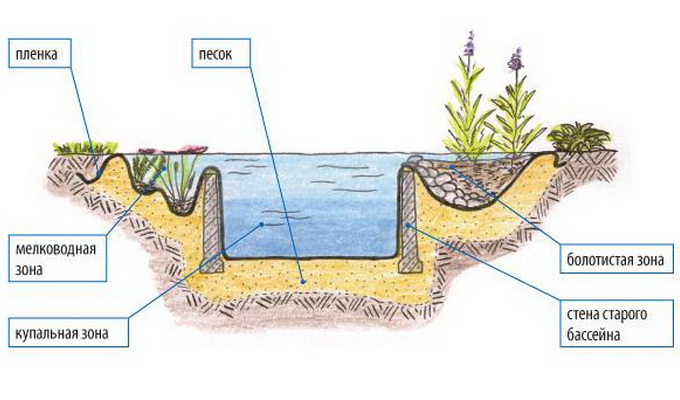
Pond from an old bath

On a small summer cottage will fit a pond from the bathroom. The principle of installation is similar to the installation of a polymer container. There is only one difference. The hole in the bottom should not be plugged, because it can be used to drain water. To do this, after digging a pit in the place where the hole will be located, make a recess measuring 50x50x50 cm. Crushed stone is poured into it. The bottom of the pit is covered with sand. The bath is installed in the pit so that the drain hole is above the recess with crushed stone filling. The voids along the vertical walls are also filled with sand and rammed.
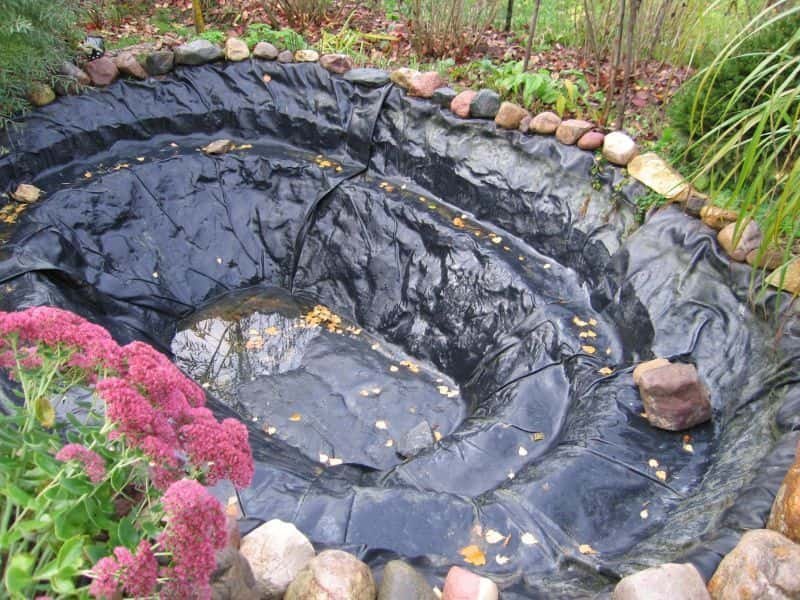
Pond in the soil from the film
The configuration of such a pond can be any. The most short-lived - polyethylene film. Varieties of PVC will last up to 10 years. The most durable and reliable option is butyl rubber film. It will last up to 50 years and withstand repeated freezing. This material is chosen for deep reservoirs with a rocky bottom. When choosing a film, take into account resistance to ultraviolet radiation and temperature extremes.
Action algorithm:
- First, they dig a pit. It is more convenient to move from the edges to the center. In sandy soils, vertical walls are made with a slope of 45 °. In black soil or clay, they can be made strictly vertical.
- To correctly determine the size of the film, the length along the length (width) is multiplied by 2 and a margin of 55-60 cm is added.
- The bottom is rammed, after which a waterproofing layer of stones and sand, geotextile or PVC film is laid.
- This is followed by a sand cushion, which is needed to protect against damage from sharp stones and other objects.
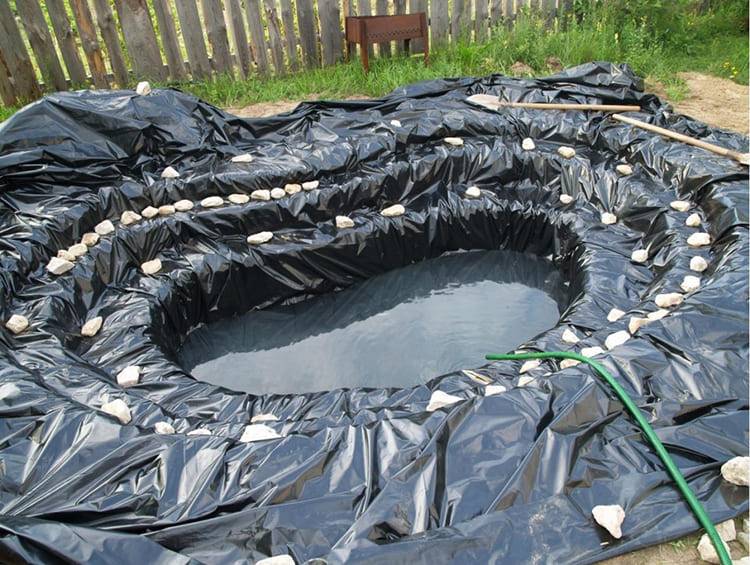
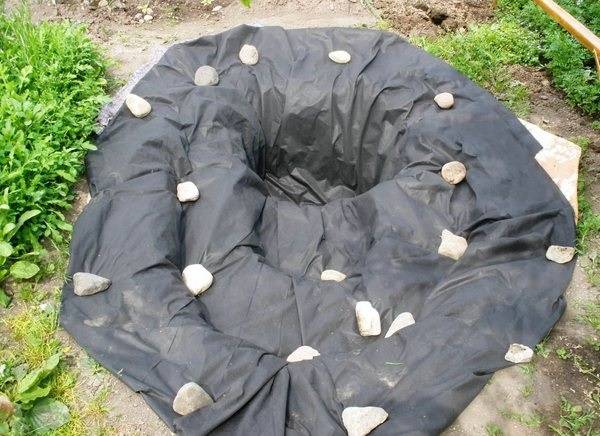
- Then the bottom and walls are covered with a film, the ends of which lead to the horizontal surface of the banks by 30-40 cm.Strips of material are glued together with adhesive tape or special glue. If bends are obtained, then they make one large fold, press it down with boulders.
- The edges of the film are pressed with stones and sprinkled with soil.
- After that, it remains to fill in water, plant ornamental plants.


Do-it-yourself pond from a film.
The main question when creating a pond: how to make it waterproof. There are several types of pond waterproofing - film, clay castle, concrete and rigid installation.
Rigid mold installation is a simple and durable method, but they usually come in small sizes up to 3.5 square meters. meters. Their service life is 10-50 years.
Waterproofing with concrete is the most expensive, in addition, to protect against frost, it needs additional treatment with a frost-resistant agent and liquid glass.
A clay castle is the cheapest in terms of materials, but the most labor-intensive. In order to waterproof the pit with clay, the compacted soil is covered with wood ash or soot. Then a 15 cm layer of clay dough is applied to the walls, compacted. When the layer dries, a second 30 cm is applied. When the layer is almost dry, crushed stone is poured on it, slightly pressing into the layer.
The optimal solution for the construction of ponds with an area of more than 5-6 sq.m. - film waterproofing.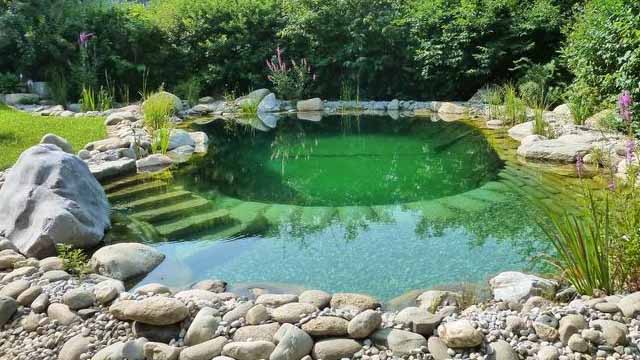 How much film is needed for a pond: Film length = pond length + 2 • pond depth + 50 cm fastener margin. Film width = pond width + 2 • pond depth + 50 cm fastener margin.
The film is produced in widths from 2 to 10 m, length 10-50 m. Knowing your needs, you can choose the optimal roll. The film is bought before digging the pit, this will allow you to cover it immediately when the pit is ready, preventing its edges from shedding. Which film to choose for the pond.
PVC film for a pond is cheaper, but eventually destroyed by ultraviolet radiation, its service life is 8-10 years.
Butyl rubber sheeting is more expensive, but has both UV and cold protection. The service life of such a film is 50 years.
Do-it-yourself fish pond without film
The simplest fish pond that you can build with your own hands is a structure with a dirt bottom and walls. The pit must be carefully tamped, but still this design is considered not strong enough and convenient for fish, so it is better to use the film as the main coating.
Figure 6. Bottom outlets: a - ordinary (1 - grate, 2 - riser, 3 - shields, 4 - dam, 5 - sunbed), b - simplified (1 - head, 2 - sunbed, 3 - valve gate, 4 - winch, 5 - fish catcher), c - spillway without riser (1 - hole, 2 - shield, 3 - rod for lifting the shield, 4 - grooves for shield movement, 5 - concrete head, 6 - dam slope)
In fact, the technology for building a fish pond from film and without it is practically the same at the initial stage. Differences appear only at the end, when the bottom and walls of the pit are covered with polyethylene.
Peculiarities
The most important feature of creating and arranging a pond is the right choice of location. It is desirable that the soil be clayey, since such soil retains water well (Figure 
Figure 7. Types of fish catchers
In addition, it is better to build a reservoir from the southwest side, so that the water is heated by the sun for at least 4 hours a day. It is not advisable to place the pond under the shade of deciduous trees, as falling leaves will pollute the pond.
It is important to correctly calculate the depth of the reservoir. A depth of one and a half meters is considered optimal, but it is better to increase this figure to two meters, and if you are going to grow carps, then up to 2.5 meters
This feature must be fulfilled so that the fish can be in the pond not only in summer, but also in winter.
Construction technology
To make a pond in a fish breeding area, you must follow a clear sequence of actions.
step by step building instructions pond includes the following steps:
- Outline the territory of the future reservoir, scattering sand over its proposed territory. Irregularities in the relief must be leveled so that the water in the pond is approximately at the same level.
- Dig a pit, and its depth should be a little more than planned. This is necessary so that in the future you can equip the bottom of the reservoir. All large boulders and plant roots are removed from the bottom, and the coastal, shallow and deep zones are marked out for further development.
- We equip artificial water level drops with the help of earth from the bottom of the pit. It is at this stage that the amount of film required is calculated. Cords are placed around the perimeter of the pond, their total length is counted and 50 cm are added on each side. If you are not going to make a pond from a film, you can skip this step.
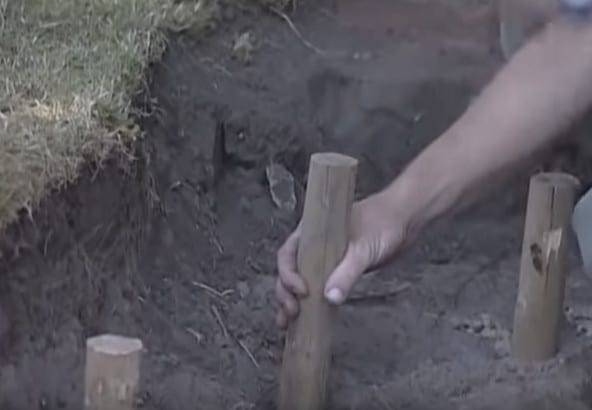
- We equip and strengthen the coast, filling it with rubble or strengthening it with pipes and boards. This will prevent the coast from falling off in the future. It is also advisable to make a small fence so that rainwater does not wash the earth into the pond and does not pollute it.
Figure 8. Stages of construction of a pond without a film
At the final stage, landscaping of the pond is carried out.A special substrate is placed at its bottom, in which aquatic plants are planted. You can also decorate the bottom with stones or broken pots if you plan to grow not only fish, but also crayfish. After that, you can proceed to install the pump, fill the pond with water and populate the fish.
Fish food
In order for the nutrition of fish in the pond to be effective, it is necessary to study the features of feeding a particular species. The growth rate and normal development are directly related to the conditions of detention and feed. The total energy requirements for an increase of 1 kg to the mass correspond to 4500 kcal. To accelerate growth, protein compounds are added to the feed. You also need to supplement the menu with such product groups:

Do-it-yourself pool skimmer: step-by-step instructions for use with a photo for beginners Stagnation of the water mass in the pool leads to the development of harmful bacteria. Hair, dust and other dirt particles turn sour ....
Amino acids - the presence of these substances in the diet is very important for the development of fry. If there is a lack of methionine, tryptophan, leucine and other compounds, young fish will stop developing and lose their appetite
Fats of animal and vegetable origin are required. With a deficiency, disturbances occur in the physiology of fish - the liver often suffers. It is recommended to add vegetable and butter to the feed. For fry, be sure to add dry dairy products to the feed. Skim milk powder and low-fat milk powder are suitable. For adult fish, bone and krill meal is added.
Depending on the type of fish, you need to add a different amount of fiber. If you grow carp and catfish, its amount relative to the total mass of feed is up to 40%.For trout and salmon, the figure is less - 20% is enough. As an addition to the main menu, it is recommended to mix enzyme preparations and specialized premixes - they are bought in stores for each type of fish.
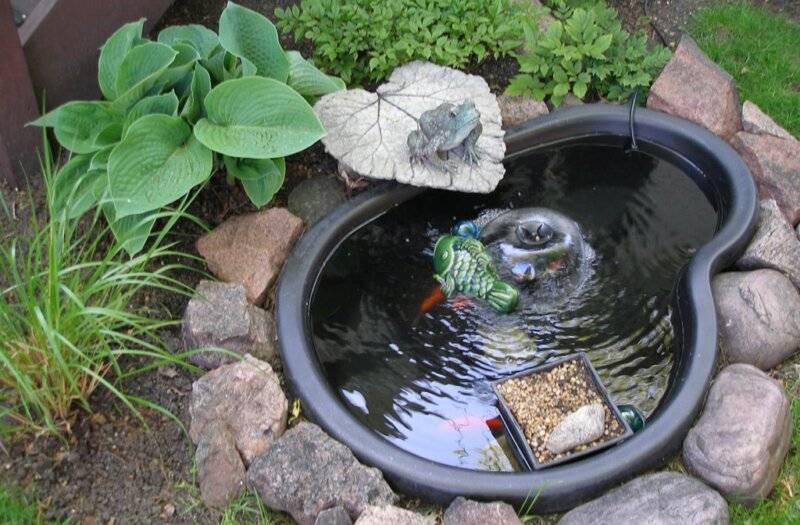
Pond in the country for 1 hour
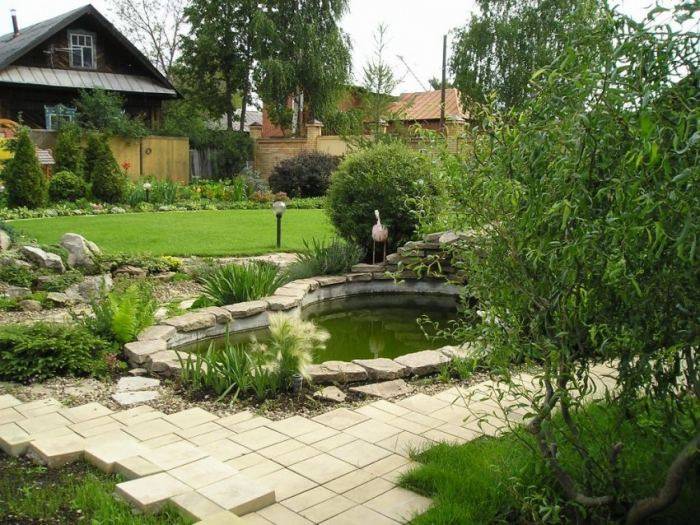
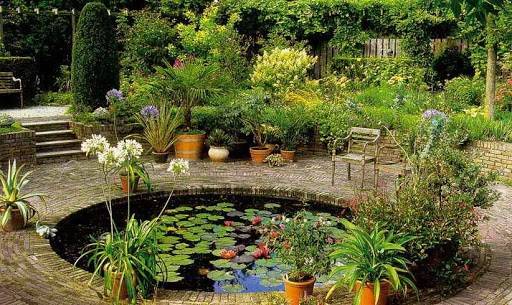
Landscape ideas with ponds in the country are striking in their diversity, while you can make a small pond with your own hands from simple and affordable materials, and how exactly, further in the description with step-by-step photos. This small and beautiful pond is made from an ordinary basin using decorative natural stone and beautiful flowers.
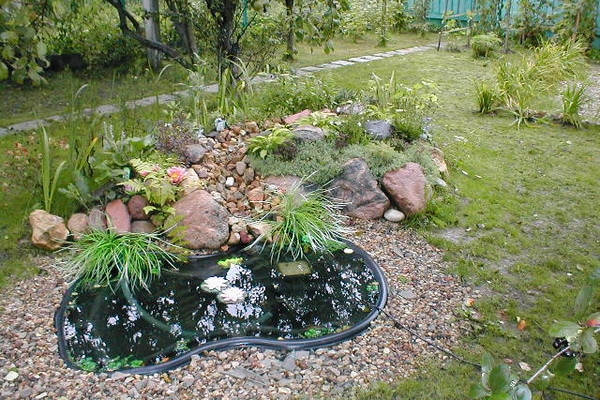
Doing everything is very simple:
- Choose a place under the pond, according to the size of the basin, which is at hand. It is better to make a pond away from trees.
- Mark the circle according to the size of the container, dig a ditch of the desired depth.
- Install a basin in the pit, strengthen it in diameter with small gravel.
- Decorate the sides with rubble and decorative stone.
- Plant plants around the perimeter.
In such a pond, you can pour settled water and run a fish there. But for the winter, the water must be drained, and the fish should be taken into the house in the aquarium.


Selecting the type of pond
In most cases, a small artificial reservoir performs an exclusively decorative function, acting as an element of the landscape of a summer cottage. But it is quite possible to make it in such a way that the structure also has practical benefits, an excellent example in this case is a pond in the country for breeding fish and swimming. In general, depending on the functional load, the following types can be distinguished:
- Swimming pool. This structure also belongs to the category of summer cottages, performing practical and decorative functions. With its help, it is quite possible to give the summer cottage a decent and well-groomed look.In addition, it will help to cool off in hot weather and will be a great place for children to play.
- Pond for fish. This option involves not only the selection of suitable fish that can exist in a limited space, but also regular care of the pond: it must be cleaned, water changed if necessary, and algae planted. This option for ennobling the local area can be used for fishing or simply as a decorative element.

The fish pond is ideal for both avid fishermen and those who like to observe the water world.
- Mini pond. As a rule, this option is a constituent element of the landscape composition and is characterized by minimal dimensions. With a limited budget, it is quite possible to make a pond from a bathtub or any other small container.
- Decorative. This option has an exclusively decorative function, as the name implies, it involves the use of aquatic plants, various bridges, fountains, which give the building a finished look.
Proceed to the choice of a place and the construction of a summer cottage should be only after choosing the appropriate option from the list presented above.
It is important to choose the right area in the local area to create a future reservoir
The most important criterion that should be followed when building a pond is its location.
It is important to consider a number of recommendations:
- The future construction site should be in direct sunlight for at least six to seven hours a day.This will allow the water to warm up well if the pond serves as a place for swimming, and also stimulates the growth and reproduction of algae if the pond is used for breeding fish.
- The total area of the water zone should not exceed 3 - 4% of the total size of the site, otherwise it is extremely difficult to call such a structure practical and functional.
- It is recommended to exclude the proximity of shrubs and trees. This is due to the fact that the root system of plants as it grows can disrupt the structure of the structure. And the purification of water from leaves is a very tedious and troublesome business.
- Regardless of the functional load of the reservoir, it is recommended to take into account that in the future it is possible to expand it. Accordingly, for this purpose it is worth leaving free space.

The dimensions of the pond meet the requirements
Do-it-yourself concrete pond in the country
This method is suitable for those who do not trust modern materials too much and prefer capital buildings.
The sequence of work is similar:
- excerpt of the pit;
- preliminary waterproofing (because otherwise the moisture from the concrete will quickly go into the ground);
- concreting by conventional technology. It is advisable to use a reinforcing mesh and do not forget about the formwork;
- landscaping and planting.
The advantage of this technology is the possibility of arranging sheer (vertical) or simply very steep sides. It is also possible to line a concrete container in any convenient way - for example, with a large flagstone on a layer of mortar that has not yet hardened.
A similar method with pebbles is also quite convenient.
If it is not planned to finish the concrete surface, it makes sense to cover it with liquid glass - this will clog the smallest pores in the concrete and will not allow it to crack over time, start letting water through.
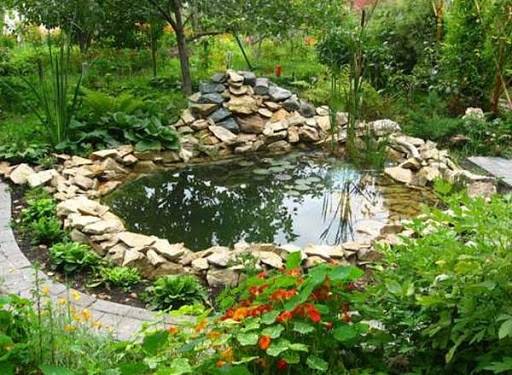
The basic principles of arranging a pond with your own hands
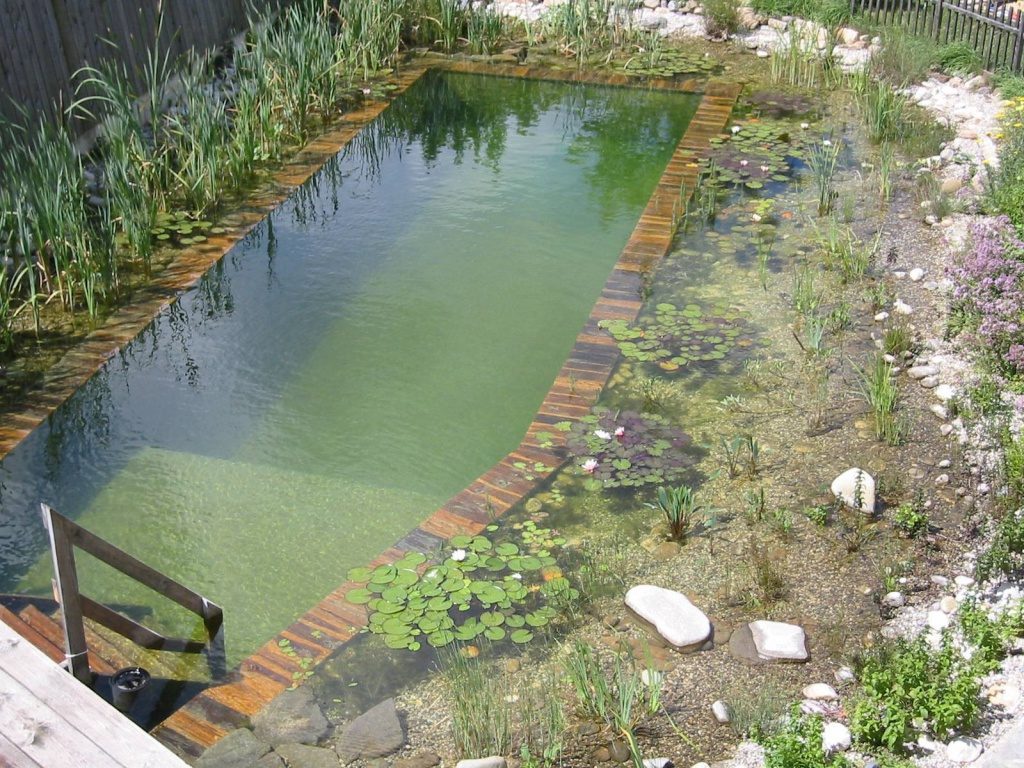
A country pond is a piece of nature that delivers incredible aesthetic pleasure. Make it fashionable by yourself
In order for such a pond to always be beautiful and well-groomed, it is important to use the right materials and construction technologies.
The following are interesting landscape ideas, photos and step-by-step descriptions of the most successful of them, but in order to create a similar pond with your own hands in the country, it is better to follow the advice of professionals. An important stage is planning and site selection:
First, it is important to determine the size and configuration of the pond. This affects both the choice of a site for it, and the possibility of using certain installation technologies.
Site selection
A place for a pond should not be chosen in the scorching sun and not under deciduous trees. Illumination of the pond should not exceed 4-5 hours a day. This is due to the fact that water begins to bloom from ultraviolet light, which will pollute the pond and make it less aesthetic in appearance. The location of the pond away from deciduous trees is preferable, as the foliage from the branches will fall every autumn and pollute the pond.
You can choose a place under the pond next to the gazebo or resting place so that you can admire the water while relaxing.
One of the main parameters of a pond is its depth. If the pond is with fish, then its depth should be at least 2 meters, and for carp at least 2.5 meters, then the pond will not freeze in winter, and the fish will survive.
Pond creation technologies can be divided into 2 groups:
- With the use of specialized step baths for ponds and pools.
- Using film.
If you use a bath, this greatly simplifies the installation process. The film pond can be absolutely any size and shape. With the use of a film, you can embody the most daring design ideas for decorating ponds.
Any construction of a pond should take place according to a certain scheme:
- Choosing the size, shape and location of the pond.
- Markup. It can be made with sand along the perimeter of the future reservoir.
- Creation of a pit. It can be dug by hand or with the use of machinery, if the area of the site allows.
- Installation of a bathtub or flooring from a film.
- Filling with water.
- The decor of the coast and the creation of additional structures: a bridge, a fountain.
But each of the options has its own installation features.
Pond Creation Algorithm
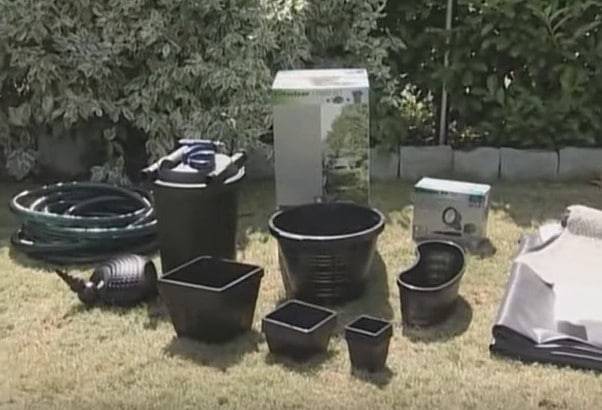
Let's take a closer look at a few good ideas, for example, installing a film pond measuring 10 by 10 meters. For work you need to prepare:
- sand, brick or blocks, gravel;
- film of the required size;
- geotextile;
- plastic pipes, wooden bars;
- coconut mats;
- plants for water in special pots, plants for the coastal zone.
Do like this:
Mark the perimeter of the pond with sand, check the surface with a level and a rope, it should be flat.
Dig a pit, make several levels of depth from shallow to the deepest in the center of the pond.
With the help of a rope laid from edge to edge of the pit along the entire depth, remove the size required for the film.
Set up the beach. To do this, dig a trench along the edges of the pit, lay it with a film and tuck it, cover it with rubble, strengthen the edging with blocks or bricks.


Lay plastic pipes along the bottom to strengthen.
Lay the bottom with geotextile or sand, then with a film.
You can install vegetation at the bottom of the pond in containers and lay out with a stone for decoration.
For deep ponds with a steep bank, bags should be hung along the sides and filled with gravel to strengthen. You can fill the pond with water.
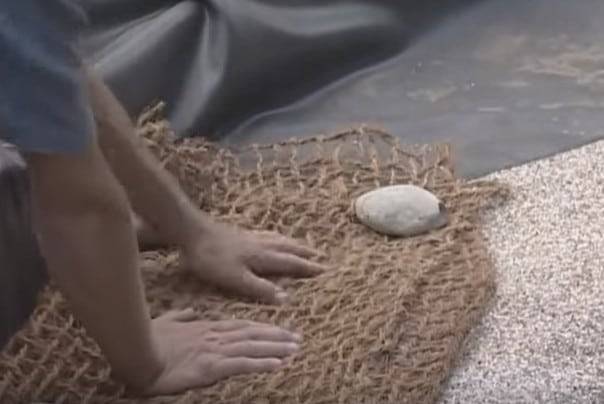

To decorate the shore, cut coconut mats and cover the edges of the pond, press down with stones.
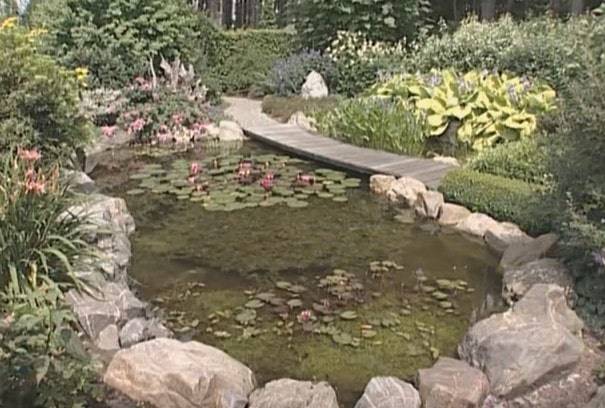
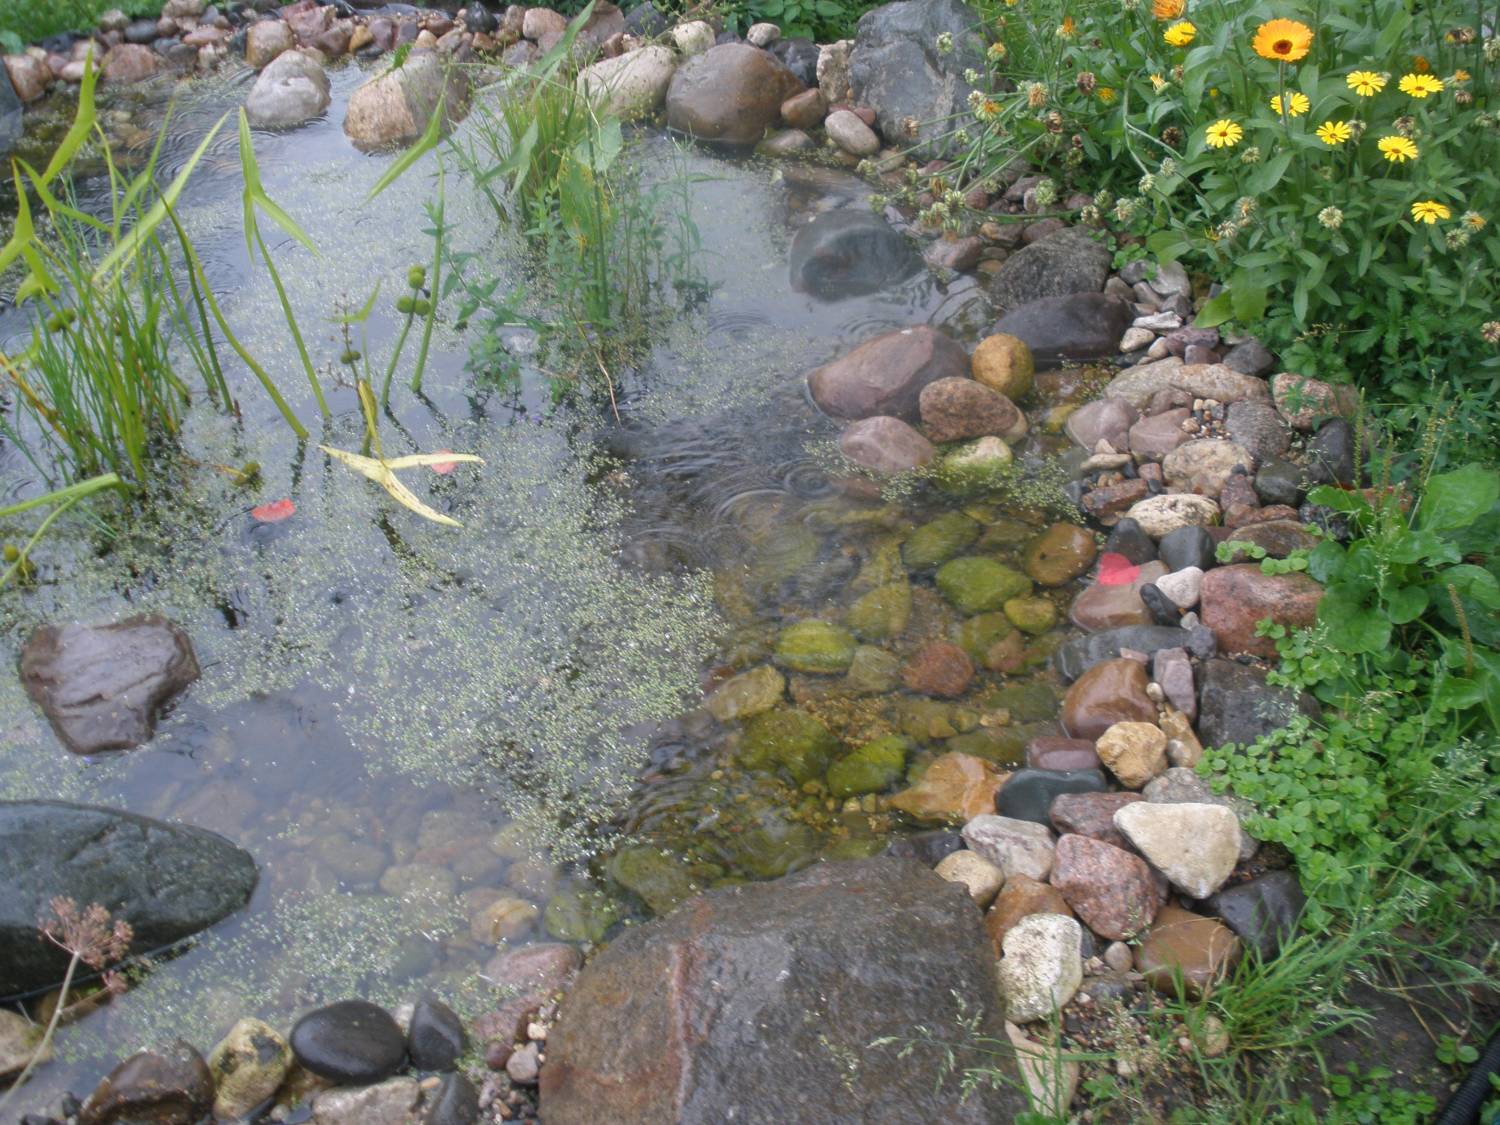
After that, you need to simulate the bed of the stream, lay out with stones, plant plants near the pond. For beauty, cover the coastal zone of the stream and pond with fine gravel. The edging of the reservoir can be laid out with natural stone, pebbles, home-made concrete slabs.
To keep the water in the pond clear and healthy, you can install any filtration system on the bottom. If you plan to run fish into it, you should consider some rules:
- No more than 1 kg of fish per 1 cubic meter of water.
- Fish need to be launched into the pond, taking into account the fact that it is growing. Initially, fish need to be launched weighing less than half.
- After the installation of the pond, it is better to wait about 1 month before launching the fish, so that the ecological balance and microclimate are established.
For beauty, lighting can be installed along the edges of the pond.
Seventh stage. We create an artificial reservoir
There are plenty of materials that can be used to create a reservoir, but we will focus on PVC film. The fact is that it is cheaper, takes the desired shape better, it can be repaired, and specific knowledge or skills are not required for work.
Step 1. First, choose the color of the film. There are several possible options here.
- Black film - it will turn the bottom into a mirror (plants, clouds, etc. will be reflected).
- Cream, blue - so the pond will look more like a pool, and the fish on a light background will be more clearly visible.
- Brown - will imitate the soil of natural reservoirs. Great option for a landscape pond.
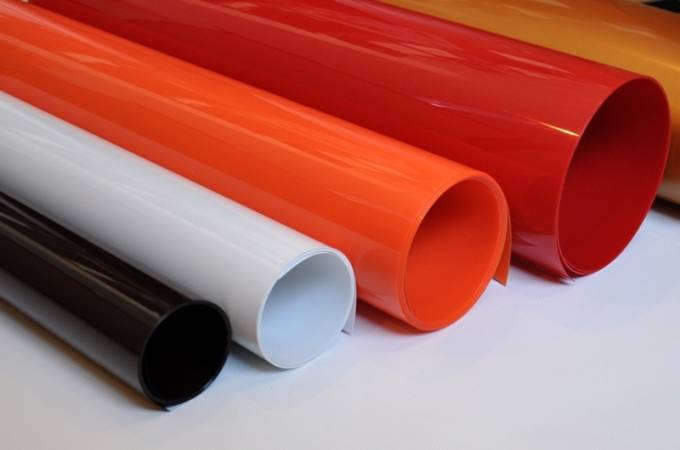
Films for a reservoir
Also, when choosing a film, we pay attention to the composition (PVC is more durable than PE) and thickness (for a pond, material thicker than 0.5 mm is required). Moreover, the greater the depth of the reservoir, the greater should be the thickness of the film
No less important is resistance to UV radiation and mechanical damage.
Step 2. Next, we calculate the dimensions of the film, for which we use the following formulas:
- pond width + (depth x 2) + margin (55-60 cm) = material width;
- pond length + (depth x 2) + stock (55-60 cm) = material length.
For gluing, we will use a special glue (for example, "Tagnit") or adhesive tape (Quick Seam 3).
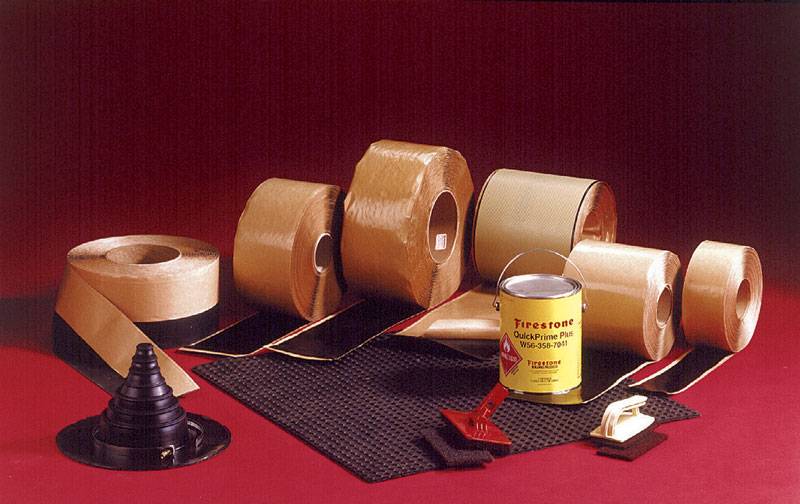
Quick Seam
Step 3. The next step is to create a schema.
Pond scheme
First, draw it on paper, and then transfer it to the ground. We indicate the dimensions of the steps or "shelves" for plants - this will avoid possible problems. For marking, use sand or a flexible garden hose (preferably a bright color).


markup
After that, we cover the marked area with a piece of light film and examine it from different angles. We make adjustments if necessary.
Step 4. We dig a ditch. To do this, perform the following steps.
- First we remove the sod.
- Then we dig the pit itself. At the same time, we move from the edges to the center, delving into the required places - it’s more convenient. For laying stone and decorating, we equip a ledge with a depth of 60-70 cm.
- We remove the soil, and with it the roots, stones, debris and everything that can damage the film. By the way, you can make an alpine hill out of the excavated earth.
Pit under the reservoir
When carrying out earthworks, we pay attention to ensuring that the banks of the future pond are located on the same line. If a waterfall is created, then we maintain the required height difference
Step 5. We lay the substrate. We carefully tamp the bottom of the finished pit, after which we proceed to the waterproofing layer, which will prevent the penetration of water into the soil.
The substrate can be made in several ways:
- we cover the bottom with stones and fill it with sand (this kind of waterproofing will lose its properties in a few years);
- we lay a layer of geotextile, which we fill up with sand (it will cost a large amount);
- we lay PVC film (the most reliable way, so we will focus on it).
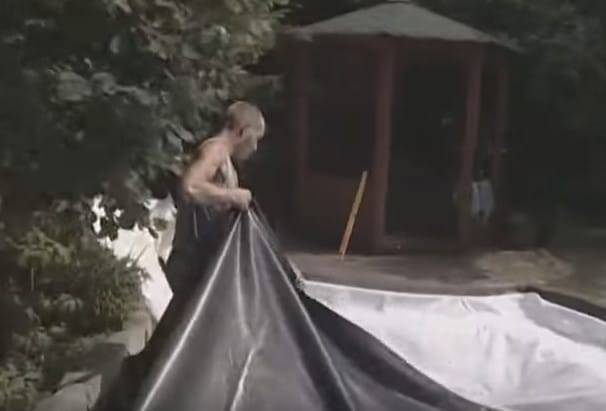
Step 6. Next, we lay the film, preferably on a sandy “cushion” (the latter will prevent damage from stones and other dangerous objects). It is advisable to lay on a hot day - heating up, the film becomes more pliable.
Film laying
This may cause problems with the formation of folds. We try to make one large fold, and not a large number of small ones, and then glue it or press it down with stones. The film must be loose, loose.
For its fastening, a swarm along the perimeter of an additional trench. We lay the film there, after which we fall asleep crushed stone. Next, we fill the trench with large stones with a flat bottom (so that the film does not tear). We lay the walls with round stones (flat ones will slide). At the end, we fill the pond with water - we serve it without pressure, directing it to the center of the pit.After two days, cut off the excess film.
Step 7. We strengthen the coast. Their slope depends on the type of soil: if it is sandy, then the walls should be sloped, if we are talking about clay or black soil, then vertical. The optimum slope angle should be approximately 45°.
The fortification itself depends on the type of coast.
If they are gentle, then you can use:
- geomat;
- geogrid;
- polymer geogrid.

Geomats and geogrids
You can also use a regular chain-link mesh, filling its cells with soil with seeds of perennial grass (for example, clover). There is another option - to strengthen the coast with shrubs or plants.
If the coast is steep, then we can use:
- piles;
- gabions;
- retaining walls.

Retaining walls, piles and gabions
It can also be effectively strengthened with the help of biological methods (planting). Ideally, biological amplification methods should be combined with engineering ones.
We make a pond with a film
By creating this artificial pond from a film, you almost exactly repeat the work described above, only without installing a bowl:
- mark out the shape of the future pond;
- dig a pit, forming, if necessary, ledges;
- clean the bottom of any sharp objects: roots, stones, etc.;
- level the banks of your pond;
- spread the waterproofing film;
- fill the pond with water;
- fix the edges of the film;
- decorate.
A country pond created using this technology may already be of a more respectable size. An important point: on loose soil, it’s just not possible to make a pit and put a film. We will have to come up with some measures to strengthen the coast. In this case, you will either have to put up a bowl, or make a more serious structure - from brick or concrete.Next, consider examples of how to inexpensively make a pond out of film.
First project: sides flush with the ground
Eight simple steps and your pond in the country is built. How to dig and equip a pond in the country, to make it look like a natural one, see the photo report.
Second project: sides raised
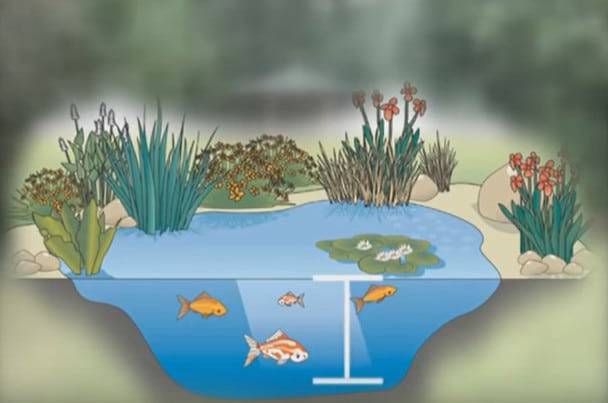
The second version of a home-made pond in the first stages is built in almost the same way as the first. Only after the depth of the pit reached the design one, the sides were raised, laid out along the edge with bricks and concreted. It turned out a reservoir with raised sides. There is also a water circulation system. It is shown in the figure below.
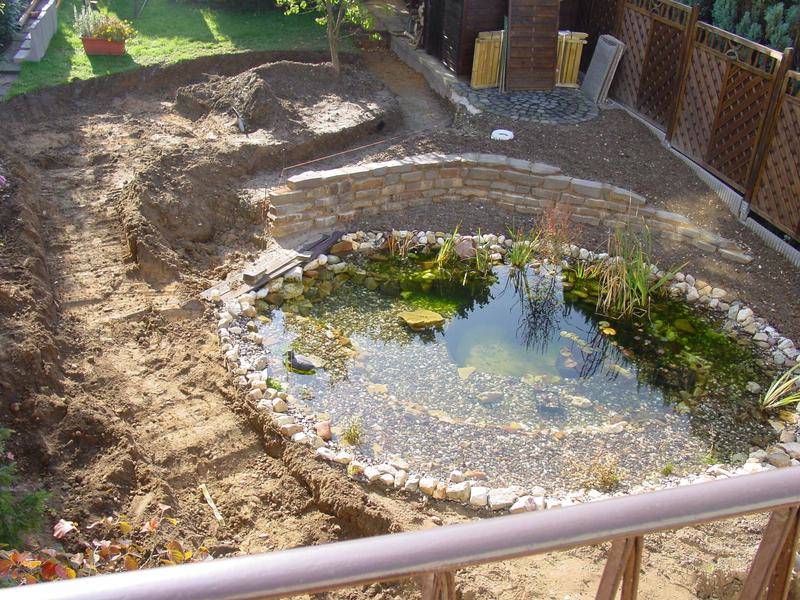


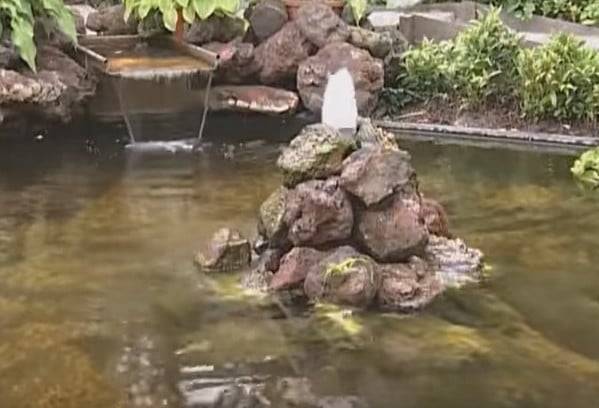
How to make a pond with a stream pump. Its arrangement is already a little more complicated, but the result is more decorative.
As you can see, this pond is more multi-layered and its volume is more serious. If you want to have a reservoir of at least a medium size and not build a serious bowl at the same time, you can do as shown in the figure: fill the created pit with sand, cover with geotextile, and only lay a film on top. Geotextile evenly distributes the load and does not allow plants to germinate. This is especially true if you are building a pond in your garden and there are bushes or trees nearby.
What kind of fish are bred in ponds
It is not recommended to take fish from open and public reservoirs - such representatives of the aquatic fauna can be infected. When choosing a species for the development of suburban fish farming, it is necessary to identify the goals of fish farming. Some varieties are suitable for eating, while others can create beauty. If fish is needed only for aesthetic pleasure, then you should choose among the following types:
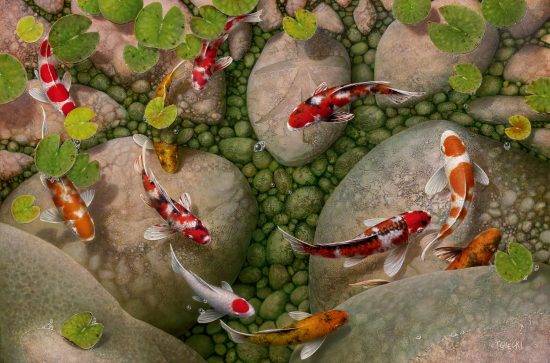
- Koya (Japanese carp) is a variegated fish with spots of gray, black and red.The required depth of the reservoir is from 2 m. You need to plant a lot of aquatic plants, and feed often, since this species is simply voracious. If you violate the rules for nutrition, there will be no algae and fry in the pond.
- Goldfish are the most common species for ornamental cultivation. The color can be not only golden - reaching a certain age, the scales can acquire whitish, orange and yellow hues. Goldfish breed very quickly, so you should not release a large number of individuals. Be sure to take them indoors for the winter.
- Minnow is a small colorful fish, up to 12.5 cm in size. The attractiveness of this species lies in its variegated color, the intensity of which increases during the spawning period. This species needs a lot of oxygen, so it is recommended to use an aerator. Many individuals should be settled in an artificial pond at once, since the minnow is more of a schooling fish.
If you plan to grow edible fish in a pond, then you need to consider that most representatives love the utmost cleanliness of the reservoir and are demanding of its depth. It is imperative to monitor the composition of the water when introducing such species. The most common representatives of the fauna for reproduction in an artificial reservoir for the purpose of catching as a food product are as follows:
- Carp is an undemanding fish that can eat any food. Up to 15 individuals can easily live in a small artificial pond. Certain temperature regimes are not needed, as well as a high concentration of oxygen.
- Tench is a fish that is rapidly gaining mass, with large areas of the reservoir. This species develops normally even with limited water aeration.But, the main disadvantage of tench is its thermophilicity - the indicators should not fall below 24ºC.
- Carp - under good conditions, this species develops rapidly. There is no need for a special depth of the pond, but there cannot be more than 2 individuals per 0.5 m². One of the features of this species is that individuals get used to constant feeding places. When it gets colder to 10ºC, the fish stops eating.
Note! If there are concerns about the possibility of timely feeding of fish in the pond, then you can pay attention to pike perch, ruff and goby. These species can remain without additional food for a long time, especially in the presence of living plants.


