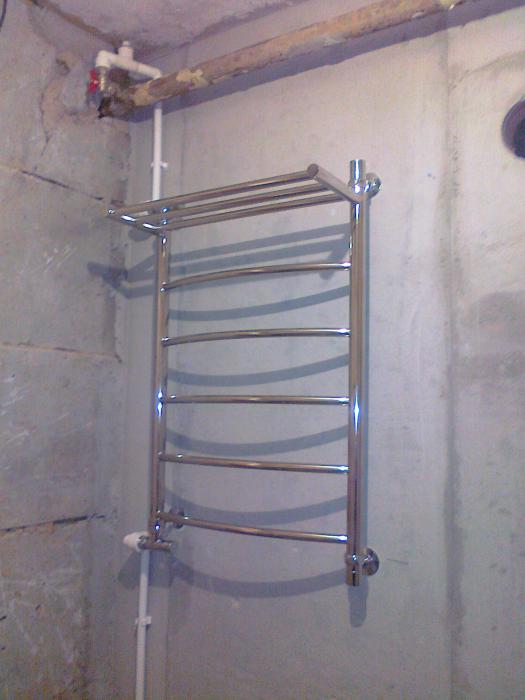
- Installing a new heated towel rail
- Installing a wall heated towel rail in the bathroom
- Constructions
- Design features of coils
- Welding of polypropylene pipes
- Device types
- The choice of device for drying by type of mechanism
- Dismantling the old towel warmer
- What should be purchased?
- Installing a new device
- Features of installing an electric heated towel rail
- Norms and rules of installation
- Installation and connection: step by step instructions
- Installation and installation of a new towel dryer
- Step-by-step instruction
- Necessary tools
- Dismantling of old equipment
- How to properly install bypass and ball valves
- Fastening
- brackets
- supports
- Fitting
- Installation, tightening "American"
- mark
- Hole preparation
- Fixation
- Tightening fasteners
- Installing a heated towel rail in the bathroom with your own hands: only what really fits
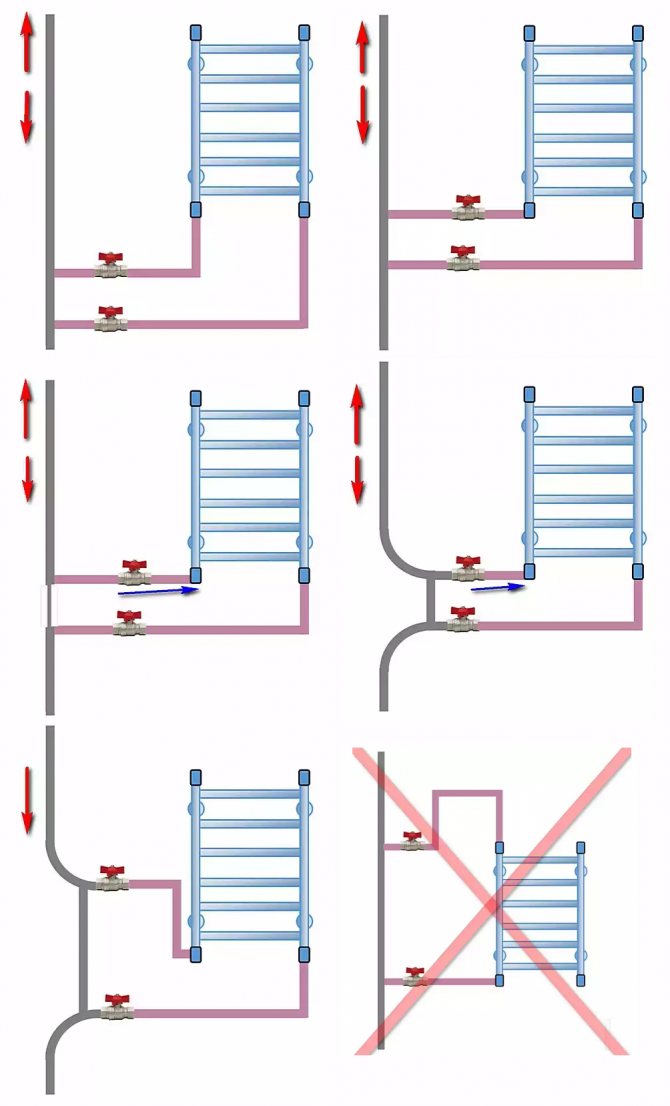
Installing a new heated towel rail
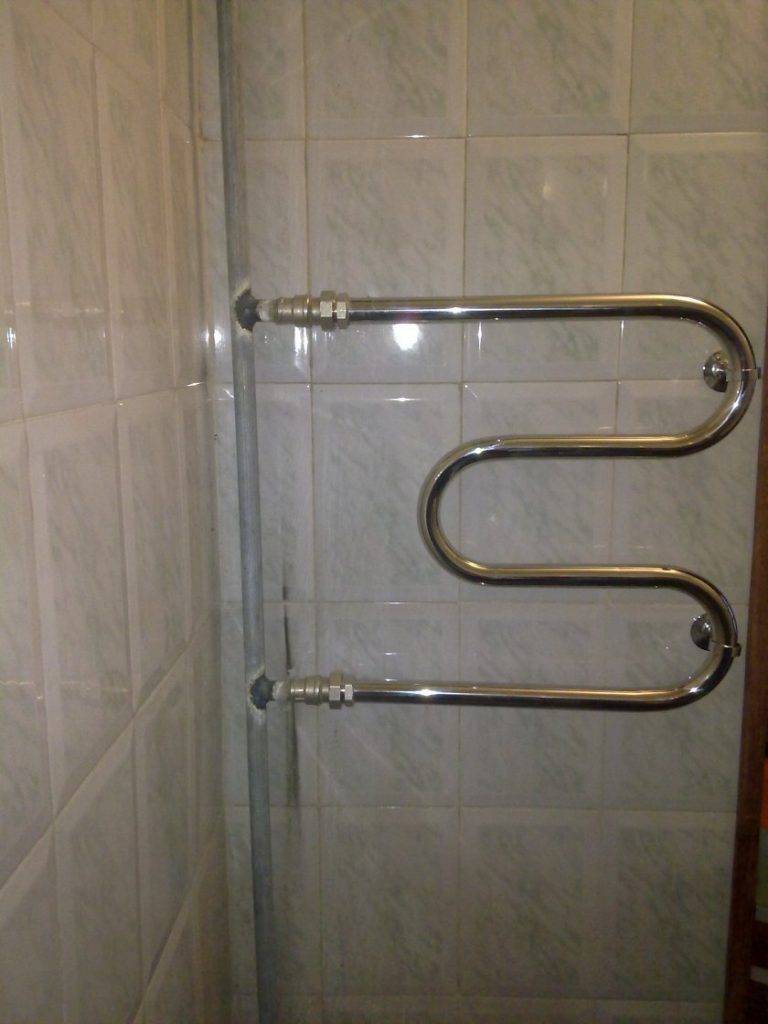
You can find the technical requirements for installing a heated towel rail in SP 30.13330.2012 (this is an updated SNiP 2-04-01-85). Popular connection schemes In order not to expose the wall and pipe to loads due to temperature deformations, the installation of a water heated towel rail should be carried out on hanging brackets, and not on a rigid mount.The mount for the heated towel rail must be at the same level so that the coil is fixed evenly, otherwise it may be torn off by pressure.
The serpentine must be 35 mm from the wall if its diameter is less than 23 mm, and set back by 50 mm if its diameter is greater than 23 mm. It is also not recommended to mount it further than 2 meters from the riser.
After completion of work, check all connections for leaks. They must be absolutely dry.
Tow can be used to seal the threads of steel or copper pipes. It is forbidden to use it for polypropylene: for this there is a fum tape, a tangit unilok thread. There are also special adhesive-sealants, but their use will not allow you to disassemble the connection anymore.
In the video you can see how the installation of a heated towel rail in the bathroom with your own hands:
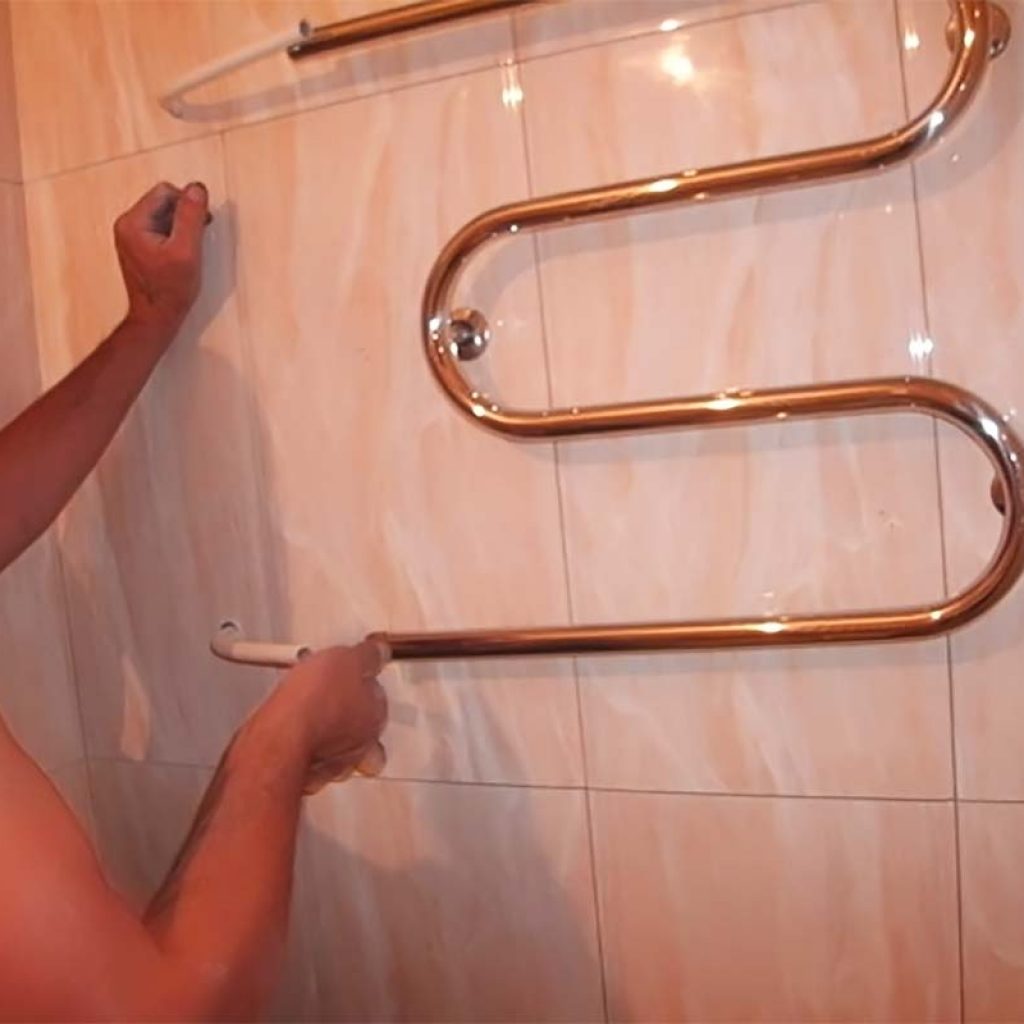
Installing a wall heated towel rail in the bathroom
So, when all the materials and tools are prepared, you can install the plumbing unit. Additionally, before starting work, you should inform the Housing Office that you are going to turn off the hot water (this should be done if you live in an apartment building). Then it is necessary to install a bypass on the hot water riser, which has three valves. Thus, in the future it will be possible to carry out the installation of a heated towel rail without shutting off the water. It's much more convenient and safer.
Next, attach the brackets to the wall. The coil will be fixed directly in them in the future. The brackets must be connected to the valves located on the bypass. This can be done using bushings or using special fittings.When you perform this step, do not forget about the use of special sealing gaskets.
We install a heated towel rail with our own hands video
Upon completion of installation work, in order to avoid water hammer, the valves must be opened very slowly.
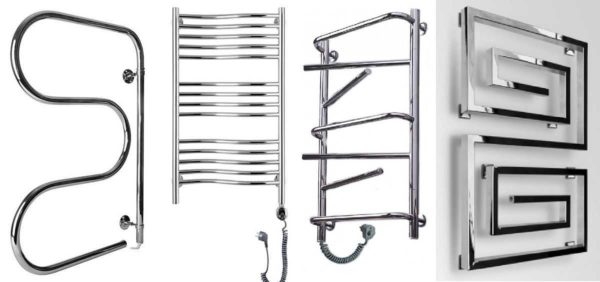
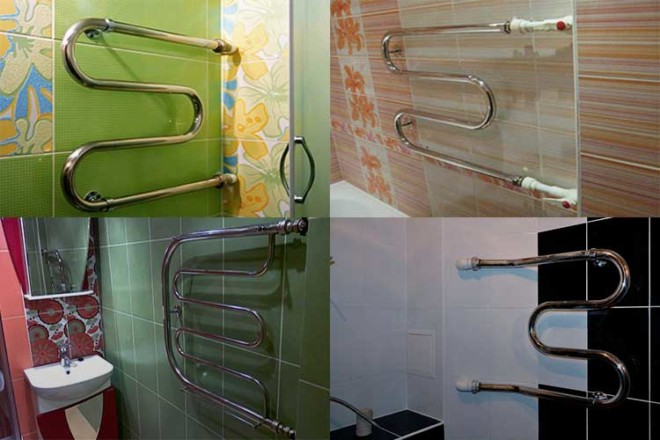
Constructions
All heated towel rails can be divided into three large groups:
- classical form;
- ladder;
- design.
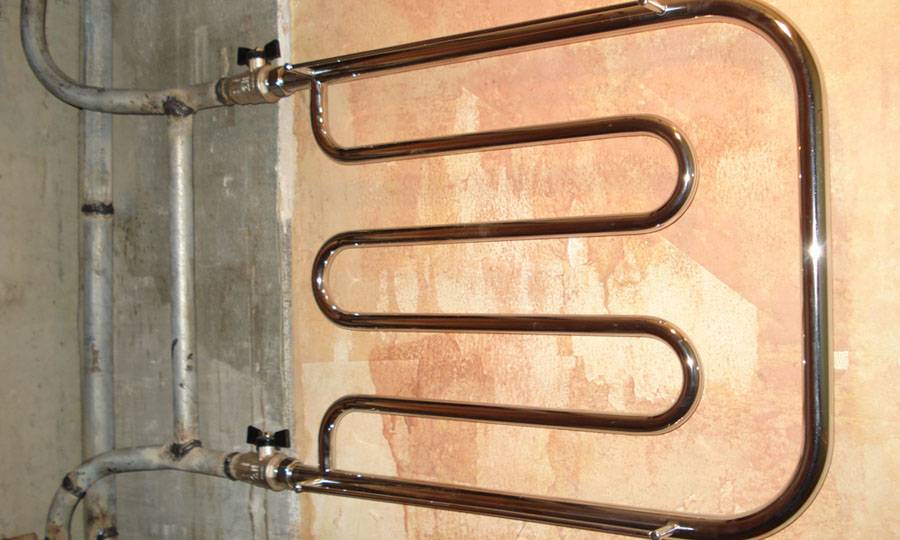
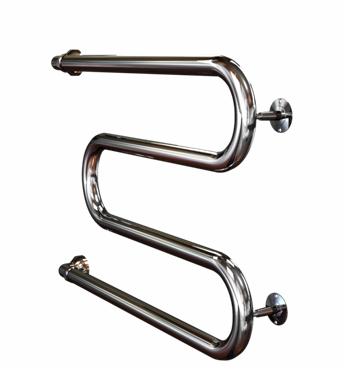
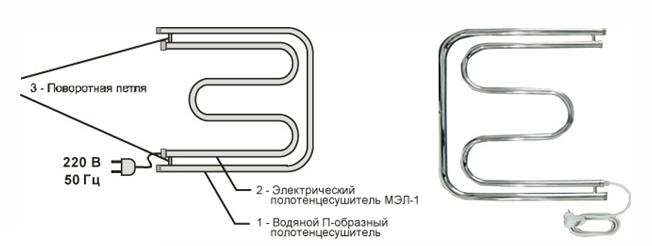
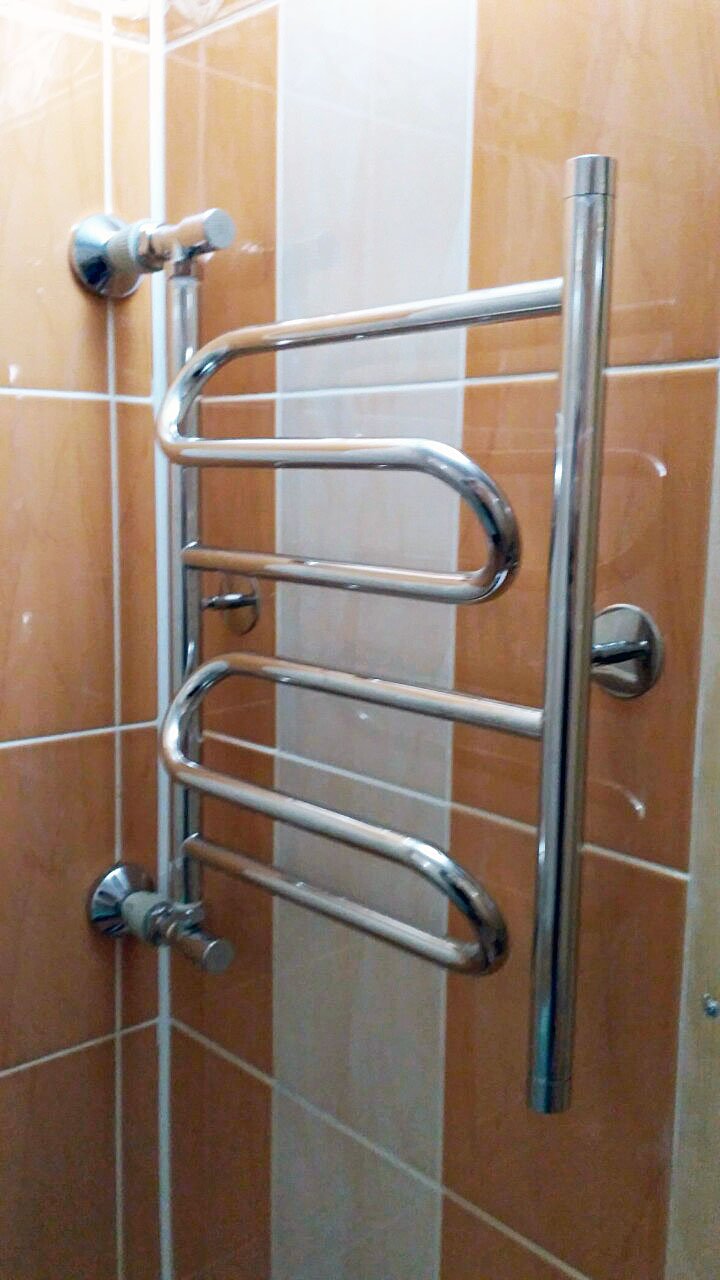
Classic-shaped electric towel warmer - not too complicated designs such as C-shaped, P and M-shaped, S-shaped, snake or zigzag. Such forms appeared first, they were made by arching the pipe of the riser. Modern designers combine them, so that interesting models are obtained. But even the simplest in form - just racks of one or two pipes - look very non-trivial in a suitable interior.
Even traditional shapes can be interesting
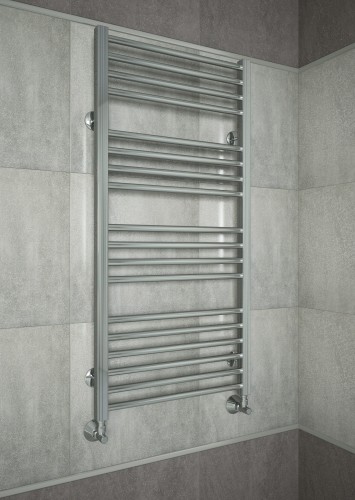
Ladders are a more complex design of heated towel rails. They consist of one or more racks that are connected by a number of jumpers. Jumpers can be hollow inside (tubes), a cable can be laid in them, a coolant (water, oil) can flow. But they are also made simply from metal plates - increasing the heat transfer area.

You can always find something interesting
Designer models of electric heated towel rails can be very unusual. Some build a mirror into them, some perform in the form of a variety of shapes. It can even be found in the form of animals, fish, flowers. It is primarily a decoration. It is unlikely that you will dry clothes on such a device.
Design features of coils
Even 5-7 years ago, hardware stores did not have such an assortment of fasteners for radiators, so the holder was a simple metal hook fixed in the wall.
Unfortunately, such an installation could not boast of reliability. In today's realities brackets are the best fastening element. They consist of the following elements:


- Mounting shelf (shield with holes for screws) - at the base of the coil, a special shelf is implemented, which is directly mounted to the wall (for example, with self-tapping screws on the tile). For the most reliable fixation, 2 self-tapping screws are driven into each shelf.
- Shelf leg - on one side, the leg has a ring for fixing the heated towel rail, and the other side is firmly connected to the mounting shelf. The height of the legs is no more than 5 cm, and this is quite enough to firmly fix the heated towel rail to the wall. In rare cases (especially for a small bathtub), you can choose a fixture with a telescopic leg, which can be shortened or lengthened.
- Fixation ring – the ring is fixed on the pipe of the device to exclude its backlash.
Heavy serpentines and designer models require extra wall mounting points to evenly distribute the weight. Fasteners can be 28, 32, 38 mm and depend on the diameter of the pipe.
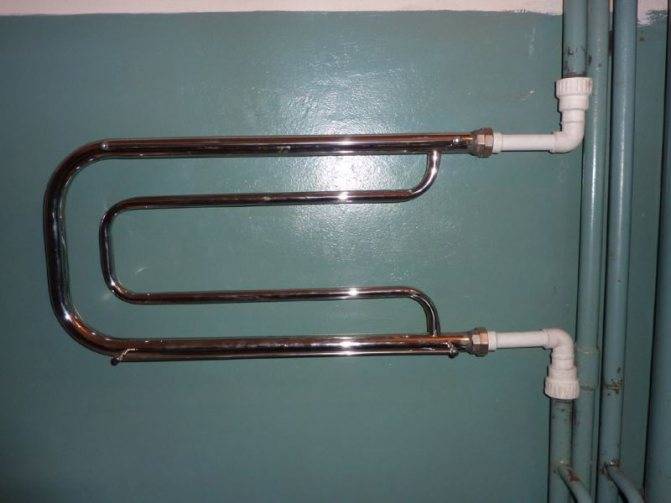
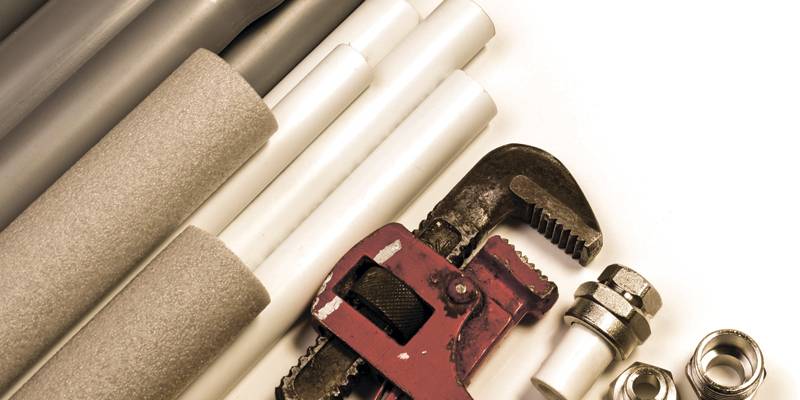
Welding of polypropylene pipes
We will connect the heated towel rail using polypropylene pipes. Why polypropylene? This is the best option.
The most common materials for supply pipes are steel, copper, and polypropylene:
- Steel pipes are heavy, subject to corrosion, and a welding machine is required for installation.
- Copper ones do not rust, but are very expensive and are mounted by soldering.
- Polypropylene are not subject to corrosion, are cheap, have small weight. Reinforcement with a special fiber significantly increases their strength and resistance to high temperatures. The presence of a variety of fittings makes it easy to connect polypropylene with metal pipes. Mounting them is very easy. For this, there are special welding devices that can be mastered in just half an hour and freely make high-quality connections. In addition, these devices can be rented at most shops selling plastic pipes and building materials. This service costs about 400 rubles per day.
You can read more about soldering and installation of polypropylene pipes here.
Device types
Currently, heated towel rails are produced in the following types:
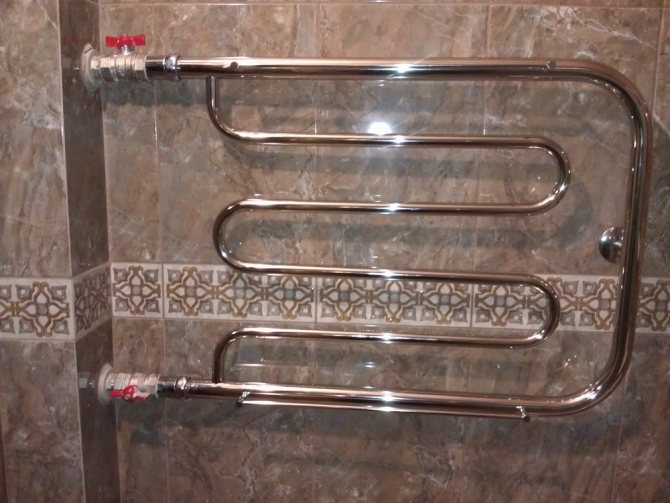
water. Hot water circulates through the pipes of the device, obtained from the heating or water supply system. If the water heated towel rail is connected to the heating system of the house, then it will only function during the heating season. If the heated towel rail is connected to a hot water pipe, the device will heat up when the user turns on the water;
Hot water heating device
electrical. Inside the pipe there may be an electric wire that heats the device or a liquid heated by the heating element. Electric heated towel rails are distinguished by the fact that they can work all year round at the request of the user. However, they significantly increase the cost of electricity;
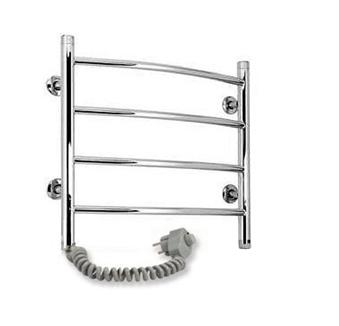
Device that works when connected to electricity
combined. Devices can work both from the heating system in the corresponding season, and from the heating electric heater (at other times). Combined heated towel rails are the most popular.
A device that can work both from heating and from electricity
Different types of towel warmers can also be of different shapes and sizes, depending on the free space of the bathroom.
The choice of device for drying by type of mechanism
To date, manufacturers of heated towel rails offer three devices that differ in power source:
- hot water supply: the heated towel rail works all year round, however, there are interruptions when preventive maintenance is carried out; air pockets often form in pipes, hard water salts settle on the pipe walls, reducing the diameter;
- central heating system: the device works only during the heating season, which is unprofitable, because most of the year the heated towel rail plays the role of an ordinary towel rack;
-
electricity: new models powered by electric current are more functional; they are easy to install, you just need to attach it to the wall and plug it into the socket.
There is a fourth type - this is a combined device that can operate both from electricity and from a heating system or hot water supply.
For the manufacture of such a radiator (regardless of the principle of operation), several metals are used:
- stainless steel;
- brass;
- copper;
- black steel with nickel plating.
In the domestic market, you are more likely to find stainless steel products with chrome plating.However, if you decide to make a heated towel rail with your own hands, it is better to use brass or copper, that is, non-ferrous metals.


Experienced professionals in home construction do not use black steel, since its service life is short, rust will quickly overcome the dryer just like stainless steel - the material is subject to corrosion.
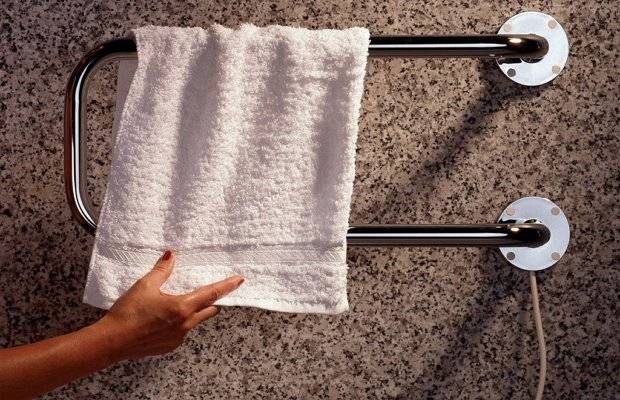
It is worth noting how practical the choice of a combined drying device will be. In cold weather, you can use the heating system, and in the summer, electricity. As noted by the reviews, it is quite difficult to find such a device, but it is easy to do it yourself.
This heated towel rail will always keep your towels warm.
Dismantling the old towel warmer
First of all, contact the organization serving your water supply and heating networks so that they turn off the hot water supply at the time of your dismantling work. And only after that start removing the old dryer.
In addition, when removing the old coil, it is necessary to pay attention to the wear of the riser to which it was attached. If its condition already leaves much to be desired, then it makes sense to replace it partially or completely
It will also be useful to ask the opinions of neighbors from above, below. Suddenly they will support the idea to change the riser completely. Even when you replace only at home, it is necessary to do this in such a way that the ancient pipes do not remain in the ceilings, and the junctions with the new sections are accessible and visible. Having outlined the required segments, cut off part of the riser with a grinder along with a dryer.
 Pipe threading
On the cut ends of the pipes, it is still necessary to cut the thread.For this, a special threading machine is useful. In specialized markets, they sell and rent this tool. From the ends of the cut pipe, chamfer with an impeller, install the lerk of the required caliber in the tool socket and, having fixed it well at the end of the pipe, simply cut the thread.
What should be purchased?
Wiring diagram for a heated towel rail.
To install a universal electric type of heated towel rail for the bathroom, you should first stock up on a new plumbing fixture. At the same time, you need to be careful and not choose any device, because the usual snake, inherent in many designs, will not be appropriate. It would be most rational to choose a heated towel rail. created like a ladder and equipped with four points of contact.
In addition, you should purchase the following tools:
- a special electric heating element equipped with a thermostat;
- Mayevsky's crane;
- 1-2 m pipes made of polypropylene or plastic (with all the turns and end switches necessary for a heated towel rail).
Installing a new device
Now let's move on to the instructions on how to properly install a water heated towel rail
In this matter, it is important not to rush in order to avoid unnecessary distortions, especially if you are doing such an operation yourself for the first time.
Features of installing an electric heated towel rail
As mentioned above, do-it-yourself installation of a device with electric heating is much easier, but it is necessary to remember the features related to the safety of its operation.
These tips are few, but the importance of each of them can hardly be disputed.
Installing an electrically heated fixture
If the outlet to which the device is connected is located in the bathroom, it must be waterproof and have a special cover that isolates from water.
Grounding is a prerequisite to prevent the formation of static electricity on the surface of the dryer.
Use an automatic power cut device


The condition is indisputable if you do not want to get an electric shock during water procedures!
It is advisable to use concealed wiring to prevent moisture from entering the wire.
When buying, you need to pay attention to the type of electric dryer. Oil-containing - require rigid fixing in one position, warm up for a long time and cool down slowly, but grounding is an indispensable condition
Cable - can be rotated as convenient, heat up quickly and cool down quickly, grounding is desirable, but not necessary.
Norms and rules of installation
All requirements for connecting the dryer to the hot water supply system can be found in SNiP 2-04-01-85.
Pipes, couplings, bends are assembled into one piece by means of a special soldering iron.
To connect the purchased heated towel rail, you can also use copper and metal-plastic pipes, but here you need to take into account a number of features. In modern half-inch pipes made of metal-plastic, the cross-sectional diameter is smaller than in plastic ones. In addition, they do not withstand strong pressure drops well.
Copper pipes, despite their durability, will cost a very large sum, and their welding requires special skills and special precautions.
If you want the heated towel rail to perform its functions normally, it is necessary to ensure a slight slope of the supply pipe in the direction of the hot water flow. For the entire length of the eyeliner, its length is from 5 to 10 mm. The water flow must pass from the top point of the heated towel rail circuit to the bottom. For this purpose, the upper radiator bell is simply connected to the hot water riser.
Be sure to make a gap between the surface of the walls and the pipes of the circuit. It is 35 mm for pipes with a cross section of less than 23 mm, and 50 mm for pipes with a cross section of more than 23 mm. All distances are easily adjusted with a pin, which is screwed into the bracket, however, there are also completely fixed mounts where this distance cannot be changed. The structure that supports the strapping should not be fixed too rigidly in order to compensate for all the thermal expansion of the pipes and at the same time not to load the wall sections that carry them.
Installation and connection: step by step instructions
Before starting the installation, it is useful to lay out on the floor both the device itself and all the fittings for it, in order to once again clarify all the dimensions. To do this, you can even dry-assemble all the connections. Nobody canceled the proverb about measuring seven times!
- We mark the installation dimensions of the new heated towel rail on the wall.
- Having chosen the location of the future unit on the wall, it is necessary to carefully examine it for the passage of internal communications, both pipeline and electrical. Special devices - metal wire detectors - can help with this.
- We drill holes, insert dowels and hang the device on the wall, fixing it with screws or bolts.
- We cut the threads on the cut ends of the pipeline.
- We prepare the jumper-bypass by carefully marking and installing tees-outlets for the heated towel rail and a shut-off valve on it.
- During operation, we seal all connections with sanitary tow or Teflon tape.
- We install it in the cutout of the riser using spurs, straight couplings and lock nuts, so that the tee outlets are exactly opposite the inputs of our device.
- Spurs of different lengths are used to adjust the installation dimensions of pipeline sections and simplify their connections. They have cut threads at the ends: short on one side and long on the other.
A lock nut and a coupling are screwed onto the long one. A tee, angle or valve is screwed onto the pipe on one side. They are screwed with a short thread, which is then connected to the other side of the pipe by a coupling with a long threaded end and fixed with a lock nut.
- We fasten shut-off ball valves to the taps, and connect the inputs of our unit with them.
- We open the ball valves to the heated towel rail, and close the valve on the bypass.
- We open the general valve of the riser. If there is water pressure in the system, carefully check the connections made for tightness.
All! Our new heated towel rail is ready to go. In this video you can watch the process of dismantling and installing a new heated towel rail in the bathroom with your own hands:
Work on the pipeline system of an apartment building should be carried out after agreeing them with the management company, only with sufficient experience or under the guidance of a qualified craftsman.
Modern heated towel rails can be quite complex in design, such as double-circuit ones.Before installing them with your own hands, you should study all the technical specifications and installation rules.
You also need to remember that some units must be selected for galvanic compatibility with metal pipelines of the materials from which they are made.
Installation and installation of a new towel dryer
Self concluded in the following steps:
-
A selection of the type of installation - water, electric or combined.
-
Choice of connection method - to hot water or heating riser.
- Fixing a pre-assembled structure (towel dryer coil) purchased at a hardware store on brackets and connecting the ends of the installation to a hot water or heating riser.
- Calculation of the distance from the wall to the axis of the aluminum coil pipe, which depends on the diameter of the pipe itself. For example, if the diameter of the coil pipe is less than 23 mm, then it is recommended to take the distance to the wall at a rate of at least 35 mm, with a larger pipe diameter - more than 50 mm.
- Check for tightness of the coil fixed on the brackets.
- Compliance with the installation of the coil of a special slope (about 5-10 mm) so that the water coming from the heating riser or hot water pipe moves according to the scheme from top to bottom.
The event is quite complex and responsible, therefore, in case of uncertainty in one's capabilities, it is best to entrust the change of the coil in the bathroom to professional plumbers. They will perform the installation with high quality, with a guarantee, much faster than you and for a reasonable amount.


Step-by-step instruction
The order of installation and connection to the system that provides the supply of coolant does not depend on the selected scheme.
Necessary tools
The type of tools is selected based on the type of heated towel rail. Coils are generally supplied with all parts required for installation. Additionally, a soldering iron and a knife may be required if polypropylene pipes are used.
Dismantling of old equipment
Before proceeding with dismantling, it is necessary to coordinate these works with the management company (if the coil is installed on the wall in an apartment building). Then you can remove the old heated towel rail.
In this case, two options are possible:
- Union nuts are unscrewed, through which the dryer is attached to the supply lines.
- The coil with the help of a "grinder" is cut off from the supplies. The rest of the latter should be enough to cut the thread.
In both cases, the length of the supply pipes must be sufficient to insert the jumper.
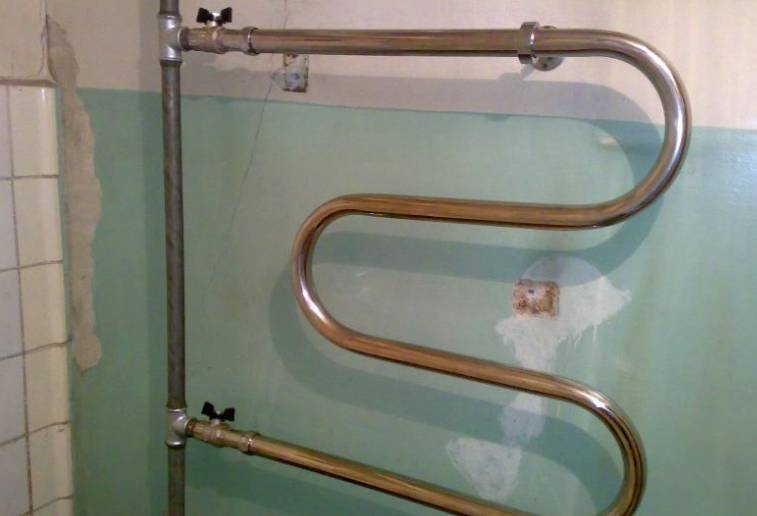
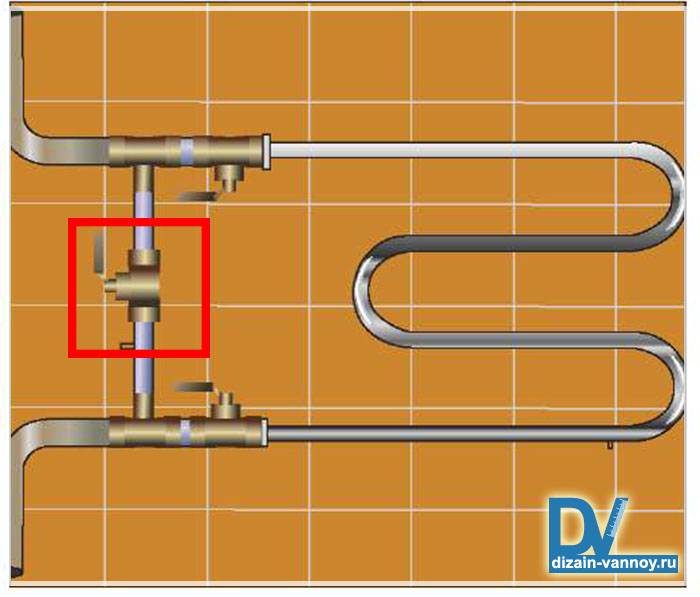
How to properly install bypass and ball valves
You can hang a heated towel rail without a jumper. However, most plumbers recommend installing the latter. The bypass is mounted on couplings pre-cut into the pipes. If necessary, threads are cut on the inlets. If work is carried out on steel pipes, then a bypass of the same section is welded to the latter. Ball valves are mounted at the ends of the coil. In this case, it may also be necessary to thread the old pipes.
Fastening
As mentioned above, various fasteners can be used to install heated towel rails, regardless of the type of coil.
brackets
Arms are subdivided on telescopic and demountable.The order of installation of these fasteners in both cases is the same. Installation is carried out as follows: marks are applied to the wall, along which holes are drilled. Then a bracket is screwed into the latter by means of anchors and screws. Telescopic models are convenient in that they not only fix the heated towel rail, but also allow you to adjust the gap between the pipes.
supports
Like detachable fasteners, supports can be attached to the wall using self-tapping screws or screws that are screwed into the wall. Such elements are rarely used to fix the coolant pipe, as they create certain difficulties during installation.
Fitting
Fittings are used to fix the supply pipes to the heated towel rail. There are several types of these fasteners, each of which is used in the appropriate conditions: "American" (with a union nut), plugs (close unused inputs), manifolds (create a separate branch), and so on.
Installation, tightening "American"
"Americans" are mounted at the outlet of the heated towel rail. The thread before starting work is treated with a sealing paste, and then the nuts are tightened. When performing the last work, it is not recommended to apply excessive efforts.
mark
In order to determine the points at which holes for installing fasteners will be drilled, it is necessary to attach the heated towel rail to the outlet pipes, align it with the building level and make appropriate marks on the wall.
Hole preparation
When installing coils, it is recommended to make deep holes. To do this, you need to drill a concrete wall. Then you need to insert dowels into the holes obtained, into which the screws of the fasteners will be screwed.
Fixation
Before installation, fasteners are put on the pipes of the heated towel rail, which are then screwed to the wall with screws. In this case, it is recommended to use brackets, since the latter allow, after installation, to adjust the position of the coil according to the level and relative to the supply pipes and the wall.
Tightening fasteners
At the last stage, all fasteners and fittings are tightened with an adjustable wrench. With excessive force, you can strip the threads, because of which you will have to repeat the described procedure.
To check the performance of the system, you need to slowly, in order to avoid water hammer, open the inlet and outlet stopcocks. Water should not seep through at the pipe connections.


Installing a heated towel rail in the bathroom with your own hands: only what really fits

So, in most cases, in the bathroom, where it is necessary to install a heated towel rail, there is a special supply, where the insert will be made. However, it happens in different ways and such a convenient thing may not be provided.
Moreover, it is extremely important that as a result you did not succeed, the so-called small ring, which completely devalues the operation of the heating device, as well as a convenient towel dryer. Among other things, modern industry offers several types and types of such devices:
- Electric-type towel dryers that are powered by the mains, and they are not entirely safe in fairly humid areas, such as a bathroom.
- Combined dryers for linen and towels, in which any liquid, water, fuel oil, and so on is heated by electricity.
- Water heated towel rails, which can be connected in two ways - to the general heating system of the apartment or at home, as well as simply to the pipe through which hot water is supplied.
Need to know
The most common types of drying, of course, were, are and remain precisely water ones, which you can easily connect with your own hands and not worry about the consequences. To connect them, you need to have two main pipes: inlet and outlet. Moreover, you should carefully monitor the correctness of the tie-in, otherwise a deaf ring may form, which can completely nullify the functionality of the dryer, and even cut off the access of hot water to the neighbors, for example, to the heating battery.
Since really the easiest to install, as well as the most popular on the market, due to the simplicity of design, and, consequently, lower cost, are dryers for water-type towels, then we will talk about them. Having figured out how to install a water heated towel rail, you will already be ready to perform other plumbing repairs in the house, but this is worth talking about later.


