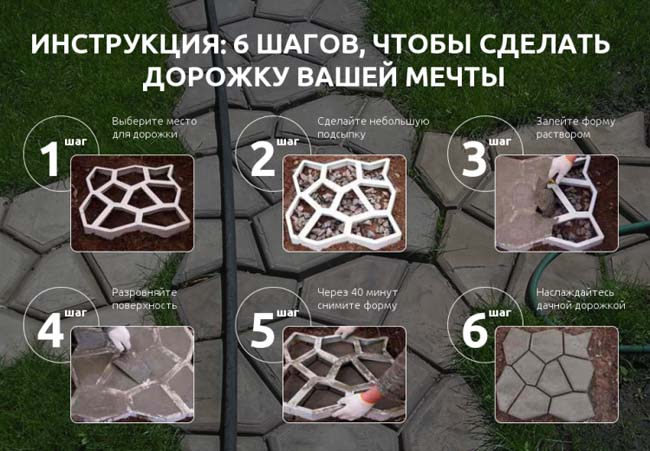
- Rules for working with a concrete mixer
- Helpful Hints
- Which tile is better - homemade or industrial?
- Work Safety Measures
- How to prepare a mixture for making pavers
- Drying and stripping
- Advantages and disadvantages of paving slabs
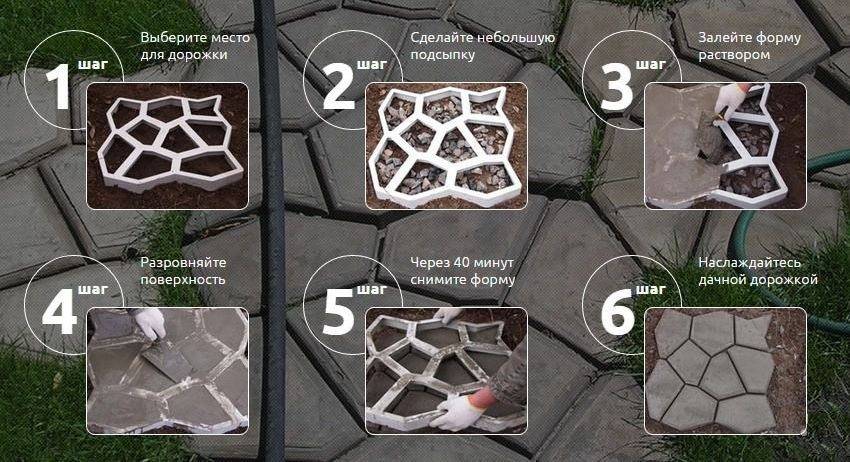
- Laying process: step by step instructions
- Advantages and disadvantages of homemade tiles
- Table: comparing the advantages and disadvantages of artisanal paving slabs
- Types of concrete material for creating paths
- Finished tiles
- Filling in forms
- Monolith pouring
- stamped concrete
- colored concrete
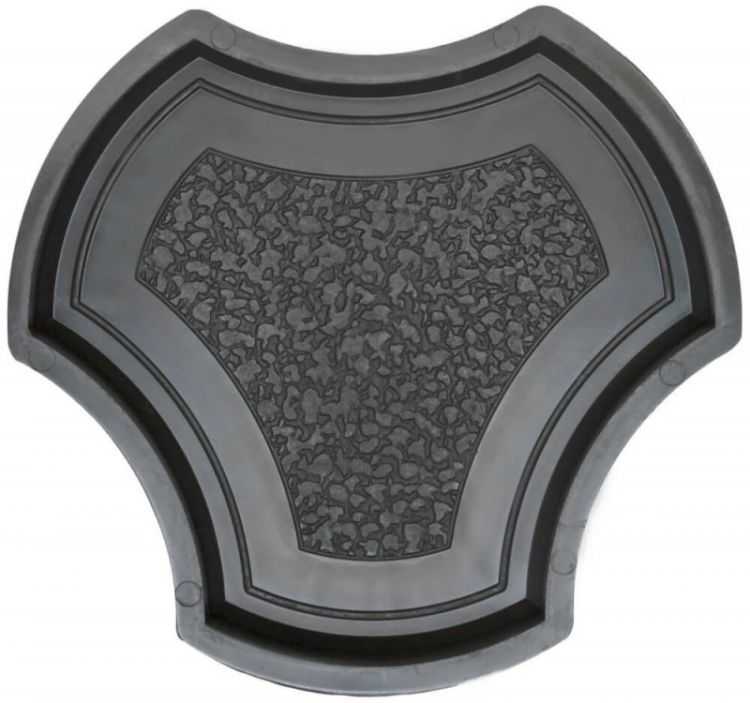
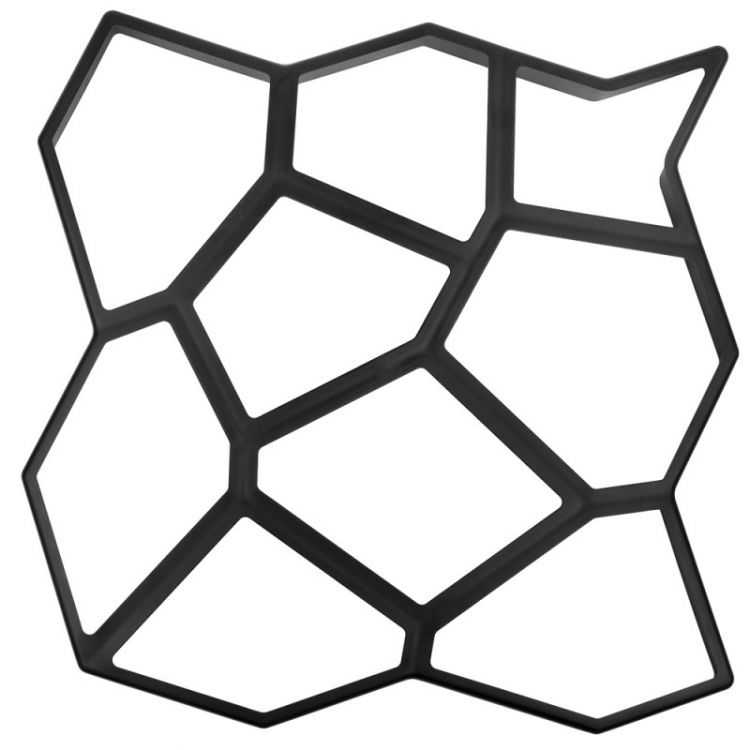
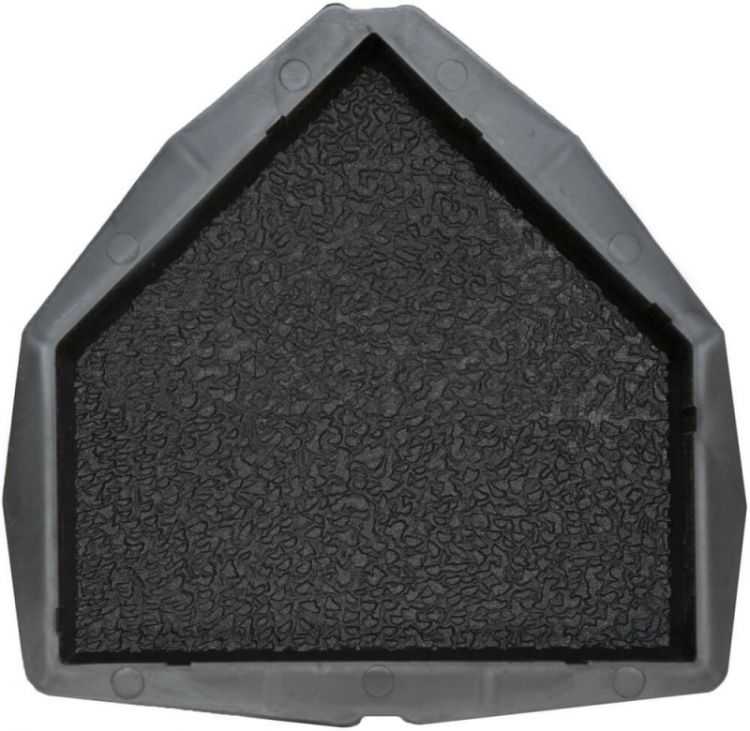
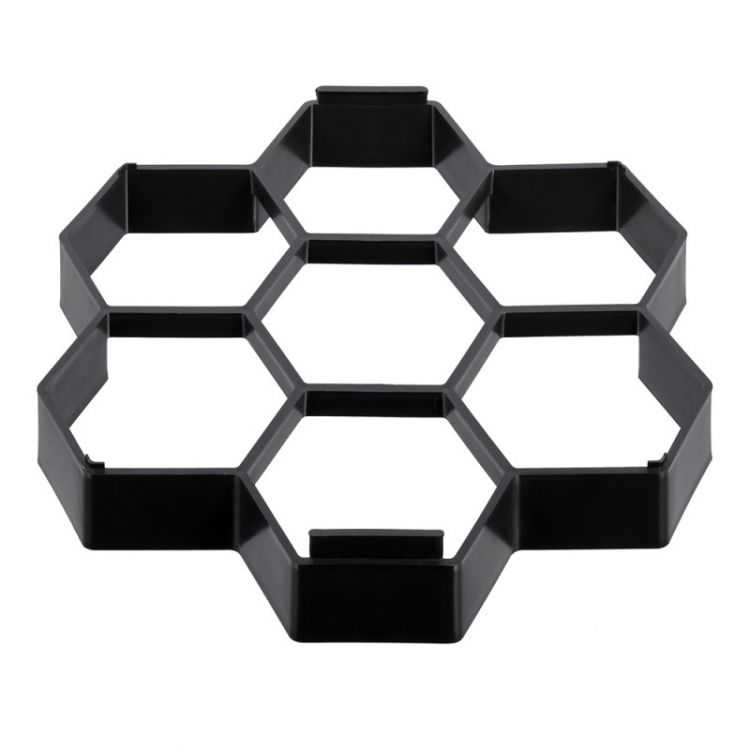
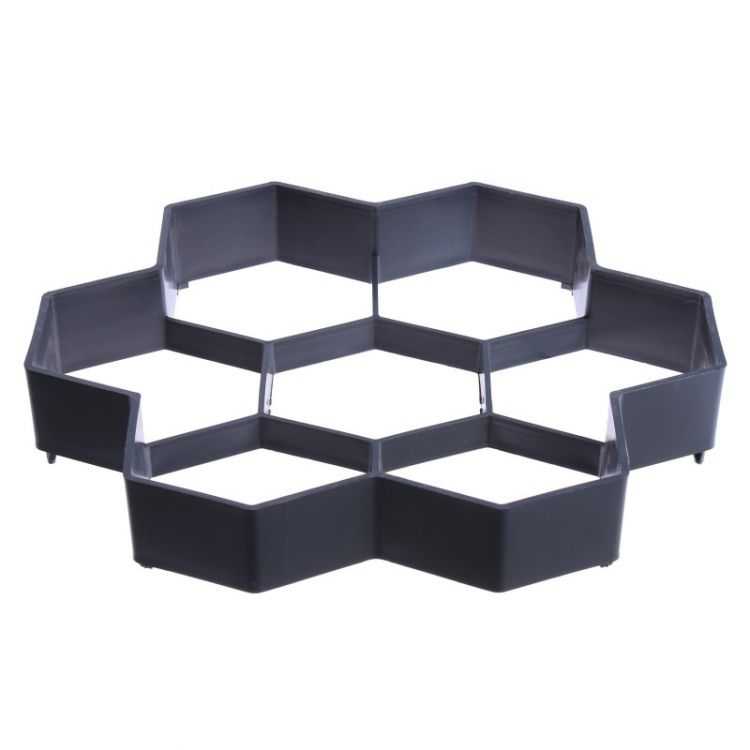
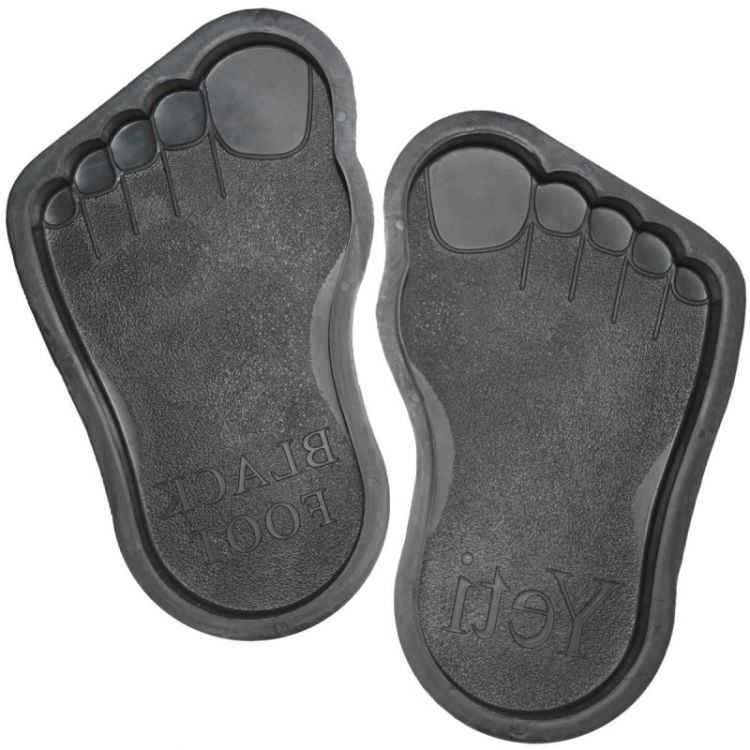
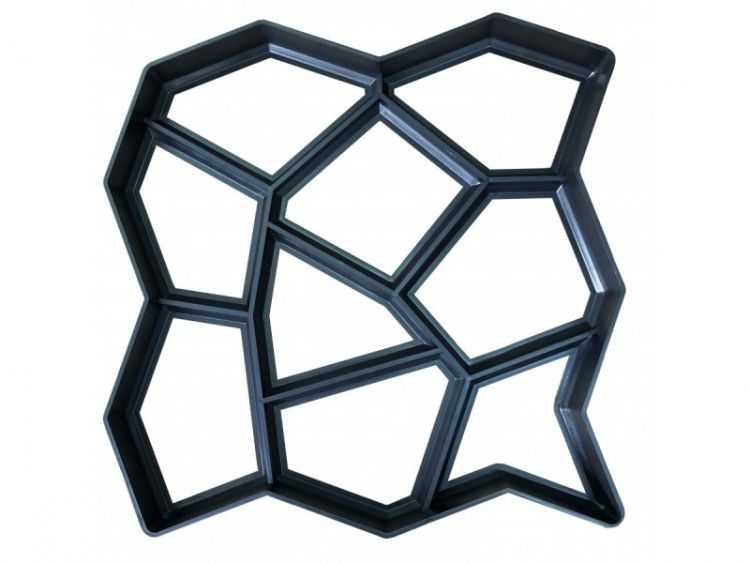
- How can the form be used?
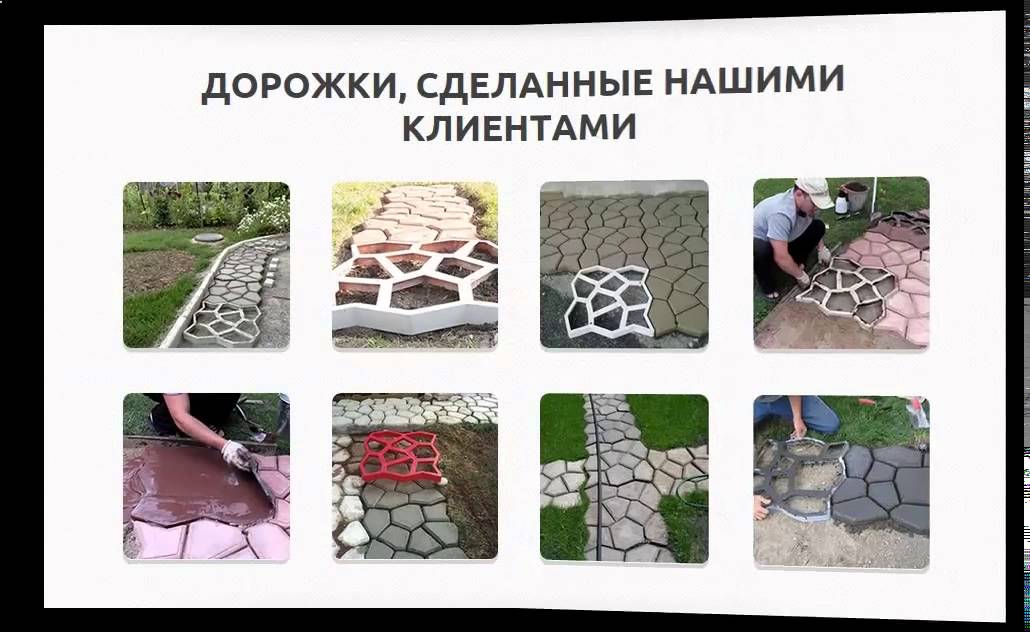
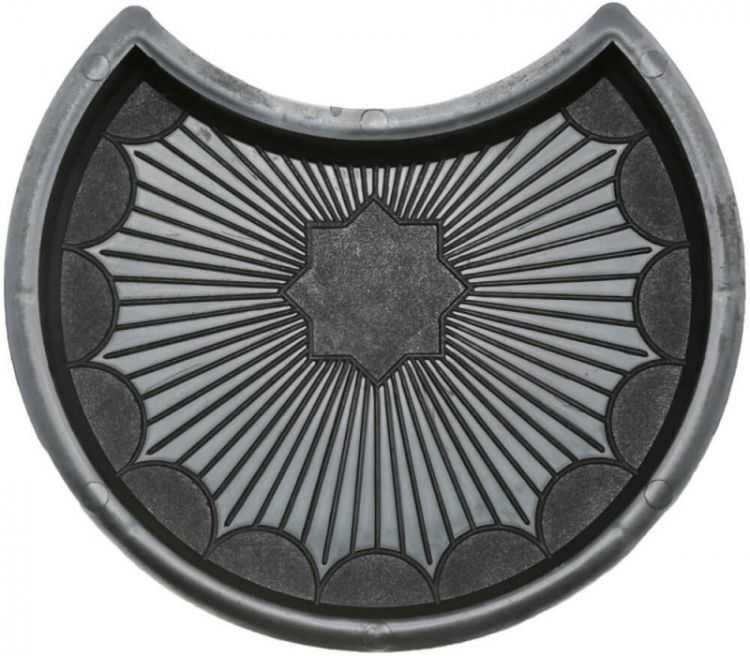
- Textures and design of paving slabs
- Mortar for paving slabs - proportions, composition, preparation
- The composition of the mortar for paving slabs is given in the table
- Solution preparation
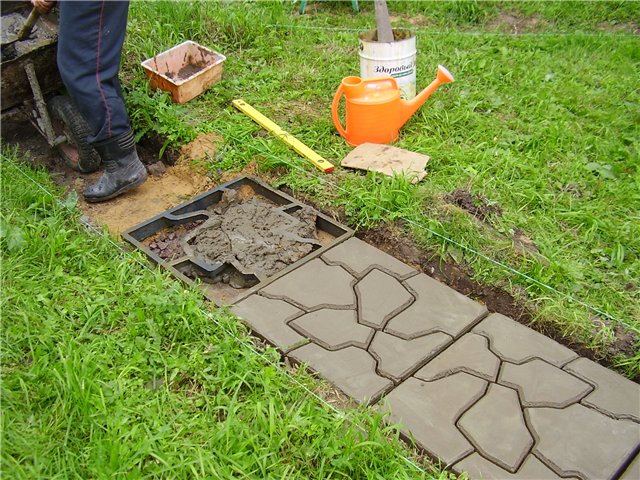
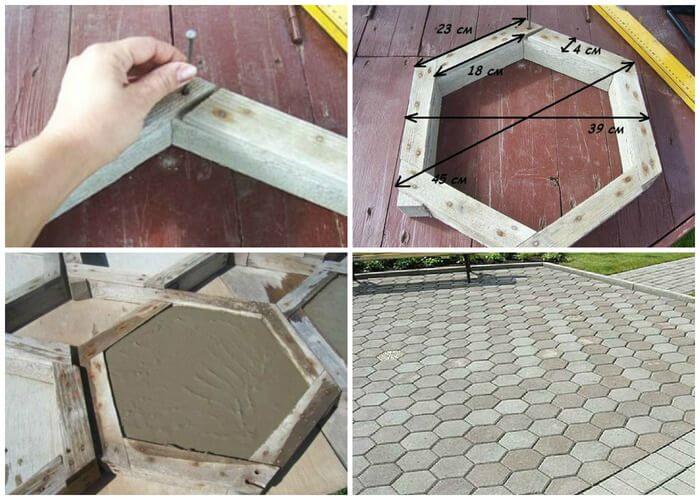
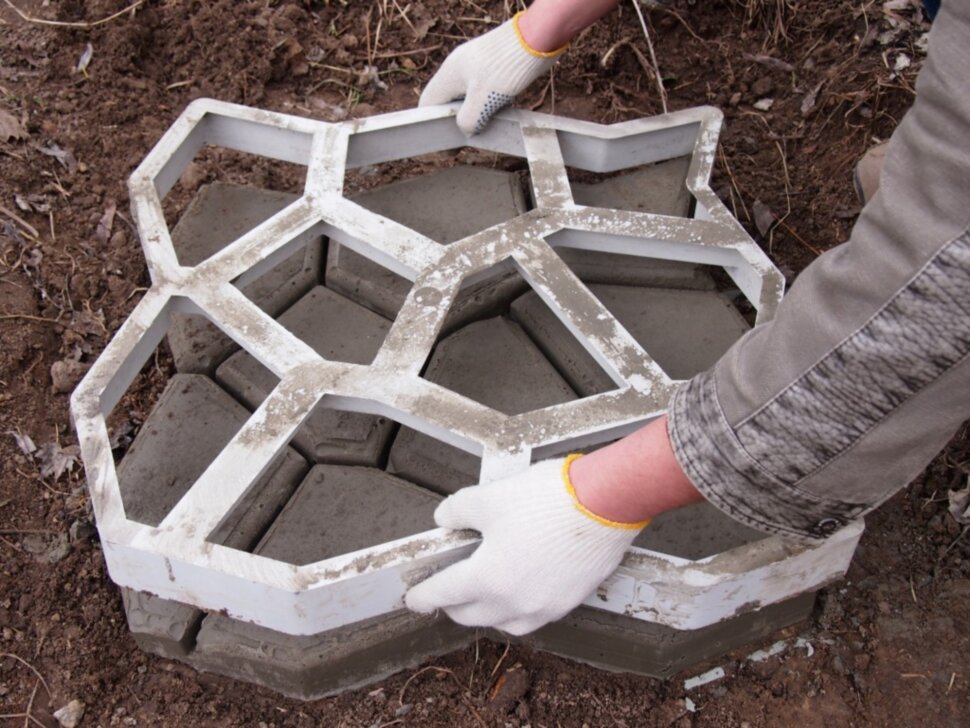
- Form preparation
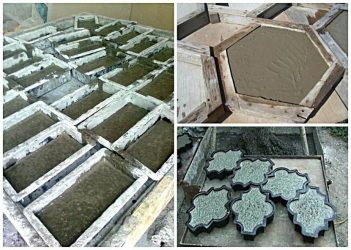
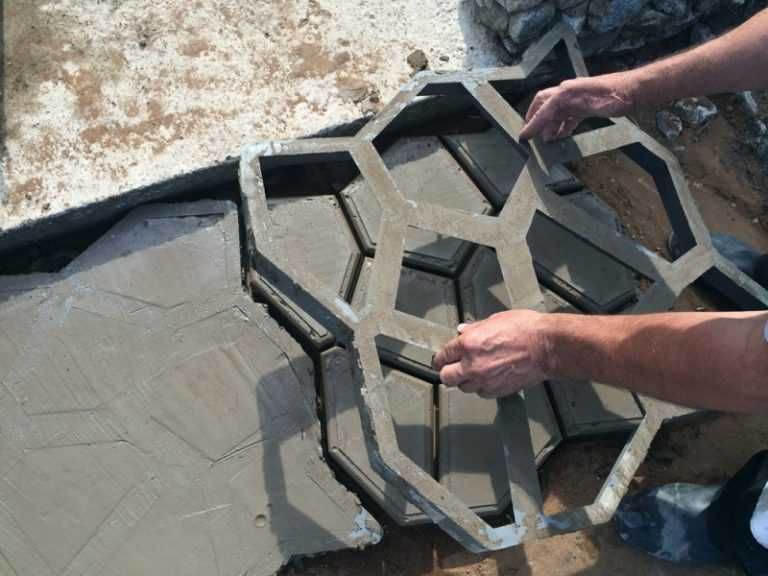
- Manufacturing technology of paving slabs (molding)
- Drying paving slabs at home
- Demoulding of paving slabs (extraction from the mold)
Rules for working with a concrete mixer
Turning on the equipment for mixing concrete, it is necessary to evenly fill it with the main components of the solution. When calculating the amount of each ingredient, it is necessary to focus on the volume of the mixer. In the calculation, we focus on the volume of one shovel.If we start from the standard recipe that is used in the manufacture of mortar for paving slabs with high frost resistance and a thickness of 4.5 cm, then the composition of the mixture will be as follows:
- 22 kg of cement;
- 54 kg of crushed stone;
- 19 kg of sand;
- 9 liters of water;
- 110 gr. plasticizer.
The first step is to fill the concrete mixer with sand. The mode of operation should be as follows: five shovels are loaded into the equipment, after which 20 seconds are taken to rest. Together with the sand, it is necessary to add dye to the concrete mixer. Its quantity should not exceed 6% of the volume of cement.
Then it is necessary to add crushed stone to the concrete mixer, followed by cement. The homogeneity of the resulting mixture must be monitored visually. After that, pour water, followed by a diluted plasticizer.
Attention must be paid to the volume of water poured into the concrete mixer and the dosage of the plasticizer, the amount of which should not exceed the calculated one. At the end of the work, it is necessary to add polypropylene fibers, six hundred gr
fiber is enough for one m3.
Helpful Hints
There are several general points that are suitable for making templates from any material. You need to study them in order not to make common mistakes.
Nuances:
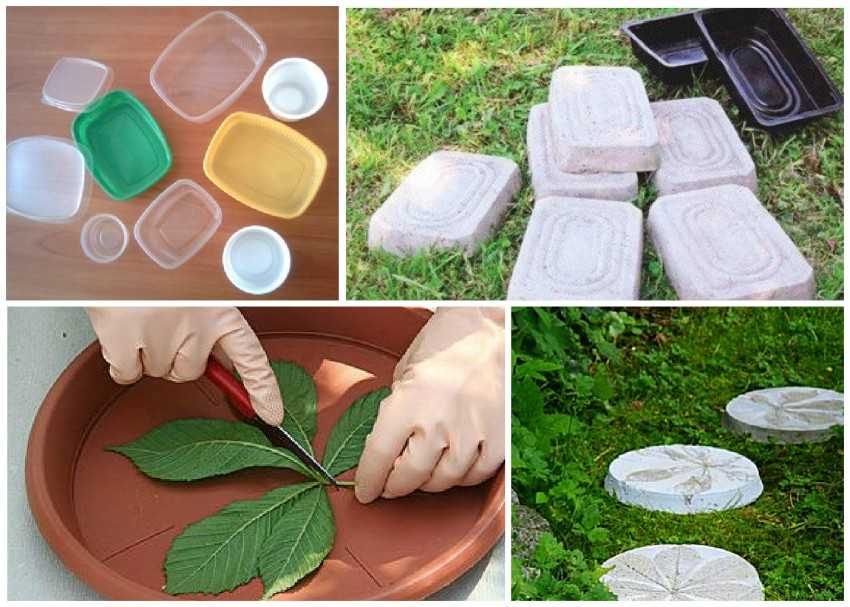
- If you have to lay out a mosaic structure or complex zones, then you need to immediately make several forms that will complement each other.
- It is necessary to observe the parameters and dimensions correctly.
- It is best to use corner templates for making a tile mold, as this can greatly simplify the work, and not cut everything after hardening.
- If it is necessary to make a large volume of the solution, then the entire composition must be stirred with a mixer.The cheapest option is a wooden template. Of course, you won’t be able to make a lot of tiles with it, but you can save money on plastic or silicone.
Which tile is better - homemade or industrial?

But, for starters, I would like to first voice such a question that worries a large number of residents of private houses, how - what is better to choose, do-it-yourself tiles or trust professionals and purchase a finished, industrially manufactured product?
The question is really complicated, especially in the current realities, when there is a worsening crisis, many are trying to save as much as possible in the construction and improvement of their sites. Therefore, on the one hand, hand-made tiles will be much cheaper, more precisely, you do not need to pay for the work of a company or individual specialists. But, in the same case, it is worth thinking about the quality of such products, this issue is especially acute if a person has not previously dealt with such an activity as the manufacture of paving slabs.
With industrial stoves, on the contrary, we pay for quality, for a certain nonsense, so to speak, that is, we receive guarantees on the one hand that the product will last a certain period of time.

Summing up, we can make such a comparison, which is more important for the client - saved 1,000 - 1,500 rubles. or quality? On the one hand, it is clear that quality is more important, but the problem of finances arises. Therefore, we can recommend the following, try to determine for yourself whether you can make at least a few samples yourself. Practice, play with shapes.By the way, the advantage of self-manufacturing, you can make tiles of absolutely any shape you want. With industrial products it is a little different, now there are very few companies, factories that work on the order of the client, making tiles of one form or another, deviating from their price list.
If you are not confident in your abilities, we recommend buying ready-made products, thus saving your strength and nerves that could be spent on an unjustified business.
Work Safety Measures
When working with cement, one of the most harmful factors is dust. Therefore, before preparing the mixture, you should wear protective clothing: gloves, a respirator or a protective mask.


But it is also important to ensure that diluted dye or plasticizer does not get on the skin and eyes.
You need to be careful when the concrete mixer is running. You should check the integrity of the wires and sockets, do not test the quality of the concrete and do not correct problems when the equipment is plugged in.
Although the process of preparing paving slabs is laborious, the result is worth it. A month later, garden paths lined with a beautiful exclusive coating can turn a personal plot into a small masterpiece of landscape design.
How to prepare a mixture for making pavers
In order to obtain high-quality paving stones, an equally good mixture should be poured into a good shape. She needs to have:
- strength;
- insignificant ability to water absorption;
- resistance to temperature changes;
- abrasive resistance;
- resistance to mechanical stress;
- minimally porous structure.
In the production of paving slabs, two manufacturing methods are used:
- with the help of vibrocasting;
- through vibrocompression.
Vibrocasting, during which you can use the simplest vibrating table made by yourself, is the only one available for home master method getting paving stones at home. Vibrocompression requires special expensive equipment and certain qualifications for its maintenance. High-quality in-house paving stones are usually made in two layers with reinforcing additives between the layers (but, of course, a single-layer tile also has the necessary characteristics, and is also easier to manufacture).
First, the front layer is made, after which the main layer is made. Therefore, mixtures for the manufacture of paving stones are of two types. Between two layers of tiles, a reinforcing material is laid, which is segments of metal rods laid so that they form a grid
This operation can be replaced by adding reinforcing synthetic fibers to the solution. Important! The time interval between these two processes should not be more than 25 minutes in order to prevent delamination of the tiles. Mix for the front layer. To obtain a square meter of colored, strong and frost-resistant front surface of paving stones, the following are required:
- cement PC500 - 3 buckets;
- fine gravel and river sand, mixed in equal proportions - 6 buckets;
- dispersant and pigment dye in the form of a solution - 0.8 l;
- water - 8 l.
Cement must be poured into a mixture of sand and plasticizer and, after thorough mixing, add crushed stone and finally pour in water in small volumes.The density of the resulting solution should resemble thick sour cream, but at the same time the solution should retain the ability to be easily distributed throughout the entire volume of the mold.
Drying and stripping
For drying, the molds with the solution are placed in one row on the racks. "Drying" is the common name for this stage, which does not reflect reality.
In fact, it is not the removal of water that occurs, but its reaction with cement, therefore it is important to prevent intensive evaporation:
- forms protect from the sun and draft;
- covered with polyethylene;
- in the heat, periodically sprinkle with water.
It is also useful to sheathe the walls of the drying room with polyethylene to maintain a high relative humidity. Tiles are folded somewhat differently when using a hardening accelerator. As already mentioned, this additive causes the solution to heat up and to keep warm, put several rows of tiles one on top of the other, then cover the stack with a tarpaulin.


Plywood sheets are laid between rows. Wooden and metal forms will withstand such a load; if they are made of plastic or silicone, each form is placed in a frame made of bars or a metal profile.
Modules are removed from the forms after the following period of time:
- when using a hardening accelerator: a day;
- without accelerator: 2-3 days.
Demoulding is carried out carefully, the module should not be knocked out. A soft mold made of plastic, rubber or silicone is slightly bent around the edges so that it comes off the tile
Next, the form is turned over, allowing the module to fall under its own weight onto the floor previously covered with a soft cloth. You can help him by slightly pressing on the bottom of the form.
Metal and wooden forms, as was said, are best made detachable.One-piece molds are placed upside down on a frame specially made to fit the mold and lightly tapped with a rubber mallet. Tiles under their own weight will fall to the floor.
The advice of some users to remove the modules on a working vibrating table was not confirmed in practice: the tile sits firmly in the molds and cannot be released without outside help. Forms with traces of the solution are washed with acid before new use.
Advantages and disadvantages of paving slabs
A feature and at the same time the advantage of the material is the appearance. Paving stones transform the roadway and sidewalks on city streets and near individual buildings, collecting simple and unique compositions.
The variability of application, the second important advantage, leaves moves for all occasions. Lay paving stones on any surface, almost anywhere, with any shape
The foundation is not poured under it, which means that the finish can be disassembled for work with a recess in the ground and then laid back without damage. Especially if you act carefully. In which case, the tile is even transferred to another place.
Physical characteristics will also please the consumer. The material tolerates shocks well, and in terms of frost resistance it can withstand up to 300 freeze-thaw cycles, vibropressed paving stones, for example. In conditions of heavy rainfall, less resistant cast tiles will last up to 10 years.
Minor disadvantages:
- sags under heavy objects;
- costs more than alternatives;
- low-quality products absorb moisture strongly and break easily.

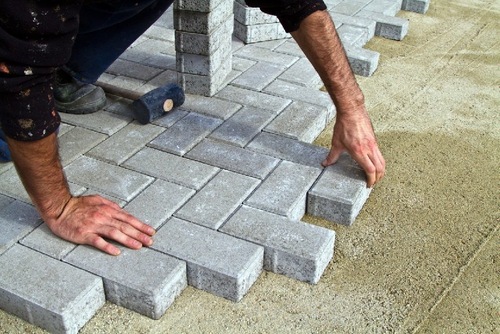
Laying process: step by step instructions
 To obtain a durable durable coating, follow the stages of work when laying:
- Fall asleep a layer of crushed stone or gravel, compact.Layer width - not less than 4 cm after tamping.
- To protect against subsidence, geotextiles are spread between a layer of sand and gravel.
- Fall asleep a layer of sand (width 3-4 cm).
- Abundantly moisten the sandy surface.
- They are ramming.
- Leave the area for 3-4 hours.
- Proceed to laying the tiled material according to the scheme.
- Lay diagonally, with a tight fit of each element. Tamp the surface with a mallet. The gap between individual specimens is 2 mm.
- When the tiles subside, sand is poured under the base.
- After paving the entire area, the surface is leveled, “knocking out” some fragments. Use a level and a rubber mallet.
- Fragments are cut with a special knife or grinder to lay the pattern (only after the entire surface has been laid out).
Note! Paving of paths or platforms is carried out only in dry weather.
To give the paved path clear contours, a curb is mounted. To do this, dig a shallow groove along the edge, install a curb stone (on cement mortar). Control that the curb is above the surface of the laid coating. Next, the seams are covered with sand or a mixture of it with cement, and the excess is swept from the coating. Only clean sand without impurities is used. Adding a mixture of sand and soil causes grass to grow in the seams of the tile. They look at the finished site, pour sand under the base, if necessary, if the fragment “sank” somewhere. The coating is ready for use in 3-4 days. In the future, do not forget to regularly clean, sweep, wash the path or platform, excluding the use of sharp metal scrapers, shovels, crowbars. Such tools damage the coating, lead to failure, ugly appearance of the territory.Also, abrasive and aggressive salt-containing compounds that destroy the tiled surface should not be used for cleaning.
We create garden paths with our own hands
Advantages and disadvantages of homemade tiles
Those who have not yet decided to create homemade tiles are afraid of two considerations: a significant investment of time and doubts about the quality of finished products. But when you consider the possibility of phased production, which allows you to do production on weekends or in your spare time, the process turns out to be not so long. In addition, the cost of materials will also stretch over time, because allocating 10% from the family budget for 3-4 months is much easier than spending half of the monthly income at once.


As for quality, it is enough to adhere to the technology and not try to save a lot, then the finished tile will serve for decades.

The combination of gray and beige tiles (made of white cement) looks stylish and helps save on pigments.
Table: comparing the advantages and disadvantages of artisanal paving slabs
| Advantages | Flaws |
| Saving money (from 30 to 60% depending on the equipment and materials used). | Large time investment (from 1 to 6 months, depending on the number of molds and the area of the tracks). |
| Unique tile design. | High probability of flaws with good detailing of the picture. |
| The ability to create non-standard corner and connecting elements that are not available in the manufacturer's catalogs. | Difficulty creating molds for precise details. It often happens that homemade corner tiles have to be laid with a large or uneven seam. |
| The ability to experiment with the composition of the tile, which allows you to save money or time, strengthen the standard composition, or add additional decorative filler. | Lack of guarantees of quality and durability. |
| The tile is suitable for all types of garden paths, recreation areas, outdoor terraces. | Reliable tiles for a territory with heavy loads (driveway, car parking area) are almost impossible to produce without special equipment and careful adherence to the recipe. |
| An exciting pastime, the opportunity to realize your ideas. | In practice, the work turns out to be physically difficult, requiring attention and precision. |
As you can see, for every drawback of homemade tiles, you can find a corresponding advantage. Therefore, if you want to proudly show your guests the work of your own hands, you can safely proceed to the implementation of the intended design of the tracks.
Types of concrete material for creating paths
Concrete is an artificial stone that you can buy or make yourself. The second option looks less costly from a financial point of view (the components cost significantly less than the finished masonry parts).
Finished tiles
The tile familiar to you also belongs to the varieties of concrete paths, as it is poured from a cement-sand mixture. It is produced in various versions:
- In the form of paving stones.
- Figured or mosaic detail.
- Textured, with a surface decorated with a pattern.
- Imitating wood or natural stone.

Concrete tile garden path/
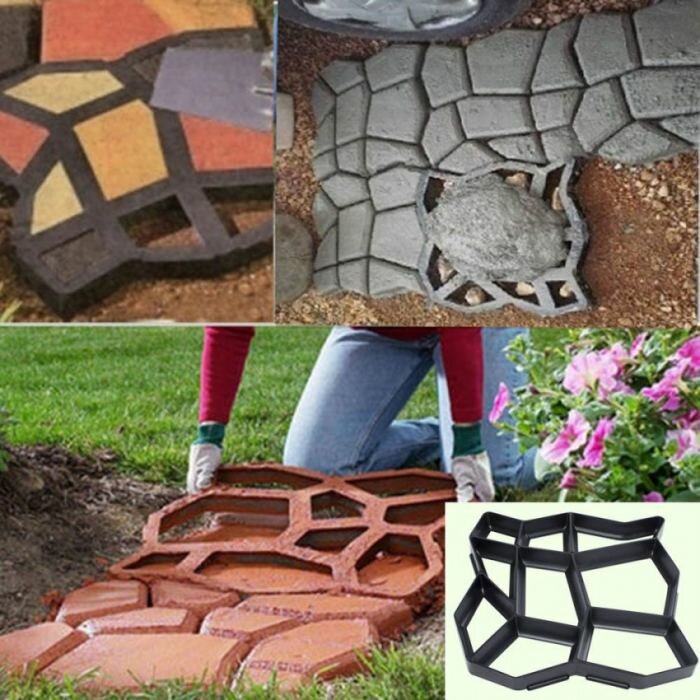
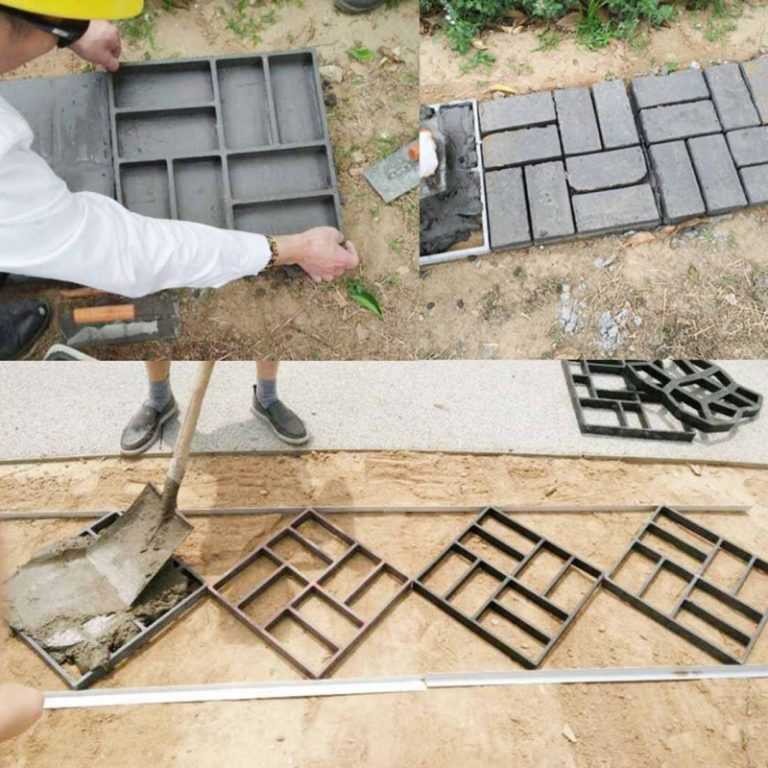
Filling in forms
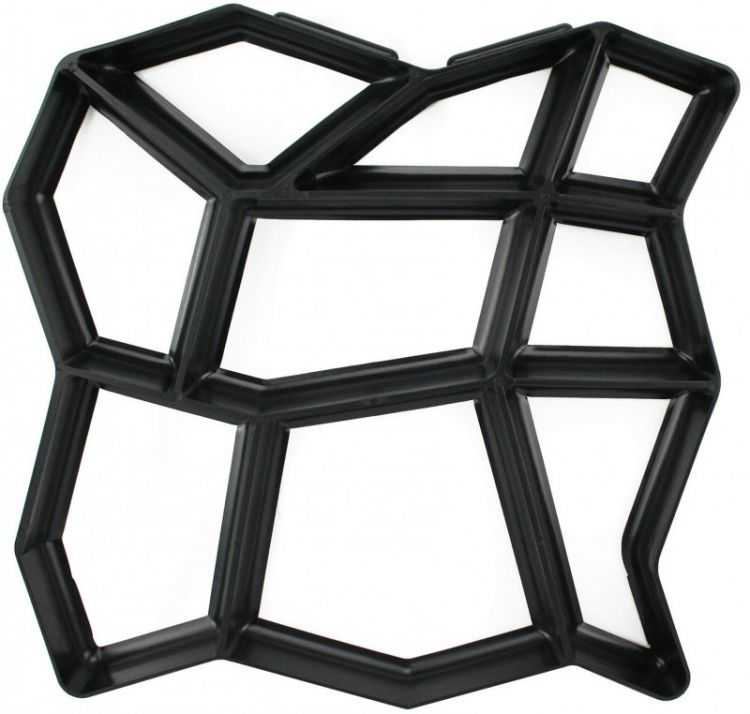
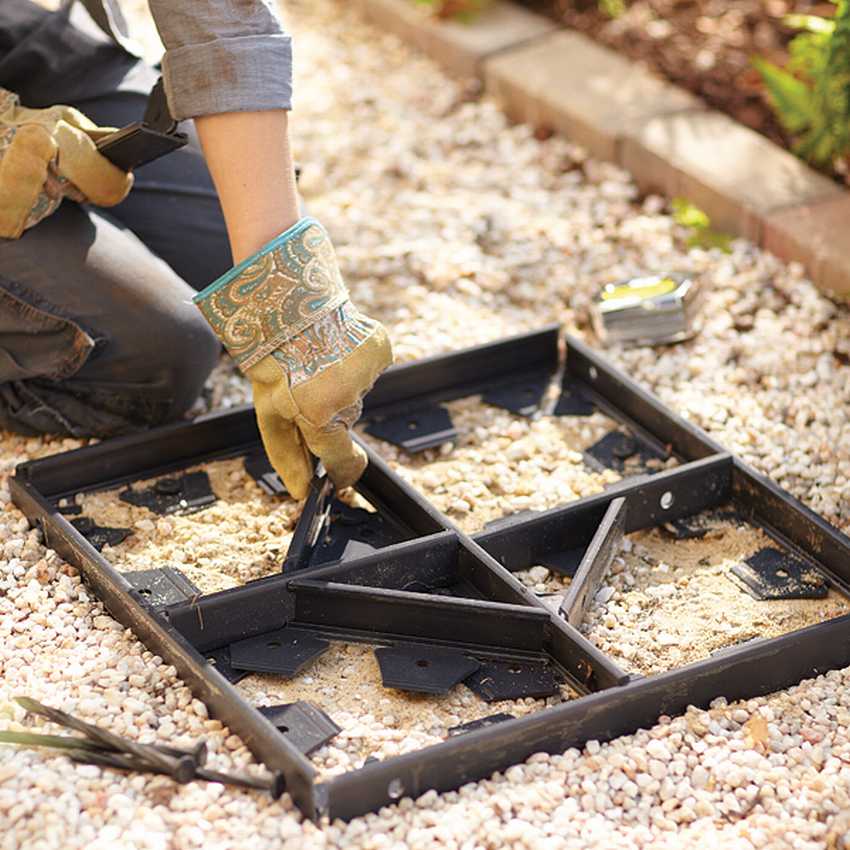
Imitation of natural stone or paving stones is achieved by pouring concrete into plastic molds, which can be purchased at any hardware store.With their help, turning on your imagination, you will turn into reality the most unusual patterns and forms of styling. Another option is to use do-it-yourself formwork. Reiki, interconnected in the order you need, will allow you to achieve the desired result in the shortest possible time.

Paths between beds/
Monolith pouring
Monolithic tape has its advantages and disadvantages. It is distinguished from a tile track by a more complex manufacturing procedure. In order to prevent the appearance of cracks in the first frosts, prepare a solid foundation:
- Well compacted sand and gravel pad.
- A minimum 20-cm layer of concrete with a grade of at least M200 with the addition of a reinforcing mesh.
Even the fulfillment of all conditions does not give a 100% guarantee of strength, since everything will depend on the magnitude of the winter movement (heaving) of the soil.

Ground concrete walkways
stamped concrete
This option is done on a freshly poured surface of a monolithic concrete path. Applying a special form-stamp, you will achieve a beautiful result. The principle is to imprint the texture in the uncured concrete. After removing the forms, a simple drawing will remain.

Stamped concrete walkways
colored concrete
Giving the original color is achieved by adding color to the solution at the stage of mixing it. The advantage of such mixing will be resistance to fading in the sun and abrasion during operation. Combine colors as you wish, use to make a monolith or fill a tile, as shown in the photo. There are many options.

colorful tiles
How can the form be used?
Make a mold for paving stones of the desired model.Then all you have to do is prepare the cement and add it to the paving mold. After 5 minutes, all you have to do is remove the excess. That's all, you just need to repeat the operation as many times as necessary to get a uniform cobblestone path. Be careful, the cement must be allowed to dry for a week so that you can lay out a path with it or create a plant pot out of it.


For roadways or other intensive use, the base layer is load-bearing and must be at least 100 mm thick. For public footpaths, this value can sometimes be reduced to 75 mm or increased to 150 mm or more to provide additional protection for underground utilities.


When working, do not use building sand. When waterlogged, moving under the slabs, it causes subsidence of the track. It may contain minerals that will stain certain types of pavement.


Textures and design of paving slabs
The landscape design of the local area is decorated by laying blocks in a variety of geometric ornaments.
- Paving stones - products are located at a slight distance to get the look of historical pavements. Using tiles of several colors, create various patterns.
- Gzhelka - blocks with the same relief of various sizes. 4 small tiles are placed around the base large module.
- Classic smooth or rough - the pattern is laid out from 4 areas delimited by stripes.
- A cloud is a texture similar to the pattern of petrified soil.
- Clover - is joined from blocks with corrugated end sides, like several puzzles from bean inflorescences.
- Flower - tiles of bright colors are produced with a pattern of plants.
- Kaso - similar to weaving "sirtaki" and in the form of a large number of rings.
- Maple leaf - relief blocks in the form of maple leaves.
- Smooth - a simple tile, in a solid shade, without excessive pretentiousness.
- Parquet - modules with a ribbed coating, which are placed in a checkerboard pattern. Has an anti-slip effect.
- Honeycombs are hexagonal products made in the form of honeycombs.
- Wave - made in the form of a parallelepiped with corrugated ends.
- Fleece - the geometry of the blocks is similar to an hourglass. They are distinguished by semicircular side faces, which makes it possible to create magnificent mosaic patterns.
- Scales - ¼ circle with a three-dimensional ornament resembles the decoration of marine representatives.
- Gossamer - the pattern is identical to the mesh weave, creates a corrugated coating.
- Grid - a tile consists of 4 sectors with many squares.
- Coil - produced with sides similar to a skein for yarn.
Mortar for paving slabs - proportions, composition, preparation
To begin with, we will provide a ready-made mortar recipe for paving slabs with a given thickness of 60 mm. And then we will tell you how to mix the components correctly.
The composition of the mortar for paving slabs is given in the table
| Components (additives) | Proportions for manufacturing in% | For 1 sq.m. tiles | For 1 cubic meter solution |
| Cement M 500 | 21 % | 30 kg | 500 kg |
| Screenings or small gravel | 23% | 32 kg | 540 kg |
| Sand | 56% | 75 kg | 1300 kg |
| Plasticizer С-3 | 0.7% by weight of concrete | 50 gr | 1.9 liters |
| Dye | 7% by weight of concrete | 700 gr | 10 kg |
| Fiberglass in quantity per 1m3 of concrete | 0.05% by weight of concrete | 60 gr | 0.7-1.0 kg |
| Water | 5.5% by weight of concrete | 8 liters | 130 liters |
From 1 cubic meter solution can be made 16.5 square meters. paving slabs, with a thickness of 60 mm.
To prepare a good mortar for paving slabs, you need to mix the components in a concrete mixer in a certain sequence, with a certain mixing mode.
Solution preparation
The plasticizer is mixed with a small amount of water and poured into a concrete mixer. For mixing, only warm water is used, because. do not dissolve in cold additives. When mixing, make sure that the plasticizer dissolves completely.
The dye is also mixed with hot (about 80 ° C) water in a ratio of 1:3. It is necessary to observe that the coloring solution is homogeneous. The presence of lumps will "result" in the appearance of craters on the front surface of the tile.
Next, filler (crushed stone and sand) is added in turn, then cement. Periodically, water is added to the cement-sand mixture for more convenient mixing. The main mass of water is supplied at the end of the batch.
Optimal mode (time) of cement mortar mixing
The mixture for paving slabs is ready when it is held on the trowel in a dense mass, without spreading. When pouring, the solution should easily fill the mold.
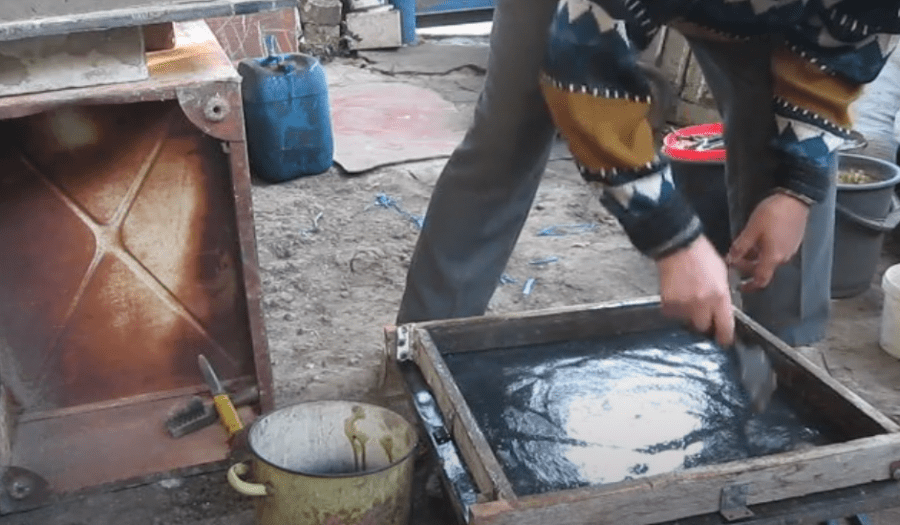
Form preparation
The surface of the mold is lubricated with the selected lubricant. In the process, you need to make sure that stains from the lubricant do not form on the surface. The form should be a little oily, for better glide of the product on the surface.
Notes. With excessive lubrication, depressions form on the tile. With insufficient - it is difficult to take out.
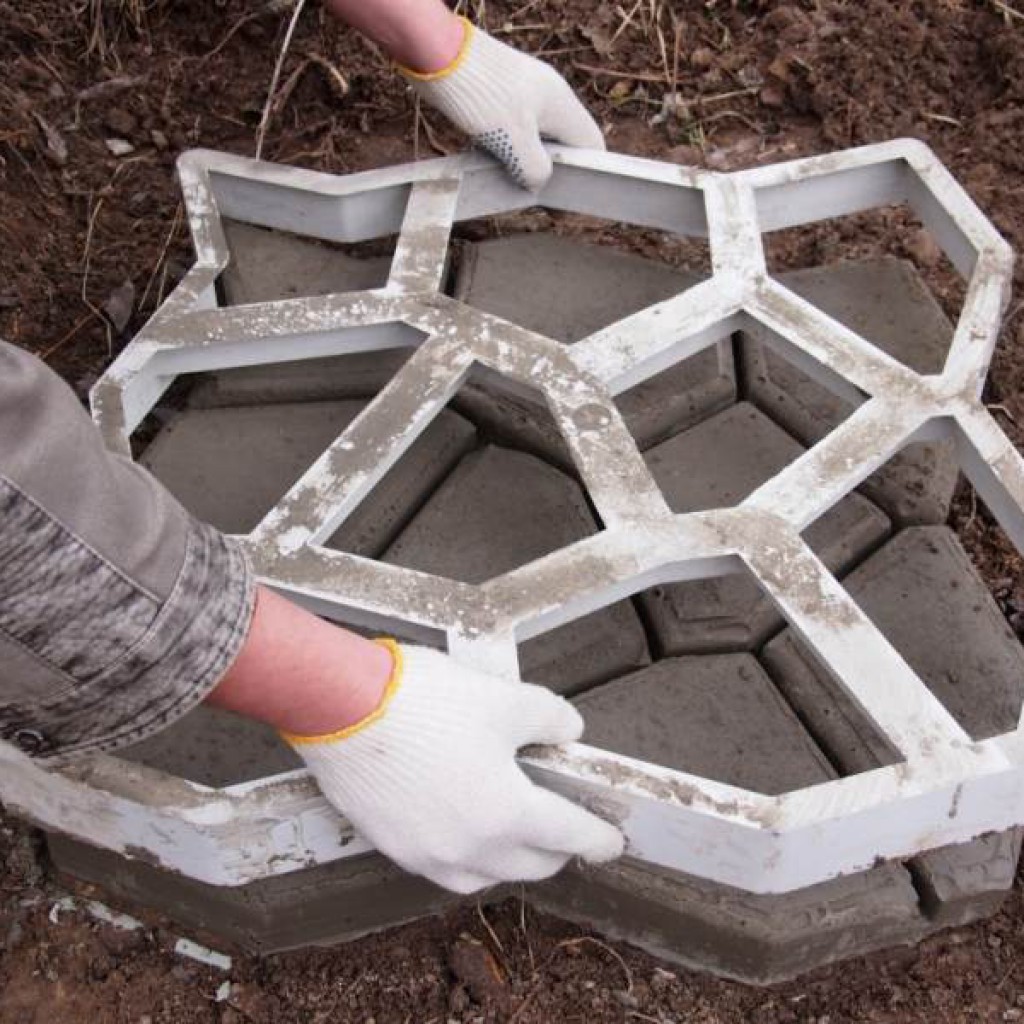
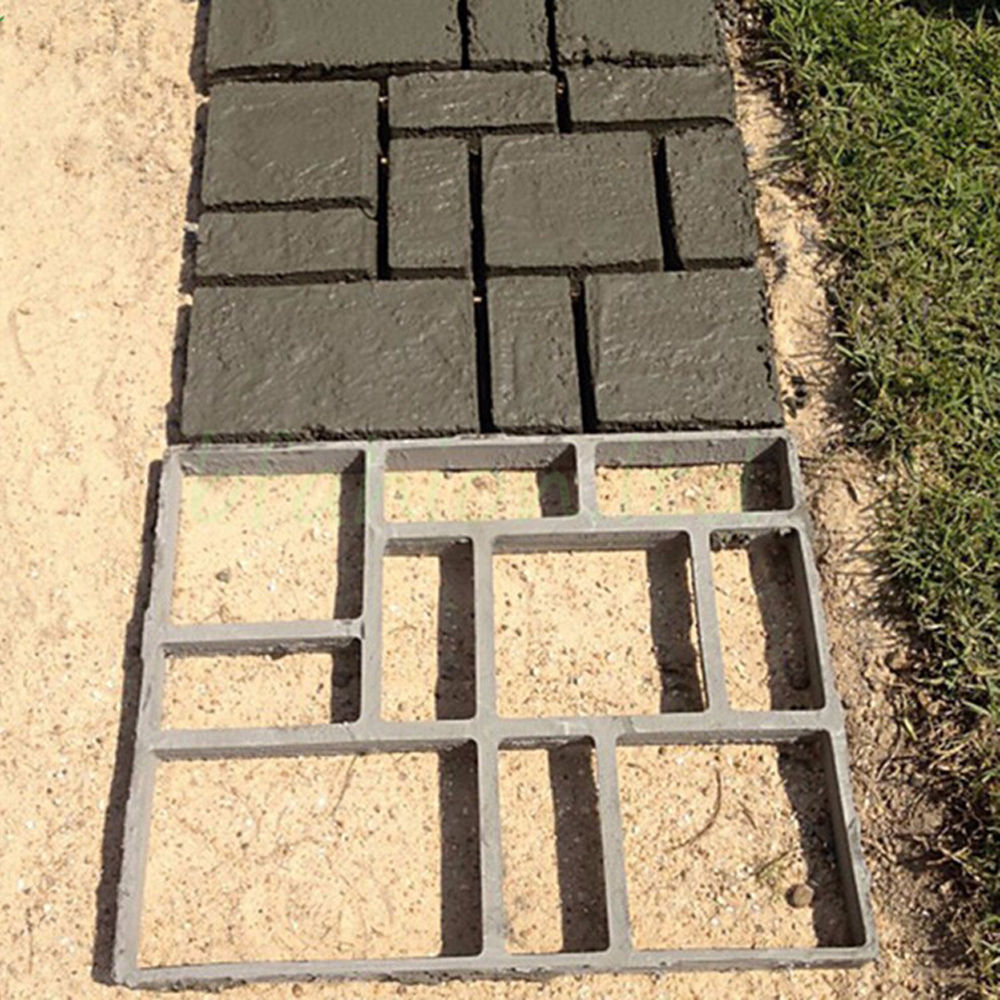
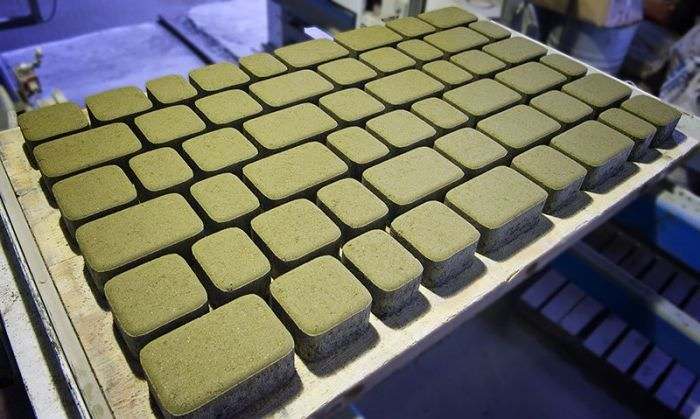
Manufacturing technology of paving slabs (molding)
At this stage, the solution is poured into molds.Moreover, if a two-color tile is made, then the form is filled with gray concrete by 75%, and then filled with color. The break between fillings should not exceed 20 minutes. Otherwise, the layers of the solution will not firmly grab together.
The filled forms must be shaken and placed on a vibrating table. The duration of the form on the vibrating table is 5 minutes. The indicator of readiness is the appearance of a white foam - this means that all air bubbles have escaped from the solution. Excessive vibration treatment (shaking the mold) can lead to separation of the solution. The signal to stop vibrations is the settling of white foam.


Advice. In the manufacture of two-color paving slabs, vibration must be carried out after pouring each layer. The second vibration lasts 2-3 minutes, while the foam may not appear.
Drying paving slabs at home
Forms filled with mortar are placed on racks for subsequent drying, which takes 2-3 days. The place for drying should be protected from direct sunlight, well ventilated. To reduce the rate of evaporation of moisture from the mold solution, it is better to cover with plastic wrap.
{banner_link_1}
Demoulding of paving slabs (extraction from the mold)
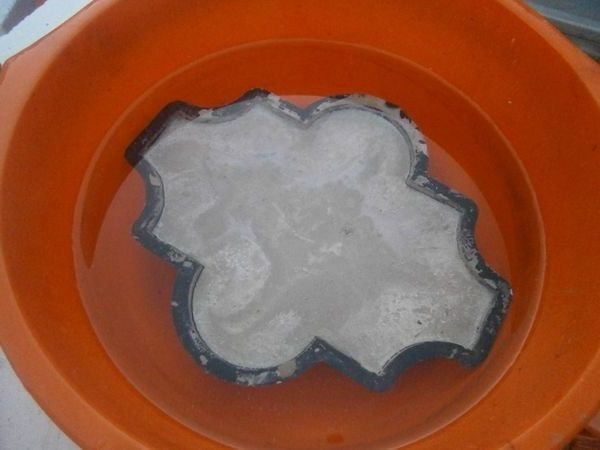
How to remove a tile from a mold How to remove a tile from a mold?
To facilitate the extraction process, you can lower the form with a fill for 5 seconds. in hot (about 60 °C) water. From heat, the form expands, and the tile is removed without defects and problems.
The product should be knocked out on a soft base, for example, spread an old blanket.
Demoulded Tile Note that the demolded tile will hold its shape well, but the grout has not fully cured yet, so the compound will crumble and may crack or break. Drying paving slabs on the racks The removed tiles are stored on the same drying racks for another week
Then it can be stacked on a pallet and finally dried for another month. During this period, the tile will gain the required strength
Drying paving slabs on racks The removed tiles are stored on the same drying racks for another week. Then it can be stacked on a pallet and finally dried for another month. During this period, the tile will gain the required strength.


