- Varieties of retractable structures
- Drawers
- Cargo
- Baskets for kitchen sets
- We make a roll-out box under the bed with our own hands
- Assembly process
- Types of stands
- Advantages and disadvantages of a built-in refrigerator
- Wooden frame assembly process
- Photo examples of sliding shelves in the kitchen
- Draw a pattern on the lamp with a marker
- Make a handmade watch
- Organize a real mini-bar from an old sideboard
- Stick fabric "wallpaper" on the door
- Paint the rug at the front door in unusual colors
- Make a natural bathroom rug
- Add a color accent to the door
- Turn a table shelf into a wall shelf
- Decorate coat hangers
- Repair types
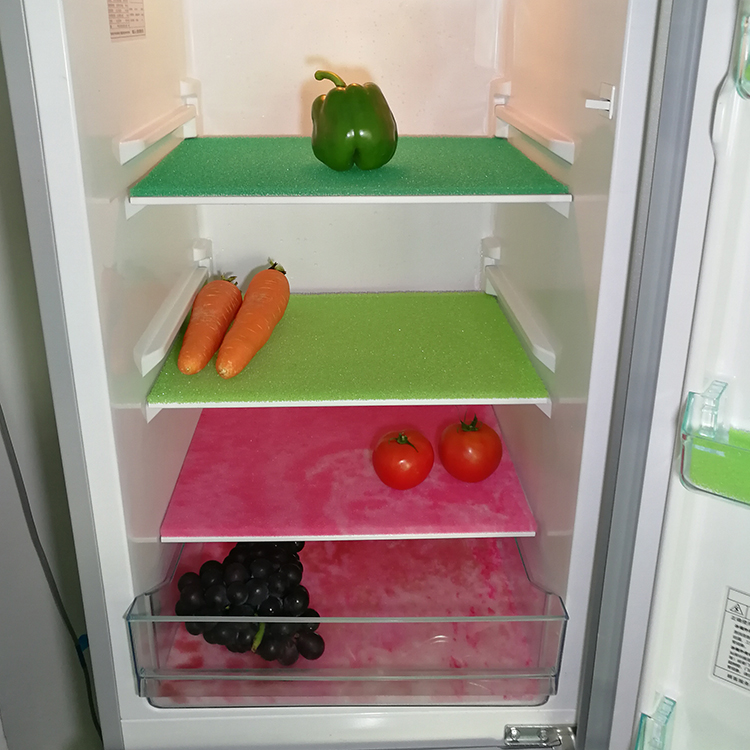
- What determines the temperature distribution
- Temperature conditions in single-chamber refrigerators
- Temperature conditions in two-chamber refrigerators
- Helpful Hints
- Advantage of the secret section behind the refrigerator
- How to pull a drawer out of a kitchen cabinet
- How to pull out a drawer from a kitchen unit with a closer
- Installing guides
- Additional accessories
- egg containers
- Ice molds
- oilers
- In the freezer
- Photo examples of sliding shelves in the kitchen
- Magnet - as an idea for storage
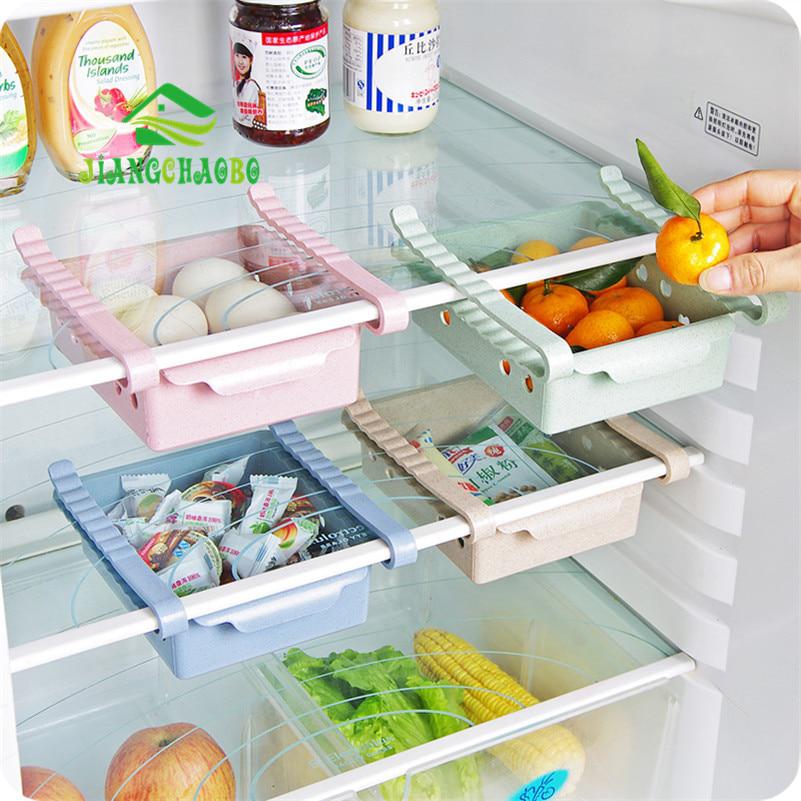
- Drawers for fruits and vegetables
- Magazine stand
- What you need to know before you start installing drawers
- How to install roller guides
- How to install ball guides
- How to install metaboxes on a drawer
- How to install drawer fronts
Varieties of retractable structures
There are several options that you can implement in your kitchen, depending on the needs of the room.
Drawers
Such simple designs can have various depth and width configurations. Often they can be equipped with additional partitions or sections designed to store small items.
Drawers are equipped with the ability to push the entire structure at once. So you can see all the contents of the cabinet at once.
It is very convenient if you need to conduct an “audit” on the shelves or quickly overlook what you need to buy before going to the store.
It will be convenient to arrange such boxes depending on the purpose of their contents. For example, a cabinet with pots and pans is best placed near the stove, and dishes near the sink.
Cargo
In fact, this is the same drawer, but it is designed to be used for bottles and tall cans. It is quite narrow, its width does not exceed 20 cm.
The small size allows you to place such a locker in various openings, where it can come handy. You can place spices in them, which will be convenient next to the stove.
It often happens that in the kitchen there is a free corner or some kind of space. It is here that a cargo box fits perfectly.
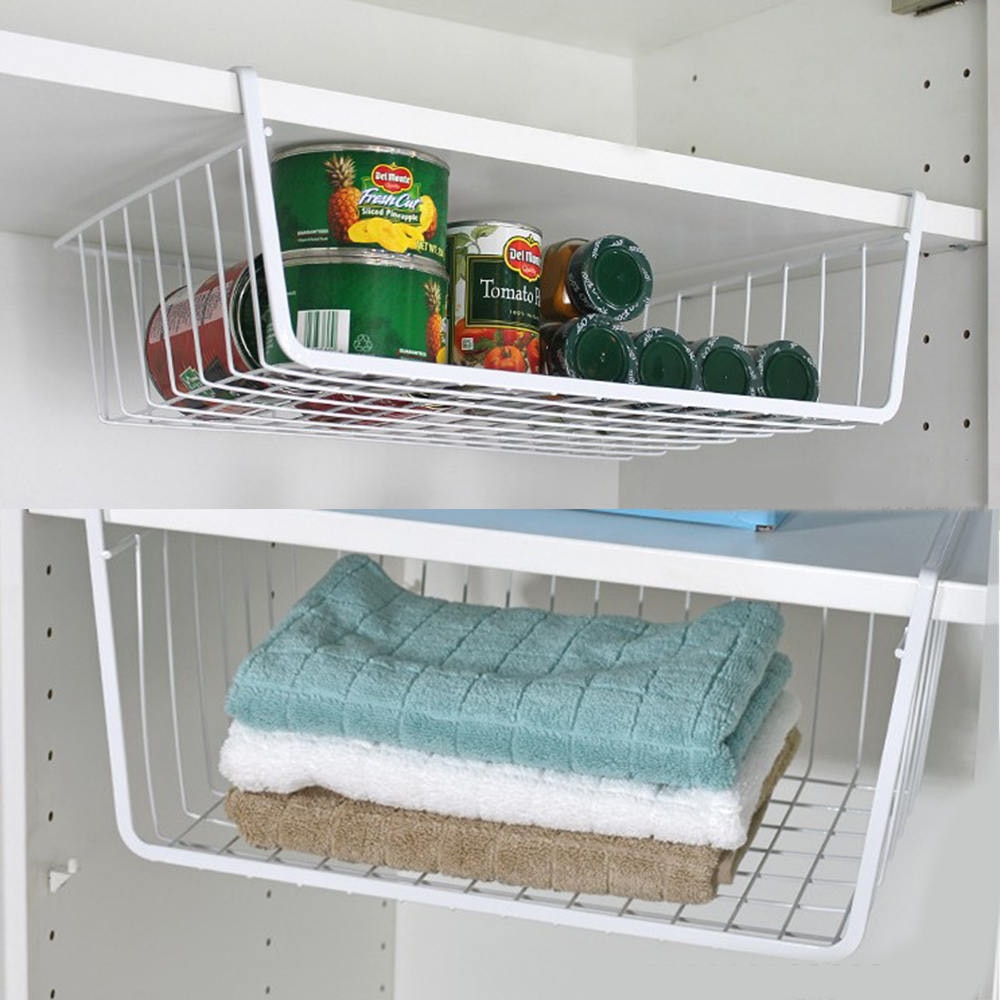
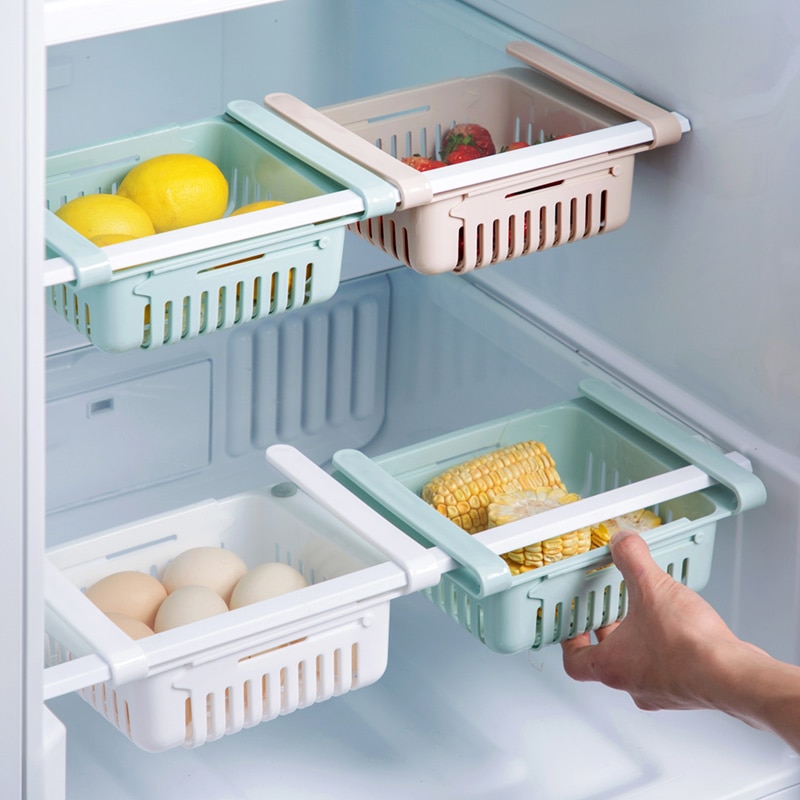
Baskets for kitchen sets
Pull-out baskets built into the furniture look very nice and noticeably unload the space due to their “light” appearance.
Depending on the size, they can be built into a cabinet or cabinet of any size.In this case, the guides will be installed in such a way that the basket leaves completely, which will ensure comfort when using it.
Such a product can perfectly complement the interior. Say, under Provence or Country, it fits perfectly.
We make a roll-out box under the bed with our own hands
We will consider in detail the option without a lid with sides made of laminate plates. We offer step-by-step instructions for its manufacture.
We make the bottom. We outline cut lines on the chipboard sheet. We cut the workpiece with an electric jigsaw. We do this carefully so that chips do not appear on the edges. If possible, use a ready-made part of suitable dimensions, for example, a countertop from an old table.
We are preparing laminate blanks for the sides. If necessary, we connect two lamellas, having previously smeared the lock with glue. We let it dry. According to the dimensions taken from the drawing, we outline the cutting lines. Carefully saw off the excess with a jigsaw. We cut off the lock part from the part. We also do this with an electric jigsaw.
We collect boards. To do this, we need steel furniture corners. We take two sides, put a corner between them, fix them with fasteners
It is important that the elements are connected exactly at a right angle, there should be no distortions. Tighten the screws carefully
So that they do not go through the laminate. When working with a power tool, you must be careful that the self-tapping screw does not turn a few extra times. In this case, the walls of the hole are destroyed, the fasteners do not fit tightly. Similarly, we collect the entire flanging.
We fix the sides to the bottom. On the lower edge of the flanging with the inner side of we set the corners around the perimeter. Fastening pitch - 120-150 mm. We fix them with screws.We lay the bottom on a flat surface, put the sides on top, combine the edges. We fasten the bottom to the corners with self-tapping screws. When properly fixed, it fits snugly to the sides. There should be no gaps or distortions.
Install rollers. We put them at the corners of the bottom, then the box will turn out to be stable. We outline the location of each wheel. We apply the mounting plate to the basting, fix it with self-tapping screws. We tighten them so that the part is tight, without gaps. We fix the rest of the videos in the same way. We put the container on the floor, try to move it. The wheels must spin freely. If the movement is difficult, we look for the cause and correct the shortcomings.
We install the handle on the facade. Some prefer to put two elements closer to the edges, so that it is more convenient to roll out the structure. In any case, first plan where to put the part. In the first version, this will be the center of the facade, in the second - closer to its edges. Holes are drilled at the marked points. Handle elements are inserted into them, fixed with fasteners.
Instagram bosch_go
Instagram rugg_ws
Instagram master.stardub
Instagram br_lukin
The storage system is ready. You can conduct "tests": roll it under the bed and roll it back. A correctly calculated and assembled box rolls smoothly, does not touch furniture elements. To protect things from dust, a plastic cover with a zipper or just a plastic sheet is used instead of a cover.
We figured out how to do-it-yourself box under the bed. The instruction will help novice craftsmen to assemble a practical storage system and use the free space under the bed to good use. For a double bed, several boxes are made.Thus, the room will be freed from unnecessary furniture, it will become more spacious and comfortable.
Assembly process
Place the side boards around the back panel and start assembling. Find the space where you would like the screws to be driven in, pre-drill each hole, this helps prevent splitting of the wood. Using 3 cm screws, attach the side panels, top and bottom panels. After that, install the shelves and cut the dowels to size.
Air conditioner in the toilet bowl: many have heard about life hacking, but it can do harm
Unsuccessful "Quantum of Solace": the appearance of Daniel Craig promised the film a failure?
Britney Spears and Christina Aguilera: 5 Stars Who Started at the Mickey Mouse Club
Attach the casters to the bottom of the bottom shelf. I added an extra plank to make the structure a bit more stable.


Optional step: Build a small shelf to fit between the casters.
Types of stands
The design for household appliances is not such a common phenomenon, since they are rarely used. There are several types of such structures:
- Cabinets. These are boxes made of wood or plastic of different sizes. Most of them are complemented by drawers on wheels. These products are additionally used for keeping vegetables.
- Metal grids. These products come across even under the old freezers "Donbass".
- Footrests. These are a few small elements that can be installed at the bottom under each leg. Often they have anti-vibration features and are used to reduce vibrations.
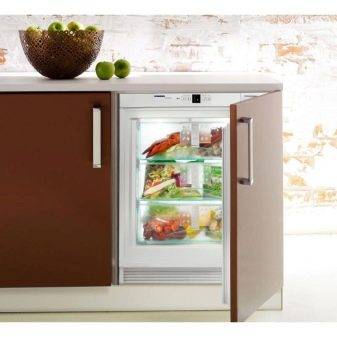
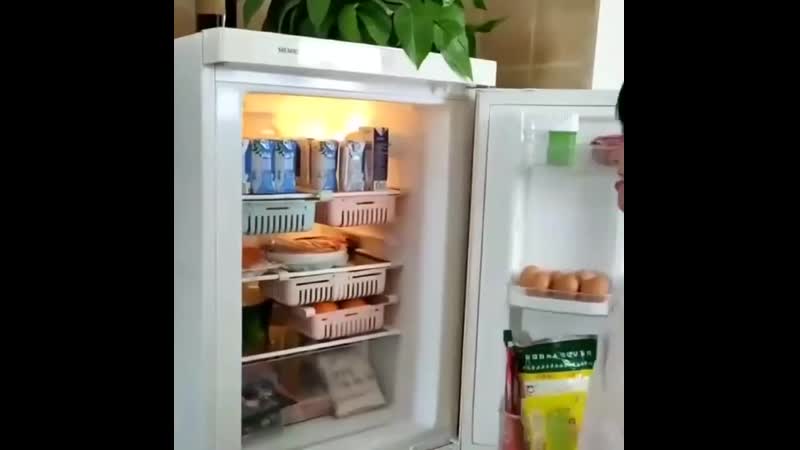
Advantages and disadvantages of a built-in refrigerator
A refrigerator hidden behind a facade provides a lot of advantages.The interior looks as complete and aesthetic as possible. This is especially true for classical, romantic, ethnic styles. In them, an enameled or steel box looks like an absolutely alien object, and negates all the efforts of designers. A disguised refrigerator is a salvation for such interiors
The wires are hidden, they do not hang along the walls and do not lie on the floor, and this is also important for the aesthetics of the kitchen space. However, the benefits don't end there.

Advantages of embedded models:
- Ergonomics - the built-in refrigerator helps rationally optimize space, minimize the distance traveled during cooking, and organize the "working triangle" area as correctly as possible. In addition, it can be positioned at a user-friendly height.
- Noiselessness - rigid fixation to the body dampens vibration and, accordingly, reduces the noise level. This is facilitated by the very presence of the device "in the closet". The walls of the furniture partially block the propagation of sound.
- Profitability - the need to place equipment inside the headset has set the task for manufacturers to provide an appropriate level of thermal insulation. An impressive protective layer effectively minimizes the impact of the external environment and allows the refrigerator to work in an economical mode.
- Ease of care - the absence of side walls reduces the time for washing the kitchen assistant. Hidden wires do not need to be washed from dust and grease.
- A variety of models - in addition to standard options, there is equipment that can be built under the countertop, taken out to the island. There are versions of refrigerators where the freezer is located below, above, on the side, is completely absent.
Noting the many obvious advantages of the "disguised" technique, one cannot fail to mention some of its shortcomings:
- Firstly, the reduced internal capacity compared to classical models with equal dimensions.
- Secondly, the inability to access the electronic control with the door closed.
- Thirdly, the high cost. Built-in models are much more expensive than stand-alone counterparts. The cost of equipping a place for their installation, as well as the installation services themselves, will also be expensive.

Wooden frame assembly process
To assemble the frame, I screwed two screws per corner on each side of the rectangle. Once the outer frame was built (I left the frame on the floor because it was still very fragile at this stage), I started preparing the intermediate pieces. The intermediate parts not only served as shelves, but also gave additional support to the structure.
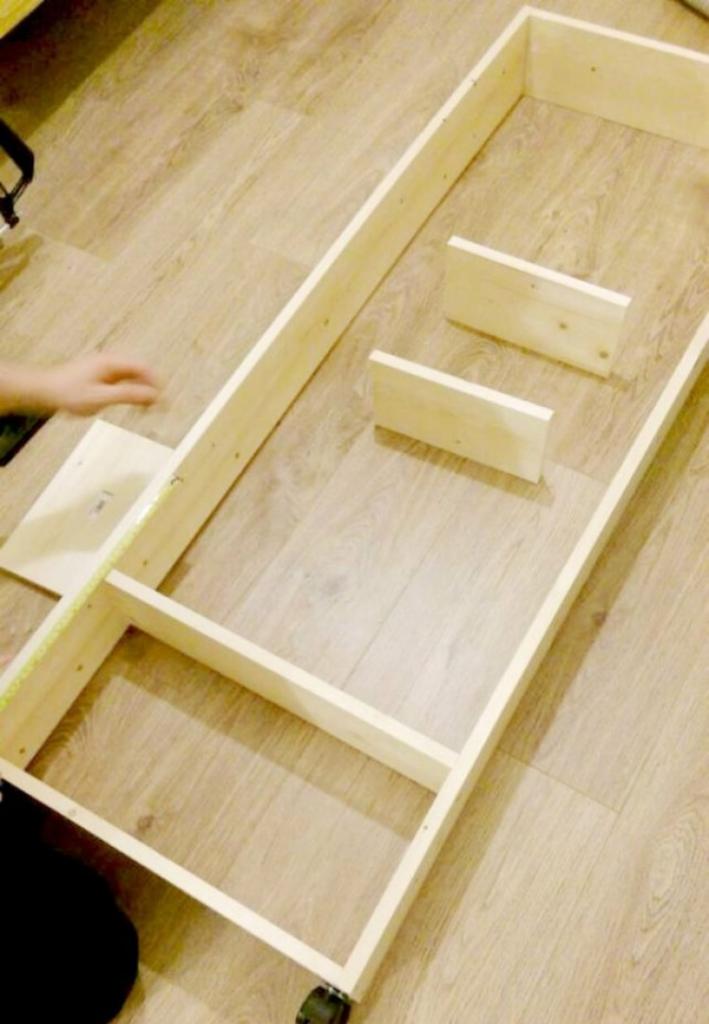
I sawed a few more wood boards with the same dimensions used for the top and bottom of the frame (54 centimeters). I placed the boards inside the frame at the right height (again, pre-drilling is necessary if your wood is very soft) and secured it with two screws on each side of the frame.
I repeated the whole process for the remaining wood pieces. I decided that five shelves would be enough for a cabinet, but the number of them is entirely up to you and your needs. The distance between the upper shelves was the same, but I decided to make the lower shelf a little higher to store larger items (for example, bottles of water, oil and various sauces).
How does hospitalized Nadezhda Babkina feel? Doctors' comments
The correct viewing order for "Fast and the Furious" is not from 1 to 8, but somewhat different
The words of a 94-year-old old woman on her birthday puzzled relatives
Photo examples of sliding shelves in the kitchen
Guys, we put our soul into the site. Thank you for discovering this beauty. Thanks for the inspiration and goosebumps. Join us at
and To make the apartment look stylish and comfortable, it is not necessary to spend a lot of money. Enough simple improvised materials, a little imagination and a desire for change. And of course, you can peep interesting ideas for the home, which he shares from time to time. website
So, what can be done to inexpensively and tastefully decorate the interior.
Draw a pattern on the lamp with a marker
A little patience and a marker that writes on different surfaces - and the modern lamp is ready. How to draw a picture on a ceiling is shown in this blog.
Make a handmade watch
Original wall clocks in the best traditions of expensive decor stores can be made at home in a few hours. It's not as difficult as it might seem. instructions for creating a clock in the style of a school board. A shows how to make a pin-up clock.
Organize a real mini-bar from an old sideboard
The era of sideboards with tons of crystal is irrevocably a thing of the past. But many sideboards themselves still remain. So why not turn your used furniture into a modern home mini-bar (not necessarily alcoholic). Here it turned out very well.
Stick fabric "wallpaper" on the door
With the help of patterned fabric and cornstarch glue, you can decorate a boring door in an original way.Such "wallpaper" is easily removed, so when the picture gets bored, it can be easily removed or replaced with a new one. You can look at the process of decorating the door in this blog.
Paint the rug at the front door in unusual colors
Carpet by the door too might be interesting. To do this, it is enough to paint it in bright, non-standard colors. How to turn an ordinary rug into an original thing, see this blog.
Make a natural bathroom rug
Cork is an excellent natural material that dries quickly and retains heat well. It is pleasant to step on such a rug with bare feet. And its creation from wine corks will surely make you remember many good moments. You can see how to make such a rug.
Add a color accent to the door
This idea is ideal for cases where you want to revive the interior a little, but there is no way to change something radically. Such a trick can be done even in a rented apartment, in the end, you can always return it as it was. How it's done is shown.
Turn a table shelf into a wall shelf
Often there is not enough space on the table to store various little things. In this case, the desktop shelf can be easily turned into a wall shelf, and foldable. It will not only allow you to organize the space, but also decorate it. Simple instructions can be found.


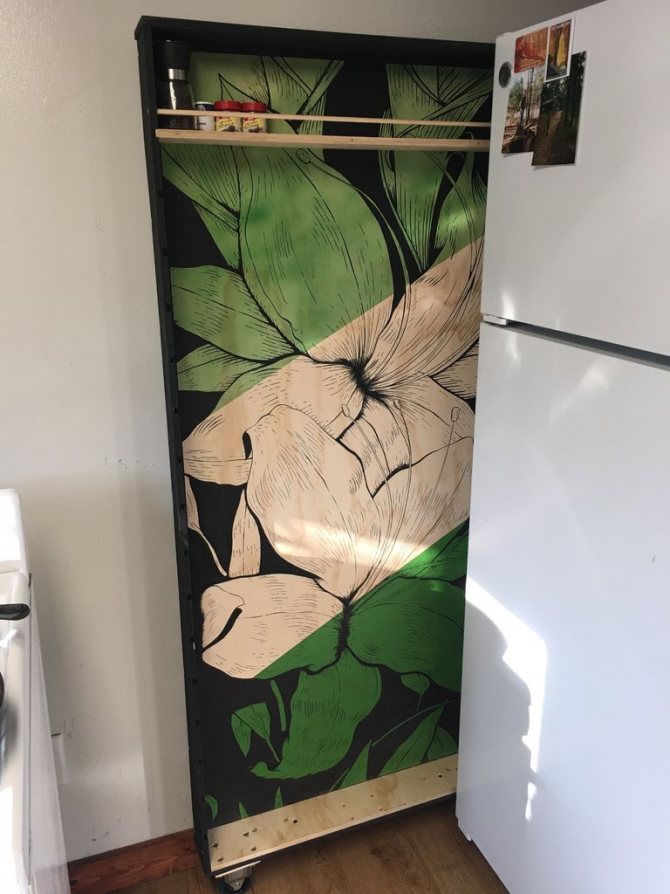
Decorate coat hangers
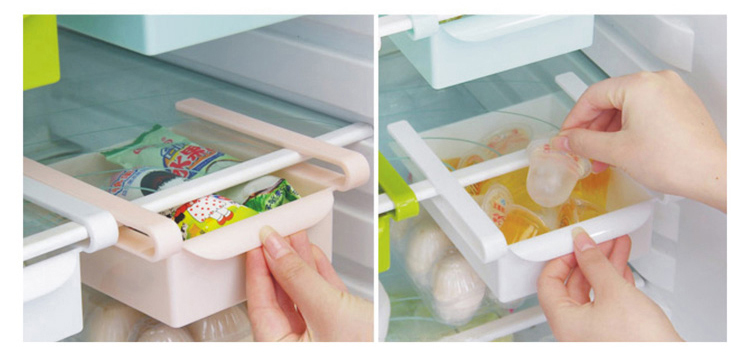
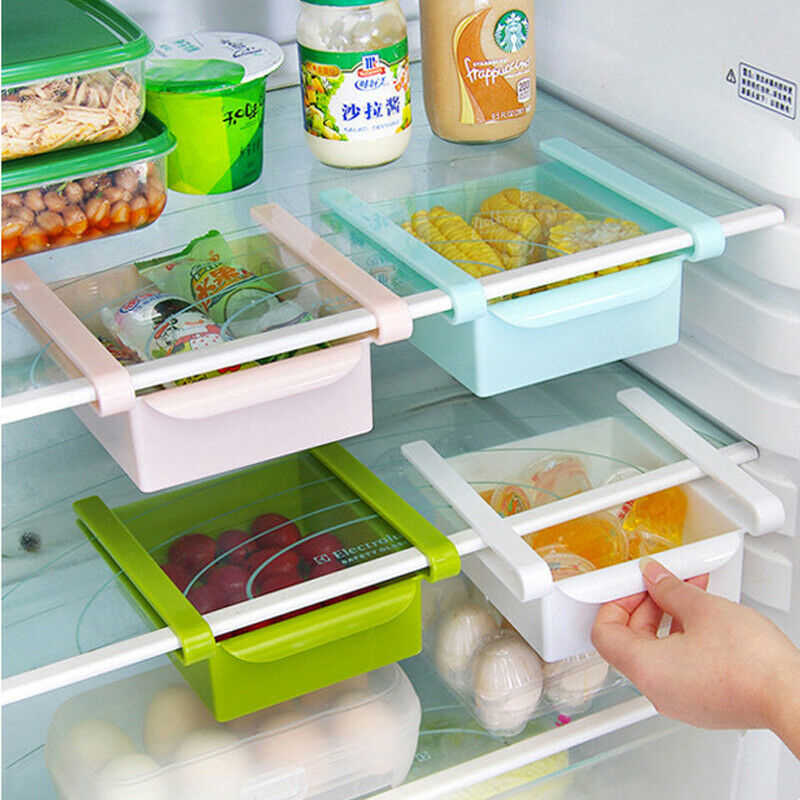
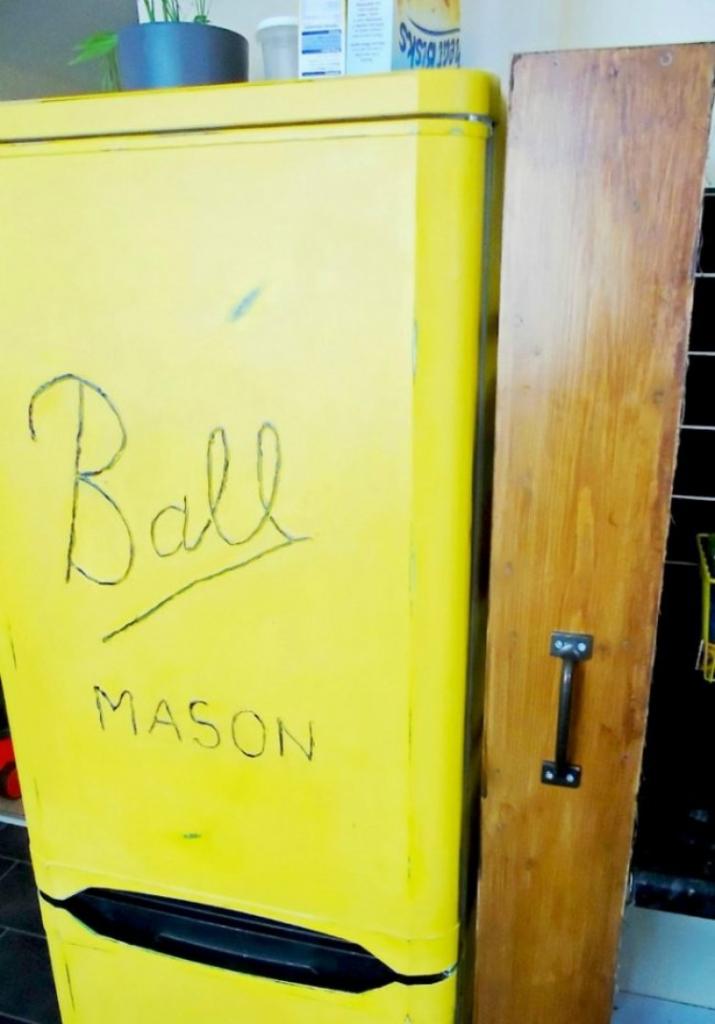
This master class will be especially useful for those who live in small one-room apartments. I will show you how to make a sliding rack in the gap between the wall and the refrigerator. It would seem that there is only a few centimeters wide, but you will definitely be surprised when you see how many items can be stored in this gap. Initially, the shelf-rack is not visible at all.In fact, after its manufacture, nothing will change in your kitchen, except for the fact that a new and convenient space is formed for storing various jars, bottles, etc.
The rack is pulled out with a simple movement. Now look how much is stored there. The gap distance is only 11.5 cm (in the photo, the tape measure is in inches), and what a huge number of different items can be stored.
Repair types
Restoration operations are divided into three classes:
- adjustment;
- redecorating;
- complete renovation.
Products need adjustment after purchase and after a complete restoration of the old one. And here it means setting up mechanisms, loops, setting levels, fixing loose handles. It happens that you want to repair a chest of drawers by simply updating a boring design or one that has lost its freshness. Then they resort to cosmetic restoration, based on the current state and the desired result. A complete repair implies the return of functionality to furniture parts and the replacement of elements that are not subject to restoration.
What determines the temperature distribution
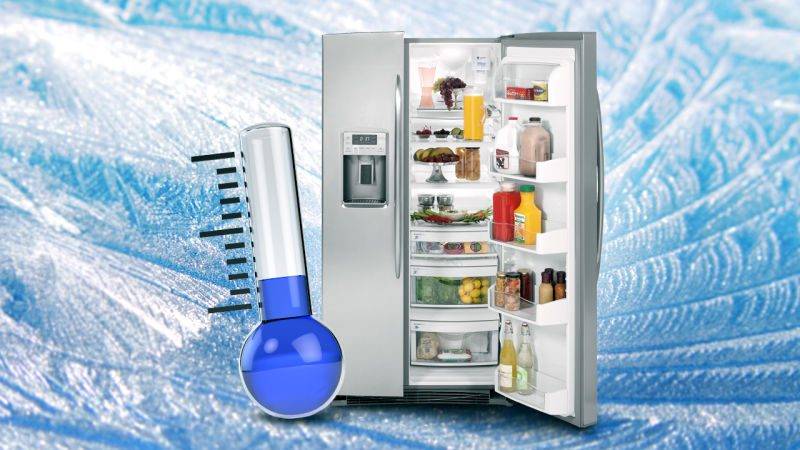
Warm and cold places are located depending on the design of the refrigerator and the type of freezing.
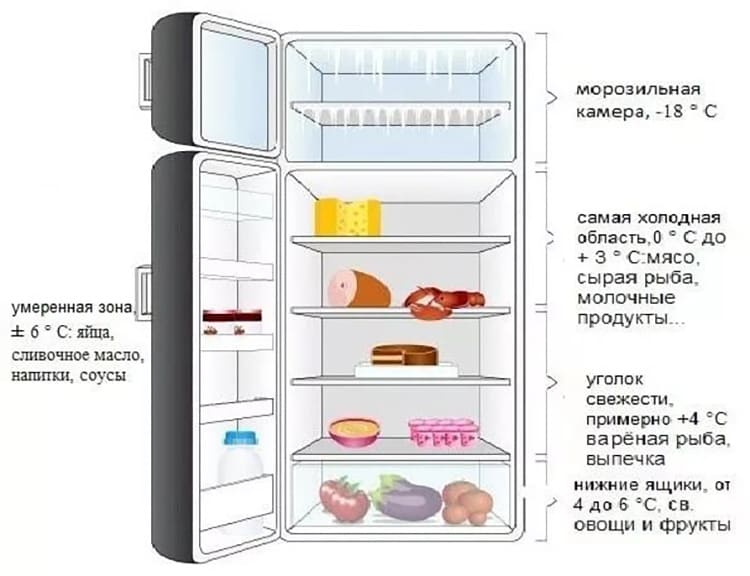
There are two types of models in which temperature regimes are distributed differently:
- Single-chamber, in which the freezer is located inside on top. Cold air comes out of it and goes down.
- For two-chamber models, the compartments are not connected, the location of the cold place does not depend on the freezer. It can be above or below. And it will be colder near the back wall, at the evaporator and vents. And in different models they are located in different ways.
Temperature conditions in single-chamber refrigerators
Single-chamber refrigerators have a simple design.They have one compartment, a freezer is located on top, under it are shelves and drawers. The freezer compartment in such models is the coldest place.
On its walls are tubes through which freon circulates. It cools the freezer and maintains the required temperature in the remaining compartments. At some models have latch at the bottom of the freezer. By moving it aside, you can increase the flow of cold air.
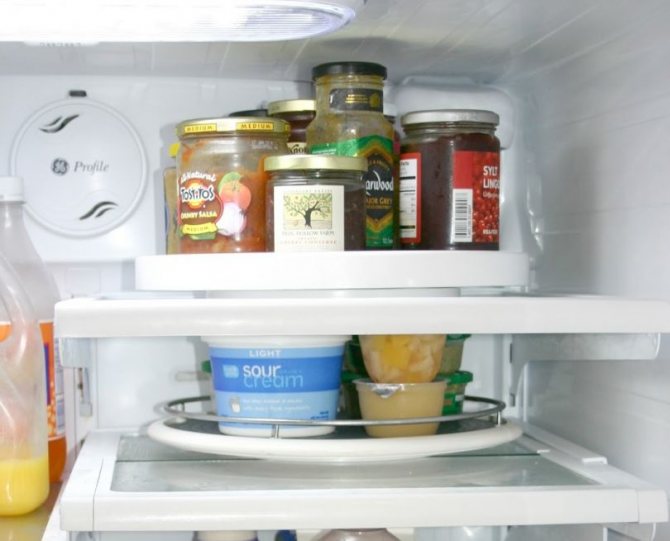
The coldest place in the refrigerator other than the freezer is the top shelf. After all, the air cooled by freon descends. In a small appliance or with metal grills instead of shelves, the temperature difference in the compartments is small. If under the freezer it will be from 0˚ to + 1˚С, from below - no more than 2-3˚С.
The large dimensions of the refrigerator, as well as solid glass shelves, create obstacles for the movement of cold air. The temperature difference in such models reaches 9˚С. Therefore, below are boxes for vegetables and other products that require such a regime.
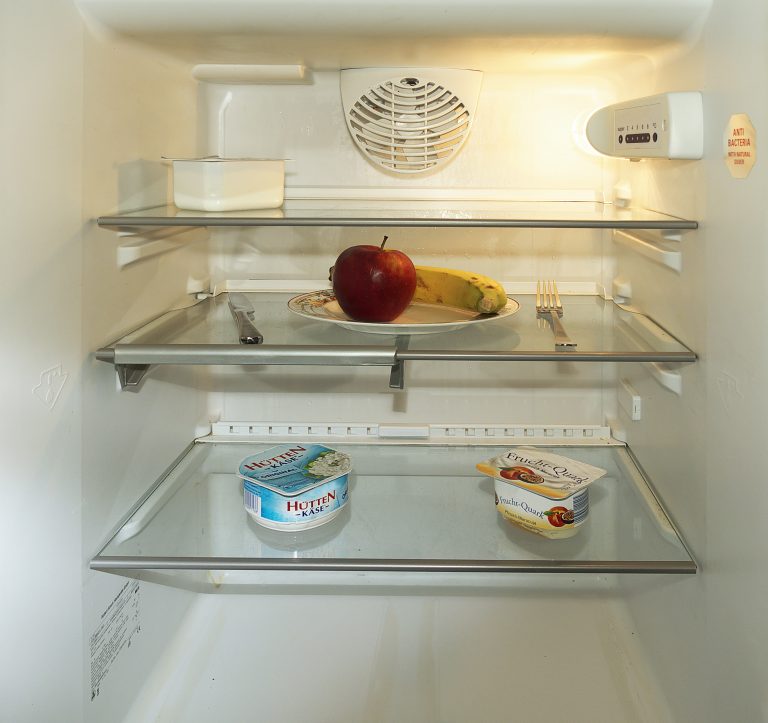
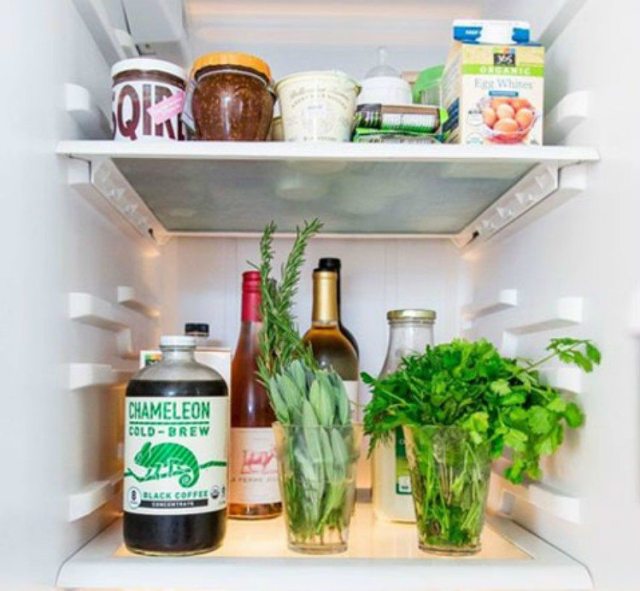
Temperature conditions in two-chamber refrigerators
The design feature of this type of devices is that they consist of two chambers: a freezer and a refrigeration compartment. The freezer can be located at the top or bottom, but does not depend on it cold distribution. Which models of freon tubes run along the back wall. That's where the cold air comes from.
There are two types of devices for such refrigerators: with a drip system and Nou Frost. For devices of the first type, the coldest is in the area of \u200b\u200bthe evaporator, it is located behind the back wall. Therefore, moisture condenses on it and on the wall.
Periodically, it freezes and thaws, flowing into the drainage hole. The coldest place in refrigerator with drip system - these are all the shelves in the depths of the wall.
Refrigerators with the No Frost system additionally circulate cold air throughout the interior. It is driven by fans located behind the back wall. It is believed that in such models the temperature is the same everywhere, but this is not so.
In addition to the areas near the wall where the fan outlets are located, the coldest shelf in the No Frost refrigerator will be at the bottom. After all, warm air rises and cold air sinks. Therefore, the compartments for meat and fish are located below, and the vegetable box is higher.
People who first purchased such a model are often interested in which shelf is colder if the freezer is at the bottom. They are used to the cold coming from the freezer compartment. But in two-chamber refrigerators, both compartments are separated from each other by a double partition and do not communicate.
Therefore, it does not matter where the freezer is located - the coldest place will still be at the back wall and below.
Helpful Hints
I strongly advise if you are using softwood for this project, make a few pre-holes with a drill before driving the screws into the wood, as you may split the wood. And this is undesirable, otherwise you will have to start everything from the very beginning.
You can also make a small indentation with a large drill so that the screws are flush with the wood frame (the screw will not stick out of the wood). In this master class, as you can see from the photos, I work with fairly simple and inexpensive equipment.But you can buy those tools that will do a lot for you. This will not only save time, but also prevent various kinds of errors.
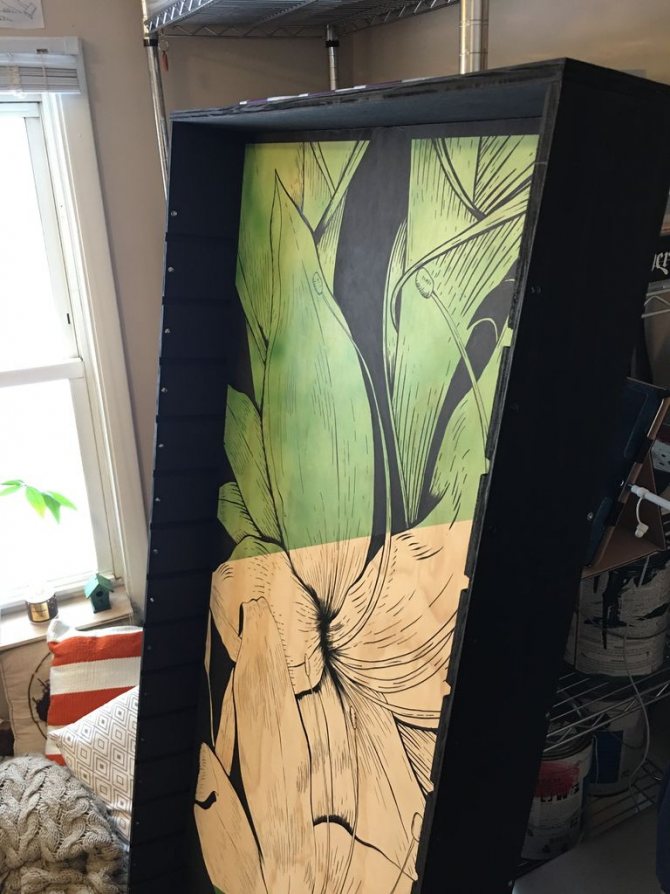
Advantage of the secret section behind the refrigerator
The section can be very easily placed behind the refrigerator. Its advantage is that, firstly, it does not take up much space. Secondly, thanks to it, the common space of the kitchen is not cluttered up.

If you turn your attention to the photo above, you can see where my new section used to be, a narrow space where absolutely nothing could fit. But with such a versatile can rack, things have changed for the better.
Russian kitchens tend to be quite compact and can't always afford extra pantry room. If your kitchen, like mine, is also small, then this master class will help you solve many issues related to organizing storage.
Ford Tudor - 1937 car with a trailer on one wheel, and only 2,000 miles
A resident of Pskov sheltered wild animals at home and became famous on the Web
Cheerful mother posted a photo of a “real lockdown” with children on the Web
I chose wire mesh for the backing and dark wax to give my "pantry" a rustic look that best suited the interior. By the way, I like the combination of these two materials. There is something about dark wood that is very beneficial and looks beautiful against the background of metal.


In the photo below you can see how the jar shelf looks when assembled. It is invisible and functional.
I really hope that this master class will inspire you to create exactly the same shelf or similar.In the meantime, we will prepare all the necessary materials and tools that we will need for a new project.
How to pull a drawer out of a kitchen cabinet
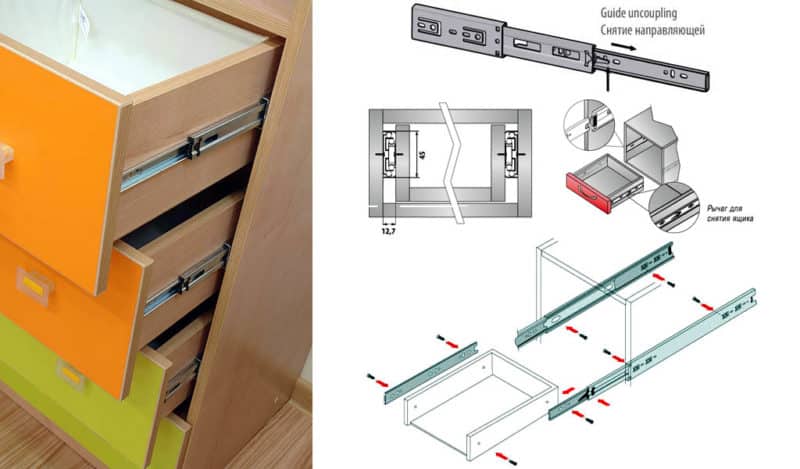
To answer this question, it is important to have a general idea of the types of furniture rails and their design features. The most common types of extension devices are:
- roller skids;
- telescopic with slide carriage or ball;
- telescopic multisection;
- telescopic with closer and push-to-open system.
Roller guides are the cheapest and easiest. Such devices have 2 paired sets, consisting of profile skids. The outer one has a flange that holds the roller when the drawer moves, and is attached to the furniture wall.
The inner one is equipped with a rolling roller at the far end of the profile and is attached directly to the drawer. When extended to the maximum stroke length, the roller is held by a protrusion on the outer profile to prevent the drawer from falling out.
To get it out, you need to take it with both hands in the middle and slightly lift the front part first, then, stretching the back part towards you as far as it will go, removing the entire box from the niche.
As for telescopic systems, here the procedure is somewhat different. Some of them are officially listed as non-collapsible. However, if absolutely necessary, any model can be disassembled.
The design of the telescopic guide remotely resembles a slide rule. An inner profile with a sliding system is inserted into the outer profile, which sometimes consists of ordinary balls in the gap between the profiles. If another one is inserted into the inner one in the same way, this is already a multi-section guide.
The stroke limiter in such systems is plastic clips. To remove the drawer, both latches must be released at the same time. They are located on the front end of the main profile. To turn off, press the "flag" or "tongue" of the right and left latches, after which the drawer is smoothly removed.
Multi-section guides are distinguished by a greater permissible load and the possibility of extending the drawer to its entire length. The procedure for separating the sliding element is similar to that described above.
Most often, multi-section guides are not disassembled. The reason is simple: when the end stops are removed, the sliding balls will fall out and will be difficult to reassemble and put back into place.
It is pointless to disassemble the guides to extract the box. Given the possibility of full extension, it will not be difficult to separate it from the carrier section, since the fastening screws are freely available.
How to pull out a drawer from a kitchen unit with a closer

The push-to-open system, with a slight pressure on the front panel of the drawer, automatically pulls it out up to 15 cm. The finishing mechanism, on the contrary, pushes it to the end. To do this, it is enough to set the initial movement to the middle.
The presence of such options in the process of removing the box obliges to take into account the design features. Regardless of the principle of operation of fittings (mechanical, compression), first of all, it is necessary to disconnect their fasteners.
When reassembling the system, the closers will have to be re-adjusted to take into account the free play for the push-to-open latch to operate. This is done using a screw on the push rod or by shifting the latch counterpart within the longitudinal groove.
For owners of the Grass guide system, such problems will not arise in principle. The design is so perfect that the box with the supporting part simply fits into the guide chute and slides in until a characteristic click. The location of the latches from below causes some difficulties when removing the box, but nothing needs to be adjusted.
Installing guides
First of all, you will need to make the correct calculation and mark the necessary points where the profiles will be located. This is done by measuring the 30 mm distance from the bottom, this is marked with a longitudinal line.
If a certain number of drawers are located in several rows one above the other, you need to make calculations with an orientation towards the facades. At the same time, it is necessary take into account that the facades of the structures should not touch.
In the middle of the facades, it is necessary to leave a small gap (2-3 mm). Therefore, the outer part of the box is made 3.5-4 cm larger than the size of its walls.
Scheme of fastening guides.
After making an accurate calculation, marking the right places and placing the guides, you need to attach them in the desired position. But before that, you need to choose the desired type of facade: internal or invoice. Each type has its own installation features.
When installing an overhead type of facade, it will be necessary to fix the removable element of the mechanism using self-tapping screws flush with the edge opening. In the case of installing an internal type of facade, it is necessary to fix the guides 2 cm inward from the end part of the side opening.
During the installation process, it is necessary to observe the uniformity of the arrangement of the profiles, they must be on the marked line.After completing the installation, you can try on the removable elements to the fixed ones and fix them. If all parts of the mechanism fit into each other without much effort, then the calculation and installation of the profiles was carried out correctly. The mechanisms will need to be fixed with a slight movement of the hand. Successful fastening will be confirmed by a characteristic click of the latch.


In case of difficulties in fixing the guides, there is a possibility that some stage of the work was performed incorrectly. Accordingly, you will have to disassemble the structure and do everything again, strictly following this manual.
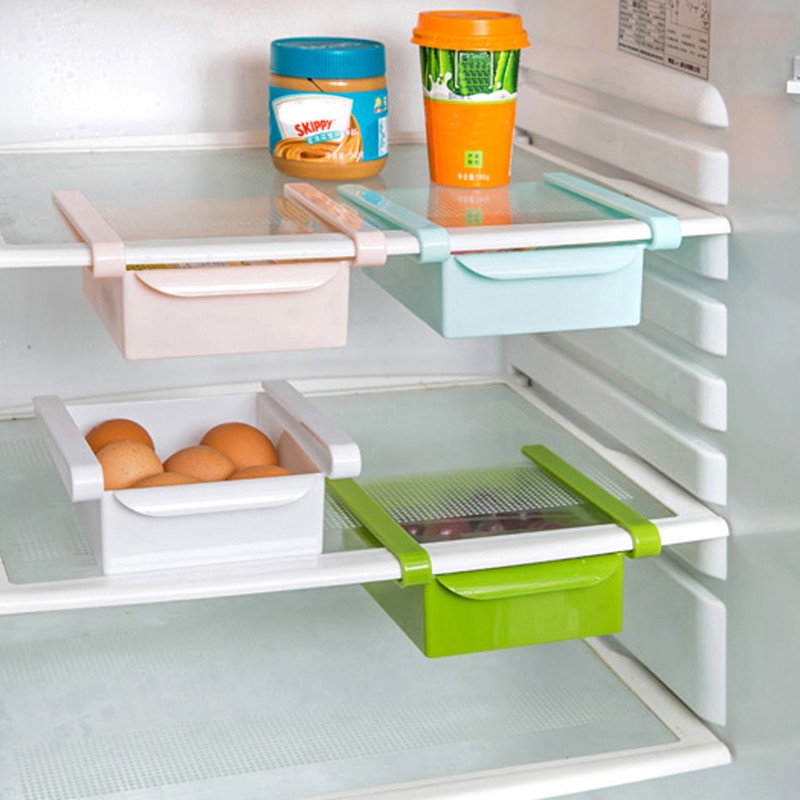
Additional accessories
egg containers
Refrigeration equipment designers have developed special containers for eggs in the form of plastic coasters with holes for the product. Each household appliance is sold with matching stands. Many housewives consider this item useless. There are few eggs in such a designer, and the container on the shelf takes up too much space. Store eggs in store packaging or on the refrigerator door.
Ice molds
This accessory is very functional. Most often, the mold is attached to the inside of the freezer door. With this accessory, the preparation of professional cocktails and drinks at home has become a reality.
oilers
Everyone knows that oil should be stored in a container with a closed lid. Some refrigerator manufacturers offer special closed shelves. There are models equipped with oilers that can also be used on the kitchen table.
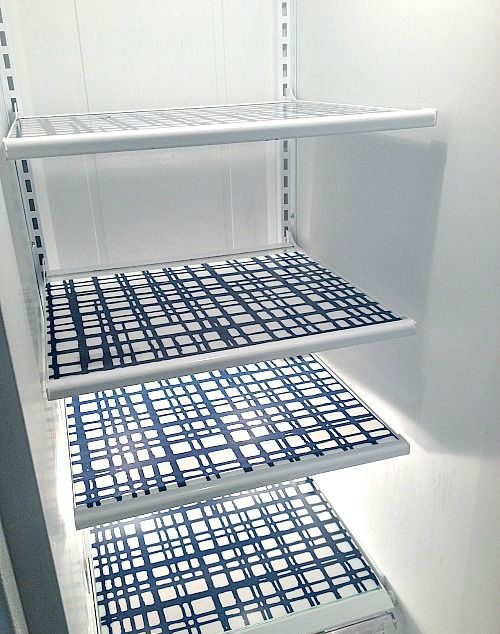
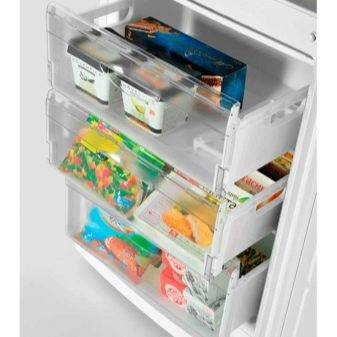
In the freezer
For the freezer, there are mainly two types of structures: boxes (containers) and conventional closed shelves with lids. Boxes are made of both plastic and metal. Latticed ones are inconvenient to wash, berries can fall through the rods. Frost formed as a result of operation may impede the movement of the box.
The topmost shelf in the freezer is designed for quick freezing of berries, mushrooms, greens. It has the form of a sliding tray with a lid. Ready frozen products from this compartment are packaged in containers or bags for storage on other shelves.
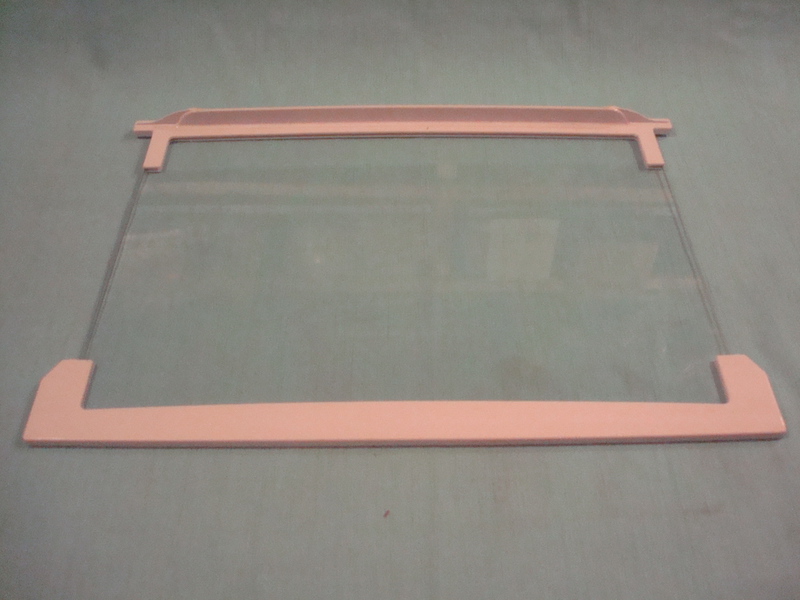
If broken or cracked, repair. You can find parts of the right size in specialized stores or on the websites of refrigeration equipment suppliers.
Photo examples of sliding shelves in the kitchen
We often do not even suspect how original and useful the simplest solutions for organizing space and its rational use can be.
website
collected a selection of 8 interesting ideas that will make life easier in the kitchen
How to close the narrow opening between the refrigerator and the wall? Turn this disadvantage into an advantage - install a hidden drawer. It is perfect for storing spices, preserves and drinks.
Metal office file holders can be used as a pan storage system. This will keep them in order, as well as protect them from scratches and dents.
Magnet - as an idea for storage
It's wonderful idea to create additional storage spaces cereals and spices in your kitchen. Simply attach a pair of neodymium magnets to the tin lids.
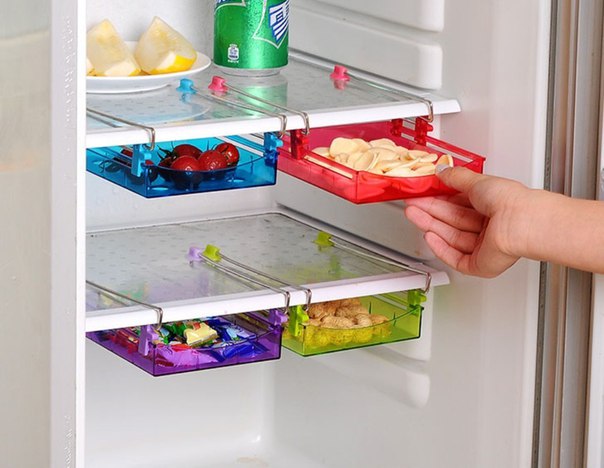
Drawers for fruits and vegetables
In boxes. This is a fairly simple project for anyone who knows how to work with wood.Make sure that the drawer slides are installed correctly so that they can be easily removed.
Attach the kitchen utensil holders to the cabinet wall. Ideally, as close to the stove as possible for maximum convenience.
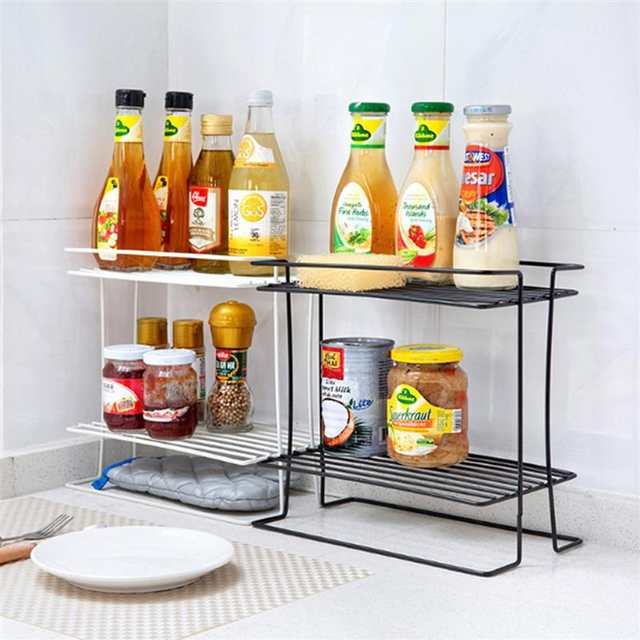
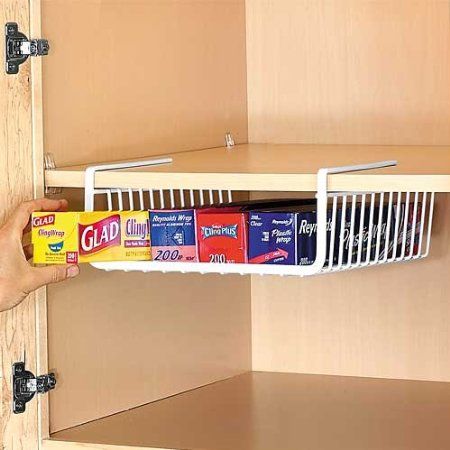
Magazine stand
Attach the magazine rack to the inside of the cabinet door. This will free up some space and also help keep the foil and bags within easy reach.
Most pan handles have a hole for hanging. To organize their storage, there is a special retractable system. It perfectly copes with the age-old problem of storing large-sized dishes in the kitchen.
To keep spices close at hand when cooking, use the drawer next to the stove. For more convenience sort them alphabetically.
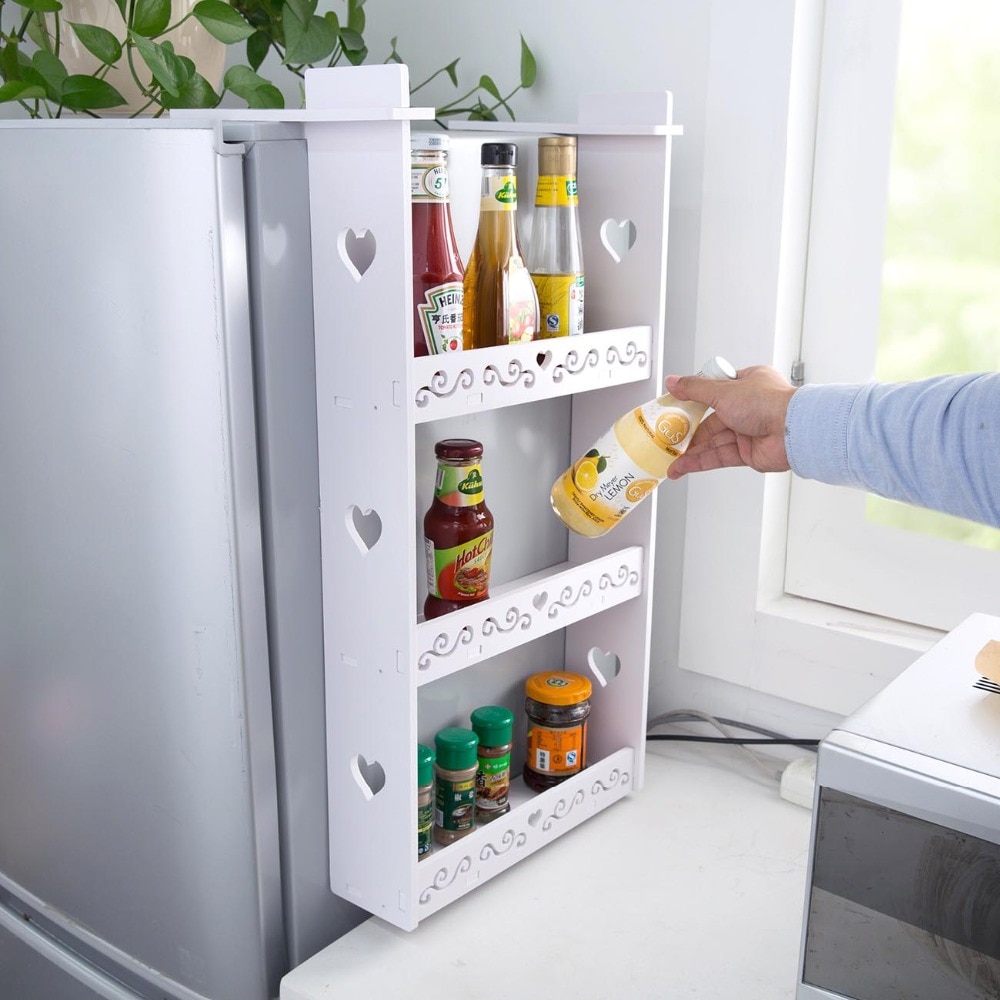
One of the biggest problems of small apartments is the same small kitchens. But it has long been known that a fourth of the time spent at home, a person is on it. The kitchen is the place in the house where you need to place a lot of useful little things, and even so that they do not interfere, and at the same time are always at hand. We suggest equipping a mini-pantry behind the refrigerator.
Consider getting some space for that much-needed pantry without cluttering up the space. Even an approximately 12-centimeter gap will fit, empty between the wall and the refrigerator. Having equipped a mini-pantry there, you can easily pull out the locker and take everything you need, and then just as easily push it back.
What you need to know before you start installing drawers
The principle of fastening the skids to the sidewalls of the pedestal is the same for almost all sliding systems.As a rule, 2 mm retreat from the front edge and then screwed along the extreme mounting holes and several central ones, depending on the size of the guides themselves.
Only the calculation of the height at which the skids are attached differs.
There are three main types of drawer slides, with different slide positions:
- Along the bottom edge (bottom). The simplest and most budgetary roller guides are installed strictly under the bottom of the box itself, overlapping on the fiberboard. As well as the most expensive options for equipping drawers - tandemboxes. They are also installed on the lower level of the drawer box.
- Centered on the side of the box. Telescopic ball bearings give greater freedom during installation - they can be mounted on any level of the sidewall of the drawer box. But still it is better to stay in the center. As practice shows, installation and adjustment is simplified at times.
- Top mount. In metaboxes (metalboxes), the roller guide rails are located on the upper level.
In each case, the box will “sit down” in completely different ways. Consider the example of a drawing of a conventional chest of drawers with three drawers. To facilitate the task, we assume that the boxes begin to be installed from the bottom of the sidewall of the cabinet itself, without deduction on the basement box and the bottom. This is possible in the next version.


- The height of the sidewalls of the cabinet is 668 mm (with the height of the chest of drawers without legs 700 mm).
- The height of the drawers is 150 mm with the height of the facades 221 mm.
How to install roller guides
The capture of the bottom by a part of the skids, which are attached to the box, is carried out at a height of 8-10 mm, depending on the thickness of the bottom (MDF).
Let's take the indent from the bottom to the lower edge of the facade equal to 20 mm (usually it ranges from 10-30 mm).
The scheme for installing roller guides will look like this.

Wherein there will be no trouble, if you round the values. Take not the level of heights 32/255/478, but round for convenience to 40/260/280. The main thing is to fix the roller guides equally on both sides.
How to install ball guides
With a similar tolerance under the bottom of 20 mm, the installation diagram of the ball guides will look like this.

The difference is that it is customary to install ball guides in the center of the sidewall. Since they come in different widths, it's easier not to move them up or down.
Also, the values 99/322/545 can be rounded up and made, say, 100/330/550.
How to install metaboxes on a drawer
A distinctive feature of a drawer with metal sides is its fastening along the upper edge. The main thing here is to correctly choose the height of the metaboxes relative to the vertical of the facade. She may be 54 mm (optimal for installation in a narrow niche under the built-in oven in the kitchen), 86, 118 or 150 mm. If a box is required deeper, it can be “built up” using one or two rows of special rails.
In our case, it is optimal to take a 150 mm metabox, the installation diagram will look like this.
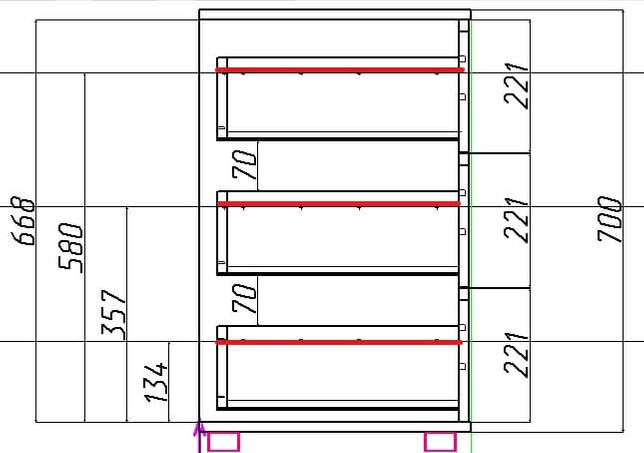
As in the previous versions, rounding is acceptable for convenience: instead of 134/357/580, it is quite possible to take 130/360/580.
How to install drawer fronts
Drawer fronts are always installed after the "test" and alignment of the inner box.
First you need to make sure that the box moves freely and smoothly, does not warp during movement and does not jam.
Only then, with the help of special linings (fiberboard scraps, a wooden or plastic ruler will fit), the even position of the facades is pretended to be.
Then, with the help of double-sided adhesive tape, the facade is fixed and attracted from the inside to 4x30 self-tapping screws. Through fastening of the handle also "holds" the facade. But it is worth drilling under the handle only after the facade is securely fixed.
Toolbox 5-section sit*
Telescopic guide right for the vm series oven
Excellent tool box made of plastic canister
How to make a box with your own hands


