- Construction of a reservoir from pallets (pallets)
- Calculation of required materials
- Tools
- Stages of work
- Nuances of care and operation
- Beautiful examples and options
- Ways to filter and purify water
- Do-it-yourself podium from boards
- Sequencing
- Multi-level pool and features of its self-construction
- Stages of pool construction
- Useful see on the topic
- Tire pool: advantages and disadvantages, characteristics
- Carrying out material calculations for a tire structure
- Required Tools
- Step-by-step instruction
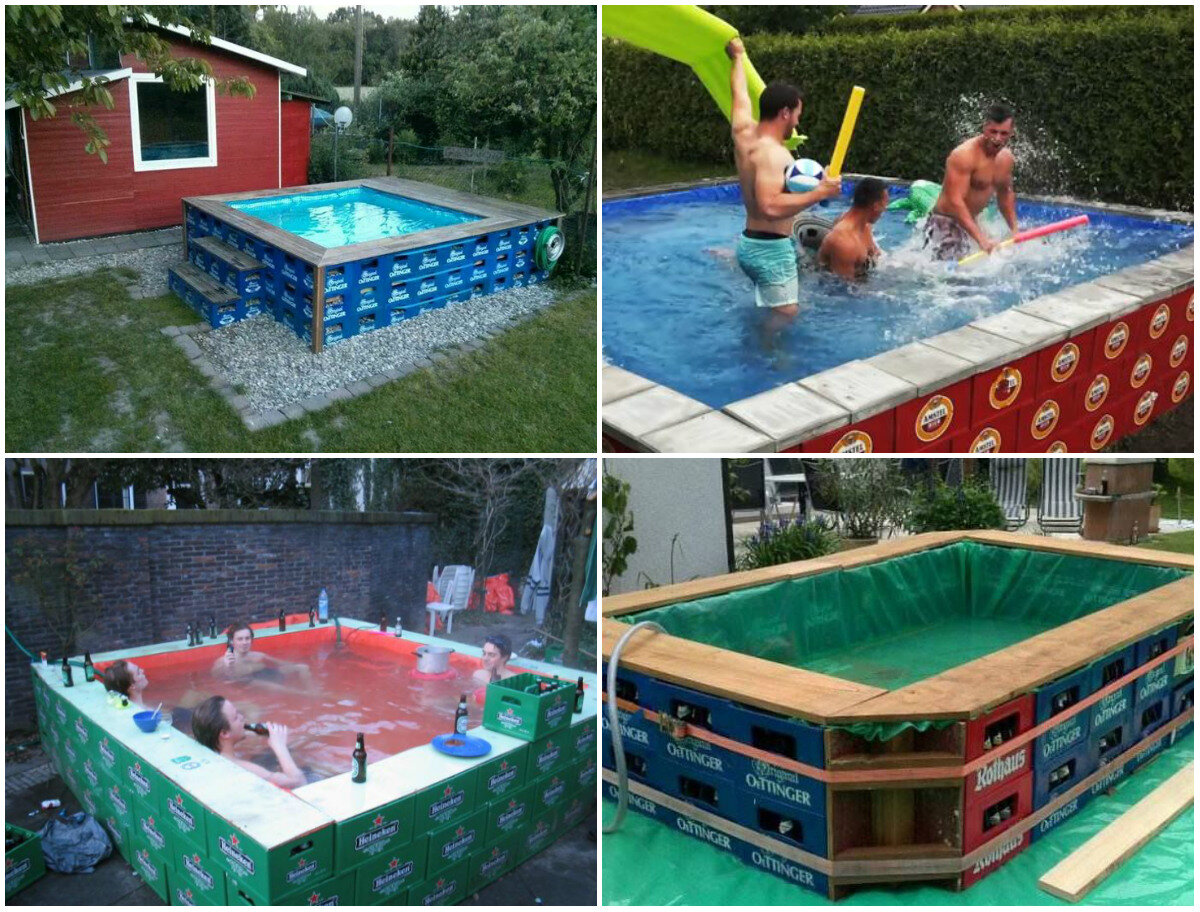
Construction of a reservoir from pallets (pallets)
Calculation of required materials
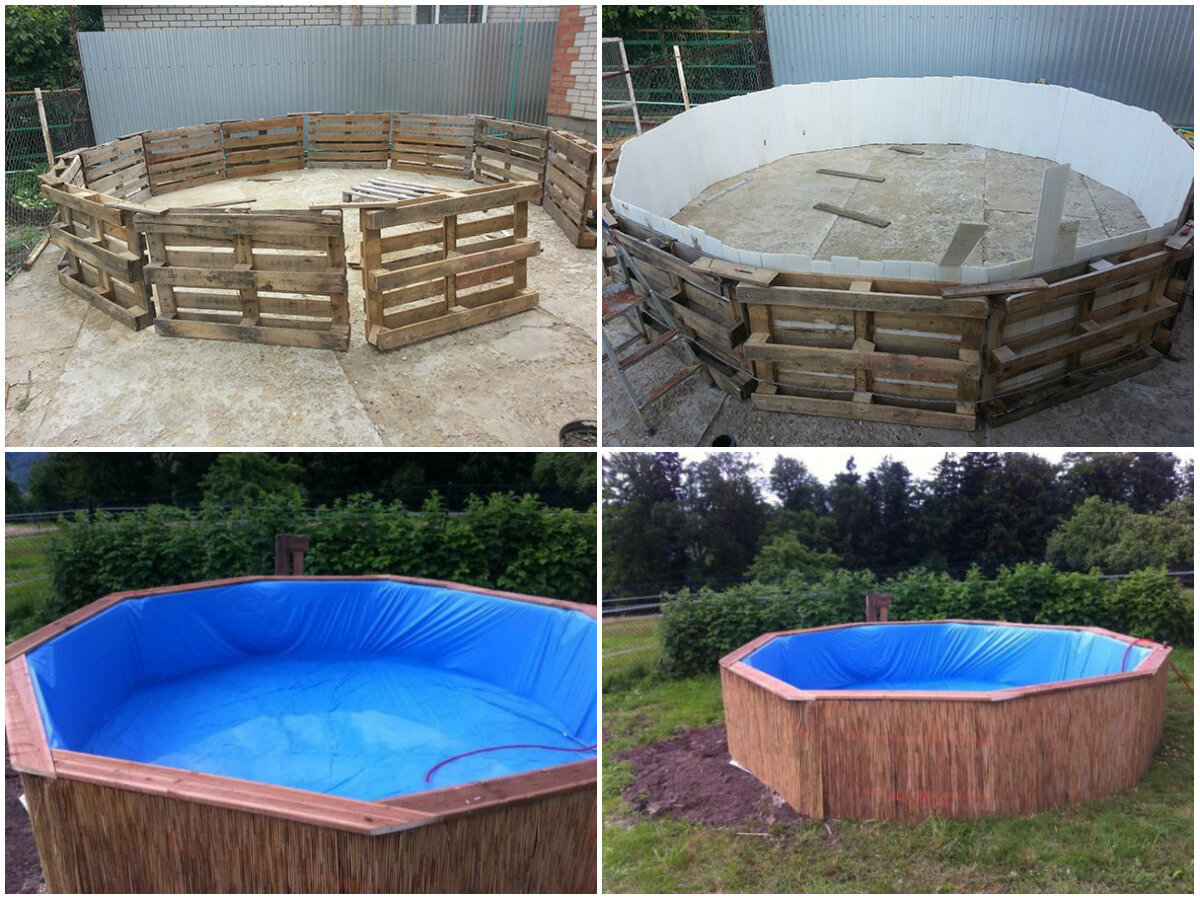
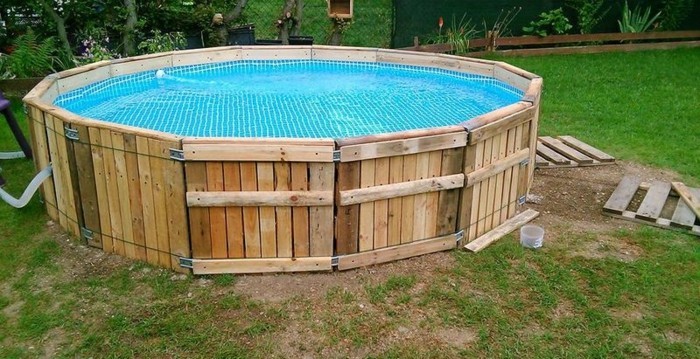
Pallets will be an excellent solution for a country pool. From them we will build the walls of the structure and the more pallets we take, the larger and rounder our pool will be.
-
In order to calculate the volume of the reservoir, we will use the mathematical formula S=A
2-a2, where "A" is the side of the square that contains the octagon, and "a" is the side of the octagon. Therefore, “a” will act as a pallet sidewall length of 1.2 meters.
-
First, we find the value of "A" by the following formula:
- The result from the root is 1.41421356. Further, according to this formula, we find a fraction and it turns out to be 0.8485281.Then we substitute our numbers into the formula to calculate side "A": 1.2 + 2x0.8485281 = 2.8970562 m.
- We calculate the construction area: S=A2-а2 and we get 2.89705622 – 1.22=8.3929346–1.44=6.9529346m2. Now we round up our figure and get 6.95 m2.
- Having all the values, we calculate the volume of the pool using the formula V=Sgroundsxh, where "h" stands for the height of the structure, which is 0.9 meters. We get 6.95x0.9 = 6.255 m3.
Tools
- Shovels are large of various types.
- Big hammer.
- Electric or cordless screwdriver.
- Concrete mixer.
- Buckets for sand, water and concrete.
- Gravel or crushed stone (the amount is calculated based on the diameter of the pool).
- Electric jigsaw.
- Sander or sandpaper.
- Roulette at least 10 meters.
- Stakes and strong cord.
- Square.
- Rule (level) and plumb line.
- Marker or pencil.
- Large pliers.
- Wood planer.
- Hardware.
Stages of work
- First, we treat all pallets with antiseptic and antifungal agents and special impregnations, since the tree will be in close proximity to the water.
-
For pool sections we take pallets 120x90 cm. From them we will create an octagonal structure.
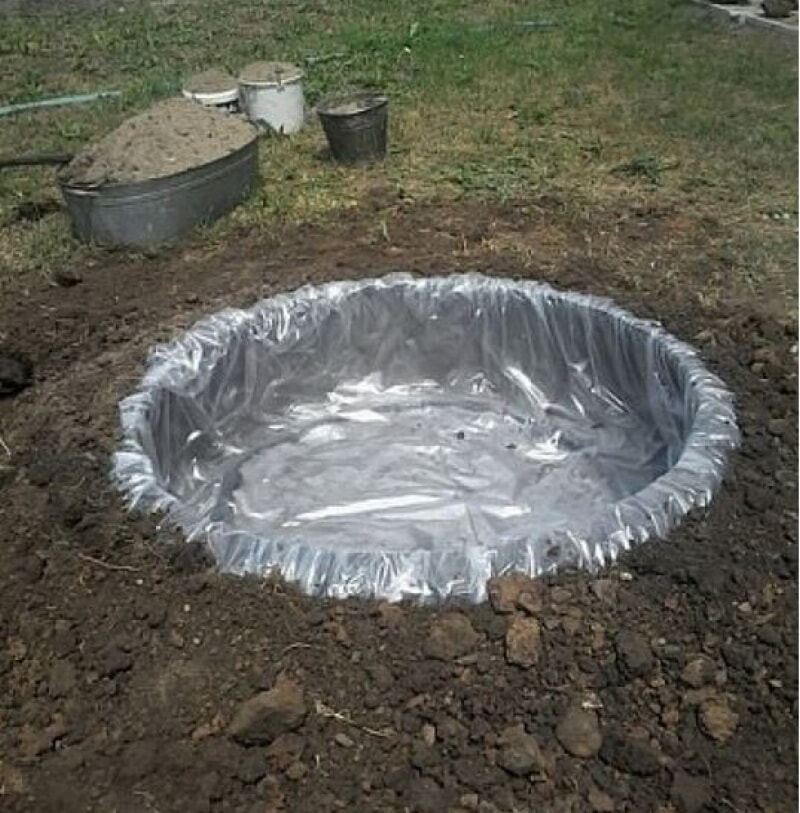
- We dig a circular pit with shovels so that we get a diameter slightly larger than the size of the future reservoir.
- We level the bottom of the pit well and fill it with gravel or gravel - a layer of 20 centimeters.
-
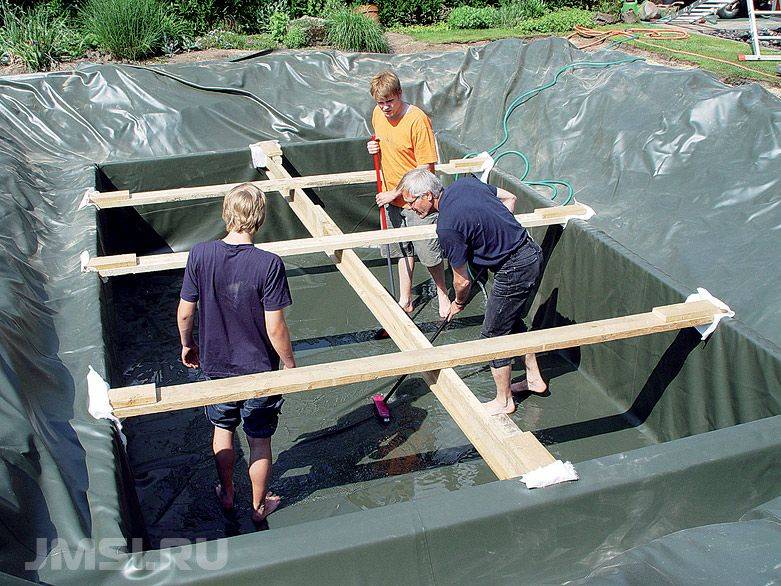
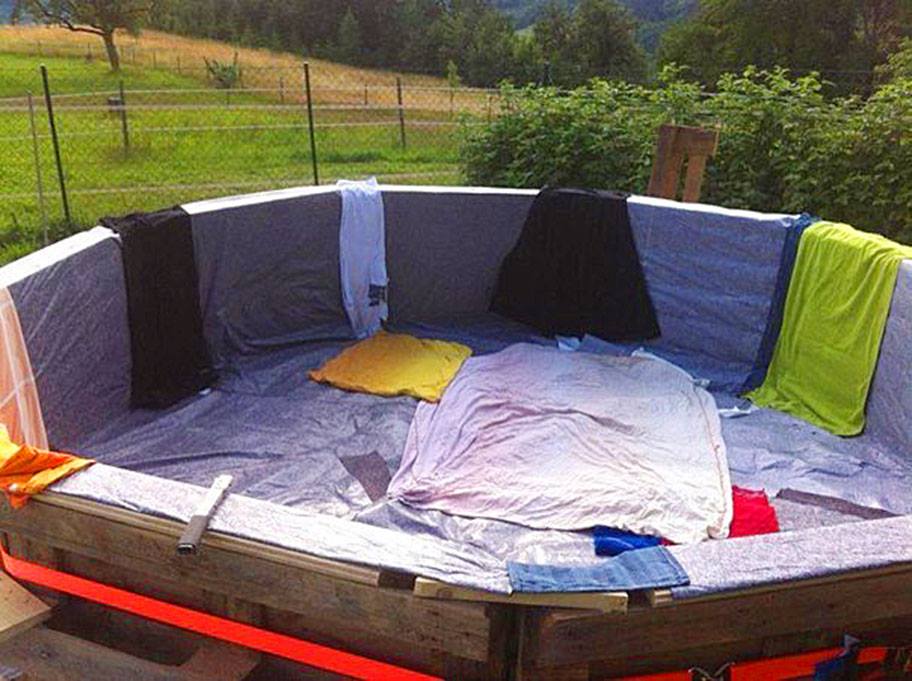
Inside the pit, we assemble a frame from pallets (8 pieces). Before that, we lay dense polyethylene at the bottom of the pit. We put the pallets with a solid part inside the structure.
-
We connect all the elements with boards, which are nailed or screwed along the perimeter of the sides of the frame. We strengthen the joints with wooden blocks using a screwdriver and self-tapping screws.
- We make holes of the required diameter in the frame to install a good drainage system.
-
After assembling the entire frame, we must securely fasten it with two reliable tie-down straps in a circle at the top and bottom of the pool.
- In the holes prepared in advance, we insert plastic pipes for supplying and draining water.
- In order to further strengthen our frame, we drive wooden pegs into the distance between the pallets and the walls of the pit.
- We fill the bottom of the pool with a 10 mm concrete solution and leave it for 5–7 days for it to completely solidify.
-
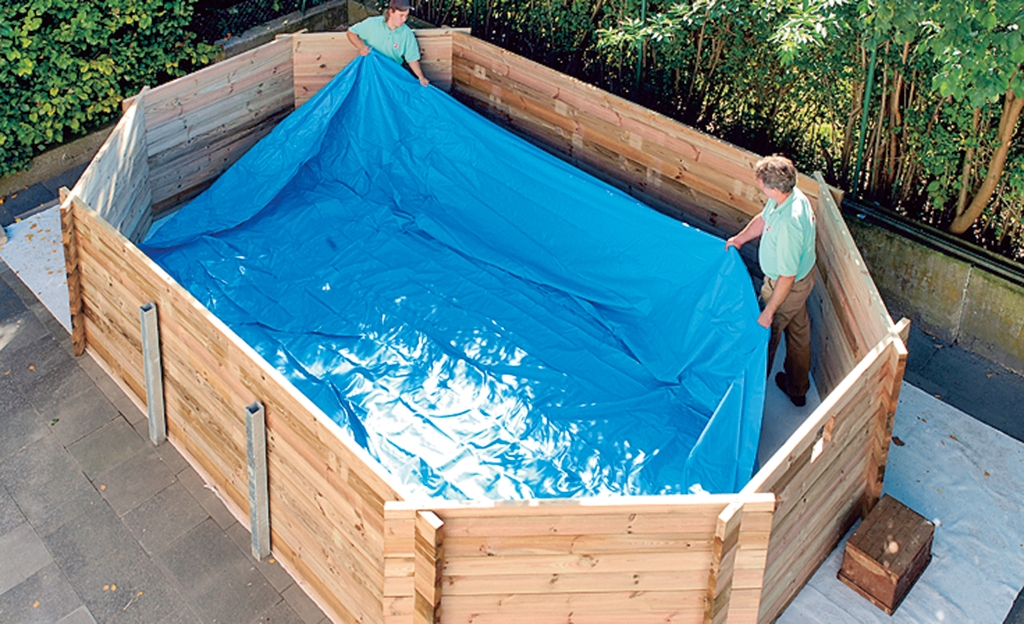
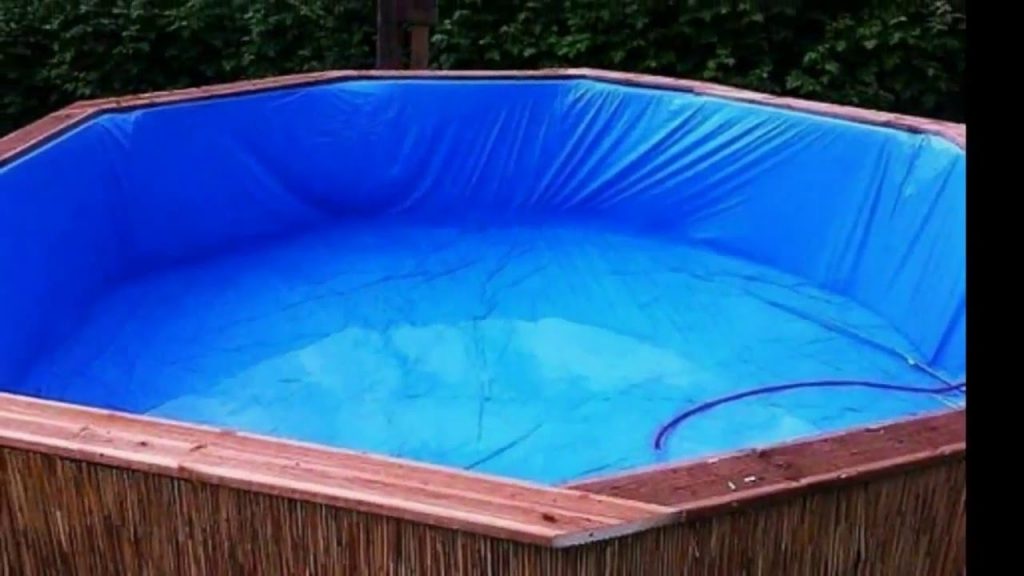
After the concrete has dried, we begin the waterproofing work. To do this, we take a dense polyethylene film and lay it over the entire inner surface of the pool. We fix with tape to the sides.
-
We can decorate the outer sides of the pool frame with OSB, chipboard or fiberboard boards, as they will help to hide all the unaesthetic elements of the pallet fasteners. You can also quickly and inexpensively decorate the frame with ordinary rolls of reeds, bamboo, etc. fastened together.
Nuances of care and operation
It is necessary to take care of such a pool carefully. Regularly check the plastic film for cuts or other damage through which water can flow. Over time, even a small leak from a small hole will damage the wooden frame (mold, rot, wood will swell, etc.).
Periodically, it will be necessary to drain the water and wash the pool well from sand, dirt and other debris. If you do not have good filters, you will have to change the water often, and this is very expensive, so it is best to do it once. buy a good device for water purification.You can even use a homemade sand filter, which is the most common among summer residents who make pools with their own hands.
Also, once a year or several years, if necessary, it will be necessary to re-treat the wooden products of the pool with special impregnations.
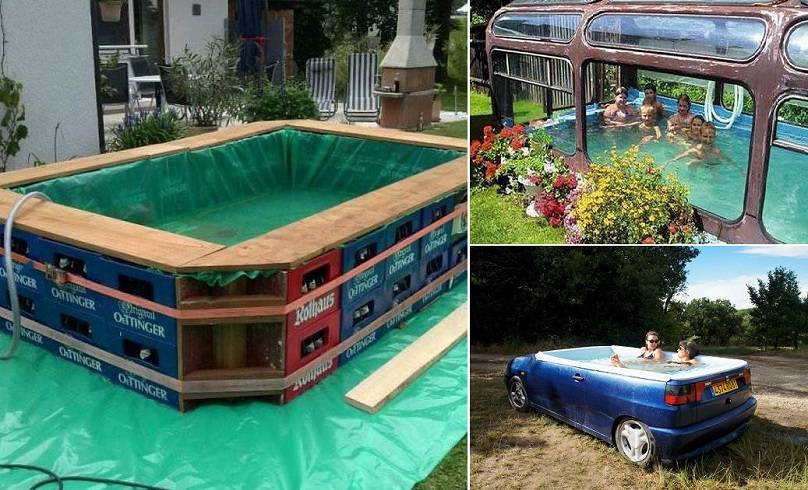
Beautiful examples and options
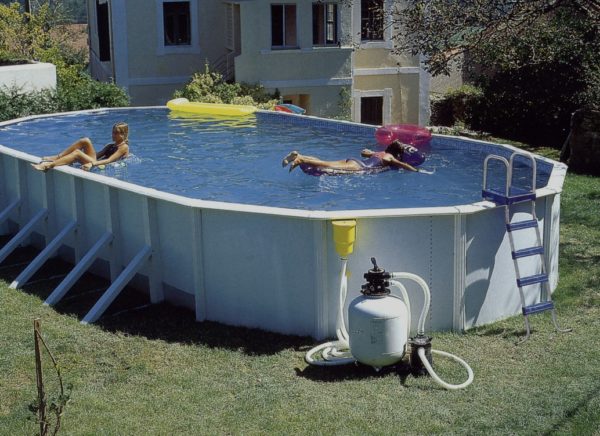
The frame outdoor pool is a good solution for a summer cottage. It is durable and easy to assemble and dismantle. This is a budget-friendly and easy way to please yourself and your family with great outdoor recreation. A distinctive feature of such a pool is its high sides, which does not always look aesthetically pleasing. But it gives limitless scope for imagination to hide the sides and give the object a beautiful look.
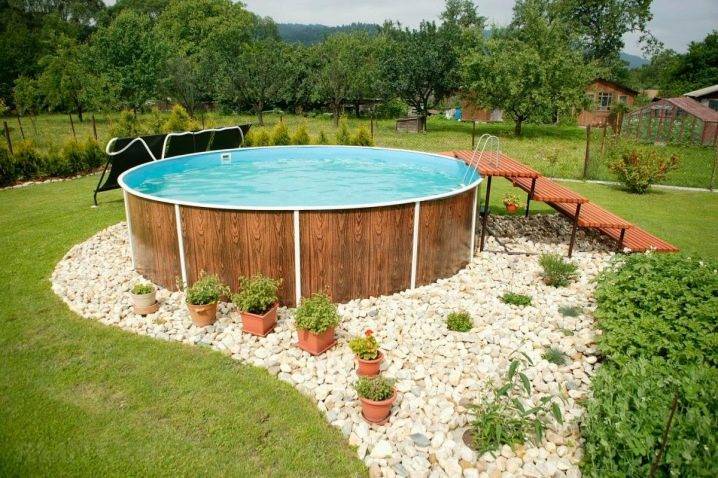
Create a surface of light stones around the pool. A touch of greenery will be added by flowers located in pots of different sizes. At the same time, observe the unity of the color scheme. Brown flower pots look appropriate, in harmony with the outer skin of the pool and the wooden staircase.
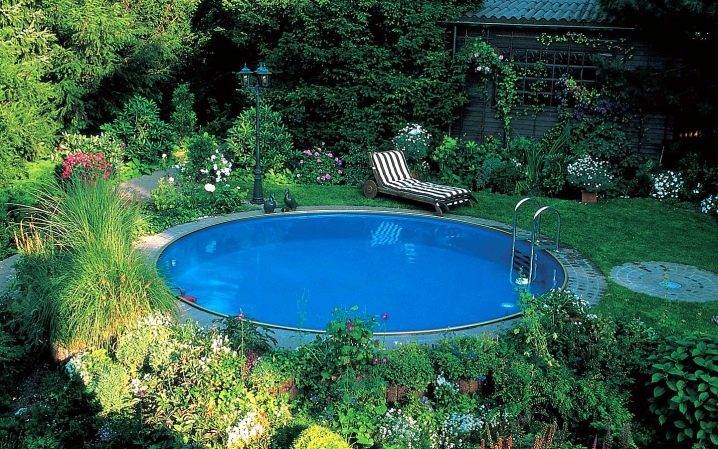
If the frame pool is completely immersed in the pit, the perimeter is trimmed with mosaics or stone, planted with plants, then you get a very beautiful option for any suburban area.
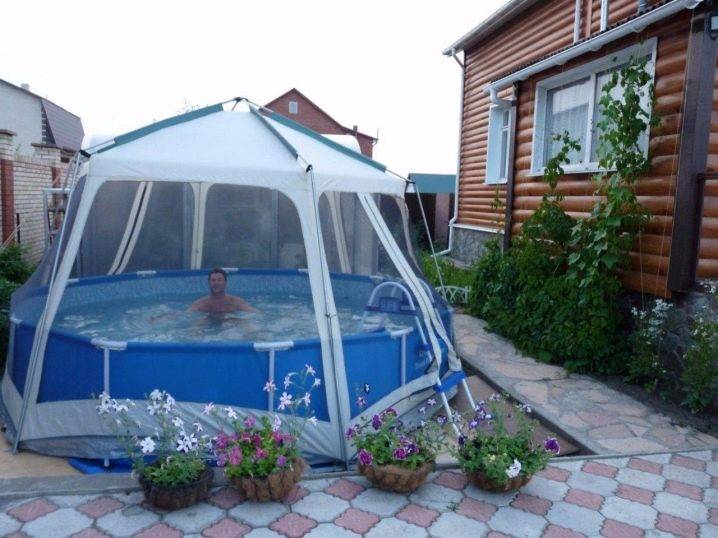
For a small frame pool, you can build a canopy. Thanks to this, you can enjoy swimming in any weather, even in rainy weather. The similarity of a tent looks especially interesting.


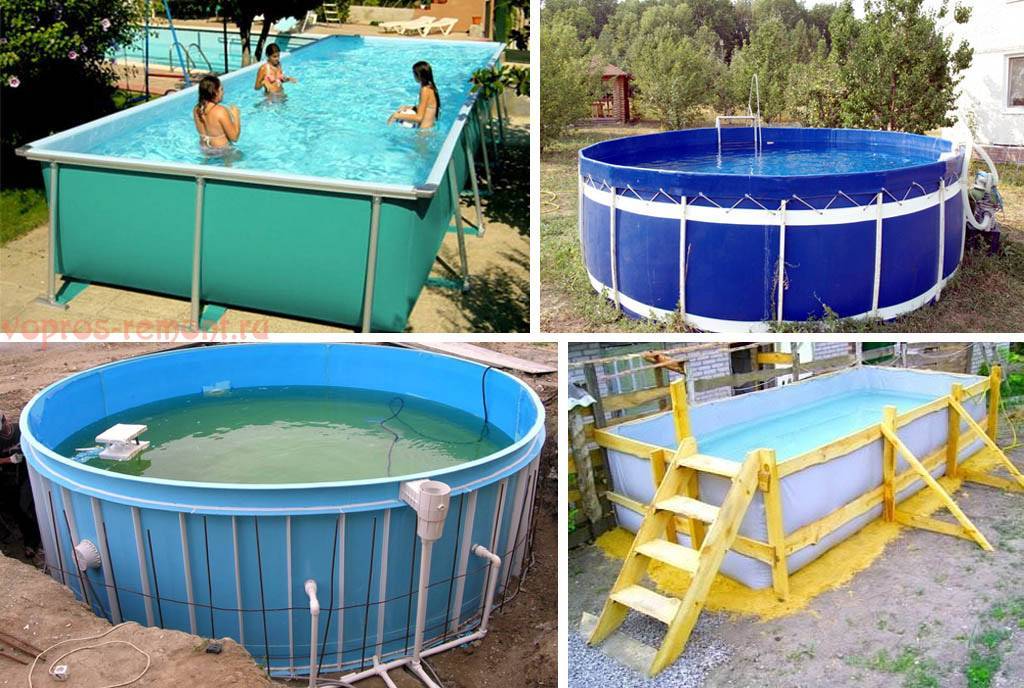
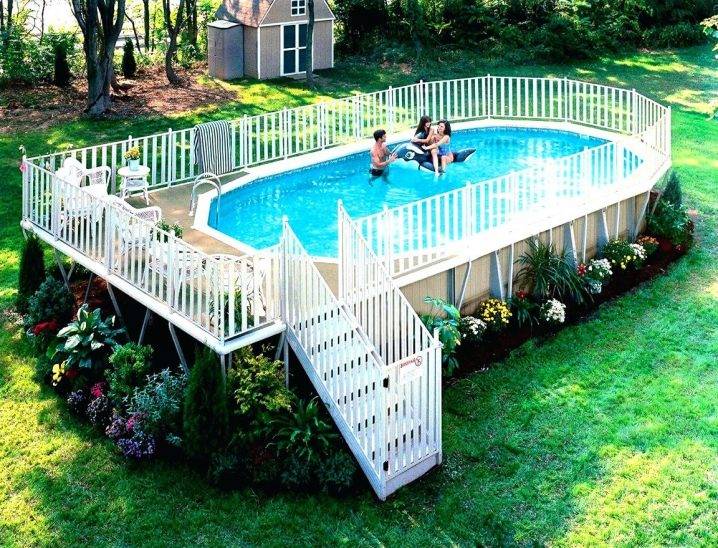
The frame does not have to be closed. Build a platform inside which there will be a pool. Perform the edges of the platform in the form of a lattice fence. Cover the lower part from prying eyes with an abundance of flowers and plants.
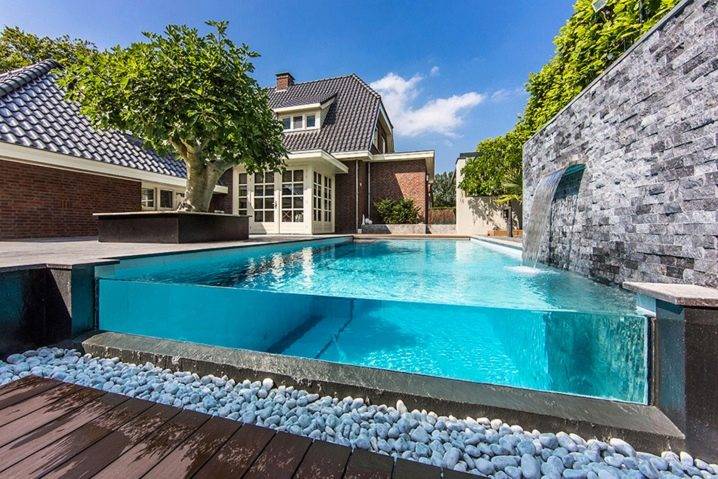
The pool with glass walls looks especially impressive. Of course, its creation will require special knowledge and skills.
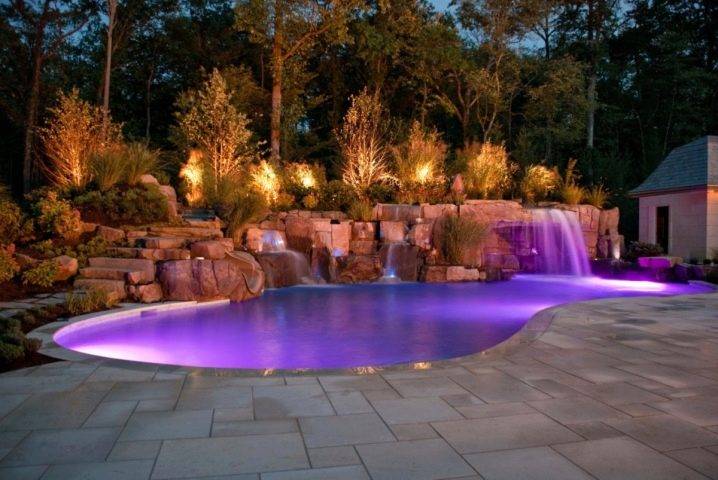
Illumination of various colors turns the pool into a fabulous and romantic place, which can be enjoyed even at night.
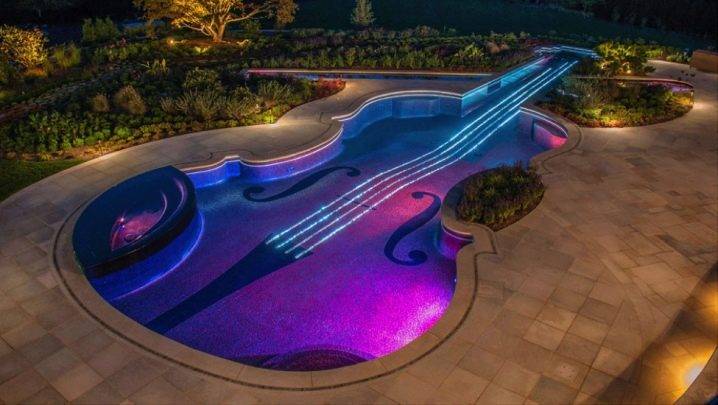
Outdoor pools amaze with a variety of forms. The violin pool will be appreciated by creative and creative people.
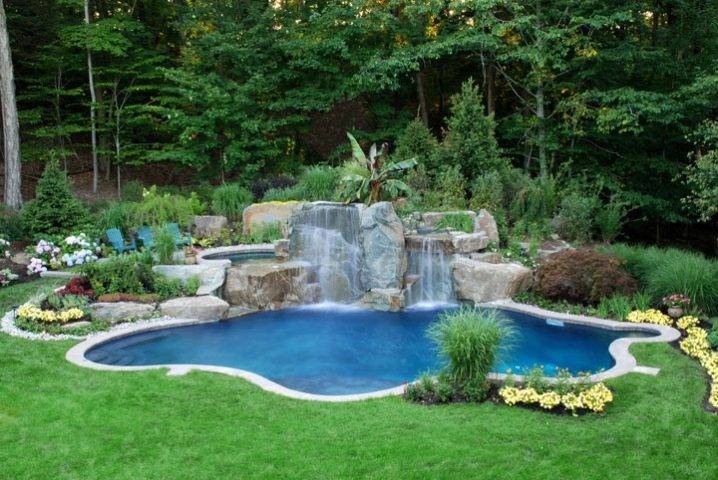
Often, the owners decorate their pools with miniature waterfalls, alpine slides, turning them into a real masterpiece. Several separate bowls are placed at different levels.
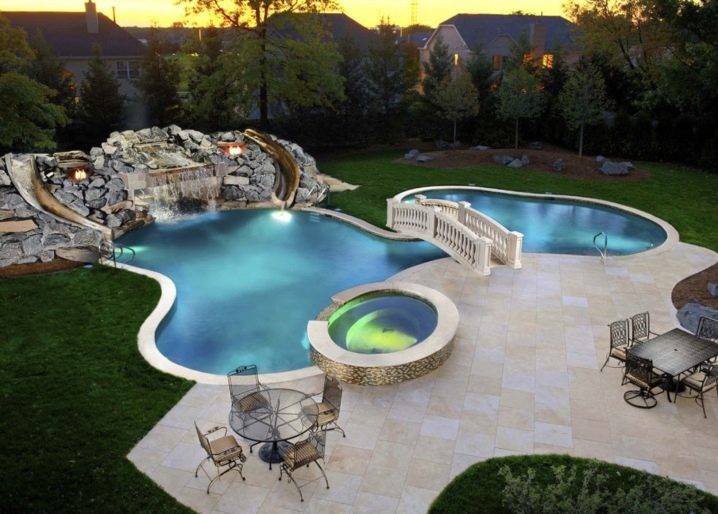
An unusual element of decor is a bridge dividing the reservoir into two zones.
How to make a pool with your own hands, see the next video.
Ways to filter and purify water
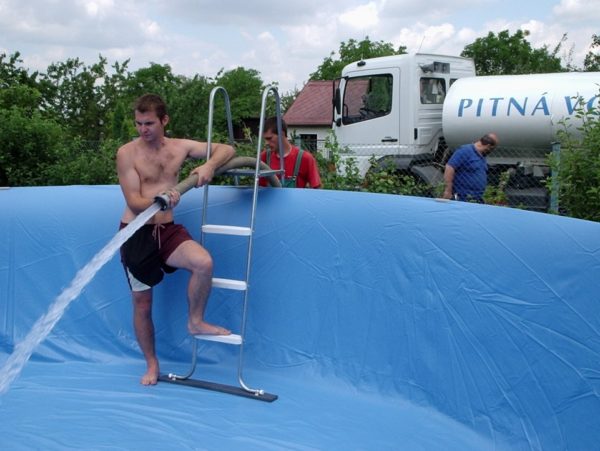
 If a special cleaning system is not provided in the pool, after a short period of time the water will become contaminated, it will smell unpleasant, and plaque will appear on top. For complete draining and filling with clean water, you can use a pump designed for this purpose. However, in this case, it will take some time for it to heat up again.


In addition to the filter pump, brushes, hoses, and testers are used in pool care. There are electric devices that catch garbage - pool skimmers. Nets can be used. They are easy to remove floating debris on the surface of the water. If the pool is large, then it will need a strong telescopic handle. But nets, skimmers cannot remove small debris, so the necessary flow filters.
 You can use a special installation with a filter pump 8000. 2 pipes are connected to the pump, one serves to drain, the other to supply purified water passed through the filter to the pool. Filters are produced:
- sand;
- cartridge;
- diatoms.
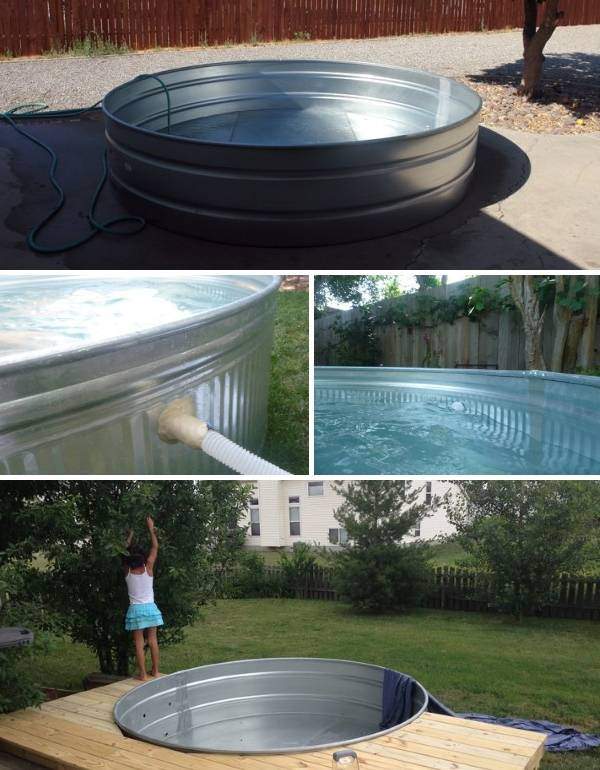
Do-it-yourself podium from boards
In the country, most often they install small inflatable and frame pools.It is convenient to mount them on supports made of larch or polymer decking. The height of the flooring depends on your tasks. The high platform is convenient because you can remove the pump and other equipment under it. But in this case, you will also need a ladder. A low platform is built faster, as steps are not needed. We will tell you how to make a podium for a pool in the country in its simplest version.
Sequencing
- Prepare the area, clear and level it. Sand is not needed here, as the flooring will be built on a hill.
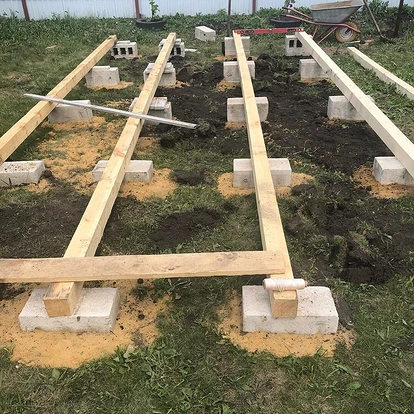
- Fasten on the prepared area supports of concrete pillars or cinder blocks.
- Lay a beam with a section of 5x5 or 6x6 on them. The lags should be parallel to each other. The smaller the distance between them, the more stable the platform will be. The average step is 30 cm.
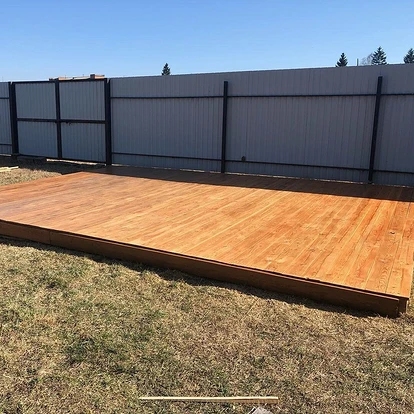
- Lay boards 2.5 cm thick perpendicular to the beams. For both natural wood and decking, leave a gap between the boards of 1 cm - in case of temperature shifts.
- Secure them with staples and nails.
- Cover the wood with impregnations to increase moisture resistance and paint.
1 of 7
Instagram @yarche_mir
2 of 7
Instagram @yarche_mir
3 of 7
Instagram @artempatskevich 4 of
Instagram @artempatskevich
5 out of 7
Instagram @artempatskevich
6 out of 7
Instagram @vintovayasvaya
7 out of 7
Instagram @vintovayasvaya
On top, you can lay a geotextile or PVC film to protect the flooring from water. But this option is more suitable for small platforms on which there is little or no free space.


Multi-level pool and features of its self-construction
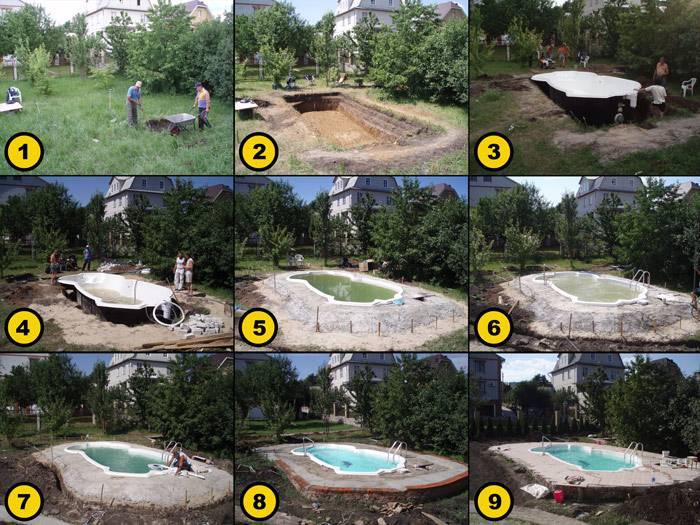
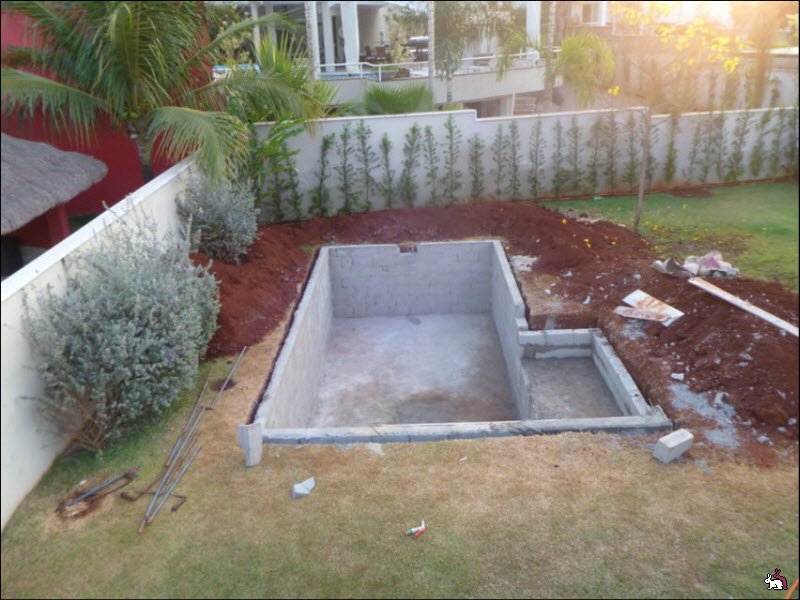
In this section you will find detailed recommendations for each stage of the construction of a multi-level simple pool without complex communications. In it, the bowl is simply filled with water, and after a while it is sucked off, and the bowl is filled with fresh clean water.
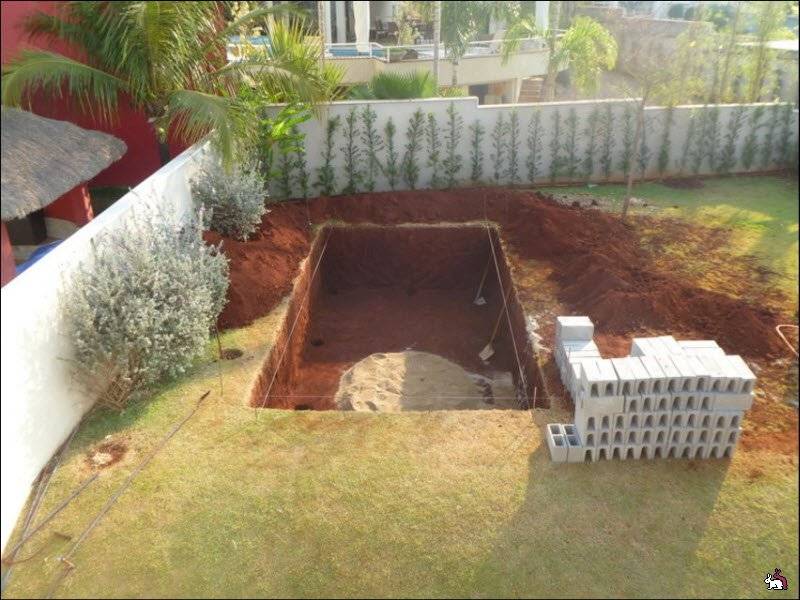
First of all, you need to choose a place. Then it is necessary to carefully consider each stage of the work, assess the feasibility of their implementation at a specific site chosen. Next, an optimal plan is drawn up that will allow you to do everything you need, with maximum savings and efficiency. After that, you can proceed to the pit.
Since a multi-level structure is planned, it is necessary to calculate the size of each level. In the process of digging the pit, level by level, the filling is also carried out. So, gradually, you will reach the bottom. After hardening, you can carry out a test set of water to find out where there are leaks. If there are no defects, then the water must be pumped out. Next, you can finish the concrete according to your personal preference.
This is one of the easiest and most affordable ways to build a pool in the country with your own hands. In this case, you will not have to bother with sewers, sewage and other communications. Such a pool does not need cleaning devices. A simple, comfortable and economical pool, which not only allows you to enjoy the coolness of the water, but also serves as a wonderful decoration of the site.
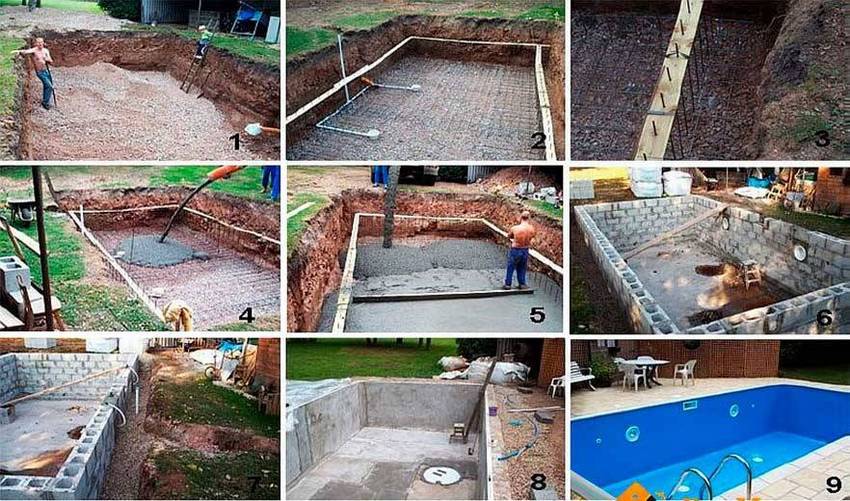
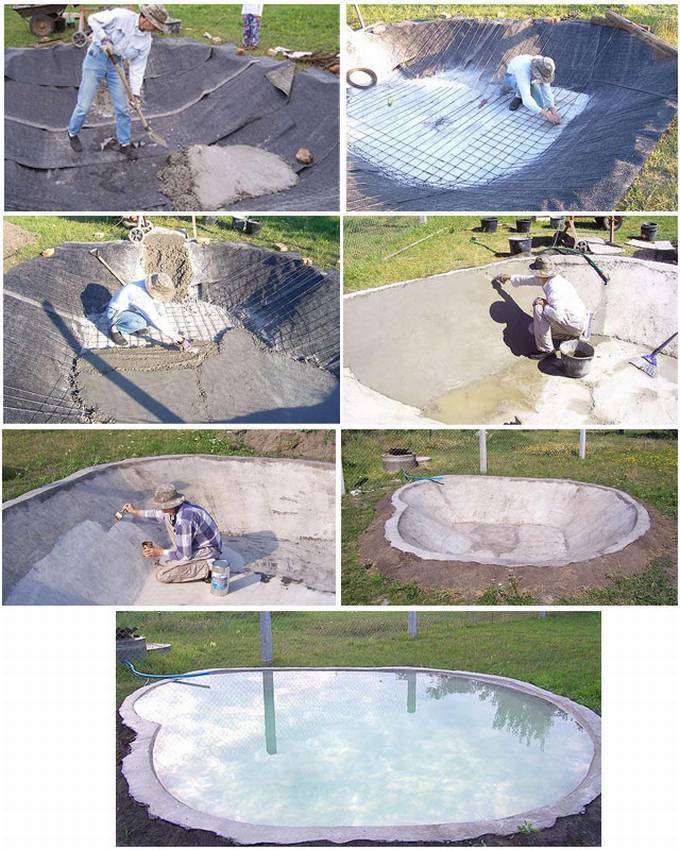
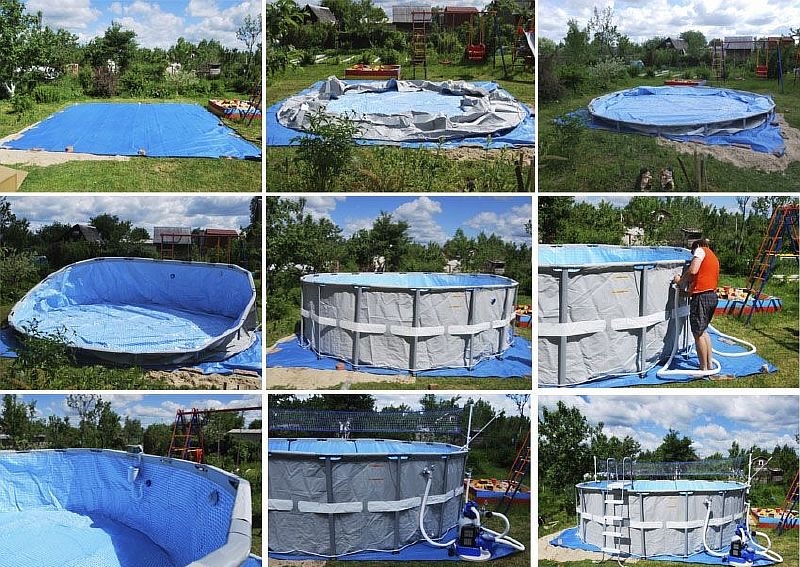
Stages of pool construction
In general terms, the process of building a stationary pool can be divided into the following stages:
- The choice of the type of reservoir and the preparation of its project. At the same time, a suitable site for construction is selected.
- Marking on the ground. Excavation.
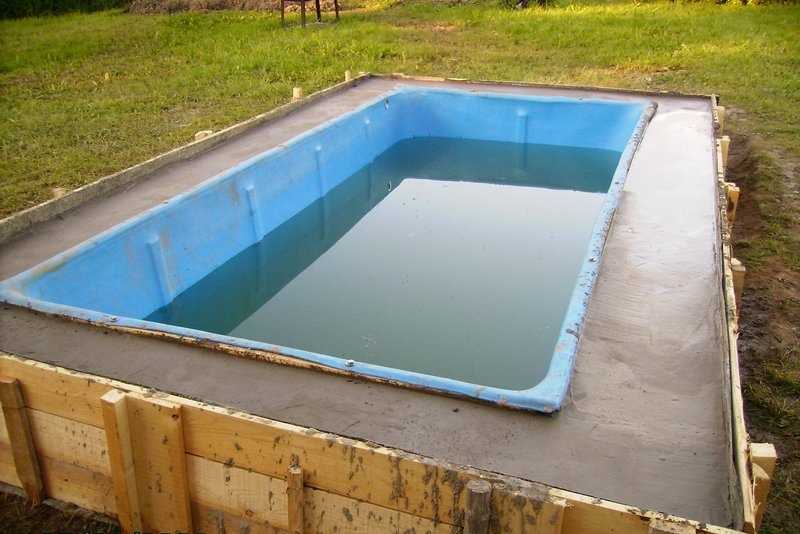
- Arrangement of formwork and pouring of the pool bowl.
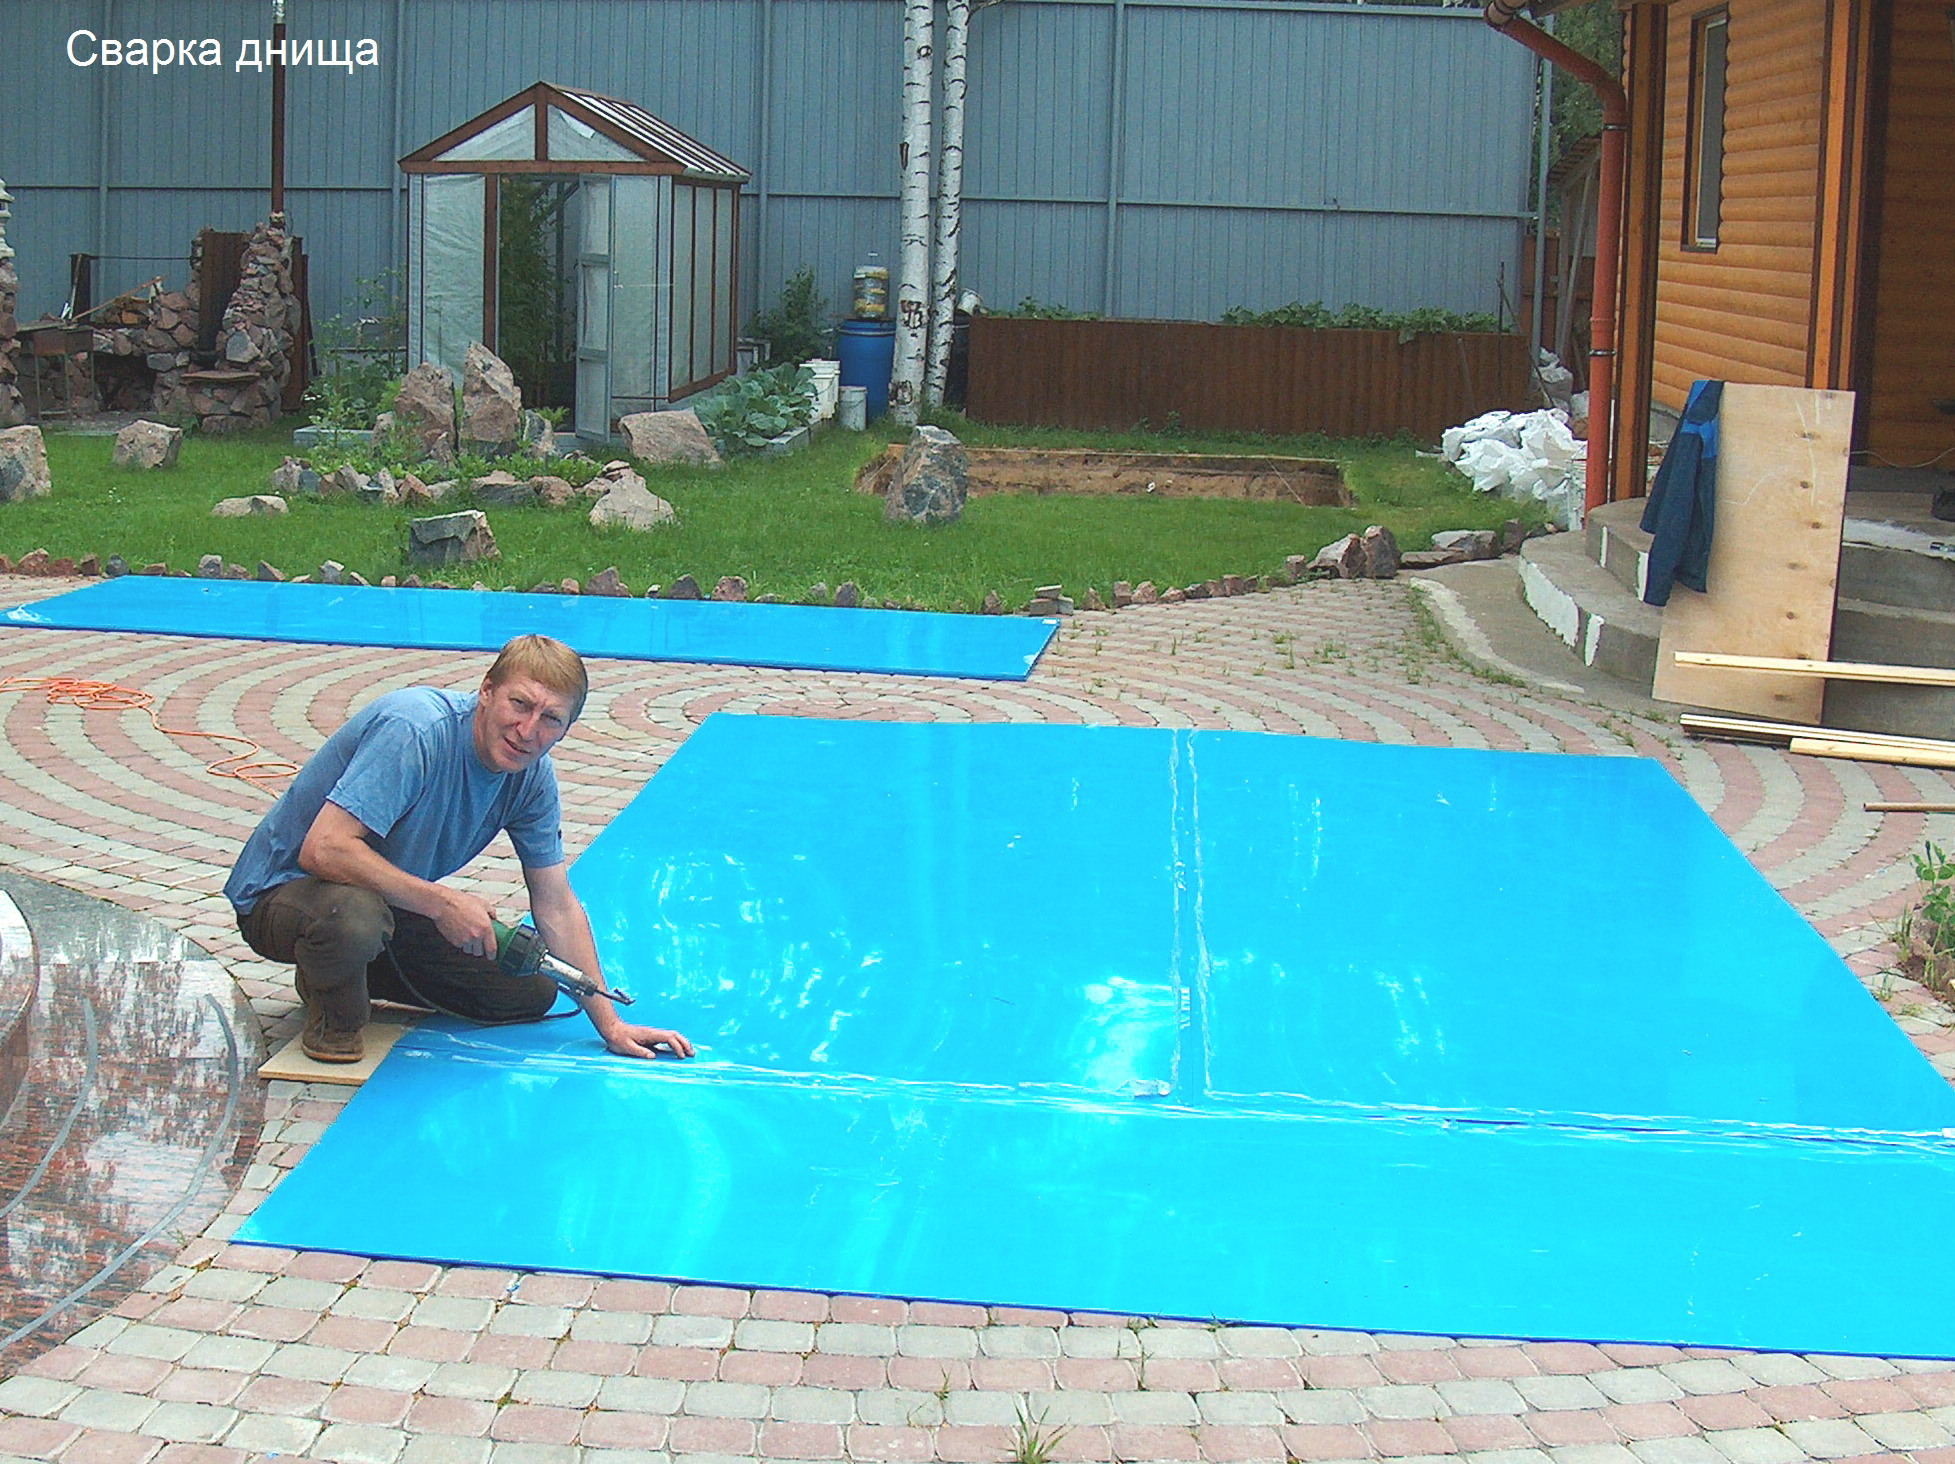
- Applying a waterproofing layer to the surface and finishing the bowl.
- Equipping the pool with equipment and lighting.
As you can see, there is a lot of work. At the same time, each stage is important, because not only the appearance of the structure and the duration of its operation will depend on this.
new entries
Chainsaw or electric saw - what to choose for the garden? 4 mistakes when growing tomatoes in pots that almost all housewives makeSecrets of growing seedlings from the Japanese, who are very sensitive to the land
Useful see on the topic
Here, the experience of pouring the bowl of a small rectangular concrete pool is clearly demonstrated:
This video shows in detail the process of finishing the pool with PVC film:
Practical experience in the operation of the pool and overview of possible errors, as well as ways to eliminate them, you can see in the following video:


The arrangement of your own pool on the site can be done even by a novice master. To do this, you need to correctly design the structure, and then perform all the necessary work, strictly observing the technology. With proper care, a homemade pool will last for many years.
Do you want to get your own pool, but have not decided which one is better to choose? Maybe there is already experience in the construction or is there something to recommend to us and site visitors? Please write comments in the block below, express your opinion, ask questions, post photos on the topic of the article.
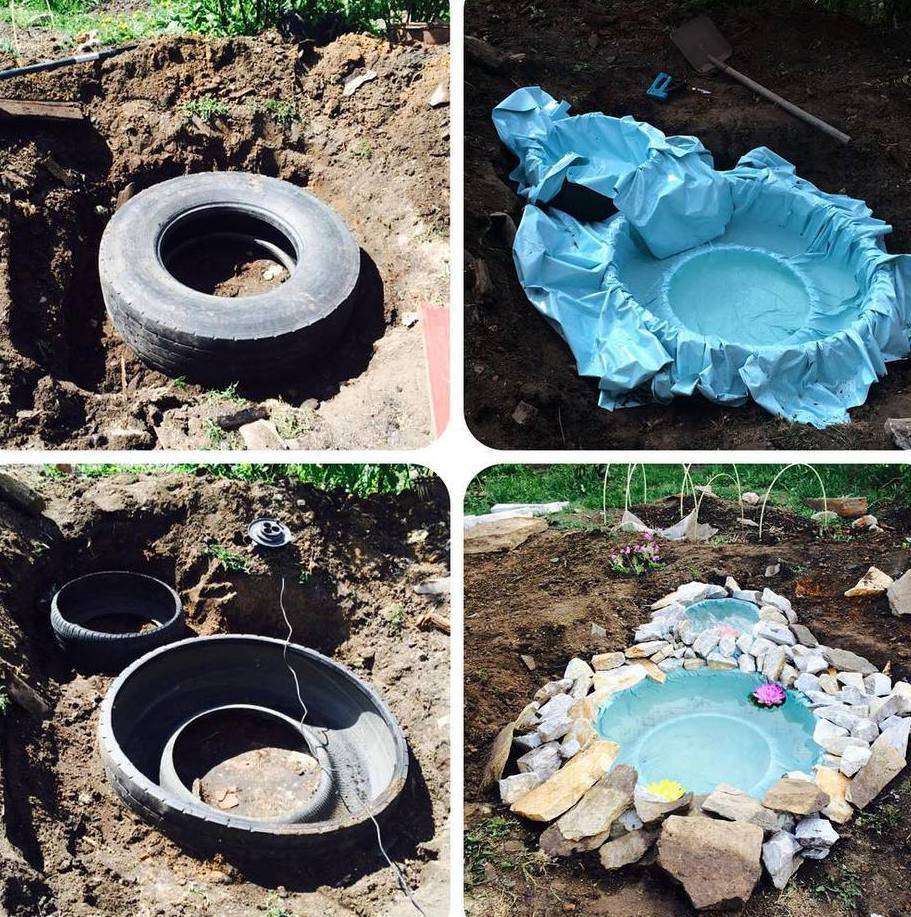
Tire pool: advantages and disadvantages, characteristics
As a building material for the construction of the pool, you can use an old tire from a tractor, combine harvester or a large truck.
Its width and diameter are quite suitable for these purposes. Finding this material will not be difficult if you contact car repair shops, where they will sell you an old tire for a small amount. With it, without spending a lot of time and effort, you can build a compact pool. You just have to wait until the concrete base for this tank hardens. The use of a tire as a material for building a pool has its pros and cons. The positives include the following:
- the width of the tire is convenient in that it will not be necessary to look for materials for the construction of the walls of the pool;
- the round and solid shape of the tire is an almost ready-made container for water;
- a thick layer of rubber will reliably hold water;
- the tire is not afraid of temperature changes, so it will last for many years;
- a pool made of such material is easy to decorate. You can just paint it in different colors, and it will be difficult to guess that this is an ordinary tractor tire.
The disadvantages of this material are:
- small size. There is no possibility to swim and dive in this pool;
- due to the small diameter, which is slightly more than one and a half meters, more than two people will not fit inside;
Carrying out material calculations for a tire structure
To create a pool from the tire you need to pick up a large model.
The wheel diameter of this car ranges from 1620 to 3575 mm, and the tire width is from 498 to 1140 mm. The following table will help you choose the right tire size.
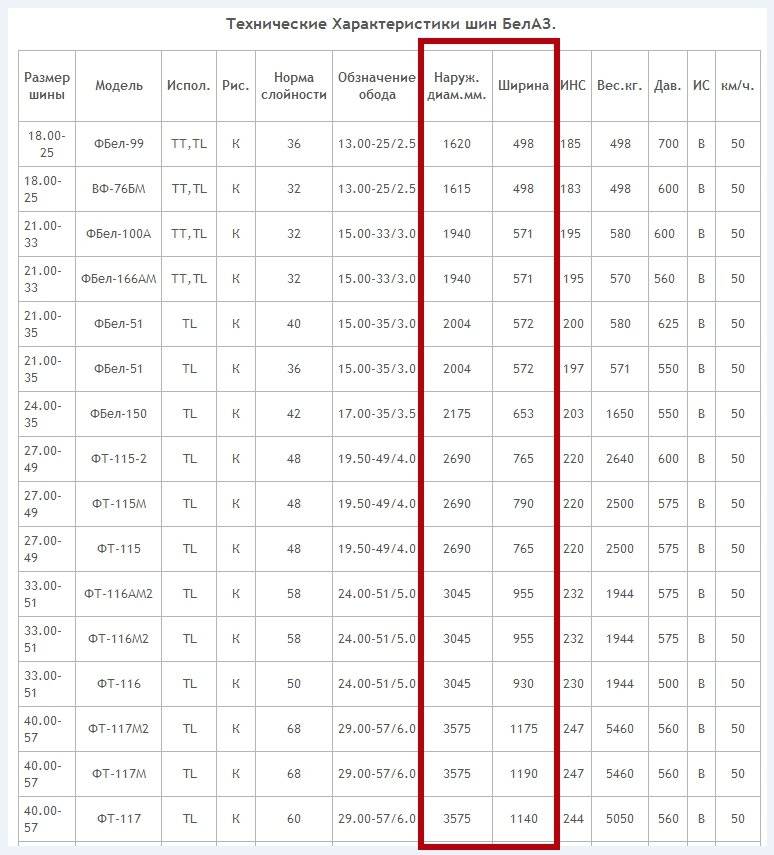
The red color indicates the outer diameter and width of the material.
To calculate the volume of the pool, you need to remember the school curriculum in the course of geometry.To make these calculations, you need to use the appropriate formula: V=π r2 h, where V is the volume of the cylindrical pool; π is a constant mathematical value equal to 3.14; r is the radius of the circle (the base of the figure); h is the height (in our case, the width) of the tire. According to this formula, you need to know the radius of the circle. To do this, you need to divide the diameter value in half: 3.575: 2 \u003d 1.7875 mm.
We substitute the values, as a result of which we get the volume of the structure in cubic meters: 3.14 1.78752 1.140 \u003d 11.4371 m3, rounded up to 11.438 m3.
For the foundation of the future pool, you will need sand and concrete. It is known that the sand cushion and the concrete base will have a thickness of 15 cm each. These data are sufficient to calculate the volumes of materials.


We make a calculation for sand: 3.14 3.1951 0.15 = 1.504 m3. A little more concrete mix will be required, since two more buckets must be added for the bottom of the pool.
The finishing material is selected individually, taking into account the design solution for the design of the bathing area.
Required Tools
To install a pool from a tire, you will need the following tools:
- Sharp strong knife.
- Shovel shovel and bayonet.
- Tanks for sand, concrete mix and water.
- Concrete mixer.
- Building level.
- Yardstick.
Step-by-step instruction
The construction of the pool from a large tire is carried out in the following order:
-
Using a sharp, strong knife, you need to make a cut on one side. To get a smooth edge, you need to cut along the intended circumferences of the tread. For these actions, you should not use a grinder, because when cutting out, part of the material will turn into small crumbs that will stick to the tool.
- Then you need to choose a flat piece of land, clear it. Pour a layer of sand to be compacted. In order for the sand to keep its shape and be better compressed, it must be moistened. The result should be a uniform layer 15 cm thick. It should be noted that the area with the sand cushion should be slightly larger than the diameter of the tire.
- On top of the compacted surface, you need to pour the concrete mixture to make a layer of 15 cm. Install a tire on it. Pour two buckets of concrete inside it.
- It remains only to decorate the pool and wait until the concrete hardens. For this you need to wait about a week.
-
The side surface of the tire can be painted with different paints. If you show imagination, you can hide the tread relief with decorative stones or plants.
-
After carrying out these works, you can take water procedures.


