- Preparatory work
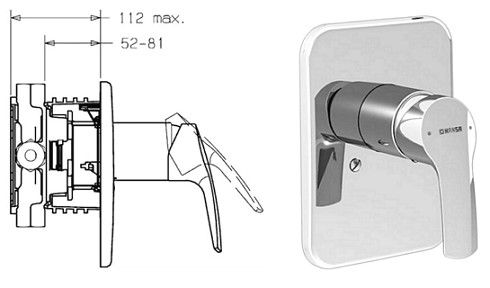
- Choice of flush-mounted plumbing systems
- Installation and connection diagram
- Fitting
- Peculiarities
- Do-it-yourself mixer installation
- Preparing for installation
- Mounting and connection
- The main steps for installing a bathroom faucet
- Installation subtleties
- Faucet set and consumables
- Concealed faucet manufacturers
- Mixer installation
- Kinds
Preparatory work
Before proceeding with the installation of a new faucet, you need to get rid of the old one, which may have already staggered. This will be easy to do. First of all, turn off the water supply, but not only from the main system, but also the flow of boiling water from the boiler or geyser. Drain all the water from the tap, unscrew it. This must be done very carefully and carefully, otherwise you can damage the threads on the fittings in the wall. If they are damaged, you will have to break the wall and change them. Polypropylene pipes from the water supply circle require careful treatment.
After removing the old faucet, you need to very carefully clean the fittings in the wall and remove all remnants of the old winding or paint from there.
Choice of flush-mounted plumbing systems
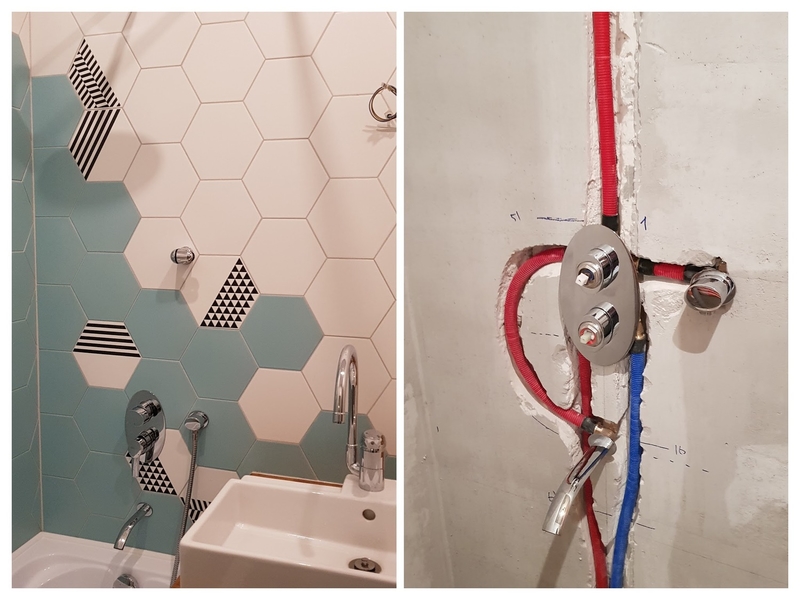
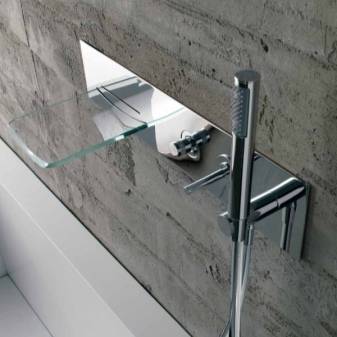
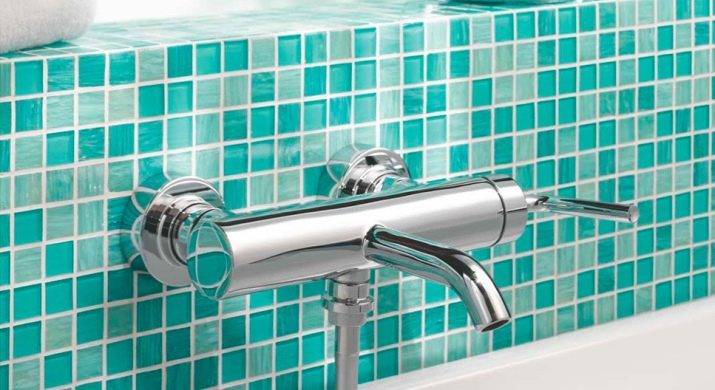
Concealed plumbing systems are becoming more and more popular these days and can transform simple fixtures into more creative options that will be a beautiful addition to the bathroom.
During the installation of such elements, every engineering communications can be freely hidden and will not be able to break the interior of your home. Due to the universal concealed installation system, users have the opportunity to install hanging-type sanitary ware, shower cabins and faucets for sinks, bath or shower. Now such systems can provide:
- sealed installation;
- reliable work;
- non-interference in the performance of such systems.
Flush-mounted systems can be attractive not only for their unusual design, but also for their versatility and versatility.
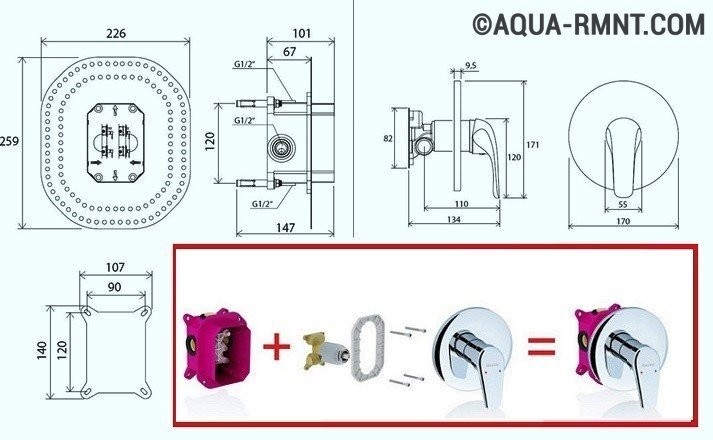
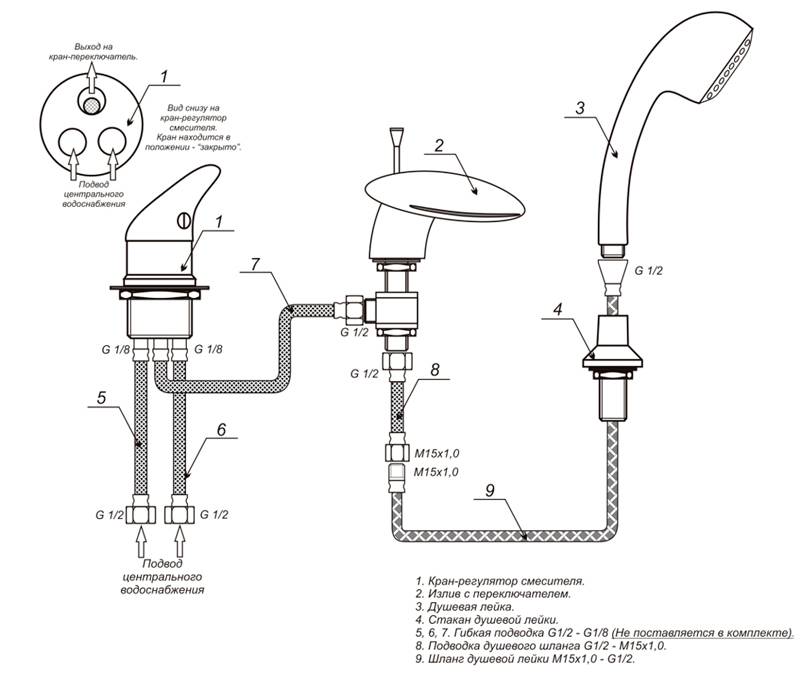
Installation and connection diagram
So, you have chosen the model you need, now you can get to work. Any of the models, regardless of price and quality, must be attached instruction with diagram installation. Having carefully studied it, you can independently connect the mixer. It should be already assembled, so you just have to check the seal in the spout, the fit of the glands, the operation of the valve head, inspect the gaskets and seals, and turn the tap.
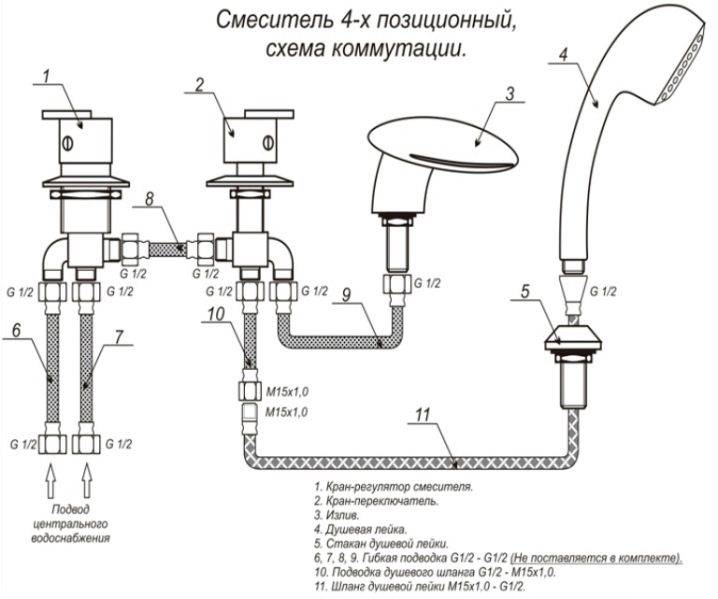
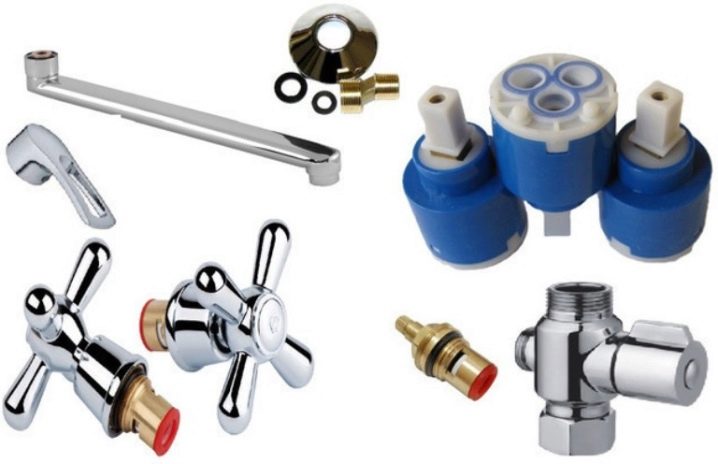
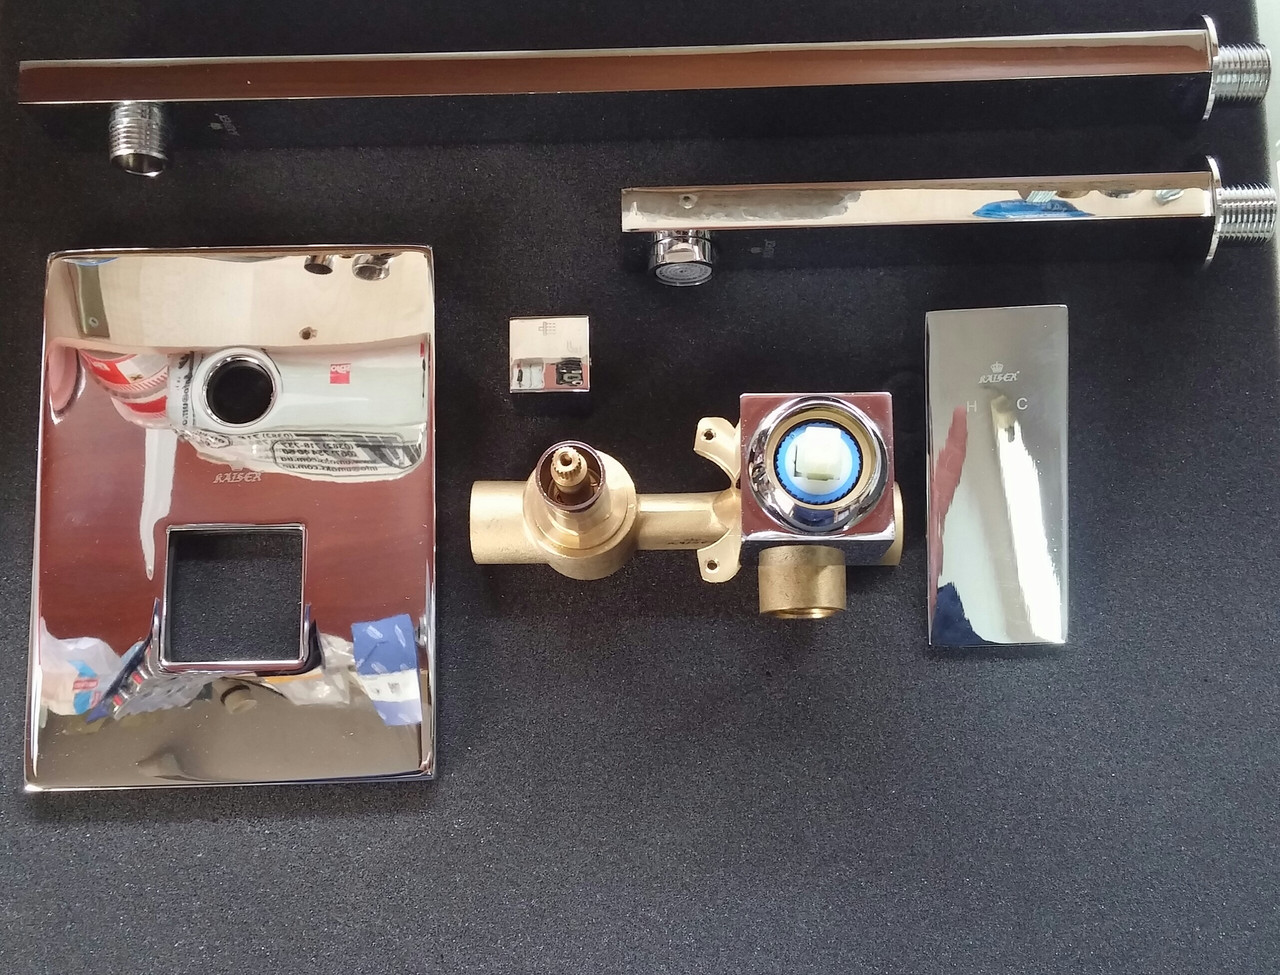
Next, unpack all the boxes and packages that come with the kit. There is a standard set: gaskets, nuts, eccentrics, wall reflectors, bushings, a faucet spout and a shower head. All this you will need to connect to the crane.
Strict adherence to the instructions will not create any problems.But do not forget about the standards: the installation height must be at least 1 meter from the floor.
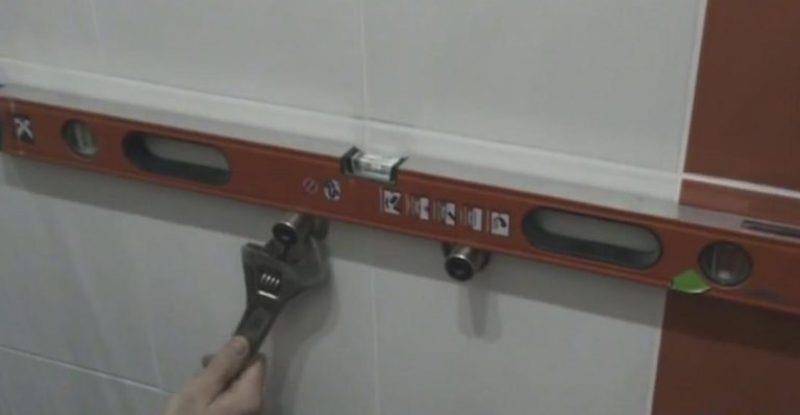
Install water outlets in appropriate places, when removing fittings, calculate the distance between pipes with water - it should be 15 cm
It is very important that the fittings are mounted strictly horizontally to each other and are not too long. Having finished with the conclusions of the fittings, proceed to the main part of the work
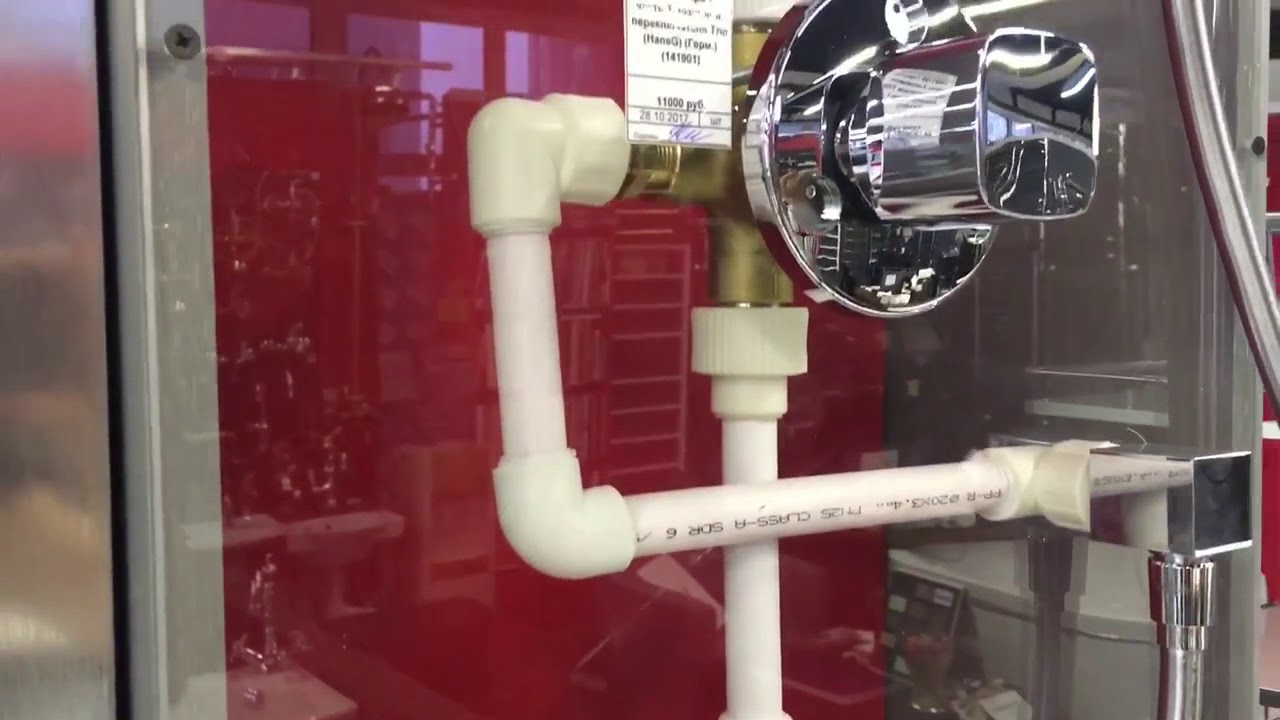
Fitting
To assess the general situation, you must first try on. Eccentrics are screwed into water sockets, on
eccentrics are screwed onto the reflectors, the mixer without gaskets is screwed onto the eccentrics.

What do we evaluate? The first point is the alignment of the water sockets, or in other words, screwed eccentrics should not
stick out in different directions, their ends should be in the same plane. If the deviation is too large, cap
mixer nuts will be screwed on with force - this is bad!
There are two ways to solve the problem of poor alignment of water outlets: correct the position of the water outlets themselves (which
very problematic when the tile is laid) or to be wiser with “pasting” one eccentric to another (about this
a little lower).
However, unevenly set water sockets are an infrequent phenomenon, given that the threaded connection and gasket
deviation can be corrected. The problem will be obvious only with very careless installation of the eyeliner.
More attention during fitting should be given to the position of the reflectors. If the water outlets are flush with the wall
or stick out - reflectors may not be pressed tightly against the wall
Here, the dimensions of the eccentrics and the depth of
reflectors. With reflectors not adjacent to the wall, there are two ways - shorten the eccentrics or look in stores
deeper reflectors. With the conclusions sticking out of the wall, you will have to do both.

Digressing a little on the topic of installing water sockets, I note: the optimal position is when the internal thread
the output is slightly recessed into the wall (into the tile), by about 5-7 mm. There is no answer with exact dimensions, different
mixers - different sizes.


The ideal position would be when, during fitting, the reflectors are pressed tightly against the wall, and the union nuts
mixers (without gaskets) are screwed up to the base of the reflectors with virtually no gaps. Keep in mind that when
sealing threaded connections, the eccentrics will screw in a little less, and rubber gaskets will fit into the mixer.
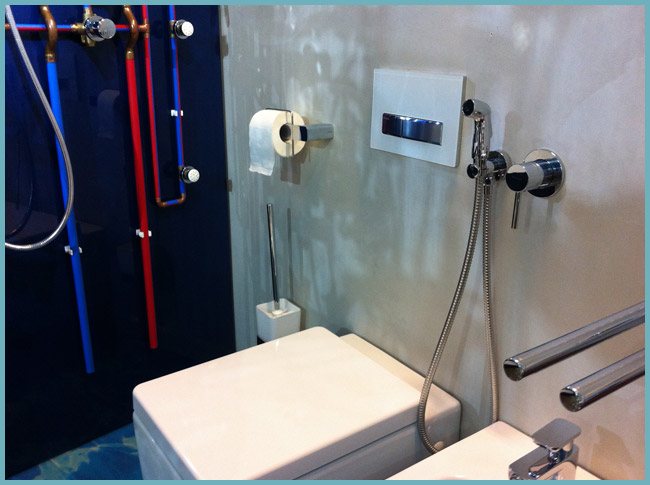
Peculiarities
Below are some of the features of concealed mixer taps.
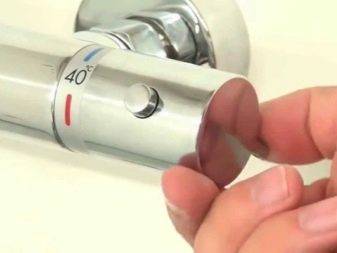
Support of the set temperature, without thermal drops. Mixers of all models are equipped with a thermostat. One of the problems with conventional spouts is the unpredictability of temperature: the faucet cannot independently supply water of the required temperature during the process of adjusting the faucet. Built-in mixers easily solve this problem, since the user himself sets the temperature, which does not change on its own, but only after he changes it to another. If in an apartment or a separate room there is not one spout, but several, then for each tap it is necessary to set its own temperature parameters.

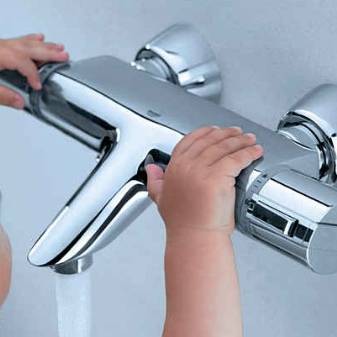
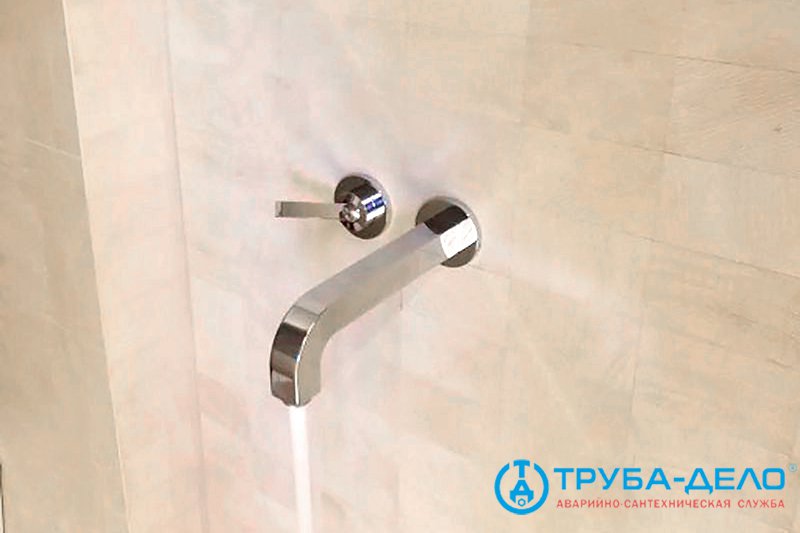
Eliminates additional abrasions and bruises. Almost every inhabitant of the planet has been crippled at least once due to bathroom items. With a hidden mixer, such incidents will not occur, since the protruding part of the device is too small.And now you can completely forget about the constantly tangled hose from the shower, which strives to slip out of your hands.
Aesthetics and convenience in one device. As already noted, with a hidden spout, there is no chance of hitting yourself or a child on a faucet or getting tangled in a shower hose.
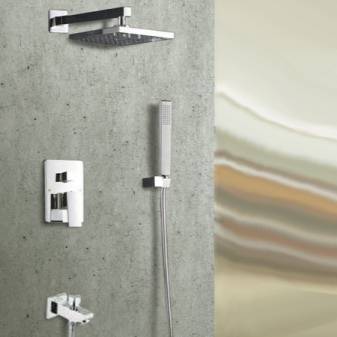
The faucet control can be placed against one wall or even near the door, and the faucet itself can be placed against the other wall above the bath. With this model, you do not have to adapt to the pipes - the user will have complete freedom of creativity, because the mixer can be placed where you want.
It harmoniously looks in the space of the room. In fact, the built-in faucet will suit almost any bathroom interior. Suffice it to recall what a standard bathroom looks like: in almost all interiors, all kinds of cans of soap, gel, shampoos, conditioners and other daily toilet items are visible. If it is possible to hide all this in the cabinets, then the pipe with the watering can definitely cannot be removed.
Save space even in a small space. As mentioned above, the faucet takes up very little space in the visible part, so it can be considered a practical solution for a miniature bathroom.
In addition to this obvious plus, one can also highlight the fact that shelves for soap accessories can be attached to the place of the old mixer. However, in this case, it is necessary to remember where the pipes go, and stay away from this place with working tools.
A rational approach to space planning.If the bathroom, unlike the previous paragraph, is large, then a person has the opportunity to install two or more faucets on one device. For example, you can set two rain showers opposite each other to create hydrorelaxation. In this case, it is recommended to opt for shower systems with a larger diameter and make sure that the pump pipe connected to the faucets delivers enough water. Otherwise, you may encounter insoluble problems with the water supply.

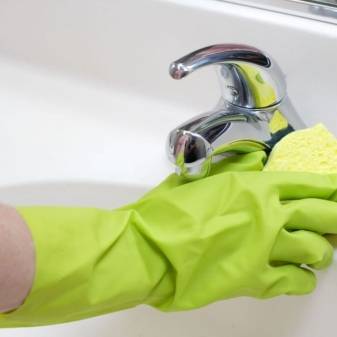
Simplifies room cleaning. Most users are familiar with the situation when beautiful faucets after a while became a collection of stains and plaque. To clean all the fittings in the bathroom, sometimes you have to spend the whole day off. With built-in faucets, cleaning time will be reduced by several times, which saves time and labor resources.
Do-it-yourself mixer installation
To mount the mixer on the wall in the bathroom with your own hands, you must:
- carry out preparatory work, during which to choose the place of attachment, prepare the necessary tools and additional materials;
- mount and connect equipment.
Preparing for installation
In the process of preparation it is necessary:
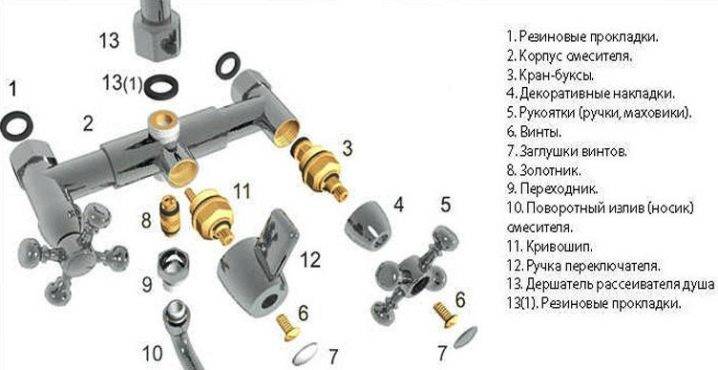
- check the complete set of equipment and, if necessary, purchase additional elements for mounting the mixer. The standard kit includes:
- mixer body with fixing nuts;
- gander;
- shower head;
- shower hose;
- eccentrics to facilitate installation. The size of the nut for fixing the body and the size of the eccentric must be identical;
- decorative overlays;
- sealing rings;
- assembly instructions and operating manual;
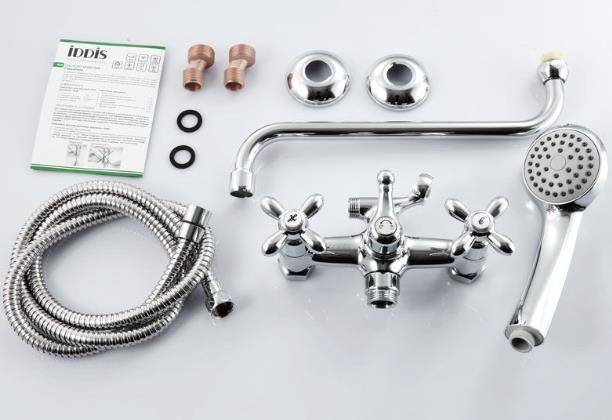
Complete set of the mixer upon purchase
- purchase additional elements of the system, which include:
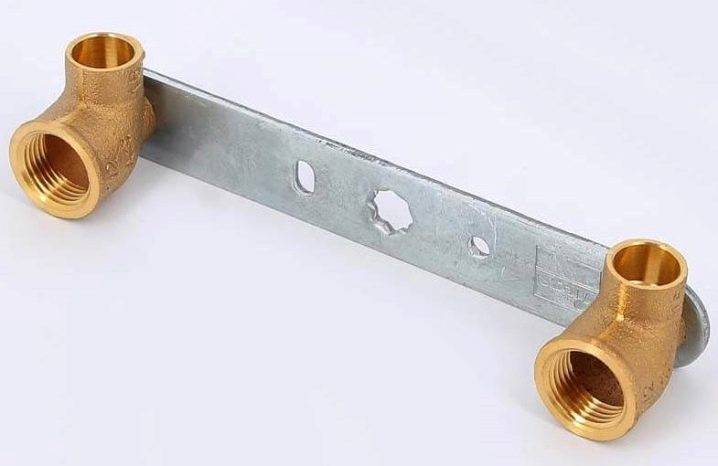
water socket or bar for mounting the mixer. Depending on the design, single water sockets, double molded water sockets are used or double water sockets on the bar. Equipment can be made of metal or plastic (used for connection with polypropylene pipes);
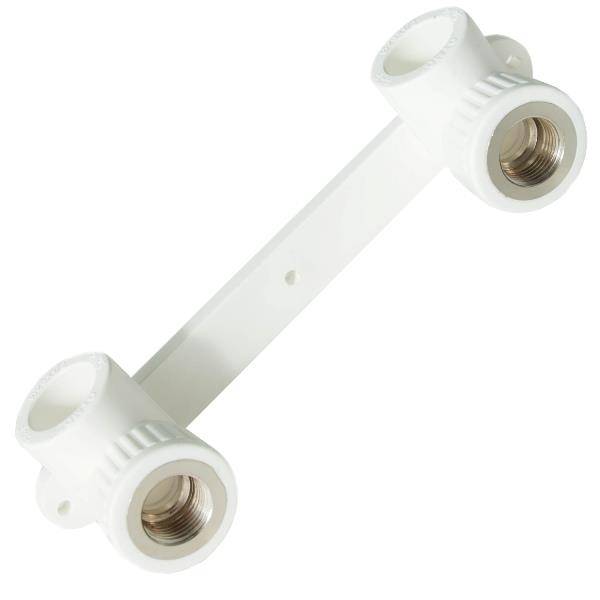
Double plastic water socket for polypropylene pipes
sealing materials: FUM tape, linen thread, Unipack paste and so on;
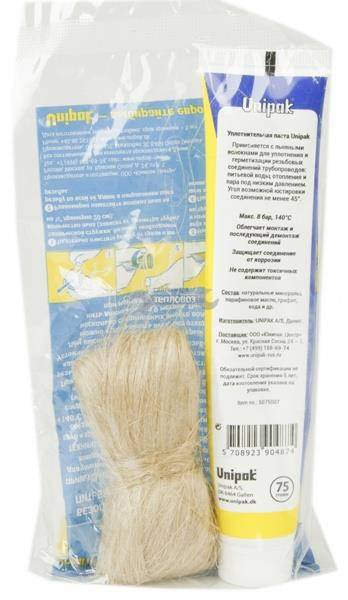
Thread Sealing Kit
- prepare tools. In the course of work, you may need:
- adjustable and open-end wrenches;
- building level;
- pliers;
- marker and tape measure;
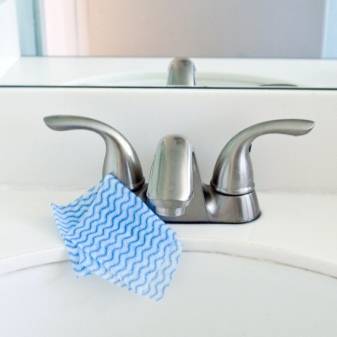
- fabric (to protect the surface of the mixer during installation);
- apparatus for welding plastic pipes (required if a plastic mount is mounted on pipes made of a similar material);
- prepare additional tools. With an open pipe connection, the above list is sufficient. For hidden wiring, you will additionally need:
- drill and perforator;
- Bulgarian;
- cement mixture and spatula.
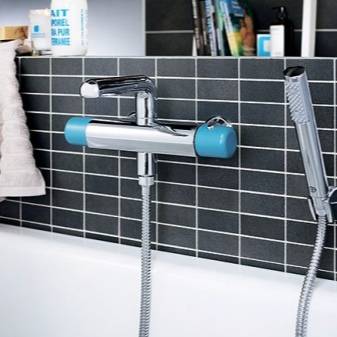
Mounting and connection
Installation begins with the choice of mounting location. The crane is fixed:
- at a height of 80 cm from the floor, if the equipment is intended exclusively for the bath;
- 100 cm from the floor if a bath faucet and a nearby sink are to be used;
- 120 cm from the floor level if the faucet is additionally used for the shower.
If the mixer is being replaced, it is more expedient to fix the new equipment in the old place. This will reduce the time of work and keep the decorative wall covering in its original form.


The mixer is installed in the following order:
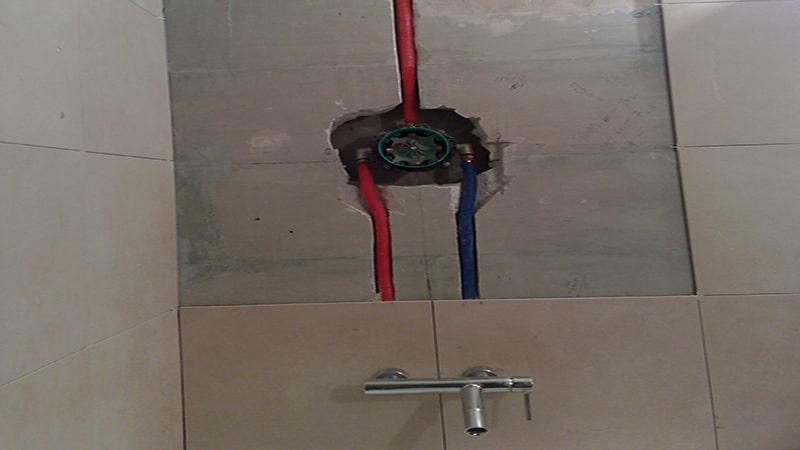
- installation of water outlets:
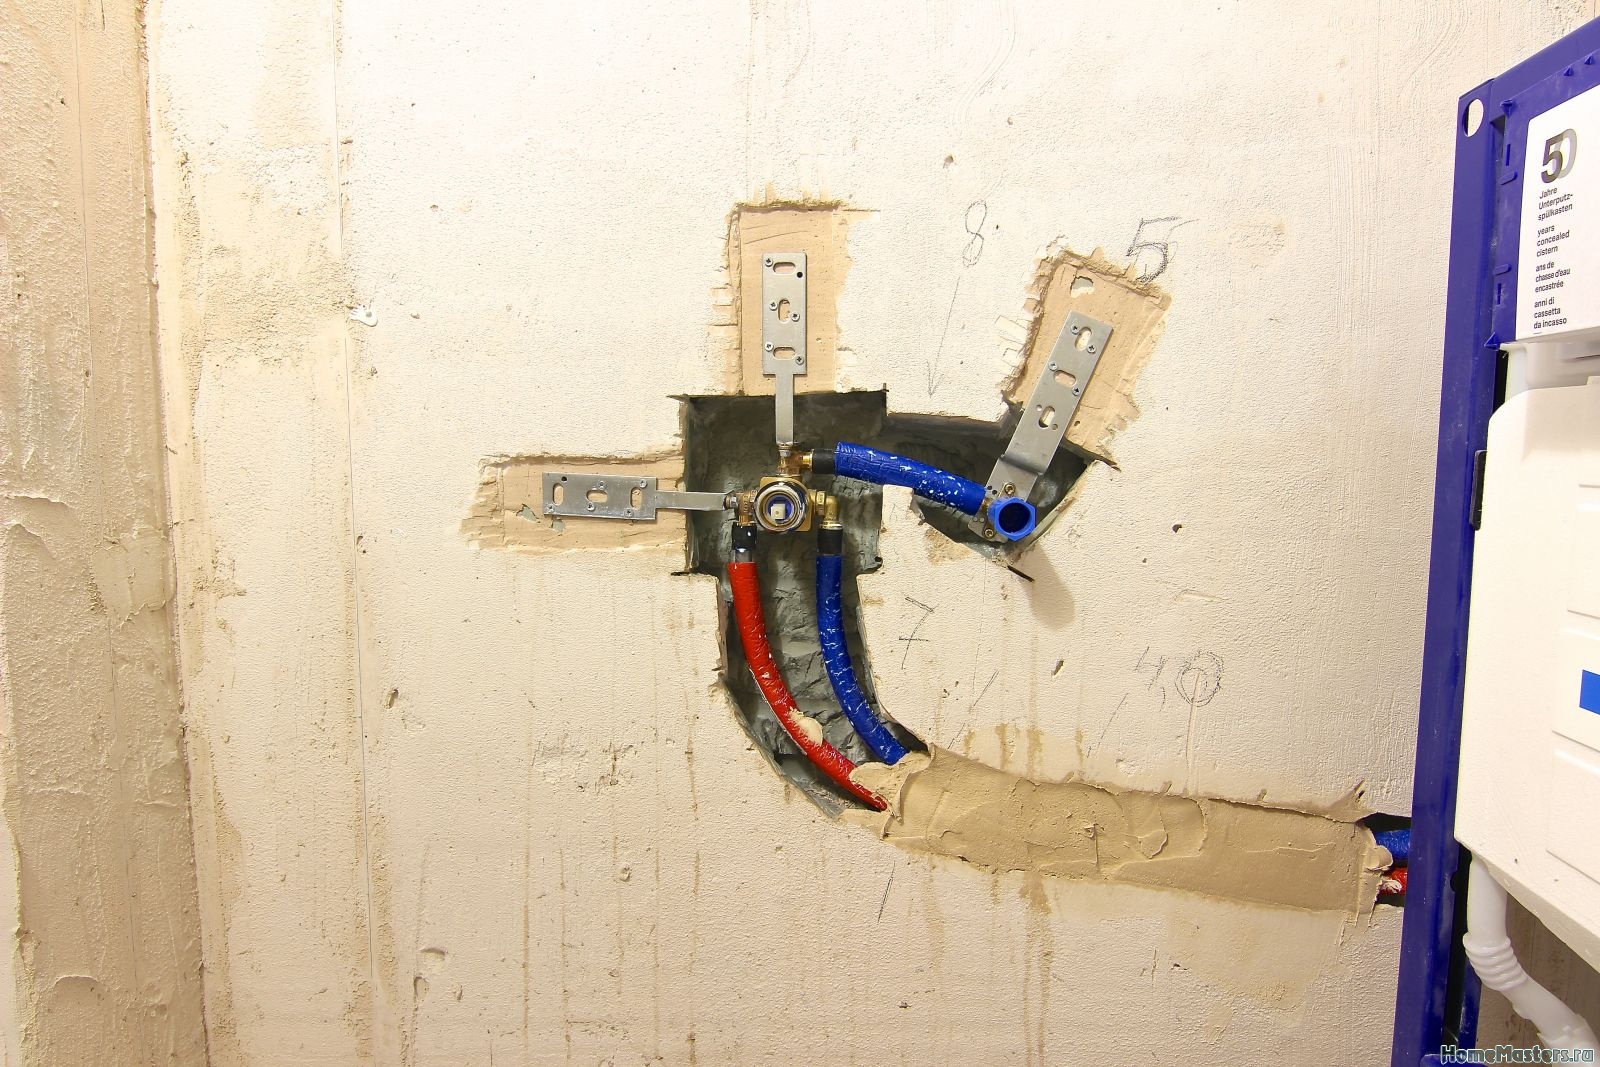
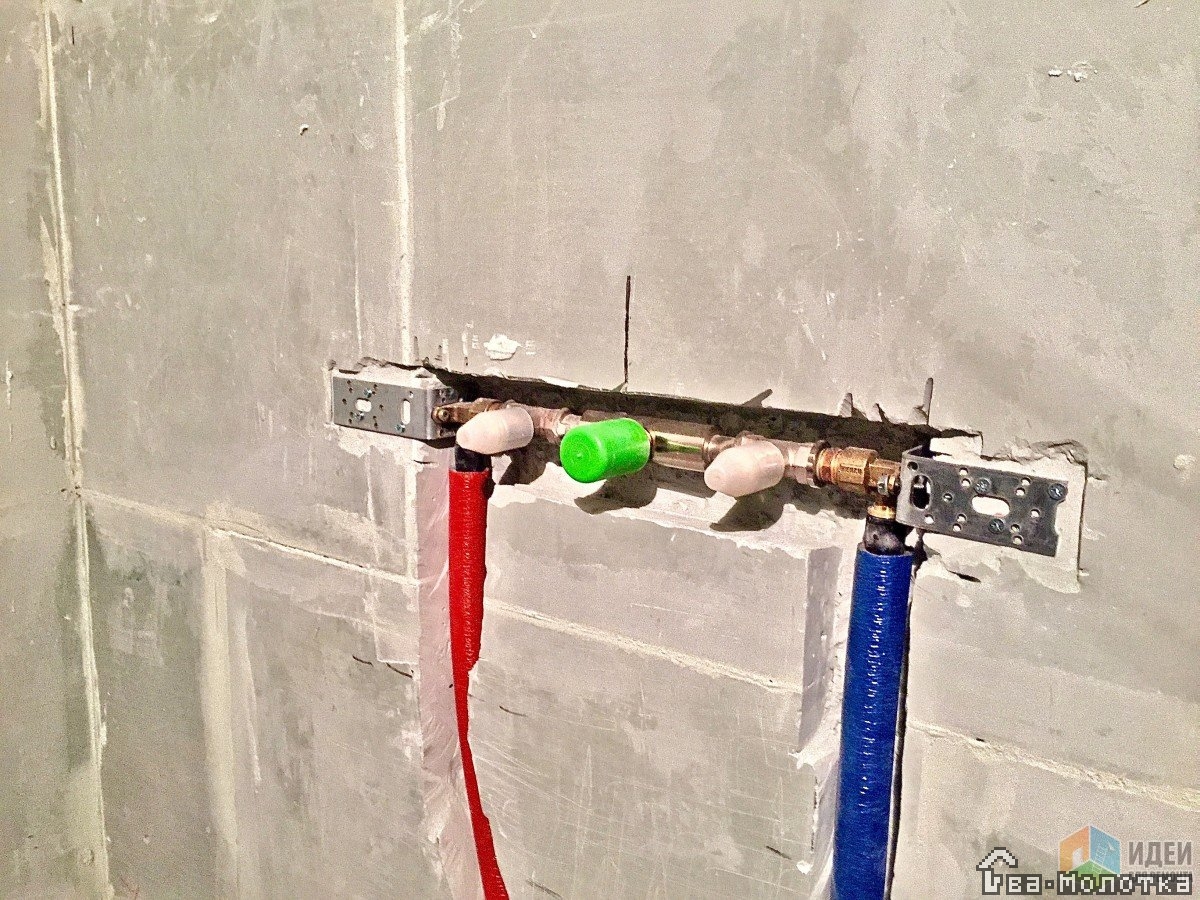
- preparation - if the supply pipes are inside the wall (hidden supply), then at the first stage it is necessary to equip a niche for the mounting plate. If the water pipes are outside (open piping), then you can go to the next item in the plan;
- marking of attachment points;
- preparation of holes for fixation;
- installation of dowels;
- fixation;
- connection with water pipes;
Installing and connecting the mounting plate
installation of eccentrics
When attaching eccentrics, it is important: install the equipment at the same height from the floor level, which will avoid misalignment of the mixer
You can check the parameter using the building level;
install the equipment at the same height from the floor level, which will avoid misalignment of the mixer. You can check the parameter using the building level;
Determination of the most optimal position of the eccentrics
- fix the equipment at the same distance from the wall;
- align the distance between the eccentrics, which must correspond to the center distance of the mixer;
- ensure a sufficient level of sealing of the threaded connection of parts to each other;
In order not to damage the surface of the equipment, it is recommended to tighten it through a rag pad.
- installation of decorative overlays;
- fixing equipment. The faucet fastening nut is also tightened through the rag gasket;
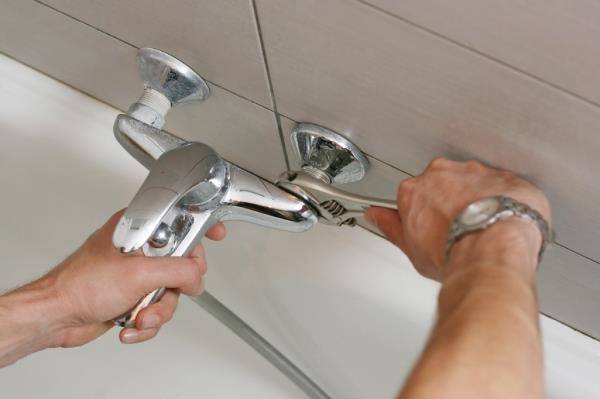
Fixing the faucet to the wall
- connect a gander, a shower head and additional equipment (if any) to the mixer body.
The process of replacing the mixer is presented in the video.
After completing all the work, it is necessary to open the water supply and check the tightness of all elements of the system.If there is a leak, additional sealing is required.
The main steps for installing a bathroom faucet
To mount a bath faucet, regardless of the installation method, it is necessary to carefully consider the entire process and prepare for work. As in any other business, haste here can only hurt.
For installation, the master will need the following materials and tools:
- the bath faucet itself;
- adjustable wrench up to 17 mm;
- gas key No. 1;
- pliers;
- linen tow.
The tool may be your own, however, if in the future it is not planned to do plumbing work, you can take it from friends - nevertheless, the cost of high-quality keys may even exceed the price of the faucet itself.
The gas wrench is used to work with those elements of the mixer that do not have a front cover and, therefore, do not require careful handling - that is, with eccentrics. But the nuts already on the tap itself should be carefully tightened with an adjustable wrench so as not to damage the enamel.
So how do you install a faucet in your bathroom without risking flooding yourself and your neighbors? To do this, you need to do a few simple manipulations:
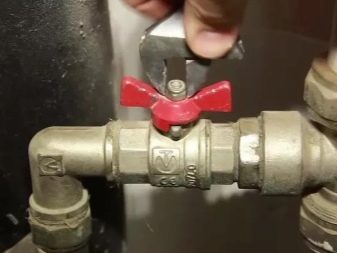
Shut off the water supply.
For this, a special valve is provided in the plumbing system of any house or apartment. In old dwellings, there is often no cover on it, then to turn off the water supply, the rotary mechanism should be clamped with pliers. If the state of communications leaves much to be desired, it is more rational to invite a plumber and not to carry out an independent installation. After the procedure, be sure to check the faucet for leaks.
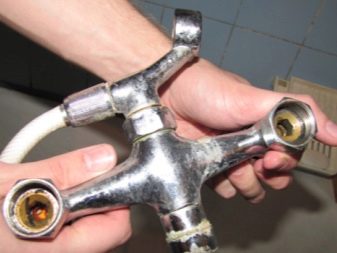
Dismantle the old crane and eccentrics.
First you need to remove the valve itself by unscrewing the nuts.Then comes the turn of the eccentrics - if the mixer was flush-mounted, it is quite difficult to unscrew them with a key. This should be done counterclockwise. If the condition of the old eccentrics allows, they can be left in place - this will significantly reduce the installation time of the valve.
If the old eccentrics are no longer suitable for use, new ones should be installed.
The mixer comes with two pieces. They have 2 threads on opposite sides, marked with ½ and ¾ diameter marks. Smaller diameter side required for water connection


The passed pipe has a polypropylene adapter, into which the eccentric must be carefully screwed clockwise (tow should be wound on the thread beforehand). Its correct position in the end - bending the top
Assemble mixer.
Many inexperienced self-taught masters are wondering how to assemble a bathroom faucet, and is it difficult. In fact, the process takes no more than 5-7 minutes. The mixer must be assembled using an adjustable wrench. All parts of the product are easily connected to each other and fixed with nuts - including the shower head - however, it is better to screw it on after installing the faucet.
Adjust the eccentrics to level the crane horizontally.
To do this, we slightly wind the assembled mixer onto one of them in order to simply estimate its future position. Then, using the key, we adjust both eccentrics so that the crane eventually takes a horizontal position. When you can find the right position, you need to twist it and attach decorative cups to the eccentrics.

Install mixer.
It should be screwed on using insulating gaskets.
This must be done carefully - it is enough to screw the mixer with your hands as far as possible, and then half a turn with a key. Otherwise, you can overtighten the nuts, which is fraught with thread stripping or damage to the gaskets.
Both will certainly lead to leaks.
After that, we can assume that the installation of the purchased faucet in the bathroom with your own hands has come to an end. It remains only to resume the water supply and try to use it for the first time. The above method is applicable when connecting mixers in any way - on the wall, in a special box or on the bath body.
Installing a faucet in the bathroom is a responsible task, having coped with it, you can save a lot on the services of paid specialists. Meanwhile, connecting any faucet in the bathroom requires some experience with plumbing. If there is none, and there is no way to use the advice of a knowledgeable person when working, it is better to refuse
A properly installed faucet will serve faithfully for many years and will 100% perform its functions to ensure the supply of water to the bathroom.
- Acrylic bath weight
- The best cast iron baths, rating
- The best manufacturers of acrylic bathtubs
- Properties, characteristics and varieties of acrylic bathtubs
Installation subtleties
It is necessary to fasten the gander to the main unit, then the line of the hose with a watering can. You do not need to use wrenches and tighten the nuts too. After assembling the model, you can start the installation, which consists of the following steps: wrap the eccentrics with sealing tape, then insert the fittings located in the wall, which are left over from the previous faucet.
This must be done very carefully.If there is no tape at hand, tow can become a substitute. Next, we screw in the eccentrics, strictly measuring the distance between the inlets on the mixer and using the level. This is done for a reason - the distance should be strictly 15 centimeters. After that, we wind the main block onto the eccentrics. You need to do this slowly, as you need to fix it carefully.
Try not to rush, and if something doesn’t work out, it’s better to take a short break and calm down. If the block is wound on both sides calmly, then everything can be put correctly. Then the block must be removed and decorative shades screwed onto the eccentrics, which must fit snugly against the wall and cover the places where the mixer taps into the wire. If that's the case for you, then you've done a great job. Next, we fasten the block back using winding. In order for the shrinkage to be dense, it is necessary to use gaskets from clamping nuts. Nuts need to be tightened with a wrench, but not very much.
Open the hot water tap and check how the mixer works. Start the test with a small pressure, gradually increasing the power of the water supply. Be sure to check how the shower works. If everything is in order, then you did it the first time. But if there is a leak, you need to find its source, turn off the water again and repeat all over again. There is a high probability that you have overtightened the nut or any fastener very much.
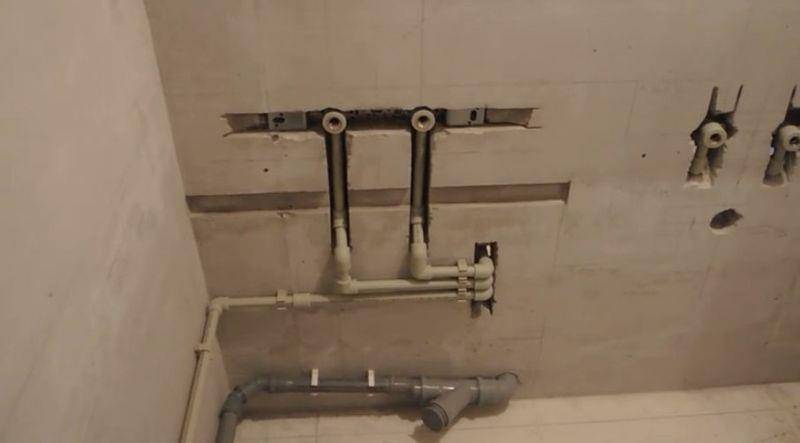
You have already understood how to install a new faucet instead of a worn-out one, now let's deal with a more difficult task - installing a faucet on a new wall. First, pipes are replaced, the walls are tiled. Further, plumbing pipes are laid out, beacons for plaster are installed.You must calculate the recesses in the wall so that they exactly match the distance from the lighthouse to the tiled plane. This is about 17 centimeters. If you are not sure that you can carry out all these works, then it is better to invite a specialist, so that later there will be no problems when installing the mixer.
After all the work done, you can begin to install the fittings. In order to install them, you need to set aside the distance between the centers of the fittings - 15 centimeters. The centers should be on the same parallel, the extreme point should protrude beyond the wall, the fittings should be flush with a suitable height. After installing the fittings, you can attach the mixer. This is done in the same way as in the previous version.
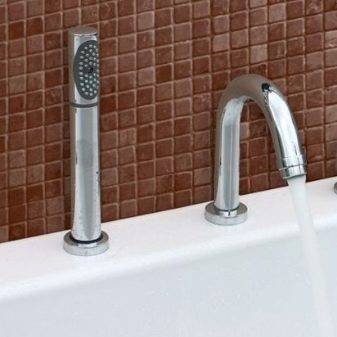
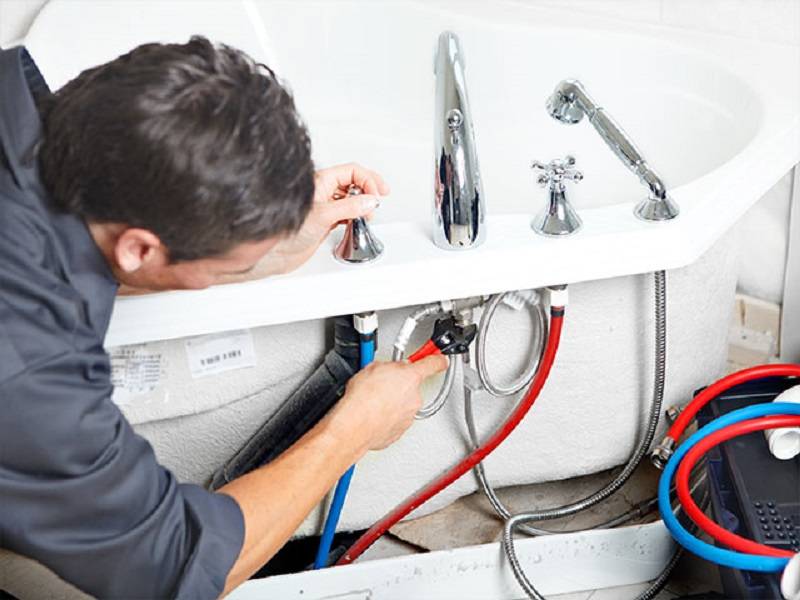
Now consider another option for installing the mixer - on a horizontal surface. Such a need arises when installing the mixer on board the bath. Before embarking on such an installation, it is imperative to clarify whether the bearing side of the side of the board can withstand the increased load. To mount this type of mixer, you will need a drill with a set of cutters, wrenches and screwdrivers.
At the beginning of the installation, it is necessary to mark up, so that later the plates can be strengthened along it. After marking, holes are drilled in the side of the bath. Carefully read the instructions on how to connect the mixer to the pipeline using the connecting hoses and other components included in the kit. Next, we seal the horizontal surface with masking tape to protect the surface from chips and damage, apply markings and start drilling the holes that are necessary to install the mixer. After the holes are ready, remove it and process the edges with a special tool.


The next step is to collect all the details and fix them without using keys. If the connecting hoses have freely taken their places, then everything is done as it should and you can proceed to the final fixing of all parts of the mixer. The next step is to check the mixer for a leak.
The last way to install the faucet, recognized as the most difficult and expensive - installing the faucet in the floor. Even before your bathroom is renovated, you need to start laying two pipes for cold and hot water. Indentations are made in the floor the size of the diameter of the pipes, pipes are laid along these indentations to the place where the bath will be located. After this, the recesses are sealed, a floor screed is made and tiles are laid. Then we act according to the technology described above - we mount the mixer, check for leaks, etc.
Faucet set and consumables
To understand how to properly install the purchased faucet in the bathroom, you should first figure out what kind of product it is.
In stores, you can now find a wide selection of taps, both open and flush-mounted. However, what is included in the basic set when purchasing a mixer and are additional costs required for any accessories? In order not to visit the point of retail sales again, it is better to decide in advance what the purchase is.
The standard equipment for a bathroom faucet includes:
- the mixer itself;
- eccentrics;
- a set of gaskets;
- decorative cups;
- shower head.
Depending on the type of mixer (with built-in faucet or long swivel) it can also be equipped with a separate gooseneck of various lengths.
Eccentrics are designed to attach the faucet to the wall.They are also needed to level it.
With their installation, the process of installing bathroom faucets begins, so it is extremely important that they are made of quality materials. The durability of the crane depends on this.

It often happens that the standard gaskets included in the set of bath faucets are not thick enough and subsequently become the cause of leaks after installation. To prevent this from happening, you should also purchase a spare set at the time of purchase in the store. Gaskets 3-4 mm thick and ¾ in diameter are ideal for installation - they will provide reliable sealing.
Tow should also be purchased as consumables - it is wound when installing the mixer in the place where the pipes are connected to the eccentrics and provides additional insulation.
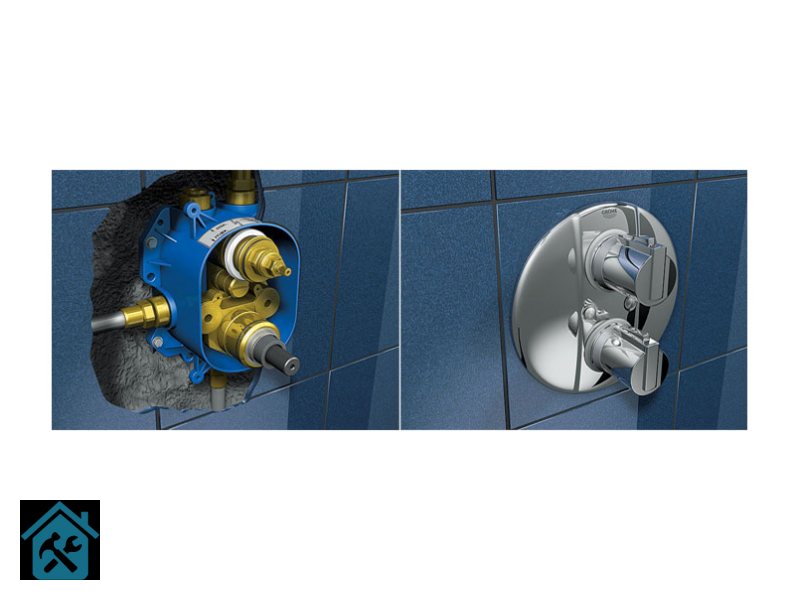
Concealed faucet manufacturers
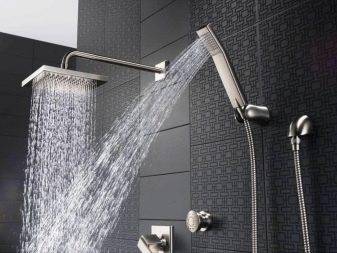
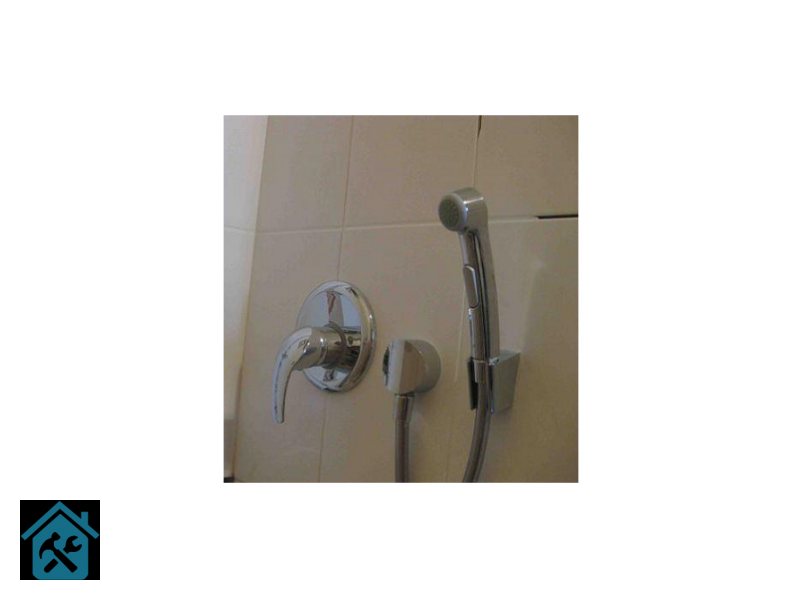
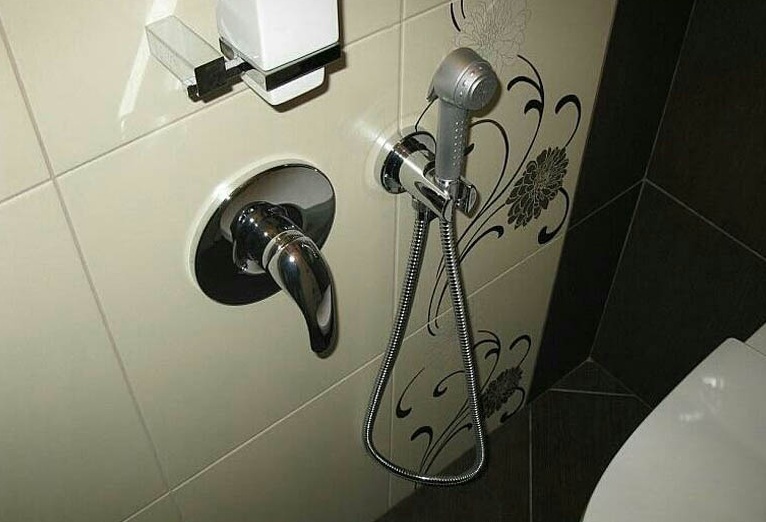
The concealed shower system hides visible pipes in the wall. It helps to easily replace worn-out plumbing with new, reliable and stylish equipment. A concealed faucet will bring conciseness, freshness and novelty to the interior. Many manufacturers, in order to facilitate the choice of consumers, bring their products to a single standard of sizes and fasteners. The popularity of such equipment is confirmed by the brands iBox Universal from Hansgrohe and Flexx Boxx from Kludi.
An important place is occupied by sanitary products of Italian manufacturers Teuco, Albatros, Jacuzzi. Built-in flush-mounted shower from German companies Grohe, Ideai Standart, Hansa is famous for its high level of products
Excellent quality is demonstrated by French, Finnish manufacturers Oras, Damixa, Jacob, Delafon, Migliore, Gess, i Axor, Oras, Nicolazzi.
So, the installation of a built-in mixer is a simplified installation scheme, carried out in accordance with the manual attached to it. Stocking up on patience and accuracy, having carefully studied the secrets of installation, you can accurately connect all the details and establish the correct operation of the device. The device is simple and affordable, even children can master its operation.
WATCH VIDEO
The faucet from the wall mixes the water evenly, and the nodal point between the sink and the shower will prevent spontaneous switching. The limiter installed on the hot compartment will prevent possible burns. In self-assembly, one cannot do without care and a responsible approach. Concealed bathroom faucet will fill life with joy, lightness and pleasure. Good luck and easy installation!
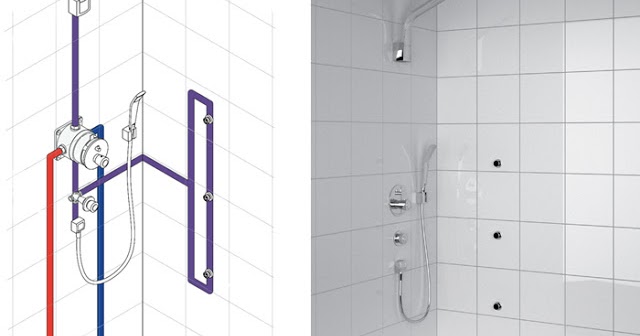
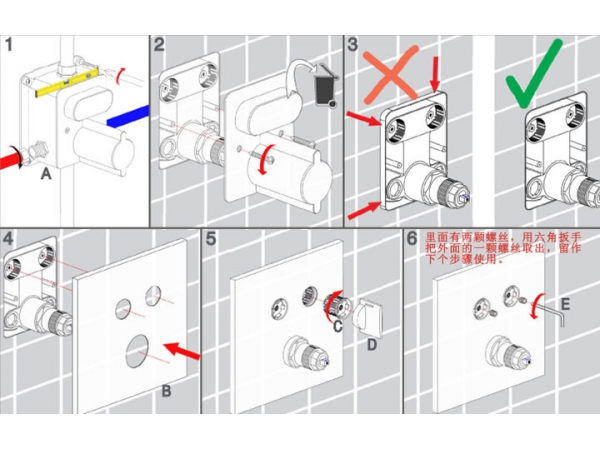
Mixer installation
The concealed shower faucet has a peculiar way of mounting on the wall. The choice of technique is determined by the features of the purchased box or type of mixing. No special tools are required for installation, you just need to stock up on a standard plumbing kit and a puncher. Each concealed shower faucet has detailed instructions to resolve any technical issues.
- The exact designation of the place for attaching plumbing, considering the scheme of work. Organization of wiring, marking.
- Preparation of a niche in which a special box is placed, wall strobe. As the openings are emptied, bends and pipes are sunk into them.
- Box installation. (It is not always present in the kit, sometimes there is a need for an additional purchase).Fastening with screws and clips.
- Installation of a concealed mixer in a prepared box. If it is absent in the set, the niche is used as a place of attachment. Screws and clips are used for reliable fixation. (Further connection of hoses requires scrupulous study of the instructions).
- A shower faucet built into the wall must pass a performance test. To do this, open the valve on the pipeline and turn on the water. To avoid possible leaks and malfunctions, at this stage they check the tightness of the connections, monitor the correct flow, the order of mixing hot and cold water, and the clarity of regulation with a lever or valve.
- Fastening of external parts. They should be installed at the time of completion of the wall repair. After fixing the outer panels, their joints are treated with silicone, it will enhance the waterproofing of the joints.
Faucets built into the wall are mounted according to a simplified scheme. Difficulties arise only with the choice and fastening of the box.
Kinds
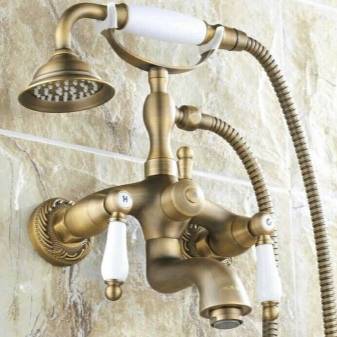
One of the most important characteristics of a faucet is its appearance in terms of functionality and the material from which it is made.
There are four types of mixers:
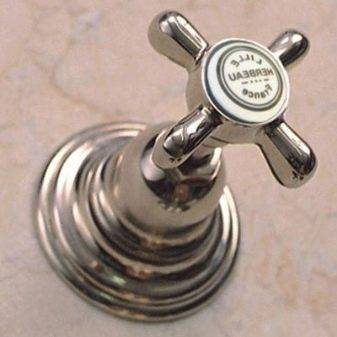
- double-lever (two-valve);
- single-lever (single-grip);
- cascading;
- thermostatic;
- sensory.
Two-valve - the most common type of mixers. Two elements are responsible for the supply and regulation of water (both hot and cold) - valves and levers. You manually bring the water to the desired temperature. There is a mesh on the faucet spout, the function of which is to reduce the splashing of water droplets.


Please note that when mounting two-valve mixers, you must remember to leave a gap between the pipes, which should be 15 cm, and use eccentrics
Mixers of this type have two small minuses. Firstly, it takes time to set the required water temperature, and secondly, the seal wears out very quickly, so such mixers have to be repaired repeatedly.
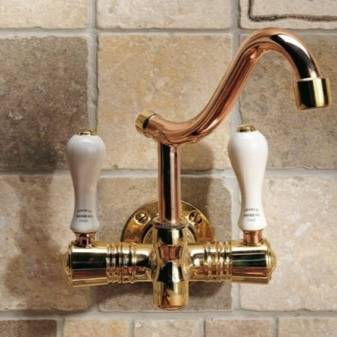
The analogue of a two-valve mixer is a two-lever. Water is regulated by turning the handle 90 and 180 degrees and instead of a rubber seal, these faucets are equipped with ceramic plates that protect against rapid wear. But at present, the demand for these two types of mixers has fallen significantly, because more advanced models have begun to be produced.
Single-handle (single-lever) mixers are currently in the highest demand on the market. It is much more convenient to use them compared to the previous ones - with one handle you control both water, its temperature, and pressure. Besides, it will also save you time. There are two types of single lever mixers: with a joystick lever. When installing them, eccentrics and sealing gaskets are needed. They are good because they save, filter, purify water.
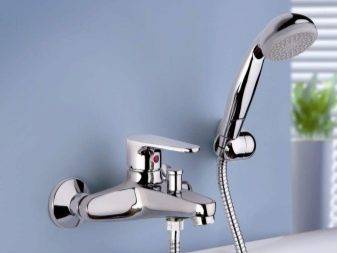

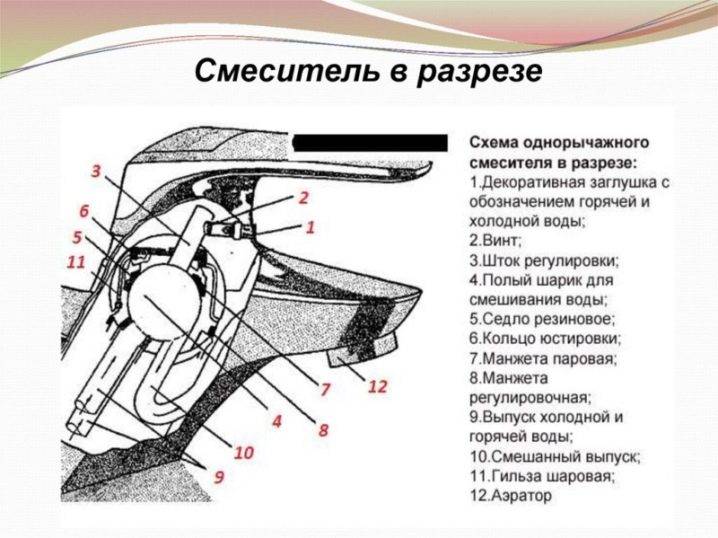
The main part of the mixer is a lever, which is mounted on a fixing screw. Also included is a cartridge. It is he who is most prone to breakdowns, but it is not difficult to replace it yourself. This type of faucet has the following design: control handle, connection fitting, non-return valve and shower hose. All these parts are very easy to remove and replace in the event of a breakdown.
Cascade faucets are called that because of the very fast spout and the visual effect of the waterfall. Some models have a hydromassage function.
Thermostatic mixers - "smart" model. You program all the parameters that are convenient for you and they remain unchanged during further use. This model is good because it protects against unstable operation of the water supply system.
Sensor faucets are the latest and most convenient model. The water turns on by itself when you approach your hands, and turns off as soon as you stop washing them. A big plus of these mixers is efficiency.
As for the materials for the manufacture of mixers, in vain many people think that this is not such an important issue. It is worth remembering the three main factors that need to be considered when choosing a mixer in a store - strength, corrosion resistance and environmental friendliness.
Silumin is the most short-lived and quickly deteriorating material from which relatively cheap built-in sink mixers are made. Despite the weight advantage, they have a very short lifespan and tend to break down very quickly. It is better to give preference to models made of brass - such mixers will last you much longer. Never buy faucets (and any other plumbing fixtures) that are nickel-plated, as the negative health effects of this alloy have long been proven. It is always better to choose a model that is coated with chrome.
For a built-in hidden stainless steel single-lever mixer, it is advisable to choose a vertical connection.


