- We connect correctly
- General information about grounding
- Execution of electrical sockets
- How to find the phase with a multimeter?
- Using an incandescent bulb to test an outlet
- Testing an outlet with a light bulb: step by step instructions
- Checking grounding in sockets
- Checking with a multimeter
- Test light bulb
- Indirect evidence of the absence of PE
- Testing with a pointer (digital) voltmeter
- Household methods for checking for grounding
- visual inspection
- Zeroing in the absence of grounding
- How to determine the presence of grounding
- Why do you need to check the correctness of the ground connection
- About sockets for general acquaintance
- Methods for determining the presence of grounding
- Checking with a multimeter
- Checking with a test lamp
- How to check the voltage in a 220v outlet with a multimeter
- Tools and fixtures for checking voltage and grounding
- How are soil and metal ties checked?
- Why is grounding checked?
- Checking with a multimeter
We connect correctly
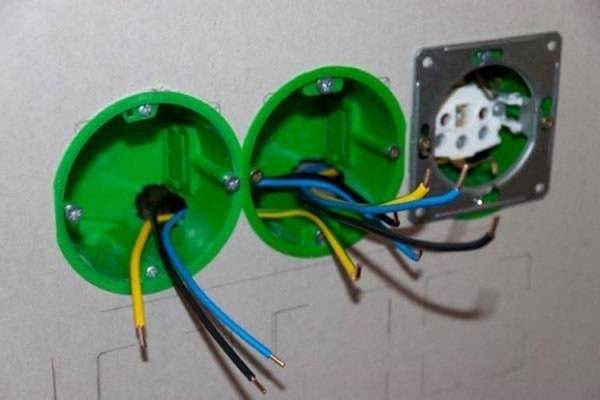
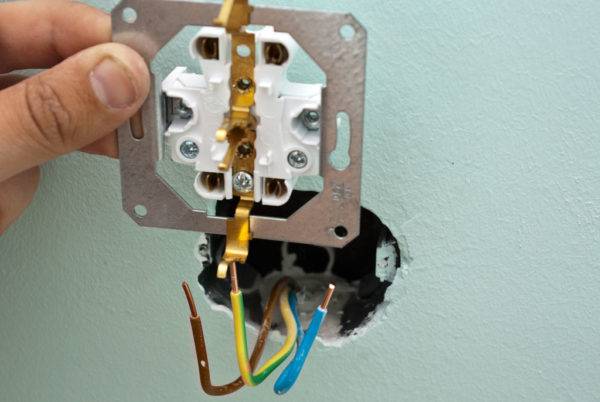
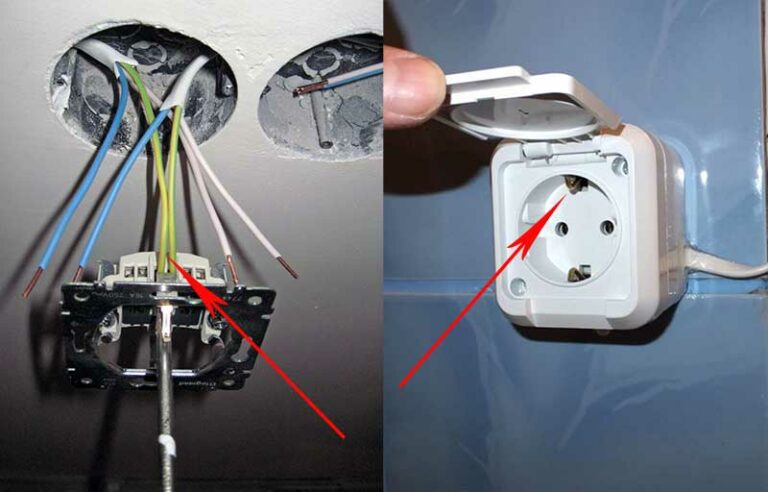
Before installation, you need to determine what type of wiring is in the wall. This stage requires the dismantling of the old outlet, as a result of which the number of wires will be visible. If there are only two wires, there is no grounding, and we see only the neutral wire, as well as the phase.
For a correct connection, all stages of work must be observed:
- Turn off the power supply at the switchboard;
- Carefully inspect the shield and make sure that the electricity is turned off;
- Next, with a special indicator (the so-called indicator screwdriver), you need to make sure that the phase is missing on all 3 wires, more precisely on their bare parts;
- Unscrew the screw on the case, loosen the legs, remove the old product;
- If the socket box is in poor condition, it can be cleaned or replaced with a new one;
- Removing the outer insulation
- We clean the ends of the wires.
- We connect the cables to the outlet and tighten the screw;
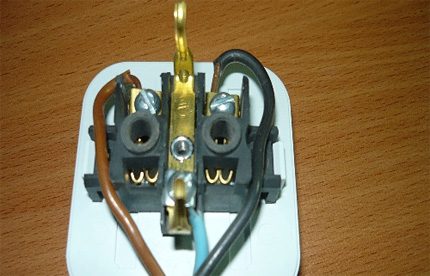
- We connect the third cable to the outlet - grounding to the terminal marked as "PE" or a special sign:
- We fix the case with screws;
- Screw on the case cover.
General information about grounding
When equipping the grounding system, non-current-carrying metal parts of electrical installations are connected to the ground. In the normal state, they do not fall under the action of voltage, but due to various reasons they can turn into conductors of electric current. In most cases, the underlying cause of this condition is broken insulation.

When the phase is closed on the case, a certain potential will appear in it, corresponding to the ground. If a person touches metal parts while leaning on the ground or a concrete floor, an instantaneous electric shock will occur.
The protective earthing device of the equipment redistributes the current that occurs between the person and the ground loop in inverse proportion to their own resistances. As a rule, this figure in the human body is many times higher than that of a protective device. Thus, a current not higher than 10 mA will go through the body. This value does not exceed the maximum permissible value and is not dangerous to life and health.At the same time, most of the potential through the circuit with minimal resistance will pass into the ground.
The grounding device consists of two main parts. First of all, it is a grounding conductor, consisting of conductive elements connected to each other and in contact with the ground. Another piece is the grounding conductor needed to connect the loop to the grounding point in the house.

Grounding conductors can be natural and artificial. The first category includes already existing structures that conduct current and are reliably connected to the ground. Details for the second option are made of metal pipes, angles, rods and other profile materials. The ground electrodes are connected to each other by means of steel strips or wire, fixed with bolts or welding. Grounding conductors are special cables with a certain cross section, as well as copper or steel tires.
Execution of electrical sockets
The industry produces two types of products:
- equipped with a grounding bus;
- without a ground bus.
The first type of structure is often called the "euro-socket". This design fully meets the requirements of electrical safety.
The appearance of the electrical outlet according to the standards established by the countries of the European Union. A distinctive feature of the design is the presence of contact bimetallic ground plates
The second type of product is considered an obsolete modification, but is still found in practice. Especially a lot of outdated outlets are used in old buildings.
Design variant without specific country affiliation.For modern electricians, it is considered an outdated model, which is not recommended for installation due to increased danger due to the lack of a ground contactor
Both types of products are made for indoor or outdoor installation. According to the new PEB recommendations, modifications of sockets for indoor installation should have bimetallic plates with an earth contactor as part of the design. For electrical outlets for external installation, the recommendations are the same, but in some cases of their use, a two-wire interface is allowed.
How to find the phase with a multimeter?
To determine the phase using a multimeter, set the AC voltage detection mode on it, which is most often indicated on the tester case as V ~, while always select the measurement limit - the setting, higher than the expected mains voltage, usually from 500 to 800 Volts. The probes are connected as standard: black to the “COM” connector, red to the “VΩmA” connector.
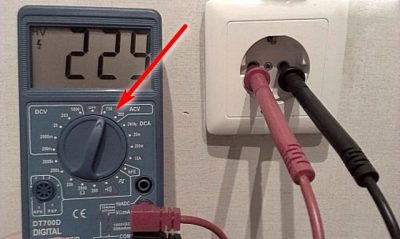
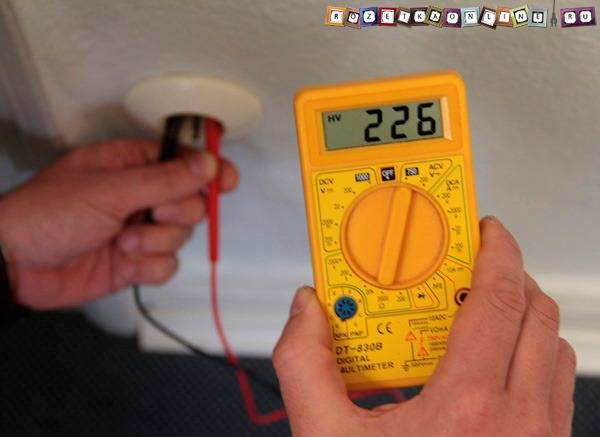
First of all, before looking for a phase with a multimeter, it is necessary to check its performance, namely the operation of the voltmeter mode - determining the AC voltage. To do this, the easiest way is to try to determine the voltage in a standard 220v household outlet.
Using an incandescent bulb to test an outlet
The first test option is to use any incandescent lamp that is rated for mains voltage, this will require make a homemade device:
- Prepare the socket for the incandescent lamp.
- Connect a wire with two cores (25 centimeters) to the cartridge.
- Then the light bulb must be returned to the cartridge.
The ends of the conductors must be cleaned of the insulating layer with a sharp blade by about 8 millimeters.Of course, in order to protect yourself, it is better to install tips on the conductors - this completes the manufacture of the testing device. An illustrative example of a home-made verification device is shown in the illustration below.


If desired, you can take any cartridge with conductors from an unnecessary lighting fixture
Testing an outlet with a light bulb: step by step instructions
Step 1. It is necessary to connect the automatic power supply to the mains.
We connect the power
Step 2. Now you should take the prepared device and attach its ends to the socket contacts.
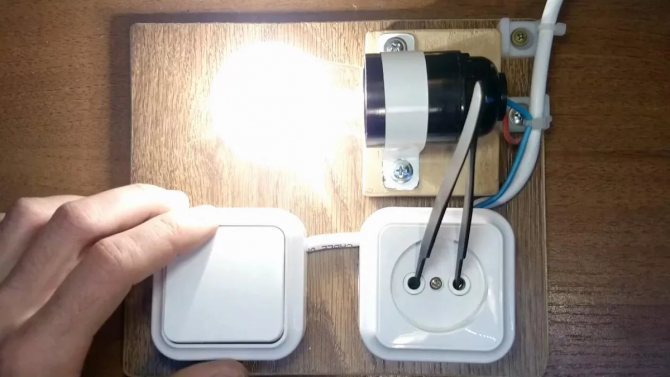
If the lamp shines brightly, then this indicates that the electrical circuit is intact, and the device is functioning without interruption.
Step 3. Now it remains to check the grounding. So, the end of one wire of the device is connected to the contact of the ground bus, and the remaining end is touched in turn to the contacts of the socket.
If the lamp lights up during testing, then the socket is considered to be grounded. In other cases, it is not safe.
Checking grounding in sockets
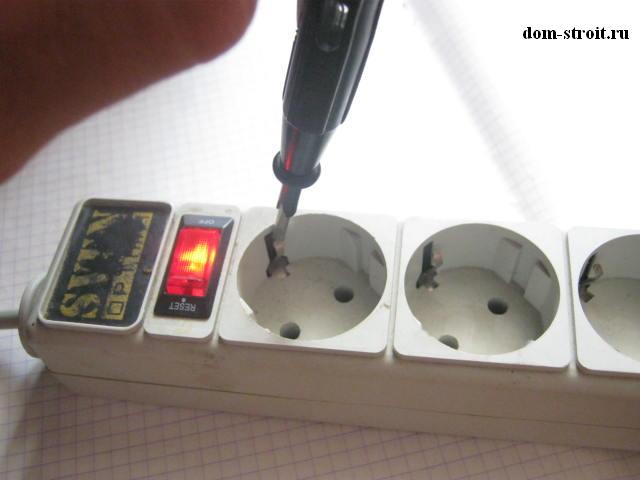
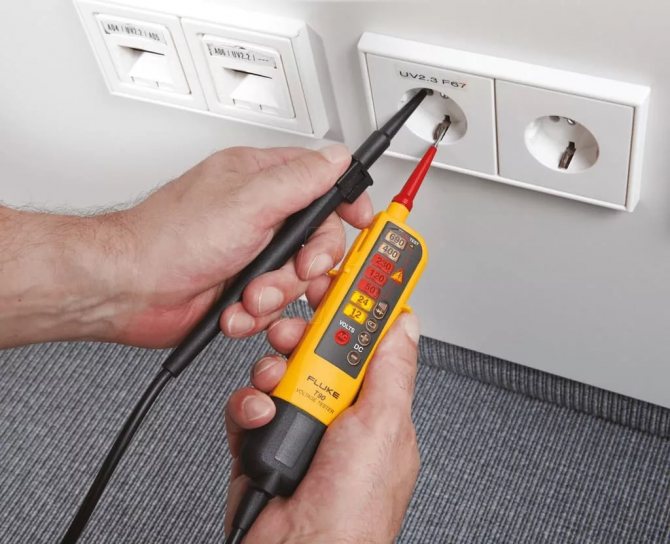
You can independently determine the grounding in the outlet in several ways. Before starting work, you will need an indicator screwdriver - it identifies the zero and phase wires. If the lamp lights up upon contact with the terminal, this is a phase. If the indicator is not lit, it is zero.
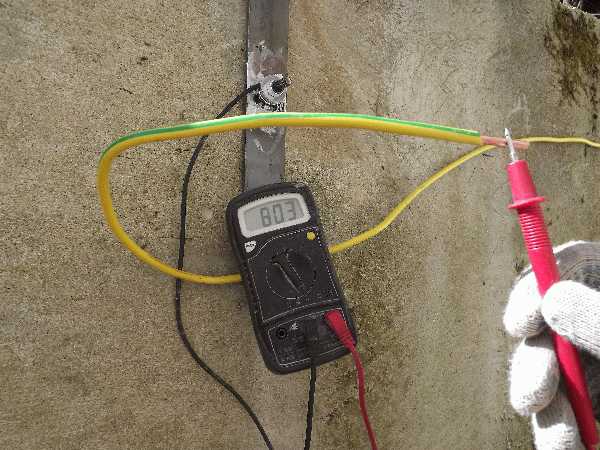
Checking with a multimeter
Testing is carried out even if the colors match according to the standards. You need to work with a multimeter like this:
- Turn on the power supply to the house in the switchboard.
- Measure the voltage at the sockets. One probe is set to phase, the second to zero.
- Move the sensor probe from zero to the ground conductor - PE.
- See what the tester shows. If the result has not changed, everything is in order with the system.If the indicators are zero, the system must be grounded again.
Test light bulb
To make a control, you need a light bulb with a cartridge and two copper wires attached to it. Between all the contacts of a homemade device, insulation is needed. Checking with a control is carried out according to the principle of a multimeter:
- The first probe is connected to zero, the second - to the phase.
- The probe moves from zero to the ground connection.
- A lighted lamp indicates the serviceability of the circuit.
- Weak light indicates the incorrect operation of the circuit and the need to install an RCD.
When there is wiring in the room without color indicators, you can find out the grounding like this:
- To determine zero and phase, one limit switch is output to the ground terminal, the second - in turn to other connections.
- The phase is at the point where the indicator light comes on.
- If the lamp is off, the PE is not working.
Indirect evidence of the absence of PE
There are several points by which one can judge the absence of PE. The owners of the apartment and house should be alerted:
- stable electric shocks from a boiler, washing machine, dishwasher, refrigerator;
- speaker noise when playing music;
- the presence of a large amount of dust around old batteries.
Testing with a pointer (digital) voltmeter
Checking the magnitude of the voltage and its presence is carried out using AC voltmeters. Pointer instruments operate without a power source, while digital ones operate in any position and are not damaged by mechanical action.
The correct algorithm for using a voltmeter:
- The maximum allowable measurement value for the device is determined by the largest number on the scale.
- Clarification of the units of measurement of the device - microvolts, volts, millivolts.
- Connecting a voltmeter in parallel to a section of the electrical network and monitoring the polarity with a wire.
- Screwing the wires of the switch device to the nuts and screws. Models with constant voltage have the designations "plus" and "minus".
Household methods for checking for grounding
If it is clear why grounding is needed in the outlet, then the question remains how to find out if it works - after all, in practice, zero in the network is always grounded and, in fact, the connection goes through the same wire. Here it must be understood that in some cases, grounding is an additional zero, but, if possible, with a lower wire resistance. It should also be borne in mind that the wiring in the apartment can be done correctly, but if there are no separate ground terminals on the access panel, then the wire can be left unconnected until a separate ground bus is installed in the house.
For the simplest test, you need a voltage indicator or tester, a control light and a screwdriver.
visual inspection

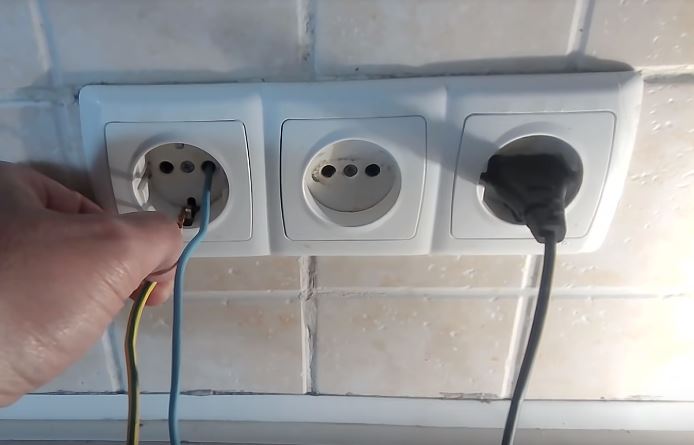
The first step is to look at the design of sockets in the house - they can only have two holes for a plug or with additional contacts.
In the first case, it is clear that the design of the sockets themselves does not provide for grounding. In the second, that the connection of protection to them is possible in principle, but whether it actually exists must be checked additionally.
Next, the socket itself is disassembled - here you need to look at how many wires come out of the wall and what color they are. According to the standards, the phase is connected with a brown (black, gray, white) wire, zero blue, and grounding with two-color yellow-green.In older houses, this may simply be a two- or three-wire single-color wire. If only two wires are used, then this clearly indicates the absence of grounding. If three wires come out, then additional verification will be required.
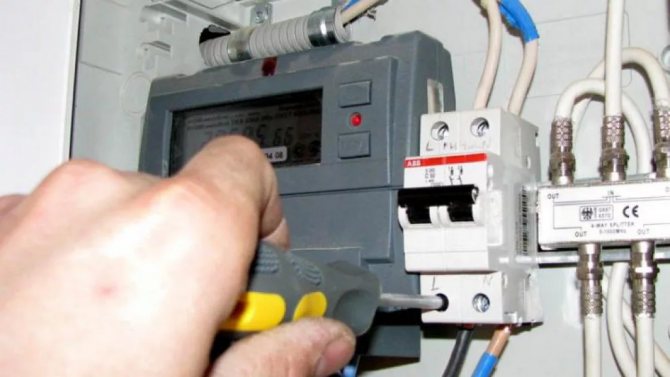
Additionally, you need to inspect the shield near the electric meter - if only two wires enter the apartment, this also indicates that there is no grounding initially.
Zeroing in the absence of grounding
It is possible to detect only two wires entering the apartment, but at the same time, when examining the sockets, it can be seen that the contacts for grounding and the neutral wire are shorted to each other by a jumper. This connection option is called zeroing, but it is forbidden to use it by the rules of the PUE, since in the event of a short circuit, the voltage immediately appears on the instrument cases and there is a high probability of electric shock to a person.


Even without a short circuit, such a connection is dangerous in case of a fairly common breakdown - the neutral wire burns out on the introductory machine. In this case, the phase through the contacts of the devices is on the neutral wire, which, after a burnout, is not connected to ground. The voltage indicator will show the phase in all socket contacts.
About what zeroing is and why it is dangerous, see this video:
How to determine the presence of grounding
If three wires are connected to the outlet and all of them are connected to it, you can check the grounding performance with a tester or an ordinary light bulb.
To do this, it is necessary to determine on which wire the phase sits, which is done by a voltage indicator. In this case, if the phase is detected on two wires, then the network is faulty.
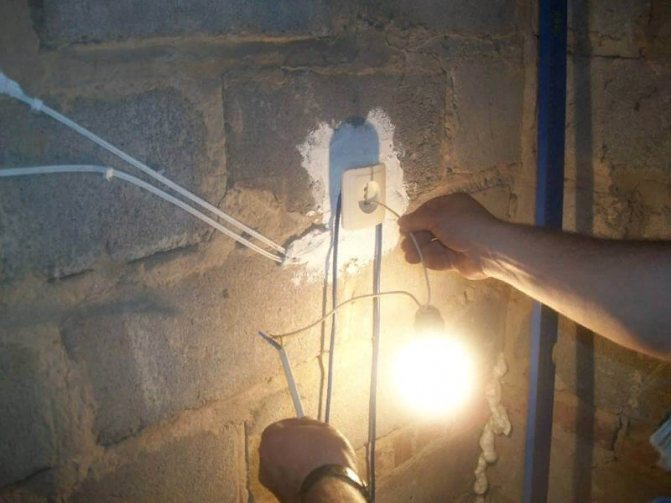
When the phase is found, it is touched with one wire of the bulb, and the second is alternately touched to zero and ground. When you touch the neutral wire, the light should light up, but if there is grounding, you need to look at its behavior - the following options are possible:
- The light bulb does not light up. This means that there is no grounding - most likely, the wire is not connected anywhere in the switchboard.
- The light bulb glows in the same way as when connected to a neutral wire. This means that there is grounding and in the event of a short circuit, the current will have somewhere to go, but there is no protection that responds to the leakage current.
- The light bulb starts to glow (in some cases it does not have time to light up), but then the electricity goes out in the whole apartment. This means that the grounding is connected and works correctly - there is an RCD on the input shield of the apartment, which cuts off the voltage when a leakage current occurs, which goes to the ground wire.
When checking, you need to pay attention to the brightness of the light bulb or to what values \u200b\u200bthe voltmeter shows. If, compared to connecting to the neutral wire, the light bulb glows dimmer (or the voltage is lower), then the resistance of the ground wire is higher and its efficiency is low
Why do you need to check the correctness of the ground connection
Grounding is a connection to the ground of any network points or parts of an electrical installation. Checking the ground connection is necessary for the safe use of powerful household appliances: washing machine, refrigerator, video or audio equipment, boiler, etc. In addition, grounded outlets provide protection against electric shock.
When considering the outlet, you can understand whether there is a ground contact or not
To do this, remove the top cover and pay attention to the wire. Old sockets have 2 wires, they do not have a protective conductor, which is connected to the ground loop, consisting of a conductor, ground electrode, connection and ground around
The grounding conductor is a metal structure that provides contact with the ground near the house.
There are 2 types of grounding:
- natural, in which structures are constantly in the ground, for example, a reinforced concrete foundation;
- artificial - planned connection of the electrical network with a grounding device.
Today, protective and neutral conductors are combined into a common TN-C-S system using a three-core wire. Protective conductors are marked on the insulation in yellow-green. Zero insulation has blue insulation, and phase has brown insulation. Connecting two-wire wires to the terminals indicates the lack of grounding in your home.
About sockets for general acquaintance
An appeal to the technique of checking the presence of a socket ground may be required at any time. Especially for those people who have to work with specific electrical outlets repeatedly.
This part of the electrical network (household or industrial) has the simplest design.
The electric socket consists of a round or rectangular plateau. A plateau is made on the basis of materials that do not conduct electricity. Usually, for the manufacture of a plateau of sockets, they use:
- ceramics;
- porcelain;
- plastic.
The back of the plateau has a flat surface, and on the front there are shaped landing pads for electrical contactors. The material of contactors is usually copper.The contactors are rigidly fixed on the plateau - with the help of rivets, plus they are introduced into the body of the plateau. Mounting screws are provided on the contactors for connection to electrical wiring.
This whole structure is closed with a lid that has two passage holes for an electric plug.
Methods for determining the presence of grounding
Known are professional methods for testing grounding devices that are part of a loop that covers the entire protected object. However, the cost of the equipment used in the implementation of these methods will not be affordable for the average user. In this regard, simpler methods are used to determine the presence of a local loop or grounding PE core in a particular house or apartment.


Checking with a multimeter
A ground test with a multimeter can be carried out under the following conditions:
- Before the grounding is checked in a country house or apartment in the switchboard, the introductory machine must be turned off.
- Then you will need to select one of the sockets located in the room and completely disassemble it.
- After that, it is necessary to visually determine whether or not a wire of the appropriate color is connected to the ground terminal.
If available, make sure that the ground bus is connected to a protective circuit and that it is really effective. To do this, armed with a tester, you must do the following operations:
- Apply power to the circuit by turning on the previously “cut down” introductory machine on the electrical panel.
- Set the central switch of the device to the desired voltage measurement limit (up to 750 Volts).
- Measure this indicator between the phase and neutral wires and fix it.
- Carry out similar measurements, but already between the phase and the intended "ground".
In the event that in the last operation a reading appears on the multimeter display that is only slightly different from the first result, this means that there is indeed grounding in the outlet and that it is operational.
But another option is also possible, when the indications in the second case do not appear at all. With this outcome of the measurements of the ground loop with a multimeter, we can safely say that it is absent or for some reason does not work as expected.
Checking with a test lamp
In the case when there was no multimeter on the farm, it is possible to check the grounding by means of a control light assembled from parts that were at hand. It is not difficult to make this device yourself; to do this, it is enough to find a cartridge from an old lamp or chandelier 1, two wires 2 and securely insulated connectors 3 on one side.
After assembling such a simple device for testing grounding, you can do all the operations already described earlier using a digital multimeter.
This must be done for the reason that some unscrupulous electricians do not pay attention to the color of the insulation and in a hurry connect the blue wire to the phase, and the red or brown wire to zero. Using an indicator screwdriver, you can accurately determine which contact the phase is acting on. When you touch it with the end of the phase wire, the neon indicator lights up (if you simultaneously place your thumb on the contact patch of the screwdriver). For the neutral wire, the same operation does not lead to neon ignition.
After that, you should take a test lamp and touch the identified phase terminal with one end of the wire, and zero with the other, respectively. If there is voltage in the network, a serviceable light bulb will light up in any case. Then the first of the ends should be left in place, and the second should touch the ground contact antenna.
When the light comes on, it can be concluded that the circuit is working. The effect of a dim glow of the filament indicates a poor quality of the ground or its complete absence.
Please note: In the event that an RCD is included in the supply line along with the machine, when checking it, it can work and turn off the circuit. This also indicates the good condition of the ground loop (indirectly)
This also indicates the good condition of the ground loop (indirectly).
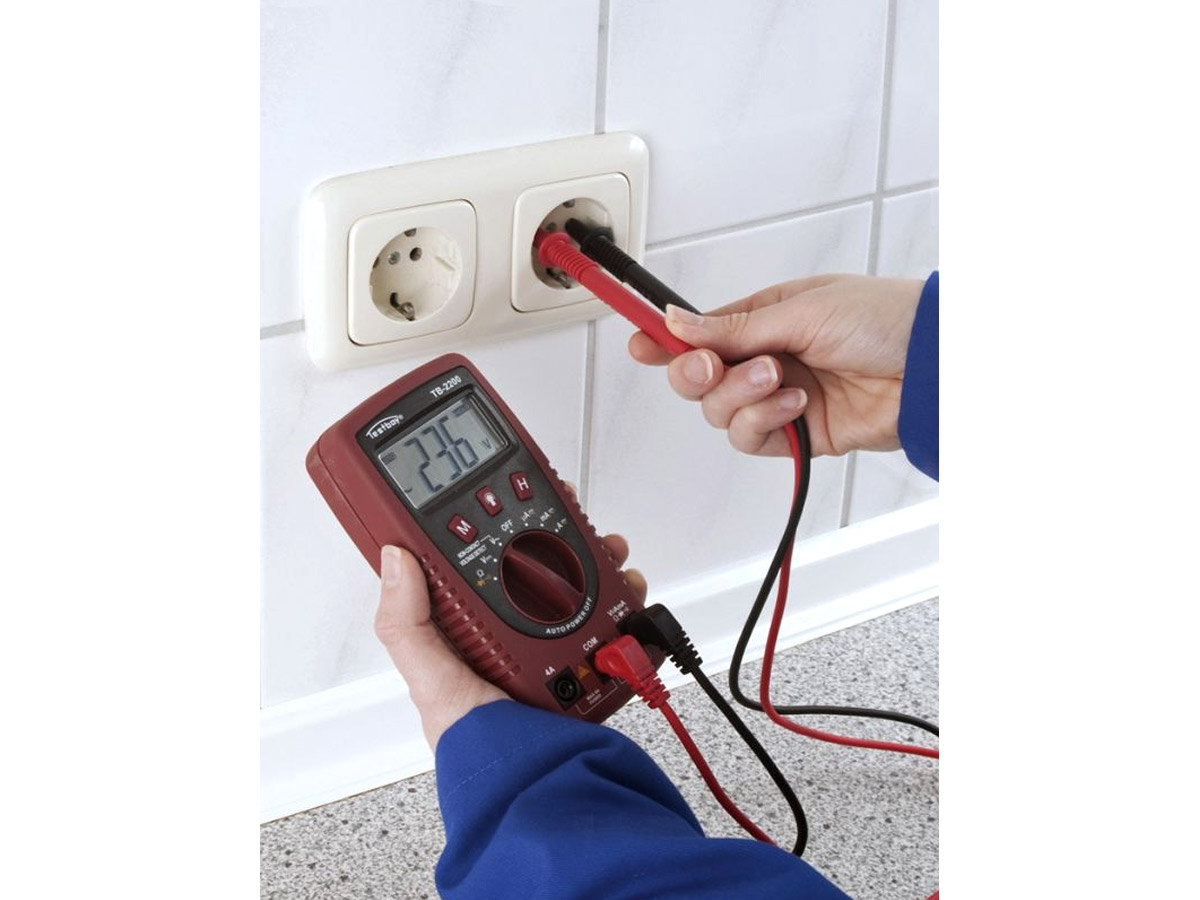
How to check the voltage in a 220v outlet with a multimeter
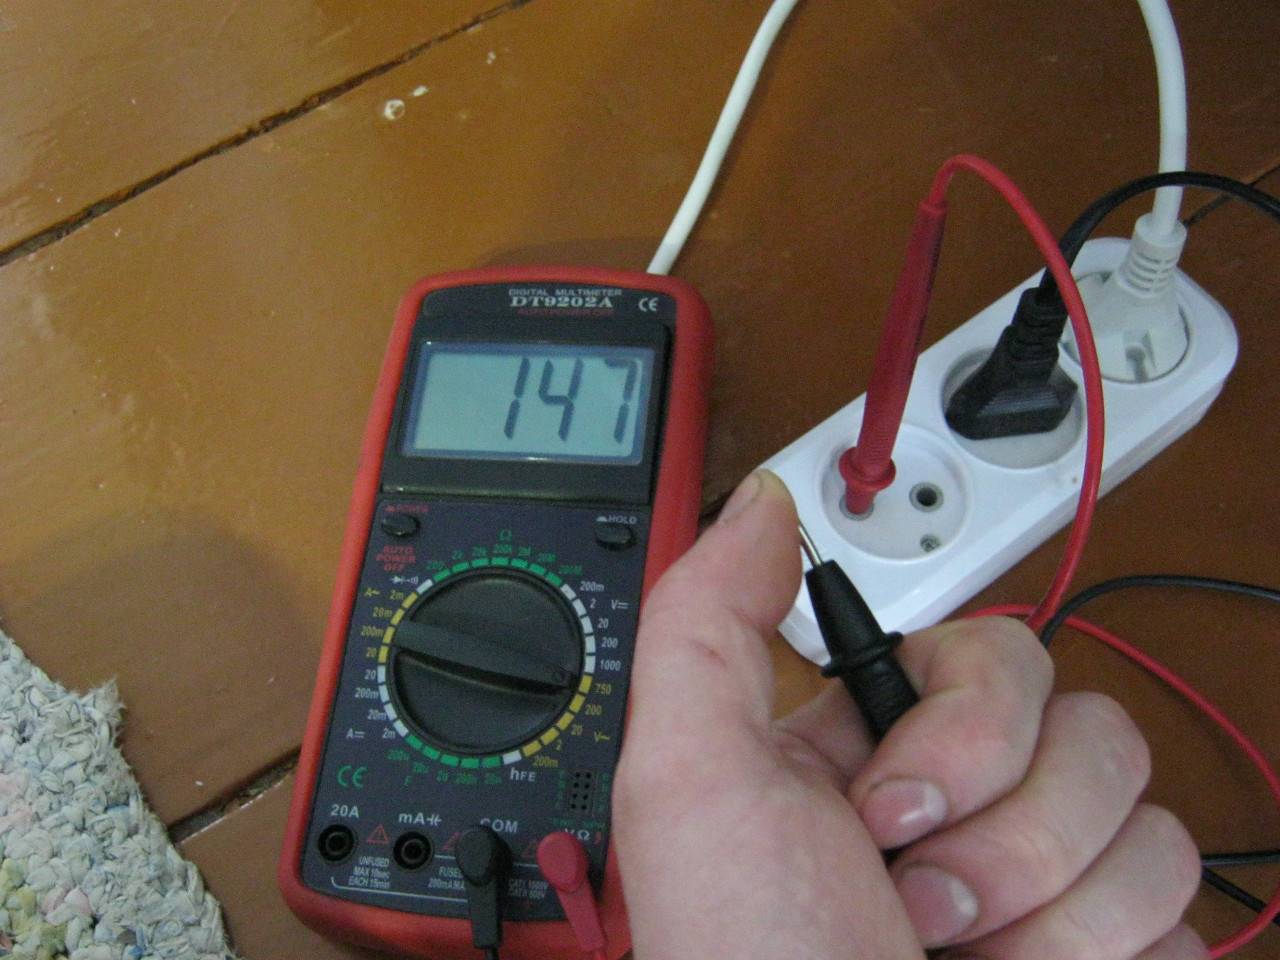
To measure the voltage in the outlet with a digital tester, you need to insert the probes into the sockets of the sockets, the polarity is not important, the main thing is not to touch the conductive parts of the probes with your hands.
Let me remind you once again that the AC voltage detection mode must be set on the multimeter, the measurement limit is above 220V, in our case 500V, the probes are connected to the “COM” and “VΩmA” connectors.
If the multimeter is working and there are no problems connecting the outlet or power outages, then the device will show you a voltage close to 220-230V.
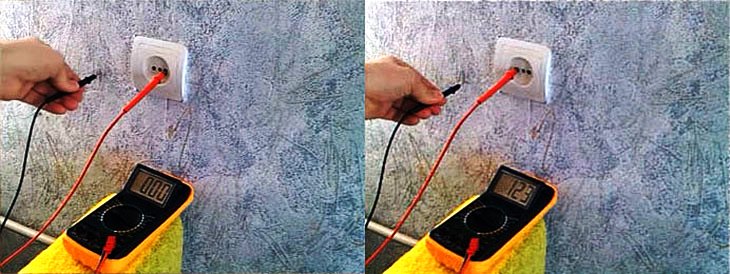
This simple test is enough to keep the tester searching for the phase. Now, as an example, we will determine which of the two wires, for example, coming out of the ceiling for a chandelier, is phase.


If there were three wires - phase, zero and ground, then it would be enough to measure the voltage on each of the pairs, in the same way as we determined it in the outlet. At the same time, there would be practically no voltage between the two wires - between zero and ground, respectively, the remaining third wire is phase. Below is a diagram of the definition.

If there are only two wires for connecting the lamp and you don’t know which one is which, then you won’t be able to identify them in this way. Then the method of determining the phase with a multimeter, which I will now describe, comes to the rescue.
Everything is quite simple, we just have to create conditions for the flow of electric current through the tester, and fix it. To do this, we simply create an electrical circuit, according to the same principle as that of an indicator screwdriver.
In the AC voltage test mode, with the selected limit of 500V, we touch the tested conductor with the red probe, and we clamp the black probe with our fingers or touch it with a deliberately grounded structure, for example, a heating radiator, a steel wall frame, etc. At the same time, as you remember, the black probe is plugged into the COM connector of the multimeter, and the red one into VΩmA.

If there is a phase on the wire under test, the multimeter will show on the screen a voltage value close enough to 220 Volts, depending on the testing conditions, it may be different. If the wire is not phase, the value will be either zero or very low, up to several tens of volts.
Once again, BE SURE TO MAKE SURE BEFORE STARTING THE TEST THAT THE MODE OF DETECTING THE AC VOLTAGE IS SELECTED ON THE MULTIMETER, and not some other.
You must say that the method is quite risky, it becomes part of the electrical circuit and not everyone wants to voluntarily get under voltage. And although there is such a risk, it is minimal, because, as in the case of an indicator screwdriver, the voltage from the network passes through the high resistance of the resistor built into the multimeter and there is no electric shock. And we checked the performance of this resistor by first measuring the voltage in the outlet, if it weren’t there, all the conditions for a short circuit would have developed, which, I assure you, you would immediately detect.
Of course, as I wrote above, it is better to use grounded structures instead of a hand - radiators and heating pipes, a steel frame of a building, etc. but, unfortunately, this is not always possible and often you have to take on the probe yourself. Experienced electricians advise in such cases to still take additional safety measures: stand on a rubber mat or in dielectric shoes, touch the probe first briefly, with your right hand, and only not detecting dangerous current effects, take a measurement.
In any case, this is the only, most reliable and easiest way to determine the phase with a household multimeter yourself.
Tools and fixtures for checking voltage and grounding
The most important tools for working on AC electrical networks are an indicator screwdriver and a voltmeter. In extreme cases, you can use an ordinary light bulb screwed into a cartridge, from which two wires are removed with small bare areas at the ends.
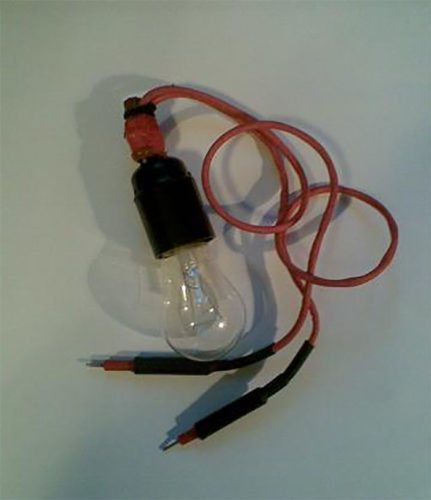
Control lamp - "control". Plugs are visible at the ends of the cords for convenience and safety of use
Electricians usually call such a light bulb "control". By the brightness of the glow of the control, you can roughly represent the magnitude of the voltage in the network. In the case of frequent use of the control, it will be safer if the paw is placed in a shock-proof housing. To reduce the heating of the housing, the lamp should be of minimum power - no more than 25 watts.
The indicator screwdriver is a neon lamp with a limiting resistor enclosed in a transparent case. One of the outputs is connected to the tested circuit, the other has direct contact with the human body. The current required to glow a neon lamp is negligible and does not pose a danger to humans, but, unlike a control, such an indicator does not show the voltage level, but only its presence. The indicator screwdriver is called so only because of the external resemblance to the tool of the same name. The design of the indicator has low strength and it is undesirable to use it for tightening bolts.

An indicator screwdriver is the main tool of an electrician. On the left, you can see the contact that you need to touch with your finger.
The most complete data on the presence and magnitude of voltage can be obtained using a measuring device - an AC voltmeter. Voltmeters can be pointer and digital. At present, it is more practical to use digital devices, since they are not afraid of shocks and can work in any position. Plus, they're cheap now. The advantage of pointer devices is that they do not need a power source. The voltage source is used in the instrument only for resistance testing.

Pointer tester

digital tester
Of the listed devices, an indicator screwdriver must be present when working with electricity, and then the tester follows in order of importance (it doesn’t matter which one) and in the last place is the control
How are soil and metal ties checked?

Assessment of the state of metal bonds begins with a visual inspection. Masters hit the contacts with a hammer with an insulated handle. If everything is in order, then you will hear a slight rattle of the conductor. Specialists must ensure that the resistance of all metal connections meets the established standards. To do this, use a multimeter or ohmmeter. The device should not output more than 0.05 Ohm. This requirement must be observed by developers of multi-storey and private houses. Soil condition is assessed in late spring or summer. This is the time of the least rainfall. Earth resistivity can be measured by electrical workers using special equipment. If the results obtained are very different from the accepted standards, grounding is brought to another piece of soil.


Why is grounding checked?
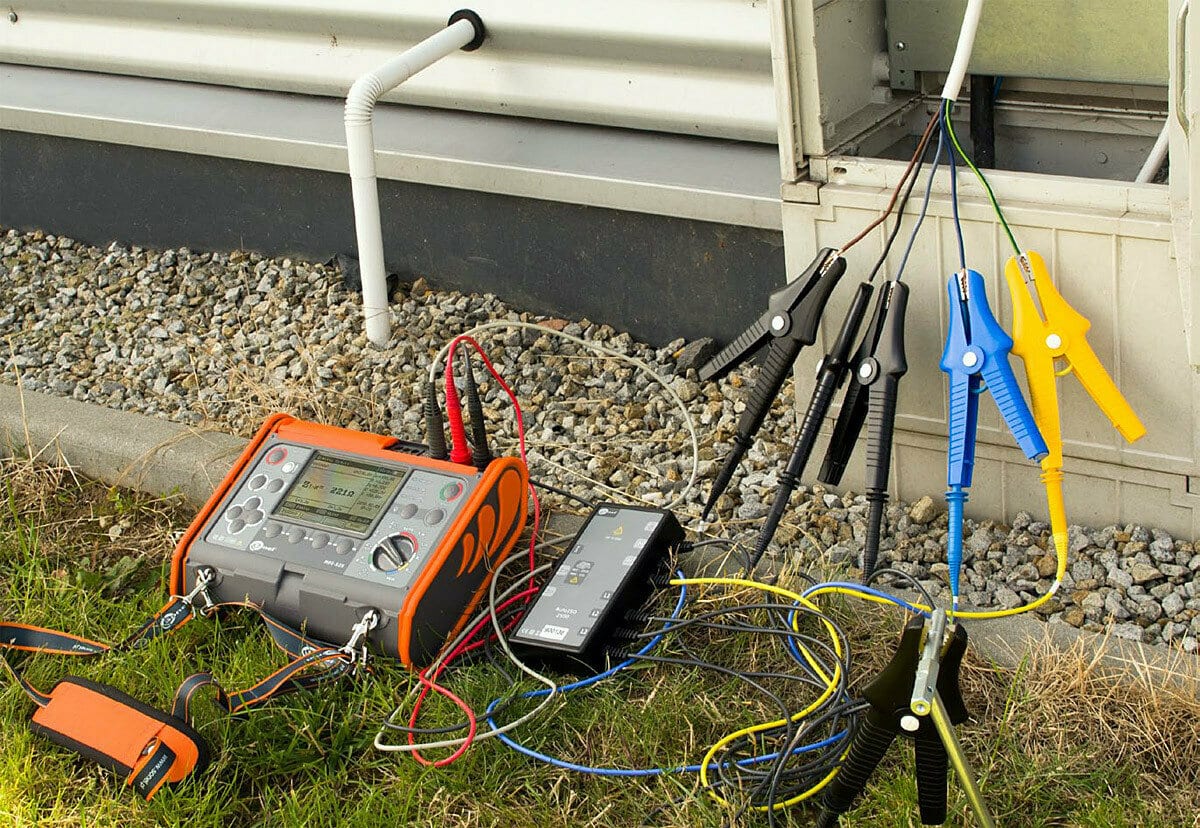
Checking the state of grounding is an important measure aimed at protecting people from the effects of electric current. To solve the problem of how to check the grounding in a private house, special equipment is used. The results obtained make it possible to establish the state of the grounding, whether it complies with the established standards and whether it is capable of performing its functions. Usually such measurements are carried out by qualified specialists from the organization that maintains the home network.
Periodic grounding checks should always be carried out, despite the fact that all the electrics in the house were installed by professional electrical technicians. It is not uncommon for an incorrect circuit connection to cause premature wear. In this regard, it is recommended to take measurements in a timely manner and check the condition of the soil and the electrodes placed in it, as well as grounding conductors, tires and metal bonding elements.
This procedure, which determines whether there is grounding, is carried out in residential buildings at least once every 3 years, and at industrial production facilities - annually.
During the measurement process, the tester determines the resistance of the circuit, the value of which must comply with the established standards. If the indicators turned out to be higher than the norm, they can be reduced. To do this, you simply need to increase the area of interaction by adding electrodes, or the value of the total conductivity of the soil rises by increasing the concentration of salts contained in the soil.
It should be borne in mind that a conventional grounding device can only reduce the voltage supplied to the equipment case. A residual current device, an RCD, installed in the same connection with grounding, will help to make protection more reliable. Any protective equipment is designed and selected individually, in accordance with the operating conditions. The choice is made taking into account moisture, soil structure and other factors.
It must also be remembered that many types of modern electrical devices are equipped with a built-in RCD that works only when plugged into a grounded outlet.Therefore, their normal operation depends entirely on the correct connection of protection and further checks of its performance.
Checking with a multimeter
After opening the outlet, there were three wires in it, and even the color design standards were observed. You need to find out if there is grounding, that is, whether it works. How it's done.
- The power supply to the apartment or house is turned on in the shield.
- The device enters the voltage test mode.
- One probe is set to phase, the second to zero. The voltage is measured.
- Now the probe from zero must be rearranged to PE. If in such a position a value equal to or slightly less than the previous indicator is shown, then the PE circuit is working. If the indicator board on the measuring device showed “zero” or the numbers did not appear at all, then somewhere there was a break. That is, the grounding system in the apartment does not work.


