- Video tutorials on laying the curb
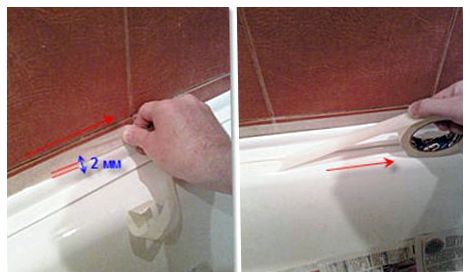
- Tips for Applying Curb Tape Properly
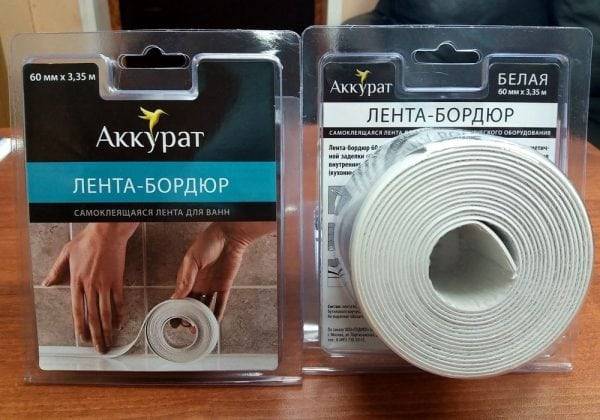
- Adhesive curb tape
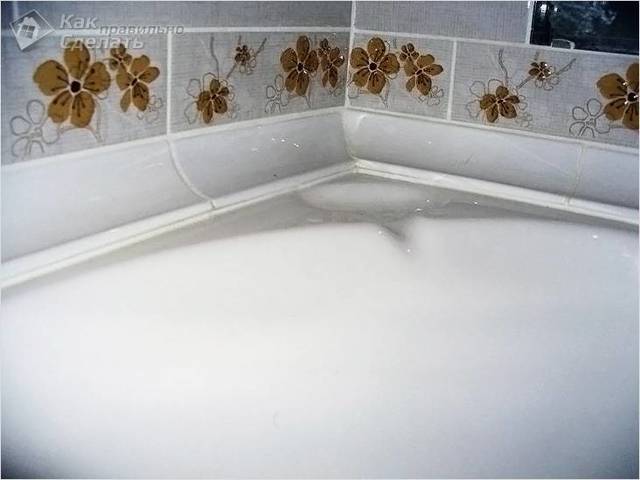
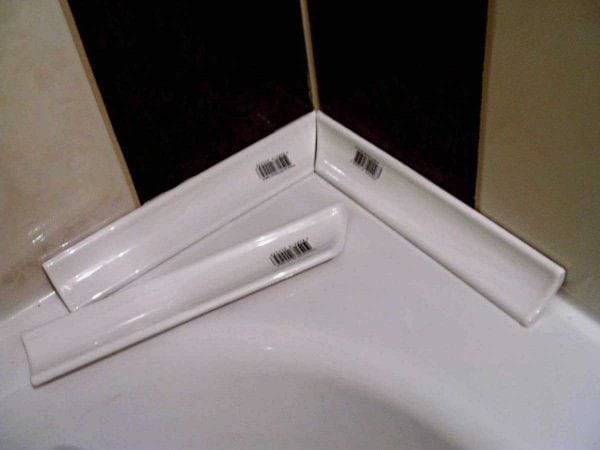
- Ceramic curbs
- Features of installation work
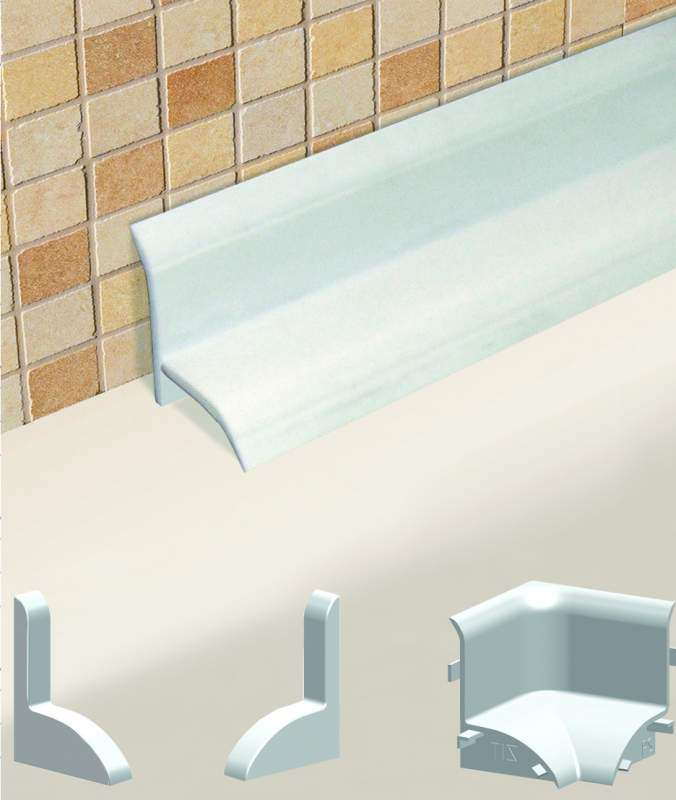
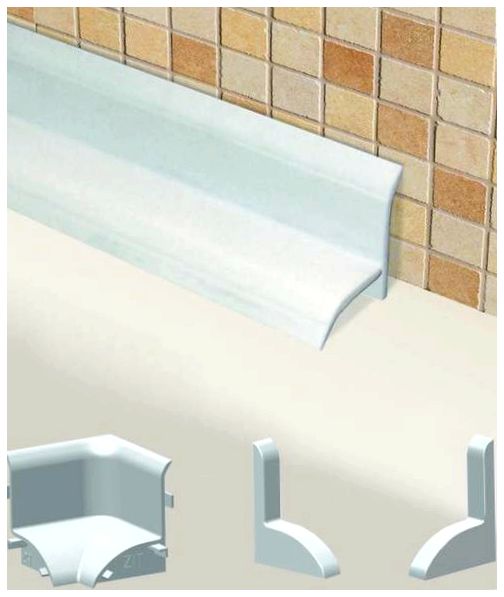
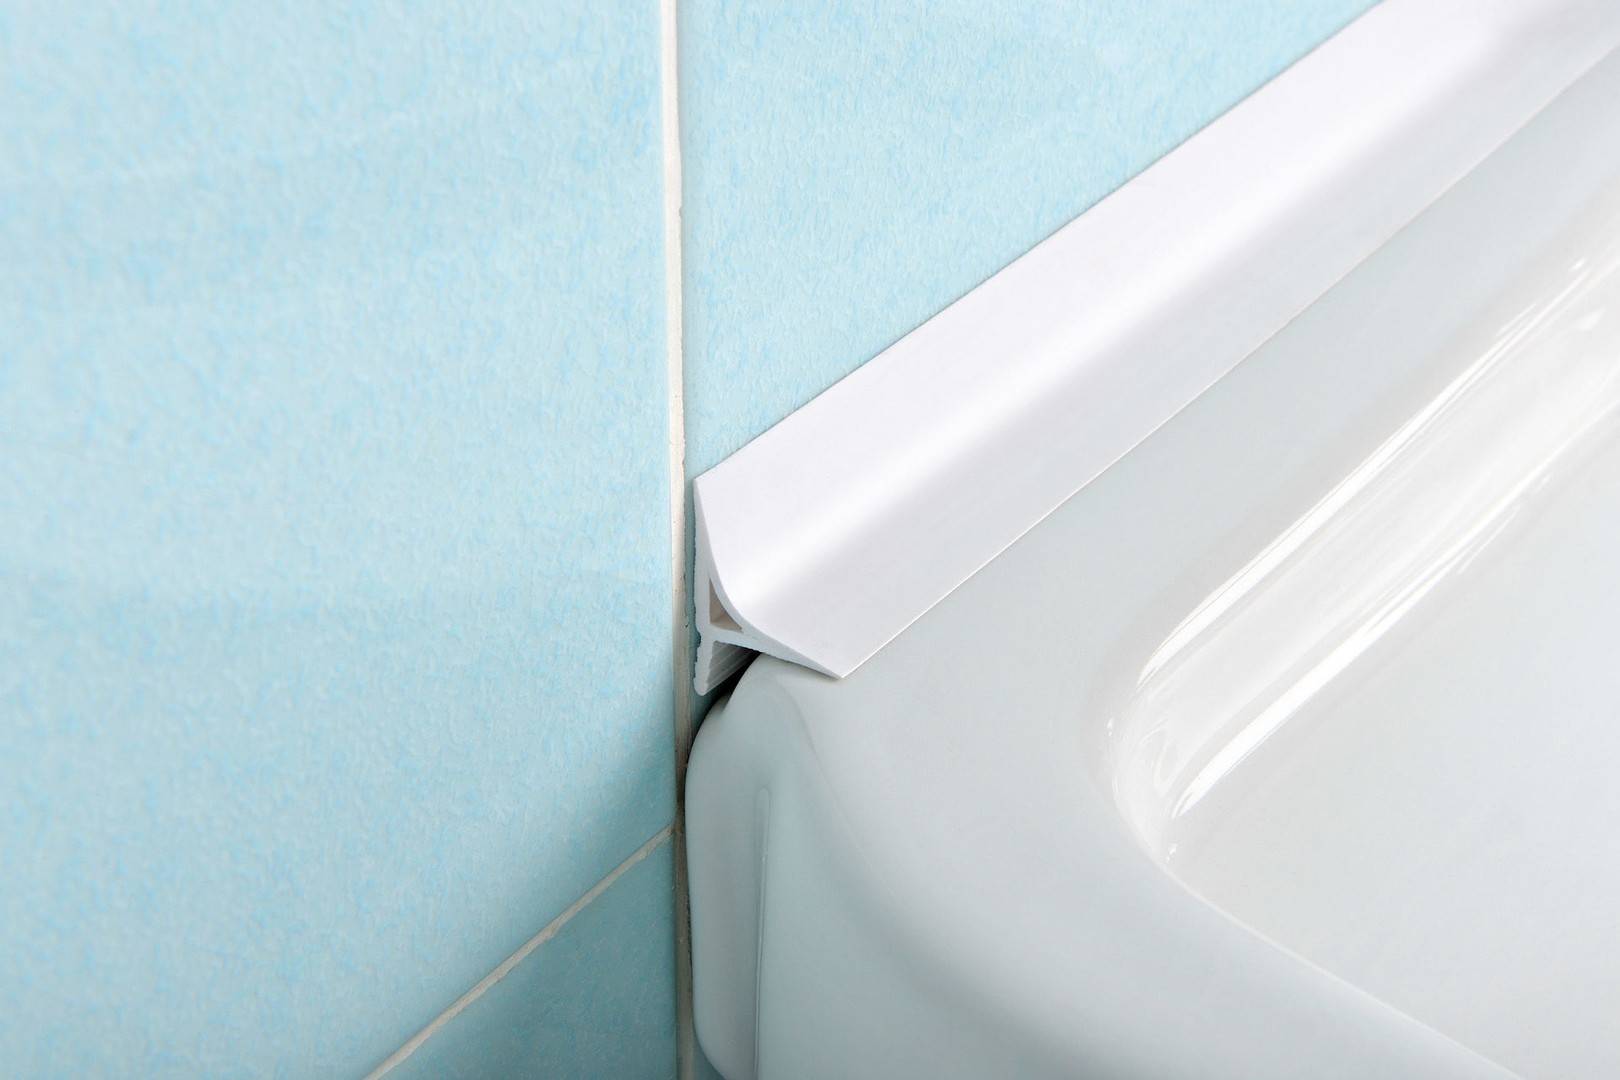
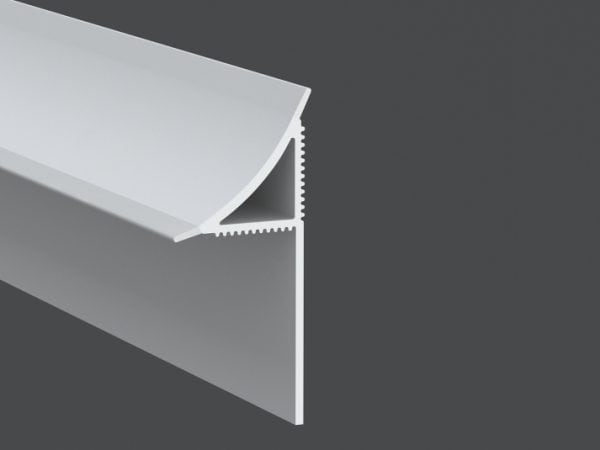
- Plastic borders
- Features of installation work
- ceramic border
- Tape gluing
- Installation of plastic plinth
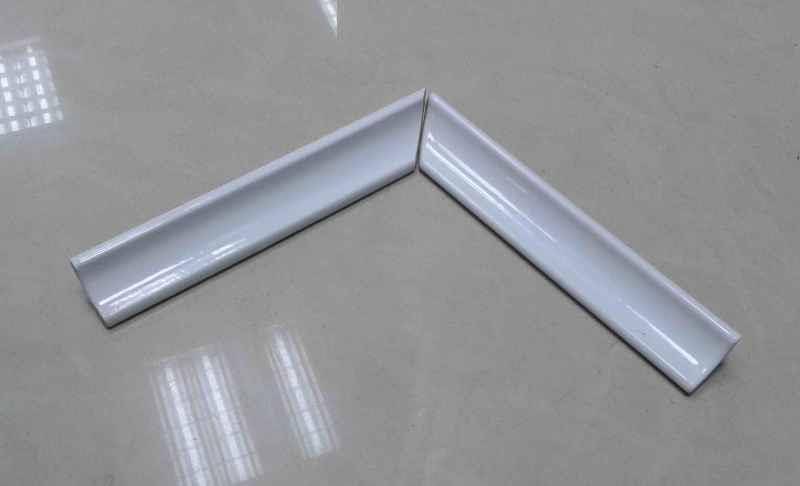
- Adhesive ceramic corner
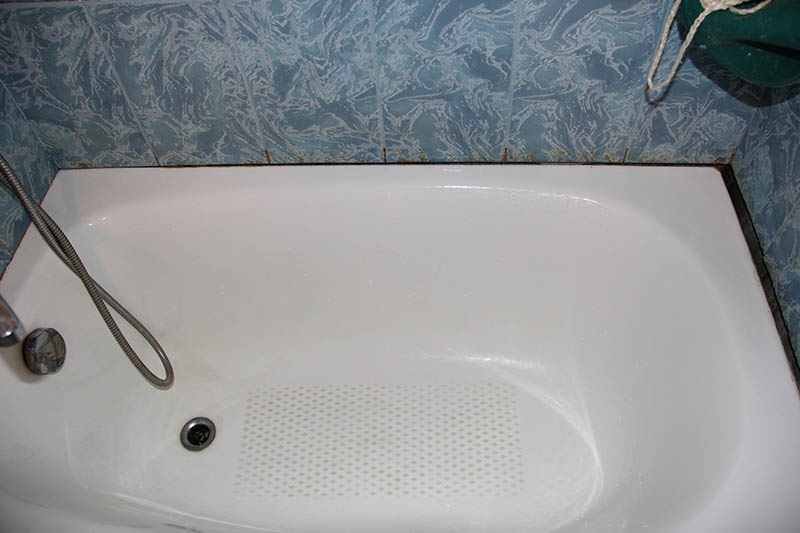
- Installation on an old bath
- Choosing a border for sealing the gap
- Flexible self-adhesive border tape
- plastic borders
- Ceramic borders
- Natural stone borders
- What rules should be remembered when installing curb tape?
- Corner glue
- Advantages and Disadvantages of Using Bathroom Border Tape
- Mounting Features
- How to choose a corner
- Types of corners for the bath
- Materials used for the manufacture of corners
Video tutorials on laying the curb
How to install plastic curb:
A good example and a few nuances for installing a flexible self-adhesive tape:
No matter how well the joint is sealed and the steps for installing the curb on the bath are carried out, there is still the possibility of moisture penetrating into pores or cracks. To prevent the development of a fungus, which will then be difficult to fight, you need to keep the corners clean and try not to miss its appearance.At the initial stage, it is easy to deal with it - it is enough to wipe the corners from time to time with ordinary table vinegar.
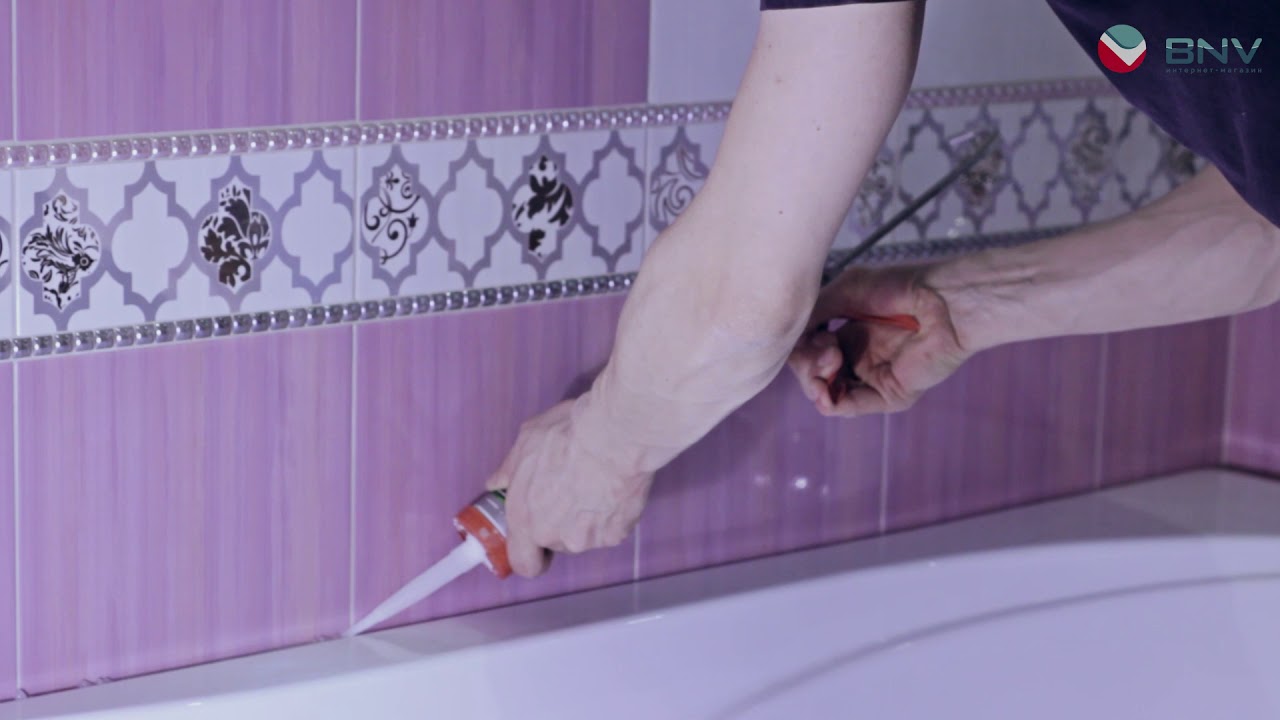
Tips for Applying Curb Tape Properly
To do this, it is necessary to prepare the surface and apply the product, and then let the composition grab. Installing the curb tape in the bath is not particularly difficult and takes a minimum of time.
Here are a few step-by-step recommendations on how to glue a border on a bathtub with your own hands:
- First you need to clean the surfaces of dirt and possible greasy traces. To do this, use a solution of soda or alcohol, and also choose a cloth or sponge that does not leave a pile on the surface. After washing the area, it is desirable to dry it with a hairdryer.
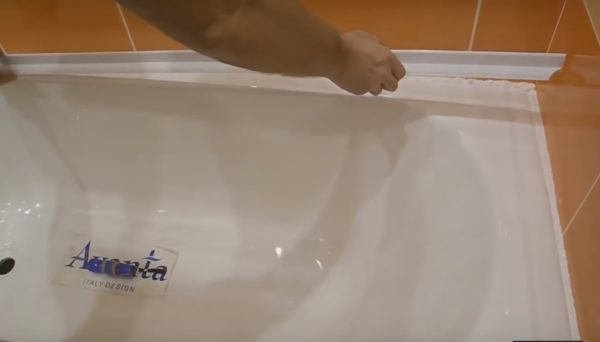
- Next, proceed to the application of the tape. Start from the corners, fixing special markers there. It is recommended to make a piece of sealant 2-3 cm longer than the desired value. The temperature in the room should not be below 10 degrees. It is advisable to warm the tape itself with a hairdryer before application - then its plasticity and adhesive properties will increase.
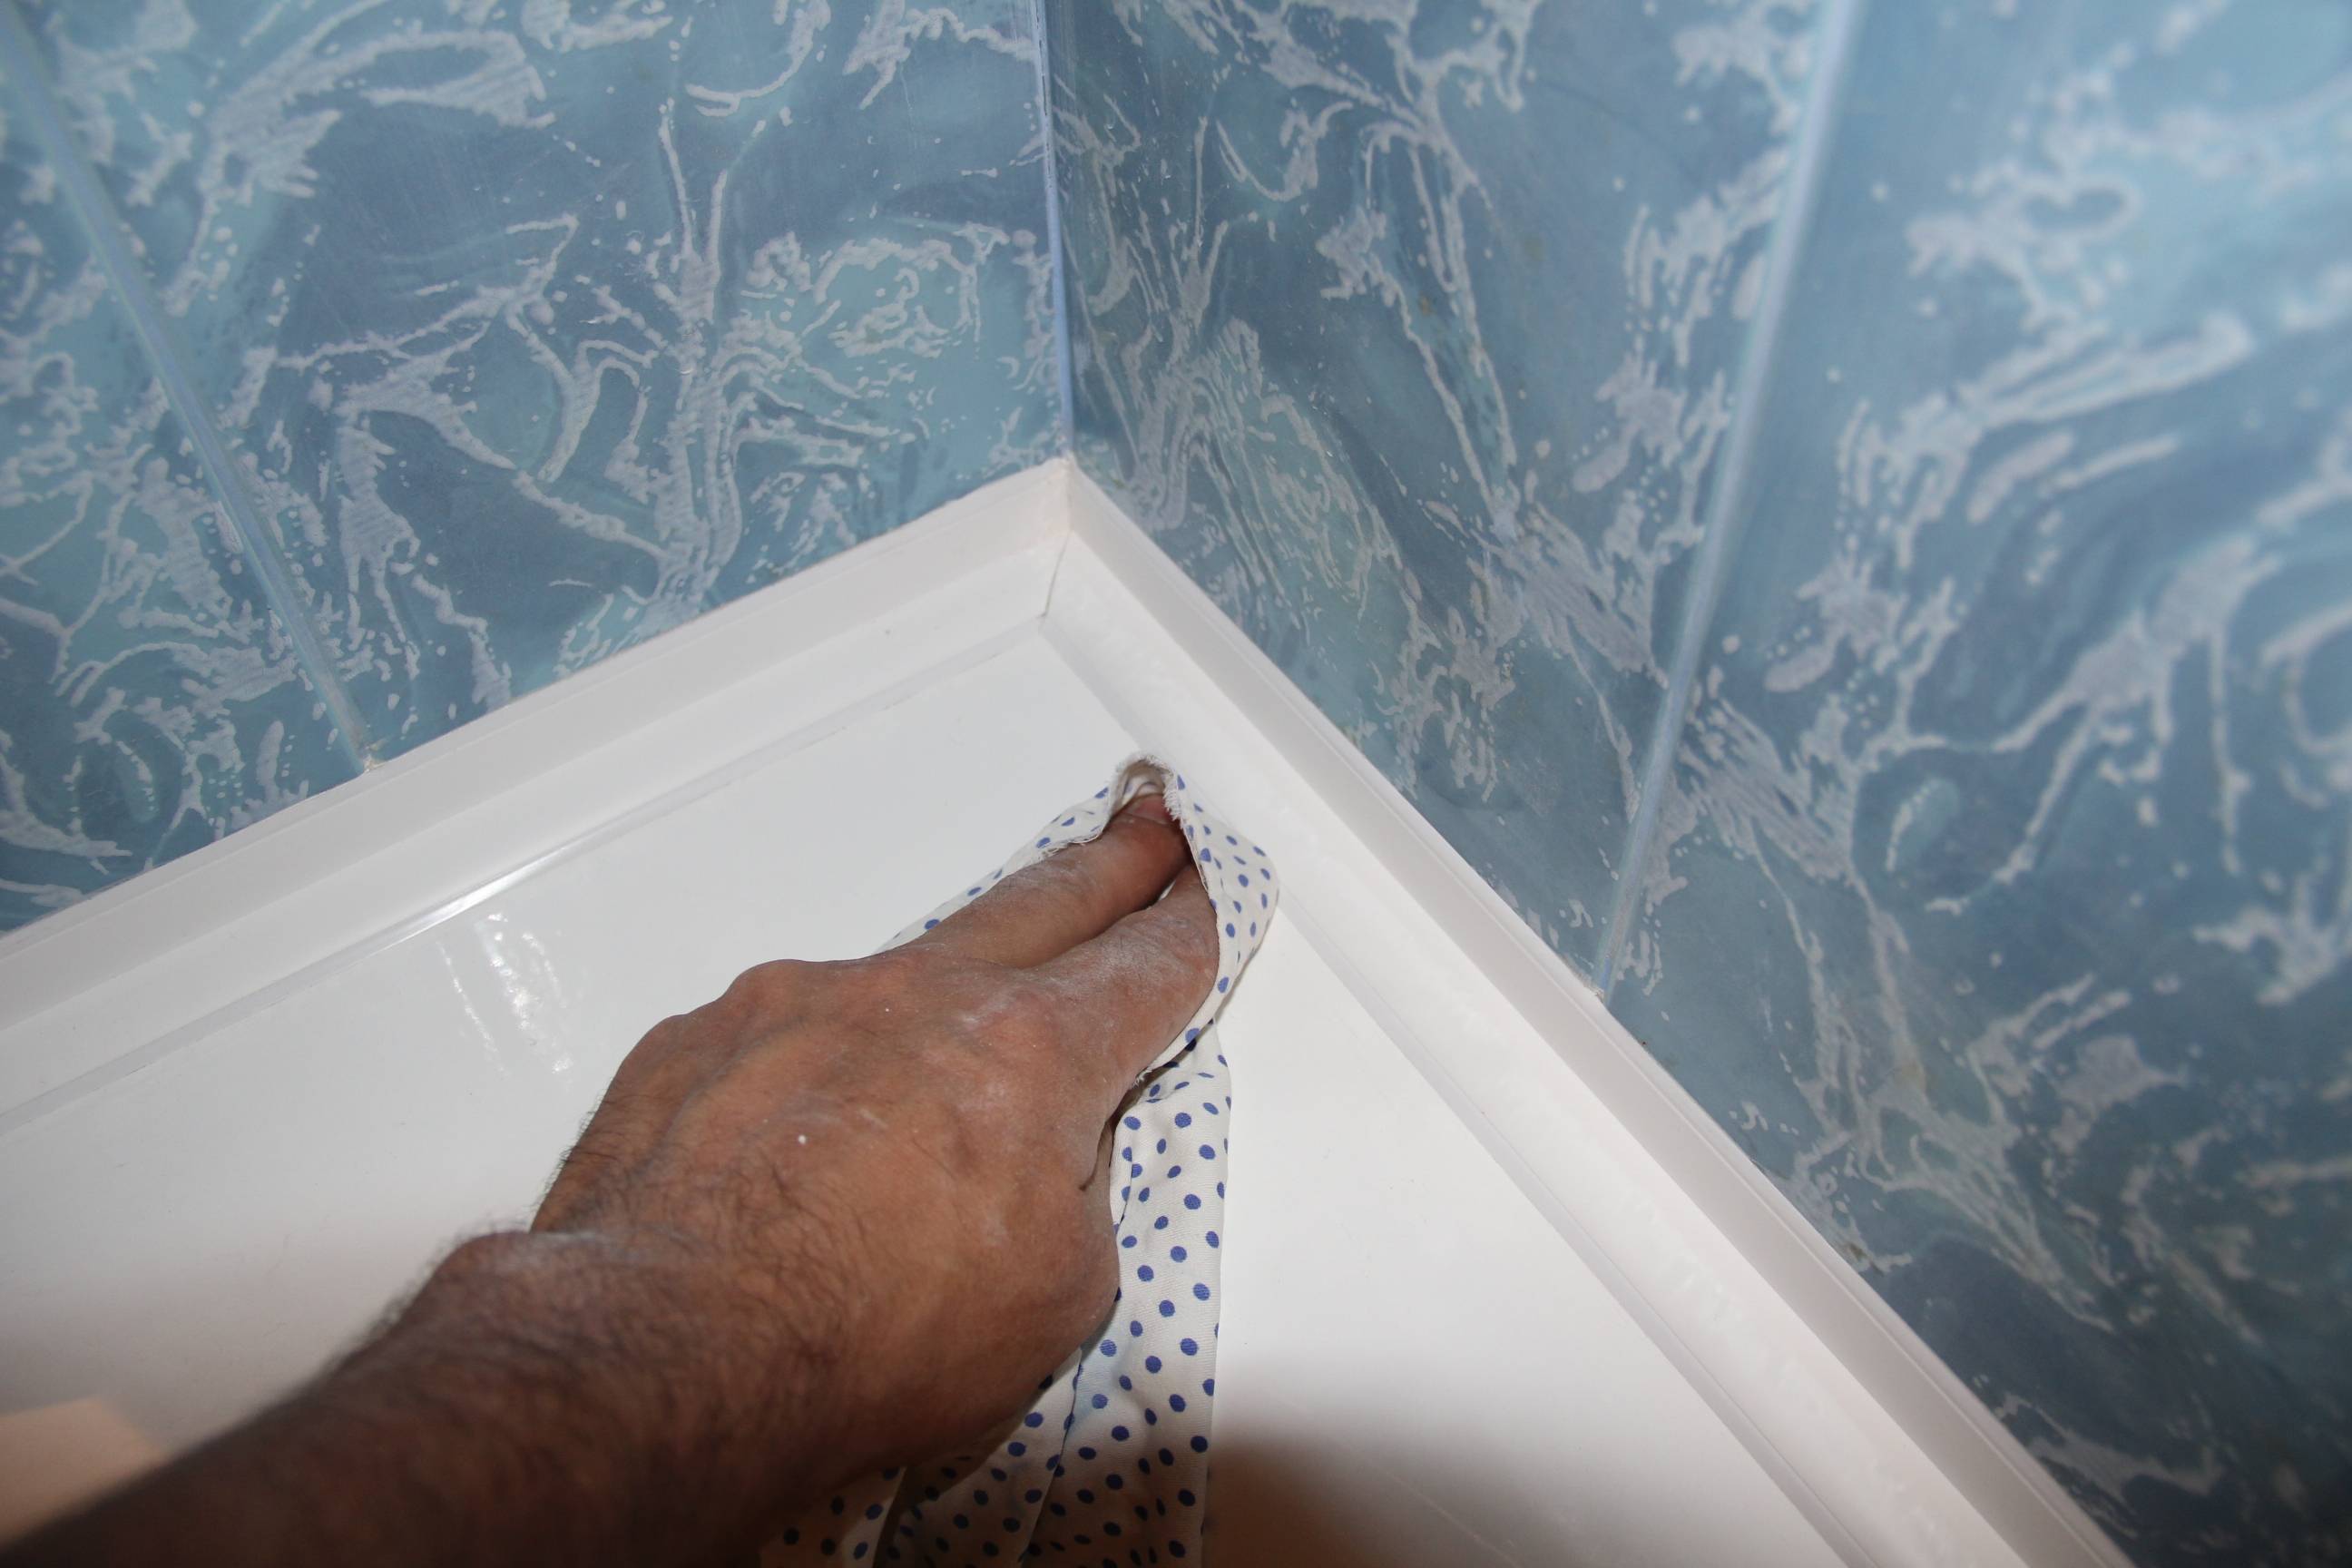
- It is advised to remove the protective layer by 10-12 cm. Glue the border, pressing the material tightly: first to the wall, then to the bath. Carefully working through the corner with the applicator.
- After processing all surfaces, it is advisable not to operate the surface for a day for optimal effect. Do not wet the strip, and then the glue will create maximum contact with the gap. If you make some flaws during the application process and notice non-glued places, then it will be easy to fix it with the composition of liquid nails.
Self-adhesive tape in the bathroom is the best way to get rid of diaper rash, mold and odor quickly and at minimal cost.We recommend that you familiarize yourself with the video instruction in order to ensure the fastest possible sealing of the bathroom using a do-it-yourself curb tape:
One of the easiest and most affordable ways to seal and decorate the joints between plumbing and the wall is bathroom edging tape. Installing it yourself is not difficult, but for high-quality installation, you need to take into account a number of nuances.
Curb tape is a relatively new material that allows you to cheaply, quickly and hermetically close the joint between the bathroom and the tile. The disadvantages of this option can only be attributed to fragility, but due to the cheapness of the material, everyone can afford to change it every 3 years.
The installation of the tape, as a rule, is performed independently, since there is nothing complicated in the installation process
And yet, before starting work, you should not only familiarize yourself with the technique, but also pay attention to some of the nuances that will save the home master from unpleasant and fairly common mistakes.
Adhesive curb tape
The order of work is as follows:
- Before sticking the curb tape, it is necessary to prepare the surface of the bathtub and the wall, cleaning them from dirt, water and grease. To do this, you can use soda, cleaning products and degreasers (alcohol or gasoline). If re-gluing is performed, then the remnants of the previous tape should also be removed. The edges of the bathtub and the wall or tiles in the gluing area should be dried with a vein and wiped with a dry, clean cloth. The surface must be completely dry.
- Next, you need to cut off a piece of border tape of the required length with a margin of 2 cm. If you need to paste over difficult areas in the corner of the tape, make an incision from the side adjacent to the bath.
- Sticking is recommended to start from the corner, removing the protective coating as necessary in 10-15 cm segments. In the process, press the tape very tightly against the surface of the bathtub and tiles for 15-20 seconds.
- After finishing work, it is recommended not to use the bath for 24 hours. This is necessary to prevent water ingress and secure adhesion of the adhesive.
Proper gluing of the curb tape, as well as installing a screen under the bath, will contribute to a more accurate and presentable appearance of the bath with minimal time and money.
Ceramic curbs
It was quite difficult and hard work: it was possible to cut small squares from the tile, from which the slope from the wall to the bath was formed. If the work was done conscientiously, then the effect was absolutely decent. Now there is no such need.
In many construction stores, when you buy toilet tiles, you can immediately recommend favorable ceramic borders. But often they still have to be purchased separately. When choosing such a frame, you need to work hard so that the border matches the color of the tile itself.
In an exceptional case, you should choose a white border, then merging with plumbing fixtures, it will not stand out from a single design.
In fact, all ceramic products are considered quite strong and hard. And therefore, of all the options that are considered, ceramic curbs will especially last a long time, they are virtually not subject to deformation and are used without replacement for many years.
But you need to remember about the disadvantages of this option: it has a weak resistance to mechanical damage, i.e.with a strong blow, such an object can prick.


In most cases, this kind of trouble occurs when installing ceramics, and already installed curbs add to their own hardness the mechanical strength of the wall and bathtub and are actually not vulnerable.
Working with ceramic components requires specific skills, and therefore the best option is to entrust this process to specialists. If, for example, you personally agreed to take on this business, then it will be useful for you to read how to make a border in the bathroom from ceramic profiles (or skirting boards).
Features of installation work
For work, you need to purchase the required number of blanks. Buy curbs with a margin (in case of damage), and also calculate how many corner-type elements you need. You will also need a specialized tile adhesive (it must certainly be moisture resistant), sealant and grout. All work consists of several stages:
-
Surface preparation. They must be very carefully cleaned and dried.
- Gap seal. If it is small, you can get by with silicone sealant. If, for example, the gap is large, it is sealed with mounting foam.
- Preparation of glue (according to the rules).
- Laying the curb itself. How to stick a ceramic skirting board on a bathtub? Using a spatula, glue is applied to the back of the parts, and they themselves lie close to each other so that there is no gap. Special corner components are nested in corners. Days must be allowed to dry.
- Grout. The finished grout removes small gaps between the parts, and also between the wall and the baseboard.
Each of these types of borders has both its own advantages and bad qualities. When choosing an option for yourself, consider the entire interior of your bathroom. For anyone, decorating a bath with a border will give it a complete and beautiful look.
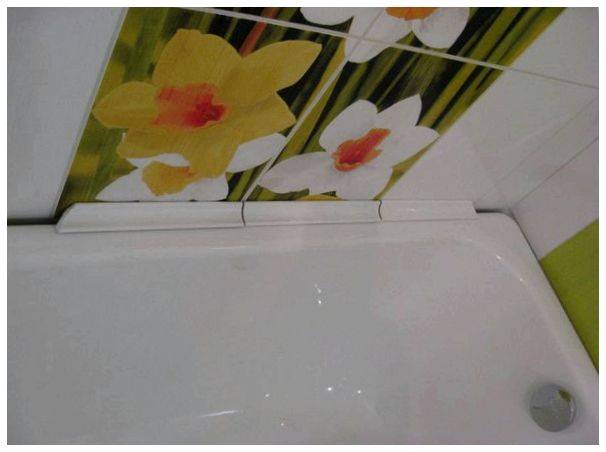
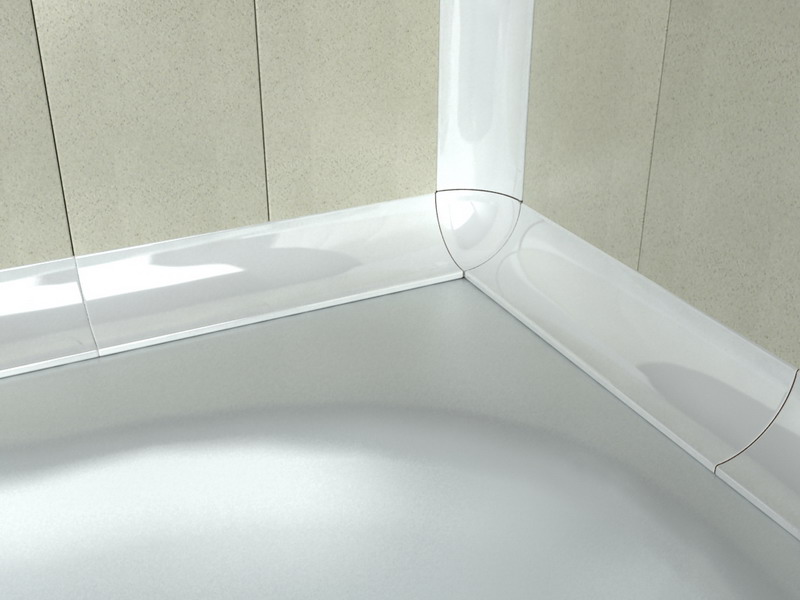
Plastic borders
To install plastic curbs, you do not need to have any specialized skills in construction. In addition, they are inexpensive, and there are quite a few ways of different colors and sizes. All this is done by plastic corners, a material that is quite popular for sealing gaps in bathrooms. When purchasing this border, you first need to think about how to stick the corner on the bath, and more specifically to the wall: under the tile or on top of the tile.
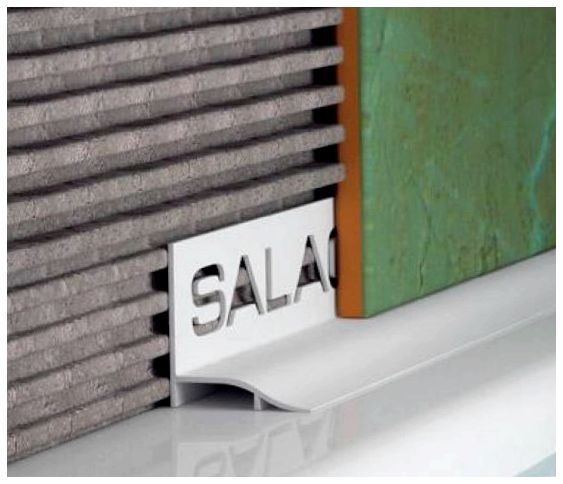
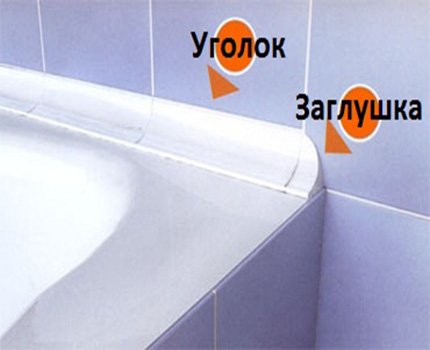
They are produced in the form of corners and skirting boards. The two options are great for conspiring the connection between the wall and the plumbing. Borders in the form of an angular profile can be installed both on top of the tile and under it. If, for example, you pick up a plastic skirting board, then it is placed only on top of the cladding material. Now manufacturers have begun to release curbs with rubberized edges. This makes it possible to perform a more reliable seal. Along with the profiles themselves, you need to purchase all the necessary accessories (plugs, corner components)
Features of installation work
If the walls in the plumbing unit are tiled, then there are two options for fastening the curb:
- under tile
- Top tiles.
Which option to choose and how to stick a plastic corner on the bath?
The second option is much easier. If the walls are already sheathed with ceramic tiles, then everyone can handle the task of how to stick a border on the bathtub.In this option, you need to start by cutting a plastic corner or plinth into pieces along the length of the bath.
This will make your next job much easier. Of course, the surface must be prepared in advance (as in the variant with curb tape). How to stick a plastic corner in the bathtub and the wall?
“Liquid nails” are much better suited: this is one of the most reliable options. If the gap is large enough, seal it in advance with sealant or mounting foam.
When it is dry, apply glue to the back surface of the corner and press it against the wall and edge of the bath for 20-30 seconds. When the part is glued, it will be necessary to install the components and remove the repair tape.
Panels are also usually placed both on top of the corner and under it. If the distance is large, then you can “bring closer” the wall with the help of a repair profile, on which the panels will be installed.
And then the corner can be put on top of the panels. Here, instead of a corner, you can also use a plastic skirting board, just do not forget to fix the seal with a specialized sealant. After all the work is done, you need to leave your bathroom for the day. Only then can you safely use it for its intended purpose.
Now the question of how to stick a corner on the bath will not cause you any difficulties.
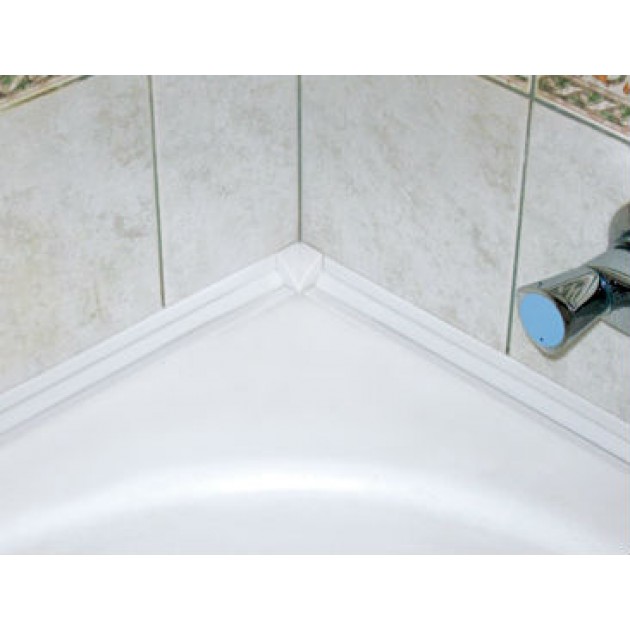
ceramic border
Ceramic curb for waterproofing
Ceramic bathroom edging is considered the most beautiful type of decoration and durable, although it takes much more time to install. Previously, to decorate the joint and seal it, it was necessary to cut borders from the remaining tiles, but today this is no longer necessary, since the production of ceramic corners has been established at an industrial level.


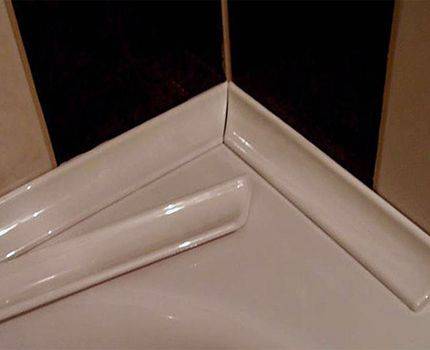

Such a corner between the bathroom and the wall is now sold in almost every building materials store. The product has a wide range of colors and design variations, which allows you to choose a model for almost every style of interior. The material is highly durable and durable, although its installation process is a little more complicated than the previous ones.
Important! Before choosing corners for bathroom tiles, you need to remember that this method of sealing the joint is not able to withstand bending and deformation stresses, as it fits on the tile adhesive. This option is best not to use for acrylic or steel baths, but only for cast iron
- Before starting work, purchase the required number of curb modules with corner joints;
- clean and dry the joint;
- then close the gap with mounting foam or silicone, depending on the thickness;
Ceramic border color options
Note. At this stage, you need to decide how to glue the corner in the bathroom. If you have an acrylic bath, then it is prone to expansion when heated, which means that it is better to use a sealant for the corner, which will provide elasticity when dried. If the bathtub is cast iron, then this material practically does not expand, and in order to securely fix the bathroom corner, you can use ordinary tile glue.
- knead the tile adhesive and use a spatula to apply it to the junction, after which you tightly lay the curb modules, saving space for grouting;
- after the installation of the border on the bath is completed, it is necessary to wait a day until the tile adhesive is completely dry and then apply a moisture-resistant grout for the joints.
Having studied the information above, you already know how to glue the corner on a plastic or ceramic bath yourself, which will allow you to significantly save money on repairs. And to consolidate the material, we suggest watching a video clip that will answer many questions.
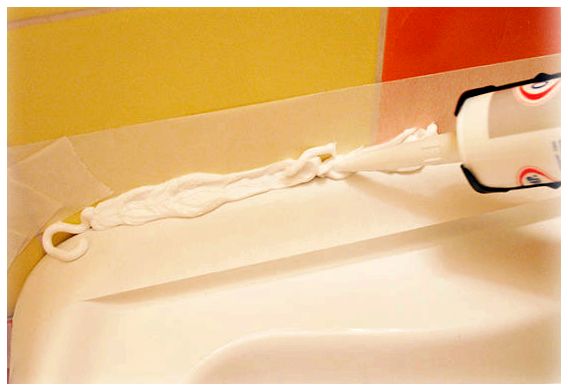
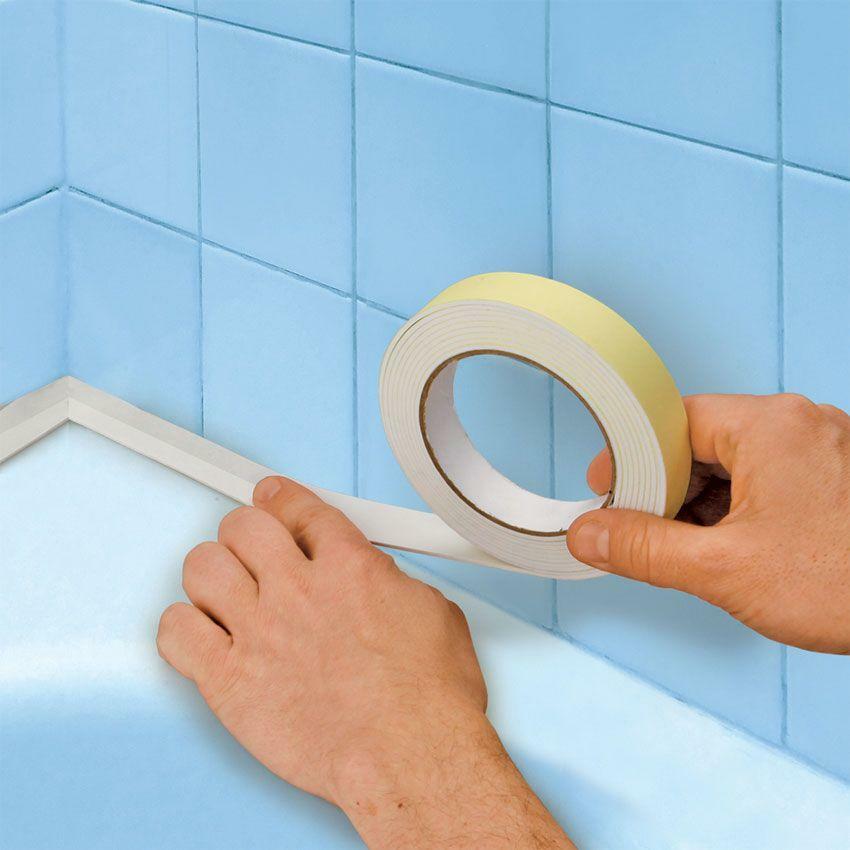
Tape gluing
The easiest way is to lay a curb tape at the junction. The curly one is somewhat different from the angular one - it has an average longitudinal sector without an adhesive composition. It is necessary to do preliminary markup. The border is glued with paper tape at the right height, since it is difficult to wash off the pencil or marker from the surface of the tile. At the end of the work, the adhesive tape can be removed.
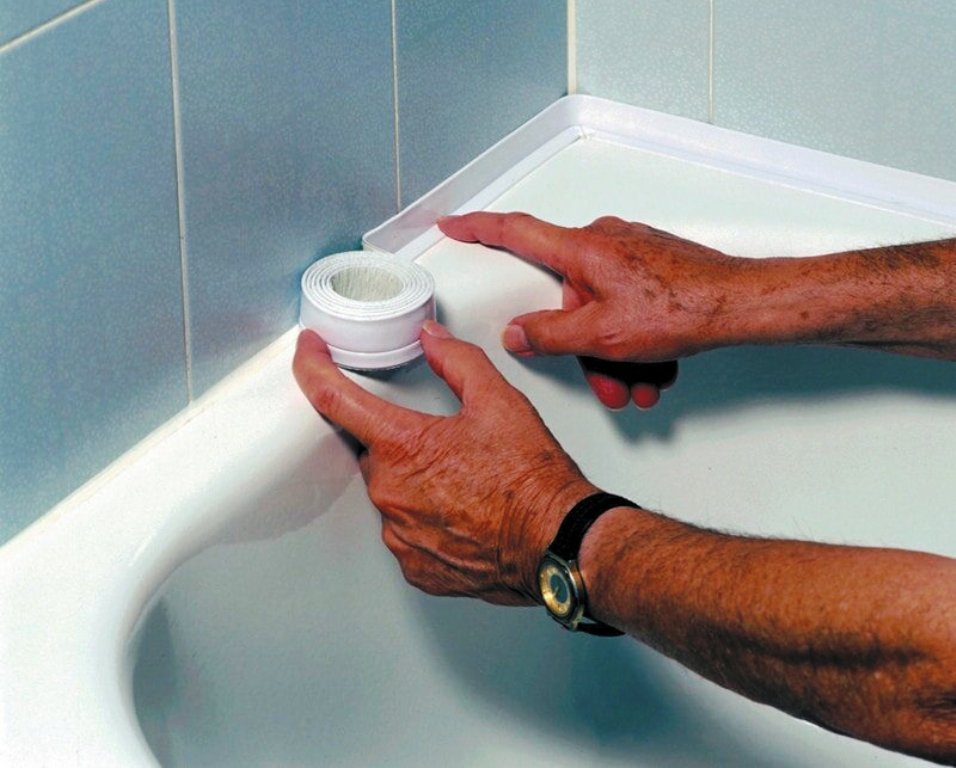
Before installation, cut the border. For each section of the bath, you need to make an allowance of 2 cm. Then the profile is bent in the right place, warming up with a hot hairdryer. After it becomes elastic, it will acquire the desired shape. This is also necessary so that the tape does not peel off ahead of time. The installation instructions are as follows:
start work from a corner;
carefully separate the film from the tape in small sections - 15 cm each;
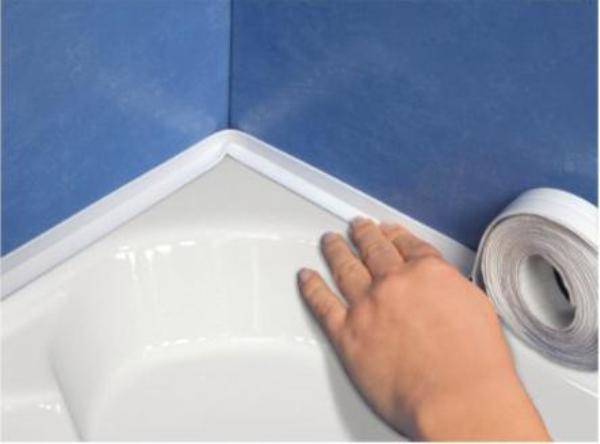
in parallel, press the profile with the applicator, do this as hard as possible (then the tape will stick stronger);
pay attention to the places of contact between the product and the tile joints;
put a border in the corners with special care, the general appearance of the bath depends on this (the corner tape is left flat on top, cut from below at an angle of 45 degrees to about the middle);
insulate the joints of the tape with sealant;
do not use the bathroom during the day, then, if there are lagging areas, glue them with “liquid nails”.

Installation of plastic plinth
It is necessary to install a plastic border in a different way, but the preparatory measures are similar. Next, you need to measure the length of the bath with a tape measure, make a mark on the border, cut off the material. The easiest way is to immediately cut out elements equal to two sides of the bath. Cut the corners at a 45 degree angle. Next, glue paper tape 2 mm above and below the future corner so as not to stain it with glue.
The sequence of work is as follows:
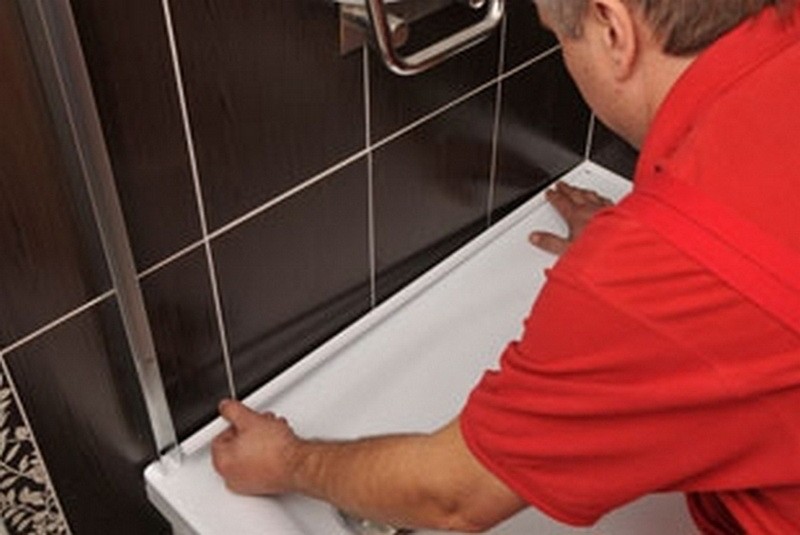
- attach a piece of the border to the wall, press it;
- bend the corner from above, leaving space between the wall and the curb;
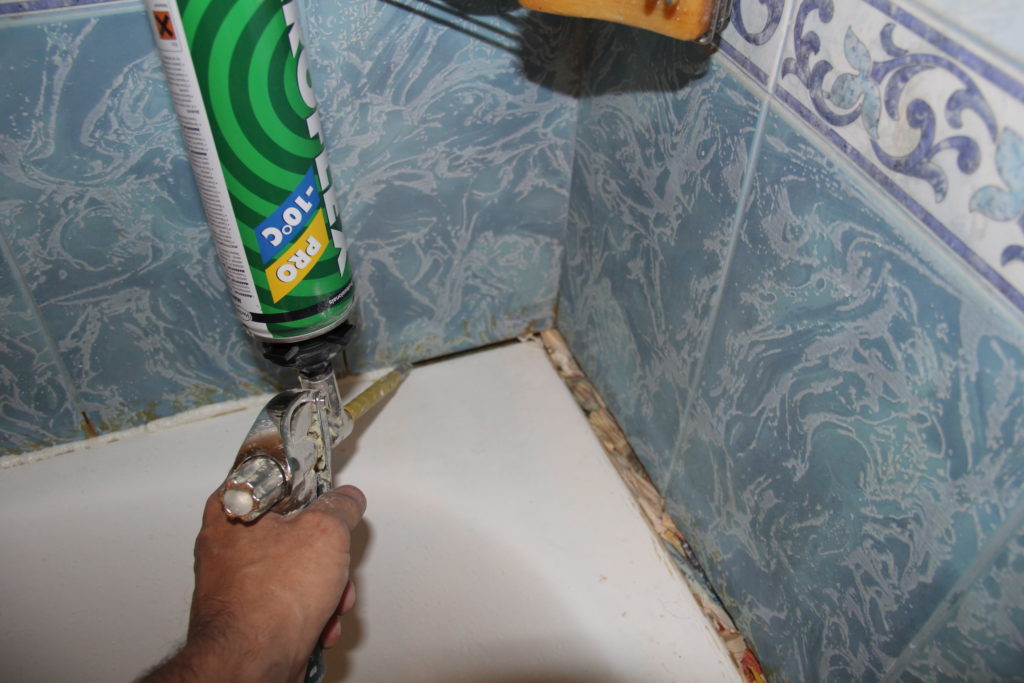
- insert the tip of the gun, squeeze the sealant or “liquid nails” into the slot;
- gently smooth the sealant with a spatula;
- do the same with the lower part of the curb;
- strongly press the corner;
- Remove the tape after a few minutes.
If it is decided to put a plastic border under the tile, this is done at the stage of its installation, but it can only be replaced with a tile. Due to the fragility of the material, this technique is not recommended by specialists.
Adhesive ceramic corner
Laying ceramic corners is more difficult, but usually even beginners get the job done after a little practice. Under the tile, the material is mounted as follows:
- apply a layer of sealant between the bathroom and the wall, filling the gap evenly, level with a spatula or with a wet hand;
- knead the tile adhesive according to the instructions;
- cut borders for joints and corners at an angle of 45 degrees, using a grinder, a tile knife (you can use “biting off” with pliers, then sand the surface with sandpaper);
- start work from a corner;
- put tile glue on the back of the borders, glue to the joint, remove excess with a spatula;
- continue installation, leaving minimal gaps between the elements;
- the next day, pour water on the corners to seal the glue, another day later, apply sealant or grout for joints.
The curb is mounted on the tile in a different way. It is necessary to process the wall with “liquid nails”, press the ceramic corner against the wall, perform similar steps for other elements (do not forget to use the level). After the glue has dried, fill the seams with sealant.
Installation on an old bath
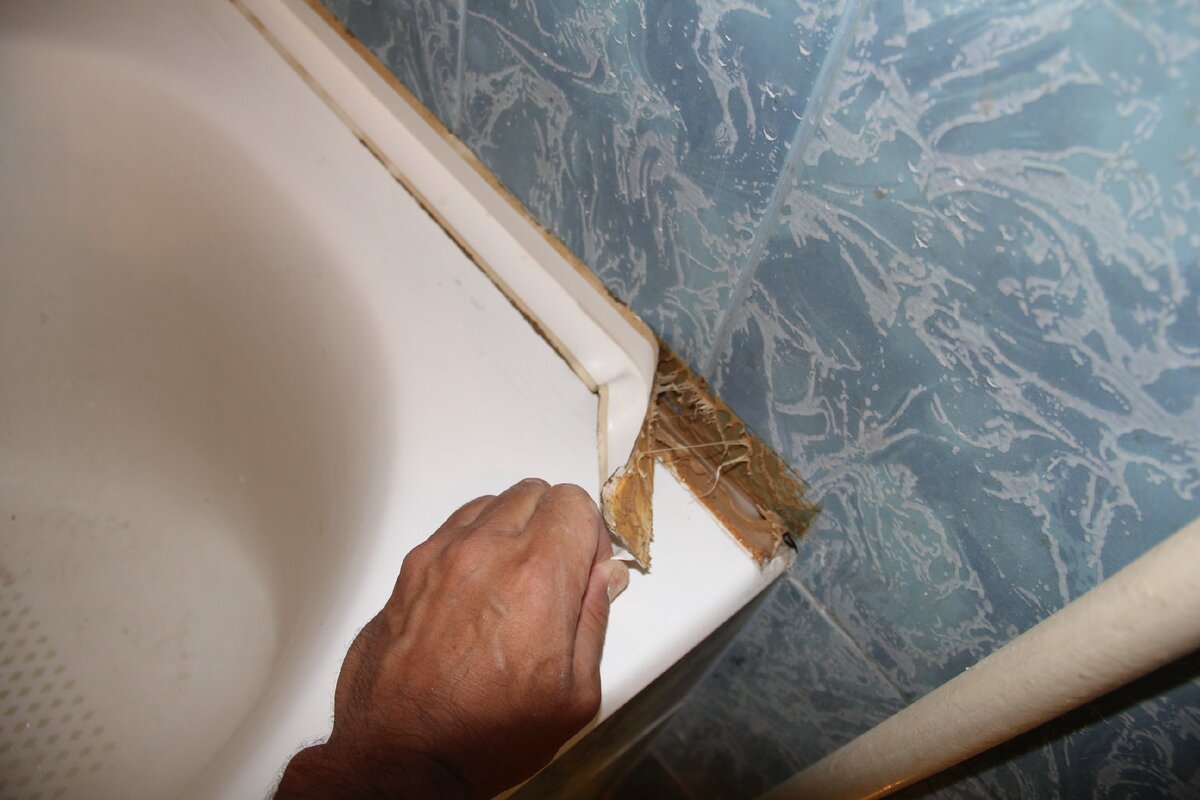
From constant use and high humidity, waterproofing materials become unusable and require replacement. If it is decided to replace them with a plastic corner in the bathroom, then the work is carried out in this sequence.
- The old deck is being dismantled. For this, a knife or spatula is suitable.
- The old sealant is struck from the joint. If the mechanical method does not allow the removal of the adhesive composition, then special solvents can be used.
- Along the perimeter, the walls and sides are treated with an antiseptic to eliminate mold and prevent its reproduction.
- The joint is washed with soapy water from dirt and treated with a degreasing agent.
- Silicone sealant fills the gap between the wall.
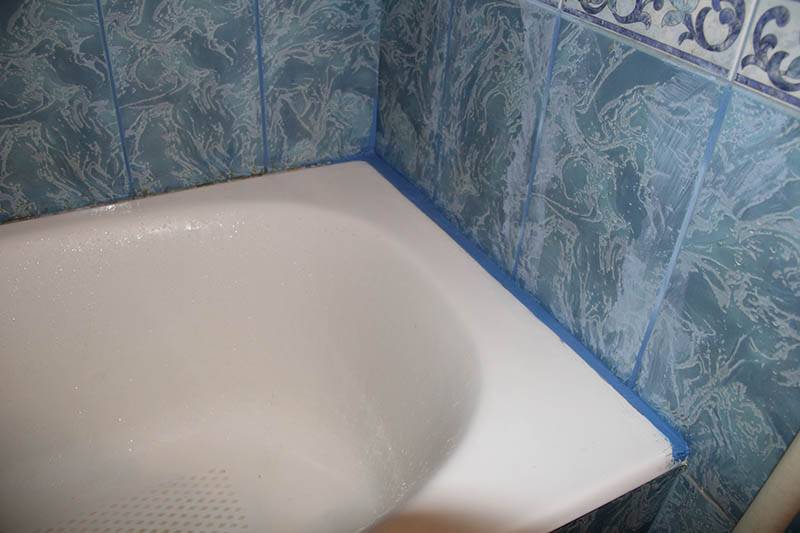
- Masking tape is glued to the wall to protect the finish.
- Cut the material to the required size.
- Apply glue and press against the surface of the wall and bath.
- Excess sealant is removed.
Using this instruction, you can install the sides on the bathtub from any material: acrylic, metal or cast iron. Wall decoration in this case can also be different: ceramic tiles, PVC panels or painting.The service life of the curbs, their appearance and other physical properties will depend on the finishing material.


Choosing a border for sealing the gap
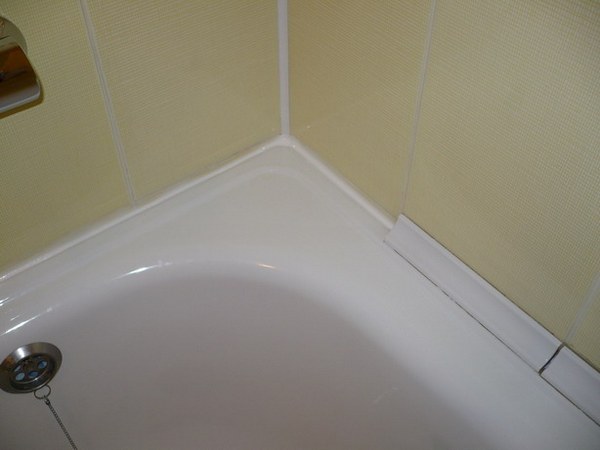
The absence of gaps near the sink, baths without sealing can only be achieved by perfect alignment of walls, floors, the most accurate installation of plumbing and tile laying. It is not always realistic to produce work of such high quality, and without great experience it is almost impossible. Even after the installation of tiles and baths, craftsmen most often leave a thin gap. The risk of water intrusion, increased humidity and mold growth is greatly increased.
The choice of materials for sealing seams is not too large; there are several options for borders on sale. The most budgetary of them is self-adhesive tape, the more expensive ones are products made of ceramics, natural or artificial stone. It is necessary to choose the right border size. When choosing a length, follow these recommendations:
- ceramic products - according to the width of the tile;
- plastic plinths - along the length of the side;
- border tape - for the entire length of the seam.
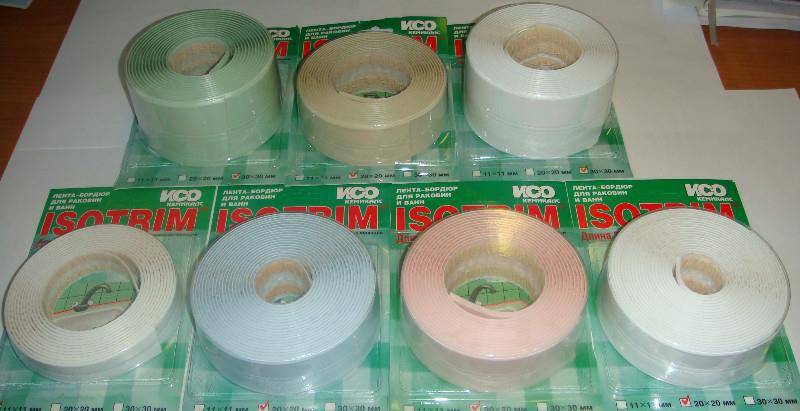
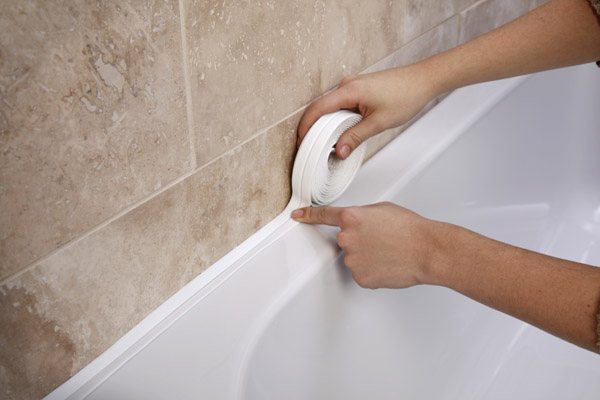
Flexible self-adhesive border tape
Tape border, or curb tape - an original material that allows you to seal the joints between the bathroom and the wall. Nta can be mounted with your own hands, you do not need to have special skills for this. The disadvantage of such a border can be called relative fragility (average service life is 3 years), but due to its low cost, it will not be difficult to change it. In addition to protecting against dirt and moisture, curb tape is used to give a finished look to the room - gluing the strip completes the repair.The plinth is perfect for an acrylic bath - which one is better to choose, you can decide depending on its shape (oval, square).
The elastic plinth for the bath is made of special plastic with various polymer additives. The reverse side is coated with liquid butyl adhesive, covered with a peel-off film. The material is sold in rolls of 3.5 meters, in shape it is angular and figured. The specified length is enough for pasting any standard bath. Some manufacturers sell kits with applicators and cutting knives, as well as a pair of corners. Skirting boards are also produced with antiseptics and fungicidal additives from fungus and bacteria in the composition.
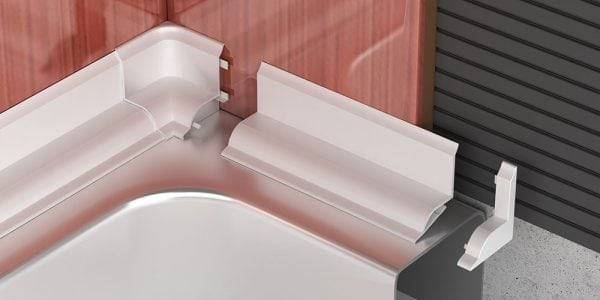
plastic borders
A plastic corner is a budget option for closing an unsightly gap near the wall. The highest quality plastic borders imitate a ceramic surface. There are several types:
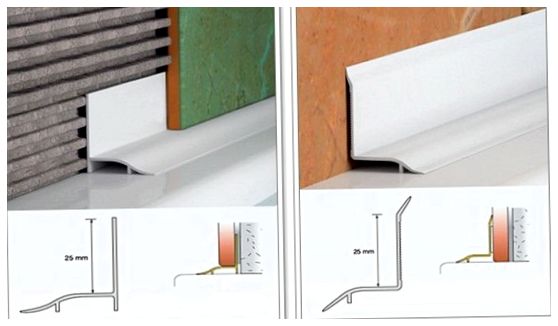
- internal, they can be put under the tile;
- outdoor, mounted at the joints after the completion of wall cladding;
- two-part profiles from a holder bar and a top decorative element.
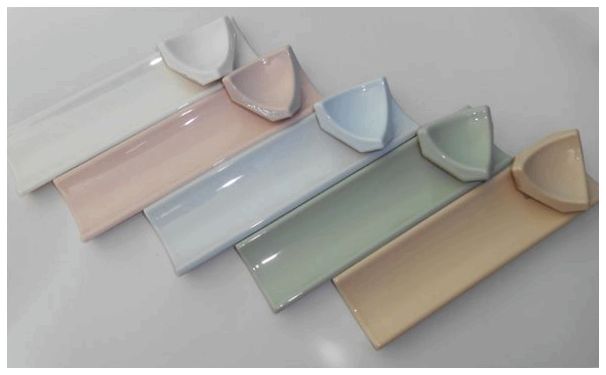
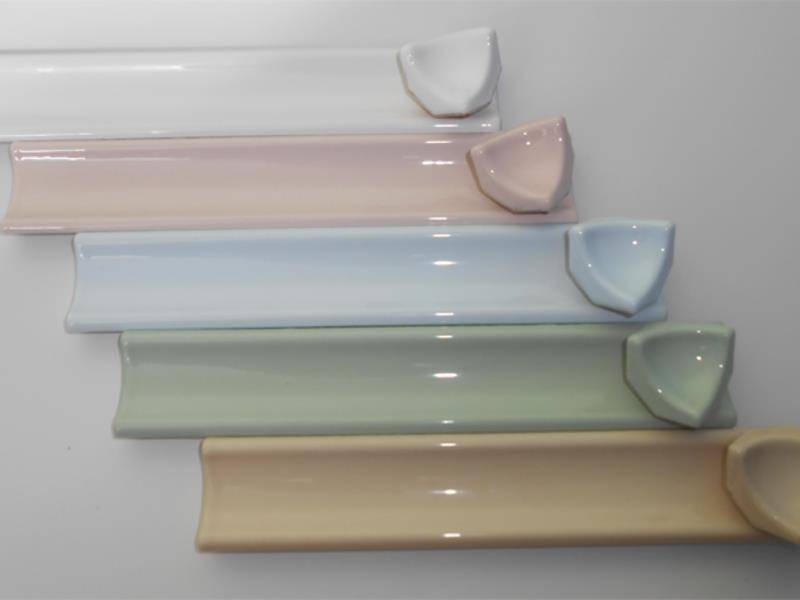
The dimensions of plastic borders are usually 3-5 cm in width, the length of individual elements is 1-3 meters. For a standard bathtub, 2 elements of 1.8 m each or one three-meter one are enough. Before installation, the skirting boards are cut according to the desired dimensions. Additionally, you should buy end caps and sprockets for mounting in the corner. Plastic profiles can have different shades - beige, green, pink, blue. Unfortunately, over time, the material darkens from water and household chemicals, after a couple of years it will have to be changed.
Ceramic borders
Ceramic plinth in the bathroom to the tiles will suit better than others.He is not afraid of water, does not lose gloss for decades, has a unique wear resistance. Other advantages of the material:
- ecological cleanliness, harmlessness to humans;
- frost resistance (can withstand large temperature changes);
- fire resistance - ceramics does not burn, does not emit harmful substances.
The material provides good protection against leakage, does not peel off at high humidity in the bathroom, while the pattern on the borders does not lose its brightness. A skirting board will be ideal even if there is a large gap between the bathroom and the wall. In this case, the gap is closed with bricks, then covered with decorative elements. Ceramic borders do not turn yellow over time, and the soap coating covering them is easily cleaned. The range of products is very rich, many are perfect for tiles and are sold with it as a set. They are not only functional, but also aesthetic:
- emphasize the geometry of the tile;
- complement the thematic drawing;
- highlight the perimeter of the bath.
Natural stone borders
In terms of characteristics, such products are similar to ceramic tiles - they serve reliably and are durable. True, the design of the bathroom must be appropriate - solid, otherwise the stone borders will not look the best. There are economy-class products (manufactured in Moscow, Ukraine) and more expensive ones. Marble and granite profiles have a beautiful appearance, travertine elements look luxurious. Such an interior can only be designed by a professional, independent installation of stone borders is not recommended.

What rules should be remembered when installing curb tape?
Installation of self-adhesive bathroom border tape must be done at temperatures above 12-14°C.
When buying a border tape, pay attention to its shelf life.
It usually lasts about 2 years
It is extremely important that the bathroom tape is not stored in excessively cold rooms and not opened until it is installed.
Do not apply border tape to uncleaned bathroom and wall coverings. If you apply it to an uneven surface with old adhesive residue, you will not achieve the desired result, and the tape will not adhere tightly to the surface.
As soon as the adhesive base dries securely, you can safely clean its coating with ordinary household bathroom cleaners.
Even water will not cause any damage to the fruits of your painstaking work.
Thus, do not forget that sealing the joints between the wall and the bathroom is a necessary procedure. You can still turn to more reliable and durable materials. But if you need to deal with this concern as quickly and inexpensively as possible, then you should try to buy a self-adhesive PVC bathroom border. A bathtub treated with curb tape will look something like in the photo.
Corner glue
The curb, by its very nature, does not close the gap through which water seeps onto the floor. It serves as a decorative element that closes the sealant layer.
To understand how to properly glue a bath skirting board, you should imagine its appearance at the end of the work. Colored sealant, appearing from under the corner, will not add beauty to the overall appearance of the room. Therefore, transparent varieties of glue should be used.
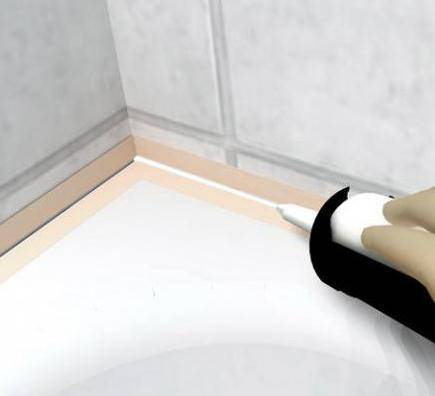
If the bathtub is white, then a sealant of a similar shade will also look pretty good.
Also, the fixative substance must be quickly tacked, otherwise it will take a very long time to hold the corner manually.
It should be taken into account the fact that in the case of gluing the border to an acrylic bath, it is necessary to select a sealant for plastic. It must be sanitary. The composition of such glue includes additives that prevent the development of the tribe and microbes. Acrylic sealant is not suitable for bathroom conditions. Therefore, waterproof adhesives should be purchased. They are silicones.
Advantages and Disadvantages of Using Bathroom Border Tape
This is the most affordable material that is used to seal joints between plumbing products and other surfaces. Unlike others, the curb tape not only has a low price, but is also easy to install. Its key strengths include the following:


- Self-adhesive bathroom edging tape does not deform under load.
- She endures all sorts of damage.
- The installation process does not take much time and is incredibly simple, thanks to which even a person without building experience can easily paste it.
- The high level of its plasticity allows laying not only on rectangular joints, but also bending the tape at different angles without the risk of damage.
- It withstands temperature extremes, and also has a fairly significant resistance to peeling and delamination after incisions.
- Affordable cost, which fully corresponds to the quality and high performance of the material.
- It allows you to seal the joints of plumbing products in any room, even with an increased level of moisture.
- Allows high-quality full-fledged masking of joints and seams.
- Its use eliminates the likelihood of fungus and mold.
- The curb tape stably tolerates the effects of chemical compounds that are used when cleaning the bathtub.
Some of the disadvantages include the following:
The material does not tolerate contact with mounting foam and acidic silicone sealants, which can cause it to warp.
In addition, the acidic environment will cause the tape to peel off the surface pasted over with it, which must be taken into account when using a flexible border.
It has an insufficiently long period of operation in relation to hard surfaces. For example, porcelain stoneware, plastic or ceramic in curb products provides for use for 10-20 years, in contrast to the tape, which must be replaced every 1-3 years, taking into account the overall level of stress during use.
The material is inexpensive and effective, but only a temporary remedy, the warranty period of which reaches 12 months, and then it is recommended to replace it with a new one. The roll of tape remaining from the previous time can be reused if properly stored.
The roll of tape remaining from the previous time can be reused if properly stored.
Mounting Features
When choosing an adhesive composition for fixing a plastic border on a bathtub, you should pay attention to some characteristics.The choice of glue color depends on the color of the plumbing: you can take a transparent version that will suit any color scheme, or choose a white tone if it is white
Starting installation, it is necessary to carry out preparatory work. If there is an old flexible corner on the bathtub, then it must be dismantled, while it is imperative to clean up traces of glue on the wall. Work must be carried out carefully, avoiding damage to surfaces. After the attachment site is thoroughly cleaned, it must be disinfected
To do this, you can use any tool that is sold in a household chemicals store. It is important to dry the base well before installing the curb.
An important point is also the cleaning of the plumbing itself and wiping it dry. Paper towels work well for this.
How to choose a corner
When choosing a corner to close the gap between the bathroom and the tile, consider:
- type of sealing element;
- device material.
Types of corners for the bath
The main types of corner designed to eliminate the gap in the bathroom are:
- soft corners, which are made in the form of a tape;
- hard corners made from various types of materials.
The advantages of soft tapes are:
- ease of installation, since in most cases the tape is supplemented with a self-adhesive base;
- low cost;
- ease of care. To clean the tape, you do not need to purchase specialized tools;
- diversity. Ribbons are available in different colors, sizes and shapes.
Self-adhesive bath tapes
Manufacturers produce two types of tapes:
- corner tape, which is intended to eliminate gaps no larger than 3 mm - 5 mm;
- curly tape to eliminate large gaps.
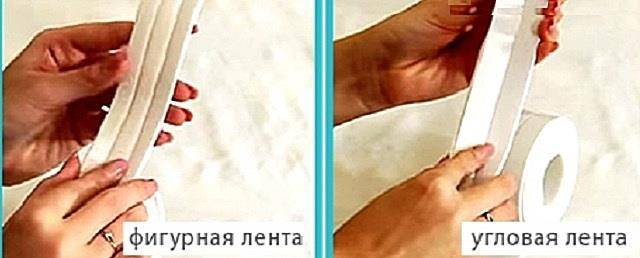
Differences between types of self-adhesive tapes
A significant disadvantage is the short service life, since over time and when exposed to moisture, the adhesive base loses its qualities.
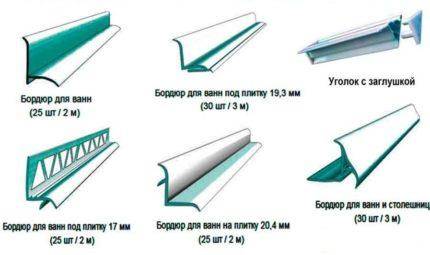
Rigid corners-curbs - differ:
- variety. For the manufacture of sealing elements, various materials are used, differing in quality and cost. In addition, the corners are available in different shapes, colors and sizes;
- durability;
- minimal care.
bath border
To reduce the complexity of mounting a rigid corner, you can use special fittings made in the form of corners, plugs and other additional elements.

Additional items to simplify installation
Materials used for the manufacture of corners
Soft type corners are made exclusively from PVC, and for the production of hard borders are used:
plastic. The plastic corner is distinguished by its minimum cost, a variety of shapes and colors, the maximum level of tightness, and resistance to temperature extremes. To clean the corner, it is not recommended to use products that contain abrasive substances, as this will negatively affect the surface of the sealing element;


Assortment of plastic corners
ceramics. The ceramic corner is distinguished by high strength and resistance to various phenomena (temperature changes, mechanical stress, and so on). Unlike plastic corners, ceramics can be cleaned with any chemical composition and this will not affect the quality of the glossy surface;
Ceramic sealing bath corner
Ceramic corners are not recommended for installation on acrylic bathtubs, since it is impossible to achieve maximum contact between the surfaces and, as a result, complete tightness.
- acrylic (a kind of plastic). The acrylic corner has an aesthetic appearance, unlike other types of plastic, a variety of models, but at the same time a higher cost. However, the difficulty of cleaning acrylic elements significantly reduces the possibility of their use. It is recommended to mount acrylic corners on bathtubs made of the same material. In this situation, you do not need to purchase additional products to clean the surface;
- natural and artificial stone (marble, granite and so on). Corners made of stone are distinguished by their presentable appearance, the maximum indicator of stability and durability, as well as their large size and high cost.
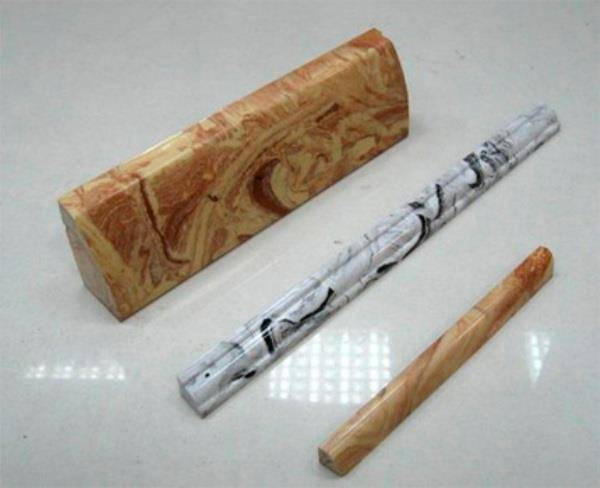
Marble bath corners
Which corner is better to choose? It all depends on the priority of the user and the size of the budget, as well as the finish of the bathroom, as the best corner is the corner that is fully compatible with the design of the room.


