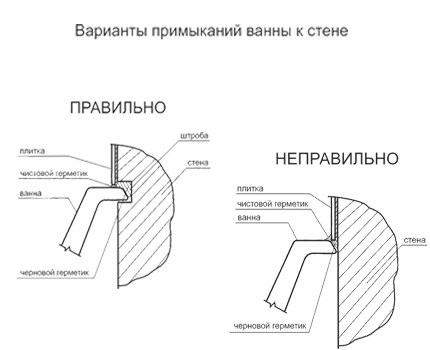
- Plastering
- Benefits of using border tape
- ceramic border
- Selection rules
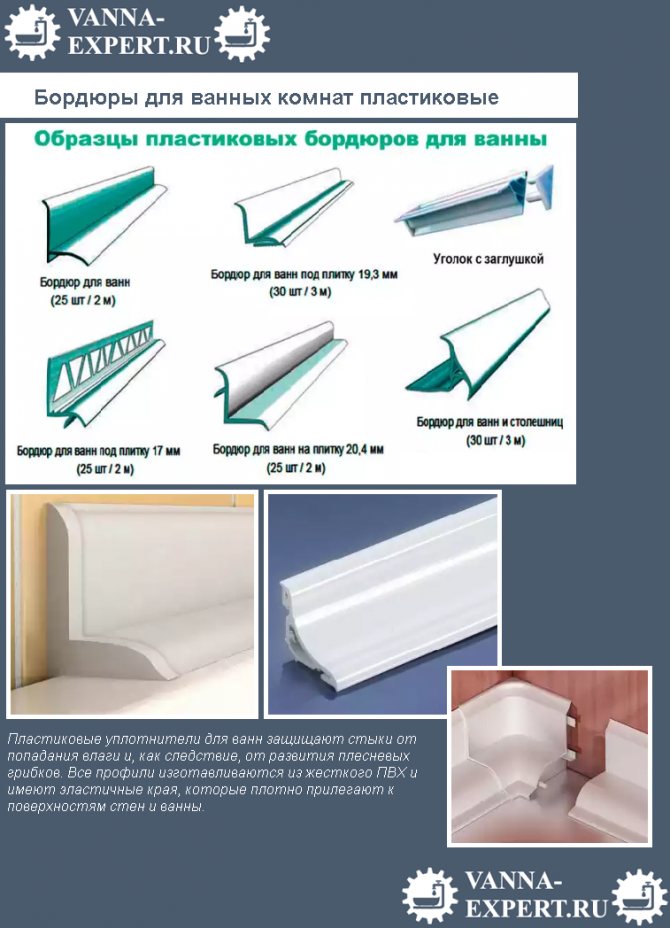
- Plastic
- Acrylic
- Ceramic
- Marble
- Made of silicone
- How to glue a plastic corner
- How to glue a plastic corner
- Installing a border in the bathroom
- Installation of a plastic border under the tile
- Installing a plastic border on a tile
- Materials and tools
- What to glue
- Adhesive curb tape
- Plastic border for the bathroom: do-it-yourself installation
- Comparison of ceramic border with other types
- Kinds
- Fixing the plastic curb
- Choosing a curb for installation
- Option 1. Plastic corner to protect against moisture
- Option #2. Border made of ceramic elements
- Option #3. Flexible tape border for sealing joints
- Why you need a bathtub border
Plastering
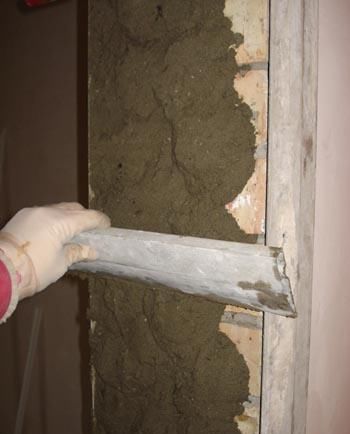
The slope is primed, pendulum profiles are installed along the opening. Next, plaster is applied from a cement-sand mortar. You can add alabaster to improve the setting properties. The prepared solution is applied with a trowel to the surface and leveled with a spatula, focusing on the beacons. If you plan to paint, then the slope must be carefully prepared. To do this, plaster with large fractions is applied to the reinforcing mesh, followed by the finishing one. For strengthening, a perforated profile (angular) is installed.It is pressed into wet plaster.
The plaster must be completely dry, after which it can be painted. Plastering is a cheap finishing method, but requires careful leveling of the surface.
Benefits of using border tape
Using border tape for sealing joints in the bathroom is a common option, as it is cheap and easy. Bathroom edging has a short lifespan and does not tolerate the presence of acidic silicones. Polyethylene, from which the curb tape is made, has a lot of advantages.
The advantages of curb tape include the following factors:
- low material cost;
- ease of installation;
- neat appearance;
- reliable protection against moisture;
- the material tolerates temperature changes well;
- prevents the development of mold and mildew;
- perfectly hides uneven joints;
- does not crack under shock loads;
- not exposed to household chemicals;
- has an optimal balance of flexibility and rigidity;
- high plasticity (it is easy to lay down both on rectangular joints and on curved planes).
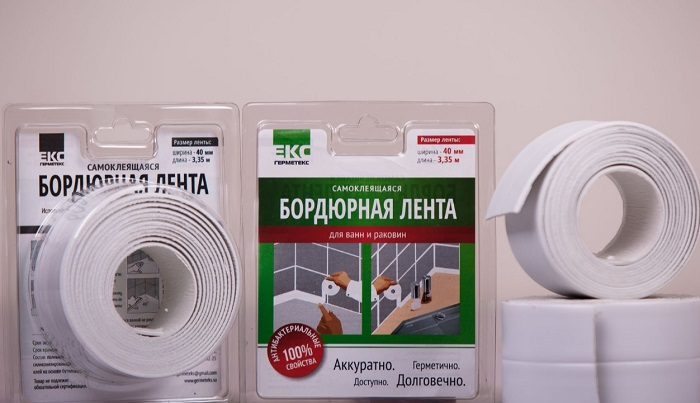
These tapes are manufactured by a number of companies around the world. They create high-quality moisture-resistant material that meets sanitary standards. This cladding element is supplied to the market in the form of compact rolls in the manufacturer's packaging.
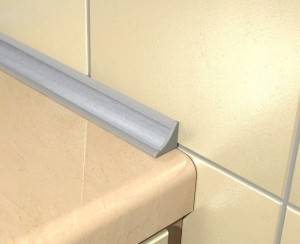
ceramic border
Ceramic curb for waterproofing
Ceramic bathroom edging is considered the most beautiful type of decoration and durable, although it takes much more time to install.Previously, to decorate the joint and seal it, it was necessary to cut borders from the remaining tiles, but today this is no longer necessary, since the production of ceramic corners has been established at an industrial level.
Such a corner between the bathroom and the wall is now sold in almost every building materials store. The product has a wide range of colors and design variations, which allows you to choose a model for almost every style of interior. The material is highly durable and durable, although its installation process is a little more complicated than the previous ones.
Important! Before choosing corners under bathroom tiles, it must be remembered that this method of sealing the joint is not able to withstand bending and deformation stresses, as it fits on the tile adhesive. This option is best not to use for acrylic or steel baths, but only for cast iron
- Before starting work, purchase the required number of curb modules with corner joints;
- clean and dry the joint;
- then close the gap with mounting foam or silicone, depending on the thickness;
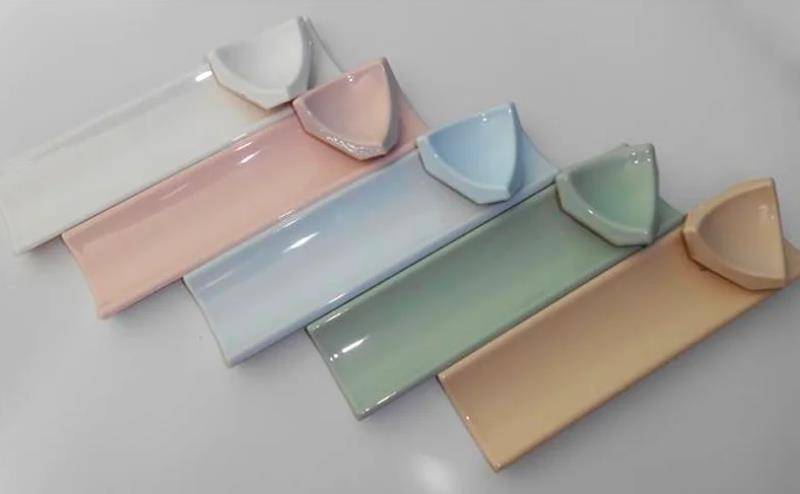
Ceramic border color options
Note. At this stage, you need to decide how to glue the corner in the bathroom. If you have an acrylic bath, then it is prone to expansion when heated, which means that it is better to use a sealant for the corner, which will provide elasticity when dried. If the bathtub is cast iron, then this material practically does not expand, and in order to securely fix the bathroom corner, you can use ordinary tile glue.
- knead the tile adhesive and use a spatula to apply it to the junction, after which you tightly lay the curb modules, saving space for grouting;
- after the installation of the border on the bath is completed, it is necessary to wait a day until the tile adhesive is completely dry and then apply a moisture-resistant grout for the joints.
Having studied the information above, you already know how to glue the corner on a plastic or ceramic bath yourself, which will allow you to significantly save money on repairs. And to consolidate the material, we suggest watching a video clip that will answer many questions.
Selection rules
When making your own choice, consider:
- the size. To achieve complete tightness, it is necessary that the skirting board completely covers the gap formed as a result of the installation of the bathroom. If the product of the maximum size is not enough, then a sealant is additionally used;
- color. When determining the color, the tone of the bathroom and the combination of the protective element with the design are considered;
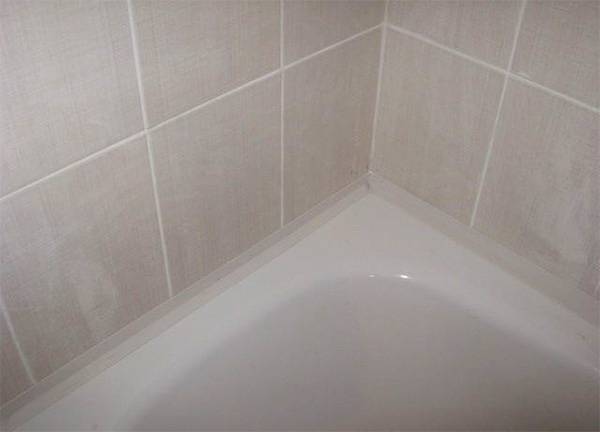
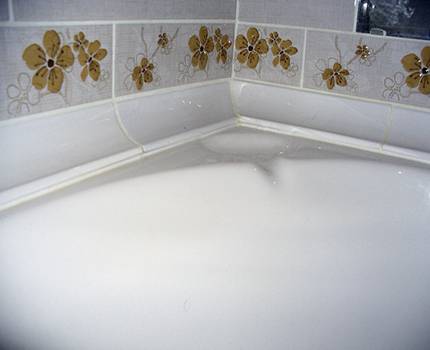
It is not recommended to install white skirting boards, as over time the curb may turn yellow, and it is rather problematic to eliminate the formed plaque.
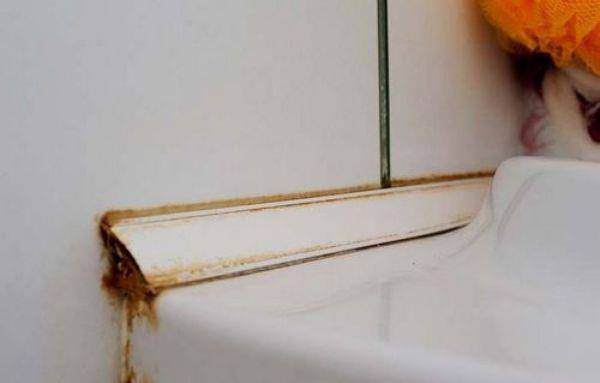
Yellowed border in the bathroom
manufacturing material.
Manufacturers produce skirting boards made of the following materials:
- plastic;
- acrylic;
- ceramics;
- silicone;
- marble.
Plastic
The most popular plastic plinth, which differs:
- a variety of models, colors, shapes and sizes;
- low cost;
- the presence of a special side, which provides the maximum level of tightness;
- inertness to moisture;
- ease of installation and maintenance.
PVC plinth can be of three types:
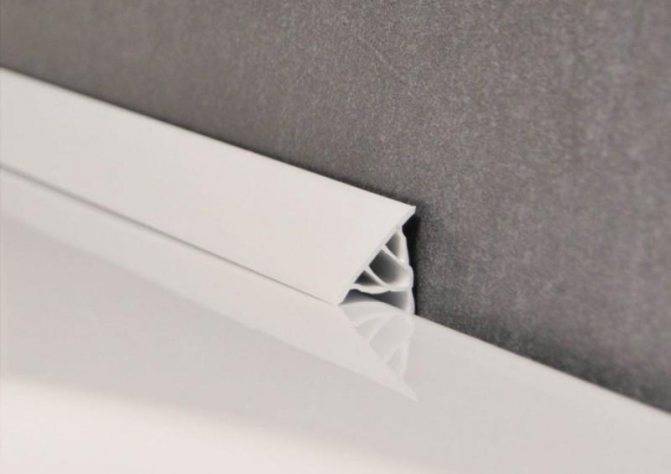
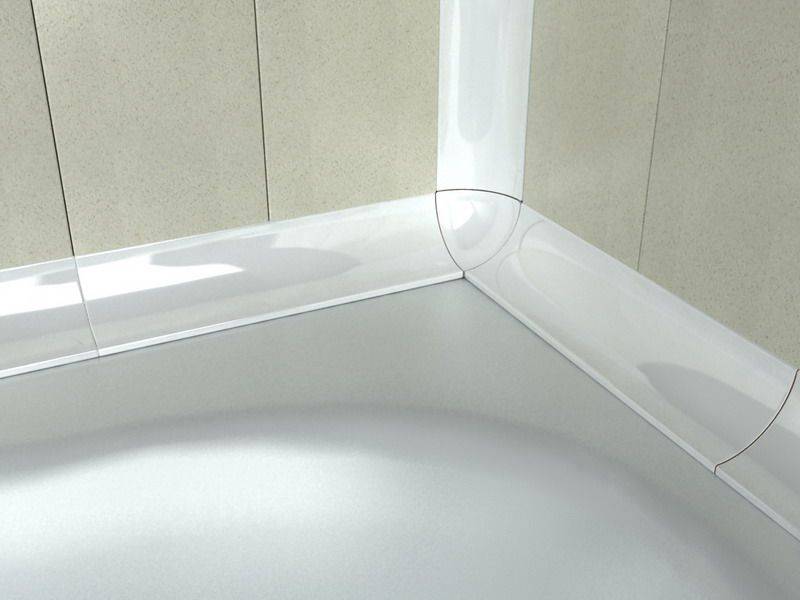
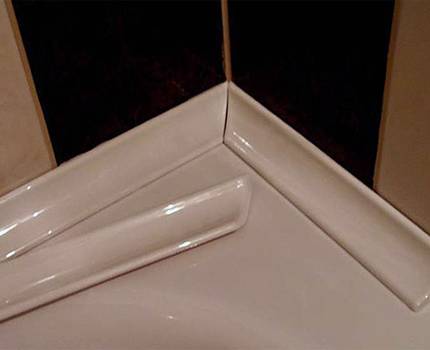
- cast (one-piece) - the most common and easy-to-install option;
One piece bath nook
- composite.The protective device kit includes special angles that facilitate the connection of straight sections, plugs located at the ends of the curb and connecting elements;
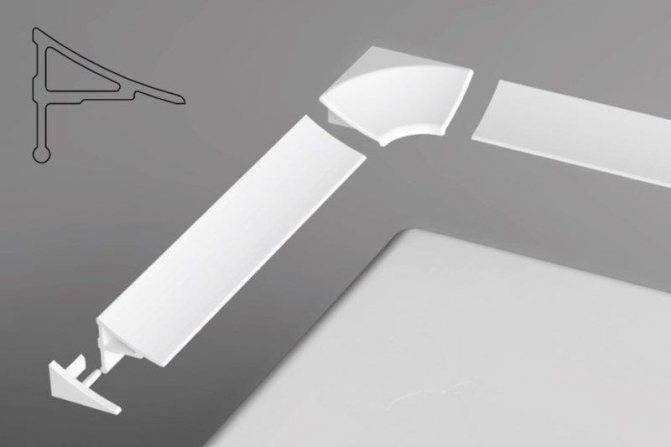
Corner made of components
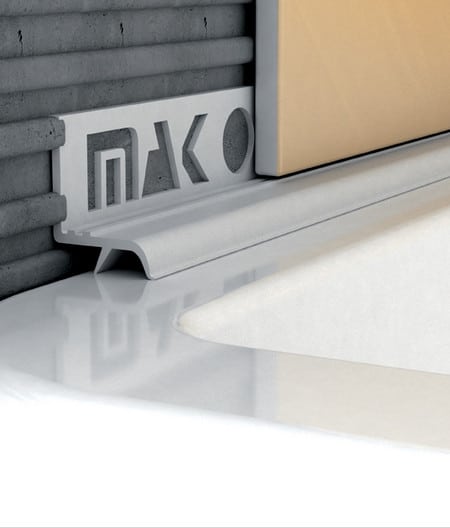
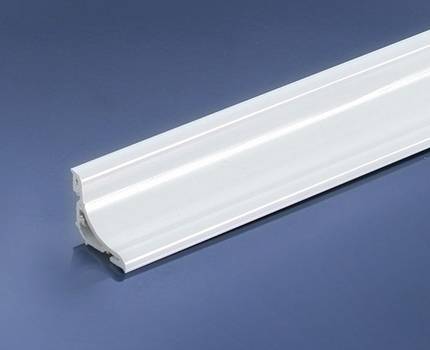
- plinth, popularly called "Swallow". Its installation takes place at the stage of laying tiles, since part of the protective device is hidden under the skin. This method of installation allows you to achieve complete tightness. However, the replacement of the skirting board, for example, in case of damage, is possible only after partial dismantling of the tiles.
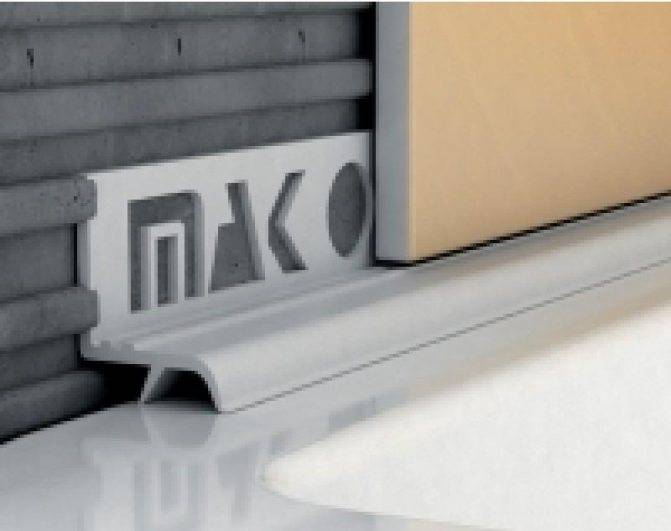
Plastic "Swallow" for installation under the tile
Acrylic
For an acrylic bathtub, an acrylic skirting board that is completely similar in its characteristics is most suitable. The advantages of acrylic are:
- ease of care, as the material is inert to various chemical compositions;
- the presence of gloss;
- ease of installation;
- low cost;
- variety of colors.
Acrylic bathtub corner
Install acrylic skirting boards for bathtubs from cast iron and steel is not recommended, since as a result of uneven heating, deformation of the device may occur.
Ceramic
Along with plastic corners, ceramic products are popular. However, a ceramic border, unlike a plastic one, has significant advantages, which include:
- long period of operation. With proper installation and timely care, the device can last more than 25 years;
- the ability to install on bathtubs made of any materials;
- the possibility of cleaning with different means;
- impervious to pollution and the negative effects of moisture.
Ceramic bathroom corners
The ceramic plinth for the joint between the bathroom and the wall is composite.Among the shortcomings can be noted:
- higher cost compared to plastic counterparts;
- susceptibility to the formation of chips (cracks) under mechanical stress.
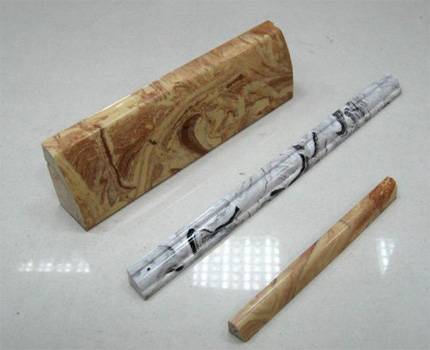
Marble
Marble skirting boards are very expensive. However, the service life of such protective corners is the highest. In addition, the advantages are:


- complete resistance to moisture;
- inertness to chemistry;
- possibility of installation on any baths.
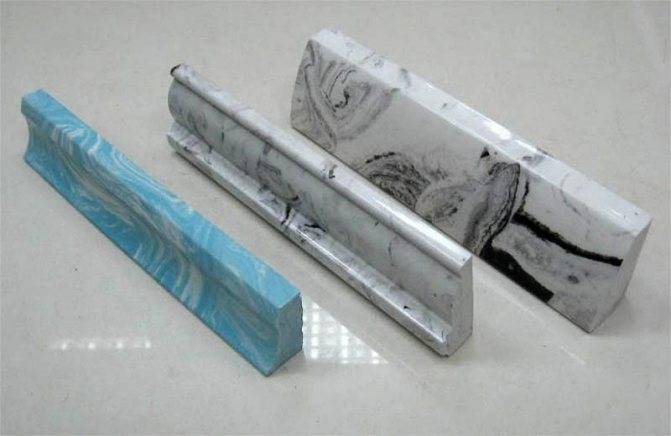
Marble bathroom borders
Made of silicone
The easiest to install is a self-adhesive silicone skirting board. The protective corner is supplied in tapes of various sizes and shapes.
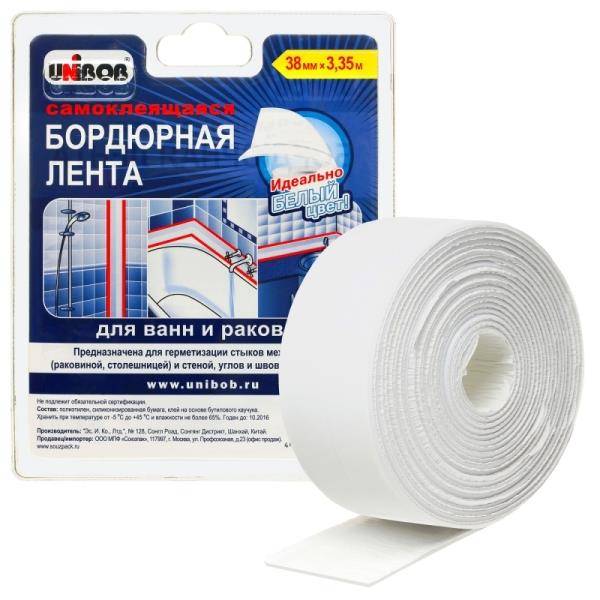
Bath & Sink Border Tape
The service life of the curb tape is 2 - 3 years. After the expiration of the specified period, it must be replaced.
How to glue a plastic corner
August 26, 2013
At the final stage of the repair, when the wallpaper is already pasted or the walls are painted, it is necessary to protect some corners in the premises from mechanical damage. To do this, glue the plastic corner.
The stores now sell such products of different sizes and appearance: multi-colored, black, white, wood-like, marble, etc. You can choose a plastic corner that matches the color of the wallpaper or furniture as much as possible.
Such corners are with equal sides or unequal.
It is not enough to choose such a corner to match the color of the walls, it is still necessary to glue it correctly - so that it holds firmly.
There are several options for gluing plastic corners using different means and adhesives, but first, let's look at the gluing technology.
- First, cut off the wallpaper protruding beyond the edge of the corner with scissors or a sharp clerical knife.
- They measure the length of the opening where the plastic corner will be attached and cut off one of the sides, and leave the other 5 centimeters longer so that it is possible to adjust the length in place. This side is cut in place. The corner is cut with scissors or a sharp knife.
- For gluing the corner, you can use universal polymer glue or any other suitable one. Glue is applied to the walls of the corner along the entire length.
- Next, the corner is applied to the desired place and fixed until the glue dries. Many people have a question, how to fix the corner along the entire length. There are two options. You can use furniture (for example, stools) stacked on top of each other with a slope towards the corner. They will press him against the wall under their weight.
- You can also use adhesive tape - in case vinyl or non-woven wallpaper was used. When sticking it, you can not smooth it and then it can be easily removed. If the wallpaper is paper-based, then masking paper tape can be used.
- After gluing the corner, cut off the excess part left in reserve. This can be done with a sharp knife heated on gas. Such a tool does not even need to be pressed into the plastic - it will go very easily and make an even cut.
- After the glue has completely dried, the adhesive tape is removed and the process is completed.
How to glue a plastic corner
- Most often, plastic corners are glued to polyurethane glue. It can be a special glue for plastic corners or any suitable for working with plastic.
- Silicone sealant can be used in areas with light traffic.Also, this method is often used to attach plastic corners to tiles in the kitchen or bathroom.
- You can also use "liquid nails" to fix plastic corners. If the corners are light, then it is better to choose colorless “liquid nails”, and any composition is suitable for dark plastic. You can buy liquid nails "Panneling" for working with PVC panels - they quickly set and securely fasten the plastic corners.
Evaluate how it's made:
(3 4.67 out of 5) Loading… Impact of the pandemic on overseas travel April 29, 2020 ( 0.00 out of 5, you have already rated)
The pandemic has disrupted the unprecedented scale of global travel today. The travel ban applies to all countries. You can't leave any country...
New technologies in construction: QUICK DECK April 16, 2020 ( 0.00 out of 5, you have already rated)
QUICK DECK are moisture-resistant chipboards, which are a structural material that consists of two oriented…
Kindergarten nature calendar March 17, 2020 ( 0.00 out of 5, you have already rated)
The use of thematic visualization when conducting classes with preschoolers significantly increases the effectiveness of training. This is due to the characteristics…
How to withdraw money from PayPal February 22, 2020 ( 0.00 out of 5, you have already rated)
Flash games online 24 hours. Why are they popular? February 20, 2020 ( 0.00 out of 5, you have already rated)
If you're sitting at work, fiddling with your fingers and wanting to have fun, you should check out our list of the top ten online flash games. Why…
Where to buy sewing equipment? February 17, 2020 ( 0.00 out of 5, you have already rated)
If you have been thinking about opening your own sewing workshop or even an atelier, then you probably know that without professional sewing equipment you simply cannot…
Installing a border in the bathroom
There are two main types of curb mounting:
- Installation of a plastic curb under the tile.
- Installation of a plastic border on a tile.
Installation of a plastic border under the tile
If there are no adjustable legs, then it is advisable to install the curb 3-5 mm higher than the markup.
It is carried out in two ways:
- With a bathroom installed in a permanent place.
- In an empty bathroom.
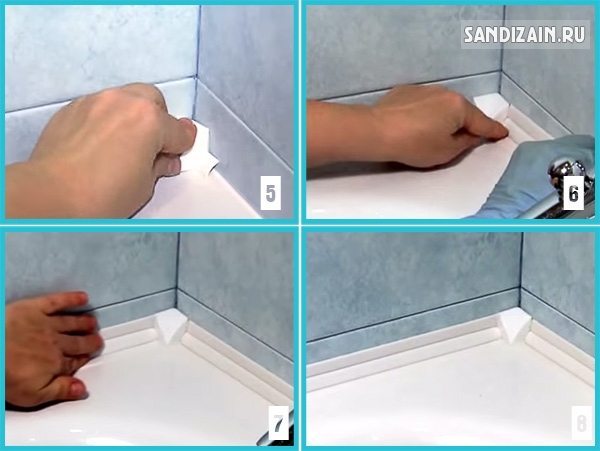
1st way:
- The places where the curb will be mounted are cleaned from construction debris, dirt, the surface of the bathtub itself is degreased.
- A plastic profile is installed - a curb. Fastening to the bath itself is carried out on a sanitary sealant.
- In the corners, the formation of a cut at 45 ° is carried out by means of a miter box - in this rectangular design, guides are provided, with the help of which the required angle is cut.
- After 24 hours, ceramic tiles are applied.
In a humid environment, it is always necessary to use substances containing antiseptics - they prevent the appearance of mold and fungus.
2nd way:
- Marking is made, taking into account the location of the bath, the location of the curb, tile. Separately, the lower cut of the plastic border is noted.
- A retaining wooden rail or metal profile is installed. The upper cut is located along the mark of the lower cut of the curb.
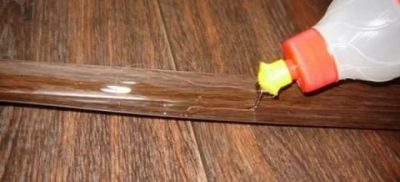
- A plastic profile is attached to the wall using, for example, liquid nails glue.
- After the adhesive has set, the tiles are installed.
- After 2-3 days, you can install a bath.In order to avoid problems with the installation of the bath, it is advisable to use legs with the ability to adjust them in height:
- A layer of sanitary sealant, glue, etc. is applied to the edge of the bath, where the curb will be located.
- With gentle movements, the bathtub is brought under the curb and set in place.
- The adhesive and sealant that has come out must be removed immediately - after setting, this process will be much more difficult to do.
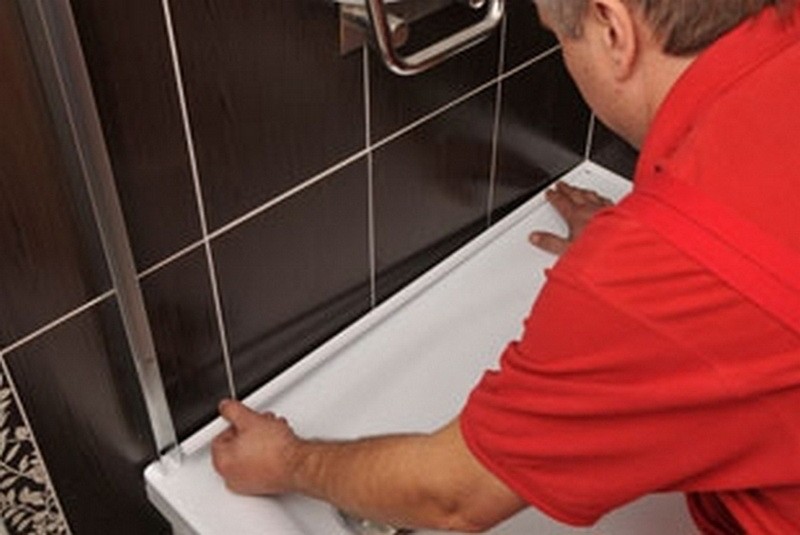
Installing a plastic border on a tile
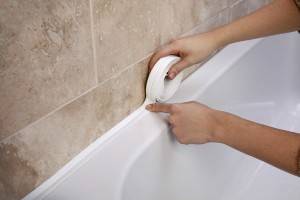
Installation of a self-adhesive border on a bathtub
Stages:
- Cleaning of mud deposits is carried out, layers on tiles and a bath are removed.
- Degreasing is done.
Tip: As a chemical surface cleaner, in order to save money, you can use ordinary vodka.
Stages:
- Installation of the tape border must be carried out with a hair dryer - at temperatures above 50 ° -60 ° C, the polymer becomes more plastic, which will facilitate installation and allow you to tightly press the border to the surfaces of the bathtub and tiles.
- It is more convenient and easier to fit a curb with soft edges on the sealant. It is applied to both inner edges of the product and is pressed with little effort when installed in place. The direction of the effort is the butt of the bath and the wall.
- It is advisable to mount a rigid border on “liquid nails” or mounting foam. Excess glue is removed with a damp cloth. The expressed foam is removed with acetone or a special solvent for fresh foam.
A tiled wall has a surface with seams between the tiles, therefore, there will be no absolute flat plane. The resulting gaps must be filled with sealant.


Note: since polyurethane foam and "liquid nails" are not moisture resistant materials, it is advisable to additionally treat both edges of the curb with sealant.
Add. tips:
- Tip 1. The bare end edges of the curbs should be filled with white sealant. To avoid overspending material, fill the void, for example, with rags or paper.
- Tip 2. Corner gaps should also be filled with sanitary sealant.
In addition to plastic products, ceramic borders are used.
Materials and tools
For gluing ceramic corners, you will need the following materials and tools:
- Ceramic borders of the selected length plus stock.
- Laser level.
- Tile adhesive is water-repellent (liquid nails are also suitable).
- Silicone based sealant containing antifungal elements.
- Construction gun for easy, precise application of sealant.
- Sandpaper.
- Bulgarian with discs, pliers.
- Construction tape.
- Stationery knife.
- Grout mixture.
- Clean, dry rag.
Such materials and tools should be prepared in advance, before work begins. Perhaps not all tools will be used, but preparation is necessary in order not to quit work and start looking for the right thing.
What to glue
More often ceramic border for bathtub glued on silicone sealant. The disadvantage of this installation is the darkening of the seam due to the formation of mold. In this case, the structure is disassembled, the old silicone is removed, disinfection is carried out, and the initial raw material is installed again. The onset of dark spots depends on the frequency of use, the presence of good ventilation in the room.
To avoid this, you should use the following raw materials for installation:
- Special sealant for aquariums. In the composition, it contains antifungal elements that prevent the formation of plaque. There are two colors on sale: white, transparent. The disadvantage is the small volume and high cost.
- Glue with waterproof properties. Before buying, study the instructions for use. The seam created by such glue will be reliable, mold formation will not occur.
- Sealant with MS polymers. Interferes with penetration of water at all duration of operation. Available with antifungal ingredients. After complete drying, the seam remains flexible, which makes it possible to prevent rupture with minor movements of the baths.
Among the commonly used adhesive mixtures are:
- Silicone sealant MAKROFLEX SX101. An effective agent, gives high adhesion, is not affected by moisture, contains antiseptics, and is resistant to aging. Well, it changes, does not lose its properties when exposed to direct sunlight. Work is mainly carried out at a room temperature of 20 degrees. Operating temperature from 5 to 40 degrees.
- Ceresit CM 9 is a cement-based tile adhesive. Moisture resistant. Application is carried out at a temperature of 5 to 30 degrees, at a humidity of 80 percent, can be adjusted for 15 minutes. Complete drying occurs after a couple of days, then the joint is grouted. When an elasticizer is added to the adhesive, the mixture is used for gluing borders with any water absorption.
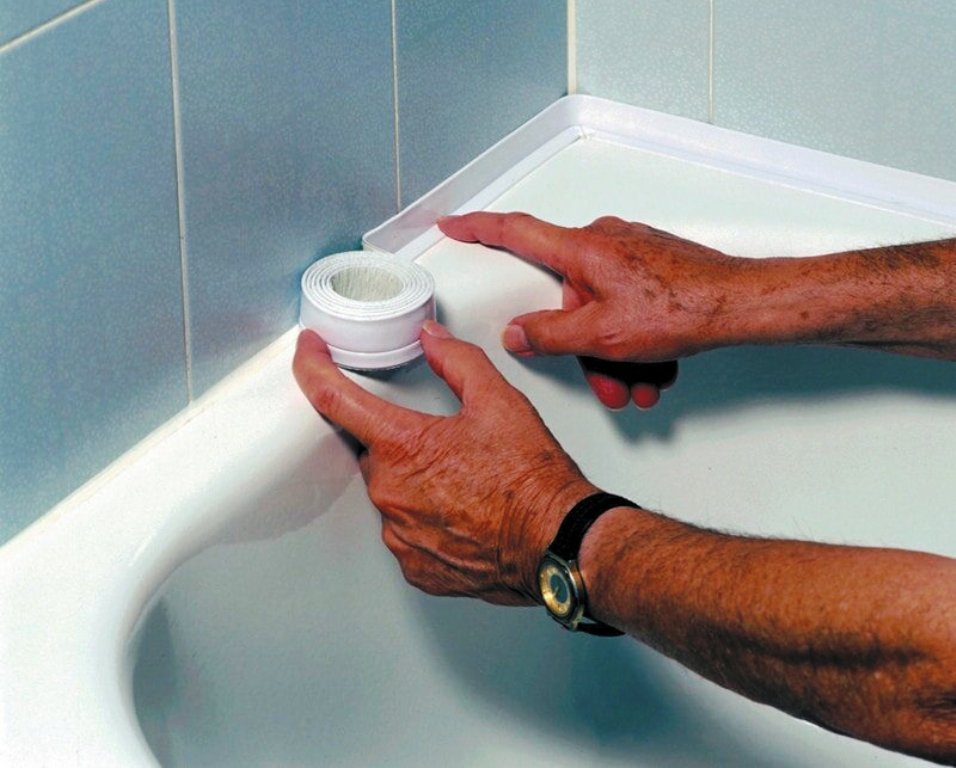
Adhesive curb tape
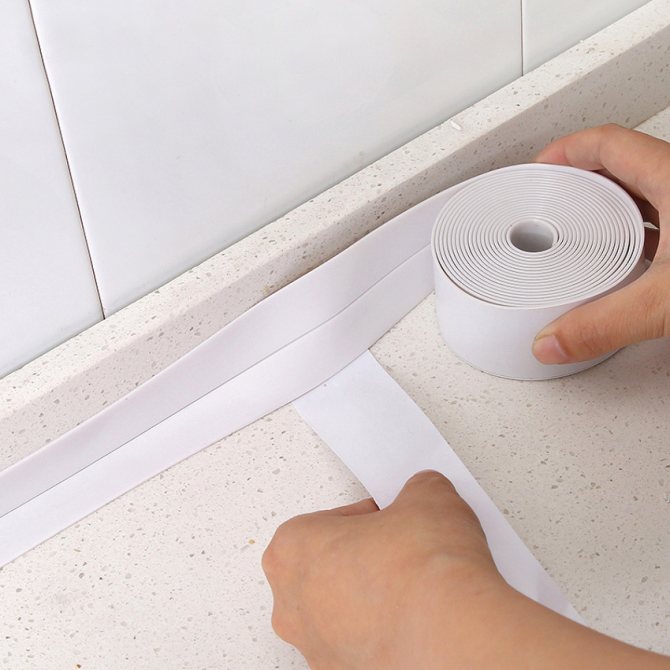
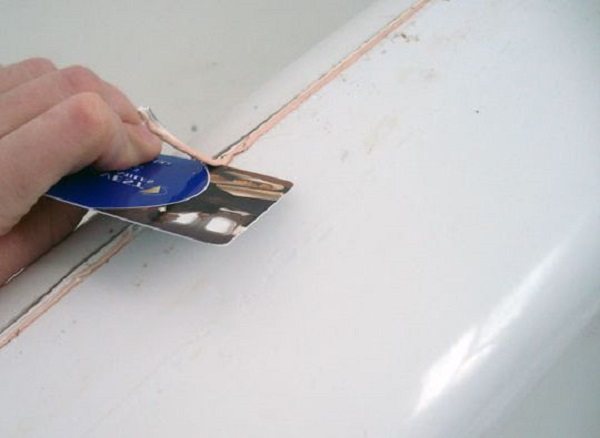
The order of work is as follows:
- Before sticking the curb tape, it is necessary to prepare the surface of the bathtub and the wall, cleaning them from dirt, water and grease.To do this, you can use soda, cleaning products and degreasers (alcohol or gasoline). If re-gluing is performed, then the remnants of the previous tape should also be removed. The edges of the bathtub and the wall or tiles in the gluing area should be dried with a vein and wiped with a dry, clean cloth. The surface must be completely dry.
- Next, you need to cut off a piece of border tape of the required length with a margin of 2 cm. If you need to paste over difficult areas in the corner of the tape, make an incision from the side adjacent to the bath.
- Sticking is recommended to start from the corner, removing the protective coating as necessary in 10-15 cm segments. In the process, press the tape very tightly against the surface of the bathtub and tiles for 15-20 seconds.
- After finishing work, it is recommended not to use the bath for 24 hours. This is necessary to prevent water ingress and secure adhesion of the adhesive.
Proper gluing of the curb tape, as well as installing a screen under the bath, will contribute to a more accurate and presentable appearance of the bath with minimal time and money.
Plastic border for the bathroom: do-it-yourself installation
PVC bathroom border is the most popular due to its ease of installation. This material is easily cut with a knife, a jigsaw file, and therefore an element made of plastic can be easily adjusted to the dimensions of the bathtub. Work begins with the preparation of the foundation.
- The walls and edges of the bath must be thoroughly cleaned of dirt with detergents. If the wall is lined with plastic panels or painted - substances with abrasives are not used.
- Before sticking the plastic strip, the wall and bathroom must be dried with a hair dryer.
 The plastic border can be installed on the tile and under it
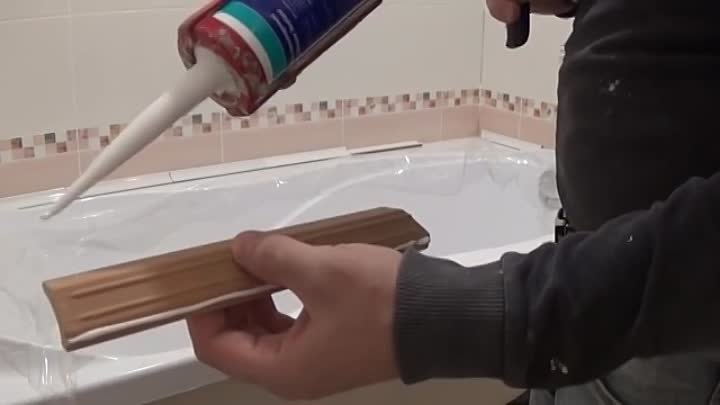
The gap between the plumbing and the wall is filled with a sealant using a construction gun.
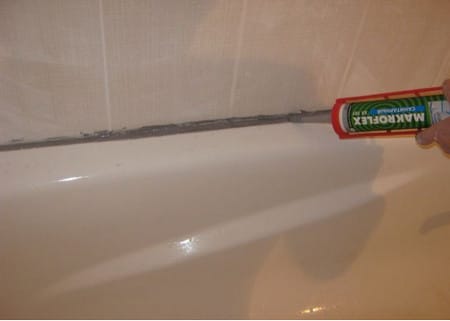 The gap between the wall and the bathroom is filled with sealant
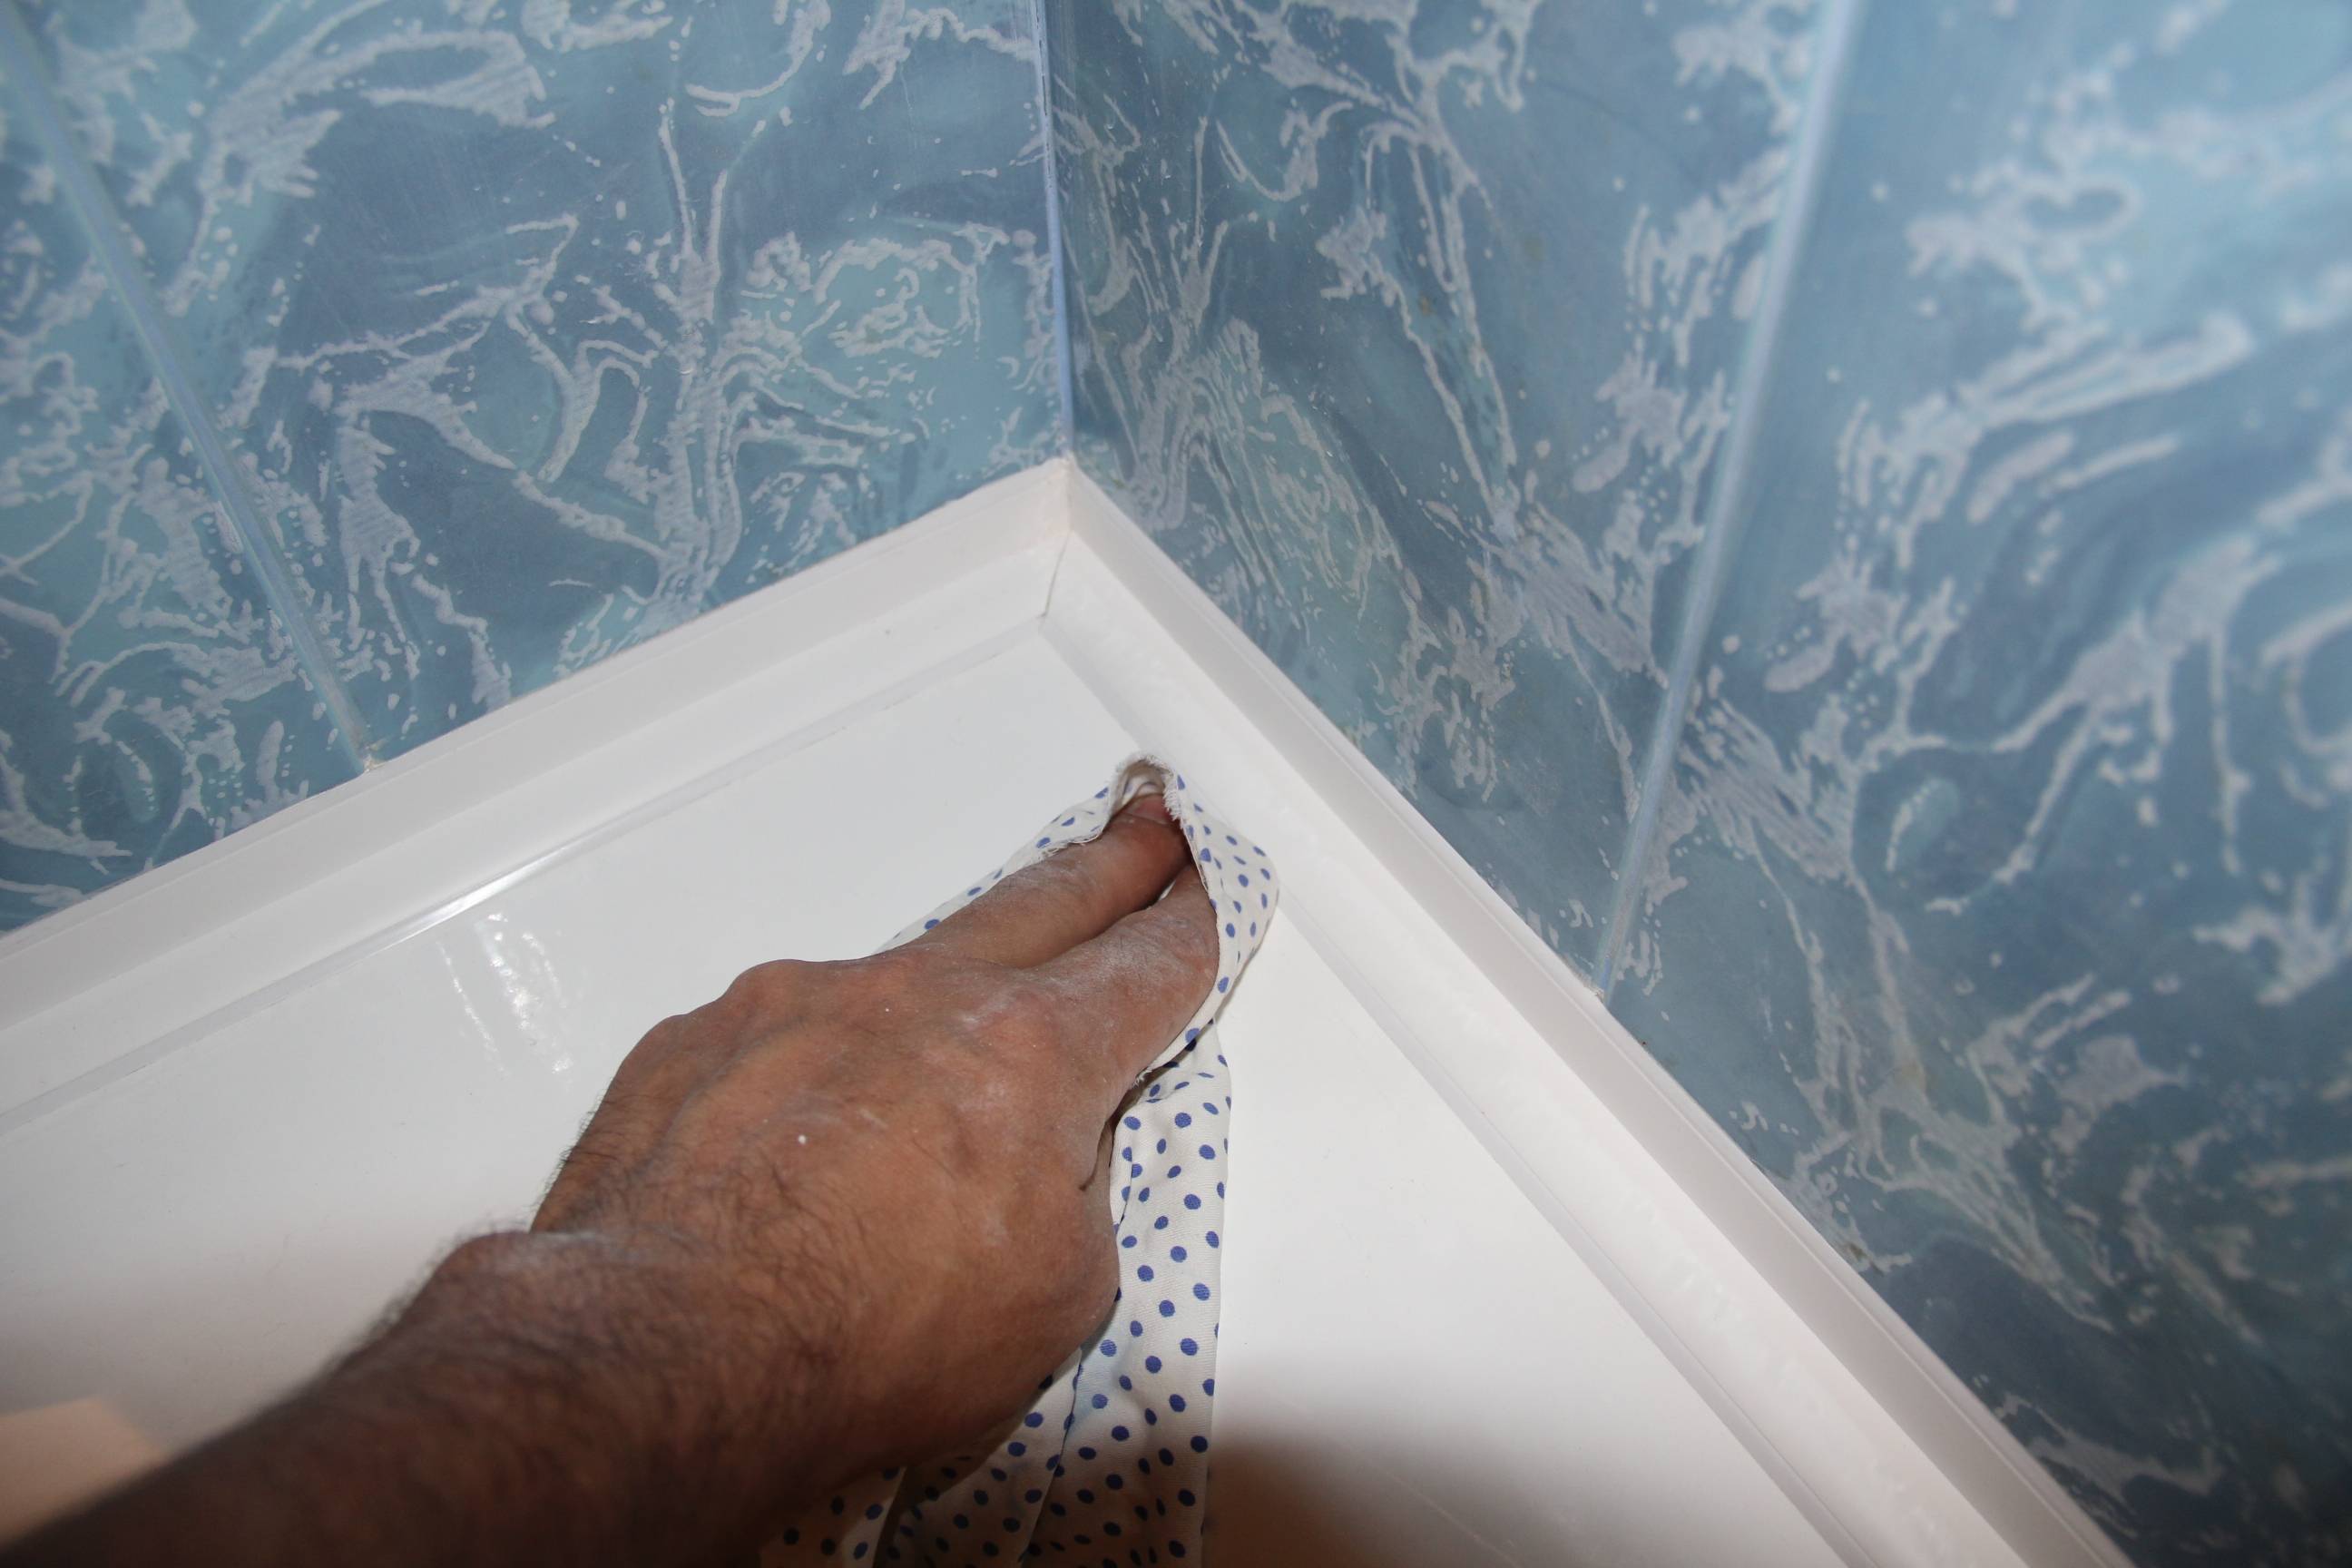
- After the silicone has dried, a plastic strip is attached with liquid nails. It is necessary to press it tightly to the place of "landing" and hold it in this position for several minutes. It is advisable to involve an assistant, since it is problematic for one person to cope with a long strip.
- Glue that has come out from under the edges should be carefully removed.
- Where an under-tile bathtub edging has a corner joint, additional sealing with silicone is made.
 Edges and corner joints are made with special elements
Comparison of ceramic border with other types
What is the advantage of installing a ceramic border?
- This type of fencing is durable. If the installation is carried out correctly, the service life is approximately 20 years.
- The rigidity of the material ensures that the shape is retained for a long time. Ceramic fencing will not discolour over time. It does not form ill-fated fungi and mold.
- Ceramics can be cleaned using various detergents.
- Variety of shapes and colors. With the right ceramic wall elements, you can give your bathtub an original look.
Despite all the advantages of ceramic borders, they have a drawback - a relatively high price in relation to other types of finishes, such as:
- self-adhesive tape. It is usually used for temporary waterproofing, as it wears out and loses its appearance extremely quickly. The tape should be replaced after a year of use;
- plastic border.Just like the tape, it is easy to install, but has a longer service life. But it is worth knowing that this fence is used more for decoration than for protection. This is explained by the fact that it is fixed on a sealant, or on “liquid nails”, as a result, gaps are formed between the edge of the bathtub and the curb, in which moisture is retained. Another disadvantage is that plastic tends to turn yellow over time.
Kinds
Considering what this product should be used for, it can be divided according to several characteristics, namely:
Color. The white color of the border tape is the most popular, it matches the exemplary color of plumbing. But, if necessary, it is not difficult to find other colors such as green, pink, beige, gray and other colors that are most suitable for your bathroom design.
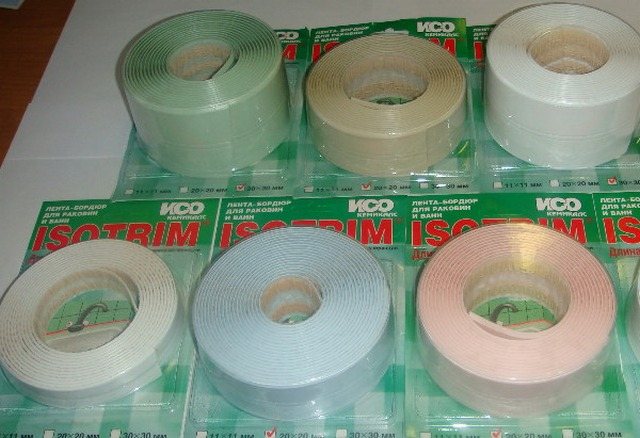
Dimensions. They should be selected taking into account the individual characteristics of your bathroom: the width of the gap and joints between the adjoining walls and plumbing, the dimensions of the bathroom itself. Standard tape length: 3.2 m or 3.5 m. This length is quite enough to close the bathroom joints (2 transverse and 1 longitudinal side). The border tape is produced in widths of 2, 4, and 6 cm. The optimal choice can be made, taking into account the width of the joints and the possibility of overlapping the tape on the edges of the bath.


There are also decorative ribbons with vintage embossing or a figured edge. But this is a rare variety due to low demand and higher cost, so it can not often be found on the finishing materials market.
Fixing the plastic curb
When making repairs in the bathroom, the question inevitably arises: how to properly install a corner in the bathroom so that even after a long time you will not be disappointed with the result?
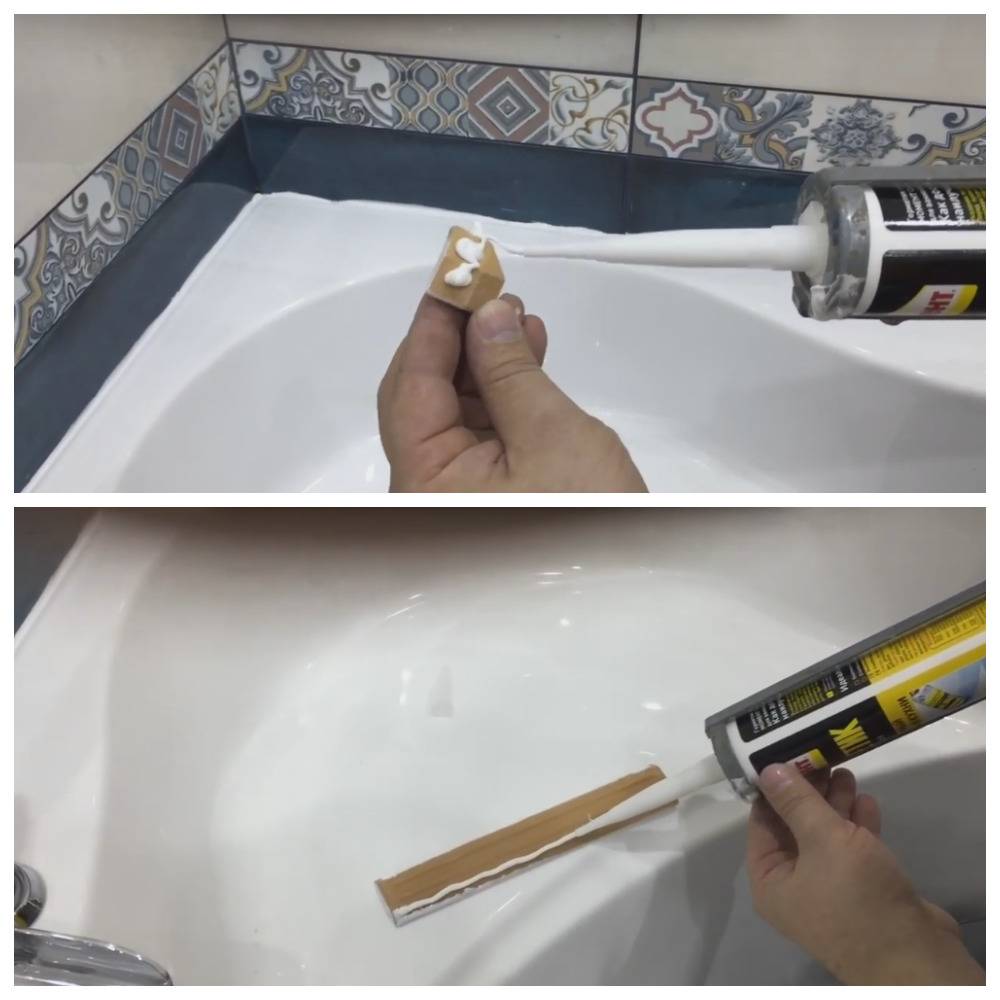
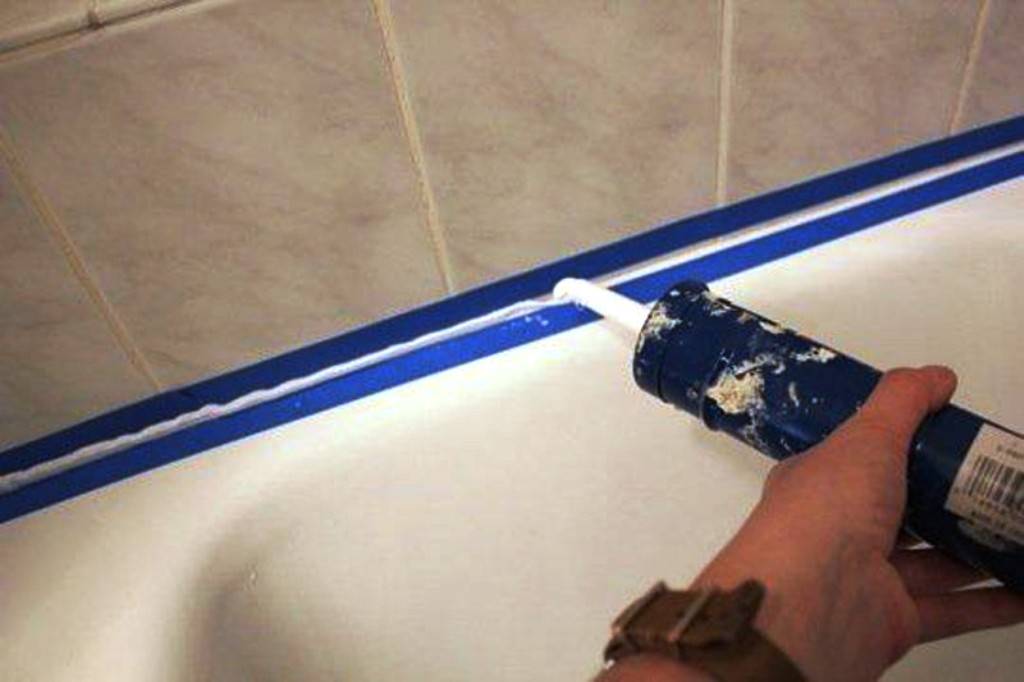
The installation process is divided into certain stages. Placement of adhesive tape on the working surface. Adhesive tape will not allow sealant and glue to get on the enameled bowl and tile. Preparing the border for installation: measuring and trimming. It is easier to measure the material with a tape measure. Plastic cutting can be carried out both with a hacksaw and a knife, depending on the density of the product and its characteristics. Product fastening. Liquid nails are applied to the inner surface of the curb, after which the part is pressed against the joint with force. In the place where the edge of the corner adjoins the bowl and the wall, a transparent silicone sealant must be laid. Mounting a ceramic border It has been described above how to install a plastic corner on the bath most correctly and quickly.
Choosing a curb for installation
From what they just do not manage to close the joint between the bathroom and the wall - they use ordinary cement putty or glue plastic corners for the kitchen set.
But for these purposes are specially designed:
- Flexible self-adhesive tape. It is used for temporary (for one or two years) protection against moisture;
- Plastic corner. Designed for a much longer life that can be easily replaced when needed - during renovations, when replacing a bathtub, or due to yellowing of the product itself.
- Ceramic or natural stone border. The most expensive option is used for good repairs, it serves as a reliable waterproofing.
In addition to the above products, foam or polystyrene foam borders are often used.But since they are not moisture resistant and are not intended to be installed on the sides of the bath, then there is no point in considering them further.
The border is matched to the color of the tiles or bath. Its width can be different and depend on the size of the joint
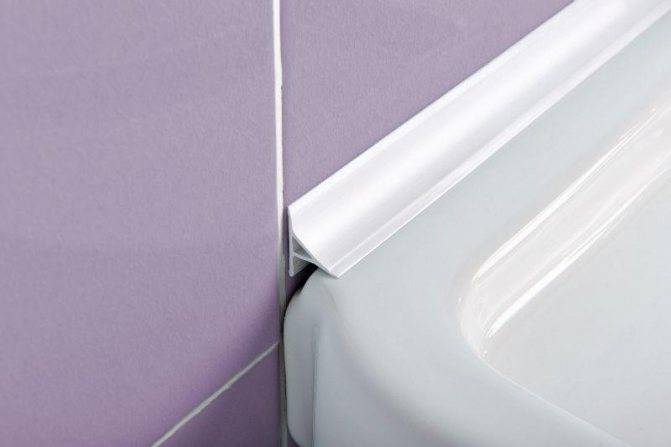
Option 1. Plastic corner to protect against moisture
A plastic border is the most practical way to close the joint between the wall and the bathroom. The service life of this product is not too long, but this is easily compensated by the fact that it is inexpensive, easy to install and dismantle.
It can be laid on and under tiles. On sale there are many options with different sizes, types of fasteners, any colors and shades.
A white plastic border may turn yellow over time, so you need to choose high-quality and not the cheapest products that are resistant to yellowing
Option #2. Border made of ceramic elements
A ceramic corner for a bathroom is often purchased in a set with facing tiles or separately - their range is very diverse. Such a border provides reliable isolation of joints from leaks, has a long service life.
You can install the corner before and after wall cladding. If the elements of the border are the same size as the tiles, then it is advisable to lay them in such a way that the seams match.
Among the advantages of ceramic borders, the following can be separately noted:
- reluctance to yellowing;
- high mechanical strength;
- resistance to chemical influence of detergents.
It is impossible to lose sight of the curbs made of stone - marble, granite.They are used if this material has already been used in the interior, for example, for the production of a bathtub, a washstand or as a decorative insert for wall cladding.
In terms of their properties, stone borders resemble ceramic ones, but they are even more durable and give the atmosphere a sophisticated look.
The choice of material for the installation of a ceramic border usually determines the tile bath screen.
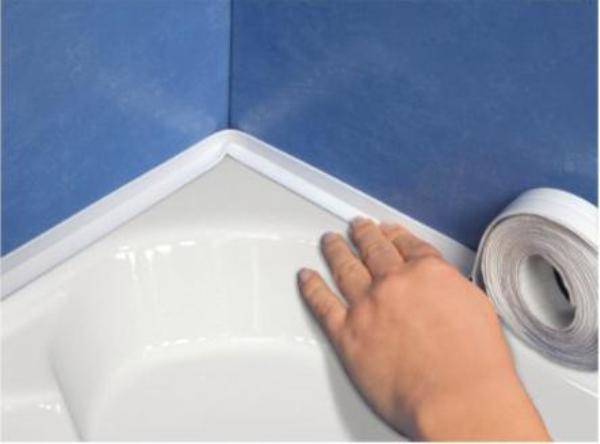
Option #3. Flexible tape border for sealing joints
Tape self-adhesive element is the easiest way to protect the space behind the bathroom from leaks. It is a polyethylene tape with an adhesive on the inside, which is covered with a protective layer.
The tape corner does not let water through and is able to withstand dynamic loads during expansion and contraction.
Such an element can be considered a temporary measure, which will sooner or later require replacement, since the adhesive composition applied to them is not of very high quality. In addition, when laying them, it is difficult to achieve neat joints in the corners.

With a tape corner, it will not be possible to achieve full sealing of the joints, but you can somehow prevent the spread of moisture and pull the time before repairs, buying a new bathtub or a better curb
Selection options and method of arrangement the joint between the sanitary ware and the wall should be oriented to the type of material from which the bowl is made, the type of screen and wall decoration in the hygienic room.
Why you need a bathtub border
Before the advent of bathtub edging, people invented various ways to protect the bathroom from mold and mildew. There were also plastic corners from the kitchen set and cement coated with oil-based paint.


All this looked unattractive and unaesthetic. Of course, with cement, you can still try and carefully process the gaps between the wall and the bathroom, but it is only suitable for cast iron baths. But what if the bath, for example, is acrylic?
After all, these materials are incompatible, cement does not stick to acrylic.
Especially for such cases, bathroom borders were created. They provide reliable protection against moisture, aesthetic and neat appearance, they can be matched to almost any bathroom interior.