- How to properly clean a stove
- We improve heat dissipation
- Design features
- Stove potbelly stove from a gas cylinder
- Stove for garage working out
- Features and nuances of use
- Important factors for the location and operation of the furnace:
- Economical and energy efficient garage ovens
- The sequence of manufacturing a stove in a garage, functioning at a test
- Disadvantages of a furnace for a garage for working out, features of operation
- Advantages and disadvantages
- Preparatory work before assembling the furnace. Location selection
How to properly clean a stove
The design features of such a stove make it possible to clean it quite rarely.
This is one of the advantages of the potbelly stove. However, periodically the chimney must be cleaned of soot residues. To do this, you can use a special brush. You can make it yourself. Attach a cylindrical brush to the rope. It is recommended to take a brush with plastic or iron bristles. At the same time, you need to pick it up in such a way that it squeezes into a narrow chimney pipe without any problems.

For potbelly stoves, it is recommended to take a brush with plastic bristles
The cleaning process itself occurs in the following sequence:
- Close the opening of the firebox and plug it with a rag.
- Make several movements with the brush (you need to stop when the brush began to move without resistance). Wait.
- Remove any food that has gone down to the sump.
All this must be done very carefully, since the chimney of bourgeois women is not very strong. A homemade potbelly stove in the garage can be a reliable and effective assistant in the fight against winter frosts. And if you do it yourself, then the efficiency of the device can be increased many times over.
And if you do it yourself, then the efficiency of the device can be increased many times over.
A homemade potbelly stove in the garage can be a reliable and effective assistant in the fight against winter frosts. And if you do it yourself, then the efficiency of the device can be increased many times over.
We improve heat dissipation
The biggest problem of bourgeois women: inefficient use of heat. Most of it literally flies into the flue gas pipe. This disadvantage is effectively combated in top-burning furnaces with afterburning of flue gases, similar to the Bubafonya furnace (also, by the way, can be made from a gas cylinder) and Slobozhanka.
A variant of a potbelly stove made of propane cylinders with secondary afterburning - the efficiency is higher than that of "ordinary" models.
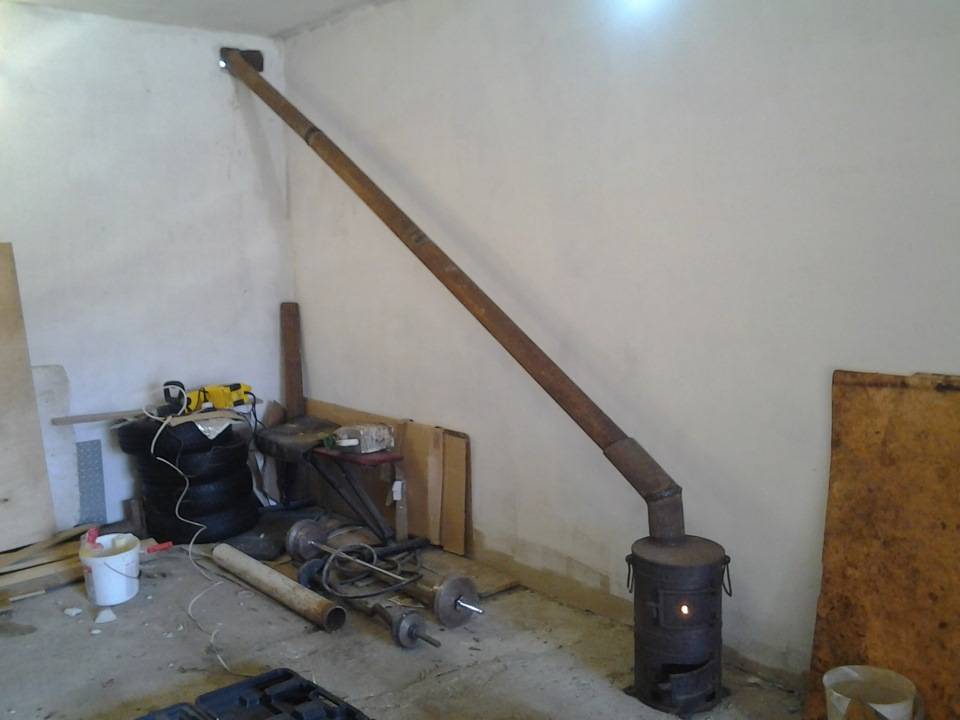
Another way to improve heat dissipation is to make the chimney longer, thereby increasing the amount of heat that will remain in the room. When designing such a broken chimney, it is better to avoid horizontal sections, and even more so sections with a negative slope.
This gas-fired stove is wood-fired. Increased heat transfer by making a long broken chimney
Another option to use the heat of flue gases is to weld a vertical cylinder-flue pipe to a horizontally located cylinder-body. Due to the larger area, the heat transfer will be higher.It will only be necessary to create good traction so that the smoke does not go into the room.


Such a potbelly stove from a gas cylinder will warm up the room faster
You can do it the way they do in sauna stoves: put a net around a metal pipe into which stones are poured. They will take heat from the pipe, and then give it to the room. But. First, until the stones heat up, the air will warm up slowly. Secondly, not all stones are suitable, but only round ones, which are along the rivers. Moreover, uniformly colored without inclusions. Others cannot be covered: they can explode from high temperatures no worse than a fragmentation projectile, or release radon, which is very harmful in significant concentrations.
The solution can be peeped at the sauna stoves: build a grid for stones on the pipe
But such a solution also has advantages: firstly, the pipe will not burn. Stones emit even heat. Secondly, after the stove goes out, they will maintain the temperature in the room.
Often you need to quickly heat the room. To do this, you can use a conventional fan that will blow around the body and / or pipe of the furnace. But the same idea can be carried out with a stationary version: weld through pipes into the potbelly stove cylinder in the upper part. On the one hand, attach a fan to them (heat-resistant, preferably with several speeds, so that it is possible to regulate the temperature).
Pipes that pass through are welded into the upper part of the cylinder. On one side, a fan is attached to them, which drives air through them, quickly warming up the room.
Another option that allows you to achieve active air movement along the walls of the case and not use a fan at the same time: make a casing around the case at a distance of 2-3 cm, but not solid, but with holes at the bottom and top. Buleryan stoves or metal stoves for saunas work according to this principle.
One of the options for such a casing around a horizontally located cylinder is visible in the photo below. Through the gaps that are below, cold air is sucked in, located near the floor. Passing along the red-hot body, it heats up, and exits from above.
This stove lies on its side: the casing is not solid, there are decent gaps at the bottom and top
The principle is not new, but it is no less effective. What the finished stove looks like with such a casing, see the photo below.
Potbelly stove with improved convection around the body for quick space heating
Here is another implemented casing, around a potbelly stove from a horizontally located cylinder
Pay attention to the non-standard door fastening
This shiny leaf improves room heating
A home-made boiler from a gas cylinder for water heating can be made according to the same principle: weld a water jacket around the cylinder, and connect it to radiators. Just do not forget that the system must have an expansion tank with a volume of 10% of the total displacement.


You now know how to make a potbelly stove from a gas cylinder and how to improve it. Watch another video about an interesting version of a combined stove for a summer residence or a garage made of bricks and a gas cylinder.
Design features
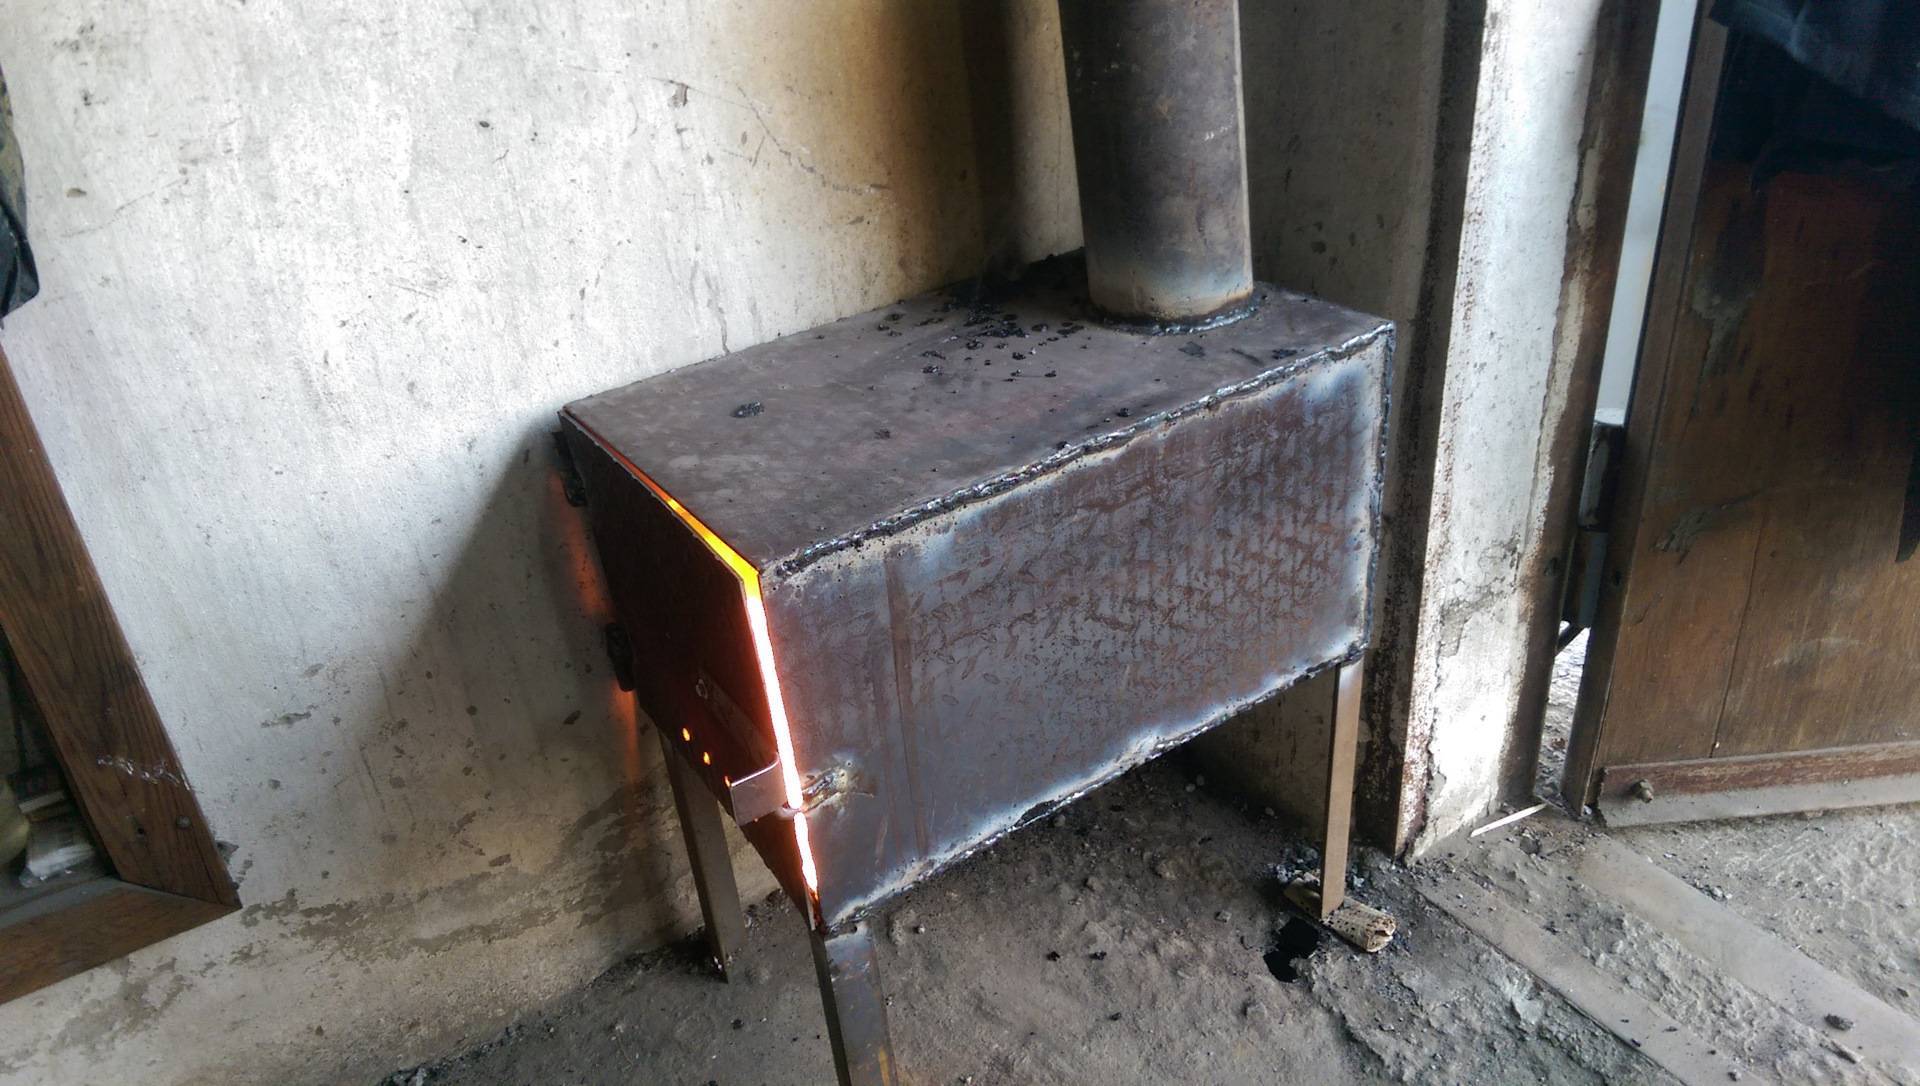
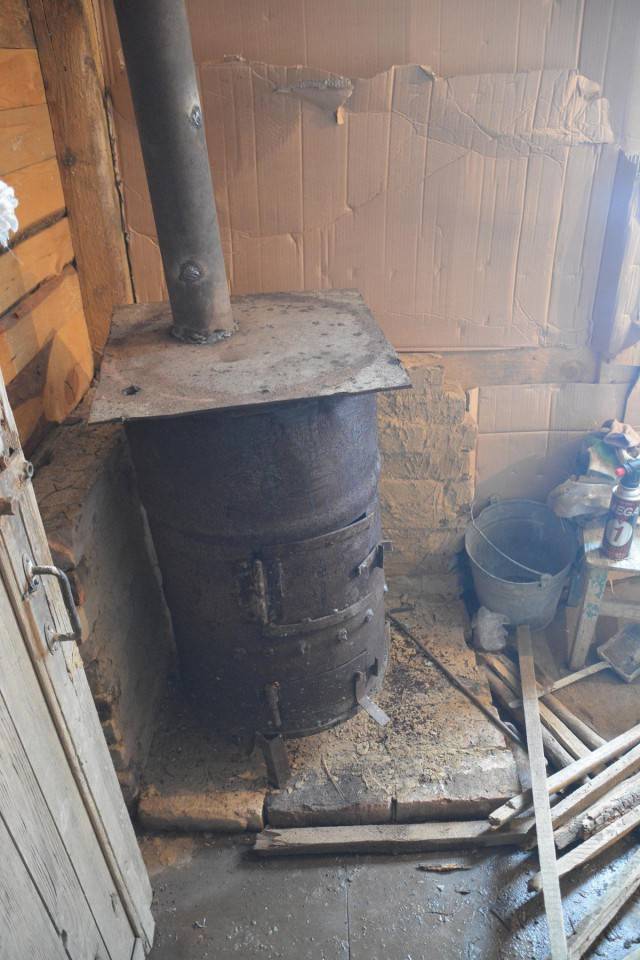
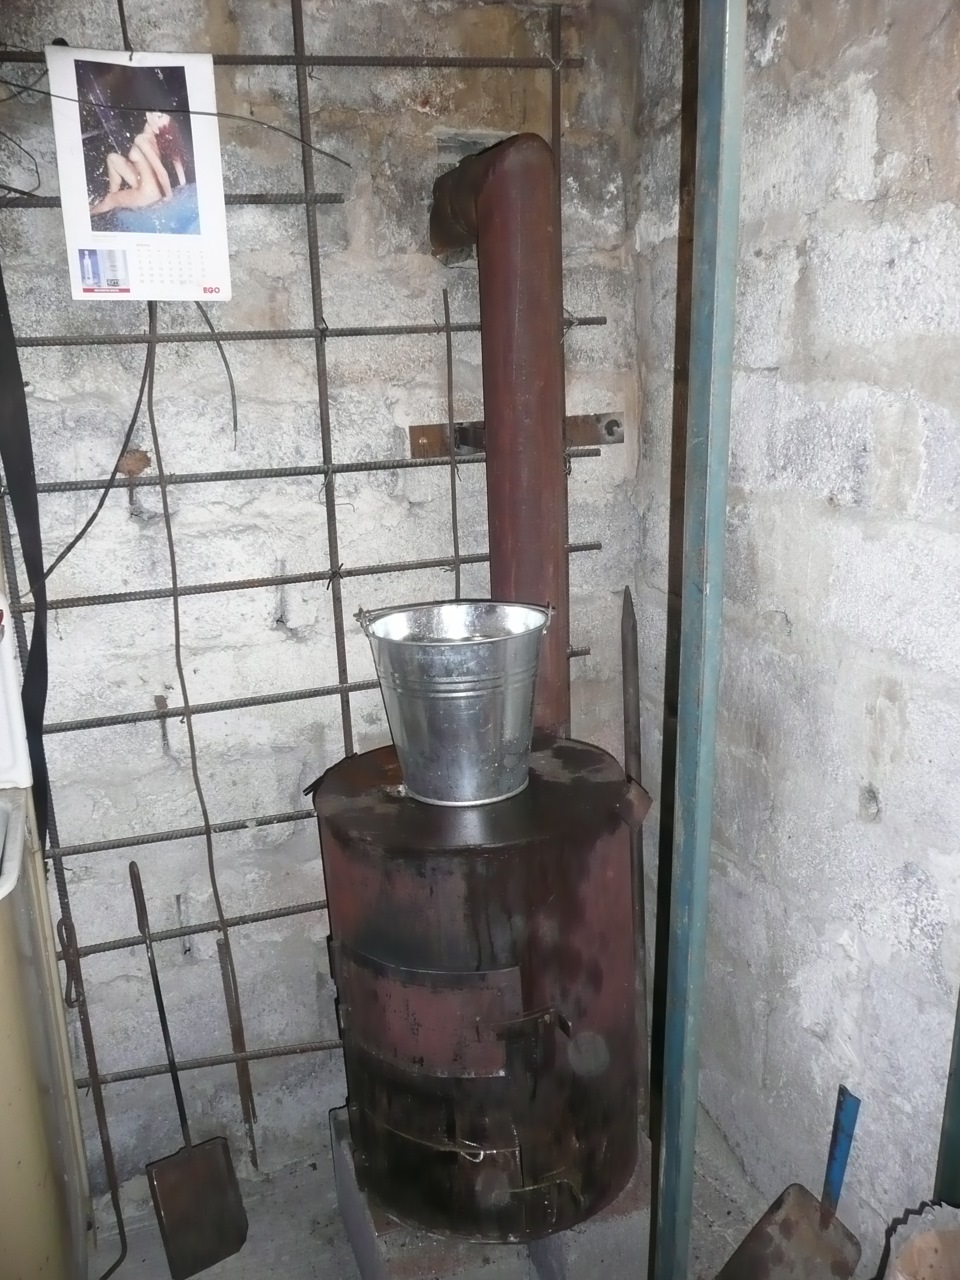
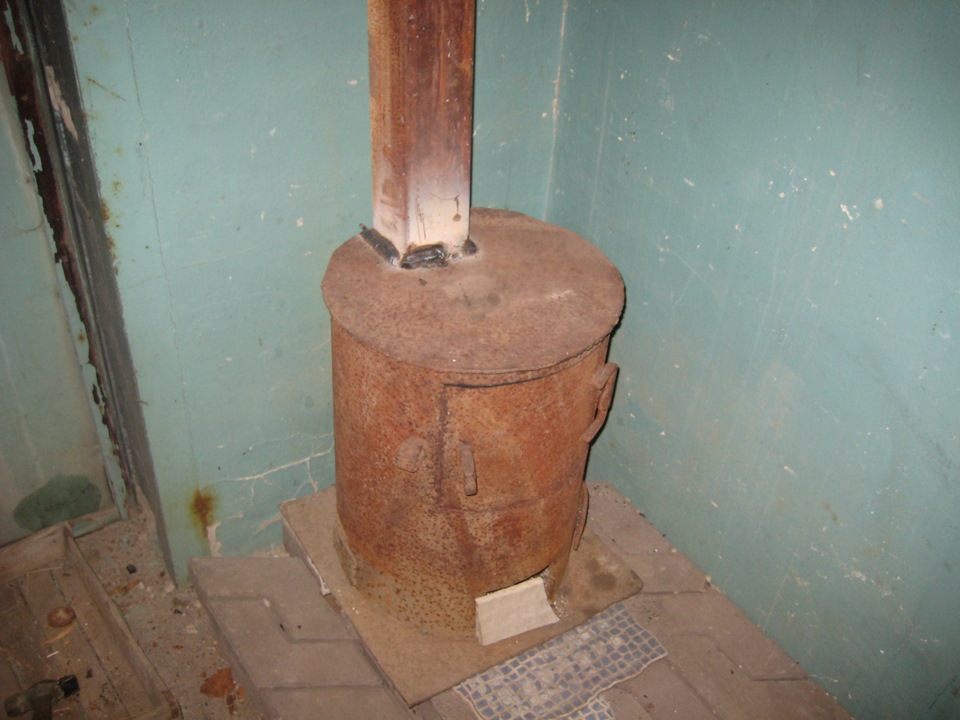
Any person who has basic skills in working with metal tools and a welding machine can make a potbelly stove in the garage. For the manufacture of the furnace body, sheet metal or a barrel, a gas cylinder, a thick-walled pipe is used. The thicker the walls of the case, the longer the unit will last - the most short-lived are stoves made from old metal barrels.
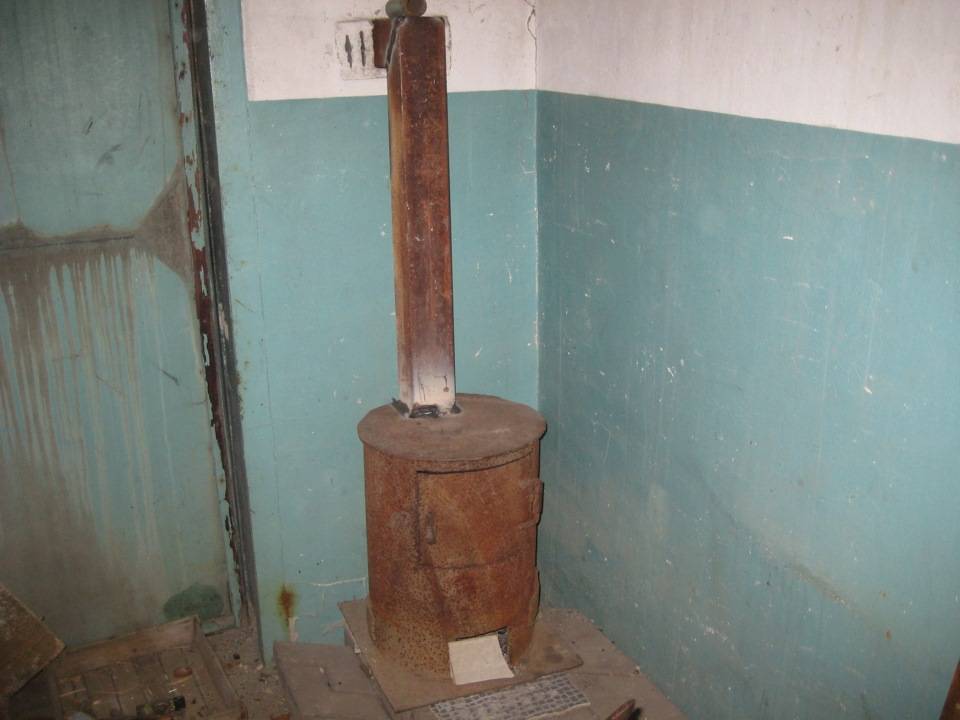
Sheet stoves are rectangular, elongated in length or height, or compact square. Cylindrical housings are also arranged vertically or horizontally. A vertical potbelly stove takes up a minimum of space, but greatly limits the size of the firewood that can be burned in it. A horizontal stove allows you to use long firewood, but takes up much more space.
The scheme of the potbelly stove is extremely simple. The internal volume is divided horizontally into two parts - the combustion chamber and the ash pan. In some cases, the ash pan can be welded on the outside to the bottom of the body in order to increase the volume of the firebox.
The firebox and the ash pan are separated by a grate. It is welded from a thick steel bar. It is recommended to use reinforcing bars, as the metal mesh will burn out quickly. The grate is welded to the inner walls of the housing, but it is more convenient to weld only the stops for it and make the grate removable - this will make it easy to replace it if necessary.
in used oil
If the ash pan in the form of a metal box is welded from the bottom outside, the function of the grate can be performed by the lower part of the body - three rows of holes are drilled in it in a checkerboard pattern.This design burns out quickly, so it is more practical to cut a rectangular hole along the length of the body and lay a grate welded to size.
The ash pan performs two important functions: it is a container where unburned fuel residues are poured, as well as a channel for supplying air to the furnace and ensuring an optimal level of traction.
It is recommended to provide separate doors for the ash pan and the firebox - in this case, the draft can be adjusted by slightly opening and closing the ash pan door. The outer ash pan of a potbelly stove of the simplest design may not have a door. If the furnace and blower have one common door, holes are drilled in its lower part for air to enter the combustion chamber.
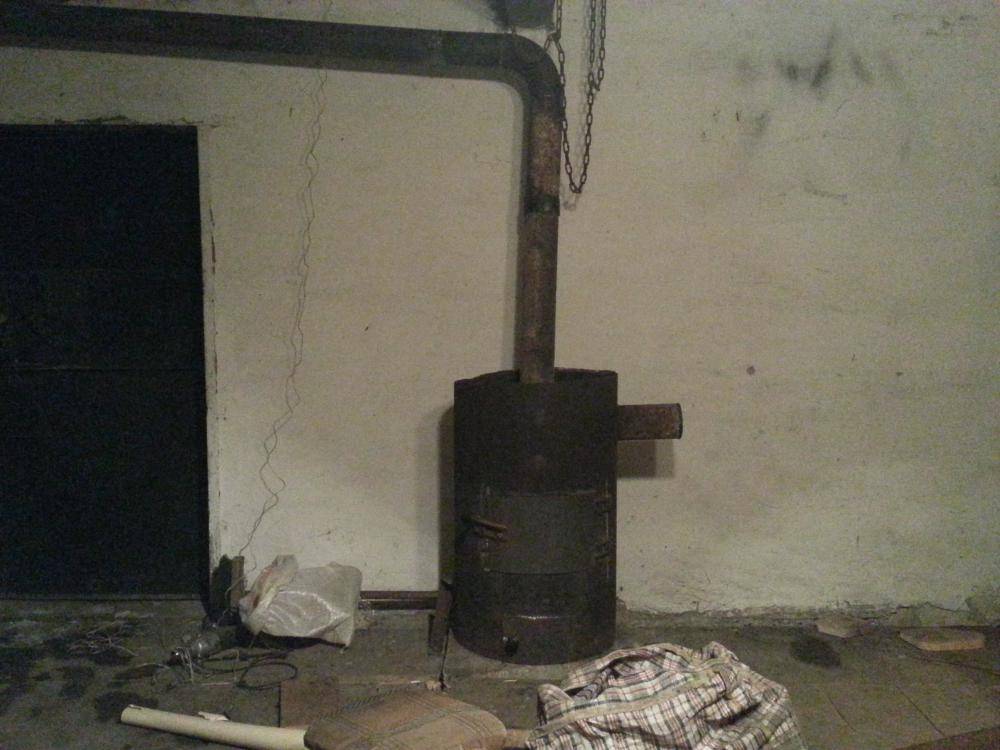
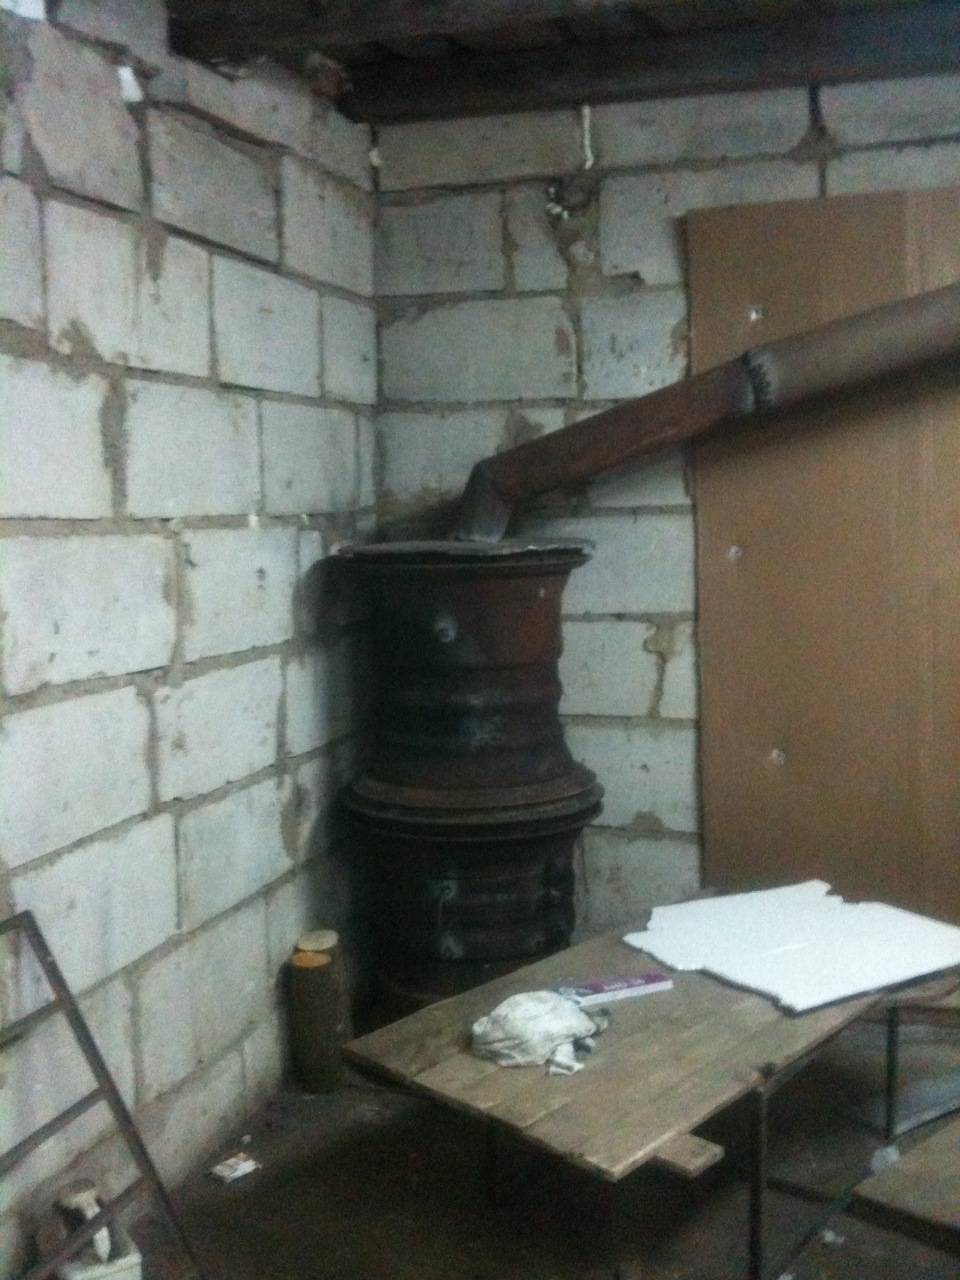
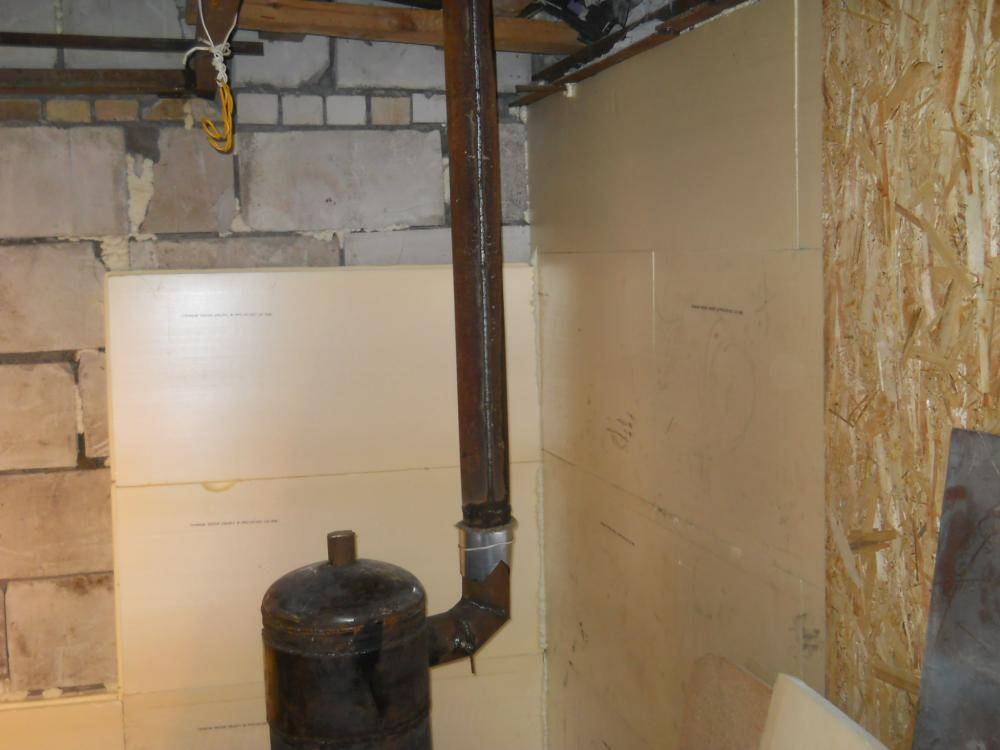
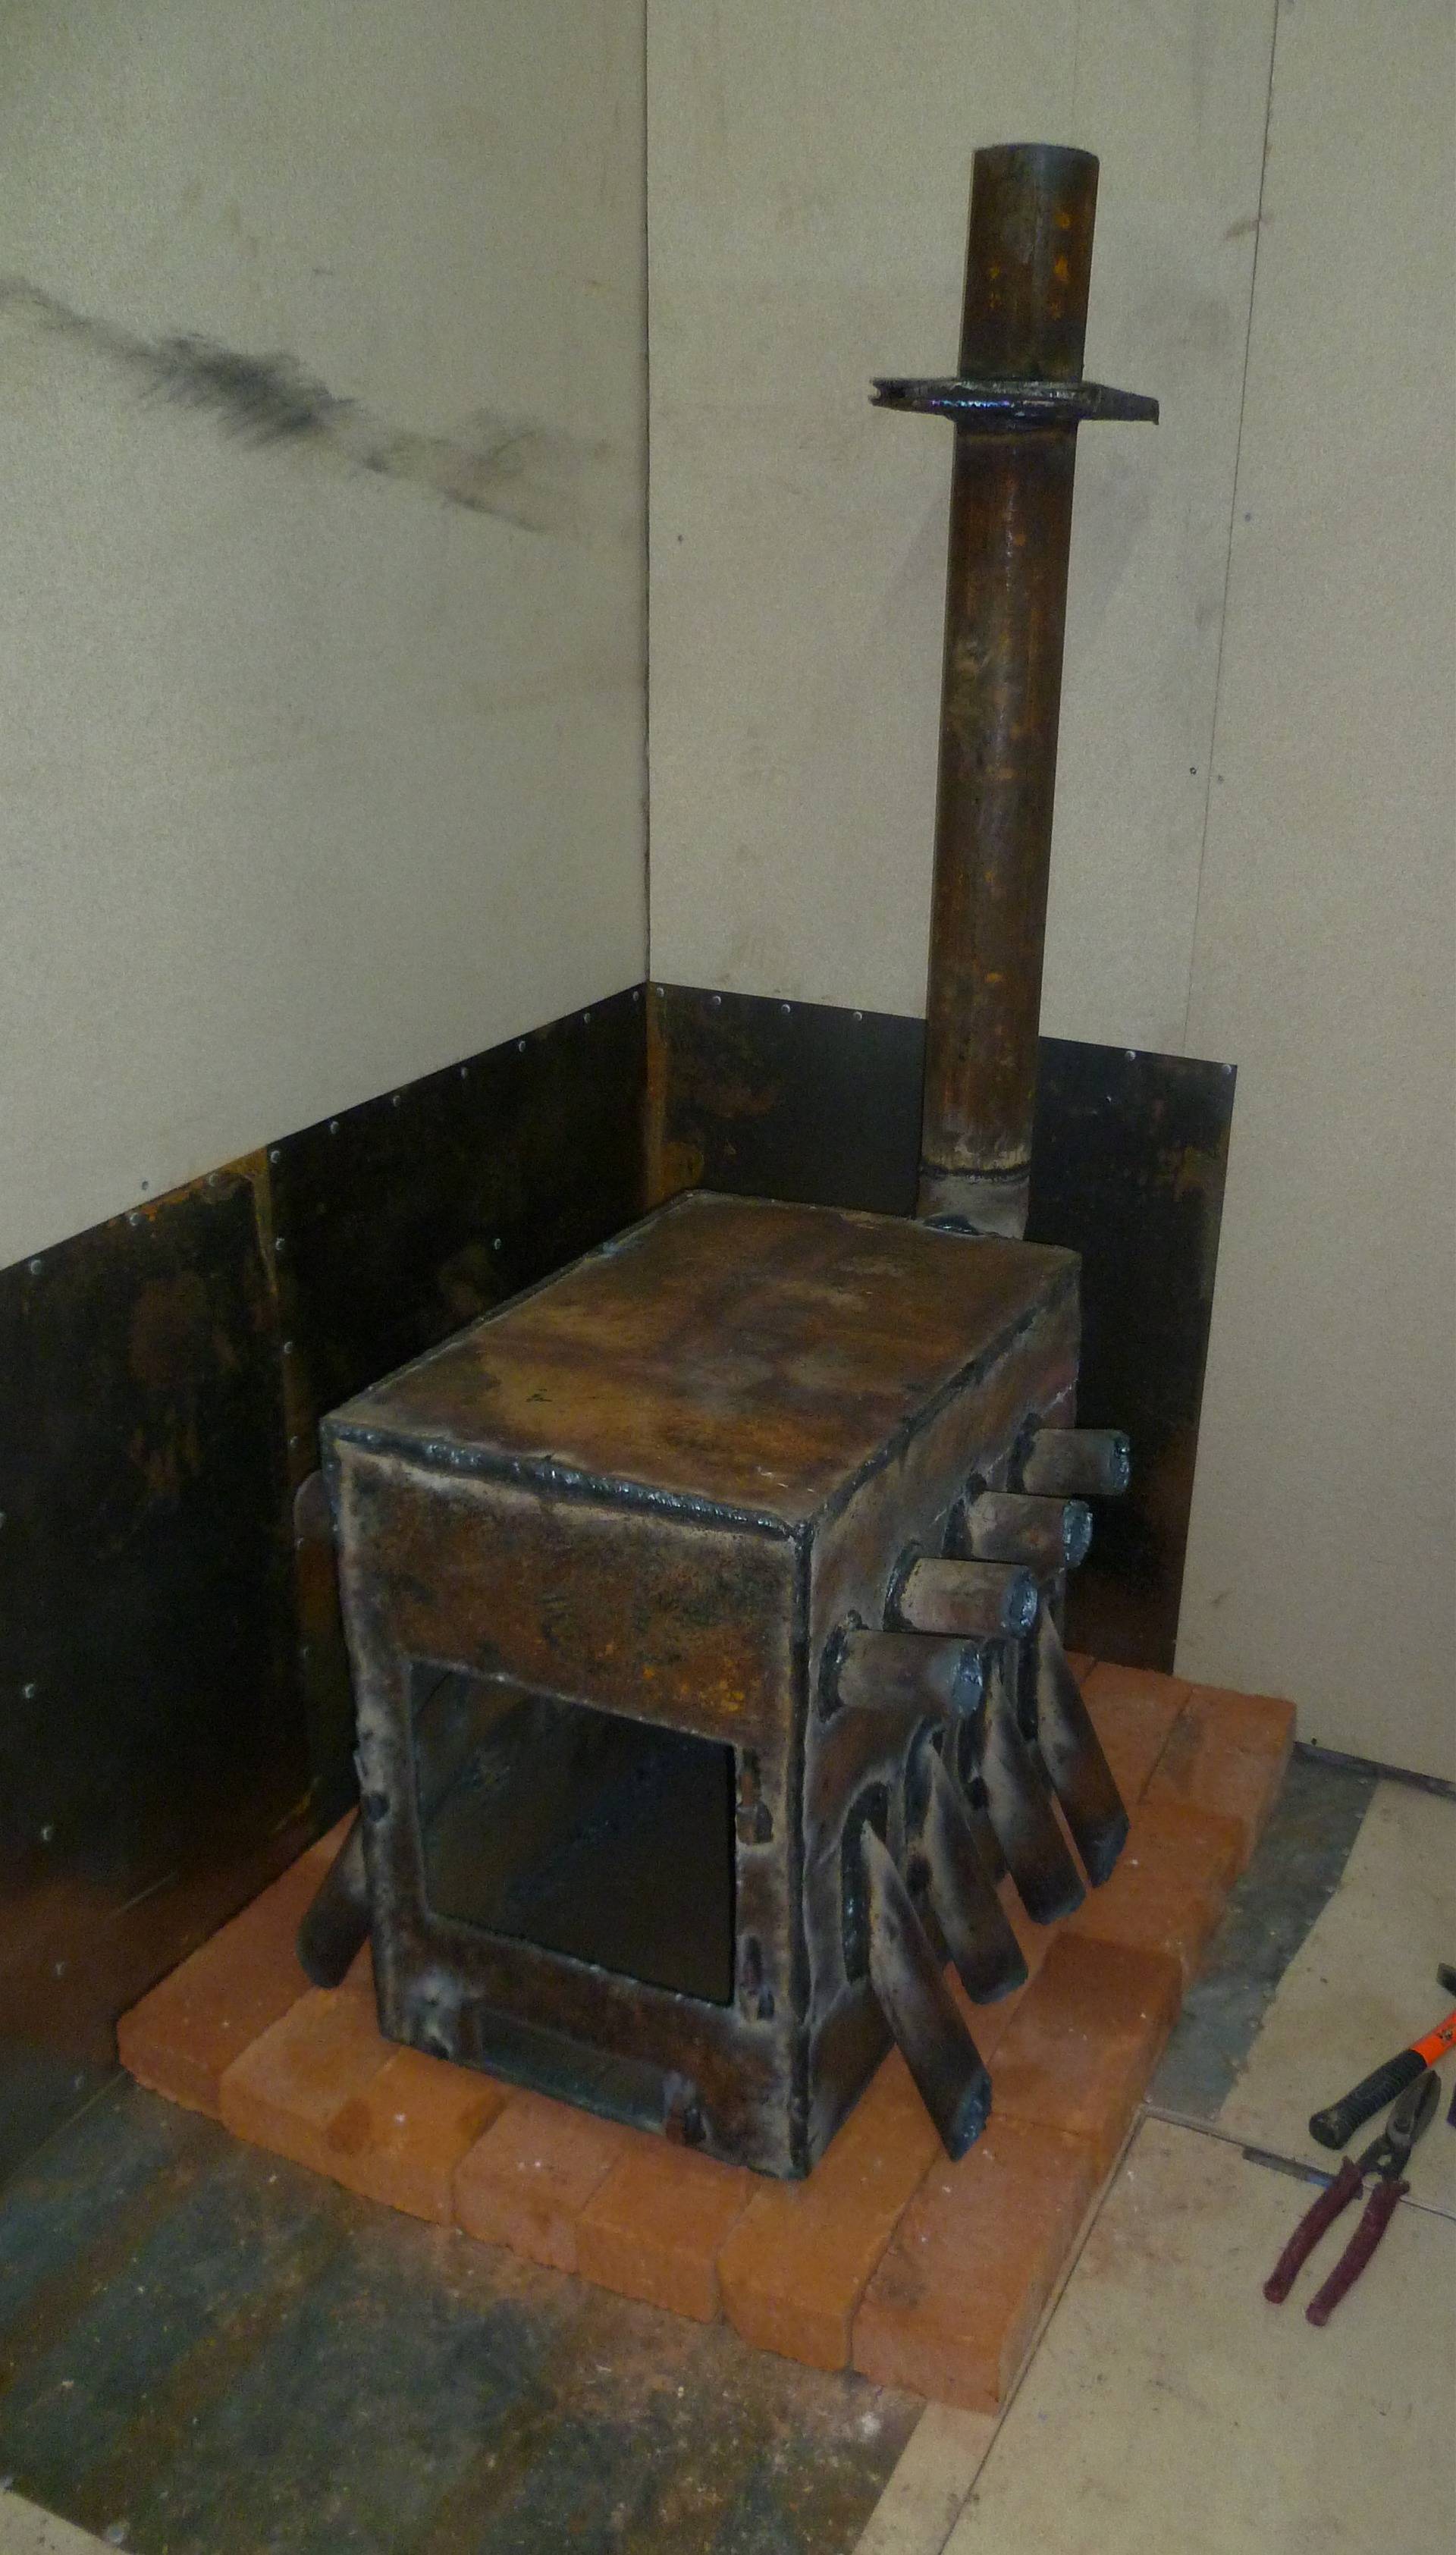
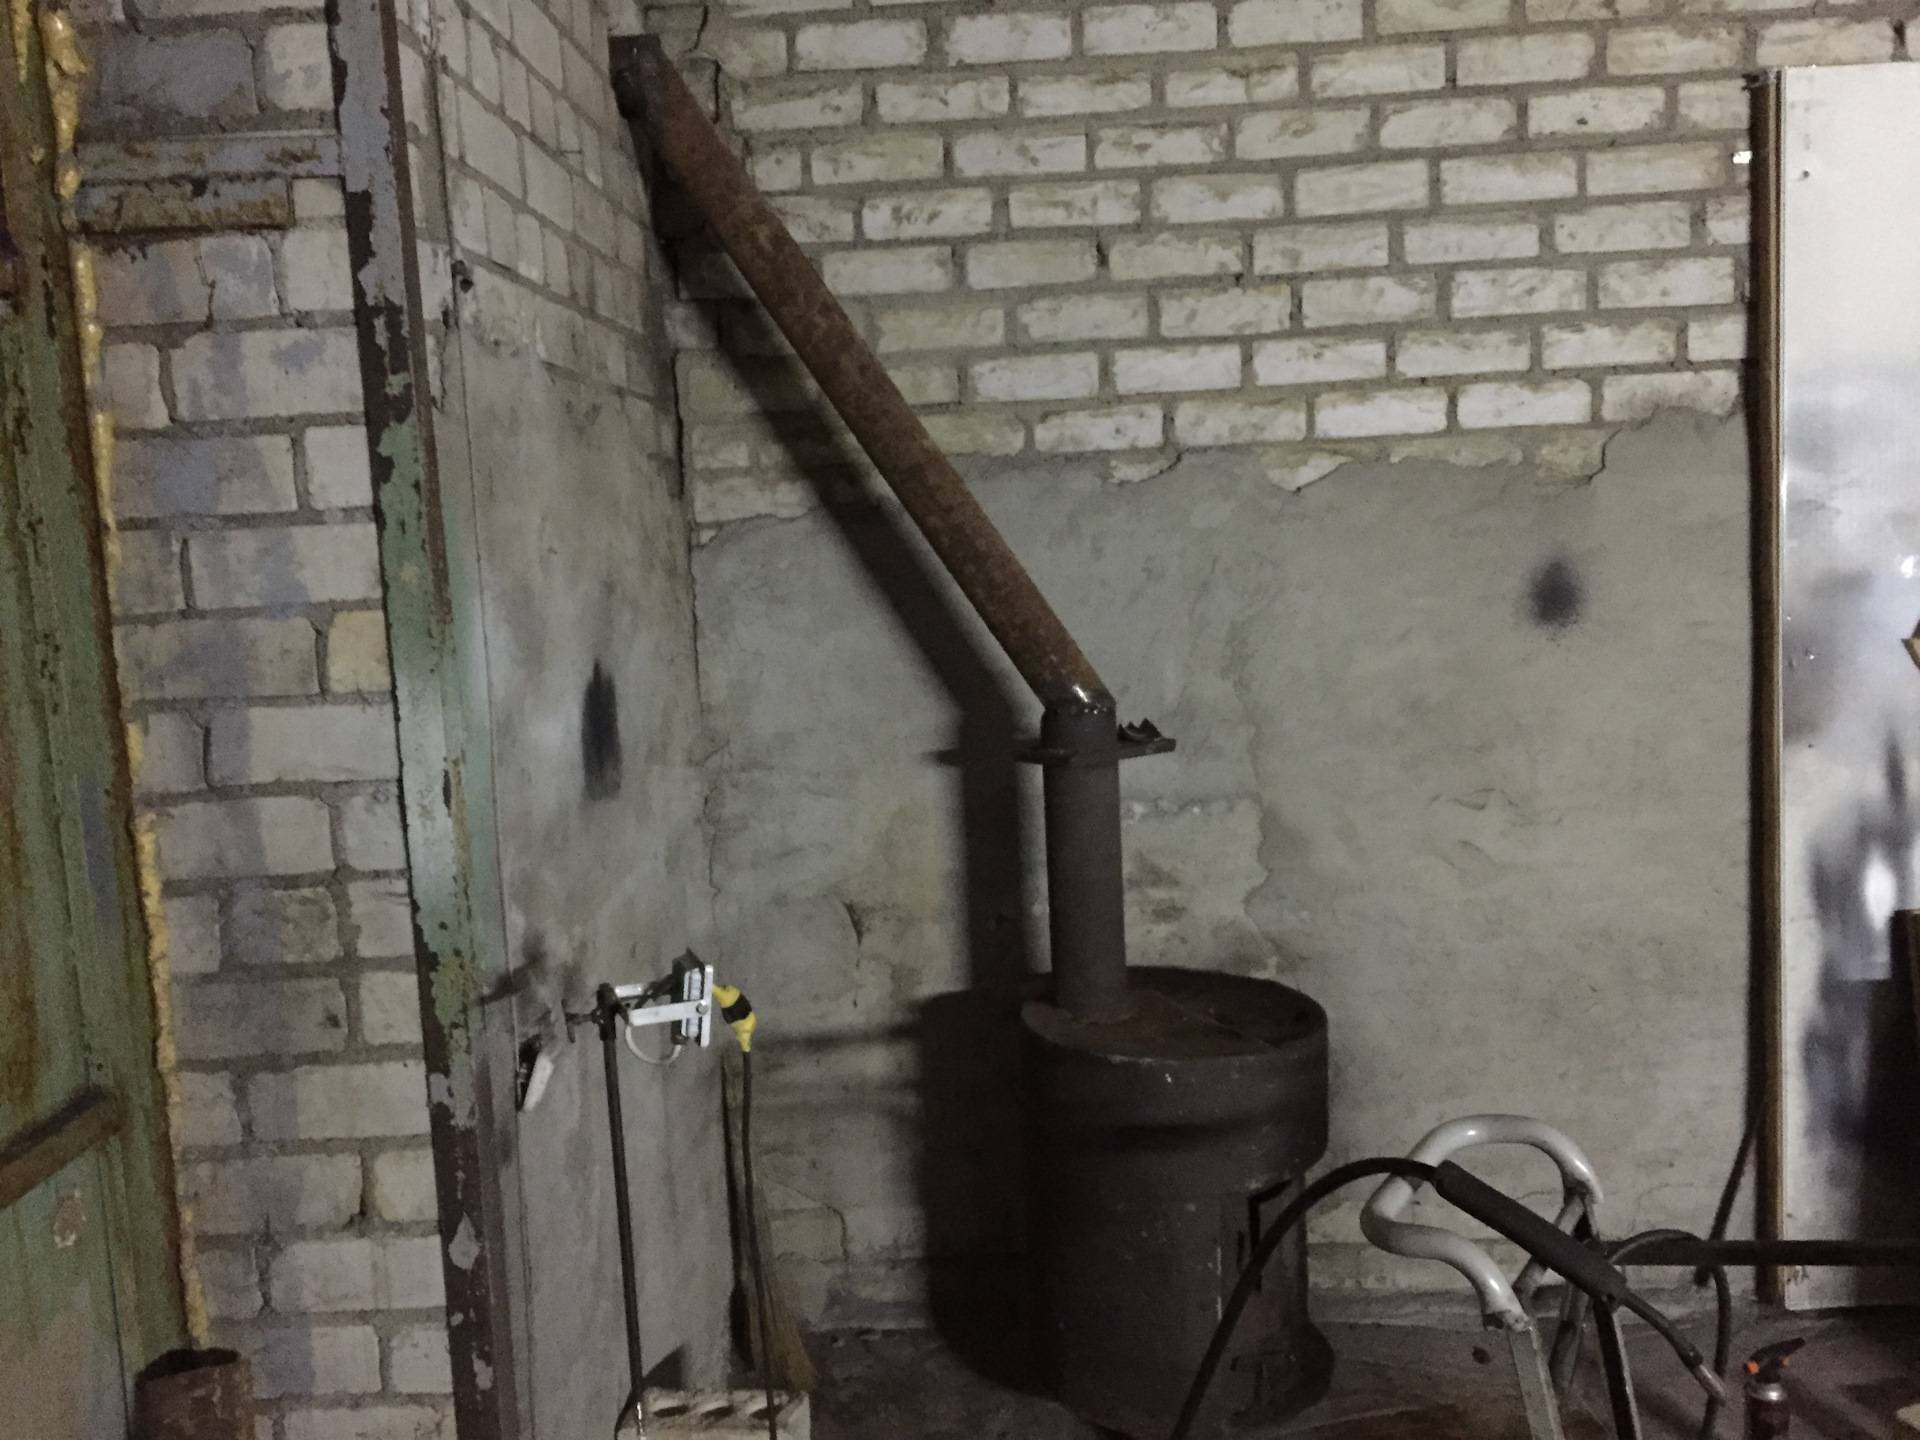
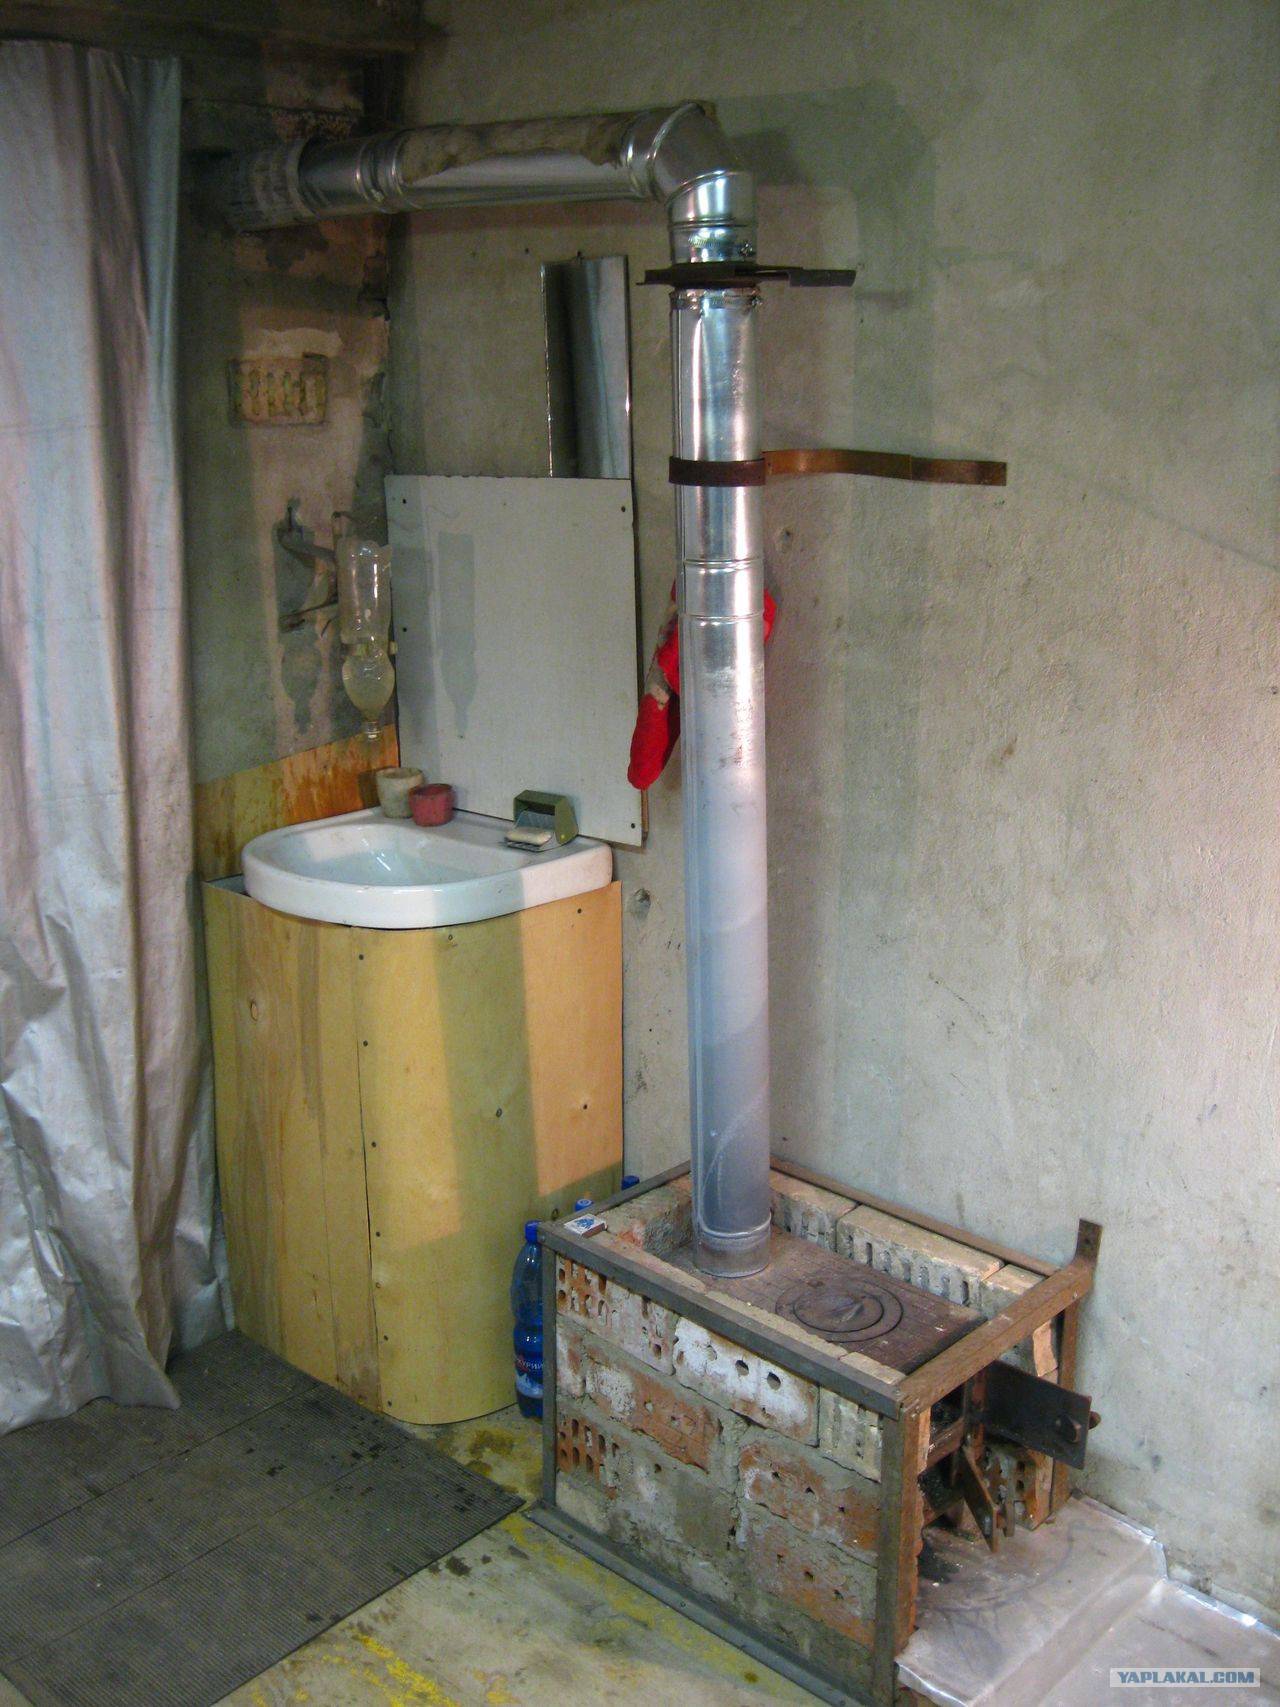
The pipe for connecting the chimney is vertically welded into the body on the opposite side of the furnace door in order to ensure the maximum level of heat transfer from the stove and leave more space under the hob.
If the heating stove is planned to be used as a tile, a steel sheet (or a stand under it) is welded onto the upper part of the cylindrical horizontal potbelly stove, or a cast iron burner is welded. For a vertical stove from a gas cylinder, it is required to cut off the upper part and weld a metal sheet.
The body of the stove is equipped with legs made of a metal corner or pipes. The structure must be stable. The height of the legs is selected individually.
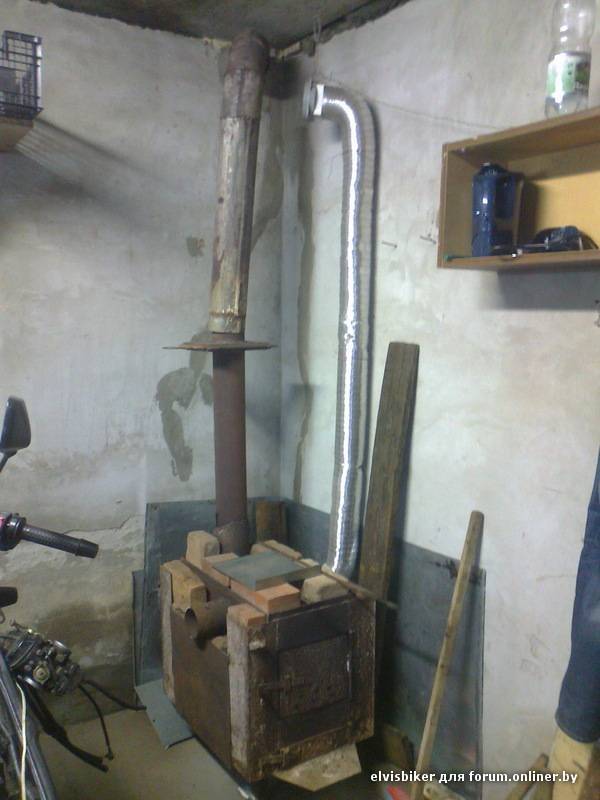
Stove potbelly stove from a gas cylinder
To remove residual gas from the cylinder, the valve is unscrewed, filled with water, left overnight. After draining the water, they begin to work:
- The upper part, where the valve was, is cut off, a plug is welded instead.
- If they make a horizontal potbelly stove for a garage with their own hands, a square hole is cut at the bottom, a firebox door is made of cut metal.
- After welding the hinges, hang the door.
- Instead of a grate for the passage of air, holes are drilled at the bottom of the future furnace.
- A box is made of thin metal, which will be both an ash pan and a blower. Weld under the holes, hang the door.
- The body is placed on legs.
- A hole is cut in the back of the top, a chimney pipe is welded.
To heat food, a frame of metal rods is installed on top. Enough space to accommodate 2 items. The vertical version is made in the same way as from a barrel.


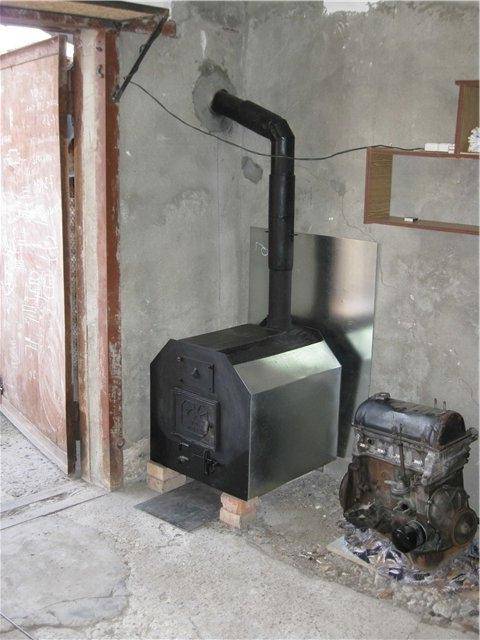
Stove for garage working out
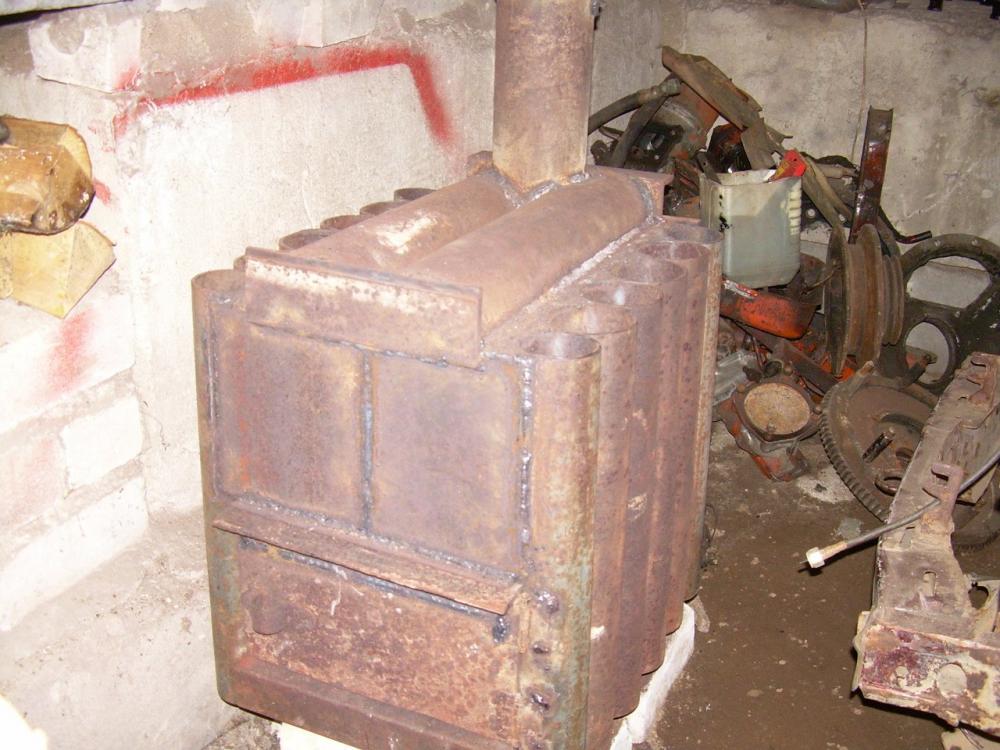
Let's see how to weld a stove in a garage that will work on working off - it will come in handy for those who repair cars and often change oil (for one warm season, you can collect working off for the whole winter). Our stove will consist of three parts:
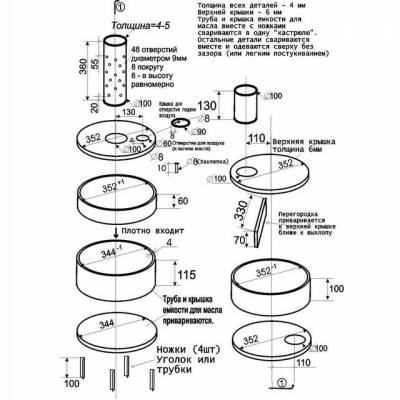
You can get detailed information about the dimensions of individual elements from the drawing.
- Fuel tank - its diameter is 352 mm. We weld the legs to it, in the middle we make a hole with a diameter of 100 mm. Nearby we make another 100 mm hole, with a lid - here we will fill in fuel for heating our garage;
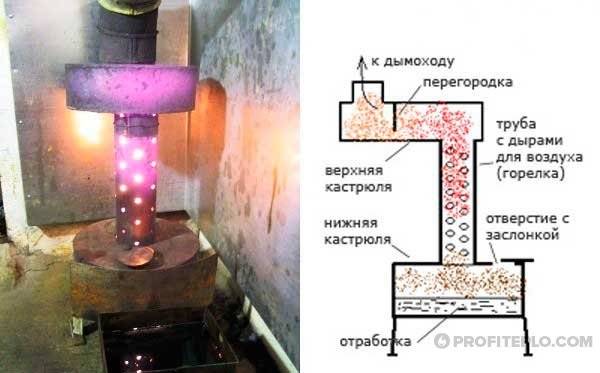
- Combustion chamber - it is a vertical metal pipe with a diameter of 100 mm, in which 48 holes are drilled in 6 rows;
- Afterburner - all unburned gaseous residues are burned here. Its diameter is 352 mm, it has a hole for the combustion chamber and a hole for the chimney (the same 100 mm). A partition is welded inside the chamber.
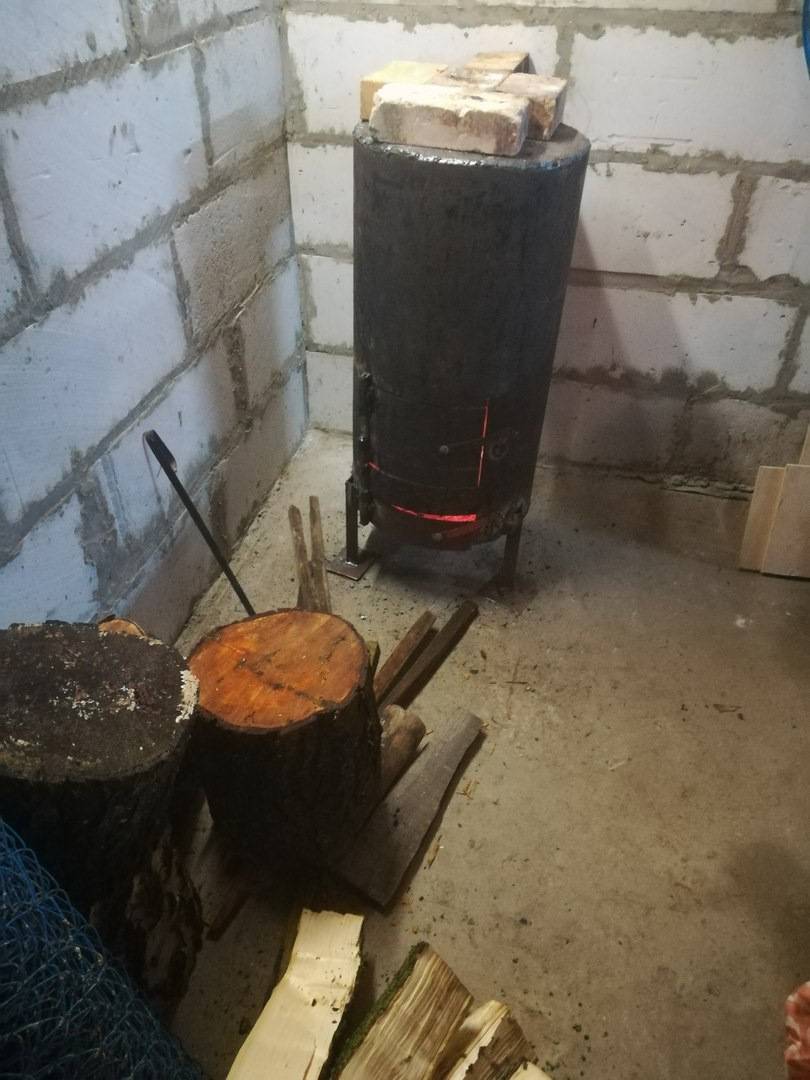
After the garage stove is assembled, you can start testing. We pour the mining inside, pour a little kerosene on top (in no case, not any other liquid, only kerosene!), Set it on fire, wait until the stove warms up. As soon as a steadily burning, literally buzzing flame appears in the combustion chamber, the experiment can be considered a success.
Please note that the recommended chimney height for this stove is 4-5 meters
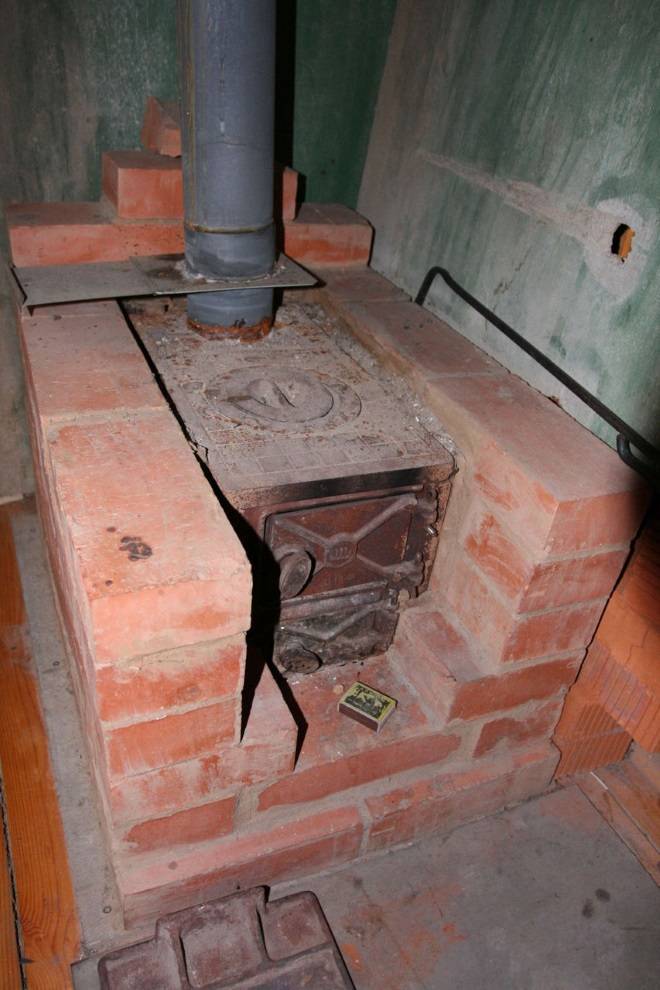
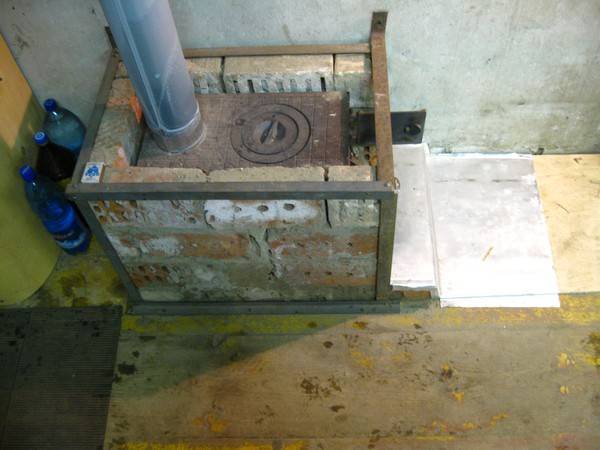
Features and nuances of use
The design diagram of such a furnace does not need complex explanations: everything is simple and clear. The lower part consists directly of the firebox, the configuration of which can take on the most unexpected options. From above, you can additionally equip a place for cooking / heating food, as well as any household needs. In the upper part, you can also install additional devices, for example, a barbecue or a container for heating water. Of great importance is the chimney, which must not only be airtight, but also create good draft so that the smoke completely comes out.
Important factors for the location and operation of the furnace:
The location of the potbelly stove, it is necessary to choose arbitrary, but so that the heating occurs as evenly as possible. It is undesirable that she should stand directly next to the car or on the aisle.
Do not place combustible materials nearby. Even suitable fuel to sustain a fire must be left at a safe distance.
You can use the basement of the garage for this if food and vegetables are not stored there.
It is very important to ensure the tightness of the chimney outlet so that combustion products do not get inside.
It is desirable to run the chimney horizontally along one of the walls of the room. This will increase the efficiency of the furnace
You can consider the location of the chimney with a water circuit. It will be almost a complete heating system.
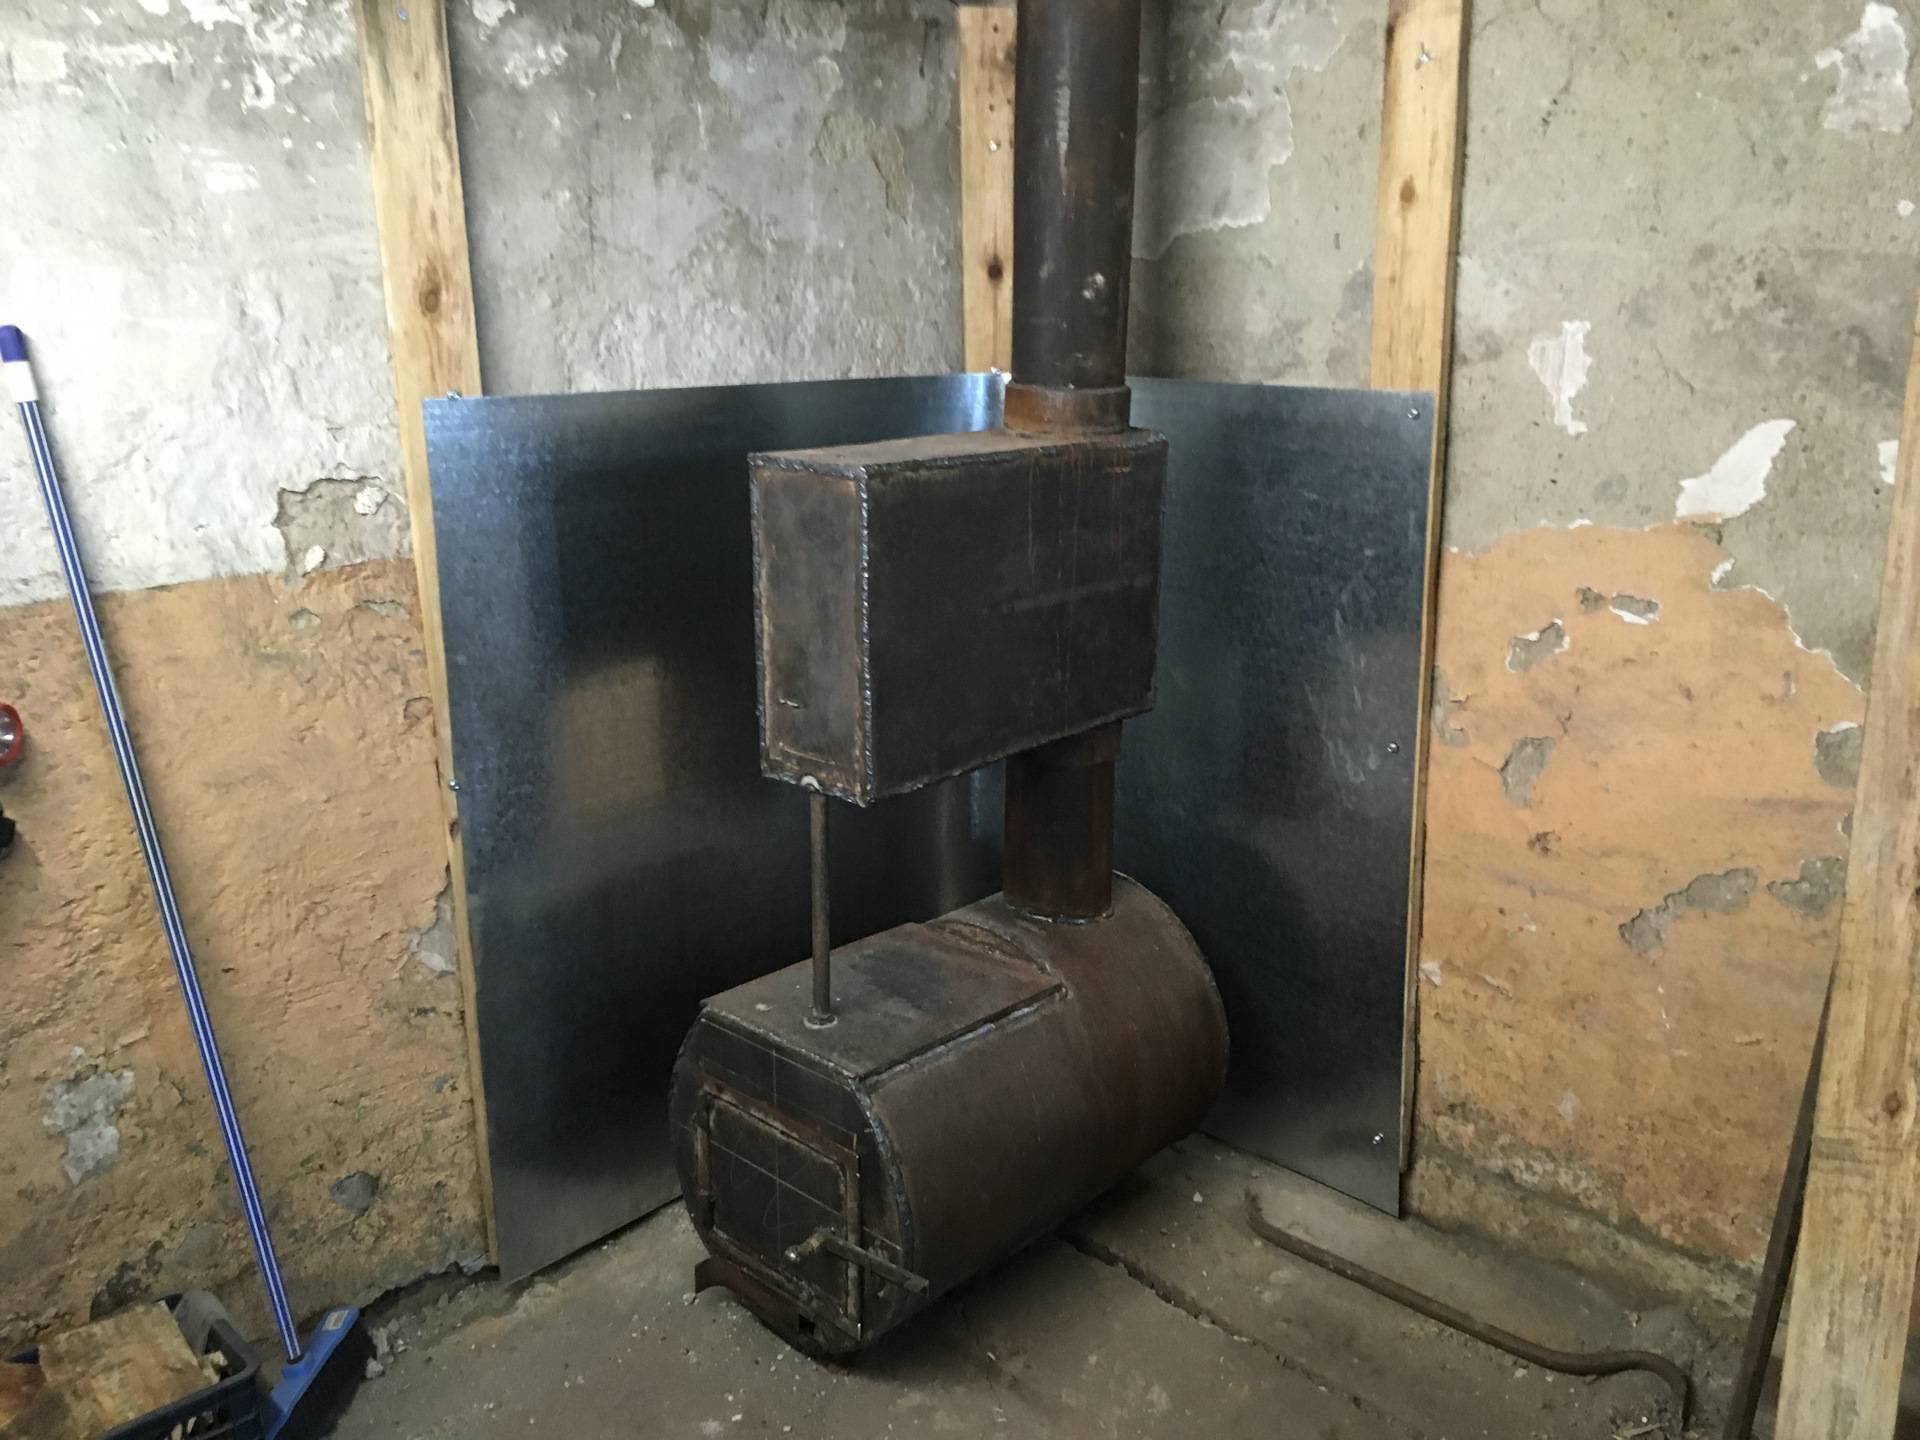
Important nuances of installing a chimney: it must be fixed to the wall so that the stove is not subjected to additional loads. In addition, do not abuse the turns with bends, this will reduce the heating efficiency. It is desirable to insulate the outer area with non-combustible materials, for example, basalt wool, in order to prevent freezing and deformation from temperature changes.
Under the body of the potbelly stove, it is imperative to install a sheet of metal of sufficient thickness and dimensions. This is a necessary fire safety requirement. As an option, make a concrete screed that has similar fire-resistant characteristics.
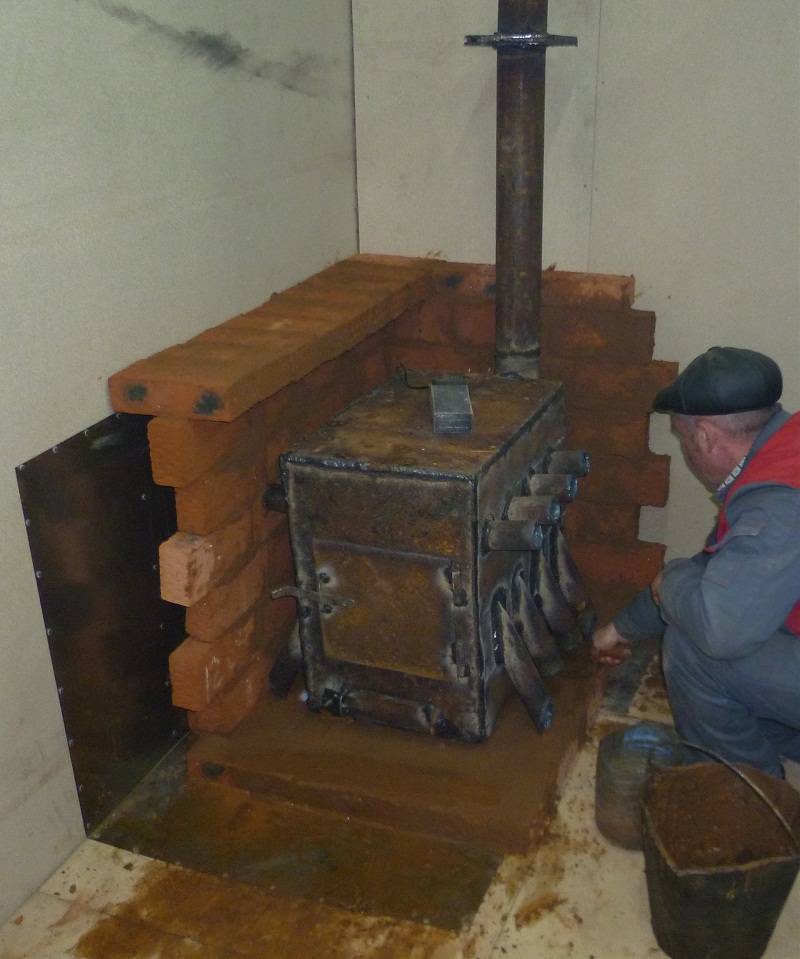
It is advisable to protect the walls around the potbelly stove with shielding materials (metal) or build a brick wall.
The potbelly stove located in the garage should be in operation only after installation and checking the operation of the exhaust - supply ventilation.
If a water tank is located on top of the body, you can run a chimney through it to increase the heating rate.
Cast iron burners welded on top make the potbelly stove a great place to warm up or cook food.
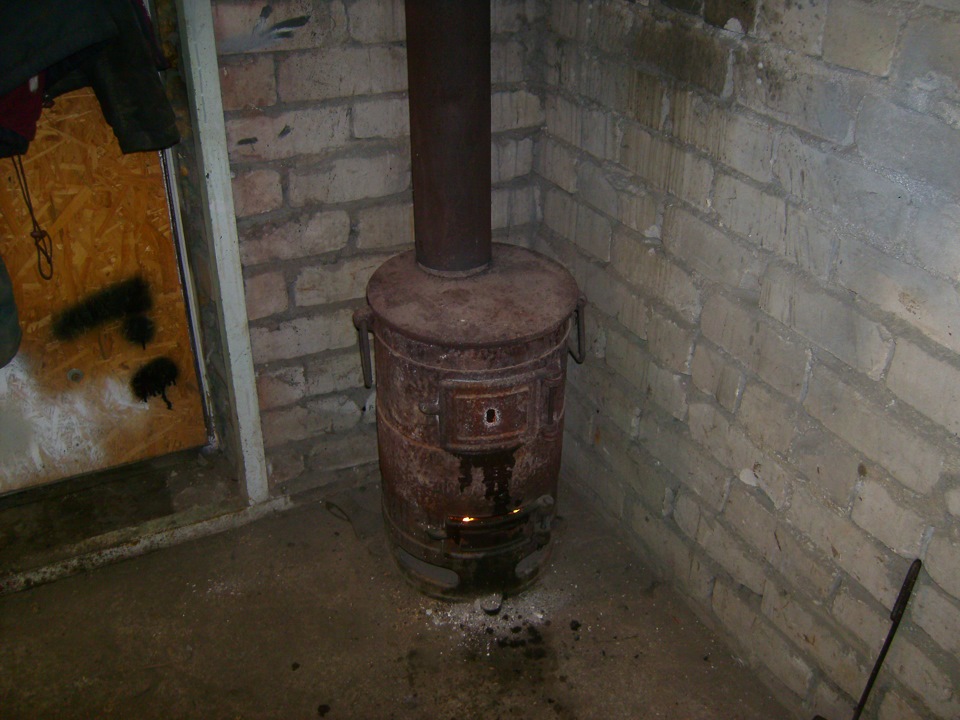
The most comfortable location is in the opposite corner from the entrance. At the same time, the distance to the car and combustible materials must be at least two meters.
Fuel supply: firewood, coal and other raw materials should also be located in places inaccessible to elevated temperatures.
When operating a potbelly stove on wood, especially coniferous trees, it is necessary to increase the frequency of periodic maintenance and cleaning the chimney. This is due to the large number soot and resin such materials.
A potbelly stove in a garage can use absolutely any fuel, and unlike a gas cylinder, it is less dangerous. Most often, traditional ones are used: firewood and coal, but with a significant rise in price or a shortage of such materials, any waste can be used. Sawdust and branches are well suited, as well as used oil and paint waste. In this regard, the potbelly stove is extremely economical, besides, it is an excellent reason to additionally get rid of trash and garbage, which is enough in every garage.
Economical and energy efficient garage ovens
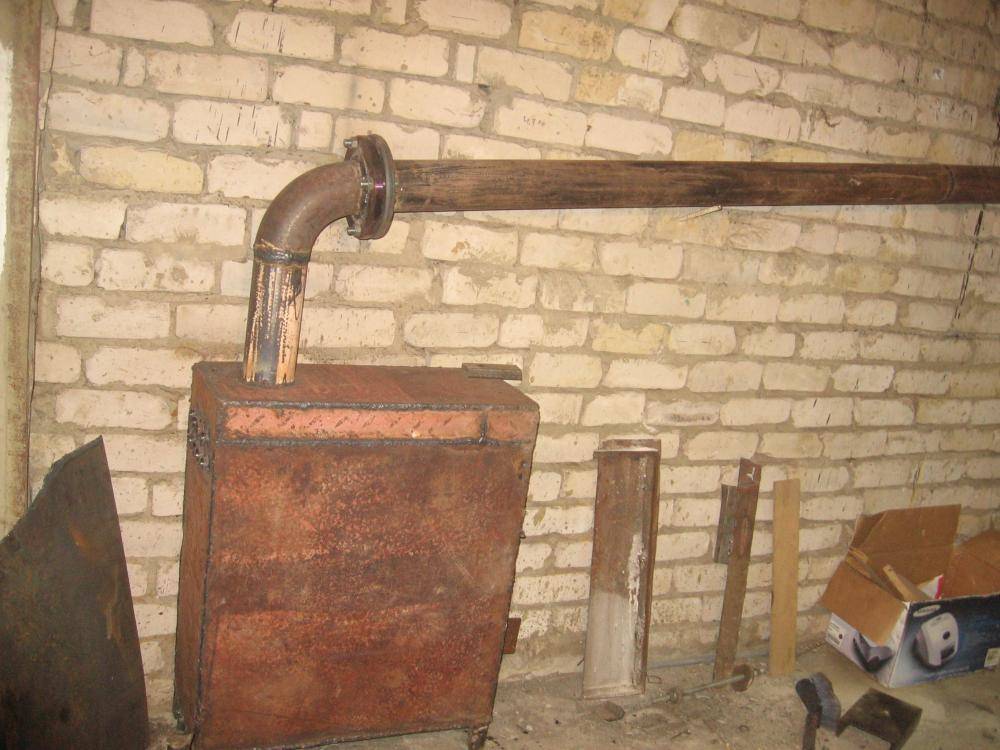
A waste oil furnace is considered the most economical, as it eliminates additional fuel costs. If you correctly calculate the materials and strictly follow the manufacturing instructions, then it will not smoke and pollute the air excessively. The operation of such furnaces on transmission, machine or transformer oil is provided. A diesel oven for a garage functions on the same principle.
Structurally, the unit consists of two containers, which are interconnected by a perforated pipe with many holes. If a decision is made in favor of installing a working furnace in the garage, then it is necessary that it meets the following requirements:
- maximum weight - 30 kg;
- capacity - up to 12 liters;
- standard size - 70x50x30 cm;
- average fuel consumption - 1 l / hour;
- exhaust pipe diameter - 100 mm.
The wood-burning garage stove from two gas cylinders is very economical and easy to maintain
To build such a structure is quite simple. No nozzles and droppers are needed to create it, so special knowledge, skills or experience are not needed to make it.
Directly for the manufacture of the furnace will require the following materials:
- steel pipe;
- two metal containers;
- steel corner.
The container can be the case of an old unusable refrigerator compressor or a gas cylinder. A furnace for a garage for mining should be made of a material with a thickness of at least 4 mm, since it is supposed to be heated up to 900 ° C, so thin metal will simply burn out.


The sequence of manufacturing a stove in a garage, functioning at a test
A garage oven for mining is beneficial if there are large stocks
The process of creating this type of stove in the garage with your own hands includes the following steps:
- Installing the lower container on the legs. For this purpose, parts with a size of 20 cm are produced from a metal corner, onto which the container is welded in a horizontal position.
- Cutting a hole in the middle of the lower part of the body, which serves as a firebox and a fuel tank, welding a vertical pipe to it, connecting both containers. It is desirable that the upper part is removed. This is necessary for cleaning the burner.
- Drilling about a dozen holes in the pipe at a height of half a meter. The first hole must be at least 10 cm from the main body of the oven.
- Making a hole on the top of the furnace tank for pouring oil and a lid that will help regulate the level of heating of the room and the combustion process itself.
- Welding a branch pipe on the upper tank.
- Construction of a galvanized steel exhaust pipe at least 4 meters long and fastening it to the nozzle.
Painting will give a presentable look to the garage stove. For this purpose, a mixture of silicate glue, crushed chalk and aluminum powder is used.
Disadvantages of a furnace for a garage for working out, features of operation
To use such a stove, in order to avoid emergency situations, it is necessary in accordance with clear instructions. To do this, using the lower opening of the furnace, it is necessary to put a small amount of kindling paper into the fuel tank. Next, approximately 1 liter of used oil is poured. The paper is set on fire and wait a couple of minutes until the oil boils. When the oil begins to burn slowly, it must be added as necessary in the amount of 3-4 liters.
Despite the many advantages of this type of garage oven, it is necessary to mention their disadvantages, in particular:
- a very long chimney, which must be at least 4 meters in height;
- it is required that the chimney device be strictly vertical, without bends and horizontal sections;
- The oil containers and the chimney must be cleaned regularly - about once a week.
The oil consumption in the furnace during mining is regulated by the air supply damper and is 0.3 - 1 l. in hour
The process of creating a heating system in a garage must be approached responsibly so that such structures as a mining boiler, a brick oven, a do-it-yourself potbelly stove are profitable and bring maximum heat. It should be noted that economical options must be carefully looked after, and brick structures require a certain time for kindling. To create a long-burning metal furnace, certain skills and knowledge will be required.At the same time, any of the options considered, under the conditions of proper construction and subject to the rules of operation, will make the garage warm and comfortable.
Advantages and disadvantages
The superiority of the potbelly stove lies in its versatility (practicality):
- profitability (you can use any fuel - coal, firewood, sawdust);
- fast and uniform heating, good heat dissipation: regardless of the area and outside temperature, it heats up the entire space around almost immediately after kindling;
- energy efficiency (due to the design and proper assembly of this furnace, we will get a fairly high efficiency);
- low cost (self-assembled potbelly stove will cost much less than any other stove);
- functions as a cooking stove.
Long burning stove.
But even a universal mechanism cannot be perfect. Now potbelly stoves are more often installed for heating outbuildings.
This is due to the following shortcomings:
- rapid loss of heat (the metal cools as soon as it heats up, so a constant temperature in the room will be maintained only when fuel is burning in the stove. However, this problem can be solved if you lay a brick box around the potbelly stove.);
- fire hazard (therefore, during installation, care must be taken to protect the floor and the nearest wall);
- the need for a high chimney (normal operation requires a sufficient level of draft, so the height of the chimney must be at least 400 cm);
- regular cleaning of the chimney and combustion chamber (weekly or monthly depending on the diameter of the chimney)
- noisy operation of the stove, a specific smell (the problem can be eliminated by circulating air using an air heat exchanger and a fan).
Preparatory work before assembling the furnace. Location selection
Simple oven in the garage.
Preparation for installation consists in selecting a place and ensuring safety. Make sure that your materials are checked and of high quality. It is recommended that the floor and walls adjacent to the oven be made or treated with a heat-resistant material.
Ventilation is also required in the garage to prevent fire or poisoning and to keep warm.
The location of the furnace in the first place should be convenient and safe. You can not mount it close to the location of the car and flammable objects (minimum distance - 2-2.5 m). Most often, potbelly stoves are installed in the corner of the wall opposite the gate. This increases heat transfer.


Important criteria are the convenience of design and dimensions relative to the area of the garage. A metal sheet, 1-2 cm thick, or a concrete slab is placed at the base of the potbelly stove. Brick screens on the sides will not be superfluous, which will protect against fire and retain heat.


