- Stages of installation work
- Installing the wall product
- Required Tools
- Preparatory stage
- Faucet and washbasin assembly technology
- Fixing the sink to the wall
- Connection to water and sewer systems
- brackets
- Console removal
- Installing the sink on the brackets
- Varieties of fasteners
- Universal
- Specialized
- Monolithic
- Wrap-around fasteners
- Benefits of wall mounting
- Mounting errors
- Features of fastening the sink
- Installation procedure
- Faucet and washbasin assembly technology
- How to determine the correct size of the sink
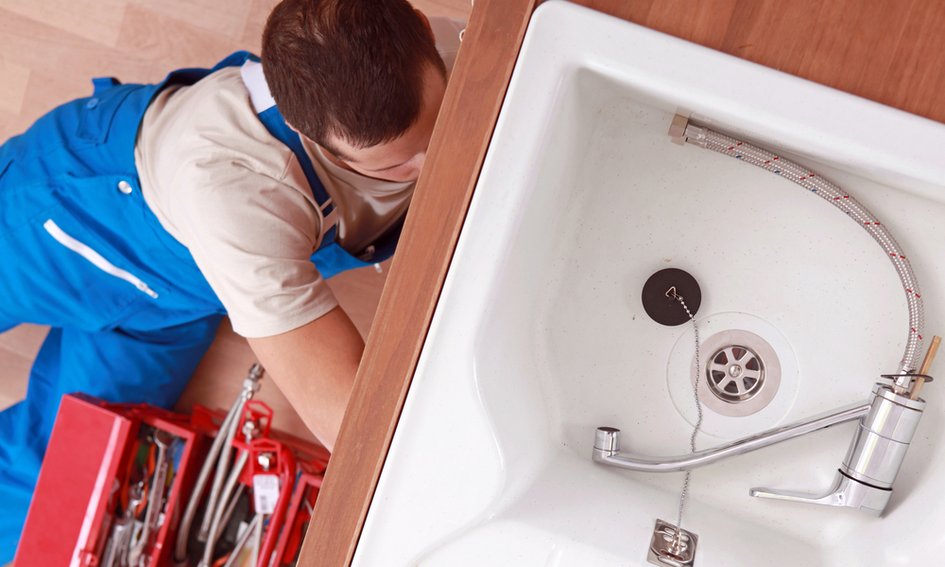
Stages of installation work
Shut off water, both cold and hot. Then you need to decide what place in the interior of the room is reserved for the bowl, taking into account the supply of cold and hot water under the mixer. After that, the sink prepared for installation is tried on in place, and its position is finally chosen.
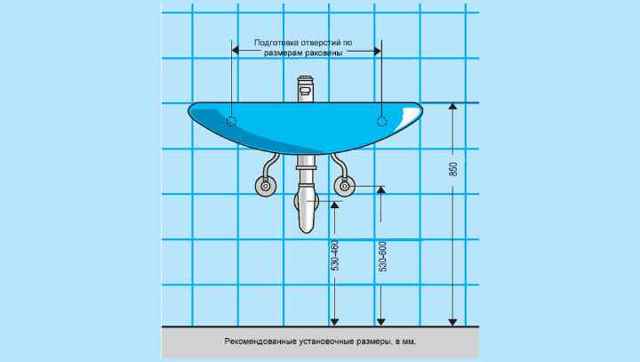
Correctly determine the size of the bowl and the height of its installation. It is necessary to choose such a model so that it does not occupy extra square meters of the room, but, at the same time, has sufficient dimensions to cover the spray sector of the water jet. It can be standard in width 50-65 cm models.The most “ergonomic” installation height is 0.8 m from the floor. And the distance in front of the wash basin is preferably left within 0.8-0.9 m.
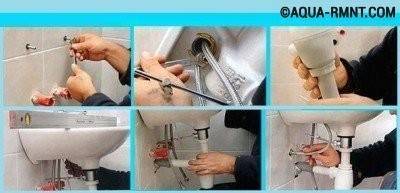
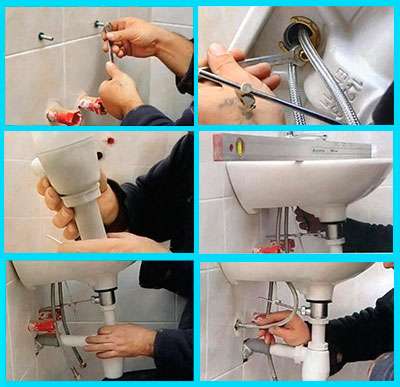
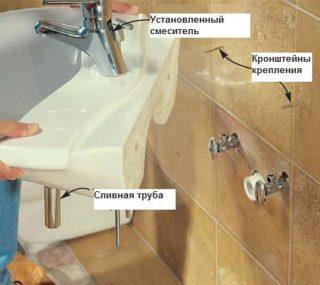
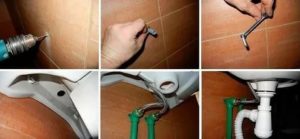
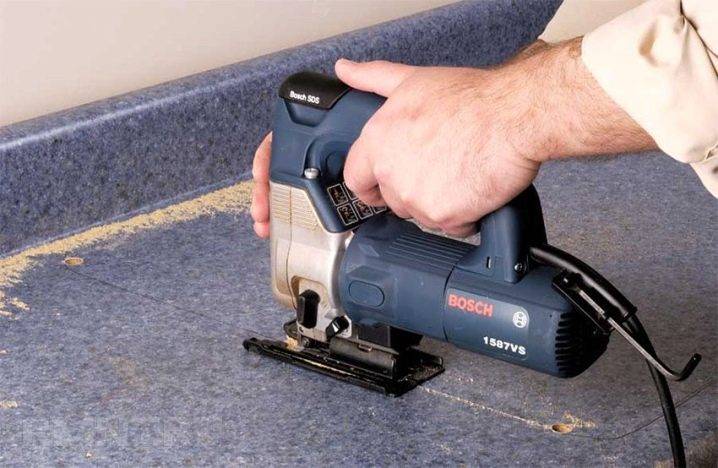
Photo guide for mounting the washbasin on the wall - in principle, everything is clear without further ado
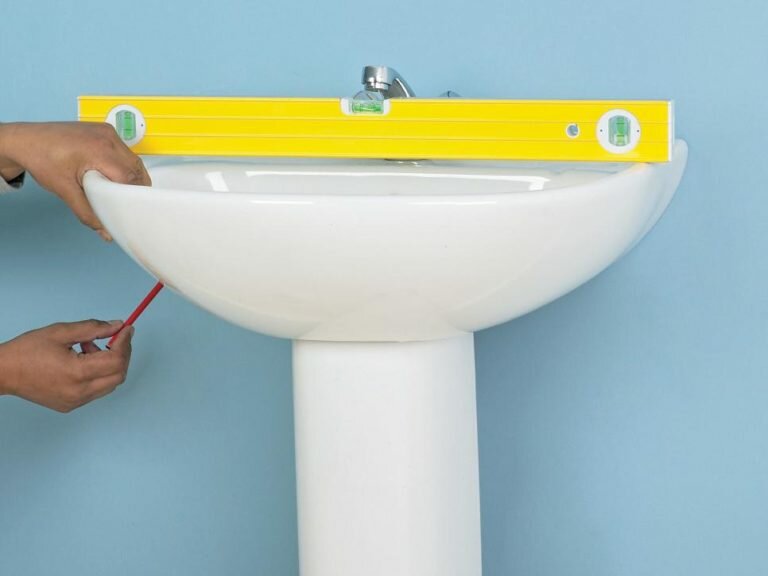
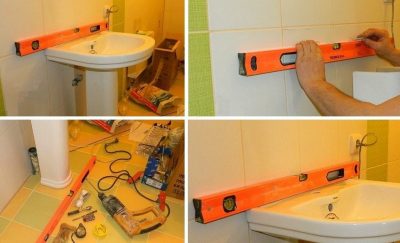
At the chosen height, armed with a ruler, a pencil and a level, the central horizontal line is indicated along which the installation work will be carried out. This will be the upper limit of the installation of the plumbing fixture.
It is very important to know the thickness of the sides of the bowl. They must withstand the emphasis of the brackets. The measured thickness is laid down from the previously made horizontal on both sides of the sink and is fixed with a mark
The measured thickness is laid down from the previously made horizontal on both sides of the shell and fixed with a mark.
The resulting marks are connected by a horizontal line indicating the height of the brackets.
Next, we work with the bowl: turn it over and fix the brackets on the sides. It is better to do this work together: one - manipulates the sink, exposing it horizontally; the other - makes the necessary marks.
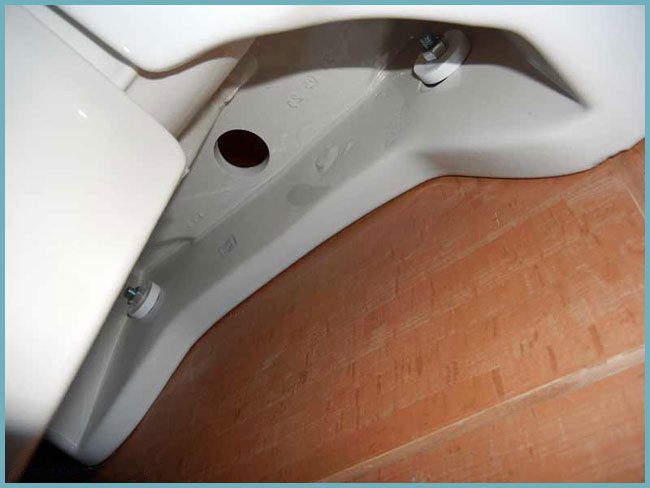
Having attached the bowl to the horizontal, mark with a marker through the recesses on the reverse side of the place for installing the fasteners. In this case, you need to make sure that all the lines, places for the brackets match. According to these designations, holes with a diameter slightly smaller than the diameter of the fixing screws or dowel screws are drilled with a drill.
Plastic or nylon bushings (plugs can be used) are driven into the drilled places, screws are screwed into them. Support-brackets are attached to them, on which, in turn, the sink bowl is installed.The places of its further fastening to the wall are marked with a marker, drilled, and the bowl is put in its place.
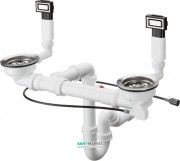
The final step is to connect the siphon, the outlet end of which is inserted into the sewer socket; faucet installation and plumbing connection.
Slightly “baited” the fasteners, finally expose the sink horizontally in level, after which the final reliable fixation of all fasteners is carried out.
Installing the wall product
Required Tools
Attach the sink to the wall will help such tools:
- powerful screwdriver;
- gas key;
- electric drill with drills of 6, 8, 10 mm;
- a drill designed for concrete work, equipped with a pobedit tip;
- several wrenches;
- the level that determines the horizontal;
- marker with a thin rod;
- a hammer.
To make the threaded connections tight, you should purchase FUM tape in advance at the store, but you can get by with ordinary tow. Stock up on enough fasteners.
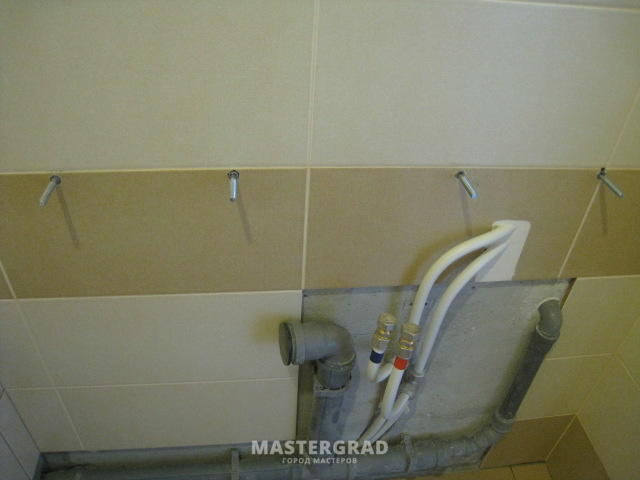
Preparatory stage
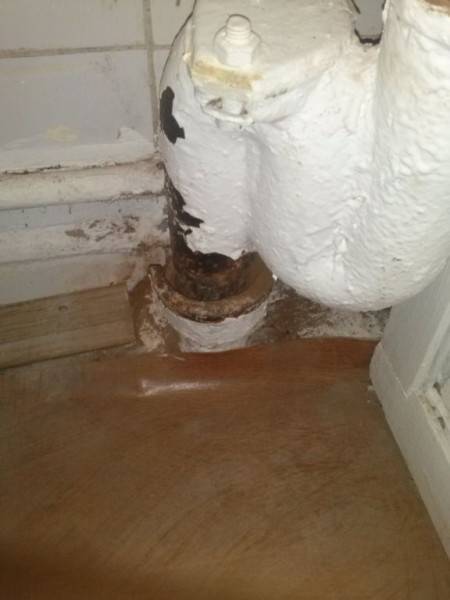
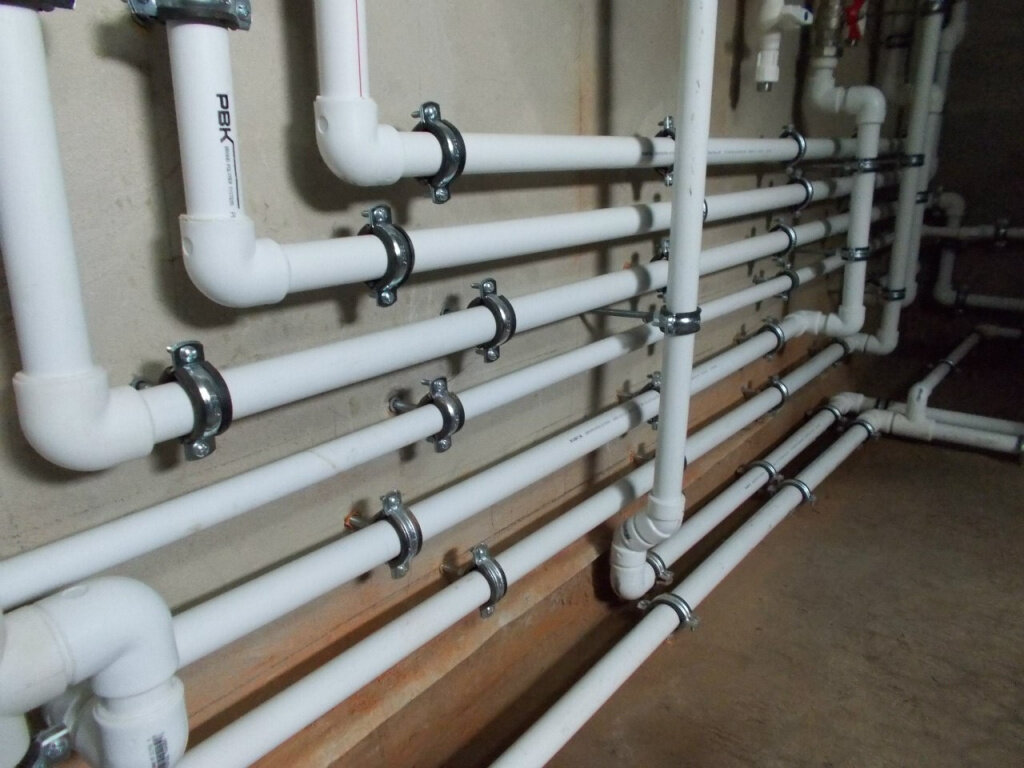
Before attaching the washbasin to the wall, it is necessary to bring communications to the installation site, namely pipes with hot and cold water. They can be made of metal-plastic, metal and PVC material, be sure to check the condition of the pipes for leaks. Place a valve at the outlet of each pipe, which, if necessary, will help stop the flow of water. The best choice is a valve made of chrome.


The sink must be fixed at a level of 80 cm, counting from the top of the washbasin to the floor.
Before hanging the sink on the wall, make a mark on the wall with a marker where exactly the appliance will be placed.Through 2 points, draw a line horizontally located relative to the floor surface. This is the main reference point for mounting the unit.
Each sink has holes through which the washbasin is fixed. Attach a ruler and measure the distance between the holes, measure the resulting value on the wall. Thus, you should have 4 marks: a horizontal line, a central fixation point for the product and a pair of marks calculated for the bolts.
You need to start the process by drilling a hole in the tile panels. Next, change the drill to a larger one and make holes for the fasteners in the wall. Insert the dowels into the holes, note that they must enter with great effort.
Faucet and washbasin assembly technology
In most cases, wall-mounted specimens go on sale from the manufacturer already with a hole in the shelf for mounting the faucet to the washbasin.
Fix the faucet to the sink hole, turn the latter over and tighten the faucet tightly with the nut
Pay attention to how symmetrically placed the spout of the mixer to the washbasin
Fixing the sink to the wall
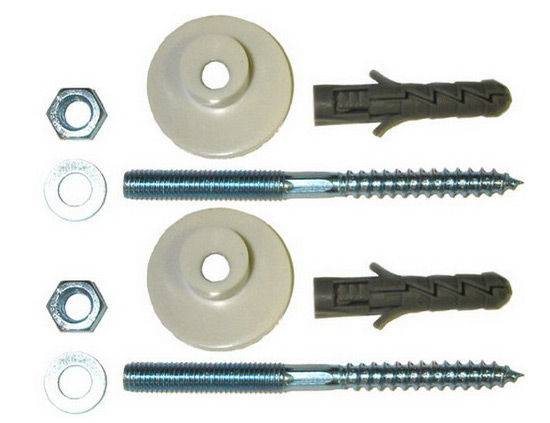
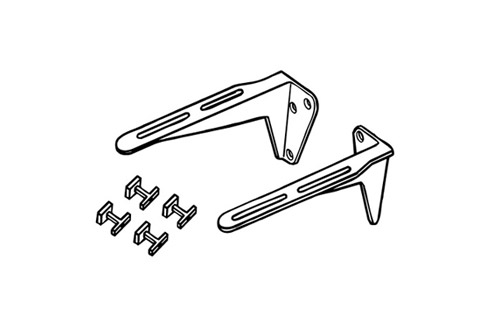
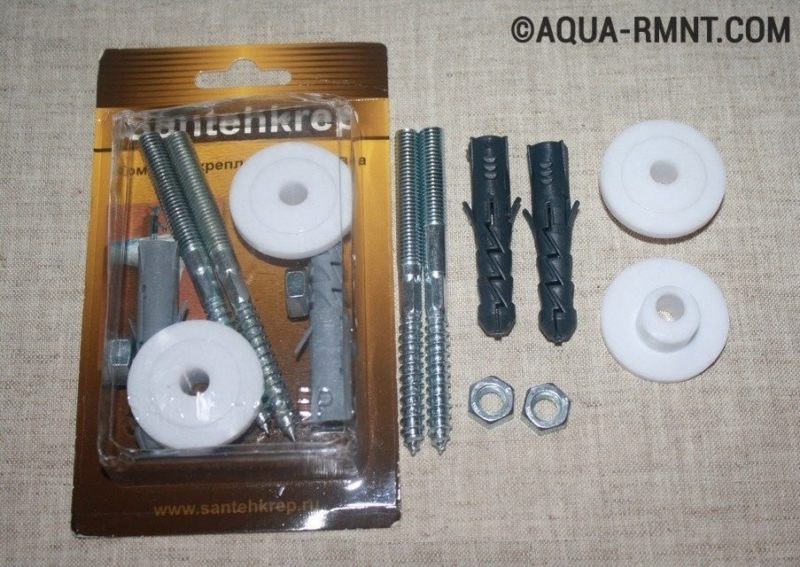
It will not be possible to hang the sink on the wall without the appropriate fixing kit, including studs and gaskets.
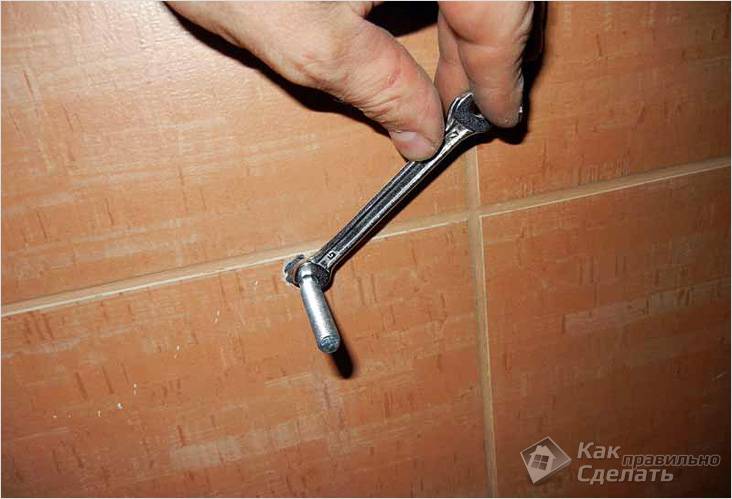
Install the studs on the dowels. First, "put" a couple of nuts on the stud, then use the wrench and screw each stud.

Now is the time to apply silicone sealant to the end of the washbasin, namely to the area where it comes into contact with the wall structure. Put the washbasin on the studs, install the gaskets and tighten the fasteners well.Slightly "shake" the device from side to side, if there are no vibrations and movements - the work of fixing the washbasin to the wall can be considered completed.
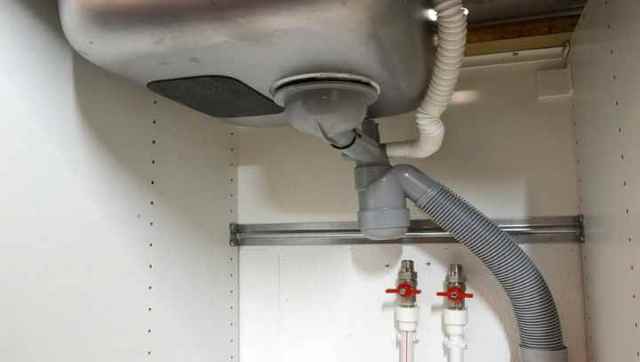
Connection to water and sewer systems
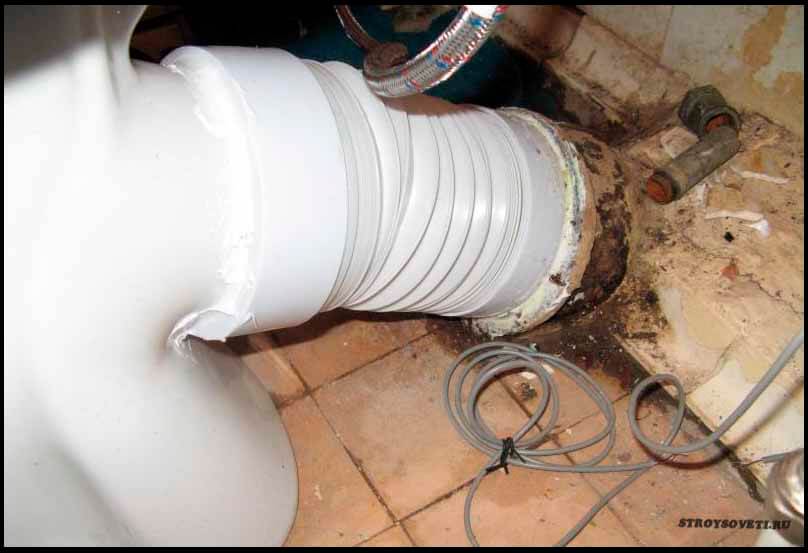
Wind the linen around the thread of the valve, lubricating it with a special paste, for example "Unipak". Connect the mixer hoses to the pipes and tighten them with an adjustable wrench. Do not overdo it - this can provoke a rush of cushioning material. The sink is now connected to the plumbing. It remains to work with the sewer.

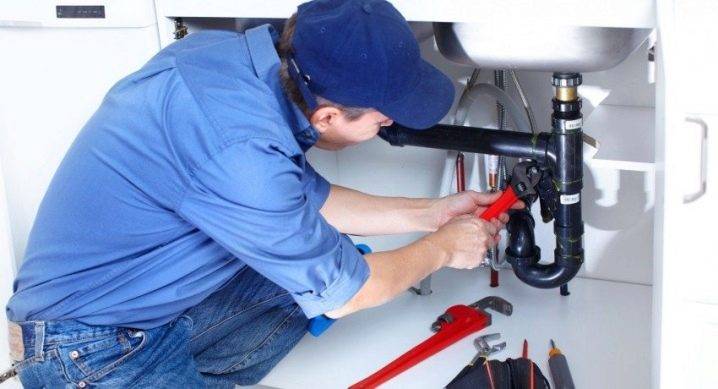
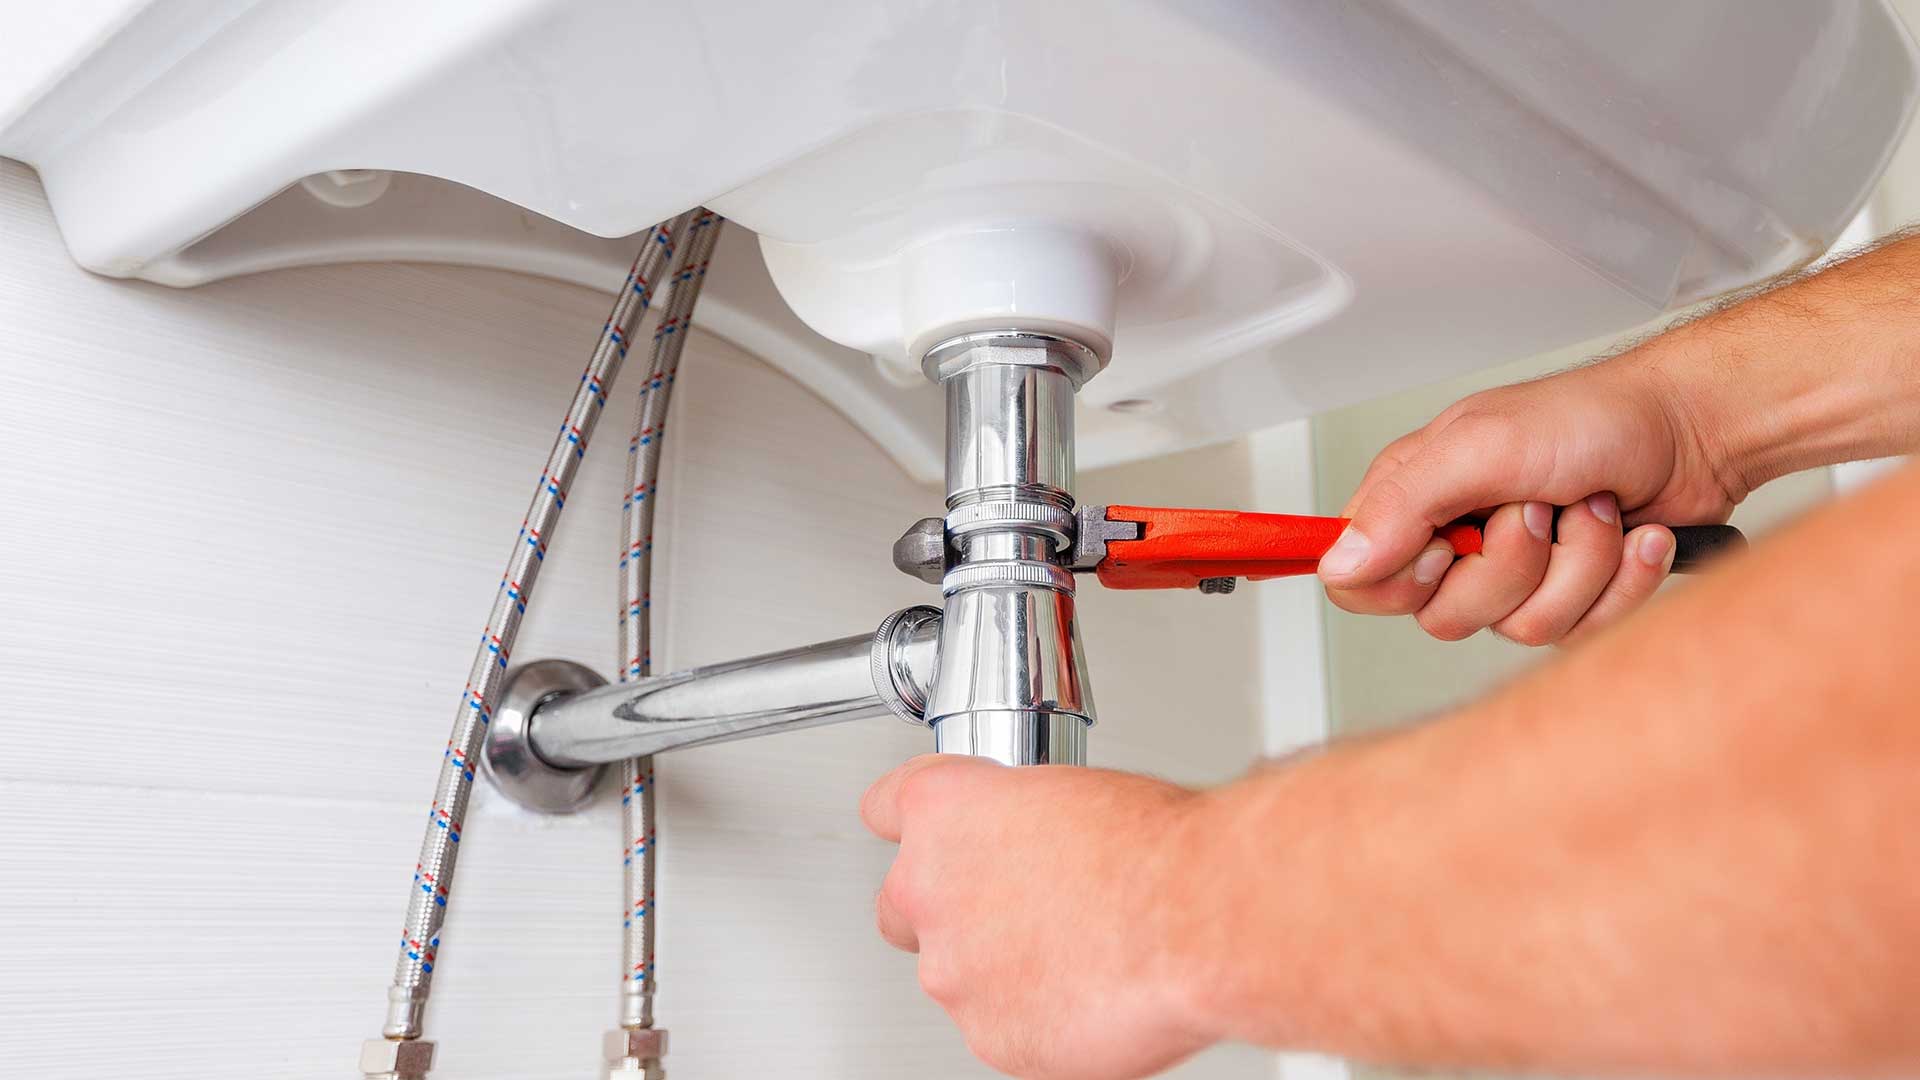
Make sure all connections are secure
Put the siphon on the washbasin. Before assembling the siphon, read the installation instructions in detail. Check that all gaskets are well aligned with the sink. Position the hose from the siphon to the sewer drain. Turn on a small amount of water and see if the wall gets wet. If everything is in order - you can be congratulated, the wall-mounted sink is installed!


brackets
Consoles and brackets for the sink were massively used for fixing enameled sinks and faience washbasins in Soviet-built houses.
The method of their wall fixing did not differ too much from apartment to apartment:
Profiled enameled consoles for sinks were fastened with a mounting gun
. They aimed at a concrete or brick wall with the help of four to six dowels.
Console removal
Consoles are now almost out of use along with enameled sinks, so we will only touch on their dismantling.
- Disconnect the sink from the sewer.In stalinkas and early Khrushchevs, this will have to be dismantled. The easiest way is to cut it with a grinder just above the socket of the sewer pipe; the rest of the siphon is then removed using a narrow chisel or a strong screwdriver.
- Armed with two pliers or pliers and a key, unscrew the four bolts that secure the sink. The main problem will be to feel and hold the nut on the inside of the side walls of the sink. We remove the sink from the consoles.
- We cut off the heads of the dowels with a grinder. Shallow cuts will inevitably remain in the wall, which are then easily puttied. It has been repeatedly verified that when trying to pull out the dowels with a mount or pry them with a chisel, the scale of destruction in the end turns out to be noticeably large.
Installing the sink on the brackets
This method of fastening is still relevant today.
The instructions, in general, are quite simple.
- We apply the brackets to the washbasin lying upside down and measure the distance between the mounting holes.
- We mark the points of attachment of the brackets to the wall, taking into account the measured distance.
- Armed with a puncher, we drill the marked holes; then attach the brackets. The best method of fastening is an anchor with a length of 75 millimeters or more. Screws, even long ones, under load can pop out of the wall along with plastic dowels.
There are several ways to securely fasten a faience or porcelain washbasin to metal (most often cast iron) brackets.
- The washbasin is placed on brackets, after which tiles are laid on the wall from the level of its upper edge. The joint between the faience and the tile is sealed with silicone plumbing sealant. It is sanitary: it contains antifungal additives, unlike most of the universal ones.
- You can put it on the sealant and, in the absence of the need to lay tiles on the wall. A lot of sealant, applied to the surface of the bracket and to the joint between the washbasin and the wall, will keep it from moving.
- Finally, the old-fashioned way used by Soviet plumbers is to insert pieces of reinforcement tied with wire into the mounting grooves of the washbasin closest to the wall. The wire then wrapped around the bracket and securely attracted the plumbing fixture to it.
Varieties of fasteners

Washbasins of small sizes are mounted on the wall without brackets using anchor screws. Brackets are used as fasteners for large washbasins. They are a cast load-bearing part or a metal structure with which plumbing is attached to the wall. Mounts are divided into two main types: universal and specialized.
Universal
Using universal fasteners, you can mount standard sinks, but you need to take into account the bearing capacity and dimensions of the structure. Universal brackets are cast from cast iron, rarely welded from a steel profile
Specialized

Specialized fasteners are used to install specific models of washbasins. They are usually used for mounting designer plumbing of non-standard shapes and sizes. They are made of ceramics, metal and complemented with decorative coatings.
Brackets for sinks are divided into several modifications.
Monolithic
This is a one-piece piece with a T-bar, strong base and fasteners. Mostly made from cast iron. They are characterized by increased rigidity, high weight, withstand significant loads.


They come in different shapes, sometimes they are equipped with size-correcting sliding nodes.To install a washbasin, two such products are used at once.
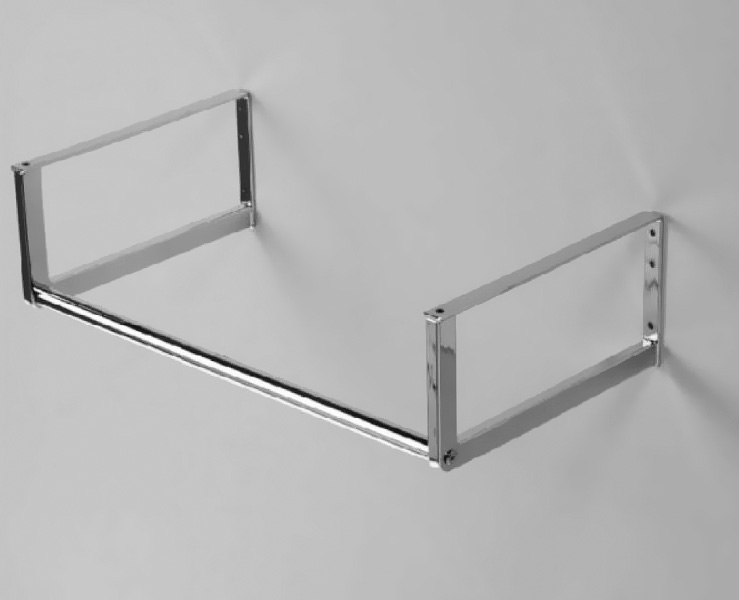
Wrap-around fasteners
They are a massive metal profile frame, a washbasin is installed on it. This is the most reliable and stable option of all.
Benefits of wall mounting
Choosing a wall mount is due to the following advantages:
- reliability - this is ensured by the fact that enamelled steel brackets or consoles are sufficiently durable materials. They fix the device qualitatively;
- ease of maintenance - after installing the sink, constant access to communications is provided. This makes it possible to clean the siphon or remove any part and attach it back;
- additional space - under the sink there is free space, which allows you to place various drawers for household items, a basket for dirty laundry or other items. This often helps in cramped bathroom conditions;
- minimalism in the interior - the creation of a hinged structure allows you to get rid of various cabinets and shelves. Due to the variety of shapes and materials of shells, such a design will seem to soar in the air.
Mounting the sink directly to the wall in the bathroom is a good solution. Mounting is quite simple, and the cost of fasteners is affordable. Such designs do not clutter up the space and allow you to use the space under the sink.
Mounting errors
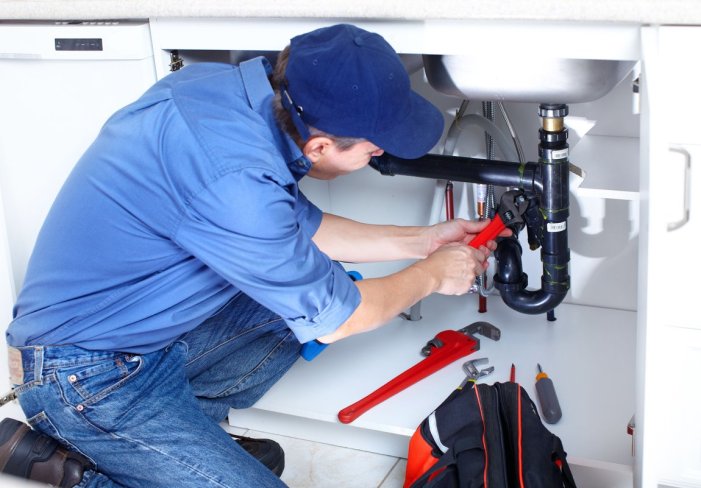
Many homeowners prefer to install sinks themselves, as the process is not considered difficult and saves money on hiring plumbers.
With self-assembly, it is important to adhere to all technologies and avoid some mistakes. All mounting holes must be made exactly according to the dimensions of the new washbasin.
Do not re-insert dowels into old holes
All mounting holes must be made exactly according to the size of the new washbasin. Do not re-insert dowels into old holes.
- When installing the bowl, excessive forceful movements should be avoided, as they can lead to the formation of cracks and fragments on the surface of the material. This also applies to the connection of the water supply and drain, which may damage the connecting thread.
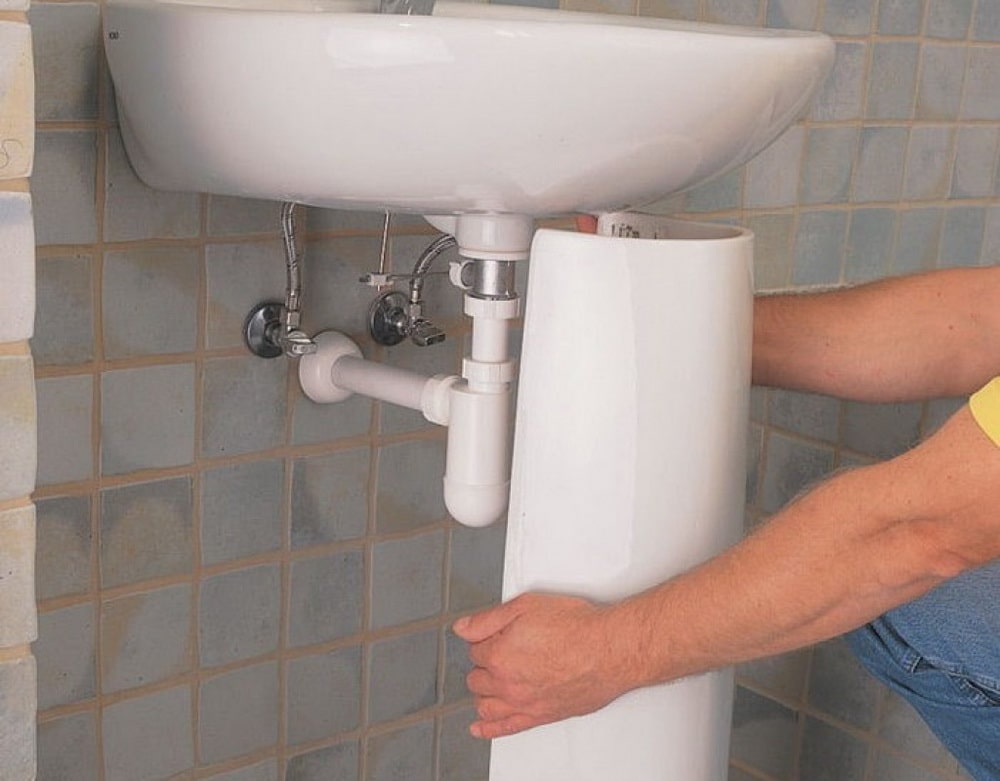
- The siphon in the "tulip" models is built in before the bowl is attached to the wall.
- Before fixing the sink pedestal, you should carefully check the evenness of the flooring. In the event that there are discrepancies in the levels, the structure will turn out to be unstable and will be able to leak.
Features of fastening the sink
A variety of models of plumbing fixtures, as a rule, have different installation methods:
Photo of a wall-mounted sink in the interior of a bathroom
- So the sink is fixed to the wall with metal brackets. moreover, the "shoulder" of the fastener can have several sizes, because depth (width to the wall) comes in three sizes. At the same time, the metal mount itself is mounted to the wall using powerful bolts or studs, but the sink, depending on the model, may not be screwed at all, but only placed on the mounting brackets. Therefore, for additional fixation in such cases, a sanitary sealant is used at the points of contact with the wall and bracket frames, which creates an elastic “bonding”.
- Mounting the sink in the bathroom on the “leg” has its own “pitfalls”, because both the plumbing and the wall and floor cladding in the bathroom are made of ceramic, which can be easily damaged upon impact. Therefore, polymer gaskets are installed between the ceramic planes of the sink, walls and floor, glued to the silicone sealant. Only this method of installation can ensure the absence of unpleasant ringing and creaking of ceramics in case of involuntary impact on it. It should be taken into account that the main mass of the sink must act on the ceramic foot stand, therefore, fastening and pulling the sink to the wall should not cause it to rise on the support (leg), otherwise the sink will simply crack under mechanical action.
- Mounting the sink in the countertop is considered the simplest, because the installation is carried out under its own weight in a specially cut seat in the cabinet, while it is recommended to use silicone sealant to improve fixation and increase the tightness of the interface seams. The combined sink/cabinet design usually has sufficient mass so as not to carry out additional fastening to the wall, but if desired, they can always be fixed using anchor bolts.
Installation procedure
The installation of the sink is carried out in a certain order. First you need to determine the location of the sink. The optimal area for free access to the sink should have approximately the following dimensions: width - 70 cm, length - 110 cm, height of the sink from the floor - about 80-85 cm. equipment is planned.To do this, draw a horizontal line on the wall at the level of the upper border of the washbasin. For an aesthetic appearance, it is recommended to do this taking into account the seams of the tiles. Move the pedestal sink against the wall, aligning the top edge of the sink with the line on the wall. Mark with a marker or pencil through the recesses on the rear mounting surface of the sink the places where the holes for the dowels will be drilled.
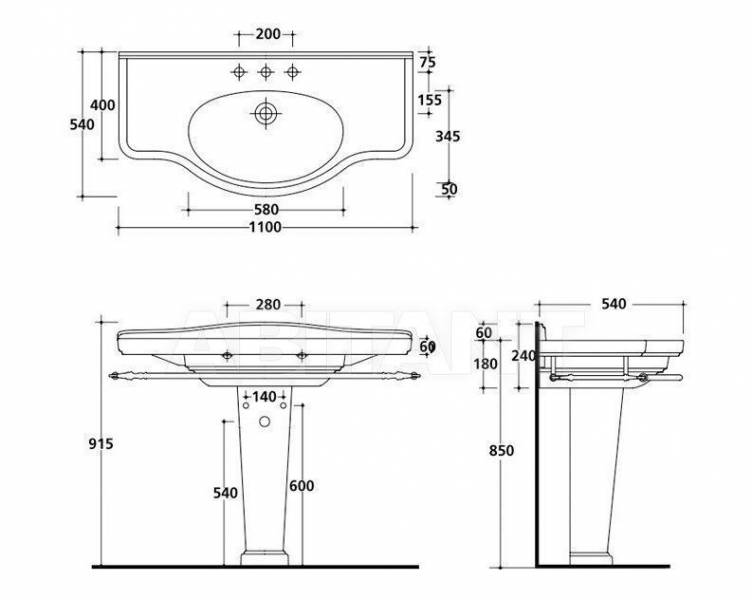
Diagram of the sink with dimensions.
Then move the sink with pedestal aside and drill holes in the marked places with a hammer drill or drill (it is best to use a drill with a carbide tip for drilling concrete). The diameter of the holes should be slightly smaller than the diameter of the dowel itself. Then expansion dowels are hammered into the holes with a hammer. It is recommended, for reliability, to pour a little glue before driving the dowels. If the wall is strong enough to support the weight of the sink, screw fixing should be used. If the reliability of the wall is in doubt, it is necessary to use a supporting frame.
Then start preparing the place for the pedestal. Make sure the floor at the installation site is level. If it has significant differences in height, it should be leveled. When properly installed, the sink should rest on a pedestal.


Siphon installation is the next step. Attach the outlet element to the sink. On the other hand, insert a mesh with a screw and gasket into the drain hole. Be sure to install the outlet with the installation of gaskets, which should tightly fit the sink drain, while there should be no gaps and displacements. Then bait and tighten the screw with a screwdriver.Connect the siphon to the outlet, then fix the outlet pipe in the sewer socket.
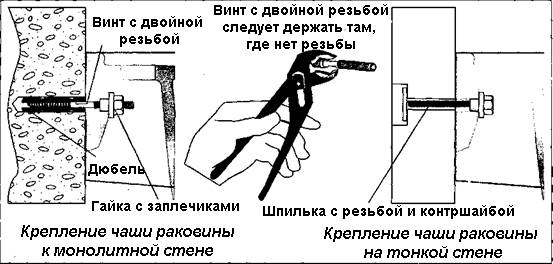
Bowl attachment scheme: to a monolithic wall, to a thin wall.
Then it is necessary to screw plumbing self-tapping screws into the holes with dowels and put the sink on them. Move a pedestal under it. Try to match them so that the sink drain is placed in the center of the pedestal. Put the washers on the self-tapping screws and tighten the nuts. Screw the sink to the wall. It is recommended to do this with the calculation of two turns per screw. After tightening the nuts, they can be closed with decorative plastic plugs. Remember that you should not tighten the nuts too much, as the sink may crack at the attachment points.
Then the mixer is installed, which should be equipped with any sink. The installation of the mixer is carried out using a flexible connection, which is connected to the water supply. The design consists of hoses with fittings or other assemblies, which allows you to attach the hoses to the pipeline. To install the structure, a special winding is used, most often it is a fum-tape, which is designed to prevent leaks and seal the connection. Branches need to be connected mixer outlets hot and cold water and tighten the connections.
After installing the sink, it is necessary to open the water to check the structure for leaks.
Faucet and washbasin assembly technology
Before starting work, the old equipment is dismantled. For this:
- water is blocked;
- the mixer is disconnected and removed;
- the siphon is removed and water is drained from it;
- holes in the pipes are blocked with a cork;
- remove the old sink.
Faucet assembly
After dismantling the old equipment, the sink is fixed to the wall:
- the sink is tried on;
- markup is performed;
- holes are made for fasteners;
- a sink is installed;
- the mixer is being assembled;
- communications (water supply and sewerage) are connected.
Wash basin installation
Before connecting communications, the reliability of the fasteners is checked. Connecting the mixer consists of the following steps:
- applying a special chemical solution to the place of contact between the mixer and the sink;
- assembly of all elements into one assembly using tabs and seals;
- connection to flexible hoses of the pipeline using cap nuts and adapters. In this case, the hoses are pushed into a special sink opening, and after fixing the mixer is put in place;
- fixing the device from below with a lining and a clamping washer.
The mixer after installation should take a stable shape. The axes of the device entry into the couplings must be joined. It should be remembered that the sink is already attached with the faucet, which will greatly facilitate installation. But first, markings are made for attaching the sink with or without brackets.
Installation dimensions
How to determine the correct size of the sink
All plumbing fixtures can be divided into several groups that differ in size:
- The most compact miniature sinks designed specifically for small spaces.
- Standard equipment.
- Combined appliances. They can combine two or more shells.
- Non-standard equipment of various sizes and shapes. Performed on individual projects.
When placing plumbing equipment in a room, its three main parameters must be taken into account: depth, width and height. This is the only way to choose the device of optimal dimensions for a particular room.
This is very important, because too large a sink will take up a lot of free space, and a small one will be inconvenient to use. Not only the width is important, but also the depth of the product
The dimensions of the sink must exactly match the area of the bathroom, otherwise it will be very inconvenient to use. This is especially true for cramped bathrooms.
To choose the right width of the sink, you need to remember that 0.5-0.65 m is considered the best option. Such equipment fits well into a medium-sized room and does not “eat up” free space in it. It is convenient for washing and allows you not to splash water on the floor. Such a sink will also look good in a large room, but wider models that solve some special design problems are also appropriate here.


The minimum width of the shells sold in stores is only 0.3 m. They are certainly not convenient enough to use, but there are no other options for small spaces. When choosing a plumbing fixture, you need to evaluate the installation method of the mixer. Most often, it crashes into the middle of the so-called installation platform, where a special hole is provided for these purposes. The dimensions of the installation site are also important.
If it is planned to install a double sink, and this is very appropriate in large families, you need to choose models where the distance between the centers of the two devices exceeds 0.9 m. Otherwise, it will be very inconvenient to use such equipment. The distance to the wall also matters.Practice shows that the best option is 0.48-0.6 m. In this case, you need to focus on the arm length of the person who will use the device.
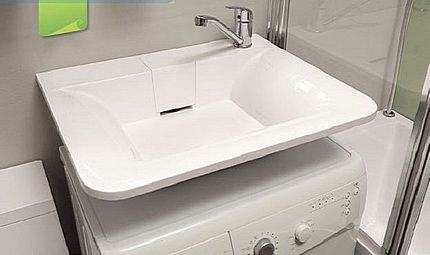
Water lily sinks are specially designed to be mounted above the washing machine. This saves space in small bathrooms.
Make it simple. You need to stand near the sink and stretch out your hand, its opposite edge should be at the fingertips or in the middle of the palm. It will be convenient to use such equipment.
Pay attention to the depth of the bowl. The larger it is, the less chance of splashing water falling into it.
The best in this regard are models such as "tulip" or "semi-tulip". They are deep enough. Worst of all are flat "water lilies" that are placed above washing machines and some overhead sinks.
And the last important nuance: the installation height of the device. It is selected based on the growth of those living in the house. It is desirable that everyone is comfortable using the equipment. On average, the installation height is 0.8-0.85 m. Console models can be hung at the desired height, while devices with a pedestal must be chosen very carefully. The installation height cannot be changed.


![[instruction] do-it-yourself toilet installation | video](https://fix.housecope.com/wp-content/uploads/e/0/5/e05c3aaa569c15a65a76abf551b1139c.jpg)