- Tape metal clamps
- How to make a pipe clamp with your own hands
- How to close a fistula in a pipe
- How to close a fistula in a pipe with a clamp
- The procedure for making a homemade pipe clamp
- Do-it-yourself clamp - a simple and effective solution to the problem
- Putting on a pipe is easy
- How to make a pipe clamp
- Installation
- Making a wire clamp
- What types of clamps are
- Varieties
- How to make a pipe clamp with your own hands
- How to close a fistula in a pipe
- How to close a fistula in a pipe with a clamp
- Making a collar from improvised materials
- Modern wire clamp - device and operation
- Types of clamps
- Purpose
- Material
- Fixation type
- The form
- pad
- How to clamp a clamp on a CV joint - a mechanical method
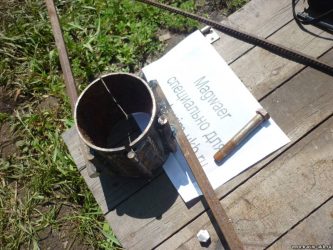
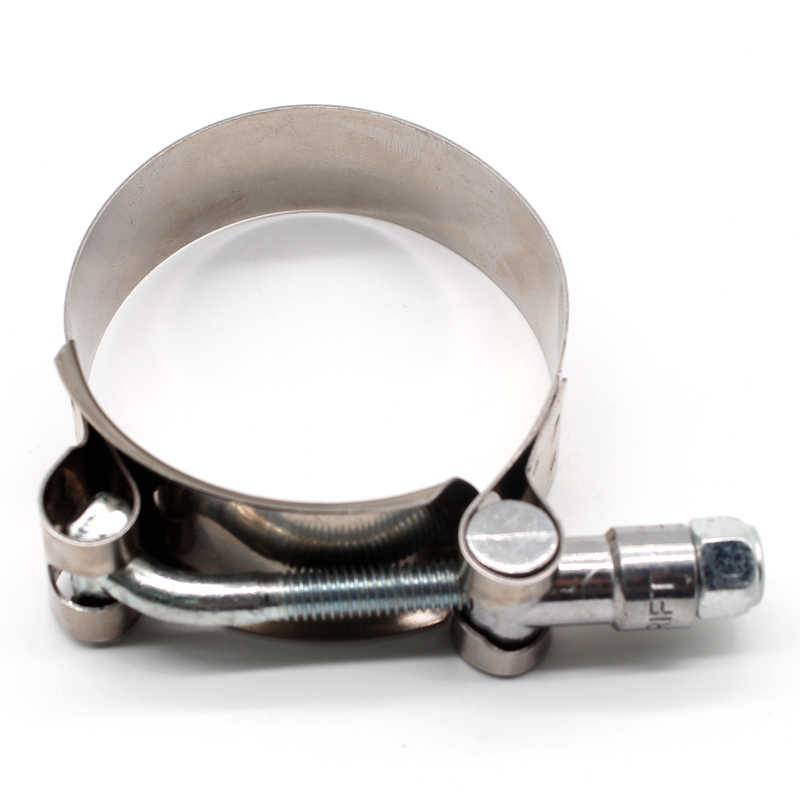
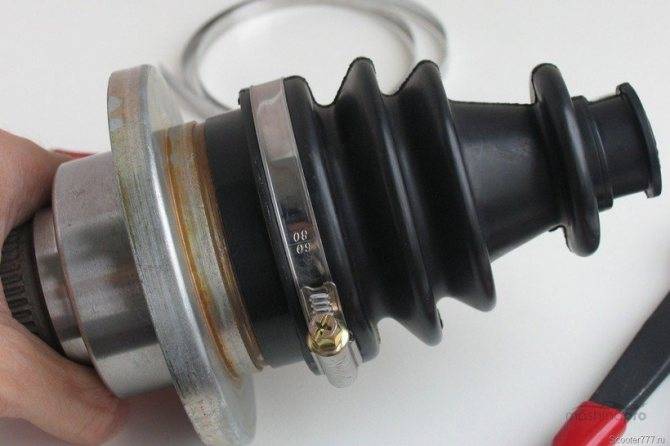
Tape metal clamps
Most often, this type of fastener comes in the factory. This is due to the reliable fixation and ease of installation. In order for the CV joint clamp to be used for a long time, the following conditions must be met:
- when making the tape, the manufacturer used high-quality steel;
- mounting on the anther was carried out using a tool for tightening the CV joint band clamps;
- to install fasteners, you must have the skills to work with the tool.
To tighten the CV joint clamps, you can use improvised means, but the quality in this case will depend only on the experience of the craftsman. The only tool you need is pliers. Clamp tightening sequence:
- The clamp is mounted on the anther;
- The tip is captured with pliers;
- Pull with a little effort and make sure that the clamp tightens the boot without distortions;
- Create maximum effort and bend up;
- Bend the antennae;
- Fasten the end of the tape.
Upon completion of the installation on the hinge of equal angular velocities, it is required to check the uniform fit of the clamp and the absence of distortions.
How to make a pipe clamp with your own hands

At the first signs of pipeline depressurization, it is necessary to quickly find the damaged area and eliminate the identified defect. When performing emergency emergency work, you can use homemade clamps to stop the flow in the pipeline for a while.
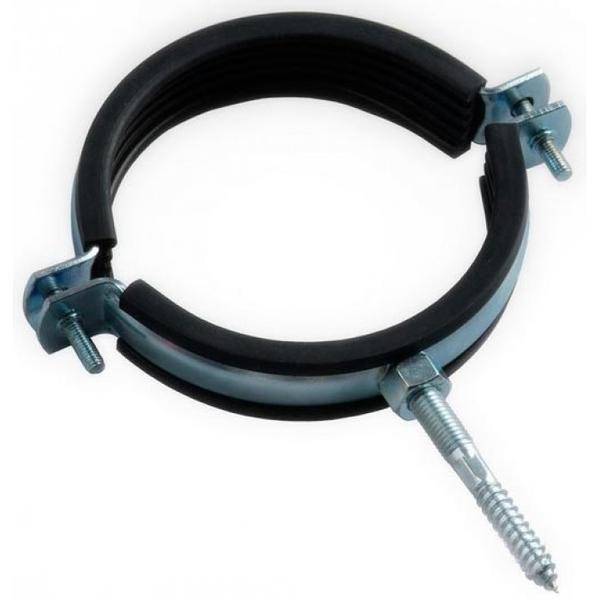
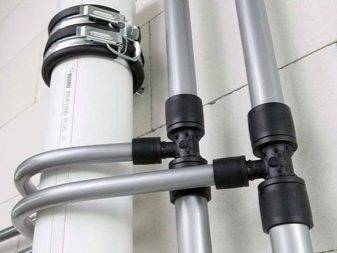
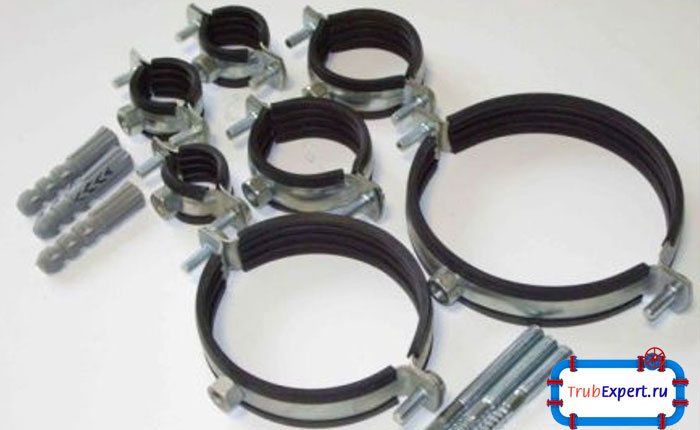
Ready-made clamps for fastening pipes, manufactured at the factory from stainless steel or fire-resistant plastic, are used when performing installation work on the installation of heating, sewerage, water supply, gas supply systems.
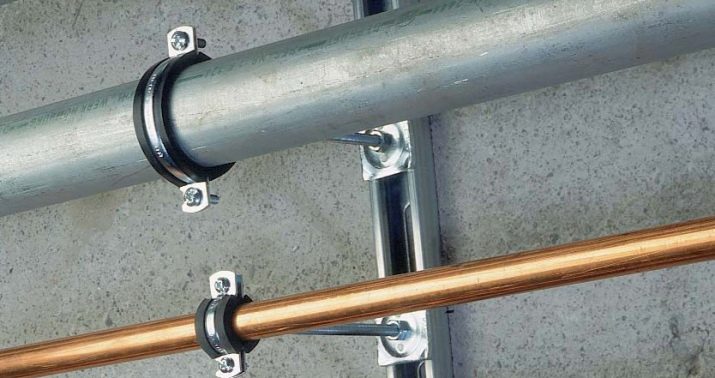
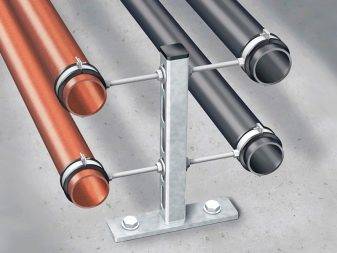
These fasteners allow you to securely fix the position of pipes running along horizontal and vertical surfaces (ceilings, walls), as well as installed on special racks.
In this video, an experienced craftsman shows how to make a wire clamp:
How to close a fistula in a pipe
How to close a fistula in a pipe. Sometimes it happens that a fistula appears in the iron pipe of the water supply or heating riser. This is especially common in hot water stand. The first signs that the pipe will burst soon is when a red growth appears on it, but it may not appear.
In scientific terms, this is called pitting, but in simple terms it is a “Pipe” of a pipe. Fistulas appear on the pipe, either due to wear or stray currents.
In principle, when you have a fistula, you will not care because of what it appeared, you will have a question how to fix it faster? I'll try to describe a couple of options for how to do this.
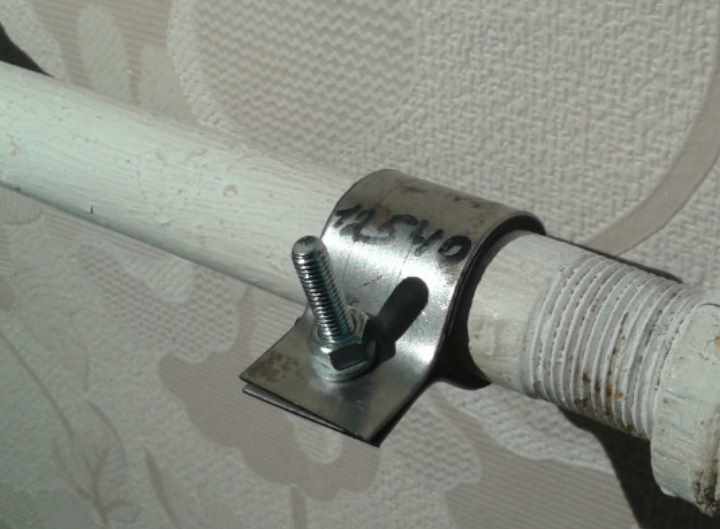
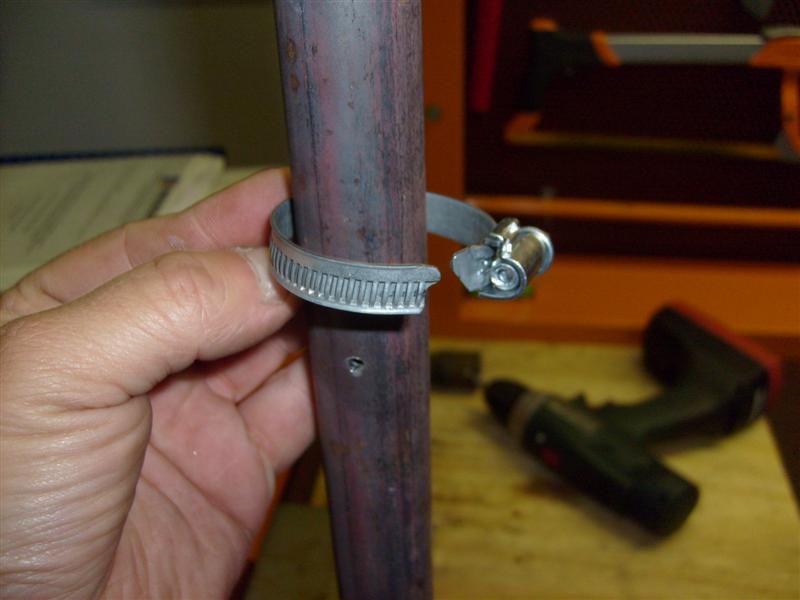
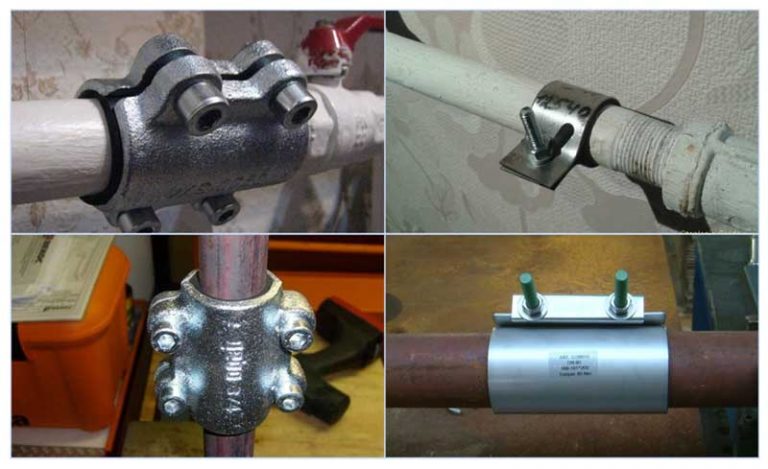
How to close a fistula in a pipe with a clamp
In general, if you see that your pipe is “not the first freshness”, then it is advisable to purchase a couple of clamps in advance for the diameter of the water supply riser, and cut rubber under them. Because, as most often it happens at night, and until the emergency gang, or a mechanic, arrives, it can flood heavily. There are a couple more nuances, what is the size of the fistula.
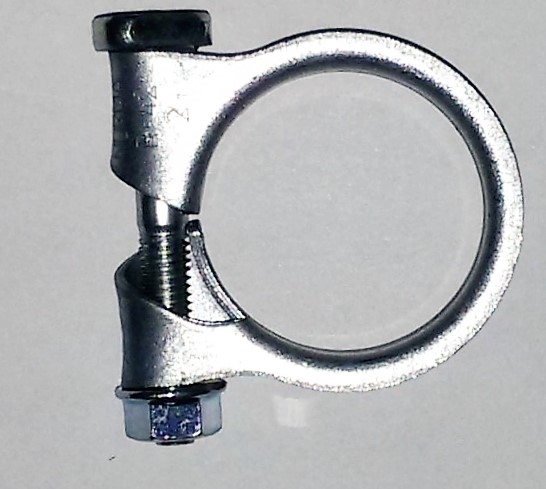
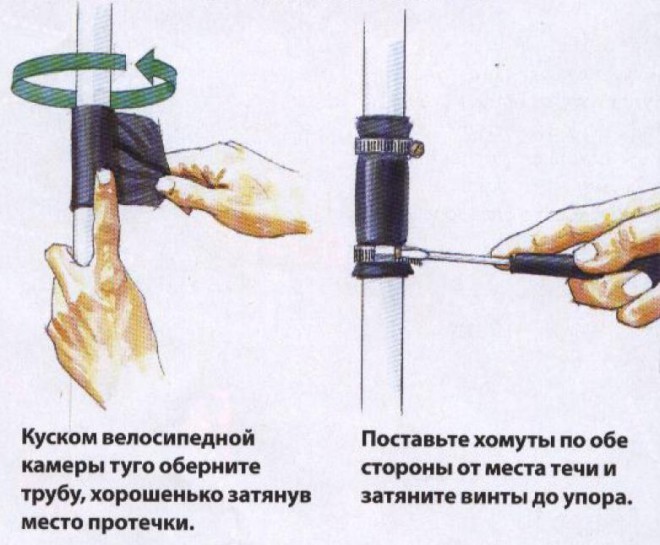
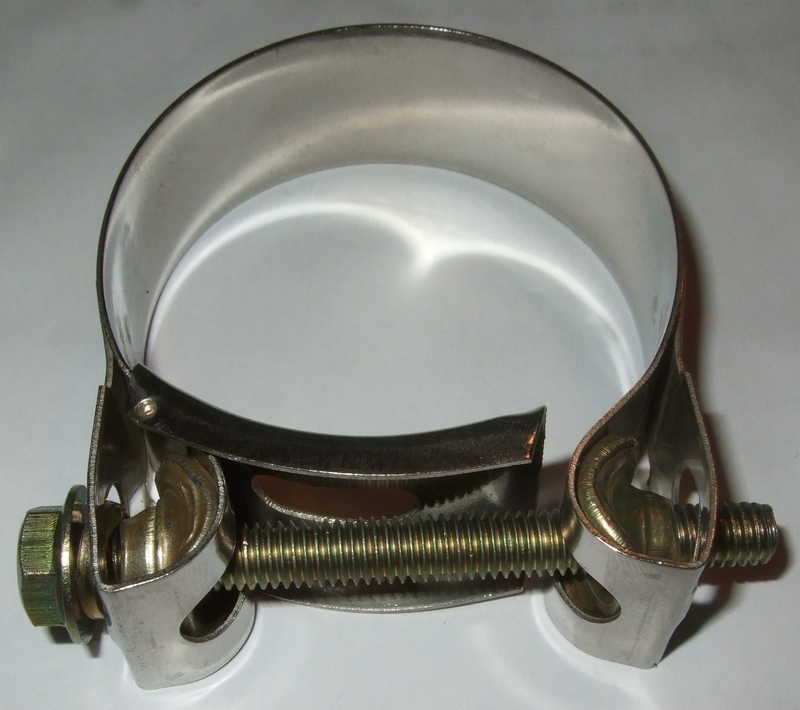
If the fistula is the size of a needle, then you can put the clamp without blocking the water, and if more, then when installing the clamp, you risk getting burned, if the fistula is in the pipe on hot water, it is better to turn off the water on the riser. If the fistula is small, you can try to close it with a regular car clamp, as in the photo.
Do this: take a piece of rubber, and cut a thin ribbon, the ribbon should be equal in width to the width of the clamp, it can be 3-4 millimeters more, but not less, now we measure the length of the rubber band. We wrap it around the pipe, and cut off the excess. Then cut off another 1 cm somewhere. Next, open the clamp, and put it on the pipe, and grab it a little.
We insert a rubber gasket under it, which you cut out, and carefully bring it to the place where the fistula formed. We cover it and tighten it with a screwdriver, or with a key, depending on which tightening device the clamp has.
I have had such cases in practice that in the apartment there is a fistula with a diameter of the “eye of a needle”, it whistles very strongly, but there is not much water, the tenant, the grandmother “God’s dandelion” screams like a carved one, but I can’t turn off the water, since she is from he doesn’t let out an apartment, and there was no clamp with me, what I do, after looking, and determining that the pipe is in excellent condition, I break off a piece of a match, and insert the tip into the fistula, and there was no fistula, but this is so that the grandmother calmed down. Then, of course, I installed the clamp. Often I closed up such fistulas in the basement in this way, but there were also punctures, you insert a match, and the fistula becomes 2 times larger, so I do not advise you to use this method. Well, this is a digression, let's consider another option.
The procedure for making a homemade pipe clamp
For work you will need:
- A strip of galvanized steel or iron, not more than a millimeter thick
- Rubber patch 3mm
- Bolts M6, M8 or M10 - to choose from, which are found. Enough 2-3 pieces.
In addition to materials, you will need tools:
- scissors for metal (jigsaw, grinder)
- a hammer
- spanners
- calipers
- pliers/vises
- drill, drills (M7, M9, or M10, M12)
The first thing to do is to measure the diameter of the pipe with a caliper. But if the pipe is large, then it will be more convenient to measure with a ruler with a corner.


Then you need to cut a metal strip with a width of 4 to 8 cm. The selected width depends on the thickness of the pipe and the size of the damage. Here you will have to tinker a little with the length of the strip, calculating it according to the rules: the diameter of the pipe obtained during the measurement is multiplied by the Pi number - 3.14, then 3-4 cm are added to it, after which the piece can be cut off.This margin of centimeters (“ears”) is needed so that the bandage can be fastened together with bolts and nuts in this place.
You will need to drill two holes in the “ears” for the bolts, given the size of the latter, however, the holes may be slightly larger to make them easier to screw. If the pipe has a large width, then it is better if there are not two holes, but three. Then the ears are bent at a right angle with the help of pliers, you can simply use your hands if the tin is thin.

The next step is trying on - bending the tin strip around the pipe. And the finished “ears” are brought together until their opposite holes coincide. If the strip does not fit snugly, then tap it lightly with a hammer. When the clamp takes the desired shape, it is lifted and a rubber gasket cut out in advance is inserted under it.
Do-it-yourself clamp - a simple and effective solution to the problem
A collar is a useful and sometimes irreplaceable thing in the household. With its help, it is always possible to ensure a tight connection of hoses, pipes, pipelines, both flexible and rigid. In technology, there are a great many types of clamps for various purposes. A thrifty owner will always find them in tools for all occasions.
However, there are situations when there is no suitable device at hand, and the problem needs to be solved urgently. For example, a fistula has formed in the heating or plumbing system, and water rushes menacingly to the floor. Even worse, on the road by car, a pipe fell off in the interior heating system or in the engine cooling system. A mounting clamp among the tools is missing.
How to be in such cases? Is it possible to make a collar with your own hands? What is needed for this?
Putting on a pipe is easy
Often in our homes, metal pipes rust and leak. These areas require repair or replacement. However, our home craftsmen solve the problem quickly and efficiently with the help of clamps that “decorate” the interiors of our apartments for many years.
How to quickly make a pipe clamp with your own hands? What will be needed for this?
Tools needed for making:
- hammer, pliers, drill;
- drills with a diameter of 6 or 8 mm;
- metal scissors or grinder;
- caliper, ruler;
- spanners.
In addition, you will need the following materials:
- a metal strip up to a millimeter thick (for example, stainless steel, galvanized sheet);
- a strip of rubber 3 mm thick;
- bolts, nuts 6-8 mm, washers for them.
How to make a pipe clamp
Making collars requires certain skills. Experienced plumbers advise to carry out work in the following sequence:
- depending on the damage, a strip of metal of the required width is cut;
- the circumference of the pipe is determined;
- the length of the workpiece is determined (4-5 cm must be added to the circumference);
- holes are drilled from one and the other edge of the strip at the same distance;
- with the help of pliers or a vice, the fastener ears are bent at a right angle to the strip;
- a rubber strip is cut along the width of the device and along a length slightly less than the circumference of the pipe.
It should be noted that a small clamp is pulled together with one bolt. It is advisable to tighten fasteners up to 6 cm with two bolts. Products with a width of more than 6 cm must be fixed with three bolts.
Installation
A do-it-yourself fixture should be carefully bent and adjusted around the circumference of the pipe so that the holes in its ears coincide coaxially.
Bending of clamps can be carried out on a piece of pipe of equal diameter with the repaired pipe. Then, when installed in place, the clamp unbends a little and is installed with little effort on the surface to be repaired.
Previously harvested rubber is put on the place of leakage under fasteners.
True, it must be remembered that a do-it-yourself device is a tool designed to temporarily eliminate the problem of sealing. It should not be delayed with the repair or replacement of corroding pipes, as the corrosion process will continue under it, and over time the problem will “come out” again.


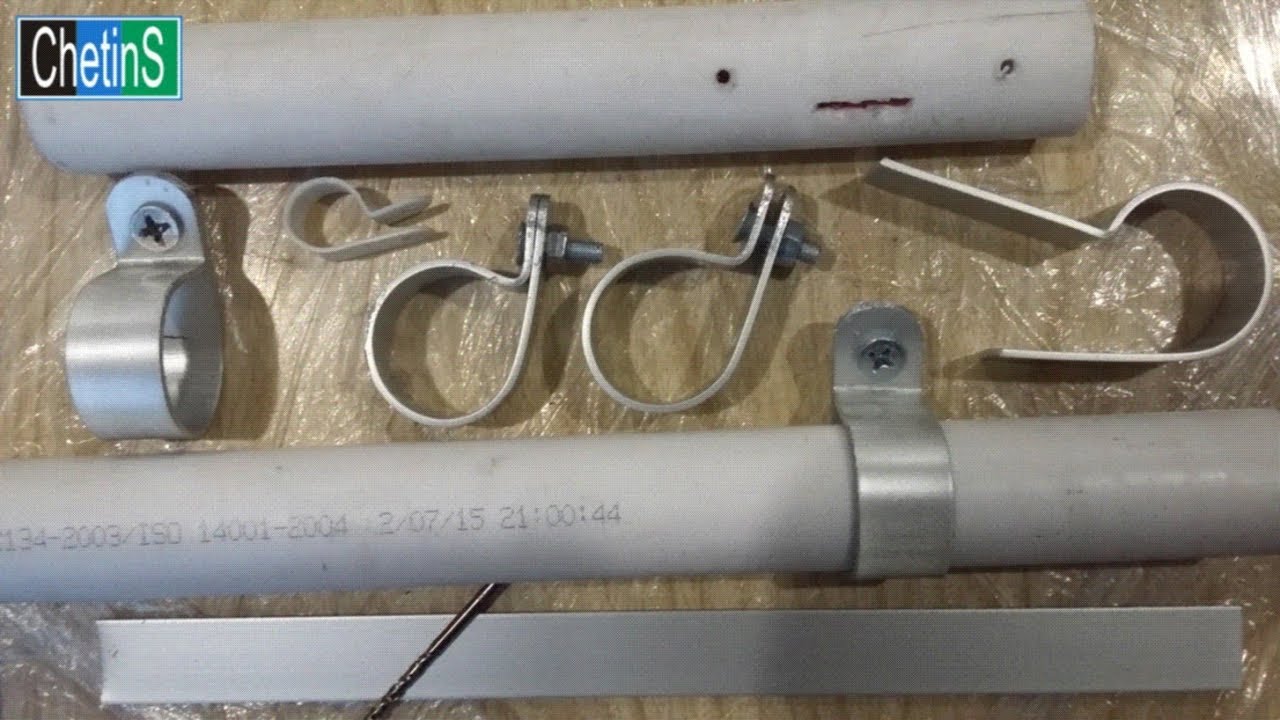
Making a wire clamp
Very often, home craftsmen need to fasten rubber pipes or pipes tightly and securely. This can be while working in the garden, in the country or in the garage. In such cases, do-it-yourself wire clamp is made.
To make it, you must have on hand pliers and a screwdriver, preferably a Phillips one. It is best to take a special wire - knitting (it is soft and strong enough).
Fold the wire in half and throw it on the hose, thereby determining how much it will be needed for fasteners, taking into account 40-50 mm for twists. Then cut off the desired piece and fold it in half again. Use a screwdriver to make an eyelet at the bend and turn it half a turn. Spread the ends of the wire and wrap them around the tube.
With the help of pliers, the ends must be rolled clockwise for several turns. Finally, the do-it-yourself wire clamp is tightened with a screwdriver.In this case, it is necessary to ensure that the tightening force is sufficient for sealing and does not lead to a rupture of the wire.
With some skill and practice, the manufacture and installation of clamps does not cause difficulties. Wire homemade devices can serve without problems for a very long time. Replacing them with store ones is a matter of the aesthetic taste of the owner.
Now you know how to make a collar with your own hands. We hope that for every owner, home problems with repairing pipes, pipes and hoses will become an easy and easy practice.
Your gratitude for my article is a click on any button below. Thank you!
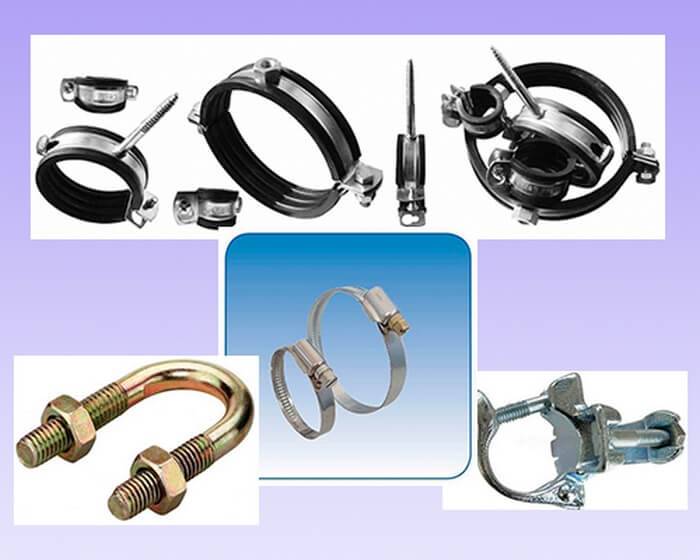
What types of clamps are
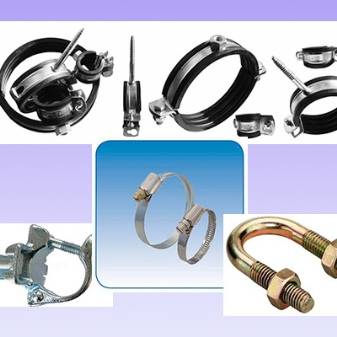
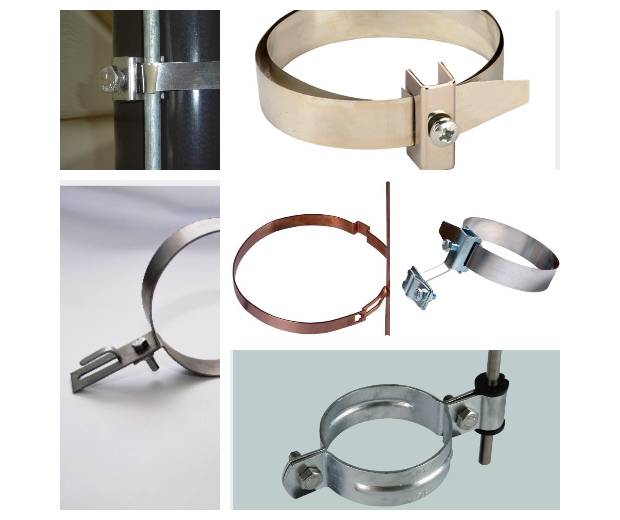
Consider on the site the main types of clamps that have received the greatest use today:
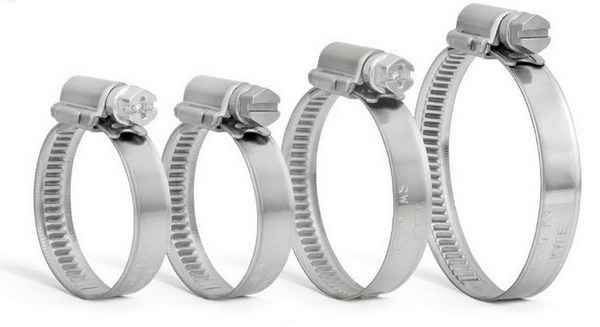
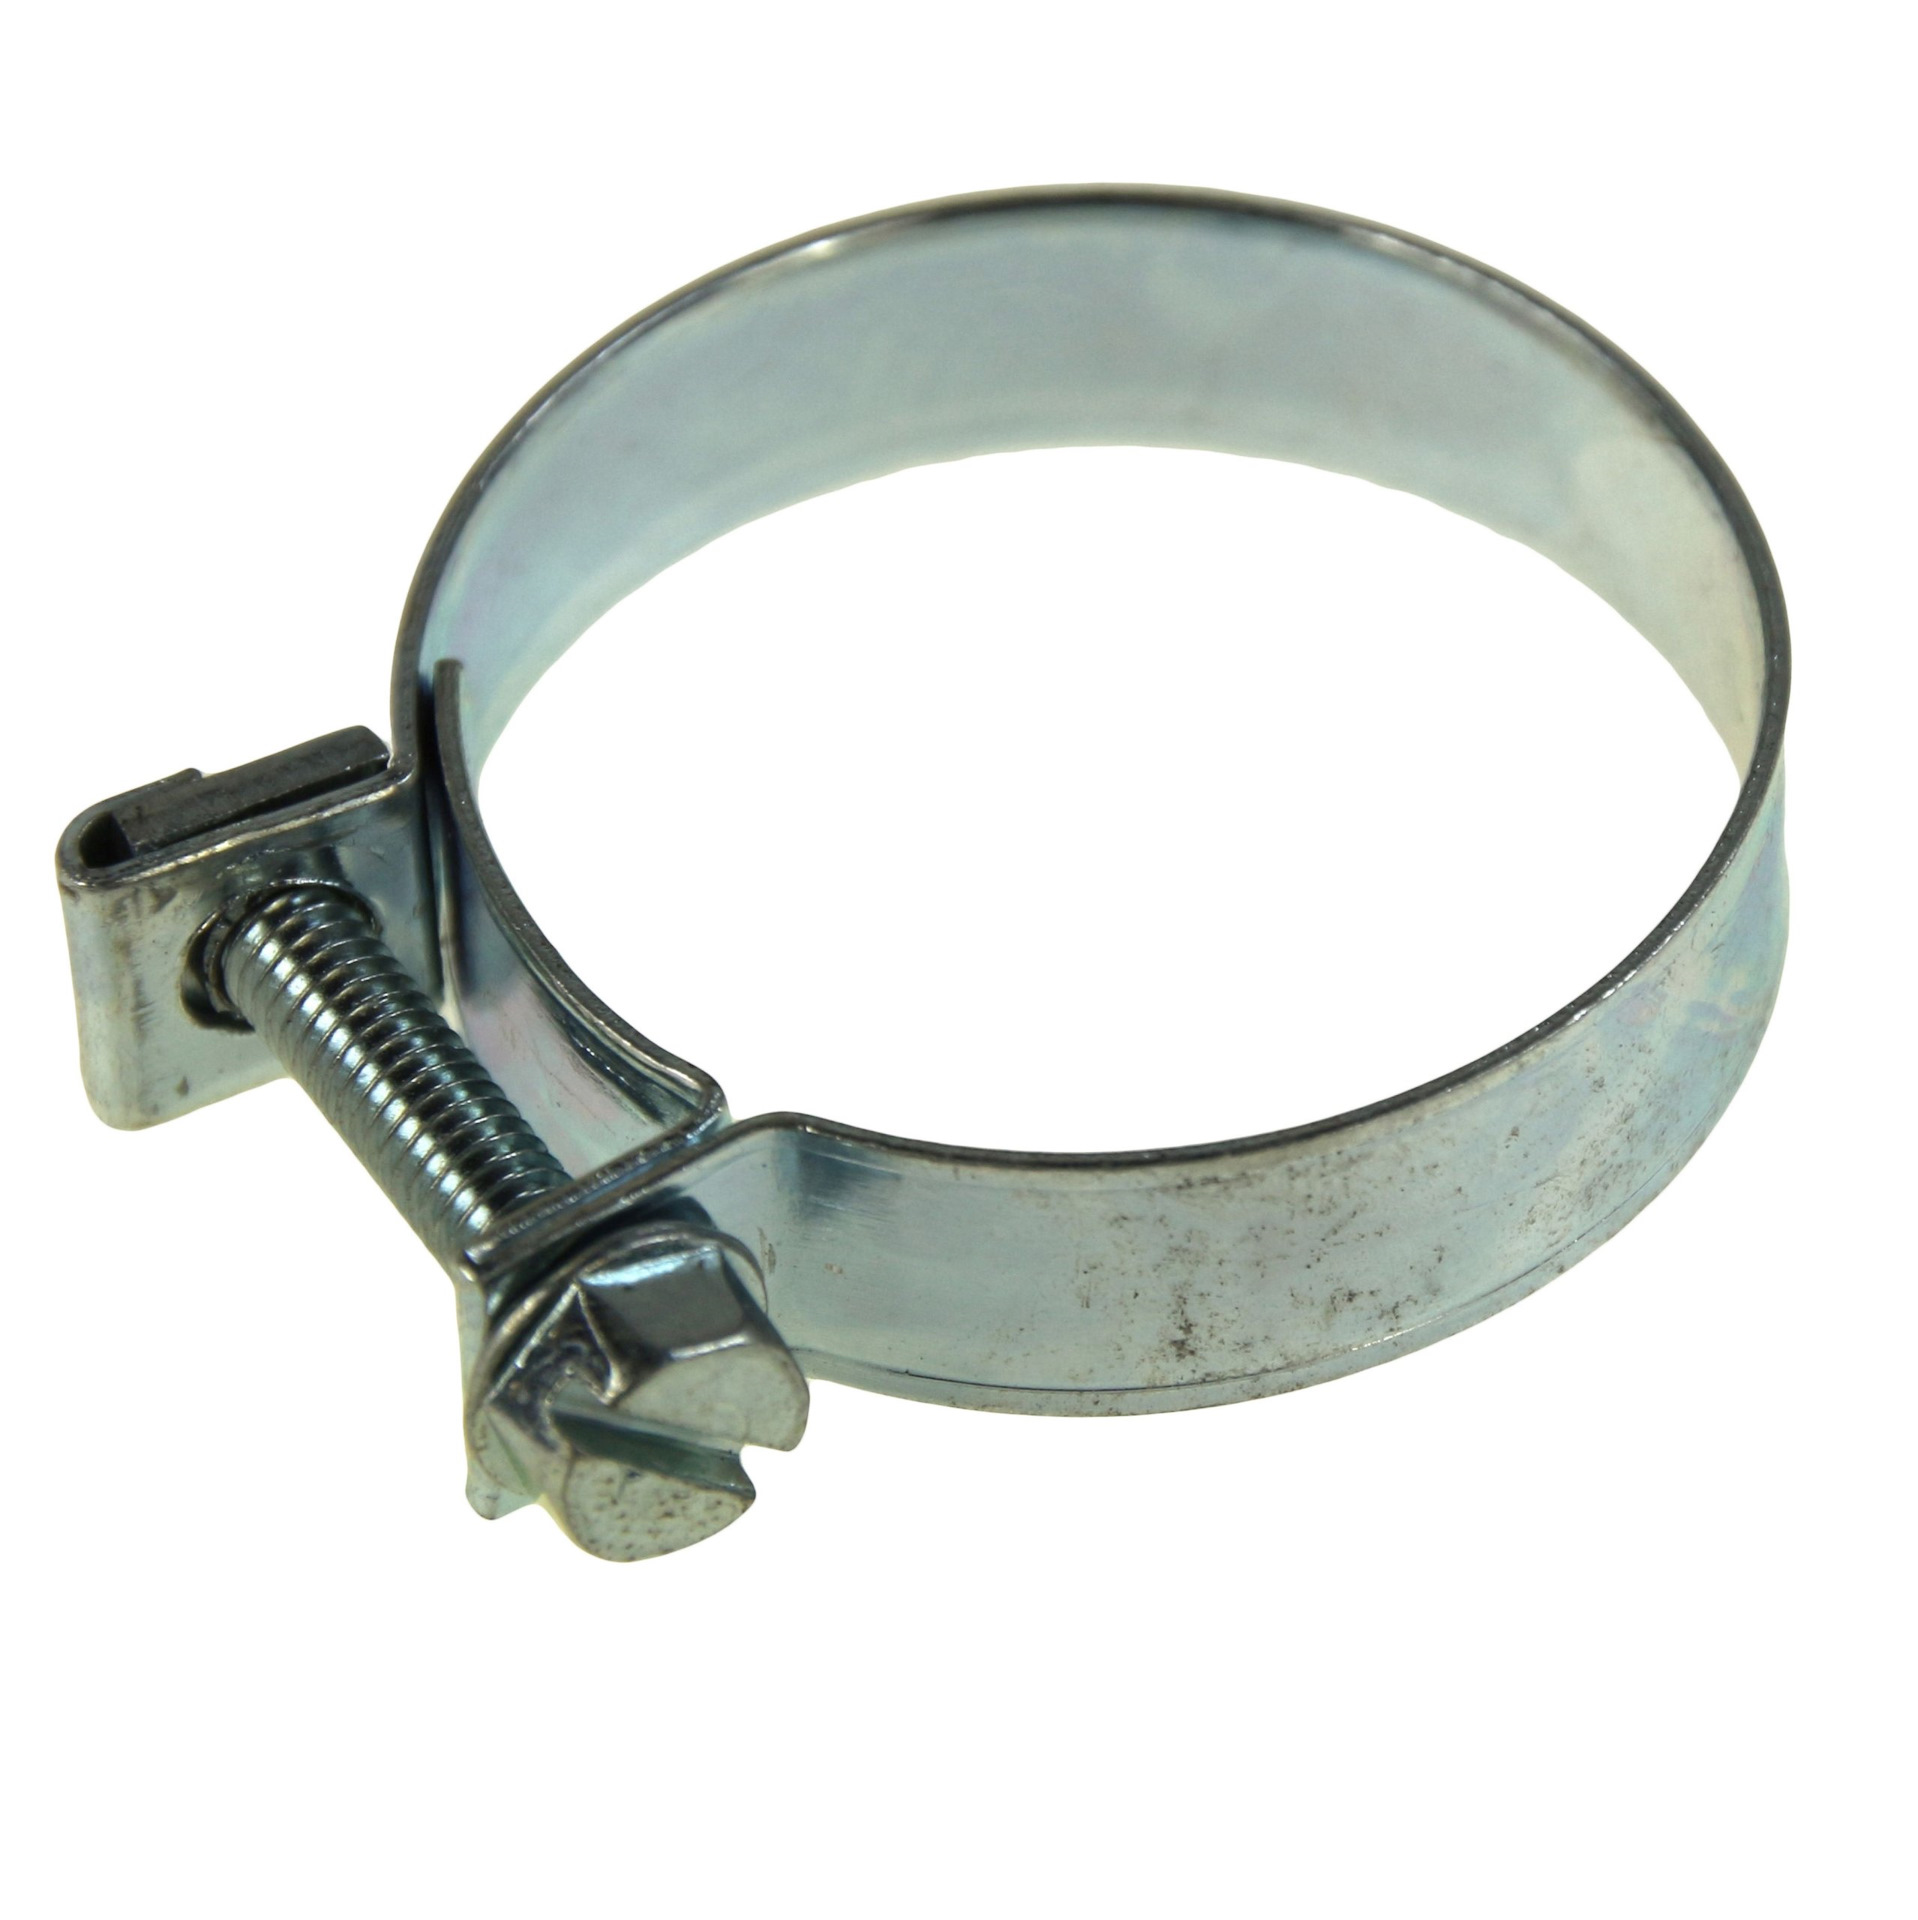
Worm-drive clamps are widely used to connect pipes and hoses, they are quickly put on, tightened with a conventional screwdriver, and also easily removed. The worm clamp can be used several times, it is able to provide a reliable and durable connection.
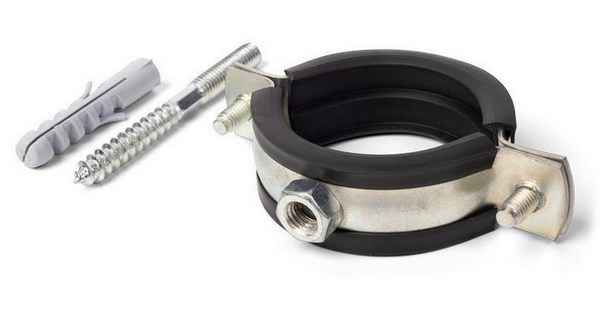
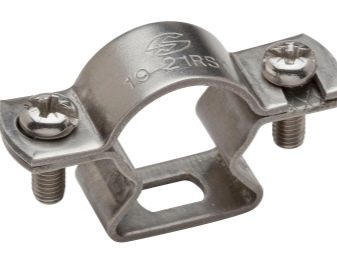
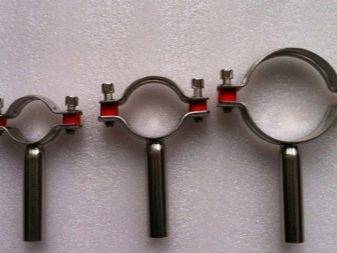
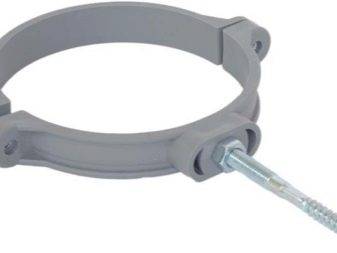
Pipe clamps - the main purpose of pipe clamps is to fix plastic and metal pipes to the wall and ceiling. The pipe clamp can have different diameters and be used for certain loads. This type of clamps are also U-shaped and sprinkler clamps.
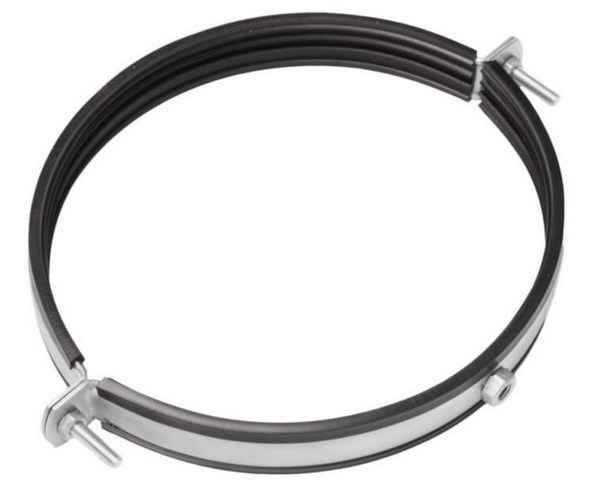
Ventilation clamps - mainly used for fastening air ducts and various other elements of the ventilation system. These types of clamps are made of two strips of thin steel, which are connected to each other by means of bolts and nuts. Ventilation clamps have several varieties, with a U-shaped and U-shaped profile.
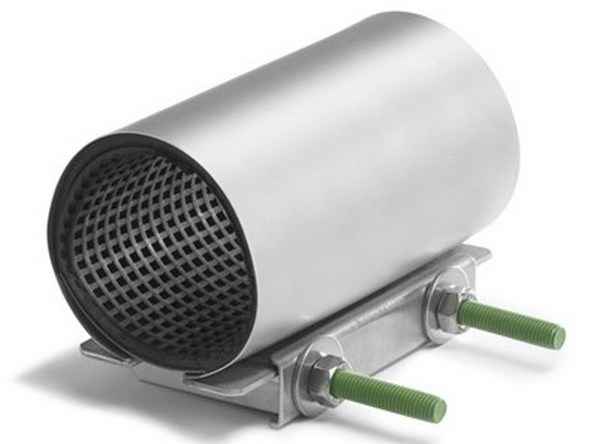
Repair clamps are designed for reliable sealing of pipelines, without any welding. Such clamps are made of steel, they have a rubber seal inside, which quickly closes the fistula. A repair clamp, or as it is also called a “crimp”, should be selected based not only on the diameter of the pipe being repaired, but also taking into account the pressure in it.
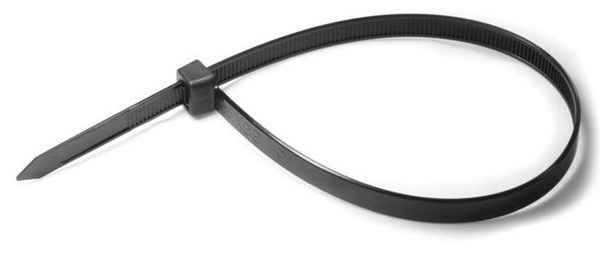
Plastic clamps - they are called differently, for example, screeds, "shmorgalki", etc. As a rule, these types of clamps are made of high quality nylon. The clamp itself looks like a narrow strip, with notches on one side, and a lock at the very end. By tightening the plastic tie, it will be possible to quickly fix the insulation on the pipe or fasten the wire to it.
Varieties
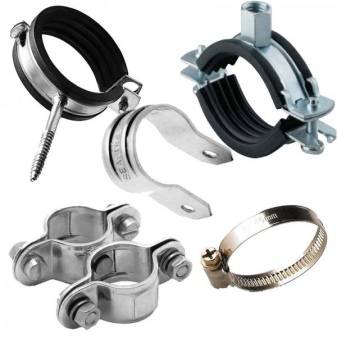
Clamps are presented on the construction market in a wide range. Models are produced in a wide variety of sizes and are divided according to such features as the method of fixation, the presence of a seal, shape, material of manufacture and purpose.
According to the material of manufacture, the products are divided into plastic and steel. Moreover, steel elements can be made both with the use of galvanization and without it. Compared to plastic models, steel clamps are considered to be more in demand and popular. This is due to the low cost of products, good tensile strength of the metal and high strength. The disadvantage of metal clamps is the low resistance of non-galvanized models to corrosion processes. Therefore, in cases where the installation of clamps is planned in excessively humid rooms, you should choose models made of stainless steel or clamps coated with zinc.


Plastic options are characterized by increased elasticity, high resistance to vibrations and the ability to create a movable fixation. Models can be used for fixing pipelines with a diameter of not more than 10 cm.

Depending on the tasks assigned to them, clamps are divided into spiral, power, wire, worm, pipe and mortise options.
A spiral clamp is a fairly common device and is intended for rigid fixation of pipes in a system.
Power has the form of a tape with holes for bolts and is indispensable when working on highways with increased working pressure, at pumping stations, pneumatic and hydraulic systems.
Wire clamps are presented in the form of one or more steel rings equipped with tightening fasteners. The model is designed for corrugated pipes and is indispensable for their fixation in case of strong movements.
The worm model is a steel strip with a track, equipped with teeth and screws for tightening. The model is used in the arrangement of heating systems, as well as a fixing mechanism for pipelines exposed to severe vibrations.
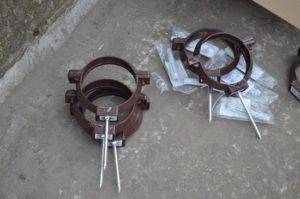
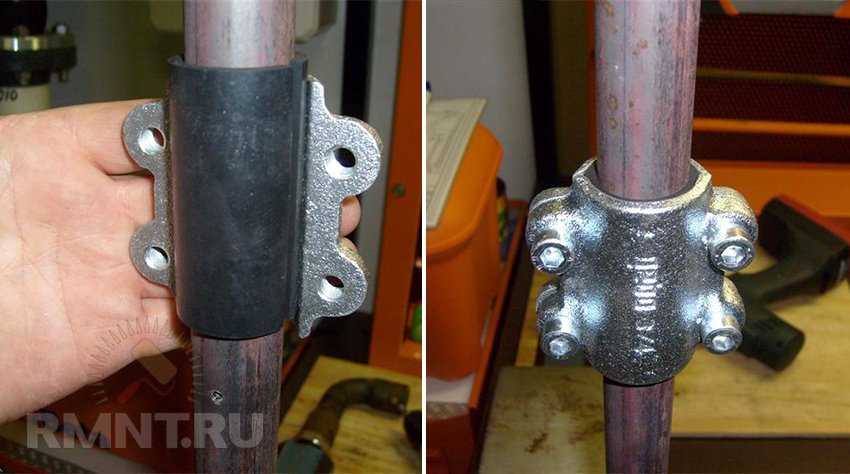
Pipe clamps are presented in the form of rings with staples and are installed to secure the pipeline in cases where it is necessary to reduce the internal stress in the system during repairs.
The spring clamp has a rather narrow specialization and is used on pipes subject to linear expansion.
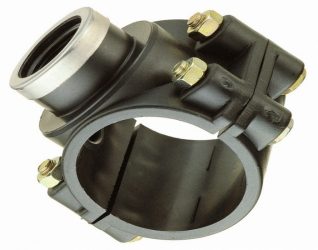
A mortise, or saddle, clamp with a branch is a more complex mechanism and is designed to be installed in places where the pipeline branches.Its main difference from traditional models is the presence of a coupling equipped with threaded pipes, which allows you to embed the clamp into the system and connect an additional branch in a short time. The tightness of such a connection is ensured by a gasket located inside the clamp and made of profiled rubber.
Rotary models, also known as hinge locks, are used to install scaffolding and are used when attaching diagonal type struts. Thanks to the swivel clamps, all elements can be fixed at any angle, which gives additional strength to the structure and ensures its stability.
According to the type of fixation, all clamps are divided into two types:
- The former include models that form a rigid type of fastening, in which the pipe becomes completely immobile. The crimping brackets of such products are securely tightened with bolts, and the clamp itself is firmly attached to the wall. This type of fastening is used in the areas of bends of the pipeline and in the presence of branches.
- The second type includes models with a movable mount used to fix heating and hot water pipes. The specificity of fastening does not create obstacles for elongation and compression of the pipeline and ensures its longitudinal mobility. As a result, the optimal voltage of the main line is created, which significantly extends the life of the networks.
Structurally, clamps are represented by several types:
- detachable ring, formed in the form of a circle and having one fastening mechanism, fixed by a bolt;
- a ring consisting of two semicircular plates and having fastening ears on both sides;
- a tape folded in a ring and having several positions for fixing;
- A U-shaped model, often made of plastic, equipped with a latch-lock and capable of being fixed in a rigid and movable way at the same time.
How to make a pipe clamp with your own hands

At the first signs of pipeline depressurization, it is necessary to quickly find the damaged area and eliminate the identified defect. When performing emergency emergency work, you can use homemade clamps to stop the flow in the pipeline for a while.
Ready-made clamps for fastening pipes, manufactured at the factory from stainless steel or fire-resistant plastic, are used when performing installation work on the installation of heating, sewerage, water supply, gas supply systems.
These fasteners allow you to securely fix the position of pipes running along horizontal and vertical surfaces (ceilings, walls), as well as installed on special racks.
In this video, an experienced craftsman shows how to make a wire clamp:
How to close a fistula in a pipe
How to close a fistula in a pipe. Sometimes it happens that a fistula appears in the iron pipe of the water supply or heating riser. This is especially common on the hot water riser. The first signs that the pipe will burst soon is when a red growth appears on it, but it may not appear.


In scientific terms, this is called pitting, but in simple terms it is a “Pipe” of a pipe. Fistulas appear on the pipe, either due to wear or stray currents.
In principle, when you have a fistula, you will not care because of what it appeared, you will have a question how to fix it faster? I'll try to describe a couple of options for how to do this.
How to close a fistula in a pipe with a clamp
In general, if you see that your pipe is “not the first freshness”, then it is advisable to purchase a couple of clamps in advance for the diameter of the water supply riser, and cut rubber under them. Because, as most often it happens at night, and until the emergency gang, or a mechanic, arrives, it can flood heavily. There are a couple more nuances, what is the size of the fistula.
If the fistula is the size of a needle, then you can put the clamp without blocking the water, and if more, then when installing the clamp, you risk getting burned, if the fistula is in the pipe on hot water, it is better to turn off the water on the riser. If the fistula is small, you can try to close it with a regular car clamp, as in the photo.
Do this: take a piece of rubber, and cut a thin ribbon, the ribbon should be equal in width to the width of the clamp, it can be 3-4 millimeters more, but not less, now we measure the length of the rubber band. We wrap it around the pipe, and cut off the excess. Then cut off another 1 cm somewhere. Next, open the clamp, and put it on the pipe, and grab it a little.
I have had such cases in practice that in the apartment there is a fistula with a diameter of the “eye of a needle”, it whistles very strongly, but there is not much water, the tenant, the grandmother “God’s dandelion” screams like a carved one, but I can’t turn off the water, since she is from he doesn’t let out an apartment, and there was no clamp with me, what I do, after looking, and determining that the pipe is in excellent condition, I break off a piece of a match, and insert the tip into the fistula, and there was no fistula, but this is so that the grandmother calmed down. Then, of course, I installed the clamp. Often I closed up such fistulas in the basement in this way, but there were also punctures, you insert a match, and the fistula becomes 2 times larger, so I do not advise you to use this method. Well, this is a digression, let's consider another option.
Making a collar from improvised materials
Find a strip of galvanized sheet, the thickness of which does not exceed one millimeter, and a piece of three-millimeter rubber. Look in your stock for a couple of bolts (M6, M8 or M10), as well as suitable nuts and washers. Of the tools useful:
- hammer; caliper; wrenches; vice or pliers; scissors for metal, which can be replaced if available with a jigsaw or grinder equipped with appropriate cutting elements; drill and drill bits (M7, M9 or M10, M12).
Use a caliper to determine the pipe diameter. If the pipe diameter is large, then take the necessary measurements using a corner and a ruler.
Next, cut the tin frame of the clamp in the form of a strip, the width of which should be 4-8 cm, and the length will have to be calculated. For this, it is determined pipe circumference by multiplying its diameter by 3.14 (the Pi number, familiar to everyone from the school geometry course). 3-4 cm are added to the result obtained, from which “ears” are subsequently made with drilled holes for fixing bolts.
The size of the holes in the "ears" depends on the diameter of the bolts, and if the washers are wide, then you can add an extra 2-3 mm to simplify the installation of the clamp in the future. If the width of the bandage exceeds 6 cm, then it is recommended to drill holes not for two bolts, but for three.
Mark a line with a marker along which to bend the “ears” at a right angle to the tin strip. This operation can be done manually if the strip is thin. With thicker material, work with a vice or pliers.
Next, the tin is bent around the pipe on which it is planned to put the clamp on, and they try to connect the ears so that the holes drilled in them coincide. If the tin does not bend well, then the strip is tapped with a hammer. A pre-cut rubber gasket, cut out taking into account the width of the bandage, is inserted into the collar.
Modern wire clamp - device and operation
First of all, I would like to clearly define the concepts: what can actually be called clamps. So, this is a ring-shaped device, usually made of light metal alloys. It has a tightening mechanism in the form of a special nut, mainly with a worm thread, and also, depending on the models, a metric thread is used on the nut. In our case, the base of the device has, as it were, a wire base, but is made of a sufficiently strong metal that does not deform when tightened.
In the modern version, the tightening element is just a nut with a metric thread, when tightening which the mechanism tightly fits the surface, while thoroughly clamping it on the working base. The scope of clamps is quite wide, but the range of action is designed to create a tight connection of hoses, rubber pipes with solid bases, branch pipes. Using a clamp, you can hermetically connect the water pipeline to the rubber hose and not be afraid that there may be a leak somewhere.
Even corrugated exhaust pipe fastened with a clamp to the chimney and does not let combustion products into the room.
Initially, such a device was created just not for domestic needs, but for the automotive industry. Clamps are an important element in the engine of almost any car.Ask - why? The fact is that the engine of the machine during operation, due to vibration, is in a mobile state, and various connections, fuel and oil supply are various pipes. It is the rubber pipes that have free play and vibrate evenly with the engine, while fulfilling their duties of supplying fuel. Well, they are attached to the metal base with clamps, they are able to provide a reliable, tight, and most importantly, strong connection of important engine components.
Types of clamps
Modern clamps for fastening pipelines are presented in various modifications. They are classified by:
- appointment;
- type of material;
- fixation type;
- form;
- the presence of a gasket.
Purpose
Depending on which pipelines are used for installation, clamps can have different structural properties. Main types:
- Spiral clamp. Can be rotated clockwise or counterclockwise. It is applied to connection of the reinforced parts of a water supply system.
- Power clamp. It looks like a tape with a tightening component. Designed for connecting round and rectangular pipelines, rigid and flexible hoses, reinforced hoses. The clamp is used for mounting systems operating under pressure - pumps, hydraulic pneumatic actuators.
- Reinforced fastener. It is a lock connected with a ribbon. The clamp is used to fix hoses with reinforcement or thick walls, operated under pressure.
- Wire fastening. It has the form of one or more thin steel rings with a mechanism for tightening them. Used to secure hoses, thin-walled corrugated and spiral pipes that experience vibration.
- Worm clamp.The design includes a metal strip with a track with teeth and a screw (bolt) for tightening. It is used for fixing hoses and pipes in places with high vibration, including plumbing and heating systems.
- Pipe clamp. Represent a ring or bracket with fasteners. They are used to openly fix pipes in a specific area in order to reduce stress from the inside of the system and fix the position of the pipeline.
- Spring clamp. Designed for fixing pipes that provide hot water, that is, structures that are amenable to thermal expansion.
Material
In addition to metal, plastic and nylon can be used to make clamps. The functionality and durability of plastic products is lower, but the price is more affordable. Nylon fasteners are durable and lightweight. They do not give in to corrosion, are used for installation of air pipelines.


As for metal pipe clamps, they can be made of stainless or galvanized steel. Stainless steel is characterized by a longer service life, as it effectively resists corrosion. For large diameter pipes and pressure structures, only metal fasteners are suitable.
Fixation type
The clamp can fix the pipeline motionless (rigidly) or movably. With a rigid connection, the element is not able to move from the fixation point. The brackets are firmly tightened with bolts and attached to the wall (floor, ceiling). Such fixation is used in places of bends, branchings of sewerage systems and cold water supply. Fasteners are used that can withstand maximum loads and ensure static pipes.
Floating (movable) fixation is used for heating and hot water pipelines exposed to high temperatures. Their feature is the periodic expansion / contraction of elements. Clamps with floating fixation do not interfere with this process, providing the possibility of a slight longitudinal displacement of the pipes. In this case, the transverse deviation from the axis is not possible.
The form
There are three main structural forms of mounting clamps:
- Split ring that opens on one side and has a movable connection on the other. After installation, the fastener is fixed with a bolt.
- Two half rings of the same size. They are connected to each other with bolts or studs.
- U-shaped bracket. It can be rubberized inside or completely metal.
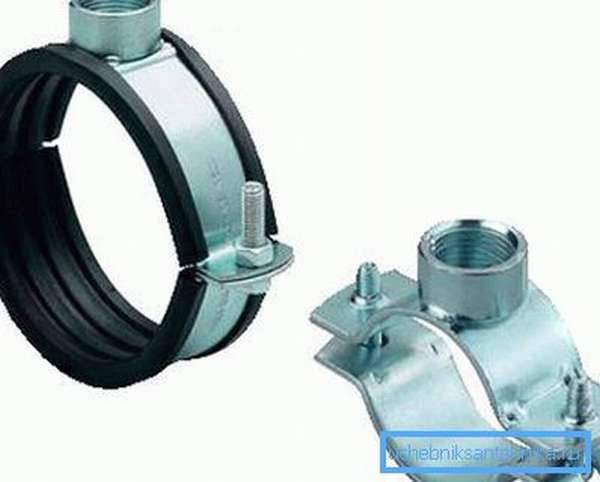
pad
Steel clamps can have a microporous rubber lining inside. The advantages of such products:
- "repayment" of vibrations during the passage of fluid through the pipe;
- reduction of noise level during pipeline operation;
- increase the tightness of the joints.
Clamps with gaskets provide a secure and durable fixation. Their minus is a higher price.
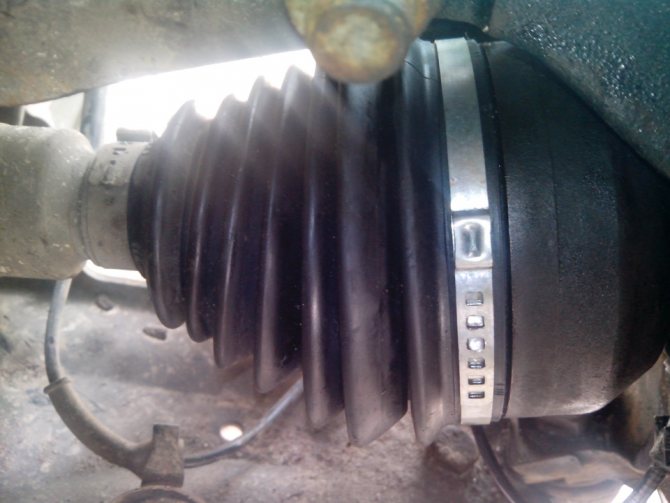
How to clamp a clamp on a CV joint - a mechanical method
Some cars from Europe have been converted to the use of clips made in the form of clamps. Clamps are simple and durable. They are usually installed with the help of pliers, but craftsmen also manage with ordinary pliers.
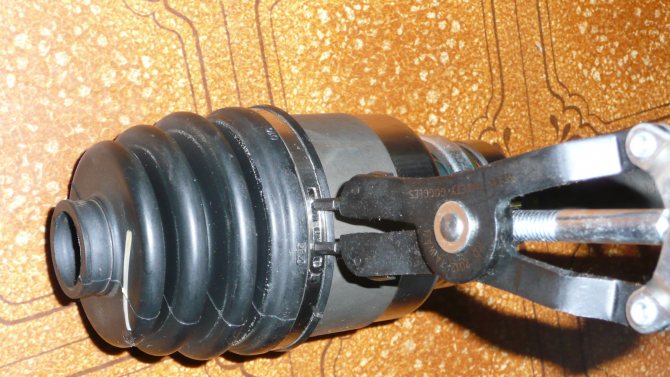
Before installing the clamp, you need to select the diameter. After that, the clamps are installed on the CV joint boot
It is important to do without distortions. Installation is best done with crimping pliers.
In their absence, we use pliers. The work is simple, at the end of it you need to check the quality of the clamp.The main advantage of the option is that you do not need to use special tools. If ordinary pliers are used when installing the device, the quality of the clamp will not be affected.
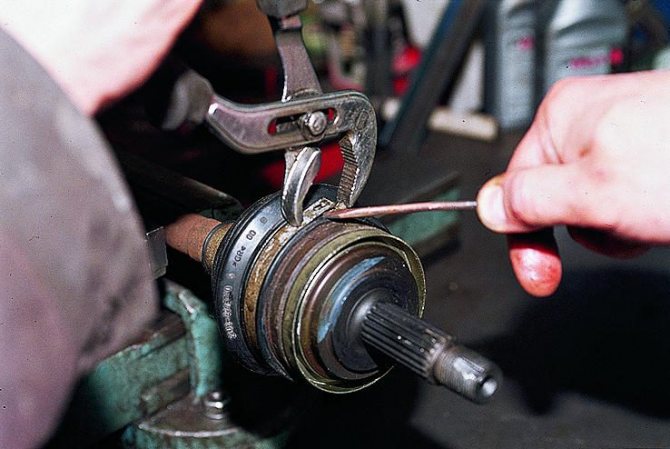
You can use a screw type device. It is clamped with a screwdriver. Installing such a clamp is the easiest, but it has its drawbacks:
- A "grenade" (slang for a hinge) is subject to vibration, which can cause the bolt to loosen. Therefore, tighten the device as much as possible.
- The protruding castle looks unaesthetic. In addition, when driving, he can hurt something.
- Such clamps are often of poor quality.


