- Connecting communications and checking tightness
- How to change the faucet in the kitchen without any problems: dismantling and installation
- Preparatory stage
- Dismantling the mixer
- Installing a new faucet
- Dismantling the old crane
- How much does it cost to change a kitchen faucet
- What tools are needed for the job?
- Dismantling the old structure
- Sealing materials for plumbing threads
- Bathtub or sink installation
- Replacement
- Tool
- Dismantling
- Installation
- Examination
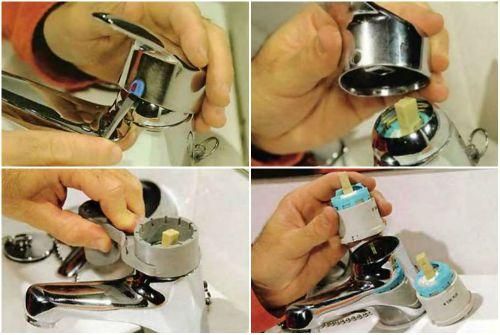
- 3 Assembling a new device - everyone can do it!
- List of necessary tools and spare parts
- Causes of failure
Connecting communications and checking tightness
It should be noted that if the sink had to be dismantled to install a new faucet, then it should be attached to the countertop or a separate cabinet using silicone sealant.
We fix the sink
Now all eyeliners should be connected to the water supply. It is not recommended to do this too hard, because here too the gaskets can be damaged. It is enough to firmly fix the fasteners with a key.
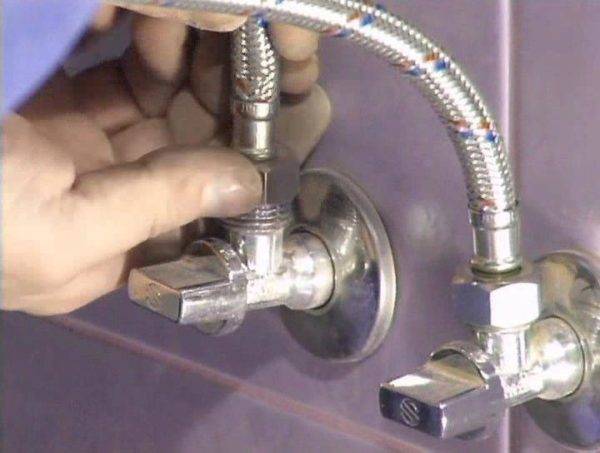
When connecting hoses, do not overtighten the fasteners.
It will be much more difficult to do this work in the case of metal-plastic pipes. To begin with, it will require you to prepare them, determine the length and bend, and then fix them in the fittings.
In addition, it is necessary to connect the sink to the sewer pipe, reinstall the siphon with the corrugated pipe. Next, you will need to carefully inspect all connections at the first connection to eliminate the possibility of leakage. This happens when the installation sequence is violated.
Be sure to check the operation of the new mixer without putting the tools away
As you can see, even a novice master will be able to cope with the installation of the mixer.
It is only important to follow all the instructions and do not tighten the hose fasteners too much. In any case, upon completion of the installation, it is necessary to check the functionality of the system
How to change the faucet in the kitchen without any problems: dismantling and installation
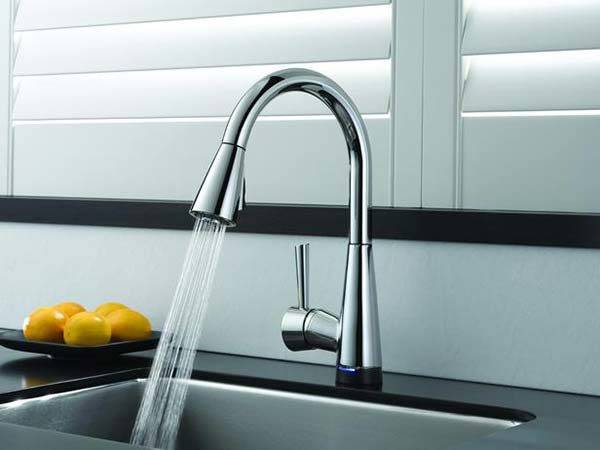
An important component of any kitchen is the water supply point along with the faucet. The faucet performs an important function - it provides a comfortable water temperature for its use for various purposes. This is an indispensable attribute
However, everything in our life is short-lived - the mixer can break. It can fail for various reasons, especially if you purchase a cheap option.
This is an irreplaceable attribute. However, everything in our life is short-lived - the mixer can break. It can fail for various reasons, especially if you purchase a cheap option.
If you have a faucet in your kitchen out of order, then in most cases it is much easier to change it than to make a lengthy repair. You can change the mixer with the help of a plumber, but if there is no desire to use their services or it is a pity for money for them, then you can make a replacement with your own hands.Fortunately, this is not very difficult, the main thing is to strictly follow the installation rules and your outdated device will be replaced without any problems.
Preparatory stage
- First you need to turn off the water supply from the central riser, otherwise you can run into big trouble - you will have to eliminate the flooding. Then you need to open the tap so that the remaining water flows out of the mixer.
- You should prepare the tools, as well as materials that will be needed for replacement. It will not be superfluous to study the passport and instructions for the purchased kitchen faucet.
Tools and materials needed for work
To change the mixer does not need any tricky devices. In most cases it is enough:
- adjustable wrench (in some cases, if it is not there, you can use a wrench);
- flat screwdriver;
- Phillips screwdriver;
- flashlight;
- sandpaper.
In addition, it is worth preparing a small container where you will need to pour water from the siphon. It will not be superfluous to have a washing agent in order to clean under the mixer, as well as under the sink, along with the replacement.


First of all, you need to buy a new mixer and prepare the necessary materials and tools. After that, you should use a flashlight and look under the sink to inspect the place of work.
The process can be conditionally divided into the dismantling of an outdated mixer, as well as the installation of a new one.
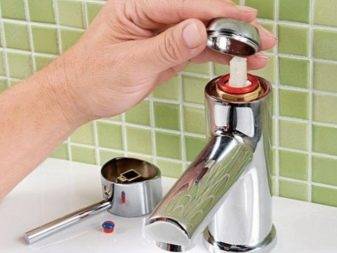
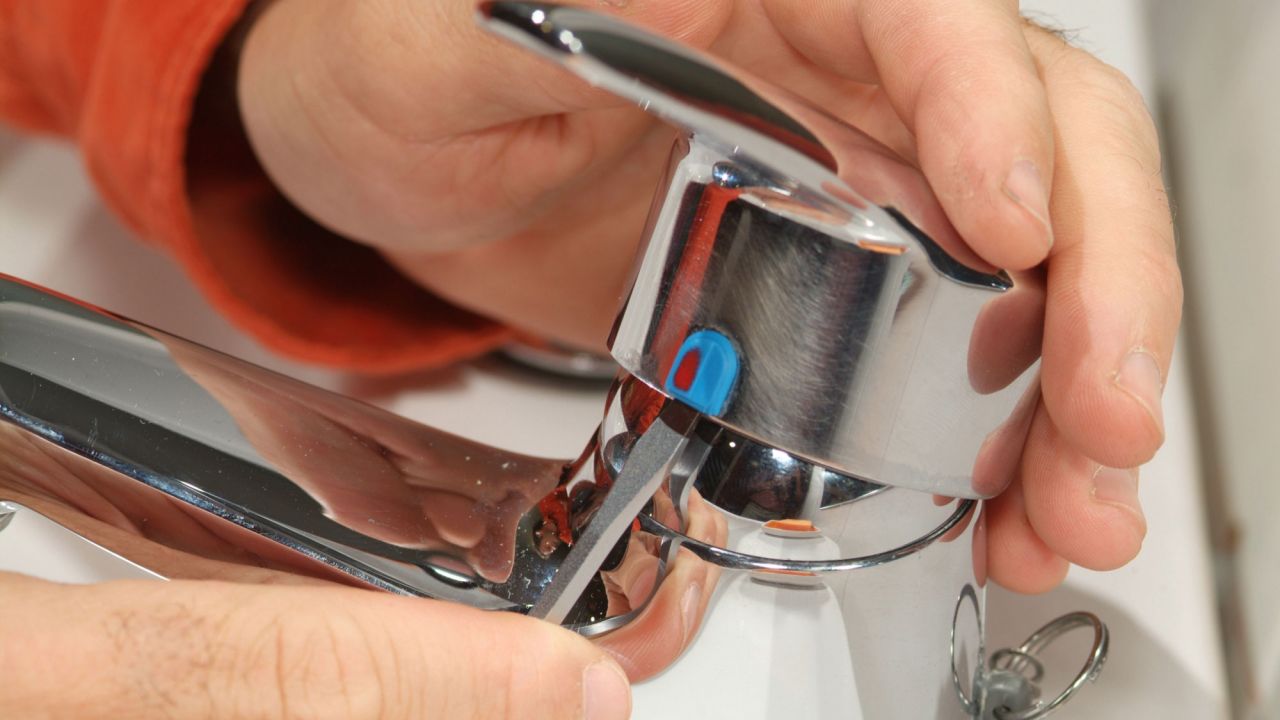
Dismantling the mixer
First of all, we turn off the water in the bathroom so that there is no flooding.
The mixer must be removed in the following sequence:
- In order to pour out the remaining water from the system, open the tap.
- Find the place where the connection of the mixer hoses with pipes is located.
- Determine where the faucet is attached to the kitchen sink.
- If you have an overhead sink, then you need to dismantle it.
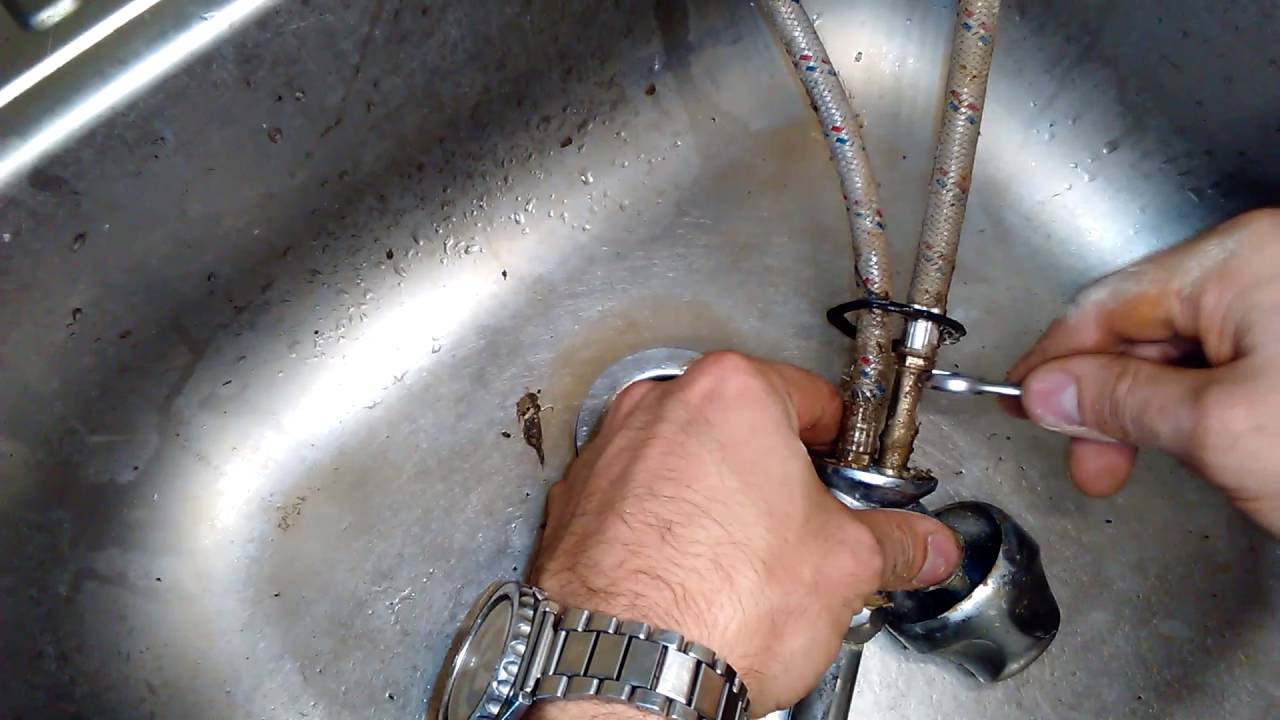
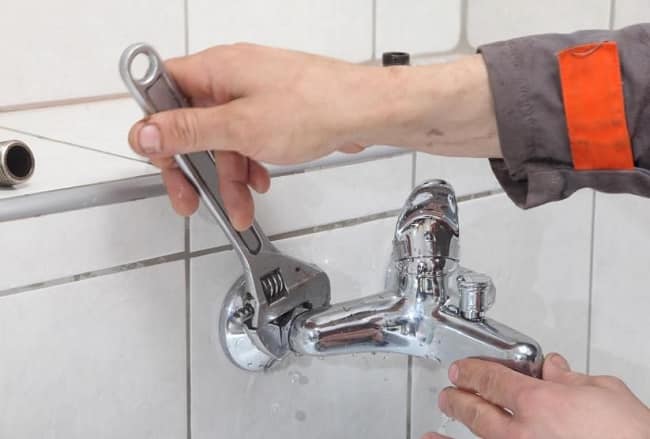
- Using an adjustable wrench, you need to remove the flexible hoses from the pipe. To pour the water still in the pipe, use a container. Try to work carefully so that the connections are not damaged.
- Next, the lower part of the siphon is disconnected.
If you decide to use hoses, then they are also disconnected from the mixer and then connected to a new mixer and installation continues. At the same time, to avoid problems in the future, you should make sure that the hose gaskets are in good condition. An indicator of their reliability will be the integrity and absence of deformation, as well as their location in the appropriate place.
After dismantling the mixer, you can begin to install a new device. But before that, it is advisable to check the mounting hole for the presence of accumulated dirt in it. If it exists, then it should be removed.
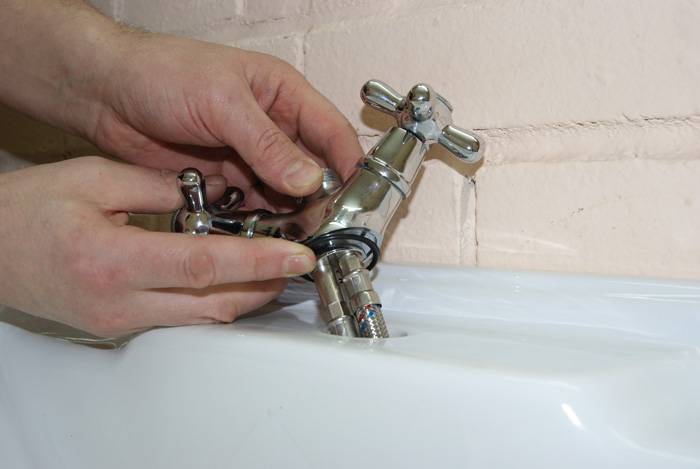
Installing a new faucet
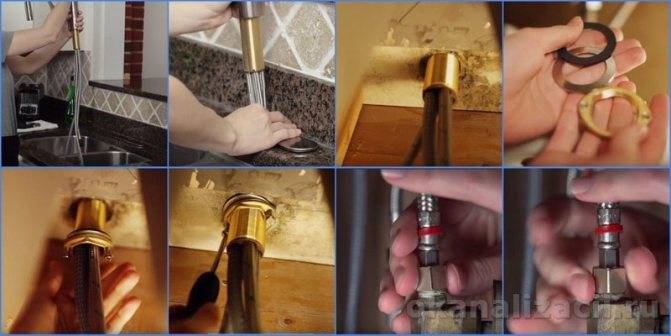
Before proceeding with the installation of a newly purchased mixer, you need to install a pipe connection, that is, install flexible hoses.
Then you can install the mixer on the sink.
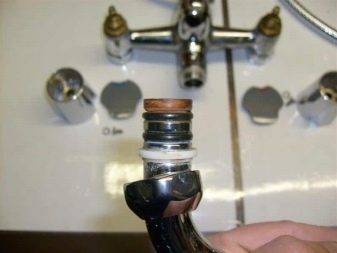
- Initially, it is necessary to install an annular gasket on the base. It should be placed extremely precisely in the groove strictly designated for it. Otherwise, if you make a mistake, the water will seep and melt the elements under the sink, as well as below. This can lead to trouble.
- Next, lead the flexible hoses through the mounting hole. To do this, the sink must again be held upside down and hold the mixer.Make sure that the O-ring stays in place and does not move during this operation.
- Then you need to install a rubber seal, which should have the same configuration with the pressure plate in shape.
- The seal must be firmly seated on the pressure plate.
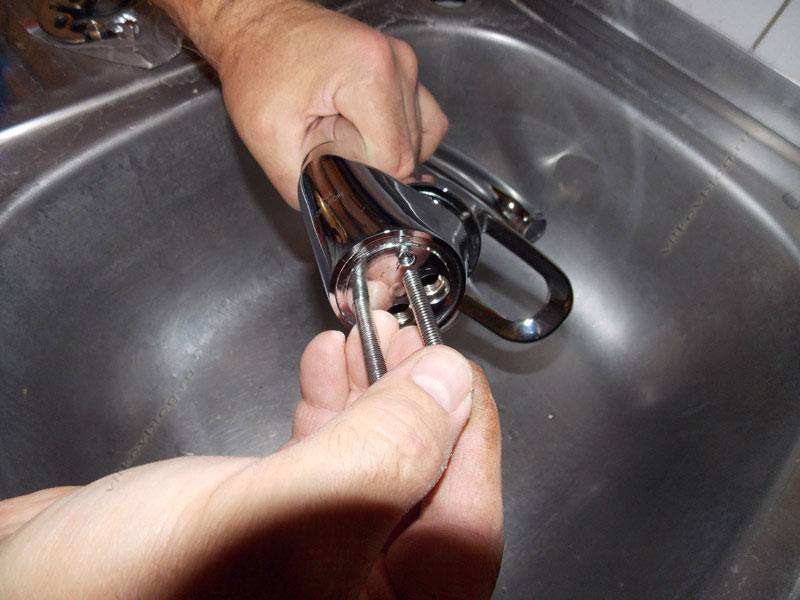
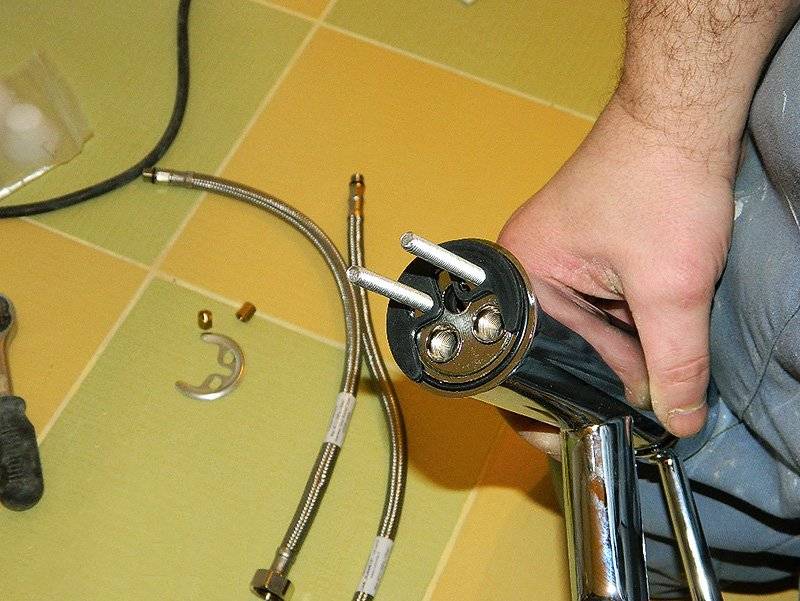
- Then you need to screw the threaded pins into the mixer elements through the necessary holes.
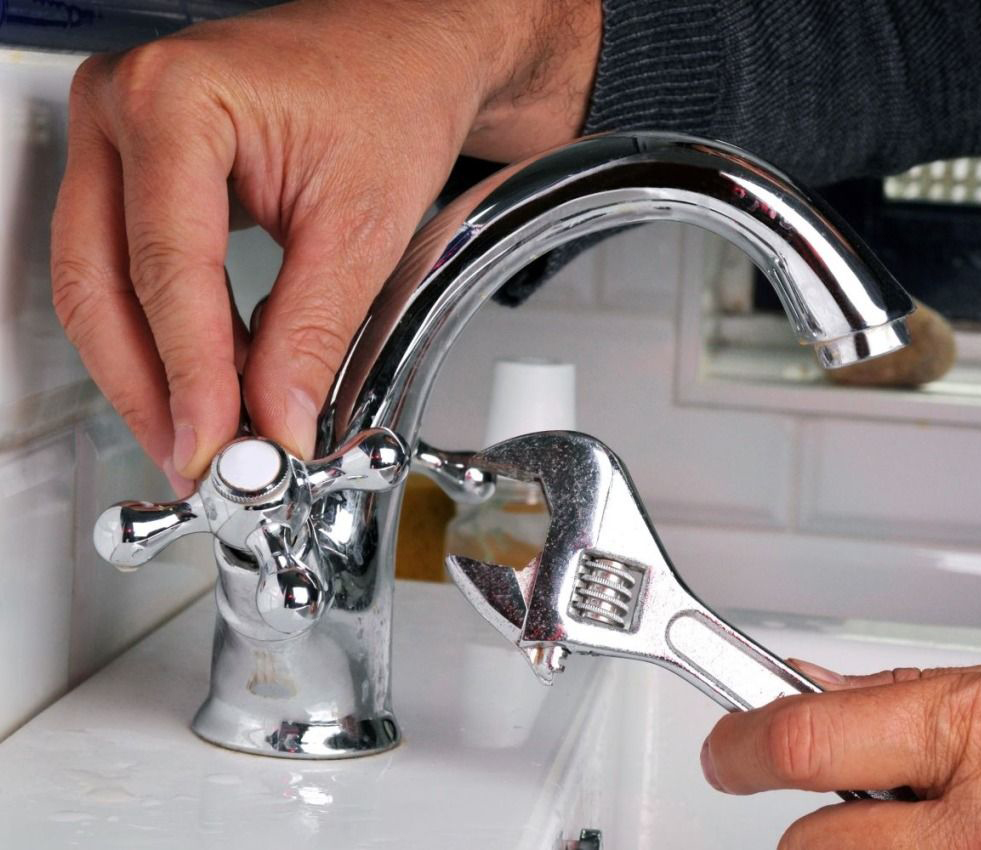
Dismantling the old crane
The mixer to be replaced is removed as follows:
close the root valves at the inlet of the water supply to the apartment and open the taps on the mixer to relieve excess pressure;
cover the bathtub and sink with rags so that accidentally dropped parts do not damage the enamel or ceramics
It is important to close the drain holes so that small parts do not fall there;
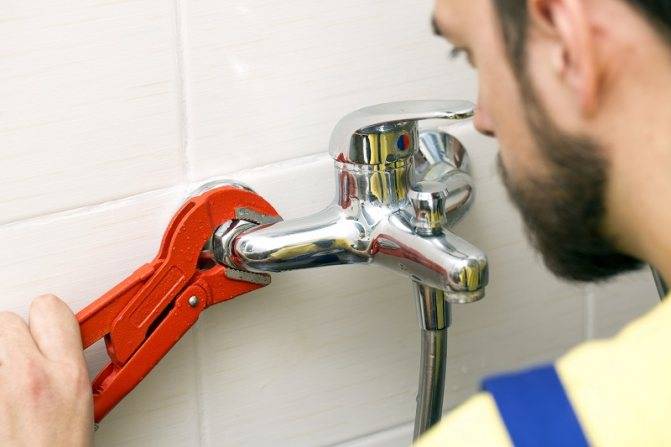
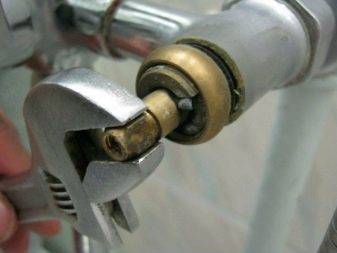
screw the nuts of the mixer from the eccentrics with a wrench. If they are stuck due to lime deposits, brake fluid or kerosene is dripped and after 15 minutes
retry. In especially neglected situations, WD-40 fluid is used. This composition effectively softens rust, paint, glue and all kinds of deposits, for which the people received the nickname "liquid key".
Having unscrewed the nuts, the old mixer is placed in a basin - so that the small amount of water remaining in it does not leak onto the floor.
How much does it cost to change a kitchen faucet
The total replacement cost will be the sum of the cost of the crane itself, consumables and installation work. At the end of 2018:
- The minimum price of a kitchen faucet is 400 rubles. The maximum is from several thousand.
- Which mixer is better is up to the owner to decide, but more expensive models will always be more reliable.The coarse filter costs from 120 rubles.
- In most cases, you won’t have to spend money on eyeliner, since it is usually included in the kit. If it is not there or there is not enough length, then for the hoses you will have to pay from 150 rubles.
- Calling a plumber will cost from 400 rubles. Do-it-yourself installation will be free of charge.
So that the problem of “how to choose a kitchen faucet” does not bother too often, it is enough to replace worn-out gaskets, cartridges and aerators in a timely manner. In addition, it is periodically necessary to clean the coarse filter and monitor the condition of the mesh inside it.
What tools are needed for the job?
To carry out the work, there are enough devices that everyone has. The list consists of only a few items:
- Fluoroplastic tape.
- Rough wire brush.
- Socket wrench with a deep bed.
- Spanners.
- Wrench.
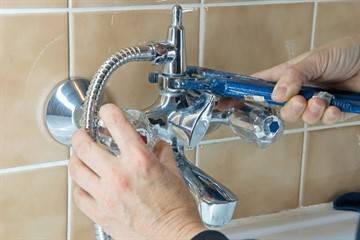
 Example of tap replacement tools.
Well, if at hand there is a complete mounting kit. That set has washers and screwdrivers, all the elements for fastening. They are usually sold with the device. Each manufacturer attaches instructions to their devices, where they describe in detail the features. For cold water too.
Additionally, you need to purchase household accessories like basins and buckets, rags. Then it will be easier to minimize the water that appears during the repair of the old product. It will not be superfluous to purchase a flashlight, since there is usually not enough light when dismantling. Without it, the installation of the mixer will not be convenient.
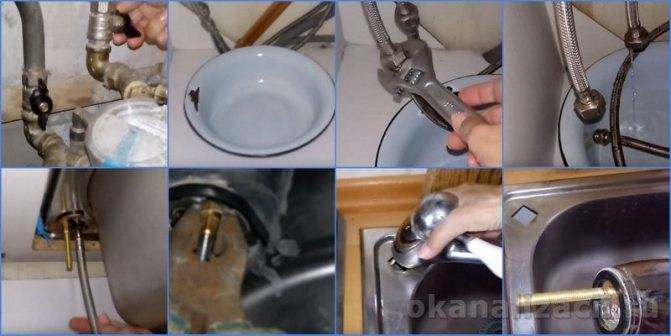
Dismantling the old structure
Before delving into the solution of the question of how to change the faucet in the kitchen, it is necessary to remove the worn out structure.The main rule here is that dismantling should be neat and unhurried. No need to break out and tear off the old faucet. All operations must be performed carefully so that you do not have to additionally repair the sink, pipeline outlets, and so on. What is the procedure for the first stage in the process, how to install the faucet on the sink - dismantling?
- Shut off the water at the stand.
- Place a container under the hose connection area.
- Carefully remove the washers for hot and cold water inlets from the pipelines.
It may happen that this procedure is actually impossible to perform. If you do not know how to remove the faucet in the kitchen, use the advice of experts (described below). Long-term operation of metal parts in conditions of high humidity probably led to rusting and “sticking” of the nodes. To disconnect the old kitchen faucet hose from the water pipe, you can use special tools: vinegar, lubricants, acids, and so on. Only the procedure must be carried out carefully.


Unscrew the hoses on the mixer.
The case if you want to install an old flexible hose for a new plumbing fixture. It is recommended to decide in advance how to unscrew the hose from the mixer without damaging the threaded connections
It is worth acting carefully. Bent metal parts can make it impossible to dismantle the crane. You will need to carry them out with a grinder
You will need to carry them out with a grinder.
- Disconnect the sink from the sewer.
- Disconnect the valve nut.
This procedure will also be difficult for the reason described above. When wondering how to install a mixer in place of an old plumbing fixture, it should be borne in mind that you will have to work in a limited space.Therefore, if the sink on the countertop is removable, it is better to dismantle it too. At this stage, you will also have to think about how to remove the faucet from the sink bowl, since the fixing nut may not give in immediately (probability of 75%). And it may not succumb even after using special lubricants and acids (they act with any degree of adhesion of metal assemblies, but you will need to wait 2-4 hours). If, after trying the above methods, you failed to unscrew the nut, and you don’t know how to remove the faucet from the sink, use a grinder. Need to cut the nut.
Remove faucet.
Now you know how to remove the faucet in the kitchen from the sink, but before proceeding with the installation of a new plumbing fixture, carefully inspect the attachment and connection points of the faucet. On the sink bowl, if it is metal, rust zones could appear. In this place, the metal will be fragile, which means that installing a faucet in the kitchen can become much more complicated. Problems can also be with the places where the hoses are connected to the sewer and water supply. Before fixing the faucet on the sink, make sure that it will be installed on serviceable and reliable functional units.
Sealing materials for plumbing threads
To seal the thread when connecting plumbing, 4 types of seals are used. In this case, only the eccentric or adapter threads will need a seal.
Flax and sealing paste

Linen with paste is still popular with plumbers. Sealing paste prevents flax from drying out on hot pipes and rotting on cold water supply.
Benefits of using flax with paste:
- Lowest consumable cost.
- Suitable for winding dirty and wet pipes.
- Suitable for large diameter pipes.
- Possibility to loosen the connection up to 45° without loss of tightness.
FUM tape
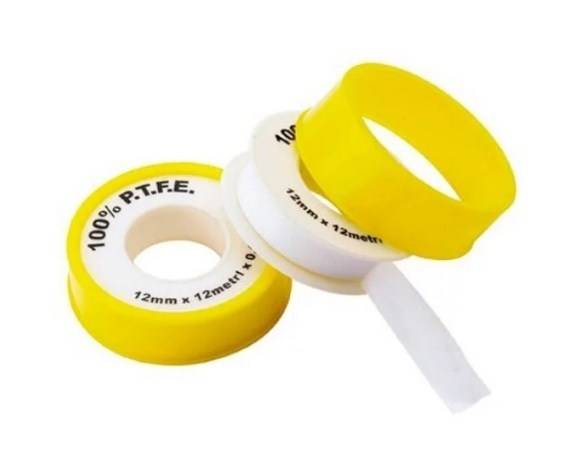
Fluoroplastic tape is suitable for winding on thin-walled connectors, plastic, wet and fine threads. The main advantage of using this compactor is the speed and cleanliness of the work. The disadvantages include an increase in the cost of making the connection, so the use of FUM tape on large diameter pipes is not economically feasible.
Sealing thread

Benefits of using a thread to seal a joint:
- Possibility of adjusting the connection up to 90° for unscrewing.
- Suitable for winding on wet, cold and hot pipes, dirty threads.
- Microfibers, which are part of the threads, provide high tightness of the connection under vibration loads, temperature fluctuations and slight thread movements.
Anaerobic Adhesive Sealant
When choosing the type of sealant, it is necessary to take into account the possibility or necessity of dismantling the equipment. For untwisted and non-separable connections, various types of anaerobic sealant are used.


Among the advantages are the adjustability of the connection, the speed of work, as well as the fact that there is no need to tighten the thread with a wrench, which is especially convenient in hard-to-reach places. Among the shortcomings, the high cost and the need to degrease the fittings are noted.
The instructions considered are of a general advisory nature, since when dismantling an old crane, especially a Soviet-style one, various nuances often arise that cannot be foreseen. And when installing a new faucet, you must follow the manufacturer's recommendations, since each model may differ from the previous one even for the same brand.
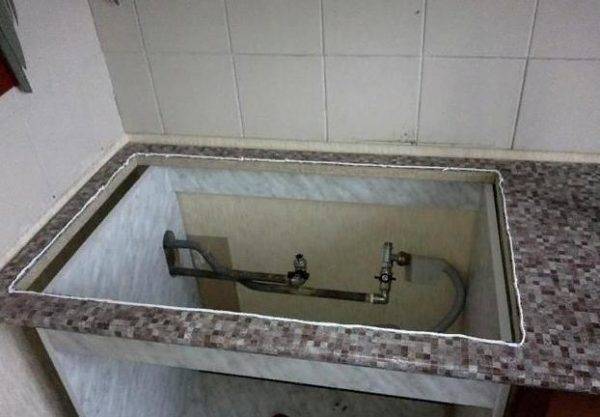
Bathtub or sink installation
Devices are connected to the water supply by means of a flexible connection, they act as follows:
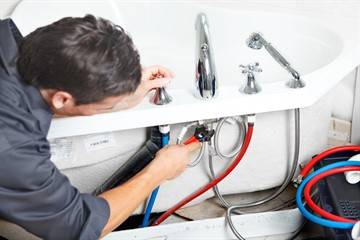
- in the side of the bathtub or washbasin, a hole is drilled with a diameter corresponding to the size of the mixer. To form such holes, crowns (cylindrical drill) are used, and if such a tool is not at hand, they drill many holes along the contour with an ordinary drill and then break the gaps between them with wire cutters;
- lay a gasket on the side and install the mixer, threading the connecting pipes into the hole. From below, the device is fixed with a horseshoe-shaped washer and nut (a gasket is first put on);
- connect the nozzles of the mixer and pipes with a flexible connection. It is not necessary to seal the connections - there are already gaskets in the nuts of the eyeliner. In order not to crush them, excessive tightening is contraindicated.
If the flexible eyeliner leaks, it is not necessary to completely change it: videos have been published on the Web with instructions for installing a cracked polymer tube inside the braid. Repair is much cheaper than buying a new product.
Replacement
The whole process can be divided into two main steps. The first and sometimes the most difficult is to dismantle the old system and crane. The second involves direct installation.
At the same time, in this situation, a process will be considered where the faucet in the kitchen is replaced using old metal pipes and without dismantling the sink. Having mastered this particular option, you can not be afraid of any such work and installation on new systems in the future.
Plumbing tool set
Tool
This type of work requires the master to have a special tool.
That is why you will need:
- wrench;
- pliers;
- tow or fum tape;
- a hammer;
- screwdriver.
Dismantling the old mixer
Dismantling
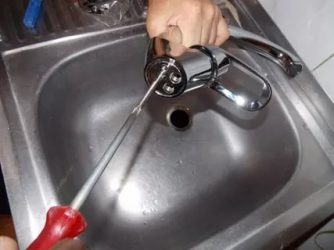
- First of all, you need to free up space for work. To do this, remove all unnecessary items, and cover the floor with a rag, which is useful for removing water and moisture.
- Next, turn off the taps through which water enters the room.
- Then many instructions on how to remove a faucet in the kitchen advise you to warm up the connection of the faucets to the pipe. This is only appropriate if there are old and rusty pipes in order to remove a little rust or plaque.
- Also, some craftsmen use kerosene, which penetrates through small holes between the threads and makes it easy to unscrew the nuts. This is done not only to facilitate the work, but also to ensure that when applying great efforts not to damage the pipe or thread.
- That is why they begin to unscrew the nuts and couplings on the taps only after warming up with a blowtorch or treating with kerosene.
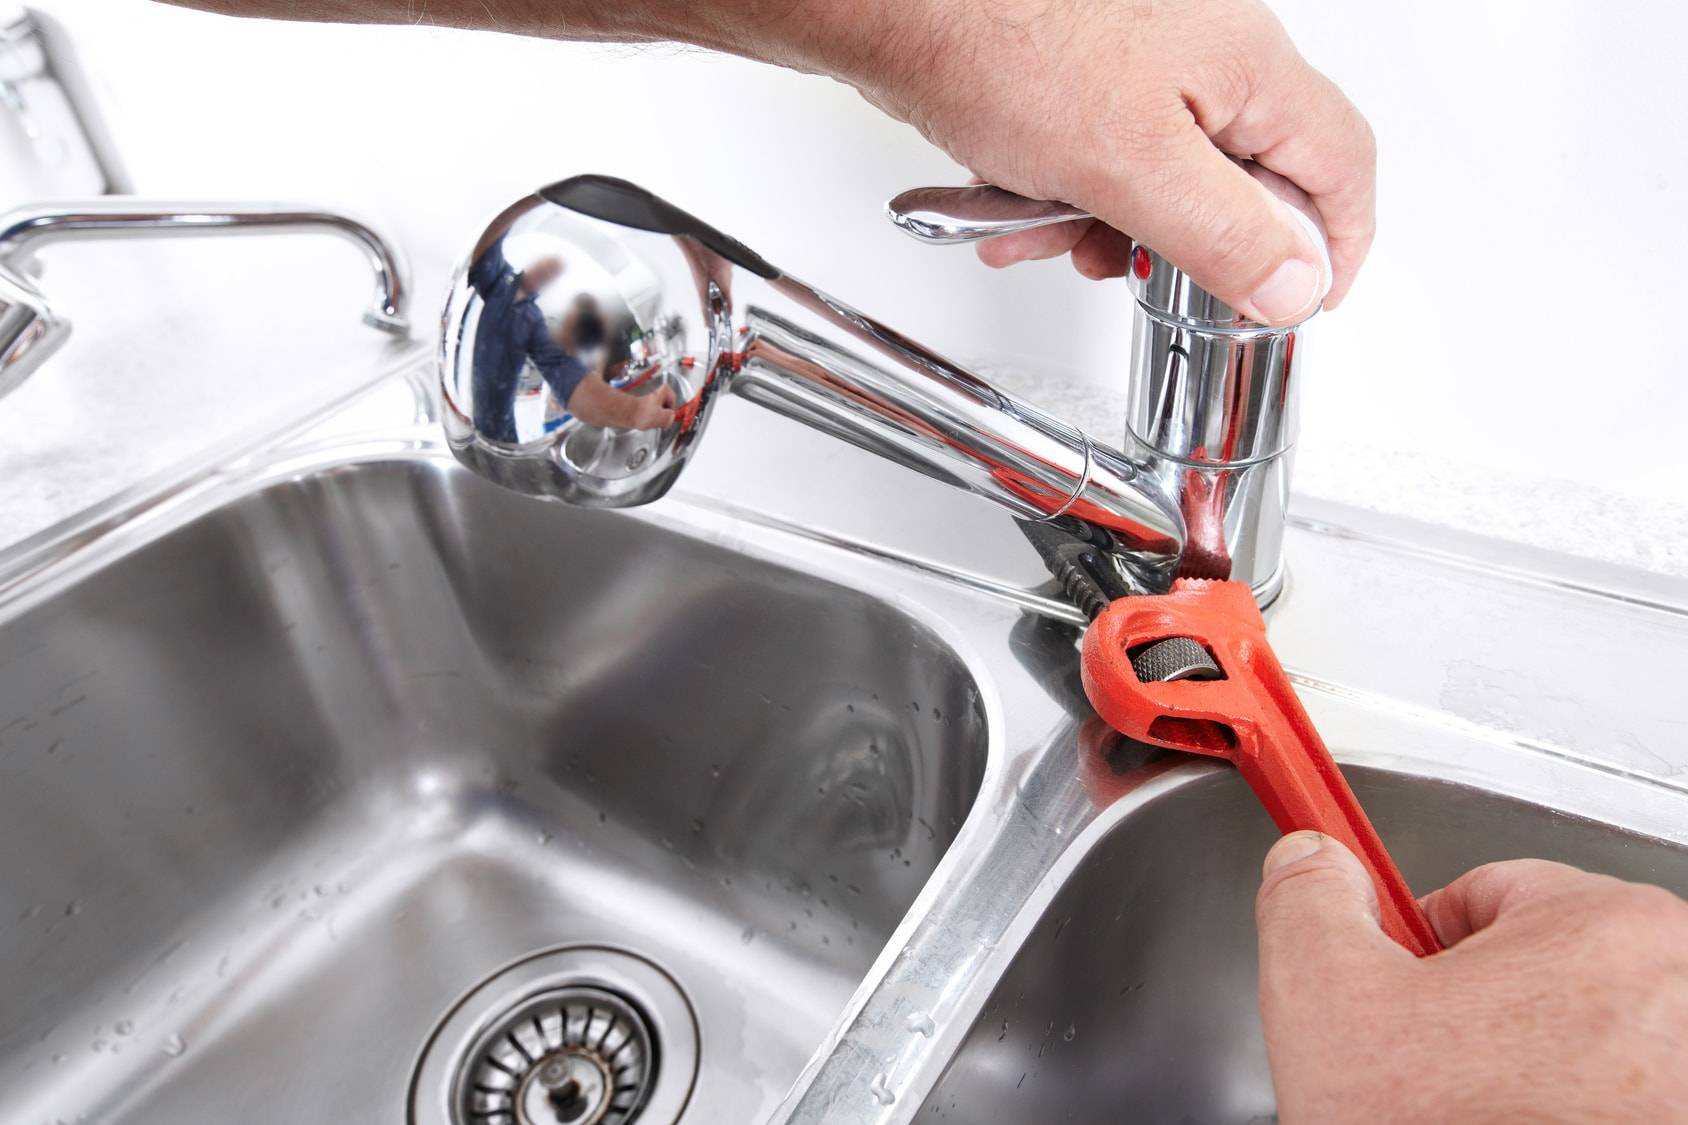
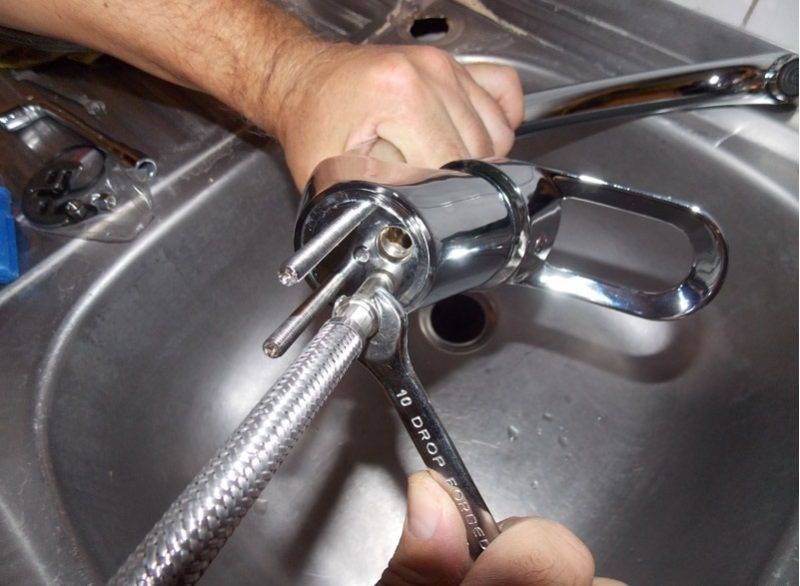
- Next, using pliers, unscrew the nut that holds the mixer on the sink. At the same time, it is also necessary to be careful not to damage the mounting hole, otherwise it will not work to change the faucet in the kitchen using the old sink.
- As a result, you need to rinse the seat well, and if you have the necessary taps, renew the thread.
Installing a sink faucet
Installation
The further process is quite simple, but requires attention and concentration.
First install the faucet on the sink
In this case, you must not forget about the presence of special rubber gaskets that come with the kit.
Many instructions that tell you how to remove an old faucet in the kitchen do not pay attention to the fact that sometimes the mounting seat is dirty or greasy. Therefore, even after installing a new faucet, there are minor leaks from water on the surface of the sink.
To avoid this, it is best to wipe the old sink at the faucet installation site with alcohol.
After the new faucet is installed, it is fixed with a special nut and pliers.


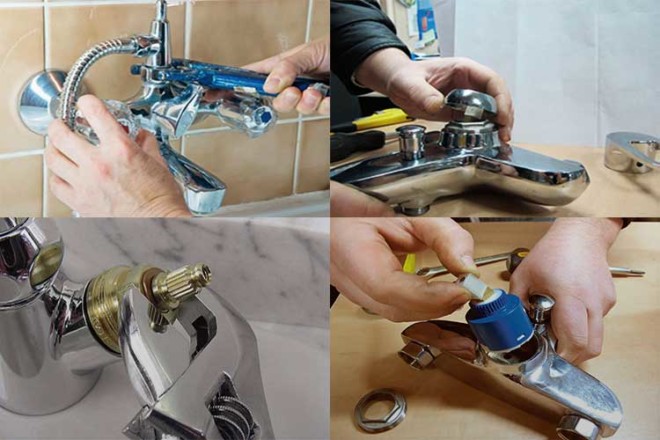


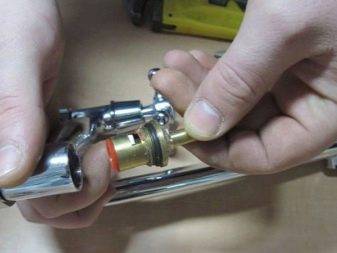
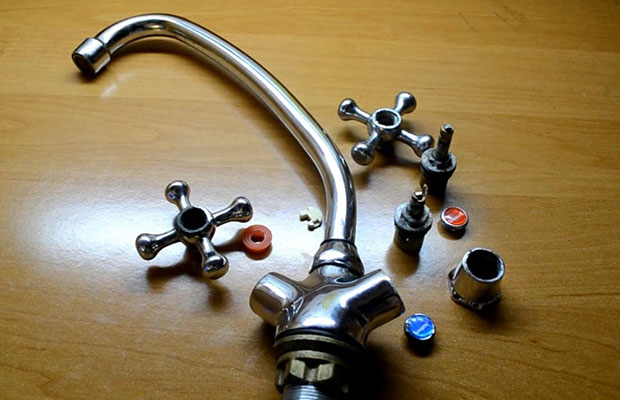
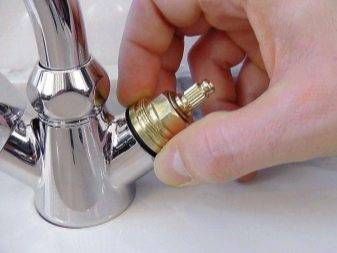
Mixer design diagram
Before connecting the faucet in the kitchen, you need to check the presence of rubber gaskets in the nuts on the mixer nozzles.
It is worth noting that if old metal pipes are used, then it is best to play it safe and wind the threads with tow or tape-fum
So the connection will be more reliable and tighter.
Special attention must be paid to the location of the cranes. Many video editing materials do not pay attention to this.
However, the user is so accustomed to the past location of the hot and cold water valves that their sudden swapping can cause a lot of discomfort.
It is also necessary to check the quality of the connection of the nozzles with the mixer. If necessary, they can be tightened with pliers.
Connecting a faucet with a water purification filter
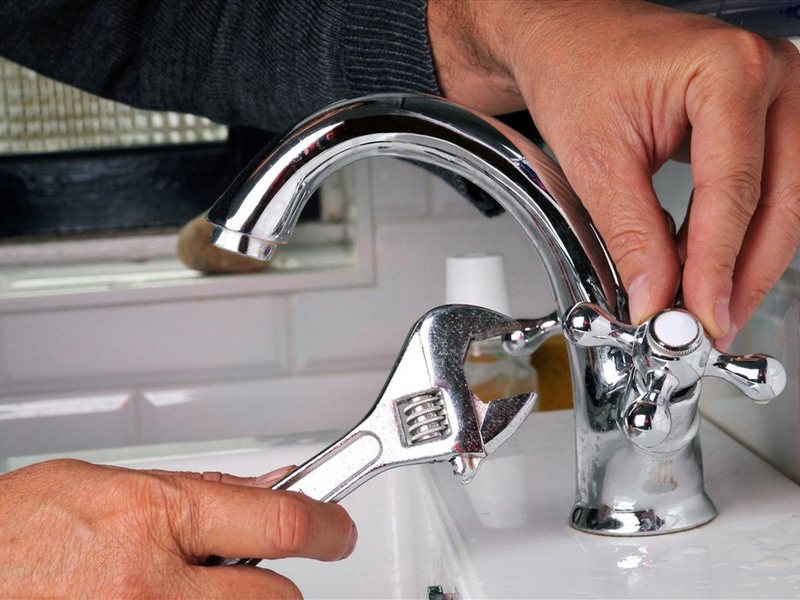
After the tow is wound, the presence of a rubber gasket is checked and the location of the water taps is selected, the instruction involves connecting the mixer to the system. In this case, an adjustable wrench is used, which tightens the nuts securely enough so that there is no leakage, but not so much that it does not harm the rubber inserts.
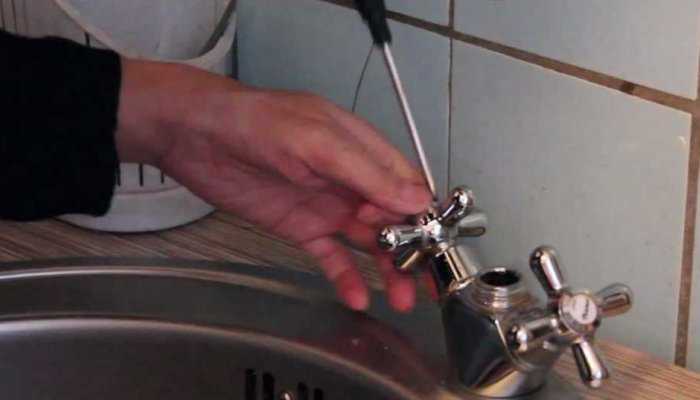
Examination
After the do-it-yourself installation is completed, it is necessary to perform a check. To do this, you can open the tap at full capacity and monitor the occurrence of leaks. You should not use an industrial leak detector for these purposes, which is distinguished by a high price and an exorbitant harmful effect on human health.
For greater reliability, you can simply pinch the faucet spout with your finger and turn on the water, creating additional pressure in the system. If there are no leaks after that, then the installation is considered complete.
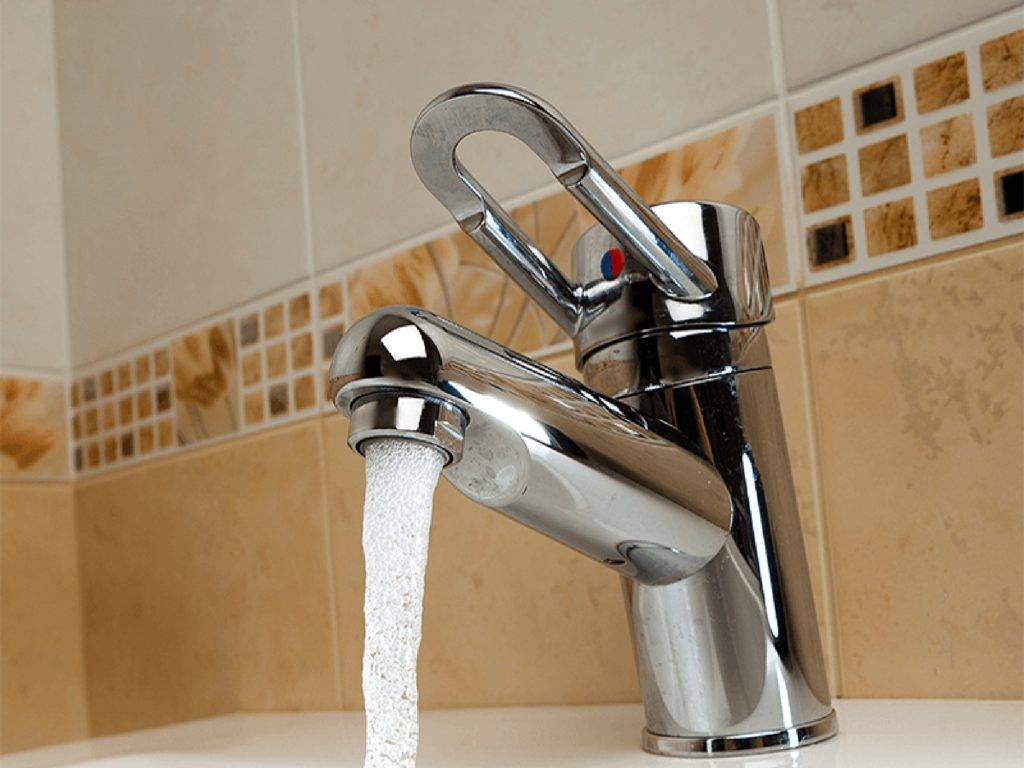
Properly installed faucet without leaks
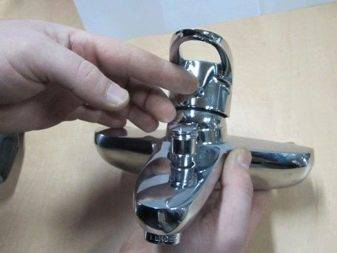
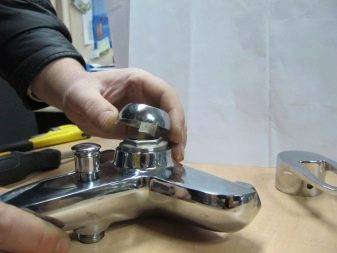
3 Assembling a new device - everyone can do it!
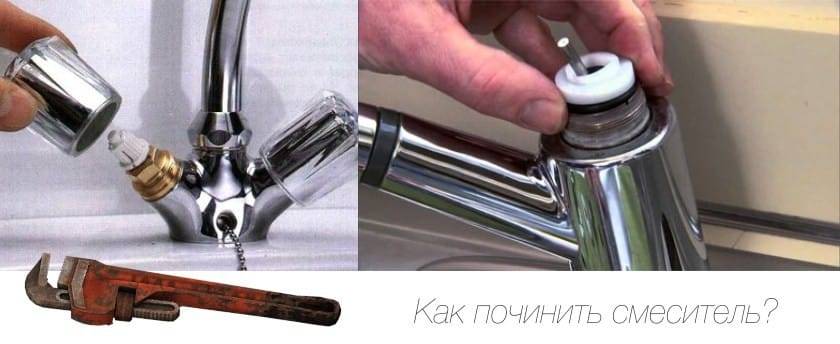
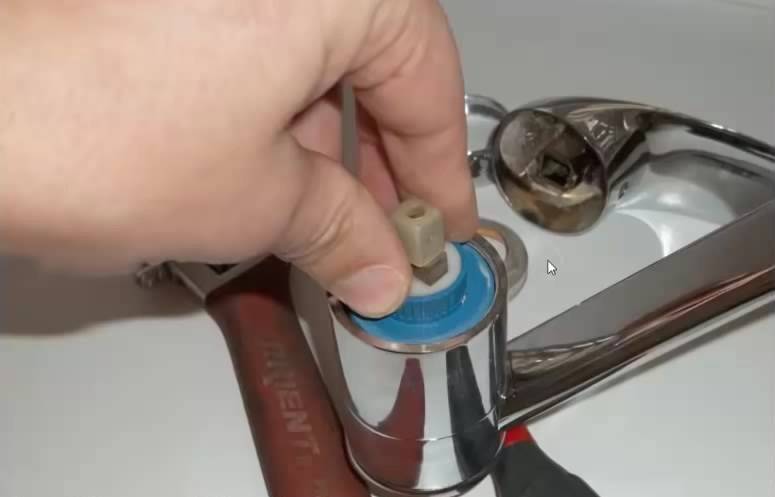
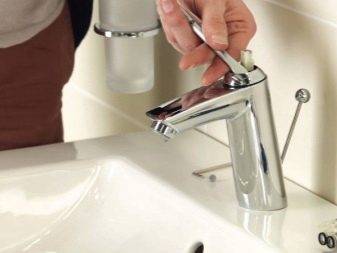
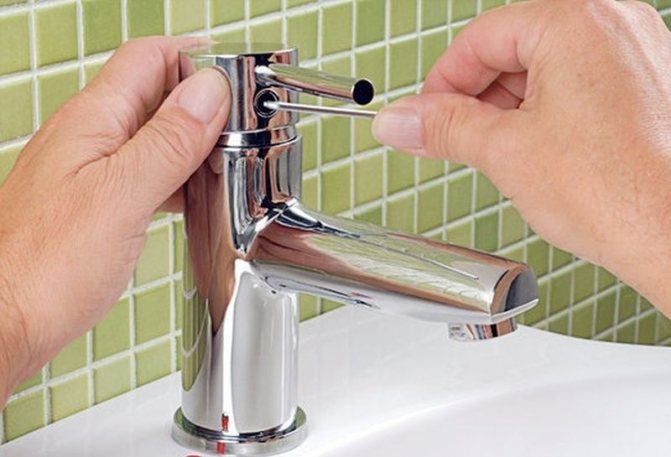
Before changing the crane, you need to assemble it. This applies, in particular, to the two-valve mixers common today. The process is elementary - the spout of the device must be inserted into its body until it comes into contact with the limiter ring, and then these parts are carefully connected to each other. The procedure is carried out without the use of any tools - manually. In this case, it is not necessary to overtighten the spout and the body.
Before installing the mixer, it must be assembled
The next step is to connect the mixer to flexible hoses. In some cases, the crane is connected to hard leads. But it is better to entrust such work to professionals.Not every home craftsman can cope with it on their own. After connecting flexible hoses, be sure to wrap their ends with FUM tape (a couple of turns are enough). But the tip does not need to be sealed. Gasket on the hose eliminates the possibility of leakage.
Next, insert (alternately) eyeliners into the tap holes. Screw them on by hand. When both eyeliners are installed, additionally tighten the connections with a wrench (open-end) by 11 or 10. Here you need not to overdo it. If you do not reach the connection, the seal will leak water. If overtightened, the pads may crack. Be extremely careful! It remains to install the studs-pins into the holes that are on the mixer, and thread both eyeliners into the sealing ring. They must be stretched to the crane body (to its base), and then fixed in a stationary state.
List of necessary tools and spare parts
Before proceeding with the installation of kitchen plumbing with your own hands, you need to prepare and purchase everything you need. You will need:
- FUM sealing tape - it is better not to take linen tow, as it swells from water, and then it will be difficult to remove the eyeliners;
- Open-end wrench for 10 or 11;
- Tubular wrench - needed to tighten a hard-to-reach nut during installation of the faucet to the sink;
- Mounting kit - it should contain rubber o-rings, that is, half washers (2 pcs.), One horseshoe-shaped metal half washer, stud (1 or 2) and nut. Such a set is attached to the mixer, but if you wish, you can buy a thicker and stronger sealing ring, since manufacturers do not always include high-quality gaskets in the kit;
- Pliers, a small key, a screwdriver - sometimes they are also needed;
- A rag, a basin and a flashlight will also come in handy so that you can see everything;
- And finally, the main thing - 2 plumbing connections - are attached to the kit, but it is better to buy others, since the factory ones are often short and made of silumin;
Perhaps it is worth focusing on the eyeliners. Keep in mind that:
- Eyeliners are needed so long that they do not break, but bend in the form of a semicircle, that is, they should not be too long or, conversely, short in tension. The most suitable length is 86 cm;
- If the factory eyeliner is too short, then it is better not to try to build it up, but to buy a new one;
- In addition, do not buy silumin hoses, especially if you bought a silumin mixer - at least the connections must be reliable;
- Installation of flexible connections is easier than connecting rigid ones, but they are considered less reliable, so it is better to install them together with faucet taps;
- In a set of eyeliners, there must be gaskets;
- Replacing an old faucet in the kitchen most often involves replacing old hoses, because they also wear out.
Causes of failure
The main reasons for the complete replacement of mixing taps in the kitchen and bathroom are their frequent leaks or blockages, wear of the switching mechanisms in the shower-spout system, cracks in the body, broken fasteners, as well as a change in the design of the rooms where these taps are installed. It is necessary to understand and determine exactly why breakdowns occur.
This is especially important for those who are satisfied with the existing mixers, and extra costs are not included in the plans.
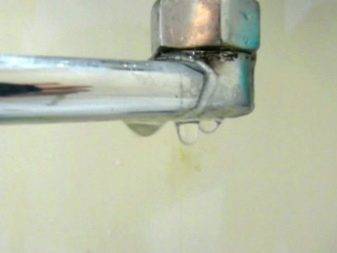
Leaks in two-valve types of taps come from the goose of the mixer and from under the flywheel of the tap.
- From the goose of the mixer.There may be one of two reasons, or both. The first is the passage of valve gaskets due to violation of their integrity, wear, hardening or deformation. Violation of integrity can occur as a result of exposure to the gasket of the sharp edges of the valve seat. The second is seat and valve wear, which occurs most often in valves with a long service life as a result of corrosion and mechanical (rubbing) action of water.
- From under the flywheel of the crane. Blame it on: flywheel stem seal or valve gasket. A bad flywheel seal is caused by a loose or deformed O-ring. The reason for skipping the gasket is that it fell off the pin.
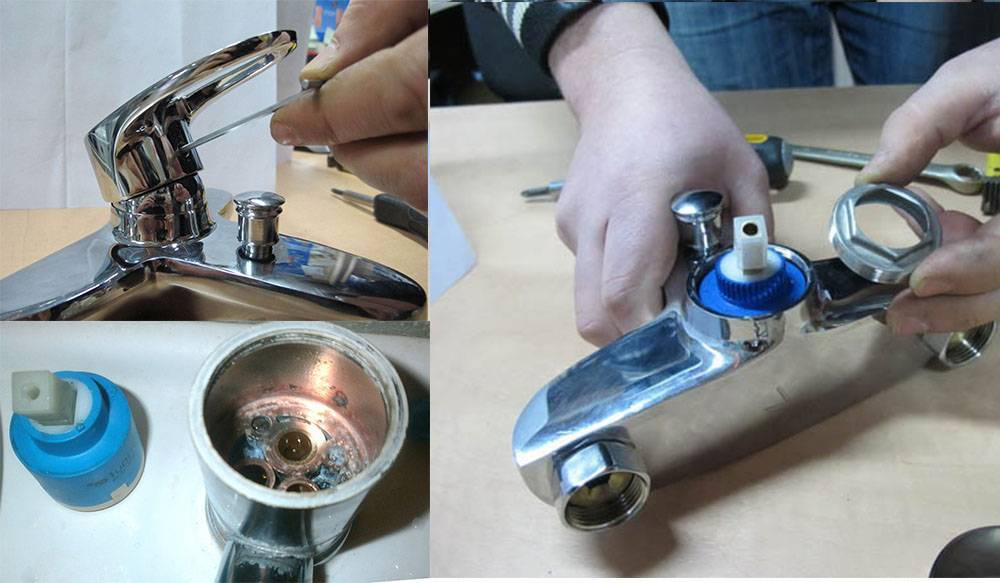
Ball or cartridge mixers leak when grains of sand or other debris get into the valve mechanism (between the ball and its seat in ball mixers, and between the discs of the cartridge type valve). Even when the taps are tightly closed, water will ooze through the resulting gap between workers shutter details.


In faucets with a shower, in addition to the listed malfunctions for the same types of mixers, other leaks are possible.
- When the faucet is turned on, water flows through both the gander and the shower. The reason lies in the switch. Depending on the type of mechanism, these can be: lack of water pressure for tight switching of the “shower-spout” system in push-button types of switches with a metal valve, wear of guide parts in switches with an eccentric and barrel, breakage due to sand ingress of plates and clamps into ball switches, wear of gaskets in spool devices.
- Leakage through the button of the pushbuttons as a result of a damaged O-ring.
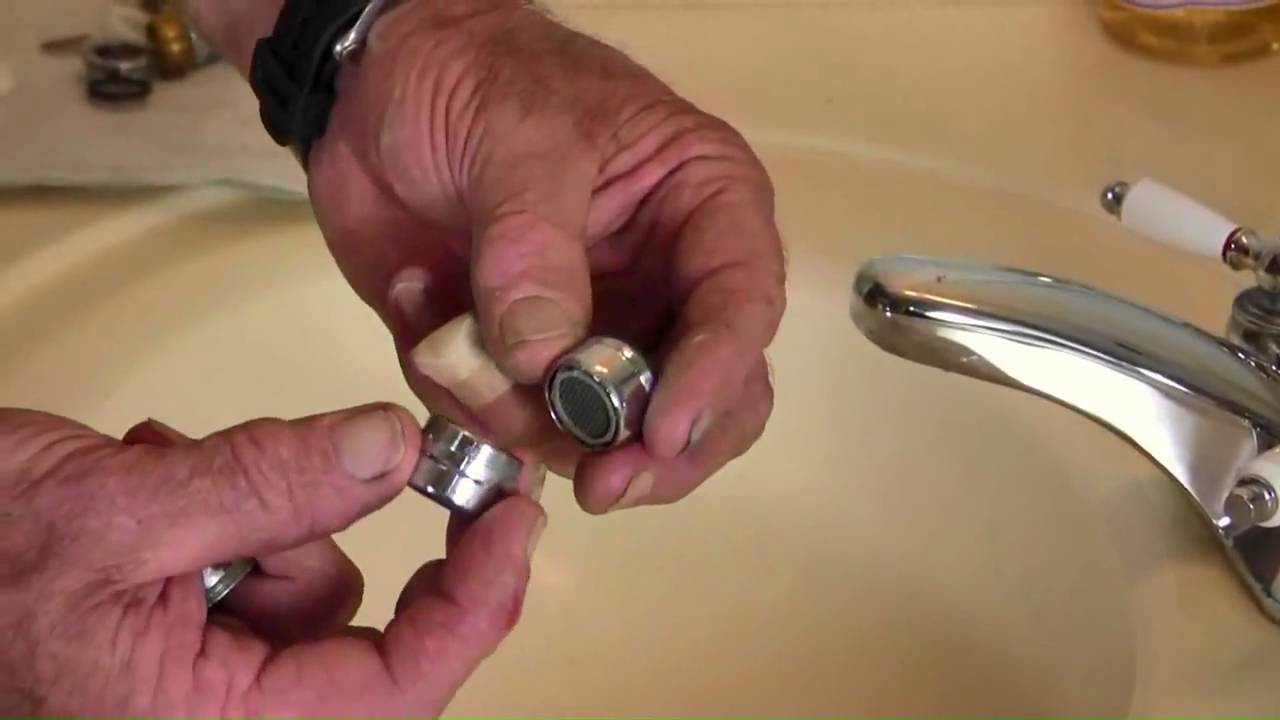
The reason for the decrease in the flow of water at the outlet of mixers of any type is most often the clogging of a special device installed at the end of the gander, called an aerator. It is polluted due to the high hardness of raw water, the salt deposits of which clog the aerator mesh and shower head openings. Litter and scale in the water pipes can cause clogging of the faucets themselves, which will also affect the power of the jet at the outlet of the tap. All these malfunctions do not require a complete replacement of taps and are easily fixed at home.
Breakdowns in the form of cracks and fistulas in valve bodies, breakage of fasteners made together with crane bodies require replacement with serviceable devices. Contactless faucets, although they have a long service life, are subject to the same malfunctions as everyone else: they become clogged from dirty water, the internal shutter mechanisms wear out, and the aerator screens become clogged. But in addition to this, sensors and photocells responsible for turning on the water when hands approach the faucet spout may fail. Such a malfunction can only be mastered by a specialist who understands electronics.