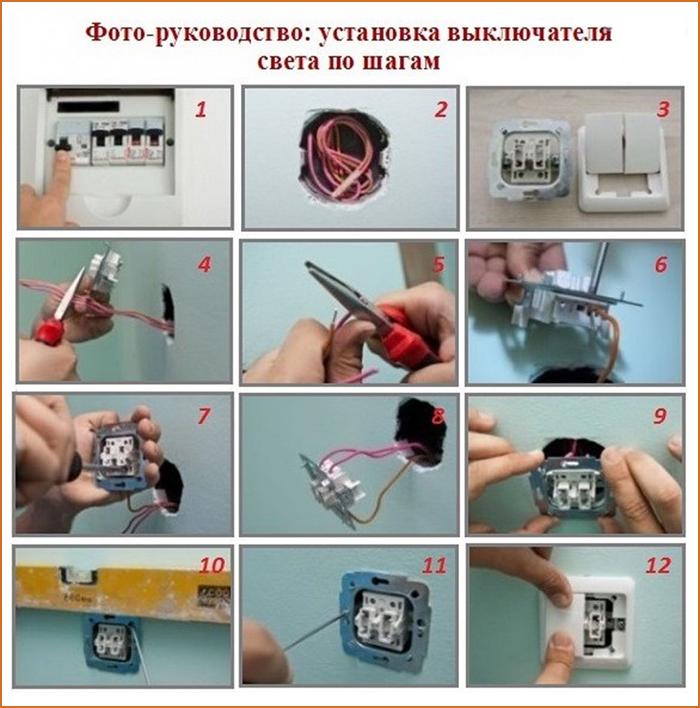
- How to replace a light switch?
- Sequence for replacing a single-gang switch
- Safety regulations
- What is a switch
- Tools for the job
- Two button installation
- Switch wiring method
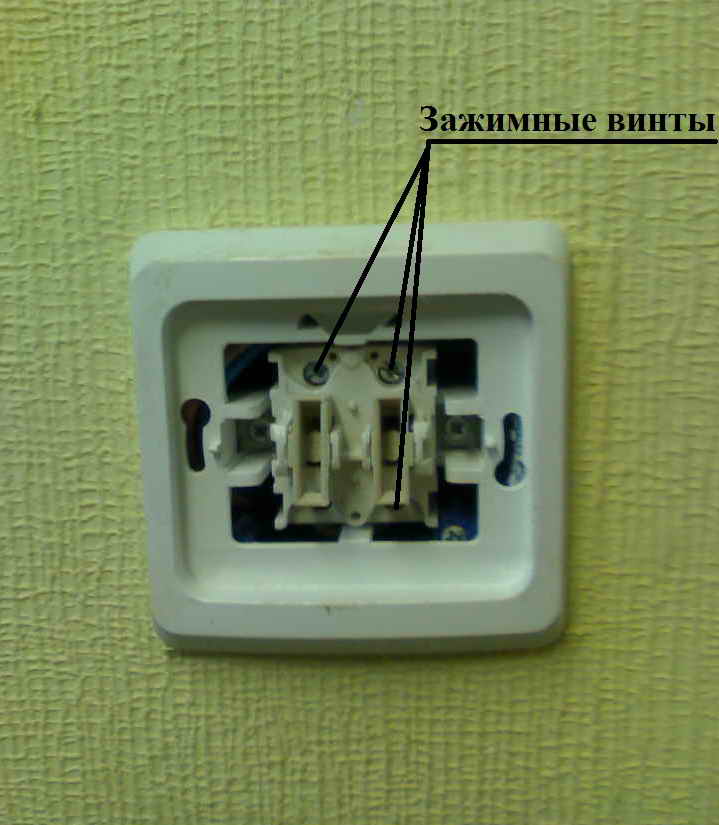
- Screw type clamp
- Non-screw clamp
- Description of the connection process
- 1 Principles of operation and types of switches - what you need to know so as not to harm yourself
- Method #1: Installing a Wireless Switch
- Switch transfer using a wall chaser
- Transfer Safety
- How to get started?
- Instructions for replacing the light switch
- How to remove the old switch?
- We are preparing to connect
- Diagram and connection with one button
- Diagram and connection with two buttons
- Non-standard situation
How to replace a light switch?
Home » Wiring » Light Switches » How to replace a light switch?
Sometimes you may encounter a problem when the light in the room does not turn on. If replacing the light bulb does not help, then the switch may need to be replaced. Calling an electrician will be expensive in most cases. Therefore, it is best to replace the light switch yourself. To replace the switch, you will need: a screwdriver, a phase indicator, a new switch, as well as a knife and electrical tape.
How to replace a switch
Before you replace the light switch, you must first turn off the electricity. You can turn off the electricity in the floor shield on the landing. In some apartments, metering boards may be located in the hallway. If a fuse is installed instead of the machine, then it must be unscrewed. If the machines will be installed on both lines, then both lines should be disconnected.
Sequence for replacing a single-gang switch
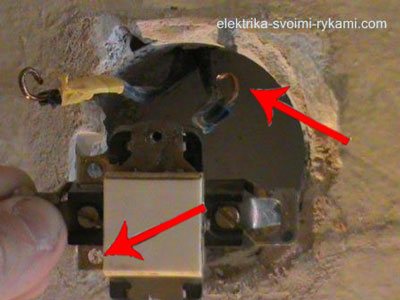
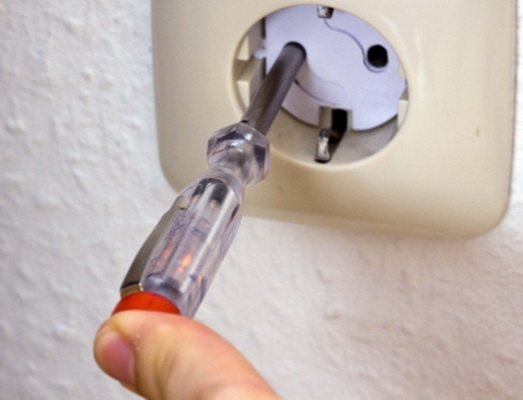
The design of the switch can be varied. Depending on the features, you need to wring out the cover and remove the switch key. In simple words, you need to remove all the elements of the switch that will block access to the wires. After you have access to the wires, you need to make sure that the problem is in the switch. For this you need turn on the home machine and, using the phase indicator, determine which of the two wires is the phase. When you touch the indicator screwdriver, a red light should light up on it. The indicator must be held only by the handle. It is forbidden to touch the metal part, as you can get an electric shock.
Important! When the electric current is on, it is forbidden to touch bare wires or terminals. It could be life threatening
After detection, you need to turn on the switch and check the appearance of a phase on the other terminal. If you see that the phase is present, then this means that the switch is fully functional, and the fault is between the switch and the lamp. If the phase does not appear, then this means that the old switch should be replaced. In some apartments, switches may be installed in violation of the rules. on the neutral line. Therefore, the method of verification that is indicated above will not work. In this case, you will need to use a multimeter. We have an article on how to use a multimeter.
Phase test multimeter
Turn off the apartment machine, check the absence of a phase at the switch terminals with an indicator and unscrew the lamps from the lamp. You can then measure the resistance between the terminals. If the switch is good, then the resistance will be zero. In the presence of a breakdown, the resistance will be close to infinity.
Removing the light switch
Now you need to unscrew all the mounting bolts and disconnect the wires and the case. When removing the switch, be careful not to damage the wires. Now you should check the condition of the wires. If the bare part fell off during installation, then you need to protect the wires again and adjust the ends so that it is convenient to connect a new switch. Areas with damaged insulation must be wrapped with insulating tape. To check the strength of the fastening of the wires, they must be pulled, but not too hard. If the connection is bad, then tighten the fixing screws.
Now you can turn on the power supply and check the operation of the new switch. If the connection and connection is done correctly, then the light will turn on. Now you know how to replace an old light switch with a new one. We hope this information was useful and interesting.
Safety regulations
It is necessary to change electrical appliances yourself, observing the following safety requirements:
- All work on the dismantling and installation of new devices is carried out with the electricity turned off at the switchboard. The only exception is the operation of searching for a phase cable.
- You can verify that there is no voltage on the wires by touching the exposed contacts with an indicator screwdriver. The LED will not light if there is at least a minimum current in the circuit.
- Do not use wires with damaged insulation, kinks or cracks.
- Do not operate switches that have visible defects.
What is a switch
A switch is a device that is responsible for supplying power and opening the circuit that goes to the lamp. It must be fixed at the point of breaking the phase wire. Therefore, do not believe inexperienced specialists who believe that it is necessary to connect the neutral and phase wires to the switch - this leads to problems with electrical wiring.

Standard Circuit Breaker Wiring
Products on the market are designed for wiring with a certain load, therefore, if there are other values, it is not recommended to connect them. The voltage and current parameters, as a rule, are indicated in the passport or on the body of the switch.


The functional task of the switch is to provide power to the lamp, as well as to stop it when the device is not in use.
Tools for the job
Before starting work, you must prepare all the necessary tools:
- Preparing a groove for electrical wiring - a wall chaser or a puncher, a chisel, a chisel, a hammer.
- Making a nest - a puncher with a crown for concrete of the desired diameter.
- Repair, dismantling and installation - a Phillips screwdriver, a minus screwdriver with a narrow and wide sting, pliers.
- Laying and connecting wires - wire cutters, mounting knife.
- Control and measurements - a tester or indicator screwdriver, tape measure, ruler.
- Embedding and finishing work - spatula for plastering and putty, sandpaper or grinder.
We should not forget that the work is carried out with the electricity turned off, which means that a flashlight may come in handy. To work at height, you will need a ladder.
Two button installation
One-key replacement switch on a two-gang carried out according to the same algorithm as in the case of a single-key switch.
There is a difference: you will need to connect three phase conductors to terminals L1, L2 and L3. For a three-key device, we use four conductors: one to the phase, and one to each contact.
Not in every case wires of familiar colors are used: red for phase, black (blue) for zero. In old buildings and in private houses, the color scheme is often different. There are also single-color wires. It is recommended to look for the necessary wires using the indicator.
Switch wiring method
Before starting the installation of the switch, you need to know that the internal wire attachments in the device may be different. There are two switching methods.
Screw type clamp
The screw type contact is tightened with a screwdriver. Preliminarily, about 2 cm of the wire is cleaned of insulation, then it is located under the terminal and fixed
It is extremely important that not a millimeter of insulation remains under the terminal, otherwise it will begin to melt, which is very dangerous.

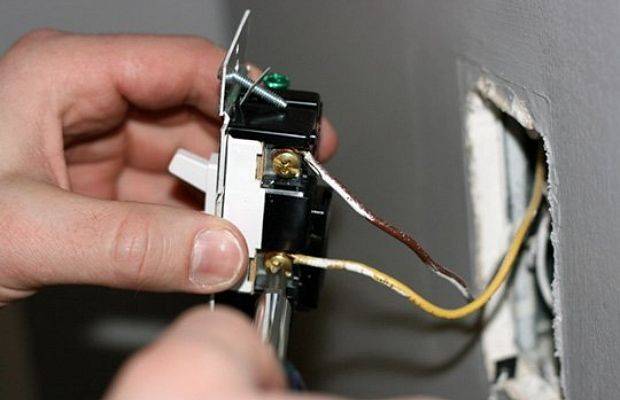
The screw-type clamp is best used for aluminum wires, which tend to heat up and deform. To return to working capacity, it will be enough to tighten the contact (+)
This connection is especially good for aluminum wires. They heat up during operation, which eventually leads to deformation. The contact in this case begins to warm up and spark.
To solve the problem it will be enough to tighten the screw. The wires sandwiched between the two flat contact plates will "fall into place" and the device will operate without heat or sparks.
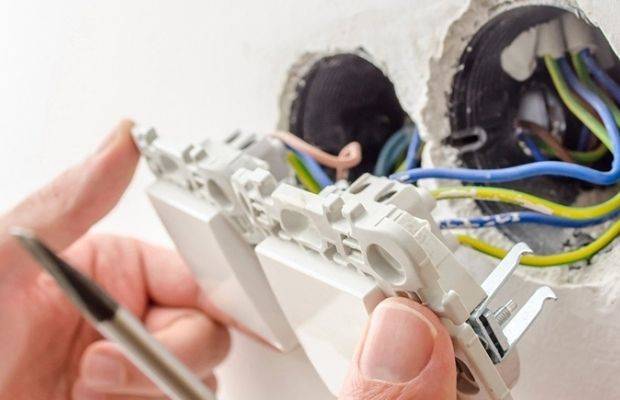
Non-screw clamp
Represents contact with the pressure plate. Equipped with a special button that adjusts the position of the plate. The wire is stripped insulation per 1 cm, after which it is inserted into the contact hole and clamped. The whole procedure is very fast and easy.
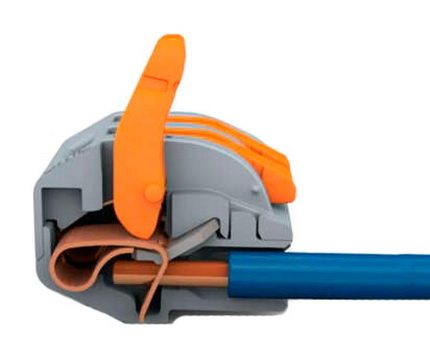
The non-screw terminal is extremely easy to install, which is why experts recommend that novice electricians work with terminals of this type.
The design of the terminal ensures high reliability of the resulting connection. Non-screw terminals are best used for copper wiring.
It must be admitted that screw and non-screw clamps provide approximately the same reliability and quality of connections. However, the second option is easier to install. It is his experienced experts who recommend using it to novice electricians.


Description of the connection process
Now let's look at how to properly connect a light switch from scratch. The wiring diagram for a single-gang switch is simple. In order for the lamp to light up, two wires are connected to it - phase and zero. In order for the light to be turned off, you need to cut one of the wires and connect a switching device to this gap.
When replacing lamps you can touch the live part of the cartridge and get an electric shock.To avoid this, the switch must be installed in the break of the phase wire.
Regardless of the installation method, in practice it looks like this.
- The main cable is laid, which goes from the power source to the lamp. It is located on the wall at a distance of 150 mm from the ceiling.
- The wire from the switch is drawn vertically upwards.
- At the intersection of the supply wire and the wire coming from the switch, a junction box is installed in which all the necessary wire connections are made.
Now you can start assembling the circuit. We will make the wiring with a two-core cable. For the convenience of performing this operation, the length of the wires coming out of the box is made such that their ends come out of it by 20 centimeters, the wires that will connect the rest of the circuit are made of the same length. The ends of the wires are stripped of insulation. Connections are made in the following order:
- Separate the ends of the wire coming from the network so that they do not touch each other. Apply voltage to this wire and use an indicator screwdriver to determine where the phase is. Be sure to put a label so as not to confuse it with others in the future.
- We turn off the power.
- Connect the neutral wire of the power cable to one of the wires going to the lamp.
- Connect the phase wire of the supply cable to any of the two wires coming from the switch.
- We connect the two remaining wires (wire from the switch and from the lamp).
- We randomly connect the wires to the switch.
- We connect the wires to the lamp holder. It is desirable that the wire coming from the switch is connected to the central contact of the cartridge.
- We supply power and check the operation of the circuit.If everything is in order, carefully lay the ends and close the junction box.
- Install the switch in the mounting box.
1 Principles of operation and types of switches - what you need to know so as not to harm yourself
Replacing a light switch in an apartment is a relatively quick procedure that does not require any additional tools or equipment.
However, it is necessary to act as carefully and accurately as possible, since you have to deal with electricity. Wrong actions can lead to very disastrous consequences:
- Ignition of wiring in the switchboard and walls;
- Failure of lamps and other household appliances connected to the network;
- Short circuit;
- The saddest development of events is electric shock.
In this regard, before starting work, it is imperative to purchase protective gloves, preferably made of rubber, to strictly comply with all the requirements and rules of electrical safety. In order to avoid mistakes during operation, it is recommended to spend some time studying the design features of electrical equipment, as well as remember the connection diagrams in the wiring circuit. In some cases, you can even take a picture with your phone so that there are no problems in the future after replacing a broken device.
Replace switches yourself without using protective equipment, only if you are sure of your actions!
Due to the fact that light switches are used almost constantly, especially in the winter season, a huge number of very different models have been developed that differ in appearance, design features, and functionality.First of all, two groups of switches are distinguished depending on the attachment to the wall:
- 1. Hidden wiring - a special metal or plastic socket is used, installed in a recess in the wall. This is where the equipment is installed.
- 2. Open wiring - in this case, overhead switches are required, which are used in wood panel products. The cable is brought out, so it has to be hidden in special cable channels so as not to accidentally damage it during daily activities.
If we talk about the design of the terminals with which the device is attached to the wiring, then there are also two main groups. The first includes screw terminals - these elements are designed to secure the stripped ends of the wire located between the plates. If you use aluminum wires together with brass plates, it creates a lot of resistance, which causes serious overheating of the entire equipment as a whole. To avoid this, it is necessary to constantly tighten the screws, which will ensure high-quality contact between the elements. At the same time, copper is not subject to such temperature changes, so the wiring from copper wires does not overheat.
Replacement procedure for double switches
Naturally, changing the wiring to copper seems to be a rather complicated process. It is much easier to use clamp terminals, which are equipped with a special spring mechanism. Due to this, the brass plate is constantly under enormous pressure, resulting in a reliable and high-quality contact. The possibility of fire is minimal, while preventive tightening of the screws is no longer required.
Based on the number of buttons, light switches are:
- 1. One-button - work with one light source or a group of lamps. When pressed, all the lighting elements connected to this switch are turned on at once.
- 2. Devices with two or more buttons - with the help of such devices, you can turn on individual lamps on the chandelier. It is very convenient, especially if the lamp is equipped with a large number of lamps. In this case, you can turn on only a few lamps so as not to waste a large amount of electrical energy.
Speaking about the varieties of switches, it is impossible not to note the modern expensive designs that are becoming more and more in demand:
- With a dimmer - a rotating element that makes it possible to smoothly increase or decrease the brightness of the light;
- Sensory - reacting to the palm brought in close proximity to the equipment;
- Acoustic - triggered by voice commands or claps;
- With remote control.


Method #1: Installing a Wireless Switch
In this case, you absolutely do not need to bother with laying new wiring, chasing walls and finding the right tool. It is enough to get a basic set of wireless light switch and remote control - learn more about them using the nooLite system as an example.
Due to wireless solutions, the scheme of actions is noticeably simplified:
- Switching the load - that is, room lighting - will be a nooLite wireless switch.This miniature power unit can be installed directly into the glass of a chandelier, behind a false ceiling, into a socket or in place of an old switch in the wall.
- We use the nooLite remote control as a remote control, which works in tandem with the power unit and transmits on-off commands to it. These modules can be mounted on any surface with double-sided tape without the need to drill the wall, and the range is up to 50 meters. They pressed the button - and instantly got the result at the other end of the room or corridor.
- It remains only to install the plug in place of the old switch - and voila, you're done!
Switch transfer using a wall chaser
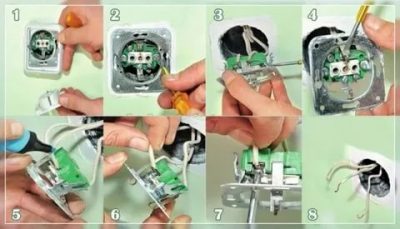
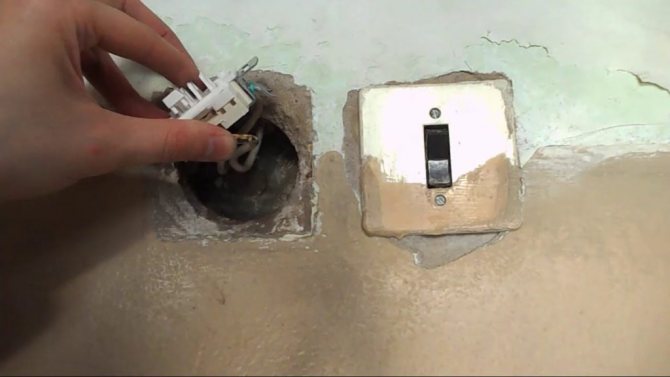
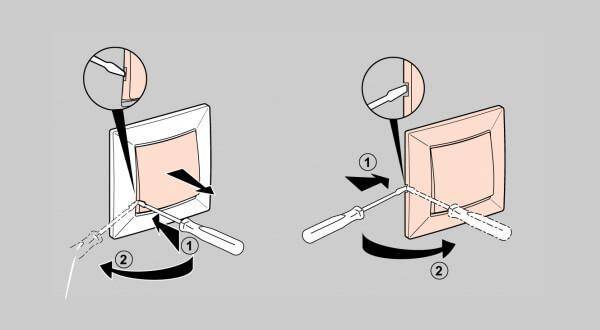
It all starts with the dismantling of the old switch:
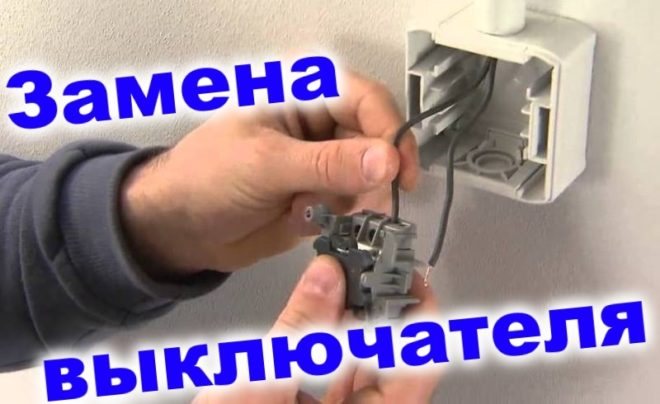
- you can remove the key with a simple movement: with one finger we press its lower part, and with the other we pull the top of the key towards ourselves;
- using a flat screwdriver, remove the decorative frame - carefully pry this insert and pull it towards you (usually it snaps off easily);
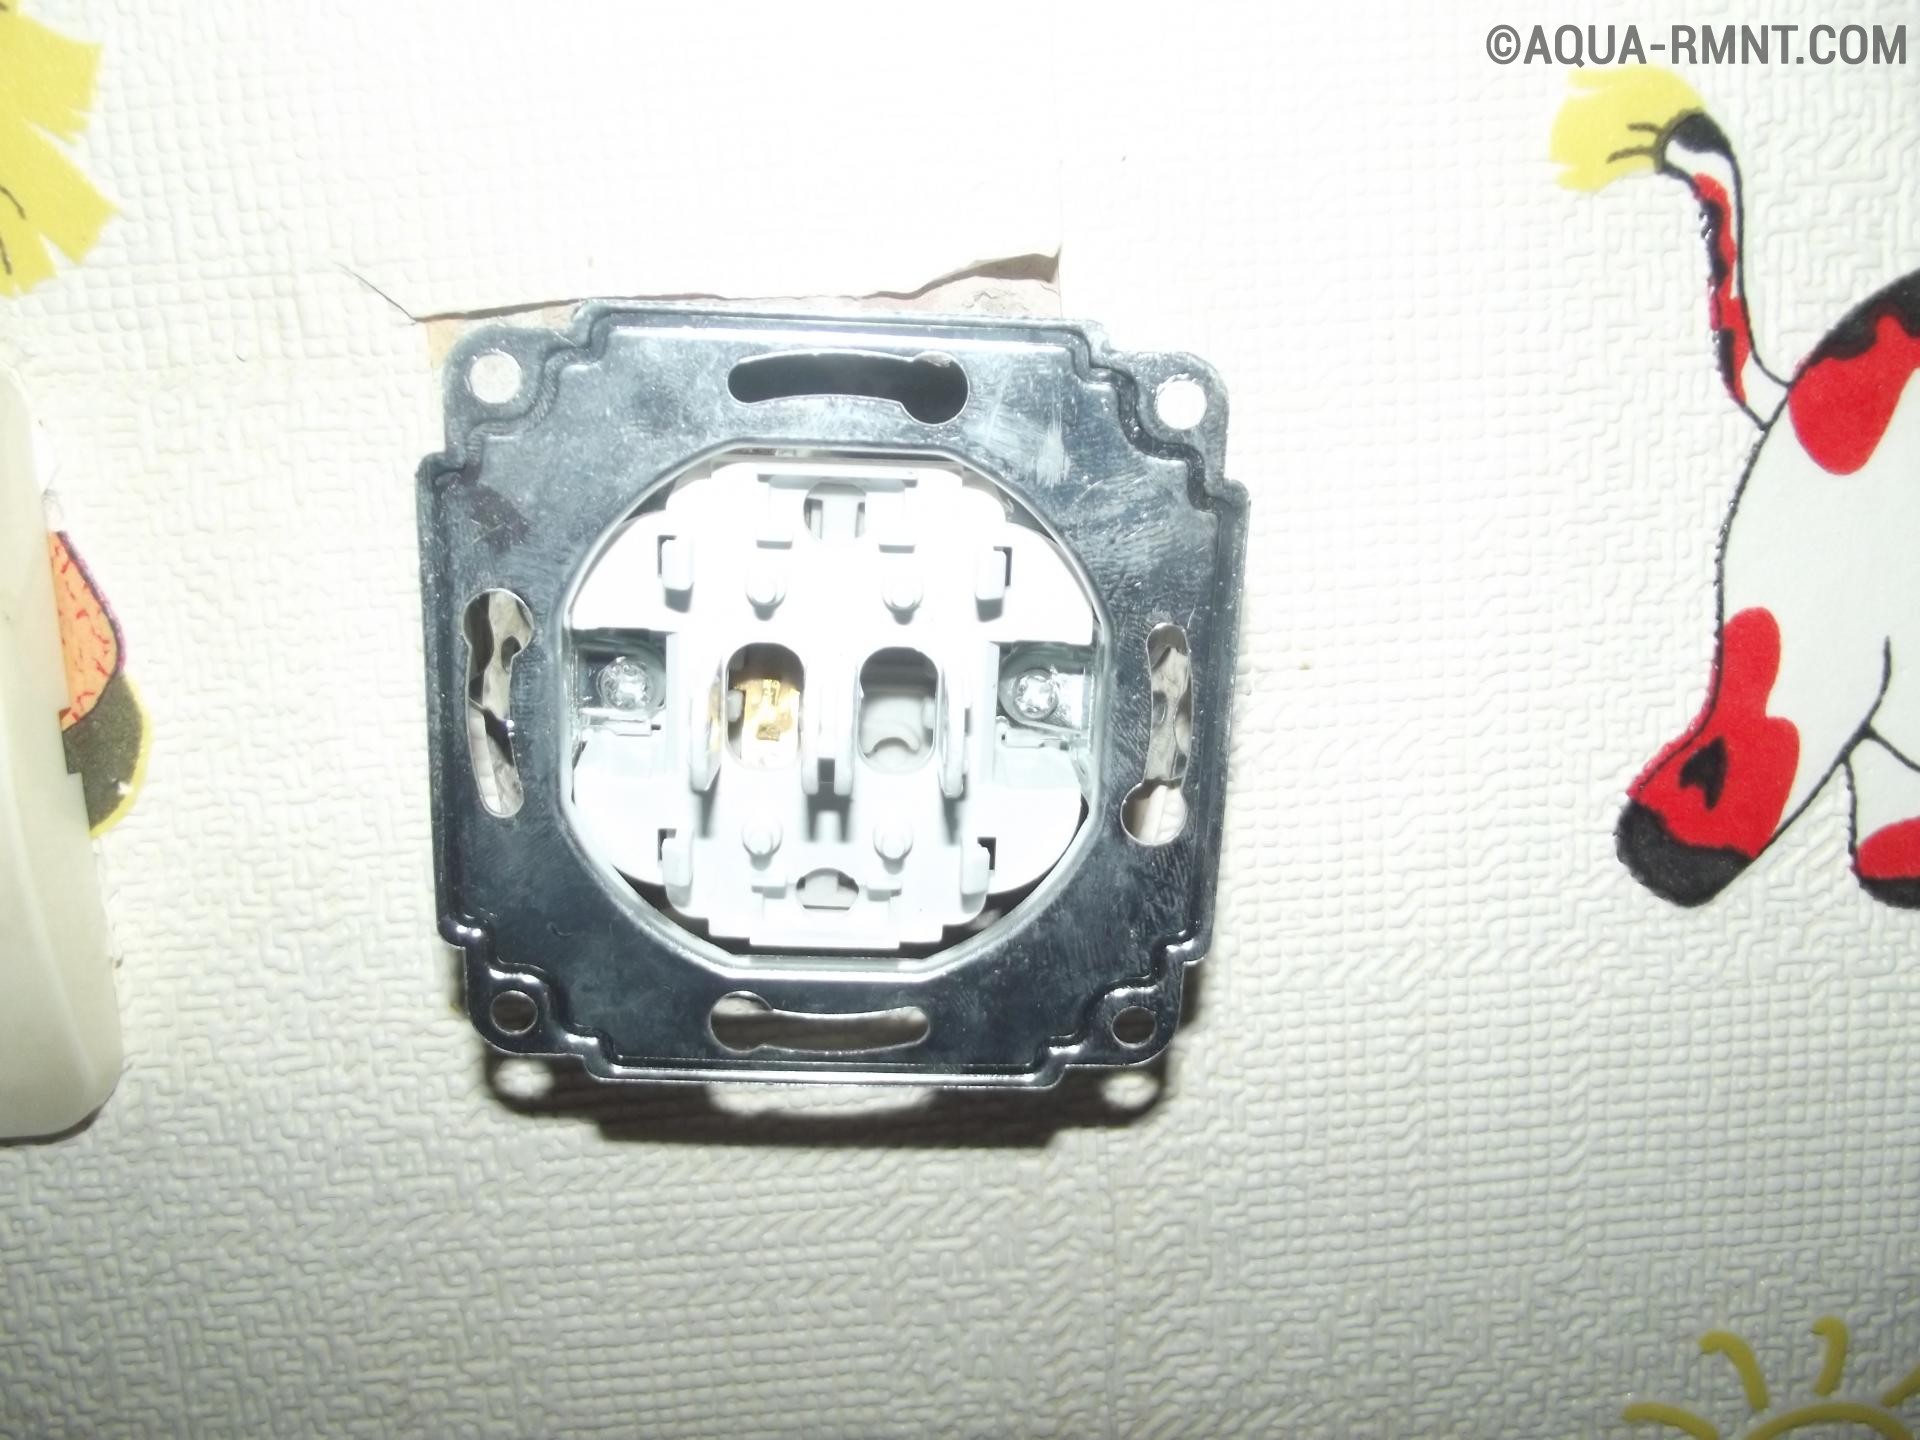
- we remove the core from the wall - for this you need to loosen the fixing tabs by unscrewing the screws located on the sides.
So, the switch is removed from the wall. The next step is to check the absence of voltage in the wires - this can be done using an indicator screwdriver. If there is no voltage, then disconnect all wires.
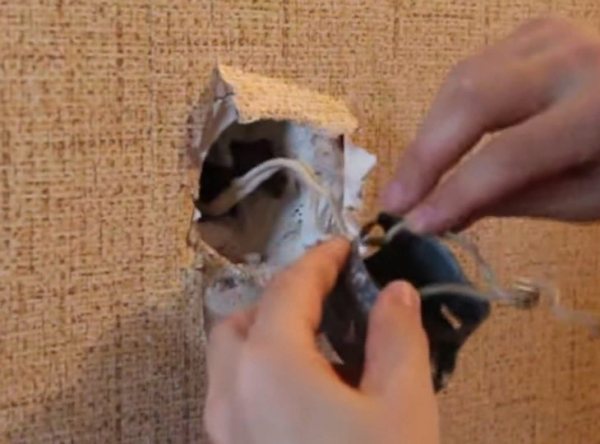
Please note: if the released wires are at least 15 cm long, then you can connect them to a pre-prepared cable. In this case, the cup from under the switch, which is already built into the wall, will play the role of the junction box. It will be enough to connect the wires together and put them in the box
It will be enough to connect the wires together and put them in the box.
 The next step is to prepare the hole for the new switch. For this work, use crown for concrete, there is nothing complicated in the process. Just keep in mind that the hammer drill or impact drill must be switched to drilling mode, and in no case can you use the combined mode with crushing.
Next, let's move on to punching. But first, make sure that there is no wiring along the “path” of the wall chaser (for example, wires leading to a junction box or a nearby outlet) - this makes a non-contact voltage detector. If there are no such wires, then switch the hammer drill or impact drill to crushing mode. You should not make a too wide and deep strobe - only one cable has to be laid, so a groove with a depth and width of 25 mm will be enough. The advantages of such a small strobe are the ability to completely drown the cable in it without any specific fasteners and a minimum of work on plastering the groove.
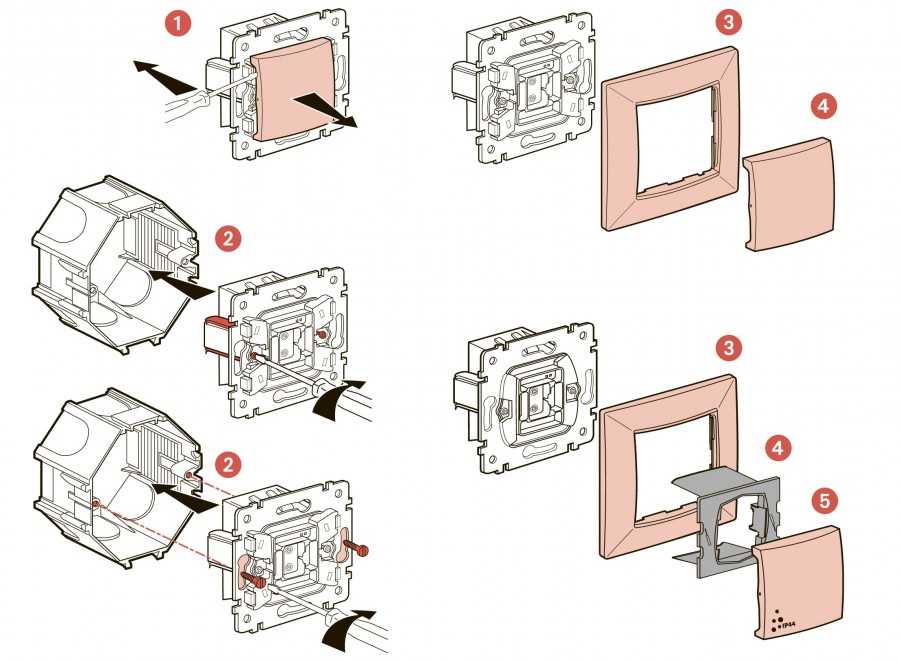
After the cable is laid in the strobe, it is smeared with alabaster, you can proceed to install the switch core. Installation is carried out in the same order as dismantling, but in reverse order:
- using fixing screws we fasten the wires;
- tightening the side screws, clamp the fixing tabs and check the strength of the fixation of the switch core;
- we install the mechanism simultaneously with the decorative frame - a characteristic click should sound, indicating a tight “fit” of the switch;
- fasten the key.
Please note: if you install a two-gang switch, then make sure that the common contact (phase) is located at the top.It is easy to determine the location of all the wires: the phase is always on one side, and the two wires going to the fixtures are always on the other. To connect the luminaire to the switch, you need to determine which of the three wires is the phase
This is done with an indicator screwdriver (it will light up when you touch the wire), but first provide the house with electricity. The phase wire can be carefully marked with nail polish or a marker. Just do not forget to immediately turn off the power to the house / apartment again in order to continue doing installation work
To connect the luminaire to the switch, you need to determine which of the three wires is the phase wire. This is done with an indicator screwdriver (it will light up when you touch the wire), but first provide the house with electricity. The phase wire can be carefully marked with nail polish or a marker. Just do not forget to immediately turn off the power to the house / apartment again in order to continue doing the installation work.
The old hole can be closed in two ways - either purchase a special decorative cover at a hardware store, or use alabaster.
If the switch is to be moved a little to the side, then the algorithm of operation will be the same as described in this material. But keep in mind one important detail - you can’t move the switch far from the junction box: experts do not recommend making a strobe longer than 3 meters.
Transfer Safety
Correct cable routing
Failure to follow safety precautions may result in a short circuit, fire, and electric shock. Often inexperienced electricians neglect these rules, which is why they suffer.


Be sure to de-energize the premises before starting any work with electricity. To do this, turn off the machines in the entrance and the apartment. After switching off, the absence of current is checked with an indicator screwdriver.
It is forbidden to use cables of different cross section. When the load on the network is not calculated during the transfer, the probability of a short circuit is high.
When connecting aluminum to copper, it is imperative to use adapters. It is also not allowed to twist wires without insulation.
During the work on the transfer of the switch, make sure that children are away. It is worth considering the location of the future device. It must be out of reach of the child.
If a cable channel is used, it must not be placed near heaters, a stove or a battery.
When installing the switch on the tile, special drills are used. It must not be exposed to water.
How to get started?
Therefore, before replacing the switch, it is necessary to carefully study the process of connecting wires and observe safety precautions when working with electrical appliances. Also, to replace the switch, you need to stock up on the necessary tools and, in fact, the switch itself.
To select a new switch, it is necessary, first of all, to determine which switch is needed by the type of fastening
It is enough to know whether your wiring is external or internal.
Then you should decide what you want to get from the switch, select the necessary functionality.
It is necessary to choose the principle of closing the circuit in the switch, it will be an expensive and fashionable touch switch or a conventional keyboard switch, with the ability to adjust the intensity of illumination or without such a function, with or without the illumination function of the lamp itself.
The backlight function should be chosen very carefully, because when using LED bulbs with this switch, the bulbs glow dimly in the dark.
It is also necessary to decide on the method of fastening the wires, screw or quick-clamp
If you have aluminum wiring, then there are no options, only screw ones, but if you have copper wiring, you can try modern quick-clamp terminals.
Also, in certain cases, it is necessary to pay attention to the maximum load of the circuit breaker and the material from which its base is made. For maximum load, there are usually switches 10 A and 16A
A 10 A switch can withstand a maximum of 2.5 kW, that is, 25 bulbs of 100 W
For the manufacture of the base of the switch is usually used plastic or ceramic
Plastic can withstand 16A and ceramic can withstand 32A.
If you are choosing a switch for a small room with standard lighting, then these indicators are not so important, but if you have a room over 100 square meters. meters with powerful lighting, it is worth calculating the load and taking a switch with a ceramic base.
And the last indicator: moisture protection. This indicator is marked with the letters IP and numbers corresponding to the degree of moisture protection. So, for an ordinary room, a switch with IP20 is suitable, for a bathroom with IP44, and for the street it is better to take a switch with IP55
For the manufacture of the base of the switch, plastic or ceramics are usually used. Plastic can withstand 16A and ceramic can withstand 32A.
If you are choosing a switch for a small room with standard lighting, then these indicators are not so important, but if you have a room over 100 square meters. meters with powerful lighting, it is worth calculating the load and taking a switch with a ceramic base.
And the last indicator: moisture protection. This indicator is marked with the letters IP and numbers corresponding to the degree of moisture protection. So, for an ordinary room, a switch with IP20 is suitable, for a bathroom with IP44, and for the street it is better to take a switch with IP55.
To replace the switch, you will need the following tools:
- Voltage indicator. Needed for safe work. Before starting work, it is necessary to check the absence of current in the wires with an indicator and protect yourself from electric shock or accidental short circuit.
- Screwdriver Set. Screwdrivers are needed to remove the old switch and then install the new switch.
- Pliers. They will come in handy in case the wire breaks at the time of dismantling the old switch and it will need to be stripped.
- Insulating tape. It can be useful if the wire insulation is frayed. It is not necessary to have electrical tape when replacing a switch, but it is better to have it on hand just in case.
- Flashlight. It will be needed if insufficient sunlight falls on the switch.
Instructions for replacing the light switch
Before changing the new light switch in the apartment, it is necessary to dismantle the old keyboard device and make sure the wiring is working.
How to remove the old switch?
The dismantling of the old switch is carried out in accordance with the step-by-step instructions:
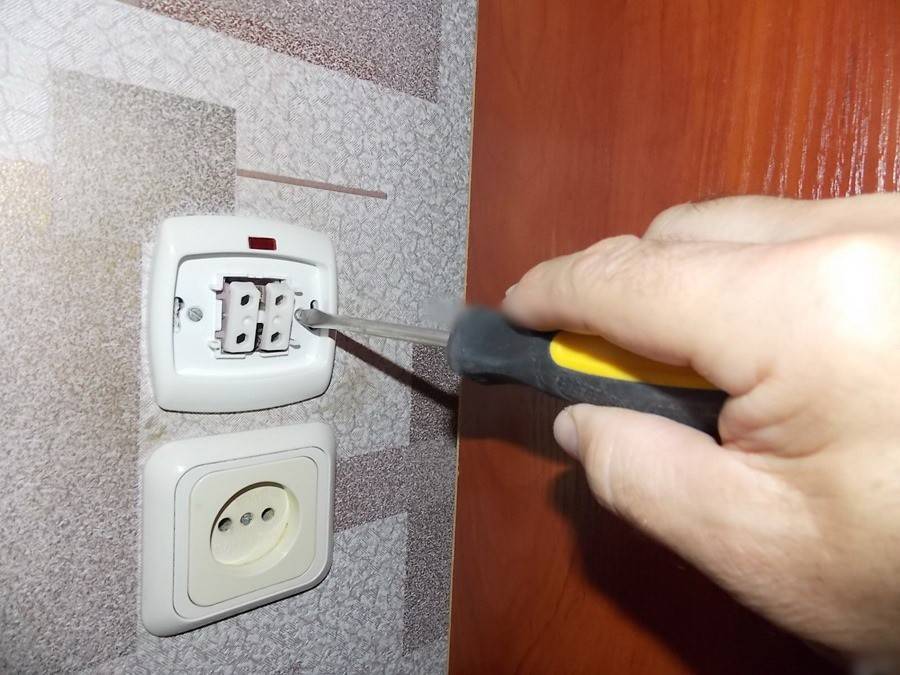
- Remove the key and top cover.
- Disconnect the wires with a screwdriver, unscrewing the bolts on the terminals.
- Apply power to the switchboard and find the phase wire using the indicator.
- Switch off mains voltage.
- Mark the phase with insulating tape or in another way.
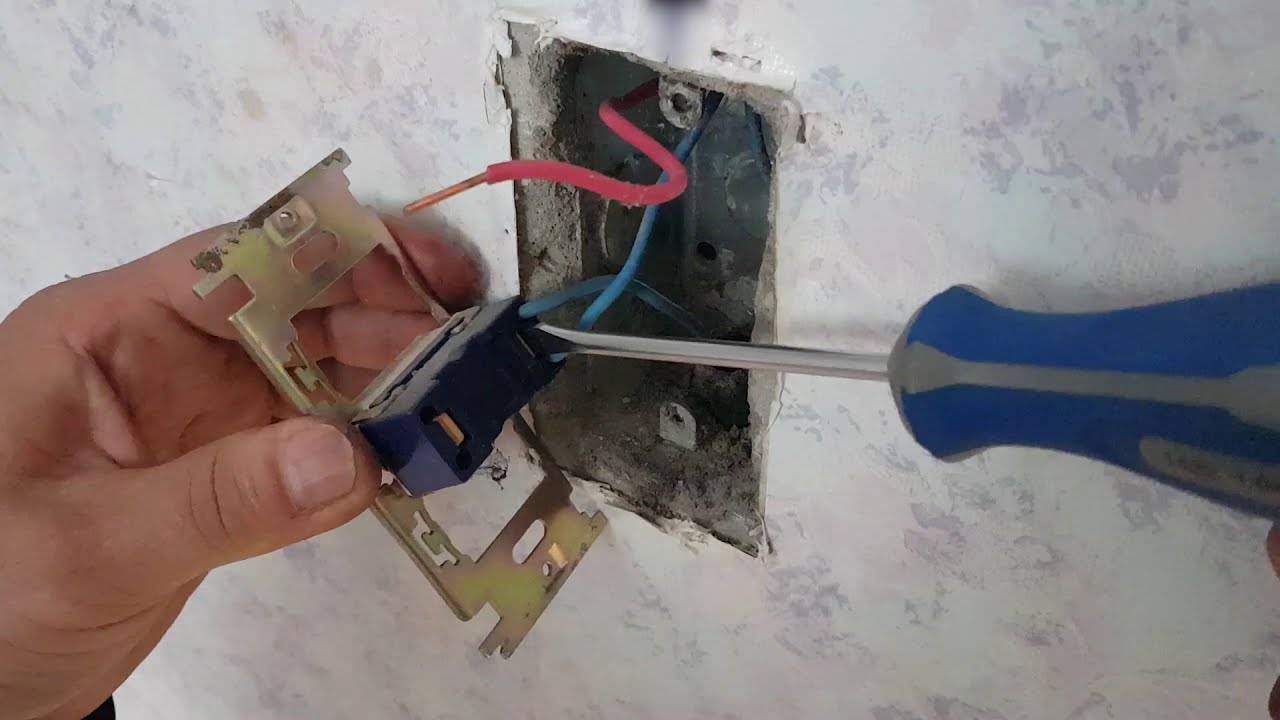
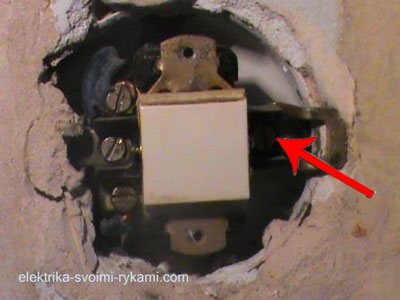
- Loosen the screws holding the spreader tabs.
- Remove the device from the socket.
The scheme of dismantling the old switch
In some cases, the sequence will be reversed - you can disconnect the wires only after the switch is removed. It depends on the design features of the device.


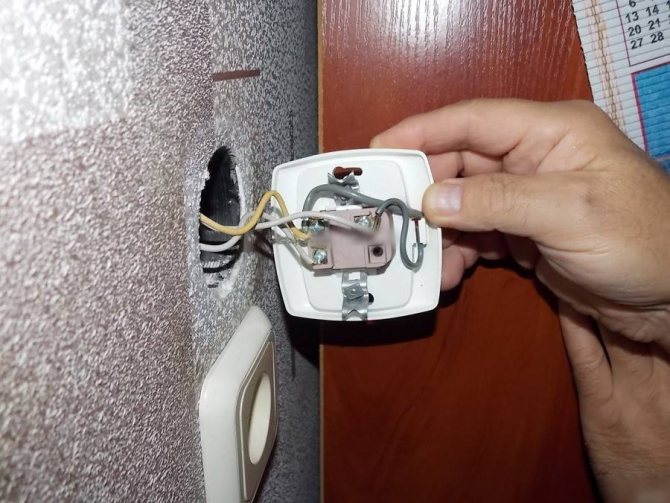
The dismantling of the external switch is carried out in a similar manner. The only difference is that instead of loosening the screws of the spacer legs, screws are unscrewed here, with which the device is attached to the wall.
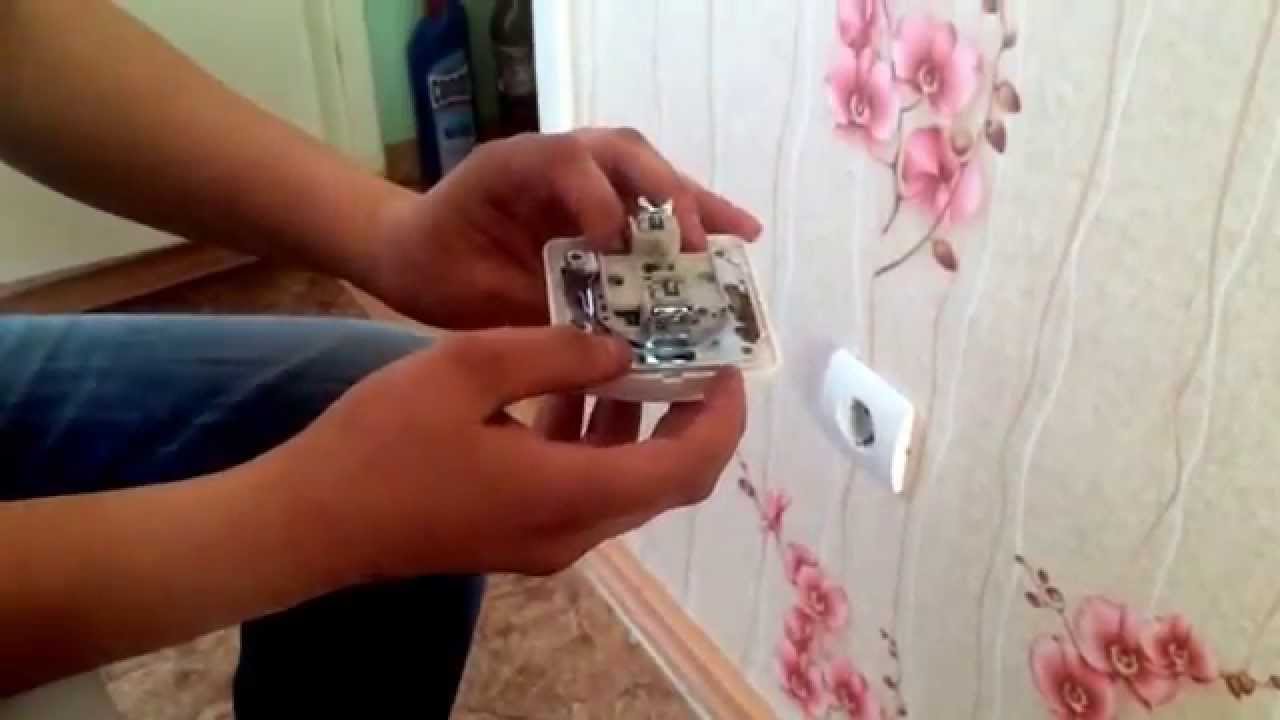
Video instructions for dismantling the old switch can be viewed on the channel “Guys from the Stone. Do-it-yourself apartment renovation.
We are preparing to connect
Before connecting a new device, the following preparations must be made:
- Loosen the screw terminals so that the wires fit easily into the hole.
- Unscrew the screws of the spacer tabs so that the switch fits freely into the socket (for outdoor devices, this operation is not required).
- Strip the wires when replacing them (if the condition of the old electrical cable is good, it is not necessary to strip it).
Diagram and connection with one button
After everything is prepared, you can install the breaker with one key, following the detailed algorithm:
- Examine the markings on the terminals of the single-gang switch.The phase wire must be connected to terminal L, the other end of the cable to connector 1, respectively.
- Insert the bare wires into the contact holes and tighten the terminal screws. Do not apply too much force, otherwise you can break the thread.
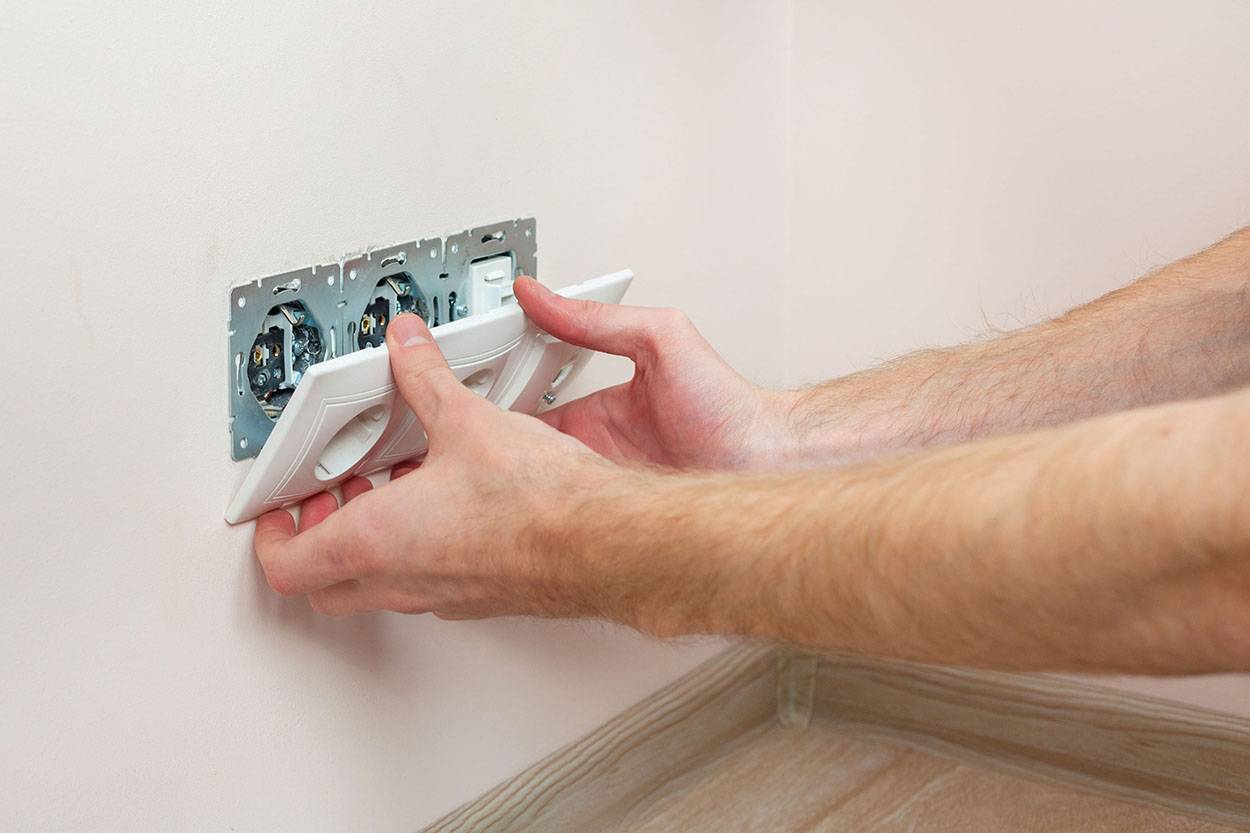
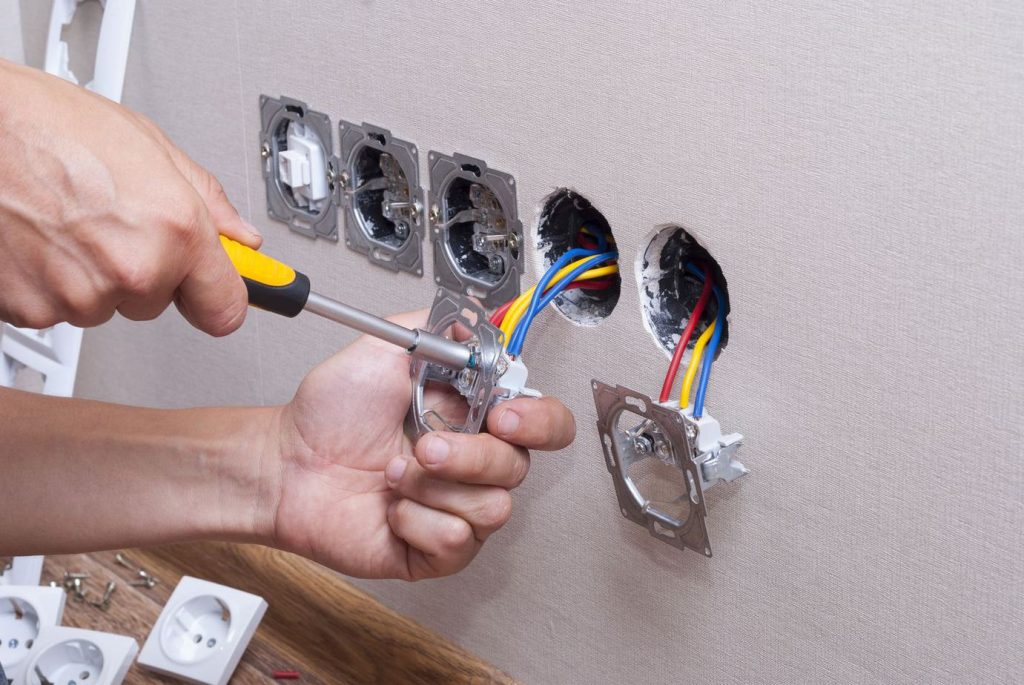
- Install the switch in the socket strictly horizontally without distortions.
- Fix the device with sliding legs by tightening the screws.
- Check the correct operation of the lighting devices by turning on the machine on the electrical panel.
- If the switch works correctly, install the cover and keys.
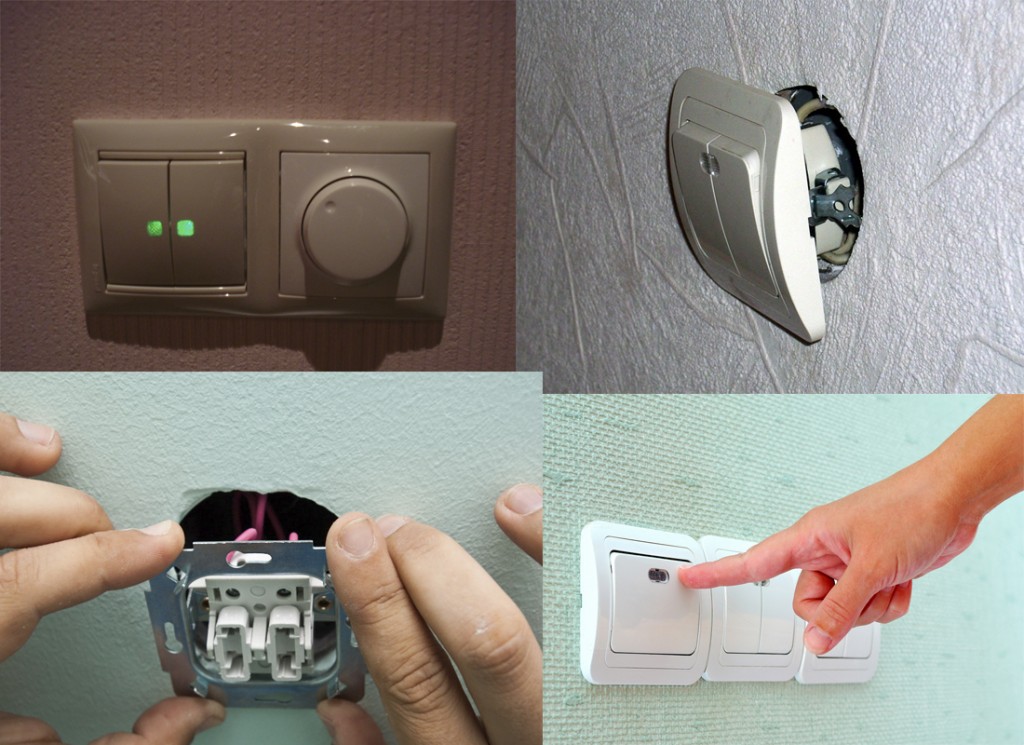
Diagram and connection with two buttons
Algorithm for installing a switch with two keys:
- Connect the phase wire to terminal L, the remaining two ends to connectors 1 and 2 in accordance with the marking.
- Tighten the fastened screws (this operation is not required on spring-loaded terminals).
- Place the switch in the socket.
- Tighten the screws of the sliding legs, eliminating even the smallest gaps.
- Verify that the device is working properly by applying power.
- Install cover and both keys.
Step-by-step instructions for installing a two-gang switch are given in the photo gallery:
Non-standard situation
It is not uncommon for the wire inside the socket to be too short. Its length is not enough to connect a new switch. Such non-standard situations arise in old houses, where electrical appliances have already been replaced several times, and the wiring has become unusable. In this case, the cable must be extended.
This will require additional tools and consumables, namely:
- a hammer;
- chisel;
- putty knife;
- two-core wire 10–15 cm long;
- a little putty or plaster;
- insulating tape.
Only wires of the same type can be spliced together.Copper cable cannot be connected to aluminum - this can lead to oxidation in the contact zone, a decrease in conductivity and burnout of the wiring.
Cable extension is performed in the following sequence:
- Determine in which direction the cable is laid in the wall.
- Carefully loosen a piece of wire about 10 cm long with a hammer and chisel.
- Cut off a section of the damaged cable with wire cutters.
- Strip the ends of the new and old cable, completely removing the insulation in a section of at least 2 cm.
- Tightly twist the protected wires together.
- Wrap exposed areas tightly with electrical tape.
- Insert the connected cable into the channel.
- Cover the damaged area with plaster or putty.
After the mortar has completely hardened (after 15-20 minutes), you can continue to work on installing a new switch.


