- Ways to connect two pieces of LED strip
- Connecting tapes with a soldering iron without wires
- Connection with wires
- We solder in the wrong place of the cut
- LED Strip Repair
- Photo of connecting the LED strip
- Joining two tapes together
- Varieties of LED strips
- How to safely connect an LED strip
- Connecting an RGB tape without a controller
- Selecting a power supply
- Connecting multiple LED strips
- Bonding tape with silicone
- Ways to connect multiple LED strips
- Parallel connection scheme
- Methods for connecting two tapes to each other
- Connecting the LED strip with plastic connectors
- Solder connection
- Pros and cons of different compounds
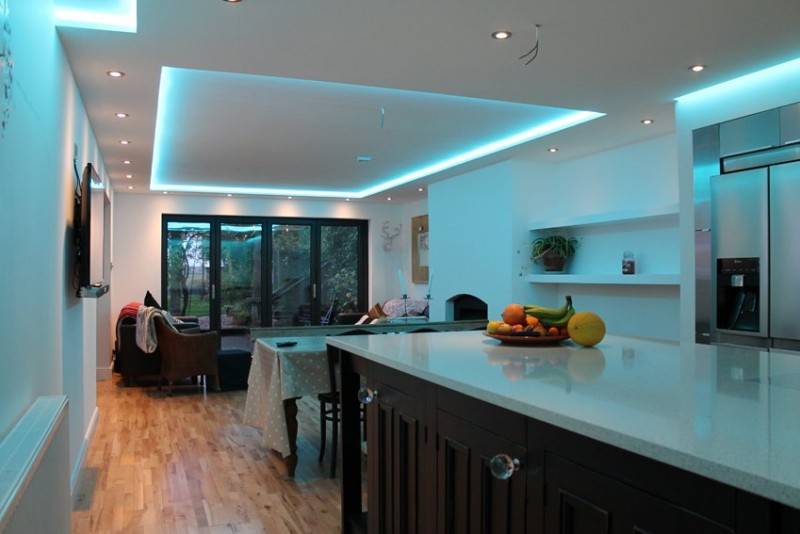
- How to install LED strip in the kitchen?
- PC as a power source
- What do we need to connect an RGB strip
- How to connect an RGB tape through a controller
- Basic RGB Tape Connection Diagrams
Ways to connect two pieces of LED strip
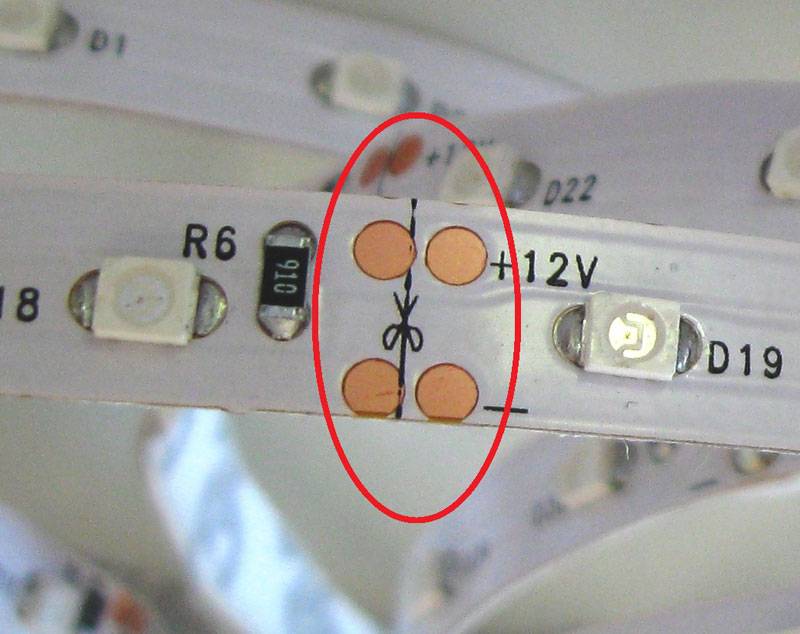
You can connect 2 segments of the backlight in 3 ways: tapes without wires - with a soldering iron, using wires and connectors.
Connecting tapes with a soldering iron without wires
To solder the strips together without wires, their ends are cut to the level of current-carrying contacts. To do this, 1 piece of the product is cleaned of the adhesive base and the contacts are exposed.Then they are lubricated with flux and a layer of tin is applied until a silvery film appears. LED strips are overlapped to each other, adhering to the polarity. In order for the tin to tightly fix the contacts, it is heated for 5 seconds with a soldering iron.
Connection with wires
In order to solder 2 segments with wires, a connector is required for the rotary connection of the segments. Before connecting the parts together, prepare the backlight:
- The end of the product is cleaned of a moisture-proof coating.
- Use a hard eraser or a toothpick to wipe the contact pads. This will help eliminate oxides. You can use the tip of a match, it is soft and will not ruin the contacts, but it will eliminate oxidation well.
- When the product is ready, then contact nickels are threaded under the spring contacts. Red wire is positive, black wire is negative.
We solder in the wrong place of the cut
If the cut of the tape is made incorrectly, then it will not work to connect it with a connector. Do not throw away the product, because it can be connected by soldering:
- To do this, the LED backlight tracks are carefully cleaned. When the contact paths passing inside it become clearly visible, the second part of the product is cleaned.
- Then, solder is applied to the contact tracks of 2 segments using a soldering iron.
- The easiest way to solder 2 pieces is to use small pieces of wire. A more difficult option is to solder the segments end-to-end.
- To test the soldering for quality, the wires are lightly pulled or wiggled. If the soldering site is not deformed, then the work is done correctly.
- Contact pads are wrapped with electrical tape or insulated with heat shrink.
LED Strip Repair
You can figure out why the LED backlight does not work and repair it using the following tools and materials:
- screwdriver-indicator;
- electrical measuring instrument - multimeter;
- connector;
- soldering iron;
- solder.
Diagnostics and repair methods for electrical circuits follow the rules: checking the voltage and integrity of all parts of the lamp. Product repair:
- The LED backlight flickers with a constant dim light, sometimes it turns off completely. The health of the LED strip power supply is checked by attaching a test lamp or multimeter to it. Flickering occurs during power surges, poor contacts in the tape and the power supply. If the backlight has 1 faulty LED, then the flicker will appear in one place. This LED is replaced with a new one. If the product is installed at a right angle, then the bends gradually fail. The damaged area is changed partially or completely.
- The tape does not burn completely or goes out, which means that some of its sections have overheated or an incorrect installation has been made. To correct the problem, a bad backlight segment is removed and connectors or connectors are installed.
- If the lights do not light up, you need to test the power supply for the presence of input voltage. To do this, check the phase in the socket with an indicator screwdriver or the power at the input terminals. The multimeter is set to measure AC current. To check the output voltage at the contacts of the lamp and the output terminals of the power supply, use a piece of tape. The voltage is checked in the extinguished area. The integrity of the conductors was broken if the voltage is supplied to the backlight, and the bulbs do not light up.
The problem of a malfunction of the power supply may be due to a blown fuse, a malfunction of the diode bridge, a broken track.
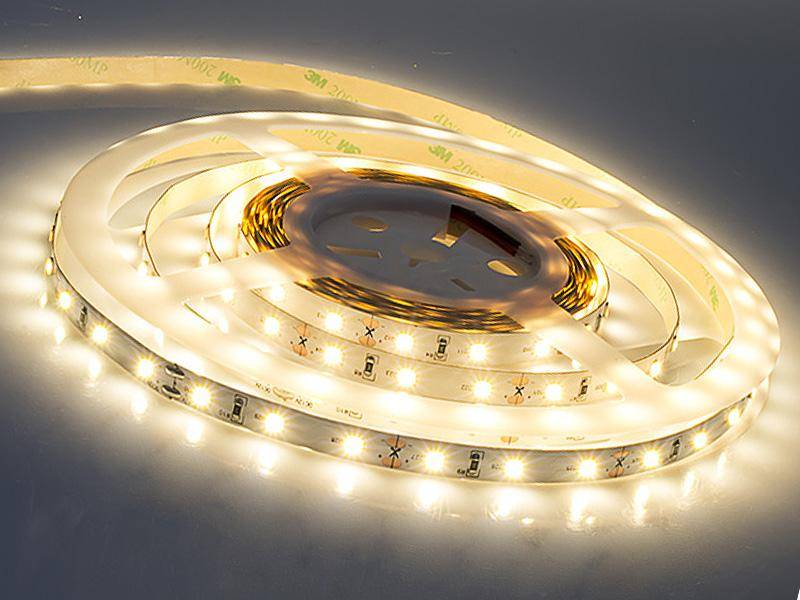
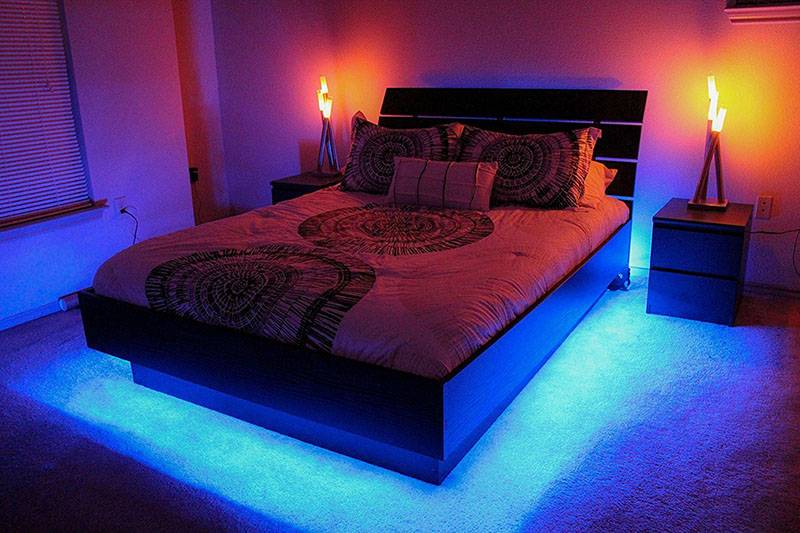
Photo of connecting the LED strip


We also recommend viewing:
- Why you need a docking station for your smartphone
- How to choose a WI-Fi adapter for a TV
- TOP of the best voltage stabilizers
- How to choose an antenna for digital television
- What are hidden wiring indicators
- How to choose and set up a universal remote for your TV
- The best industrial vacuum cleaners
- Rating of the best TVs of 2018
- How to choose a vortex heat generator
- How to choose a mobile air conditioner
- Review of the best laptops of 2018
- What is a smart home system
- How to choose a good grease trap under the sink
- Review of the best monitors of 2018
- How to choose a heating convector
- The best IPTV set-top boxes for TV
- The best instantaneous water heaters
- Instructions on how to charge a car battery
- What size TV to choose
- Rating of the best boilers for heating water
- Review of the best tablets of 2018
- Fitness bracelet rating 2018
- Overview of the best WI-FI routers
- Rating of the best refrigerators in 2018
- Rating of the best washing machines
Help the site, share on social networks 
Joining two tapes together
Connectors with connectors are a convenient and simple alternative to traditional connection, allowing you to reconnect segments of strip diode illuminators, or combine several diode strips into a single system.
Currently, connectors are being implemented that have one or more connectors, so when choosing, you need to take into account the type of diode strip and the type of connection, which can be rigid or flexible.
Connecting two or more LED strips
It is important to remember that the possibility of using a controller with connectors in rooms with high humidity is completely excluded, which is due to the risk of contact oxidation and device failure.
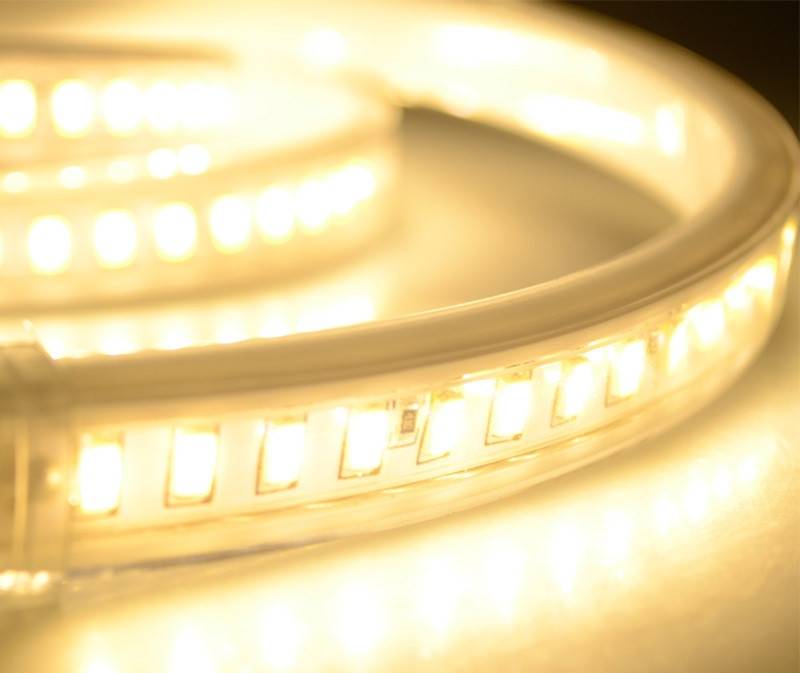
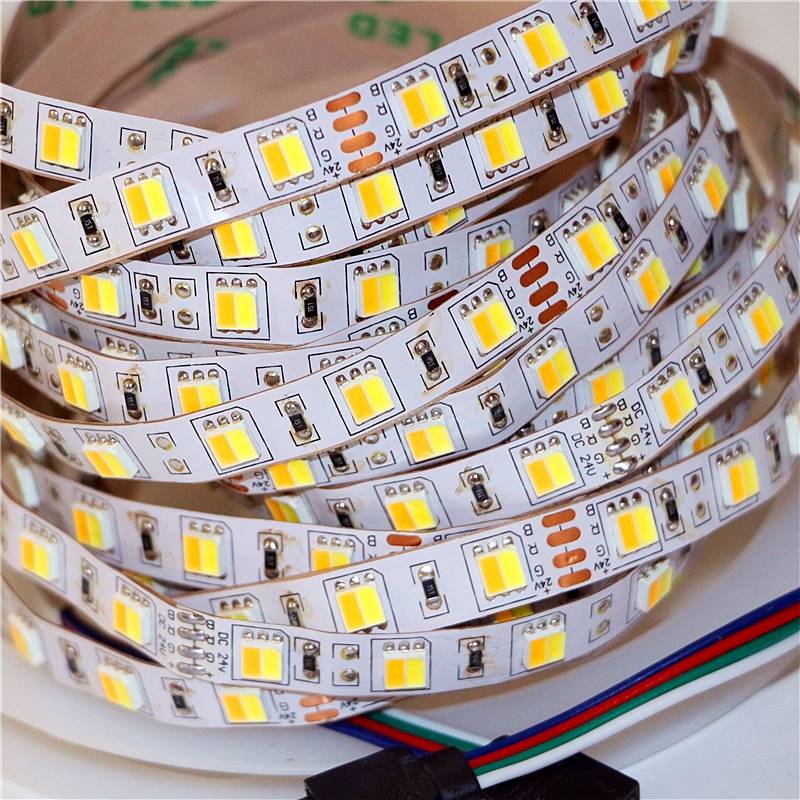
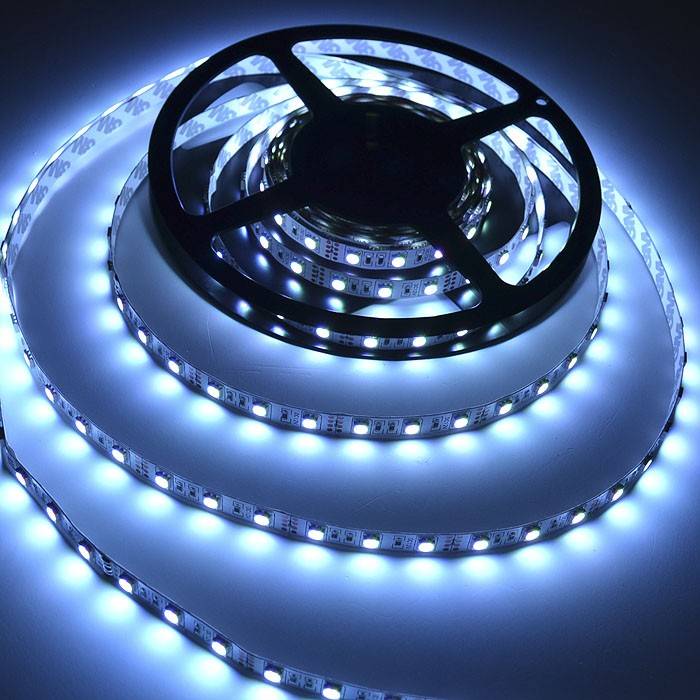
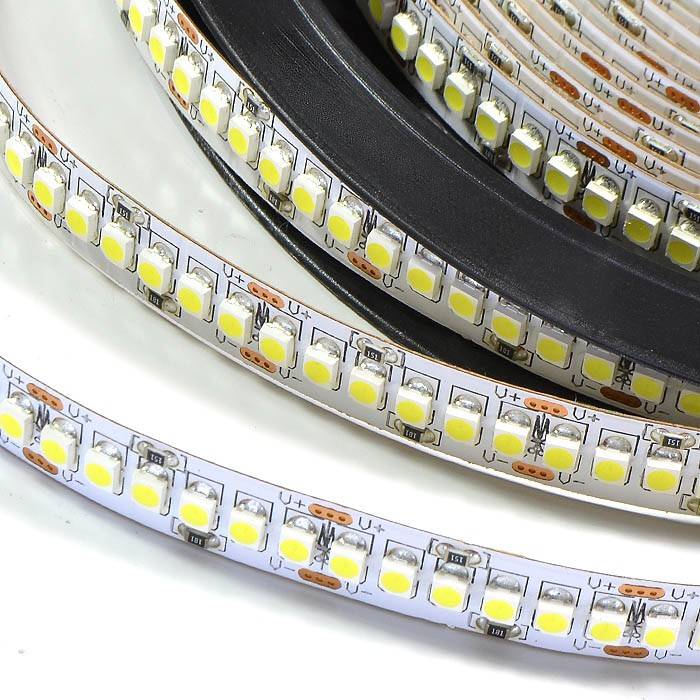
Varieties of LED strips
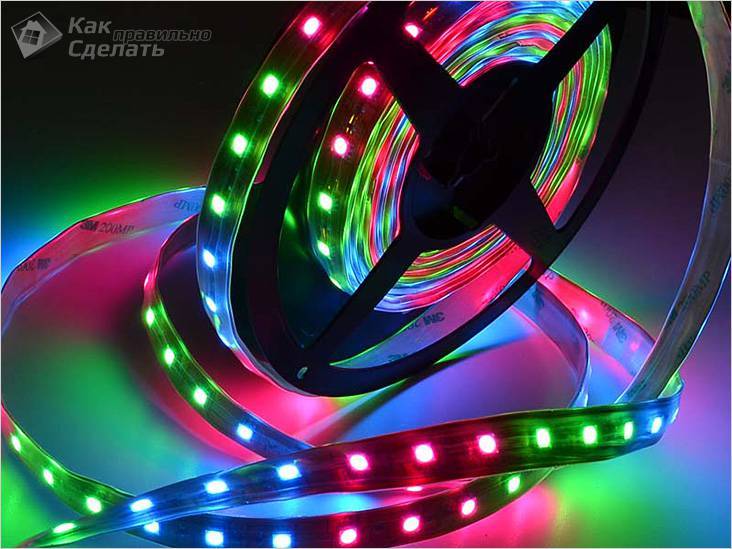 Waterproof LED strip
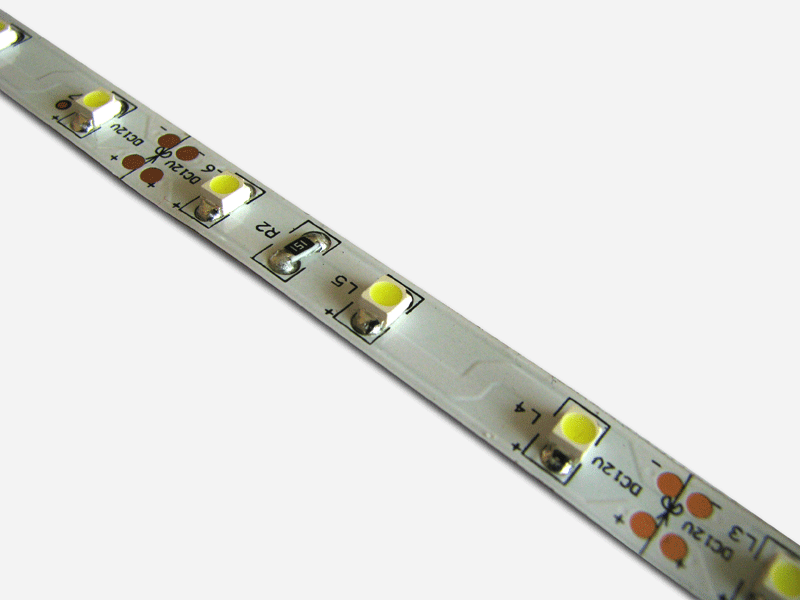
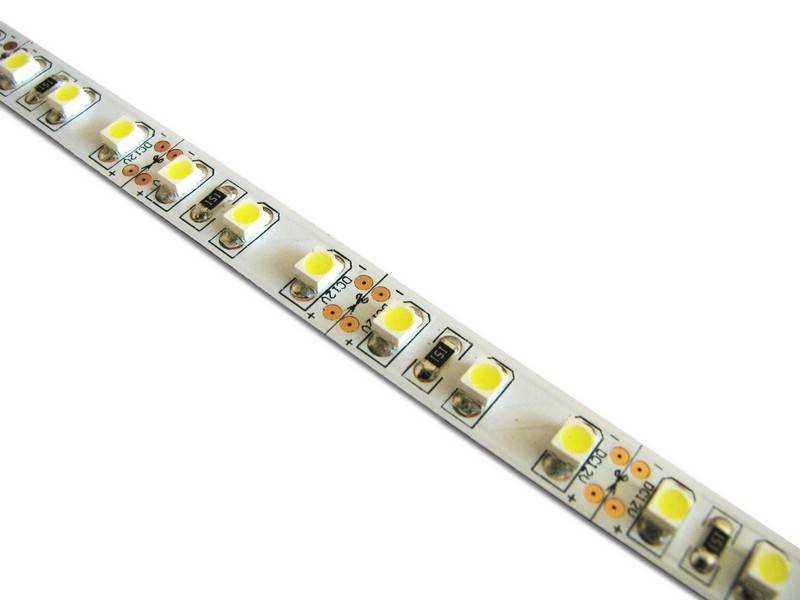
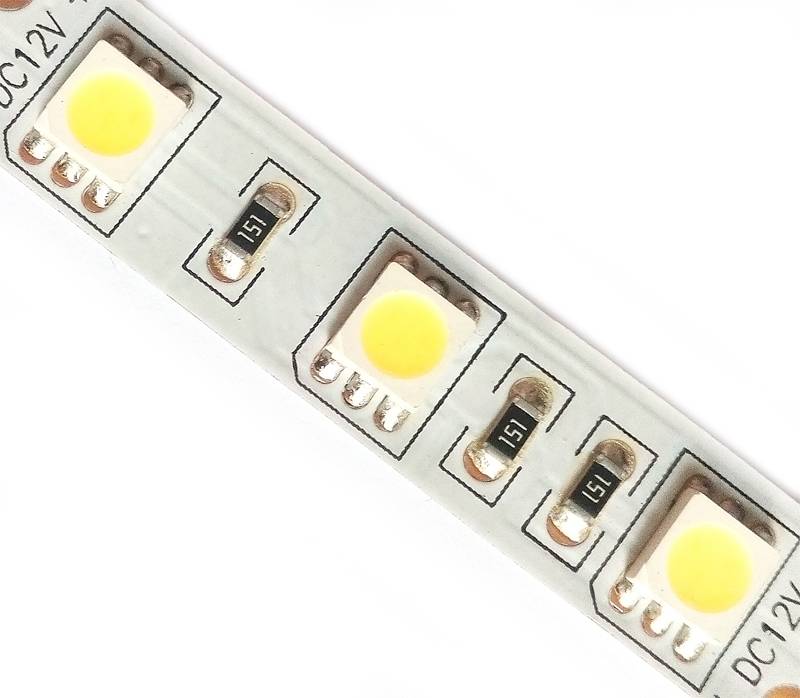
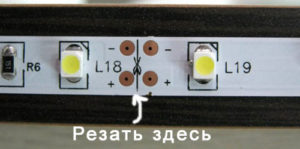
Lighting strips are made from a strip of dielectric material on which light-emitting diodes are fixed at regular intervals. Special tracks are applied to the base of the tape, along which an electric current passes. To limit the current strength, resistors are included in the circuit. The width of the lighting device varies from 8 to 20 mm, the thickness is only 3 mm. The degree of illumination depends on the number of LEDs on 1 meter of tape, it can differ tenfold - 30–240 pieces. The size of each diode is indicated in the marking of the tape, the larger it is, the more intense its luminous flux. In powerful devices, light sources are arranged in several rows. The length of the standard strip is 5 meters, it is sold on reels. The cutting points are marked on the substrate; the tape can only be separated along these lines.
 Cutting the LED strip
The main classification of LED strips is based on the color of the emitted glow:
- SMD - monochrome color rendering (white, blue, green, red). The white version of the glow is divided into warm, moderate and cold.
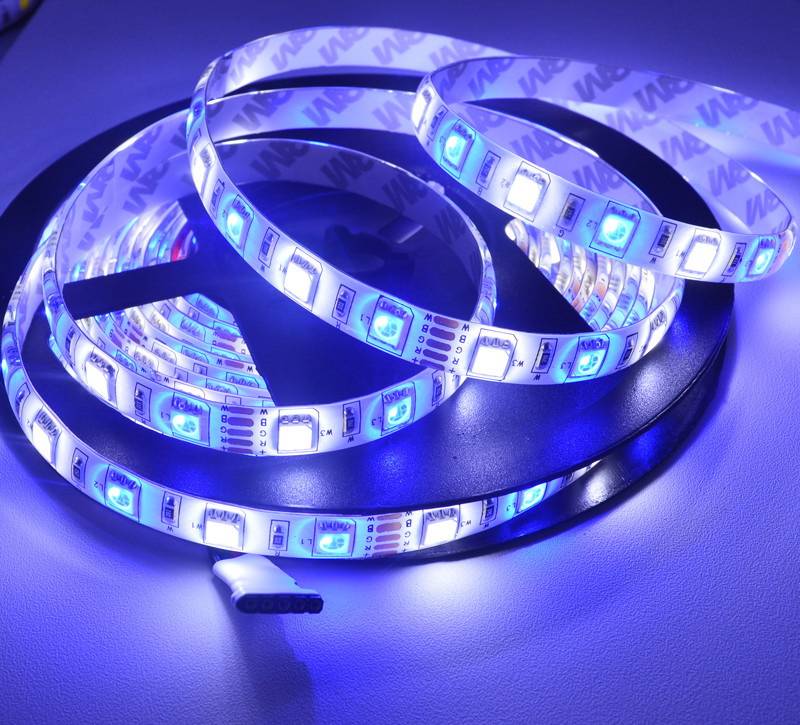
- RGB - LED strip that gives illumination of any color. Three diodes are placed inside its case, indicated in the name of the colors - red, green and blue. Their combination, created by the operation of the controller, gives any glow. The cost of this design is three times higher than SMD tape.
Lighting fixtures are produced open, designed for indoor installation, and waterproof, designed for outdoor use and in water, protection class - IP. For ease of attachment, some strips of LEDs are equipped with a self-adhesive film.
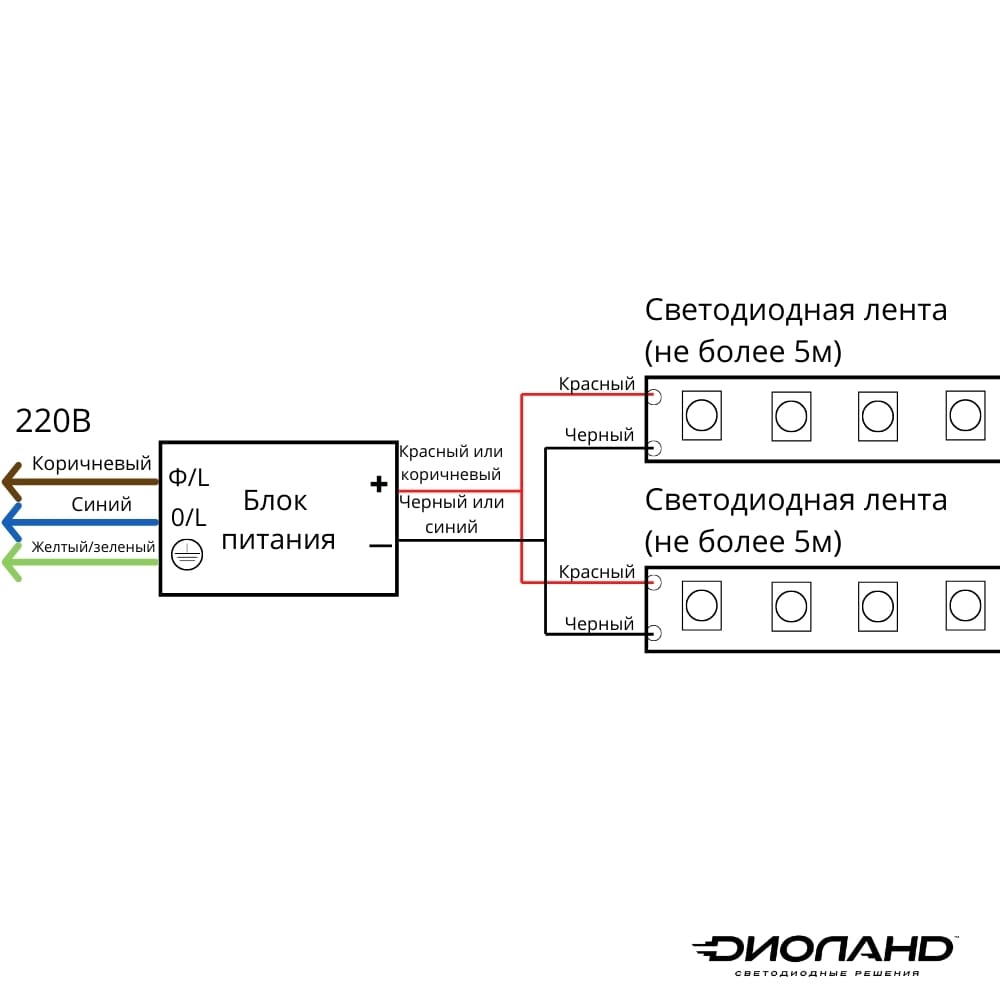
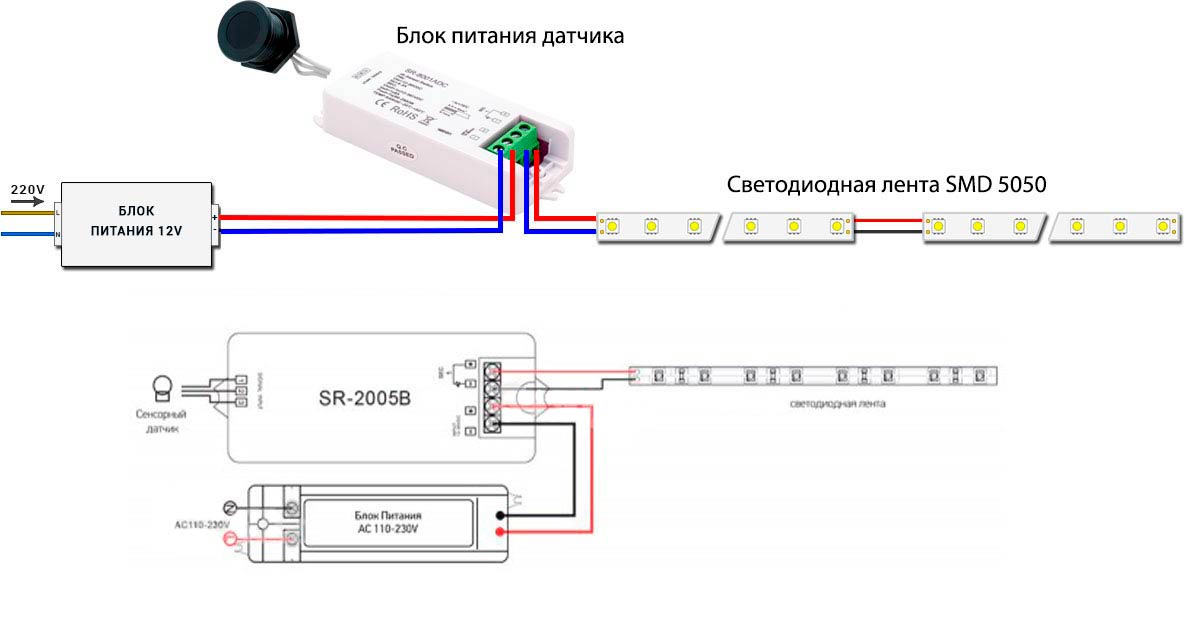
How to safely connect an LED strip
- Tees must be located indoors. This is necessary so that water does not get there and cause a short circuit. A prerequisite for the location of tees imposes requirements for connecting cables, which should be more.
- All used cables entering and exiting the power supply must be grounded. This requirement must be observed even if the connection of the LED strip is needed to illuminate the ceiling. Usually modern wires have such a color marking system: phase - brown wire; zero - blue wire; protective earth - yellow or green wire.
Connecting an RGB tape without a controller
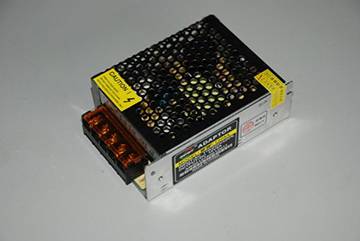
Sometimes home craftsmen do not want to spend money on additional equipment. It is in such cases that ingenuity comes to the rescue. For example, there are 10 m of RGB tape available, but the controller, like the power supply, is missing. And this is where the tricks begin. Instead of a standard power supply, it is quite possible to use an adapter from a plasma or LED TV that delivers 12 V. The main thing is that the rectifier fits the output power parameters. The only problem is that you will need 3 of these blocks - one for each color.
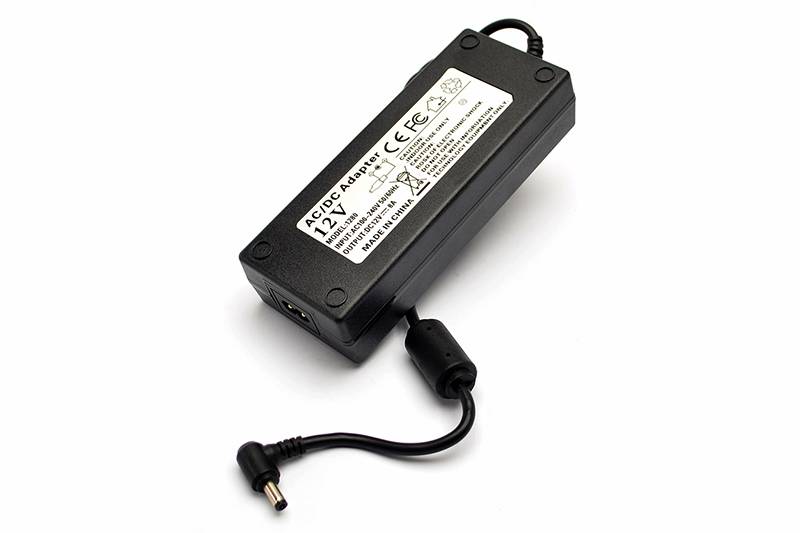 These power supplies are perfect
Further, instead of a conventional switch, a three-gang switch is installed. The connection is made as follows:
- zero goes immediately to the power supplies, and after them it is again connected to one line;
- the phase wire goes through the switch, where it turns into three separate wires. Further, each goes to its own power supply, and then to a certain color of the RGB tape.
Thus, when individual keys are turned on, a certain color will light up, and when they are combined, additional shades can be achieved.
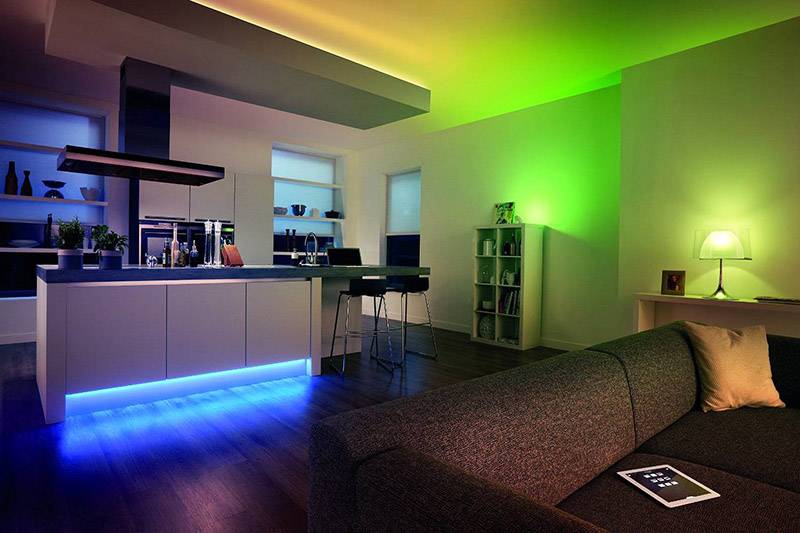
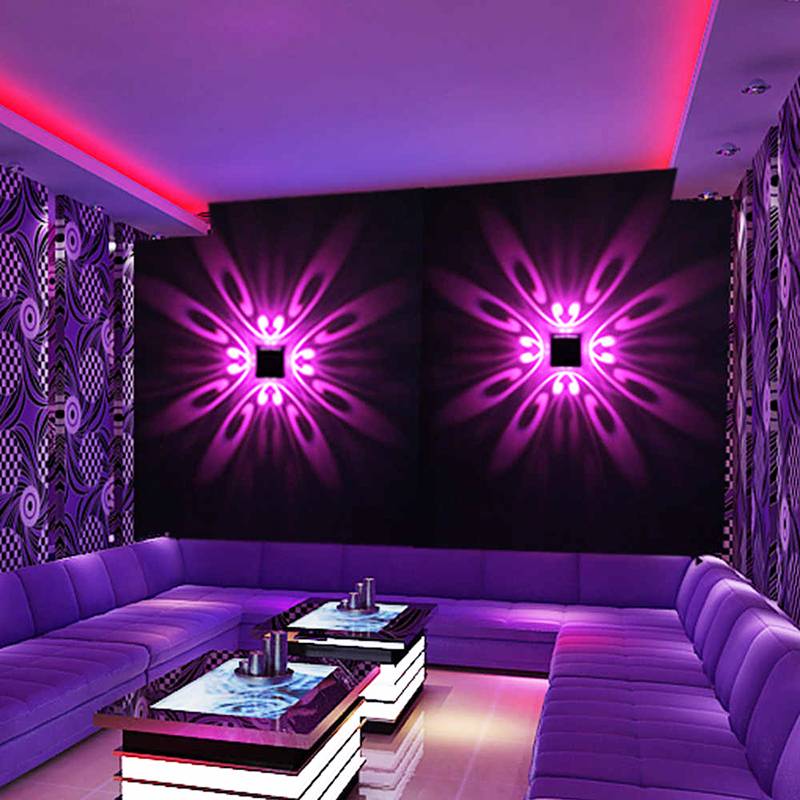
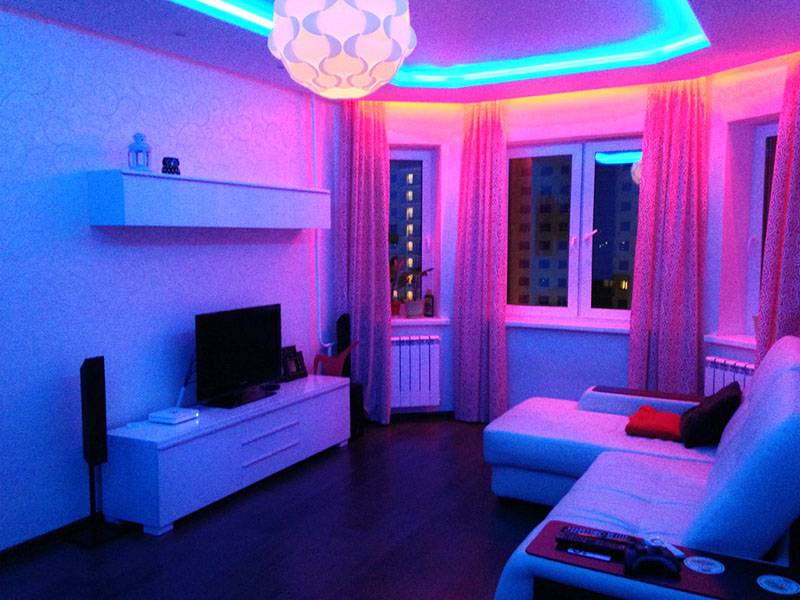
And as a general information, we suggest that you familiarize yourself with the various variations of the use of RGB strips in interior design.
1 of 5
Related article:
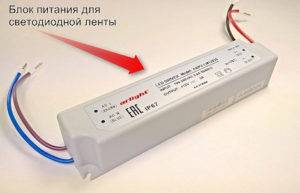
Selecting a power supply
To date, several options for power supplies in different versions are produced and sold:
- A compact and sealed device with a plastic case, characterized by small size and weight, as well as a sufficient level of protection against moisture. The maximum power indicators do not exceed 75W. The device is designed to power diode strips for interior lighting.
- Sealed device with aluminum case, average power 100W. This version of the device is characterized by a rather tangible weight and dimensions, therefore it is widely used when performing backlighting in outdoor devices. It is distinguished by increased reliability and good protection against adverse external factors, represented by wind, precipitation and ultraviolet radiation.
- Open type device with an average power of 100W. Large instrument designed for installation in the equipment compartment or a special cabinet. The main advantage of this option is represented by affordable cost.
Thus, in order to choose the right power supply, it is necessary to determine not only the type of lighting tape, but also its power.
To independently determine the power level for which the power supply is designed, you need the power of a diode lighting device of 1 mp. multiply by the length of the tape and add about 10% of the stock to the result. The standard safety factor is 1.15.
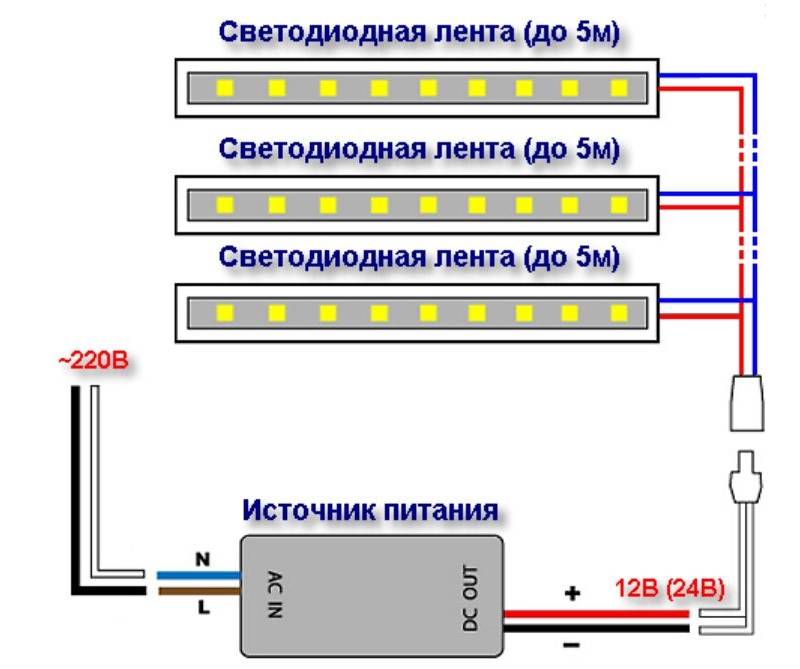
Connecting multiple LED strips
When connecting no more than two tapes, in this case it is possible to connect them in series, provided that the second strip is of negligible length. The connection points are checked for possible voltage drops.
Most often, single-color tapes are connected in parallel. For this purpose, a high-power power supply is used, corresponding to the connected lighting devices. The same goes for multi-color ribbons. The only difference will be the use in the amplifier circuit. It connects to the end of the first tape and the beginning of the second. In some schemes, several power supplies are used at once.
Various methods allow you to perform not only the connection of the LED strip to the 220 V network, the circuit of which is most widely used. A variety of switching and adjustment devices allow the use of LEDs in a wide variety of rooms, with almost any interior.


LED strip connection diagram

LED strip device
How to calculate the power supply for the LED strip
LED kitchen lighting
How to make a lamp from an LED strip with your own hands
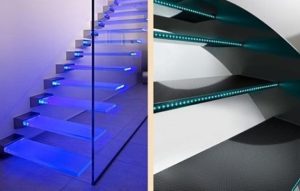
Staircase lighting with LED strip
Bonding tape with silicone
If you have a sealed tape with IP65 protection, then the process of connecting the connectors looks almost identical. Cut with scissors to the lengths you need.
After that, with a clerical knife, first remove the sealant over the contact patches, and then clean the copper pads themselves. All protective silicone from the substrate near the copper pads must be removed.
Cut off the sealant just enough so that the end of the tape, together with the contacts, fits freely into the connector. Next, open the cover of the connecting clamp and wind the tape inside.
For better fastening, remove some tape from the back in advance. The tape will go pretty hard. Firstly, because of the adhesive base on the back, and secondly, because of the silicone on the sides.
Do the same with the second connector. Then close the lid until a characteristic click.
Often comes across such a tape, where the LED is located very close to the copper pads. And when placed in a clamp, it will interfere with the tight closure of the lid. What to do?
Alternatively, you can cut off the backlight strip not at the place of the factory cut, but in such a way as to leave two contacts on one side at once.
Of course, the second piece of LED strip will lose from this. In fact, you will have to throw out one module of at least 3 diodes, but as an exception, this method has the right to life.
The connectors discussed above are available for various types of connections. Here are the main types of them (name, characteristics, sizes):
To connect this type, pull out the pressure plate and insert the end of the tape into the socket until it stops.
To fix it there and create contact, you need to push the plate back into place.
After that, be sure to check the security of fixation by slightly pulling on the LED strip.
The advantage of this connection is its dimensions. Such connectors are the smallest in both width and height.
However, unlike the previous model, here you absolutely do not see the state of the contacts inside and how tightly and reliably they are interconnected.
The two types of connectors discussed above, during long-term operation, show not entirely satisfactory results and contact quality.
For example, in NLSC, the most painful place is the fixing plastic cover. It often either breaks off by itself, or the fixing lock on the side breaks off.
Another disadvantage is the contact patches, which do not always adhere to the entire surface of the pads on the tape.
If the power of the tape is large enough, then weak contacts do not withstand and melt.
Such connectors simply cannot pass large currents through themselves.
When trying to bend them, when there is some mismatch of the pressure spot, they can break off.
Therefore, more modern models designed according to the puncture principle have recently appeared.
Here is an example of a similar double-sided piercing connector.
On one side, it has contacts in the form of a dovetail for a wire.
And on the other in the form of pins - under the LED strip.
With it, you can connect the LED strip to the power supply. Such models can be found both for tapes of open execution, and for sealed ones in silicone.


To connect, insert the end or the beginning of the backlight segment into the connector and press it on top with a transparent cover.
In this case, the contact pins first appear below the copper patches, and then literally piercing the protective layer and copper tracks, form a reliable contact.
At the same time, it is no longer possible to pull the tape out of the connector. And you can check the connection points through a transparent cover.
To connect the power wires, they do not even have to be stripped. The process itself is somewhat reminiscent of connecting a twisted pair in Internet connectors.
To open such a connector, you will need to make a certain effort. It's just not possible to do it by hand. Pry off the sides of the lid with a knife blade and lift it up.
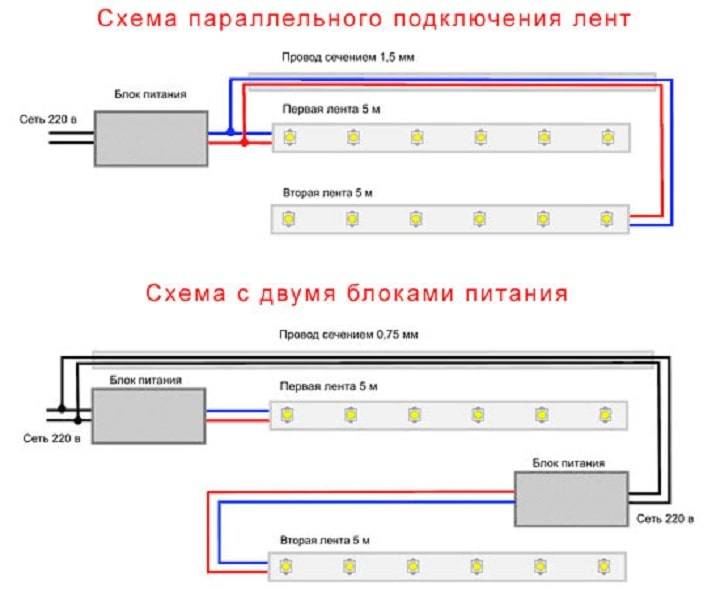
Ways to connect multiple LED strips
Typically, manufacturers produce LED strips in coils 5 meters long. This is a standard unified length, which is convenient for most manufacturers. For various tasks, it becomes necessary to connect several LED strips for their simultaneous operation in different parts of the premises or with a large length of the illuminated area. With such a connection, there are certain nuances and difficulties.
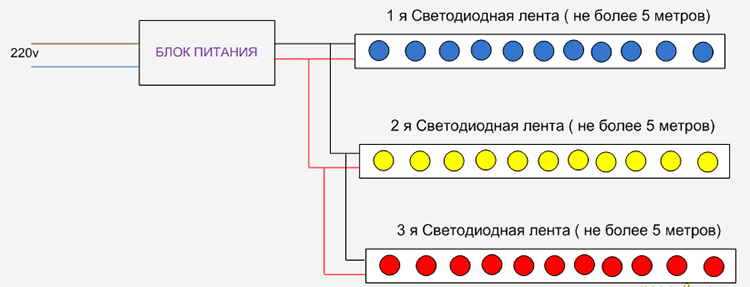
Parallel connection scheme
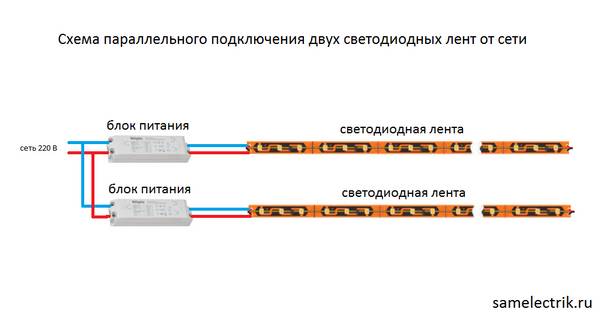
As with most lighting fixtures, the most common and convenient option is to connect LED strips in parallel. This method is suitable when simultaneous operation of tapes is required without reducing their light output.
The connection looks like this:
- Conductors are soldered (or connected) to the contacts of the tapes;
- Further, the “pluses” of all tapes are interconnected;
- Connect the "minuses" of all tapes;
- The common plus and common minus are connected to the corresponding poles of the transformer with the calculated power.
Methods for connecting two tapes to each other
If it is necessary to mount the tapes on the same plane one after the other, then they are also connected in parallel. But to simplify the circuit and save wires, such a connection can be made using connectors or short conductors.
Connecting the LED strip with plastic connectors
To simplify the connection and in the absence of soldering skills (or a soldering iron), you can use special plastic connectors for LED strips to connect several single-color or multi-color tapes to each other. They are available at most electrical or lighting supply stores. The principle of connection using such components is simple: the contacts of the LED strips are connected to the contacts of the connector and fixed.
Connectors are both straight and designed for corners and various bending options.
Solder connection
The most reliable option for connecting LED strips to each other is soldering. At the same time, this method is the most time-consuming and requires certain skills and tools.
This connection can be made in two ways:
- Connect the tapes by soldering directly.
This method involves soldering two pieces of tape without the use of conductors. The tapes are overlapped and soldered at the contact point. This option is used when mounting the tape in a conspicuous place so that the wires and junctions of the tape are not visible.
- Connect with wires
This method is the most preferred, as it is reliable.Conductors are soldered to the contacts of one segment, which, in accordance with the polarity, are soldered to another tape. Moreover, the conductors can be of any length if necessary.
Pros and cons of different compounds
- Solder connection
| Advantages | Flaws |
|---|---|
|
|
- Connecting with connectors
| Advantages | Flaws |
|---|---|
|
|
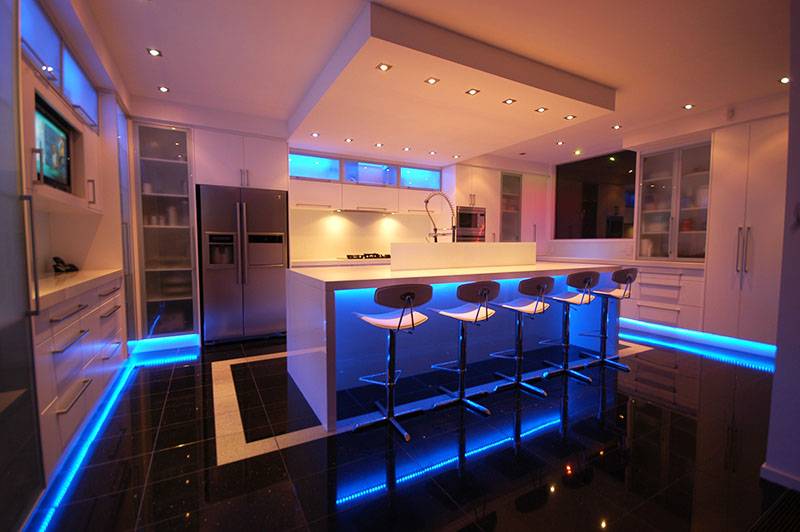
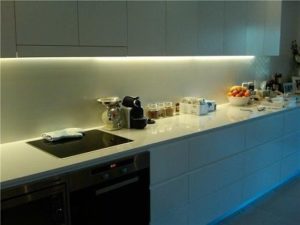
How to install LED strip in the kitchen?
In wet rooms and the kitchen, sealed tapes are installed, for fixing which on a wall or ceiling surface, special plastic clamps or clips are most often used:
- connect the contacts of the diode tape to the wires by soldering or special connectors;
- insulate the joints with insulating tape or heat shrink tubing;
- when installing the tape on the profile using double-sided adhesive tape, the surface must be dry, clean and fat-free;
- stick the LED strip, gradually removing the top film protection and pressing the lighting device;
- install a transformer in a predetermined place.
When creating a backlight from several diode elements, their combination into a single system must be strictly parallel, and the connection areas are removed in special plastic cases.
Recently, consumers prefer not traditional switches, but modern dimmers, which are installed together with the power supply. At the final stage, the operability of the installed lighting is checked.
PC as a power source
This connection option is quite common to provide local lighting around the computer space. You can also highlight the PC system unit itself from the inside or outside. Illumination of the PC monitor is useful for reducing eye strain during night work hours.
As for the connection itself, it is quite simple. The "molex 4 pin" plug in the PC has four wires. A current of 12 volts is supplied to one, 5 volts to the second, and the remaining two connectors are reserved for the “ground”. It is enough to isolate one "ground" and 5 volts. The tape is soldered to the remaining wiring in the order as indicated above.
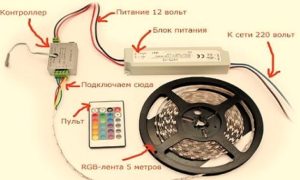
What do we need to connect an RGB strip

The photo shows all the components of the chain for the proper operation of the diode tape. Let's figure out why each of them is needed and what function they have.
RGB tape, which is important to choose carefully. This is the first element whose characteristics you need to decide in advance.
It all depends on where and under what conditions it will be placed. When buying, consider moisture resistance and protection from external influences.
The controller is an additional link that is necessary for the operation of colored diodes. Connecting the controller to an RGB LED strip allows you to perform the function of selecting and adjusting the color. With it, you can create your own backlight shade. Capital letters RGB stands for:
R - red, translated from English is red, G - green (green), B - blue (blue).
Using the remote control to control the controller remotely, you can also adjust the brightness of the glow, set a fixed shade, turn the LED strip on and off.
To select a controller, you need to calculate the required power. This is easy to do by applying the following formula:
Multiply the power consumption of one meter by the length of the LED strip. The final digital indicator will be the power of the controller (W).


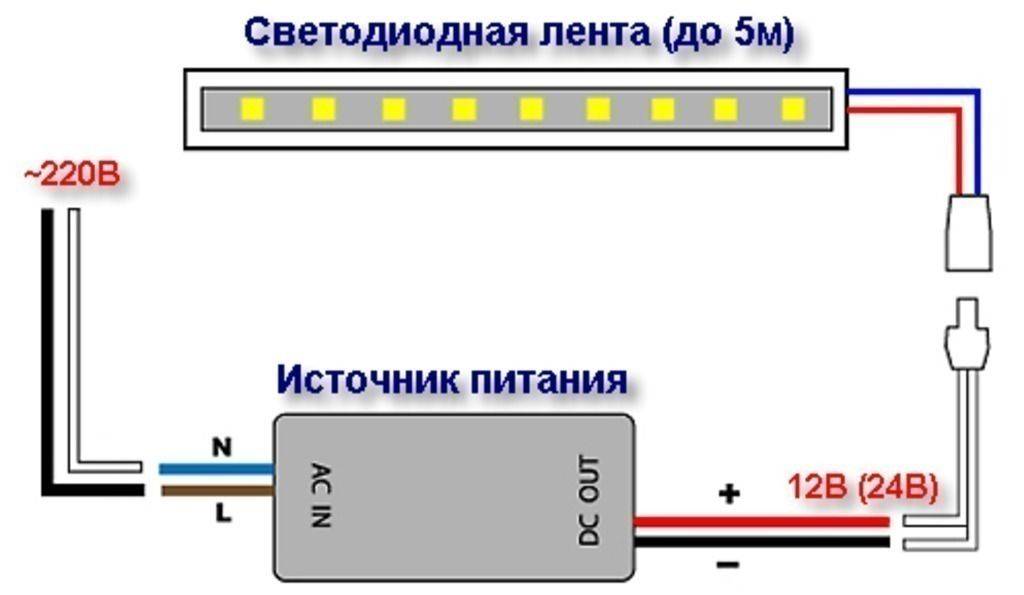
- The transformer (power supply) is another important part for the operation of the entire circuit. It should be chosen individually, having determined the conditions of the room and correctly calculating the required power for the uninterrupted operation of the LED backlight.
Prepare a place for mounting the transformer in advance, where the air circulates freely to avoid overheating of the device. At the same time, do not place it near flammable objects. Calculate the required power.
Important! It should be 20-30% higher than the total power of all LED strips. This power reserve of the power supply is necessary in order to supply a stable current to the entire structure without interruptions and power surges.
If you avoid this rule, you run the risk of LEDs failing quickly or not working well enough. How to perform power calculations, as well as even more practical advice on choosing a transformer, you can find here.
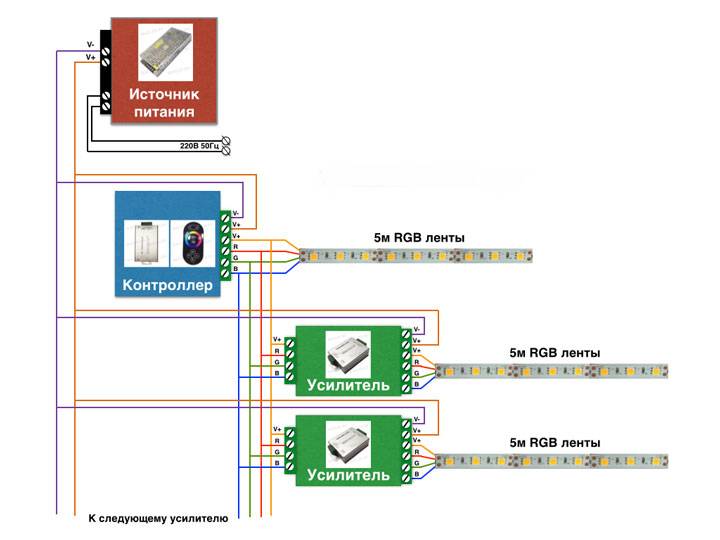
The amplifier is used at will and when a particular case requires it.It should be used for a diode tape, the length of which is more than 5 m, if the entire structure is powered by a single transformer.
It is especially recommended to use an RGB amplifier when connecting several LED strips in series. Thus, it implements the current supply directly from the transformer to each individual component.
The amplifier has a positive effect on the operation of the power supply and controller. It reduces the load, supplying stable power without voltage drops.
Also, if you decide to create a complex lighting structure from an RGB strip, an amplifier will help you a lot.
- Remote control. The only note about it - check the presence of batteries inside.
- Aluminum profile can be used as desired. Most LED strips are already protected from external factors with a silicone coating, so there is no special need for a profile. But if your LED strip belongs to models with high power consumption, then such a profile is necessary. It will play the role of a cooling radiator.
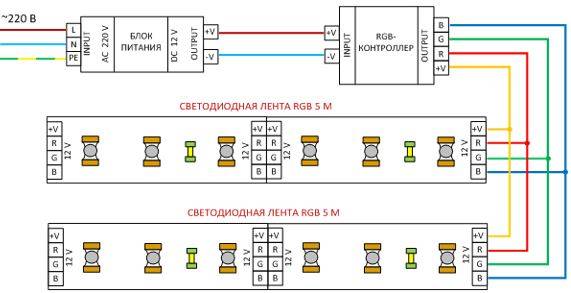
How to connect an RGB tape through a controller
How to connect an RGB tape to the controller should be analyzed separately, as there are some features.
The photo below shows a diagram of connecting an RGB tape to the controller, connected using four wires: 3 of them are colored and 1 is connecting to supply current from the power supply. The controller must be strictly installed between the transformer and the diode section.

- The first thing to do is, on the one hand, where there are only two wires “+” and “-”, connect the controller to the transformer, observing the polarity of the wires.
- Further, on the other hand, you need to connect a piece of LED strip with a controller, see how to do this in detail in the picture above. Connect four wires, 3 of them in accordance with the color marking, and attach the fourth wire to the remaining place (it is usually white or black).
In fact, if you connect correctly, the process is not at all difficult. If the first time you didn’t manage to make the connection correctly, then don’t worry - it won’t shock you. Just swap wires.
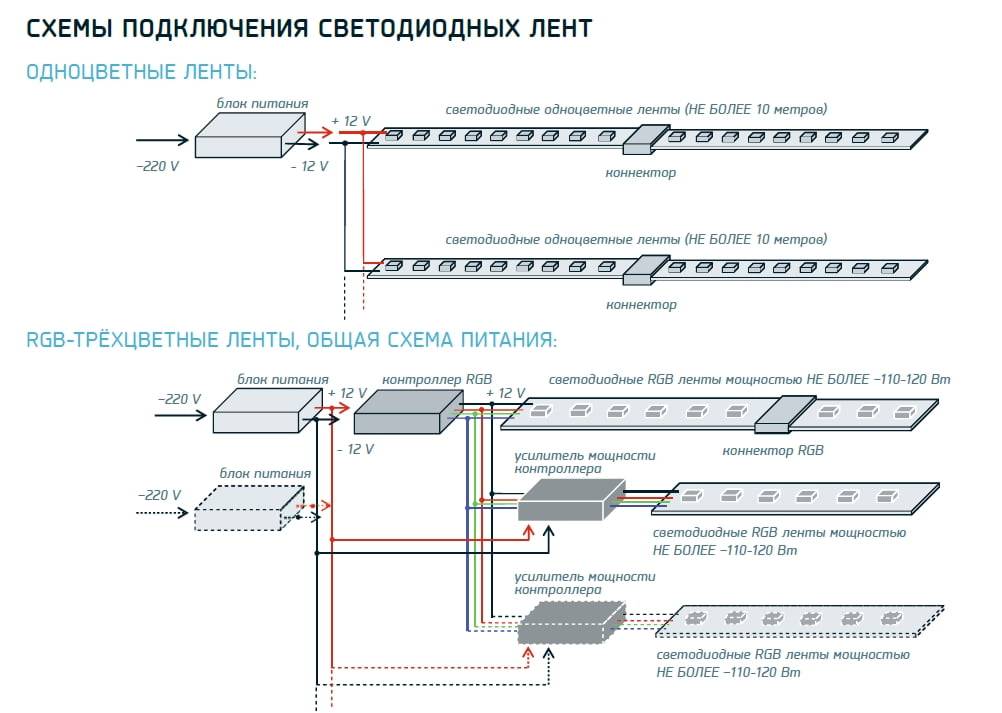
Basic RGB Tape Connection Diagrams
When you figured out how to connect the controller to the RGB strip, your next step is to connect all the remaining parts into a common circuit. Consider several connection schemes when you need to connect one or more segments, and also in which case an amplifier is needed.
- A simple option for installing all the elements together. This circuit will be useful for those who are going to connect only one diode strip, no more than 5 meters long. With this method, it is enough to use one power supply and an RGB controller. If the required unit power is calculated correctly, then an amplifier is not needed. Below is a visual connection diagram.

- A method for connecting two LED strips, each no longer than 5 m. This method for connecting an RGB strip is also simple, but requires some conditions for its implementation:
- the power of the power supply and the controller should be sufficient to serve the current of several diode segments, whose total length is not more than 10 m.
- additional wires are required.As shown in the diagram below, this can be done by connecting two wires to the corresponding outputs of the controller, which go to two different tapes, connecting them in parallel to each other. That is, two wires are connected to one contact of the controller at once.
How effective this method is is anyone's guess. After all, the power of one power supply may not be enough for a long time to service two pieces of tape, and if you make mistakes in the calculations, then the design may not work at all.
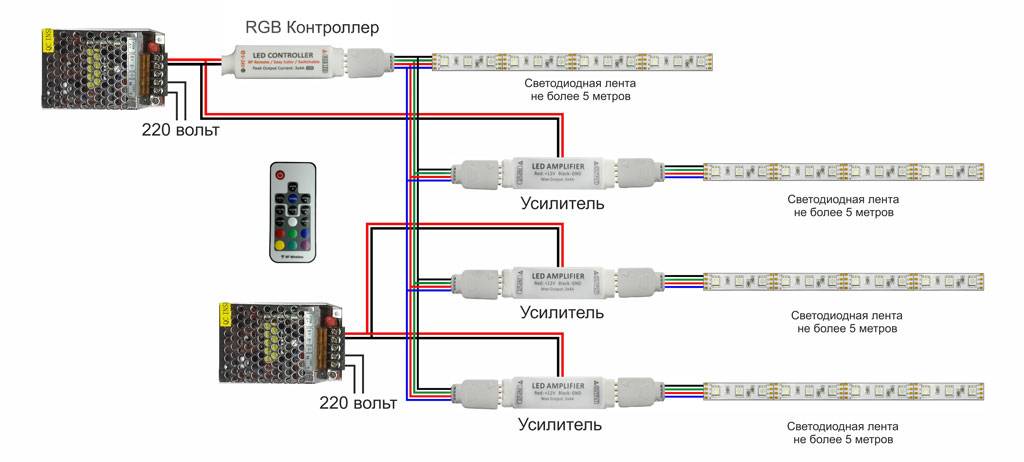
There are more reliable ways to connect two segments of diode tapes. There are two main methods for connecting the entire circuit, over 5 m long: using an additional power supply and using an amplifier.
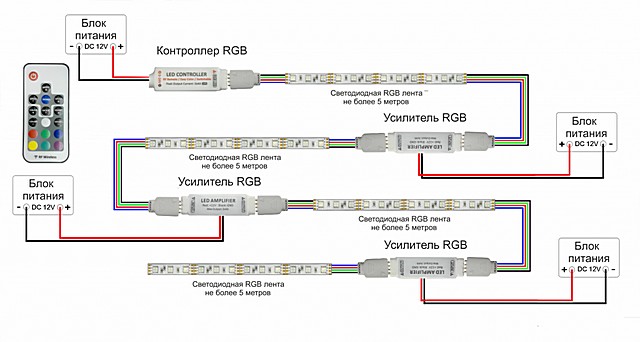
- Consider the scheme for connecting an RGB tape to two power sources, which is presented below. This chain is much better suited for serving longer sections of belts, since the power is distributed evenly over both sections in the required amount. The disadvantage of this method lies in the fact that the transformer is more expensive than the amplifier.
- The next connection method is to add a new element - an amplifier. When choosing it, it is not necessary to calculate the power of the entire tape, but only the individual segment to which it is connected. It is more convenient to use, as the transformer looks more bulky and heavy. In addition, not every controller can withstand such a voltage. This is where the use of RGB signal amplifiers comes in. As a result, both segments will work synchronously. To make it clearer, take a look at the diagram.

- A connection method that allows you to create a more complex design of LEDs of any length and complexity.This will require several power supplies and amplifiers, in accordance with the number of LED strips. Whether an additional transformer needs to be added depends on the power of the lighting. Below is a diagram of how you can gradually increase the length of the backlight by adding one amplifier every 5 meters.

Here is another possible scheme for connecting complex structures, similar to the previous ones. See below for how to do it.
There is such a variety of connection options, and this is not the limit, then it all depends on your imagination. The main thing is to find a place to place all this equipment.


