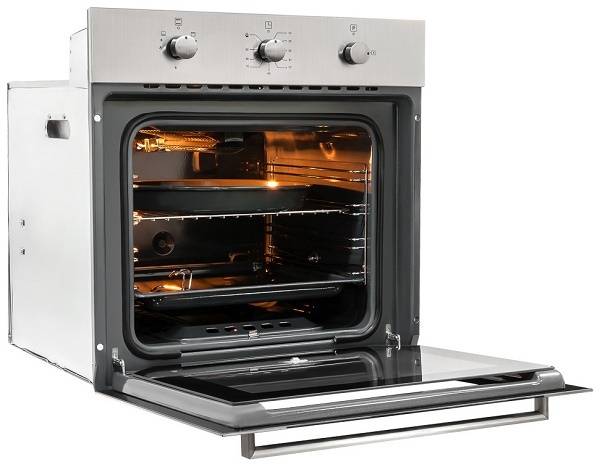
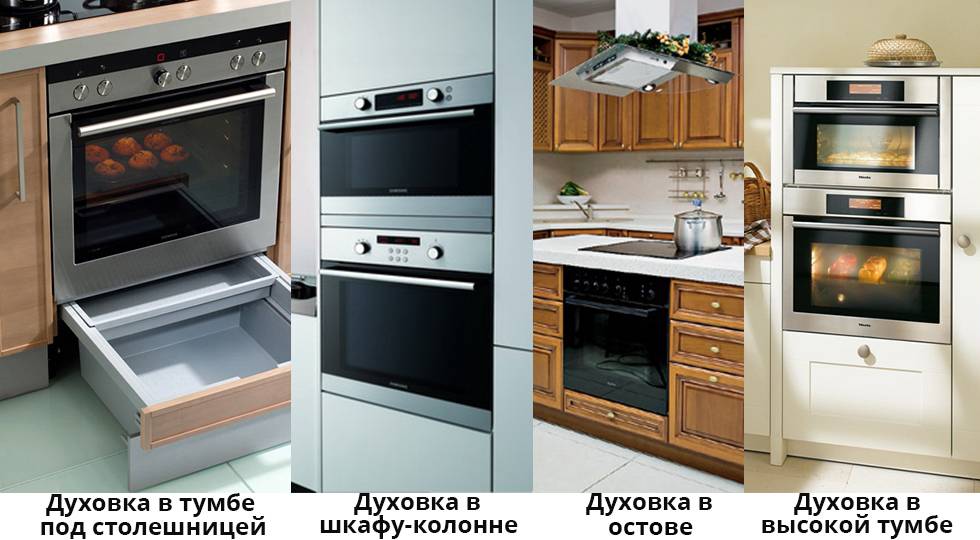
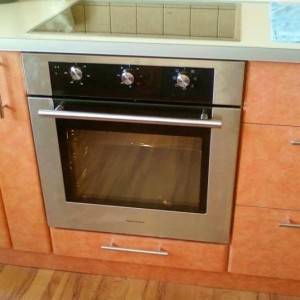
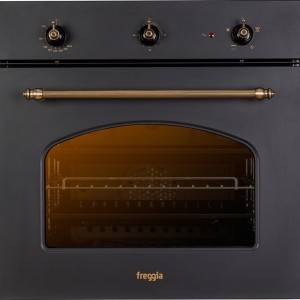
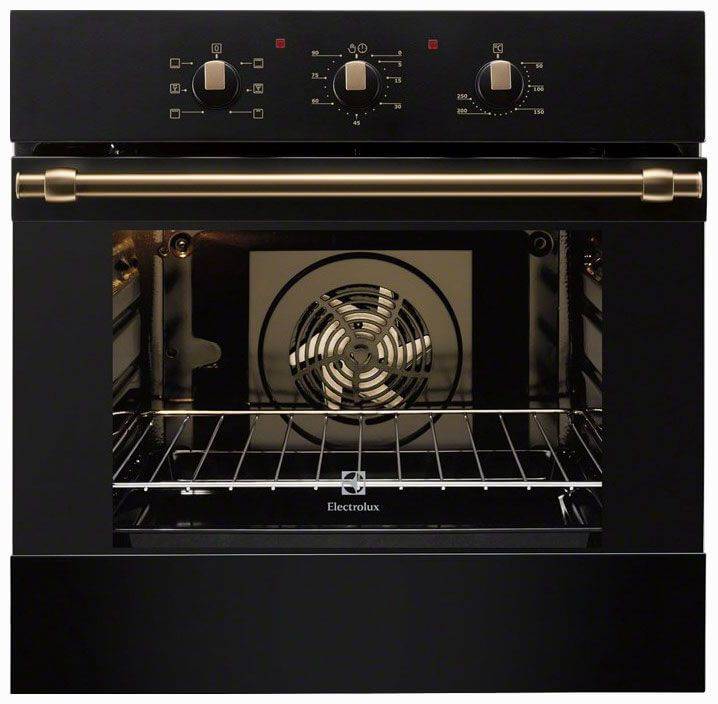
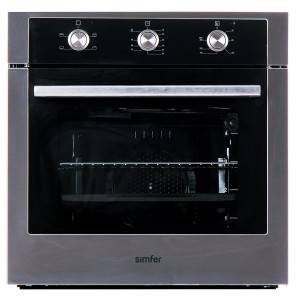
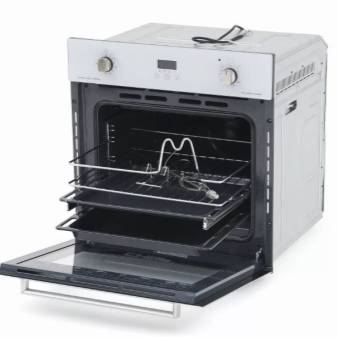
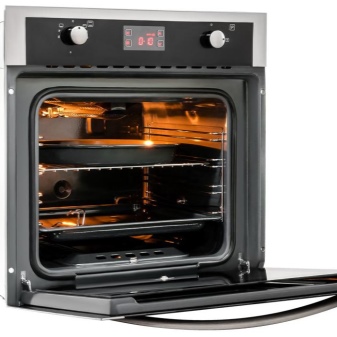
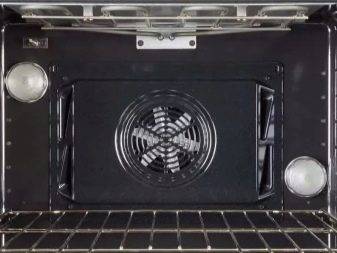
- Types of ovens and their photos
- How to connect?
- Algorithm for connecting the hob and oven
- 5 rules to follow
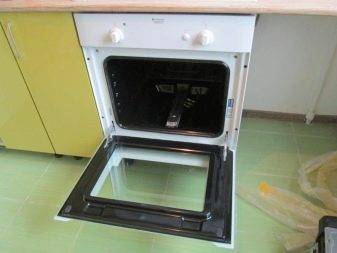
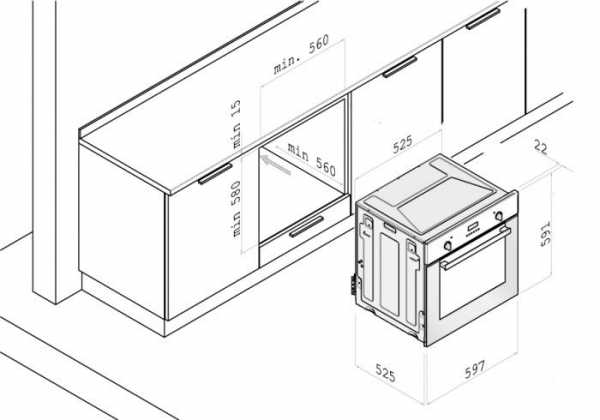
- Placement of the oven in a niche
- Kinds
- According to the installation method
- Independent
- Embedded
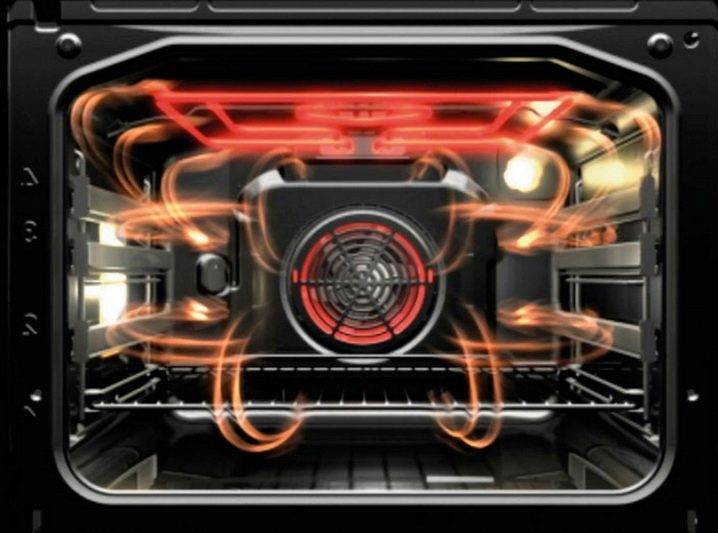
- According to the heating method
- Gas
- Electrical
- How to install?
- Characteristics
- Color
- The size
- Power
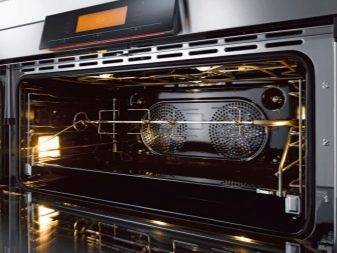
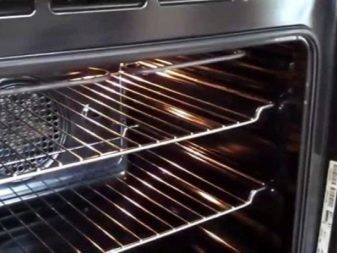
- skewer
- Care and cleaning of the panel
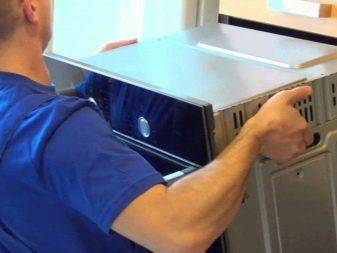
- Do-it-yourself installation in a niche
- Requirements
- How to build in an oven: cabinet design
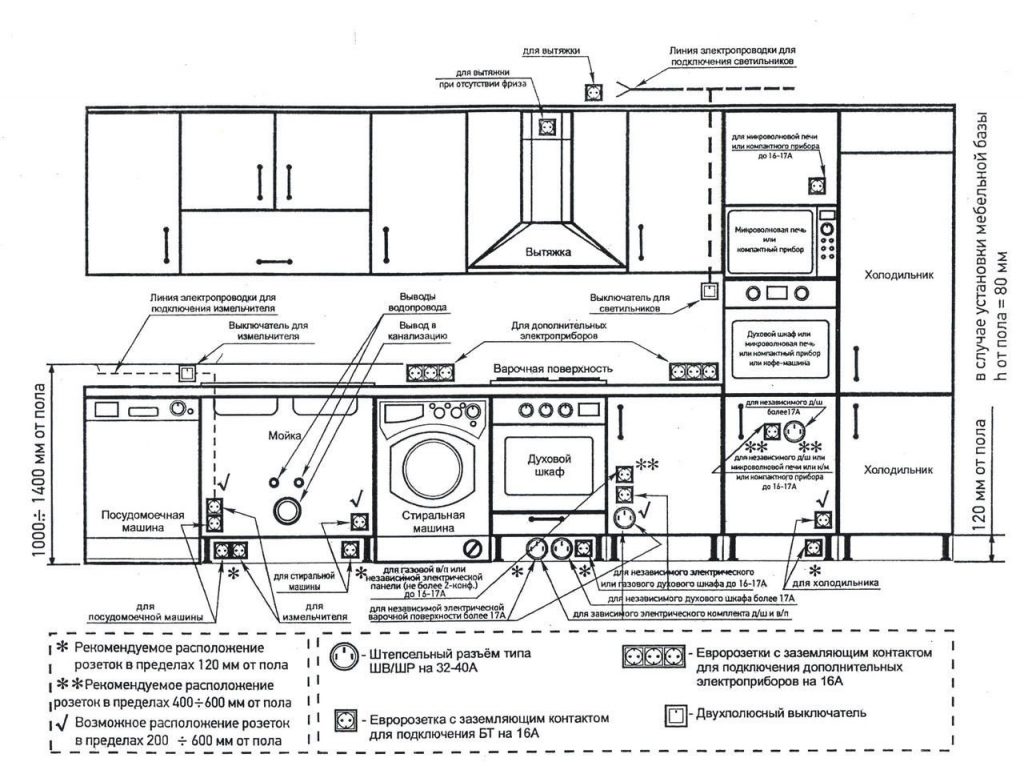
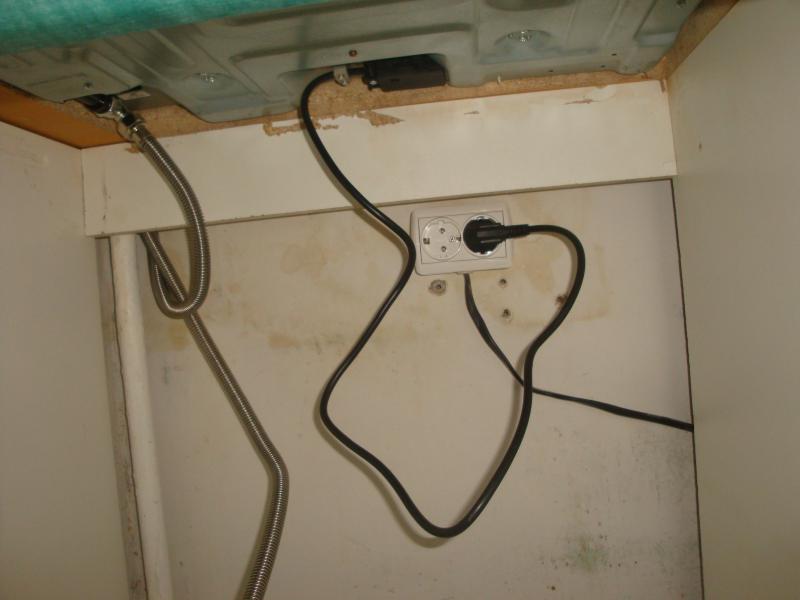
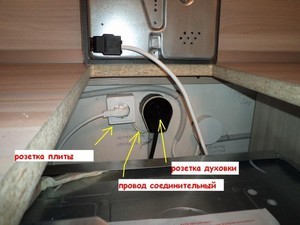
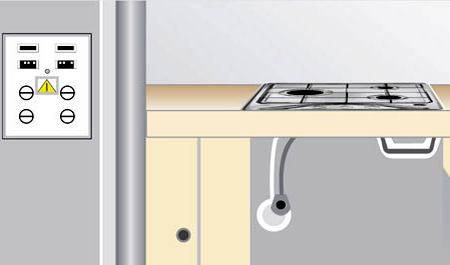
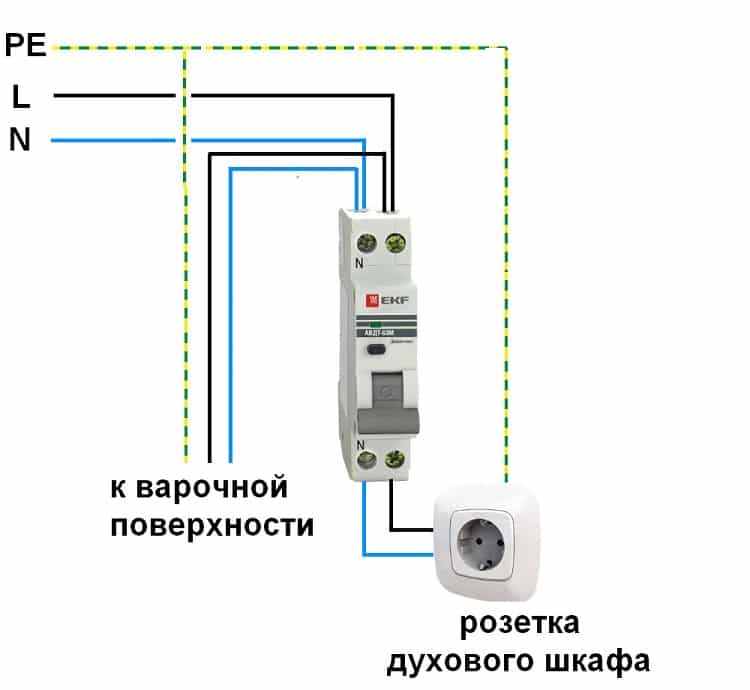
- Socket for oven and hob
- Inspection of equipment
- Features of ovens
- Features of installation in a MDF countertop
- What it is?
- Detail calculation
- Scheme of connecting the oven to the hob
- How to connect a gas oven
Types of ovens and their photos
Regardless of whether the oven or hob is built-in or not, they are of two types according to the heating method:
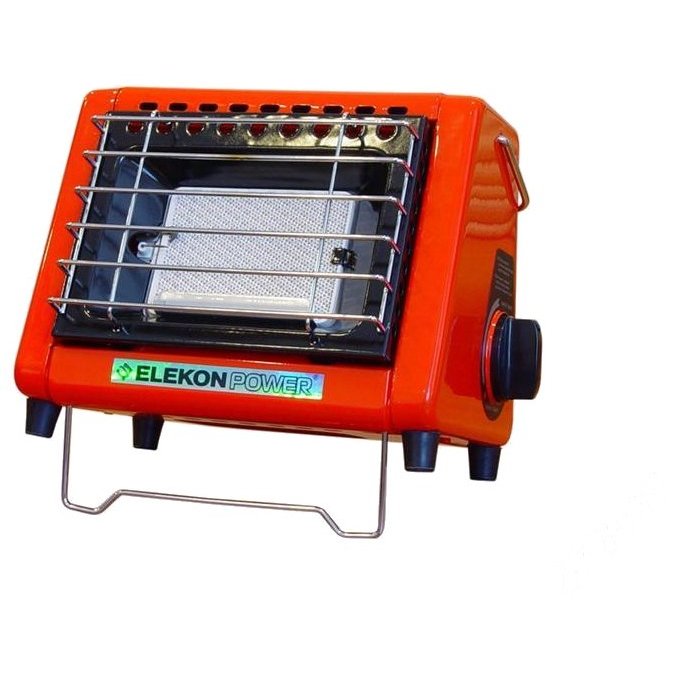
- Gas oven - can be installed in any kitchen, but it is recommended not to do it yourself, but to call the master, especially when it comes to built-in appliances. Incorrect actions during installation and connection can lead to a violation of the gasification of the house. Burner nozzles are placed at the bottom of the oven, food is heated from above.
- An electric cabinet and a hob - their installation and connection to the network is done by hand, even a person who is far from this sphere can handle it. In addition, electrical products are often equipped with all sorts of additional features that greatly simplify the operation of the product. And the temperature conditions for cooking here are created faster than in gas ovens.
How to connect?
The hob or oven must be properly connected to the mains.
To connect the panel to the mains, either a socket and a high current plug or terminal connections are required. So, a 7.5 kW hob is a current of 35 A, under it there should be wiring for 5 “squares” from each wire. Connecting the hob may require a special power connector - РШ-32 (ВШ-32), which is used when connecting to two or three phases.
The socket and plug must be purchased from the same manufacturer, preferably from light plastic - such plugs and sockets are no different from their black carbolite counterparts.
But the terminal block is simpler and more reliable. The wires in it are not just pressed, but fixed with clamping screws. In this case, the phases and neutral must be marked.
Consider the procedure for connecting the hob or oven.
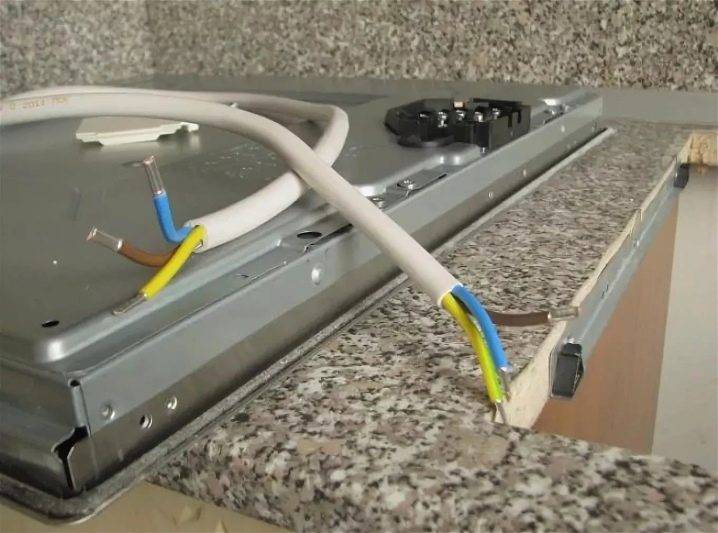
The color marking of wires is most often the following:
- black, white or brown wire - line (phase);
- blue - neutral (zero);
- yellow - grounding.
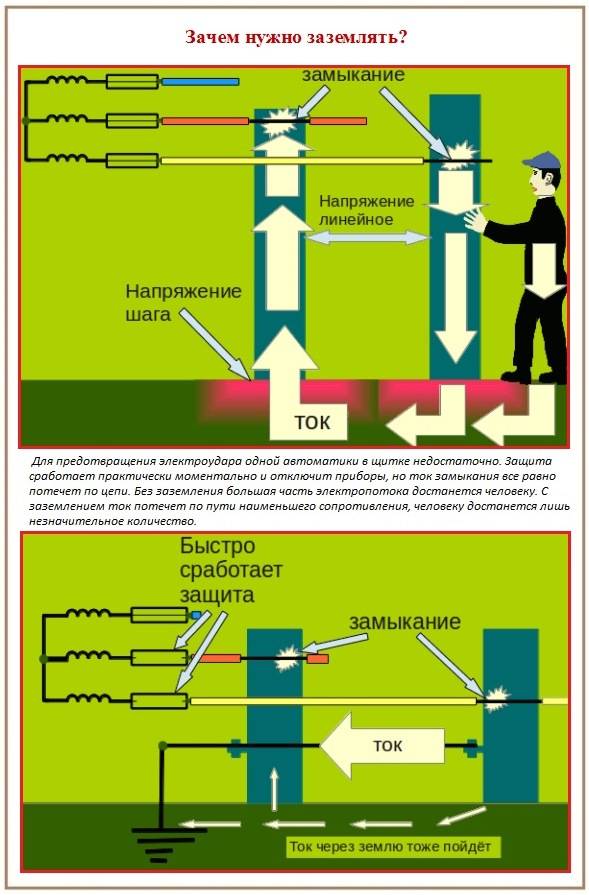
In Soviet times and in the 90s, local grounding of sockets and terminal blocks was not used at home, it was replaced by grounding (connecting to a neutral wire). Practice has shown that the connection to zero can be lost, and the user will not be protected from electric shock.
For two phases, respectively, the cable is 4-wire, for all three - for 5 wires. Phases are connected to terminals 1, 2 and 3, common (zero) and ground are connected to 4 and 5.
Algorithm for connecting the hob and oven
Long and proper operation of home appliances begins with the correct installation and commissioning. This mainly applies to high-powered appliances such as a stove and household stove. When installing and connecting the hob and oven to the power supply, the following conditions must be observed:
- Protective ground.
- Power cable.
Protective earthing is the main factor in the installation and commissioning of the instrument. For this, plugs and sockets with several contacts are used. The classic grounded contact is larger than the others. In the houses of the old building there is no grounding to make it; a cord with a built-in ground connection is led from the distribution panel. At high power household appliances, an auxiliary feeder is placed so that the usual 220 V power line can withstand the load. It is undesirable to subject this feeder to additional loads by connecting other equipment.
Many kitchens do not have outlets to power appliances.
Therefore, it is important to find out the required intensity of the equipment. It is also important to study the connection steps stated in the user manual and the placement of the connection on the equipment.
Cooktops work with any voltage. Household stoves work only at 220 V. The manufacturer installs jumpers in the clamps that can work with one phase.
To connect the stove and household oven to one socket in the electrical panel, an auxiliary protective switch is provided, from which the power wire comes. Their capabilities depend on the expected load.After that, the cord is connected to the outlet and the device is started. Sometimes, instead of a socket, stone pads attached to the wall are installed.

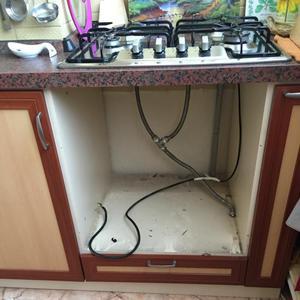
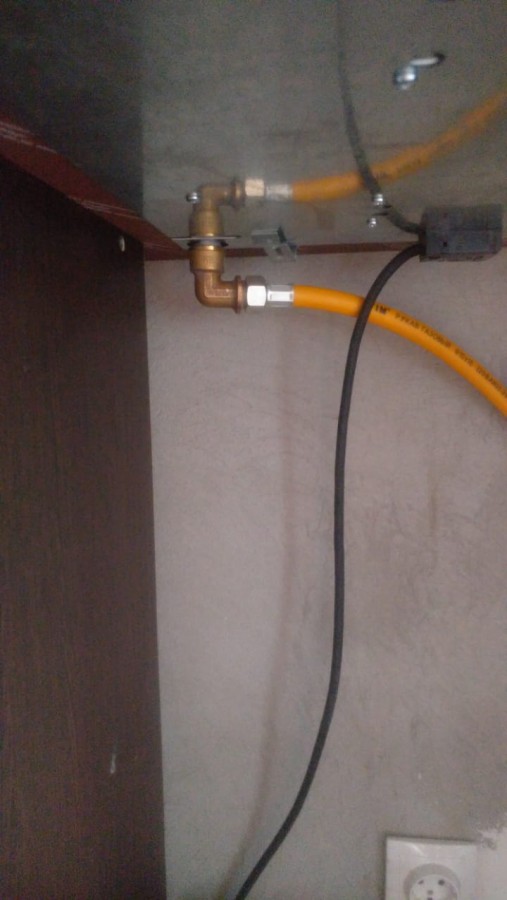
The choice does not always fall on electrical appliances, many continue to be adherents of gas cooking. To do this, you need to join the gas pipe. It is better not to implement this yourself, but to hire experienced specialists. To connect a gas hob and an oven, a pair of gas supply pipes is taken, each of them has an individual valve that stops the flow of gas when necessary. Connecting a gas oven and hob is not a difficult task.
Two types of connections are used to connect devices to gas:
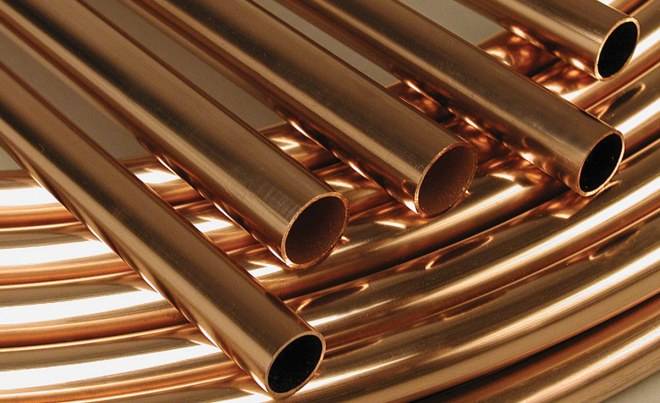
- dense steel or copper tube;
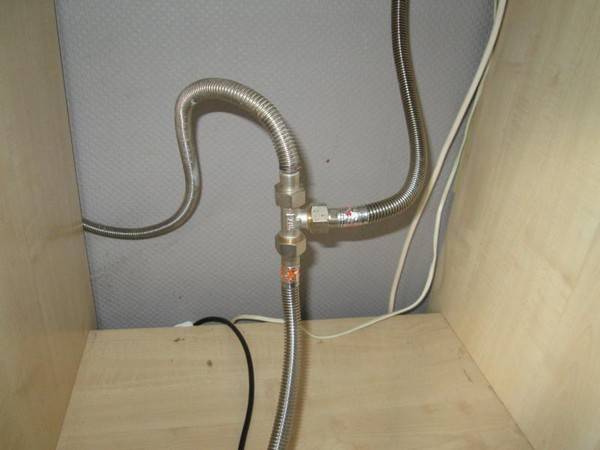
- elastic tube.

Connect through the outlet near the gas oven. After installation, it is necessary to check that the tube is not bent and nothing interferes with the flow of gas. To power a gas oven, the length of the tube cannot exceed one and a half meters. Connections are allowed at a minimum. This will allow you to install the equipment quickly and hassle-free.


5 rules to follow
- keep a safe distance from flammable objects and materials - in particular, there should not be towels, curtains, or various dangerous liquids that are sensitive to temperature changes nearby;
- the minimum recommended distance from water sources is 0.6 meters;
- the compartment must be standardized and raised from the floor by 8-10 cm;
- if your device consumes 3.5 kW, then you will need a wire with a cross section of 2.5 sq. mm and an automatic machine for 25 amperes, if the power is higher, then already - at least 4 sq. m and 40 A;
- the electrical wire should not come into contact with the gas pipeline - the recommended distance is at least 10 centimeters.
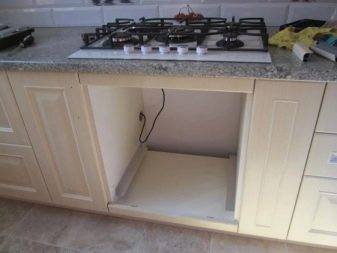
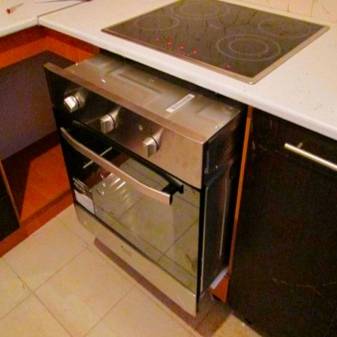
Placement of the oven in a niche
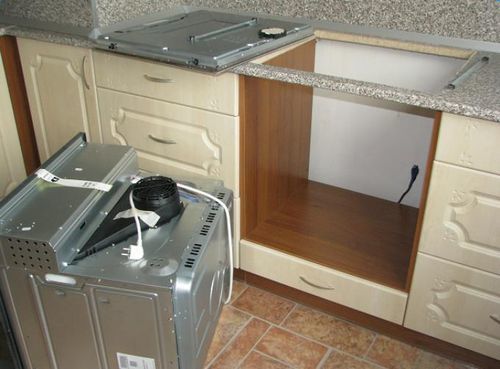
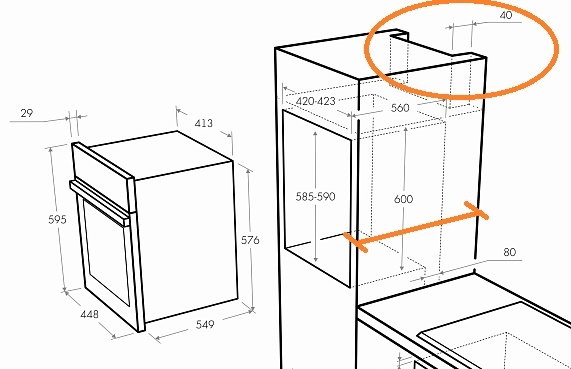
Connecting the oven begins with preparing a niche for its location. It is necessary that there are no distortions (we use a level to control this moment), otherwise the device can quickly break down due to improper heat distribution.
The functioning of the oven is accompanied by the release of heat, which is why a certain distance must be left between its walls and the walls of the niche. This will help prevent product failure. To be specific, then from the wall of the niche to:
- The back wall of the oven should recede 40 mm;
- Right and left walls - 50 mm each;
- Cabinet bottom 90 mm.
Kinds
The type of oven purchased directly affects the order in which cabinets are installed. These devices are divided into the following types:
- independent and embedded;
- gas and electric.
The most stringent requirements apply to the installation of gas ovens. This is partly due to the fact that such devices must be installed in places determined by the plan of the apartment.
The above means that you can only mount electrical devices yourself. Gas household appliances are installed with the involvement of relevant specialists.
According to the installation method
According to the installation method, ovens are divided into independent and built-in. The former are easier to install than the latter.
Independent
Independent ovens differ from built-in ovens by the presence of a full-fledged housing, which hides the internal parts of the device and protects the key elements from external contact.Such devices can be installed anywhere and do not require high time costs.
Embedded
This type of device is distinguished by the absence of a protective case. These ovens are mounted in a pre-prepared structure and are part of the headset. Built-in devices provide the effect of a single space in the kitchen, without standing out from other household appliances and without taking up additional space.
According to the heating method
Ovens heat food using either electricity or gas. The first option is convenient in that during installation, such devices must be placed near a source of electricity. The second type of device is rigidly tied to the exit point of the gas pipe, since the latter, according to current regulations, cannot be transferred to other areas.
Gas
Such ovens are distinguished by the presence of gas burners stretching along the bottom. Devices of this type are complemented by modern systems for controlling the supply of blue fuel and automatic ignition. The main disadvantage of gas ovens is that the dishes are heated from the bottom up. In addition, these devices are allowed to be installed only with the involvement of appropriate specialists and in strictly designated places.
Electrical
Electric ovens differ from the previous ones in the following features:
- warming up to three thousand degrees;
- the presence of convection;
- accurate timer;
- the presence of a self-cleaning mode;
- built-in redundant protection system against overheating and fire.
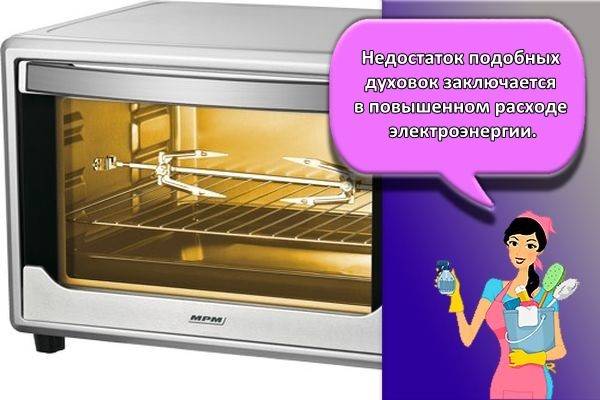
The disadvantage of such ovens is the increased power consumption. This ultimately leads to an increase in the cost of maintaining the apartment.
How to install?
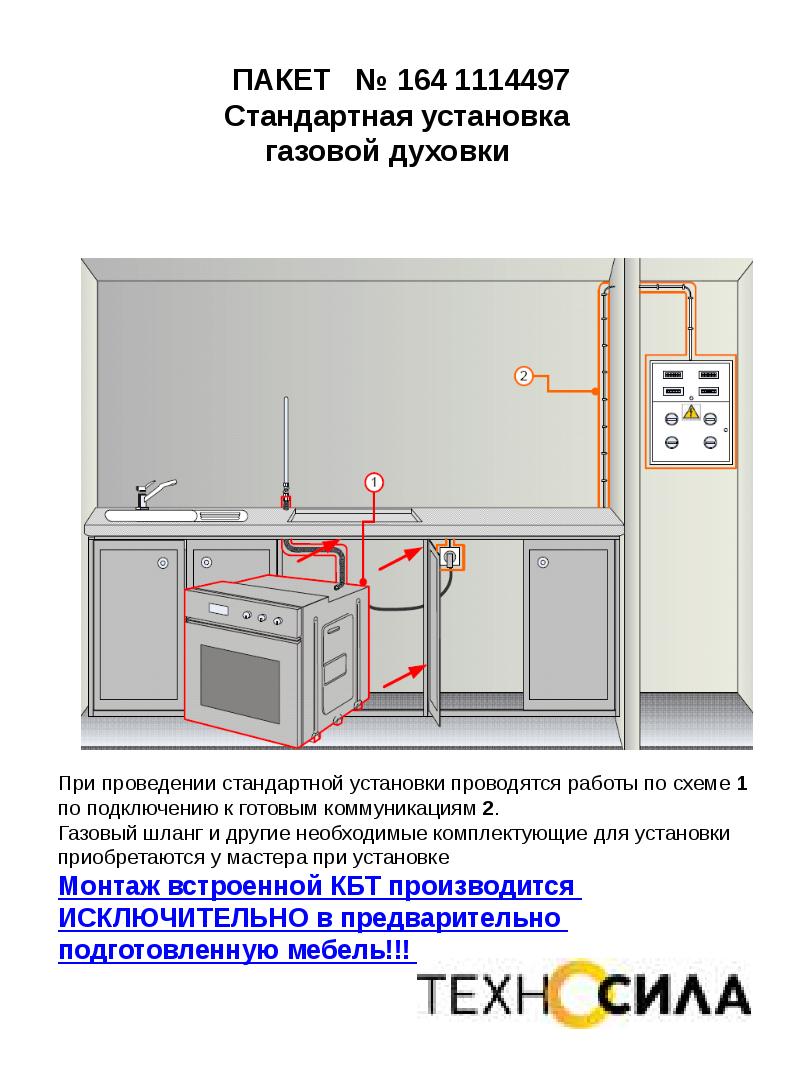
After purchasing a suitable gas oven, it is required to install it in accordance with all the rules.But just studying the requirements is not enough. It is strictly necessary to contact the specialists of the gas industry for connection. The choice of location for installation depends on the owners. Dependent cabinets are placed under the hob, and independent cabinets are placed where the owners see fit.
Warning: Even the best ovens generate heat through the walls. Therefore, the lack of a gap between them and the kitchen set is very bad for both furniture and appliances. Usually, a minimum of 0.04 m is left between the back line of the cabinet and the wall, and 0.05 m at the edges
Between the walls of the niche and the bottom of the oven must be at least 0.09 m
Usually, a minimum of 0.04 m is left between the back line of the cabinet and the wall, and 0.05 m along the edges. There should be at least 0.09 m between the walls of the niche and the bottom of the oven.
Important: All these figures are indicative only. More detailed information can be obtained from the accompanying documentation. A few more tips:
A few more tips:
the installation location of the cabinet must be chosen away from other heat sources;
the installation site must be level;
models with electric ignition are placed where there is a suitable outlet;
usability considerations should always be taken into account;
design decisions are taken into account last.
Characteristics
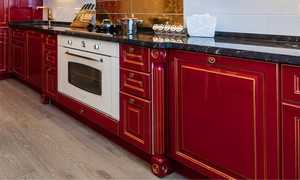
Color
Coloring can be quite important: after all, a product that is attractive in terms of technical parameters must also be liked and fit the interior. Undisputed classics are white ovens. Do not think that white models will look old-fashioned. Modern appliances have a beautiful design. But in any case, it is necessary to take into account the style of the kitchen space and design principles.The impeccable classic style usually implies the choice of black ovens. They go great with any kitchen set.


Regardless of the environment, such devices look strictly and concisely, without focusing on themselves. They should not be used as dominant indoors.
The size
Any gas oven, regardless of color, weighs quite a lot. And the larger the product, the heavier it is. Dimensions must be taken into account both for stand-alone units and for units built into kitchen sets. A typical value is 0.6X0.6 m. But there are also designs of non-standard sizes that are selected for a specific room. Most commercially available ovens have a depth of 0.55 m. This value will suit even the owners of a small kitchen. But if the area is very small, you need to choose models with a depth of 0.45 m. True, it is unlikely that many dishes will be cooked on such a technique. If this is critical, it is worth choosing other parameters: not 0.6X0.45, but 0.45X0.6 m. The mass of the structure is usually determined by:
- product brand;
- materials used;
- geometry;
- the number of accessories;
- metal thickness.

Power
Gas ovens, like electric counterparts, have different capacities. Traditionally, it is measured in watts. The power of the gas oven can reach 4 kW. For electrical products, the upper bar is smaller: only 3 kW. There is a clear relationship between temperature and power consumption. Not only the maximum, but also the minimum temperature is important. Some dishes require very little heating. The vast majority of dishes that are used in modern cuisine require a cooking temperature of no more than 220 °.The limit values of the unit usually range from 250 to 300°. But increased heating cannot be considered an unnecessary option.
skewer
When using a spit, you need to be extremely careful. Its rod and forks have sharp ends, so there is a risk of injury. It is necessary to insert the hook of the holder into the hole located in the upper part of the cabinet. Place the first fork on the skewer, then string the meat on it and insert the second fork. Then tighten the plugs using the screws. Place the front part of the skewer on the hook of the holder and remove the handle. At the very bottom you need to put a baking sheet, turn the mode control knob. It must be borne in mind that food with a weight not exceeding 5 kg can be cooked on a spit.

Care and cleaning of the panel
It is very important that before you start cleaning the tile, turn it off and wait until it cools down. For safety reasons, it is forbidden to resort to cleaning gas appliances using pressure washers or steam jet devices. Owners should remember that in no case should you use abrasive or acid products, as well as steel sponges.
All of these can lead to damage.
Owners should remember that in no case should you use abrasive or acid products, as well as steel sponges. All of these can lead to damage.
In order for the burners to work properly, it is necessary that the legs of the grates are in the middle of the burner. We recommend using warm soapy water to clean the enameled parts, the divider and the lid. Rinse stainless steel fixtures with water and dry immediately with a soft, clean cloth.The burner grates are washed by hand, after which you need to make sure that they are installed correctly. Once all parts are clean, the gas stove should be wiped dry.
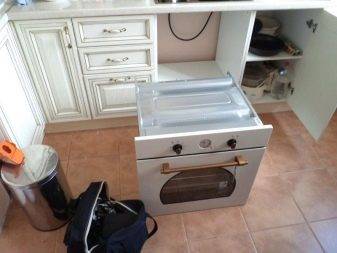
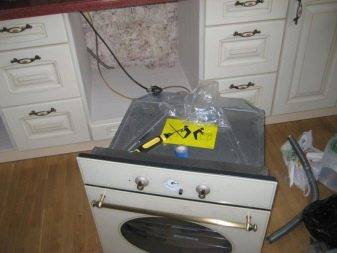
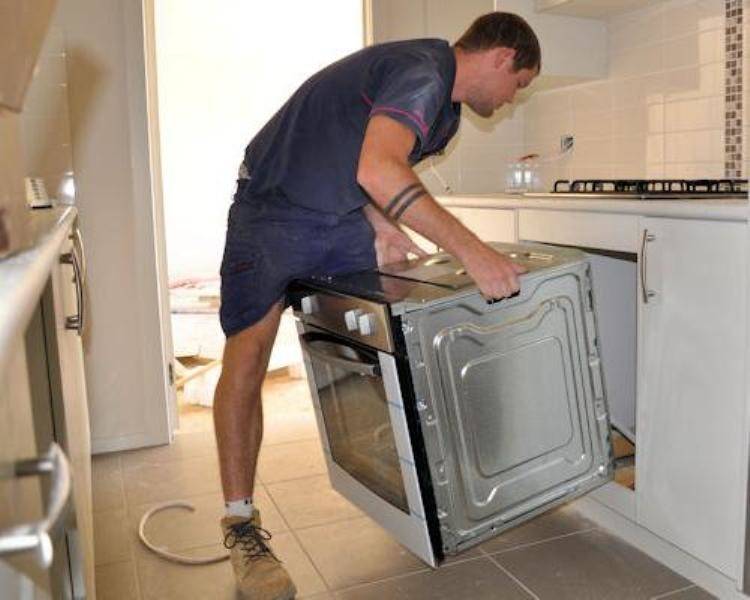
Do-it-yourself installation in a niche
To install the oven in a niche, you will need:
- level;
- screwdriver;
- drill (if necessary);
- adjustable wrench (needed for installation of a gas oven);
- pencil and ruler (roulette).
Requirements
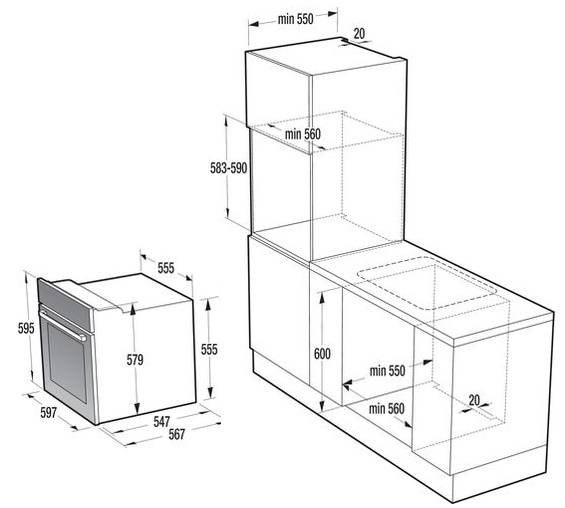
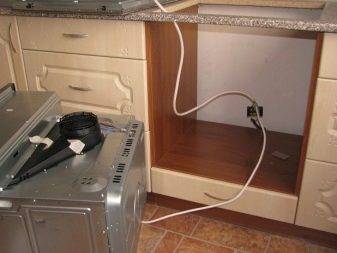
Wooden furniture is suitable for the installation of electrical and gas appliances. Metal surfaces with incorrect connection of the device (insufficient grounding) will be shocked. Ovens are installed so that the distance to the back wall exceeds 4 centimeters, side - 5 centimeters, floor - 9 centimeters. If the appliance is mounted under the hob, then there must be at least two centimeters of free space between these devices.
Ovens are aligned strictly horizontally. Failure to comply with this requirement will result in rapid damage to the device. Lack of level causes uneven distribution of heat inside the oven.
How to build in an oven: cabinet design
We will design a cabinet in which the hob and oven are mounted. To design such a module, it is enough to know the typical dimensions and tolerances. This is the height of the box for the oven itself, the position of the body strip (if, of course, it will be in the project), and the size of the gap for the lower drawer.
For reinsurance, it is recommended to carefully study the instructions for the oven. Better yet, just in case, measure the key dimensions of the embedded equipment.
As mentioned above, there should be a clean wall behind the oven, i.e. no outlets or pipes. Otherwise, it may not “get up” in depth, and this is a problem. And it is better to mount the tabletop on the boxes so that the overlap in front is 30 mm (excluding the thickness of the facade), and in the back - 50 mm with a standard tabletop depth of 600 mm.
Let's give an example of the calculation of parts for a cabinet under the oven.
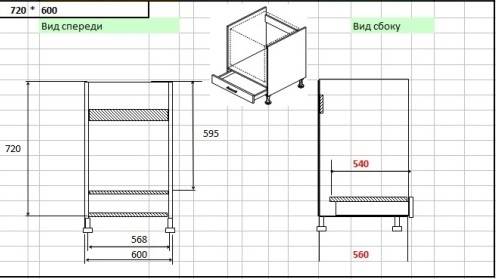
The overall width of the box should be 600mm. The height of the box for the equipment we are considering should also be 600 mm, depth 500 mm.


If the project has a tightening bar, then it is one and is attached in the center. Otherwise, it will not be possible to fix the hob. Moreover, it needs to be lowered down (relative to the top edge of the side panel) by 10mm. This is done in order to mount the hob in the countertop. Actually, there is no need for this tightening bar, many furniture makers do not put it on.
If a 28mm thick worktop is used, then most hobs will extend beyond these dimensions. And by lowering the hull bar, we will enable this “plate” to “sit down” normally in its place.
The niche for the built-in oven is 600x600. With a module height of 720 mm, 120 mm remains at the bottom. Usually a drawer is mounted in this gap. In order for the box to be more or less similar to a box, its height must be at least 60 mm, and the free space in height, under this box, must be at least 80 mm (So that the box can generally be mounted there along with the guides). We believe:
850 kitchen height, 100 kitchen legs height, 28-30 mm countertop height. Hence the height of the module (its sidewalls) = 720 mm.
720-600-32 (module bottom and oven shelf thickness) = 88 mm. This is the drawer space.The depth of the box box will be about 50-60 mm, no more.
If the height of the lower modules is designed to be less than 850mm, then at the bottom of the box there will be not a drawer, but a snag, i.e. just a facade fixed on the box. Actually, many furniture makers make a snag even at the standard height of the cabinet for the oven, without bothering with the calculation of the drawer. Moreover, if the kitchen set itself is quite large and there is simply no need for this narrow drawer.
You can write down the details on the resulting cabinet with a drawer for a built-in oven:
- Horizon/bottom 600x500 (1pc)
- Horizon/shelf 568x500 (1 pc.)
- Sidewalls 704х500 (2 pieces)
- Plank 568x80 (1 pc.)
- Side of drawer 510x60 (2 pcs.)
- Forehead of the box 450x60 (2 pcs.)
- Fiberboard / bottom 540x448 (1 pc.)
- Facade 116x596 (1 pc.)
Embedding the oven into the resulting module will not be a problem.
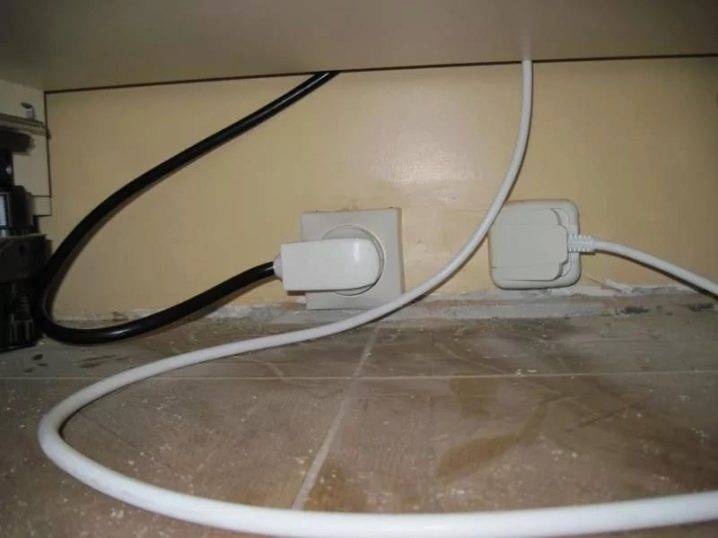
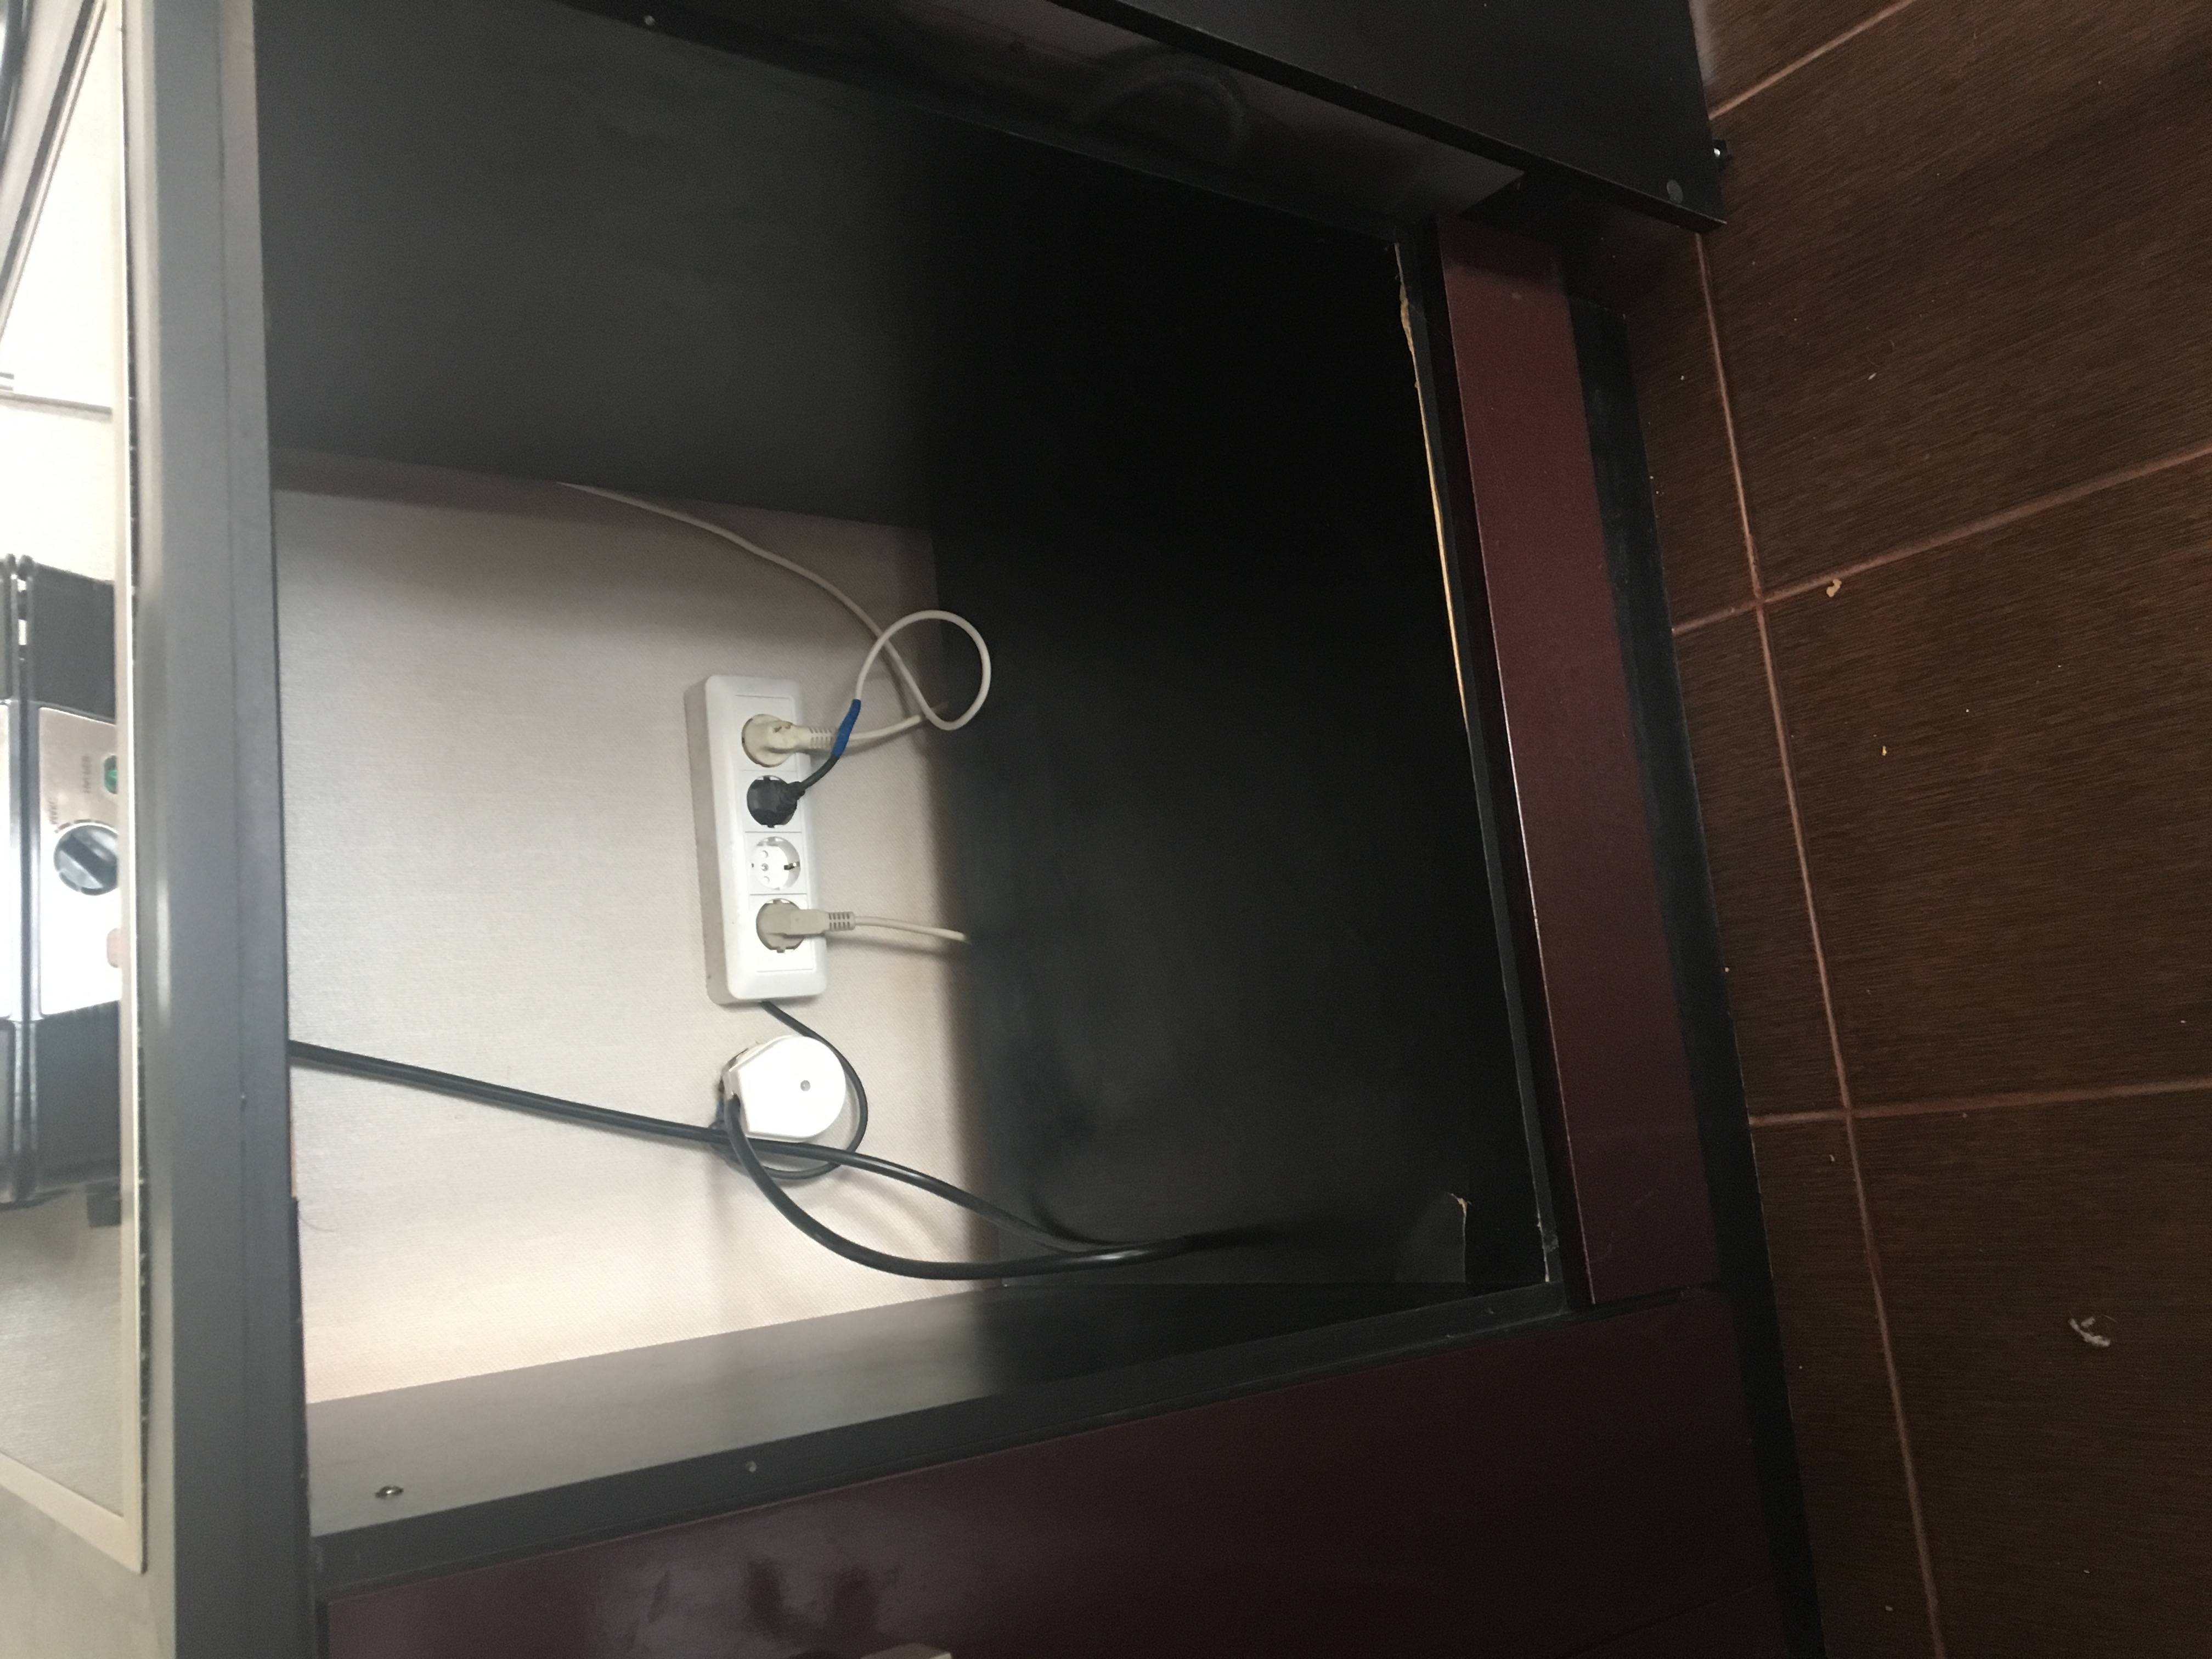
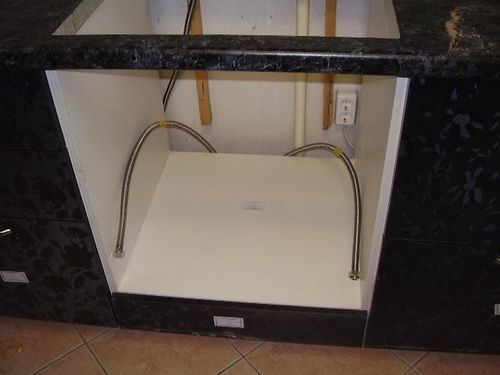
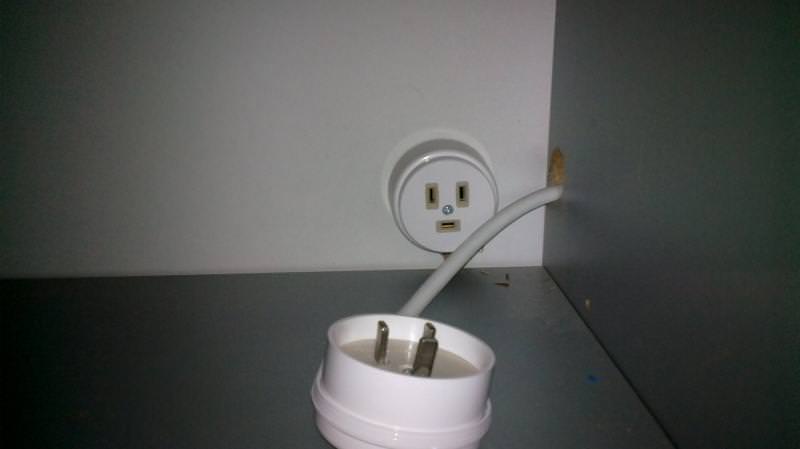
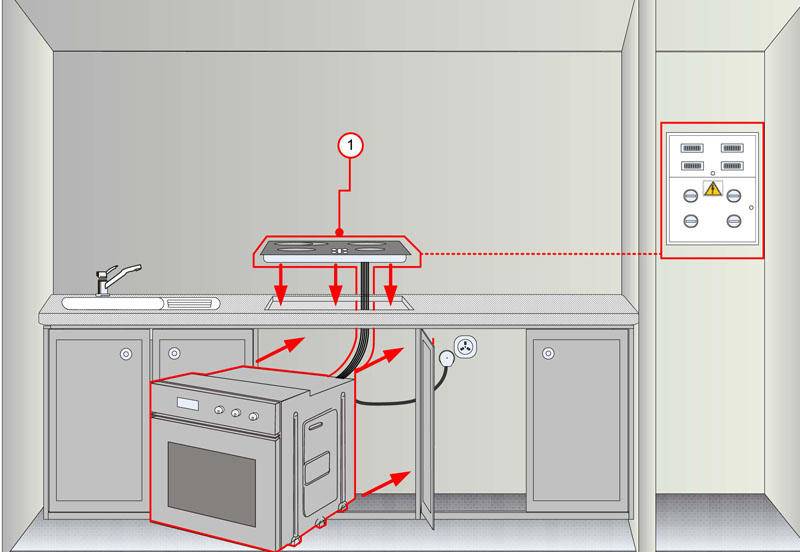
Socket for oven and hob
Hob sockets capable of withstanding more than 20 A are considered power sockets. Based on the method of installation, they are divided into overhead and internal. Overlays are installed on the wall. They are convenient to use when laying wiring by air. They are not dangerous for wooden buildings and in rooms where there is a lot of moisture. They are not afraid of dust and moisture. The internal ones are installed in socket boxes built into the wall. What sockets to use, the master will advise you.
Before buying an outlet for the oven and hob, you need to make a choice based on the calculation of the maximum tension. For example, for household stoves up to 3.5 kW, 15 A is enough, for an electric stove of 9 kW - above 33. For equipment with a higher power - 65 A. For such purposes, the socket has appropriate thick pins, and the insulation is made with refractory material.
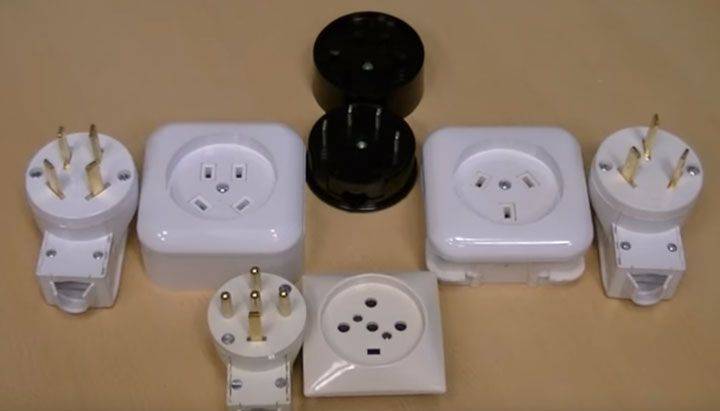
You also need to determine how many phases will work. To work with a voltage of 220 V, three connectors are needed, with a voltage of 380 V - five.
The feeder is connected to the plug in different ways. The first - the core of the cord is released from the sheath by less than a centimeter, inserted under the clamp and clamped with a screw. The second is more reliable: the wire is released from insulation more than a centimeter, and a screw is wrapped around it, after which it is pressed. The area where the wire touches is larger, respectively, the contact is better. All these processes allow you to connect the oven and electric stove to one cable, therefore, all this is connected to one outlet.
It is better to mount the socket near the hob, observing the conditions that protect against the ingress of liquid or water. It should be freely accessible with maximum secrecy.
Inspection of equipment
At the end of the connection of the equipment, it is necessary to check its working capacity, including at critical loads for the available power. The action allows you to find out the quality component of the wiring.
Technique check:
- activate the unit responsible for the equipment;
- the LEDs or the screen on the oven should light up;
- turn on the heating elements to maximum power;
- we calcine the chamber with an active hood (> 250⁰С).
It is useful to wait for the factory grease to completely burn out, otherwise the dishes will be saturated with an unpleasant technical smell during cooking. If the verification procedure passed without the participation of problems, then you can thoroughly fix the cabinet in its place.

Oven control
Features of ovens
Of course, no zealous housewife can do without an oven.It is its use that allows you to cook at home gourmet dishes, confectionery, and other menu items that are not intended for everyday cooking. Today, the market offers a fairly large number of these household kitchen appliances, which differ in their design, principle of operation, functionality, capacity and other features. Therefore, before you stop looking at a specific model, and rush to adjust kitchen furniture for it, you need to carefully study all the features of these appliances.
According to the installation method, ovens (ovens) are divided into:
- Independent, which are fashionable to install in a furniture niche and easily move from one place to another;
- Built-in, which are installed in furniture niches on an ongoing basis and their dismantling is carried out only when replacing furniture products or when the cabinet fails.
- gas, the connection of which must be carried out by specialists of the relevant organizations;
- electric, which you can easily mount yourself.
- the heating of the gas device is carried out due to the combustion of gas entering through the nozzles - burners into the lower (bottom) part of the working chamber, which creates uneven heating of its entire volume;
- electric ovens have heating elements located at the bottom, top and sides of the chamber, which provides more uniform heating, and, consequently, improves the quality of cooked dishes.
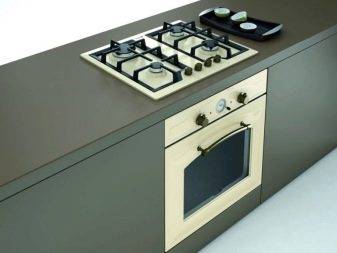
 Embedded model
 gas model
 electrical model
 independent model
Features of installation in a MDF countertop
The installation of ovens in an MDF worktop is carried out according to the following algorithm:
- Holes are cut in the countertop corresponding to the dimensions indicated in the instructions for the oven. Work is recommended to be carried out with an electric jigsaw with a fine-toothed file. The latter will reduce the likelihood of defects on the surface of the countertop.
- The sawn edge is treated with a sealant that will protect the material from water.
- An oven is installed in the hole, after which it is fixed.
When sawing a hole, it is necessary to guide the jigsaw strictly along the marked mark. With a deviation of 10 or more millimeters, you will have to completely change the countertop.


What it is?
The oven is an essential piece of kitchen equipment. There is a huge number of oven designs and their individual models.
Understanding the existing assortment is quite simple if you pay attention to the correct classification. It will not allow you to get confused and make ridiculous mistakes. The difference is primarily that some models are integrated with the hob, while others do not depend on it.
According to this indicator, the technique is divided into groups:
The difference is primarily that some models are integrated with the hob, while others do not depend on it. According to this indicator, the technique is divided into groups:
dependent;
Modern ovens have gone far from their "ancestors" that existed 30-40 years ago. Now it is possible not only to “put to fry or bake” something in the oven. All models that are found in stores now can do a lot, even if we talk only about budget-class products. Ovens with an abundance of auxiliary functions are widespread:
- convection;
- grill;
- skewers;
- telescopic guides.

Convection is gradually becoming an almost mandatory mode in ovens. It is so valuable that models that are not able to implement such an option will soon disappear. Thanks to this function, the dependence of the temperature of the products on the distance to the heating elements is significantly reduced. But the answer to the question, what is a gas oven, cannot be considered fully disclosed, if you do not point out its weak and strong points.

Detail calculation
Based on the drawing, determine the dimensions of the furniture parts. Let's take a standard example:
| № | the name of detail | Quantity, pcs. | Size, mm | Material |
| 1 | sidewalls | 2 | 704x560 | MDF |
| 2 | Bottom | 1 | 600x560 | — |
| 3 | Base for oven | 1 | 568x560 | — |
| 4 | table top | 1 | 600x560 | — |
| 5 | Back wall | 1 | 550x129 | HDPE |
Separately fix the dimensions of the details of the box:
| № | Drawer details | Quantity, pcs. | Size, mm | Material |
| 6 | Side planks | 2 | 560x90 | MDF |
| 7 | crossbars | 2 | 518x90 | — |
| 8 | Facade | 1 | 129x600 | — |
| 9 | Bottom | 1 | 560x518 | HDPE |
How to install led strip on kitchen cabinets?
But these dimensions are not dogma. Check with your calculations. To make the most economical cutting, you need to determine the total area of \u200b\u200bthe MDF. According to the specified specifications, you will need: 2 (0.7 x 0.56) + (0.6 x 0.56) + (0.57 x 0.56) + (0.6 x 0.56) + 2 (0 .56 x 0.090) + 2(0.52 x 0.09) + (0.6 x 0.13) = 2.3 m2.
Draw a rectangle on a sheet of paper in a convenient scale and place the contours of the detailing areas in it. This must be done so that the fragments fit on the plan. MDF sheets are sold in the distribution network with a size of 2800 x 2070 mm, an area of 5.8 m2. Therefore, you have to buy the whole panel. MDF is a more durable material than chipboard.
Expert opinion
Bashir Rabadanov
Technologist at Woodband furniture company
The surfaces of the plates are often made with a complex relief to give originality to furniture facades. Chipboards are covered with enamels, acrylic and PVC film. Manufacturers also create panels with a surface that imitates precious woods.
The ratio of the dimensions of the cabinet for the oven, taking into account the supply of gas
According to calculations, from one sheet it will be possible to cut parts for two cabinets for the oven. Use one set for its intended purpose, and the rest of the plate can be used to make the same or other furniture.
Scheme of connecting the oven to the hob
How to connect the hob and oven correctly? First you need to deal with the work manual that comes with the equipment. Next, we start working. We are preparing a place for installing a cooking surface and a socket with grounding. Before that, it is better to buy a clamp and a feeder (based on the power of the equipment). Let's take the device for cooking. We turn it over, lift the connector cap and clean the edges of the feeder. Using the tester, we reveal where the mass, zero and phase are. Adhering to the connection diagram of the hob, we connect the wires.
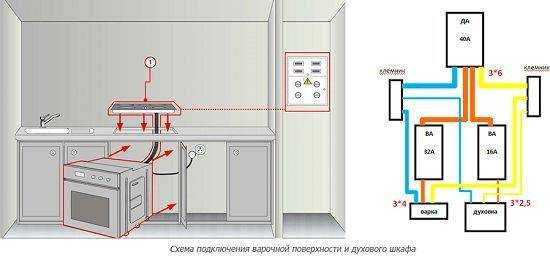
Many modern models are easy to connect yourself. Their design is simple, and for its installation it is not necessary to buy special clamps. For connection, a cord is wound around the screw and screwed. This completes the connection of the feeder, and you can close the cap back.


It is important to remember that it is better not to purchase a device for connecting electrical circuits to each other outside the set of equipment. There are such products on sale, they are made in China
They have a mediocre quality that does not meet the standards.Because of this, the equipment may deteriorate - due to a bad connector, the contacts will not cope with the load.
We prepare the power cord for the outlet. We will connect the terminal block to it, where we will connect the feeders from the cooking surface and the oven. Having securely connected the feeders, we place the equipment in its place. Next, we check the operation of the devices and whether they are connected correctly.
How to connect an oven: we determine the model of the device - built-in or independent. If it is built-in, then it is necessary to connect the equipment to one supply feeder, and the devices are connected to each other according to the manufacturer. It is possible to put an independent oven separately and place a gas cooker on it (in order to save money).

With an installed power of a household stove up to 3 kW, connection to a socket is possible. If more, then it is better to run an additional power cable from the distribution point that connects the oven. It is advisable to calculate whether the home power line can handle such a load. If not, it will be necessary to replace it, in case of a recent replacement of the power line, you can safely start installation
It is important to remember about grounding. In its absence, it is absolutely impossible to connect the oven with a plug
How to connect a gas oven
Today, gas ovens are connected using two options for connecting parts, namely:
- flexible hoses;
- an inflexible tube that is made of a copper or steel alloy.
Before you connect the gas oven, you need to figure out the wiring of the above hoses:
- connection using a special connector located near the equipment;
- after all work is completed, you need to make sure that the tubes are not bent, and the fuel flows to the device without obstacles;
- when connecting a gas oven, please note that the length of the hose should not exceed two meters;
- the total number of connections is minimal.
Connecting a gas oven takes place in several stages.
- The type of oven is determined.
- Connecting and test run.
- An important step is to connect the equipment to the gas.
It is important to consider that it is possible to connect a gas oven only in sections of pipelines located near the tap, with which you can regulate the supply of this combustible substance