- Enameled composition: from selection to application
- "Bath to bath" or acrylic liner
- Application of acrylic by pouring
- We do prevention whitening and polishing of enamel
- Some Helpful Tips
- Bathroom renovation with acrylic liner
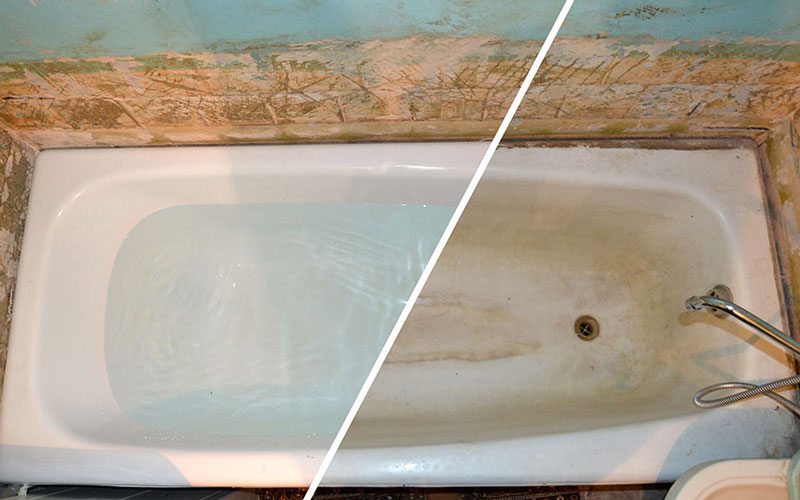
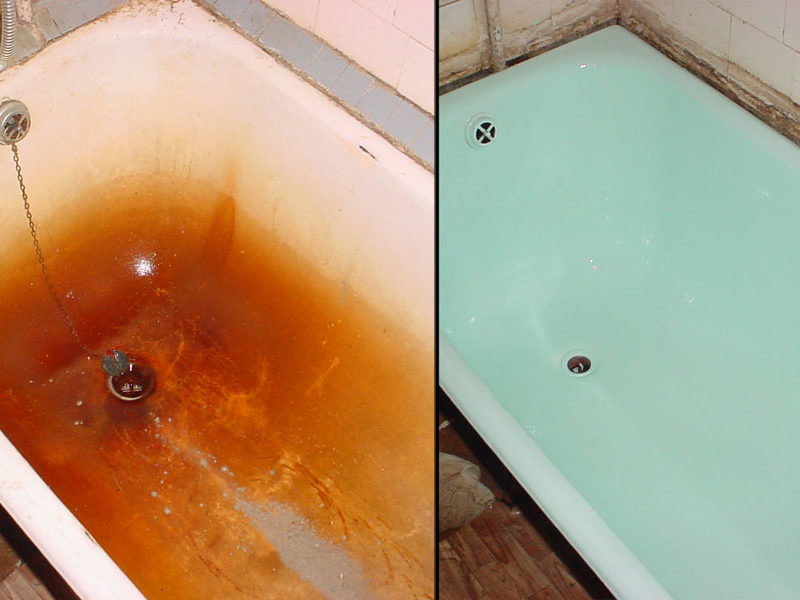
- Why is it necessary to update the enamel?
- 4 Liquid acrylic - advantages and disadvantages of the medium budget option
- Which bathtubs can be restored?
- Re-enamelling
- Personal experience
- Restoration methods, their advantages and disadvantages
- Enamel painting
- liquid acrylic
- Acrylic insert
Enameled composition: from selection to application
The most budget option for the restoration of a cast-iron bath is applying liquid enamel to the surface. A mixture in a liter iron can costs about a thousand rubles. This amount is quite enough to treat the surface, remove cracks, rust.
Experienced craftsmen recommend special equipment from the manufacturers Svyatozar, Reoflex, Aqua-Color.
You can restore the bathtub with enamel if there are no large chips or cracks on the product. Otherwise, this method will be ineffective.
Restoration of the layer on the cast iron bath by enameling is carried out if small scratches, cracks, rust, darkening have formed on the surface. If chips, depressions, deep scratches have formed, then the enamel will not help. Irregularities will be visible through it.
After the application of the product, the restored surface requires special care:
- nothing can be dropped inside, especially heavy and sharp objects;
- it is forbidden to wash with abrasive sponges, powders, caustic household chemicals;
- a sharp temperature drop is also prohibited - the enamel can move away.
If you still decide to use just such a method, then to restore the bathroom you will need:
- the remedy itself. After opening the can, it is ready for use;
- brush. Choose one that is made from combined fibers;
- sandpaper;
- cleaning powder.
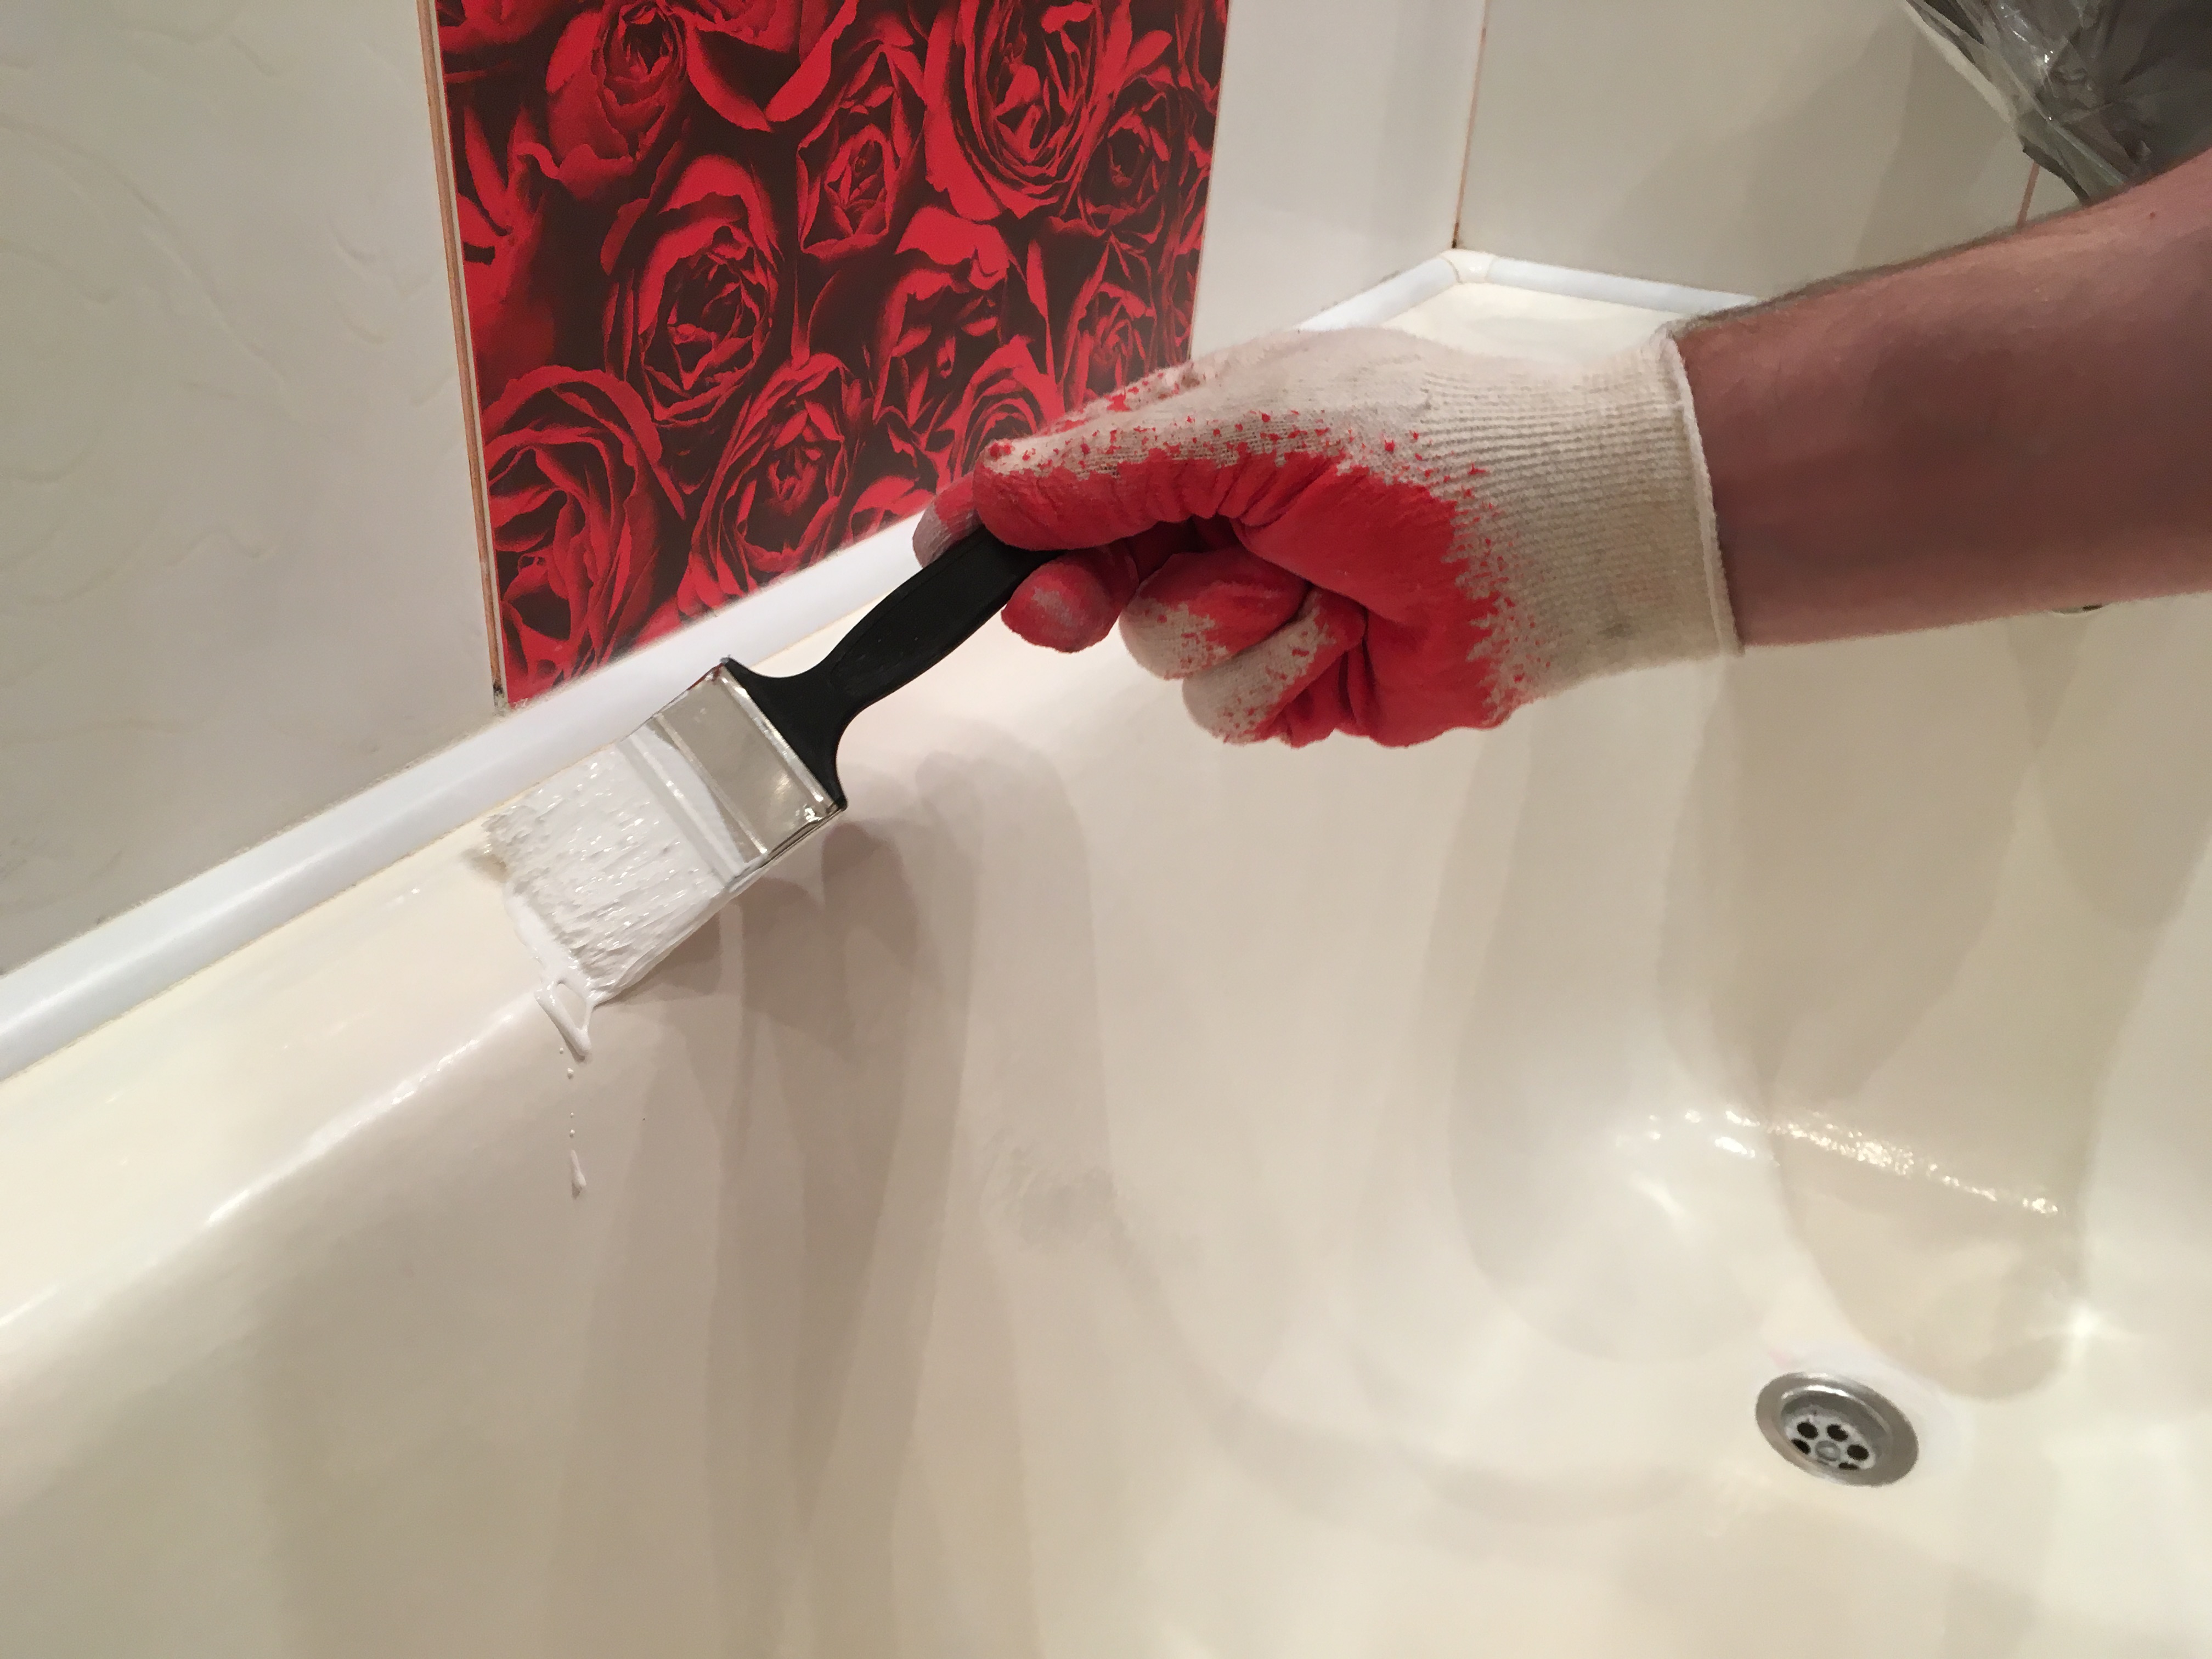
Take care of your own safety at work. The enamel solution is a caustic and strong-smelling special agent. If it comes into contact with the skin, it can cause a chemical burn, it also corrodes mucous membranes when inhaled. To prevent health problems, use protective gloves, goggles and a respirator. You can apply the solution yourself, you do not need to involve professionals.
When restoring the bath with enamel, wear a respirator on your face. The substance emits caustic fumes which may cause poisoning
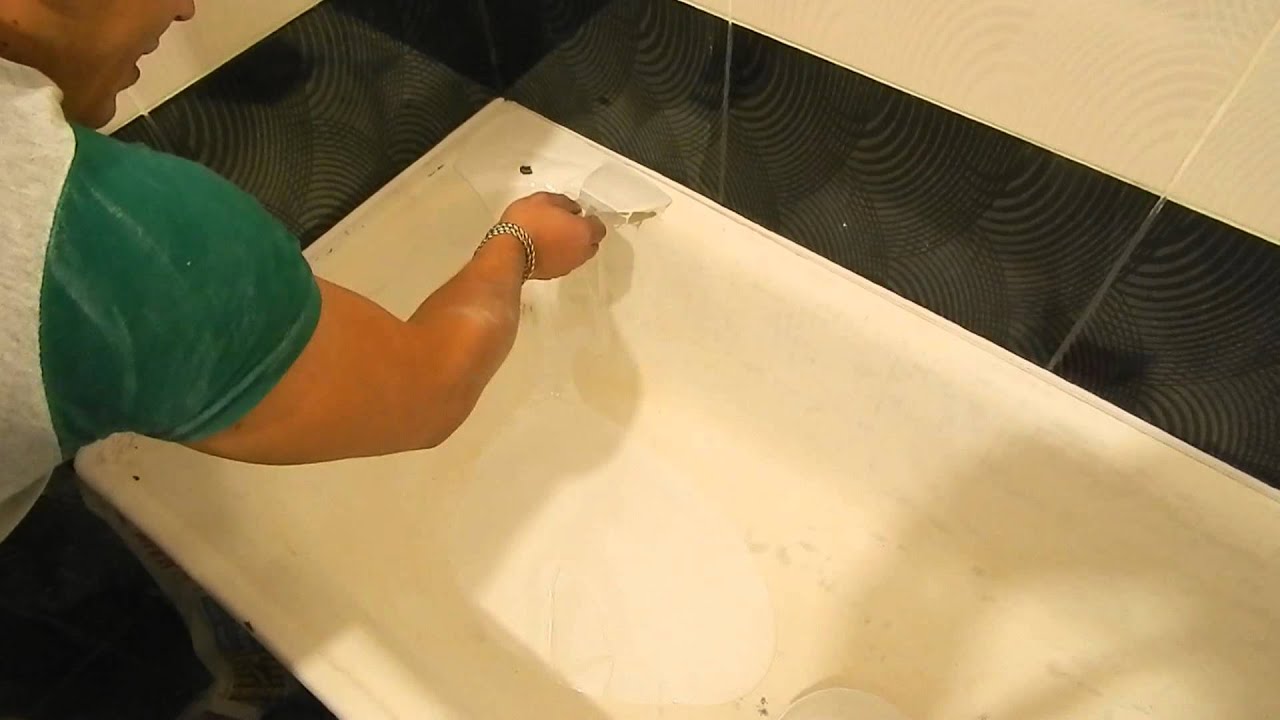
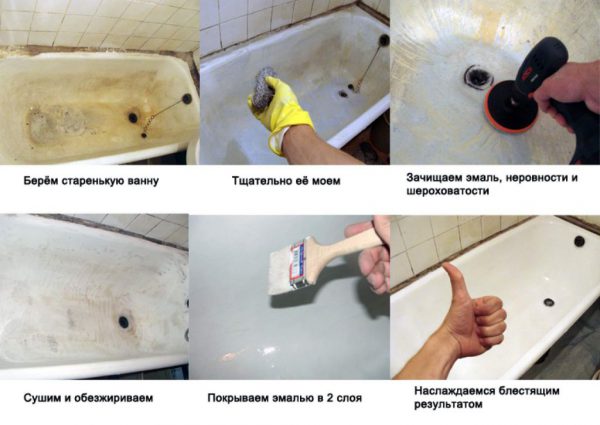
How to renovate a bathtub with enamel:
- prepare the container for applying the repair agent. To do this, the bath must be dried during the day. The water should evaporate completely. Take powder and sandpaper and clean the surface of dirt. Powder residue must not be washed off with water! They are swept away with a brush and removed with a shovel. Some craftsmen recommend sanding the surface with a grinder or a grinder drill. However, if you are not knowledgeable in this matter, use the manual preparation method. So it will be more reliable.
- Make sure the bath is dry.It will not be superfluous to pick up an ordinary hair dryer and “walk” it around the bathroom to remove any liquid.
Important: there should be no water on the surface at all. If even a small drop gets under the enamel, the coating will swell, you will have to redo the work.
- Remove the siphon.
- Vacuum the inside of the bathroom so that there is not the slightest speck of dust left on it.
- Open an iron can with enamel and pour exactly half of the special agent into a plastic container. Use the first part for the first layer, the second, respectively, for the second;
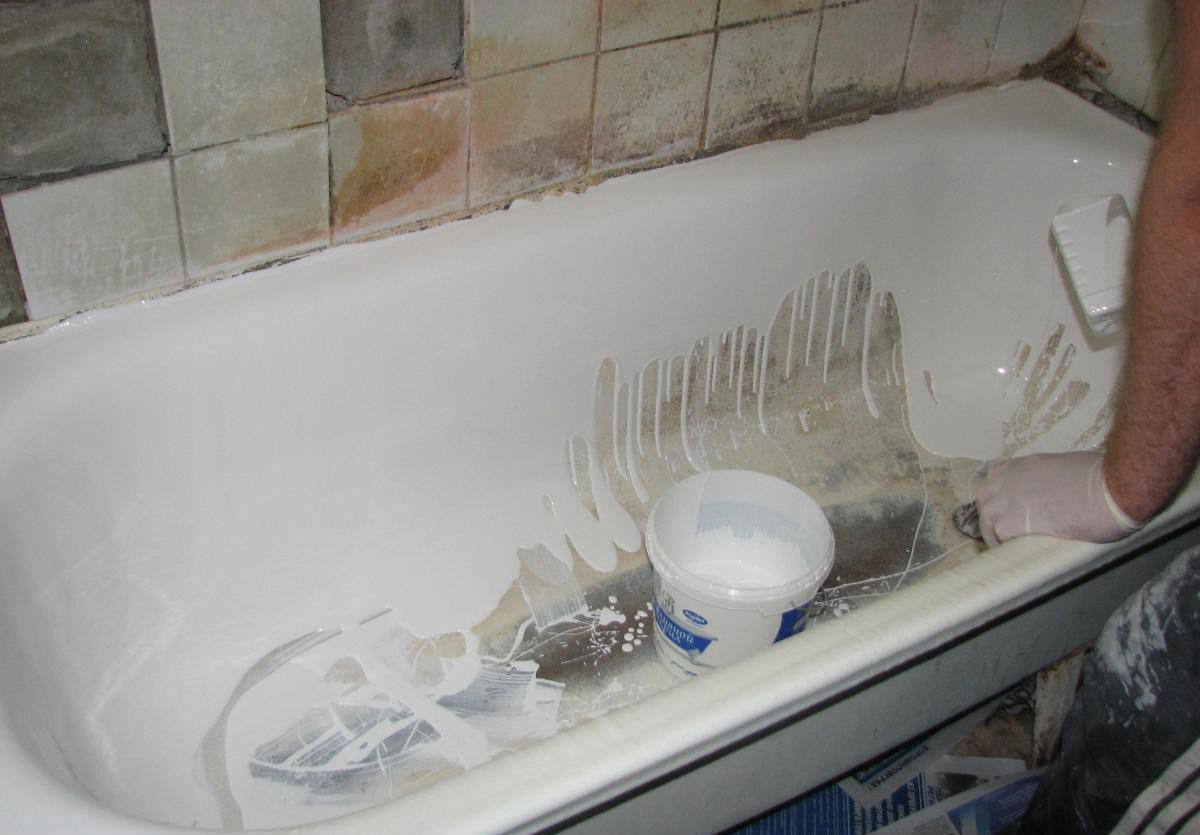
- Take a brush, lower it into the solution and treat the entire surface of the bathtub. Start from top to bottom from the edges to the central part of the structure. The first layer seals pores and cracks.
- After the first, the second layer is applied immediately, it is not necessary to wait for drying. Now work with the brush from bottom to top, from the center to the sides. So all the bumps will be smoothed out, the layer will lie flat.
- Wait 20 minutes.
- Proceed to leveling the smudges, the layer should be uniform.
- The setting of the enamel occurs after 2-3 days. Before that, it is considered unstable. But already 20 minutes after applying the second layer, it will no longer be possible to level the surface.
- After a day, the siphon can be put in place.
- The use of the bath is possible after a minimum of three days.
Important: experts assure: such a restoration of the bathtub enamel with your own hands is a rather temporary measure. It is not recommended to use it on an ongoing basis.
After a year, the coating will begin to turn yellow, small cracks appear, which gradually grow. But it's cheap - no other bathroom reconstruction can boast of such a price.
Enamel is considered the cheapest way to restore a bath, however, the service life of the coating is short - no more than 5 years
Recommendations for restoring the coating of the bath using enamel in the following video:
Watch this video on YouTube
"Bath to bath" or acrylic liner
Acrylic liners
If you do not want to carry out hygiene procedures for several days, using a basin or visiting a bath, then the method of inserting an acrylic liner will suit you perfectly. The process of self-restoration in this way takes no more than three hours, and you can use the bathroom the very next day.
In addition, the liner made of durable sanitary acrylic significantly reduces the thermal conductivity of the bath, as a result, the water cools very slowly.
For the best result, it is important not only to choose the right size liner, but also to correctly distribute the adhesive composition (foam and sealant from Henkel). bath measurements bath measurements bath measurements
bath measurements bath measurements bath measurements
Step 1. Armed with a screwdriver and a grinder, we dismantle the strapping elements.


Dismantling the strapping
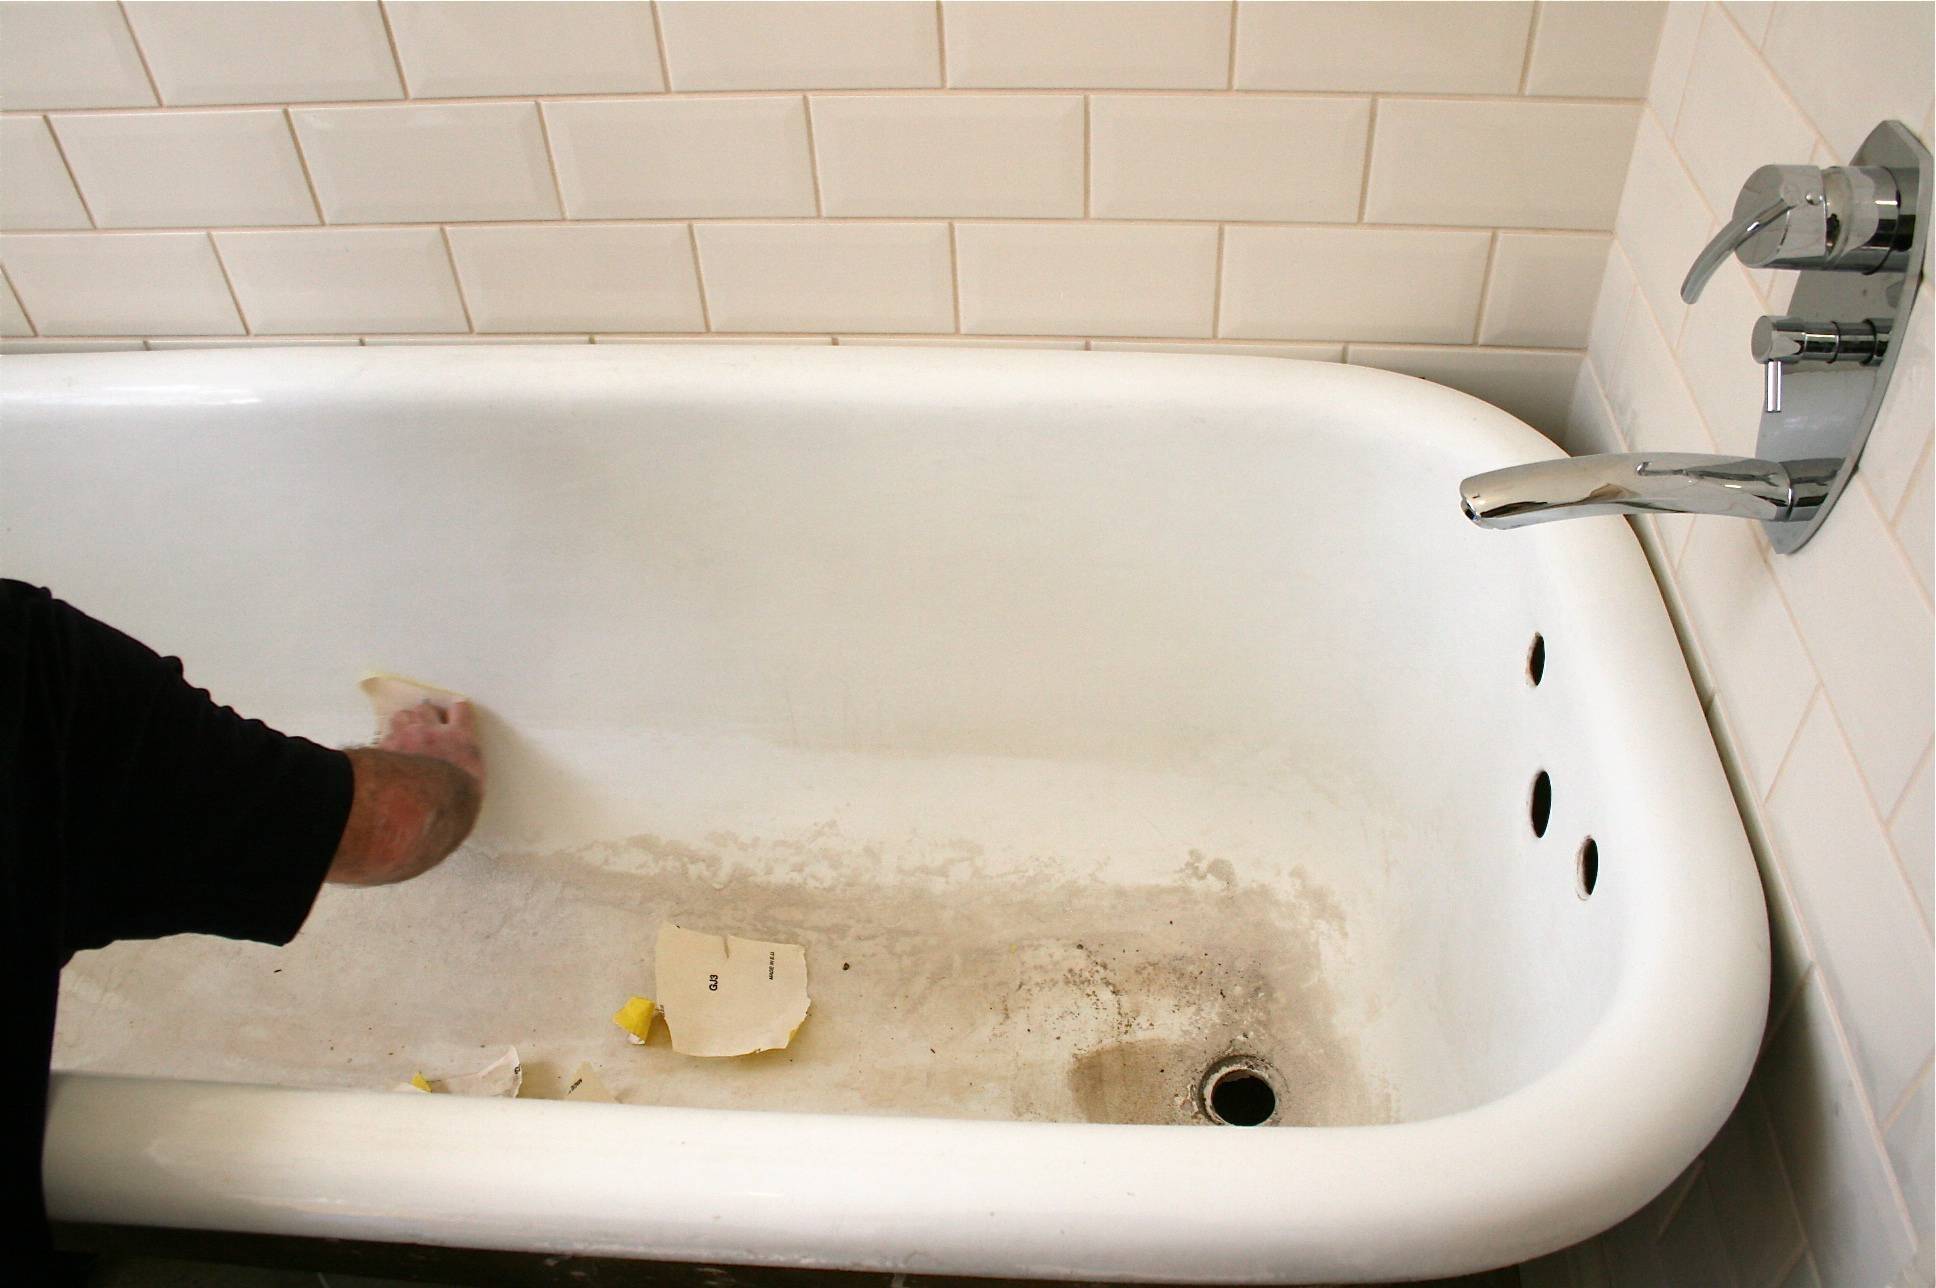
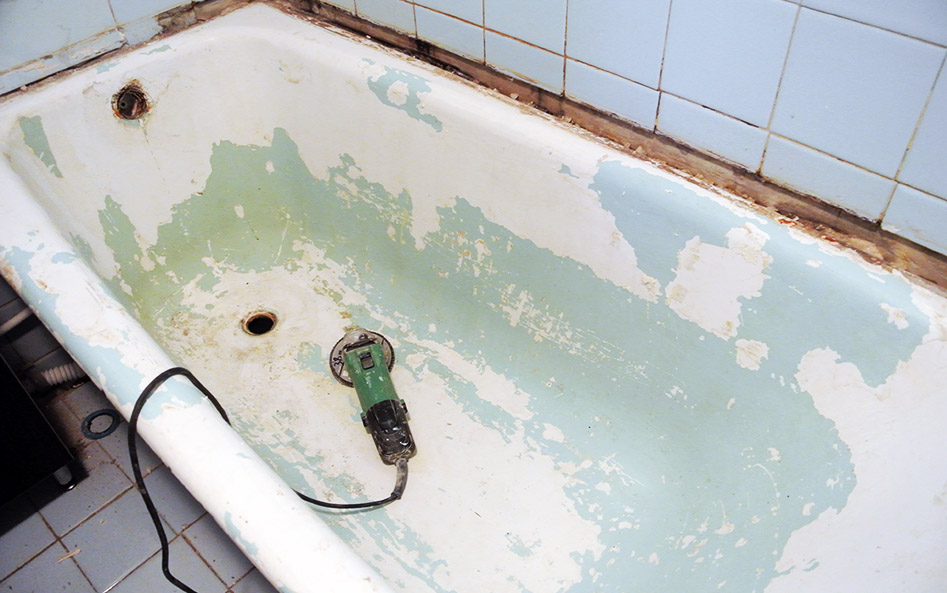
Step 2. Preparing the bath to install the liner. We clean the entire surface with sandpaper, a grinder, remove debris with a vacuum cleaner and degrease the surface. Wipe any drops of water dry. This measure is necessary to improve the adhesion of the adhesive foam to the plumbing.
Step 3. The liners are transported with a technological edge, which we carefully cut with a grinder before installation.
Step 4. After the edge is cut, insert the liner into the bath and mark the technological holes. To do this, draw circles with a marker, sticking your hand under the bathtub and circling the drain and overflow holes.
Acrylic insert in the bath
Step 5. According to the marking, we drill technological holes.
Step 6. Apply two-component foam and sealant. We insert a bottle of sealant into the gun and distribute it around the drain and overflow holes. Next, we take the foam, we introduce a special composition into the balloon with a syringe, which will not allow it to swell excessively. From bottom to top, we apply foam in stripes to the bottom, walls, sides of the vessel being restored.
Foam application
Step 7. We insert the acrylic liner into the bath, gently press it with our hands, leveling it. Remove excess sealant and foam.
Installing the liner
Step 8. We make the installation of the siphon (strapping).
Step 9. We fill the bath with water so that the foam, while solidifying, does not force out the light liner. The next day, you can drain the water and use the updated bathroom.
Fill the bath with water and leave for a day
In your free time, you can install a decorative screen under the restored bath, as well as protective bumpers on the edges that come into contact with the walls.
Before starting hygiene procedures, do not forget to remove the protective film from the insert.
Application of acrylic by pouring
Restoration of bathtubs with acrylic involves the use of a two-component mixture. A solid base and a liquid hardener are always sold as a set and are called stakryl.
To obtain a mixture of a homogeneous consistency, it is very important to mix the compound thoroughly. Experts recommend doing this only by hand for at least ten minutes.
The method of "bulk" bath requires the application of acrylic on a preheated plane. To do this, the container is filled with hot water and left while the compound is being prepared.After heating the bath, it is necessary to drain the liquid and dry its surface. To do this, you can use a soft, lint-free cloth or a regular hair dryer.
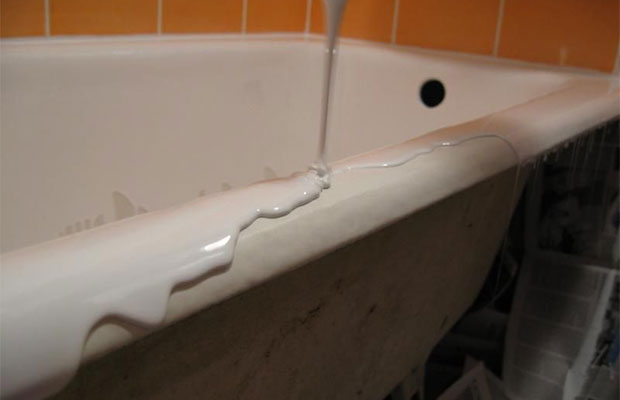
Pour the mixture carefully and without haste. It is better to start from the corner of the side farthest from you, moving in a circle. The paint gradually drains from the walls of the bath, filling them up to about half. Do not try to smooth out the influxes, as well as remove the bubbles manually, they will gradually spread on their own.
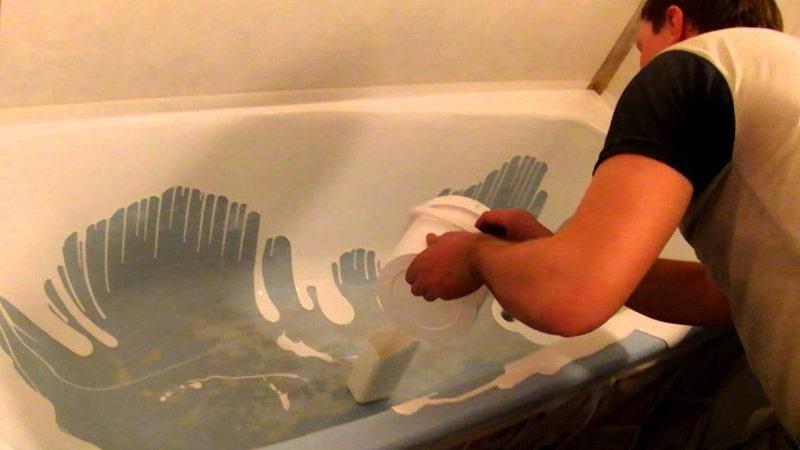 Liquid acrylic is gradually evenly distributed over the entire plane of the bath
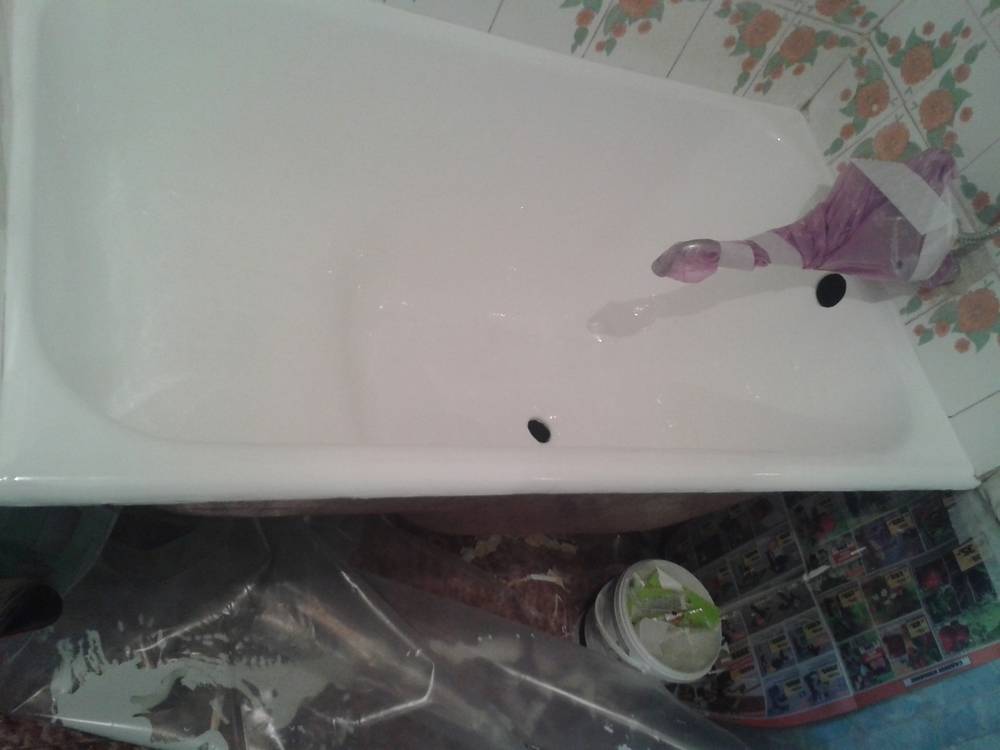
In the same way, starting from the same place and moving in the same direction, pour the mixture from the middle of the side of the container. The paint on the bottom of the product can be leveled with a rubber spatula. Excess glass can also drain into a container pre-installed under the bath drain. It is better to remove the mixture dripping from the sides with the same rubber spatula.


Restoration of a bathtub with liquid acrylic will take at least two hours even for a professional, and a beginner can spend much more time. Complete hardening of the coating occurs within two to six days, it all depends on the brand of enamel. The longest drying types of glass usually form a more reliable and durable coating, according to experts.
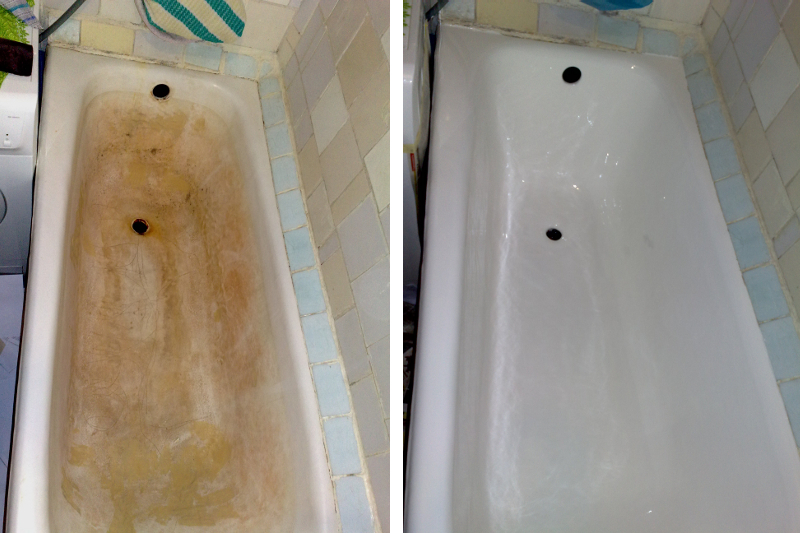
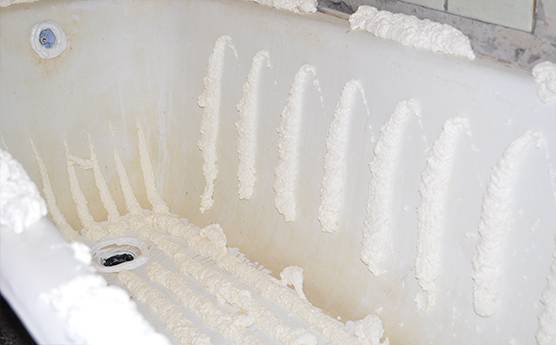
We do prevention whitening and polishing of enamel

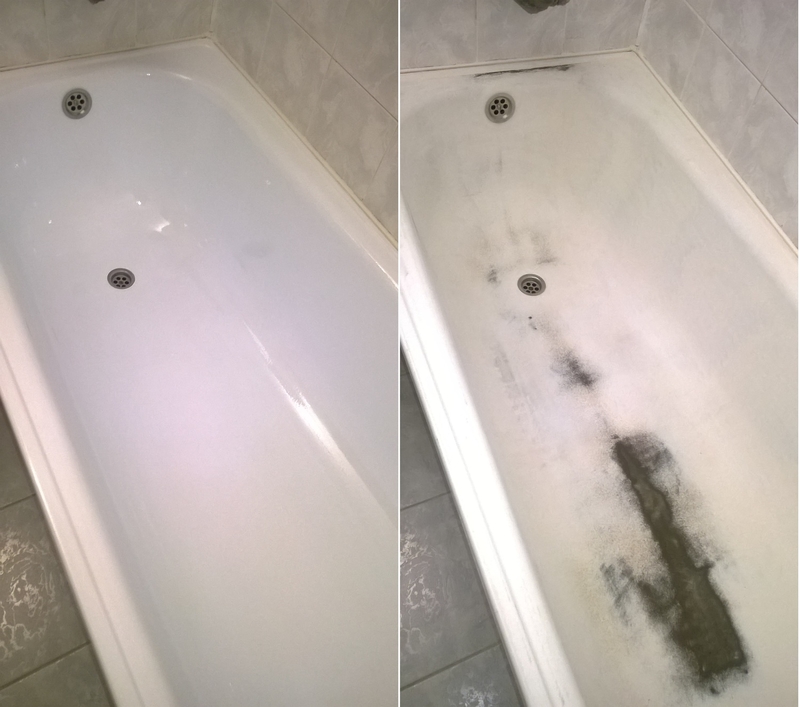
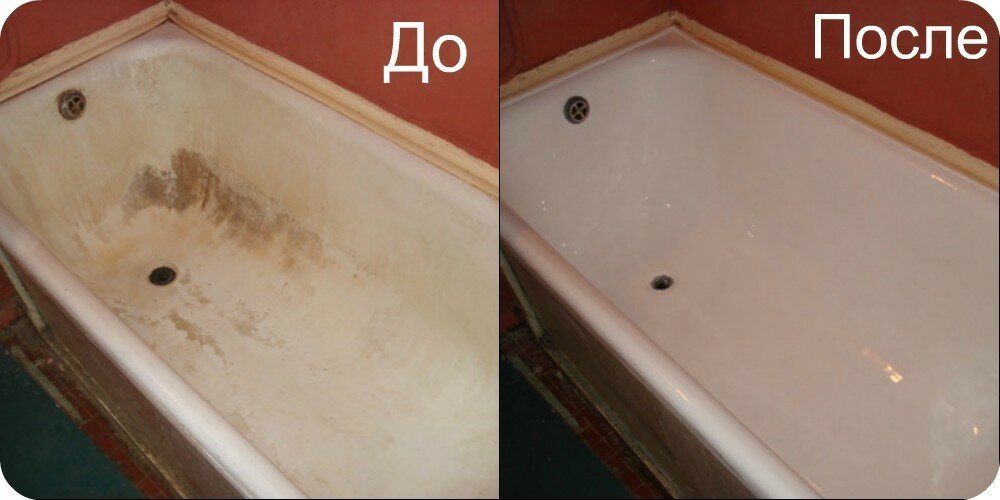
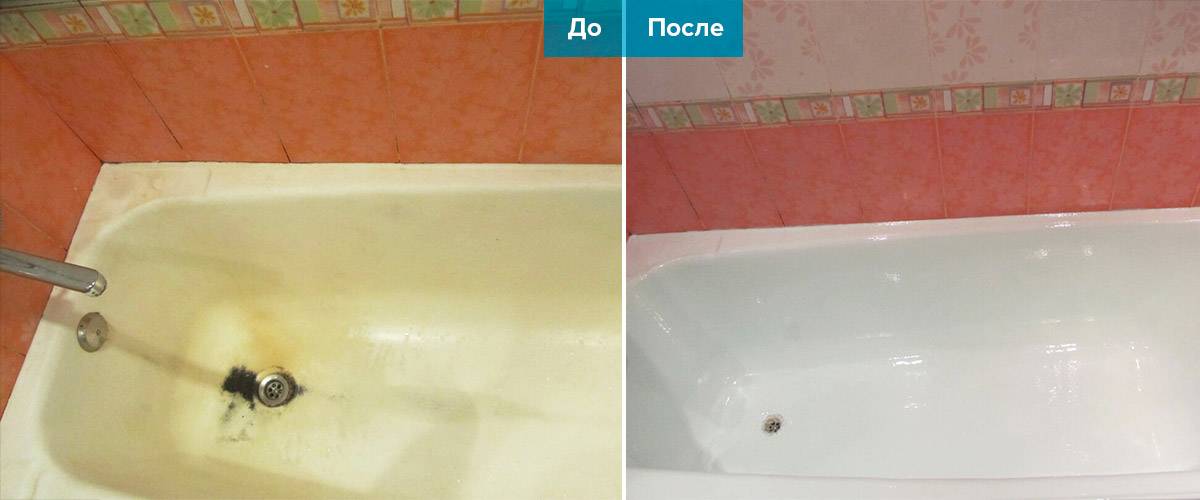
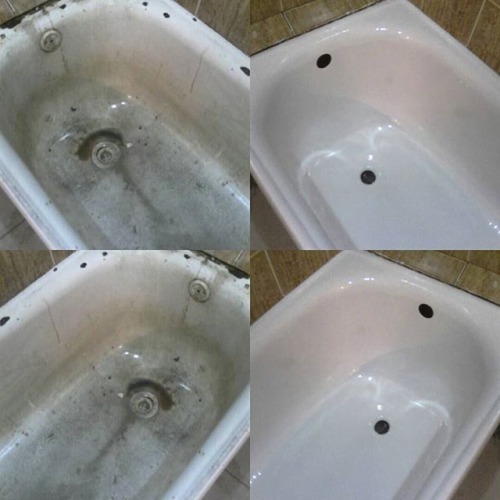
If the enamel of a cast-iron or steel bath does not have large visible cracks, chips, and just darkened or turned yellow, we restore whiteness and smoothness by polishing and bleaching. The procedure is not very complicated and is safe for the enamel: the enamel of a good bath can be polished several times.
Bath enamel (by the way, just like tooth enamel) changes its color because microcracks appear on its surface - dirt and other deposits accumulate in them.With them, we will fight.
In the hardware store we buy a cleaning bleach for the bath - in any market you will find a dozen items. You can also use folk remedies: vinegar, chlorine bleach, car cleaner.
You will also need a rotary or vibration type grinder - it doesn't matter. Rent it from friends or buy it - a useful thing, it will come in handy on the farm.
- Wash the bath thoroughly with detergent and scouring powder, remove all dirt with a sponge or stiff brush
- Apply bleach to a clean bathtub surface. Do exactly as instructed
- After the time specified in the instructions, rinse off the bleach with plenty of water. If acid is used as a bleach, add soda to water: alkali neutralizes acid (chemistry, grade 7)
- If darkening or yellowness remains somewhere, repeat the treatment in these places.
- After the bath is dry, start polishing with a sander. Start polishing with coarse emery, then medium, and finish with polishing paste. Ideal for car polishing products.

Before polishing, try bleaching and polishing some of the most heavily soiled areas. If everything went well, great. If visible cracks remain, it means that the enamel coating has worn out, restoration of the bathtub enamel or even its replacement is needed.
Polishing will last for a year or two, no more: the enamel layer becomes thinner, but the temperature and mechanical effects on it remain the same. Then - only treatment.
How much does such a procedure cost?
A grinder - from 500 to 2500 rubles, a bleaching agent - about 500 rubles, sandpaper - about 200 rubles per pack.
Total: 1200 - 1500 rubles (if you buy the cheapest grinder).
In terms of time, you can meet in one day. The bathroom can be used that evening.
Some Helpful Tips
After reading this article, every home master will have complete information about the do-it-yourself bathtub enamel restoration technology. On this basis, he will be able to weigh all the pros and cons, and then decide whether he is capable of doing this work or inviting specialists.
Perhaps some do not want to waste their own precious time and decide to turn to professionals. Here it is necessary to clarify that calling a specialist also has certain pros and cons. First of all, do not forget that the master will require payment for the work performed. In addition, the technology he uses will absolutely not differ from that described in this article. So, if you are completely confident in your own abilities, you can safely proceed with restoration work!
Among the materials of domestic production, pay attention to "Aqua-color" and "Svetlana".If you belong to the category of adherents of Western products, the best choice would be Tikkurila Reaflex 50 restoration enamel, which also contains epoxy resin and hardener in the initial composition.
By the way, the latter composition is very often used during the restoration of the inner surface of pools.
After all restoration work is completed, it is required to follow the necessary recommendations for caring for the surface of the restored bathtub. During operation, do not clean the bath with hard abrasive or acid-containing products. For example, familiar to everyone, widely advertised on TV screens "Cillit Bang", "Pemolux" or "Comet" are not suitable. To clean the surface of a restored bathtub, it is best to use laundry soap, regular laundry detergent, and diluted lemon juice.
Also, it should be borne in mind that detergents must be applied only to sponges based on soft foam rubber. In no case should the use of metal brushes or their analogues made of coarse synthetic materials be allowed. In addition, you should not soak the laundry for a very long time before washing, as in this case mild detergents can damage the enamel layer.
During the operation of the reanimated enamel coating, it is necessary to ensure that various metal objects do not accidentally fall into the bathtub and do not form cracks or chips on its surface. Those who like to wash in the bathroom with a high chair should equip their favorite attribute with foot pads made of rubber or soft plastic.
The restored surface of the bathtub has good strength characteristics and an attractive appearance, which makes it possible to further use it for at least ten, and maybe even more years.
Bathroom renovation with acrylic liner
Is your old bathtub outdated, worn out, scuffed and rusty? It is not at all necessary to change it; you can restore the cast-iron bath.
Do-it-yourself restoration of a cast-iron bath using the “bath to bath” method can also be done by everyone. The surface cleaning stage is similar to the previous ones.


Further:
- Remove the top and bottom water drains.
- Holes for plums are cut in the acrylic liner, the edges are trimmed if necessary, that is, a fit is made.
- A two-component polyurethane foam is applied to the surface of the bath.
Apply foam to the surface of the bath
Sealant should be applied around the drains and at the junctions at the edges.
Next, you should install the liner in the bath - thus restore the old coating.
Installing a liner in the bath
We install water drains and fill the bathtub with water in order to achieve optimal adjoining of the liner to the bathtub.

Filling the bath with water
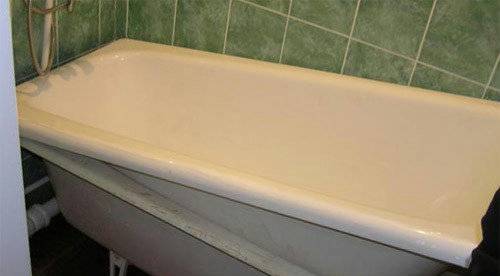
After 8-12 hours, the restoration is completed, you can start using it.
Summing up, we can safely say that it is not necessary to change the old bathtub for a new one. After all, there are ways to give her a new life - a second youth.
Whether it is the restoration of bathtubs with acrylic, enamel or with the help of an acrylic liner - it is up to you to choose the restoration method.
Good luck!
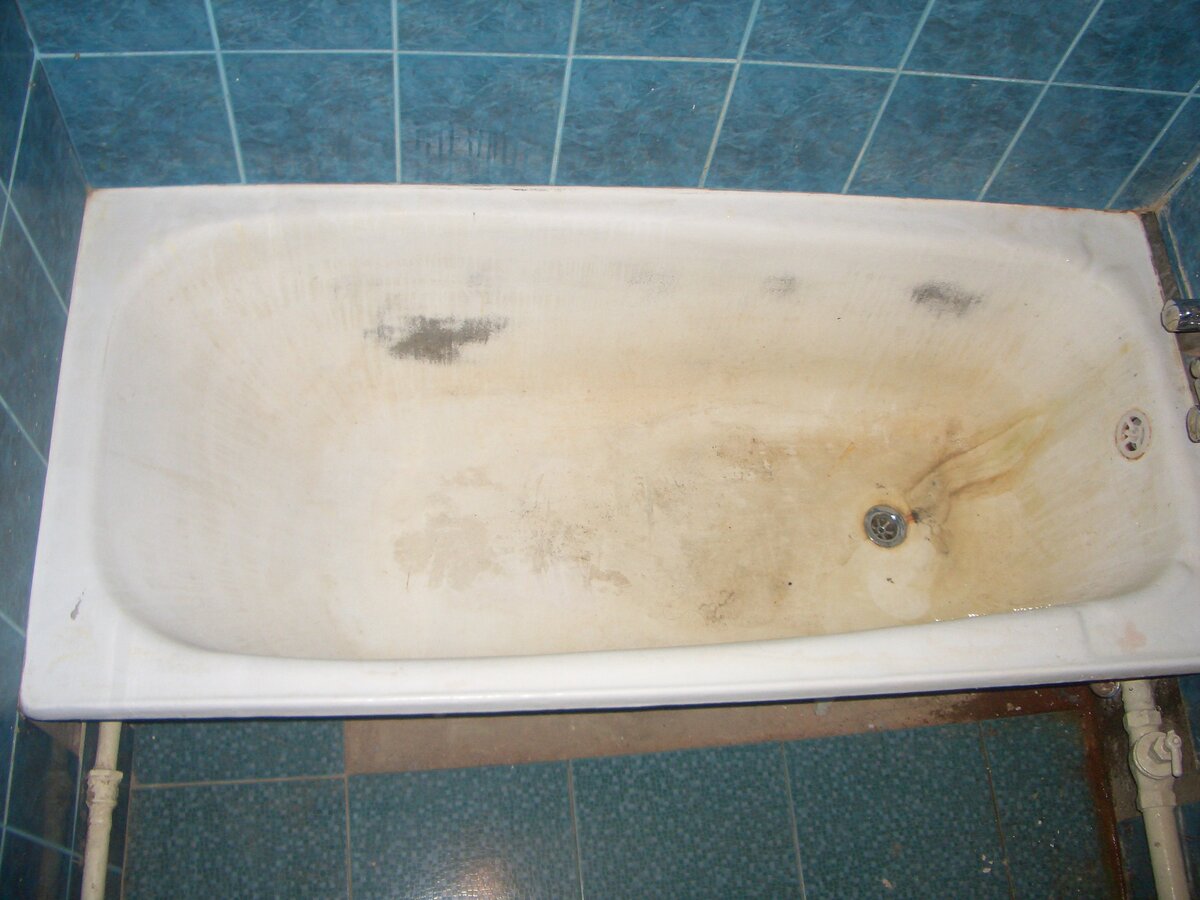
Why is it necessary to update the enamel?
In modern stores selling plumbing, you can find bathtubs made from a variety of materials: acrylic, stone, steel, cast iron. Especially valuable are cast iron products, which have the longest service life. Such products can last more than fifty years and are always easy to restore. Speaking about the possibility of restoring the enamel coating, they mean precisely cast-iron or steel products with thick walls.
During operation, the following changes may appear on the enamel:
- yellowness in the area of the drain hole from frequent contact with water containing a large amount of iron;
- chips from impacts or other mechanical impact;
- cracks and roughness from the action of powder detergents.
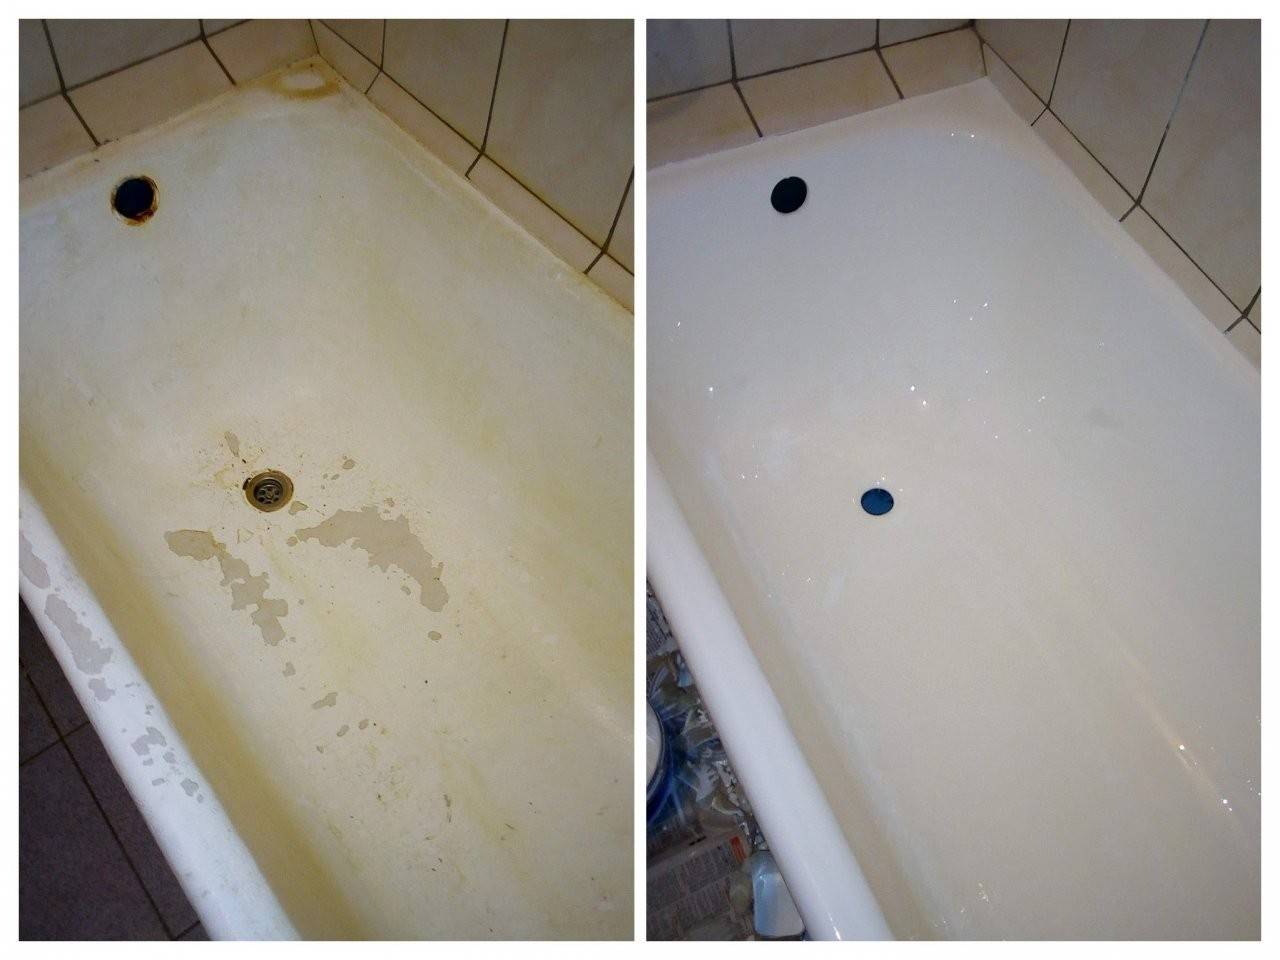
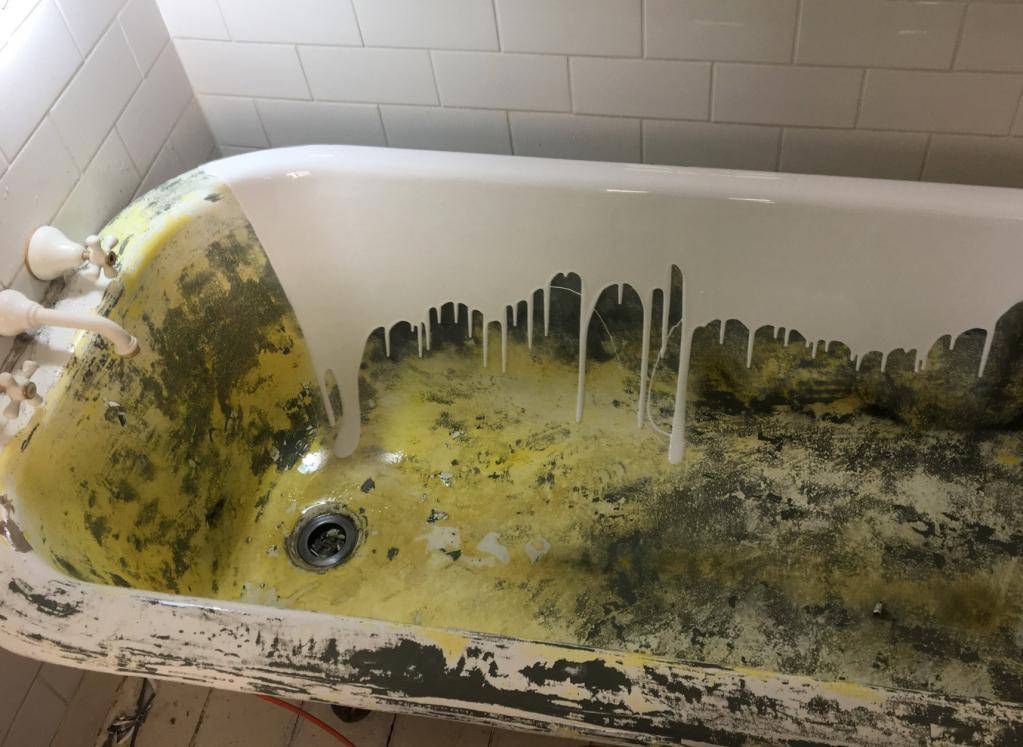
It is necessary to restore the destroyed enamel coating in order to return the product to its original appearance. In addition, using a dirty bathroom is unpleasant and unhygienic, because harmful microorganisms linger in the cracks and fungi form. In addition, if you do not start the restoration on time, rust will completely destroy the product.
Of course, you can buy and install new plumbing. But often this requires dismantling half of the bathroom, which is not always possible.
The enamel coating restoration technology has several significant advantages:
- low cost;
- no need for dismantling;
- work can be done alone.
This is interesting: How to close a crack in a water pipe under pressure - cast iron, plastic
4 Liquid acrylic - advantages and disadvantages of the medium budget option
Restoration of a bathtub with liquid acrylic is a relatively new method that appeared a little over 10 years ago.Unlike enameling, the composition is not applied with a brush, but is poured over the sides, after which it is leveled with a spatula. Flowing slowly along the walls, it fills small cracks, creating an absolutely even coating.


Liquid acrylic is poured over the sides, and then smoothed out with a spatula
Bulk bath, technology name applying liquid acrylic, allows you to restore the bath without the involvement of a specialist. With your own hands, you will create a protective layer that will last you for many years. To repair the bathroom, we recommend using liquid acrylic from Stakryl or Ecovanna. For a lower price, a self-leveling bathtub has almost the same advantages as an acrylic liner:
- has increased sound insulation;
- made from environmentally friendly materials;
- easy to clean;
- resistant to mechanical damage;
- has low thermal conductivity, water cools down slowly, in contrast to the enameled surface;
- service life - up to 15 years.
Besides, liquid acrylic apply to bathtubs of any shape and size, compared to acrylic liners, which have limitations in use. Among the shortcomings are the prolonged drying of the surface up to 4 days, the sticking of dust.
Which bathtubs can be restored?
Often homeowners wonder if their old bathtub can be restored. In order to assess whether a repair is possible, and what kind of bath restoration kit is required, it is necessary to assess the nature and amount of damage. It is believed that the maintainability of the model depends on the thickness of its walls. The main conditions for restoration are:
- No rust. If there are pockets of corrosion on the surface of the hot tub, they must be removed with a rust converter.
- No through holes.If there are no through holes in the bowl, then all surface damage can be repaired with acrylic or enamel.
- Quality surface preparation. In order for the restoration result to last longer, it is necessary to prepare the font surface for work: level, clean, degrease.
 Bath restoration scheme
Re-enamelling
Re-enamelling is the restoration of bathtubs with your own hands by applying a new layer of paintwork on the inner surface of the product, which is made at home. For this, epoxy enamel is used, applied to the surface of the bowl with a roller, brush or spray gun, in several layers. The features of this recovery method are:
-
Ease of mixing. The re-enamelling mixture also consists of 3 components (base, hardener and plasticizer), which are easily mixed, resulting in a homogeneous, thick mixture.
-
Various application methods. Enamel restoration can be done with a brush, spray gun or roller, depending on the scope of work.
- Low cost. The method of restoration by re-enamelling the bathroom with your own hands is the least expensive.
- Long drying time. Re-applied epoxy enamel dries for 5-7 days, during which it is recommended not to use the bathroom.
- Bad smell. Epoxy enamel has a sharp "chemical" smell, so it is necessary to organize ventilation during work, and also use a respirator.
Personal experience
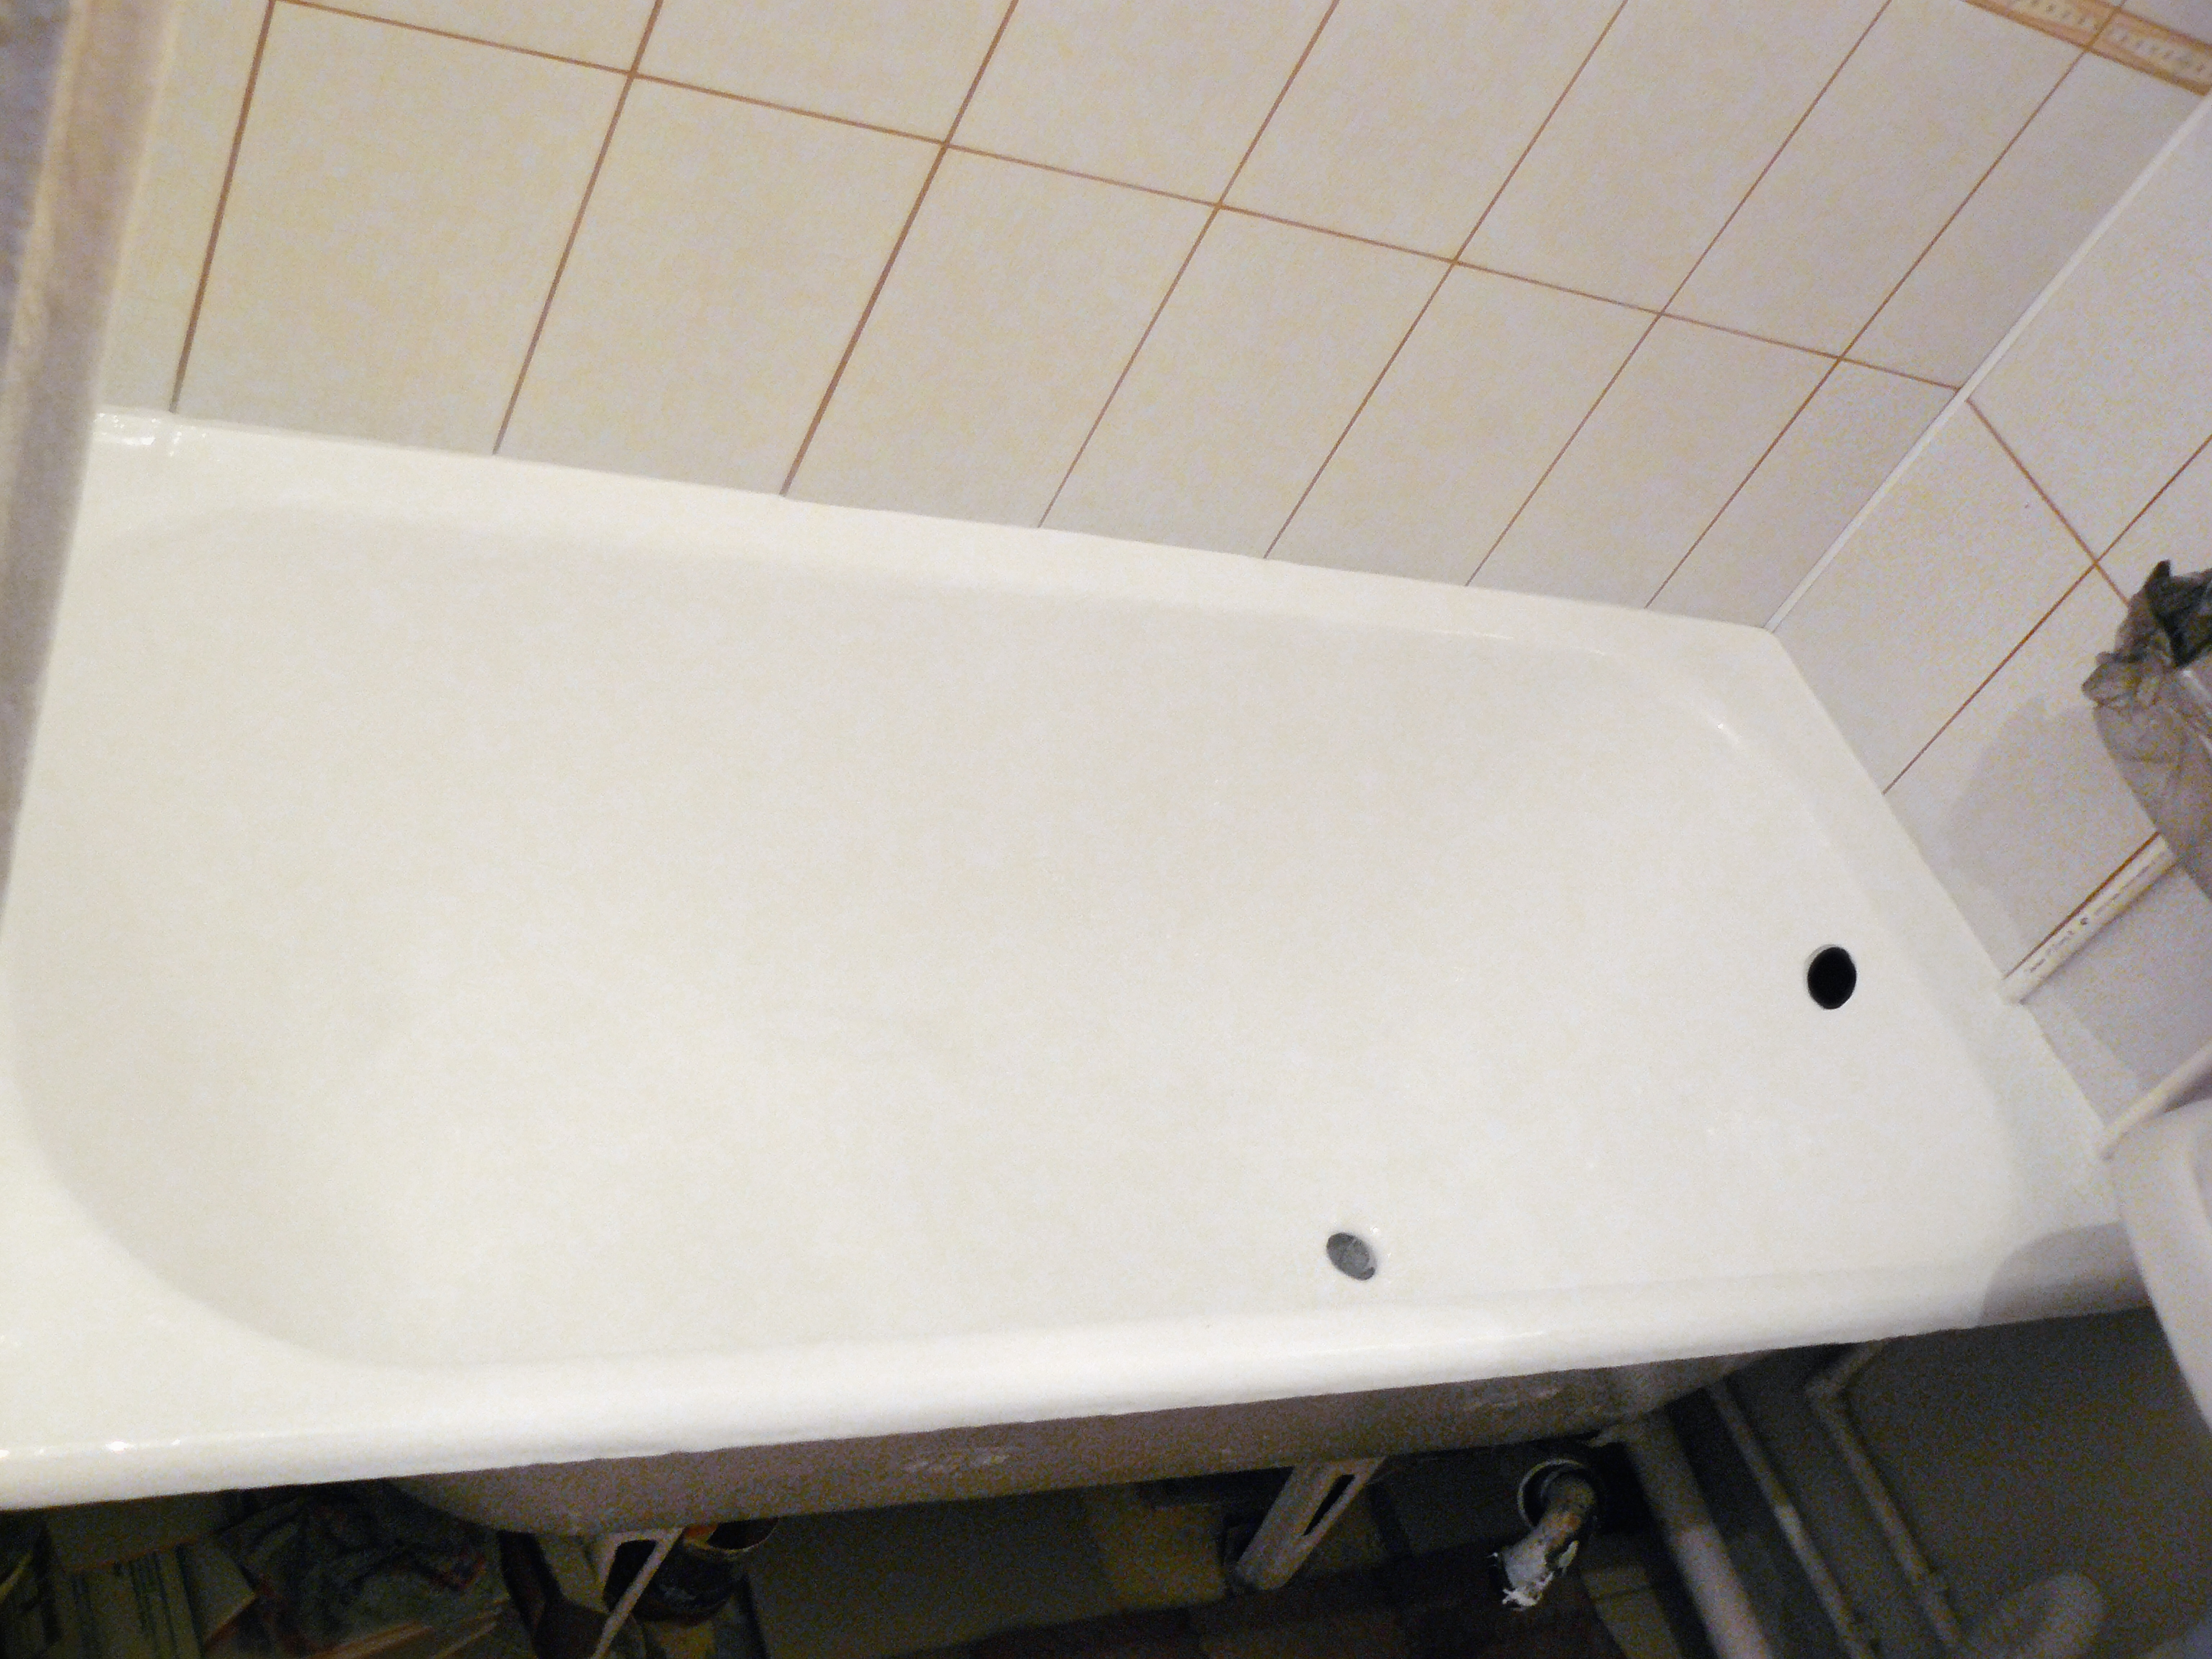
As you can see from the comparison above, liquid acrylic leads the way in terms of benefits.For my bathtub, I chose the Stacril standard material, but they restored my bathtub with the Plastall standard material, saying that there was no difference between them. The bath is 1.5 meters long, I paid 3,600 rubles. Warranty - 3 years.
My bath was supposed to dry for 24 hours, but the master assessed the ventilation and air temperature and allowed it to be used after 20 hours - and it happened
While the bath was drying, it was important to prevent water drops and dust particles from getting on it, so it is better to restore the bath after the rest of the repair.
After drying, the coating had to be finished by ourselves according to the instructions of the master (so as not to call him for an additional fee): smudges of paint accumulated on the edges of the bath and under the bath in the area of the drain, they had to be cut off with a knife and sanded a little. We did this in the area of the drain, but on the sides we were afraid to damage the coating: now the bath does not look very neat, but it is not visible from above.
The company's website says that the drain does not need to be dismantled. We have already removed it in connection with the repair and its replacement, so I cannot confirm this information.
Care instructions given to me by the master:
- Do not immediately turn on hot water, start with warm, otherwise the bath may crack over time from temperature changes.
- Do not put objects in the bath that can scratch it: acrylic is resistant to impacts, but not to scratches. And metal basins can not only scratch the coating, but also leave stains.
- Do not soak clothes that are dyed with unstable dyes and do not drain liquids with dye residues.
- Do not wash with abrasive products and hard sponges.
- Do not wash with bath chemicals containing oxalic acid, in order to avoid darkening and damage to acrylic: the master advised using a regular Fairy or soapy solution, and removing difficult stains by applying a Pemolux type product for no more than 5 minutes. If I wash the taps with chemicals or wash something in the basin, then I rinse the bath thoroughly so that the product does not linger on the surface.
Six months have passed - the flight is normal: the bath looks fresh, and it is not difficult to take care of it!
bathroom, bath restoration
Restoration methods, their advantages and disadvantages
The work on the restoration of the inner enamel layer of the bath is carried out in three ways:
- enameling;
- application of liquid acrylic (glass);
- installation of a special insert.
Each method has both positive and negative sides.
Enamel painting
Enameling is usually carried out at the manufacturing stage under industrial production conditions - the process begins with a sharp heating of the metal workpiece and the application of a protective coating of enamel. You cannot do this on your own. However, there are special formulations that allow you to work without heating. For example, "Random House", "Epoksin-51" or "Epoksin-51C", "Reaflex-50" and others.


Pros:
- low cost;
- the ability to choose a shade;
- maintainability of the new layer.
Minuses:
- change in the original color from exposure to cleaning products;
- the coating is short-lived, will last no more than 5 years;
- the restored coating does not tolerate processing with abrasive substances.
How the coating will show itself in operation depends on the observance of the instructions of the manufacturer of the mixture and the accuracy of the work.
liquid acrylic
The technology based on the use of liquid acrylic is known as the "filling bath". It consists in processing the old worn surface, cleaned in a special way, with a layer of glass.
Pros:
- the composition dries quickly (24 hours);
- the new layer does not change color;
- no strong odor;
- small cost.
Minuses:
- you will have to remove the siphon before pouring;
- stakryl does not hide irregularities;
- special skills are required.
A coloring composition called STACRYL is applied in a uniform layer to the damaged bath coating. the work is very difficult and requires experience and special skills.
Acrylic insert
This technique involves placing an acrylic tab inside the bath. Such a restoration will cost a pretty penny, because the price of the insert is slightly less than the cost of a new product. In addition, it is almost impossible to buy an insert of non-standard sizes.
Pros:
- fast installation;
- long service life (20 years);
- smooth, rough surface.
Minuses:
- high price;
- the internal volume of the product is reduced.
This is interesting: How to unscrew the tap from plastic pipe


