
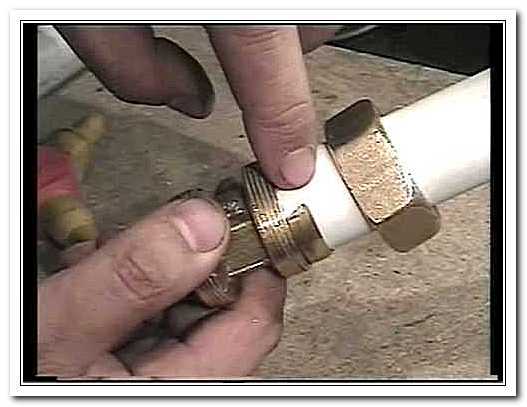
- How to unscrew a broken faucet eccentric from a plastic pipe.
- How to unscrew a broken eccentric from a plastic / steel sleeve or water socket?
- Types of tools
- Manual drive
- Mechanical
- hydraulic
- Electro-hydraulic option
- The right approach and expert advice
- Disassembly order
- How to remove the plug from the sewer yourself video
- Plug installation process
- Causes of accidents in non-pressure pipelines made of polypropylene
- Causes of an accident in pressure pipelines made of polypropylene
- Installation of metal-plastic pipes
- Mounting with compression fittings
- Mounting with press fittings
- Faucet installation
- How to fix a pipe body leak
- Clamp installation
- bandage
- Cold welding of pipes
- Installation of ball valves
- Periods of the most intensive formation of moisture
- Metal-plastic or polypropylene
- Tees for metal pipes
- What to do if the eccentric is broken
How to unscrew a broken faucet eccentric from a plastic pipe.
How to unscrew a broken eccentric from a plastic / steel sleeve or water socket?
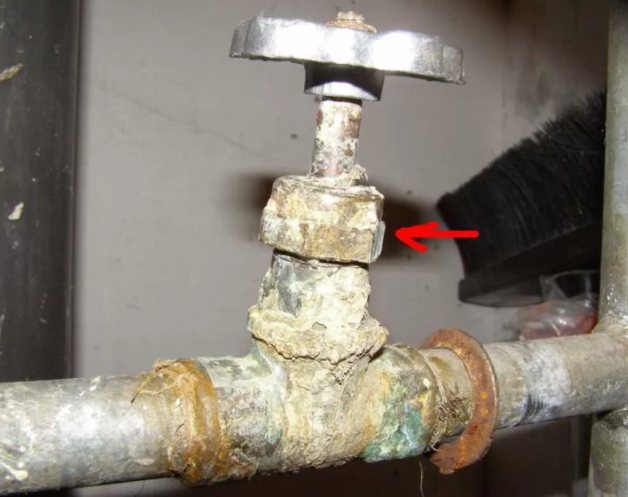
In the work of a plumber, we often have to change bathroom faucets or showers. Often mixers are mounted on old metal pipes and mixer eccentrics are screwed into cast-iron bends. But when trying to unscrew, such an eccentric often breaks and part of the thread remains in the cast iron branch.Therefore, just as often the thought arises, why did I sign up for this at all?
At the same time, you can panic and swear at everyone, or you can miss such a moment if you prepare for it in advance. For example, we decided to change the mixer, this is plan A.
For its implementation, we prepare the necessary material and tools. But suppose that our plan was interfered with and the threads broke off and remained inside.
But picking out part of the thread will be plan B. Thus, in order not to waste nerves, you must also prepare for plan B. And if this plan matures, then you can easily implement it, and then implement plan A. And everyone will be happy.
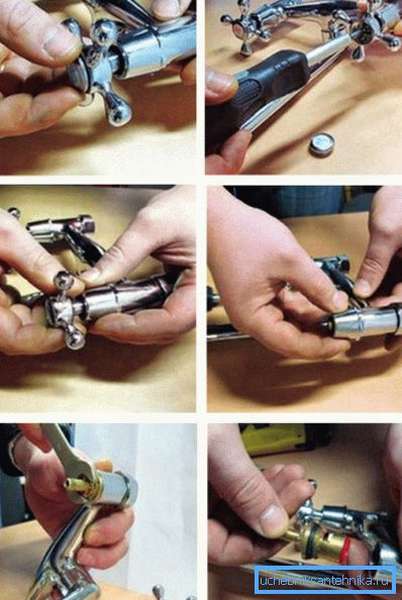
In order to unscrew a part of the thread from almost any fitting, there are two main methods. Rather, the use of one method or another depends on the quality of the broken part of the fitting thread.
If the fitting is of good quality, but it sticks firmly and breaks off when unscrewing, then you can unscrew it by picking up a chisel or a wide screwdriver, slightly larger than the internal size of the fitting. With a light blow of a hammer, we hammer the chisel, for example, into the fitting and try to unscrew it, as an option, with a gas wrench. But this method is suitable for not very stuck or freshly twisted threads.
Otherwise, proceed as follows. With a hacksaw blade for metal, we cut the broken thread from the inside out to the thread of the fitting in which the thread is stuck. At the same time, we make four washed down with a cross. Now we try to unscrew if the thread is fresh.
If it boils, then we take a flat screwdriver, which can be hit with a hammer and break off the sawed pieces, trying not to damage the thread of the fitting, from which we remove the broken piece.
But before that, for insurance, you can insert a piece of matter inside the fitting, but with the possibility of its further extraction. This must be done so that the broken pieces do not fall into your pipeline and subsequently clog the mixer or other device.
This is a universal method and it is suitable for most threads of various pipes, including plastic ones, and is also suitable for cast iron plugs.
This is not taught in plumbing school. Many will reach it themselves or have already reached it. I decided to describe this technique because I consider it one of the most unpleasant things in plumbing. And I was terribly angry with this situation that happened to me at the dawn of my career.
Fortunately, you all have a head on your shoulders. It remains to sharpen your hands correctly and always have a good park of tools with you to solve almost any task. After all, as they say in the East: Perfection consists of small things, but perfection is not a small thing!
We can summarize. To unscrew a part of a stuck external thread in an internal fitting, you must:
- Close the hole with a cloth to prevent thread fragments from entering the pipe.
- Cut the thread in a cross cut to the thread of the inner fitting.
- Break off the notched parts with a hammer and a flathead screwdriver.
-To go through the damaged thread with a 1/2″ tap
- Screw in the new eccentric.
It is also worth noting that in order to carry out these works, it is necessary to have at least the slightest plumbing skills, because, by overdoing it when cutting, you can ruin the thread of the internal fitting (coupling, bend), and then you can’t do without dismantling the tile and replacing the pipe section.
In case you are not sure about yours and do not have all the necessary tools, our professional plumbers are at your service! By calling us by phone in Arkhanglsk: 8-952-252-47-30, our specialist will promptly come to you and competently unscrew the broken eccentric, and also, if necessary, help with the installation of a new mixer.
Types of tools
To make a strong one-piece connection using press fittings, you need to use a special tool, which is classified depending on the type of drive.
Manual drive
Manual crimping pliers are more commonly used at home. This is due to the low price of the tool, the simplicity of the design. The pliers are designed to work with fittings up to 32 mm in diameterwhich limits their scope.
Hand pliers ( / retooling)
Mechanical
The tool consists of two long handles, which are connected by a gear mechanism. The principle of operation is to use a system of levers, through the transfer of physical effort.


hydraulic
Hydraulic tongs are used for installation work without much effort. The handles are connected to a hydraulic cylinder, which is actuated after they are squeezed. The cost of a hydraulic tool is higher than that of a manual or mechanical one, it needs to be serviced regularly.
Electro-hydraulic option
Power tools are used by professionals who are constantly involved in plumbing work. The power tool can be operated from a battery or after being connected to a 220 volt network. Cordless tools have little power, but can be used anywhere.Plug-in electric tongs are powerful, but not mobile.
Plumber ( / vodobroingenering)
The right approach and expert advice
To begin with, I would like to emphasize that this article will consider household valves and other water supply control systems, which in most cases are used in an apartment or a private house. Products that are used on a gas cylinder belong little to another category. But some of the recommendations below may be needed for them.
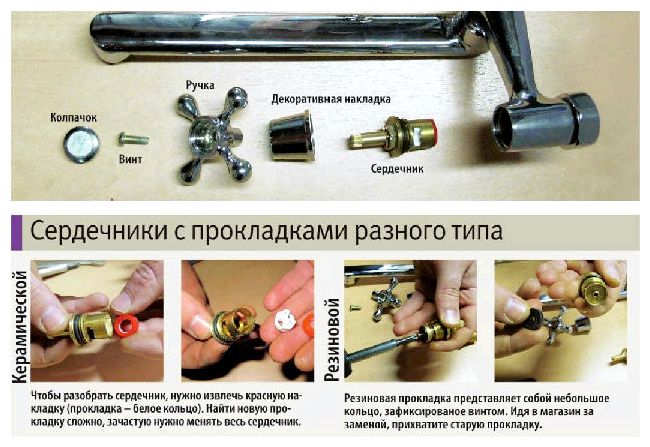
Disassembly order
For example, it is best to consider the design that is used in the kitchen. The fact is that it has more details and in most cases is fixed with the help of special fasteners. It can only be compared with a faucet for washing in the bathroom, which is very similar in design.
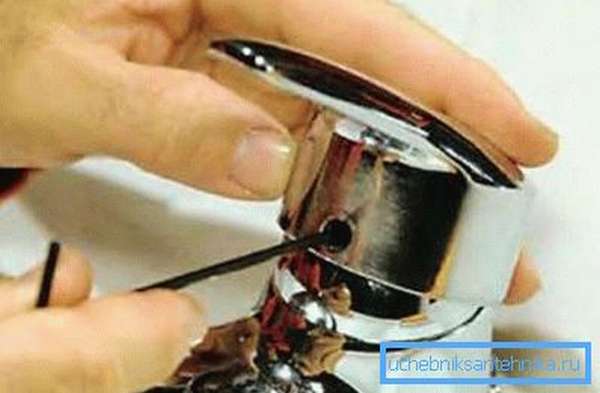
- First of all, the masters advise to remove the handles on the taps. To do this, on some models you will need to remove the decorative caps, and on other systems, you will be directed to remove the pin and remove the handle.
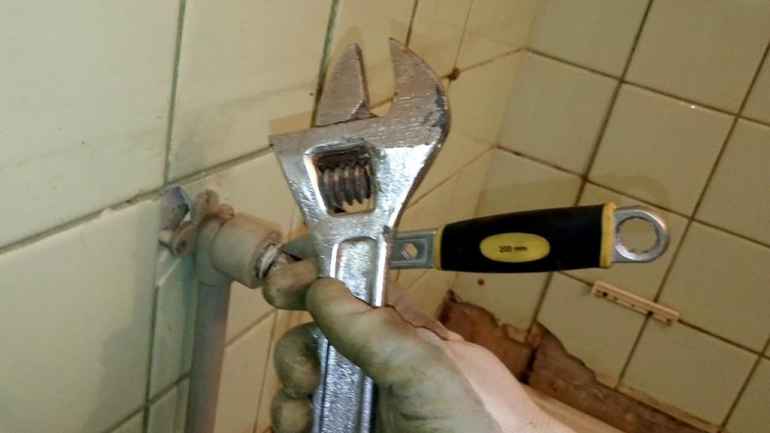
- Most of the manuals explaining how to unscrew a rusted tap at the next stage are advised to use a special tool or wrap it in rags. The fact is that if it jumps off or accidentally hits the structure, then it is possible to take important damage that spoils the appearance.
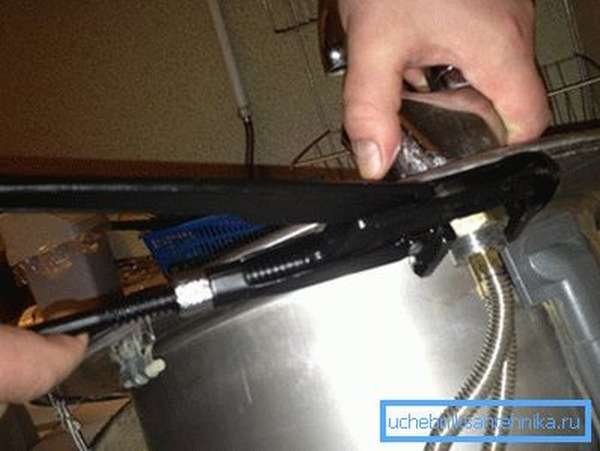
Masters who say that I cannot unscrew the bushing valve are first advised to choose the right tool and create attempts with the valve open. Along with this, it is not necessary to allow distortions or displacements. The tool must be firmly fixed on the surface of the part.
The installation manual recommends removing the tap in the next step
But its chrome nuts must be unscrewed very carefully so as not to damage the coating.
The mixer itself is removed only after the water supply pipes have been disconnected from the system. Along with this, it is necessary to unscrew the fixing bolt or nut that holds the pressure plate. This must be done very carefully, because the price of the shell is quite high, and there is a high chance of accidentally damaging it during this work.
How to remove the plug from the sewer yourself video
Recently, more and more employees of the management company use the method of influencing the non-payer of utility bills by limiting the supply of services. Sewer plugs for non-payers, which limit the volume of the pipeline, are becoming one of the impact measures. The appearance of a plug leads to the accumulation of fecal masses that do not move along the pipe, and the vertical main risers remain functional, they remove sewage from other apartments.
According to the installers, this method of influence should encourage the debtor to pay. However, many people do not agree with this and are looking for other methods to solve such a delicate problem.
Plug installation process
The specialist inspects the sewer system, counts the number of risers in the defaulter's house or apartment, understands the scheme of the internal waste collection system. After evaluating the design, the specialist selects a place for installing the plug (as a rule, this is an intra-apartment pipe), determines the area for entering the drain system and installing equipment.
Removing the plugs is a labor-intensive procedure, since their installation is carried out from the roof with special probes with manipulators. The installation has a camera, thanks to which the operator accurately installs the device in the required sewer hole.
They can also be installed to protect nozzles during repairs or before transportation so that the structure is not damaged.
Causes of accidents in non-pressure pipelines made of polypropylene
The pressure in non-pressure systems is equal to atmospheric. The capacity of such lines is calculated in advance. In addition, the installation of joints in non-pressure systems is carried out using socket technology, with sealing of the contact point with a conventional rubber sealant. That is, it is not worth fearing exorbitant internal pressure or errors in the assembly of the pipeline, in this case.
As a result, only a “third force”, malicious or accidental, can damage a polypropylene pipe in such a system.
Moreover, such an impact can look like an attempt to dump a highly active chemical substance into the system, and like the operation of the system with a deliberate violation of the temperature regime, and like a trivial mechanical damage.
However, theoretically, another reason for such accidents may be factory defects unnoticed in the technical control departments of the polypropylene pipe manufacturer. However, such defects in polypropylene pipelines are not common. The production process of such products is controlled quite carefully. Therefore, such a "reason" can be neglected.
Causes of an accident in pressure pipelines made of polypropylene
Building codes that regulate the laying of polypropylene pipelines allow the use of such structures not only in non-pressure lines, but also in pressure systems.
After all, the pressure pipeline is mounted on a sufficiently strong welded joint that does not forgive technological errors. Misalignment of the pipe in the coupling, errors in the soldering process, breakdowns of the welding machine - this is just a short list of the causes of accidents at the joints. Moreover, most of the accidents of pressure pipelines are provoked precisely by "docking" reasons. Therefore, we will begin the analysis of methods for eliminating leaks and breakthroughs in pipes by studying ways to deal with poor-quality joints.


Installation of metal-plastic pipes
The installation of metal-polymer products is carried out using two types of fittings - compression (threaded) and press fittings; high-temperature welding is not used for their connection, since only composite pipes can be soldered together with high quality.
The main advantage of fitting connections is extremely fast and easy installation, which does not require special skills. We also note that through fittings, metal-plastic pipes can be connected to other types, including steel, copper and stainless steel.
Mounting with compression fittings
A compression fitting allows you to make a collapsible connection, if necessary, to be dismantled, which is why its cost is higher than that of a press counterpart. The design of the compression fitting consists of three parts:
- fitting (metal or brass body);
- crimp ring;
- union nut.
No special tools are required to install this fitting - the union nut of the fitting is threaded, which allows it to be tightened with an Allen wrench or an appropriately sized open end wrench.
Compression fittings are available in a wide range of sizes, you can purchase elbows, adapters, tees, crosses and water connectors (straight couplings).
Compression fitting
Note that compression fittings need periodic repair and maintenance, because due to the tendency of metal-plastic to linear expansion, leaks may appear at the junctions of individual parts of the pipeline, which are eliminated by tightening the fitting. This imposes a limitation on the possibility of concealed installation of pipelines, which involves concreting pipes inside walls and floors.
To connect segments using compression fittings, you will need a tool:
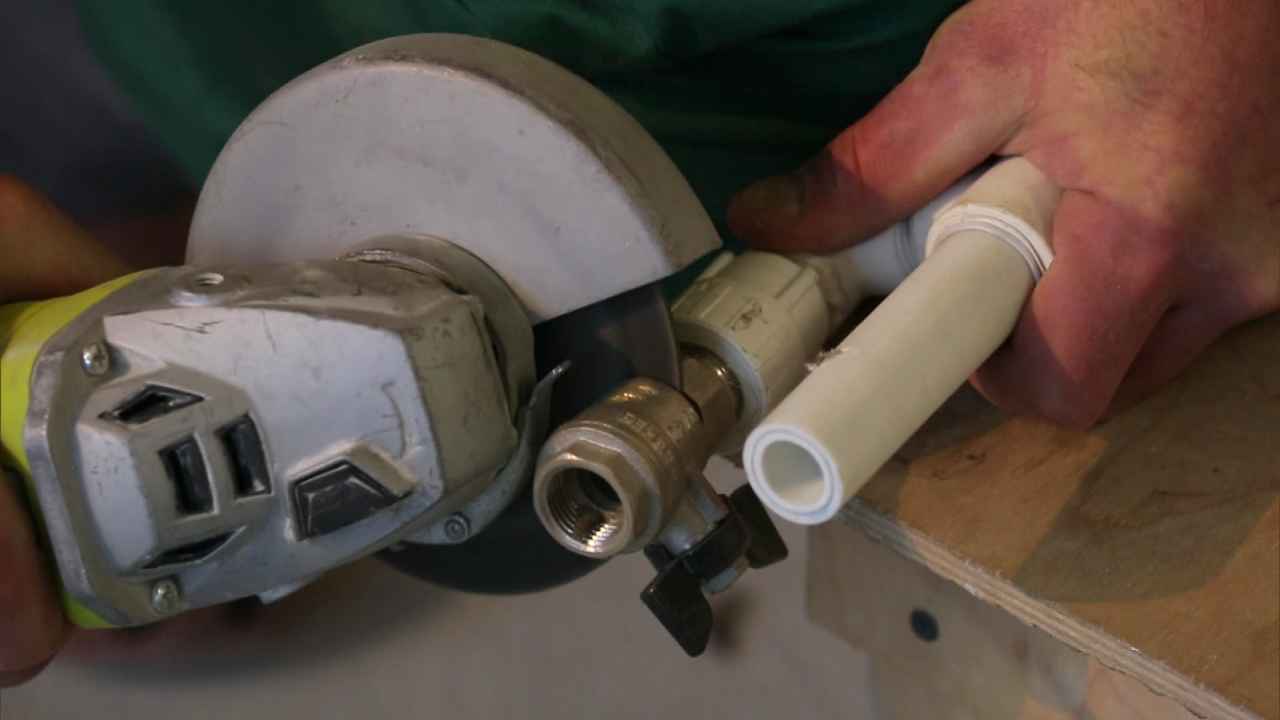
- scissors for polymer pipes (can be replaced with a hacksaw for metal or a grinder);
- fine-grained sandpaper, file;
- calibrator.
Do-it-yourself installation of metal-plastic pipes is carried out according to the following instructions:
- The pipe is straightened, measured and the required cut point is marked.
- According to the preliminary marking, the pipe is cut at a right angle.
- Burrs are removed from the end part of the cut using a file or sandpaper, then the product is given a rounded shape by means of a calibrator;
- A union nut and a compression ring are put on the segment, which is placed at a distance of 1 cm from the cut.
- The pipe is put on the fitting fitting, after which the cap nut is manually tightened. When the nut slows down, it reaches 3-4 turns with open-end wrenches.
When tightening the fitting, it is important not to overdo it - after assembly, the system is checked for leaks and, if necessary, problematic connections are tightened
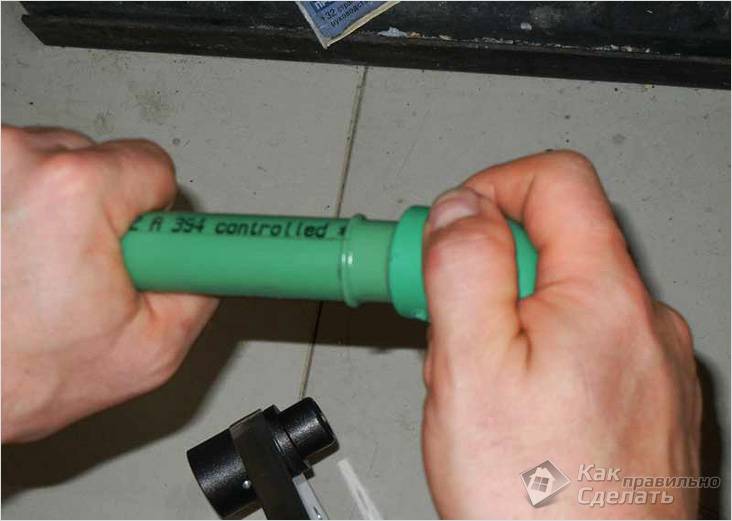
Mounting with press fittings
Press fittings provide a one-piece connection that does not require repair and maintenance, which allows for concealed laying of pipelines. Such fittings withstand a pressure of 10 bar, and their service life reaches 30 years.
To connect metal-plastic pipes using press fittings, in addition to a pipe cutter, calibrator and sandpaper, you will need press tongs. This is a tool that compresses the fitting sleeve around the pipe. The cost of pressing tongs varies between 1-3 thousand rubles, the tool is presented in the assortment of all companies selling metal-polymer products.
Press fitting
The technology of installation of metal-plastic pipelines is as follows:
- The pipe is marked and cut at a right angle into sections of the required length.
- By means of a reamer or sandpaper, the cut point is cleared of burrs.
- The calibrator eliminates the ovality that has arisen during cutting.
- The segment is inserted all the way into the fitting so that it is placed between the fitting and the crimp sleeve.
- With the help of press tongs, the sleeve is crimped to the characteristic click of the tool. If the compression is performed correctly, two rings of the same size are formed on the surface of the sleeve.
There are fittings in which the crimp sleeve and the fitting come separately. In this case, you will first need to put a sleeve on the pipe, then fix it on the fitting, move the sleeve to its extreme position and crimp it with tongs.
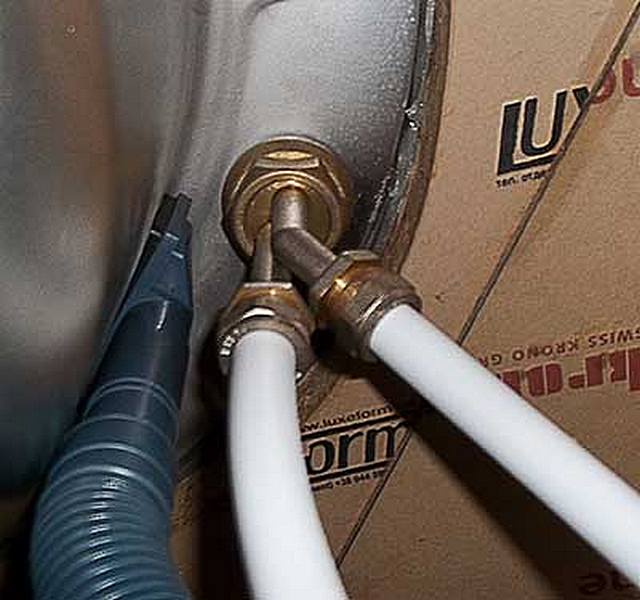
Faucet installation
In order to install a faucet in a bathroom or kitchen, you will need most of the skills that have been described above. The connection can be made with hoses or eccentrics. Everything will depend on where the installation takes place.
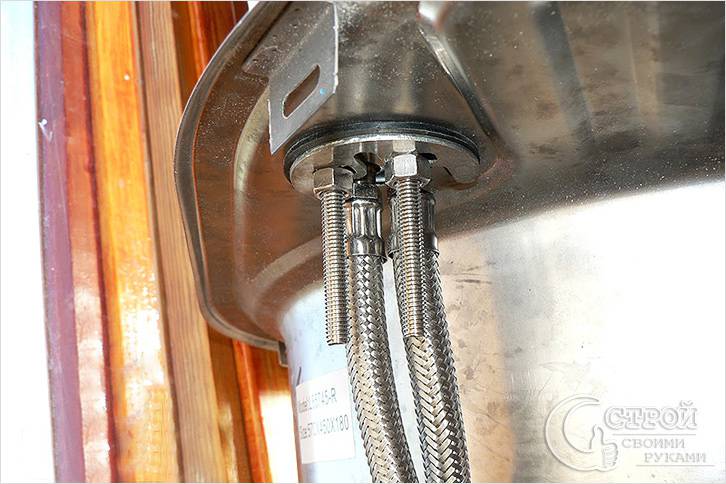 Anchoring kitchen sink faucet on hairpins
The kitchen faucet is installed as follows:
- The scope of delivery is checked. It must have all the necessary seals, a retainer bar, nuts, rods. It is better to buy hoses separately, those that come with the kit are usually not of very high quality.
- If necessary, a hole is made in the sink using a special tool or a drill.
- The mixer is assembled. To do this, a gander is screwed to the main module.
- If the mixer has an installation thread, then it is simply placed in the socket made and secured with a nut, if not, then it is necessary to install the threaded studs in the corresponding holes on the body. Next, a rubber gasket is put on, the crane is placed in its place and fixed on the inside with a metal plate and nuts.
- Two ball valves are installed on the supply pipes, with which it will be possible to cut off the supply during repairs. Threaded connections are sealed as described above.
- Hoses with a long and short needle are screwed into the mixer, and then screwed onto the mounted locking mechanisms. They usually have a sealing gasket, so no packaging is required.
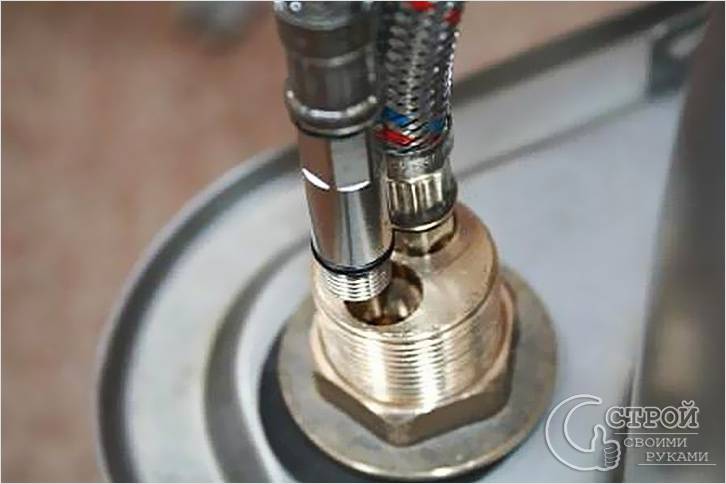 Screwed in hoses
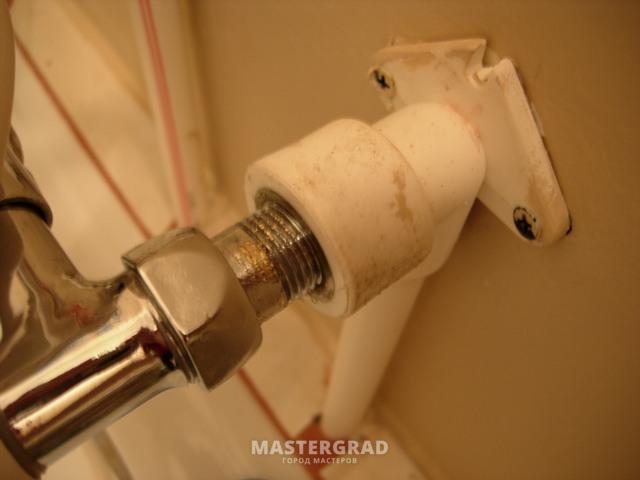
For the bathroom, everything is a little easier if the faucet outlets are already installed.
- The crane is going.
- The eccentric threads are packed and the elements are screwed into the coupling or angle.
- Top mounted chrome rims.
- The mixer is screwed onto eccentrics.
- With the help of the level, its plane is set.
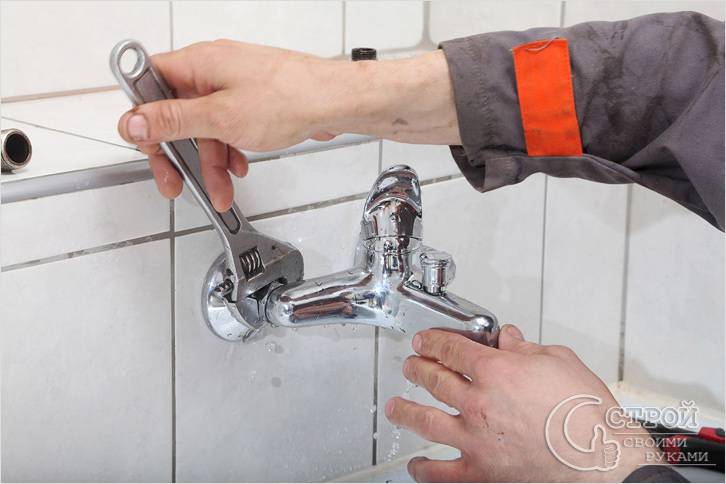 Installing a faucet in the bathroom
Now you know how the installation of locking mechanisms is carried out. This information is useful for any home master. We hope you will not have problems with laying communications in the country or at home.


How to fix a pipe body leak
How to close a leak in a pipe, provided there is a crack formed on the body? To troubleshoot the problem, you can use one of the following methods:
- install clamp;
- put on a bandage;
- apply cold welding.
Clamp installation
The easiest way to fix a leak on a pipe body is to install a repair clamp. The special device consists of:
- metal case;
- rubber seal located inside the case;
- fixing bolts.
Special device for fixing pipe leaks
You can install the clamp with your own hands in the following way:
- the place of leakage is cleaned of dust and rust;
- the pipe is wrapped with a clamp;
- the device is fixed.
Stopping a leak with a clamp
Clamp selection should be based on the size of the crack. To completely eliminate the malfunction, the clamp must be 1.5 - 2 times the size of the leak.
bandage
How to fix a leaking pipe if there is no clamp? To eliminate the leak, you can use a rubber, adhesive or cement bandage.
The rubber band is:
- a piece of rubber. A cut from a bicycle tube or a medical tourniquet used to stop bleeding is optimal. It is necessary to wrap the cracked section of the pipe with a rubber cut;
- small tie-down straps, wire or other fixing straps for attaching the rubber to the pipe.
Bandage for a pipe from improvised materials
The adhesive bandage is installed according to the following scheme:
- the section of the pipe on which the leak has formed is cleaned of dirt with a solvent;
- fiberglass or medical bandage is impregnated with special glue;
Special composition for elimination of leaks
- the pipe is wrapped with prepared material in several layers;
- complete drying of the applied composition is expected.
Instead of special glue, you can use epoxy resin or, when using metal pipes, ordinary table salt.
How to cover the current pipe with epoxy, see the video.
Cement bandage is an analogue of adhesive bandage. The bandage or fiberglass is impregnated with a cement mortar prepared in a ratio of 1:10.
Cold welding of pipes
A relatively new way to eliminate leaks is the use of a composition of the so-called cold welding. How to cover the pipe so that it does not flow? For different types of pipes (metal, plastic, metal-plastic, and so on), different compositions of cold welding are used.
Composition for plastic pipes of various types
Detailed instructions for using the mixture are given on the bottle with the active substance. Here is a general algorithm:
- before applying the mixture, the damaged section of the pipeline is cleaned of dirt. If the composition must be applied to a metal pipe, then the crack is additionally cleaned of paint and rust;
Stripping the pipe before applying cold welding
- a special compound is applied to the damaged area. If liquid cold welding in the form of glue is used, then it is desirable to apply it with a brush.If a plasticine-like composition is used, then before applying it is necessary to knead it thoroughly until a homogeneous mixture is obtained;
- the substance for cold welding is evenly distributed over the entire section of the cracked pipeline, capturing 3–4 cm more than the crack itself;
Coating the damaged area with a cold welding agent
- the composition is left to dry completely, which takes an average of 2.5 - 3 hours.
So that the area restored by cold welding does not stand out, the dried composition can be cleaned with sandpaper and painted.
All the methods given in the article to eliminate leakage on the pipe body, except for the use of cold welding, are only a temporary measure. To completely get rid of the problem that has arisen, it is necessary to completely replace the damaged section of the pipeline. To perform this operation, it is desirable to involve qualified specialists.


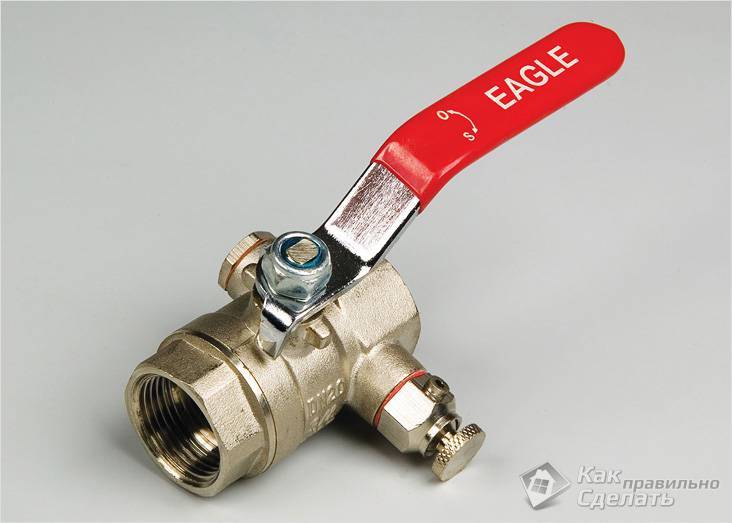
Installation of ball valves
 ball valve
Installation of metal-plastic water pipes in your apartment should begin with the installation of ball valves on the riser.
 Installed ball valves
It is these taps that will successfully shut off the water supply in the event of leaks, thereby protecting the premises from flooding. The next element after the tap and in front of the water meter should be a filter for deep water purification. Then a fine filter, a pressure reducer, a manifold for piping (if necessary) are installed. Cleaning filters are needed to protect plumbing fixtures by trapping scale, sand and metal particles present in large quantities in risers.
Periods of the most intensive formation of moisture
Most often, water appears at the stage of warming up the engine.This is due to the use of an enriched mixture, which is designed to speed up the warm-up time of the catalyst, because it works most effectively in the region of + 300 ° C. As a result, rich in carbon monoxide, unburned hydrocarbons, it is intensively converted into steam and water.
Constant and frequent accumulation of water in the muffler will inevitably lead to corrosion of this element of the exhaust system. To avoid such a nuisance, it is recommended to make long, active trips, which will contribute to better heating of the muffler and prevent the formation of moisture. Another way is to completely warm up the engine; driving with a cold engine only contributes to the formation of condensate.
Winter is the most unpleasant time of the year for a motorist living in the middle lane (there is nothing to say about the north). Very often, in the cold, the car simply refuses to start, even if it has stood on the street for only a couple of nights. This can be caused by bad or dirty spark plugs, oxidized battery terminals, bad oil, or a buildup of frozen condensation in the muffler. The best way to avoid such situations is, of course, prevention and proper maintenance. But if trouble does happen, there are many ways to solve your particular problem. Let us dwell in more detail on the accumulation of frozen condensate in the muffler. The way out of this unpleasant situation is to warm it up.
Instruction
You can try to drive it to a service station, where for a nominal sum the masters will do all the work in the best possible way.You can get it to take it to a car service if you unscrew the exhaust pipe of the muffler (or simply) below, which is used for additional purification of exhaust gases. The car will start. But there is a small "but". The car will make a lot of noise, even roar, which is not surprising, because you removed part of the muffler.
If there is no desire or opportunity to tow the vehicle, you will have to act on your own. Before warming up, you need to know where, in fact, to start warming up. Condensation tends to accumulate further away from the engine. Therefore, you need to start heating from the can under the bumper.
Moisture in the internal components of the car is a sign of the proper functioning of its main components. At the same time, there is no need to grab your head and rush to the nearest service station. After all, there can be no talk of any defect here. Although novice motorists are sometimes shocked when this moisture accumulates in a decent puddle. Reasonable question: why is there a lot of water in the muffler? This already depends on the ambient temperature, operating mode and fuel quality.
Metal-plastic or polypropylene
 Connection of polypropylene pipes
Modern plumbing equipment is, first of all, five-layer pipes made of metal-plastic, which have gained particular popularity due to their many advantages over other types of pipes:
- compacted inner layer of polyethylene;
- elastic aluminum layer of the pipe, which retains the shape and configuration specified during installation;
- connecting the inner and outer layers of the polyethylene of the pipe with its aluminum layer using glue;
- durable layer of anti-corrosion polymer;
- not obligatory observance of the exact calculated dimensions when installing pipes made of metal-plastic.
When installing plumbing equipment, another type of pipe is also used - polypropylene pipes. Their advantages over metal-plastic ones are economic benefits (polypropylene pipes are at least three times cheaper), as well as ease of installation. They can be connected without much difficulty even with metal pipes.
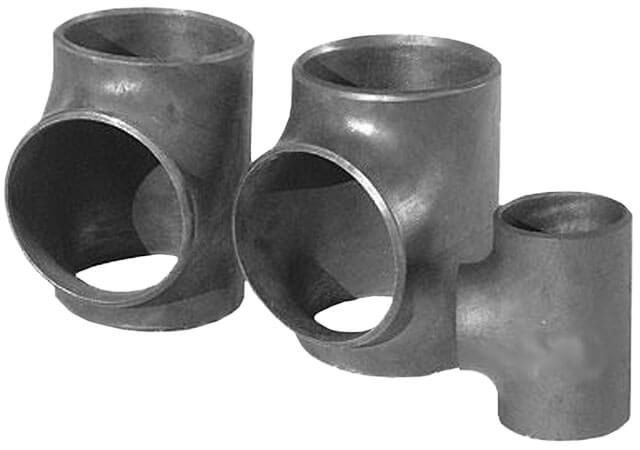
Tees for metal pipes
With the help of tees, additional branches can be connected to the pipeline, thereby creating more complex communication networks. A tee, as the name implies, has three branches. Depending on the purpose and working features, transitional and equal tees are distinguished, and they are produced in two forms - ordinary and combined.
For the manufacture of tees, both different grades of steel and polypropylene can be used. Both the first and the second are popular, but more questions arise with metal products. Steel tees can be threaded or welded. Fixing a tee with a thread is somewhat easier, so this method is often chosen if you want to save a little time and effort.
When choosing a tee for your own pipeline, you need to start first of all from the steel grade and the method of fastening the device. An important point is the technical characteristics of the tee - it must withstand the workload without any problems.
A variety of tees allows you to choose the best option for each case. For example, for angled branches, you can select a fitting that has 30, 45, or 90 degree elbows.
If the pipeline will operate in aggressive environments or chemically active substances, then you should stop your choice on devices made of lightly alloyed carbon steel. The fact is that such material gives the finished product a high degree of resistance to corrosion and aggressive substances, and also ensures durability and reliability.
Conclusion
Metal plugs for pipes have a lot of varieties, so there will be no problems with the choice - there are locking elements for each case. By selecting high-quality materials, it is possible to reliably and safely close any pipes.


What to do if the eccentric is broken
At the moment, professional plumbers have developed several ways to solve this problem. Moreover, the method depends on the quality of the fitting thread.
- If the fitting is of good quality and can withstand severe mechanical stress, then the remnants of the thread can be unscrewed from the pipe using a chisel. In this case, it is necessary to select the tool in such a way that its pointed part is larger than the dimensions of the fitting. The process itself is as follows. With a hammer blow, the chisel is driven into the eccentric. Then we unscrew the fitting by holding the chisel with a gas wrench.
- If the eccentric is not of very good quality and at the same time strongly stuck to the pipe. in this case, you need to cut it from the inside with a blade from a hacksaw to a cross. Further parts of the fitting are removed with a screwdriver.
At the same time, when carrying out all such procedures, a small piece of material should be put into the pipe, so that pieces of metal can be avoided from entering the pipeline.
The methods presented above have been developed over many years of practice and are therefore not taught to would-be plumbers during training. On the other hand, they have repeatedly proven their effectiveness and therefore they can be used if necessary.
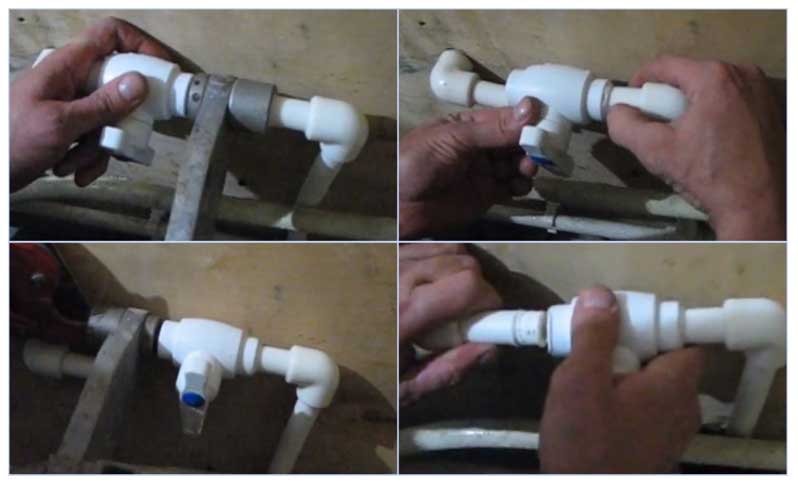
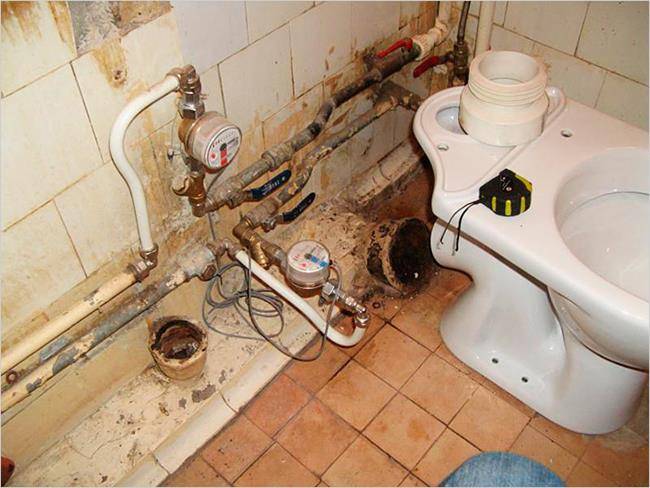
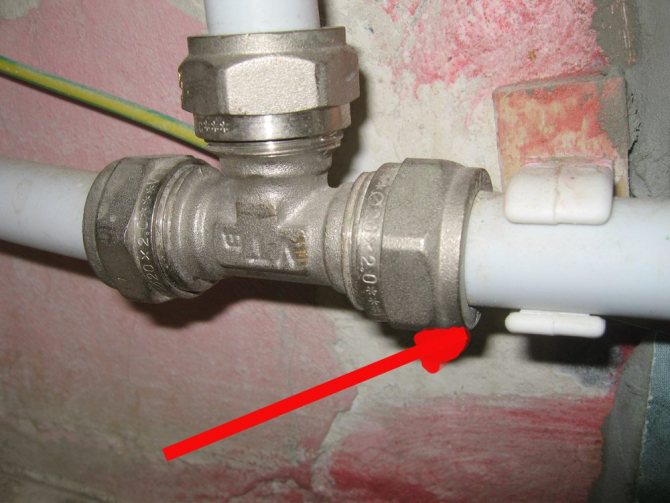
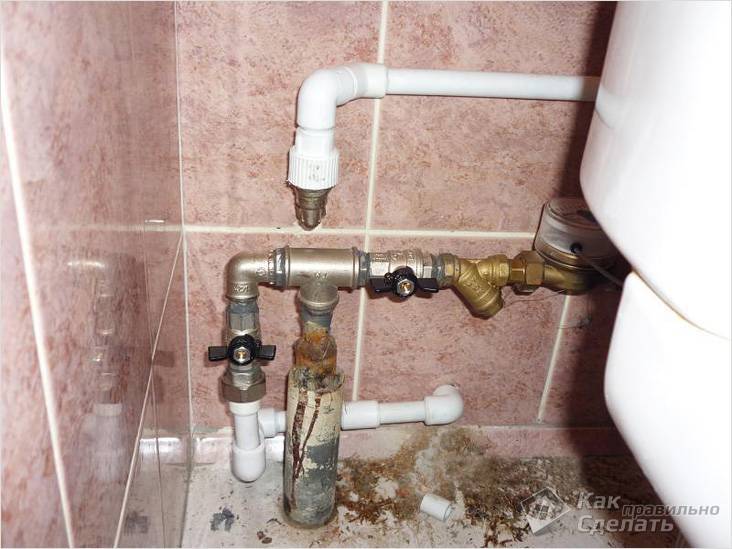
Judging by the figure, we can note several points complicating the installation of a new crane - there is practically no distance between the non-separable coupling (metal / polypropylene) tee and the crane, the proximity of the wall. All this can be used further in the same form, if only a new (serviceable) tap is inserted below the faulty tap.
What to do with a complete replacement. In your case, I would stop the water and cut the pipe below the tap. After that, you need to cut the pipe between the coupling and the angle of 90 degrees, unscrew the coupling (because the wall may not completely unscrew the coupling with the angle). After that, unscrew the coupling from the thread of the metal pipe.
Now you can also use a brass faucet by screwing it directly onto a metal pipe and on it, in turn, an American collapsible coupling. There are brass taps already with such couplings.
In a very limited space, you can put just such a valve, which combines the transition from metal to polypropylene, and a shut-off block, and a 90-degree turn.
Another option, after disassembly, again put a non-separable coupling in the same way, go down at an angle of 90 degrees, and already to the corner (through a piece of pipe) solder such a crane, in a vertical position as the old one stood -
And another tip: I personally try to avoid when soldering polypropylene (where possible) to join corners, tees, taps, etc., too tightly to each other. It is better to leave a margin for at least one more soldering. This greatly simplifies both dismantling and reduces costs, because the vast majority of polypropylene components can be reused by washing and degreasing.
Well, from the tools you will need, of course, a soldering iron (welding machine for polypropylene), scissors for PP, and the necessary crane, it is better to have a hacksaw for metal, an angle of 90 degrees, a fum tape or flax, a gas wrench.


