- Restoration with liquid acrylic
- Possible methods of restoration
- Enamel option
- The algorithm of actions includes the following works:
- Using Liquid Acrylic
- bathtub in bathtub
- Choosing a restoration method
- The main reasons for the restoration of the bath:
- Bath preparation before staining
- Cleaning the surface of the bath
- Abrasive processing
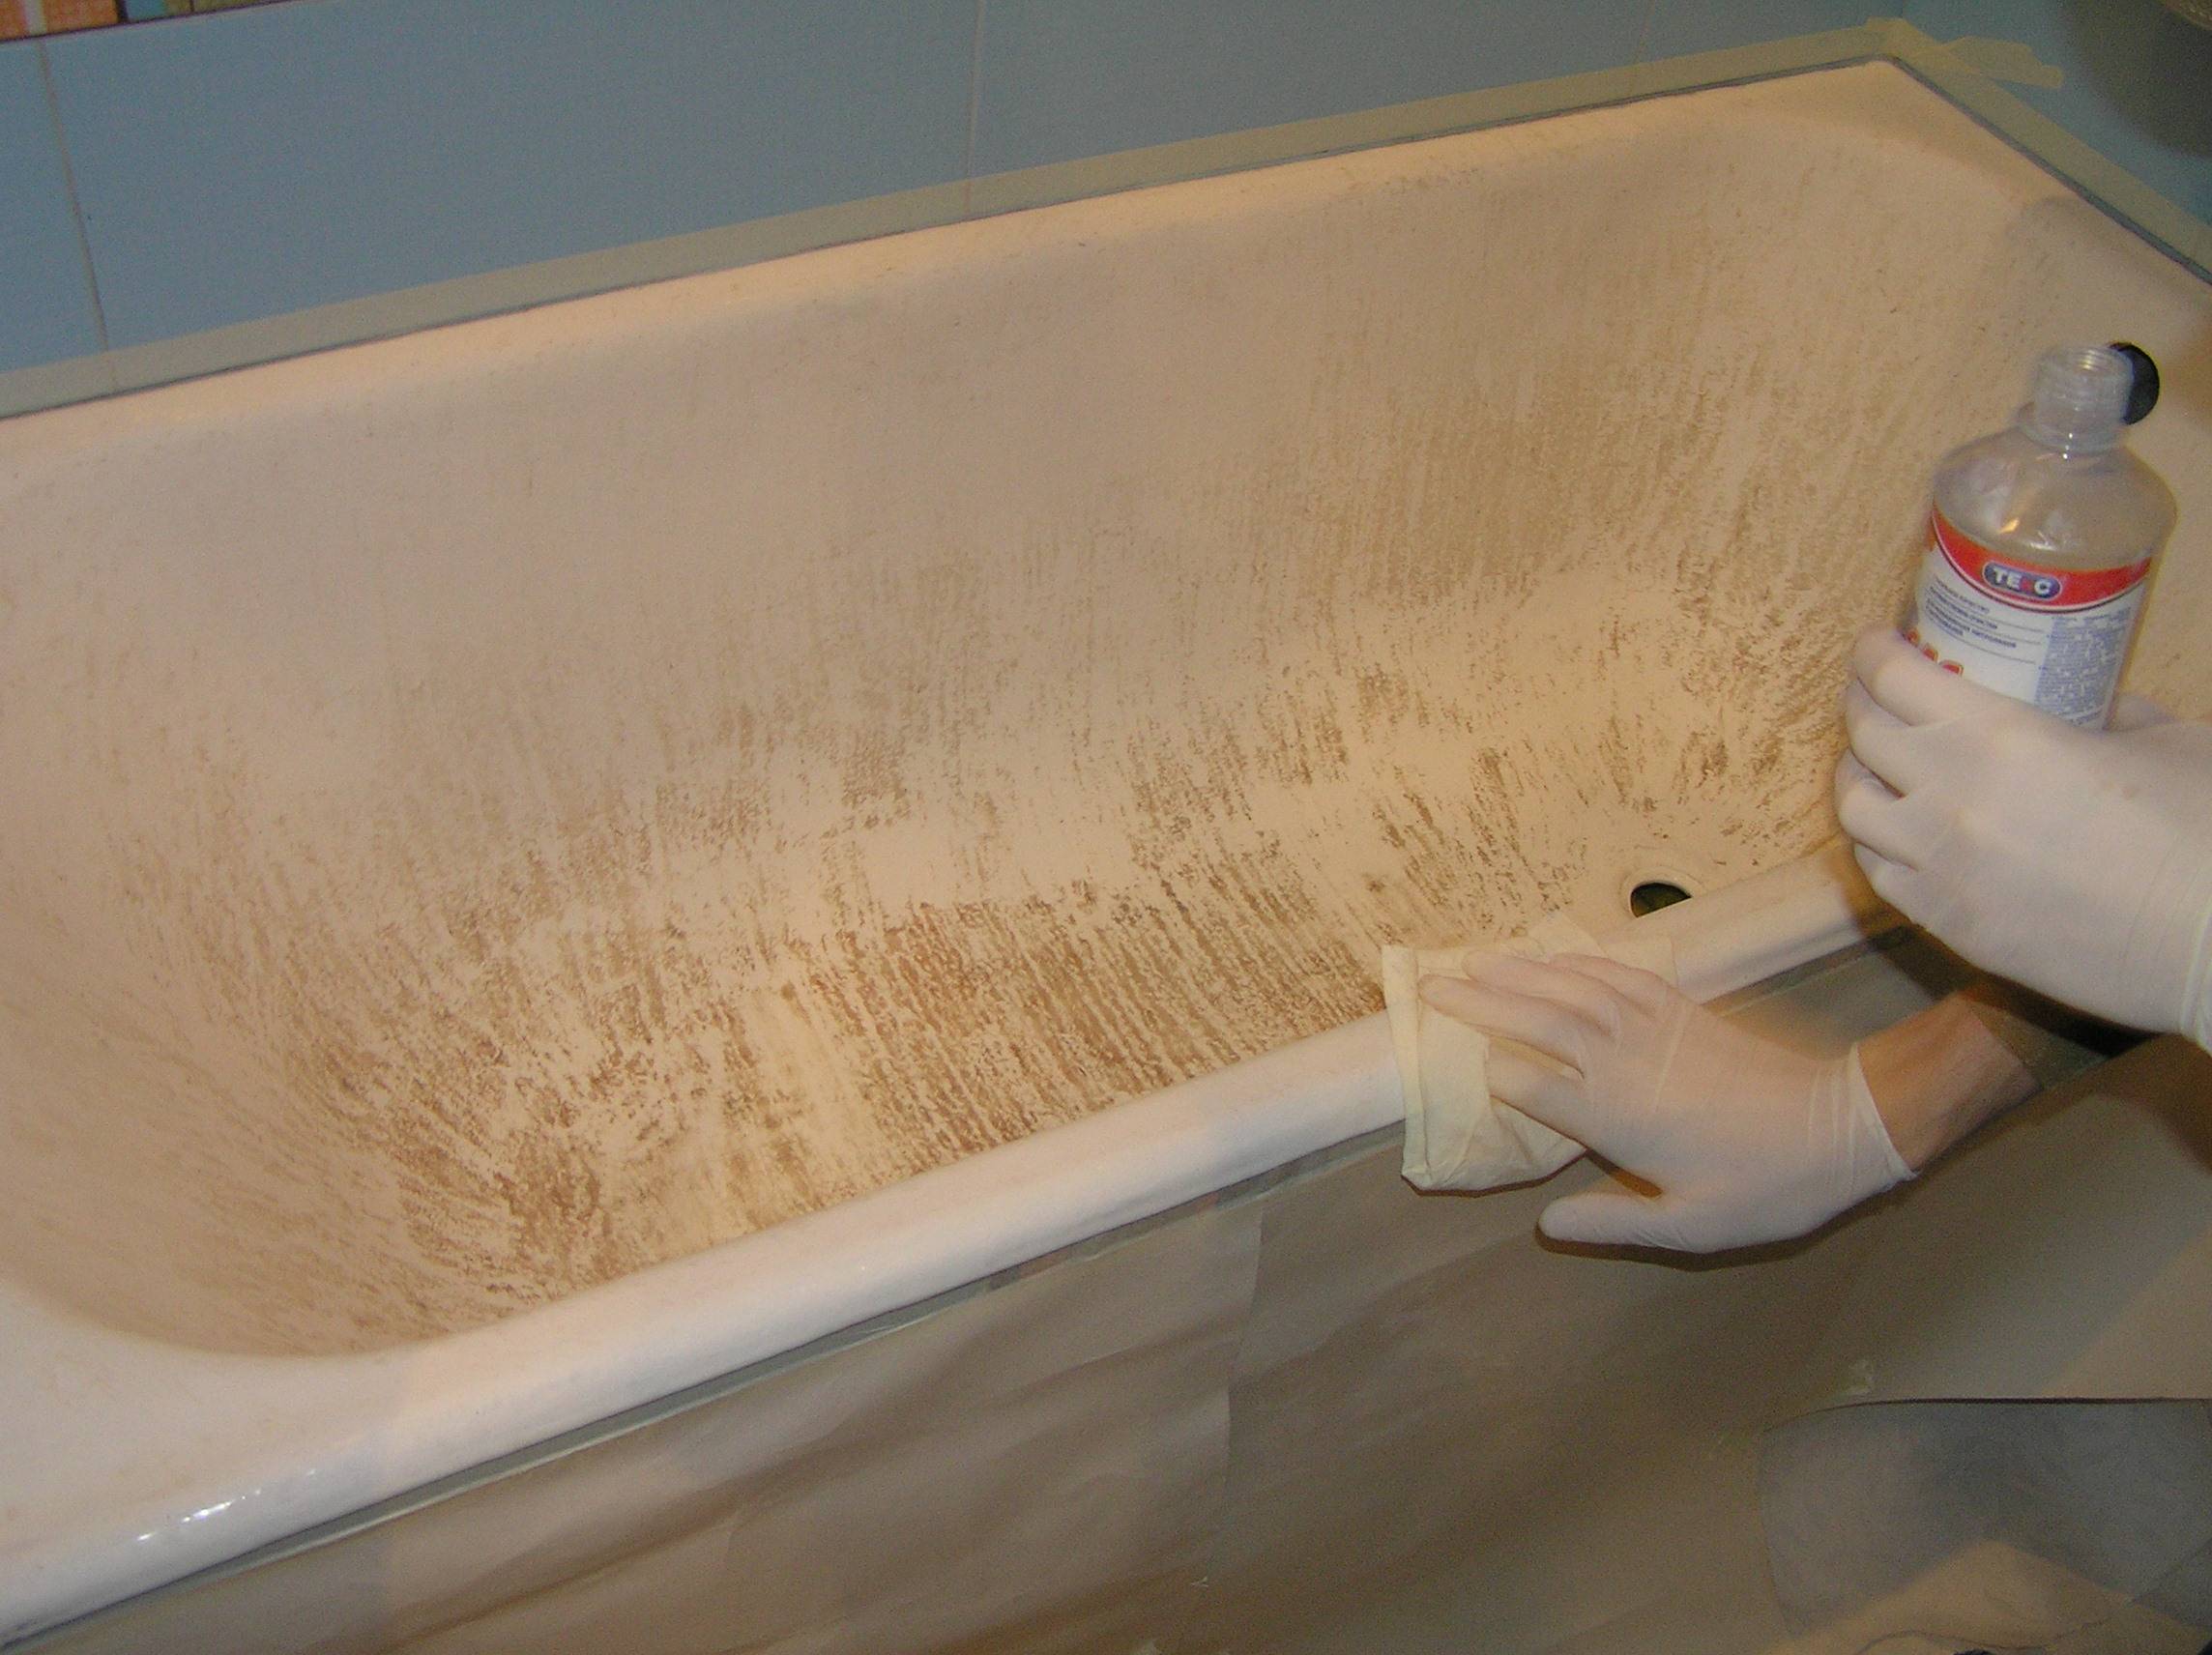
- Remove dust and degrease
- Signs of wear on the coating
- Acrylic liner "bath in the bath"
- Restoration with liquid acrylic
- Pros and cons
- How is the restoration done?
- Enamel restoration with liquid acrylic
- Tips
- Correction of small chips, scratches
- Bathtub enameling
- Method 1: ordinary enameling
- Why does enamel usually wear out?
- Restoration of the enameled surface
- What will be needed for work?
- Preliminary step: surface preparation
- The main stage: applying enamel
- All home remedies
- Restoration with bulk acrylic
- Video: bathtub restoration with liquid acrylic
- How to restore a cast iron bath with enamel
- Restoration with acrylic inlay
Restoration with liquid acrylic
Repairing a bathtub with liquid acrylic is an easier process at home than enamelling. Acrylic is resistant to chemical and mechanical stress, unpretentious in work.With the help of liquid acrylic, you can get a beautiful smooth surface that is resistant to temperature extremes and hard water.
Due to the way the acrylic is applied, this method is sometimes referred to as a "fill bath". A do-it-yourself bulk bath is a suitable economical way to update cast iron products.
Do-it-yourself acrylic bath coating consists of the following steps:
- Surface preparation. This process is similar to preparing for enameling: you need to clean the bath from the old coating, degrease, repair cracks.
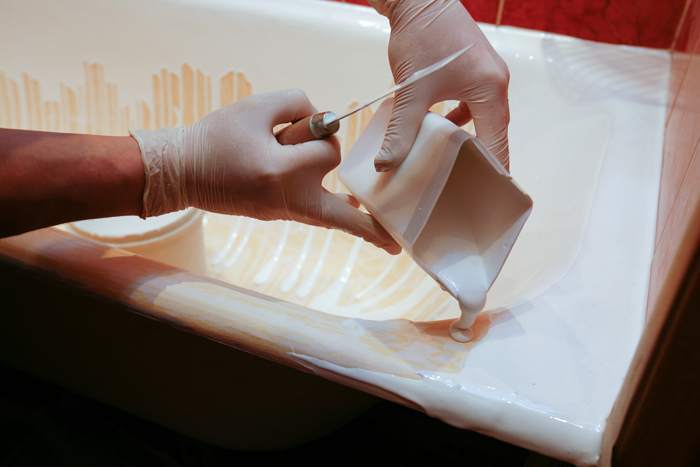
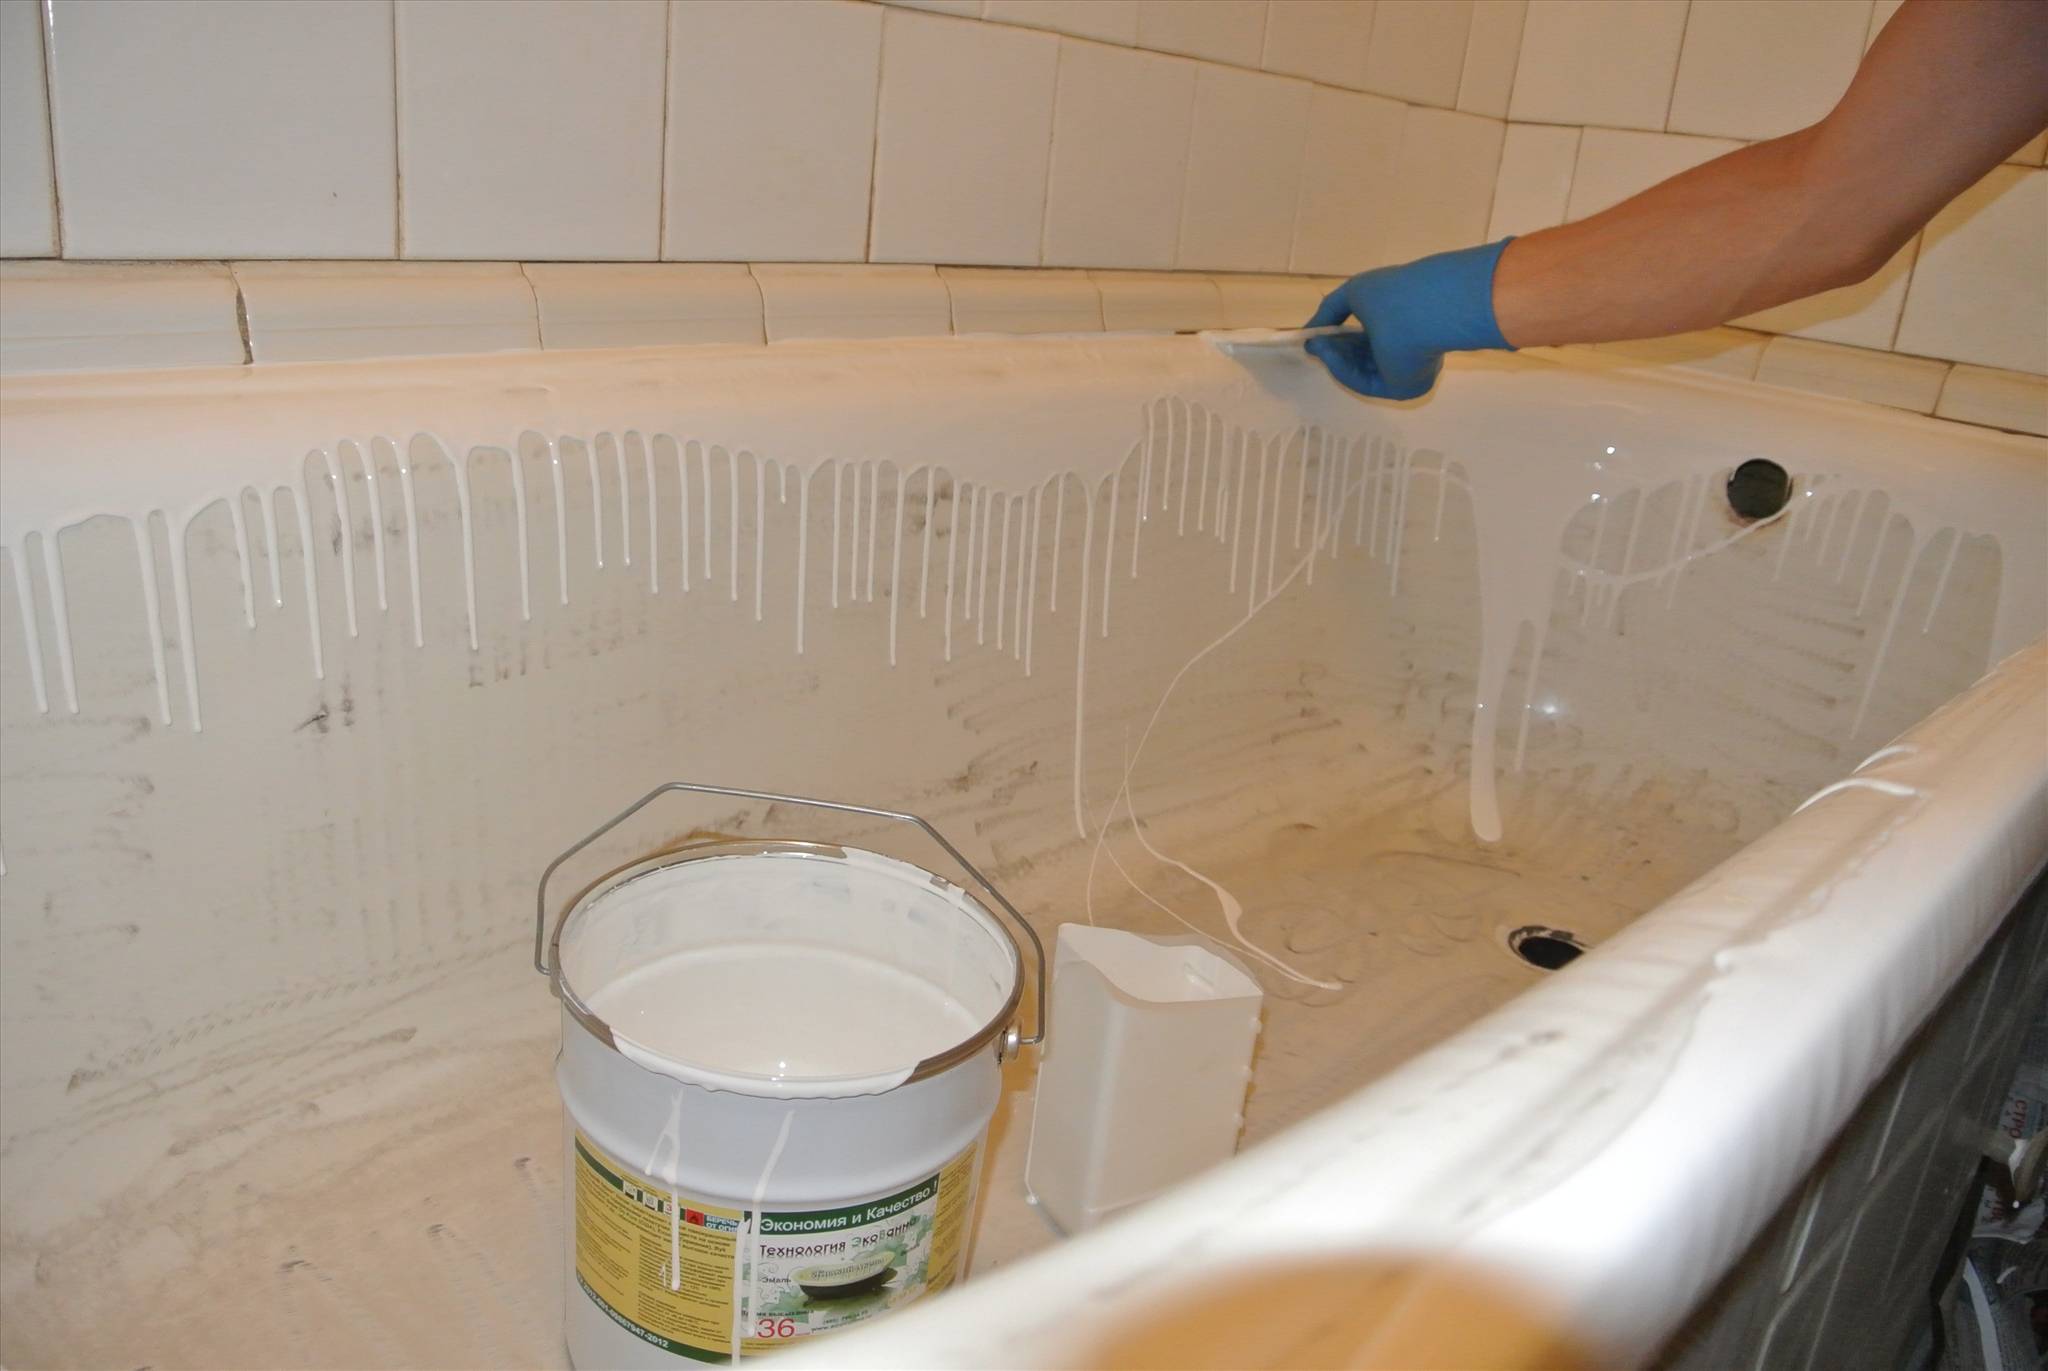
- Acrylic application. Having combined the components according to the instructions, acrylic is poured from a convenient container in a thin stream onto the side of the bathtub, pushing it under the edge of the tile. The acrylic layer should be approximately 4-6 mm and flow down to the middle of the container. Moving along the side, you need to pour acrylic evenly. After applying acrylic along the outer edge, continue to pour it into the middle of the container, gradually narrowing the circles and moving in a spiral. The rest of the mixture flows into the prepared container through the drain.
- Drying. Liquid acrylic can dry from 6 to 24 hours. But still it is better not to rush to immediately use the updated bathroom, but to wait a few days.

Possible methods of restoration
There are several ways to update your bathtub.
Enamel option
The market is able to offer the consumer two-component enamel in cans or as part of aerosol cans. But if you use enamel in the second option, then the enamel on the surface will last no more than a year. If someone decides to restore the bath according to this option, then it is more expedient for him to immediately purchase a complete repair kit. In addition to enamel, it also includes all the accessories necessary for the work, including even napkins.But sometimes the enamel itself may not be included in the kit. In this case, it is purchased separately.
The algorithm of actions includes the following works:
- First you need to apply the soil. After it dries, it should be treated with a lint-free cloth. Then the first layer of enamel is applied. It is better to do this with a spray gun. Those who do not have it use a regular brush.
- Minimum 2 coats are required. A maximum of 4 layers are applied. The exposure time between coats is 1 hour. As a rule, along with the preparation for such work, the whole daylight hours are spent.
- After the last layer of enamel is completed, a gloss is applied to the surface. To do this, after an hour, the surface should be wiped with a napkin with a solvent. Although the paint will dry in an hour, you will not be able to use the bathroom until after a week.
The paint consists of two components that must be mixed. In this state, it will harden in an hour. Therefore, do not immediately mix a large amount of paint. This must be done in such an amount that it is enough for one coating. You should not unconditionally trust the manufacturer, who claims that such paint will last more than 5 years. It will last no more than 3-4 years. Painting work is accompanied by the presence of a pungent odor. It is necessary to work with such paints only in a respirator.
Using Liquid Acrylic
According to consumer reviews, the use of acrylic coating is the best option. All work is carried out in several stages:
- First, they also prepare. The bath must be cleaned, rinsed, dried and degreased. Then acrylic is carefully poured onto a dry bath. You need to start with the sides.In this case, rollers and brushes should not be used. Acrylic itself is distributed over the entire surface of the bath.
- Do not forget to substitute a container under the drain into which excess composition will drain. After the board is filled, go to the middle. Filling is continued until the surface of the bath is completely covered with acrylic. As a result, a layer 5-7 mm thick is formed.
- After pouring, the bath must dry thoroughly. The average drying time is 3-4 days. These indicators may vary in one direction or another, which depends on the quality of the composition and the manufacturer.
All work, including preparation, will take 2-3 hours. In addition, acrylic does not have a suffocating smell. This is an undeniable advantage. The only downside is that acrylic is more expensive than enamel. Within 10 years, acrylic will have to be replaced at least 3 times.
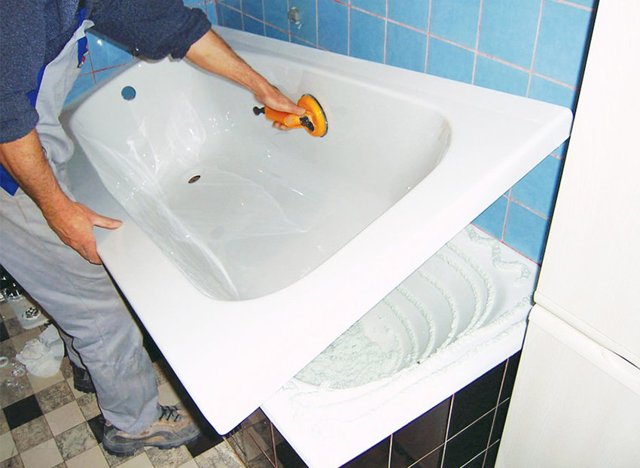
bathtub in bathtub
This method involves inserting a plastic liner into the bath. It has a fairly small thickness, and in size corresponds to the inside of the bath.
First you need to purchase the insert itself. Externally, all baths look the same, but in practice, the parameters may differ. Before buying, you must take the exact dimensions of the bath and provide them to the seller so that he can choose the right option. You can take a picture of the bath before going to the store or shoot it on video. Such a function is available in almost every phone today. The plastic trough should enter the bath tightly, but without effort. If additional force is applied to the liner, it may simply burst. We must not forget that this is just a thin plastic. The liner may not reach the end due to overlap on the edge. In this case, it must be carefully cut with a grinder.After the insert is inserted, it is necessary to make holes for draining and overflowing. To do this, you need to use a drill with a core drill. After that, the edges are processed with a round file.
But just inserting an insert is not enough. It needs to be glued on. All existing problem areas are treated with a sealant. Otherwise, mold will grow in these places. Gluing is carried out with a special foam, which looks like ordinary mounting foam. After processing with a sealant, its excess is removed. On this, the restoration of the bath can be considered complete.
Choosing a restoration method
How to update an old bath with your own hands? To do this, you can use one of the methods: enamel restoration, installation of an acrylic liner or filling with liquid acrylic.
Before giving preference to one of the restoration methods and getting to work, you should assess the condition of the product itself. The choice of repair method depends on the degree and type of damage.
The main reasons for the restoration of the bath:
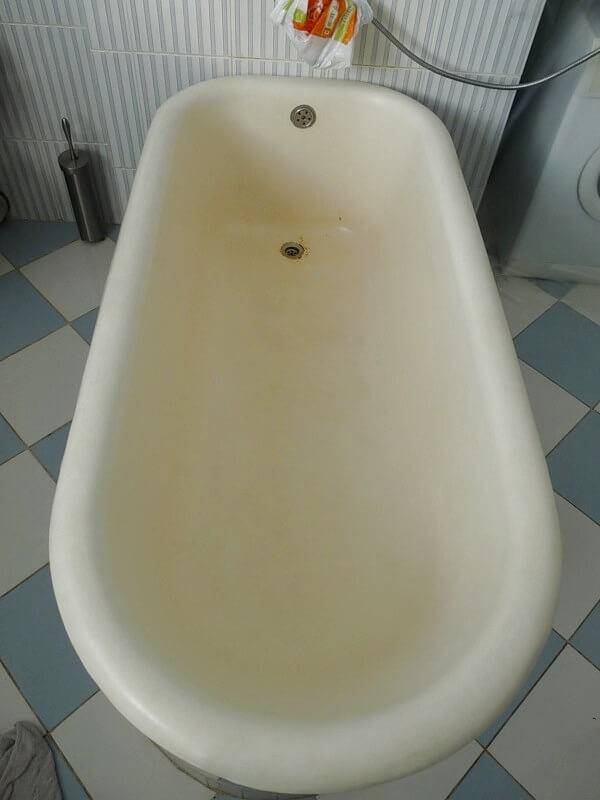
- The enamel lost its luster, became dull, rough, dark spots appeared, the paint peeled off. Re-enamelling the surface will help solve this problem.
- Rust has appeared on the product, which cannot be removed, cracks, chips have formed. An acrylic liner or restoration using the "filling bath" technique can repair the damage.
- The steel bath began to cool quickly, a strong noise of pouring water was heard. You can update such a product only by installing an acrylic liner.
- Strong deformations of the bath body, large chips and cracks, mismatch of new pipes with drain holes. In such a situation, there will be only one way out - the replacement of equipment.
No restoration technique is able to restore the aesthetics and functionality of the bath.
Of course, the choice of method is also based on the material from which the product is made. Acrylic bathtubs lend themselves perfectly to repair.
With the help of a special polish, scratches and minor defects can be removed. And liquid acrylic and special repair compounds can eliminate even such serious damage as chips and through holes.
Renewal of steel and cast iron baths is carried out according to one of the above methods, depending on the extent of the damage. Repair is especially relevant for cast iron structures, as they have a long service life, while remaining very durable.
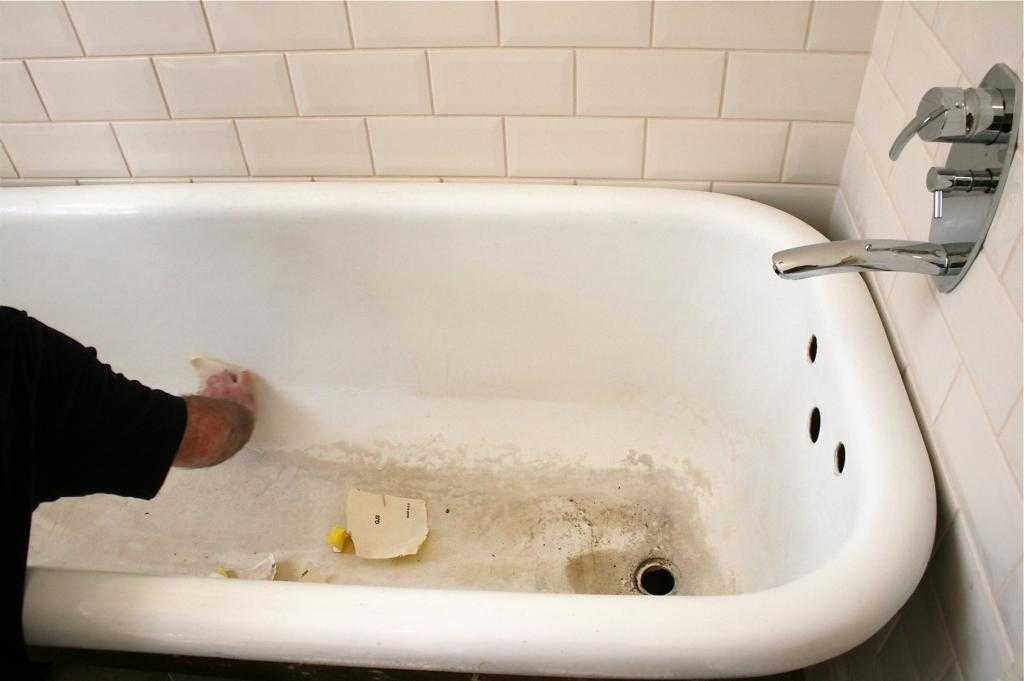
Bath preparation before staining
In a nutshell, do-it-yourself restoration of bath enamel, namely preparation for staining, includes degreasing, as well as creating a rough surface. Before cleaning the surface of the bath, it is advisable to remove all appliances from the bathroom and remove nickel-plated parts such as faucets and shower hose. This is due to the use of caustic volatile materials.
Cleaning the surface of the bath
In order to remove surface contaminants from the bath, it is best to use oxalic acid. Before the procedure, put on an apron, rubber gloves and a respirator. Knowing how to restore the enamel in the bathroom with your own hands, you should not forget about basic safety precautions! Pour acid on the bottom and rub it with a new sponge soaked in water over the entire surface of the bath. Let the acid bath stand for about 15 minutes. After that, we fill the water to the brim and wait another 20 minutes. Drain and begin abrasive treatment.
Abrasive processing
Before abrasive treatment, make sure that there is no trace of rust left on the surface. The remains of rust will become a hotbed for the appearance of cracks in the enamel in the future.


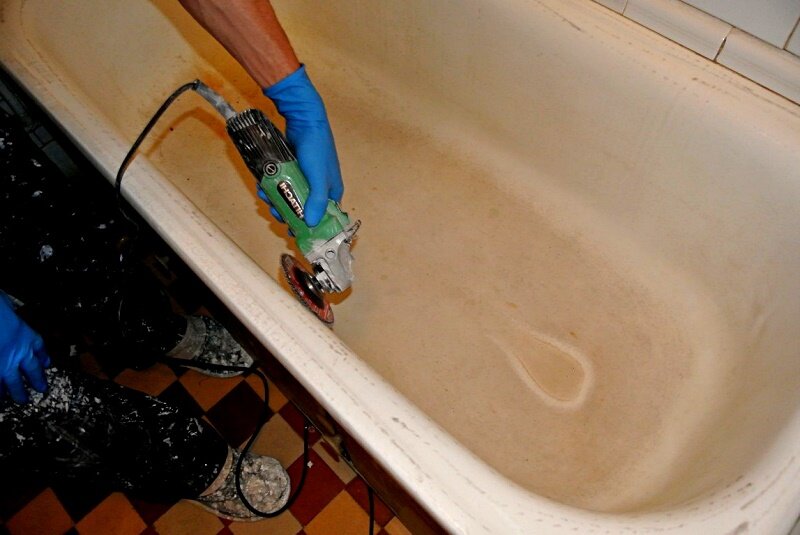
After that, we grind the inner surface with an electric drill with Durex or a cord brush until a matte sheen appears. The result can be checked using a fingernail. Run them across the surface. It should stretch, not slide.
Remove dust and degrease
Subsequent operations provide for the absence of any skin contact with the inner surface of the bath. Removal and fixing of plugs for plums is carried out in rubber gloves. Attach a fishing line or chain to the cork in advance, as you will have to pull it out while draining the water.
Before you restore the coating of the bathroom and apply the enamel, the preparatory process must be completed. Vacuum the entire interior surface. Then, take a clean rag and moisten with solvent. Thoroughly wipe the drain holes to remove any remaining dirt, after removing the plug and plug. Don't forget to wear an apron and rubber gloves. After that, pour 1 liter of Adrilan or Sanoks into the bath. Next, with a new clean sponge, rub the cleaning agent over the entire surface.
Let the bath stand for about 1.5 hours. Next, plug the drain holes and draw water to the brim. We are waiting for another 1.5 and touch the outer surface. If the bath has warmed up, then you can proceed to the next step. If not, then pour another half-liter of detergent and wait an hour.
As soon as the bath has cooled, then drain the water and dial again to the brim. Repeat this procedure at least three more times. After that, you need to take a hair dryer and dry the surface.It is impossible to delay the process at this stage, as the dust settles quickly and can ruin the final result. Check the bath for fat-freeness. Dampen a clean rag with the solvent and wipe over the surface of the tub. If it remains clean, then you can proceed to the next step - painting.
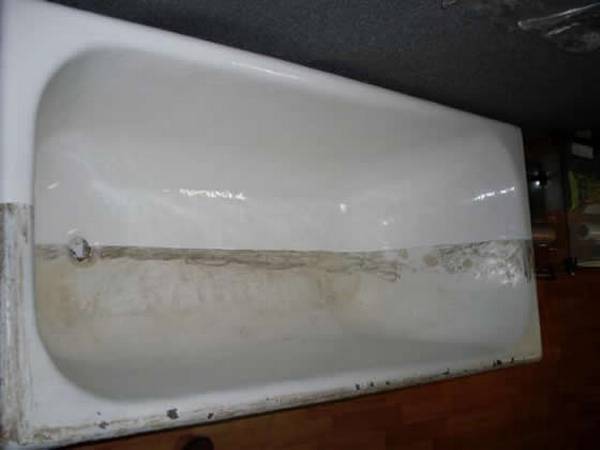
Signs of wear on the coating
In many respects, a cast-iron bath is superior to its competitors. It is able to perfectly retain heat, does not lend itself to deformation and does not increase the noise of running water. Even in view of its long service life, the product, like any other, eventually loses its appearance and characteristics.
The wear of the coating can be recognized by a number of the following signs:
- The enamel has become rough.
- The coating absorbs rust and dirt, the removal of which can be done with significant effort or cannot be removed at all.
- There are chips or cracks on the surface of the enamel.
The formation of any of these signs indicates a violation of the coating of the bathroom and the need for its restoration or replacement.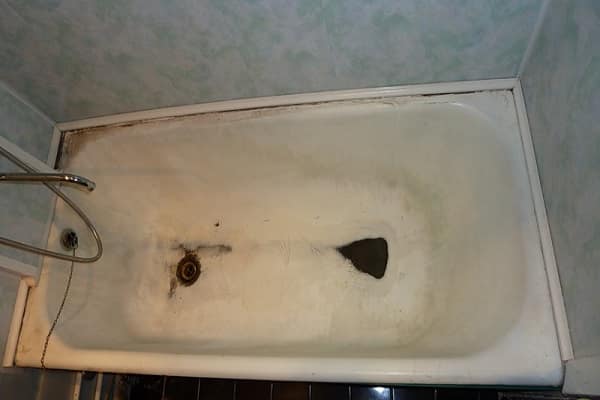
Before you give preference to one or another option, you need to find out the advantages and disadvantages of each of them, thanks to which you will be able to determine the most suitable for yourself.
Acrylic liner "bath in the bath"
Instead of working on the old coating, a new plastic trough is simply inserted into the bath, repeating its shape. It is attached to a special foam, and looks like a new bath. However, there are many "buts" here:
Firstly, this method is not suitable for steel baths and thin cast iron baths, because they bend.Although this movement may be imperceptible to the eyes, it will greatly reduce the life of the liner: it moves away or microcracks are formed into which water enters, stagnates there and begins to smell unpleasant.
Secondly, if you have an old Soviet bath, it is most likely uneven and of a non-standard size, so the liner may simply not fit. Or there will be the same problem as in the paragraph above.
Thirdly, another element comes into play in this case: the sticky foam that holds the liner inside. If its quality is low or there are other unfavorable factors, the bath will simply stick out.
The liner is glued and adjusted for about 2 hours, and then the bathtub is filled with water for a day. You can use it after a day. Acrylic should not be rubbed with abrasives. It is better not to turn on the hot water abruptly, but to let the bath warm up gradually.
Pros:
- no smell during restoration;
- perfect restoration of cracks, chips and any other visual imperfections - this is literally a new bathtub;
- shock-resistant and warm to the touch material;
- does not turn yellow over time.
Minuses:
- design unreliability;
- the indicated service life of about 15 years is rarely realistic;
- high price;
- the need for additional payments for the dismantling / installation of the siphon;
- if the bathtub is built into the tile, it is necessary to dismantle the tile;
- thickness of 7-8 mm "eats" the volume of the bath.
Restoration with liquid acrylic
Acrylic bathtubs are very popular these days. The method is great for updating the inside of an acrylic bathtub that has lost its appearance.
But it can just as well be used to update a cast-iron bath with your own hands.It uses modern material - stakryl, which keeps perfectly and does not lose its appearance for a long time, if the work is done correctly.
Stakryl is a two-component composition, which consists directly of the acrylic itself and a special hardener. Right before application, the components are mixed. Immediately after hardening, acrylic will be a smooth polymer film, the thickness of which can vary from 3 to 7 mm.
Pros and cons
Acrylic bathtub has a lot of advantages. Firstly, the substance is very durable, due to which the surface will then have additional resistance to mechanical damage.
Stacryl is also very fluid. This makes it possible to do the job without much effort. The substance hardens quite slowly, so you don’t have to worry that the coating will not look the way you want. The same cannot be said for enamel.
The only downside is the price. Usually high-quality stakryl is expensive, so not every owner can afford to restore the bath with this substance. But with the help of glass, it is possible to carry out the restoration of both cast-iron bathtubs and acrylic ones.


How is the restoration done?
Restoring a bathtub with liquid acrylic is quite simple if you strictly follow the instructions on the package. First, you should prepare all the materials and tools necessary for the work. Here's what you need to update bathtubs quickly and efficiently:
- protective gloves and respirator;
- sandpaper;
- abrasive and hard brush;
- degreaser;
- rust converter;
- container for breeding liquid acrylic;
- several brushes made of natural pile;
- lint-free wipe.
Before you cover the bathtub with acrylic, you should clean the surface of debris and dust, then sprinkle abrasive powder over it. Further, using a stiff brush or sandpaper, try to carefully polish the surface of the container. If this is an acrylic coating, then only fine-grained sandpaper can be used.
Now you should carefully wash off all the remnants of dust with cold water, and then allow the surface to dry. Be sure to treat the bath with a degreaser so that the acrylic can adhere to the surface as much as possible in the future. When everything is dry, it will be possible to take on the restoration of the bath with acrylic.
First you need to disconnect the siphon and be sure to substitute a large container under the bathtub, where excess liquid acrylic will drain. Now dilute the substance with the hardener, as indicated in the instructions, put on a respirator, gloves and start covering the bath with the solution. From the edge of the bath, start slowly pouring a stream of acrylic. And as soon as it reaches the middle of the surface, start turning the jet around the entire perimeter of the bath. Work smoothly, but slowly, so that the coating is as uniform as possible.
As soon as the circle closes, it will be necessary to cover the bath with acrylic again. Repeat pouring acrylic with a stream into the bath as many times as required by the instructions. Here, much will still depend on the quality and consistency of the base material, and also on the degree of wear of the base surface of the bath. As soon as the work is completed, you can remove the container with excess acrylic from under the drain. Bathroom renovation completed.Stakryl usually hardens for 3 days. But it is best to wait about a week for the surface to be as durable as possible.
Enamel restoration with liquid acrylic
For such restoration work, liquid acrylic is required. Often liquid acrylic is sold in stores with building materials called "Stakryl". For restoration with liquid acrylic, it is necessary to apply a large layer of liquid. Due to the modernized composition, liquid acrylic spreads evenly over the surface of the cast iron product. It is very easy to restore enamel with it. There is no need to distribute it manually. Before using this method, you need to thoroughly clean and prepare the surface for repair work, in the same way as when preparing a cast-iron product for enameling. It is necessary to erase the old coating, then clean the surface, rinse it and dry it for several days.
A brush is not required to apply the liquid mixture. Starting from the sides, the bathtub is filled with the mixture, as a result of which the mixture smoothly flows down the sides and stops at the bottom. Incompletely finished areas at the bottom must be carefully filled with acrylic.
Before painting, it is necessary to disconnect the drain pipe, and put an old, unnecessary container under the hole. Adhering to all the rules, acrylic will be applied correctly, evenly.
The layer of liquid acrylic is 0.5-0.6 cm. It takes 4-5 days for the paint to dry. This method of coloring is laborious, but effective. If acrylic in liquid form is applied correctly, the coating will be durable, compared to enamel painting. The market offers a wide range of suitable colors for any interior.
The whole repair process for the restoration of an old cast-iron bath is not at all complicated.
It is important that the work be carried out slowly and carefully, adhering to all the above rules. Although they take a lot of time and effort, restoration is many times cheaper than buying a new bathtub.
Cast iron is one of the heaviest metals. Transportation of a new bathtub will cause a lot of trouble, and installation and repair of a bathroom will take even more time than a simple restoration.
Tips
And finally - a few valuable and useful tips.
For the duration of all these works, good ventilation in the bathroom should be ensured.
Doors and ventilation grills must be open, and windows in the apartment can be opened for drafts.
It is important to use a respirator to inhale the cleanest air possible.
All pets and children should be removed from the home while work is being done.
When buying materials, you should carefully inspect the hardener that comes with the enamel. If it has a dark red-brown hue, then it is quite possible that the enamel will not be a pure color.
After completion of work, you will have to wash the bath only with mild detergents, abrasives are prohibited for use.
No metal washcloths and coarse fabrics.
You can polish the bathtub from the inside with a soft flannel. This will add shine.
While the enamel is drying, the surface can be slightly moistened with a solvent. This will give you a semi-gloss finish.
In order for the drying of the enamel to go well, and the surface does not crack, you should use a reflector in conditions of high humidity in the bathroom.
Applying a new enamel to the bath is best done in the summer.This will ensure the most efficient ventilation of the apartment, since it will be possible to open all the windows.
When applying the second layer of nitro enamel, the previous one may partially dissolve.
Bathtub enameling
Restoration of a bathtub with the replacement of old enamel with a new one is a completely independently feasible way to restore the product to its former beauty. At the same time, the new coating will serve for at least 5 years with a careful attitude towards itself. Of course, later you will have to paint the bath again, but considering how much cheaper this type of work is than all the others, it is definitely worth it. By the way, an important factor affecting the long service life of enamel is the chemical composition of water. It is also desirable to take this into account when choosing a method for restoring a bathtub.
Do-it-yourself bathroom enamel restoration
Dismantling the cast iron bath
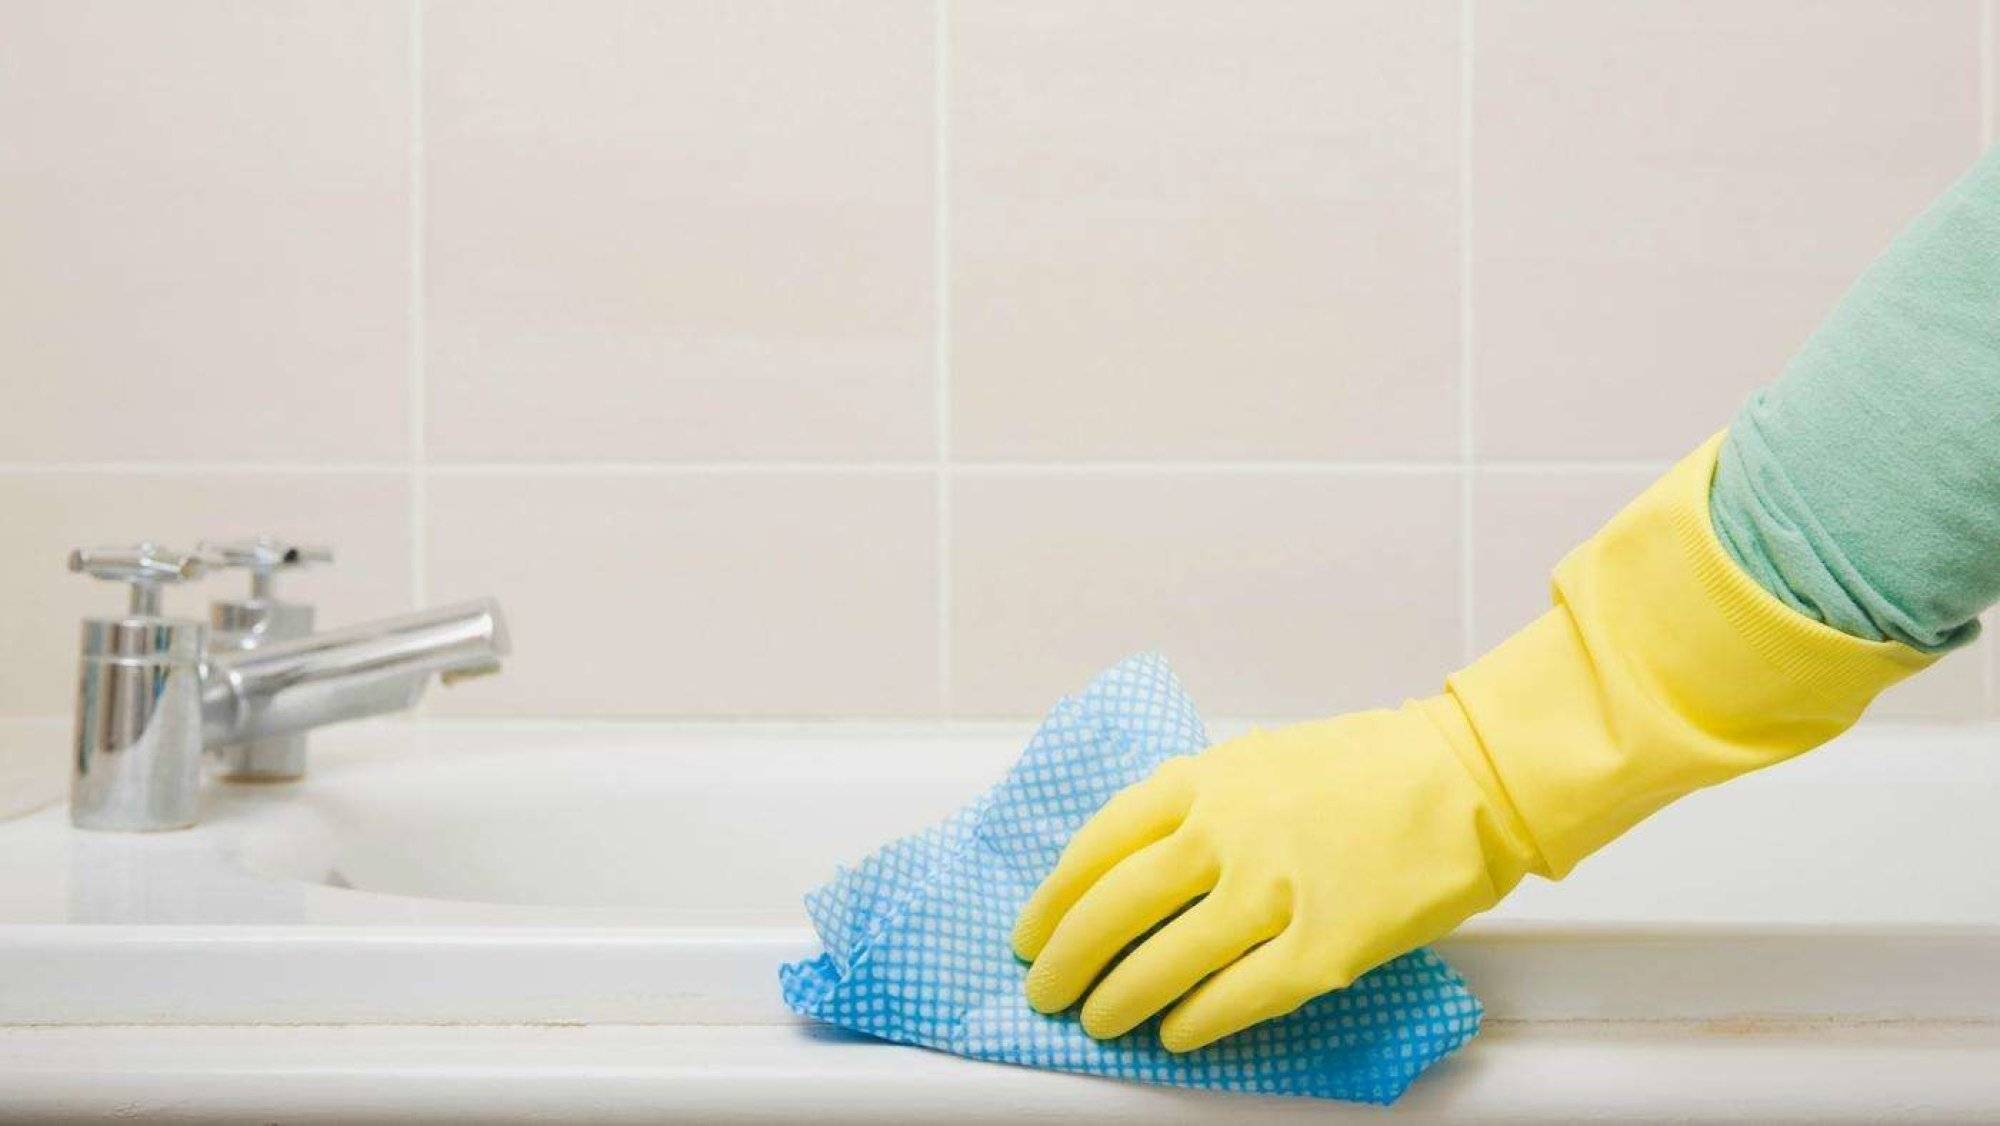
Enamel protects the bathtub from aggressive cleaning agents
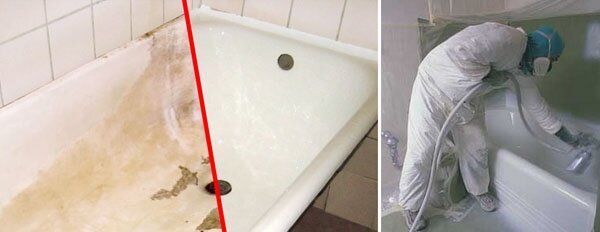
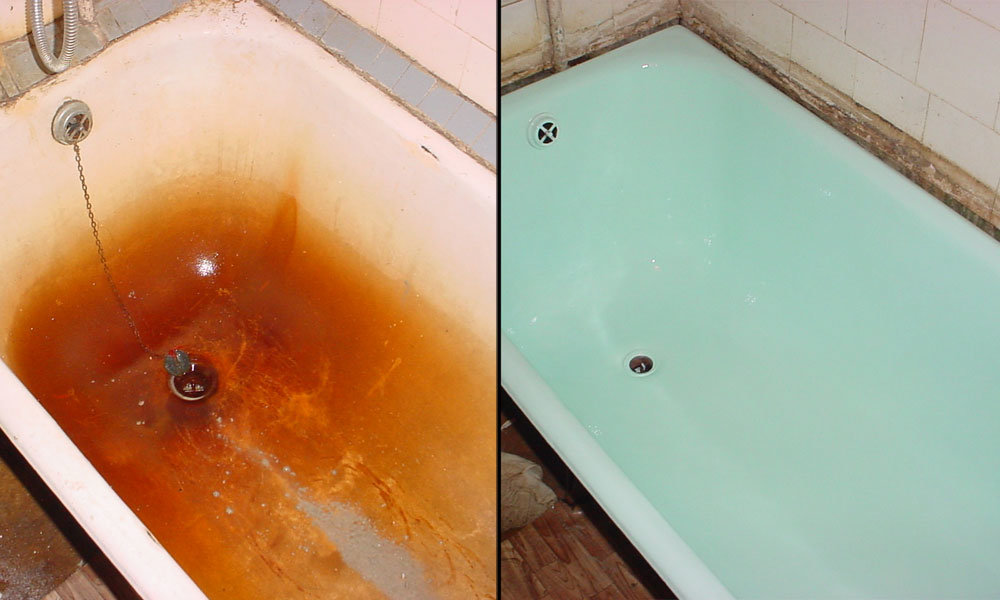
Bathtub before and after restoration
What is required to restore enamel
Restoration is a great chance to change the color of the bath
Preparing the bath for restoration
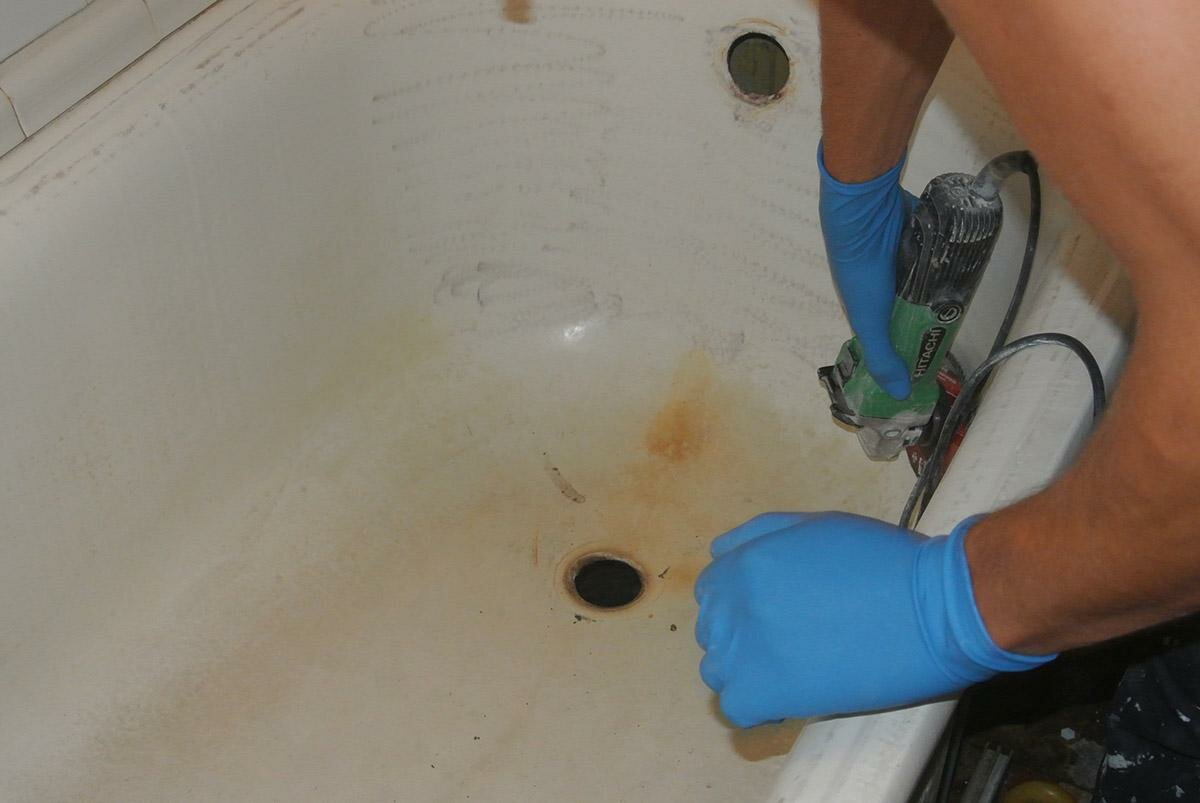
Processing with a grinder
bath wash
Primer application
Preparation of restoration enamel
Enamel application
Do-it-yourself bath restoration
Bathtub enameling
Restoring bathtub enamel
Acrylic bath liner
Bath enamel in a can
Drying the bathtub with a hair dryer
Bath enamel restoration steps
Don't Forget Personal Protective Equipment
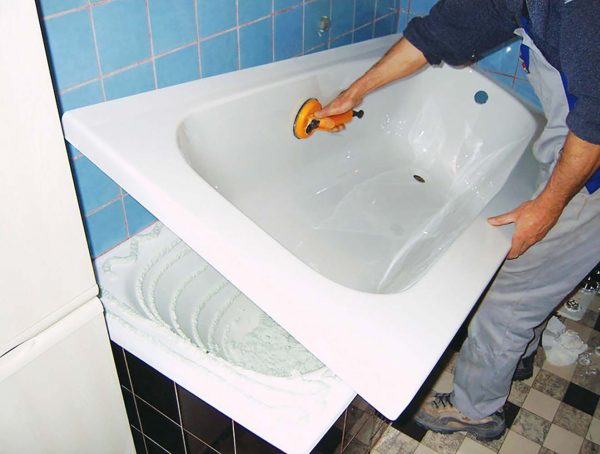
Bath polishing
Correction of small chips, scratches
Most of the known microbes can hide in the smallest cracks, scratches, and chips in the bath cover - it is very problematic to get them out, wash them off, but removing, smoothing out irregularities is easy to do at home.If the chip is not removed in time, its sharp edges can cause injury during washing, cracks tend to gradually expand, branch out under the influence of water, capturing more and more new “territories”. Scratches are easily polished with special enamel restoration products or painted over. Chips are a more difficult case, they must first be puttied to get a smooth plane. Before starting finishing work, the bathtub is cleaned of dirt, the damaged area is polished, puttied with a two-component epoxy composition applied in several layers. After complete drying, the surface is polished again, one or two layers of enamel are sprayed on top from a can.


Bathtub enameling
The most inexpensive way is to cover the bathtub with new enamel. It is suitable for cast iron and steel bathtubs. This is painting the bath with a brush with a special waterproof compound.
Enamel helps to remove roughness, yellowness, rust, small scratches, cracks and chips, but will not cope with larger damage and deformation. Enamel is important to choose specifically for baths, because other types of enamel release toxic substances when in contact with hot water.
The specialist copes with this work in an average of two hours, but then the bath will dry for at least another 24 hours (the exact period depends on the quality of the enamel and the ventilation in the bathroom) - during this period it cannot be used, but it is better to leave the house altogether: while the bath dries, a pungent smell spreads throughout the apartment.
The renewed coating will last for about 5 years, if you do not rub it with abrasive products and do not subject it to shocks to which the enamel is sensitive.
Pros:
- low price;
- a thin layer that does not particularly “eat up” the volume of the bath;
- no need to dismantle the siphon during restoration;
- if the tile comes on the sides of the bath, it also does not need to be dismantled.
Minuses:
- low strength;
- there may be stains from the brush with non-professional performance;
- dries for a long time;
- pungent odor during operation and drying;
- does not remove large damage;
- relatively low coating life.
Method 1: ordinary enameling
Cast iron and steel enameled bathtubs are the most common types of bathtubs in our apartments. They are produced in accordance with GOST 18297-96, which has been in force since 1997. According to this GOST, the guarantee for bathtubs is 2 years. But as practice shows, the enamel on them lasts no more than 10 years of use.
Enamel on baths in the factory is applied quite simply. First, the outer surface is red-hot, then enamel powder is sifted onto the inner surface and held for some time to sinter the powder with the metal. Heat the outer surface again until the powder is melted. The result is a smooth, glossy enamel finish. It is clear that at home this method of restoring a cast-iron bath, as well as a steel one, is not suitable.
Why does enamel usually wear out?
The wear of the enameled surface occurs as a result of two factors:
- The use of cleaning products containing abrasive powders or substances with chlorine inclusions.
- The use of chemical reagents in the cleaning of water supply networks.
As a result of many years of exposure to these factors, the enameled surface of the bath becomes thinner, rougher and begins to rust.
Restoration of the enameled surface
Do-it-yourself enamel restoration is a fairly simple process. It consists of two stages: surface preparation and application of a new layer of enamel.
What will be needed for work?
You will need the following tools and materials:
- electric drill with a nozzle in the form of a grinding wheel;
- abrasive powder;
- sandpaper;
- rust converter (for example, "Tsinkar");
- degreaser (for example, "Nefras");
- lint-free napkin;
- natural bristle brushes or spray;
- respirator and gloves;
- enamel, preferably two-component (enamel plus hardener).
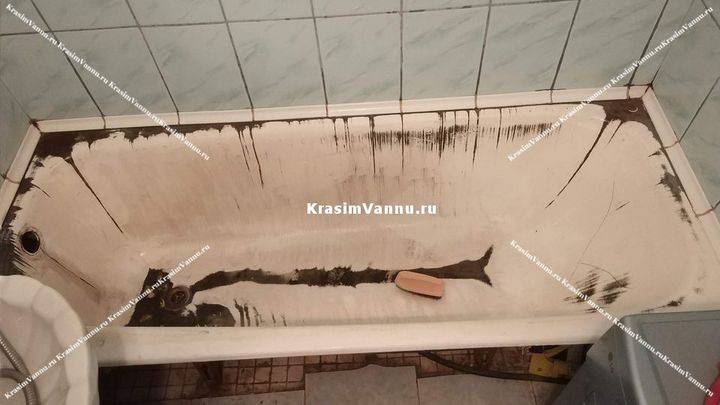
Preliminary step: surface preparation
A very important step. The more thoroughly the surface of the bathtub is cleaned, the better the new enamel layer will be.
- sprinkle the old enamel with abrasive powder and clean it off with sandpaper or a grinding wheel mounted on an electric drill;
- treat areas affected by corrosion with a rust converter, hold for half an hour, then clean with sandpaper;
- wash off the enamel and crumbs with water;
- thoroughly treat the bath with a degreaser using a lint-free cloth;
- fill the bath with hot water and let it warm up for 10 minutes;
- drain the water and wipe dry with a lint-free cloth; make sure that there are no lint or other foreign elements on the surface.
The main stage: applying enamel
- according to the manufacturer's instructions, enamel and hardener are mixed in a certain proportion and mixed thoroughly;
- apply the first layer of enamel with a brush or spray;
- withstand a certain period of time according to the instructions;
- apply a second layer of enamel.
This completes the process of restoring an enamelled bath with your own hands.It is advisable to withstand at least a week before the start of the operation of the bath. This is how long it takes for the enamel to fully polymerize.
The service life of the new enamel will be about 6-8 years.
All home remedies
There are several different methods that allow you to return the bath to a pleasant appearance.
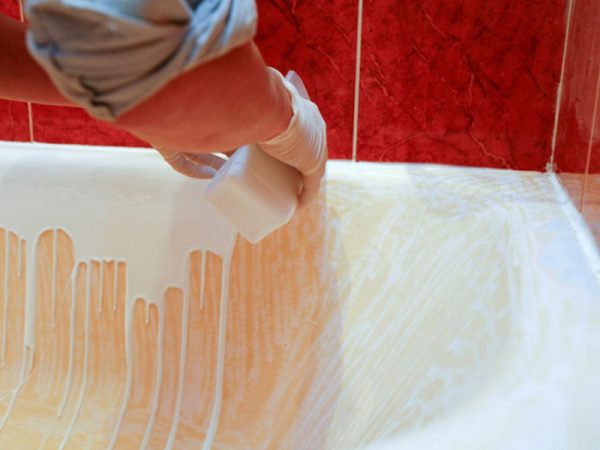
Restoration with bulk acrylic
Restoration using bulk acrylic is becoming increasingly popular, as this material is very affordable and easy to use. Enamel restoration in this way includes several stages. Necessary:
- Prepare the surface.
- Pour the composition into the bath with a thin stream (it is distributed by itself, so no additional manipulations are necessary).
- Wait until the bath is completely dry (this will take about 2 days, while it is not advisable to open the windows, so the composition will dry faster).
Do-it-yourself restoration of bathtubs with liquid acrylic is quite budgetary (although the cost of the material is slightly higher than that of enamel compositions) and at the same time the simplest and most affordable way that does not require much effort. For such a restoration, you do not need to purchase any additional tools, you only need a small container from which you can pour the composition.
 Restoration with bulk acrylic is the easiest and most affordable way
Video: bathtub restoration with liquid acrylic


How to restore a cast iron bath with enamel
Of all the methods for restoring a cast-iron bathtub, enamel painting is most suitable, although the method can also be used for acrylic structures. In order to restore the surface of the product, you must:
- Prepare a bath.
- Prepare the enamel composition in accordance with the instructions, mix it thoroughly to get rid of lumps and achieve a uniform consistency.
- Using a brush, apply the first layer, carefully and carefully painting over all areas.
- Dry the bath thoroughly, and then proceed with applying the next layer (a total of 3 or more will be needed, depending on the initial state of the structure). Each layer dries for about 24 hours at room temperature.
This method of restoration is the most budgetary, but it requires a lot of time and effort.
 For the restoration of the surface, the application of an enamel composition in several layers is required.
Restoration with acrylic inlay
To restore the bathtub with an acrylic liner, it must be chosen correctly. To do this, evaluate parameters such as the shape, dimensions of the structure (they must ideally match the size and shape of the bath), its thickness and color.
Work is carried out in the following sequence:
- Preparation of the liner (it is tried on to the structure, after which the protruding parts are removed with a jigsaw, a hole for the drain is marked and drilled).
- Sealant treatment of the drain area and the edge of the structure.
- Applying a special foam to the entire surface of the bath, its careful distribution.
- Installation of the prepared liner in the bath by pressing it firmly against the surface.
- Replacing the siphon (optional, so that the bath really looks like new).
This method of restoration is expensive and time-consuming, but it is most suitable for acrylic bathtubs with severe damage (chips and deep cracks).
 Installing an acrylic liner is a laborious process


