- Paints - "professionals" for baths
- Types of coloring compositions
- Brands "paints for painting"
- Features of the restoration of cast iron bathtubs
- Bath Restoration: Myths Debunked
- Restoration technology
- Choosing an enamel
- Best Answers
- Which is better, acrylic or enamel
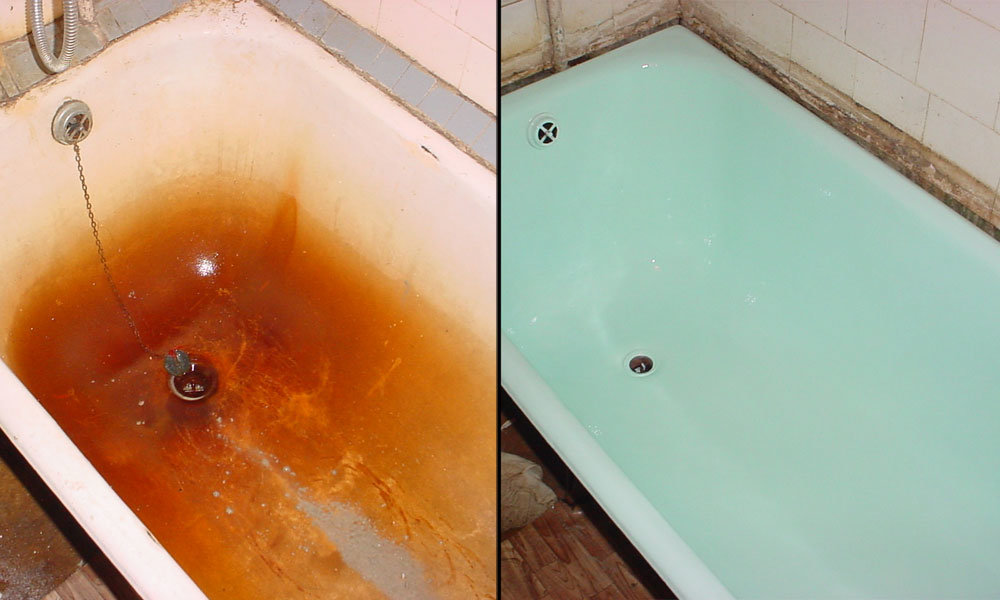
- Why paint a bath
- bath liner
- Bath preparation before staining
- Cleaning the surface of the bath
- Abrasive processing
- Remove dust and degrease
- Acrylic update
- Coating Requirements
- "Bath to bath" or acrylic liner
- Preparing the bath for painting
- Is it worth restoring an old bath?
Paints - "professionals" for baths
Painting a cast-iron bathtub involves the use of special compounds, since the requirements for them are quite stringent. Mixtures must withstand daily contact with water, not be afraid of temperature changes or detergents / cleaners.
Types of coloring compositions
Only two competitors have such “abilities”.
- Epoxy enamel. This is a traditional coating that has been used for several decades. The paint is distinguished by a complex preparation technology and composition, which includes a base, a hardener, and a plasticizer (dibutyl phthalate). The mixture is thick, viscous, and therefore requires certain skills from the master.For this reason, epoxy paint is not as popular when it comes to cast iron "makeover".
- Acrylic bulk. These mixtures have been popular with home craftsmen for a decade. Liquid acrylic is in no way inferior to epoxy enamel, and in some respects even surpasses it. The last advantages include simplicity and speed of application. However, to prepare a high-quality coating, the ingredients (thick base, liquid hardener) must be stirred for quite a long time, and this operation is not entirely simple due to the heterogeneity of the components.
Quality enameling requires experience to help avoid streaks
For bulk acrylic, the most important thing is to obtain a homogeneous substance. The choice is not too rich, but in both cases, the owners will be able to get a “new” bath with not much effort.
Brands "paints for painting"
To avoid problems in the future, it is recommended not to look at the cost, but to choose the compositions of those manufacturers who have already earned laudatory reviews from the masters: both professionals and amateurs. These can rightly be attributed to the top three sympathy leaders.
- Dulux (UK) - Reallife Bathroom & Kitchen.
- Jobi (Germany) - Wasch Fest.
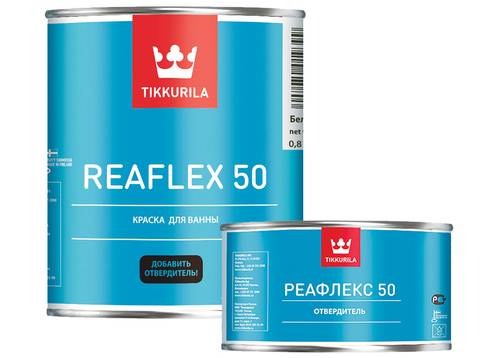
- Tikkurila (Finland) - Reaflex 50.
There are among the popular formulations and brands of domestic manufacturers: these are Ecovanna, Epoksin-51 or 51C (from German ingredients) Renaissance, Svetlana, Kudo (spray).
Features of the restoration of cast iron bathtubs
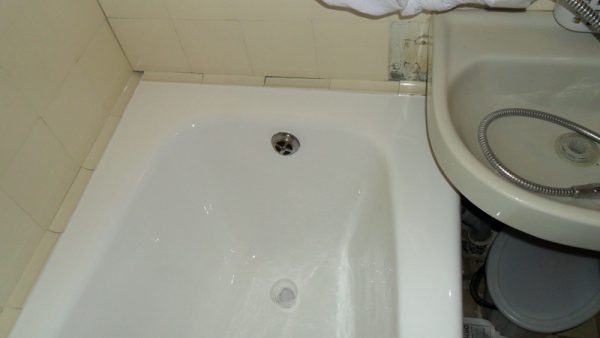
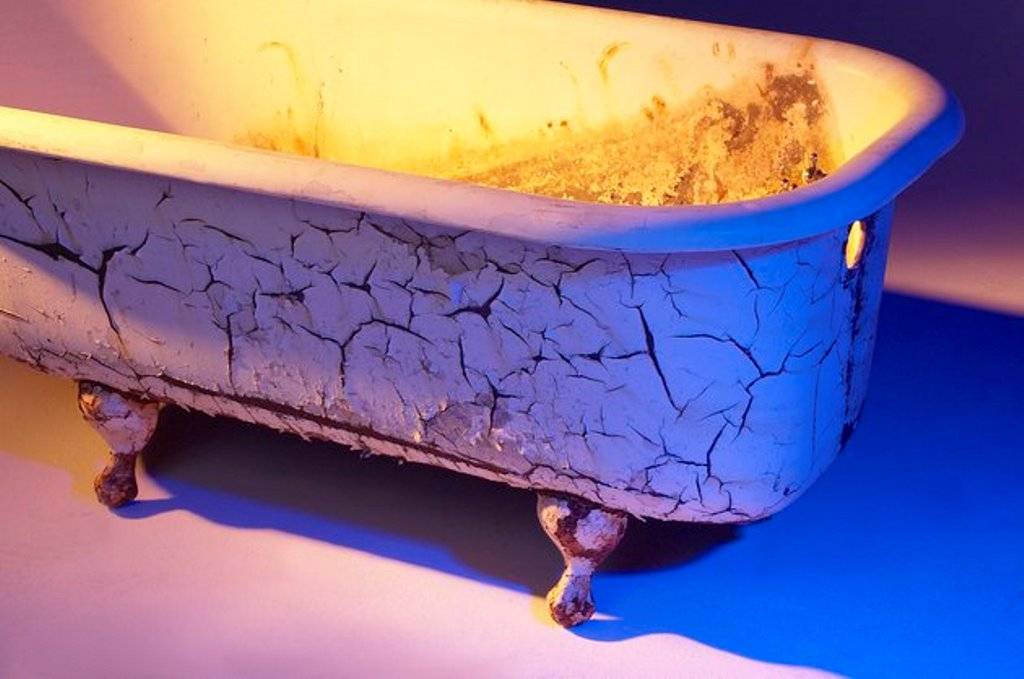
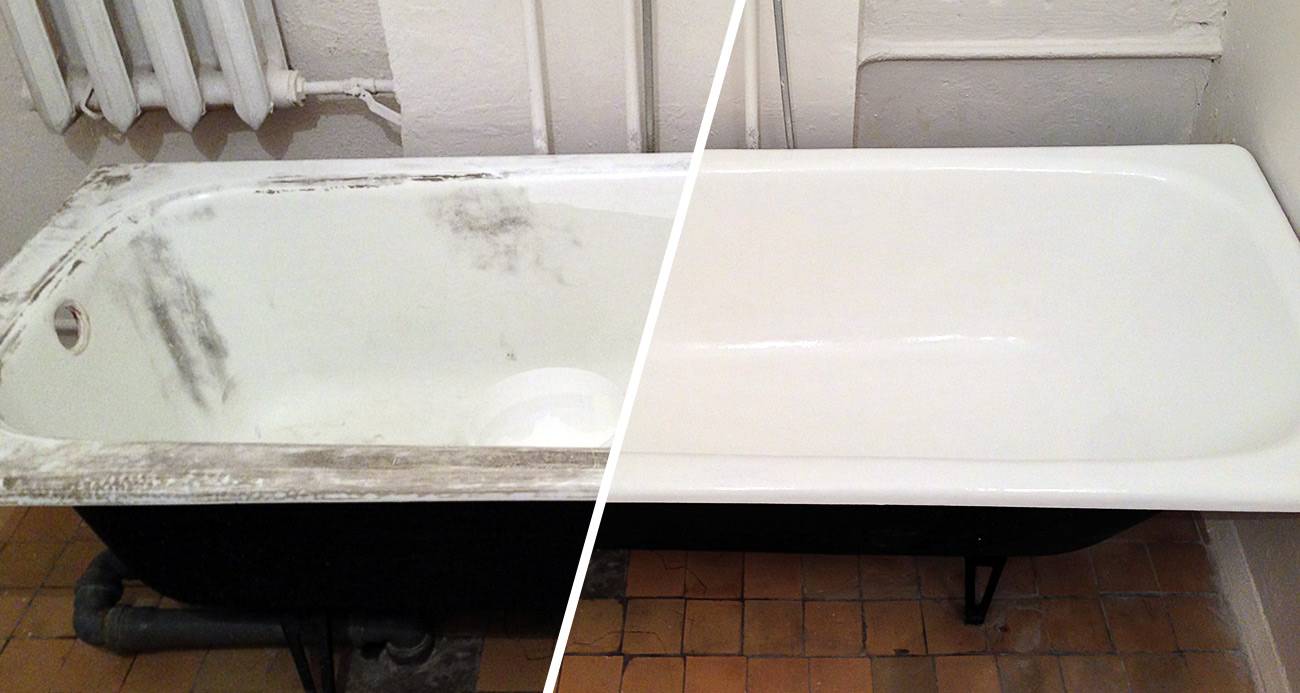
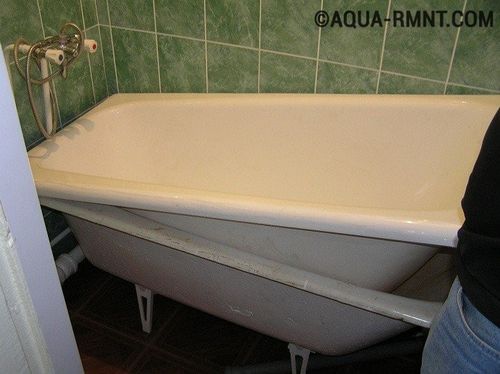
A cast-iron bathtub is a practical and durable plumbing fixture with a long service life, good strength properties and significant weight, which, depending on the size of the model, can reach up to 500-600 kg.The cast iron itself is black, while the enamel gives the white color to the product, on the surface of which minor damage, cracks, and color changes occur during operation.
 Renovated vnna
Cast iron bath restoration has the following features:
- The wall thickness of the cast iron washing container is 0.6-0.8 cm, so models made of this material are considered more maintainable in comparison with thin-walled steel products. Restoration of a cast-iron bathtub is possible even with fairly deep damage.
- The service life of high-quality cast iron plumbing equipment exceeds 50 years, but the enamel coating on the inside of the bowl wears out much earlier. If the enamel is restored, the restored appliance will be almost like new, so do-it-yourself restoration of a cast-iron bathtub is cost-effective.
Bath Restoration: Myths Debunked
In fact, the restoration of bathtubs, as a modern and inexpensive technology, is shrouded in a whole ball of far-fetched myths. But it's worth talking about the main ones:
There is an opinion that the technology is expensive. The total work on restoring a bathtub costs from 3,500 to 7,000 rubles, while a new mid-priced bathtub with delivery, installation, dismantling and removal of the old bathtub will cost about 20,000 rubles. Moreover, if we are talking about the cost of restoration of 7,000 rubles, then this will include additional services in addition to restoration, such as installing a new siphon, chipping tiles around the bathtub edging, and others. All these works also have to be done when replacing the bathtub with a new one. The benefit is obvious!
They say that liquid acrylic after application cracking and peeling off the surface.It's true, there's no point in evading it. But this is possible only in case of non-compliance with the requirements of the technology, the use of non-certified acrylic material and non-compliance with the rules of operation. You don't stir food in a Teflon pan with a fork, do you? There is a similar situation here - in fact, instead of a cast-iron one, you now have an acrylic bathtub and you must follow the new operating rules.
It is also known that there are many counterfeits on the market. Naturally, this is not even a myth. Therefore, specialists here insist on purchasing material only from trusted suppliers, manufacturers with a name and companies that have proven themselves well! In addition, such companies have all the necessary certificates, many of which are posted on websites and can provide them to you personally. Also, reputable companies conclude an agreement and provide a guarantee - usually from 12 months.
Another myth is that acrylic liners crack.
Of course, it will crack if the liner is not made at an enterprise that specializes in this, but in a handicraft way.
In addition, in order for the liner to last for a long time, the most important thing is to install it correctly and pay attention (!) To use materials (glue, foam, sealant) for its installation, which, in terms of their characteristics and service life, are suitable for the parameters of the liner. And for liners, the manufacturer sets the service life, subject to all the rules, 20-25 years! Therefore, when installing the insert, special attention must be paid not only to technology, but also to materials.
For example, Makroflex materials are excellent for these works.
Someone thinks that the material is not environmentally friendly
In fact, the properties of acrylic, as well as certified acrylic inserts, fully comply with the norms of Russian legislation. All hygiene certificates (if it's not fake, of course) will be provided to you by a bona fide seller or a company that will restore your bath. You can even drink water from this material.
Well, the last myth is the comfort of using the bath after restoration. If you are told that it is not comfortable to wash in such a bath, do not believe it until you check it yourself. If you have taken into account all our recommendations, have chosen a certified material for restoration and a company with a good reputation and solid experience, you can be sure that such a bath will delight you every day! Personally, I, the author of this article, use a cast-iron bathtub every day, the restoration of which was carried out using liquid acrylic, and I also had the experience of using a bathtub in which an acrylic liner was installed. My point is that if I hadn't been told this, I would never have known that the baths had been refurbished.
Restoration technology
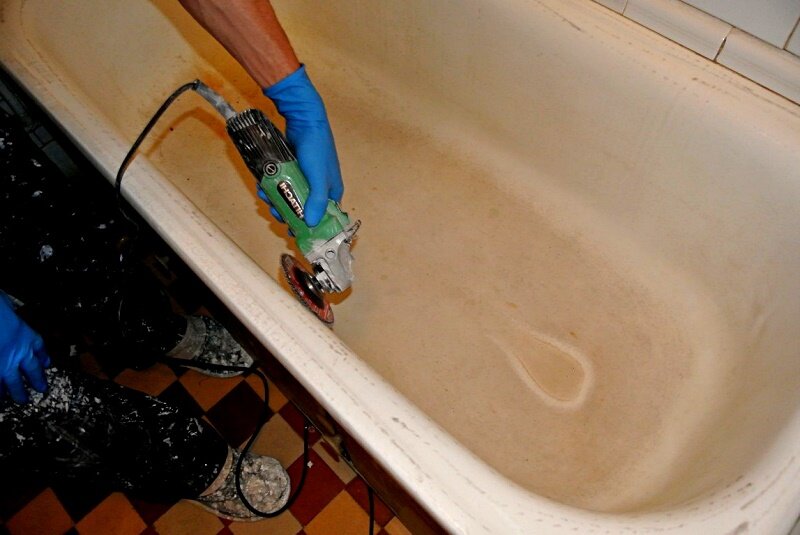
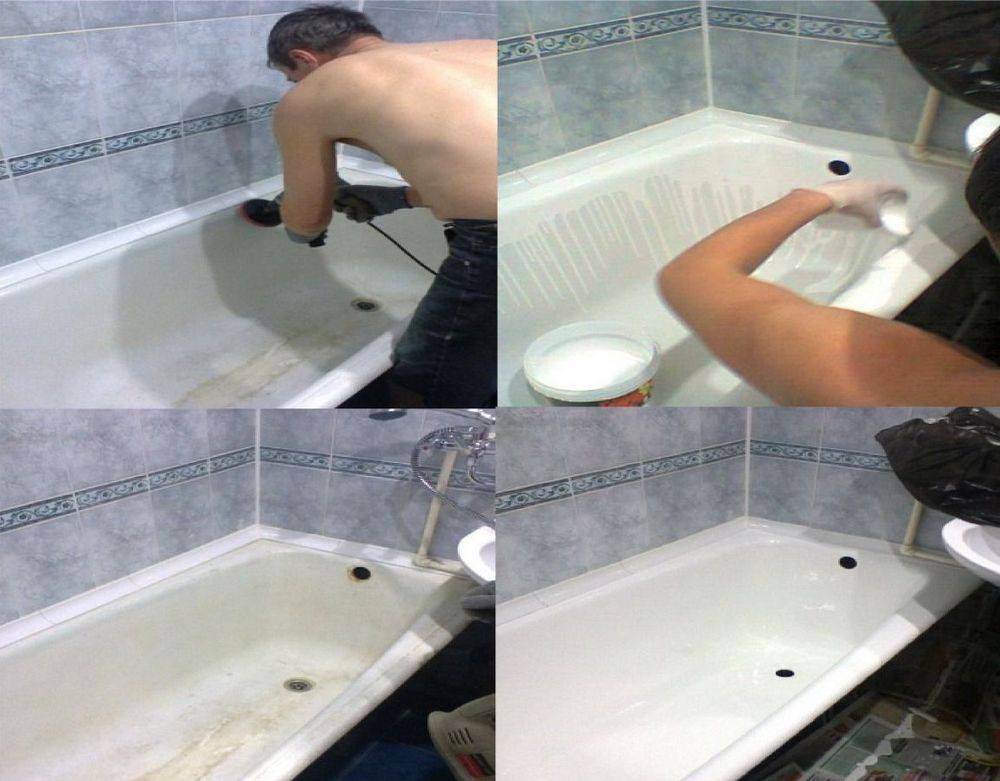
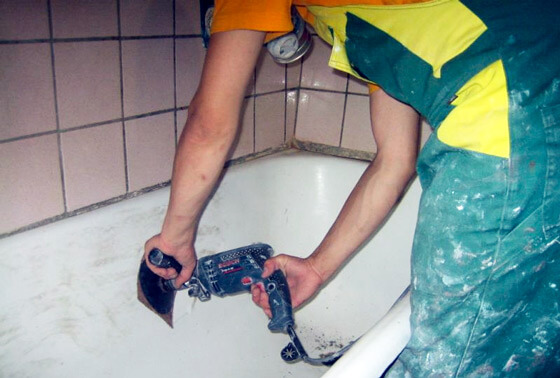
- Prepare the surface for restoration. To do this, pour an abrasive cleaner into the bath, and then treat the bath with a drill with a special nozzle, which is an abrasive disc.
The surface is polished until the old enamel becomes homogeneous and matte, without traces of rust and salt deposits.
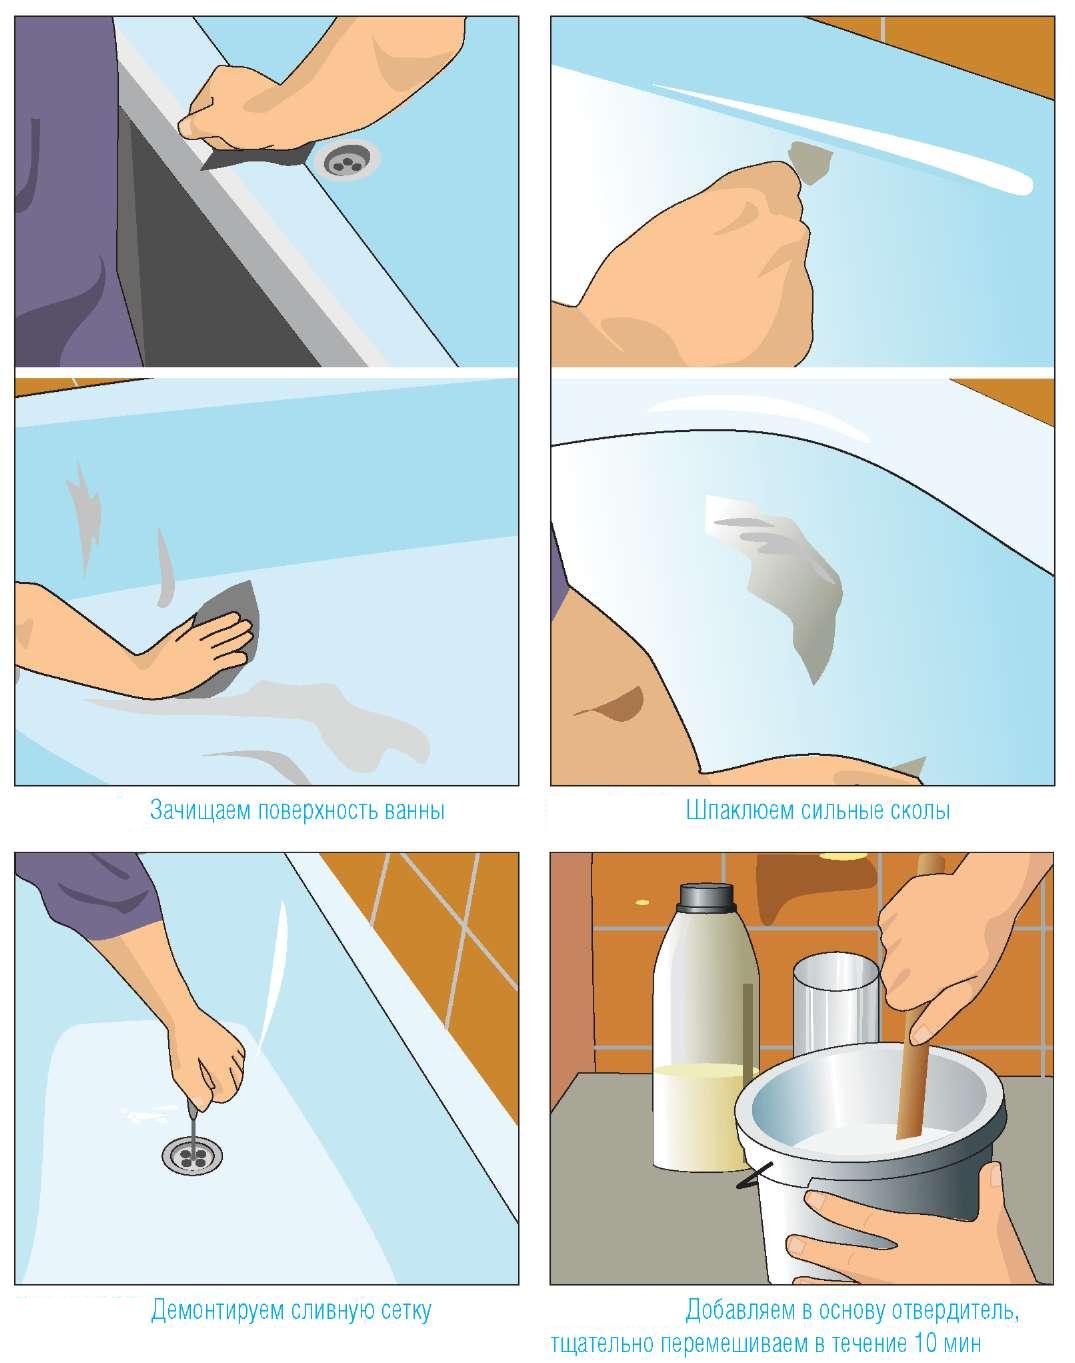
Chips are treated most carefully, removing a layer of old enamel along the edges so that the differences become invisible.
Remove dust and abrasive residues with a jet of hot water, if there are traces of rust, additionally rinse the bath with an oxalic acid-based cleaning agent.After washing, the bath is filled with clean hot water and left to warm up for 20 minutes. The water is drained, and the bath is wiped dry with a non-woven cloth.
Dismantle the drain, clean the drain hole if necessary and wipe it from dust and detergent residues with a damp and then dry cloth.
A container is placed under the drain to collect the flowing enamel. Treat the bath with any solvent using a non-woven napkin. This operation will allow you to get a degreased and ready-to-enamel surface.
Apply a layer of primer recommended by the enamel manufacturer. Some types of restoration enamels, such as Tikkurila Reaflex-50, can be used as a primer; for this, the enamel is diluted with a solvent in the specified proportion.
Wait for the primer to dry, usually it takes no more than an hour. Some compositions, for example, liquid acrylic, do not require surface priming.
The enamel is mixed with a hardener and, if desired, with a tinting paste. The proportions for mixing are usually indicated on the packaging.
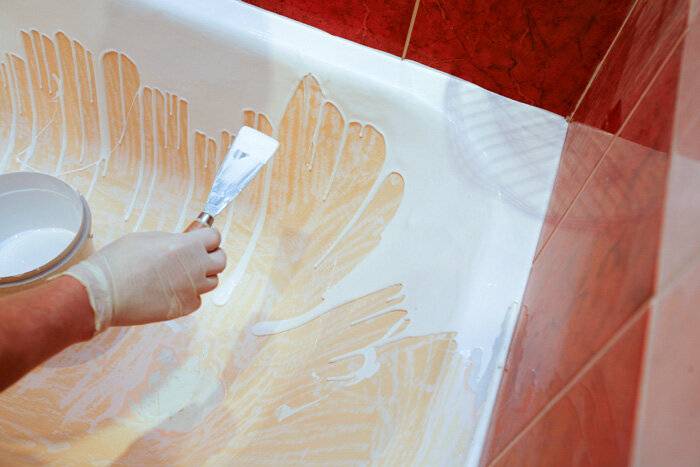
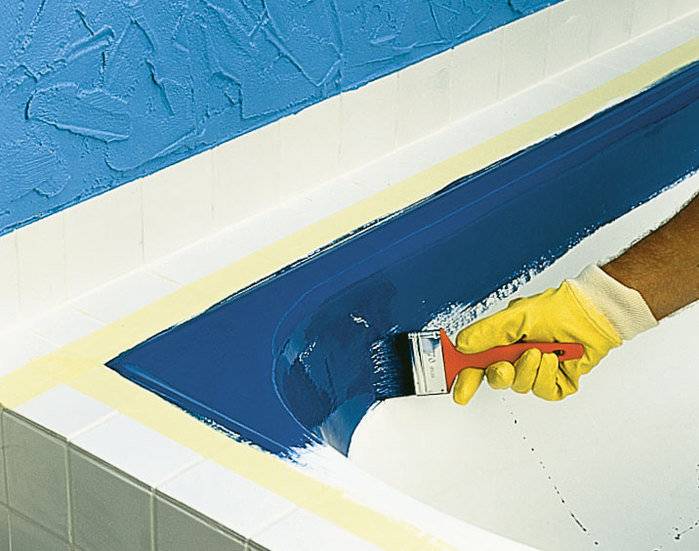
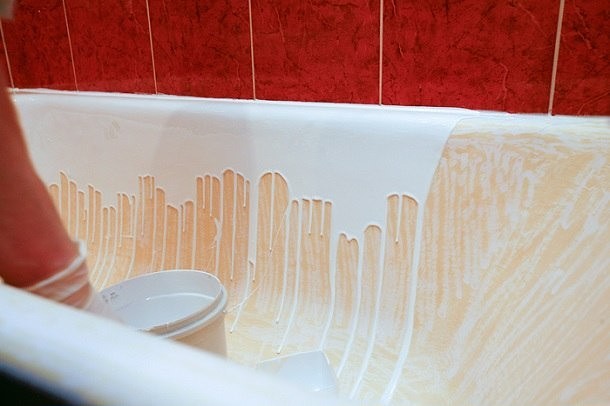
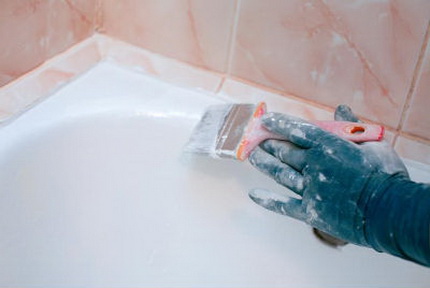
Apply the first layer of enamel with a brush with natural hair or a roller. To obtain a smooth surface, the composition should be applied as quickly as possible, from top to bottom, moving in a circle.
After the first layer has dried, the next layers are applied in the same way.
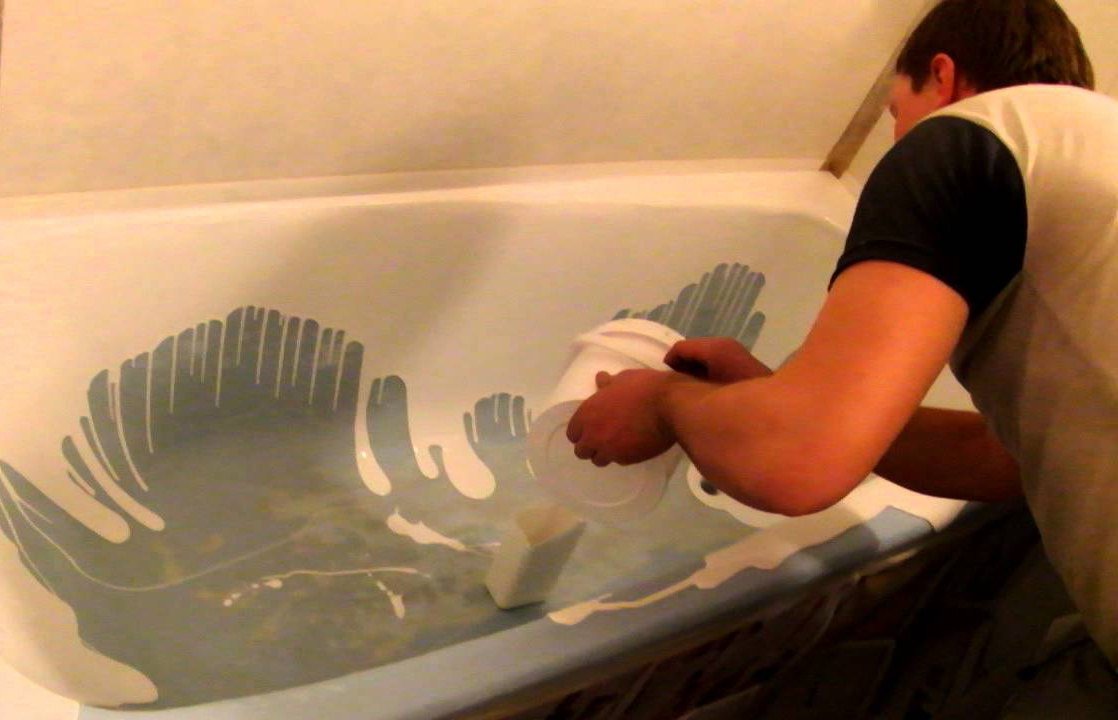
When restoring a bathtub with glass, the composition is applied by pouring after mixing.
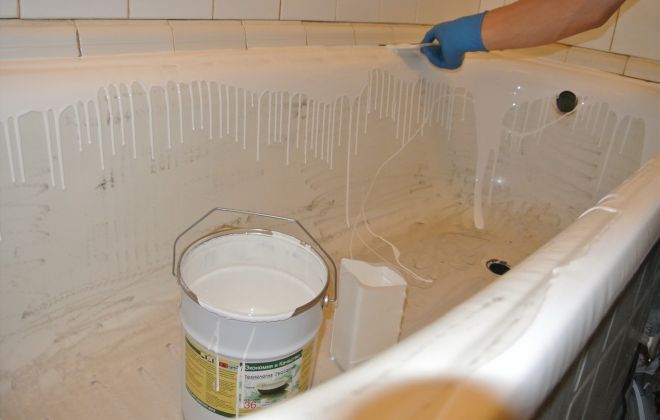
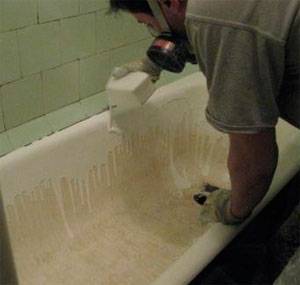
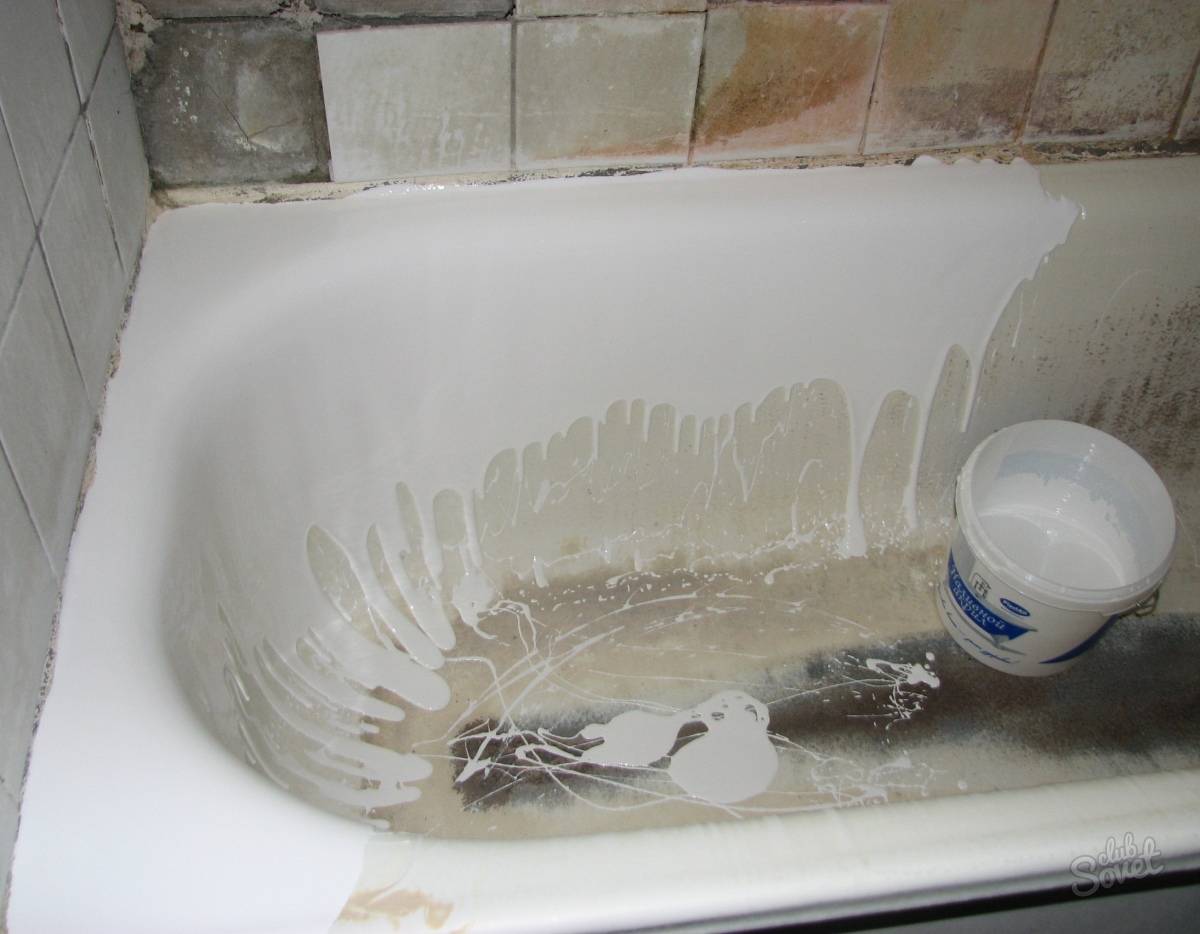
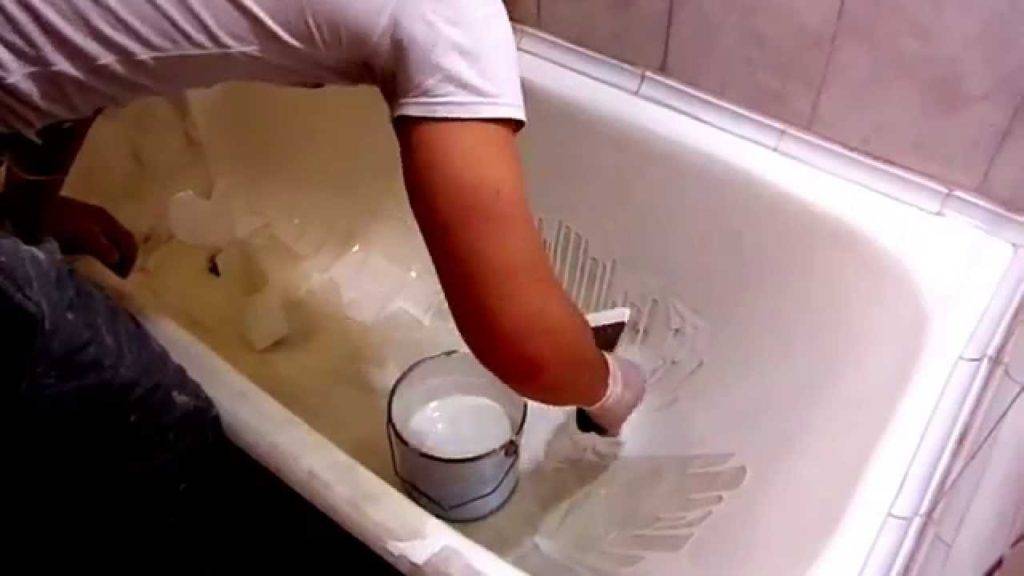
The consistency of liquid acrylic, ready for application, resembles sour cream. It is first poured onto the edges of the bath, slightly leveled with a soft brush, after which they begin to pour onto the walls, moving in a circle from top to bottom.
The composition begins to flow down the walls to the bottom, gradually covering them with a layer of polymer composition.Its thickness on the walls is about 4 mm, at the bottom of the bath - from 6 to 8 mm, after even distribution liquid acrylic on the bottom of the bath.
Drying of the restored bath lasts from 3 to 7 days at normal room temperature, the manufacturer usually indicates this information on the packaging.
It is impossible to reduce the polymerization time of enamels, this can cause damage and peeling. During the specified time, the bath must not be used, and debris, drops of water and any objects must be avoided.
After the enamel has completely dried, drains are installed, after which the bath is ready for use.
Bath restoration work involves the use of abrasive materials and toxic liquids. Use a respirator and gloves!
Choosing an enamel
Heading to the store for bathtub enamel paint, it is necessary to clearly understand how it works.
These compositions are presented in three types: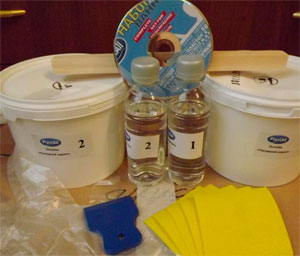
- Aerosols;
- Two-component liquid compositions, including a polymer composition or epoxy resin and a hardener;
- Liquid acrylic, or stakryl.
Aerosols are applied by spraying and are very easy to use, but due to the large amount of solvent less resistant, the service life of such enamel will be no more than two years.
Two-component liquid formulations require pre-mixing and layer-by-layer application, their full polymerization period is about a week, but they form a more durable and abrasion-resistant enamel layer that will last at least 10 years with care.
Liquid acrylic is simply poured onto the prepared bath surface, and due to its high fluidity, it forms a smooth coating.Drying lasts several days, after which the bath will last more than 20 years.


Enamel aerosol "WHITEST New Ton", manufacturer - Ukraine, for quick restoration of bathtub enamel is available in only one color - white, and is intended for restoration of enamel that has minor damage or smudges.
When buying aerosol enamel, it should be borne in mind that chips, rust and serious damage cannot be hidden with its help.
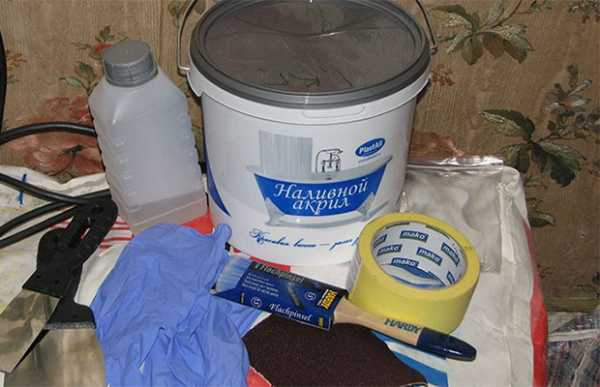
The kit for the restoration of the bathtub of domestic production "Svetlana", in addition to enamel and hardener, also contains a means for preparing the surface of the bathtub and removing rust, as well as tinting pastes in the form of a set of various shades.
The Fantasy set comes with the same configuration, except that the color is added to the enamel beforehand.
The high-quality and popular Finnish-made Tikkurila Reaflex-50 enamel is popular not only as a bathtub enamel restorer, but also as pool paint. Its drying time is 7 days, while the coating is glossy and durable.
 Liquid acrylic on the Russian market is represented by several companies.
Eco-Acryl from Eco-bath has a less toxic odor, is easy to apply, does not form sags and smudges, the surface is almost flawless.
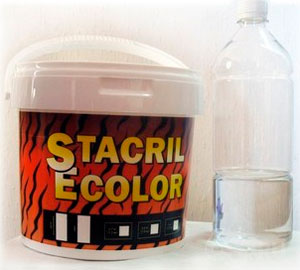
Starcreel is a modern and most popular composition for bulk bath restoration. This tool contains epoxy resins, its shade is warmer, closer to creamy.
All compositions can be tinted, getting any desired color.
Best Answers
Irima:
buy a bathtub. or put a new one, minus all costs from the payment for the apartment.
Evgenia Voldkova:
the main thing is that the hostess is pretty and doesn’t mind the shower together with the swami, but lying with her is not the main thing! ;-))
Bolshevik cats:
Well, degrease and paint with alkyd enamel.
Sergey Vasiliev:
They painted the shower tray with white enamel for 3 times, several years have passed, nothing has happened, it has not even turned yellow from the water ...
647 acc:
The game is not worth the candle, don’t even think about it, especially in a rented apartment !! ! We hired bathtub enamellers, the paint literally peeled off from it in a week, they called them to redo it again, history repeated itself. So we bought a new bathroom...
ENLIGHTENED:
To prevent the enamel from peeling off, you must first clean it well (sand the bathtub), then apply a layer of primer, sand it again and then apply the enamel. Moreover, you also need to know which enamel to cover. In short, hemorrhoids, but if you do everything right, then the coating will be for a long time


Which is better, acrylic or enamel
Acrylic and enamel are the main compositions for the restoration of the bath. Therefore, many are lost and do not know what is better to choose. It is difficult to clearly understand which composition is preferable. It is necessary to rely on your own painting skills, the condition of the product, and so on. It should be noted the advantages and disadvantages of each type of paint, so that it is clearer when and what is better to use.
The cost of liquid epoxy enamels, in comparison with the same acrylic paints, is low.
Advantages of enamel:
- Reliability;
- Long service life;
- Economic consumption of funds;
- Fast application method;
- Resistant to chemical detergents.
Cons of enamel:
- Pungent odor;
- Long drying process. Takes an average of a week;
- Poor thermal conductivity.The collected water will quickly cool down.
Enamels for domestic use are thicker and applied in two layers, they are suitable for self-application at home.
The advantages of acrylic include:
- Simple application. No roller required;
- Retains heat well. Therefore, the water stays hot for a long time;
- Long service life;
- a perfectly smooth surface is created;
- Wide choice of shades;
- Less prone to delamination.
Among the disadvantages of the composition:
- The high cost of funds;
- The surface absorbs hair dye;
- Over time, the color may fade.
It is possible to update the bath on your own with a relatively small financial investment.
Choosing one of the compositions is based on personal preferences and features of the bath, as well as the effect that you want to get. There are options that dry quickly, and there are products that create a unique design of the bath.
It is recommended for beginners who decide to paint the bath for the first time, to make their choice in favor of acrylic. Enamel requires experience.
Why paint a bath
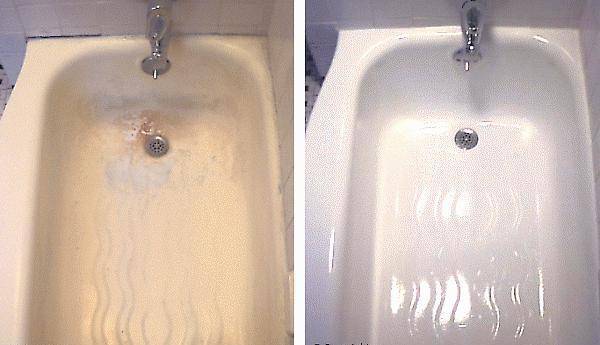
With prolonged use, yellow marks and rust begin to appear on the surface. You can find cracks and chips in the enamel. Even the best cleaning products cannot cope with such defects.
After restoration, the outer surface will not only be restored, but in many respects will exceed the characteristics of enamel.
Therefore, the owner has several options for how to deal with the problem:
- Purchase of a new model. But this may turn out to be unprofitable, expensive and it will take an additional waste of time to deliver the product and carry out its installation;
- Installation of the liner according to the "bath to bath" method.The technology consists in using a special acrylic product, which is placed inside the old bathtub. So it turns out that the liner with a flat surface hides defects. Costly method, the cost can be compared with the acquisition of a new model;
- Product painting. It is required to choose the appropriate composition and carry out the processing, following the rules. The most budgetary method to solve this problem.
 The disadvantages of this method include the toxicity of the compounds: it is recommended to work in a respirator.
Coloring also allows you to experiment with design, changing and updating the color of the product. This method can completely cope with defects, such as cracks, chips, traces of stubborn dirt, rust. Naturally, if the product is so heavily rusted that holes have formed on the surface, then staining will not help.
 During its use, over time, streaks and various kinds of defects begin to appear on its surface, associated with the natural aging of its coating.
bath liner
How can you paint a bath? This question may not be asked, because this restoration method is called “bath to bath”. In an old cast-iron bathtub, an insert is placed on the glue, which completely repeats the shape of the bathtub.
This method has the following advantages:
- The new coating consists of acrylic, which is able to withstand impacts, and is resistant to chemical attack by detergents;
- The surface does not change color over time;
- The bath is like new - smooth and radiant.
However, there are a couple of nuances when installing the liner in the bathroom. If a bathroom made of thin cast iron, then in the future the deflection of the structure cannot be avoided, as a result of which the liner is deformed. Also, before laying the acrylic surface, the siphon is dismantled.From the foregoing, we can conclude what and how it is possible to paint a cast iron bath inside and outside.
Bath preparation before staining
In a nutshell, do-it-yourself restoration of bath enamel, namely preparation for staining, includes degreasing, as well as creating a rough surface. Before cleaning the surface of the bath, it is advisable to remove all appliances from the bathroom and remove nickel-plated parts such as faucets and shower hose. This is due to the use of caustic volatile materials.


Cleaning the surface of the bath
In order to remove surface contaminants from the bath, it is best to use oxalic acid. Before the procedure, put on an apron, rubber gloves and a respirator. Knowing how to restore the enamel in the bathroom with your own hands, you should not forget about basic safety precautions! Pour acid on the bottom and rub it with a new sponge soaked in water over the entire surface of the bath. Let the acid bath stand for about 15 minutes. After that, we fill the water to the brim and wait another 20 minutes. Drain and begin abrasive treatment.
Abrasive processing
Before abrasive treatment, make sure that there is no trace of rust left on the surface. The remains of rust will become a hotbed for the appearance of cracks in the enamel in the future.
After that, we grind the inner surface with an electric drill with Durex or a cord brush until a matte sheen appears. The result can be checked using a fingernail. Run them across the surface. It should stretch, not slide.
Remove dust and degrease
Subsequent operations provide for the absence of any skin contact with the inner surface of the bath. Removal and fixing of plugs for plums is carried out in rubber gloves.Attach a fishing line or chain to the cork in advance, as you will have to pull it out while draining the water.
Before you restore the coating of the bathroom and apply the enamel, the preparatory process must be completed. Vacuum the entire interior surface. Then, take a clean rag and moisten with solvent. Thoroughly wipe the drain holes to remove any remaining dirt, after removing the plug and plug. Don't forget to wear an apron and rubber gloves. After that, pour 1 liter of Adrilan or Sanoks into the bath. Next, with a new clean sponge, rub the cleaning agent over the entire surface.
Let the bath stand for about 1.5 hours. Next, plug the drain holes and draw water to the brim. We are waiting for another 1.5 and touch the outer surface. If the bath has warmed up, then you can proceed to the next step. If not, then pour another half-liter of detergent and wait an hour.
As soon as the bath has cooled, then drain the water and dial again to the brim. Repeat this procedure at least three more times. After that, you need to take a hair dryer and dry the surface. It is impossible to delay the process at this stage, as the dust settles quickly and can ruin the final result. Check the bath for fat-freeness. Dampen a clean rag with the solvent and wipe over the surface of the tub. If it remains clean, then you can proceed to the next step - painting.
Acrylic update
Of course, not everyone wants to paint the bathtub with enamel. Therefore, you can resort to the method of restoration using bulk acrylic. There is nothing complicated in this procedure either, and it is very easy to deal with it.
First you need to carry out the preparatory work described above, then pour the acrylic on the sides of the tank: the liquid will begin to flow down the surface, filling all the old flaws. This method has significant drawbacks. For example, acrylic has poor adhesion to old enamel, so it needs to be cleaned thoroughly. In addition, if you scratch the acrylic surface hard, it will begin to break down, over time, the water will simply wash away the new layer, tearing off the dried acrylic in whole pieces. But you can minimize these risks by covering the product with two layers. The thicker the applied acrylic layer, the more difficult it is to damage it.
In general, restoring an old bath is quite simple. This does not require a lot of materials and tools. It is necessary to approach responsibly the choice of the coloring composition and surface preparation, then the result will please with an unchanged appearance for a long service life.
Coating Requirements
There are many types of paint and varnish coatings (LKM) on the market and there is something you can paint a bathtub with. There are restrictions that prohibit painting the bath:
- The composition of the paintwork materials should not contain toxic substances that can interact with water, detergents and oxygen;
- The texture of the paint should be dense and firm, with a glossy effect. This paint fits perfectly on the surface of the old cast iron.
Paintwork - that's what you can paint the bath. But you need to test in advance for color. To do this, it is worth applying one coat of paint before painting the cast-iron bowl, on a clear glass and allow to dry. You can evaluate the quality of the tone like this: look from the back of the glass.
"Bath to bath" or acrylic liner
Acrylic liners
If you do not want to carry out hygiene procedures for several days, using a basin or visiting a bath, then the method of inserting an acrylic liner will suit you perfectly. The process of self-restoration in this way takes no more than three hours, and you can use the bathroom the very next day.
In addition, the liner made of durable sanitary acrylic significantly reduces the thermal conductivity of the bath, as a result, the water cools very slowly.
For the best result, it is important not only to choose the right size liner, but also to correctly distribute the adhesive composition (foam and sealant from Henkel). bath measurements bath measurements bath measurements
bath measurements bath measurements bath measurements
Step 1. Armed with a screwdriver and a grinder, we dismantle the strapping elements.


Dismantling the strapping
Step 2. Preparing the bath to install the liner. We clean the entire surface with sandpaper, a grinder, remove debris with a vacuum cleaner and degrease the surface. Wipe any drops of water dry. This measure is necessary to improve the adhesion of the adhesive foam to the plumbing.
Step 3. The liners are transported with a technological edge, which we carefully cut with a grinder before installation.
Step 4. After the edge is cut, insert the liner into the bath and mark the technological holes. To do this, draw circles with a marker, sticking your hand under the bathtub and circling the drain and overflow holes.
Acrylic insert in the bath
Step 5. According to the marking, we drill technological holes.
Step 6. Apply two-component foam and sealant. We insert a bottle of sealant into the gun and distribute it around the drain and overflow holes.Next, we take the foam, we introduce a special composition into the balloon with a syringe, which will not allow it to swell excessively. From bottom to top, we apply foam in stripes to the bottom, walls, sides of the vessel being restored.
Foam application
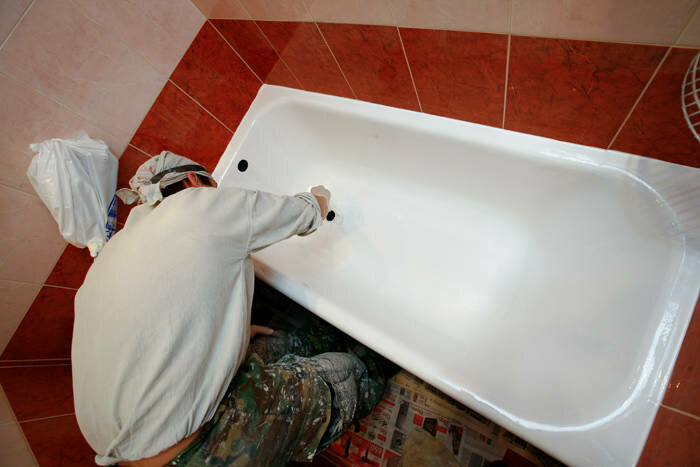
Step 7 Paste acrylic bath liner, gently press it with your hands, aligning. Remove excess sealant and foam.
Installing the liner
Step 8. We make the installation of the siphon (strapping).
Step 9 Filling the bathtub with waterso that the foam does not force out the light liner when it hardens. The next day, you can drain the water and use the updated bathroom.
Fill the bath with water and leave for a day
In your free time, you can install under the restored bathtub decorative screen, as well as protective bumpers on the edges in contact with the walls.
Before starting hygiene procedures, do not forget to remove the protective film from the insert.
Preparing the bath for painting
After the question of what paint to paint the bath has been sorted out and the final conclusion has been made, it is necessary to begin work on preparing the surface of the cast iron for applying the coloring composition:
- First of all, the drain and pipes are removed from the cast-iron bath;
- All fat and lime deposits are removed from the inner surface with the help of special detergents, which include alkali (oxalic acid or baking soda). The cast iron bath is polished from the outside;
- Peeling paint, enamel is removed with a grinding wheel or an electric drill with abrasive nozzles to smooth the surface;
- Cracks and log cabins are polished separately with sandpaper;
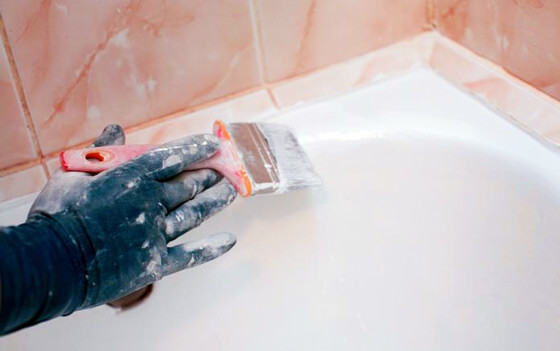
- The primer is distributed throughout the bath, a thick layer is applied to the chips and to the edges of the bath sides;
- We prepare the mixture - we breed.You need to know that the diluted composition should not stand for more than half an hour - this is the time for painting the bath, as it begins to harden.
- Next, a coloring composition is applied to the dried surface and evenly distributed over the surface of the cast-iron bath with your hands;
- The second layer of cast iron or metal bathroom paint (quick-drying option) is applied only after the first layer has dried;
- After application, allow to dry for at least a day with doors and windows closed.
The grinding nozzle is selected in accordance with the material being processed - for metal, you can also use sandpaper or a steel brush.
You can check the cleaned surface for paint and enamel residues, for the quality of degreasing, you can use a jet of water. If smudges and drops remain, the surface is poorly processed, and if it is smooth, then the work is done properly.
How and how unusual to paint a cast-iron bathtub outside? You can use bright paint, and after it dries, apply a drawing.
The pattern can be found on the Internet and printed on a printer. Usually the outer side of the bath is covered with plastic frames or ceramic tiles. You can use a cast-iron bath after painting no earlier than seven days after applying the pigment.

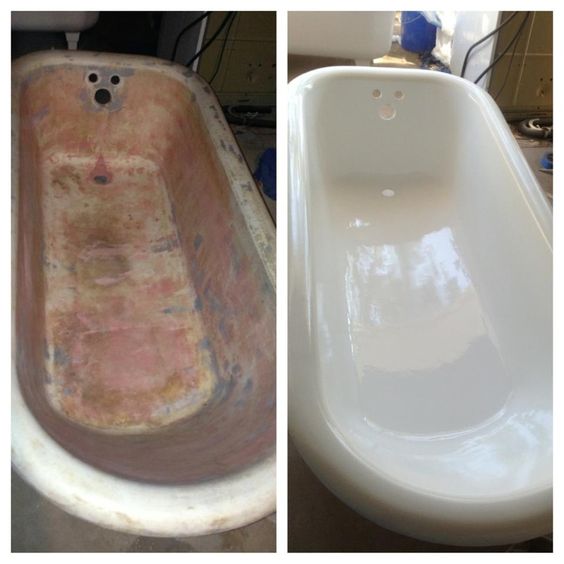


Is it worth restoring an old bath?
We usually send our used product to the landfill without regret. However, a cast-iron bath, which has lost its attractive appearance, may well be used further. But replacing it may seem irrational.
The heavy weight of the equipment makes it very difficult to dismantle and remove it from the apartment, especially if it is located above the first floor. In addition, if tiles have been laid around the bath or screen made of ceramics, all this will have to be disassembled.
The owner understands that a simple removal of the device will not do, repairs will be required. Big or small - it all depends on the extent of the upcoming destruction. In addition, there will be costs for the purchase of new equipment, its transportation and installation.
Thus, to avoid serious financial losses will not work. It must be understood that all this is very troublesome and will require loss of time.
Perhaps you should save your nerves and money by taking on the restoration of an old bath. There are three fundamentally different methods for restoring plumbing fixtures: installing an acrylic liner, cold enamelling, and pouring or “filling tub”. Each of them has advantages and disadvantages. Let's take a closer look at all restoration methods.
Modern technologies make it possible to restore an old cast-iron bathtub without time-consuming dismantling


