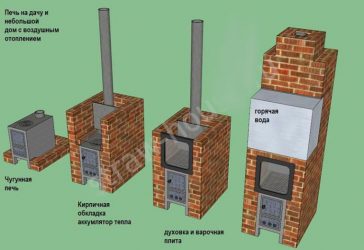
- Types of protective screens for furnaces
- Metal
- Brick around the iron stove
- For cast iron stove
- Stages of laying a brick potbelly stove
- Here you will learn:
- How to properly fold a potbelly stove?
- Scheme and drawing
- Drying
- Making a firebox door
- metal sheathing
- Cover sequence
- How to overlay a potbelly stove with a brick with your own hands? Instruction
- Step 1. Solution preparation
- Step 2. Preliminary preparation of the furnace for work
- Effective brick potbelly stove in the workshop or garage
- Materials and tools
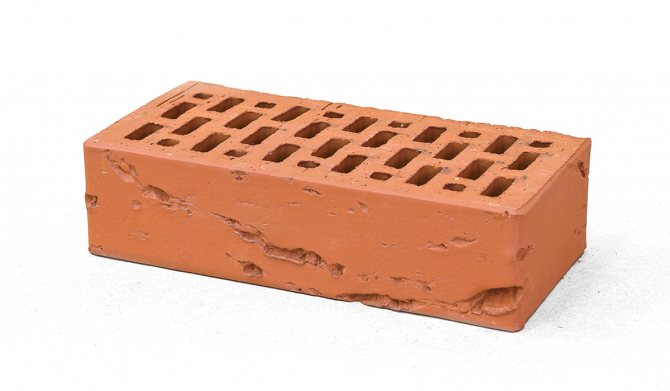
- Brick
- Solution
- Tools
- Solution preparation
- Finishing a potbelly stove stove with bricks: tips and tricks - Working with Brick
- How to overlay a potbelly stove with bricks in the country
- Choice of material and tool
- Required Tools
- Installation and connection
- The process of lining an iron furnace with bricks
- Conclusion
Types of protective screens for furnaces
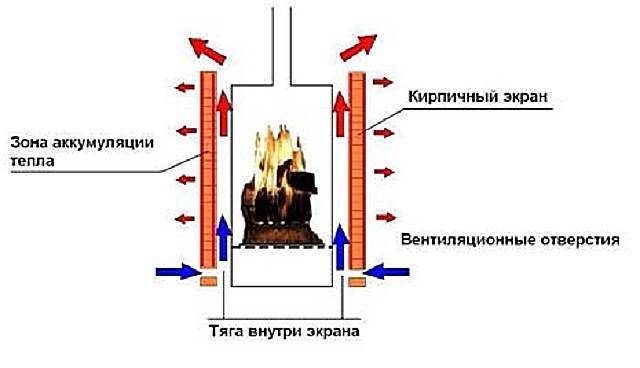
For air movement and better heating of the room, the protection is located a few centimeters from the walls. Gaps are made in the lower part of the structure: gaps are left in the brickwork for this, metal sheets are installed on legs.
Reference. When using brickwork, the room warms up more slowly, but the comfortable temperature lasts longer.
Such screens are placed on the sides facing the room. And to protect the walls, especially wooden ones, they are sheathed.
Important! Side and front screens are used only for metal stoves. Protection of nearby walls is also needed for brick structures
The size of the screens depends on the dimensions and power of the furnace. The material chosen also matters. At the same time, they make the necessary gap between the screen and the stove, otherwise it will overheat.
Metal
Metal protection is installed at a distance of at least 1-5 cm from the stove itself. The distance to the wooden wall should be no less than 38 cm.
If the screen is attached directly to the wall, it must be insulated from the outgoing heat. Then the following scheme is applied:
- At a distance of about 3 cm from the wall, a layer of thermal insulation is laid. In order to have a gap, the material is not attached directly to the wall, but through slats or metal pipes.
- A metal protection is installed on top of it.
- The screen is made in such a size that it is higher and wider than the stove by a meter.
Advice. The air gap creates the possibility of additional cooling.
There should also be a small distance between the floor and the screen. Protection is broadcast on the wall 3-5 cm from the floor. When mounted on the floor, the screen is installed on special legs. Another option is to make holes at the bottom of the sheet.
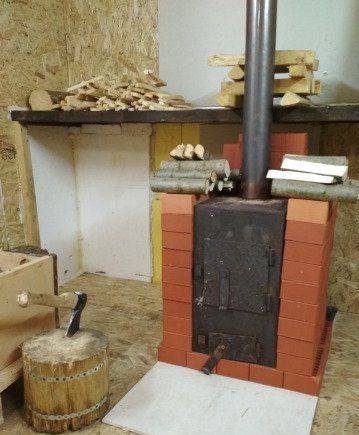
Brick around the iron stove
As a rule, laying is carried out in half a brick. This gives sufficient protection, at the same time does not interfere with warming up. Sometimes other options are used. When laying in a quarter of a brick, the protective properties are reduced, and the heat becomes less soft, but the room warms up faster. But the distance to the walls must be greater than the minimum.
If the masonry is thicker, in a whole brick, the room will warm up longer. But this shield becomes a heat accumulator, that is, it gives off heat after the firewood burns out.
Dimensions are calculated as follows:
- The height of the screen should be 20 cm more than the stove. Masonry along the wall is sometimes brought up to the very ceiling.
- The distance from the furnace to the edge of the shield should be 5-15 cm.
For cast iron stove
Cast iron in terms of heat-conducting properties occupies an intermediate place. It heats up worse than steel, but better than brick, and cools down, respectively, longer than the first and faster than the second. Therefore, the protective screen is installed according to special rules. For him, the brick is placed on the side, that is, the wall goes into a quarter of the brick. In this case, less material will be required, otherwise the technology is preserved.
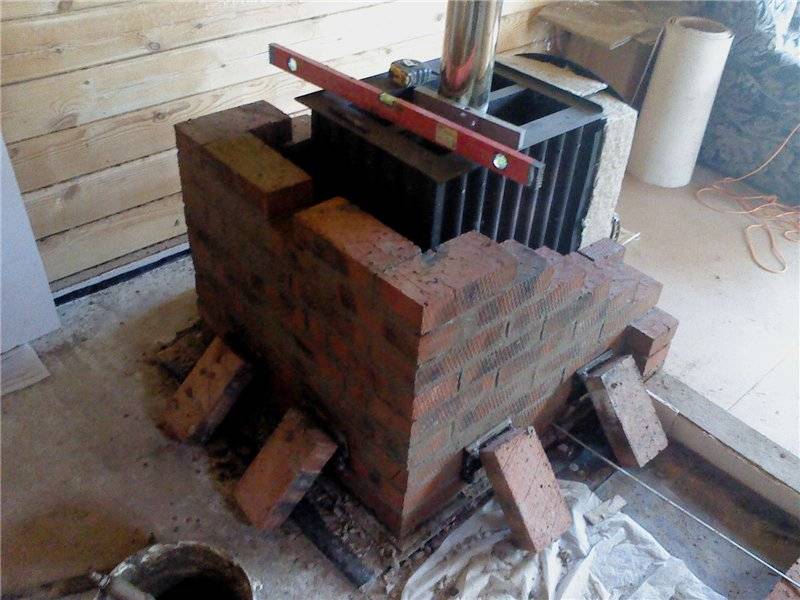
Stages of laying a brick potbelly stove
Due to the fact that a potbelly stove made of bricks is much heavier than a metal stove, it is necessary to lay it out on a special foundation.
Therefore, a do-it-yourself brick potbelly stove for a person living in an apartment building is a pipe dream, unless he is a tenant of the first floor. A private house, garage and cottage do not impose any restrictions on the construction of a potbelly stove.
Usually the oven is placed near one of the walls. This saves space in the room, but increases the likelihood of a wall fire. Therefore, the part of the wall located in the immediate vicinity of the installation site of the furnace is insulated with a metal sheet, sheet asbestos or a layer of plaster.
A foundation is being built at the selected location. It is enough to dig a hole under it to a depth of 500 mm. The bottom is rammed, covered with a layer of sand (3-5 buckets) and rammed again. Then comes a layer of crushed stone (100-150mm), which is also rammed, then leveled and filled with cement mortar (cement / sand - 1: 3). We leave the foundation for a day to harden the solution.
Despite the fact that a brick potbelly stove does not belong to stoves of increased complexity, its laying must be carried out in the same way as laying any stove of a different design, that is, according to a pre-calculated order.
Having the order in hand, we prepare the necessary materials and stove appliances, as well as the tools that will be needed when laying the stove.
We lay two layers of waterproofing on top of the poured foundation. The first row of masonry (basement) is done directly on the waterproofing layer.
This row is subject to increased requirements for the horizontal of its upper surface, since it sets the vertical of the entire furnace structure. This row is placed "on the edge". All further rows are placed in ½ bricks.
Use the building level to check the vertical and horizontal masonry, preferably every five rows. So that the walls of the furnace do not “leave” to the side, it is recommended to lower a number of air restrictors from the ceiling at the corners of the furnace (a cord with a nut at the end).
It is most convenient to equip the firebox at the level of 4-5 rows, leaving for this a space two bricks wide and three rows high. Under it, it is desirable to provide a hole in one brick for the blower.


A variant of the ordering of such a furnace is given below.
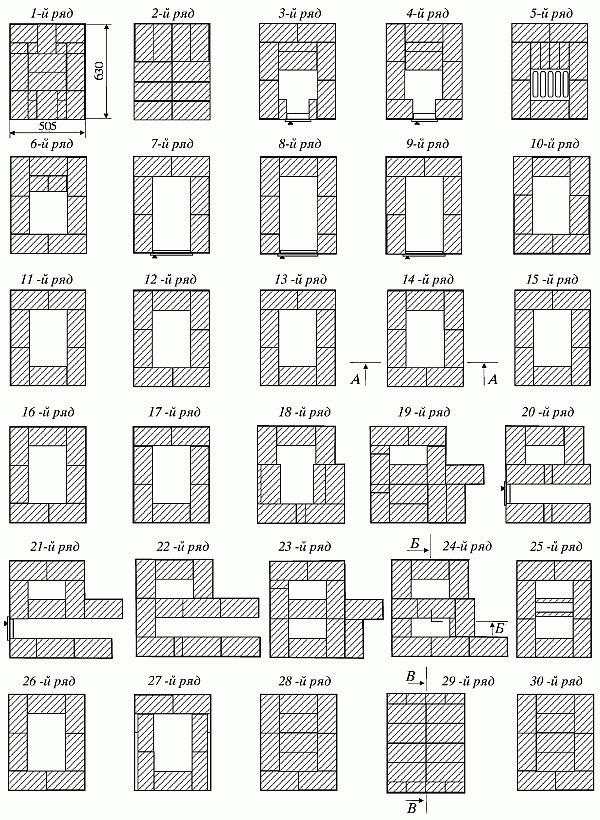
Furnace order option
When laying it, red row bricks, fireclay bricks, fireclay clay, ordinary clay, sand, cement are used.
It is easier to make a pipe from metal (the internal flow area must be at least 12 cm), and it can be removed through the roof (traditional option) or through the back wall of the furnace.
Please note that the wall thickness of the pipe, especially in its first meters, must be more than 3 mm. Otherwise, it will quickly burn out.
Features of the chimney masonry and possible errors, masonry scheme and main elements.
Foundation for a brick oven
There is one more nuance that should be taken into account precisely at the stage of choosing a place to install the stove in the house.
Types of fireplaces for home heating
Technologies used to improve heating systems have led to the creation of alternative types of fireplaces
How to build a fireplace in the house with your own hands
Assembling a fireplace with your own hands is a difficult task, since experience and skillful hands are important in this matter.
Here you will learn:
A potbelly stove is one of the simplest stoves. Burning solid fuel in its interior, it provides heat to residential and non-residential premises. These furnaces are divided into factory and home-made. Thanks to their simple design, they are easy to assemble with your own hands. In the future, it is recommended to overlay the potbelly stove with bricks. This step will increase its effectiveness and protect users from burns. Get information about the lining from our review.
How to properly fold a potbelly stove?
Even a beginner can fold a brick stove-stove correctly on his own. To do this, you need to know and follow the simple rules that pechnoy.guru will provide below.
Scheme and drawing
Below we will consider how to fold a potbelly stove made of bricks with our own hands. The drawing and dimensions can be seen in photo No. 1:
Photo No. 1 - do-it-yourself drawing of a potbelly stove made of bricks
The ordinal layout of the bricks of the potbelly stove from is shown in photo No. 2:
Photo number 2 - ordinal layout of bricks (scheme)
We have decided on the materials and design of the furnace, the solution is ready. This design does not require a foundation device. For comfortable and safe work, heating must be placed in compliance with all fire safety standards.Having chosen a place, lay two layers of waterproofing. From above we make preparation from sand, 10 mm thick. Let's start laying:
- From above, without mortar, we lay a brick (see photo No. 2, first row). We strictly control horizontality with the help of a level.
- Installing the blower door. We fix it with a wire and wrap it with an asbestos cord.
- We continue laying (see photo No. 2, row No. 1).
- Next comes the fireclay brick (see photo No. 2). Grates will be installed above it.
- We put grates directly above the blower.
- We put the next row on spoons. Behind the wall we put without mortar (knockout bricks).
- Installing the firebox door. We fix it with wire and bricks.
- On top we put a row on the bed along the contour of the fourth.
- The next - again on a spoon. Behind we put 2 bricks.
- From above, the row should overlap the furnace door and end 130 mm above it.
- We continue laying, slightly shifting the bricks back. Before this, we lay an asbestos cord, on which we install the hob.
- Let's start the formation of the chimney from the next row. The design provides for the installation of a tube made of tin or corrugated aluminum. The pipe should not be heavy. Otherwise, the center of gravity may shift.
- On the eleventh row we put a valve to regulate the air flow. Do not forget to seal it with an asbestos cord and cover it with clay.
- Next, we put a chimney in the quadrangle, which we join with a metal one. The pipe must stand strictly vertically and not deviate to the side. For greater stability, it should be covered with three rows of bricks.
- We remove the knockout bricks that we put on the 4th row, clean the chimney from debris.
- Now the oven should be whitewashed. Any message will do.Experts recommend adding blue and a little milk. So the whitewash will not darken and fly off.
- We install a metal sheet in front of the firebox.
- Installing plinth.
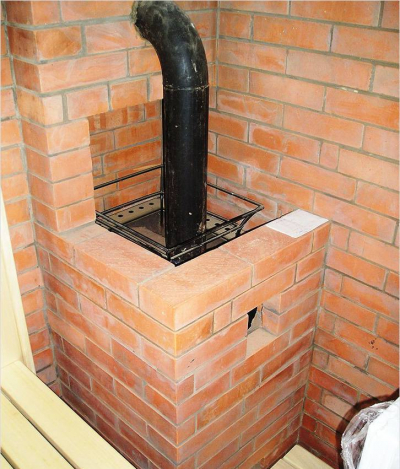
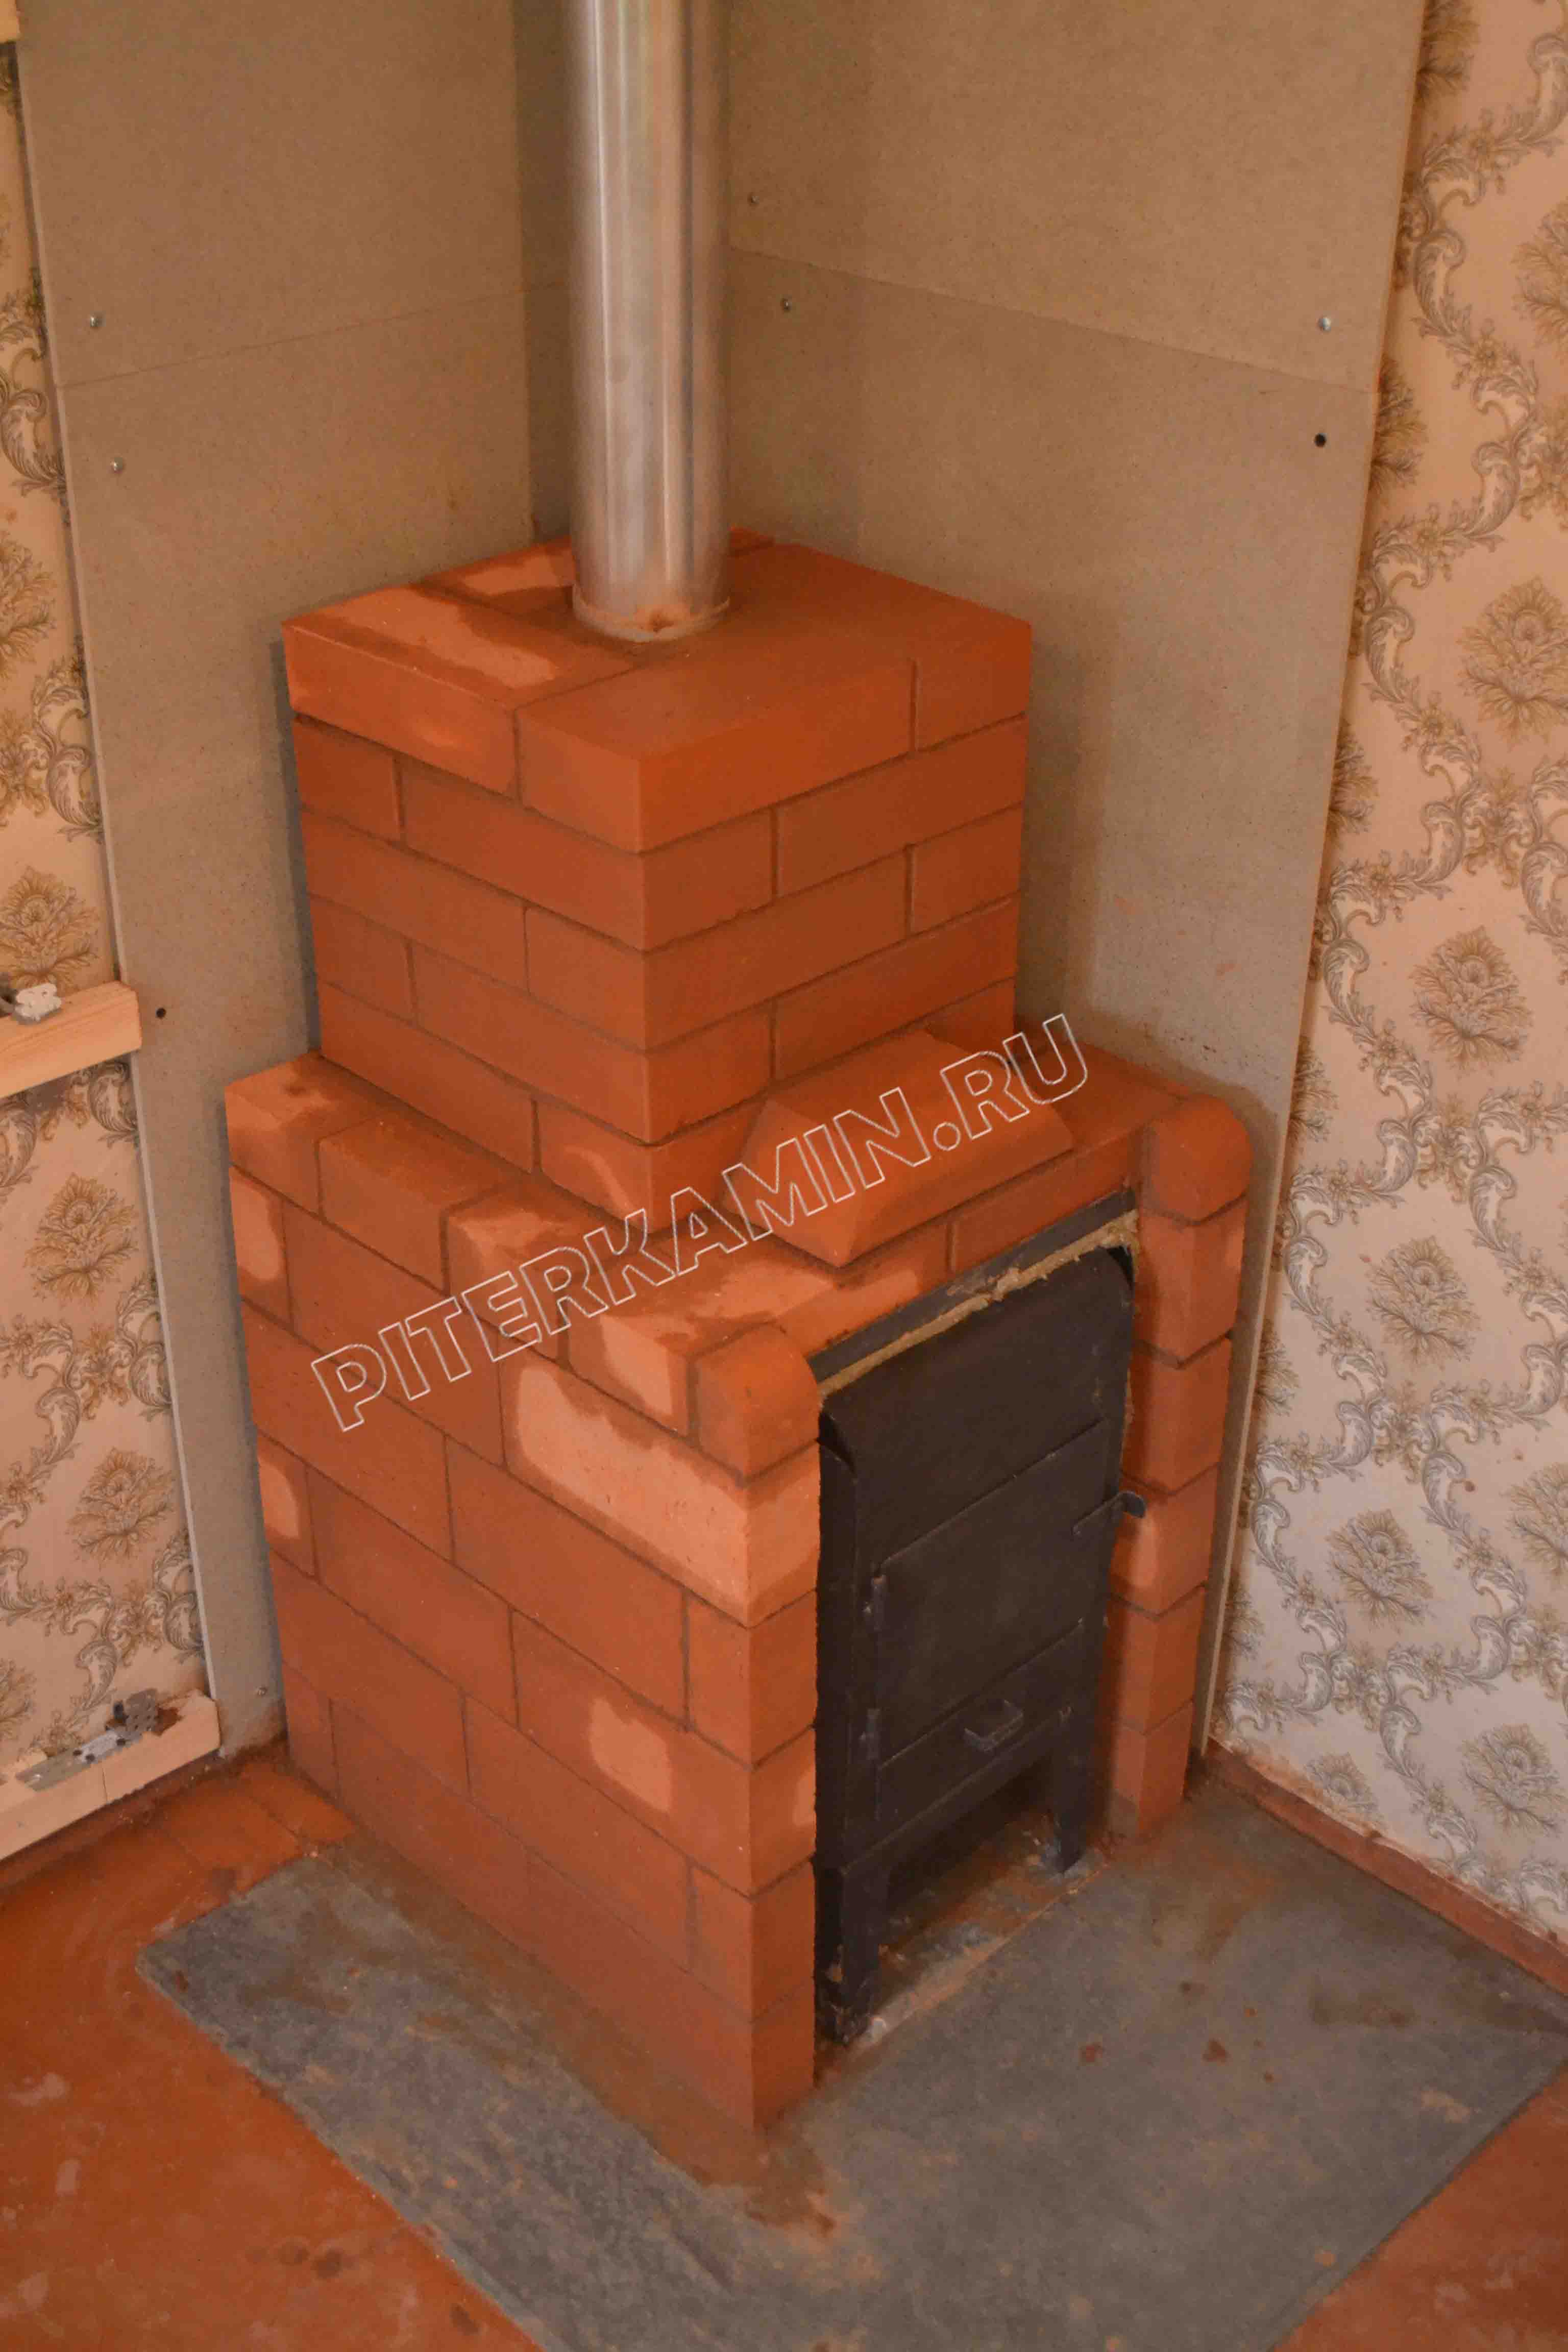
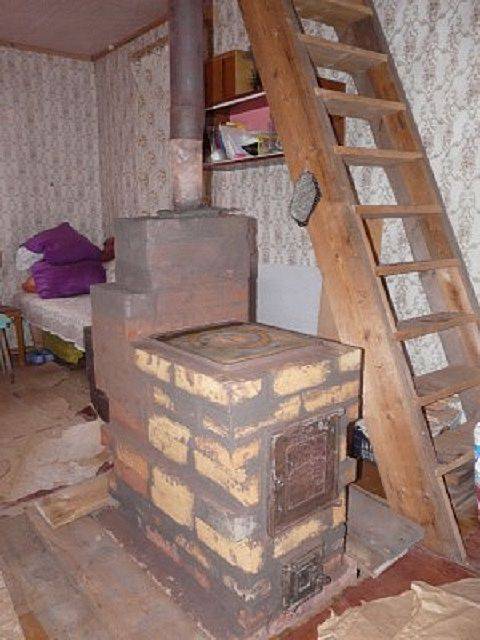
An example of a finished brick potbelly stove
Drying
The reason for the appearance of cracks is excess moisture in the bricks, so the oven must be thoroughly dried. There are two stages of drying: natural and forced.


- Natural drying lasts at least five days. All doors must be fully open. To increase the intensity of the process, put a fan in front of the furnace or put it in and turn on a conventional electric incandescent lamp (but not energy-saving). It will not be possible to completely dry the oven with this method, so we proceed to the next step.
- Forced drying is carried out by burning dry firewood. Such a furnace is carried out once every 24 hours. It should be heated only with small dry logs. Slightly open the blower door and open the plug halfway.
When the firewood burns out, loosely cover the blower. And close the top plug, leaving 1-2 cm. When the coals burn out, open all channels. Do this for a week. On the first day, about 2 kg of firewood is burned. Then every day add 1 kg.
Making a firebox door
This element is the most complex in the entire design. The following table shows the standardized sizes of oven doors:
| The size | Blower, cleaning doors, mm | Openings for furnace doors, mm | |||
| length | 25 | 25 | 25 | 30 | 25 |
| width | 130 | 130 | 250 | 250 | 250 |
| height | 70 | 140 | 210 | 280 | 140 |
We manufacture the firebox door according to the drawings shown in photo No. 3:
Photo No. 3 - drawing of a door for a firebox and a cleaning chamber
metal sheathing
A brick potbelly stove can be additionally sheathed with metal. We will get a metal potbelly stove with all the pluses, but no minuses (except for weight). This design will protect the oven from cracking and chipping. This will greatly increase the service life. This will require sheet metal, 4-6 mm thick. The process is not particularly difficult. The metal sheet is marked out, the necessary parts are cut out with a “grinder” or a cutter. Next, the cladding is carried out and connected by welding and a metal corner.
This design is not only durable, but safer. However, it requires additional costs and labor.
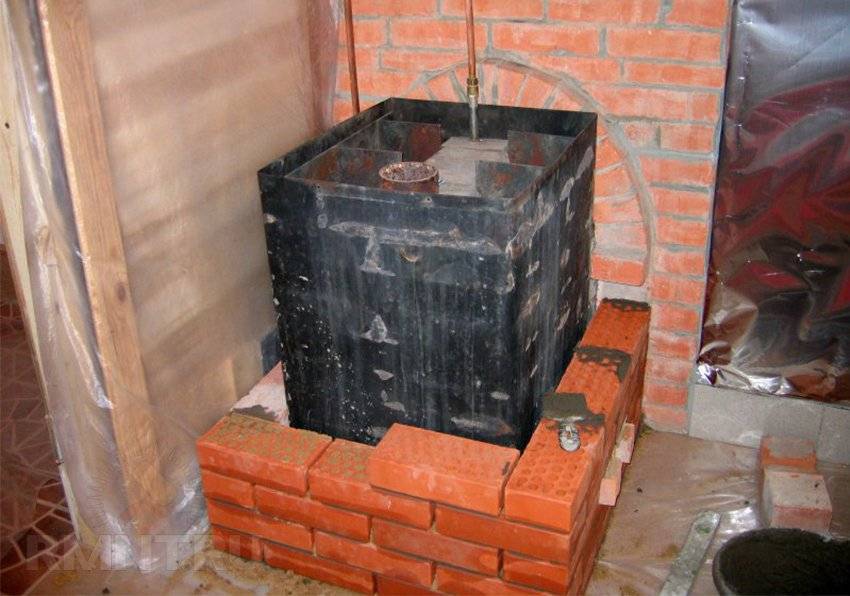
Cover sequence
Scheme of an iron furnace lined with bricks.
Before overlaying the stove with bricks. you need to make sure that the floor can withstand such a load. Without a foundation, stoves weighing up to 800 kg can be installed on a wooden floor. Of course, this is subject to the good condition of the beams and lag. A sheet of steel is placed on the floor, a layer of brick is placed on it, and then a furnace is installed. If the floor is wooden, then a sheet of asbestos must also be placed under the metal. The lining of the steel sheet should protrude in front of the front wall of the stove by 30-40 cm, in order to prevent hot coals from falling onto the unprotected floor. On the walls of the room, located next to the stove, you also need to attach metal sheets with an asbestos cement backing. It should be noted that a gap must be left between the lining of the stove and the wall of the room.
There must be a gap of 30-50 mm between the metal wall of the stove and the masonry. This must be done because metal and brick have different temperature coefficients of linear expansion.When heated, metal expands much more than brick, therefore, if the potbelly stove is laid close, without a gap, the stove may collapse. The free space between the metal wall and the brick is also necessary for air convection.
As a rule, the stove is lined with 1/2 bricks. Making the wall thicker does not make sense, since it will take too much time and fuel to warm up the thick brickwork. Before you start lining the potbelly stove, you need to make a markup, taking into account the gap. Mark the outer contour of the furnace. The first row is made solid. The thickness of the mortar between the bricks should be tried to be no more than 0.5 cm. In the second row, 1-2 holes are made on each side of the stove, depending on the size of the stove. The length of the holes is 1/2 brick. All subsequent rows are solid, like the first row.
The front wall of the stove on the side of the firebox must be lined with ease of use - the door must open and close freely. Here you can show your imagination and perform curly masonry. At the top of the opening above the door, you need to lay a metal corner on which the upper rows of bricks are laid out. The upper part of the stove can be overlaid at your discretion, since technically it does not play a significant role, performing mainly a decorative function. The top of the furnace can be made in the form of a vault or made flat.
After the lining is completed, the mortar in the seams must dry. This will take 1-2 days. After that, the surface of the masonry must be cleaned with a drill with a nozzle in the form of a brush from excess mortar. Then the masonry is washed with soapy water with a brush with stiff bristles.
Now on sale is a large selection of metal furnaces of various designs and price categories. Metal stoves are used to heat private houses, temporary structures, construction sites for heating workers, security guards and other purposes. Also, the use of metal stoves in home baths and saunas is increasingly gaining popularity, although in this case a brick stove is considered more traditional, but it can not always be used for a number of reasons. The main advantages of metal stoves are their compactness (since not every room can install a brick oven), ease of installation, fast heating. The main disadvantage is that after the furnace is stopped, it cools down rather quickly. You can eliminate this drawback by overlaying a metal furnace with a brick. This will greatly extend the heat transfer without increasing the size of the stove too much. If the metal stove was made on your own, then by lining such a stove with brick, you will give your stove a decorative look.
Possessing basic building skills, you will be able to overlay an iron stove with bricks on your own, for this you will need such materials and tools.
How to overlay a potbelly stove with a brick with your own hands? Instruction
The first step is to prepare the solution.
Step 1. Solution preparation
The mortar, like the bricks themselves, must be heat-resistant. A simple option is to buy dry mixes for laying stoves. To prepare the solution, you just need to add water and stir in the right proportions. The advantages of this option are: saving time, no need to select the fat content of clay and a guarantee that the masonry will turn out to be of high quality.This option is preferable for those who do not want to waste extra time and are not confident in their abilities.
A more time-consuming option is to prepare the solution with your own hands. To determine the required proportions, it is necessary to take into account the fat content of the clay, the higher it is, the more sand is needed.
To prepare the solution, you need to mix clay with water, if the clay is oily, then the ratio should be 1:1, if dry - 1:2. Leave the mixture for a day. Next, you need to strain the clay and add sand to it to get a creamy mass.
It is necessary to use only pure water without mechanical and chemical impurities. The increased content of mineral salts will lead to the formation of stains and streaks that will be difficult to remove.
In order to give the solution strength, you need to add 1 kg of cement per 10 kg of clay and 150 g of salt.
Before starting work, we recommend checking the quality of the prepared solution. It is simple to do this: you need to connect several bricks with it, leave for 5-10 minutes. Next, take the top brick, if the bottom one does not fall off, the solution is of high quality, and you can proceed to the next step. If the lower brick has fallen, then it is necessary to adjust the ratio of the added components.
Another option for assessing the quality of the solution: roll up a sausage 20x1.5 cm, fold it into a ring. If small cracks appear, then the mortar is suitable for masonry, if there are no cracks, then it is too greasy and sand needs to be added, if the cracks are too large, then, on the contrary, there is more sand in the mixture than necessary.
Of course, if the solution is greasy, then it easily fits in a light layer, does not form cracks, but already shrinks when dried, so this option is completely unsuitable for furnace work. Too thin mortar is also not suitable, it does not shrink, but it crumbles when it dries.
Step 2. Preliminary preparation of the furnace for work
Before proceeding to masonry, you need to make sure that the floor in the bath can withstand such a load. Bricks, especially full-bodied ones, weigh quite a lot, so after laying the stove will exert a high load on the base.


A strong, reinforced concrete floor can withstand a load of up to 800 kg per square meter, any other floor - no more than 150 kg. If the weight of the furnace is more than 800 kg, then you will need to make an additional foundation.
Before lining the potbelly stove with bricks, you need to install it on a special reinforced base. To make it, you need to lay asbestos cardboard on the floor, cover it with a steel sheet, lay bricks in two dense rows.
If you plan to make a lining for an already built bath and an installed stove, then the stove must be disconnected and moved away. If the floor is already old and destroyed, then the best option is to cut the logs and fill the base under the stove with a cement foundation, of course, if the bath is on the ground floor. Next, also lay asbestos cardboard, a sheet of metal and one row of bricks.
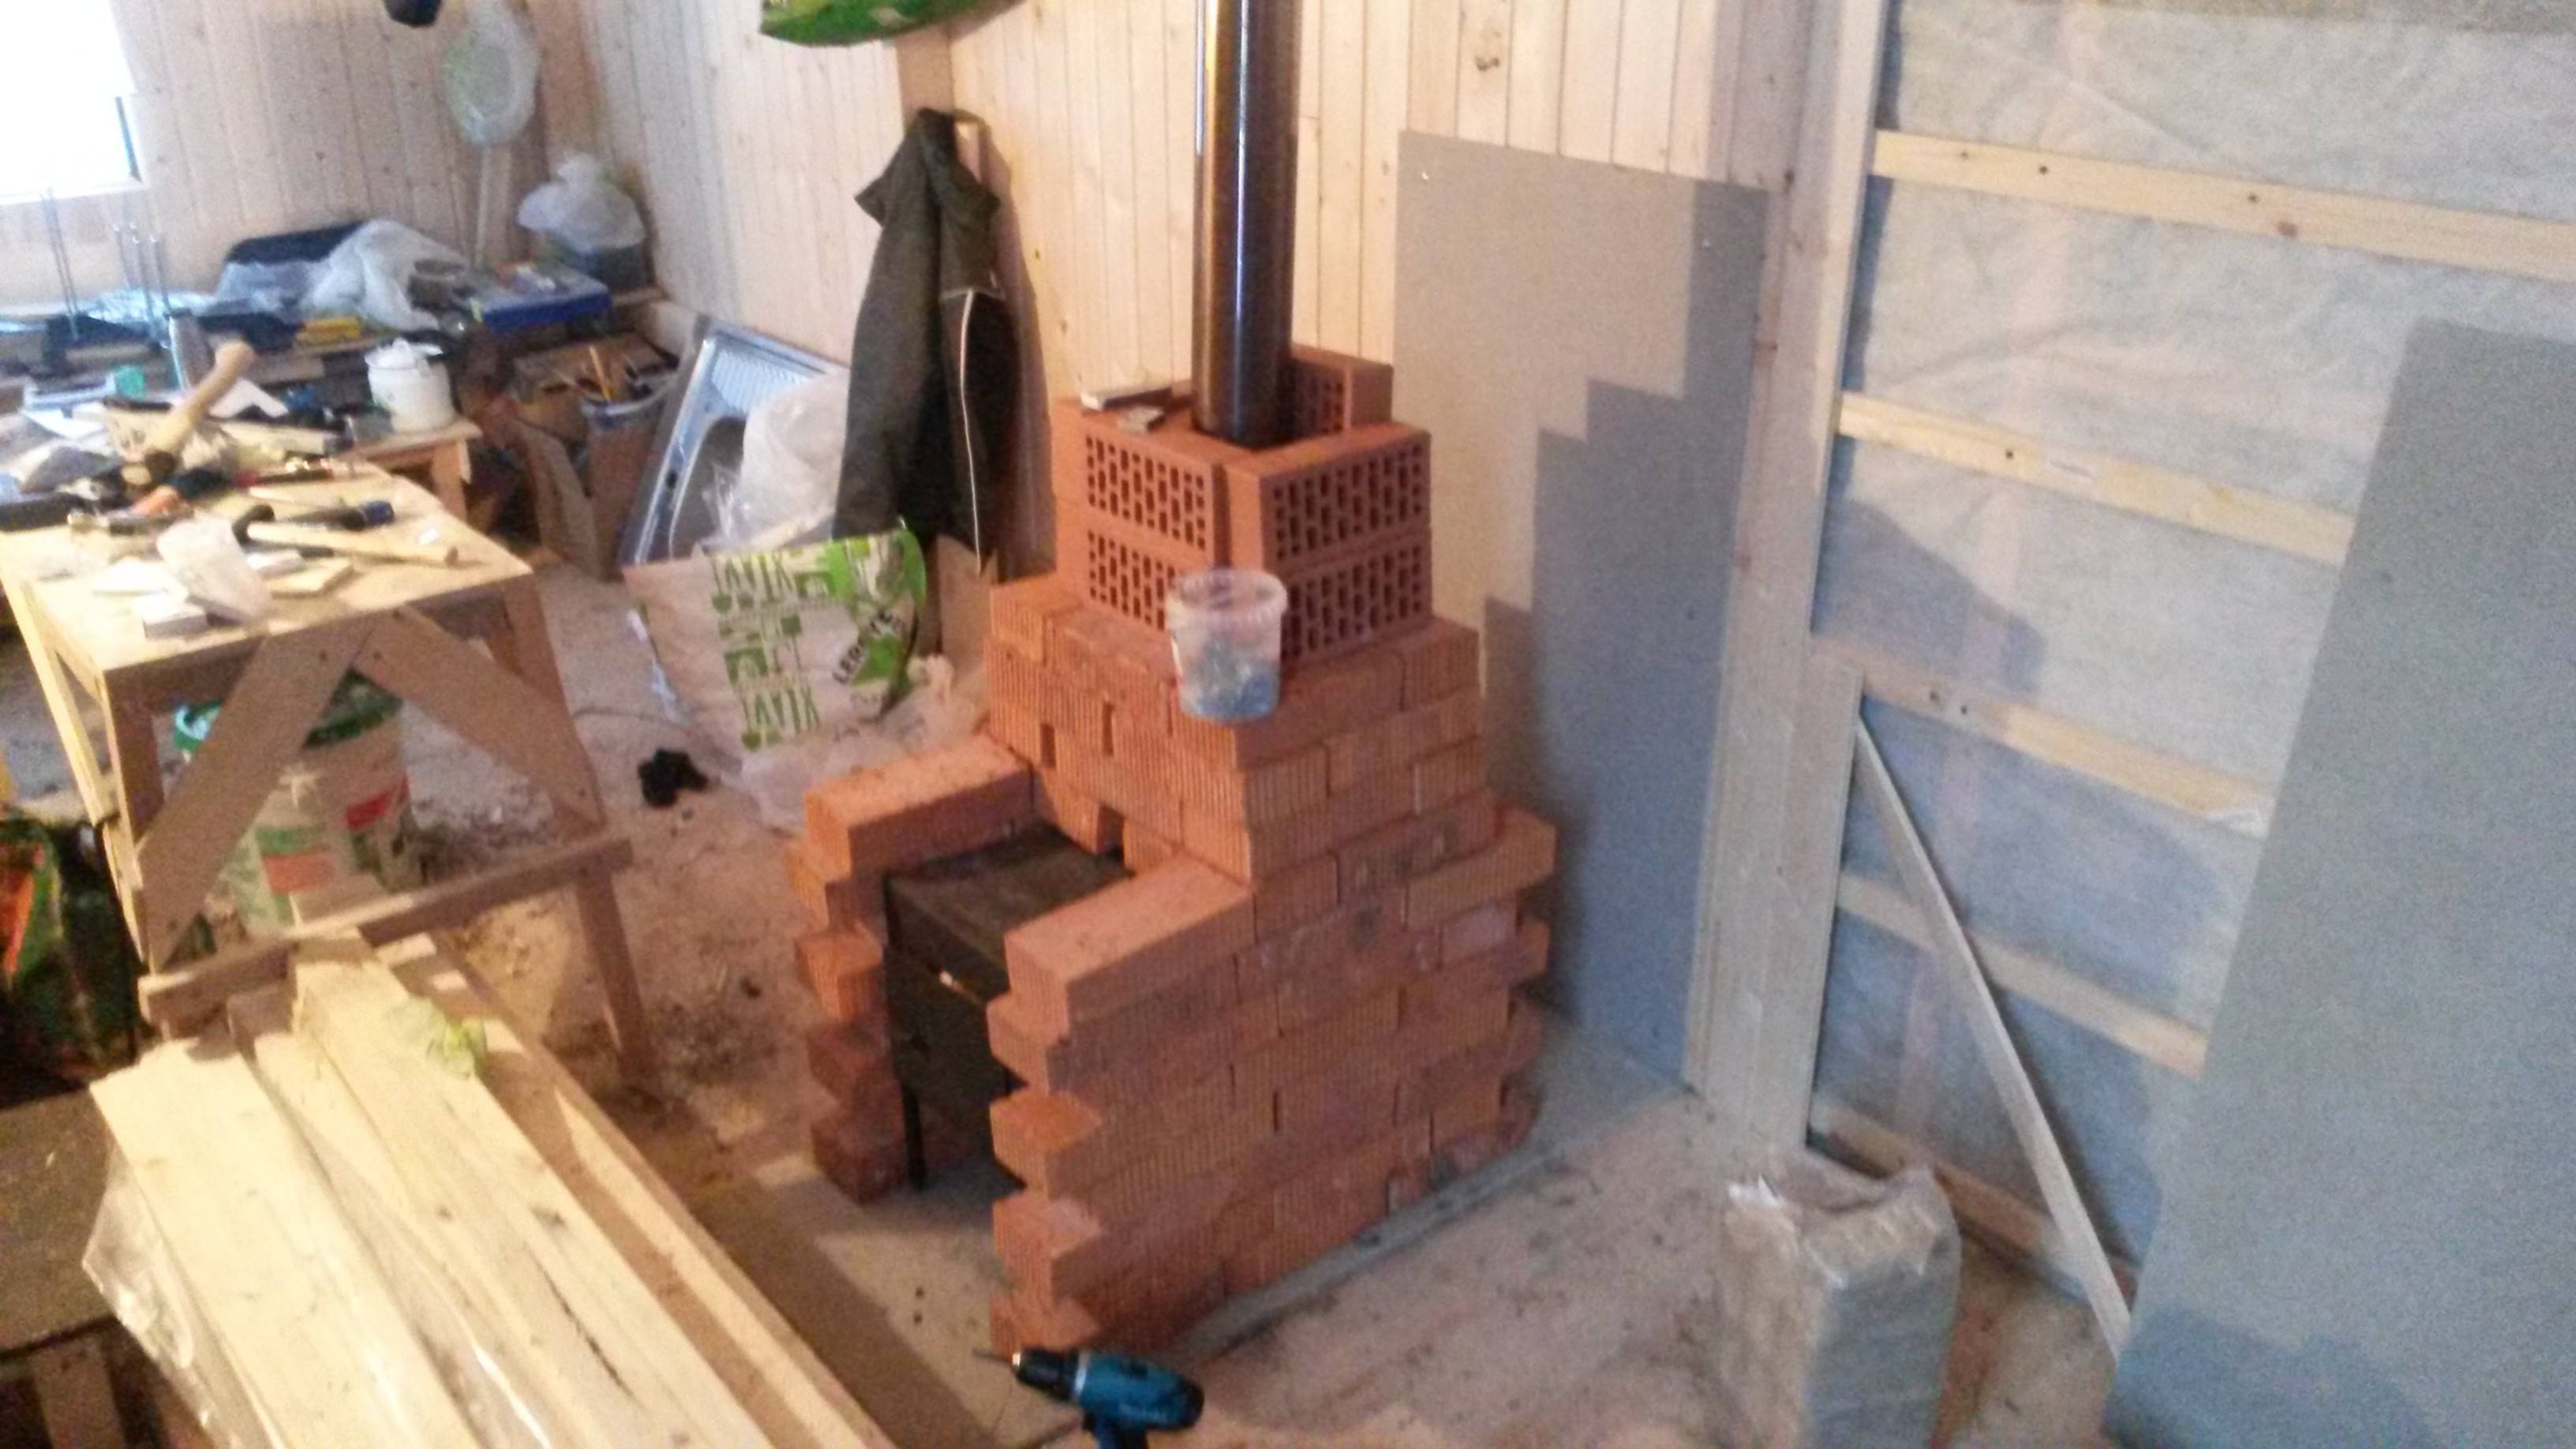
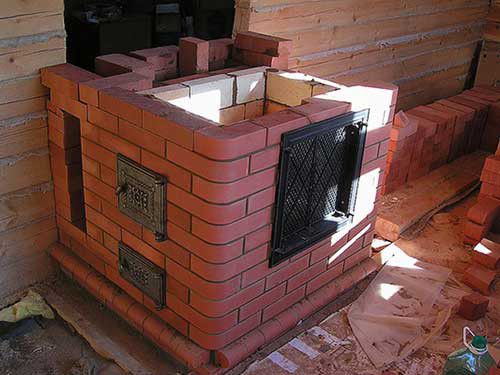
Effective brick potbelly stove in the workshop or garage
Potbelly stoves are considered one of the most famous types of stoves; it is possible not only to buy them in the distribution network, but also to make them with your own hands without much effort.Such heating structures have the ability to heat residential and non-residential premises, such as garages or workshops, using a variety of solid fuels. Such a heating source occupies a small area, approximately 2x2.5 bricks. For it, a special heat-resistant refractory brick is used, and the masonry is performed on a solution of fireclay powder and refractory clay with the addition of sand.
In fact, this universal brick mini-boiler, in terms of its working and design characteristics, does not differ from large boilers and Russian stoves. Like any stationary stove, a potbelly stove also has important functional structural elements:
- Heat-resistant foundation, which serves as the base of the furnace, for uniform distribution of the weight load over the area and for fire safety purposes.
- Furnace device. In this design of the unit, the firebox and the firebox are combined into one space.
- The grate provides lower air supply to the combustion area. This increases the productivity of the furnace and makes it possible to regulate the intensity of the process.
- Ash chamber, for collecting ash and organizing the cleaning of the heating device.
- Chimney - creates the operating parameters of the movement of flue gases in the furnace space and their release into the atmosphere.
Materials and tools
When deciding how to properly brick an iron stove, first of all, you need to decide on the materials suitable for this. They must have special characteristics.
Brick
The main material for cladding must be of high quality: without voids, with high heat resistance and fire resistance.
You can choose which brick to overlay the iron stove in the bath from two options:
Clay brick. It is used for lining the body, laying the firebox and the chimney of a wood-burning stove. It happens ordinary, front, with a decorative front surface.
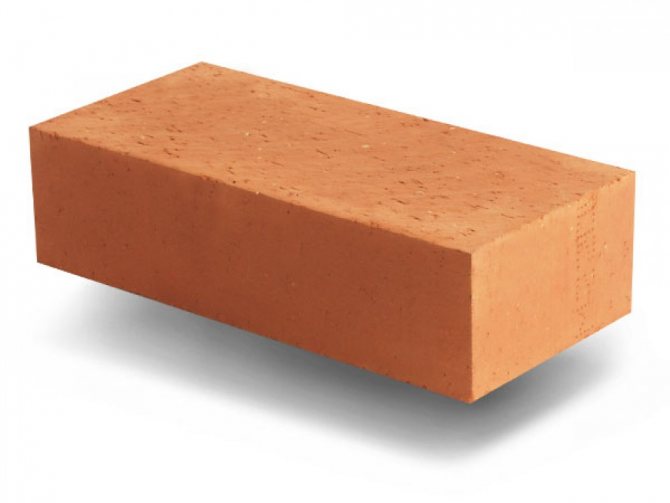
Ordinary solid brick
face brick
Front brick with a decorative surface "oak bark"
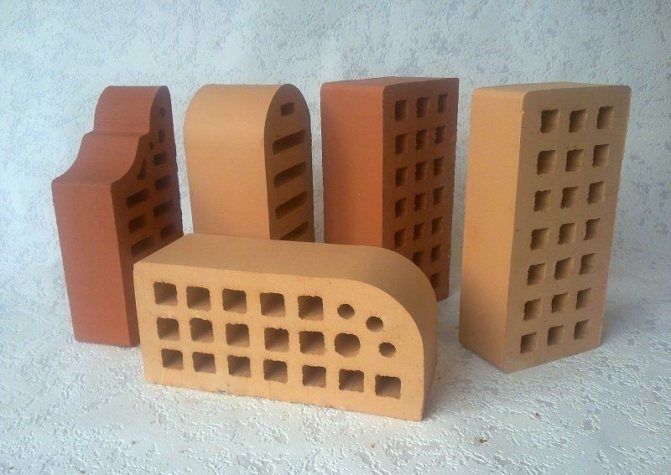
With the help of figured bricks, you can create unique shapes
Refractory fireclay brick. Withstands temperatures up to 1800 degrees. It is recommended to use it for masonry and lining of coal-fired stoves.
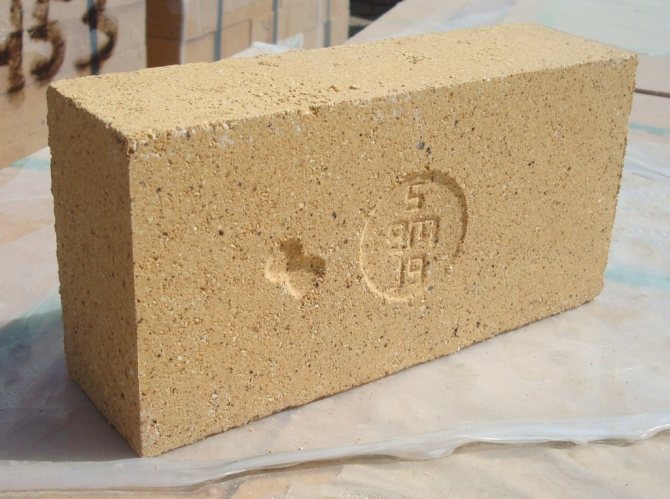
fireclay brick
The approximate amount is calculated depending on the method of laying (in half or a quarter of a brick) and the perimeter of the cladding. This takes into account the dimensions of the furnace itself and the distance between it and the lining. The amount necessary for the construction of the site is also added here, since it is possible to overlay a metal furnace with bricks only on a solid foundation.
With this laying, the brick is placed on a spoon - a narrow long part
Solution
The ideal masonry mortar is made from clay and sand in certain proportions, which depend on the quality of the clay. Without experience, it is very difficult to do it. Therefore, it is best to buy a ready-made refractory mixture based on red clay.
Before overlaying a cast-iron firebox with a brick, it will simply need to be diluted with water, as required by the instructions on the package.
Heat Resistant Blend Terracotta
In addition to bricks and masonry mix, masonry mesh and refractory sheeting may be needed to create a protective screen for wooden surfaces. As well as roofing material as waterproofing.
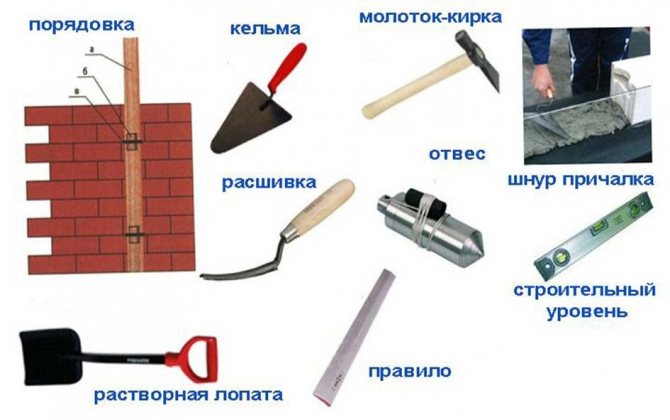
Tools
The tools you need to do this job are:
- Solution container;
- Trowel for his set;
- Hammer for fitting bricks;
- Pickaxe for their division into parts;
- Stitching for seams;
- Ordering - a rail with divisions applied to it, the distance between which is equal to the height of one or more rows, taking into account the thickness of the seam;
- Building level and plumb line for level control;
- Cord to control the evenness of horizontal rows.
Necessary tools for masonry A sponge or rag and a bucket of clean water will also help to remove the mortar from the front surface of the masonry.
Solution preparation
Let's start by preparing the solution. For masonry work, we use a special ready-made mixture. Sold in hardware stores. It is a yellow-gray powder in bags of 25 kg. It remains only to dilute with water in the correct ratio and mix. Detailed instructions are always indicated on the packaging, you need to follow it step by step. This solution is the best choice. It has only one drawback - the high price.
You can prepare a mortar for masonry yourself. For this we need clay and sand. To begin with, we will determine the quality of the available clay and the content of impurities in it. We follow the following instructions:
- We roll the clay into a bundle. Thickness - 10-15 mm, length - 150-200 cm.
- Take a rolling pin with a diameter of 50 mm and wrap the tourniquet around it.
- The tourniquet should stretch smoothly and break, stretching by about 15-20%.
Expert opinion
Pavel Kruglov
Baker with 25 years of experience
If the tourniquet is stretched more - the clay is "fat", it breaks earlier - "skinny". In the first variant, the solution will shrink strongly under the influence of temperature, in the second it will crumble.
The next step is to prepare the sand. First we sift it through a fine sieve. The cell should not exceed 1.5x1.5 mm. Following are the instructions:


- with the help of a holder and burlap, we arrange a kind of net;
- pour sand into it and begin to rinse under running water;
- rinse until the running water is clear.
Thus, we rid the sand of impurities.
We do the same with clay. Now it should be soaked. To do this, pour clay into a previously prepared container. Pour water so that the entire surface of the clay is covered. Mix thoroughly after 24 hours. Repeat the process until the clay has a consistency similar to toothpaste.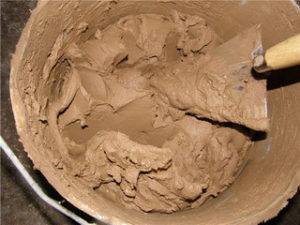
There is no universal proportion for the solution. Everything is established by trial and error, depending on the characteristics of the materials used. The main thing is that it is convenient to work with the solution.
To increase strength, experts recommend adding a little cement or salt.
Expert opinion
Pavel Kruglov
Baker with 25 years of experience
Here is a basic recipe for masonry mortar:
We take 2 parts of clay. We add one sand to it. Using a construction mixer, mix until a homogeneous thick mass. We need about 40 liters of solution.
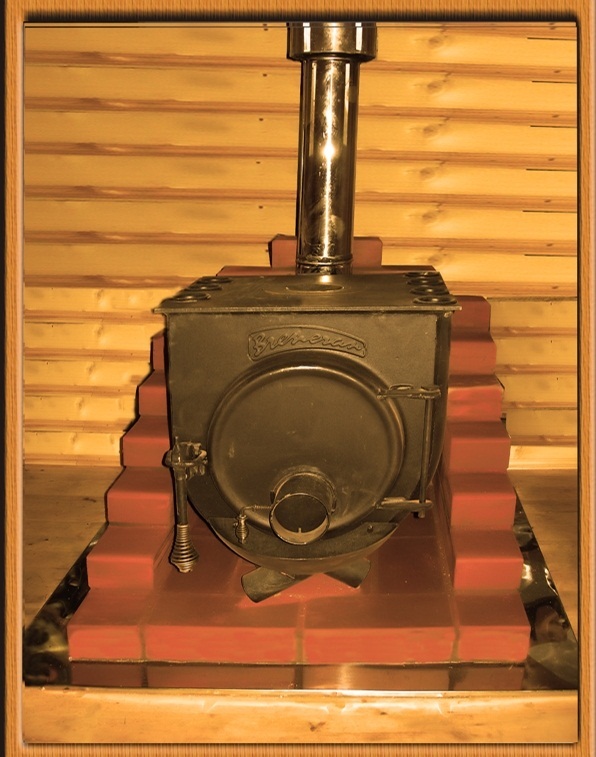
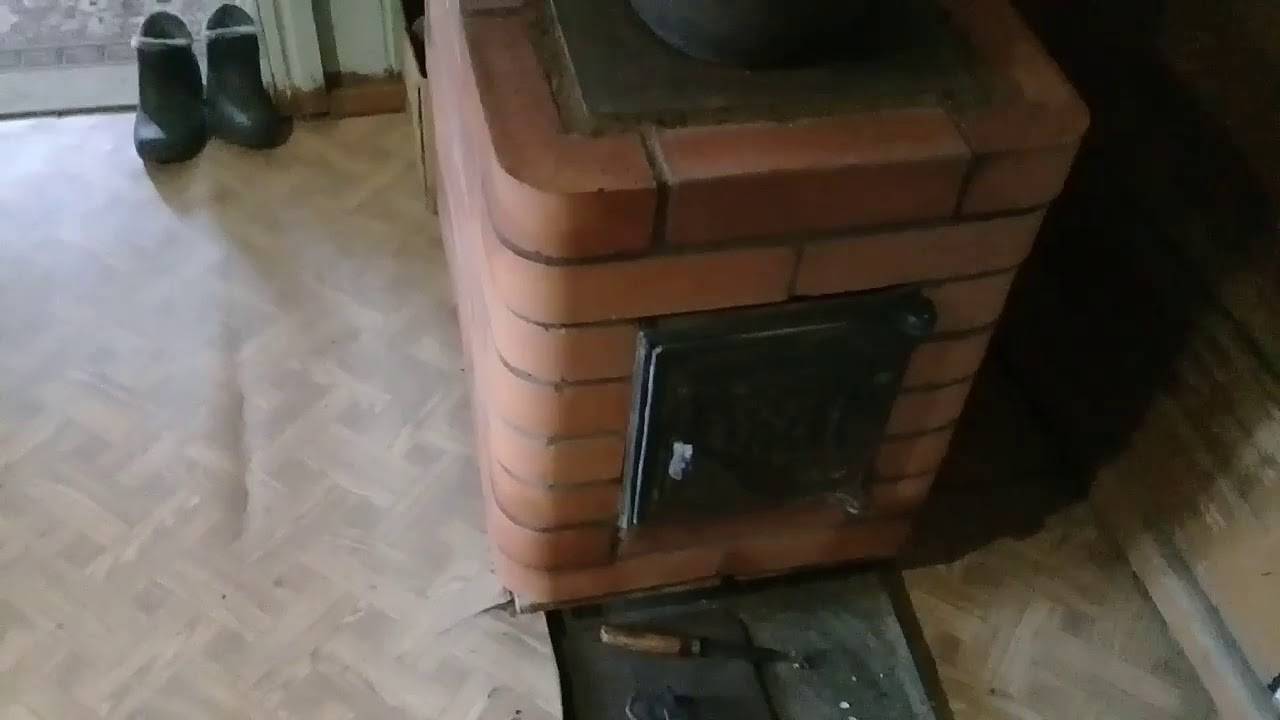
Finishing a potbelly stove stove with bricks: tips and tricks - Working with Brick
The potbelly stove is familiar to all summer residents. It is not profitable to buy expensive heating appliances for change houses and country houses, and an old potbelly stove will cope with the task and will not ruin the owner. This stove is not demanding on fuel, has a hob and a small size. In some cases, you can overlay a potbelly stove with bricks.
Potbelly stoves are cast iron and metal. The first, of course, are more economical. The problem with all metal furnaces is the rapid heat transfer.As soon as all the fuel has burned out, the potbelly stove instantly cools down, and with it the heated room.
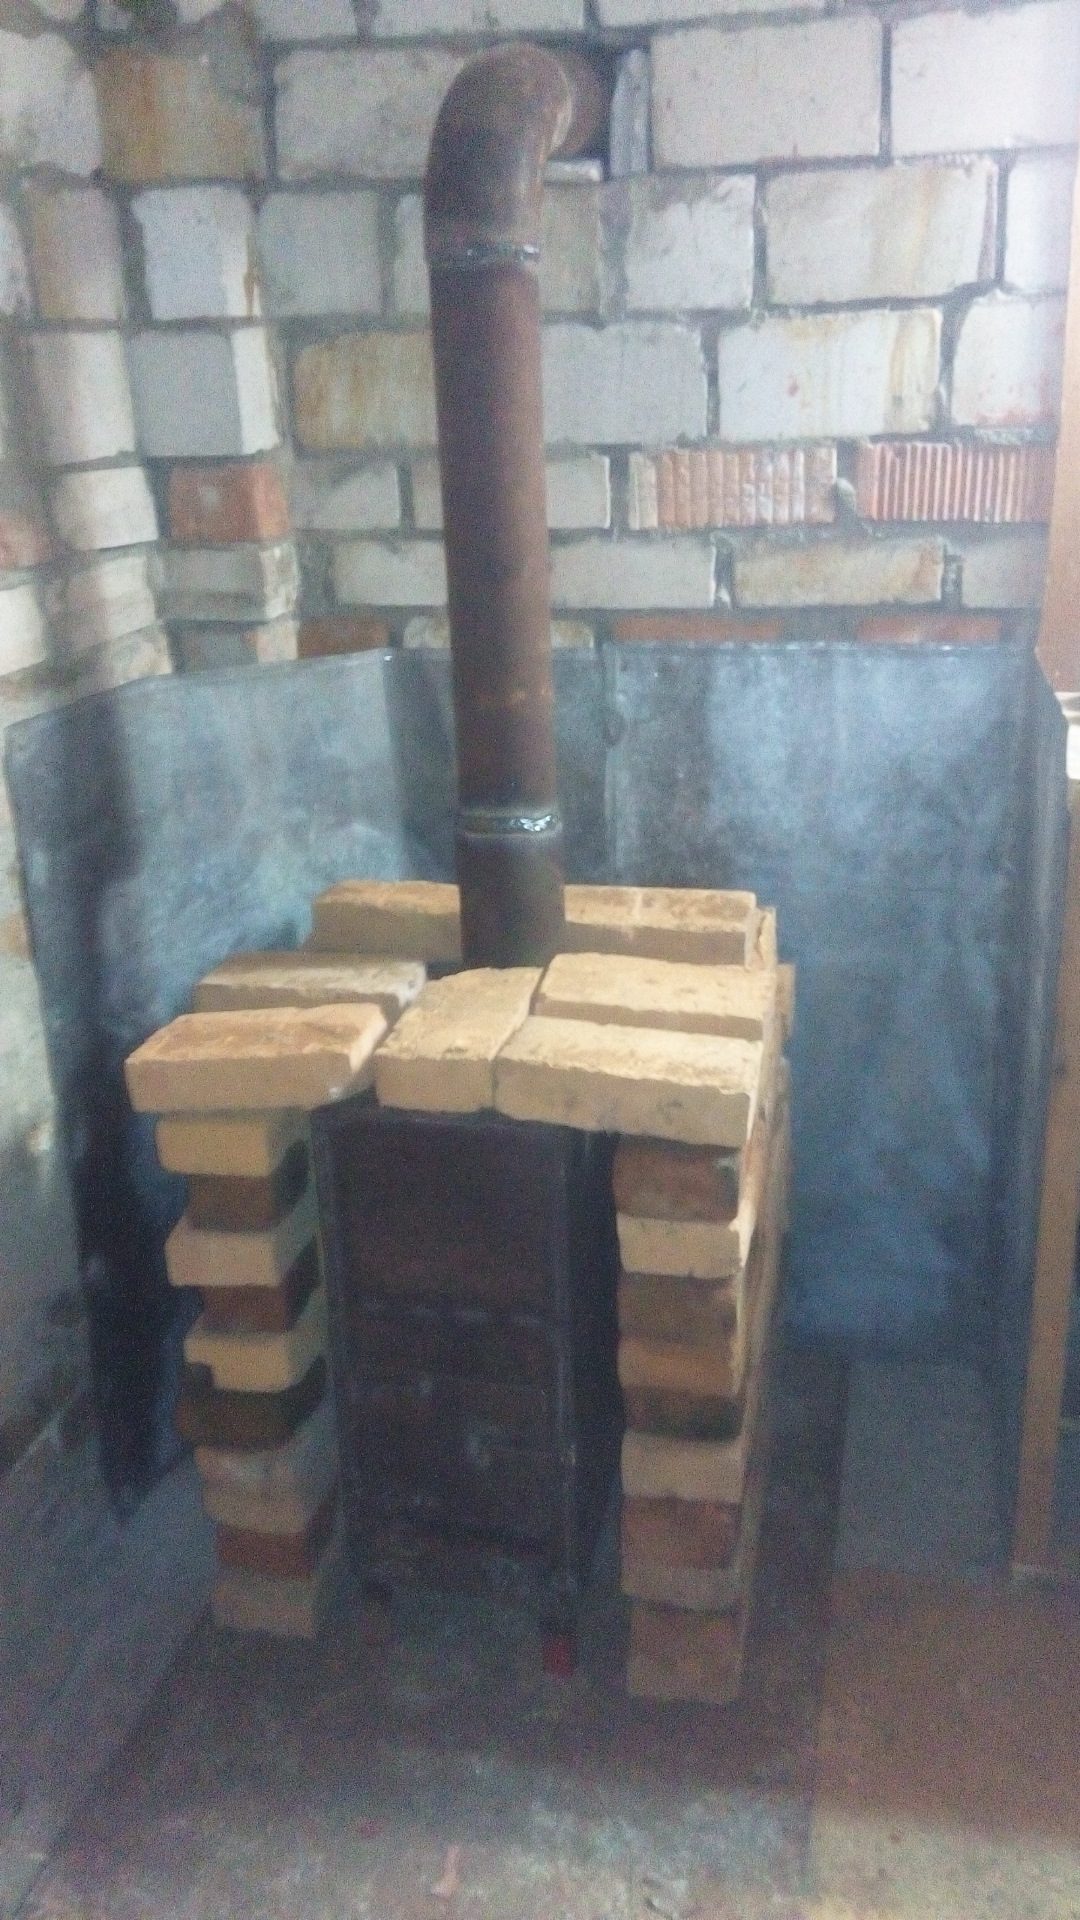
Rapid heat dissipation helps, if necessary, quickly warm up the room, but requires a constant load of fuel. For such "gluttony" the potbelly stove got its name - no matter how much fuel you put in - everything is not enough. To increase the efficiency of the potbelly stove, during the October Revolution, the chimney pipe was lengthened.
Burning gases passing through a long pipe heated it, so the length of the chimney could be equal to the perimeter of the room.
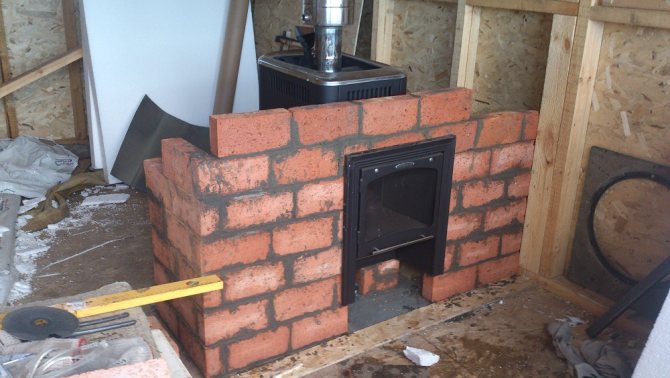
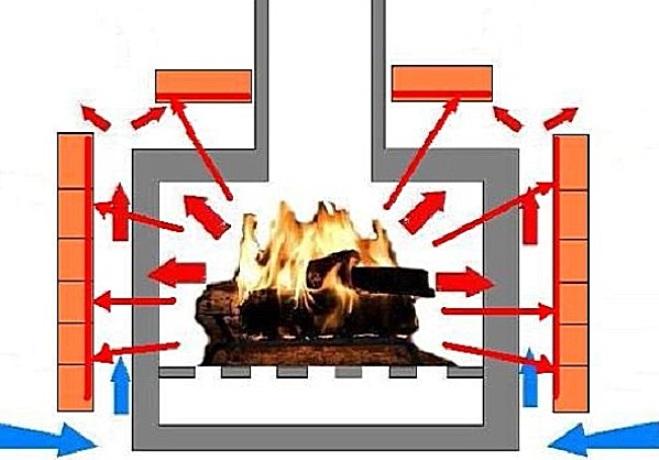
An easier way to save some of the heat is to overlay the stove with bricks. The heat emanating from the stove heats the brick, and when it cools down, it gives off the accumulated heat. Brickwork will allow a couple of hours after the potbelly stove has cooled down, it is warm.
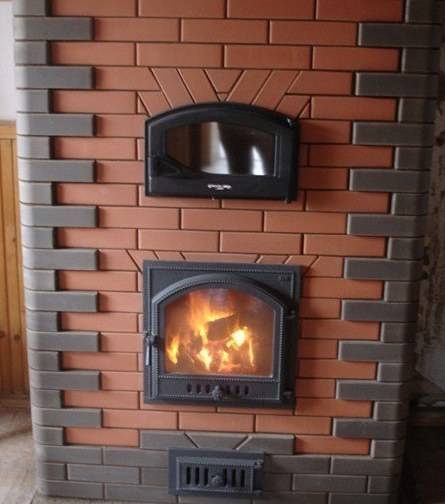
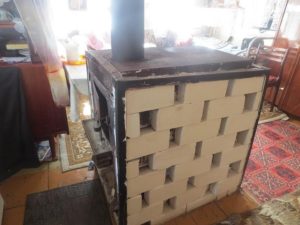
Such lining of a potbelly stove with a brick not only increases the efficiency, but also externally transforms a cheap stove. For greater beauty, you can use a special heat-resistant tile.
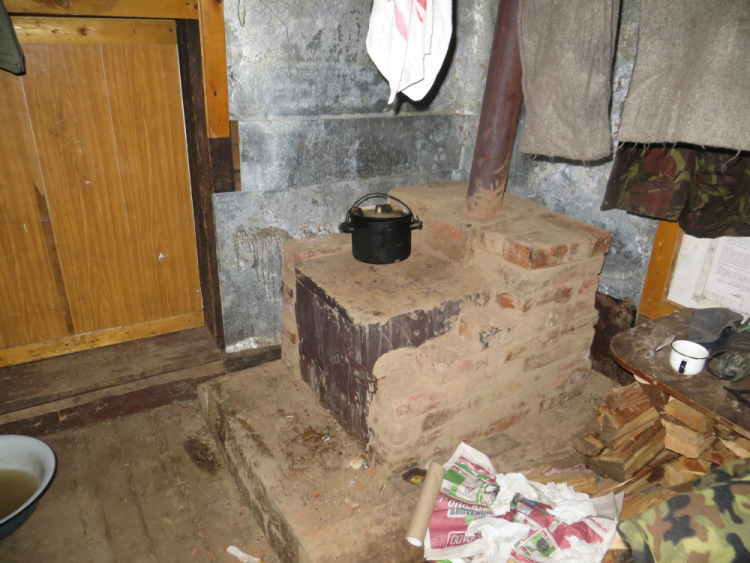
So a potbelly stove can become visually very attractive and resemble a Dutch, Swedish stove.
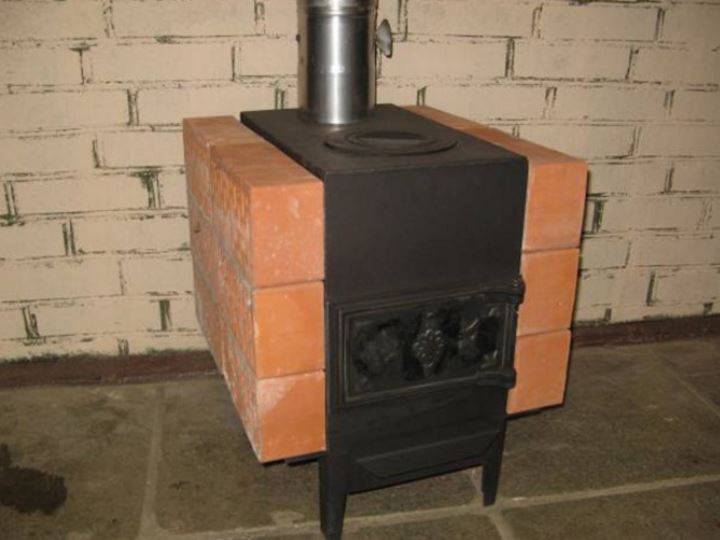
Cover example
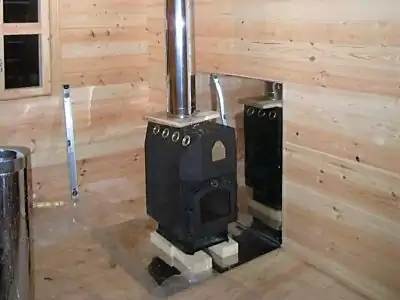
How to overlay a potbelly stove with bricks in the country
To heat the premises in the country house and in a country house, a stove-stove or a fireplace is often used. A cast iron or metal stove is easy to manufacture, unpretentious in maintenance and affordable.
The material of the furnace - metal or cast iron - has both negative and positive properties.
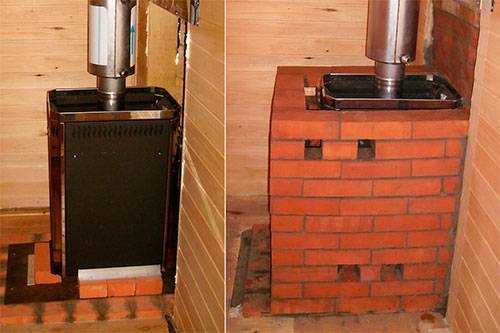
So, contributing to the rapid heating of the room, a metal stove, on the other hand, cools down quickly with the same “success”.
On the network you can find a large number of videos with instructions for lining the stove or fireplace, but we propose to consider this problem in detail in the article.
To begin with, we list the main qualities that distinguish a lined potbelly stove from the original stove:
- A do-it-yourself construction made of bricks allows you to keep heat inside for a long time, spreading it evenly throughout the room.
- After turning off, the stove will maintain a high temperature in the room for a long time, eliminating the need to reheat a cold house after the next turn on.
- The design of a potbelly stove or fireplace lined with bricks is safe to use. as it saves the owner from the possibility of getting burned on contact with a hot metal case.
Choice of material and tool
You can overlay a potbelly stove with a brick case with your own hands and on your own. The main problem is the correct selection of the necessary tools and bricks of a certain quality.
For lining a potbelly stove or fireplace, a classic brick, clay oven brick is used. characterized by heat resistance properties.
When exposed to high temperatures, such a brick will not undergo deformation, and, most importantly, will retain its operational properties.
The surface of the brick does not affect the functionality of the final structure. It can be a smooth solid ceramic brick or brick with a textured surface.
For decorative aesthetic purposes, it is better to use textured bricks. which will perfectly complement the interior of any room.


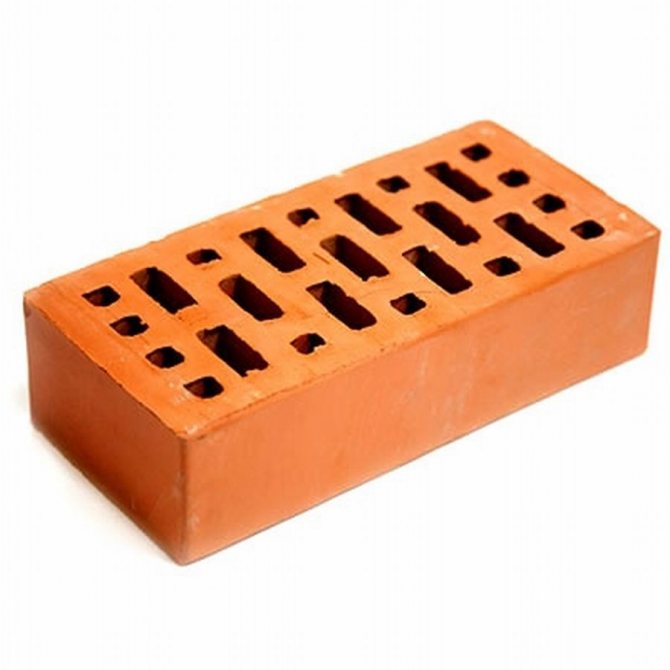
Do not use a brick with voids, as high temperature will lead to its destruction.
The entire arsenal of tools necessary for lining the stove and fireplace with bricks with your own hands includes. trowel, spatula, pick or rubber mallet, grinder, level, corner, plumb line and fishing line for laces.
Required Tools
To organize the work you need the simplest tools. If there is no electricity on the site, you can do without kneading with a drill and do everything manually. For work you will need:
- Trowel for laying bricks and cleaning excess mortar.
- Pickaxe, for dividing bricks (if necessary).
- A plumb line to maintain even vertical masonry.
- Water level for horizontal alignment.
- Solution container.
- Shovel or drill with a nozzle for mixing the solution.
- Stitching, if desired, make neat seams.
- Sieve for sifting sand 1.5*1.5mm. For washing use burlap.
- Abrasive nozzle on a drill for cleaning the finished masonry from excess mortar.
Installation and connection
When installing the furnace, you must strictly follow the fire safety rules:
- The distance to walls and surrounding objects must be at least 800 mm. Walls can also be covered with ceramic tiles.
- All parts of the chimney must be tightly connected.
- The room must be equipped with a supply and exhaust ventilation system.
The chimney is installed like this:
- We fix the first section of the pipe above the chimney opening.
- We build pipe elbows to the level of overlap.
- In the ceiling we make holes with a diameter of 170 mm. We remove a layer of thermal insulation around the hole to prevent fire.
- First we mount the passage glass, then we insert the pipe into it.
- Next, the pipes are connected to the external chimney.
- We apply bitumen to the pipe and insulate it.
If you need to heat a large area, you can connect the stove to the heating panel. This will increase the flow of heat and allow it to last longer.
A do-it-yourself brick potbelly stove is a good alternative to a metal stove.Potbelly stoves made of metal are small in size, but have a serious drawback - the high thermal conductivity of the material. The metal heats up quickly but cools down quickly, resulting in the need to maintain the fire regularly, which means high fuel costs. A brick oven or a metal oven lined with brick is a more rational choice - it is able to retain heat for a long time.
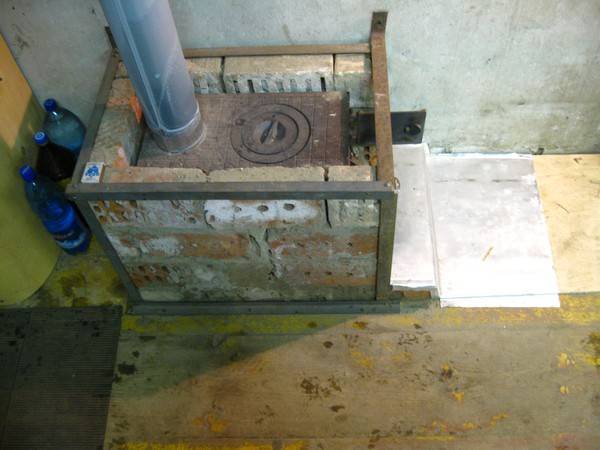
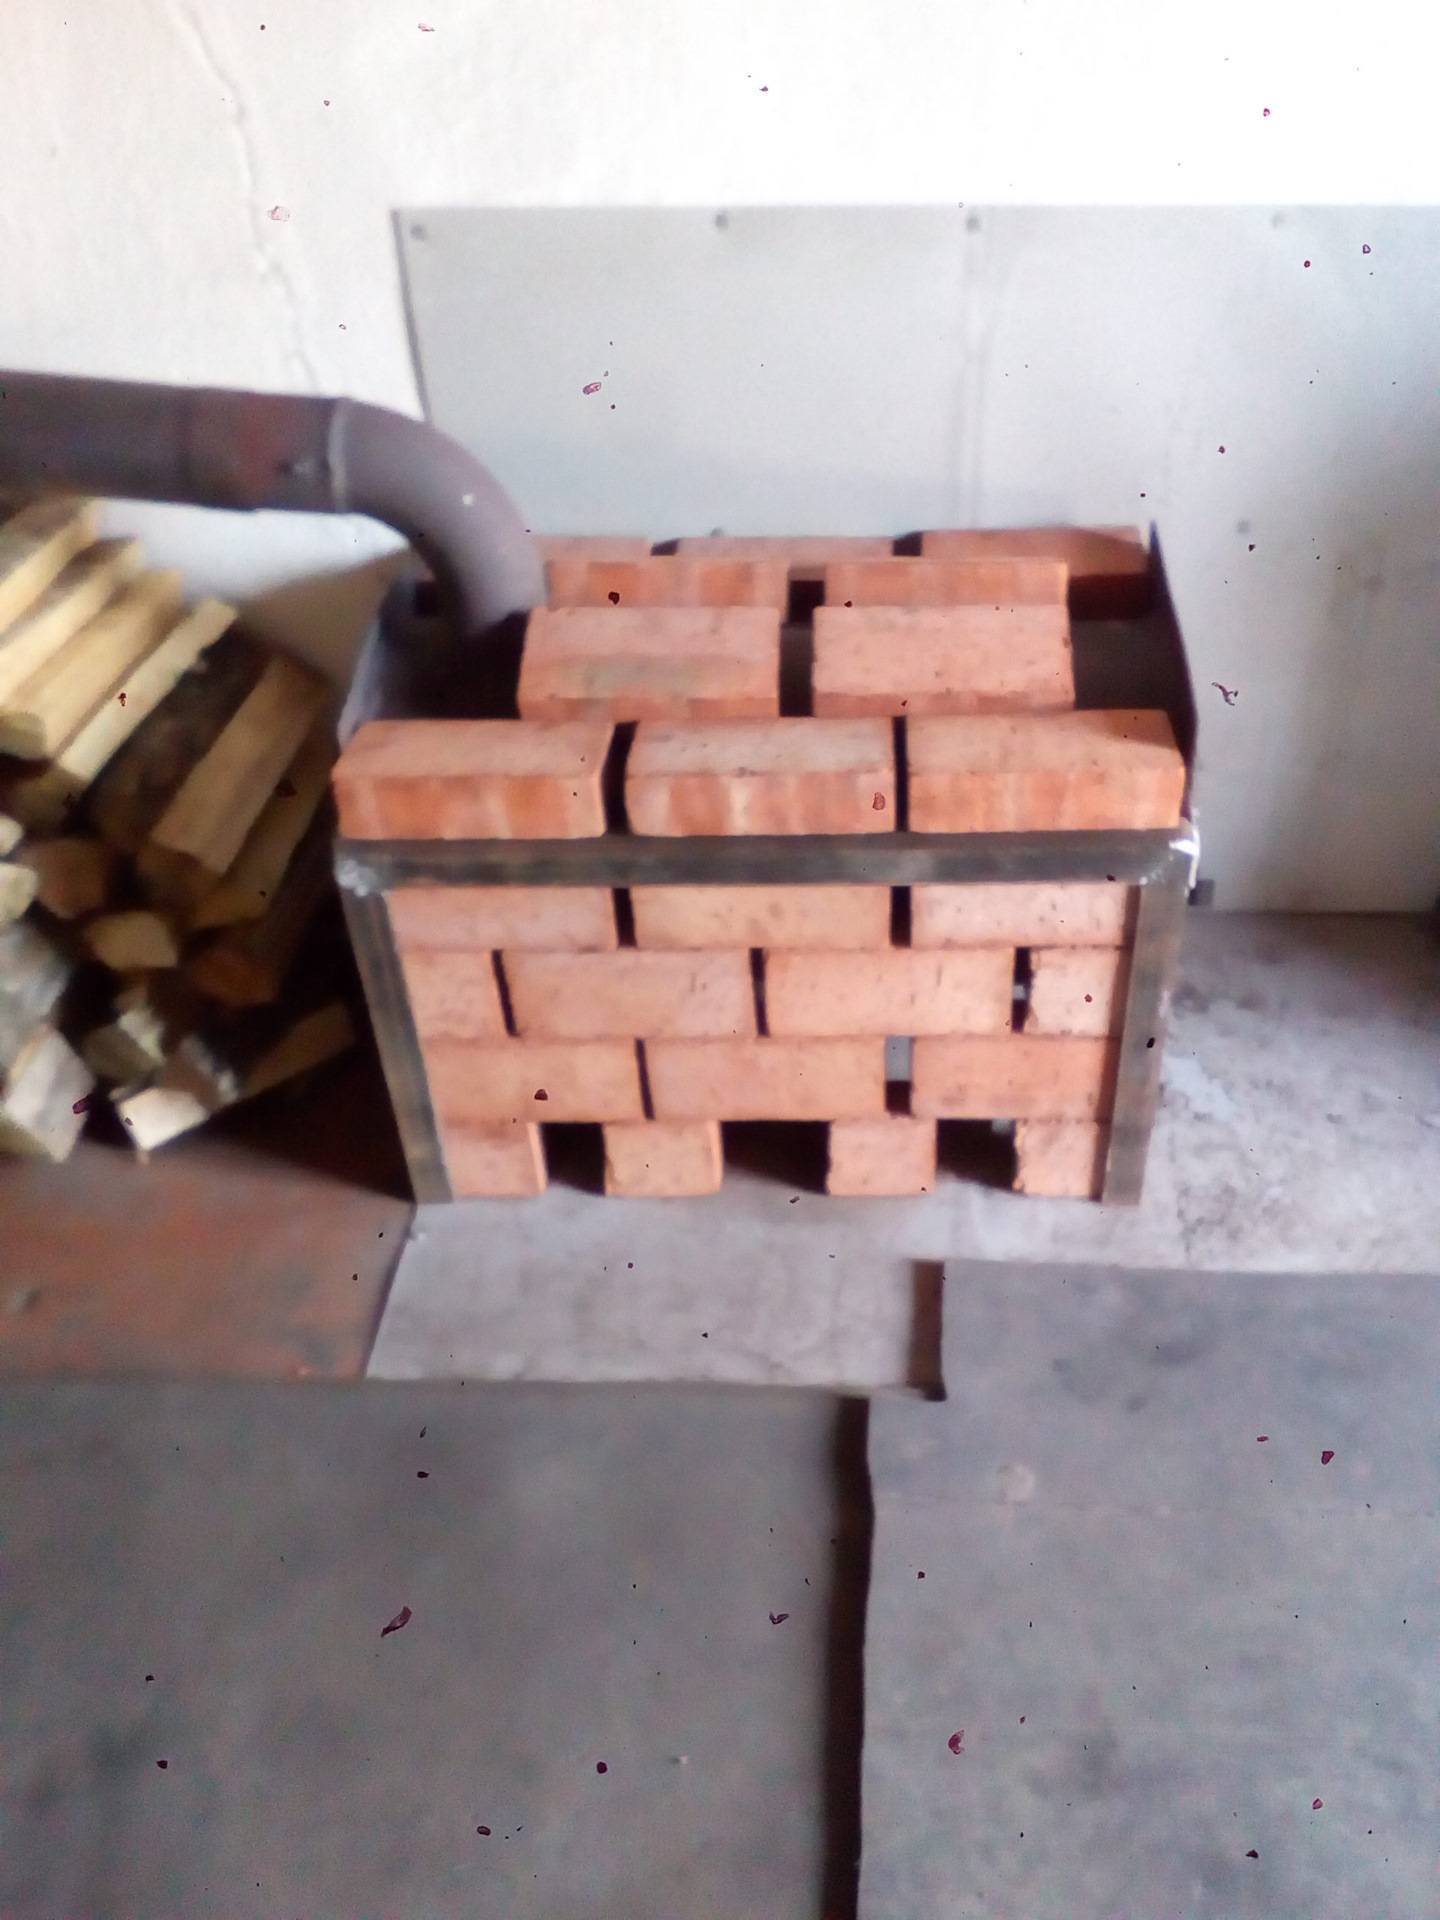
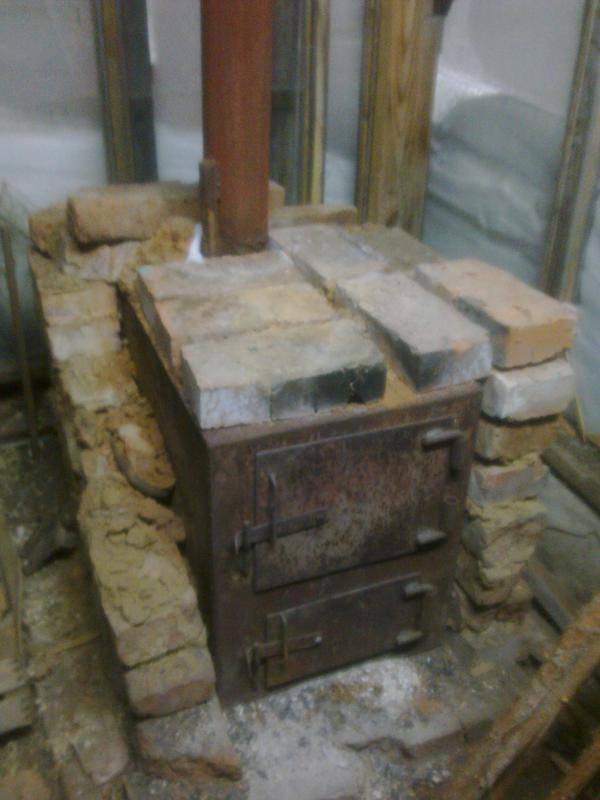
The process of lining an iron furnace with bricks

1. Before laying, you need to soak the brick in cold water for 30 minutes, this will improve the quality of the masonry and make it more durable.
2. The recommended distance between the metal stove and the brickwork should be 10 ... 12 cm, this air gap will keep the heat longer.
3. It is recommended to enclose the stove in a "half-brick". In this case, heat will be retained longer than when laying in a “quarter of a brick” (when the brick is installed on a narrow edge), although the consumption of bricks is greater. In addition, laying in a "quarter brick" is more difficult and requires some experience and more careful control over the verticality and horizontality of the masonry.
4. Between the bars installed strictly vertically, you need to pull a horizontal cord, which will move higher during the masonry process and is a guide to the horizontalness of the masonry.
5. The first masonry must be laid out with particular care, since the direction of the entire wall depends on it. Having laid out the first row, you need to remove excess mortar, if necessary, the bricks are leveled with a rubber mallet.
6. You can not start laying several rows at the same time.
7. The width of vertical joints should be 5…7 mm, and horizontal 8…10 mm.
eight.In each row or through a row, it is necessary to provide holes the size of half a brick for ventilation and active heat entry into the room, sometimes the masonry is made “lattice” with a large number of holes.
9. While the solution remains wet and plastic, having laid out several rows, it is necessary to “joint” the seams, and immediately remove the excess solution, and wipe its remnants with a damp cloth.

10. When lining the stove doors, you need to check that the brickwork does not interfere with opening them. If necessary, use an iron strip if the doors are large enough.
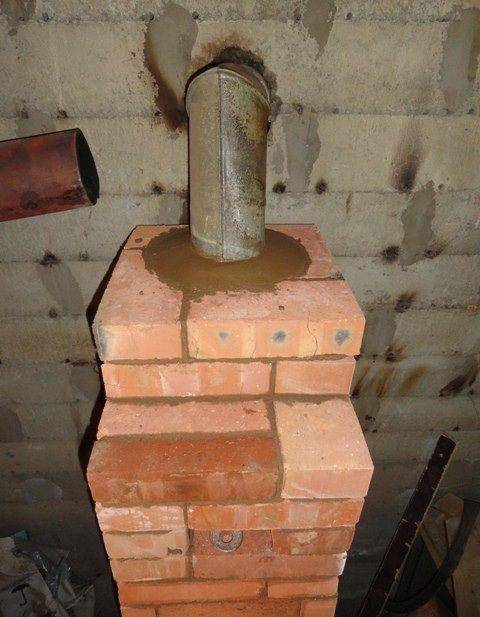
11. Masonry can be finished at the height of the stove, or you can close the chimney with brickwork. In the latter case, it is necessary to provide ventilation holes around the chimney.
12. The finished masonry should dry well, preferably naturally without the use of heating devices, in this case the risk of cracking is reduced.
Conclusion
A potbelly stove, lined with brick, retains heat longer, allows you to spend less fuel. Masonry significantly increases the aesthetic qualities of a simple stove. If desired, the efficiency of the potbelly stove can be increased by installing a sandwich grid. It protects the chimney from burning out and accumulates heat. Often the front and top are left open. So the stove warms up the room faster, but due to the decrease in the area of \u200b\u200bthe brick, it gives off this heat faster. Clay mortar is ideal for stoves, but demanding on room humidity. If the logs are old, it is better to remove some of them and fill in the cement foundation.
How to impose a potbelly stove to keep warm, people have been asking since the time of the revolution. The brick takes on some of the heat, which is safer to use, reduces the risk of getting burned.On the masonry, you can dry things, fruits and berries. The potbelly stove has been helping out in the cold for more than one generation, it does not cease to be in demand and loved by all summer residents. Overlaying the stove with brick is an affordable and quick way to ennoble it, keep the heat in the house. Budget method that does not require special skills.


