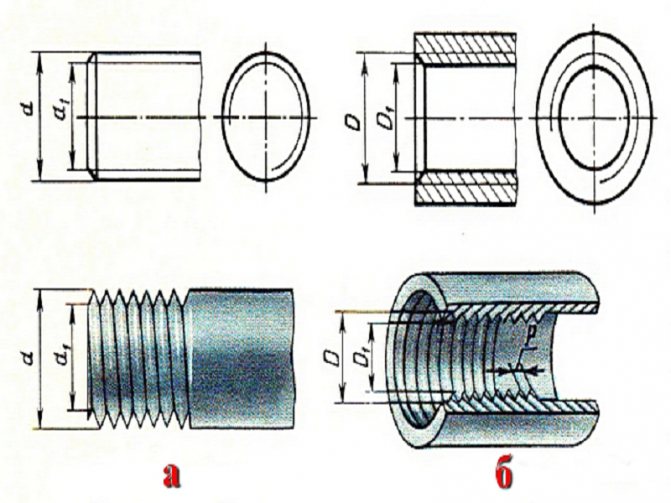
- Thread cutting by hand
- Rules for tapping internal threads
- Note to the locksmith: about GOST for pipe threads
- Existing threading options
- Peculiarities
- How to cut an external thread. Cutting threads on pipes and fittings. Die. Klupp
- Threading with round dies (lerks).
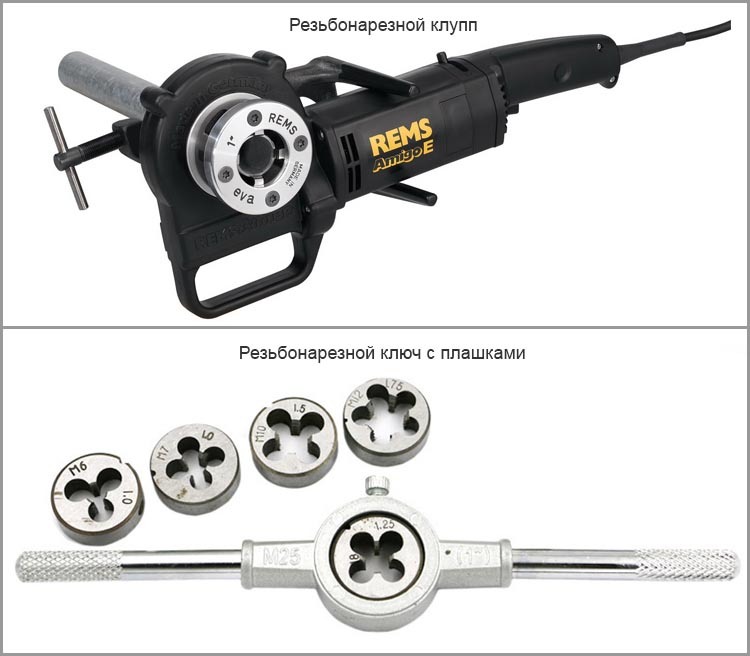
- Klupp for threading.
- Thread cutting technology.
- Cooling and lubrication for threading.
- Screw boards.
- Cutting threads on pipes and fittings.
- Klupp for cutting threads on pipes.
- threading with a tap how to cut threads by hand
- How to choose the type of tap?
- Threading with a tap by hand
- Tapping an internal thread
- Tapping technology
- External thread cutting
- Detailed description
- Tap
- die
- Klupp
- How to cut a thread
- Video description
- Briefly about the main
- Threading a pipe thread with a screw
Thread cutting by hand
All work is done with a die or lerka. These are identical concepts and are synonyms. Depending on the design, they can be:
- Adjustable or sliding. Usually they have several incisors, the distance between which can be changed. They are especially useful in cases where the pipe profile is uneven due to deformation or manufacturing defects, but you still need to cut the thread.Most often they are installed in klupps, which provide them with a good fixation. With the help of such products, threads can be cut in several passes, which increases its accuracy and quality.
- Monolithic. They are a small cylinder with a hole in the middle. Such a tool is clamped in a special die holder. Usually fixed with one or more bolts. With this tool, cutting is made in one pass.
- Cone. Designed for cutting the corresponding threads mentioned above.
 The end is aligned
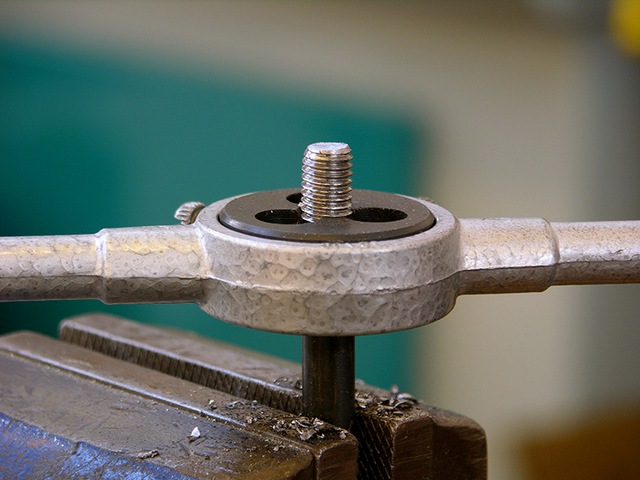
The lerka is selected depending on the diameter of the pipe being processed, as well as on what the direction of the thread should be - right or left. All designations are applied to the packaging or directly to the instrument itself. The whole process will boil down to the following steps:
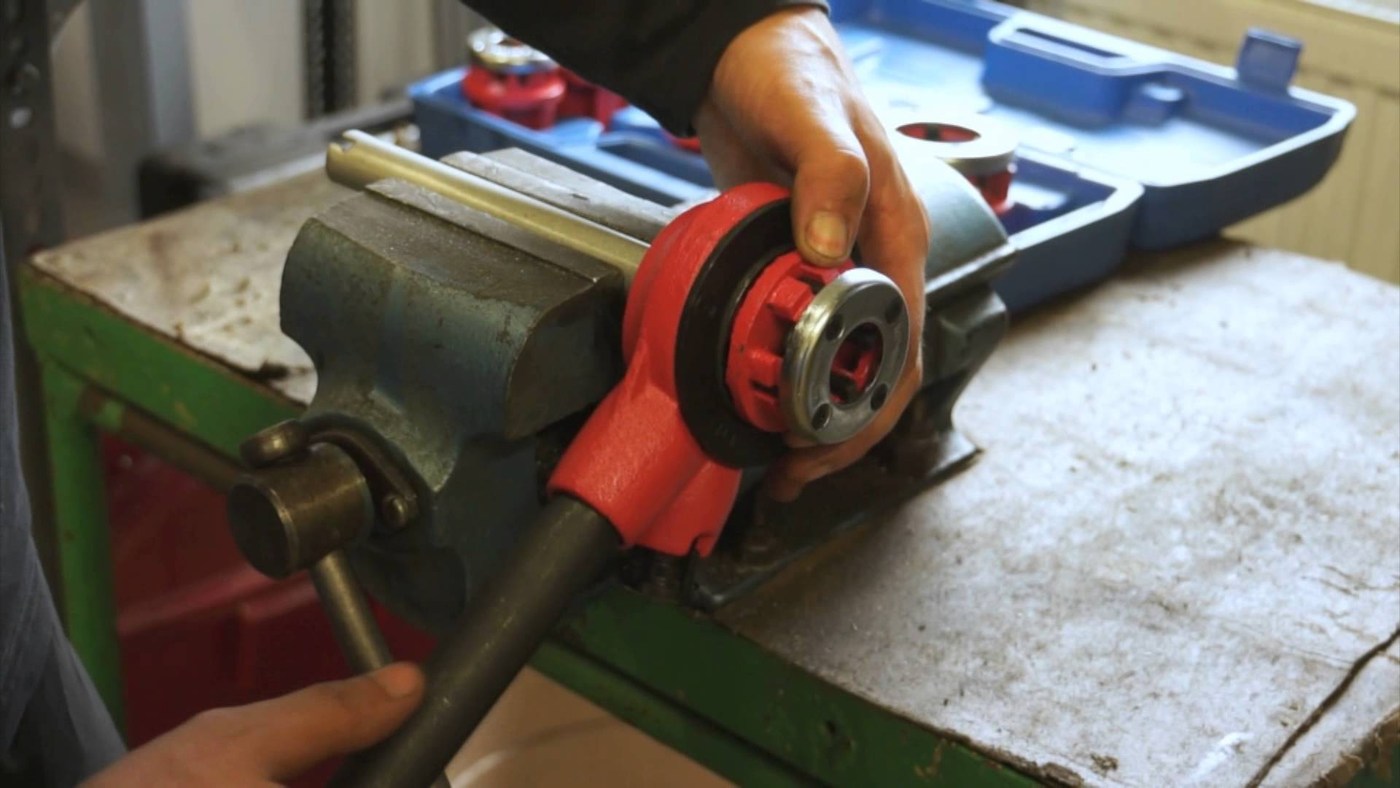
The workpiece is fixed. If it is not fixed in any system, then it is clamped in a vise. In the case when cutting will be done on a water pipe or a heating pipe, it is necessary to make linings to immobilize it.
The end of the prepared pipe section is lubricated with machine oil or grease. If these components are not available, then you can use what is at hand - even lard.
The surface of the tool cutters is also subjected to lubrication.
A die holder with a handle is brought to the end of the pipe. This must be done exactly at a right angle. It is much easier to do this with a guide plate holder.
At the same time, it is necessary to rotate the threading tool and press it against the nozzle. Clutch must take place
Thus, it is important to cut the first 2 turns.
If you do not use a guide die holder, you will need to constantly ensure that the angle remains 90°. If you do not comply with this requirement, then there may be a distortion
This threatens that the thread will be broken, the tool will be damaged, or the required step will not be observed.
Do not cut continuously. In the process, metal chips will form. In order to remove it, it is necessary to make one turn in the direction of travel and half a turn back. It is through this that the accumulated waste will be removed.
Along the way, you also need to add lubrication.
After completion, it is necessary to unscrew the lehr and walk it again to make a finishing eyeliner.
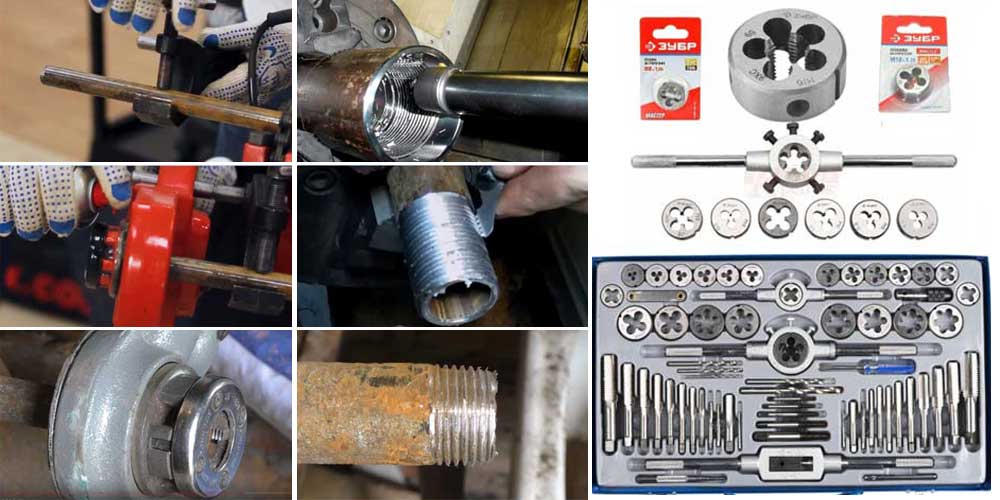
 Thread cutting dies
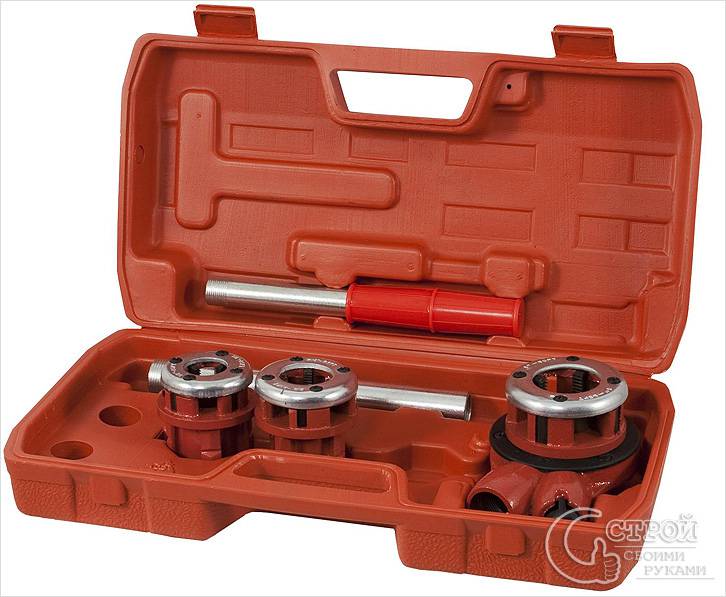 Klupp set
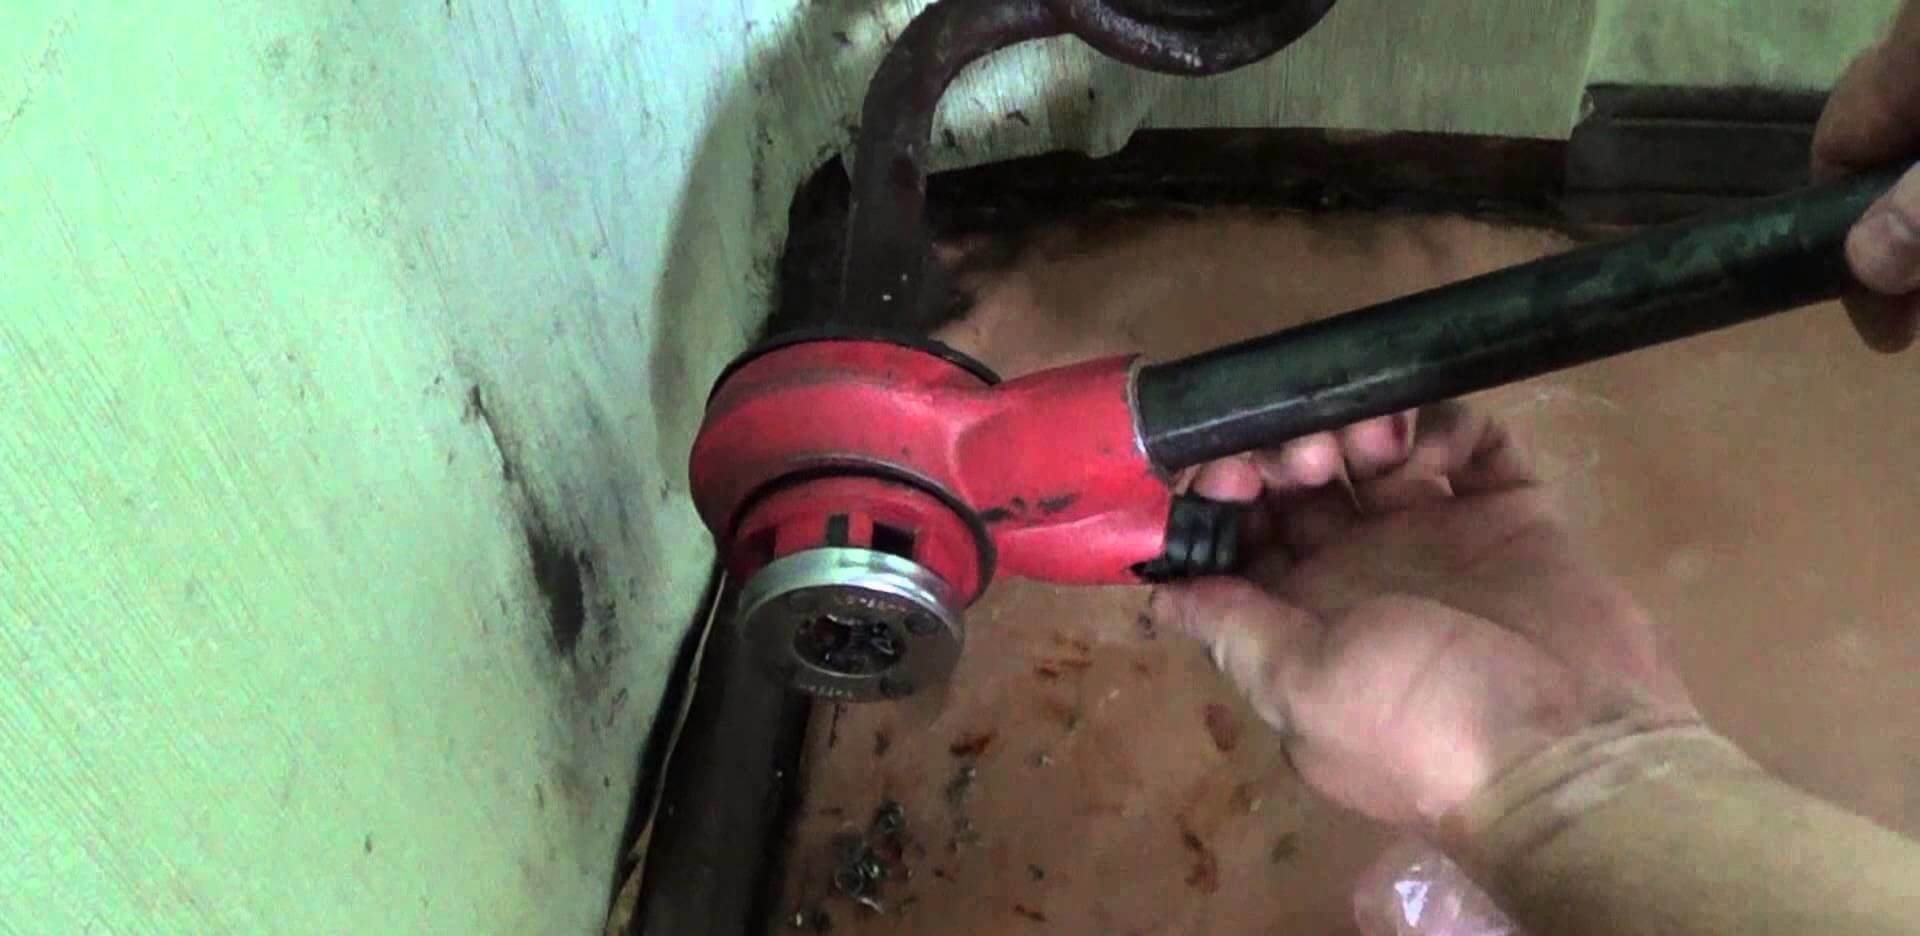
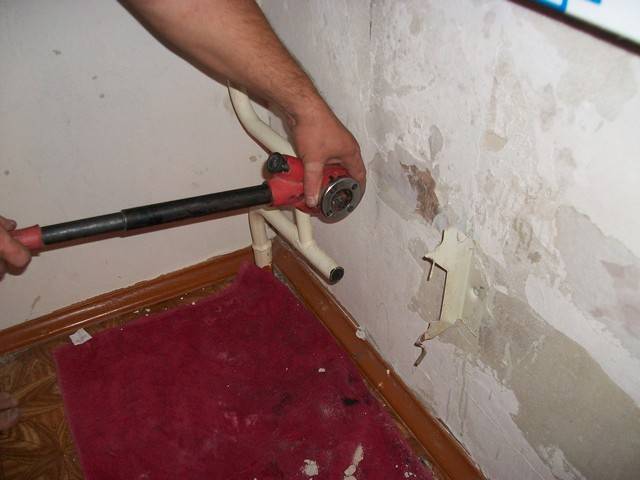
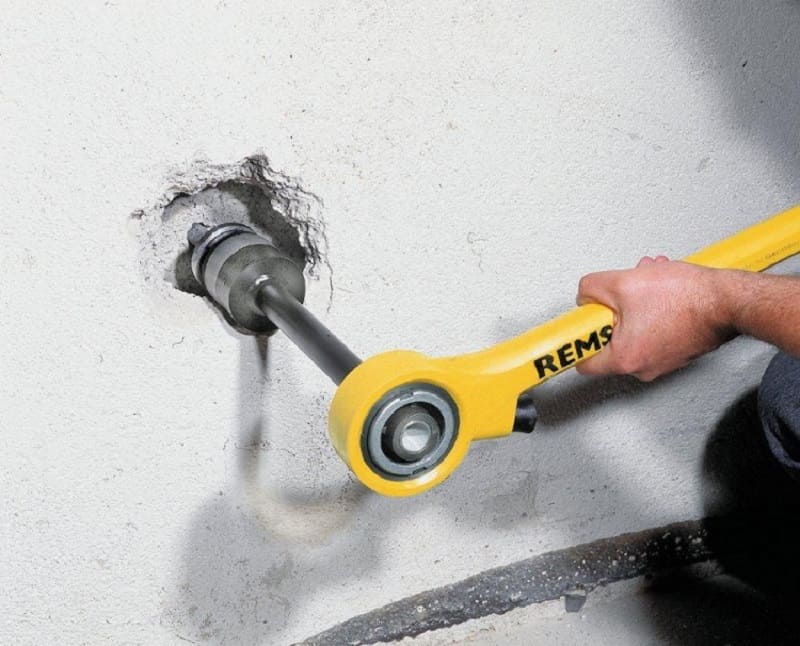
Threading with a die cutter follows the same mechanism. In addition to everything, in some products it is possible not only to shift the incisors, but also to deploy them. In this situation, it is possible to perform both a finishing and a roughing pass with the same tool. When using such a unit, you must be very careful during the initial stage. This is due to the fact that thanks to the ratchet handle, more force can be applied than in the case of a conventional lerk holder. If at the very beginning you do not set the angle correctly, then you can ruin the entire workpiece and not notice it. Klupp is inconvenient to use in cases where the pipe is already installed and is close to the wall. It will either need to be bent with a wedge or a part of the plaster should be hollowed out so that the nozzle fits well and does not move.
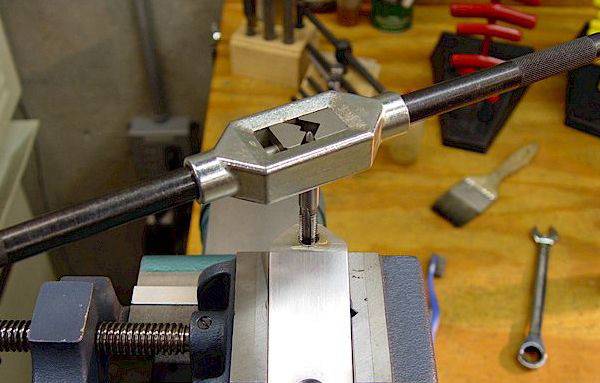
Rules for tapping internal threads
At
hand thread cutting tool
inserted into the hole vertically (without
skew).The collar is rotated in the desired
direction (for right hand thread clockwise
arrow) not all the time, but periodically
make 1-2 turns in the opposite direction.
At
such a revolving motion
tap, the cut chips break,
becomes short (crushed) and lighter
is removed from the working area, and the process
thread formation significantly
relieved. After finishing cutting
the tool is turned out by rotation
gate in the opposite direction
then it is driven along the finished thread
through or all the way for the deaf
holes. It is also necessary to follow
the following rules:
At
thread forming in tough and soft
metals (aluminum, copper, babbits and
others), as well as in deep holes
tool should be periodically
unscrew from the hole for cleaning
chip grooves.
At
using a set of taps
all tools required
set. Cutting straight away
tap or medium, and then finishing
without a rough pass does not speed up, but
only slows down and hampers the process
cutting. Moreover, the carving
turns out to be of poor quality, and the tool
may break. Fine and medium
taps are screwed into the hole by hand
(without wrench) until the tool
will not go along the thread correctly, and only
then install the collar and
continue to work.
AT
cutting process required
carefully follow the correct
tie-in tool so that it is not
skew. For this, it is necessary through
every newly cut 2-3 threads
chips check the position of the tap
relative to the top plane of the part
using a square
Be especially careful
should work with deaf and small
holes
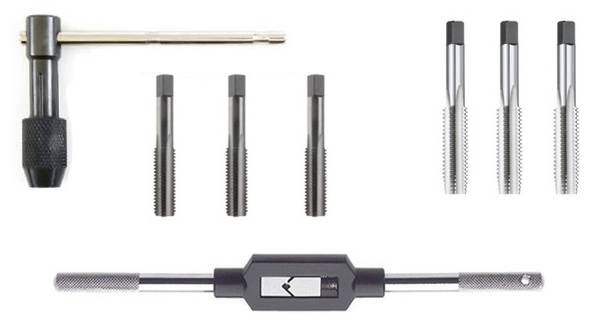
Design
tap
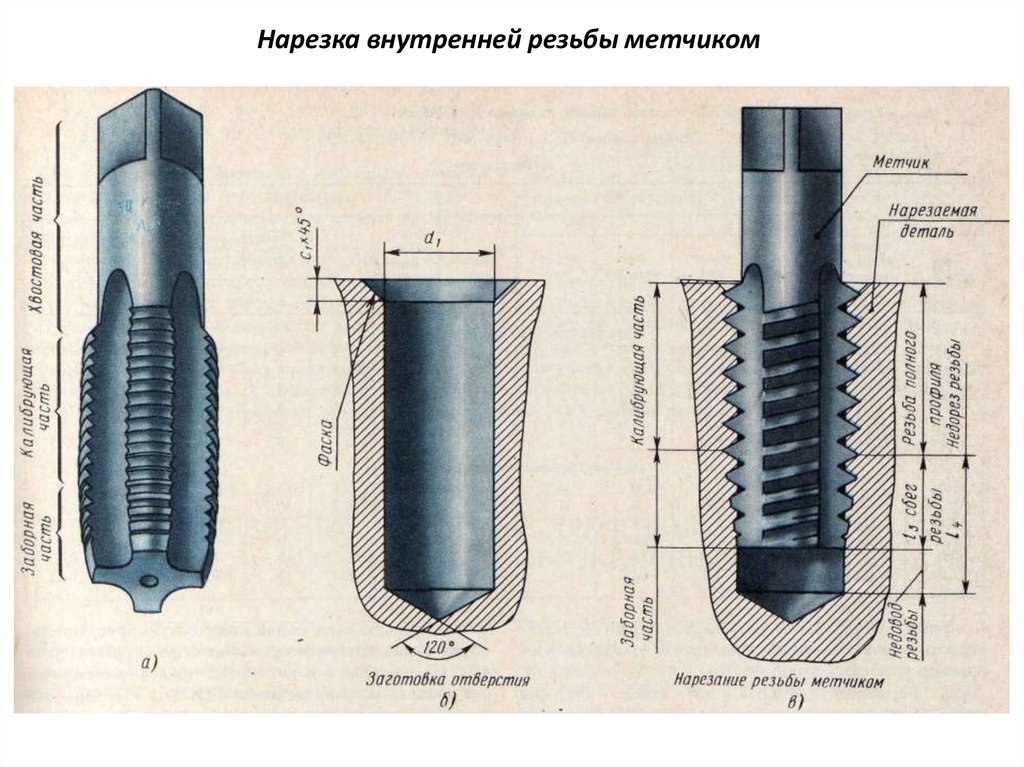
Tap
(Fig. 1) is a hardened
screw with several
straight or helical grooves forming
tool cutting edges. grooves
also provide chip placement,
chip generated during cutting
can be removed from the cutting zone.
Tap
consists of two parts
- working and shank, at the end of which
a square is made (for manual taps).
The working part of the tap includes:
cutting (intake) part, which
provides removal of the main part
allowance for processing; calibrating
the part that carries out the final
thread processing; chip grooves;
feathers (threads separated
flutes) and core,
providing the tap with sufficient
for processing strength and rigidity.
The tail part of the tap is used for
fixing it in the collar, which
produced working and idle
tap movement.
Working
part of the tap is made
from tool carbon steels
grades U11, U11A, high speed steel or
hard alloy. The choice of material for the working
parts depends on physical and mechanical
workpiece properties. At
solid taps tail material
parts are the same, but for taps consisting of
two pieces joined by welding
tail section is made of
structural steel grades 45 and 40X:
Number of flutes made
on the tap depends on its diameter (three
grooves for taps up to 20 mm in diameter
and four - for taps with a diameter of over
20 mm).
main
threading work is performed
cutting edges formed by the intersection
front surfaces of the groove with the back
(backed up, made according to
Archimedean spiral) surfaces
working part. backing
the surface of the cutting teeth allows
keep their profile constant after
transfer, which is carried out
centrally in the grinding shops.
How
as a rule, taps are made with straight
grooves, however, to improve conditions
cutting and obtaining precise and clean
threads use taps with screw
grooves. The angle of inclination of such a groove
to the axis of the tap is 8 ... 15 °. For
obtaining accurate and clean threaded
surfaces in through holes at
processing of soft and viscous materials
use fluteless taps.
Rice.
1 Tap:
a
- construction: 1
- thread (coil); 2 - square; 3 - tail;
4 - groove; 5 - cutting pen;b
– geometric parameters: 1
- front surface; 2 - cutting
edge; 3 - backed surface;
4 - rear surface; 5 - cutting pen;
α is the back angle; β is the cutting angle;δ
- taper angle;
γ is the rake angle;in - from
helical flute: 1
- groove; g - cutting a blind thread;
ω is the angle of inclination of the helical groove.
Note to the locksmith: about GOST for pipe threads
In the conditions of work with gaseous and liquid media, according to GOST 6111, if it is necessary to introduce detachable connections into pipeline schemes, it is allowed to manufacture such connections on a threaded basis. It is possible to perform not only pipe, but also conical threads (GOST 3662).
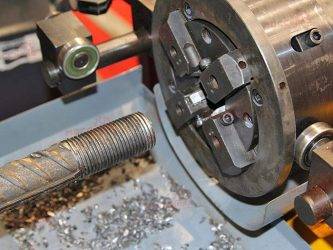
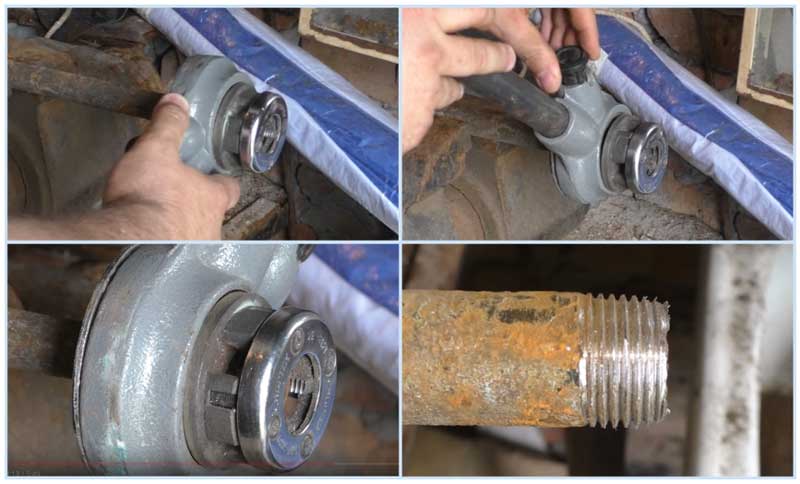
An example of the production of a conical pipe thread on a technological adapter. Similar techniques are often used in plumbing.In terms of performance, conical threads stand out for the better relative to other types


Despite the rare use of tapered threads in pipe connections, it is considered more convenient in terms of screwing / make-up characteristics. It should be recalled that the taper angle of a tapered thread is directly related to parameters such as pitch and diameter. The permissible value of this angle cannot be less than 26 º. The standard value for the profile nose angle on a tapered thread is 60º.
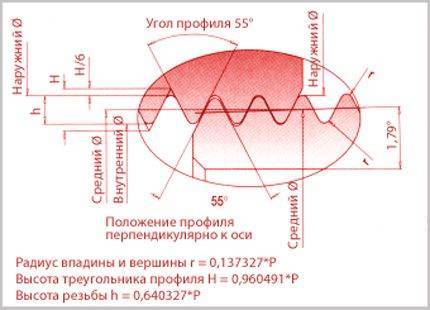
Pipe threads are distinguished by a characteristic feature - they have a rounded profile top. Subject to threading standards, the rounding value is 10% of the thread radius size. With this cutting technology, it is possible to achieve a significant reduction in internal stresses on a small metal area occupied by a threaded profile.
The established tolerances of GOST 6357, along with cylindrical and conical threads, provide for the execution of metric threads on pipes.
Here, the standard of the angle of inclination is 55º, which causes an increase in the number of turns in the section along the length equal to the section with a different type of thread. The result is a connection with a higher degree of tightness, but the complexity when using such connections increases.
Metric threads and full technical layout according to standard parameters. For metric threads, the unit of measurement is millimeters, while pipe threads are usually measured in inches.
The existing GOST installations also provide for the possibility of making thrust and trapezoidal threads on pipes. But in practice, these types of cutting are not used because of their low operational strength.
Existing threading options
Pipe threads are divided into five types, but the most popular options are conical and cylindrical. Households often face such pipe thread options. There are two ways to thread a water pipe:
- Automatic, which involves cutting threads on water supply pipes using special machines and power tools.
- Manual. For this, special hand tools are used.
If, on duty, a person needs to cut threads on a large number of pipes, then it is appropriate to purchase a special power tool, which will facilitate manual labor.

When the need to obtain a threaded connection is a single case, then manual technology is suitable for such purposes. On water pipelines, as well as pipes of heating systems, threading is performed using a die.
The die is a steel disk, and its inner diameter has axial holes in different numbers, depending on the size of the product. The edges of these holes form cutters, with the help of which threading is performed. To ensure the reliability of such a tool, it is made of alloyed steels or hard alloys.
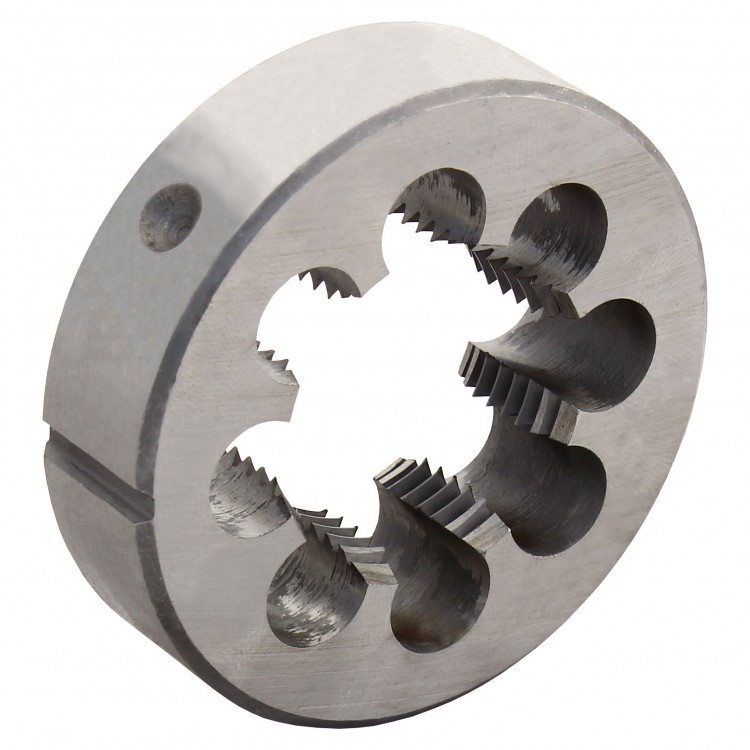
Dies can have a different shape (round, square, hexagonal or prismatic), but most often disk options are used. It is the disk dies that are intended to obtain a threaded connection on water pipes. To make it convenient to work with a die, they are additionally equipped with knobs, as well as clamps in the form of screws. Dies are also solid, split and sliding.
One-piece dies for threading pipes have one significant drawback - this is the rapid wear of the cutters. This is due to the rigidity of the product's own design. Split or spring-loaded dies have a less rigid design, which significantly increases the life of the product. Due to the spring-loaded mechanism, such a tool for threading pipes allows you to vary the diameter of the resulting threaded connections in the range from 0.1 to 0.3 mm. A device of this type has a high resistance to wear of the cutters, but is not capable of providing high accuracy.
Sliding dies are 2 working parts intended for installation in a mounting module. A die with a special fastening module forms a tool called a pipe die. The die in the die is fixed with a cracker and an adjusting screw. It is with the help of the adjusting screw that the thread diameter is adjusted.
Peculiarities
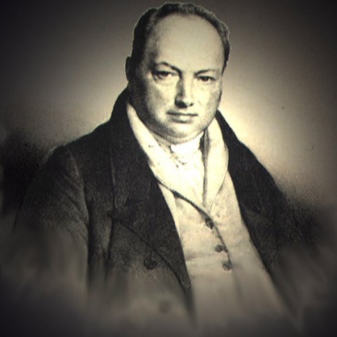
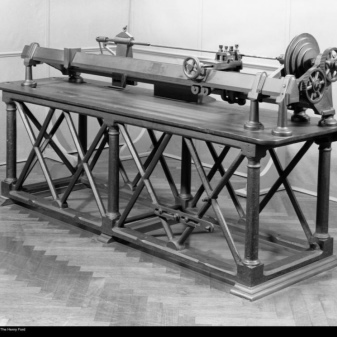
Threading was invented two centuries ago when the screw lathe first appeared in Britain. Inventor G. Maudsley discovered a method for applying precise threads and invented a device for measuring it (micrometer) with an accuracy of 0.0001 inches.
Around the same time, mechanical engineer D. Whitworth created the first screw thread profile and proposed a system of its standards. Since then, the invention bears his name - Whitworth carving. It formed the basis for various national standards.
The main feature of threading is that the tool for its implementation must be made of a material of greater hardness than the element being cut, and for the manufacture of this tool, in turn, designs with even harder elements in composition must be used.
Nowadays, there are countless options for threading a pipe.
It is only important to choose the one that is needed. A good result is guaranteed if high-quality materials and tools are used during the work, the instructions are followed, as well as the cutting technology. When threading, it is best to use a quality tool, as a cheap option is unlikely to work for a long time
When threading, it is best to use a quality tool, as a cheap option is unlikely to last long.

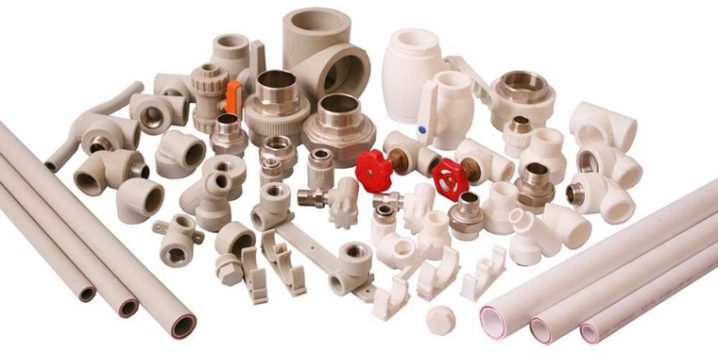
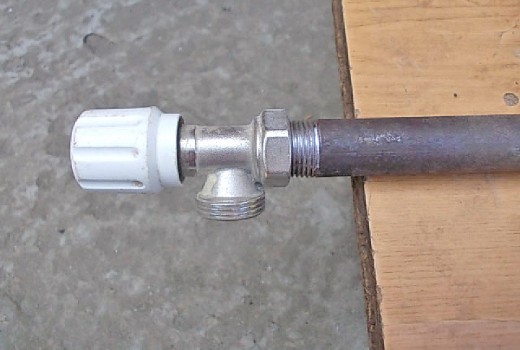
Now most piping systems are made of plastic. It is often necessary to fasten structures using connecting elements made of plastic and metal. In the domestic sphere, such fasteners are a fairly common solution, they are called combined. In modern communication systems, one of the types of plastic or metal pipes is traditionally used. However, in some cases it is expedient to use combined designs.


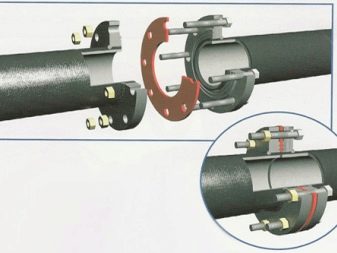
Pipes with a diameter of up to 40 mm are joined by a threaded method. Flanged connections are used for larger diameter pipes where it is not possible to tighten the thread.
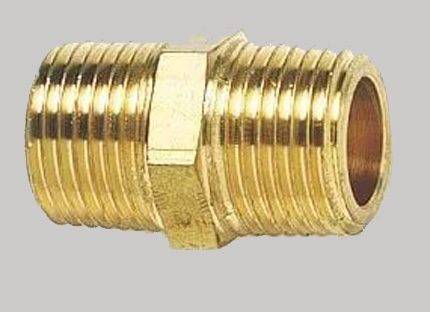
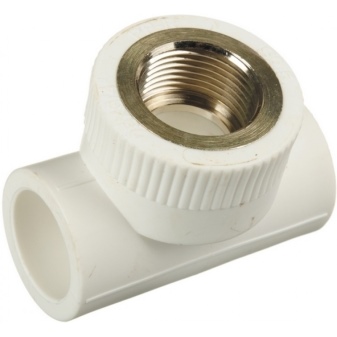
The connection of a polypropylene pipe with a metal pipe is carried out using fittings that are specially designed for this. They are connections, one side of which has a metal thread, and the other has a plastic sleeve. Multiple combined connections are made with special complex fittings.
How to cut an external thread. Cutting threads on pipes and fittings. Die. Klupp
How to cut an external thread. Thread cutting pipes and fittings. Die. Klupp. 4.46/5 (89.23%) lost 13
An external thread is cut using round or sliding dies, as well as screw boards. Thread cutting can be done both on machines and manually.
Threading with round dies (lerks).
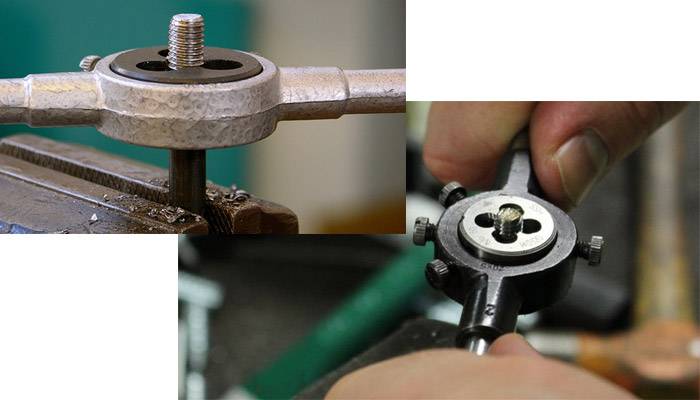
Round dies (lehrs) are a disk with a cut hole. To remove chips and form feathers with cutting edges (Fig. 1), several chip holes are made in the die. The dies (lehrs) are inserted into the lerko holder and clamped with screws (Fig. 2).
Rice. 1. Die round cut (lerka).
Rice. 2. Lerko holder:
1 - frame; 2 - handle; 3 - clamping screw.
The diameter of the cut rod is taken slightly less than the outer diameter of the thread and sawed down cone-shaped for the lehr to enter. The choice of rods for cutting metric or inch threads is given in Table. one:
Table 1. Shaft diameters for threaded bolts.
| Metric thread | Inch thread | ||
| Outer diameter in mm | Stem diameter in mm | Outside diameter in inches | Stem diameter in mm |
| 5 | 4,89 | 1/4 | 6,19 |
| 6 | 5,86 | 5/6 | 7,7 |
| 8 | 7,83 | 3/8 | 9,3 |
| 10 | 9,8 | 7/16 | 10,8 |
| 12 | 11,7 | 1/2 | 12,4 |
| 14 | 13,7 | 5/8 | 15,6 |
| 16 | 15,7 | 3/4 | 18,7 |
| 20 | 19,6 | 7/8 | 21,8 |
| 22 | 21,6 | 1 | 25 |
| 24 | 23,6 | 1 1/4 | 31,3 |
| 27 | 26,6 | 1 1/2 | 37,6 |
| 30 | 29,5 | 1 3/4 | 43,8 |
| 36 | 35,4 | 2 | 50 |
Sliding dies (Fig. 3, a) consist of two prismatic halves with a cut hole. A groove is made in the middle part of the die hole, which forms the cutting edges.
Rice. 3. Sliding dies and crackers:
a - plate; b - cracker.
Klupp for threading.
For fastening the dies, a screw clamp with a rectangular or oblique frame is used (Fig. 4). The prismatic protrusions of the klupp enter the grooves of the dies, and from the side the dies are pressed with bolts.
Rice. 4. Klupp (oblique)
1 - frame; 2 - handle; 3 - clamping screw.
To avoid direct pressure of the bolt on the dies, a so-called cracker is installed between the dies and the bolt (see Fig.3b) having the shape of a plate.
Thread cutting technology.
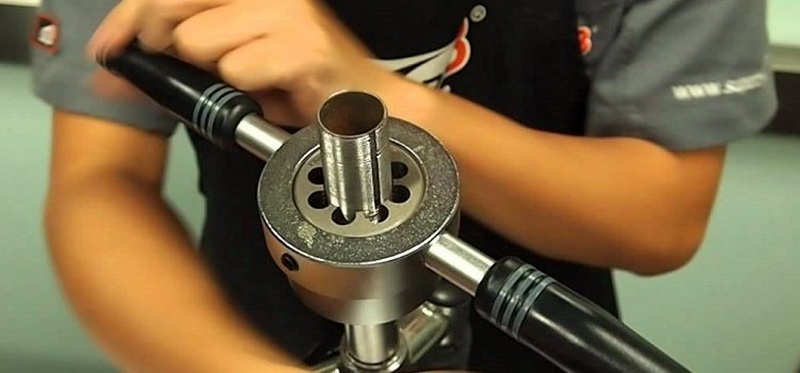
Cutting with prismatic dies is somewhat different from cutting with lerks. When cutting with dies, the rods are not sawn into a cone, but the dies are moved apart.
Then they are clamped on the rod, the end of which must coincide with the upper plane of the dies. By turning the die to the right and slightly to the left, threading is performed.
The position of the lerkoderzhatel and klupp is set strictly perpendicular to the cut rod, otherwise the thread will be oblique and one-sided.
Cooling and lubrication for threading.
When cutting threads with taps and dies, lubricant must be used. As a lubricant, you can use a regular emulsion, dissolving one part of the emulsion in one hundred and sixty parts of water. In addition, you can apply: for cast iron - lard and kerosene; for steel and brass - boiled and rapeseed oil and lard; for red copper - lard and turpentine; for aluminum - kerosene.
It is not recommended to use machine and mineral oils when cutting threads, since they, by increasing cutting resistance, do not give clean holes and lead to rapid wear of taps and dies.
Screw boards.
In order to cut threads on screws with diameters up to 6 mm, screw boards are used. On the screw boards there are several cut holes of different diameters with chip grooves, two for each hole.


Threading with dies is performed in the same way as tapping. The rod is firmly clamped in a vise, lubricated with oil, and then a die with dies is put on the rod, clamped with a screw and rotated a full turn in one direction and half a turn in the other.If the rod is thicker than required, it must be filed.
The thread of the bolts is measured with annular thread gauges or a thread gauge.
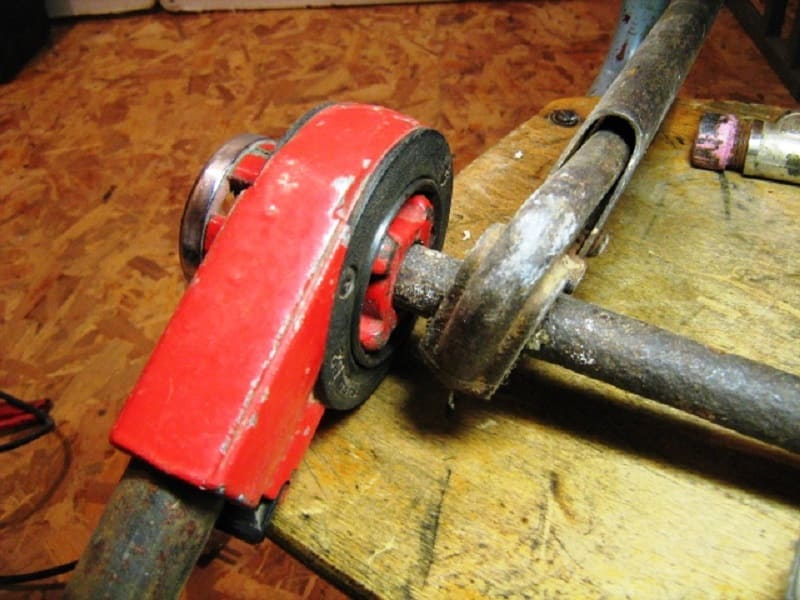
Cutting threads on pipes and fittings.
Pipes and fittings (connecting parts for pipes) are cut with a special tool using fixtures.
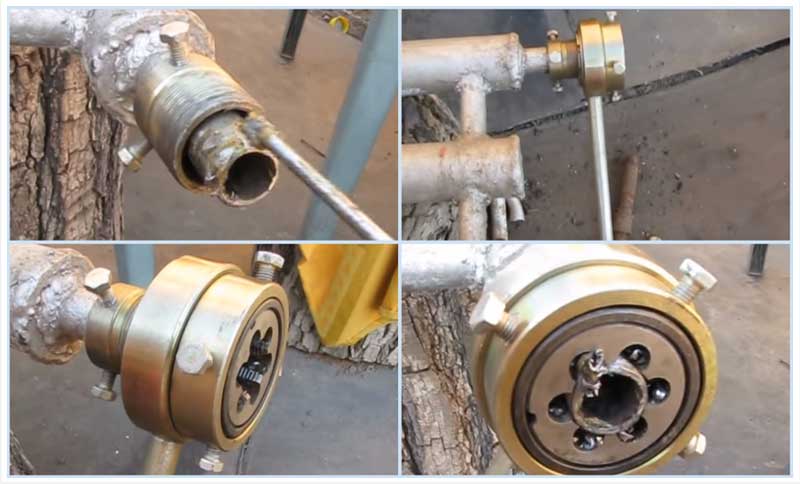
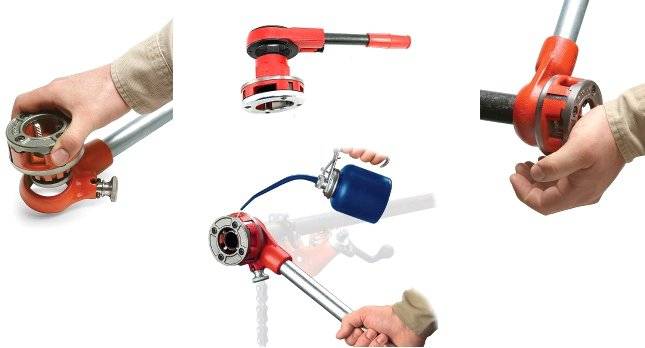
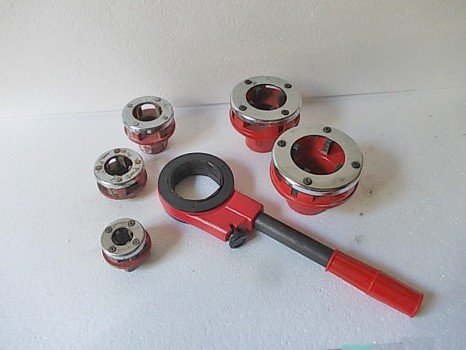
Klupp for cutting threads on pipes.
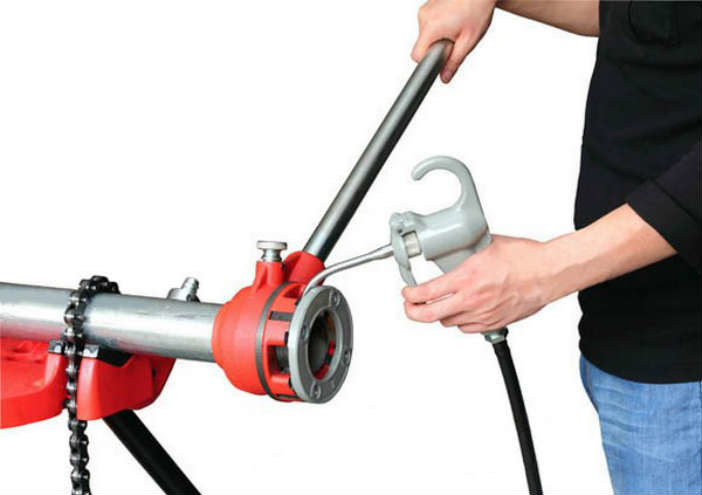
On pipes, the thread is cut with a special screw thread (Fig. 5). The die cutter for cutting pipes according to the device differs from ordinary die cutters. Four steel combs enter the slots of its holder.
By turning the top handle, they can be brought together or moved apart. Therefore, pipes of various diameters can be cut with one die. In addition, the klupp has guides that are regulated by the lower handle.
The guides ensure the correct position of the die on the pipe when cutting.
Rice. 5. Klupp for cutting pipes.
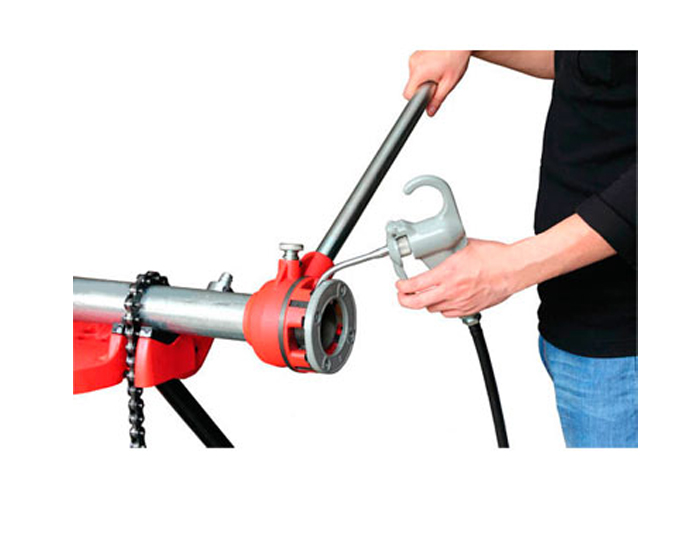
Pipes during cutting are fixed with a special pipe clamp. The clamp consists of a frame in which crackers with cutouts for pipes of various diameters are placed.
threading with a tap how to cut threads by hand
How to cut threads with a threading device was described earlier. The threading device differs greatly from the tap device, but the principle of threading with both tools remains the same.
A tap is a metalworking and turning tool, in its shape somewhat reminiscent of a long rod. Inside this very rod there are cutting elements, with the help of which the thread is cut manually.
A tap can be used for more than just cutting new threads. With this tool, you can also restore the thread, making it as "new".
According to the principle of operation, taps are manual and machine.Machine taps are fixed on a lathe, and threading occurs in automatic mode.
How to choose the type of tap?
For manual threading, you first need to select the correct type of tap. The choice of tap for threading depends primarily on:
- thread pitch;
- profile;
- Forms of threaded connection;
- Tolerance;
In addition, the choice of a particular tap is also influenced by the material of manufacture of the parts on which the thread will be cut. The main choice of a tap, first of all, depends on the diameter of the thread being cut.
Threading with a tap by hand
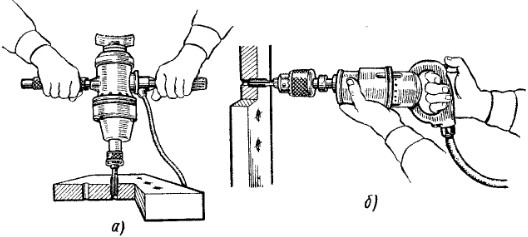
Threading with a tap occurs as follows. The part to be threaded is fixed in a vise or other device. The main thing is that the part is securely fixed in the device, since when threading with a tap, you will need to apply a lot of effort.
Then, a hole is drilled into the part for threading with a tap, depending on the type of thread - blind or through. The diameter of the drilled hole should be slightly smaller than the diameter of the cutting elements of the tap.
Be sure to chamfer the top edge of the tapping hole. After that, a tap is taken and installed in a drilled hole, which should be located in a vise with a chamfer up.
Threading with a tap is done clockwise, all the time, pressing the tap into the hole. It is necessary to press the tap smoothly, without unnecessary jerks, gradually turning it, thus, until a clean and even thread is obtained.
After making several turns with the tap clockwise, it is returned in the opposite direction, thereby getting rid of the accumulated metal chips.
During threading, it is necessary to cool the tap in time, otherwise the tool can be easily damaged. If an aluminum thread is cut, then the tap is cooled with kerosene; if a thread is cut on a copper part, then with turpentine; when cutting a steel thread, it is best to cool the tap with an emulsion.
Tapping an internal thread
To form an internal thread, the following tools and materials are required:
- hammer, center punch, drill, drills;
- a set of taps, knobs, bench vise;
- machine oil.
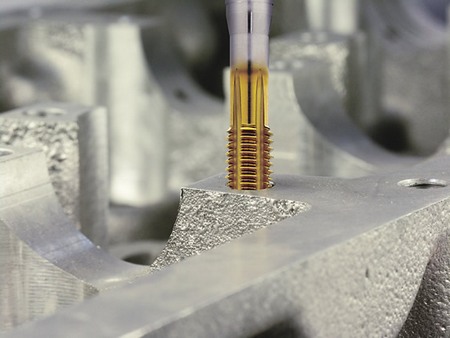
Tapping technology
The first step is to mark the workpiece and core the center of the future hole. Select a drill that matches the required thread diameter. This can be done using lookup tables or approximately using the formula d = D - P. Here D is the thread diameter, P is its pitch, d is the drill diameter. For example, for M10 d = 10 - 1.5 = 8.5 mm.


| Nominal diameter threads, mm | Step, P | Drill diameter threaded |
|---|---|---|
| 2 | 0,4 | 1,6 |
| 3 | 0,5 | 2,5 |
| 3,5 | 0,6 | 2,9 |
| 4 | 0,7 | 3,3 |
| 5 | 0,8 | 4,2 |
| 6 | 1 | 5,0 |
| 0,75 | 5,25 | |
| 0,5 | 5,5 | |
| 8 | 1,25 | 6,8 |
| 1 | 7,0 | |
| 0,75 | 7,25 | |
| 0,5 | 7,5 | |
| 10 | 1,5 | 8,5 |
| 1,25 | 8,8 | |
| 1 | 9,0 | |
| 0,75 | 9,25 | |
| 0,5 | 9,5 | |
| 12 | 1,75 | 10,2 |
| 1,5 | 10,5 | |
| 1,25 | 10,8 | |
| 1 | 11 | |
| 0,75 | 11,25 | |
| 0,5 | 11,5 | |
| 14 | 2 | 12,0 |
| 1,5 | 12,5 | |
| 1,25 | 12,8 | |
| 1 | 13,0 | |
| 0,75 | 13,25 | |
| 0,5 | 13,5 | |
| 16 | 2 | 14,0 |
| 1,5 | 14,5 | |
| 1 | 15,0 | |
| 0,75 | 15,25 | |
| 0,5 | 15,5 | |
| 18 | 2,5 | 15,5 |
| 2 | 16,0 | |
| 1,5 | 16,5 | |
| 1 | 17,0 | |
| 0,75 | 17,25 | |
| 0,5 | 17,5 | |
| 20 | 2,5 | 17,5 |
| 22 | 2,5 | 19,5 |
| 24 | 3 | 21 |
| 27 | 3 | 24 |
| 30 | 3,5 | 26,5 |
A hole is drilled in the part to the required depth, which must exceed the length of the cut part. Using a drill with a diameter larger than d, a chamfer is made on the edge of the hole. It serves for centering and better entry of the tap.
According to the main parameters of the thread - diameter and pitch - a cutting tool is selected. As a rule, a set of two taps is used. One of them is rough, the other is finishing. According to the size of the square of the tail part of the taps, a knob is selected.
The part is securely fixed in a vise. The rough tap and the hole are lubricated with machine oil. After that, the tap is installed strictly perpendicular to the surface of the part and, pressing along its axis, rotate the knob by the handles.
Having cut one or two threads of thread, make a quarter turn in the opposite direction. This contributes to crushing and removal of chips, prevents jamming of the tool. Work continues, carrying out alternate rotation: ½ turn forward, ¼ back. In this case, it is necessary to ensure that there is no distortion of the tap. Also, don't put too much pressure on it. To prevent jamming, the cutting tool is periodically withdrawn, and the hole is cleaned of chips.
After cutting the internal thread to the required depth, a finishing tap is installed in the hole. When he goes in a given direction, they put a collar on him and continue to work. Periodically add lubricant.
The thread is checked with a plug gauge or bolt. It should screw in effortlessly and not swing. If necessary, make an additional pass with a finishing tap.
External thread cutting
External threads on bolts, rods and screws are manually cut into dies.
Separate them depending on the device:
- prismatic;
- round;
- sliding;
- whole.
The prismatic ones have a pair of identical halves, which are mounted in a screw cap in the form of a frame with handles. On the two outer sides of these dies there are prismatic grooves intended for the prismatic projections of the klupp.
Prismatic dies have a pair of identical halves, which are attached to the screw in the form of a frame with handles.
Sliding dies are installed in the klupp so that the numbers on its parts are opposite the same numbers on the frame. Otherwise it will turn out wrong. They are fastened with a fixed screw.A steel cracker plate is placed between the die and the stop screw so that it does not burst when pressed with the screw.
The round die is fastened in the easy-hold wrench with a pair or two pairs of thrust screws.
With the help of a sliding variety, threading can be made if there are slight deviations in the diameter of the rod, which should not be allowed when cutting into round solid dies. With a smaller diameter of the rod, an incomplete thread will be obtained, with a larger one - even.
Detailed description
Tap
Outside, the tool resembles an ordinary bolt, ending not with a hat, but with a small square shank. By the beginning of the thread, the size of the ridges is significantly reduced, which provides the smoothest entry with minimal hardening. The tap is equipped with longitudinal grooves that remove chips.
In most cases, when cutting threads, a set of two or even three tools is used. Let's say, when cutting a half-inch thread, the future coupling (drilled cylindrical billet) first passes a 1: 2 rough pipe tap, then a finishing tap. When cutting in one pass, tool wear increases, and the level of thread quality turns out to be much worse.
die
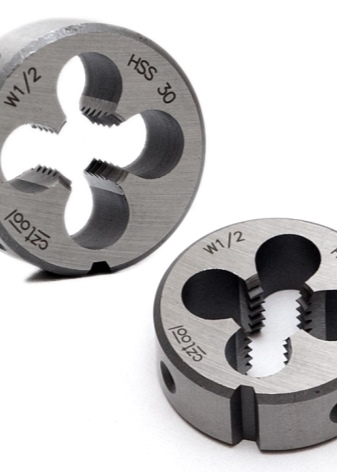
In addition to the fact that this tool is recommended for cutting external threads, the die is distinguished from the tap by another feature: the thread is cut in one pass.
What does the plate look like? Where a 1 1:2 pipe tap resembles a 1.5-inch bolt, the corresponding die predictably resembles a 1.5-inch carbide nut. It is distinguished from a simple nut by a thread with the same smooth (conical) entry and a pair of through channels for chips.
On the outer cylindrical surface of the die there is a pair of conical recesses, against which the screws fixing it in the holder rest.
Klupp
We have already outlined its fundamental difference from a die: the cutters are fastened only by a mandrel and can change independently of each other if damaged.
It is useful for a potential client to know only one subtlety: if the outer diameter of the die is strictly regulated by GOST 9740-71, according to which they are produced, then the cutters of the die can have a different shape and be fastened by various methods.
When buying a replacement, it is better to pay attention to the products of the same manufacturer that made the mandrel. Otherwise, a situation is likely, at a time when the incisors simply will not rise to their place
How to cut a thread
Before cutting a thread, you should determine its size, pitch and the standard used. If you want to make a cut on a part that should fit an already finished element, it is recommended to first understand its dimensions. To do this, look for the appropriate marking next to the finished thread.
If it is not there, then a caliper or a special set with templates for notches of different standards can be used for measurement. You can also use marked plumbing fittings for this, if there are no other options. With its help, you can understand the diameter of the pipe.


To determine the step of the notch, you can mark 10 turns with a marker, measure the length of the entire section and divide it by 10. The resulting number will be the step. The threading tool should also be selected based on the diameter of the pipe and the pitch of the notch on the part to which the connection is required.
Before working with dies or a die, clean the surface of the pipe on which the notch will be made using a file, sandpaper or a grinder with a grinding wheel. The end part of the part also needs to be turned and an input chamfer made on it to start work.

Entry chamfer example
Before cutting, it is recommended to apply lubricant to the surface of the part to reduce resistance and friction during operation, and also to fix it in a vise for better stability. Carefully tighten the holder and control the pressure on the pipe walls so as not to bend it.
The first pass of the thread is made with a roughing die for basting the recess, and after that a finishing or intermediate device is used, as strong metals can require up to 5 thread passes.
When working with dies or a die, keep the working surface of the tool perpendicular to the end of the pipe. During cutting, you need to press a little on the device and make a notch with small turns (20-30 °). It is recommended to constantly check the angle of the tool to ensure that the thread is straight. This must be done for the first 2-3 turns, and then the cutting edge is tightly fixed by itself and it is not required to follow the angle.
Video description
This video shows how to cut an internal thread using a machine and a tap:
Cutting with an electric screw clamp is similar to the conventional process, but this tool requires more space and additional fixation to work. Its advantage is that the labor intensity of the process for the locksmith is reduced. For any type of cutting, it is recommended to add lubricant during operation to those places where the cutting edge is located.
Threading can also be done using a lathe. This type of work is most often used for large volumes of production. Using such a device, you can make both external and internal threads, but a trained specialist is needed to work with them. Without proper knowledge, working with the machine can cause injury.

Threaded Plumbing Fitting Example
Briefly about the main
Threading is a convenient and reliable way to fasten parts and mount various structures.
There are various types of threads, but for pipes, the cylindrical or conical standard is most commonly used.
The simplest and most affordable tool for notching external threads is a die, and for internal threads, a tap.
Using a die cutter, you can save time and effort when cutting threads in hard-to-reach places, for example, near walls, and an electric device is able to make a notch on its own.
Source
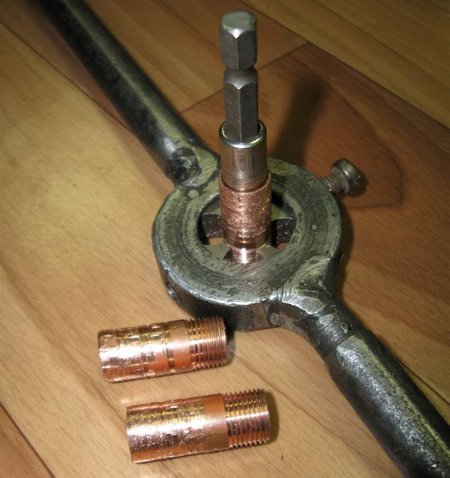
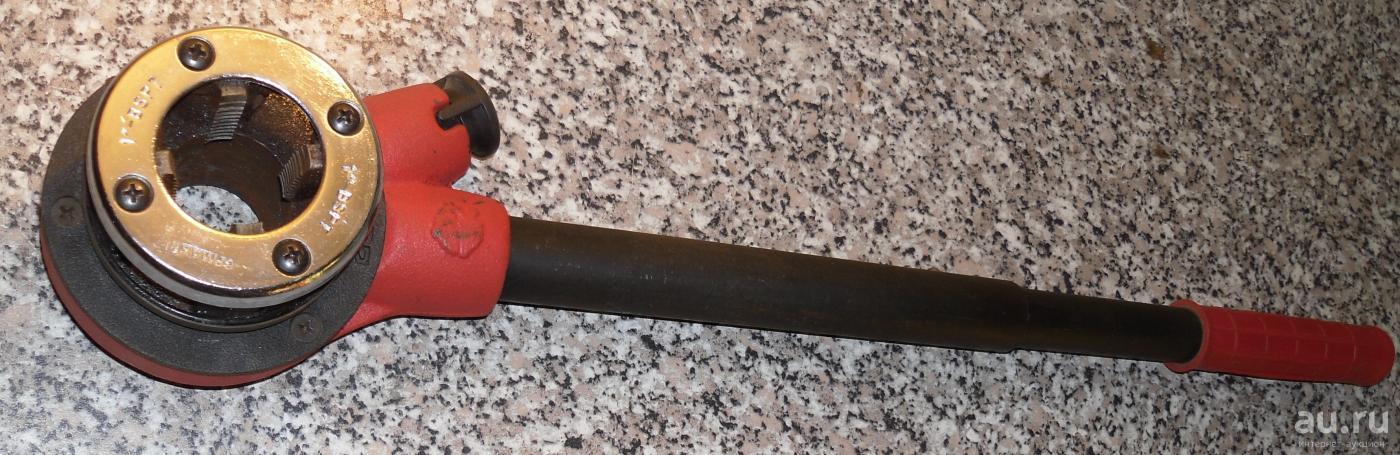
Threading a pipe thread with a screw
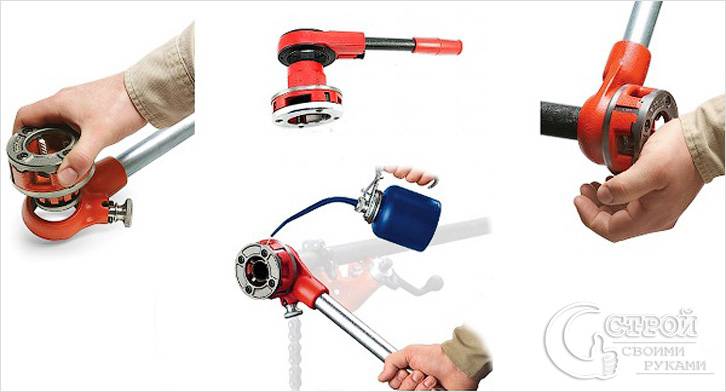
Such a mechanical kit is sold in any specialized stores and is especially popular among users, since there is no need for a centering operation. This feature is included.
The external device of the klupp looks more complicated, but the internal content is so constructive that it allows you to quickly and efficiently do the job.
The tool consists of:
- Round metal frame cast from durable alloy.
- Four removable cutters or comb blades. The second sample has a huge advantage. The first incisors make shallow grooves while moving, and the next, higher ones, sliding along the “rough” track, cut out a full-fledged one, ready for use.
- A wide holder with a guide tube that minimizes the skewing process.
Instructions for use:
- Klupp is installed in a ratchet, and on the edge of the workpiece - a guide.
- Cutters are lubricated for a smooth ride/
- The work of the ratchet begins, which rotates around its axis.


