- Applicator to help
- How to use acrylic sealant
- How to close a large gap between the wall and the bathroom
- How can I seal the seam between the bathroom and the tile, the main methods
- How to close the gap between the wall and the bathroom basic options
- Causes of the gap
- Three ways to close the gap
- Sealing seams with silicone sealant
- How to choose a sealant?
- How to apply sealant?
- Useful tips for sealing the space between the bathroom and the wall
- Silicone
- Properties and scope
- Brands and prices
- Shelf extension
- Borders (corners) plastic
- Skirting boards, corners and borders made of plastic
- How to close the gap between the bathroom and the wall
- How to seal the junction of the bath and the wall
- Cement
- Mounting foam
- Silicone sealant
- Filling the gap between the bathroom and the wall in decorative ways
- 1. Plastic corner
- 2. Border tape
- 3. Tile
- Methods for carrying out work on sealing
- Application of sealant
- Using a ceramic corner
- We use a plastic corner
- Application of plastic adhesive tape
- Sealing the gap with mortar
- Joint sealing
- The use of mounting foam
- Application of grout for tiles
Applicator to help
For convenient sealing of hard-to-reach gaps, use devices called Applicators 360.Their tips can be rotated to any angle, allowing accurate and accurate application of materials in tight spaces and with insufficient access to joints. There is a possibility of fixation in the traditional straight position to do everything as usual.
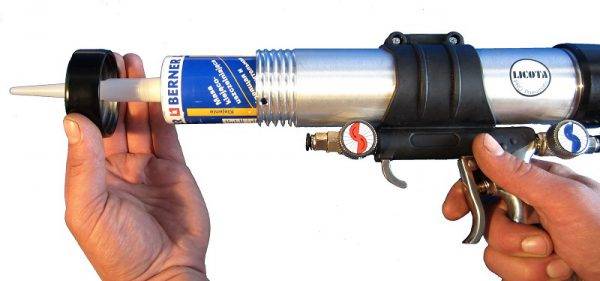
The tip is relevant when sealing the bathtub is carried out in small rooms or the object is located very close to the floor or wall (for example, a low-lying bidet). This method makes it possible to seal joints effortlessly and at optimal dosage.
How to use acrylic sealant
Acrylic sealants are used: moisture resistant, unstable to moisture, dew. A sealant resistant to a humid environment, household chemicals is used. It differs from silicone in the worst elasticity. Therefore, fastening is required foot baths reliable, strong without going down and to the sides.
Acrylic mass has undeniable advantages:
- The seal does not change its color;
- Plaster, any paint is easily applied over the joint;
- The composition does not contain components, containing organic solvents, it is safe.
Acrylic waterproof sealants are sold from manufacturers:
- Czech Republic of the company "KVADRO".
- Belgium firms "DL CHEMICALS", "KIM TEK".
- Germany production "DUFA" "JOBI".
- Russia "SAZI".
They have excellent performance. The price does not affect the choice and quality.
 Acrylic sealants have excellent performance characteristics.
How to close a large gap between the wall and the bathroom
The voids must be carefully filled in order to indentation of the font edge from the wall became airtight. The most suitable material is selected at the junction of the bathtub and the wall and the option of how to close a through hole, cracks.At large distances from the wall to the edge of the font, building materials are used: brick, curb edging, plasterboard sheet, ceramic and tile, sealant, adhesive tape, adhesive tape. Leaks are sealed, the areas where the vertical partition adjoins the edge of the font are sewn up.
On top of the building material, sealing is done, preventing the wetting of cement, brick, plasterboard. Tiles, natural stone, granite, marble, substitutes, sealing tape are laid. The joints are carefully closed and filled with sealants, mastics, putty, stained.
At large distances from the wall to the edge of the bath, building materials are used.
How can I seal the seam between the bathroom and the tile, the main methods
Bathroom remodeling involves work to prevent water leaks at the junction of tile and tub. An effective method is not to brick the bath into the wall, on the contrary, use modern building materials. This will better hide and embellish the sealing of the joint.
The most popular methods are:
- Grout for tiles;
- Lime or cement mortar;
- Finishing the joint with mounting foams;
- Passage of joints with silicone sealants;
- Installation of beautiful, comfortable ceramic borders.
Each option is reliable, good in its own way, has advantages and disadvantages. The best means of sealing a joint is a simultaneous combination of two three methods and materials.
The best means of sealing a joint is a simultaneous combination of two three methods and materials.
How to close the gap between the wall and the bathroom basic options
This article will discuss how and with what to close the gap between the wall and the bathroom, as well as the main ways to close this gap.
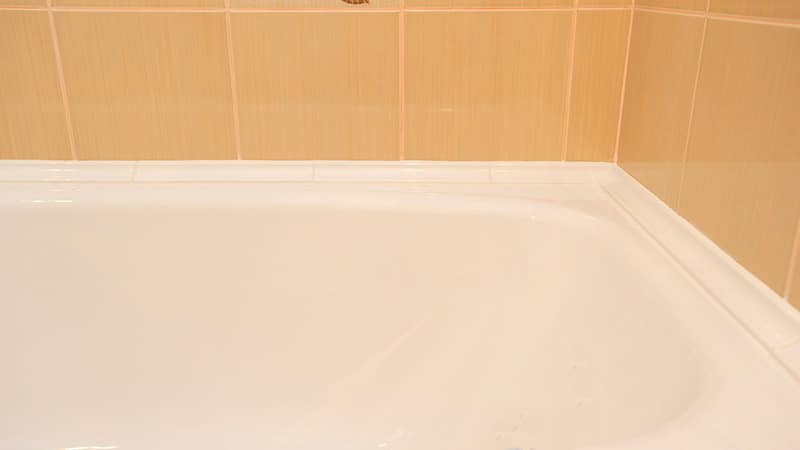
Causes of the gap
Most often, a gap that appears between the bathroom and the wall is a sign of the following situations:
- The dimensions of the installed bath do not fit the dimensions of the bathroom;
- The geometry of the bathroom does not meet the standards, that is, the walls intersect at an angle other than 90;
- Incorrectly observed technology for the repair of the bathroom - small or large.
If the installation of the bathtub was carried out after laying the tiles in the bathroom, then this gap appears quite logically, and it is necessary to somehow solve the issue of its elimination.
In the case of installing a bath, proceed in a slightly different sequence:
- The first step is to lay the floor of the bathroom;
- Complete the installation of the bath;
- Only after installing the bath, start laying tiles on the walls.
In this case, the tile will rest on the edges of the bath, which avoids the formation of this gap and the question of how to cover the gap between the wall and the bath will not arise.
Considering this problem, first of all, you should deal with various methods for eliminating the resulting gap - there are different ways to eliminate free space of certain sizes
In addition, you should take into account what material the bath is made of.
In this case, the acrylic bathtub should be fastened to the walls with high quality and securely using ordinary hooks screwed into the walls: two hooks are screwed along the long side of the bathtub, and one at a time along its ends. Such a fastening is sufficient to ensure that the sealing of the gaps between the bathroom and the wall is sufficiently reliable.


Three ways to close the gap
As already mentioned, the method of connecting the bathtub and the wall depends primarily on the size of the existing gap, it is by this criterion that it is determined how to close the gap between the wall and the bathtub.
closed gap
- Sealing small gaps less than 10 mm in size:
- This will require an outer white tile corner and sanitary white silicone;
- The ends of the corner are measured strictly to the dimensions of the bath and cut at an angle of 45 degrees;
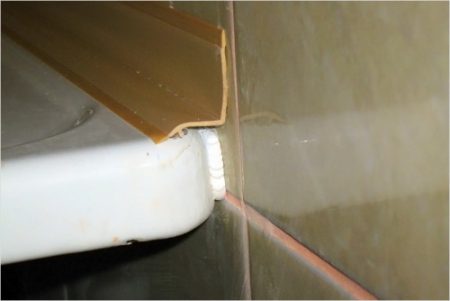
- Next, the gap between the bathtub and the wall is tightly filled with silicone and closed with a plastic corner. In this case, such an amount of silicone should be pumped up so that pressing the corner causes it to crawl out both near the wall and near the bathtub. The excess silicone is then removed with a damp cotton rag.
plinth
- Elimination of a gap of 10-30 mm in size:
- To eliminate such gaps, ordinary tile corners are not suitable, since their maximum width is 12 mm. In this case, a self-adhesive border or a special plastic plinth should be used;
- The installation of skirting boards is carried out similarly to the installation of a corner, the main difference is that a gap more than 1 cm wide cannot be completely filled with silicone - this is not necessary, the main thing is to securely and efficiently glue this skirting board to the wall and bath;
- Before gluing the plinth, the surfaces to be glued must be thoroughly degreased and dried;
- Closing the gap is carried out taking into account the same rule in the case of a self-adhesive border, which is sold in rolls by linear meters. Gluing a border is a more complicated procedure than it might seem, to facilitate the process, it is recommended to glue one side first (for example, to a bathtub), and only then another.
closed gap
- Closing large gaps. The first two methods are not suitable when the gap size exceeds 30 mm. In this case, you will have to use another method that requires certain concreting skills:
- From below, under the bath, a semblance of formwork is installed in order to prevent the mortar from getting under the bath;
- The resulting recess is filled with a solution;
- After the mortar dries, ceramic tiles are laid on top of it (white or in harmony with the tiles on the walls of the bathroom).
When solving the issue of closing the gap between the bathroom and the wall, other methods and materials can be used that differ from those described in this article. With imagination and the ability to use tools, you can come up with your own way to solve this problem.
In this case, the main thing is to remember that regardless of the chosen method of eliminating the gap, tightness and aesthetics should come first.
Sealing seams with silicone sealant
To achieve the desired effect, it is more convenient to use not a solution or foam, but a sealant for joints in the bathroom. These are polymer compounds designed specifically for waterproofing joints, they are great for sealing the gap between the wall and the edge of the bath.
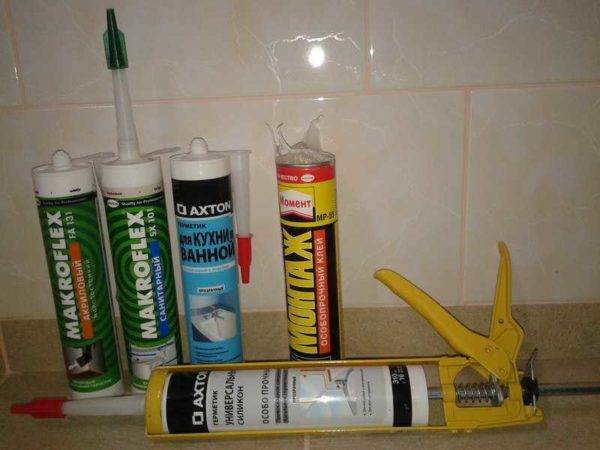
How to choose a sealant?
In hardware stores you can find a variety of types of sealants, so making a choice can be difficult. What is the best material for a bathroom?
- It is better to purchase a silicone or silicone-acrylic sealant.
- Well, if the tube has an inscription: "Sanitary". This means that the composition of the sealant includes antibacterial additives.
If the gap between the wall and the side of the acrylic bath will be sealed, then a neutral silicone sealant should be selected.
When buying another type of material, you should choose the one that is marked "for acrylic".
When choosing a sealant, you should pay attention to its color. The composition can be completely transparent, white or colored.
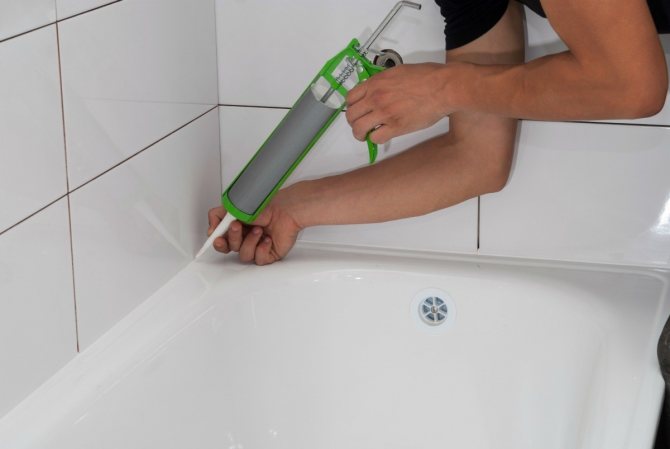
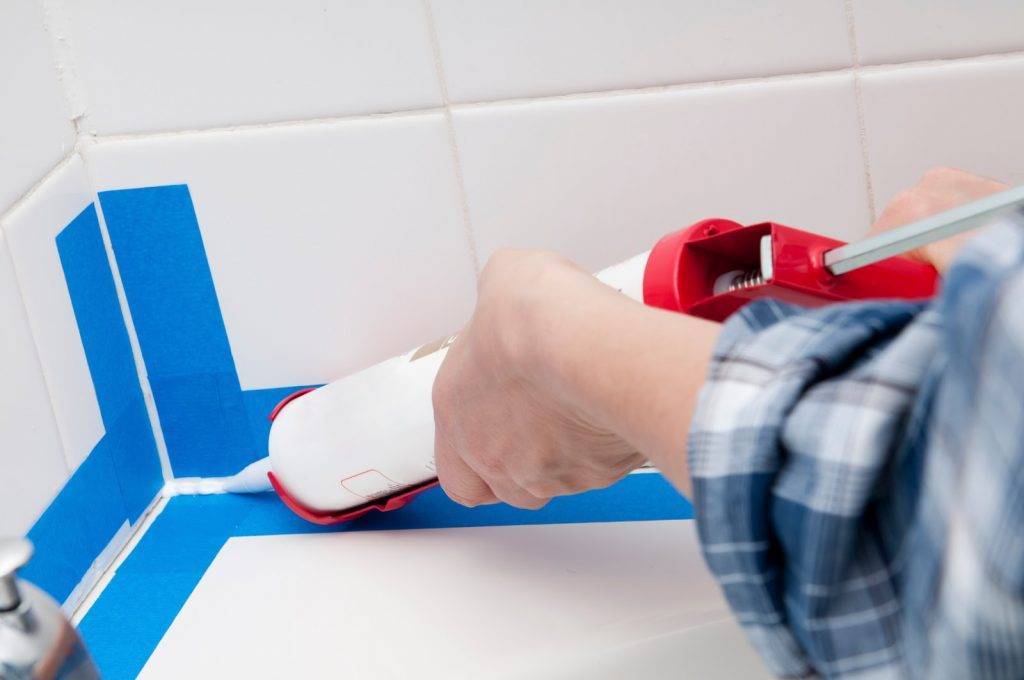
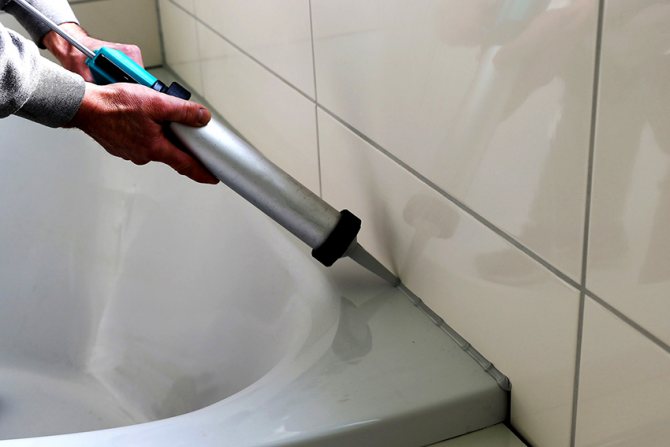
How to apply sealant?
Consider how to seal the seam between the side of an acrylic or metal bathtub and a tiled wall:
- First you need to clean the surfaces well and wipe them with alcohol or acetone. Dry well.
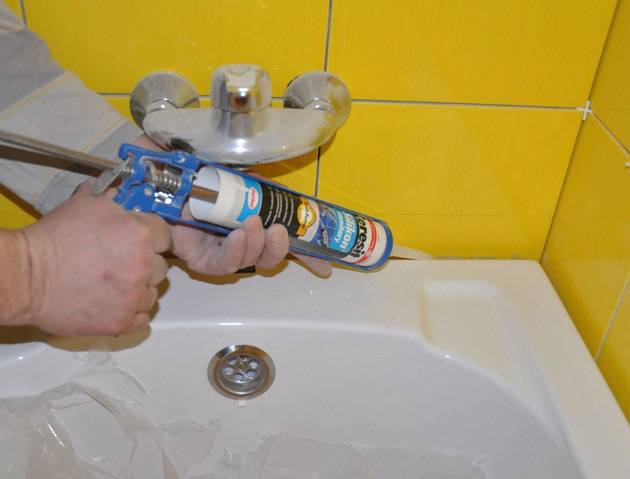
- Insert the sealant tube into the mounting gun, cut off the plastic nose on the tube.
- The sealant is applied in a continuous line along the sides adjacent to the walls.
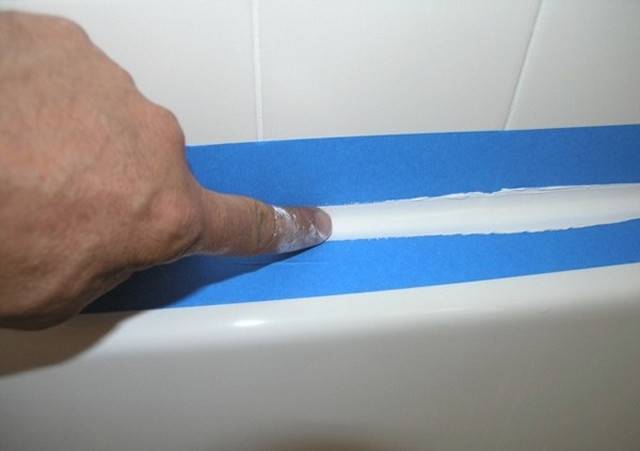
- Now the sealant needs to be smoothed. The easiest way to do this is with your finger. And in order not to get your hands dirty, you should moisten your finger in a solution of soap.
- Sealant should be allowed time to dry. Drying time depends on the type of sealant and ranges from 8 to 24 hours.
Useful tips for sealing the space between the bathroom and the wall
Repair specialists advise the following:
- The plumbing fixture is selected in accordance with the length of the niche where it is installed. The ideal distance from the object to each wall is no more than one cm.
- The minimum required amount of mortar, sealant, foam is used - otherwise the result looks sloppy.
- Before starting work, all processed surfaces are cleaned of contaminants, degreased.
- The seam filled with something is made continuous - even the smallest gaps break the tightness, and water gets inside.
- In the presence of mold, damaged areas are treated with special compounds that prevent its development.
- If the plumbing fixture is made of acrylic, which has a “habit” to bend, deform, you will need to install fasteners from several sides.
- Before sealing, cast-iron plumbing is installed by any means as stably as possible, evenly, relative to horizontal and vertical surfaces. A metal frame will do, less often bricks are placed under the bottom.
- The most beautiful option is when the design is the same on all sides of the bath. To do this, the bath is placed in a niche so that the gap everywhere matches in width, closing it in one of the appropriate ways.
Some sealants and bathroom decorating processes are unhealthy, so some work is done with gloves and a respirator.
 Whichever method you choose, the main condition is water resistance and aesthetic appearance.
High-quality installation, docking the bathtub with the wall is a guarantee that there will be no extra holes in unwanted places through which water easily penetrates. If, for some reason, leakage nevertheless arose, sealing is done as soon as possible - before the neighbors from below were flooded or mold appeared. Sealing is carried out independently or with the participation of invited experts.
Silicone
Quite a popular type of sealing compounds. The composition can be acidic and neutral. Acid ones are easier to manufacture, cost less, but it is difficult to work with them indoors - a strong smell until the moment of curing. The second negative point of acidic ones is that when applied to a metal, it quickly oxidizes. Therefore, it should not be used to seal steel and cast iron bathtubs. Neutral silicone sealants do not react with materials, therefore their scope is wider. But the production technology is more complicated and they are more expensive.
Bathroom silicone sealant is a good solution
Both acidic and neutral silicone sealants may or may not be water resistant. Bathtubs are only suitable for water resistant baths. They are also available in one-piece and two-piece versions. For private use, one-component ones are mainly used, since they do not need to be mixed before use.


Properties and scope
Properties and scope of silicone sealants:
- They have good adhesive ability. Can be used to seal the joints of stone and plastic window sills, when installing sinks and other appliances in the countertop.
-
It is used for sealing glass joints, non-porous building materials (metal, plastic, glass, wood, ceramics), joining drywall to the ceiling, downpipes.
- They are characterized by increased tolerance to high temperatures, can be used to seal joints around chimneys.
- Resistant to water, can be used for sealing adjoining bathrooms and showers, sinks and other plumbing fixtures.
The main advantage of silicone sealants is that after polymerization, the seam remains quite elastic. It does not crack and can be used to seal the joint acrylic or steel wall baths. The disadvantage is the susceptibility to the appearance and reproduction of the fungus. It is solved by adding antiseptic additives. To prevent the development of mold and fungus, it is better to use an aquarium silicone sealant or a special plumbing sealant. Both of these species have antibacterial properties.
Brands and prices
Silicone sealant for the bath is popular today and in any store there is quite a decent assortment.
| Name | Color | Special properties | Surface film formation | Release form and volume | Price |
|---|---|---|---|---|---|
| BAU MASTER UNIVERSAL | white | acid | 15-25 minutes | Tube for gun (290 ml) | 105 rub |
| Bison Silicone Universal | white, colorless | acidic, resistant even to sea water | 15 minutes | Tube for gun (290 ml) | 205 rub |
| KIM TEC Silicon 101E | white, transparent, black, gray | acidic, contains antibacterial additives | 25 min | Gun tube (310 ml) | 130-160 rub |
| Somafix universal silicone | white, colorless, black, brown, metallic | acid | 25 min | Gun tube (310 ml) | 110-130 rub |
| Somafix construction | white, colorless | neutral, non-yellowing | 25 min | Gun tube (310 ml) | 180 rub |
| Soudal Silicone U universal | white, colorless, brown, black, | neutral | 7 min | Gun tube (300 ml) | 175 rub |
| WORKMAN Silicone Universal | colorless | acid | 15 minutes | Gun tube (300 ml) | 250 rub |
| RAVAK Professional | neutral, antifungal | 25 min | Gun tube (310 ml) | 635 rubles | |
| Ottoseal s100 sanitary | 16 colors | acid | 25 min | Gun tube (310 ml) | 530 rub |
| Lugato Wie Gummi Bad-Silicon | 16 colors | neutral with bactericidal additives | 15 minutes | Gun tube (310 ml) | 650 rub |
| Tytan silicone sanitary, UPG, Euro-Line | colorless, white | acidic with bactericidal additives | 15-25 minutes | Gun tube (310 ml) | 150-250 rub |
| Ceresit CS | colorless, white | acid/neutral | 15-35 min | Gun tube (310 ml) | 150-190 rub |
As you can see, there is a very large variation in prices. Expensive sealants (Ravak, Ottoseal. Lugato) - made in Germany, Denmark, Czech Republic. According to reviews, they are of excellent quality - they have been used for several years without changes, the fungus does not multiply on them. They are presented in the widest range of colors.
Not bad are inexpensive Ceresit, Tytan, Soudal. These manufacturers have a wide range of both acidic and neutral silicone sealants. There are other types (acrylic, polyurethane). They also have good reviews specifically for use as a sealant for the bathroom - the junction with the wall.
Shelf extension
The shelf as a continuation of the bath easily eliminates the problem of unclaimed space, serves as a functional element of decor in the interior.
The reference points of the structure are a frame (profile or timber), fixed to the wall and the end of the bath. The material for the shelf can be plastic, moisture-resistant drywall, plywood. Tiling the upper part of the product improves its waterproofing properties and prevents moisture from leaking past the container.
 The joint between the bathroom and the wall tiles - we build up the shelf
The resulting niche can be used to store washing powders, cleaning products, rags. The side space is covered with a door or screen to enhance aesthetics.
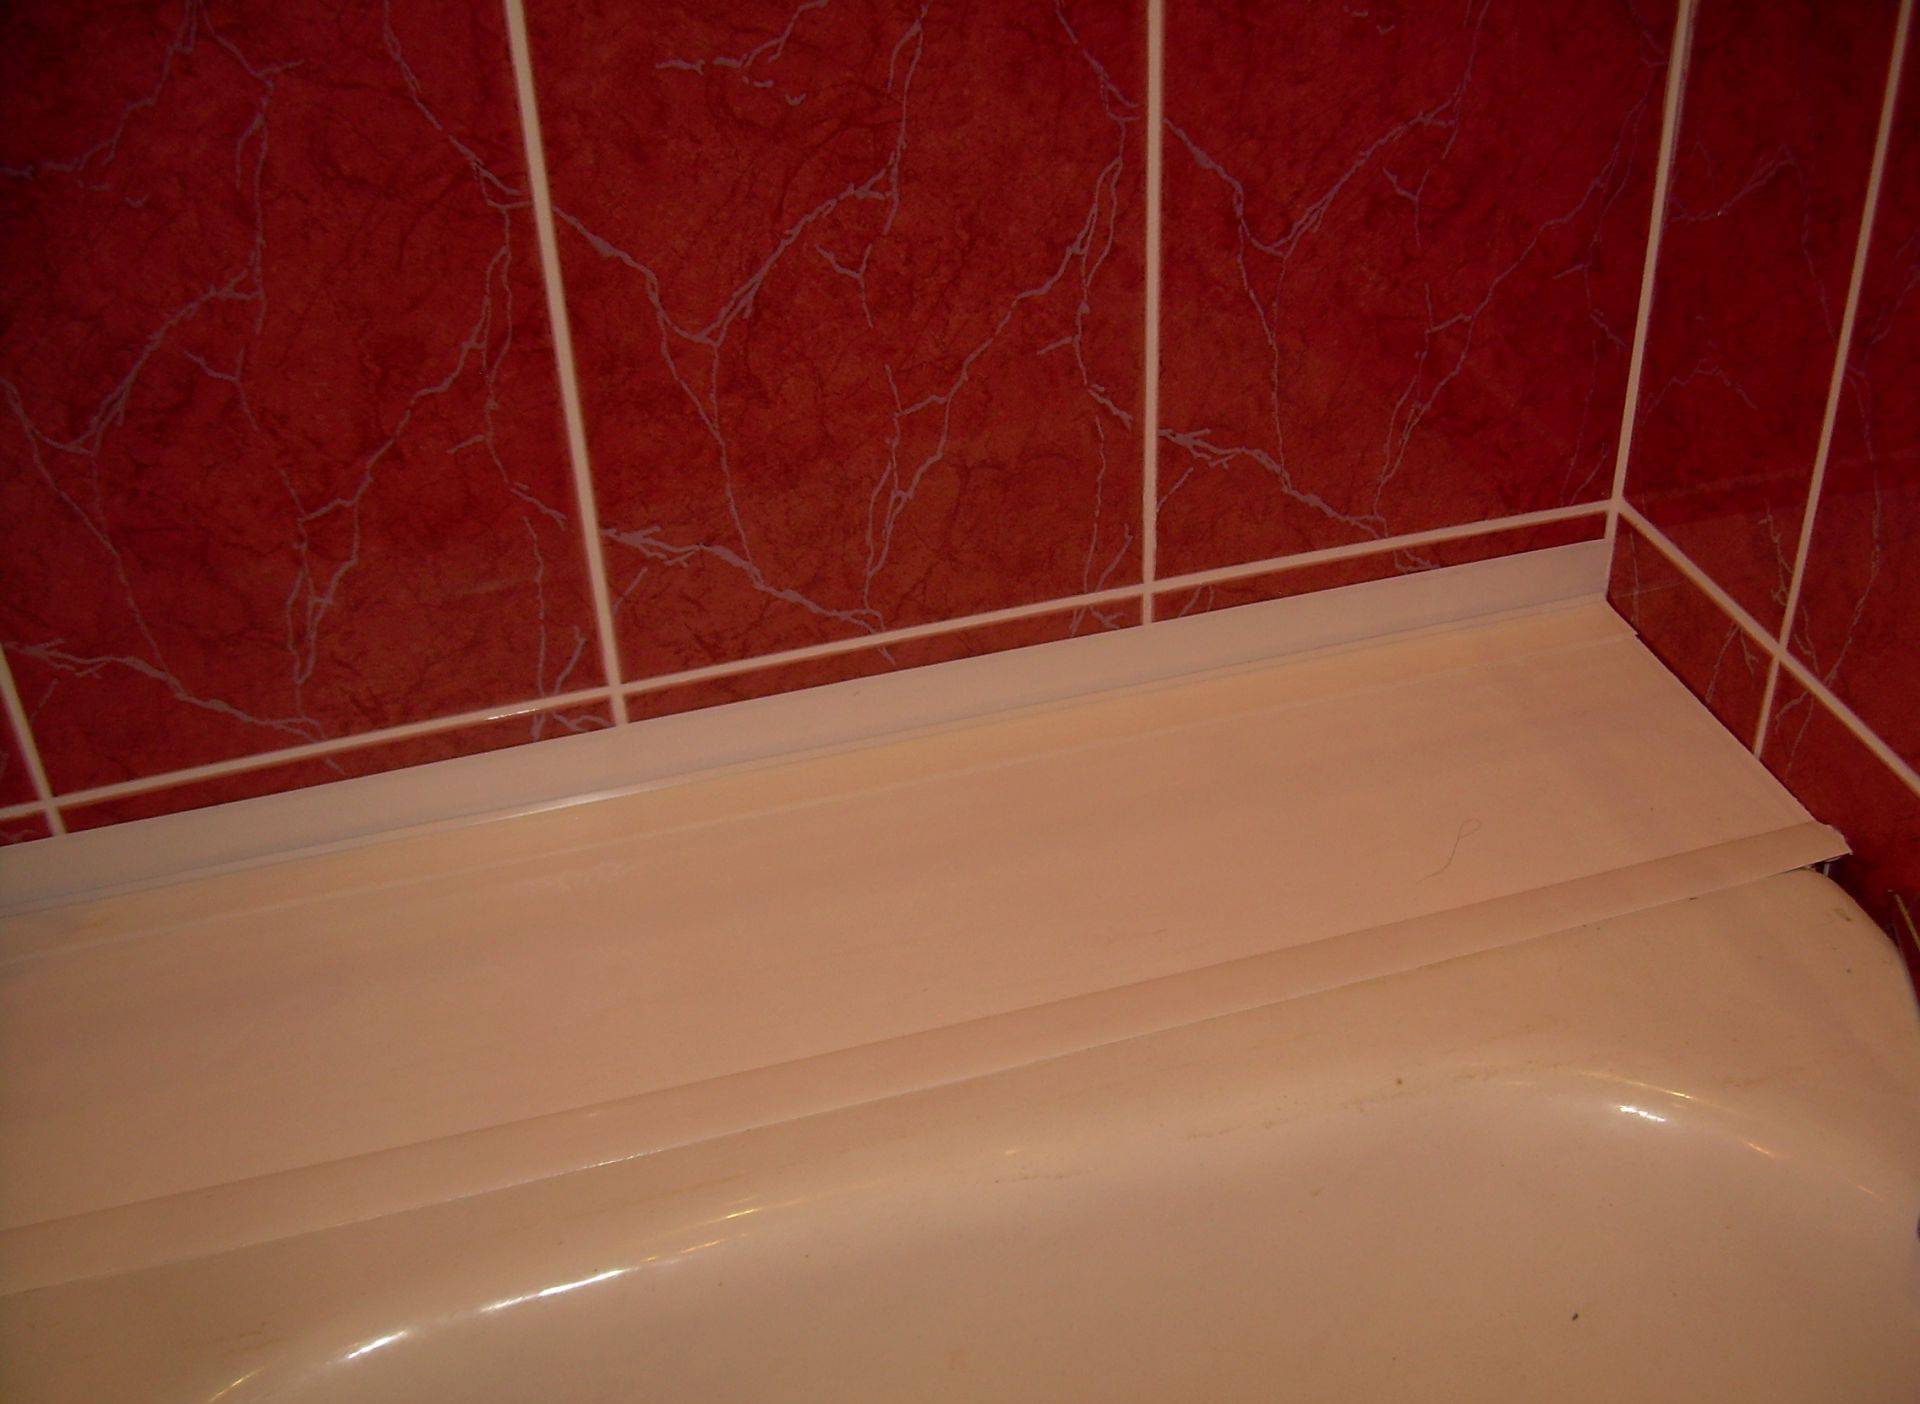
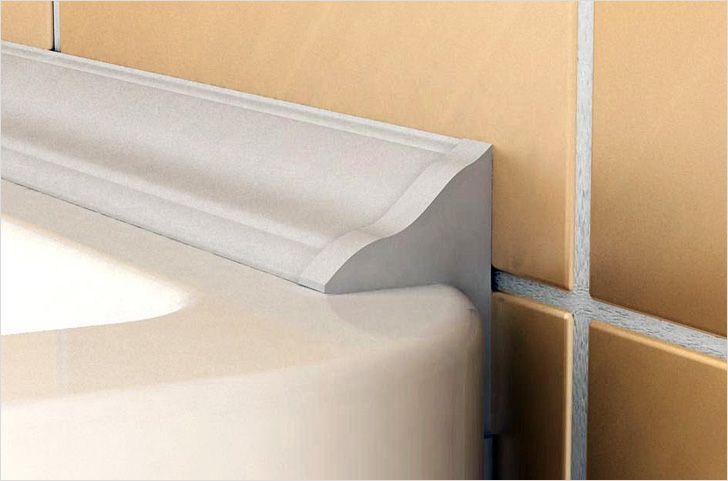
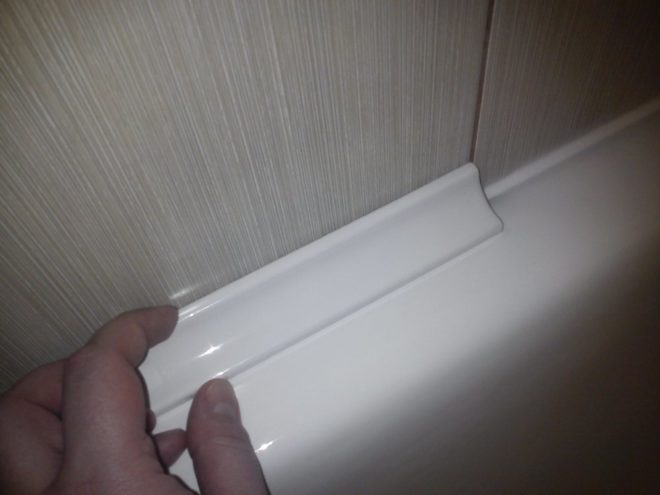
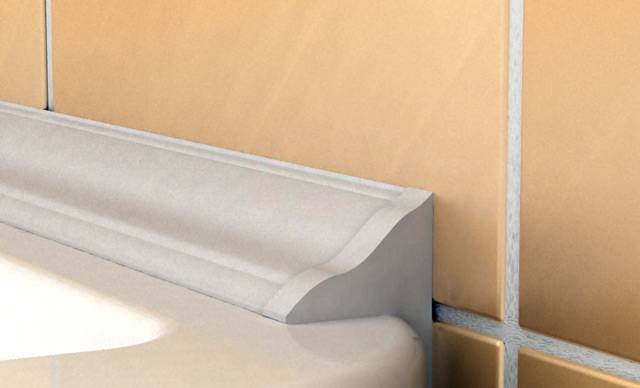
Borders (corners) plastic
Plastic corners can be attached both to the tile and under it, they are used to close the gap up to 2.5 - 3 cm.
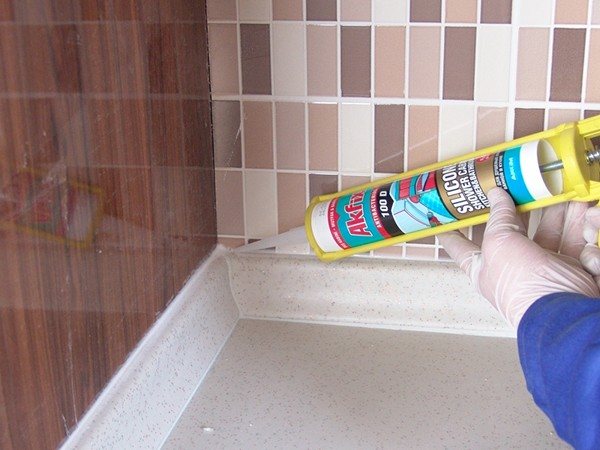
- Overhead products are installed on silicone. The width and length of the bathtub is preliminarily measured. The border is cut in accordance with the dimensions obtained. The edges are cut at an angle of 45. The decorative effect is enhanced by plastic elements installed in the ends of the curbs and corner joints. This method of sealing is economical, easy to perform and aesthetically pleasing.
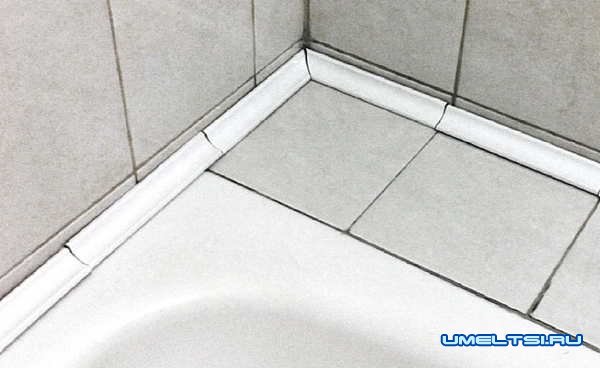
- The size of the inner tile corner is selected according to the thickness of the tile.The installation of a plastic plinth is started after the bath is installed near the wall according to the level.
 The joint between the bathroom and the wall with a plastic plinth
The corner of the desired length is simultaneously pressed against the wall, where the tile adhesive has been previously applied, and the edge of the bath. Excess glue is squeezed out through the perforated part of the plinth. To install the tiles, a special corner groove is used.
The surface of ceramics is not always smooth (there are curvature, deep relief stripes, etc.). Since it is impossible to make the connection of the bathtub to the wall ideal in this case, the lower inner corner of the tile has to be ground down and the seam adjusted.
Despite the complexity of laying and fitting, the method is ideal for creating a tight and neat skirting board.
Skirting boards, corners and borders made of plastic
Sealing can be done in another way, much easier. To do this, you will need plastic corners that are used when installing PVC panels. There is also such an option as plastic rubberized corners. They are glued with liquid nails. Please note that the surface must be degreased, dust and moisture must be completely removed. Only in this case, liquid nails will hold well.
This sealing technology is best used for wall cladding. Due to the fact that the plastic is elastic in its structure, it is possible to compensate for the movement of the tub. As for the installation of the corner itself, it can be pre-treated with a sealant. This will allow you to prevent moisture from seeping in even if the plastic peels off.
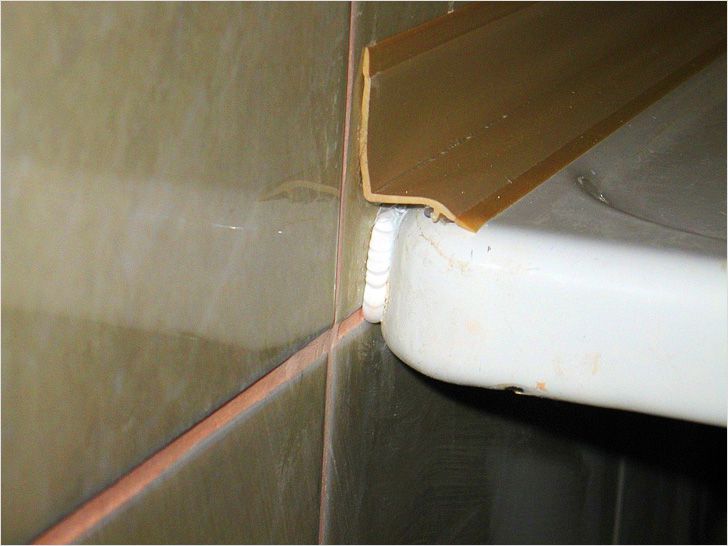
Like these skirting boards, plastic bathtub borders are used. Their installation is carried out in a similar way.


How to close the gap between the bathroom and the wall
Based on the width of the resulting seams, the appearance of the bath, its shape and material of manufacture, the best tool is selected for sealing large gaps and masking small seams.
Next, we recommend watching the video, which describes in detail how and what is better to close the gap:
h3 id="chem-germetizirovat-mesto-styka-vanny-i-steny">How to seal the junction of the bathtub and the wall
For sealing, both time-tested products and modern sealants can be used. The choice of means depends on the width of the gap.
Cement
The most reliable, albeit outdated, solution to the clearance problem is cementing. The advantage of cement is that it is strong enough and is not afraid of moisture.

It is necessary to mix sand with cement in a ratio of 3: 1 and dilute the resulting mixture with water, not forgetting to add PVA glue as well. The resulting composition must be stirred to the consistency of sour cream. Since the composition dries quickly, it should be applied and leveled as quickly as possible.
Mounting foam
One-component polyurethane foam has good moisture resistance, so it is great for this kind of work.
 /wp-content/uploads/2016/02/Zadelat-shhel-mezhdu-vannoj-i-stenoj-montazhnaja-pena.jpg
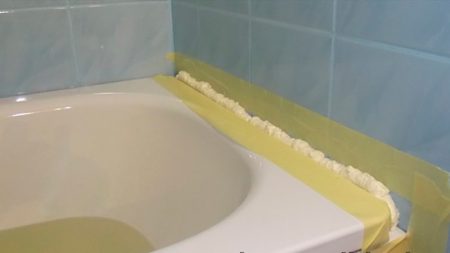
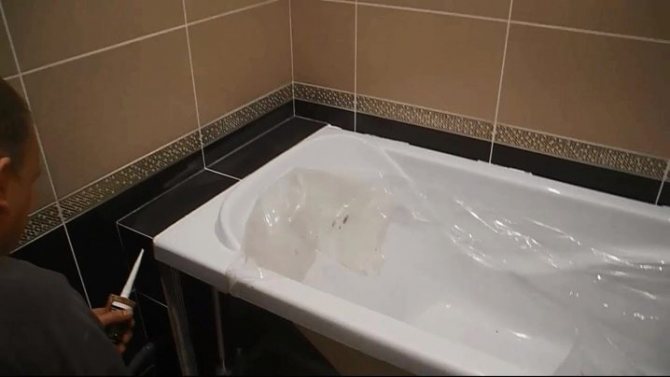
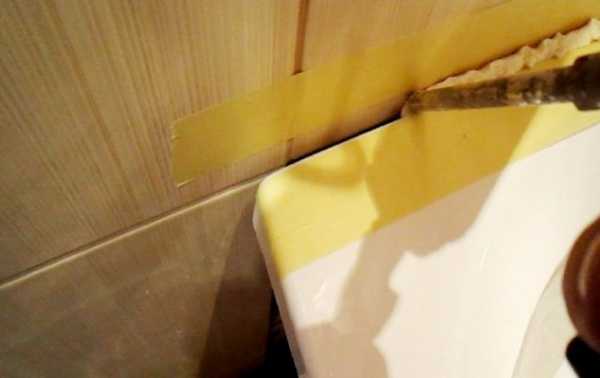
To protect the surface near the seams, masking tape should be applied to the wall and bathtub. Moreover, this must be done in such a way that it is located as close as possible to the joint, because then it will be very difficult to clean the tiles or painted walls from accidentally falling mounting foam. After the foam hardens, the adhesive tape is removed, and the excess foam is cut off.
In accordance with sanitary standards, the foam must be closed, as it is quickly contaminated or tends to turn yellow and crumble.Usually, the foam is closed with a plastic corner, plastic tape, or a decorative ceramic border. Such materials are widely presented in hardware stores, so choose them according to the color the bathroom is not will be labor.
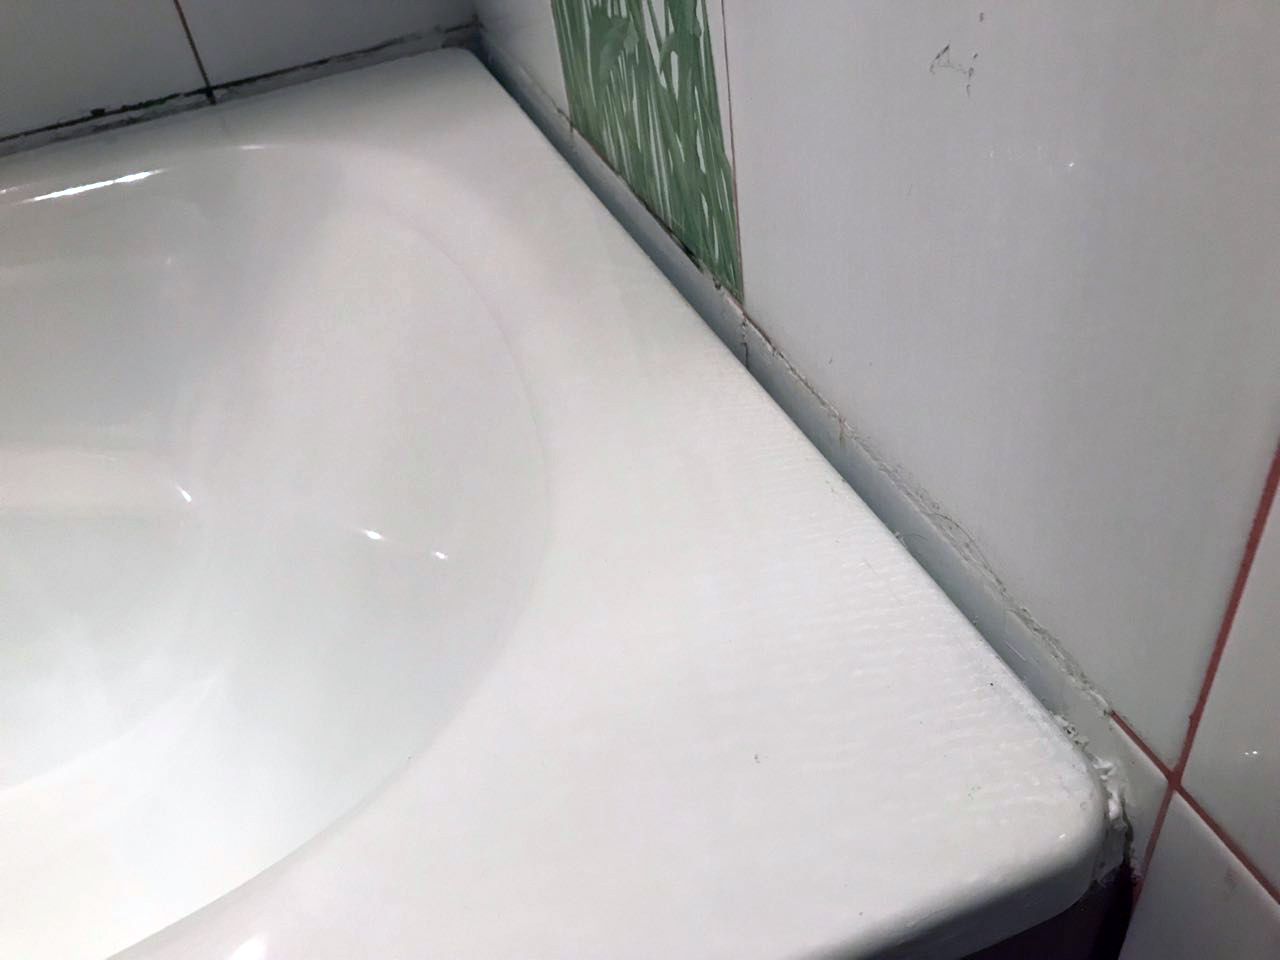
Silicone sealant
This option for sealing the seam is only suitable if its width does not exceed 0.5 cm. In this case, it is necessary to use only a waterproof sanitary sealant with an antifungal effect. In the assortment of hardware stores, sealants of different colors are presented, but it is wiser to use transparent ones.
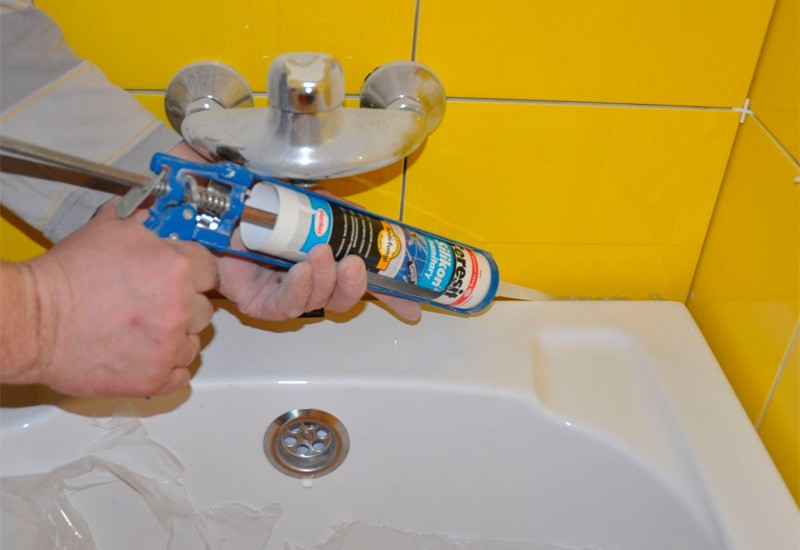
After applying a layer of sealant with a special gun, it is leveled with a finger dipped in soapy water. A finger is drawn along the joint, trying to press the sealant into the seam, and thus securely close it.
The bathroom should always be kept clean and hygienic, so there should be no poorly sealed joints. In conditions of high humidity, bacteria and fungi settle in them. Therefore, in order to avoid their spread throughout the bathroom, all joints and gaps must be securely sealed with cement, foam or sanitary sealant.
Filling the gap between the bathroom and the wall in decorative ways
After sealing, you need to close the openings with decor. Here are 6 main methods.
1. Plastic corner
One of the most popular and affordable options. The corner will easily hide openings up to 3 centimeters. The silicone sealant will help to attach it, and it's better if it's clear. In addition, today there are sealants containing antifungal drugs - an excellent 2 in 1 tool.
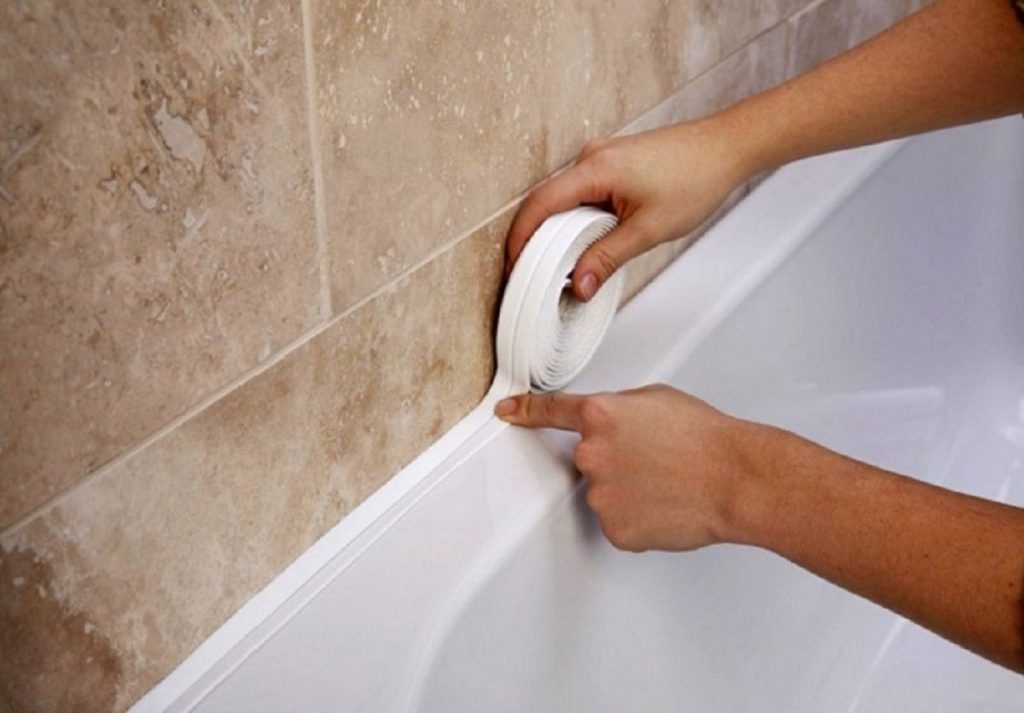
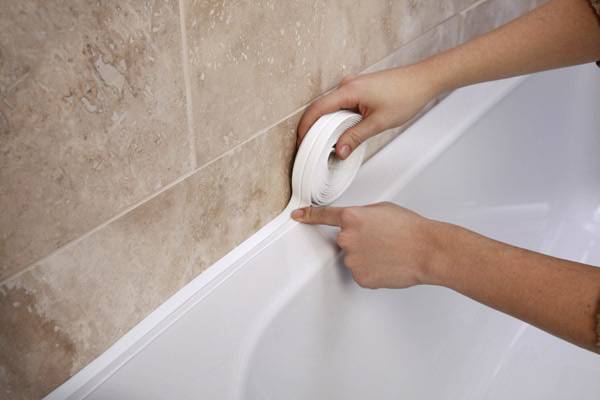
2. Border tape
Another inexpensive and easy-to-install accessory for decorating the junction of the bathtub and the wall is a self-adhesive border tape. It is made of a polymer material that is resistant to moisture. Adhesive on one side provides a snug fit, tight connection and long-term fixation. Depending on the size of the gap, the width of the tape is selected, it ranges from 11 to 60 mm. The length is usually 3.5 m, which is enough for two short and long sides of the bath. If you managed to purchase a really high-quality product, then installation takes only a few minutes.
wolfcraft
wolfcraft
3. Tile
You can also use wall tiles. To do this, plumbing is first installed, and then tiles are laid on top. The gap filled with tiles cannot be changed, so initially the whole process must be of high quality and thoughtful. You can cope on your own only if you have special tools for cutting material and styling skills. Otherwise, the process of laying on the gap is no different from the usual cladding procedure.


For a heavy cast iron bath - this is a suitable way of finishing, and for products with a hydromassage function - not very much. To repair failed devices, most likely, you will have to dismantle part of the tile. In the case of an installed large-sized corner bath, there is a high risk of getting it dirty or spoiling it, and besides, it will be simply inconvenient to carry out facing work.
Methods for carrying out work on sealing
This procedure is not very difficult, so it can be performed independently without involving specialists.Before properly sealing the bath, it should be noted that the choice of method is determined by the type of decorative finish, as well as the size of the gap between the wall and the bath.
Application of sealant
It is worth saying that this is a simple method used in cases where it is necessary to seal small gaps about 1.5 cm in size. In this case, a sanitary sealant with increased water resistance is used for sealing. This sealant is also used for sealing joints when using other finishing materials. It is best and best to use a sealant that is either acrylic-silicone or ordinary silicone in composition. By color it is distinguished transparent, white or some other color. Sealant manufacturers pack in tubes or cylinders. Packed in a balloon (used with a gun) it is much more convenient to use.
Sealant is most often used to seal small gaps.
The disadvantage is that over time it can change color (turns yellow or darkens) and, accordingly, does not look aesthetically pleasing.
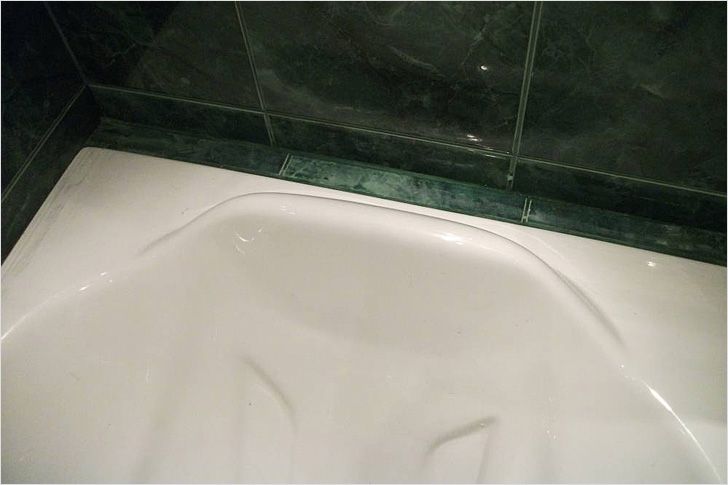
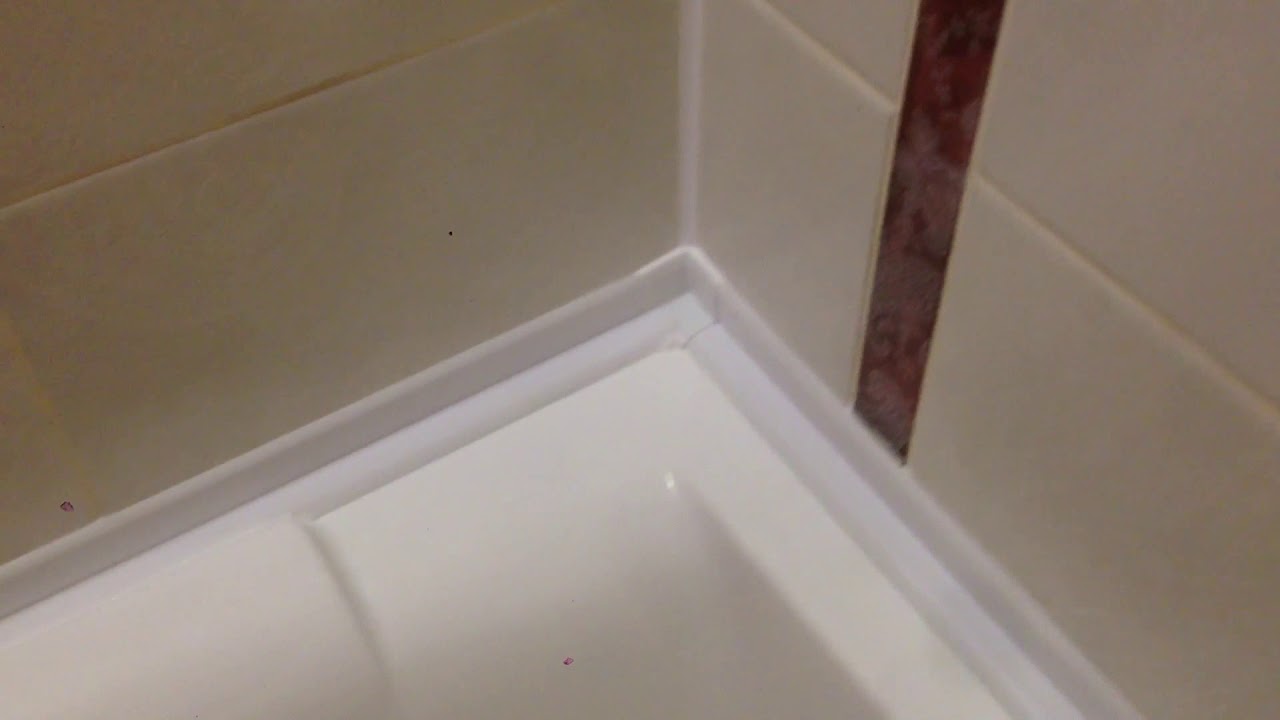
Using a ceramic corner
This option is more presentable and lasts a long time. The corner fits into the gap
For high-quality sealing of the gap with a ceramic corner, it is very important to install the bathtub before the ceramic wall cladding begins, and already during the gluing of the tiles to the wall, glue the ceramic corners

Ceramic corner is reliable and presentable
The advantage of this method is its beauty and long service life.
The downside is that it is not always possible to find the right color for ceramic corners to match the color of the tiles glued to the walls.
We use a plastic corner
This corner is purchased in specialized building materials stores. It is convenient in that it can be used both for facing the surface of walls, and for future repairs or replacing plumbing, and it is glued to “liquid nails”.
The use of a plastic corner is a practical and aesthetic option for sealing joints
The advantage of using this method is that the corner is elastic and smoothes out small surface bends that cannot be avoided.
Application of plastic adhesive tape
This tape can also be found in construction centers. It is a thick tape that is very comfortable to use. It has the same advantages as a plastic corner.
Adhesive tape made of plastic is a modern method of sealing seams.
In the event that the gap is too large, before sealing the bathroom, in this place you can mount a shelf from waterproof drywall, on top of which glue a tile or plastic panel. In this case, it will be optimal to seal the joints with a sealant.
Sealing the gap with mortar
One of the most common and inexpensive options for sealing joints between a bathroom and a tile is considered to be sealing with mortar, which consists of certain stages.
- Before pouring, the junction is preliminarily cleaned from the old finish of dust and dirt.
- If the gap is large, then the mortar will fall to the floor. To avoid this, a rag pre-impregnated with cement milk is laid end-to-end.
- For high-quality adhesion of the solution, it must be applied to a damp surface.
- The building mix for grouting is kneaded with medium density.
- The solution is poured carefully so that wide seams do not form.
Naturally, in addition to the quality of sealing, the aesthetic component is also important. Therefore, after masking the joint with a solution, it is advisable to ennoble it with a more attractive material, depending on the finish of the bathroom:
- if the room is tiled, then the joint between the bathroom and the wall is decorated with a ceramic border;
- if the wall adjacent to the bathroom is decorated with plastic panels, a plastic border is installed;
- the painted walls in the bathroom at the joints with the bathroom tray are puttied and painted to match the overall decoration of the room.
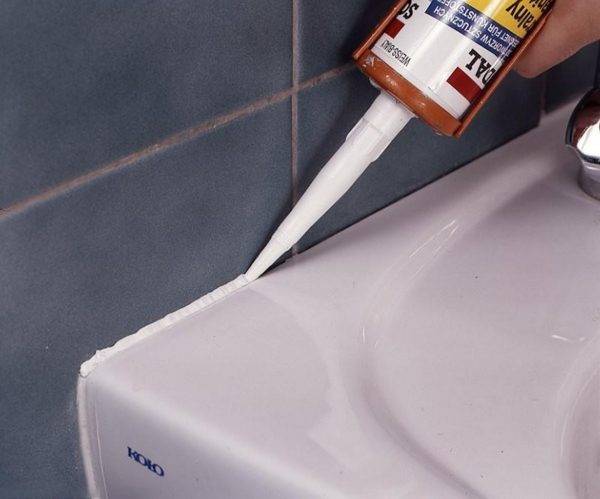
Joint sealing
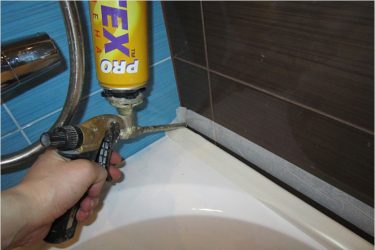
What is the cheapest way to seal gaps between bathroom and tiles? - Common waterproof sealant. Silicone sealant is sold in special tubes. To use it, you need a mounting gun. This material is ideal for sealing joints with a width of 3-4 mm (see photo).
Before using the sealant, the junction must be cleaned of any contaminants, wiped dry and degreased. Next, the joint space is carefully filled and covered with sealant using a mounting gun, after which the resulting seam is leveled with a spatula or plastic spatula, and excess sealant is removed with a damp cloth. To prevent it from getting on the glossy surfaces of the walls and baths, it is better to glue masking tape.


Watch the video for the easiest way to do it:
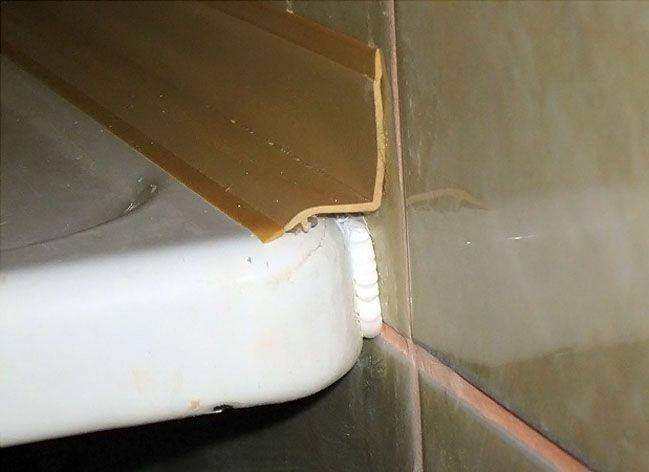
The use of mounting foam
In the event that the gap between the bathtub and the tile is wide enough (joint 1-3 cm), then this distance can be filled with waterproof mounting foam
A feature of foam application is extreme caution, this is due to the great difficulty in removing its traces from glossy surfaces.
Those places on the wall that may be unintentionally exposed to foam should be covered with masking tape, newspapers or oilcloth. After the foam has dried, its excess is removed with a wallpaper knife, and the resulting seam is closed from above with a plastic or ceramic plinth.
Often, in large gaps at the end of the bath, you also have to deal with pipes that bring water to the mixer. It is also easiest to bypass them with mounting foam or by cutting holes in a plastic corner. In some cases, you can install a small wooden or plastic shelf. Gaps of 10-20 cm will already have to be strengthened with additional brackets that fasten the shelf to the wall.
In case of contamination of the bath surface or tiles with foam, you must either immediately wipe it with a dry cloth before it dries, or wait until it hardens and carefully remove it with a knife, mineral spirits and a cloth.
Application of grout for tiles
Another way to eliminate gaps in joints using sealing materials is to use tile grout. Its advantages include high moisture resistance and durability of the resulting tile joints. In addition, there is a wide choice of different colors of grout for cracks between tiles, which allows you to choose it in accordance with the color of the interior in the bathroom. The disadvantages of this method include the possibility of its use to eliminate only the narrowest gaps. How to cover up wider gaps, read in other paragraphs of the article.
Some specialists use cement mortar to seal particularly wide gaps in the junctions between the bathroom and the wall. Before applying it, the joint is wetted with water. To prevent the solution from falling out during its laying, the sealing site can be pre-laid with any synthetic material, for example, with a thick rope. Due to the need to give the resulting joint an aesthetic appearance, cement mortar is used only if a plastic or ceramic bath skirting is installed together on top of it.
It must be said that after acrylic baths have become especially popular, the use of grout or cement mortar for sealing joints will not work. This is due to the ability of such baths to sag under the influence of water collected in it, and such subsidence can lead to cracking of the seam. A similar problem arises in the case of using steel baths, the walls of which expand and contract with temperature changes.
The disadvantage of all methods using sealing solutions is the impossibility of obtaining perfect seams in cases where the joints between the tiles are not even. To achieve the most attractive appearance in such a situation, one of the materials discussed below is used.


