- Details
- How to connect a towel dryer to hot water or heating
- The installation of the dryer has a certain sequence. Stages of inserting the device:
- Installation of the device model Lesenka
- How to embed in the heating network
- What designs are
- How to make bends and how to change the riser
- Common Mistakes
- When air removal is not possible
- Scheme 1 lateral and diagonal connections, open and unbiased bypass.
- Stages of work
- System failure or blockage
- Selecting a connection scheme
- Lateral, diagonal inlet
- Bottom supply
- Water heated towel rails
- Where to connect and where to hang
- With or without bypass
- Why you need to bleed air from the heated towel rail
- How often do you need to bleed the air from the heated towel rail
Details
How to connect a towel dryer to hot water or heating
Devices for drying towels are connected to a hot water supply or heating system. With the first option, it will be possible to use the dryer all year round, because hot water is supplied constantly. The device warms up when hot water is used, at night the pipes of the device cool down.
If you connect the dryer to the heating, the device will be suitable for operation in the winter.But since the water will circulate forcibly during the day, the pipes will always be warm. Copper and brass appliances must be marked that the dryers are galvanized, they can be connected to the central risers.
The installation of the dryer has a certain sequence. Stages of inserting the device:
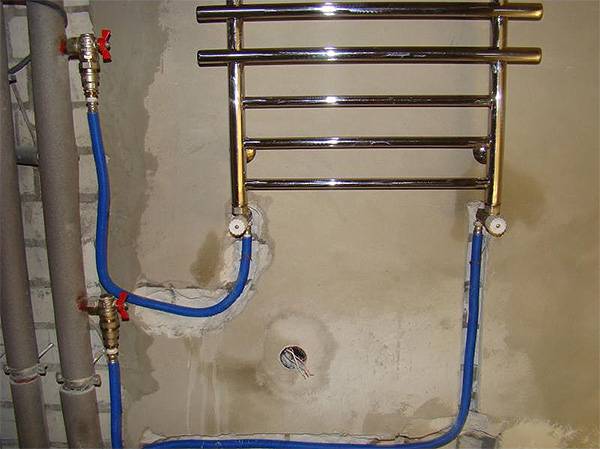
 1. prepare the necessary materials. The tool kit consists of an adjustable wrench, a low-speed drill, a grinder, a die to cut threads, telescopic brackets, screws, dowels, American taps, a Mayevsky tap to bleed air, various fittings to make connections, sealant and seals for connecting parts. The details of the system include a coil, a bypass, branch pipes, in which the length corresponds to the scheme, as well as the installation site of the device.
2.dismantle the old dryer. In order to install or remove the device, you need to obtain permission from the housing department. For these works, it is necessary to block the riser with hot water or the heating network for a while, which is done by the employee of the Criminal Code. If there is an old dryer, it must be cut off the thread where it is screwed, then removed from the brackets. During the initial installation of the device, it is necessary to cut out a section in the riser that is slightly larger in size than the width of the device.
3.prepare lintels and outlets, lay tiles. Behind the bypass, ball valves are installed. It is allowed to fix the device immediately, without waiting for the completion of the finishing work in the room, but you need to expect that tiles and glue will be laid to the wall.
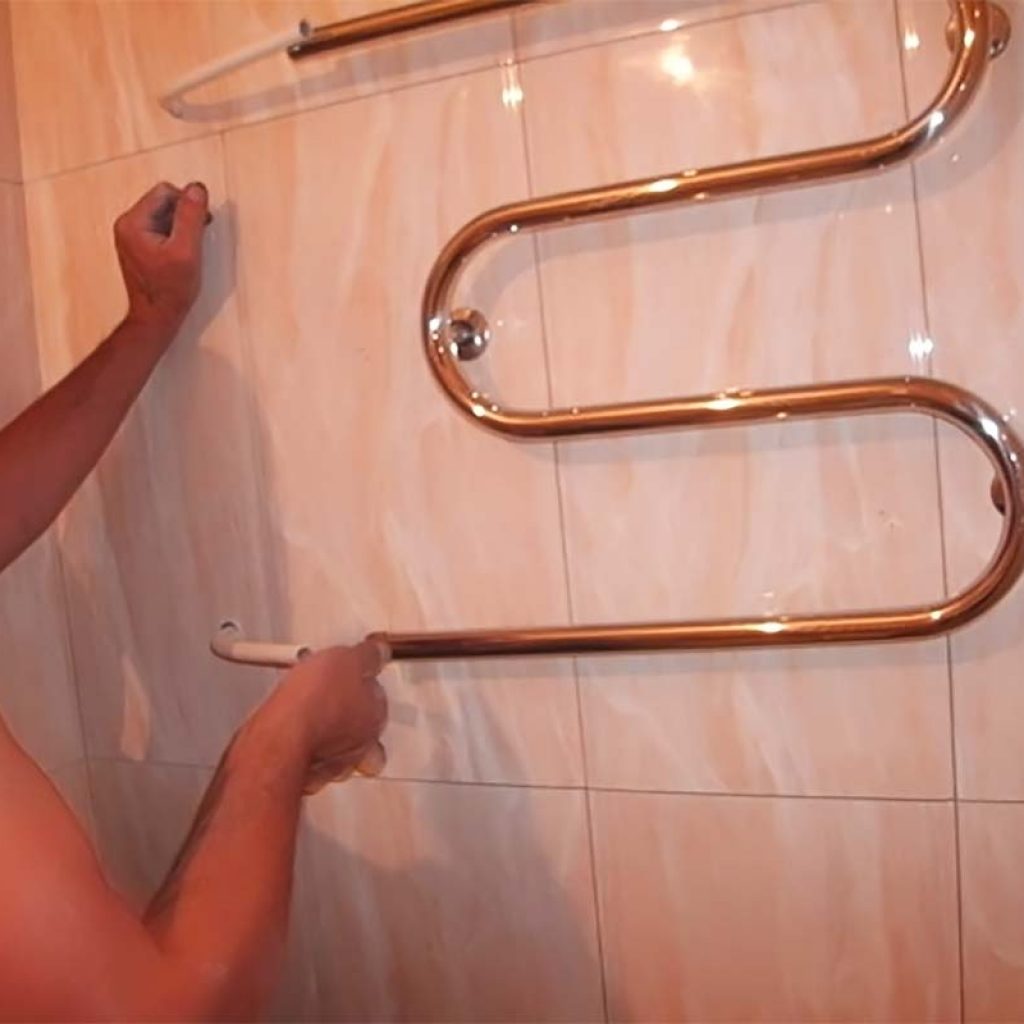
4. make markings for fasteners. It is performed taking into account the slope of the outlet pipes, the horizontal position of the dryer, the gaps between the elements.They check the markings, then drill holes by inserting dowels and screwing the brackets.
It is recommended to mount the dryer when a major overhaul of the premises is carried out, or when a water riser is replaced. This gives the right to choose a more suitable installation scheme and materials. The coil is installed when all preparation work is completed. Pipes with fittings and corners are attached to ready-made bends. All joints are laid with fum-tape or silicone gasket. The device is attached to the bends and brackets using screws.
Next, the system is checked for quality work without leaks. Open the riser to fill the heater with water. When installed correctly, the liquid circulates freely through the device, there are no leaks, and the surface of the coil is warm.
Installation of the device model Lesenka
For dryers of this type, connection is used from the side, or diagonally. If a bottom connection is implied, then installation of swivel angles on the outlets, additional pipes is needed to connect from the side.
Install the device in the same sequence as the coil. The brackets are fixed in two places in the middle of the device.
How to embed in the heating network
The device is cut into the heating network in the warm season. To start work, you should submit an application to the housing department to turn off the riser and drain the remaining cold water.
It is better to entrust the preparation of taps to a specialist from the housing department. If an accident occurs, then all the blame can be shifted to the management company. After the jumper, water shut-off valves should be installed to reduce the risk of a major accident.
Attention! It will be possible to check for tightness only during the heating season, which is a big drawback of this scheme.
What designs are
Towel warmers come in different shapes. When choosing them, people are often guided solely by aesthetics, which is not entirely justified. These devices work normally with good water circulation, but not all models provide such circulation. With some you have to be smart for a long time, looking for the right connection scheme, otherwise they simply refuse to work.
So, all heated towel rails can be divided into four groups:
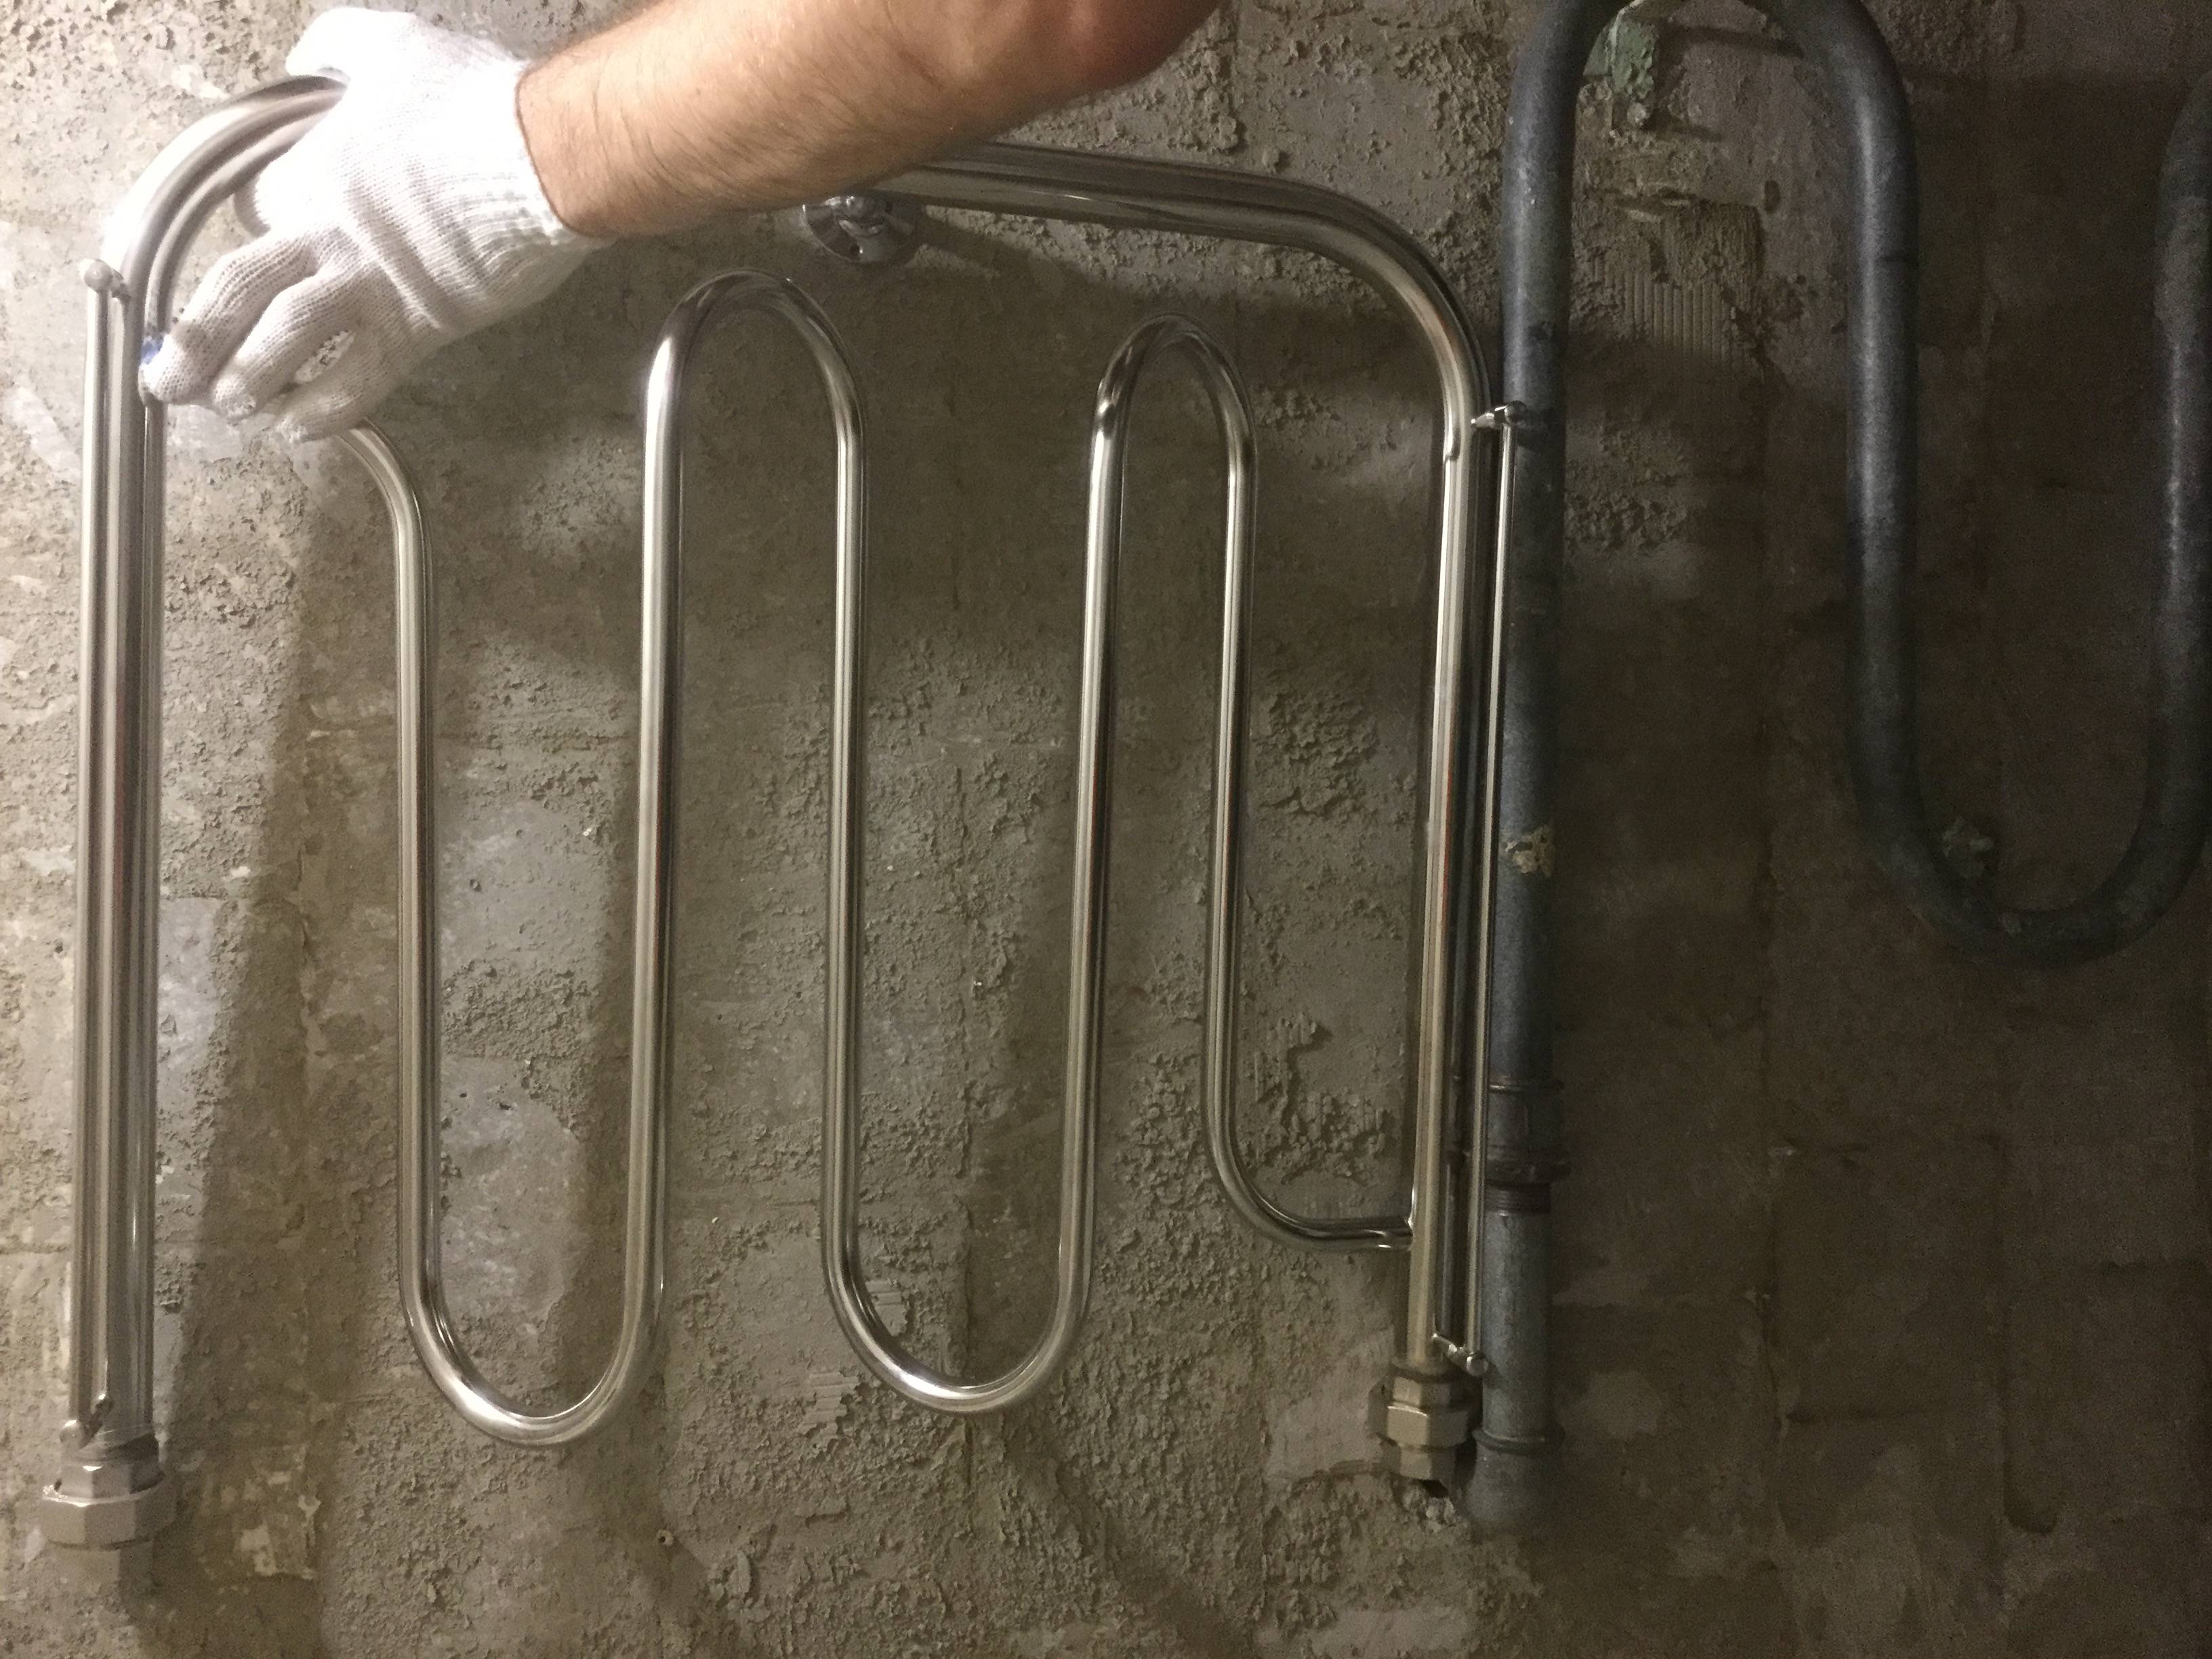
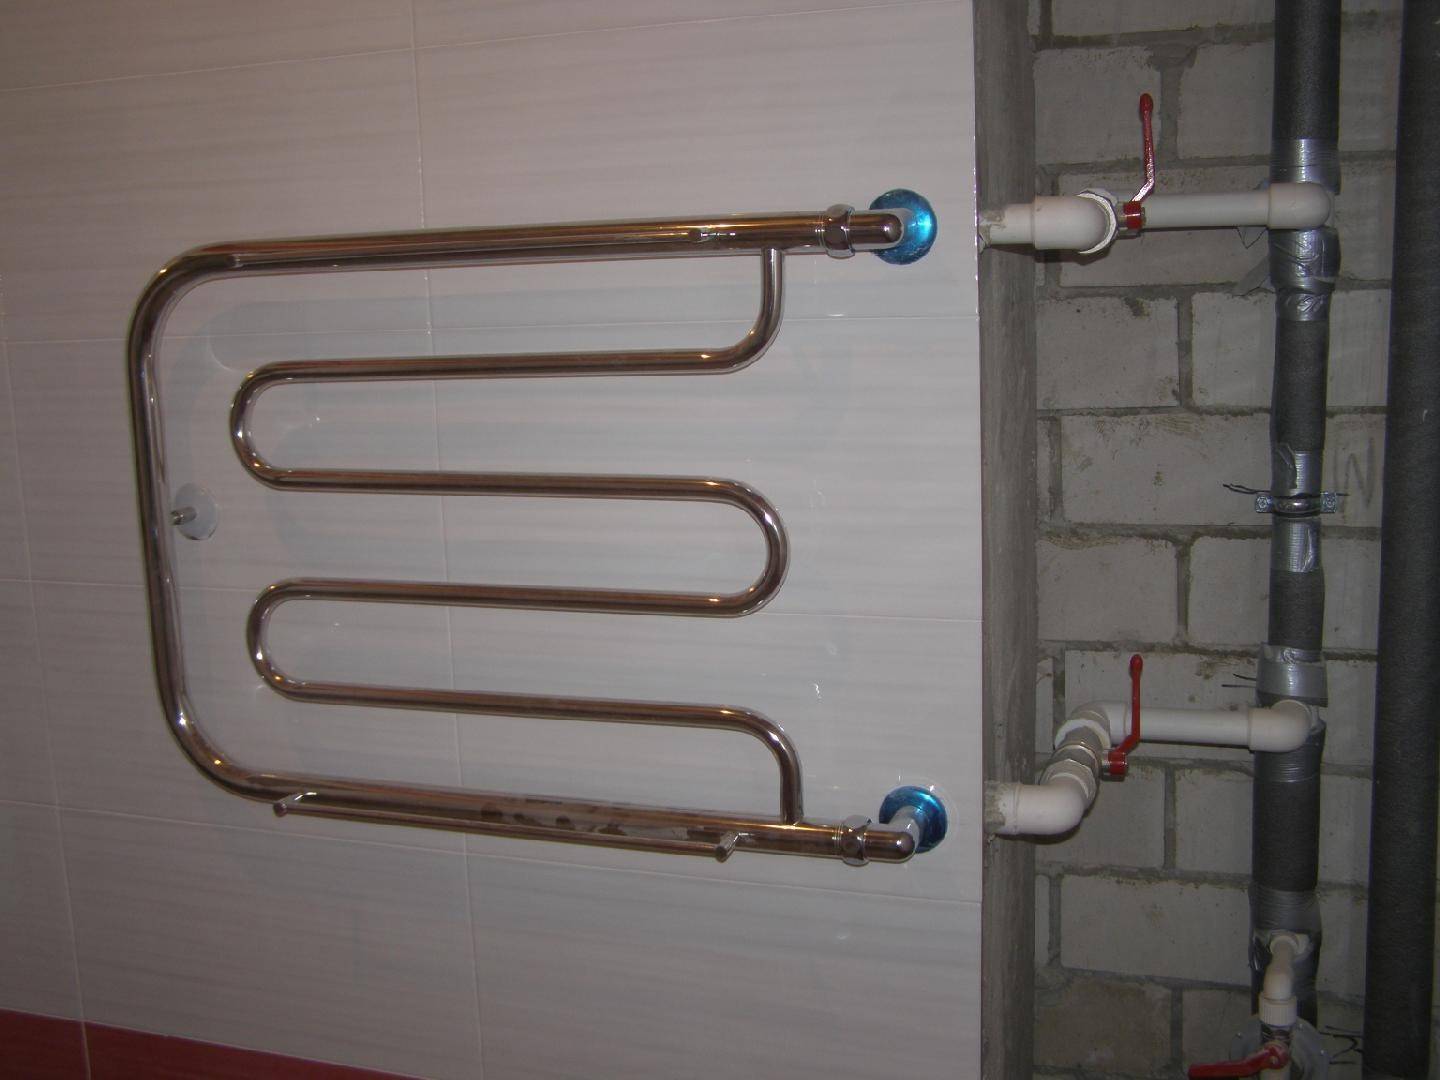
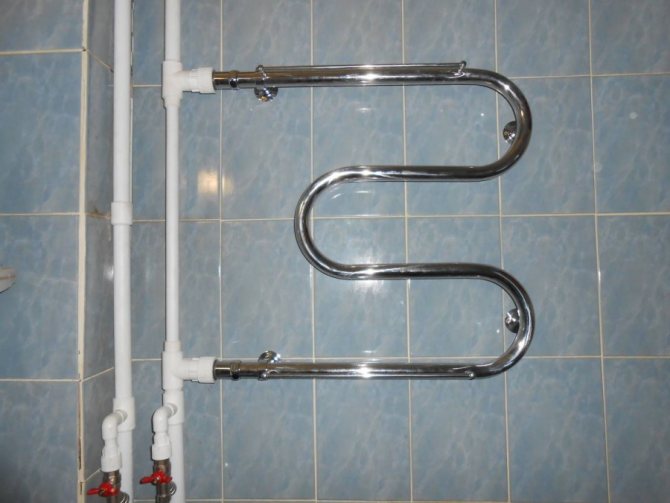
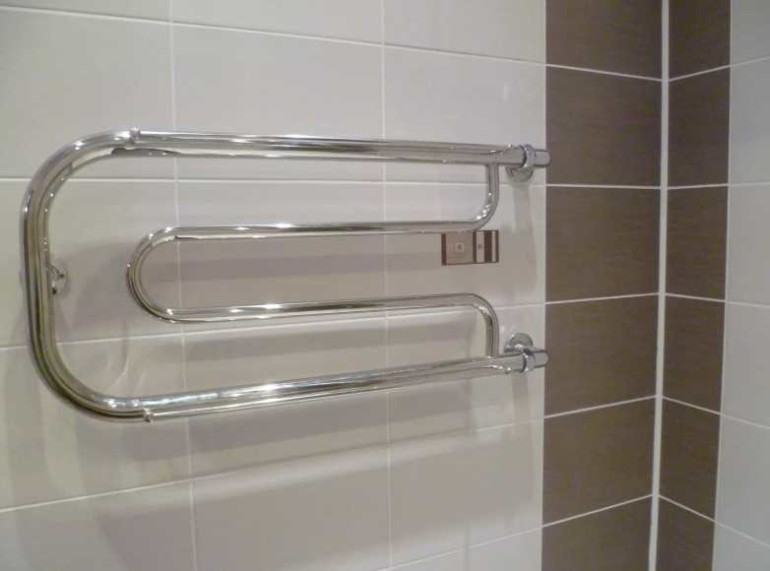
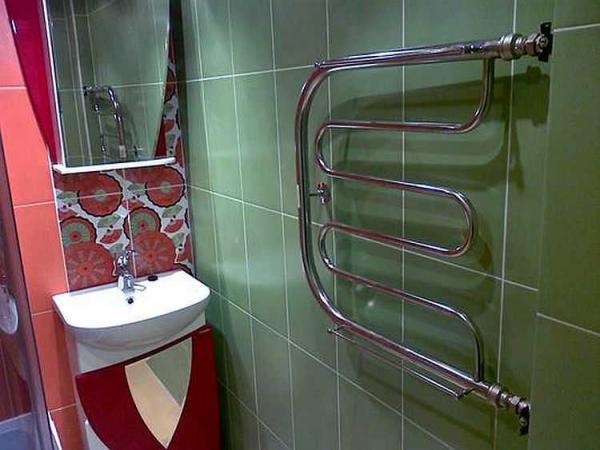
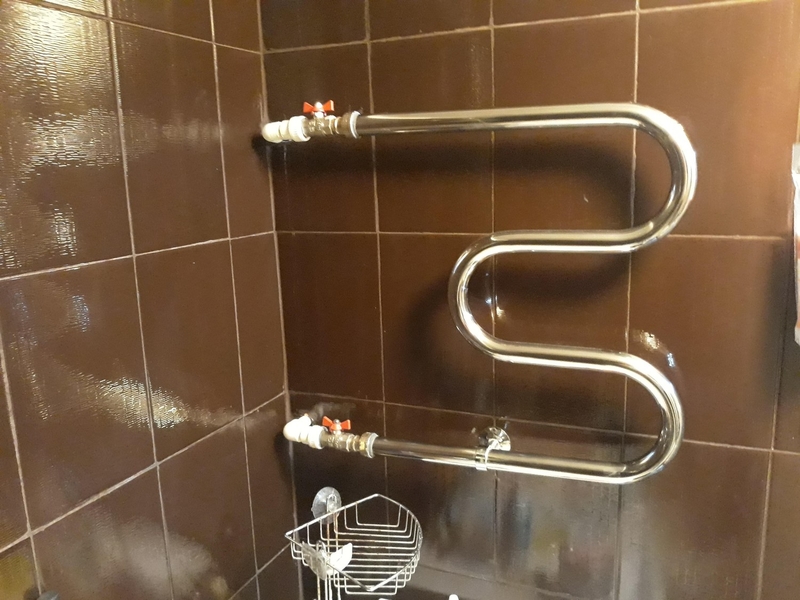
- U-shaped or U-shaped. The simplest models, elementary connection (side). Ideally, when replacing the old one, you find a model with the same center distance. Then, if you're lucky, you can even not redo the bends.
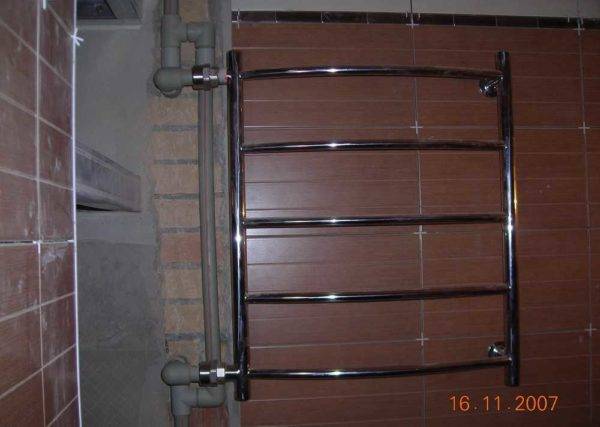
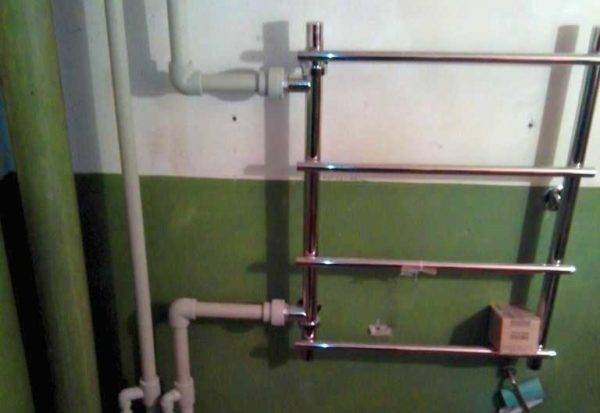
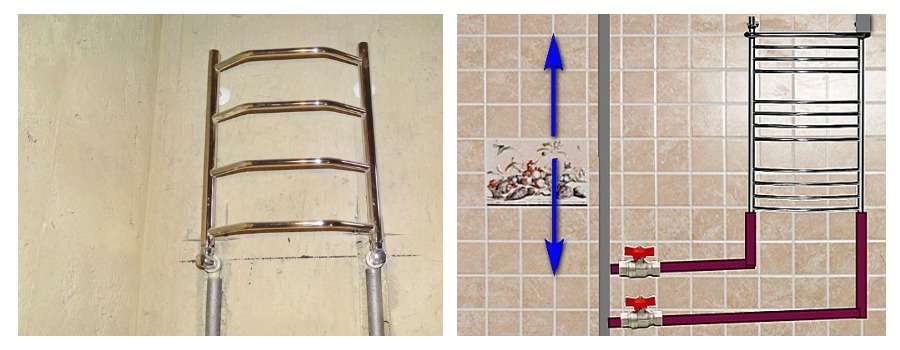
- Ladder. Modern designs with a number of crossbars. Also a good option in terms of hydraulics. The connection can be bottom, side or diagonal. But it is not chosen arbitrarily, but according to a combination of conditions (where the supply comes from, location relative to the riser).
-
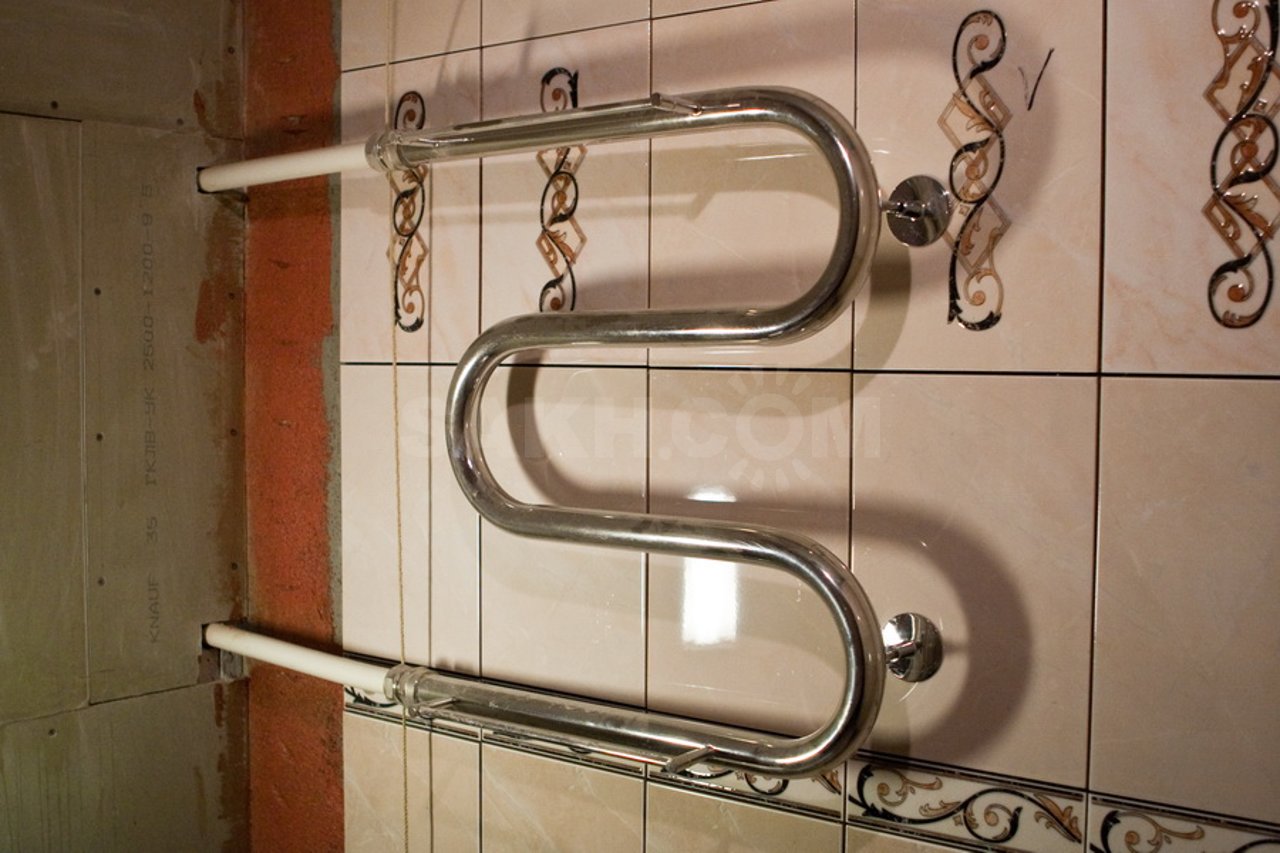
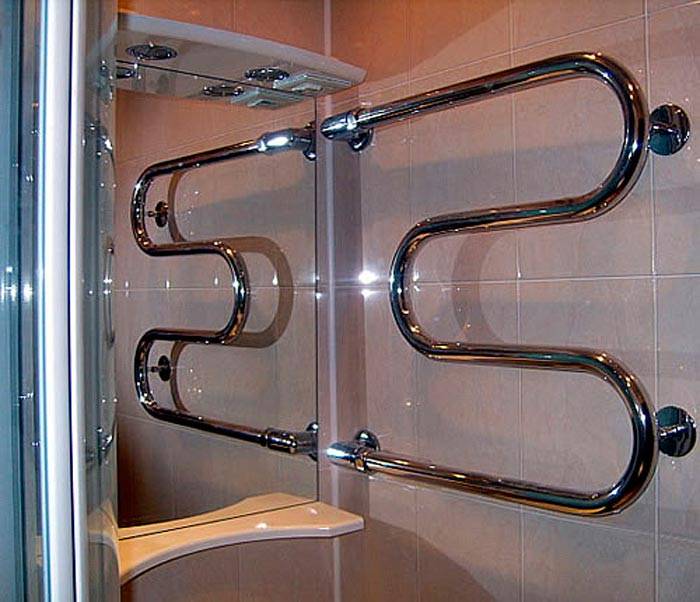
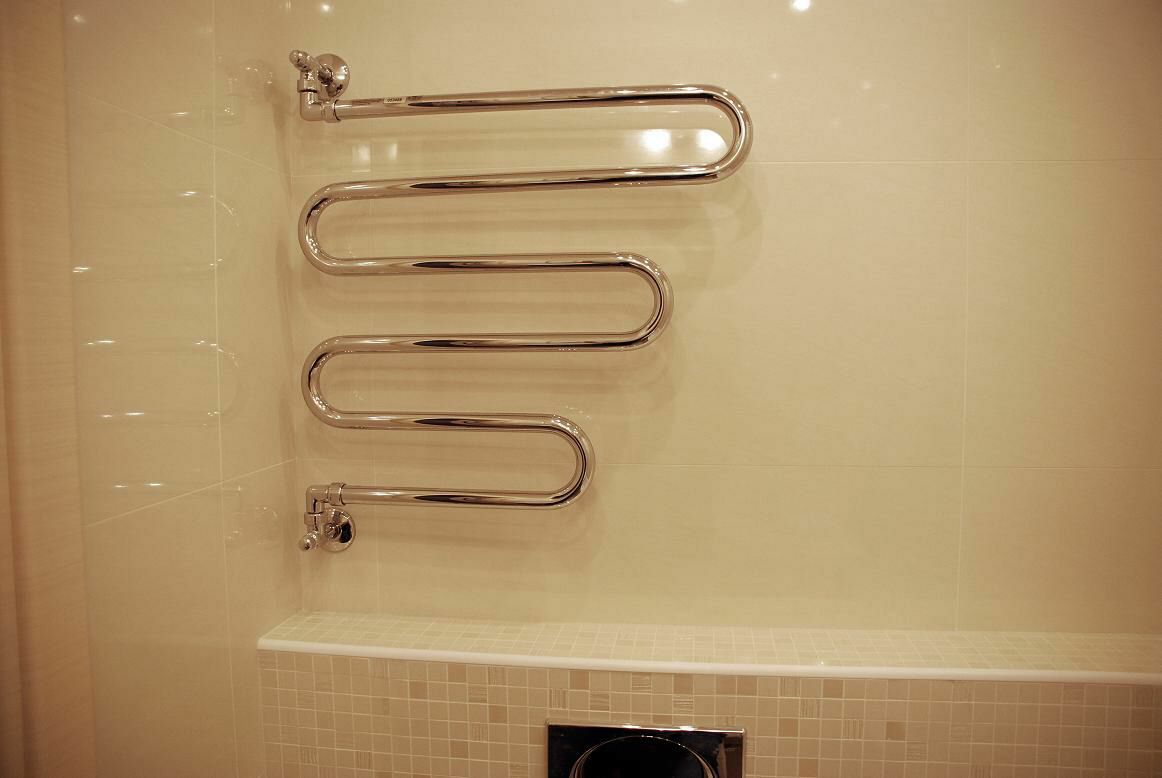
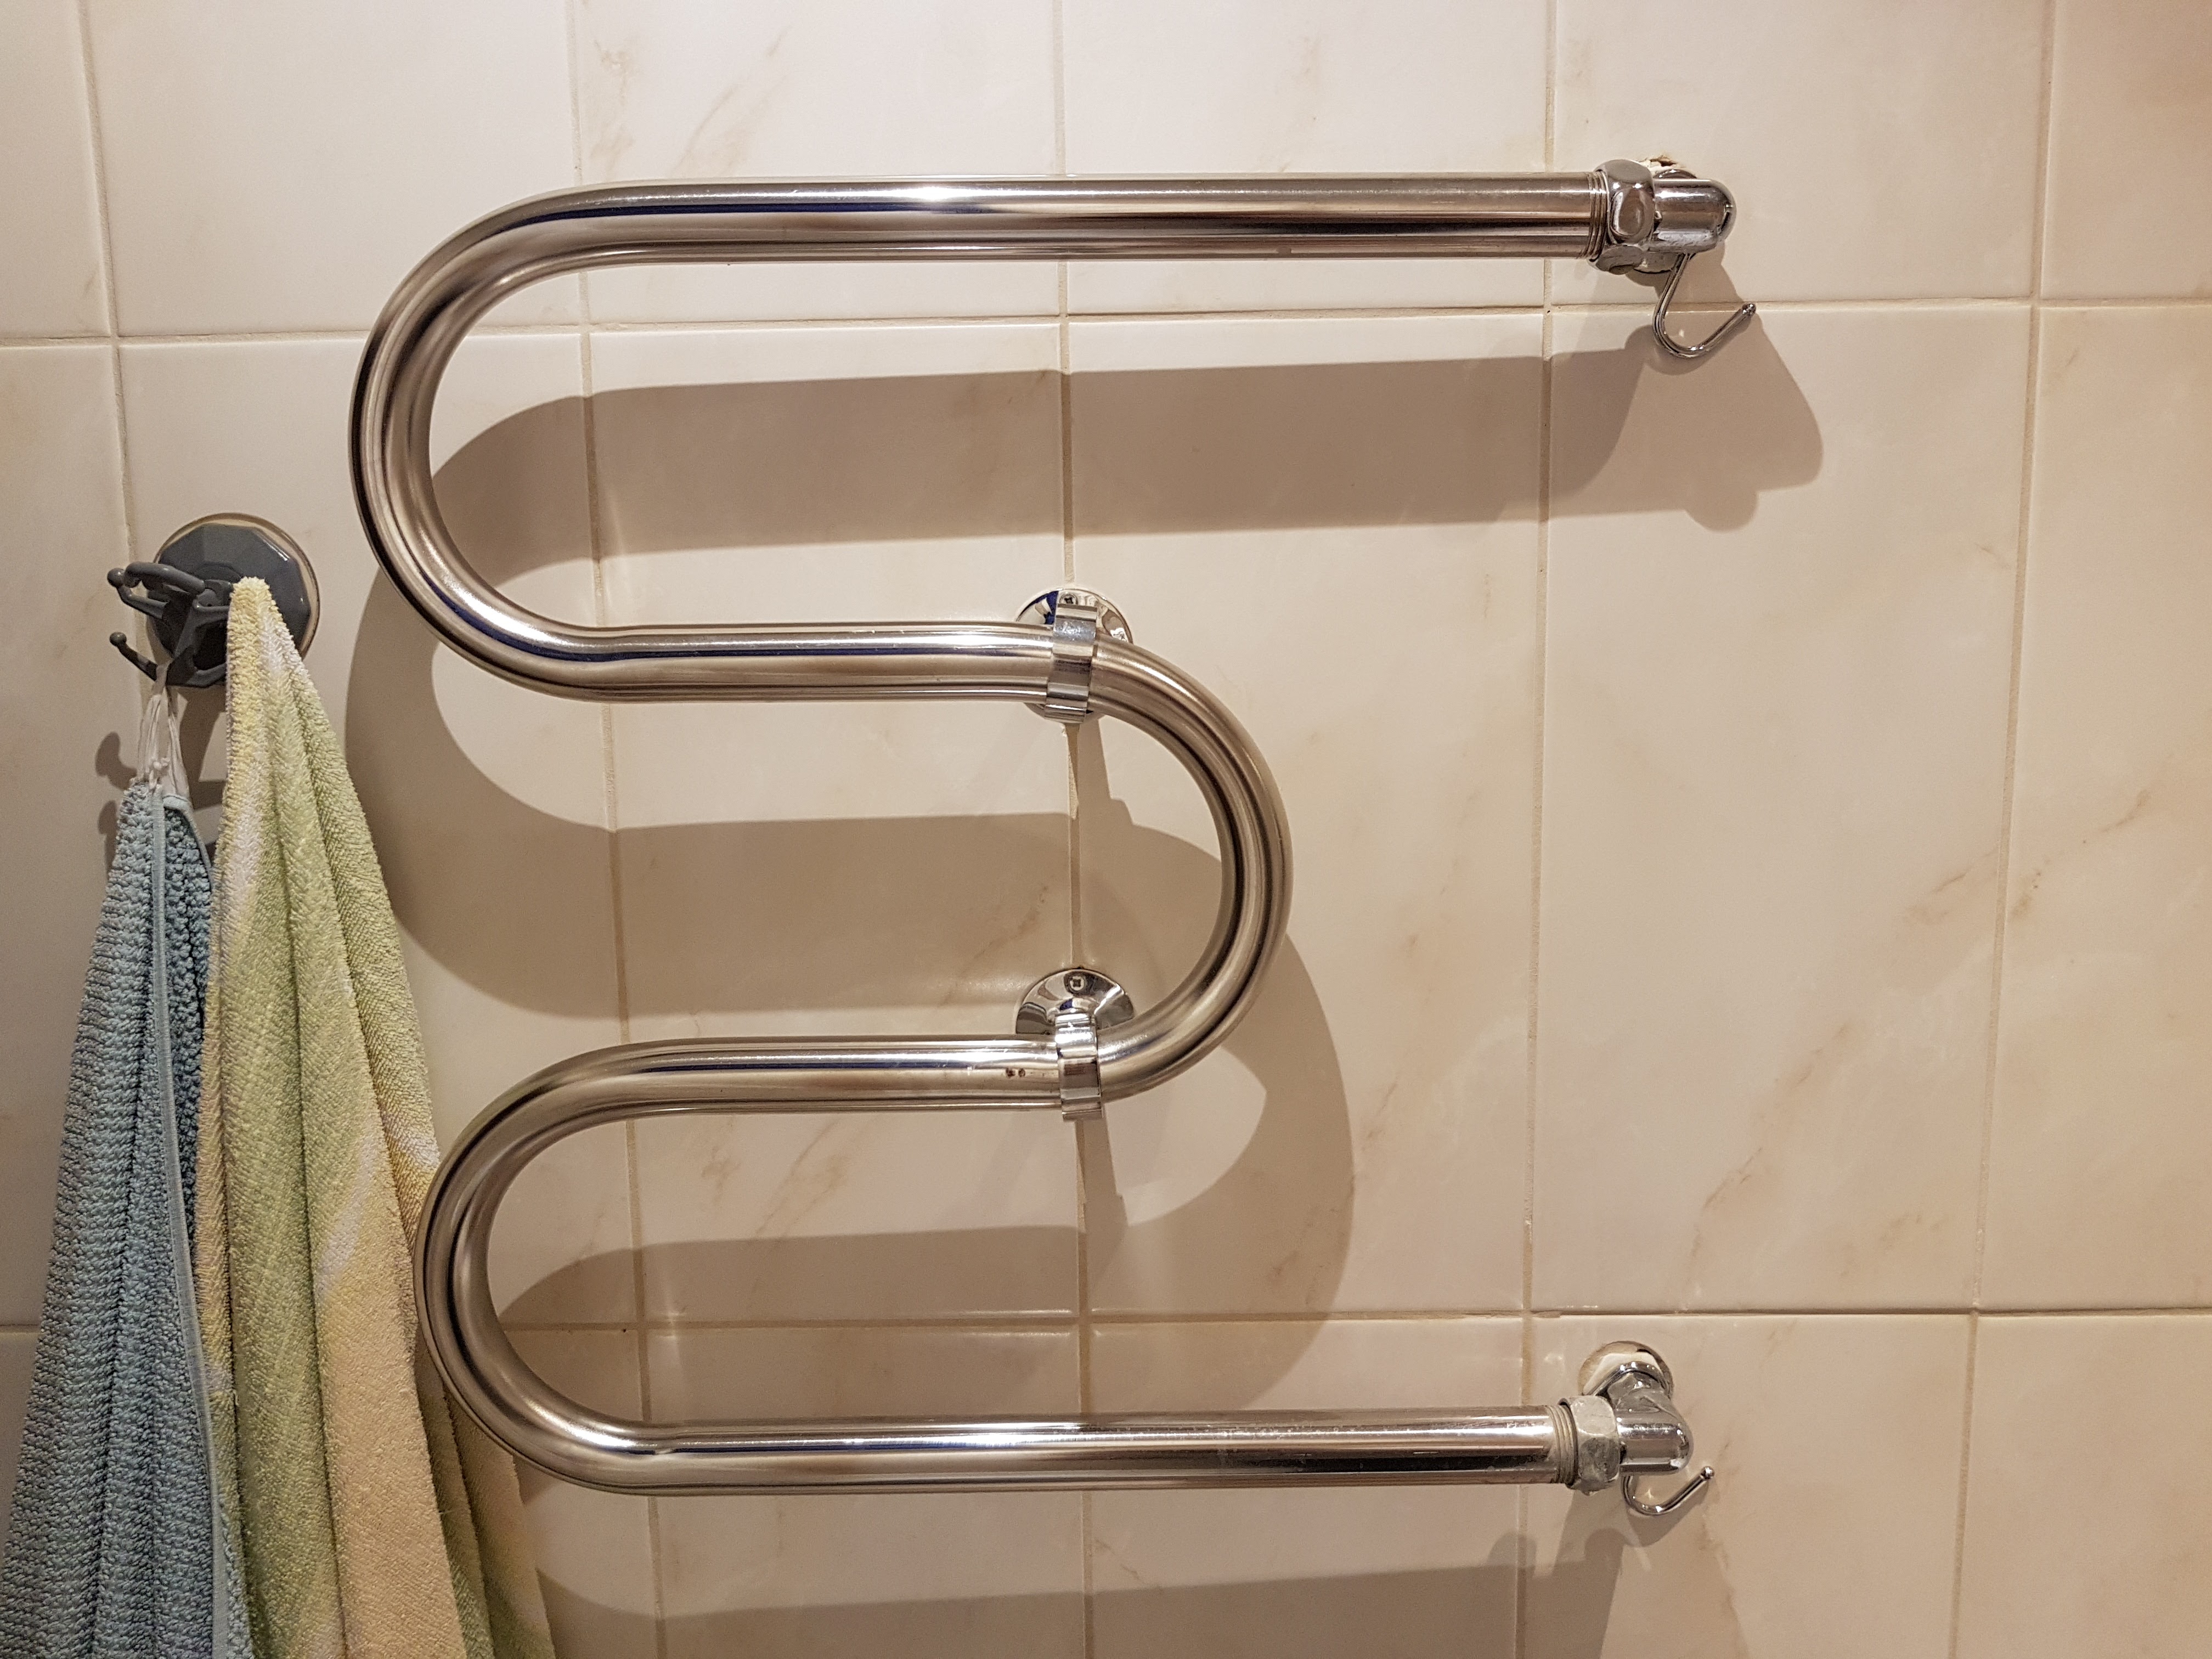
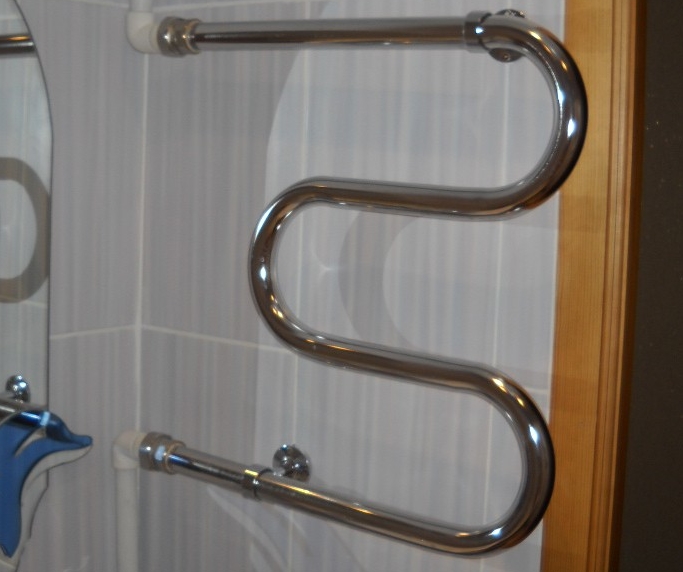
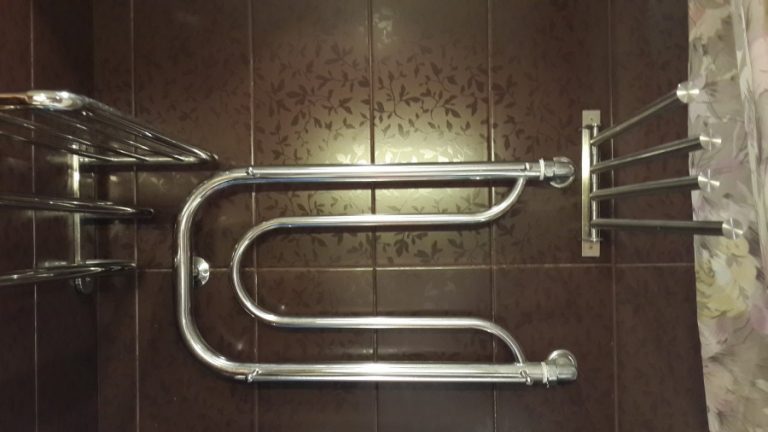
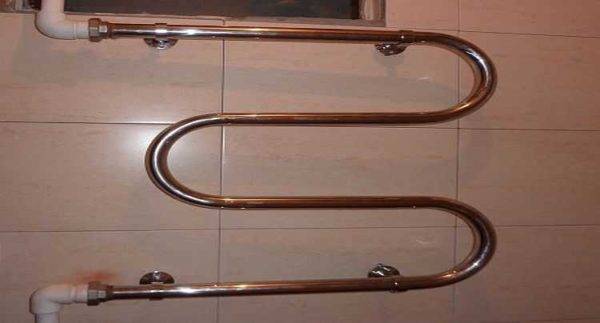
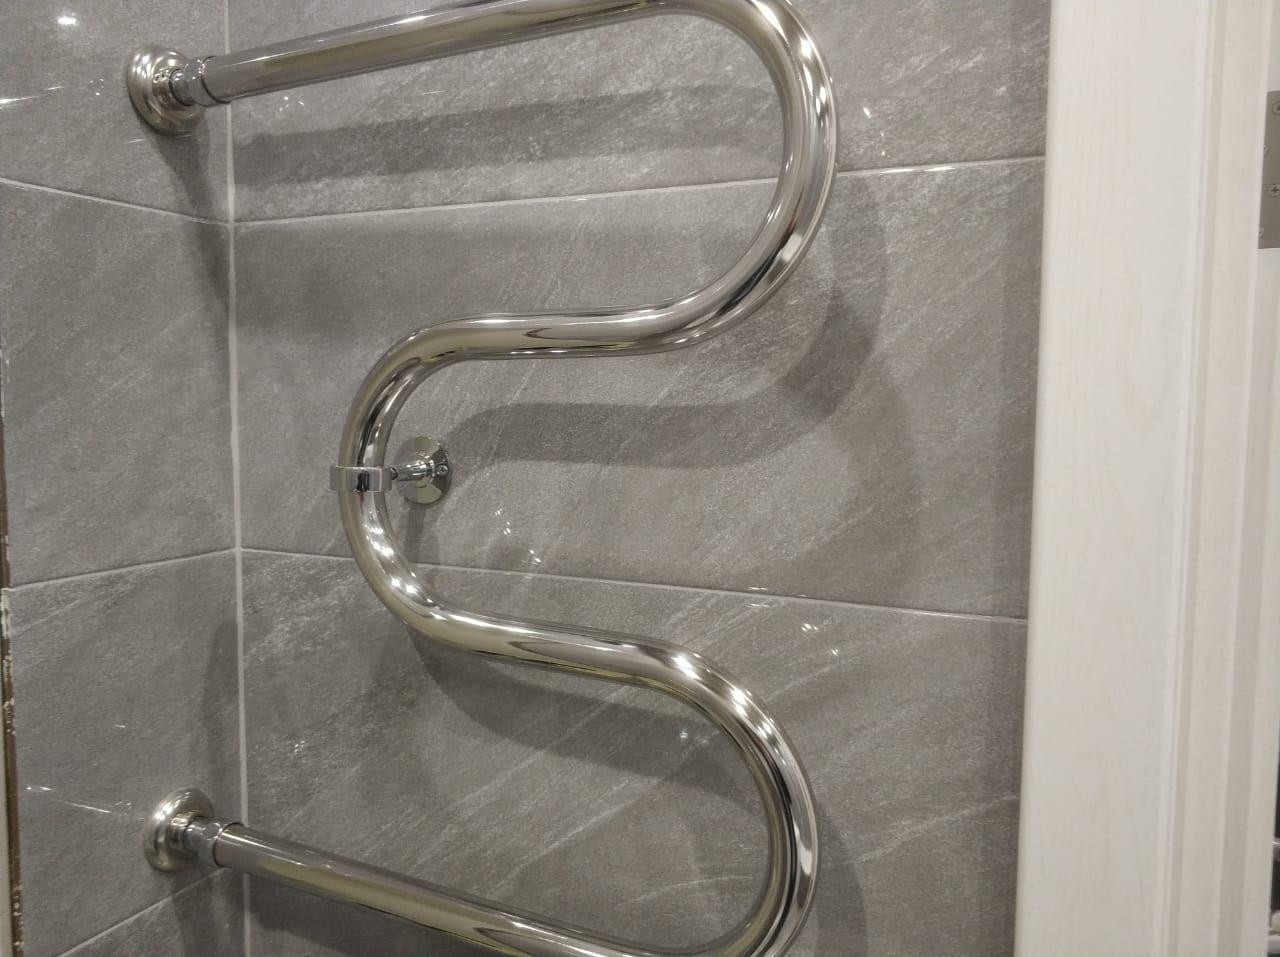
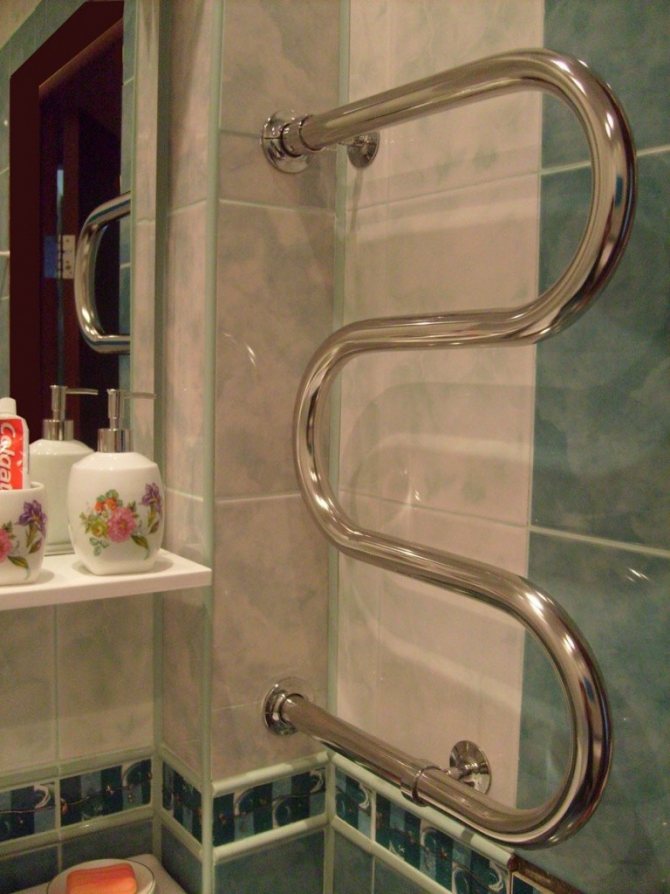
snake. Another classic model with side connection. Installation of this type of heated towel rail, as a rule, does not present any problems.
Types of heated towel rails
-
- Complicated form. There are very unusual heated towel rails. They can even be an interior decoration, but their proper connection is a problem. As a rule, consultation of a competent specialist, a plumber who is well versed in hydraulics, is required. As you can imagine, finding one is not an easy task.


It often happens that after installing a heated towel rail, it simply does not work. If the error is serious, the riser to which it is connected also stops working. Therefore, it is necessary to know and follow the connection rules.
How to make bends and how to change the riser
If the riser is metal and you are not going to change it, then installation of a heated towel rail is possible with steel or polypropylene pipes. If you change the riser (the best option) and install polypropylene, there is no choice - PPR pipes also go to bends. Take polypropylene for hot water, better - reinforced with fiberglass.
Why is metal-plastic not suitable? Because he has fittings with a strong narrowing of the lumen. This is very bad for circulation. As a result, even 100% efficient circuits do not provide normal heating.
Installing a heated towel rail with polypropylene pipes
A little about why to change the riser. It makes sense to do this in old houses when repairing a bathroom or a bathroom (depending on where your riser is located). First, the pipes are usually already old and worn out. Even a branch can be problematic to weld to them, so the metal has worn out. Secondly, modern renovation involves hidden laying of communications and you also want to close the riser. Hide the old pipe, and after a few years to destroy everything again ... not the best solution.
A little about how to change. You need to negotiate with neighbors from below and above, as well as with the Housing Office (DEZ, UK). With neighbors that you will cut off their riser and install a new one on the thread. Why have them? Because leaving the old pipe in the ceiling is dangerous: it will collapse and flow. Will flood you or neighbors from below. Therefore, it is better to pass through the ceilings with a new pipe.
With this connection, the dryer is part of the riser and there can be no taps
Having agreed or not with the neighbors (they may have already closed the riser), go to the housing office and agree on the date of replacement and the time for which the riser will be turned off. “Local” locksmiths, you yourself (if you are qualified as a welder) or people hired by you can work. After the tie-in, the water is turned on, you check the performance of the heated towel rail and the system as a whole. If in 30 minutes it does not begin to cool, then it is set correctly. This completes the replacement or installation of the heated towel rail.
Common Mistakes
 The main and unacceptable mistake is the lack of a bypass, or the installation of a ball valve on it.
If it is blocked, hot water will stop flowing to other apartments located further down the riser.
Another mistake is the excessive narrowing of the bypass. As a rule, plumbers motivate their actions by the fact that there is no difference - the water still passes through the PS and returns to the riser.
However, if the device is blocked, the water pressure of other subscribers is sharply reduced. In MKD systems, the difference between the standard and changed pressure becomes critical.
In addition, they often make bends from the riser that have humps, a lot of curved sections, fittings. All these elements create the possibility of the formation of air bubbles that stop circulation.
Correcting these errors without a complete rework of the connection is impossible.
The best option is to think over the installation process in advance and avoid any mistakes.
When air removal is not possible
It is guaranteed that it will not be possible to remove the cork if the heated towel rail is tied incorrectly. For example, in the indicated scheme, the substation is located too close to the riser.


When tying, a "dead loop" is made higher than the point of its connection to the riser.This section will constantly air the system, and the release of an air plug from it is impossible, especially with a covert method of piping.
With a lower coolant supply in the riser, the narrowing of the bypass leads to a loss of circulation. In turn, air begins to be intensively released in stagnant water. One problem overlaps with another. If the user does not know the direction of water supply, it is better to connect the heated towel rail through a standard diameter bypass.
Thus, the easiest way is to bleed the airlock from the heated towel rail through the Mayevsky tap. In rare cases, when the device is not equipped with an air vent, simply loosen the union nut on its outlet, taking into account the circulation pattern.
Scheme 1 lateral and diagonal connections, open and unbiased bypass.
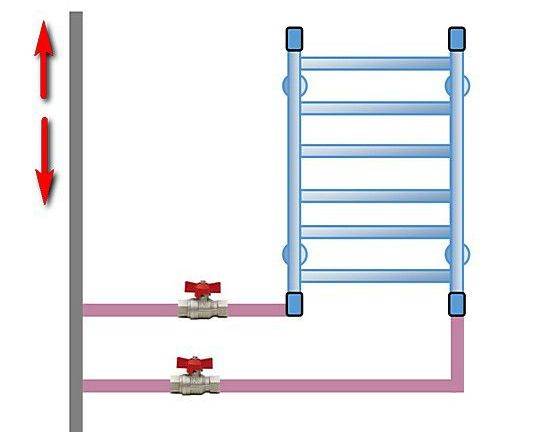
The most efficient connection for the vast majority of substations (exceptions will be added a little later) is with the coolant supply to the upper part and the cooled coolant outlet from the bottom. This can be ensured by using a lateral or diagonal connection with an open and unbiased bypass.
Figure 12. Connection of the PS-ladder, working on natural circulation, without narrowing and without offset bypass. Side connection.
Figure 13. Connection of the PS-ladder, operating on natural circulation, without narrowing and without offset bypass. diagonal connection.
The schemes are equivalent, the diagonal version has practically no advantages over the side one.
This PS connection scheme is the most versatile:
- Works with any direction of supply in the riser.
- It is completely independent of the circulation rate in the riser.
- It is not required to bleed air from the PS after turning off the water.
- The distance from the riser is arbitrarily large.
Conditions for the scheme to work:
- The lower outlet of the riser should be below the connection point to the substation, and the upper outlet of the riser should be above the connection point to the substation.
- The slope of the supply pipes must be observed (the direction is shown in the figure). For definiteness, you can take a difference of 3 ... 30 mm per meter. More is better. With small distances from the riser (a couple of meters) and a large diameter of the supply pipes (PPR 32 mm), strictly horizontal laying is permissible.
- There should be no “humps” (completely unacceptable, otherwise air will accumulate in them and circulation will stop) or dips on horizontal routes (allowable only within small limits, deep “pits” will serve as “pockets” for airing).
- With a lower feed, there should definitely not be any narrowing between the outlets! It will interfere with the work of the PS up to complete inoperability! At the top supply, it is permissible in extreme cases to narrow the bypass by 1 step of the riser diameter (we will consider this option in detail below), but it is not required for the operation of the substation.
- Pipe diameter to ensure maximum circulation - preferably at least DN20 (3/4" for steel, 25mm for good reinforced PPR), ball valves - at least 3/4". The practical maximum distance of the substation from the riser when using a plastic pipe with a diameter of 25 mm is approximately 4.5 meters.
- It is highly desirable to place the supply pipes in thermal insulation. In addition to the fact that it is mandatory when embedding any plastic pipes (provides mechanical protection and compensation for thermal expansion), such insulation can improve the operation of the substation in certain cases (sagging pipes or "pits" on them).
It is strictly forbidden to install any taps on the bypass - this is vandalism and sabotage to yourself and your neighbors. Overlapping or excessive narrowing of the bypass:
- a) Slows down the circulation in the entire riser (the temperature of hot water drops from the points of water intake in the apartments).
- b) Radically worsens the water pressure in all apartments located further in the direction of supply. And with a certain location of the hot water outlet - and at the vandal himself. Indeed, when the bypass is narrowed by one pipe size, its throughput becomes approximately half as much.
- c) It does not noticeably improve the efficiency of the above scheme, and with a lower feed, on the contrary, it interferes with the operation of the PS.
Stages of work
To move the heated towel rail:
- Carry out preparatory work. First, the water in the apartment is shut off. Then the hot water supply to the entrance is turned off. It is desirable that this work be performed by a plumber of the management company. Only he knows how to turn off one riser without disturbing the water supply at home. The whole process takes about one and a half hours. In order to maintain good relations with neighbors, it is worth notifying in advance that it is planned to install a heated towel rail.
- Prepare the location of the equipment. It is better to place above the washing machine. The M-shaped cutout is set at a height of 90 cm from the floor, and the U-shaped cutout is set at 110 cm.
- Dismantle unnecessary equipment. A grinder cuts off a heated towel rail above the toilet. Segments of sufficient length are left to connect to the new pipeline. If there are threaded connections on the device, they are simply unscrewed.
- Place connectors, tees of a suitable diameter on the mounting holes.
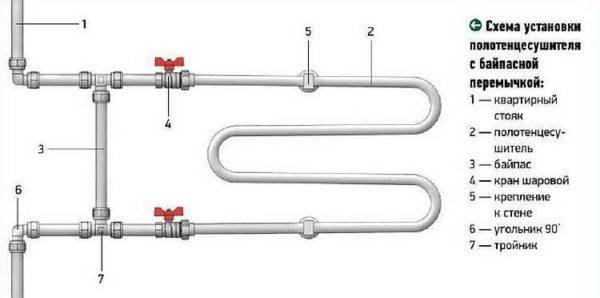
- Mount a jumper - a bypass, which contributes to the unhindered operation of the system when the shut-off valves are closed. For its manufacture, a pipe of a smaller diameter is used than the main one. Shut-off valves are located on both sides. One of the ball valves from the equipment is mounted on the bypass. Now you can safely repair or replace gaskets.
- Increase the length of the pipes to the new position of the heater. You will need hydraulic calculations for the location of the pipes to warm the device to the desired temperature. To install a heated towel rail, polypropylene reinforced pipes belonging to the category "heating" are used. The diameter is not less than the original pipes. Since pipes with a longitudinal weld do not withstand long-term operation, it is preferable to purchase heated towel rails from seamless seamless pipe. Installation is carried out at the same level in order to avoid the formation of a plug from the air. Laying is carried out horizontally with a slight slope in front of the device. The pipeline is laid along the wall or the pipe is hidden with a decorative coating. From the second method, the bathroom will only benefit.
- Accurately and evenly mark the places for fixing the heater. Drill holes with a drill, drive in dowels, fix the brackets, hang the heater.
- Connect the heated towel rail above the bathroom to the pipeline by welding or using threads and taps. The second method is not recommended if you intend to use a decorative finish. Because this connection is leaky. The heated towel rail in the bathroom must contain a Mayevsky faucet through which air descends.
- Check the operation of the device and carry out finishing work.
At the end of the above steps, you need to open all water taps. Since in apartments there are water drops in the system, water hammer, experts recommend purchasing a seamless heated towel rail.
WATCH VIDEO
System failure or blockage
The ball valve, although metal, is still not eternal.
In addition to everything that has already been said, the reason why the heated towel rail does not work can be two factors:
breakage of valves; blockage.
Any equipment has its resource, and ball valves can fail. In addition, the composition of water plays an important role. If the quality of the coolant is low and it contains a lot of impurities of metals, salts and other things harmful to the circuit, then it is likely that this can lead to the formation of pollution. As a result, the heated towel rail does not work. What are the options here? There is nothing left but:


replace faulty ball valves; clean the system.
Both the first and the second will not do without the employees of the housing office serving your multi-storey building. If you live in a private house, then most likely the towel is connected to the heating. If there is a pump for hydraulic testing, then you can clean the circuit yourself, but only by the chemical method. What are the liquids for flushing the heating system we have already discussed in one of the previous articles.
We will not even consider such obvious things as a hole in a heated towel rail.Although if there are no taps and it is impossible to turn off in any way, then the most optimal thing is to make a temporary repair, until it becomes possible to turn off the entire riser and drain the water from it. We have already described the pipe repair method, you can use it. Cold welding is also not bad for these purposes.
Selecting a connection scheme
This is the first stage of such plumbing work. If you do not learn the basic installation methods in advance, then the likelihood of making an error during operation will increase.

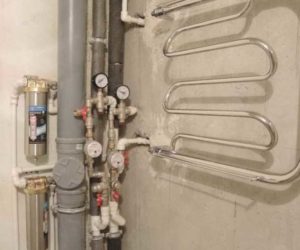
The easiest option is to connect directly to the riser. In this case, a heated towel rail (of various shapes) becomes its integral part. Such installation can be seen in houses with an old water supply system. This scheme does not provide for the installation of ball valves or other shut-off elements, since when they are locked, the riser is blocked, which means that the neighbors are left without hot water supply. Therefore, in order to be able to turn off or independently adjust the temperature in the heated towel rail, a bypass is connected.
Lateral, diagonal inlet
Connecting a heated towel rail with locking elements and a bypass is possible in these two ways. The difference between them is small, but each master makes a choice based on his own considerations. This scheme can work effectively if you follow a few rules:

- The heated towel rail, located 2000 mm (or more) from the riser, must have an inset of the upper outlet higher than the connection point itself at the structure, the lower one is lower. If the distance is less than this figure, then direct connections are allowed, since in this case a slope is not needed.
- The pipes that connect the outlets to the heated towel rail must be straight: they must not have "humps" that provoke a gradual accumulation of air - a plug that blocks the circulation of water over time. If possible, it is better to cover the plastic supplies that are planned to be hidden in the walls with heat-insulating material.
Bottom supply
Some large H-shaped models (ladders) allow a connection scheme with lower connections. This lateral or diagonal connection also requires compliance with several rules to ensure efficient operation.
- If the diameters of the riser and bypass do not match (the latter is smaller), then the upper insert is placed below the heated towel rail. The same is done when the bypass has an offset. The bottom tie-in must always be below the structure.
- In this case, thermal insulation of the supply lines is also recommended, "humps" are prohibited. The use of an air vent - a Mayevsky crane - is the first necessity.
If the bypass is not offset, has the same diameter, then the top tie-in can be located above the bottom of the heated towel rail. To carry out a quality installation, you need to know that:
- inlet and outlet pipelines must have a slope - at least 3 mm per meter, more is better;
- good circulation of water in a heated towel rail located far from the riser will be ensured by a pipe diameter of more than 32 mm, a smaller section is allowed for towel dryers located close;
- any unevenness of the pipes (protrusions, recesses) will adversely affect the circulation of the coolant;
- insulation of supply PVC pipes is recommended for any connection scheme.
Water heated towel rails
The order of fastening the connecting elements.
Water valves are almost always made of stainless steel or chrome-plated brass. Visually, they are almost the same. A heated towel rail made of steel is more reliable, withstands high pressures during the operation of central heating in Khrushchev. However, there is one “but”: it must be solid, that is, made of a seamless pipe.
When purchasing a stainless steel device, it is necessary to choose the one with the thickest walls (3 mm or more), that is, the thicker the pipe walls, the better.
In the building materials market, imported brass heated towel rails are mainly represented. They are not suitable for installation in systems with centralized heating and water supply. The maximum allowable working pressure for brass towel warmers is lower than that of stainless steel analogues.
If it is decided to replace the water heated towel rail in Khrushchev, rearranging it to another wall with an increase in the length of pipes for supplying water, it is better to choose models that have an air vent valve (Mayevsky tap).
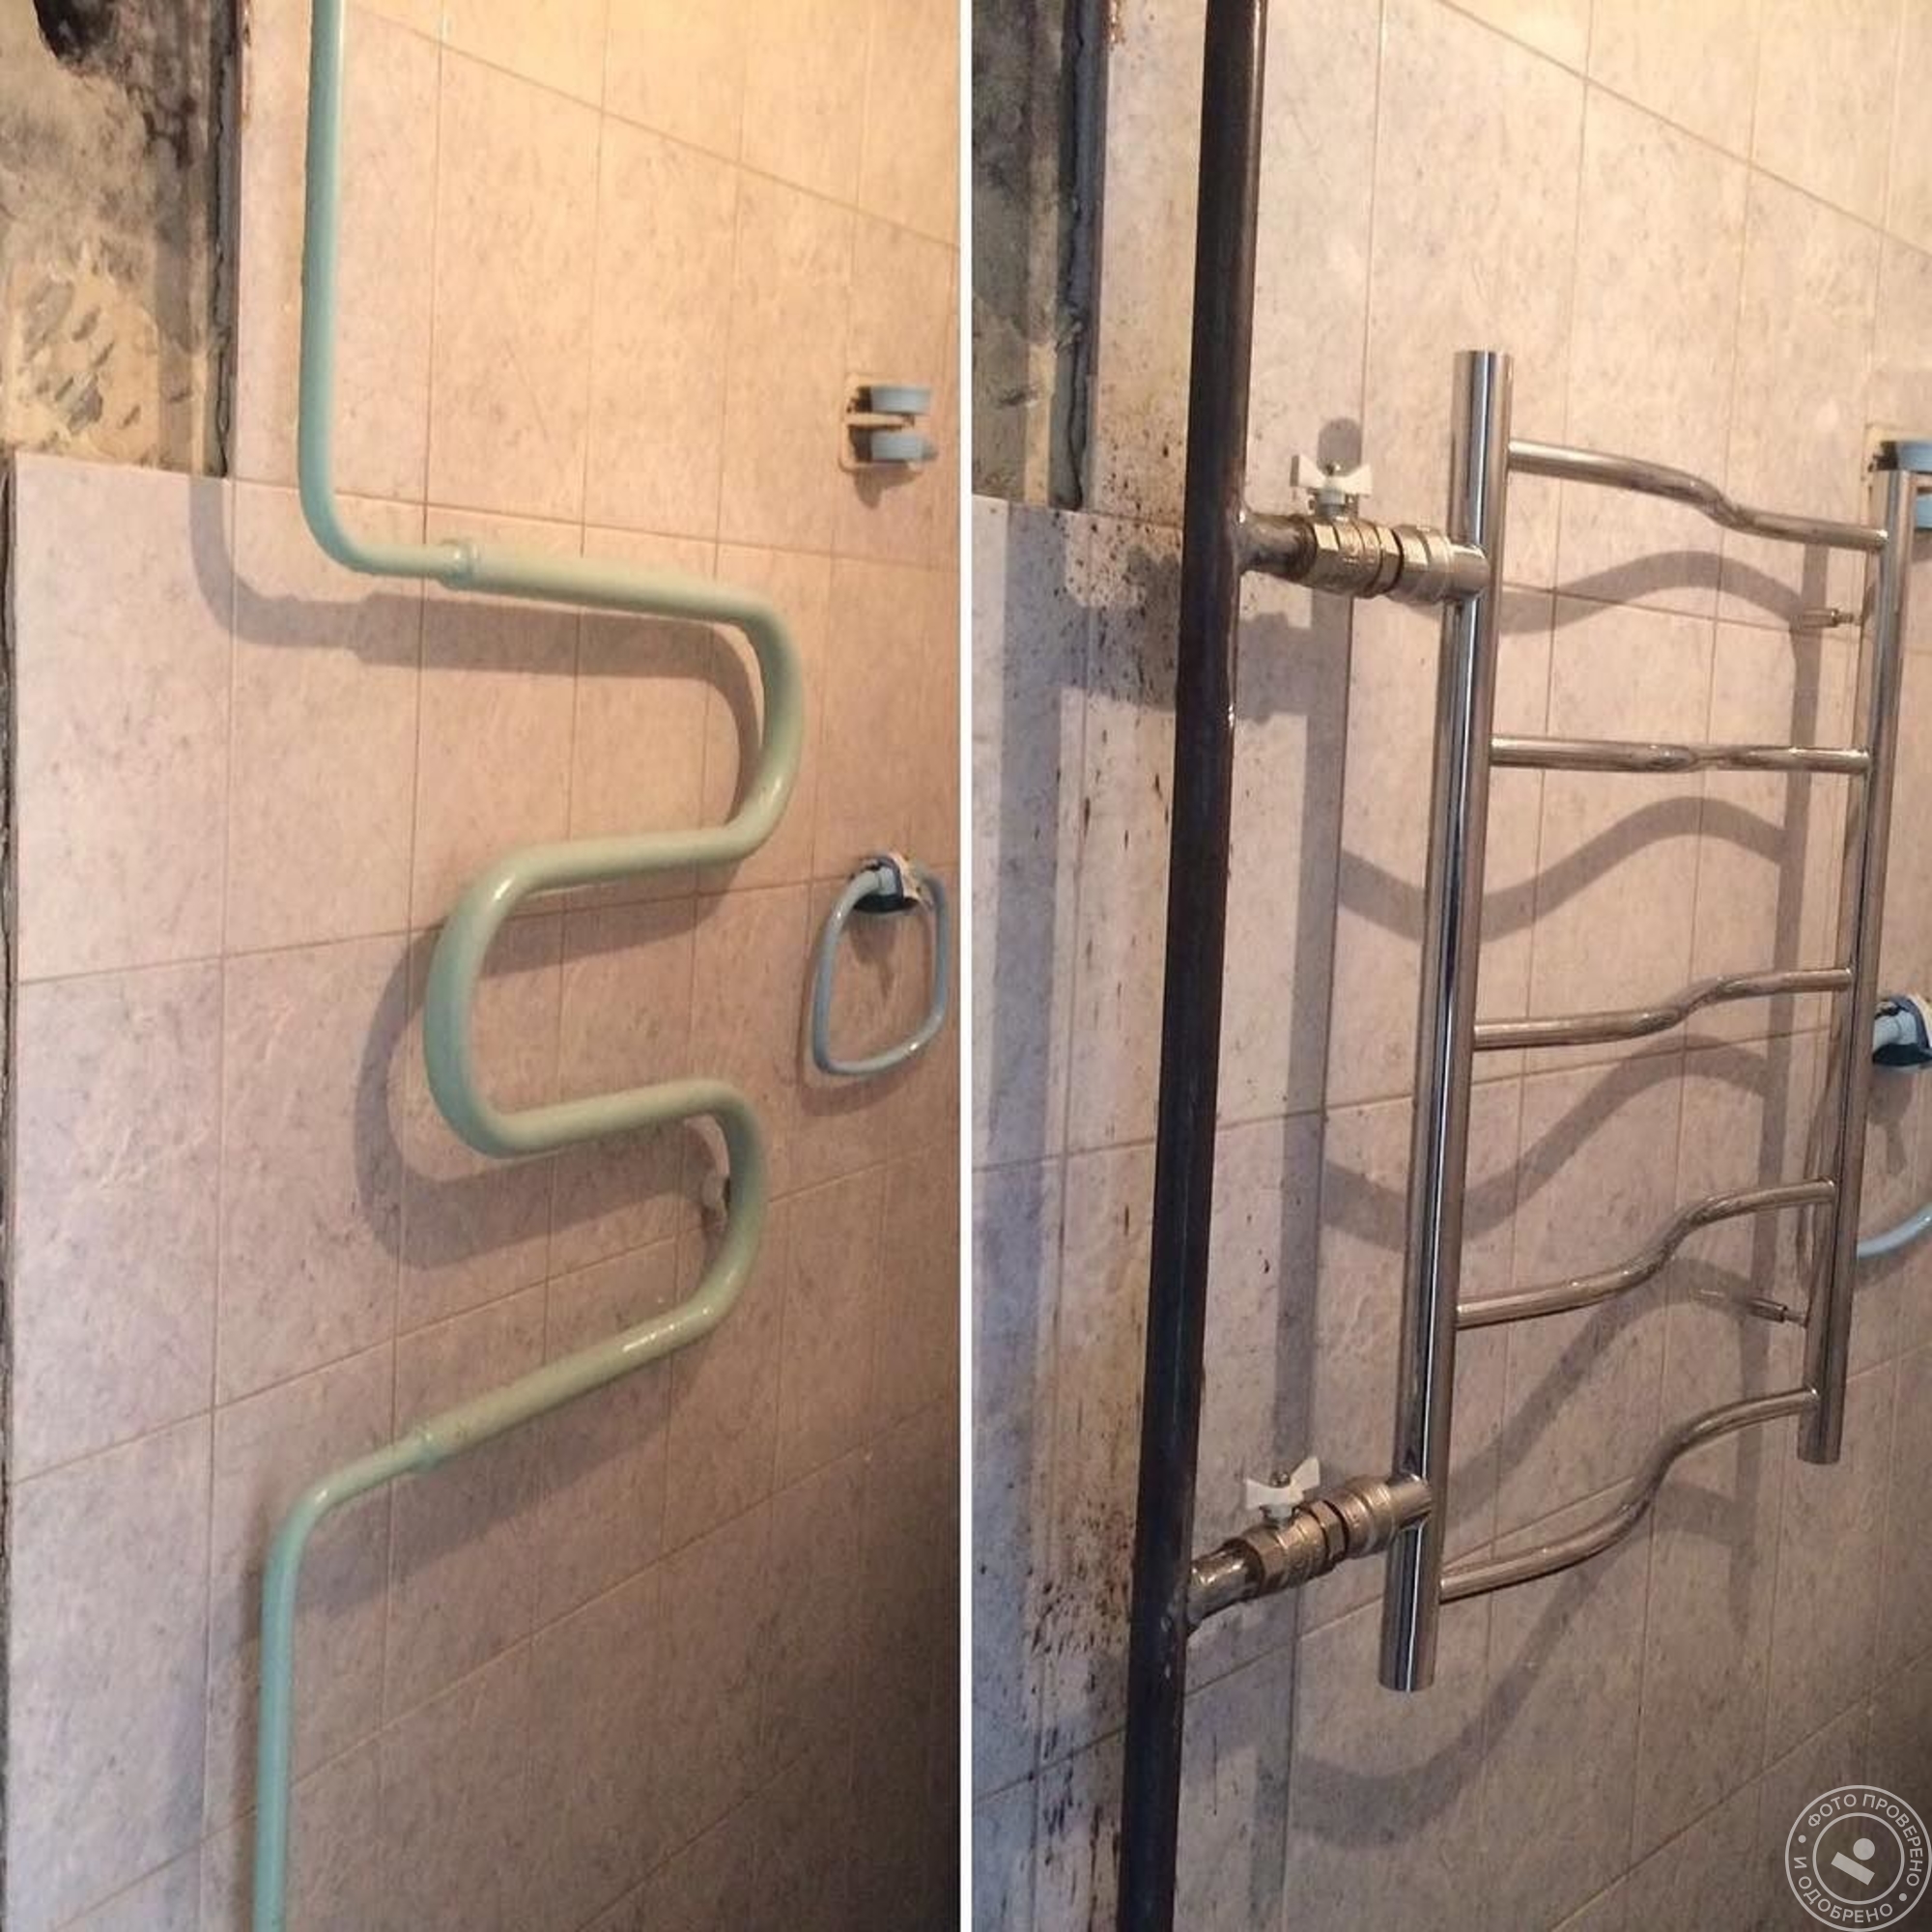
When replacing a water heated towel rail, it is advisable to equip the riser with a jumper by installing ball valves at the inlet and outlet. A jumper of this type will cost 4.5-6 thousand rubles, taking into account installation costs.


Basically, water heated towel rails are connected to the pipeline using an “American” type connection, a characteristic feature of which is the presence of rubber or paronite seals.
Where to connect and where to hang
You can connect a water heated towel rail to both the hot water riser and the heating. If both of these options are available, DHW is usually chosen.
There are three reasons for this: less hassle with permission to connect, you can connect at any time of the year (agree with the management company to turn off the riser and that's it) and, most importantly, such a heated towel rail is heated all year round
If there is no hot water in the house, you will have to connect to the heating riser. This requires permission from the Criminal Code and a project. You buy a heated towel rail (preferably of a simple design), go to the housing office with his passport (copy), write an application. If permission is given, order the project (you will also need a copy of the passport with connecting dimensions). Then, according to the project, you do it yourself or hire performers (plumbers from the Housing Office, as an option). Call the representatives of the Housing Office for acceptance.
To ensure that the “towel” is always warm and without problems, all supplies are straight, without arcs and pockets
When determining the installation location of a heated towel rail, questions may still arise about at what height it should be hung. If there is a choice, it is most convenient to position it so that it is at head level and below. This is if you put a U-shaped or a snake. If we are talking about "ladders" of great height, the upper bar is placed not at the level of the glow of the hand of the raised hand (about 190-200 cm).
When choosing a place to install a heated towel rail, one must also take into account the distance from the riser. In principle, the closer to the riser, the better - more chances that it will work. But, it can be attributed to a meter or so, only if the following conditions are met:
- low hydraulic resistance of the heated towel rail (simple shape and section 1″ or 3/4″),
- sufficient pressure (2 atm or more)
- drainage with pipes of normal diameter (one step less than the riser).
In this case, be sure to follow other connection rules.Then there will be chances that such a “remote” device will work normally.
With or without bypass
Let's start with what a bypass is. This is a jumper between the input and output of the device, which ensures the circulation of water when the device fails or is turned off.
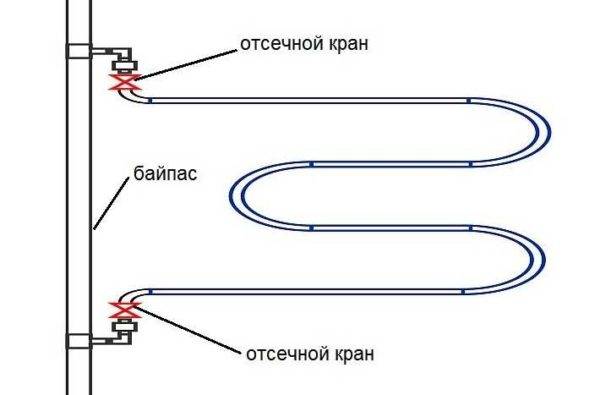
The jumper between the input and output of the heated towel rail is the bypass
If there is a bypass in the circuit, shut-off ball valves can be installed at the inlet and outlet of the device. This is convenient - you can turn it off if necessary (during repair or replacement) and not block the entire riser.
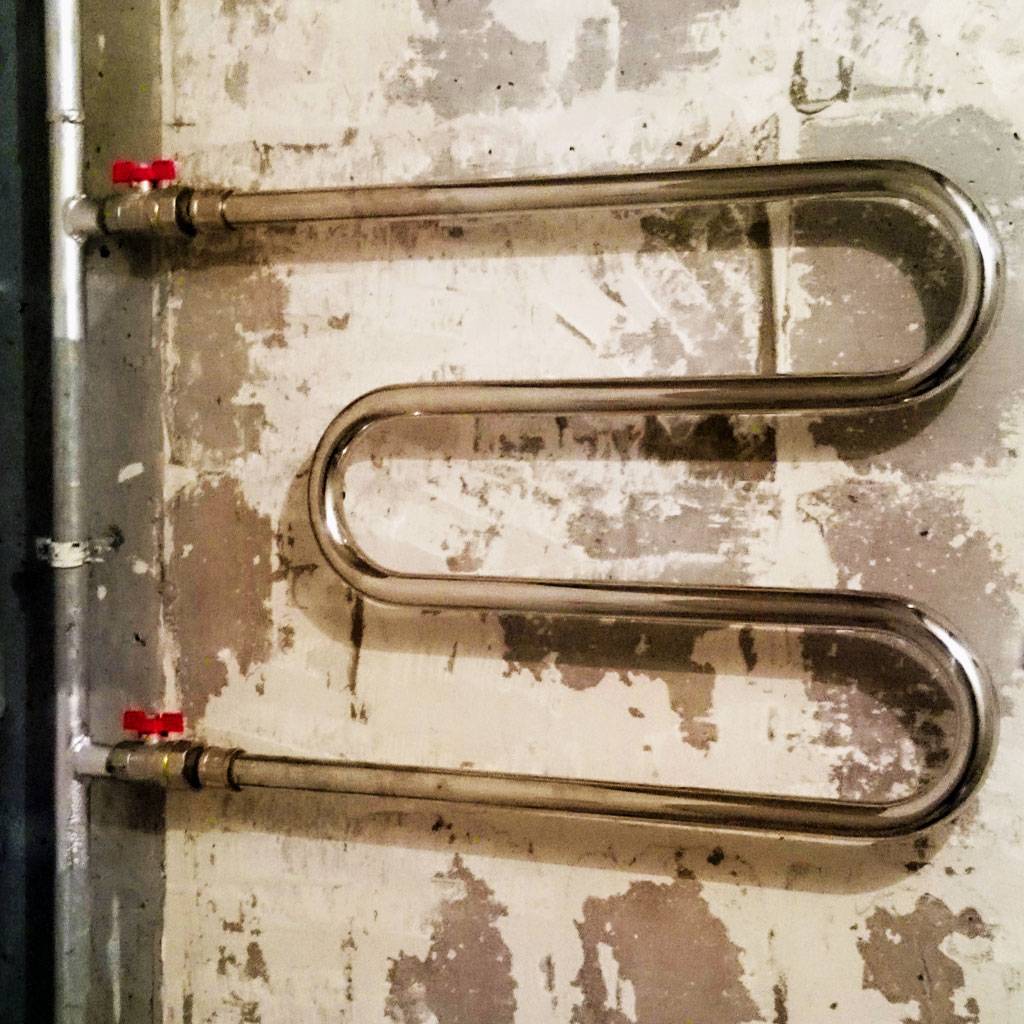
If there is no such jumper, no taps can be installed. In this case, the heated towel rail is part of the riser, by closing the taps you completely shut off the riser.
When connected without bypass, no taps
The bypass can be straight (as in the first photo in the chapter) or offset (in the photo below). An offset jumper is placed at the top coolant supply for better performance (circulation improves). With a bottom feed, the offset only interferes. If you don't know where the water is coming from, it's best to do a direct bypass.


Offset bypass for top flow improves circulation
More bypasses (straight or offset) are made narrower. Tapering, as well as offset, improves circulation, but only in the case of top feed. The narrowing is made with a pipe, which is one step smaller than the main one (if the riser is an inch, a bottleneck is made 3/4 ″). Can't be less. The size of the insert is at least 10 cm.
Categorically it is impossible to put taps on the bypass. Each faucet is a pressure loss, which means that it impairs the circulation of the entire riser, the water flows not so hot anymore. All neighbors above or below (depending on the direction of supply) noticeably worsen the pressure. Sometimes it also falls at the owner of the bypass with a tap.In addition, this is an absolutely unnecessary detail that only brings harm, and there is no noticeable improvement in circulation in the heated towel rail. Well, and besides, this is a violation of SNiP 31-01-2003 (clause 10.6) - interference in general house communications, for which a fine (considerable) can be issued.
Why you need to bleed air from the heated towel rail
The heated towel rail is designed for drying wet laundry. Thanks to this device, the microclimate in the room is maintained. Drying allows you to soften the environment. As a result, the appearance of a large number of harmful microorganisms on the walls, skirting boards and ceiling is prevented:
After using the product for a long time, water circulation may be disturbed. Air mass begins to accumulate inside the unit. A plug occurs that affects the functionality of the device. It ceases to heat up, there is a loss of its properties and positive qualities. To get rid of the cork, you need to drain the water. The main reasons for performing such an operation are:
- Evaporation of hot water in pipes is very slow. This phenomenon is associated with the formation of air bubbles inside the pipe, which interfere with the free movement of the heated liquid.
- Another reason may be the restart of the water supply, if for some reason there was a break in operation.
- The cork appears due to the incorrectly selected shape of the product.
- Wrong connection.
In order not to worsen the quality of the atmosphere, the air lock must be eliminated.
How often do you need to bleed the air from the heated towel rail
Many users face this problem.Let's say right away, as soon as there is a problem with the heat supply, the operation must be performed immediately. There is no need to postpone bleeding the air from the towel warmer, as this process begins to worsen significantly over time. If everything is done on time, after the release of the mass, the design of the device will begin to work at full capacity.


