- What do we know about surface preparation for painting?
- Plaster work
- Save money on bathroom refurbishment
- How to correctly determine vertical deviations
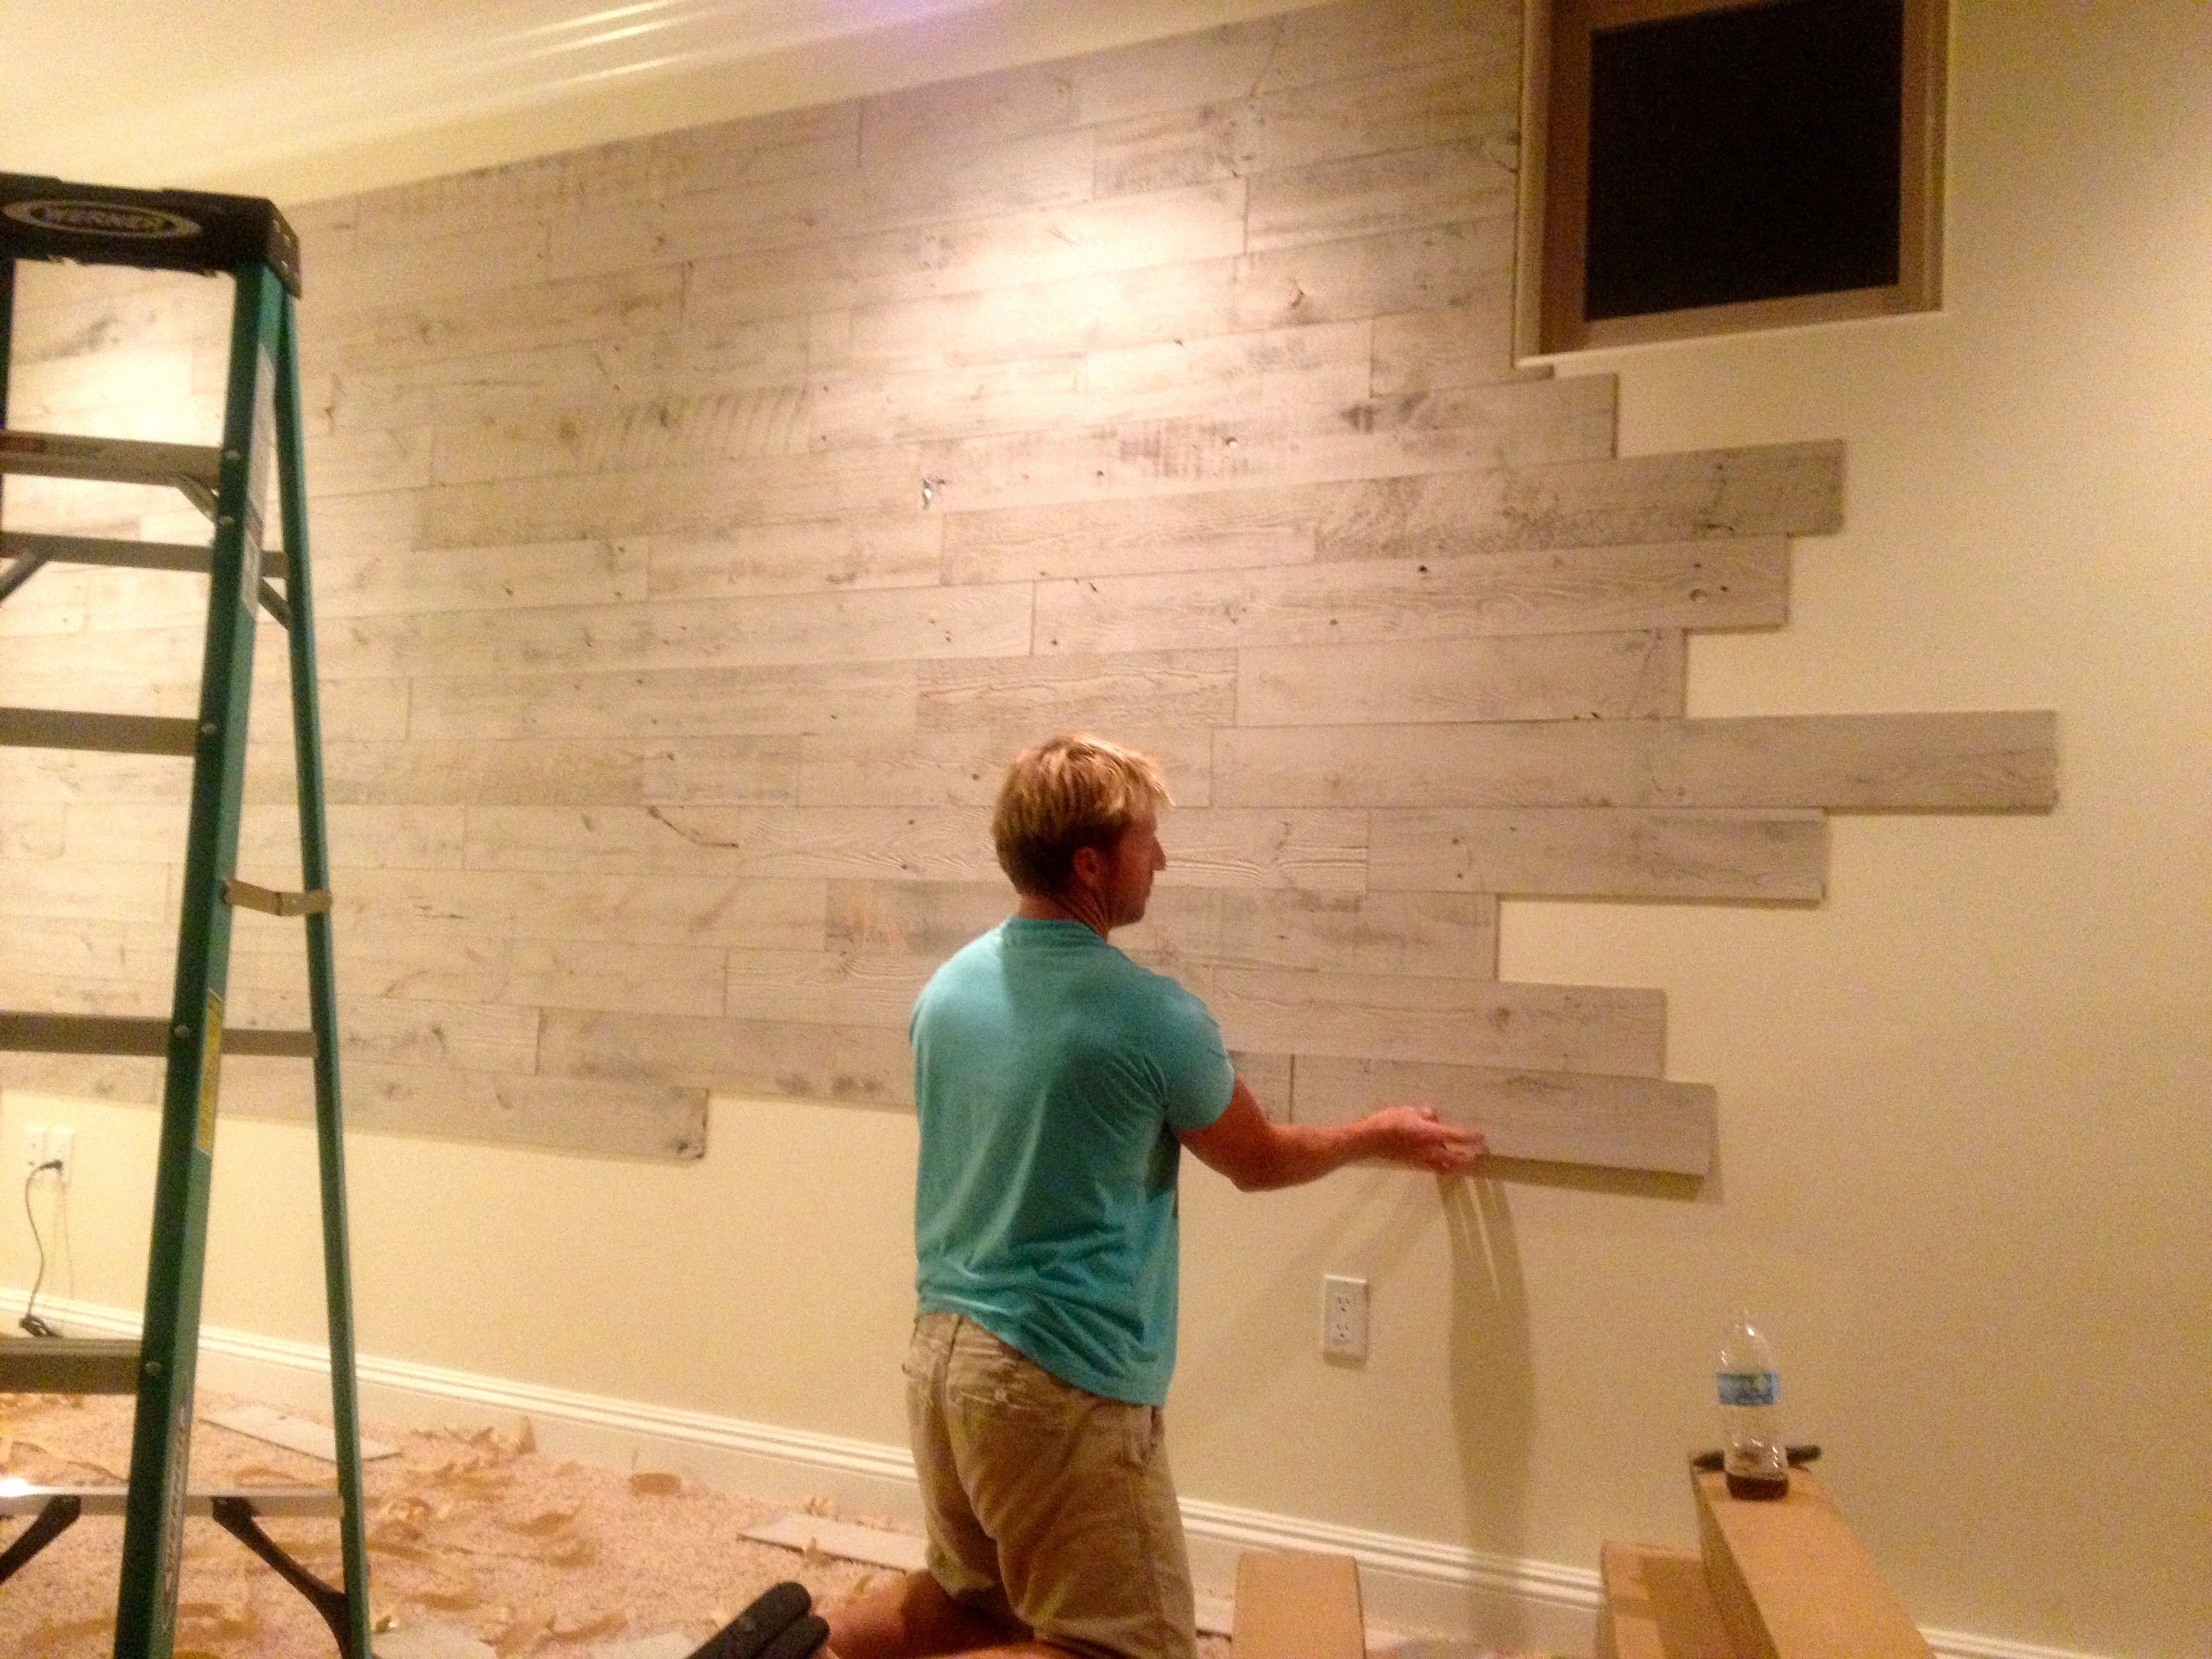
- No. 5. Leveling with plywood
- Choosing an alignment method
- What you need to level the walls
- Plasterboard leveling
- Video description
- Briefly about the main
- Drywall for wall repair
- Leveling the floors
- Wall plastering
- Installation of guide rails-beacons
- We start plastering
- Add light and warmth
- How to measure floor level?
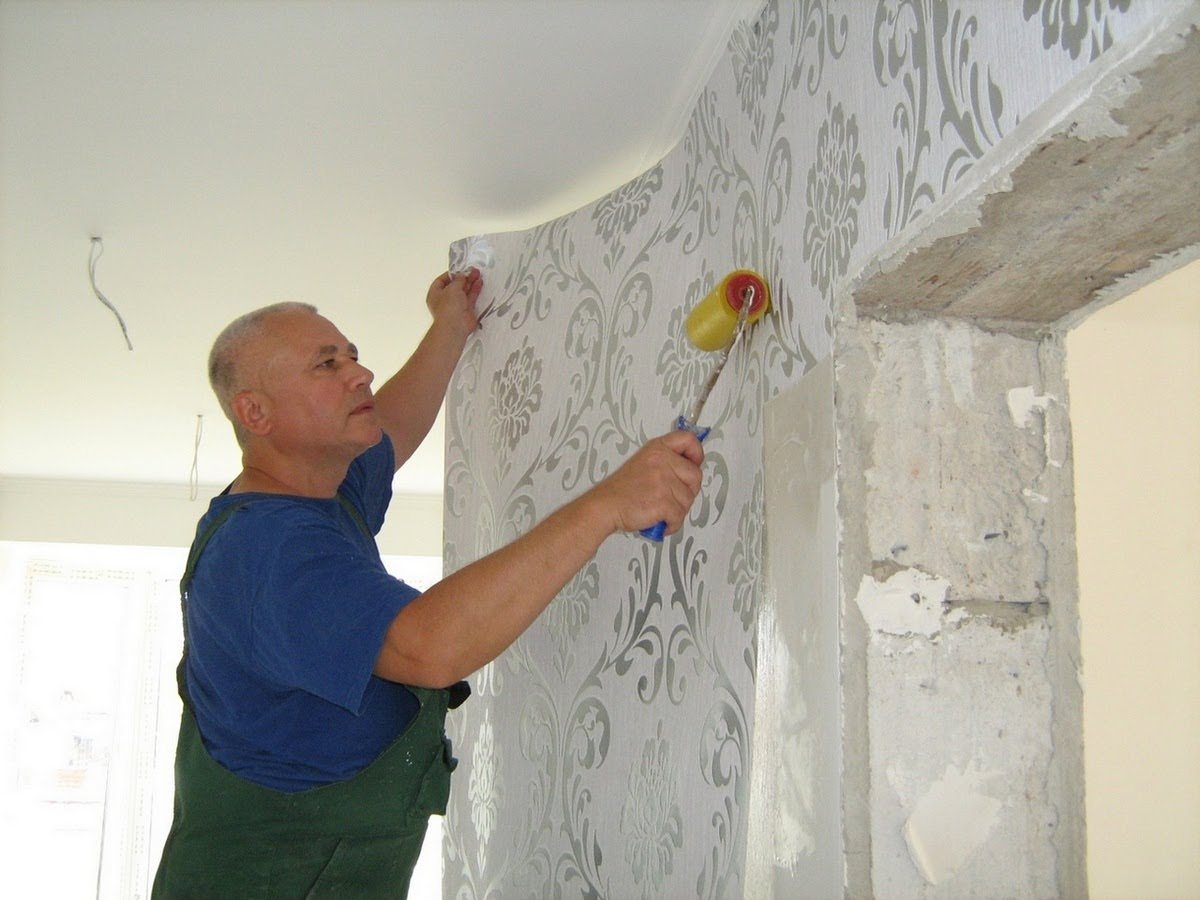
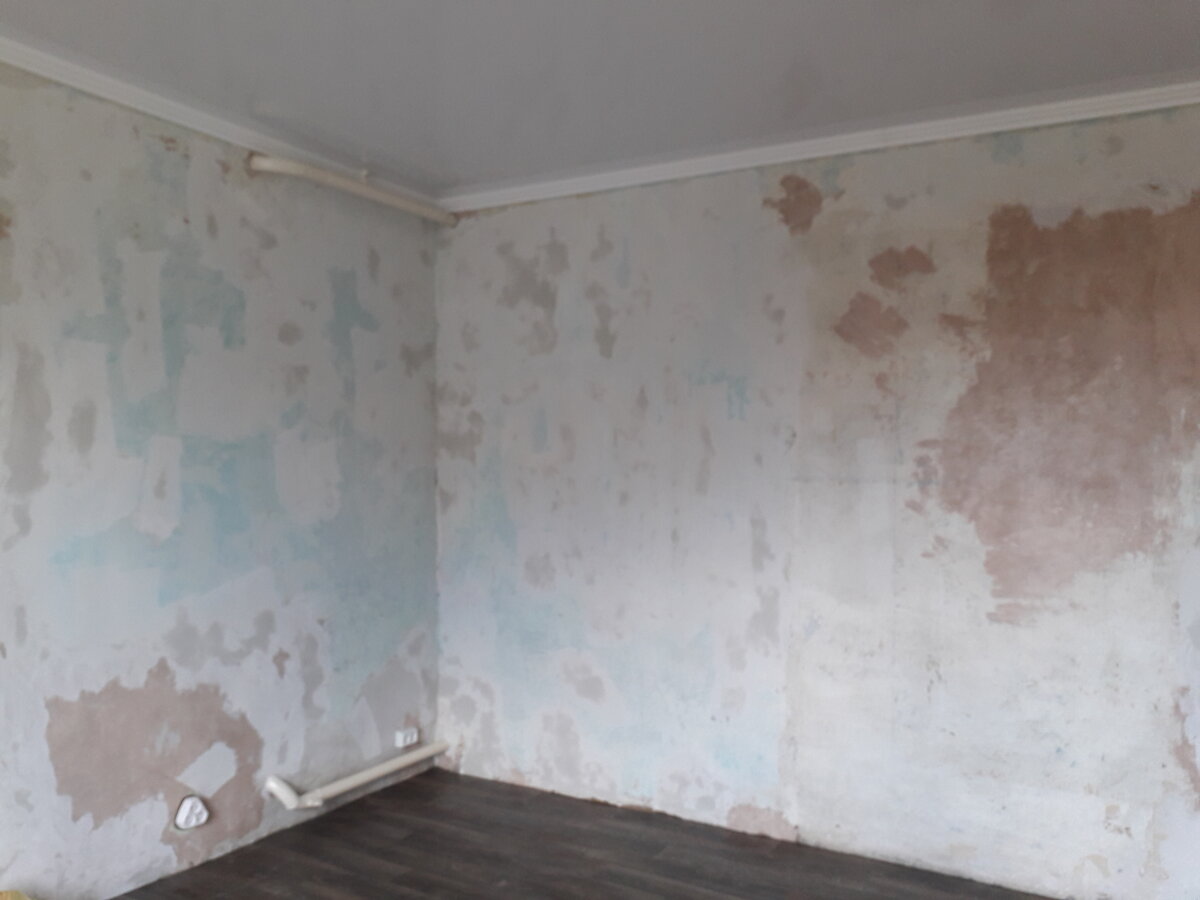
What do we know about surface preparation for painting?
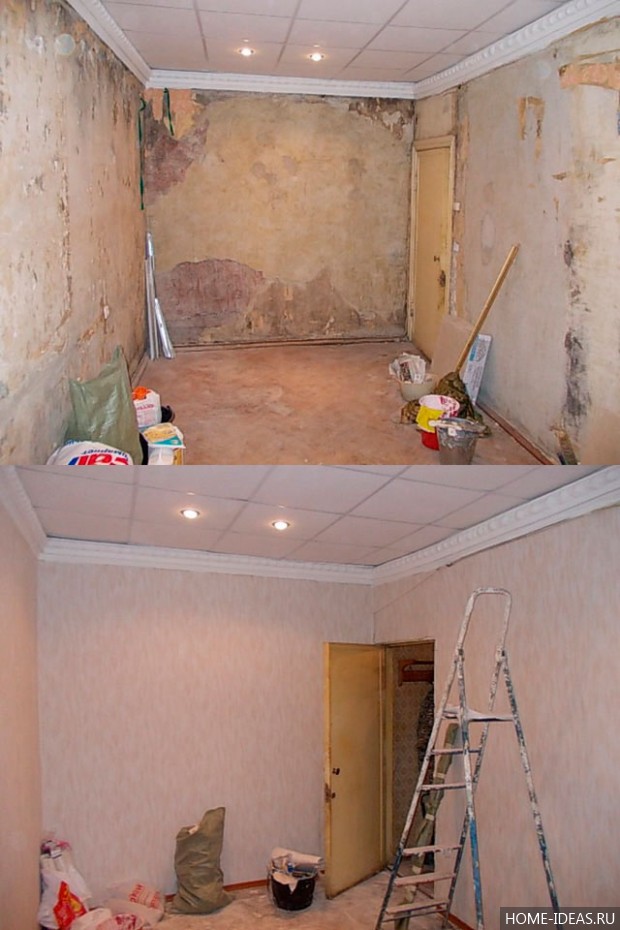
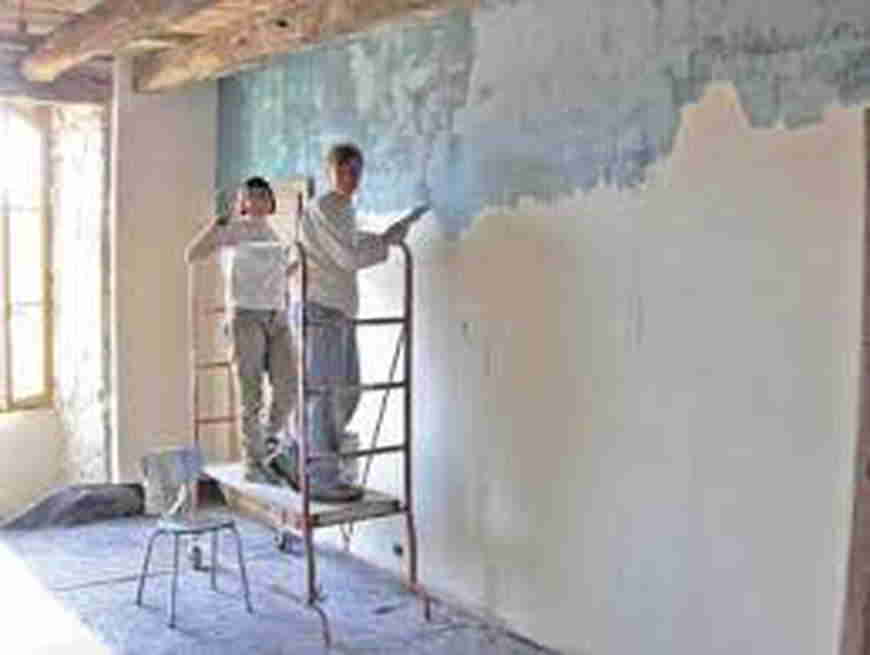
As everyone knows, painted wall surfaces are capable of revealing very small imperfections, and this makes their careful preparation especially important. The process of preparing for painted work is considered time-consuming and expensive, so it is necessary to be strict about this type of rough work. If you want to do all the work on your own, then follow the rules for applying plaster and do not forget about the surface leveling technology for painting.
Ignoring the complex process of preparing the wall with my own hands, I gained invaluable experience, which later allowed me to carry out the cladding and facade insulation of my own house on my own.I will try to tell by my own example about the correct order of plastering. walls.
If you want to do all the work on your own, then follow the rules for applying plaster
So, there are two types of plastering for painting:
- Leveling with plaster, and after putty - a flat surface
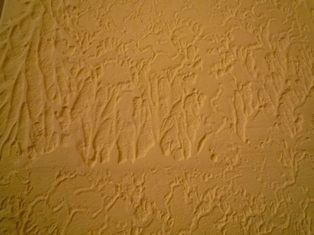
- Textured plaster
Between themselves, these types are different due to the application of the final plaster layer. Despite the fact that the preparation process itself is the same, the final appearance of walls of this kind is radically different from each other.
Interesting! Plaster itself is considered a material that makes it possible to realize the most striking designs of designers. In addition to the fact that it eliminates permissible errors, it can be used to create stucco patterns and various surfaces that have an texture for painting.
As everyone knows, painted wall surfaces can reveal very small flaws, which makes their careful preparation especially important.
When I got acquainted with the material, I identified several positive qualities for myself:
- Has water-repellent properties plaster able to dry out after accidentally getting wet. At the same time, it does not lose decorative characteristics.
- Improves thermal insulation properties
- Safe material that meets sanitary and hygienic standards
- The incombustibility of plaster indicates the possibility of finishing on the outside of the house and using it for wooden houses
- Relatively low cost for doing the work yourself

The process of preparing for painted work is considered time-consuming and expensive, so it is necessary to be strict about this type of rough work.
And if you immediately talk about the disadvantages of plaster, then you need to remember such aspects as:
- If the plastering technique is violated, then the formation of cracks is inevitable.
- For facade cladding with plaster, a positive temperature is needed
- The plaster layer has its own power limitations
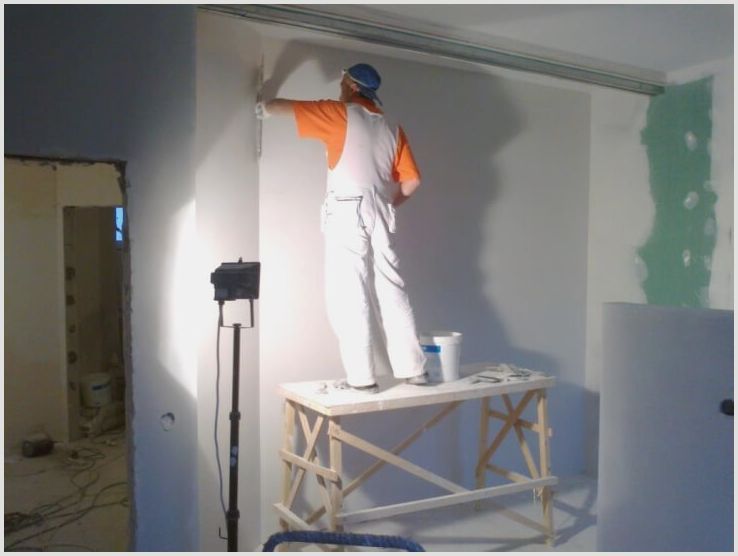
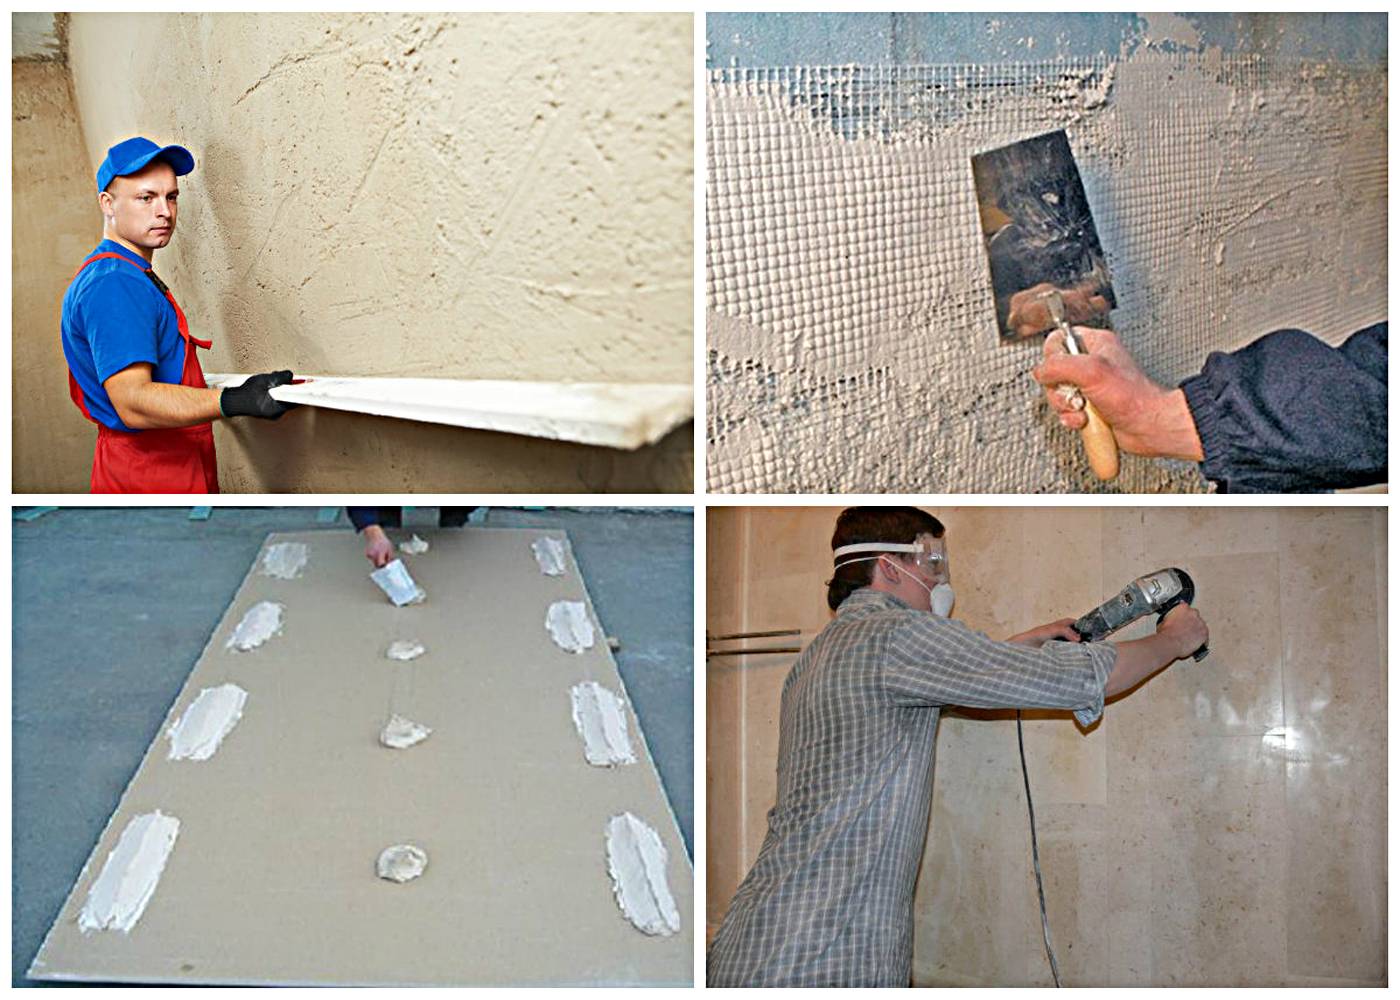
Plaster work
A set of tools for wall plastering.
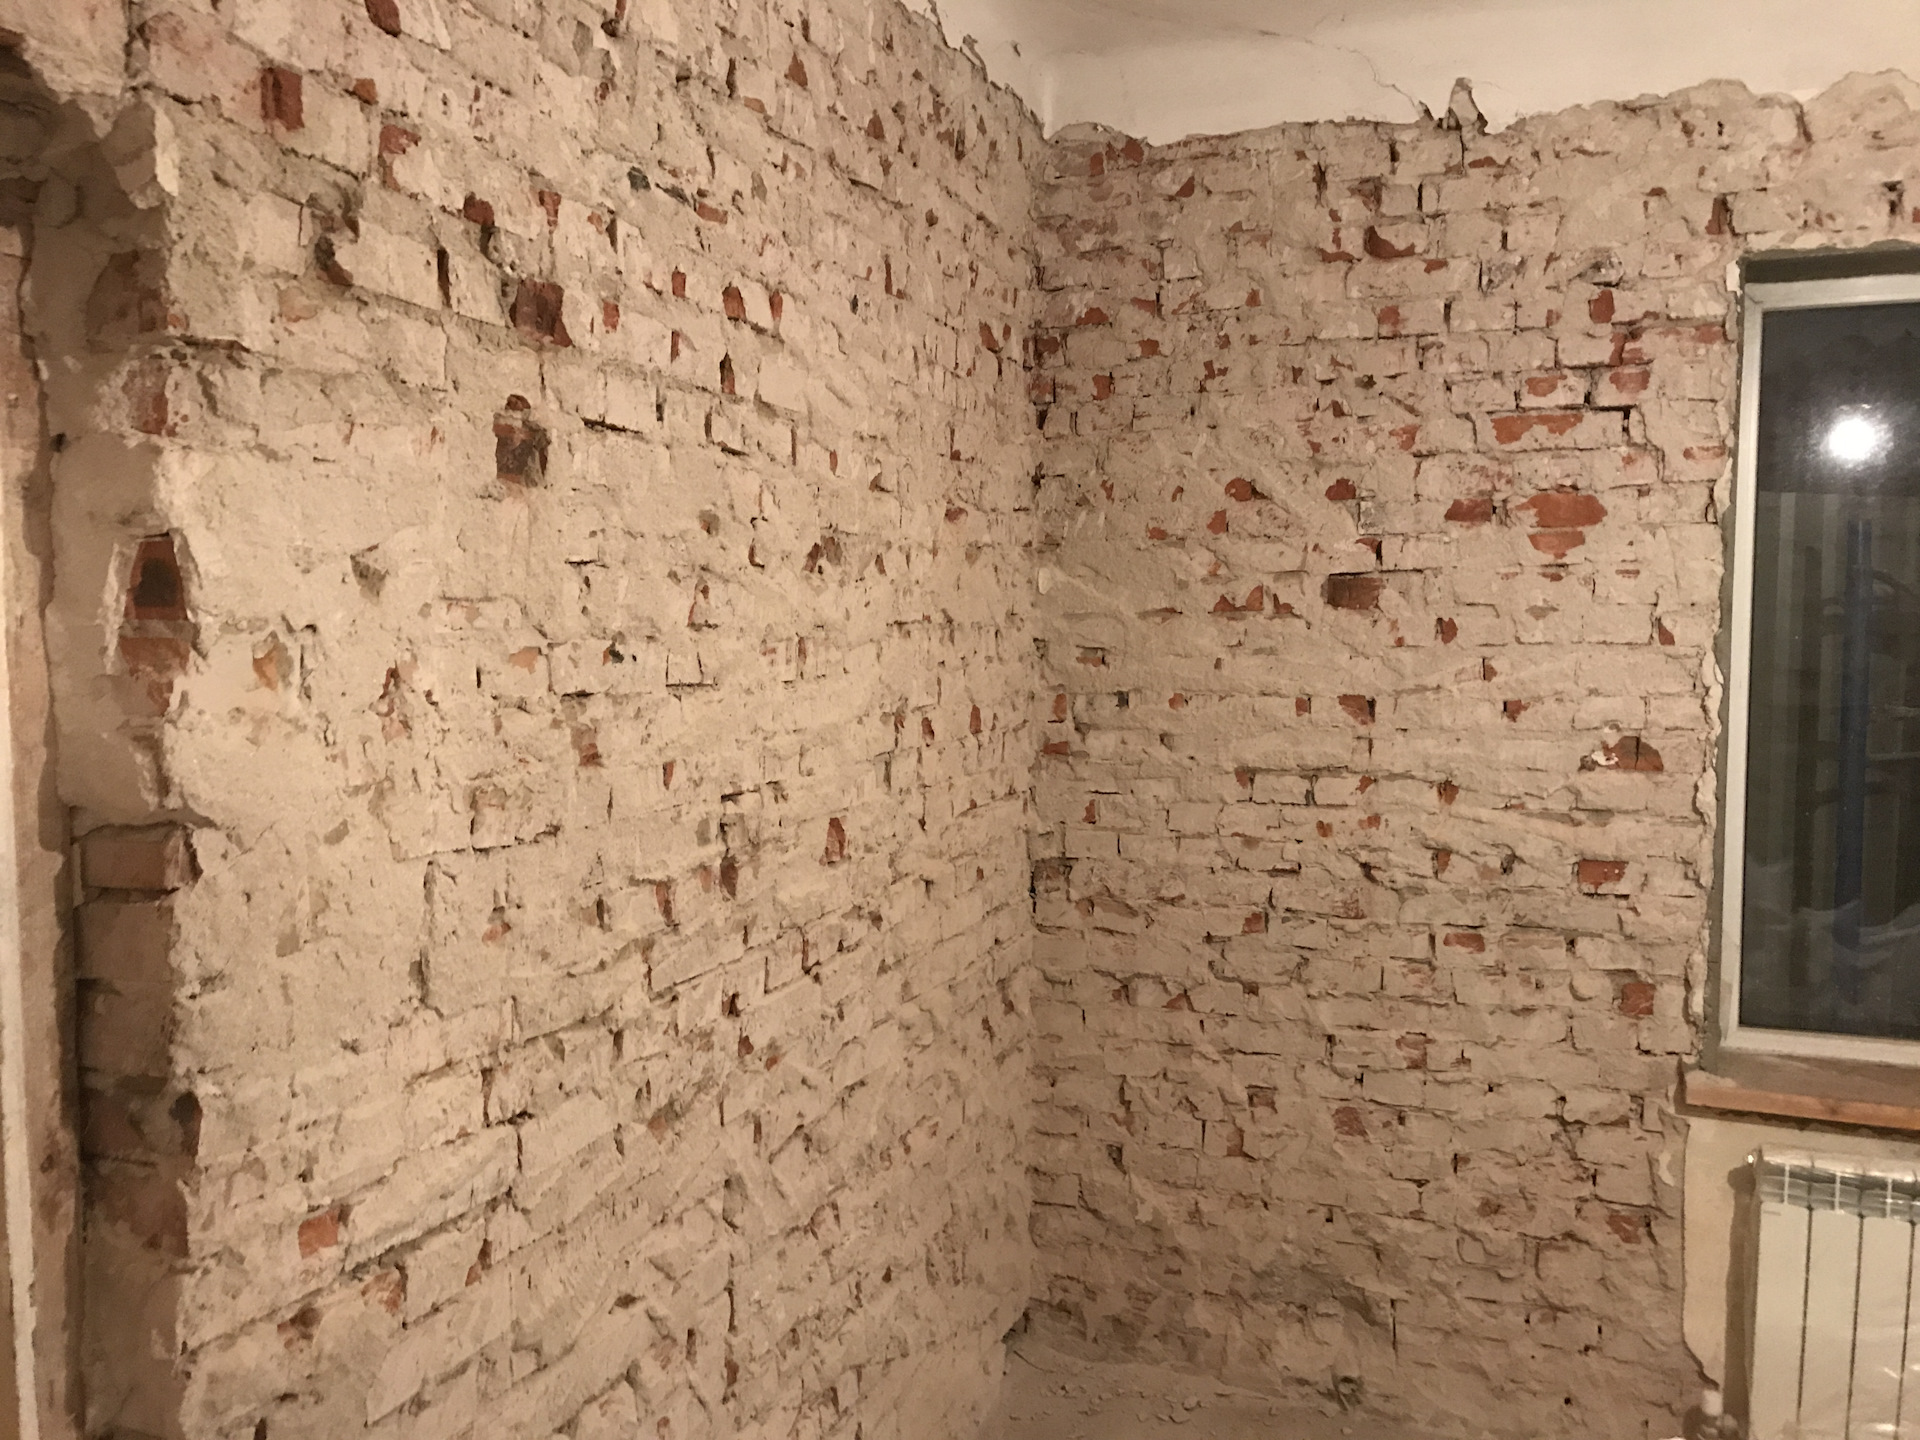
Plastering is the initial stage of work. With its help, the walls are leveled, all depressions are smoothed out. This type of work is ideal for leveling walls that have been cleaned down to brickwork.
If there are many irregularities on the wall surface, for example, brick joints, it is necessary to purchase metal guides, the so-called "perforated corners". They are attached to the wall with a gypsum mixture, carefully checking the verticality using the building level. Then 3-4 threads are pulled between the guides at a distance of 1-1.5 m from each other.
Each thread, which is also a beacon, should touch 3 guides. According to these guidelines, it is worth plastering, only in this case the wall will turn out to be even. After installing the beacons, the wall should be treated with a primer and allowed to dry.
For plastering work you will need:
When using cement mortar, it must be thrown with a ladle. If a plaster mixture is applied, only a spatula can be used.
Scheme of the direction of puttying.
The cement mixture is usually thrown onto the wall and then leveled with a leveler. If a non-professional works, you can apply composition to levelers and then transfer it to the wall.


alignment do-it-yourself walls is made from the bottom up, on a wet surface, taking into account all the irregularities.After applying a layer of the mixture with the help of the rule, the excess is removed and the application is corrected. In the event of the formation of bubbles and layers, part of the cement mixture must be removed and the work repeated, otherwise the wall repair will not be durable.
When working with lighthouses, it is important to apply plaster in stages. After the main layer of the material hardens slightly, you need to apply a thin additional layer and use a grater to make the surface of the wall smooth
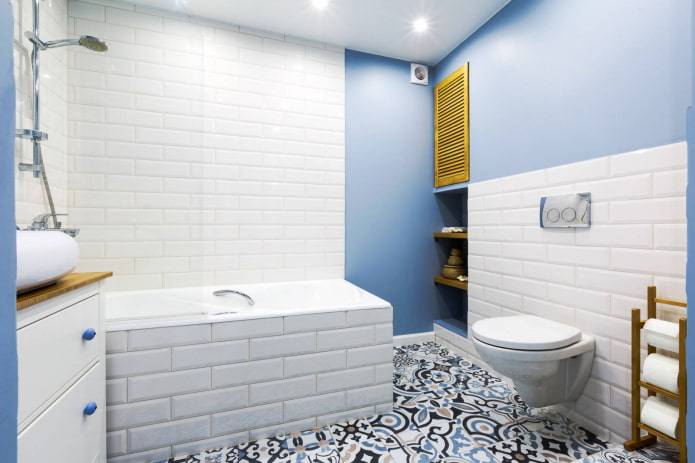
Save money on bathroom refurbishment
Difficult to save money bathroom renovation, but by carefully studying the catalogs of hardware stores, comparing prices and getting into promotions, you can significantly reduce the amount of expenses.
The cheapest way to finish a bathroom is to paint the walls with latex paint. If you need to lay tiles, you should choose products from Russian manufacturers, which are almost as good in quality, but are cheaper than Italian products.
You can also choose cheap white tiles and make inserts from mosaics, glass or just original expensive tiles from leftovers. If the tiles have already been laid, have a solid appearance, but do not fit in color or style, it is possible to repaint it. The process is detailed in this video:
Updating the bath, you have to choose between two methods: restoration and buying a new product. Steel bathtubs are the cheapest, but unlike acrylic bathtubs, they cool down faster and increase noise. when collecting water.
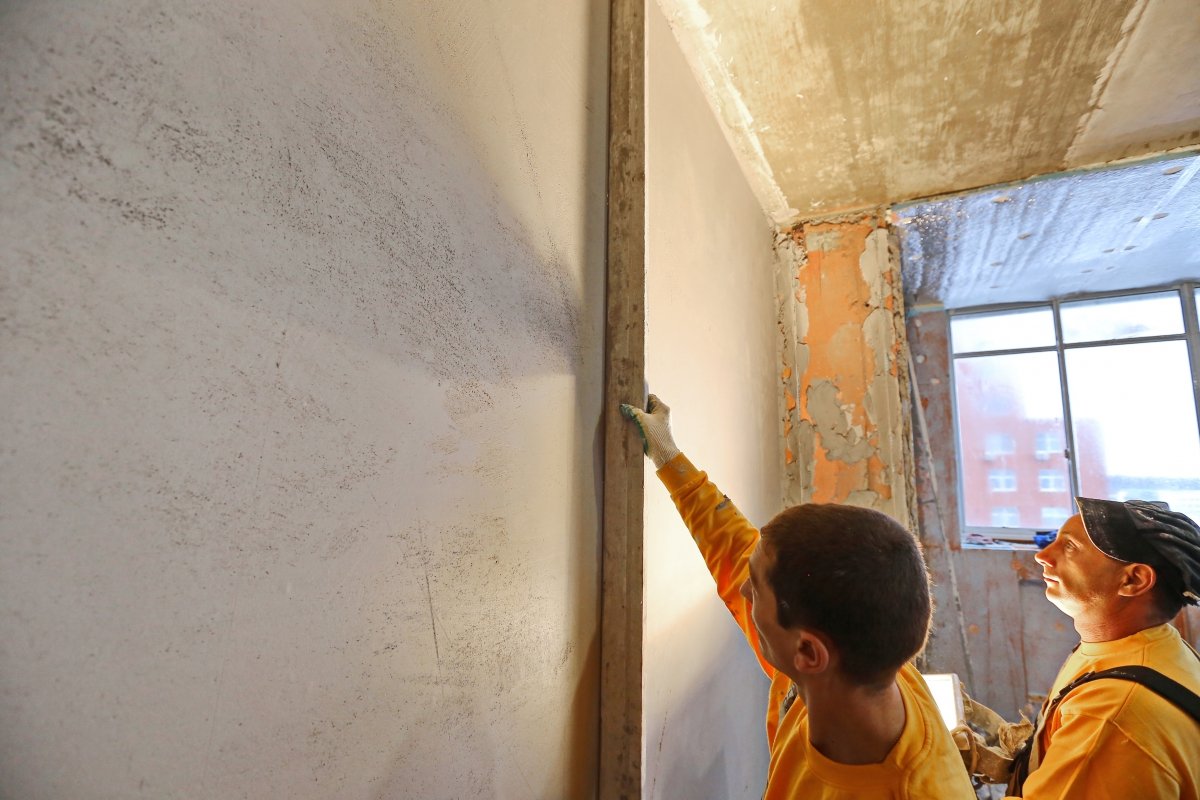
How to correctly determine vertical deviations
- Building level. To check the condition of the surface, apply a long (ideally the entire height of the room) level to the surface and find an exactly vertical position.The angle to which one edge of the device will have to be moved is the amount of vertical deviation of the wall. If there is no such long level, you can use a long rule, which is applied vertically to the wall, and the level is already applied to it. If there is neither one nor the other, then another option will help.
- Plumb. This option is the easiest and most affordable. A thread or a thin cord, up to the floor, is attached to the upper part of the wall, a small weight (nut or something similar) is attached to the free end. The position of the thread is the ideal vertical to check the condition of the wall.
The main thing here is not to overdo it and not fall into excessive perfectionism. According to SNiP, horizontal deviations for plastered surfaces are 5-15 mm for the whole room height. These are old standards, still Soviet ones, but they reflect the approach of builders quite correctly. Since the vertical is not as important as the flat plane.
How to level the walls if they do not make it possible to determine the degree of verticality? This situation occurs with a wavy surface. In these cases, they are guided by the highest, in relation to the surface, points that create a line along which the vertical is determined.
No. 5. Leveling with plywood
Another dry way to level floors is to use plywood. This method is only applicable for those rooms, where in the process of further operation there will be no strong changes in humidity. Leveling with plywood is usually used for wood and concrete floors when the finish is laminate, parquet or linoleum.
Depending on the level of deformation and height differences, two main methods of leveling with plywood are used:
- installation of plywood directly on the wooden floor;
- installation using log.
The first option is applicable when the height difference is minimal, and the unevenness is mainly caused by the deformation of correctly laid floorboards. In this case, the lags will not be required - their role will be played by the tubercles of the curved floorboards. The thickness of the plywood sheets, in this case, will be 8-10 mm, if the width of the main floor boards does not exceed 20 cm, and they are all uniformly deformed. If the floor consists of boards with a width of more than 20 cm, or not every floorboard will rest against the leveling layer, then it is better to use plywood 20 mm thick.
It is better to keep plywood sheets in advance for several days in the room where the work will be carried out. They should be treated with an antiseptic. Before starting work, the sheets are laid out on the floor as they will be subsequently attached. If sheets with dimensions of 125 * 125 cm are used, it is better to cut them into 4 parts for ease of use. They are laid out on the floor, shifting each row relative to the previous one and imitating brickwork, leaving a gap between the sheets of 1-3 mm and a gap between the sheets and the wall of 1-2 cm to expand the wood. Now it remains to attach the sheets to the "ridges" of the plank floor with self-tapping screws.
Sometimes sheets of plywood are laid on an already leveled concrete floor. This technique helps to achieve the most even surface.
The second method is used when the elevation changes are significant. With the help of a log, concrete and old wooden floors can be leveled. Work begins with the preparation of the base, which is cleared of debris. If the base is a wooden floor, then it must be treated with an antiseptic.Then a layer of waterproofing is laid, which can be a plastic film or a special membrane. Logs and plywood are pre-treated with an antiseptic.
As a log, you can use a beam with a side of 40 * 40, 50 * 50 or 60 * 60 mm, a second-grade board or chopped plywood. If it is undesirable to raise the floor strongly, then they do not use timber, but cut pieces of plywood. Logs are laid across the direction of incidence of sunlight in increments of 40-50 cm. Now you can install transverse jumpers, which are fastened with self-tapping screws.
This is followed by the most crucial moment - setting the finished crate according to the level previously planned on the wall. For this purpose, metal wedges, roofing material, roofing felt are installed under the logs, but most often wooden spacers are used, which will resemble point supports. Some use sand for this purpose. After leveling, the entire system is attached to the floor, for which you can use dowels that are three times longer than the thickness of the lag. The space inside the crate can be filled with a layer of insulation (mineral wool is more often used) or with a screed of wet sawdust and PVA glue. In the latter case, the mixture is applied in 2-3 layers, waiting for hardening for 2 days, but plywood can be used less thick. Pre-prepared and processed plywood sheets are fastened with self-tapping screws, leaving a gap between the sheets of several millimeters.


If the height difference is more than 5 cm, but less than 8 cm, then a more complex mini-lag system is used. Wooden linings are installed under the logs and lintels, and the height of each such supporting element is calculated separately and can be different, and this is the most difficult stage.
In general, the leveling method using plywood can be called quite fast, because you do not need to wait for solidification. Logs and plywood sheets do not create such a load on the floors as concrete, therefore, in the case of old housing stock, this option is indispensable. But in some cases, this alignment method will require a professional approach, and it will cost a pretty penny.
Choosing an alignment method
You can level the walls with plaster, putty and drywall. The choice of method is not so much a matter of the personal wishes of the owners of the house, but the need to give these structures all the required characteristics. Namely - heat and noise insulation properties, being in a vertical plane, strength and smoothness of the surface. If there is a need for hidden wiring and other communications, it must also be taken into account.
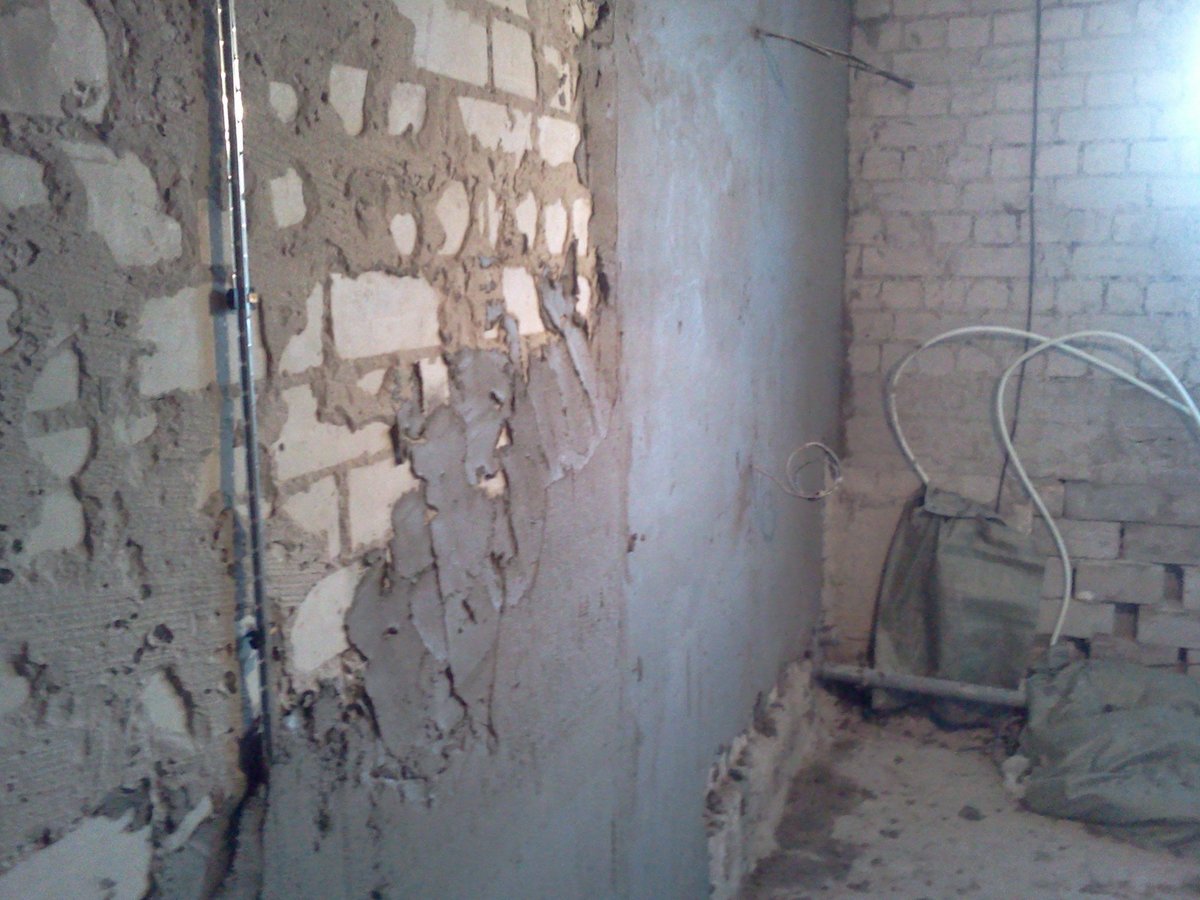
First of all, the strength and integrity of the walls, especially the outer ones bordering the street, are evaluated.
The presence of through seams, cracks and other serious defects will require their elimination before leveling the walls under the wallpaper. Moreover, such walls need to be repaired not only inside, but also outside, in order to protect them from atmospheric moisture, blowing and other negative influences. Without this, dampness, fungus will settle in the house, it will be cold, and no decoration will stick to the walls.

Such defects require serious repair.
The second factor influencing the choice of alignment method is the curvature of the walls: the deviation of their plane from the vertical, the presence of noticeable depressions and bumps, exfoliating areas.
The degree of curvature is determined using a plumb line and any building level.If the deviation from the level and the depth of the irregularities are no more than 10-15 mm, you can get by with leveling wall putty. If they are larger, plaster or drywall must be used.

Checking the vertical level with a plumb bob and tape measure
You can insulate the walls by mounting a heat-insulating layer and plastering it or covering it with sheets of drywall. Under them, it is easiest to lay pipes or electrical wires. But if the walls are fairly even, communications can be laid in strobes or specially made decorative boxes so as not to reduce the area of \u200b\u200bthe room with a thick finish.

Even heating pipes can be hidden under a layer of plaster
What you need to level the walls
Alignment of the walls requires the preparation of the necessary materials, tools and fixtures
For plastering you will need:
- trowel or trowel;
- spatulas of different sizes;
- grater or half grater;
- rule;
- paint brush (for wetting and priming);
- mixer;
- roller;
- level;
- roulette;
- masking tape;
- lace;
- containers;
- lighthouse slats;
- jointing or a tool replacing it;
- hammer and hacksaw (for stuffing shingles);
- clean rag.
In addition, you may need a tool to remove old plaster.
For external plastering, scaffolding or scaffolding will be needed, a canopy device that protects the solution from rain and sun. For interior decoration - ladder, scaffolding.
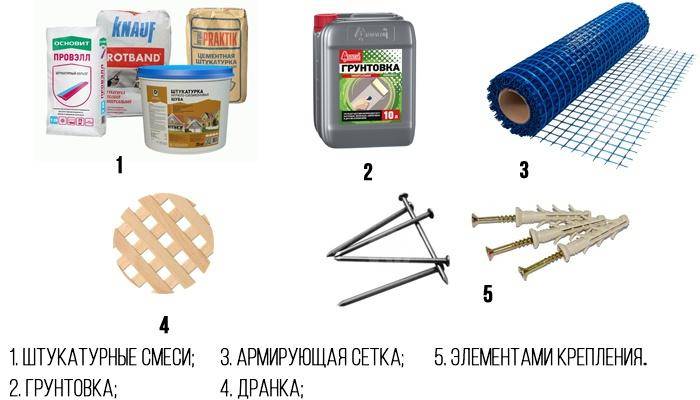
From consumables you need to stock up:
- plaster mixtures (or their components in case of self-preparation of the composition);
- primer;
- shingles (for plastering wooden structures);
- reinforcing mesh;
- fastening elements (nails for stuffing shingles, self-tapping screws, dowels for fixing the mesh).
Plasterboard leveling
There are two technologies on how to independently align the walls under the wallpaper using drywall sheets.
Gluing.
It is applied on rather equal walls with small curvature. It is allowed to pre-cover large depressions with plaster. Glue is thrown on the back of the sheet in small piles, then pressed against the wall and leveled. The glue squeezed out at the joints is removed with a spatula. For additional fixation, fastening with dowels is used in several places.


Gluing drywall to the wall
With a large curvature of the walls, they are pre-leveled with plaster, and then drywall is glued. But it is much easier and faster to fix a frame made of special galvanized profiles or wooden bars on them, and screw drywall to them with self-tapping screws, slightly sinking their caps into the sheet.
Video description
How to install the GKL on the frame, see this video:
The second method of leveling the walls with drywall due to the indentation from the base surface reduces the area of the room. But on the other hand, it will allow not to dismantle the old finish, lay any communications behind the cladding and mount a heat-insulating layer.
Without fail, after the installation is completed, the joints between the sheets are puttied and the recesses above the caps of the self-tapping screws are covered. The dried putty is ground with a fine sandpaper.
The result is a perfectly smooth and even base on which wallpaper can be glued. But first you need to make sure that they have sufficient density and do not shine through.If the wallpaper is thin and light, putty stripes on the seams can stand out on a freshly glued wall and spoil the look.

These spots and streaks can show through the wallpaper.
In any case, experts advise covering drywall with a thin layer of finishing putty, which will even out the color of the surface, protect the cardboard layer from soaking with wallpaper glue and allow you to easily dismantle the outdated decorative coating when the time comes for the next repair.
But if you have thick non-woven wallpaper, just prime the walls. When removing such wallpaper during the next repair, their lower layer will remain on the surface.
Briefly about the main
When choosing how best to align the walls for wallpaper, you must first determine their curvature and the general condition of the surface. If it is strong, stable and with little deviation from the level, it is best to use putty. Curved walls with serious defects, as well as those in need of insulation and sound insulation, are leveled with plaster or plasterboard sheets. The plaster is applied not in one thick layer, but in several, gradually bringing the surface to the desired plane. Drywall on the walls can be glued or attached to a pre-mounted frame.
Drywall for wall repair
You can also perform the alignment procedure using drywall. This method is becoming more and more popular as it avoids working with different mixtures. Therefore, it will not be necessary to wait for each layer to dry and the pollution from such a procedure will be much less. Plasterboard sheets are used in the following cases:
- If necessary, internal insulation of surfaces.
- If the walls are too crooked.
- If for repairs in the kitchen or bathroom you need to cover the pipes.
- To create complex structures: arches, columns or niches.
- When repairs need to be done as quickly as possible.
First you need to determine the areas on the surface where heavy objects will hang. These places will need to be reinforced first.
It is also necessary to correctly markup the placement of profiles. After marking, the installation of profiles and drywall sheets is carried out. This procedure is quite simple, but there are a number of significant nuances:
- Profiles with a width of 27 mm act as guides.
- The remaining structural parts are made from a profile with a width of 60 mm.
- Installation of large curly structures will require skills and experience from the worker.
- In areas where heavy objects will be placed, it will be necessary to install horizontal jumpers between the profiles and strengthen them. For this, a profile segment is used, the width and length of which is 60 mm. It is installed using self-tapping screws at a given height. Strengthening the profile is carried out by mounting a wooden beam of the desired size. To ensure high strength, in addition to the horizontal jumper, you need to install vertical profiles to which it is attached.
- Also, jumpers should be installed at the horizontal joints of the material.
- If further lining of drywall is planned, it is recommended to install the profiles at intervals of 40 cm from each other. This will strengthen the structure, and in any case, the joints of the sheets will fall exactly on the profile.
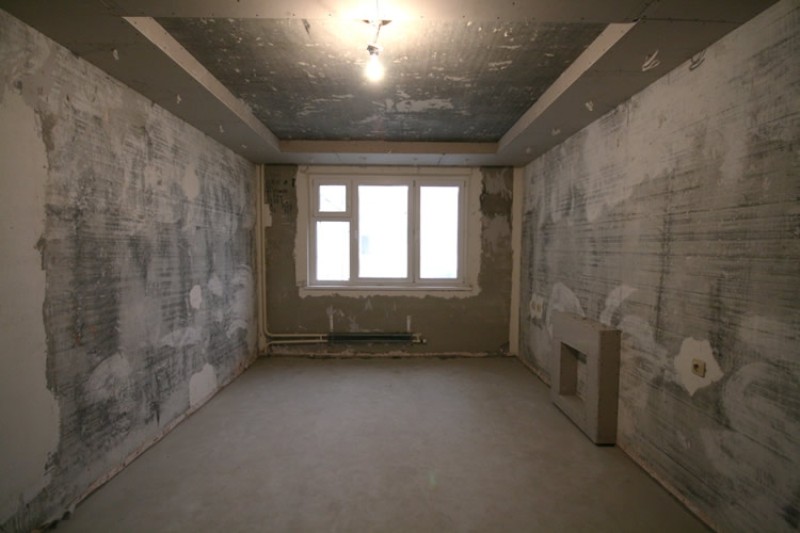
Leveling the floors
The first step is to level the floor.
If your apartment is completely “bare”, then you have a monolithic slab on the floor, which must not only be leveled, but also isolated, because it transmits all vibrations and sounds.
To do this, it is desirable to first fill up a layer of expanded clay, which has excellent sound and heat insulation properties (layer thickness of about 5 cm).
Before starting work, you need to make sure that there are no gaps in your concrete floor, otherwise water from the screed may leak down to the neighbors.

Usually holes can remain in the area of risers and ventilation shafts. They need to be sealed with mounting foam or adhesive mixture. Next, we fall asleep expanded clay, starting from the place that has the greatest depth.
Expanded clay is poured with a solution of liquid concrete, which resembles milk in consistency. This solution dries for about a day or two. You can also immediately make expanded claycement-sand mixture and put it on the base.


For bathrooms, it is advisable to make floor waterproofing before laying expanded clay, with access to walls up to 10 cm. If it has already been done before handing over the house, then its quality must be checked, since marriage is often found.
Next, we begin directly leveling the floor.
It can be done with a cement-sand screed or self-leveling floor. The main advantage of a cement-sand screed is its price, from 90 rubles (on average 150 rubles) for 40 kilograms depending on manufacturer, region and composition. The consumption of the screed depends on the applied layer.
However, the screed does not allow you to get a perfectly even and smooth surface, and its drying time is 28 days, which significantly delays the progress of repair work. Self-leveling floors are a more technological option.
Due to a sufficiently liquid consistency, the mixture spreads over the surface of the floor and takes on the level of the horizon, that is, it self-levels.
The master needs to select the optimal amount of water and slightly help the mixture spread over the surface.
It must be said that before installing the self-leveling floor, the base must be primed. You can prime with a regular or acrylic primer, rollers or brushes.

Betonkontakt is usually used when the apartment is from an old fund and the foundation is very poor - it makes no sense to use it in a new building, especially considering the difference in price (3-4 times more expensive than a primer, namely 1500-2000 rubles per 10 liters).
Priming should be done either in two layers, or immediately with a plentiful layer - before applying the second layer of primer, the previous one must dry.
Also, the installation of a self-leveling floor should be carried out on a dried primer, but the time gap between priming and laying the floor should not be large - no more than a day, and preferably an hour or two, in order to avoid dust settling on the surface.
The only drawback of the self-leveling floor is the price - from 240 rubles per 25 kilograms (400 rubles on average), therefore, self-leveling floors are usually used for height differences no more than 4 cm.
Also, the self-leveling floor can be laid already on a cement-sand screed (after it dries), this will allow you to get a more even surface at a lower cost. You can walk on self-leveling floors after 5 hours, lay linoleum or tiles after two days, and wooden coverings after 7 days.
Under some finishing coatings, it is desirable to use a self-leveling floor in any case, for example, under a laminate - it is not attached to the floor, but simply lies on the substrate, due to which it can move and rub against the surface during operation.
If you have just a sand-cement screed on your floor, dust will form, while self-leveling floors completely exclude this.
Another way to level the floor and prepare the base for laying the finish coat is to use dry prefabricated floors, the Knauf Gips expert points out. “When using this solution, floor elements or, for example,
“Knauf-superfloor” are laid either directly on the base, or on an insulating layer (polystyrene foam or mineral wool boards), or on a layer of dry backfill made of expanded clay sand.
The last dry precast floor option is the most popular because it allows you to quickly level the floor surface.
The use of this method of preparing the base allows one day after its laying to produce a finishing coating and at the same time the issues of reducing the load on the floors are solved, the sound insulation of the floor is improved, ”says
Bortnikov. Gypsum fiber boards (GVL board) can be up to 20 millimeters thick. Their cost ranges from 315 to 566 rubles.


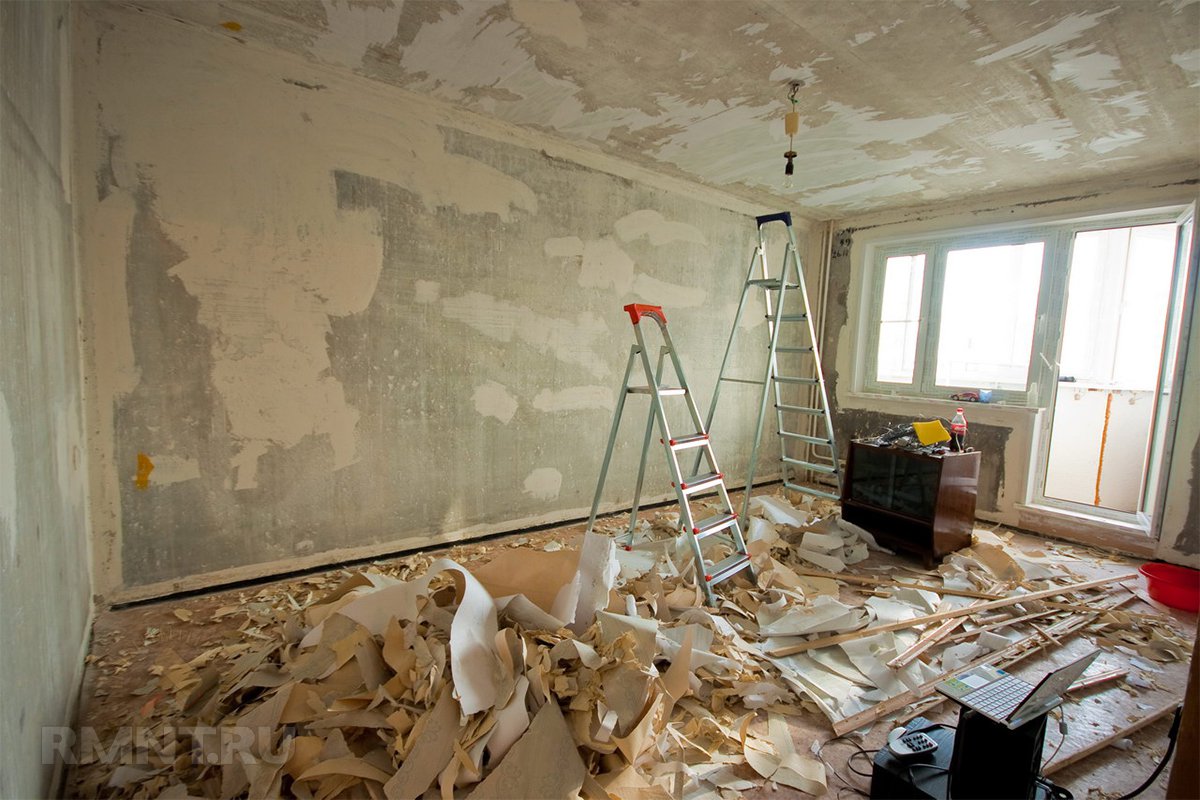
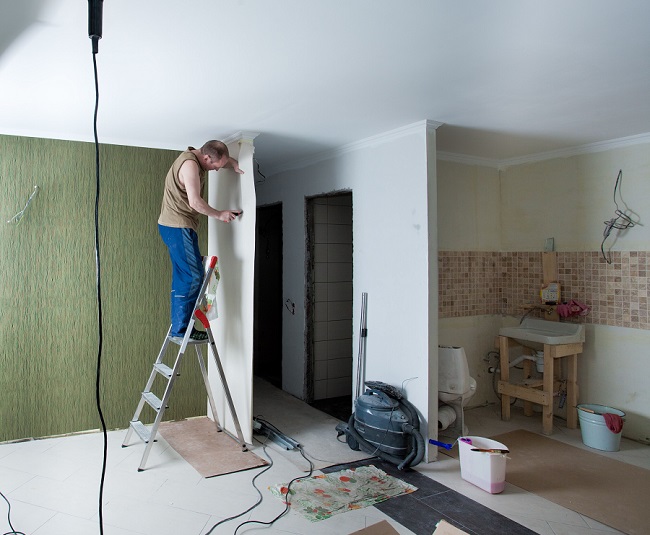
Wall plastering
First of all, we prepare the surface. Here is the sequence of actions:
- We remove the old finish, especially that which is already badly holding.
- All cracks in the wall expand, after which the degree of unevenness is assessed. Further, large and prominent indents are removed with a hammer and other suitable tools.
- If there is old plaster on the wall, you need to assess its condition.To do this, knock on it, if a dull sound is heard, then there are voids there, which will inevitably lead to a collapse during alignment.
- All large depressions are corrected separately. Too thick a layer can break off, so small defects are sealed with mortar, and large protrusions simply go astray.
- If you are going to finish the walls with paint, then without a special coating it will come off in pieces. To avoid this, apply a primer - concrete contact. It will make the surface rough. In this case, the putty will “hold” the paint well and nothing will fall off.
- For even more tenacious bonding of materials, notches are used (100 pieces per 1m2). Previously, an ax was used for this, now a grinder.
The primer can be either ready-made or requiring dilution. In any case, it is necessary.
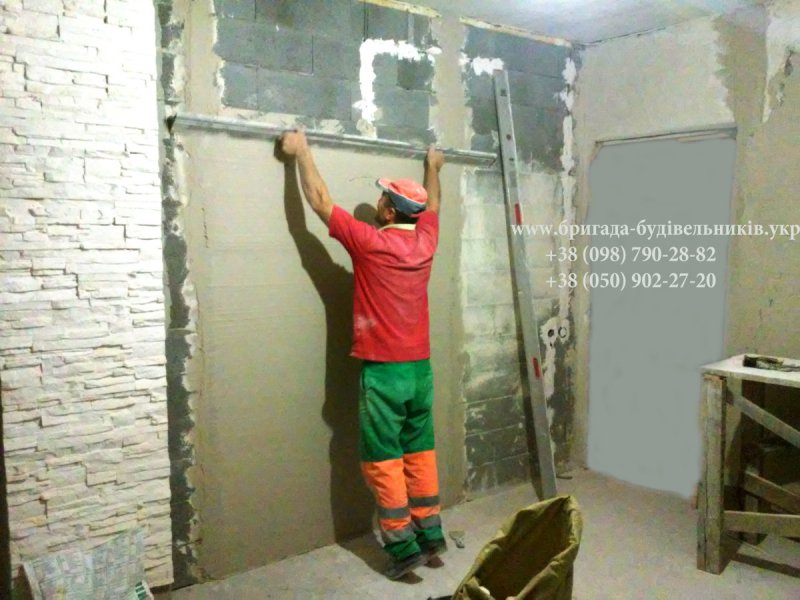
Installation of guide rails-beacons
To get a flat surface from a curved wall, beacons specially designed for this are used. This is a profile that is installed parallel to the wall, and the beacon will perform the function of directing the plaster to unfilled places, removing voids. Basically, the profile is chosen T-shaped from steel with zinc coating, but some use bars as guides.
Mounting a beacon made of metal is easier and more convenient than a bar. The plaster layer will be approximately 7 mm. The disadvantage of this method is additional financial costs. Although the amount is small. The plaster is terribly bonded to the metal, therefore, after drying, the beacons are pulled out and the holes are closed.
Wooden slats, although they have a lower cost, but it is more difficult to pick up a bar. Wood warps from moisture, and the layer is not even.Some people use a special mixture instead of standard beacons. First, plaster strips are applied to the wall, and leveled. When they dry, they are already used as lighthouses. The most economical method, but also the most time-consuming.
Installation is carried out in this way: several lumps of plaster are thrown onto the wall. A bar or profile is applied to them. Leveled to the level, you can use a plumb line. After the cakes have solidified, work continues. Distance m / d beacons orient according to the rule (should be available).
We start plastering
The solution is prepared according to the manufacturer's instructions, after which it is thrown onto the wall. Of the tools you will need a spatula or a molar bucket. After the composition is applied to the wall, your next steps are:
- Start the cast from the bottom point between the beacons, covering part of the wall.
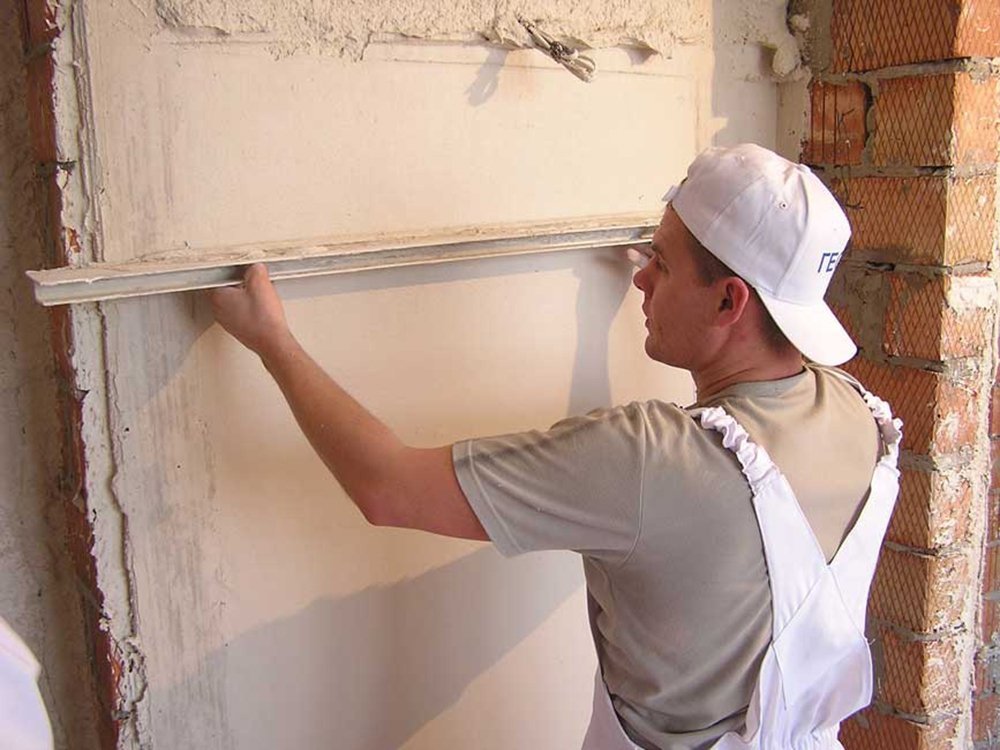
- The rule is set to the lowest point of the beacons. The plaster moves up, leaning on them. The mixture is applied with light shaking movements of the rule to the sides.
- It is necessary to plaster until the state of the solution is as smooth as possible.
- We remove the adhering mixture with a spatula and throw it on the wall.
- We carry out this work up to the ceiling. Having finished laying out one strip of beacons, we proceed to laying the next one. Do this with every square meter until the surface of the entire wall is leveled.
The primary part of the work is over, but the leveling still needs to be done. Because visual defects are still noticeable. The liquid composition of the putty will finally help to complete, but we'll talk about this later.
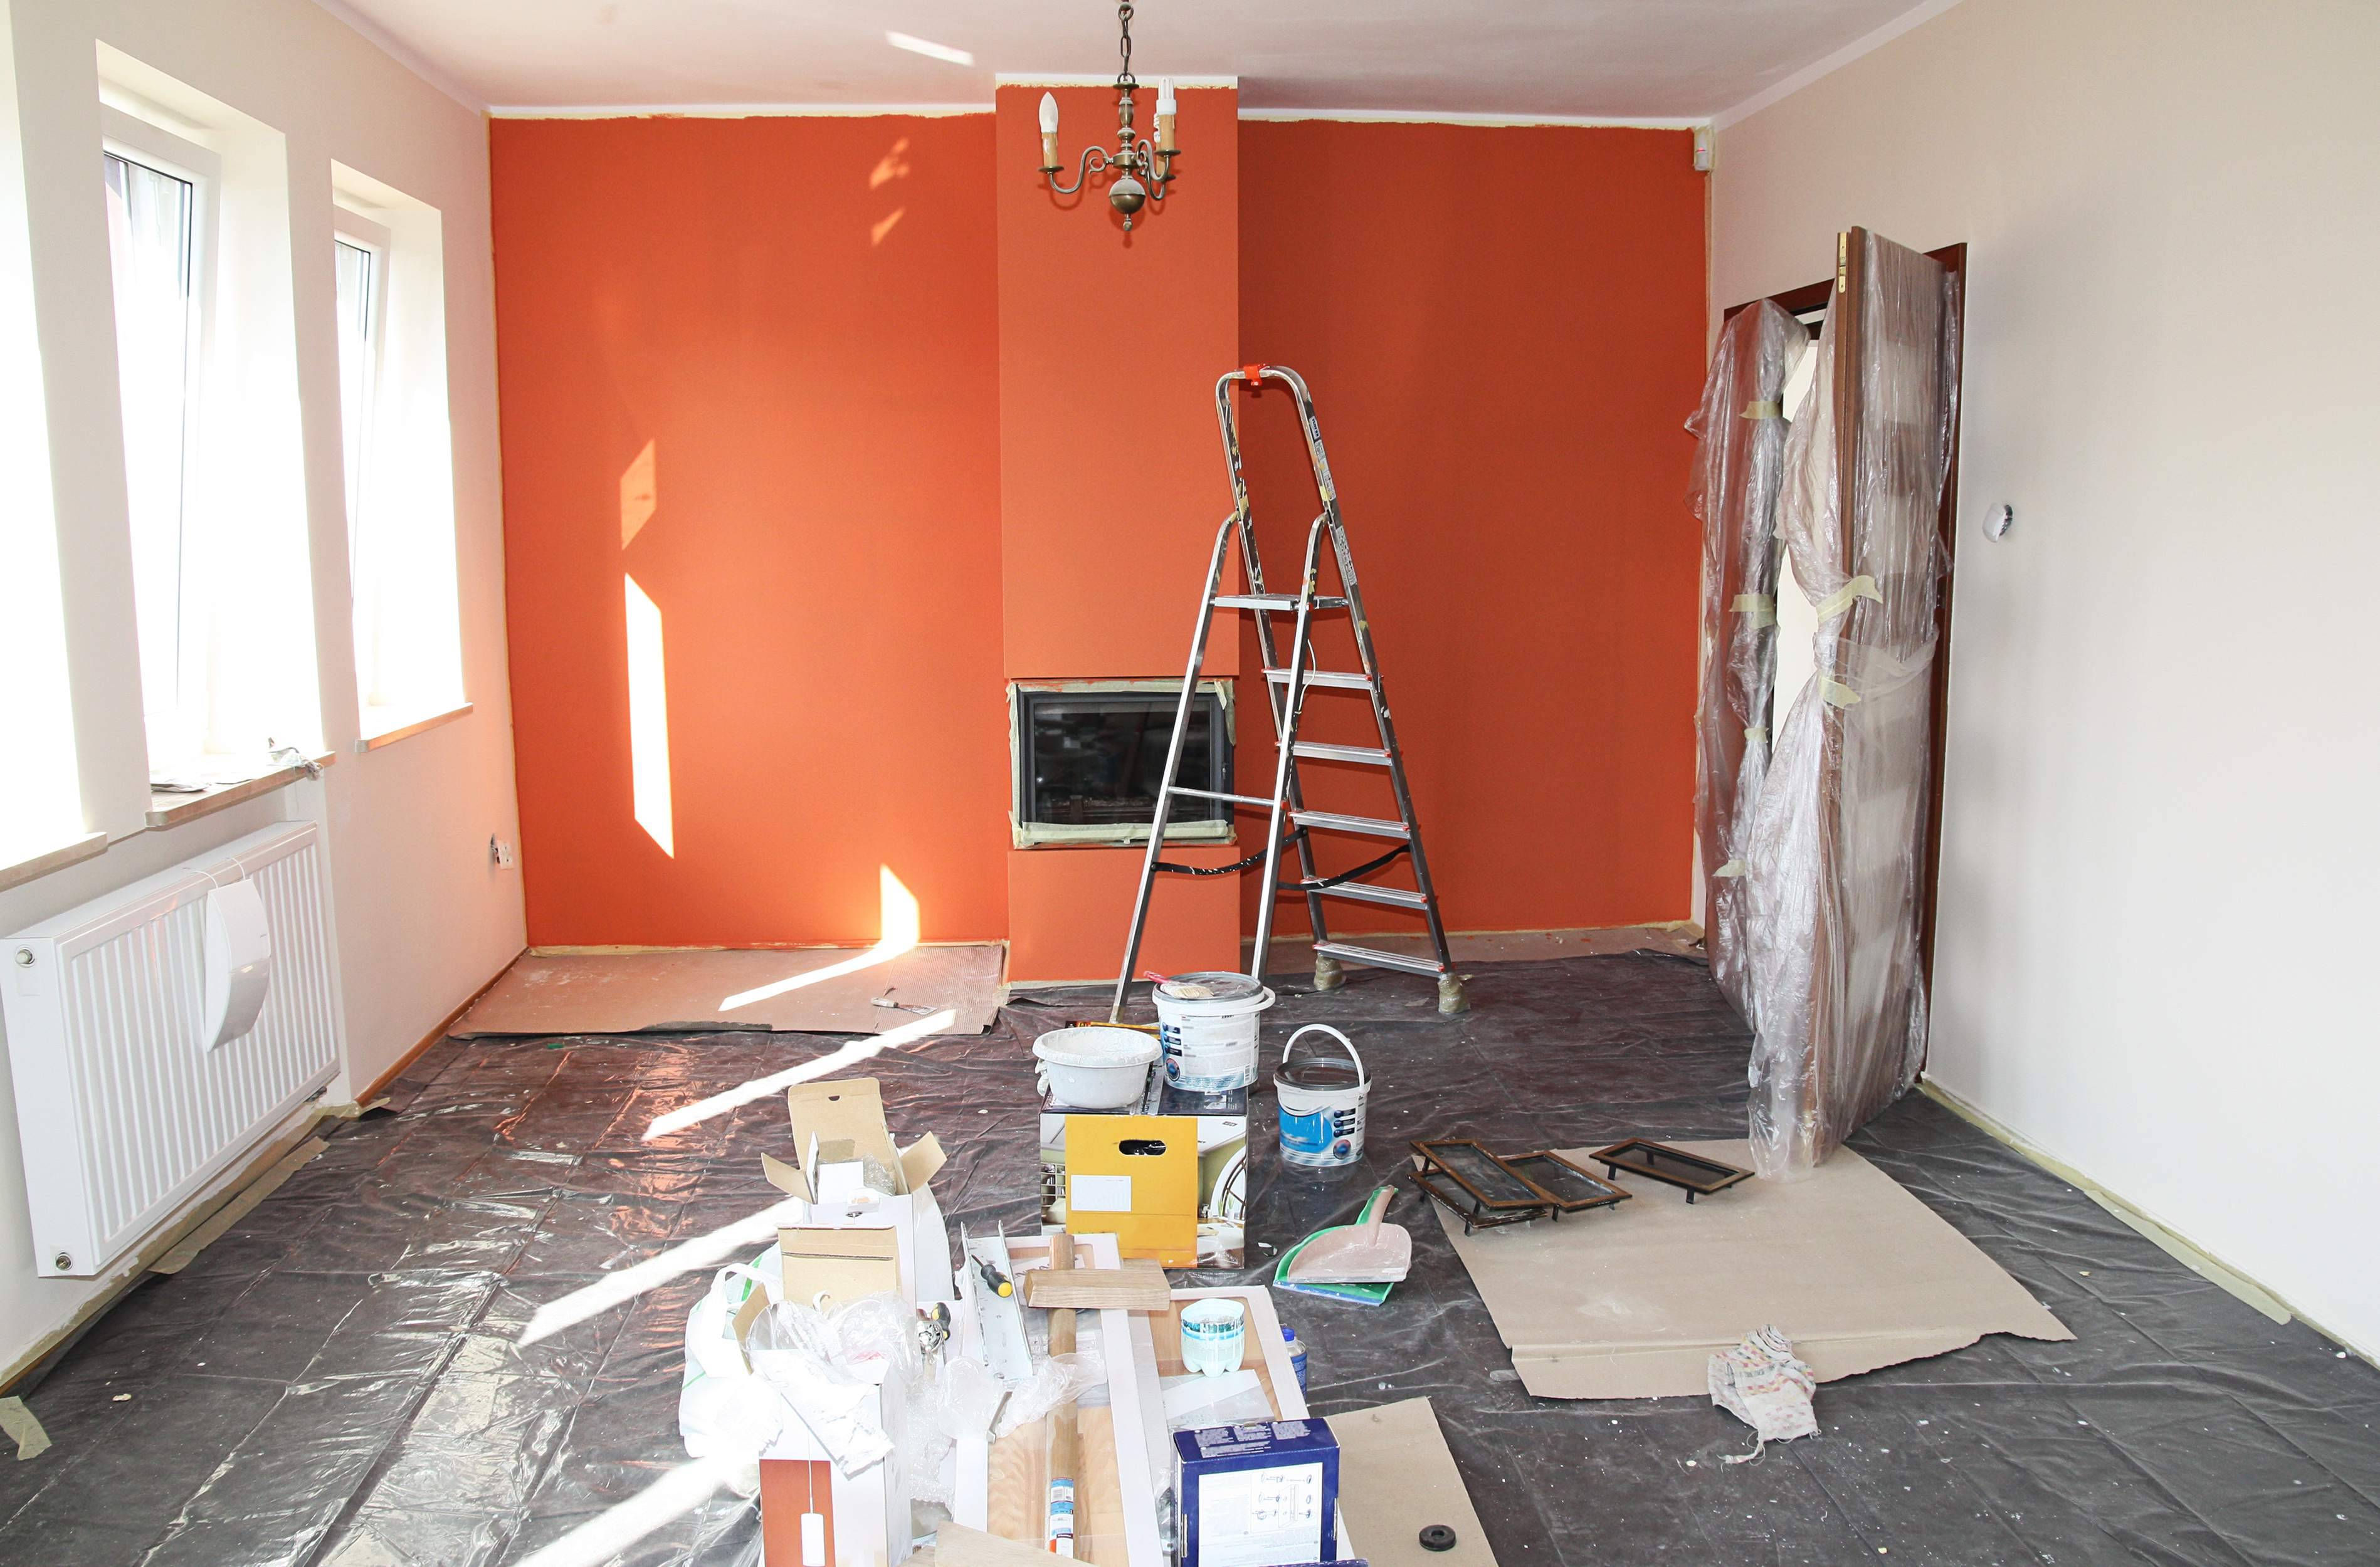
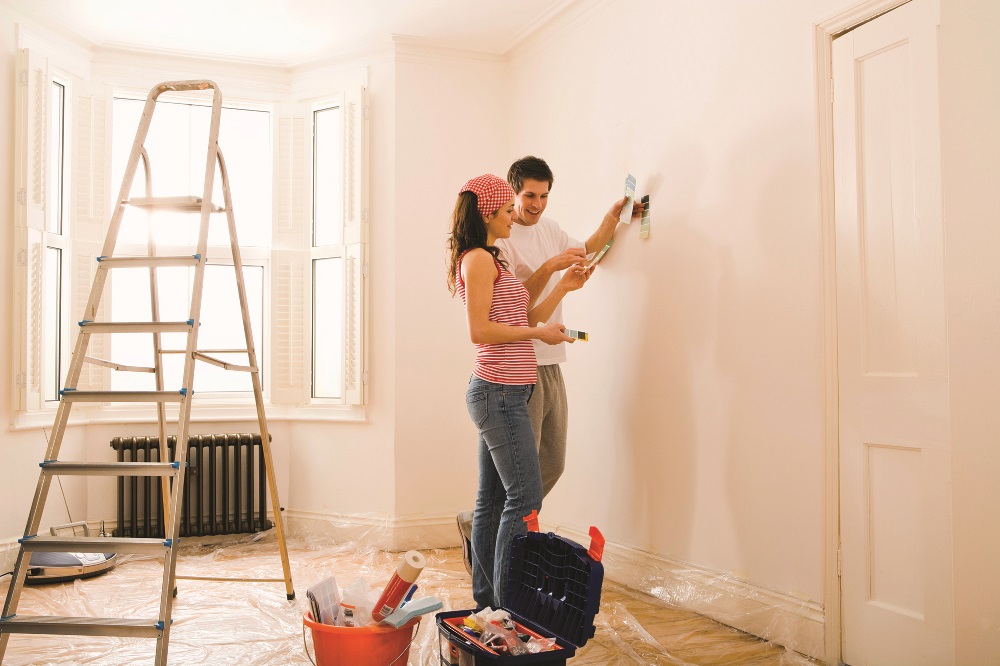
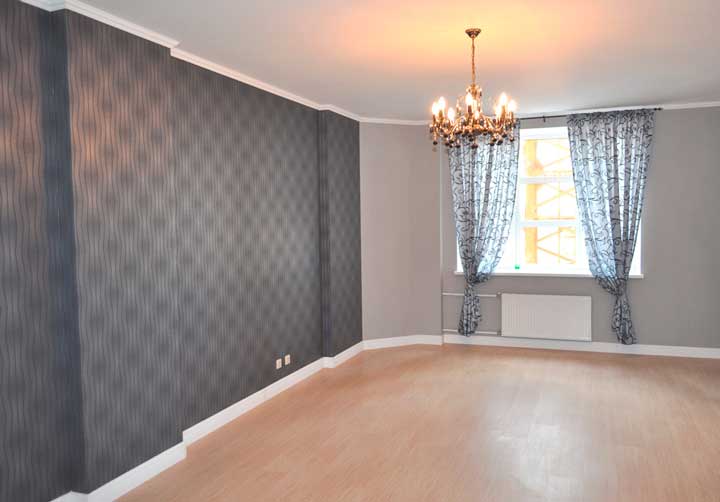
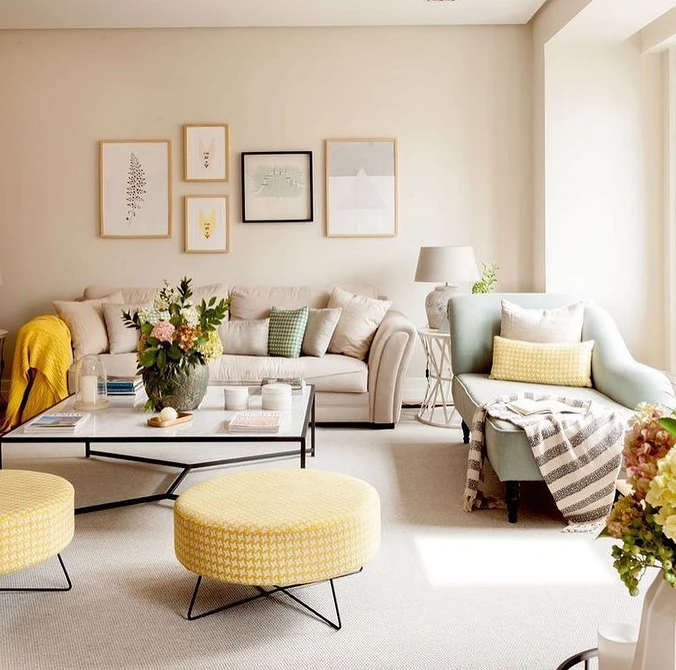
Add light and warmth
Windows can face the north side of the house or rest against the tall house next door. To make a room cozier, it is not enough just to think over the lighting scenario.Try to keep in mind the following important points.
- Choose the correct bulb temperature. It is better to abandon the "daytime" cold light in favor of a warmer one.
- Use rich and bright shades for walls and textiles, large furniture. Yellow, orange, mustard tones are perfect.
- If you want white walls, choose warm tones of white. For example, "Stockholm White" will look cozy in a dimly lit room.
Instagram: @nata_h0me
Instagram: @nata_h0me
Instagram: @nata_h0me
How to measure floor level?
The choice of floor leveling method, first of all, depends on the degree of surface roughness, which is difficult to determine with the naked eye - special tools will be needed. For this purpose, the following tools are used:
normal building level
If its length is not enough, then a building rule is placed under it;
the hydraulic level allows more accurate and simple measurements in large areas, but when filling the instrument with water, it is important to avoid airing its working tube;
laser levels are even easier to use and allow you to measure with maximum accuracy, and their wide functionality makes the entire measurement process much easier. The error is no more than 1-2 mm / m, and when measuring, it is better to wear goggles;
A level is a professional surveying instrument, quite difficult to use, it provides perfect accuracy and allows measurements to be taken over vast areas, therefore it is used mainly in large-scale construction.
Leveling the floors in the apartment, you need to bring them to a zero level.After completing all the work and completing the finishing, the level of the floors should be the same in all rooms, which means that the height of the finishing material used must also be taken into account when leveling. Thus, the height of the subfloor level in rooms where different coatings will be used may differ by 1-2 cm.


