- Blacksmith forge from a bucket
- Scope of application after conversion
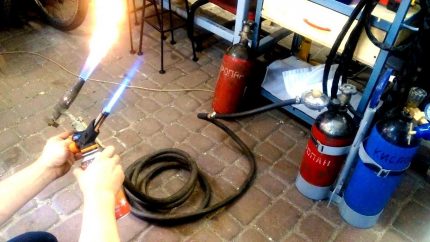
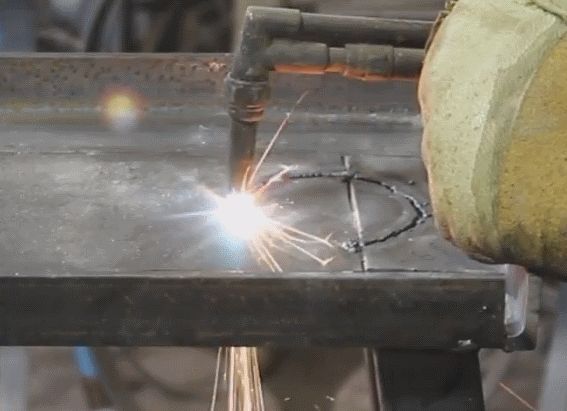
- Production of a gas burner
- Rules for the safe operation of equipment
- Manufacture of handles and nozzles
- How do they heat the horn?
- A few words about the air supply itself
- open horns
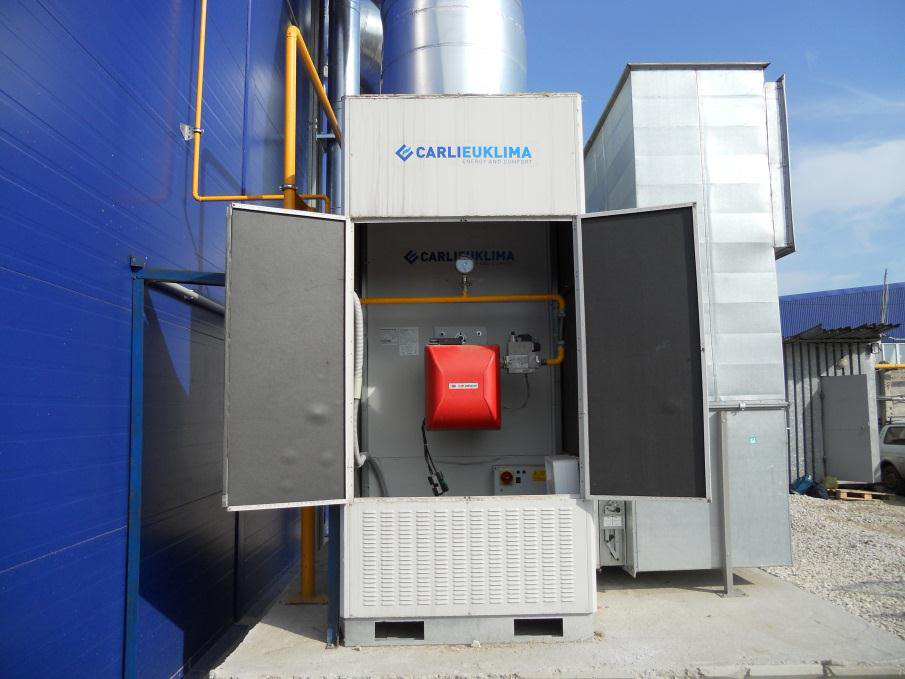
- Manufacture and installation of a burner in a closed gas furnace
- Burner design
- Gas-burners
- SAMODELKIN FRIEND
- Work to improve flame regulation
Blacksmith forge from a bucket
You can create a forge at home from improvised materials - for example, an ordinary bucket.
Such a furnace is created quite simply: holes are made in the walls, the inner surface of the metal is sheathed with ceramic wool, capable of withstanding temperatures of more than 1200 degrees. Since the bucket has a conical shape, it must be placed correctly, for which legs are installed.
A hole for the burner is created in the middle part of the hearth, and a ventilation hole is cut in the bottom. Chamotte brick, which has increased fire resistance, is placed on the bottom. Finished equipment is often covered with a layer of heat-resistant paint.
Scope of application after conversion
Gas burners are used in household and agriculture, in construction and repair work, in the repair of vehicles and equipment,
In addition to the listed areas, gas appliances are used for the following purposes:
- installation of heat shrink tubes;
- solder melting before soldering;
- heating of metal water pipes;
- bitumen heating for roof repair.
In addition to the above, the device is used to remove paintwork by firing the surface, to weld materials with a melting point of about 1000 C. With it, right on the construction site, you can cook or heat food, boil water for tea.
Production of a gas burner
Starting to independently manufacture the device, it is necessary to prepare tools for work and select the required material. First of all, choose the material for the handle. There are no strict requirements, so everyone can use their imagination and possibilities. The main requirements for the handle are: its ease of use, so that it does not overheat during operation. Experience shows that it is advisable to use a ready-made handle. For example, a handle from some failed soldering iron, boiler or other household appliance.
Steel is used to make the supply tube. Choose a steel tube with a diameter of not more than 1 cm and a wall thickness of 2.5 mm. The made felling is inserted into the prepared handle. There it must be securely fastened. The mounting method is selected in accordance with its capabilities.
After that, the divider is securely fixed in the body. A small clearance should be provided for the inner flange. The recommended clearance should be approximately 5mm. Such a gap will provide the necessary deceleration of the gas flow rate that enters the igniter. Slowing down will allow more reliable ignition of the burner.
We recommend: Do-it-yourself installation of a circulation pump: instructions, connection, photo work
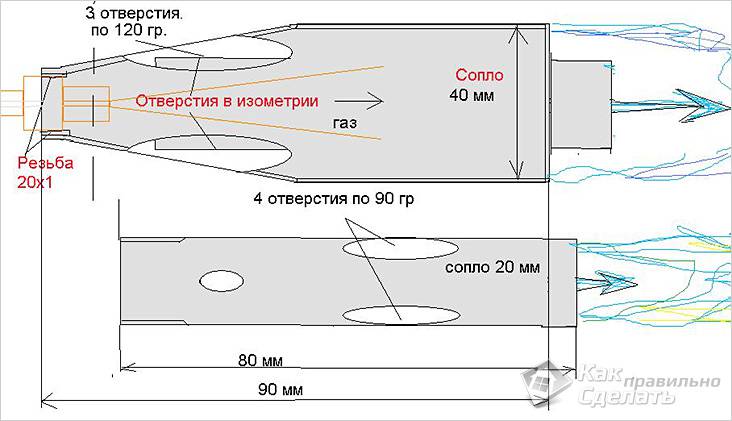
The nozzle is made from a metal rod. It will provide gas supply to the combustion area. It is made in the following way. With a drill with a diameter of 2 mm, a blind hole is carefully made in the nozzle body. Then drill a hole with a 4mm drill bit. It is necessary to create a jumper. They are carefully riveted and polished.

Gas burner drawing
The end of the manufactured tube is connected to the outlet of the reducer. A flexible hose is used for connection. The material is selected from the list of approved materials for domestic gas systems. It can be a special rubber or a special fabric material. To ensure reliability and fire safety, it is more expedient to use certified material. The hose is put on the tube and secured with a standard clamp.
After completing the assembly of the entire apparatus, it is required to set the optimal pressure in the cylinder. Before lighting the burner, the entire gas supply system, mixing with air, should be carefully checked for possible leaks. If they appear, they must be eliminated. Only after all checks can the burner be ignited. The burner must provide a burning jet length of up to 50 mm.
Competently self-assembled burner will serve as a reliable assistant in business for a long time. It will be the tool that will help solve many everyday problems without resorting to the use of an expensive tool.
Rules for the safe operation of equipment
Gas cylinder equipment, if used improperly, can become a source of severe explosion or fire.
When performing welding work, be sure to use personal protective equipment: goggles, gloves, special shoes.
Before starting work, you need to carefully inspect the equipment for damage. If the equipment is dirty, be sure to remove the dirt
It is possible to work with propane cylinders only in well-ventilated areas, while the air temperature should not be below 0 ° C.
Absolutely forbidden:
- Work near open flames.
- Keep the cylinder tilted when working.
- Place vessels under the sun.
- Carry out work without a gearbox.
- Warm up the gearbox over an open flame.
In addition, if you smell gas, you must immediately stop working and close the valve on the cylinder. We also recommend that you familiarize yourself with the main causes of the explosion of gas cylinders.


Working without personal protective equipment, you can get burned, not only from open flames, but also from accidental contact with hot parts.
If the considered home-made burners are not suitable for you, we recommend that you familiarize yourself with other options for making useful home-made products discussed in our articles - a blowtorch burner and a sauna stove burner.
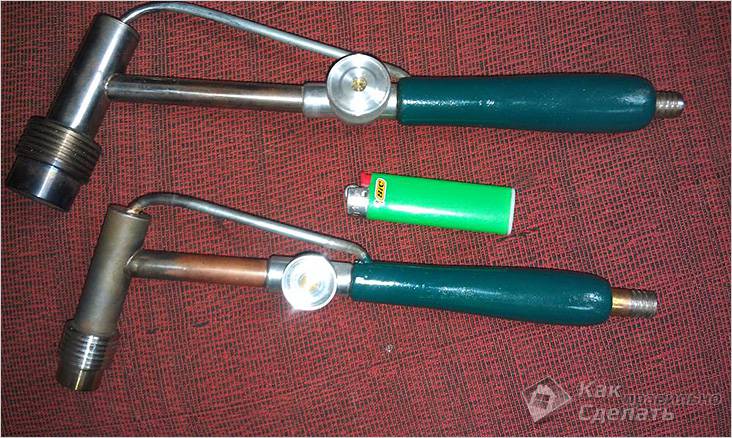
Manufacture of handles and nozzles
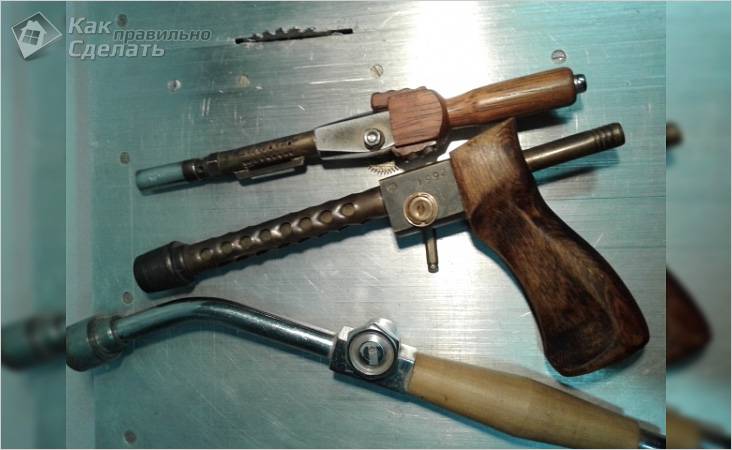 Burner handles
Take a brass tube and attach a handle to it. If you have a handle from an old burner, you can use it - it will be much more convenient. If not, you can take a wooden block. To make the handle fit comfortably in the hand, it can be processed. It needs to drill a hole for a brass tube. Their diameter must match. After that, the tube is pushed into the beam and fixed there with silicone or epoxy.
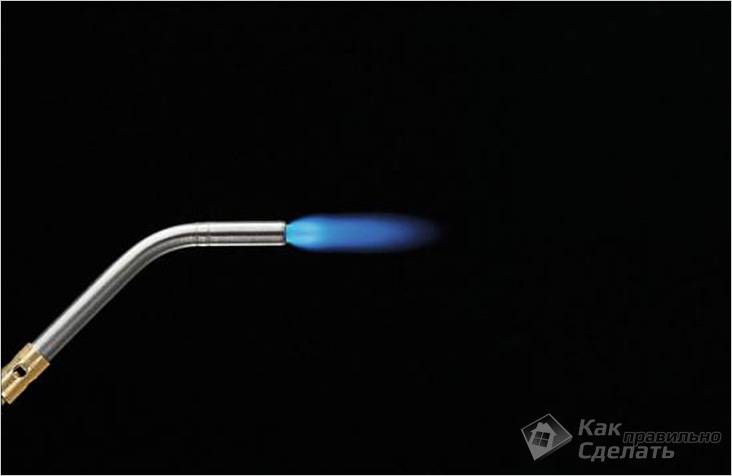 If the nozzle is made correctly, then the flame is even.
The next step is the manufacture of the nozzle. This is a laborious and long process. It needs to be approached with more responsibility. The desired nozzle hole size is 0.1 mm. It is clear that it will be very difficult to achieve this size on your own without special equipment, so you need to drill a hole a little wider and fit the edges to the desired size. Everything must be done carefully so that the hole is even and does not direct the flame in different directions. After making a hole, fix the workpiece in a vise. Then gently strike the future nozzle with a hammer. This should be done vertically, with a "branch" to the center of the workpiece. Gradually, the part must be scrolled, providing a perfect hole without a slope.
After chasing the part, the nozzle head needs to be sanded with fine-grained sandpaper. The back of the part should be threaded to connect it to the tube. A simpler connection method is soldering the nozzle to the pipe. But it should be noted that in this case, the repair of any parts will be very difficult to perform.
In principle, that's all, now you can connect a gas cylinder to the tube, set it on fire and the unit is ready to work. But, now there are some difficulties that interfere with normal work and bring inconvenience. It turns out that the gas flow can be regulated only by opening and closing the valve on the gas cylinder. In this case, it will be very difficult to achieve the required flame strength. What to do?
How do they heat the horn?
To finally take on your own forge, it remains to find out, but how to drown it? Then it will be easier to understand the designs.
The best fuel for a forge is fine coke. Blacksmiths call it koksik, the name was adopted by merchants. If coke is on sale, but there is coke in small packages. Koksik costs, looking to the region, 3 times more expensive than coal, but it takes 1 forging with skillful handling 4-5 times less.
Coke is practically pure amorphous carbon, carbon. Really clean: coke oven gas is a valuable chemical raw material, so metallurgists don't cheat. It ignites at 450-600 degrees, so double kindling is needed: coal is kindled with firewood, and a layer of 150-170 m of coke is applied to it and the blast is turned on to the maximum. When the coal burns out (this can be seen from the flame), the mass of coke is raked, leaving a layer on the grate 1/3-1/4 of the height of the entire heap, a billet is introduced into the hearth and raked in burning fuel. The blast is reduced to the norm for this operation and they wait until the part matures.
To work with Damascus, you need charcoal, it lights up at a lower temperature and burns out faster, because. preserves the microporous structure of wood. And also, like activated carbon in a gas mask, it additionally absorbs doping poisons. The fact is that damask steel is forged from a bundle of wires or bars of different hardness. The product itself is obtained by their mutual diffusion during forging. The process is very delicate, and the adjustment of the blast requires jewelry, and the light porous charcoal responds instantly to the manipulation of air drainage.
Shell for firing a hearth with firewood
If you heat with coal, you need to let it burn out to carbon, i.e. volatile components, the same coke oven gas, must burn out.This again can be seen from the color of the flame. But such a complete extraction of volatiles, as in a coke oven battery, cannot be achieved directly in the furnace, so decorative or medium-quality household products can be forged on coal. As a rule, one load of coal is not enough and it has to be burned. An additional load for afterburning is placed on the side of the table on the side of the hearth and, as it burns out, the resulting carbon is raked onto the workpiece.
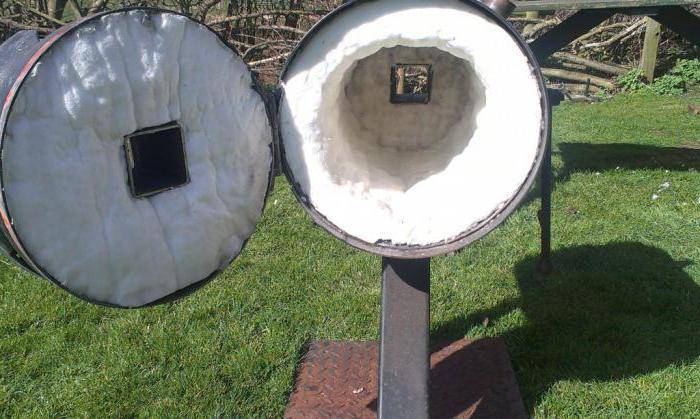
In general, firewood is heated in the same way as coal, but only hardwood. Just a bunch of firewood is more likely to burn to ash than completely release volatiles and form coal. In addition, it is impossible to allow unburnt chips to get on the part, there are too many impurities in the wood that are harmful to steel. Therefore, firewood for carbon in the hearth is burned in the shell, see fig. The additional load is burned out by placing it close to it, and as it burns out, the coals are transferred to the shell with tongs.
A few words about the air supply itself
Of course, something must drive delicious oxygen into this pipe, which will heat the coals in the chamber to hellish temperatures. You can use bellows. Such that our ancestors used in the forges. But this is not the best option, you need at least a couple of bellows to get the required temperature, and it would be nice to have an assistant who will tirelessly press the bellows. It is much more productive to use electric blowers. For example, a turbine for inflating mattresses. I used an old Soviet vacuum cleaner. He can even twist the hose from blowing to blowing, but it broke. I had to tape the bag on the side where the air is blown out.
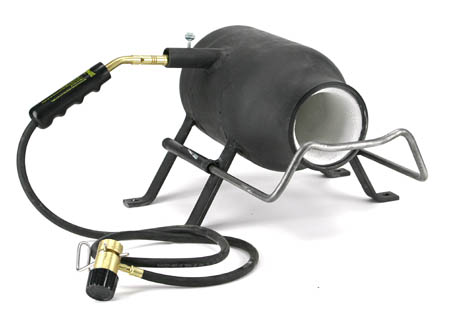
open horns
An open forging gas forge consists of vertical racks on both sides of a metal container, which is installed on a fire-resistant base. The role of the foundation can be performed by:
- concrete floor (platform);
- several refractory bricks laid in a row, etc.
A gas burner is installed on the racks, directed with the nozzle down. In most cases, the forges are mounted on a metal stand, which has a tray at the bottom to accommodate the workpieces to be processed.


Manufacture and installation of a burner in a closed gas furnace
Let's consider two options - to make a burner "from scratch", using the recommendations of home craftsmen with experience, or to apply a finished design, adapting / modifying some of its characteristics. It should be noted that in the first case, one should have a very high qualification, as well as have experience in setting up and, at least, repairing such devices. Otherwise, the case may end in an explosion, burns, and other troubles.
- Confusion socket made of heat-resistant steel of the X18N9T type.
- Steel tubular body, having the shape of a double truncated cone.
- gas supply head.
- Air head.
- Mouth.
- Regulators of the amount of gas-air mixture.
For the manufacture of such a burner, you need: 1.5-inch pipes, a sheet blank with a thickness of at least 1.2 mm for a confuser, two fittings and three flanges for connecting elements. A welded structure is best made of heat-resistant steel, while welding must be done under a flux or using an inert gas.High-pressure hoses can be used as air and gas supply pipes, the diameters of which will correspond to the connecting dimensions of the housing. You also need fixing clamps and high-quality seals made of gasoline-resistant high-temperature rubber. All other elements are connected by thread.
Horn with homemade gas burner
On some sites there are recommendations for the manufacture of the burner body by rolling a tubular billet. But at high jet pressures, plastic hardening of the material can lead to the occurrence of internal stress zones, which, when the burner is started, often cause cracking of the body metal.
The option of installing a burner from a used gas stove is much simpler. First, you will need to determine the fuel costs required to quickly heat the metal for forging. When choosing a finished design, the power of the main unit (boiler, stove, etc.) for which the device was used is set. The product of this value by the efficiency (for gas it is 0.89 ... 0.93) gives the desired power value W. It is a little more difficult to set the gas flow rate T. The calculation algorithm is as follows:
- It turns out the calorific value of the fuel Q (for propane, you can take 3600 kJ / m3);
- Using the formula T \u003d 3.6W / Q, the flow rate is determined.
- Based on the results of the calculation, all the necessary shut-off and control valves are selected: valves, tees, sealing rings, etc.
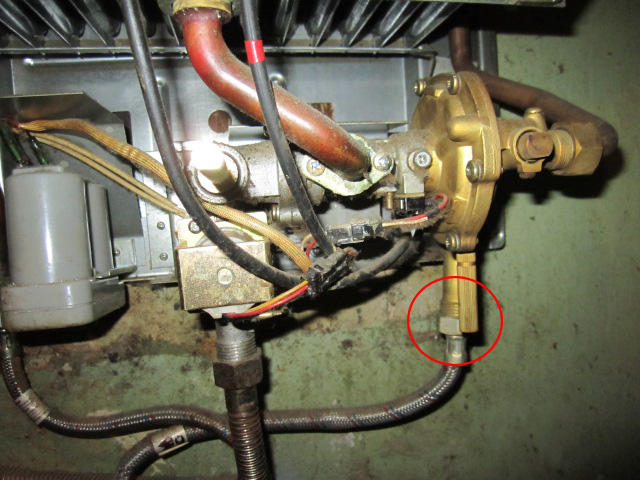
Do-it-yourself installation of a burner in a forging furnace is carried out as follows. First, a confuser is inserted into the prepared lining hole, and the mouth of the burner is attached to it through a sheet gasket made of heat-resistant steel.The product itself is attached to it, and pipes for supplying air and gas are screwed in. The effectiveness of the regulators is checked, after which a test run of gas from a cylinder or a stationary network is carried out. All work must be carried out in a well-ventilated area. At the slightest smell of gas, installation work is stopped and the source of possible leaks is found out.
If you find an error, please select a piece of text and press Ctrl+Enter.
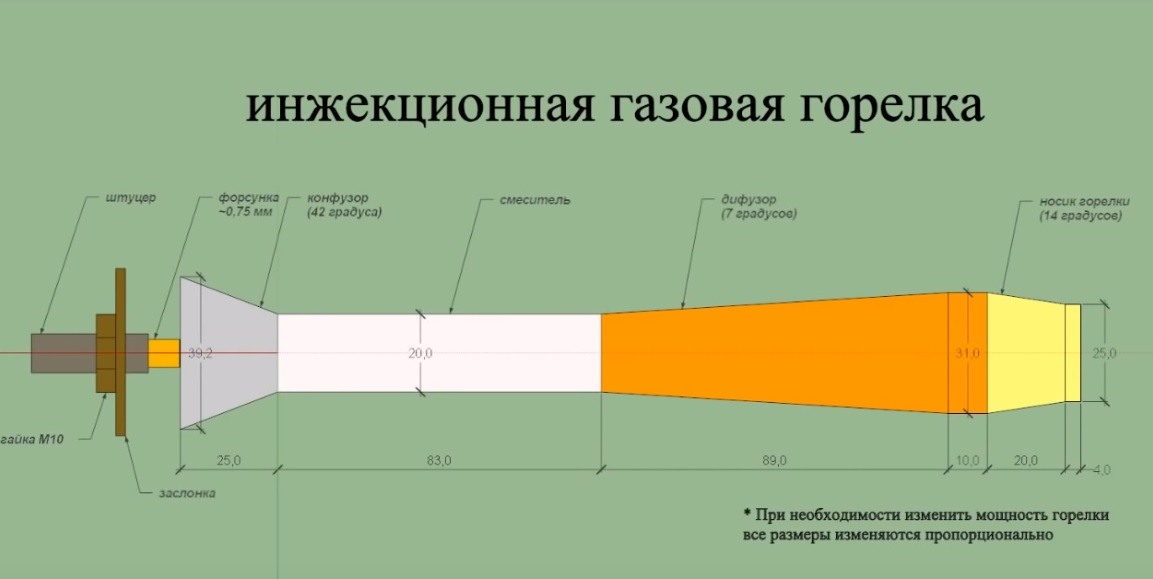
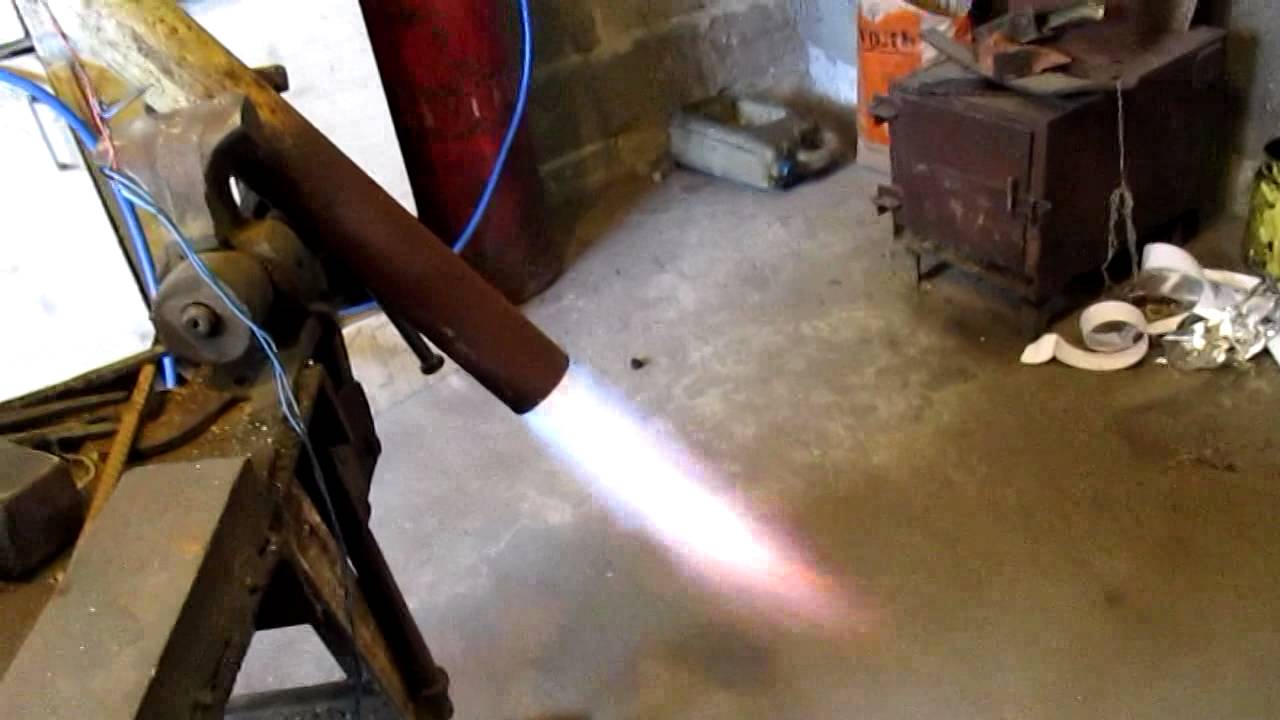
Burner design
A standard homemade burner functions in this way. Under pressure, gas is supplied from a cylinder through a special hose. The most commonly used gas is propane. The volume of supplied gas is changed by a regulating working valve located on the cylinder. Therefore, the installation of an additional reduction gear is not required.
The shut-off valve is located behind the main valve and is attached to the gas cylinder. It is used to open or close the gas supply. All other adjustments (length and intensity of the flame) of the burner itself are carried out using the so-called working tap. The supply gas hose, through which gas is supplied, is connected to a special nozzle. It ends with a nipple. It allows you to set the size (length) and intensity (speed) of the flame. The nipple together with the tube is placed in a special insert (metal cup). It is in it that the creation of a combustible mixture occurs, that is, the enrichment of propane with atmospheric oxygen. The created combustible mixture under pressure enters through the nozzle into the combustion area. To ensure a continuous combustion process, special holes are structurally provided in the nozzle. They perform the function of additional ventilation.
Based on such a standard scheme, you can develop your own design. It will consist of the following elements:
- body (usually it is made of metal);
- a gearbox that is mounted on a cylinder (a ready-made device is used);
- nozzles (made independently);
- fuel supply regulator (optional);
- head (the shape is selected based on the tasks to be solved).
The body of the burner is made in the form of a glass. The material used is ordinary steel. This form allows you to provide reliable protection against possible blowing out of the working flame. The handle is attached to the body. It can be made from various materials. The most important thing is that it provides convenience during work. Previous experience shows that the most optimal length for such a handle is in the range of 70 to 80 centimeters.

Gas burner device
A wooden holder is attached to the top. A gas supply hose is placed in its body. This allows you to give the structure a certain strength. Flame length can be adjusted in two ways. With the help of a reducer located on the gas cylinder and a valve mounted on the tube. Ignition of the gas mixture is carried out thanks to a special nozzle.
Gas-burners
And in the end we will give drawings of several burners for gas furnaces. For artistic forging, they are quite suitable, and, whatever you say, it is the most demanded of blacksmithing. All these burners are direct-flow injection burners. Much more efficient and versatile vortexes are too complicated for self-production.


The first one, in Fig., is the most difficult.To do it, you need to be a milling turner of at least 5 real ranks. But it works on any gas (except acetylene, see below!), gasoline-air mixture and gives a very powerful boost: it can also blow a large stationary hearth, described above.

drawings of gas burners for a forge
The next one (see the figure) is simpler and contains fewer details, although even here it is necessary to accurately sharpen shallow cones. The blower is also great, but it only works on propane. For butane, a very narrow nozzle is required, and butane is used little.

It is necessary to grind clean the outer surface of the D1 injector and drill the nozzle in one setting. The nozzle is drilled with a carbide drill and run clean with a reamer. This is the main drawback of the design: a small, precise tool is required, which is not available everywhere and not always.
Below in fig. two burners are simpler. On the left - chiseled universal for household gas or propane. A small mobile forge can blow through at most, but turning parts can be done by an average turner. You just need to master the technology of landing parts in a hot fit. Which, however, is not difficult.

On the right is a homemade burner. Most of the parts, including the nipple, are from a bicycle. From the lathe, you only need to grind the smallest sprocket from the bicycle gearbox to size. This burner is omnivorous: propane, butane, household gas cocktail, gasoline air. But it can only heat the small closed brick hearths shown at the beginning.
SAMODELKIN FRIEND
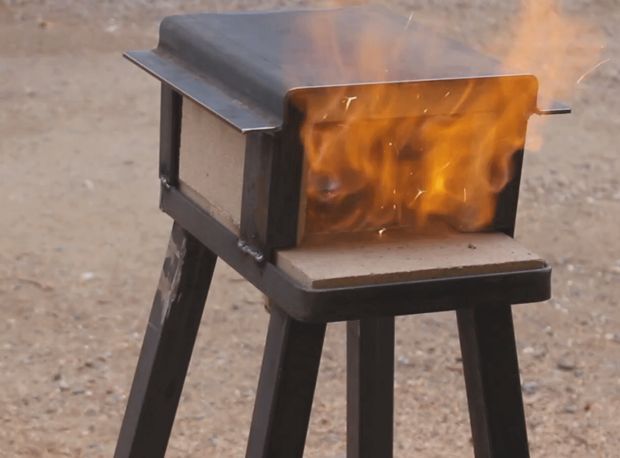
Dear visitors of the Samodelkin Friend website, today we will consider detailed step-by-step instructions for creating a portable forge working on do-it-yourself propane. A propane-fueled forge is much more efficient than a coal forge, and has the advantage of being able to be moved anywhere in your garage or workshop, and it doesn't require any additional air supply.
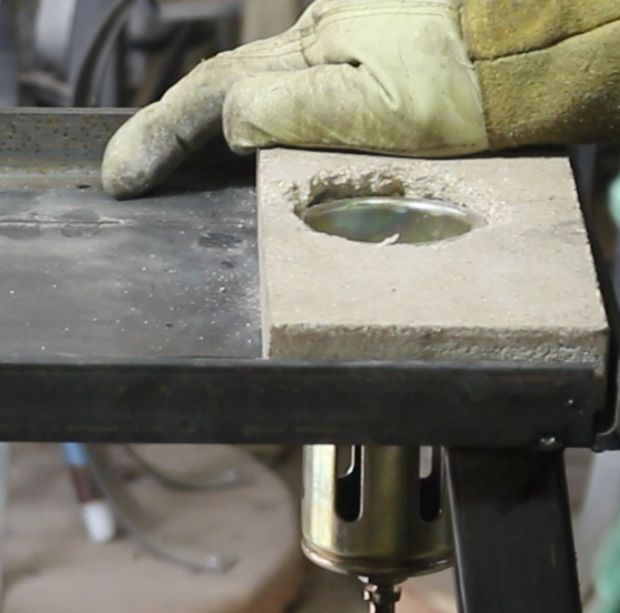
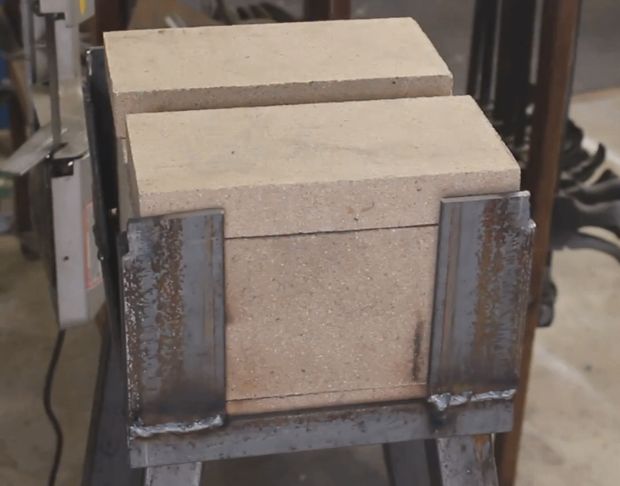
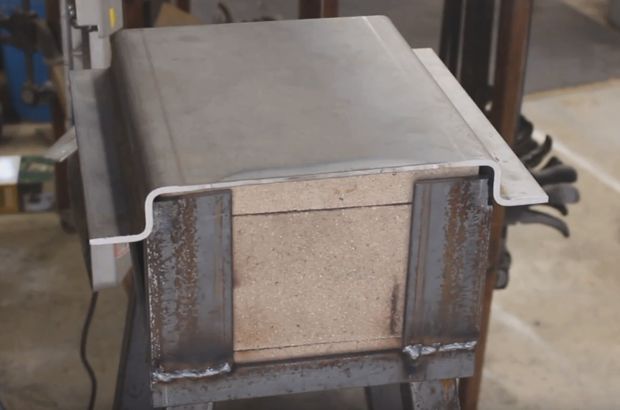
In this case, the GAS HORN is a metal structure made of an angle, a professional pipe and a 2 mm sheet metal. The hearth chamber is lined with refractory bricks, which makes it possible to withstand maximum temperature loads, and at the same time fireclay bricks have low thermal conductivity, which further increases the efficiency of the hearth.
Having a small forge in your workshop, you can forge all kinds of products: knives, axes, chisels, cores and much more, if you are a creative person .. then it is quite possible to do artistic forging.
And so, let's look at the step-by-step process of assembling a forge.
materials
- corner
- professional pipe
- sheet metal 2 mm
- refractory brick
- gas-burner
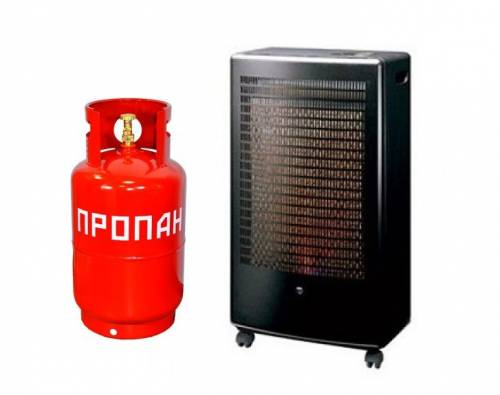
- gas bottle (PROPANE)
Tools
- welding inverter
- drill
- angle grinder (Bulgarian)
- ruler and marker
- a hammer
- clamp or pliers
Step-by-step instructions for assembling a forge gas forge with your own hands.
First of all, we make the base of the camera from a 50x50 corner, in the places of the bend you need to cut out the corner.
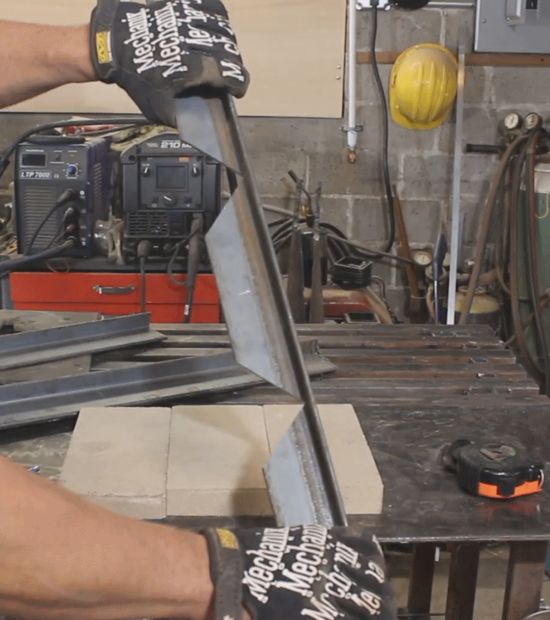
We bend.
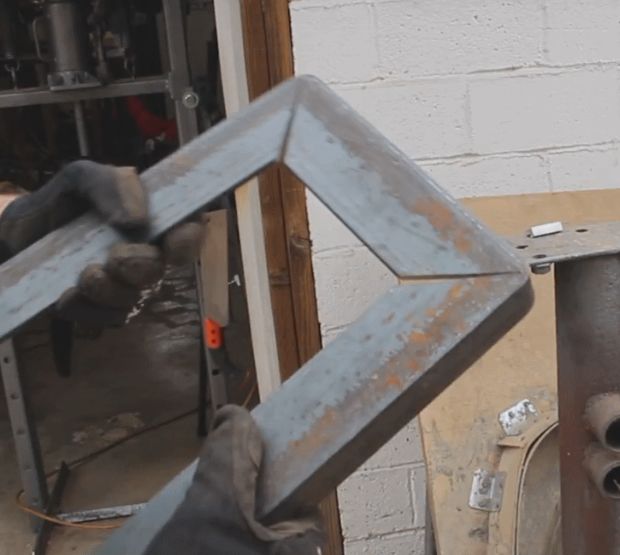
It turned out the basis for laying refractory bricks.
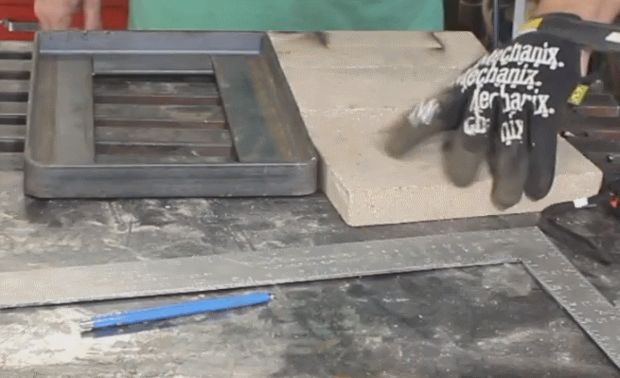
We weld the lower part with 2 mm sheet metal.
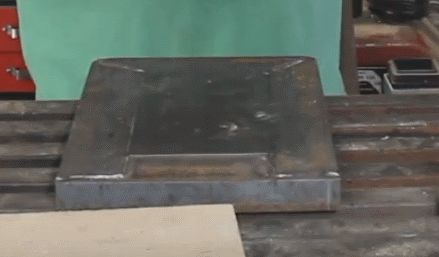
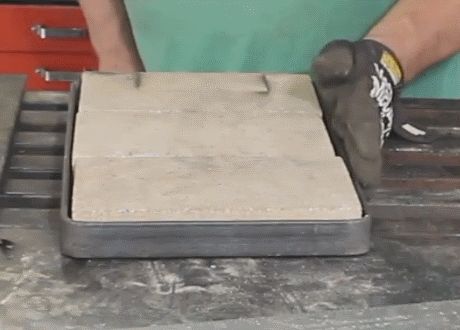
We lay out the refractory brick.
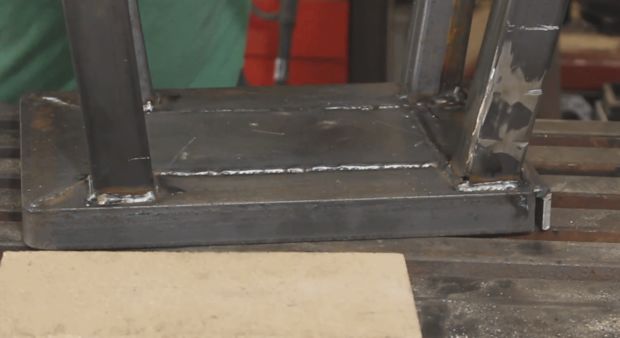
We weld the legs from the pro-pipe.
Then it is necessary to make a hole in the base for the installation of a gas burner nozzle.

Drilling holes in brick.

You also need to burn a hole in the metal.
Installing the burner.
Then we weld the corners in the corners and make walls with a roof.
The upper part of the rut should be covered with 2 mm metal.
We fasten the handle of the gas burner and fix it to the base of the forge legs.

Then it remains only to connect a gas cylinder through a flexible rubber hose and it is fashionable to start working with metal, for example, to forge a knife from a piece of iron.
Thank you for your attention. Tweet
Tweet
18 Shared


Work to improve flame regulation
 Burners with adjustable flame intensity
To ensure the normal operation of our burner, it is necessary to equip it with a divider and a tap. A suitable place for mounting the tap is near the handle, 2–4 cm higher. But it can also be installed on the inlet pipe. A tap from the burner of an expired autogenous burner or its other analogue will do. It is permanently fixed on the tube with a threaded connection. Use FUM tape to seal the connection.
The divider will be installed on the pipe with the nozzle. It also needs to be made of brass Ø 15 mm. The best option is a cylindrical part with a hole for a tube with a nozzle. If there is none, do the following:
- Take a brass pipe Ø 35 mm and cut a piece of 100–150 mm.
- Stepping back from the end, mark with a marker 3-5 points evenly distant from each other.
- Drill 8–10 mm holes in it with a drill and use a grinder to make even cuts to them.
- Now you can bend everything to the center and weld it to the burner tube.
 Burner nozzle device
To properly fix the divider, it must be placed so that the nozzle protrudes 2–3 mm from the junction. Such a device serves two purposes: to protect the flame from strong winds and to provide it with a flow of oxygen, which is necessary for a more stable and stronger flame.
All welding spots can be smoothed out with a grinder. Then your homemade burner will look more solid. That's all. Now it remains only to supply gas and use the burner for its intended purpose.