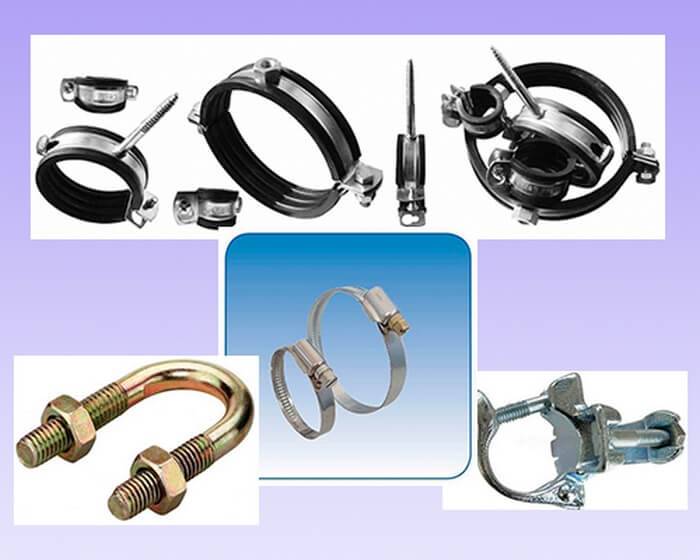
- Design features and application
- Metal hose clamps
- Accounting for product dimensions
- Types and designs for different piping systems
- Self-manufacturing
- Mounting clamps
- Material selection
- Mounting fasteners
- Leak repair
- Pipe insert
- Homemade clamps
- Do-it-yourself clamp - a simple and effective solution to the problem
- Putting on a pipe is easy
- How to make a pipe clamp
- Installation
- Making a wire clamp
- Plumbing pipe clamp - how to fix communications?
- Installation instructions
- Hidden
- Installation of a flat cable using a dowel-clamp
- Fixation on a self-adhesive pad
- Open
- Fixing a thin cable
- Clip-on styling
- How to make a wire clamp - step by step diagram
- Step 1: Measure the required length of wire
- Step 2: Proper Clamp Assembly
- Step 3: Detailed installation of a homemade clamp
- Specifications of plastic clamps
- How to make and put a clamp on the pipe.
- Materials:
- Tools:
- The principle of operation of the clamp is as follows:
- The sequence for making the clamp is as follows:
- The clamp installation sequence is as follows:
Design features and application
Any execution of the element includes the following mandatory elements.
- Frame.
- Non-metallic lining.
- Fasteners.
- Mechanism for adjusting the inner diameter (optional).
- Mounting bracket (optional).
The use depends on the design, as well as which element of the pipeline - flexible or rigid - needs to be fixed.
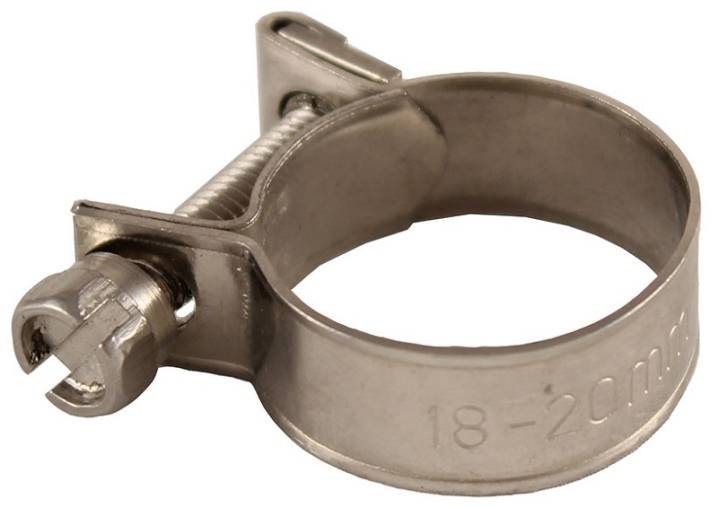
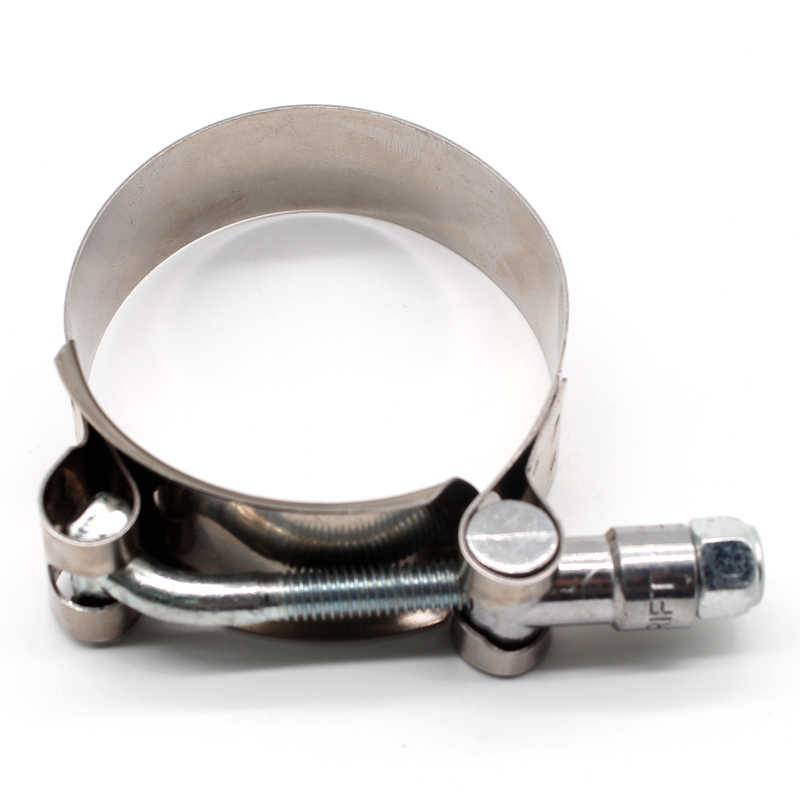
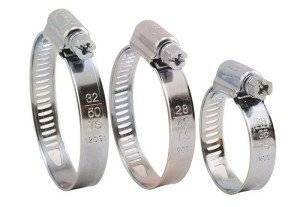
Metal hose clamps
The designs of these parts are regulated by the technical requirements of GOST 28191-89.
Products are calculated for the maximum pressure of the working medium up to 7 MPa, with a range of external operating temperatures of -60 ... + 1200C. They can have a worm or bolt fastening, and the width of the tape (or wire diameter) is determined by the product series - light or heavy. Available in two versions, which differ in connection configuration.
Accounting for product dimensions
GOST establishes the following standard dimensions for these parts (smallest/largest), mm: 8/12; 10/16; 12/20; 16/25; 20/32; 25/40; 32/50; 40/60; 50/70; 76/100; 90/110 and beyond any diameter multiple of 10, with a difference in diameters of 20 mm.
The range of outer diameters (for the most commonly used versions of adjustable options) is, mm: 31-38; 32-35; 59-63; 83-92;108-116.
Steel pipe diameters: internal and external dimensions, wall thickness, table in inches and millimeters Products for domestic piping and flow diagrams have a number of characteristics. The most important of these are the diameters of the pipes. This parameter is regulated by state standards, allocated ...
Types and designs for different piping systems
The design of pipe clamps affects the reliability and durability of the system. Before installation, it is necessary to study the installation diagrams, features of maintenance, dismantling. Finished products must comply with applicable standards.
Types depending on operational requirements:
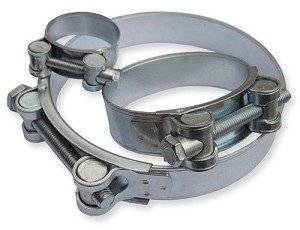
- Clamp designs for high loads. They are taken into account by the increased thickness of the strip / tape, which is used as the initial blank for stamping, as well as the use of structural high-carbon steel grades in accordance with GOST 14969-89.
- Clamp designs for large diameter pipes. Such products are characterized by an increased length of the guide part, as well as the presence of additional attachment points. If there is sufficient space for installation, double versions are used.
- Clamp designs for PVC pipes. Most designs are characterized by the presence of elastic gaskets that absorb part of the clamping force, which eliminates cracking and deformation of PVC. The noise from pumping the working medium is also reduced.
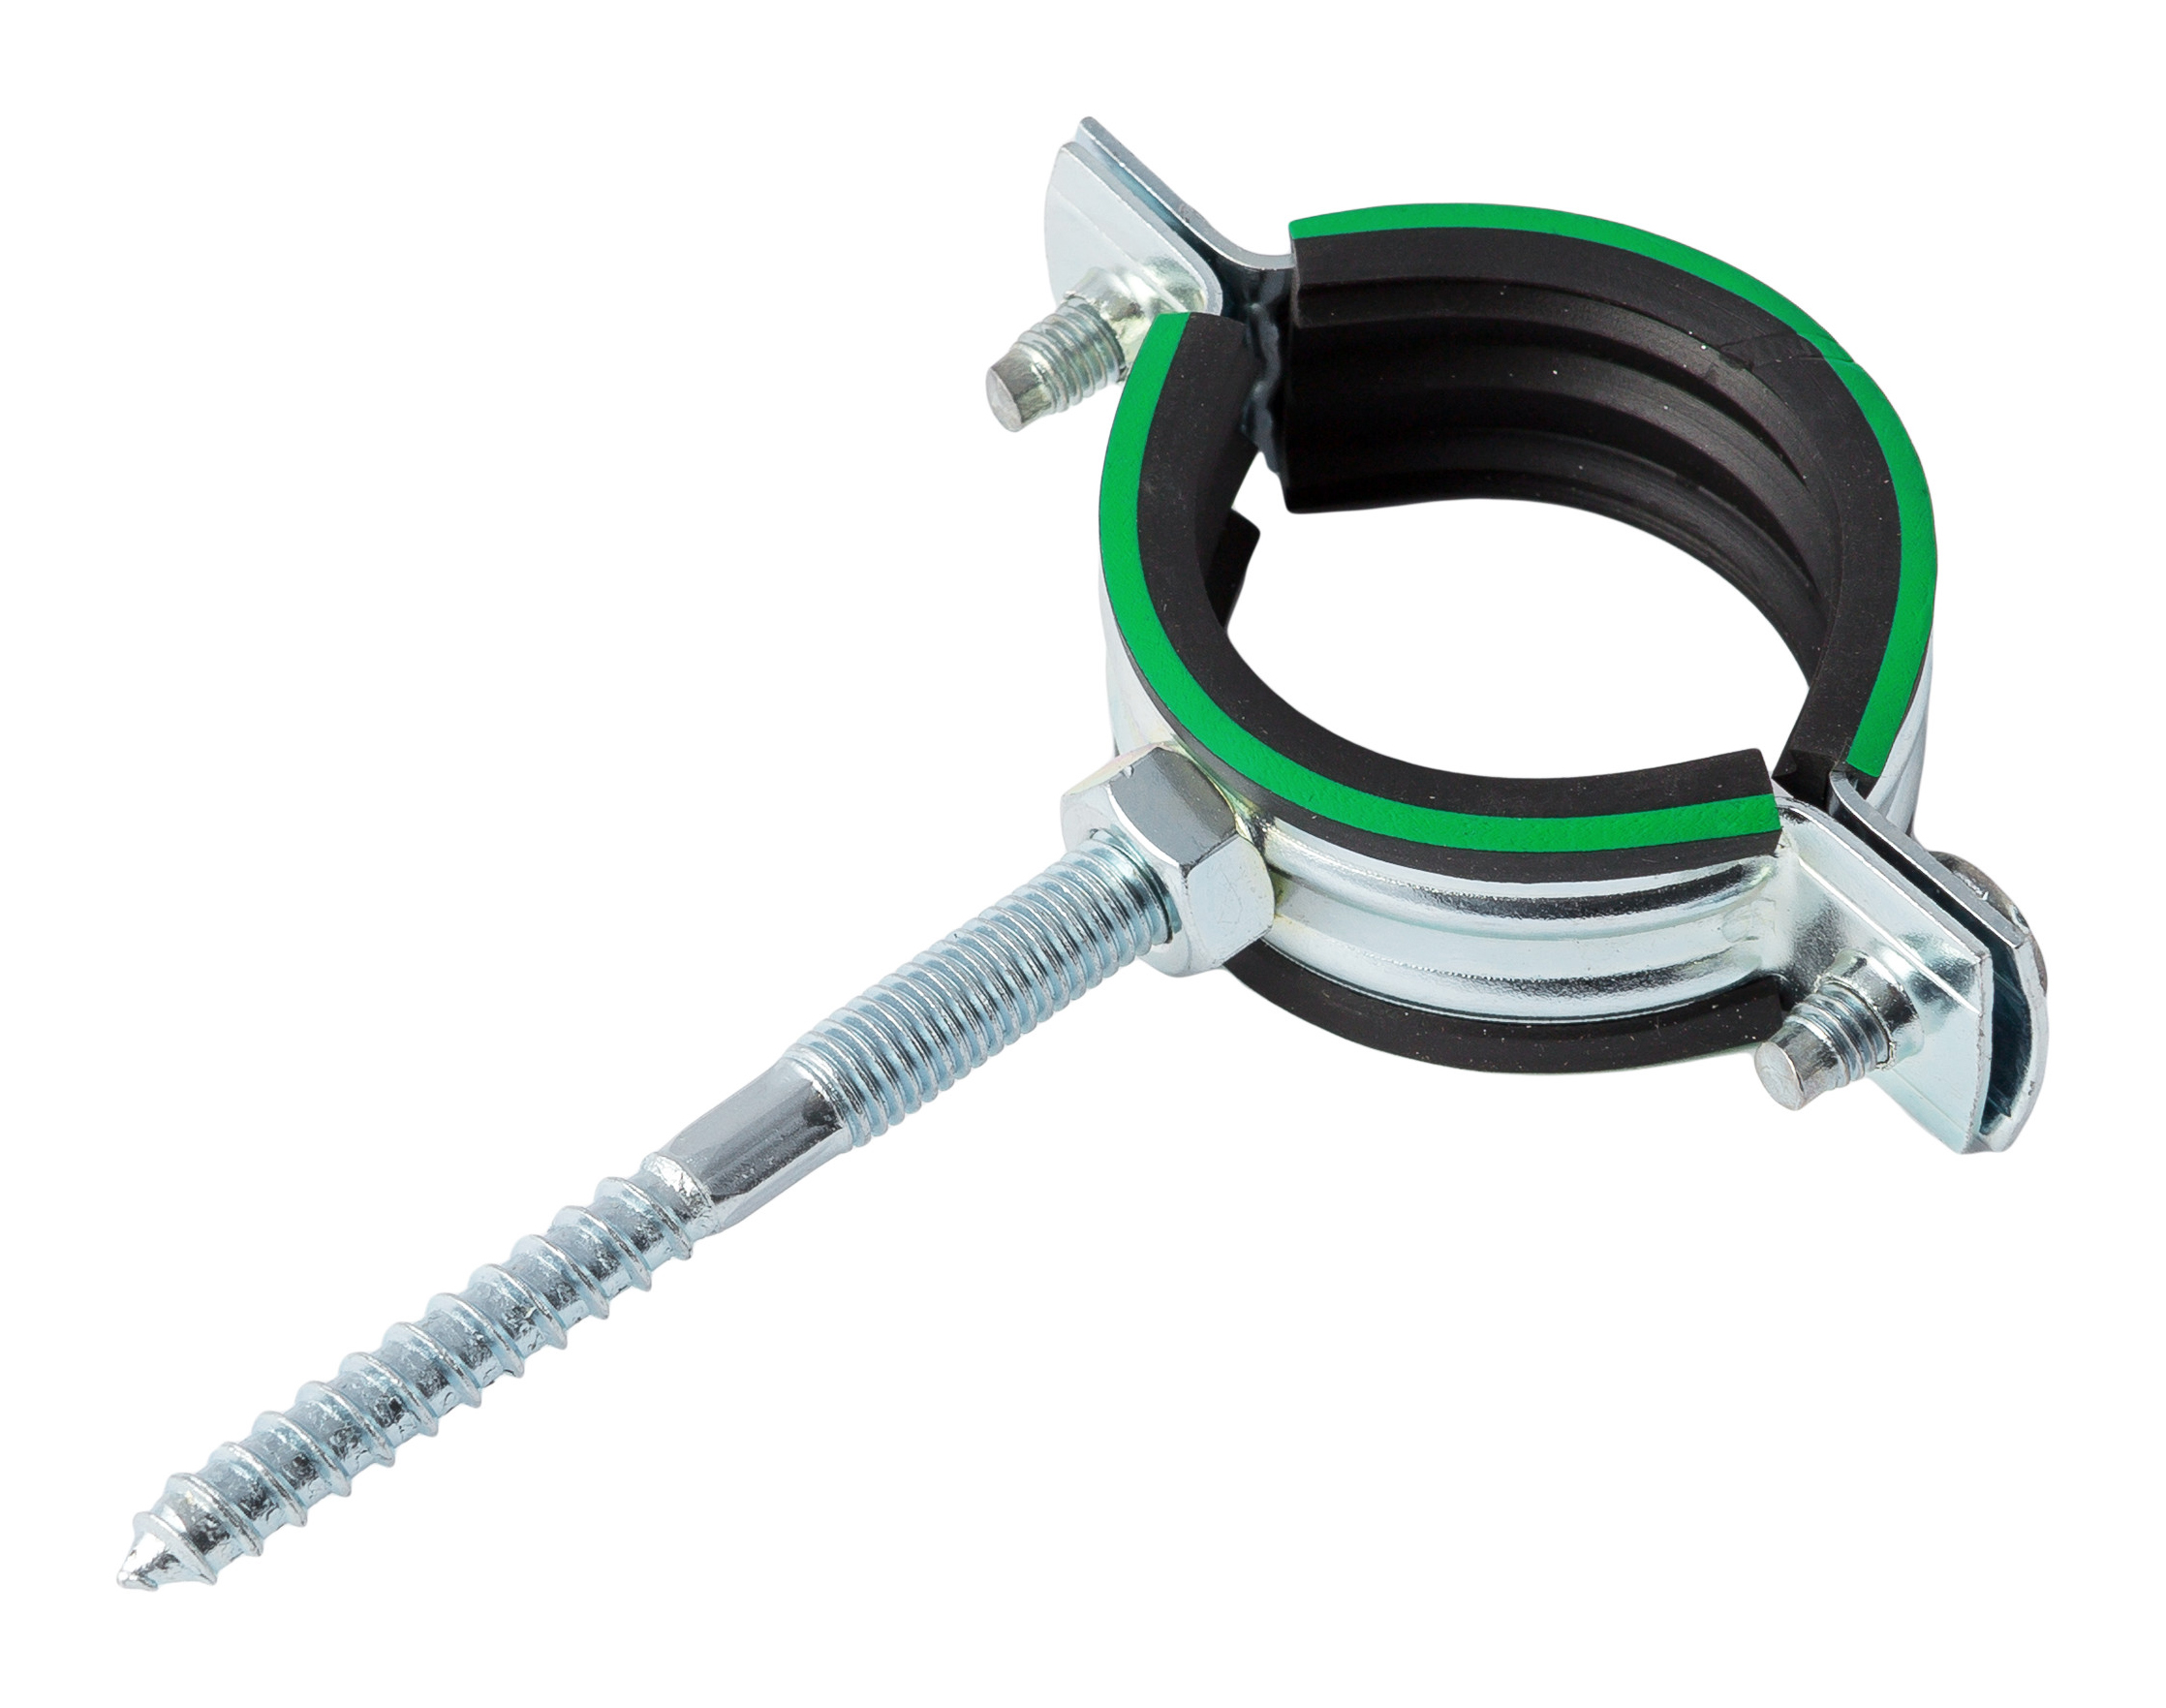
- Non-assembly connections with plumbing clamps. They are implemented using products of the Ktr type, which include a plumbing screw and a plastic dowel.
- Clamps with seals and long screw. Abroad, such designs are called BISMAT Flash. In addition to the gasket, they are equipped with an axisymmetrically located screw or self-tapping screw, with the help of which the product is preloaded. Particularly useful when repairing long pipe sections.
- Ventilation clamps without seal. Used in the installation of air ducts. Since the connection of such sections is coaxial, there is no need for sealing elements.
Tip: In recent years, Walraven star Quick plastic clips with a ratchet actuator have become more common, which speeds up the installation process.
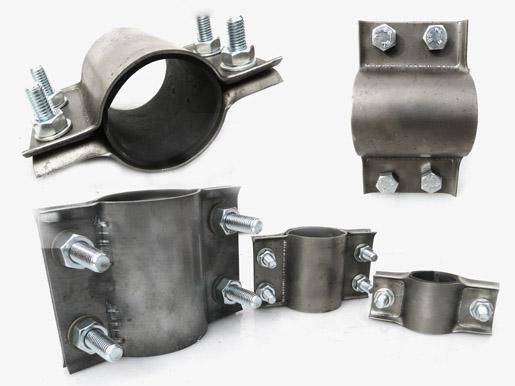
Self-manufacturing
If it is not possible to buy plastic clips, you can try to make them yourself from metal. To create you will need:
- hammer, pliers;
- a set of wrenches, a drill;
- bolts with nuts;
- metal sheet 1 mm thick, scissors for cutting metal.
Manufacturing:
- Cut a metal strip 4–8 cm wide. The length depends on the diameter of the tubes.
- At the ends of the strip, mark the holes for the mounting bolts. Bend the ears with pliers.
- Between the holes you need to fix the rubber gasket, clamp the pipes with a bolt, nut.
The number of bolts varies depending on the width of the metal strip. From 4 to 6 cm - 2, from 6 to 8 cm - 3. The step between the dowels is calculated depending on the material from which the tubes are made, their diameter. Additionally, you can think of a metal platform for fixing the dowels. Metal clamps should not squeeze plastic pipes so that the plastic does not collapse during expansion.
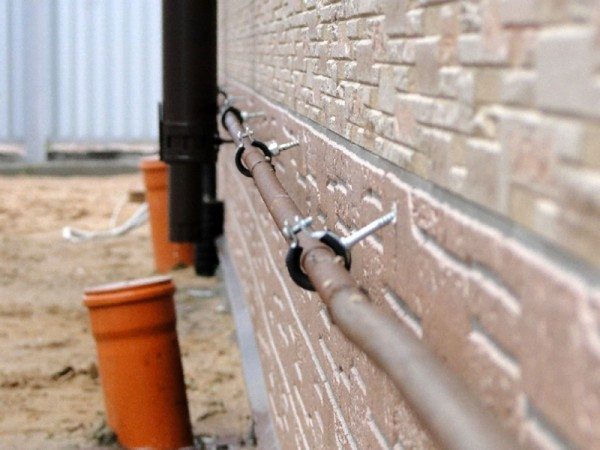
When it is not possible to hide the pipeline in the walls, it is necessary to consider a system for fixing the pipes on vertical or horizontal surfaces. Most often, plastic clamps are used for this. They are highly durable and low cost. Installation of tubes on clips can be performed by anyone without training
It is important not to forget that the pipes are first pushed into the clamps, and then connected together.
Watch the video about fixing the heating pipe to the wall with a clamp and a base plate:
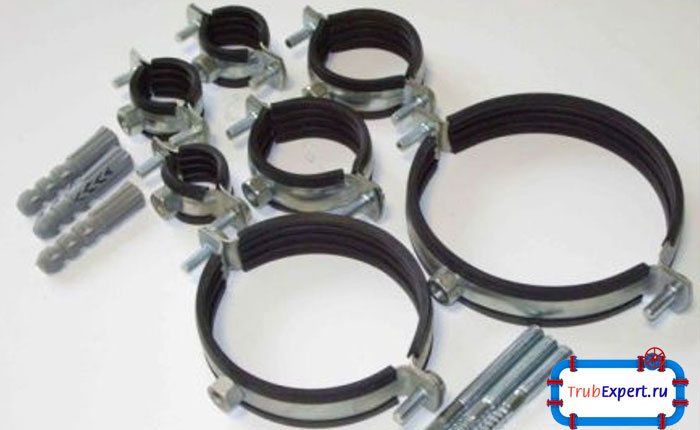
Mounting clamps
Material selection
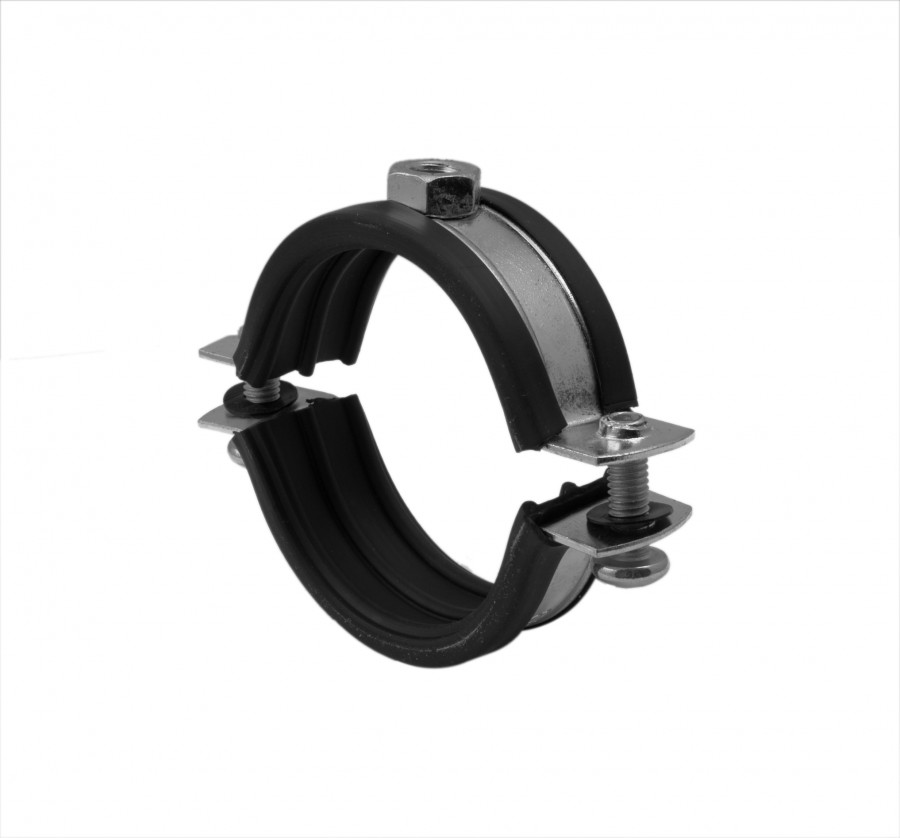
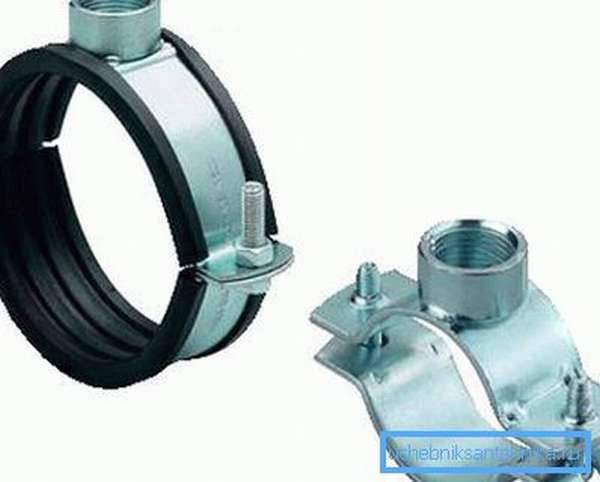
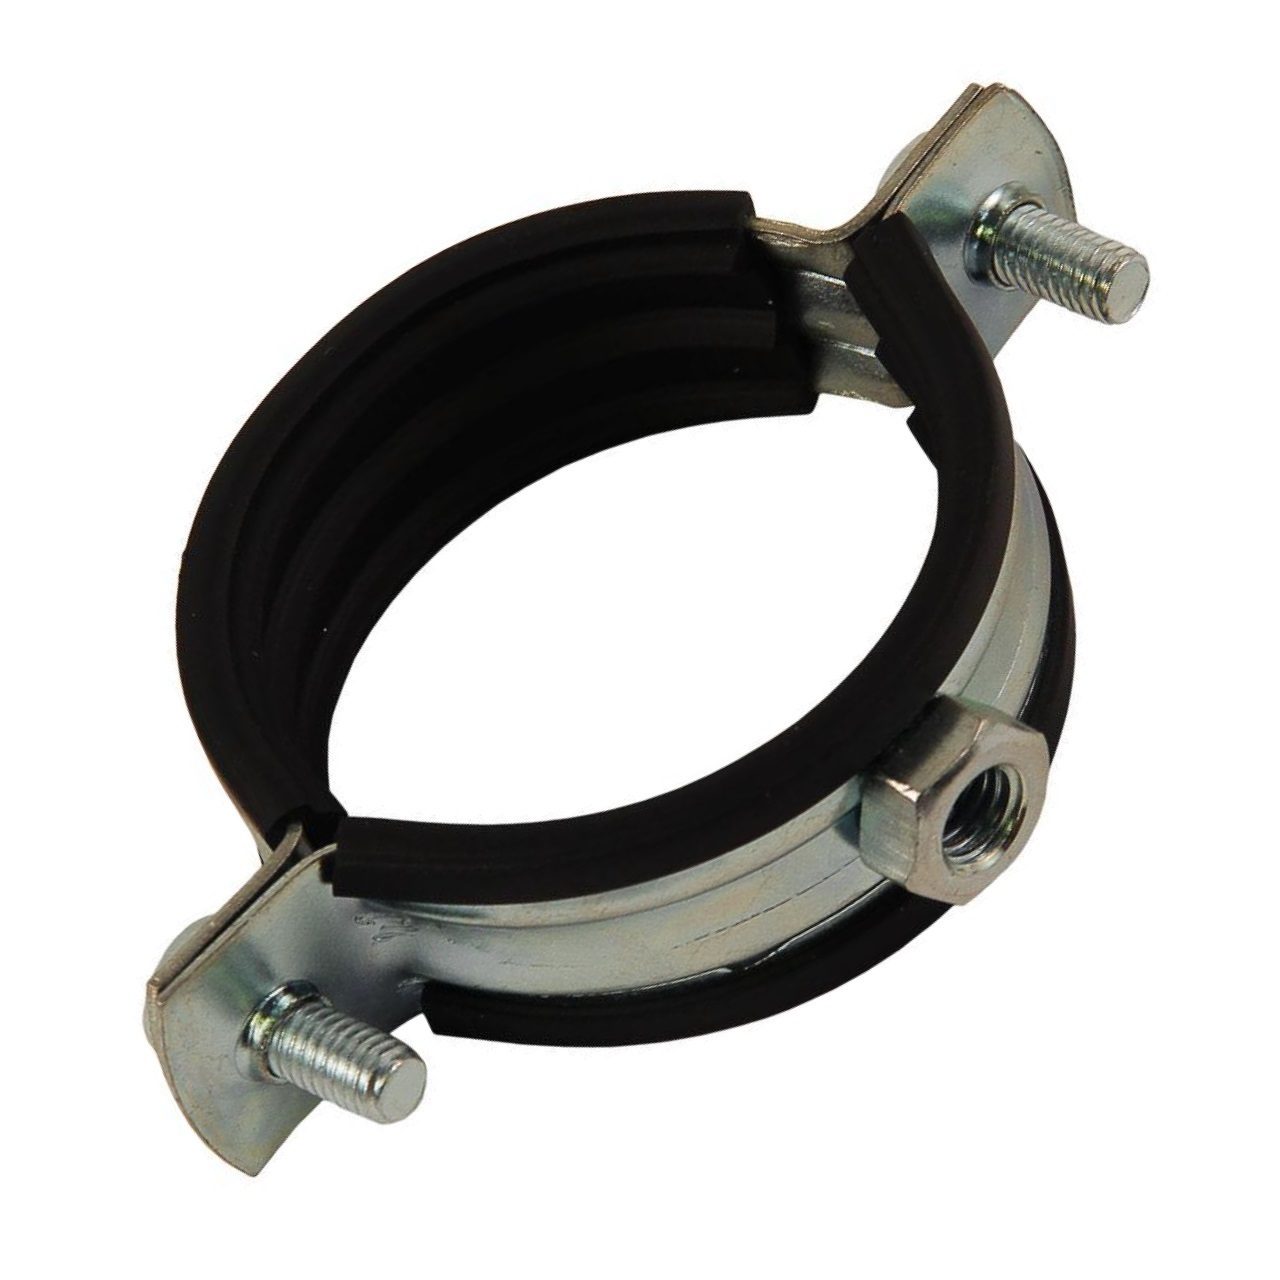
Clamps come in a variety of sizes and designs, however, all items have a spherical shape that follows the bend of the pipe.The design of the product necessarily contains clamping bolts, which make it possible to tighten the clamp as tightly as possible around the pipe being repaired / mounted. According to the scope of application, these products are divided into fixing and repair items.
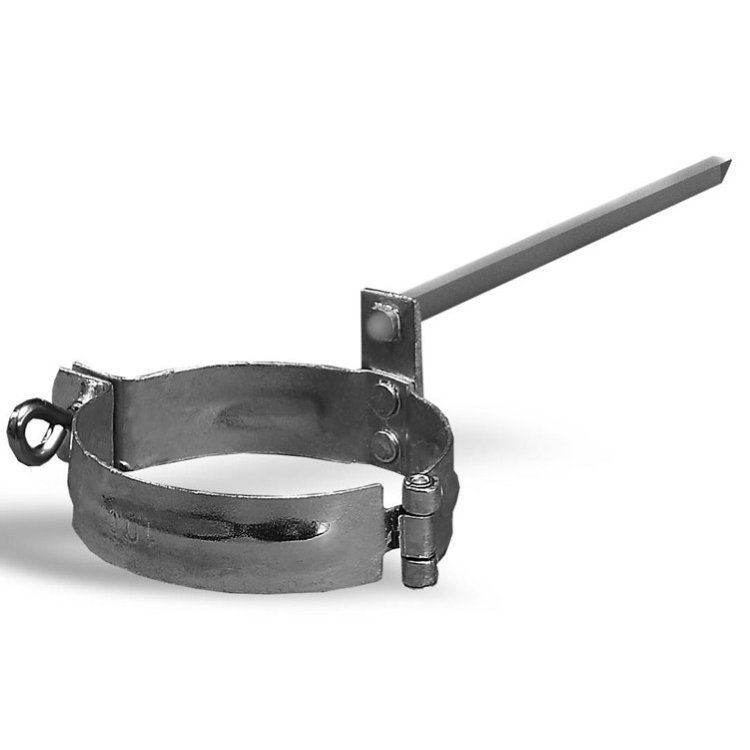
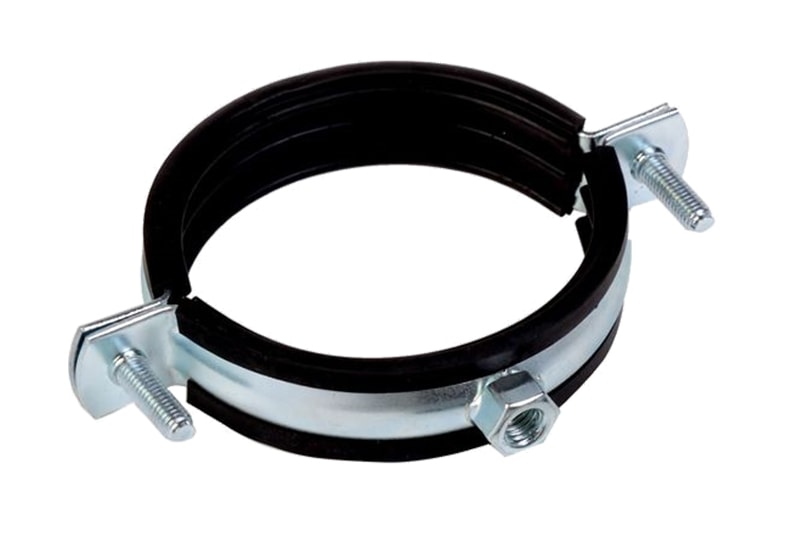
Mounting clamp: photo
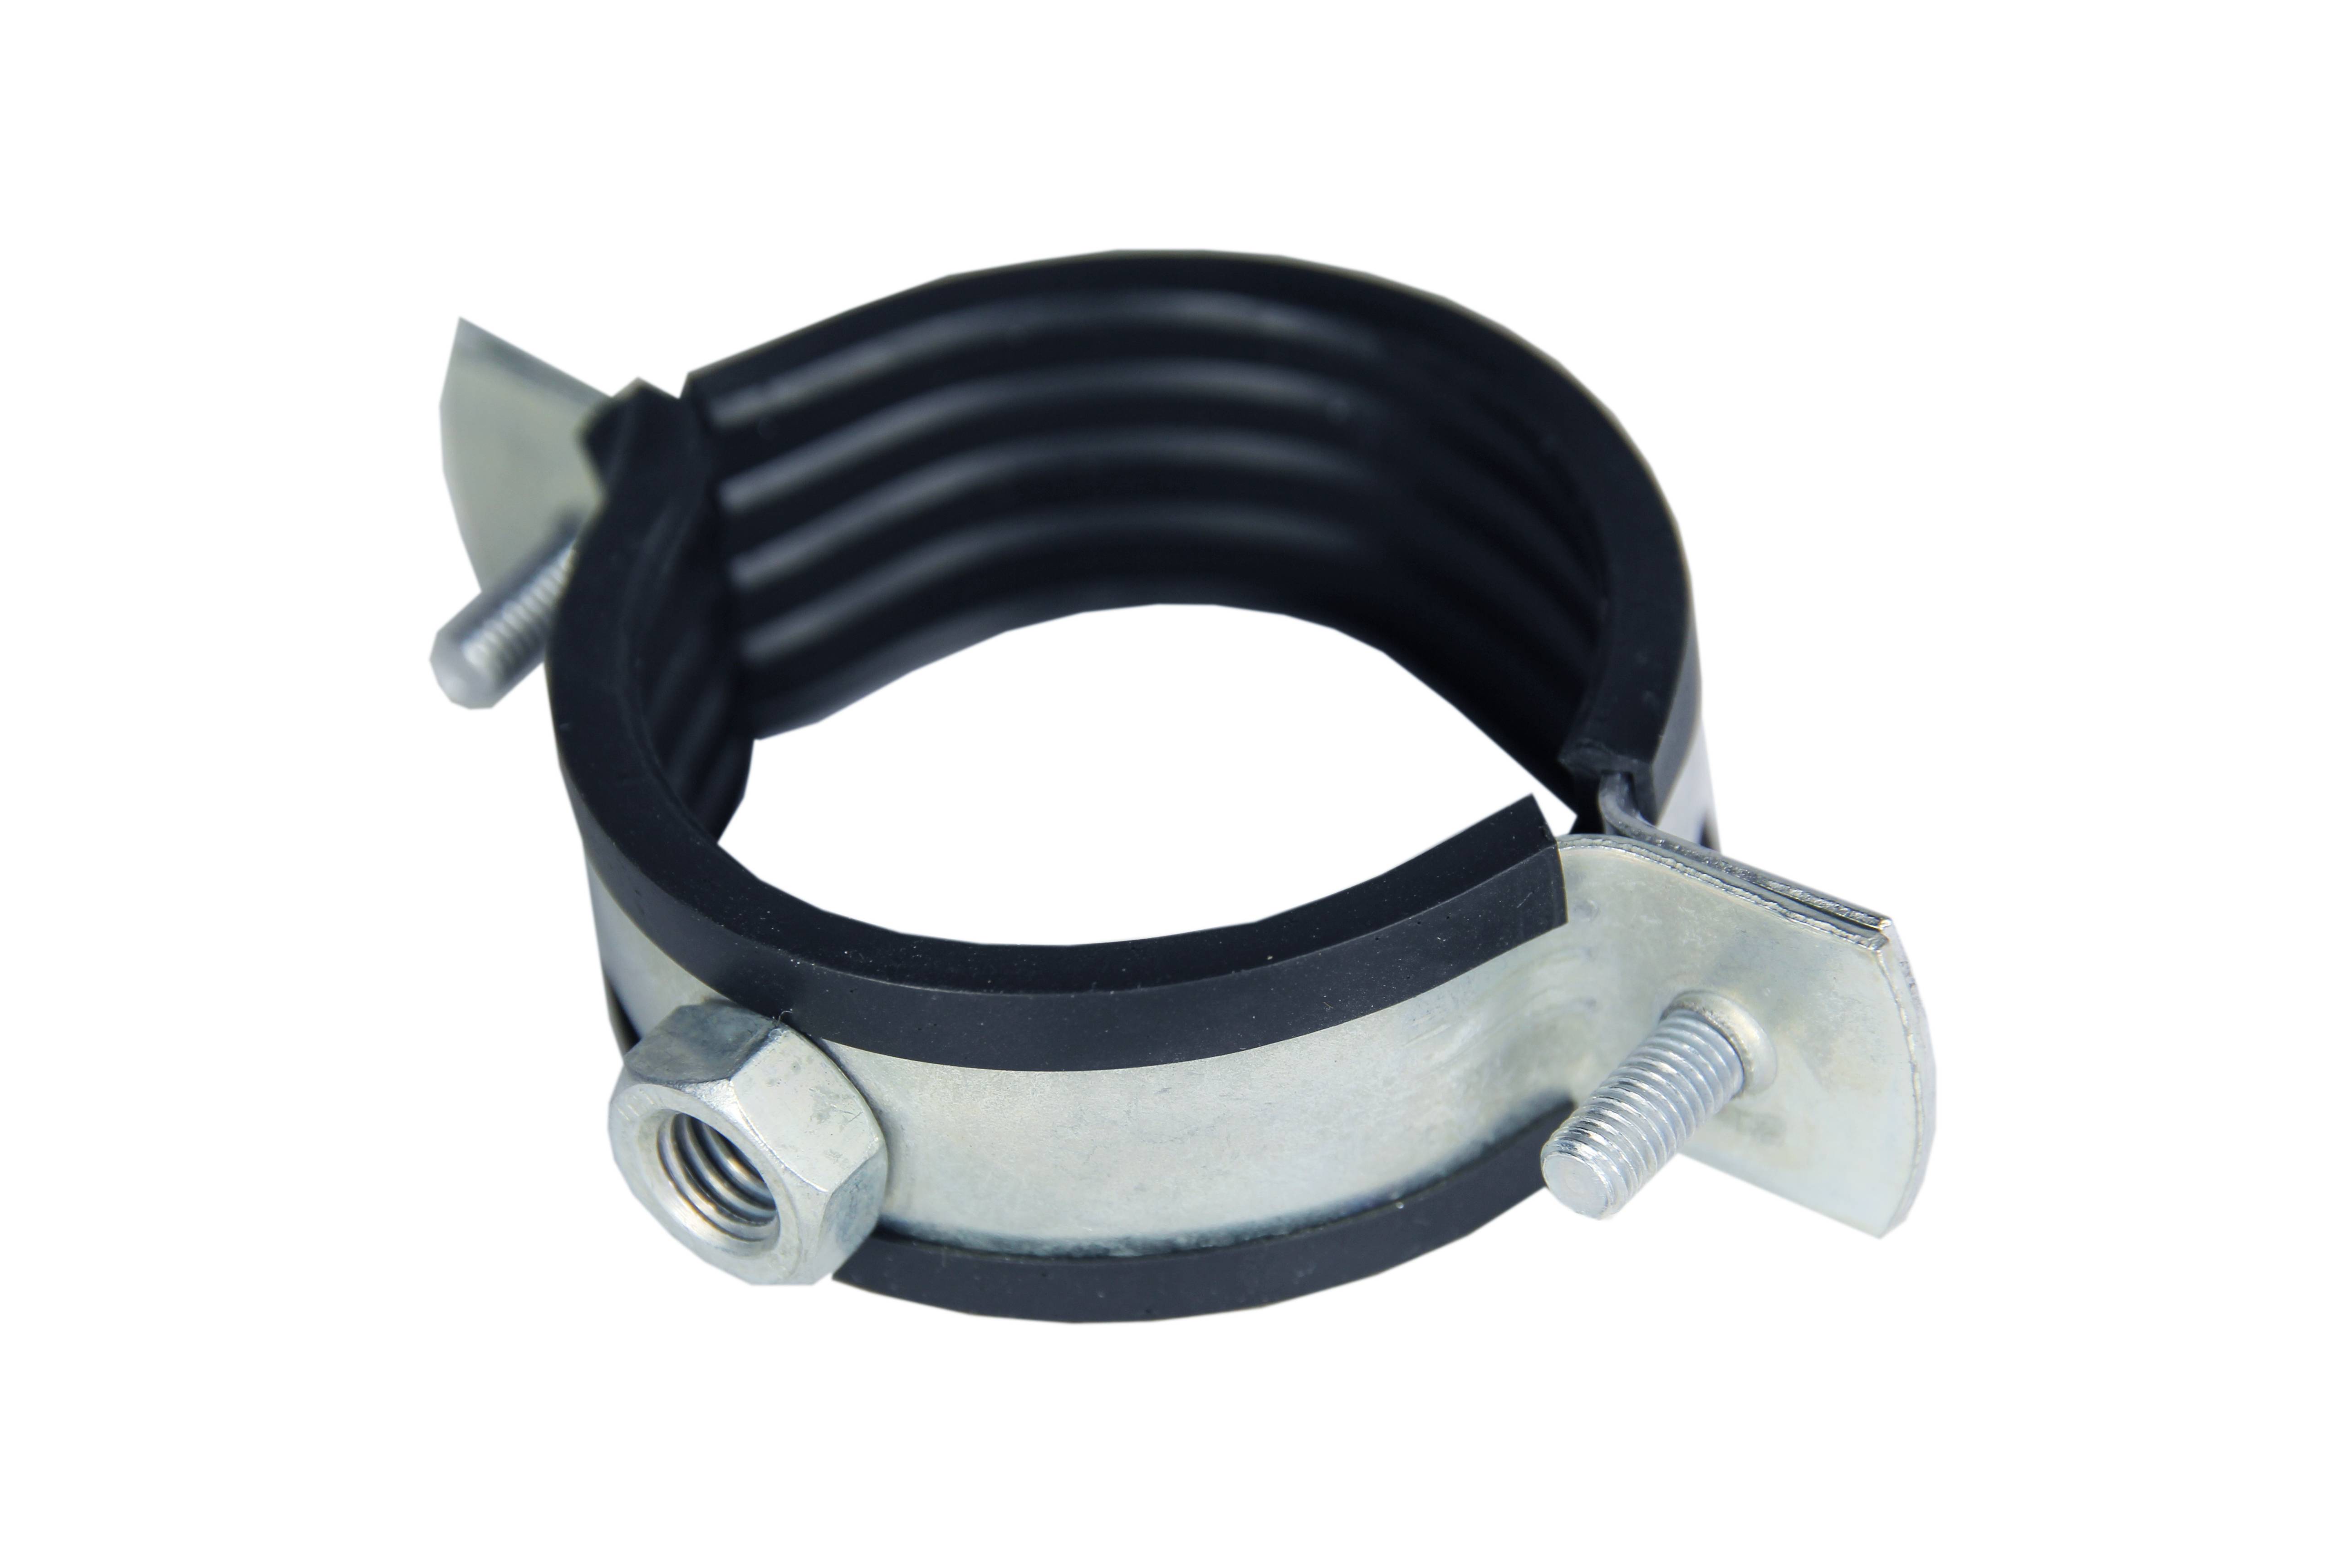
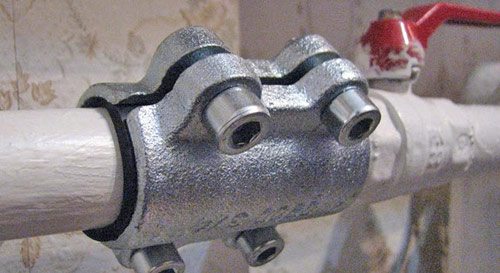
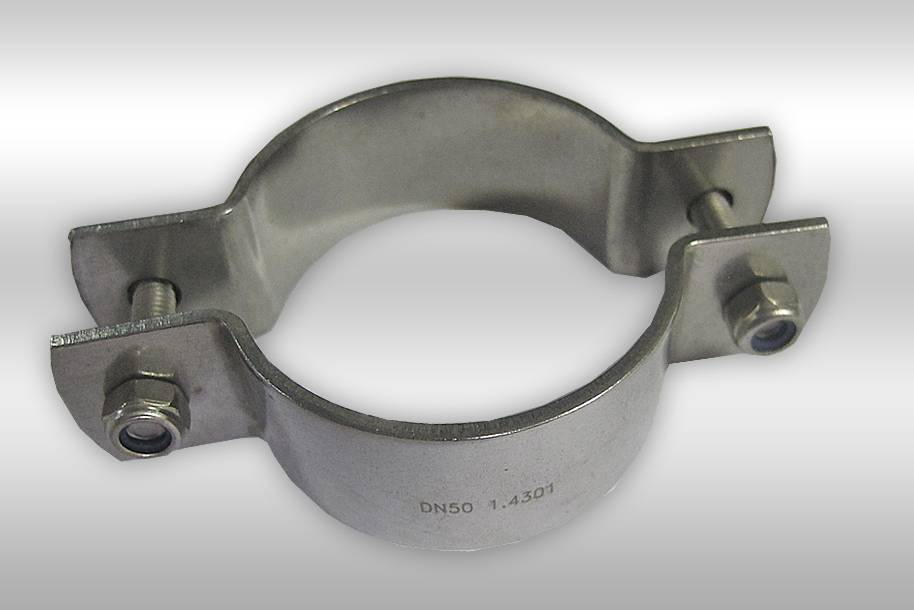
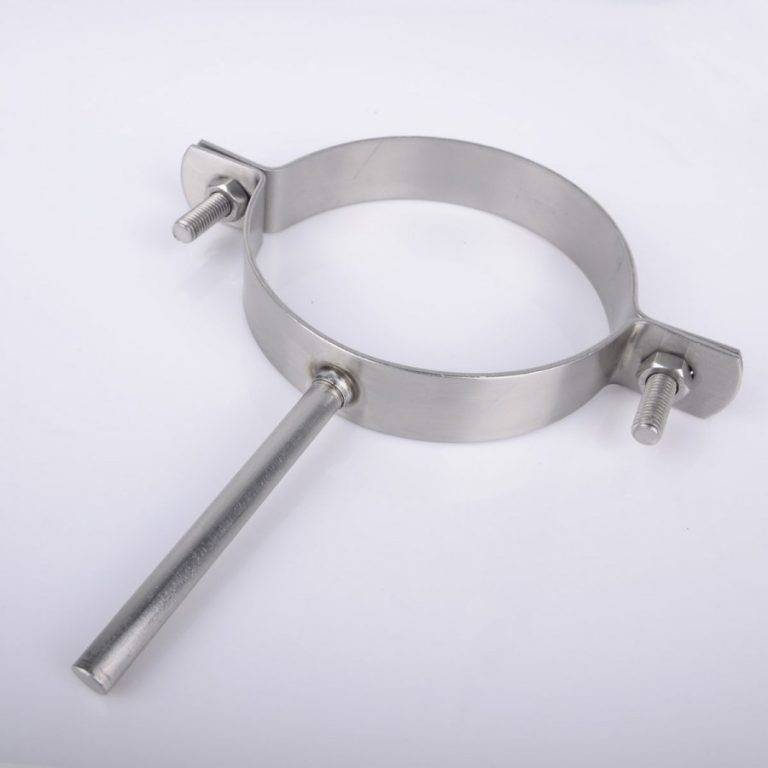
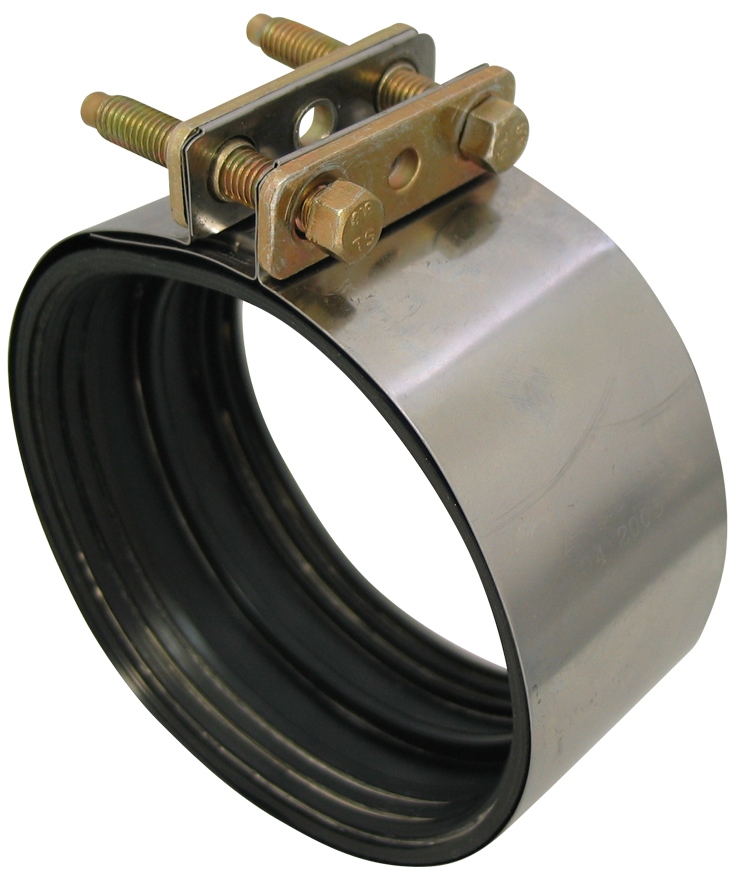
The clamp-fastener consists of a metal shell and a corrugated rubber gasket that prevents vibration noise and excessive squeezing when twisting. A prerequisite for products of this type is the presence of a side mount, which is most often made in the form of a welded nut - with its help, the pipe is mounted / suspended on a wall or ceiling.


Leak repair clamps have a wider metal sheath and a solid rubber gasket that seals the leak on the pipe. There are also specialized products for inserting an additional branch into the water supply system - with its help you can create a branch without the participation of a welding machine. The only condition for its use is the absence of strong pressure in the system.

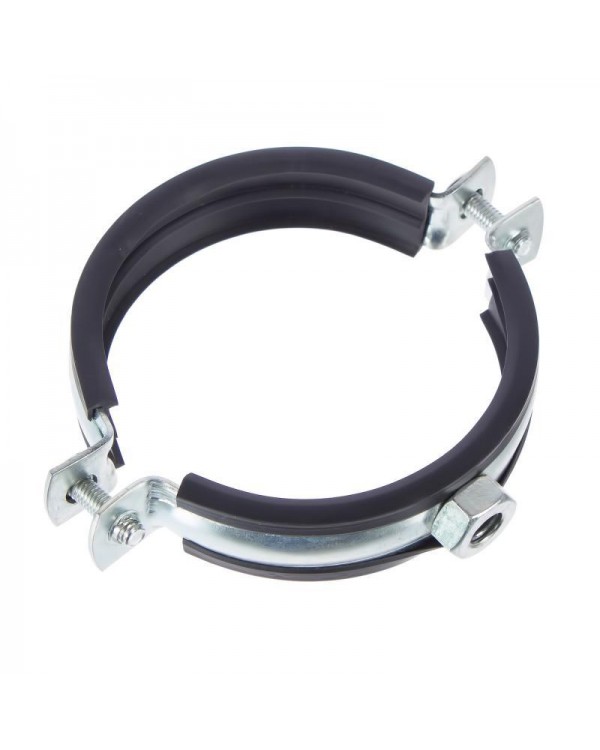
Repair clamp with rubber seal
When purchasing, special attention should be paid to the dimensions of plumbing pipe clamps - an incorrectly selected size will make the purchase in vain. The diameter of the pipe is determined by a caliper or, in the absence of it, you can simply measure the external section of the pipe
It is also important to have a rubber gasket - it is not always included in the basic package. If there is a choice between products with and without a seal, then you should give your preference to the first option, even if its price turns out to be an order of magnitude higher - the gasket significantly increases the technical characteristics of the fastening

Sizing
Mounting fasteners
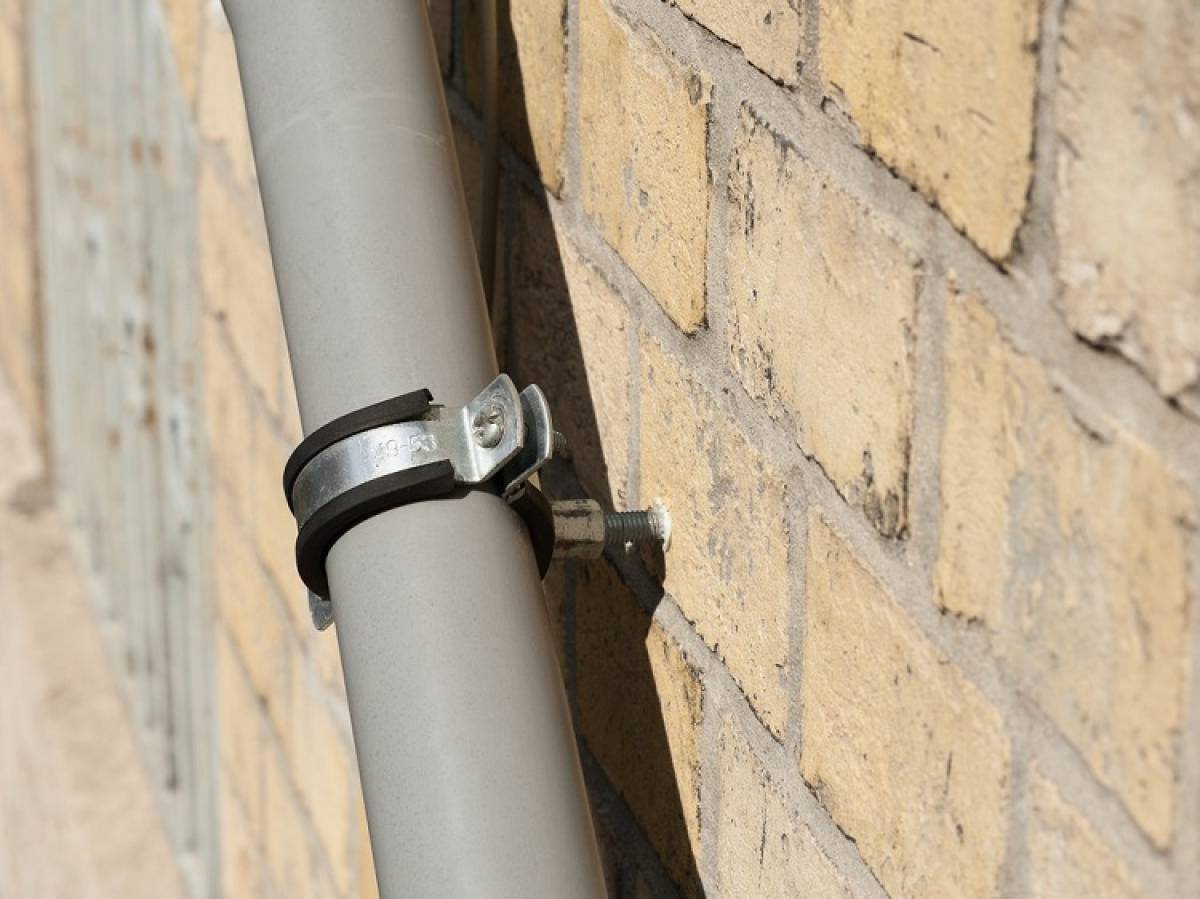
- The path of the future pipeline is being marked, the location of the fasteners is marked. The distance between the fasteners is determined depending on the length and weight of the pipe - in standard situations it is about one to two meters;
- At the place of the future fastening, a hole is drilled into which a plastic dowel is inserted, and a stud with a thread at the end. A collar is screwed onto the hairpin in the open state - it should be twisted all the way, but one should not be too zealous so as not to deform the shell of the product;
Pipe installation is not difficult to do it yourself
The pipe is inserted and the clamp is clamped
It is important here to create a floating clamp and not overdo it - it should not be too tight to compensate for the thermal expansion / contraction of the material;
Leak repair
- Before putting the clamp on the pipe, it is advisable to turn off the water supply in the system. If this is not possible, installation is also possible, but you will have to get pretty wet;
- The clamp is put on the burst place in such a way that the crack / cavity is located approximately in the middle of the rubber gasket. The rubber seal must lie flat, without folds. The fasteners are tightened as tightly as possible to avoid leakage;
Leak repair
The junction is wiped dry, the water supply is resumed and the pipe clamp is inspected for leaks. If this is the case, then the mount is additionally tightened;
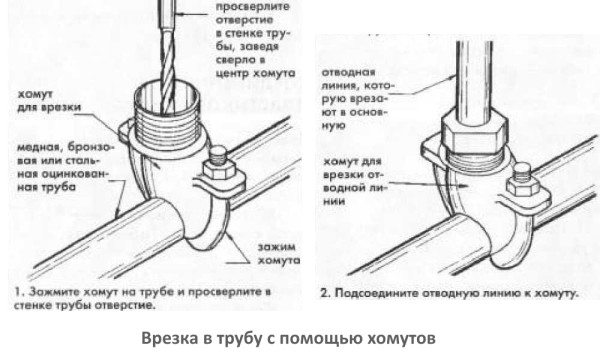
Pipe insert
First of all, a hole of the required diameter is drilled, then an adapter is put on it. The main thing is that the sealing gasket lies without bends.After tightening the clamps, the connection is ready for installation of an additional water supply branch.
Inserting a branch into the water supply
Homemade clamps
If your pipe has burst, and you don’t have the necessary clamps at hand, then you can temporarily eliminate the leak with improvised means. The answer to the question how to make a collar on the pipe, quite simple - you will need ordinary clamps, of any design and a piece of dense rubber, which will act as a gasket.


The place of the leak is tightly bandaged with rubber, after which clamps are put on at both ends - there must be at least two of them. In the absence of such, you can use an ordinary wire, through which the junction is pulled on both sides. It should be noted - despite the fact that such a "repair" may last for several years - this solution is temporary.
Rubber pipe bandage
Do-it-yourself clamp - a simple and effective solution to the problem
A collar is a useful and sometimes irreplaceable thing in the household. With its help, it is always possible to ensure a tight connection of hoses, pipes, pipelines, both flexible and rigid. In technology, there are a great many types of clamps for various purposes. A thrifty owner will always find them in tools for all occasions.
However, there are situations when there is no suitable device at hand, and the problem needs to be solved urgently. For example, a fistula has formed in the heating or plumbing system, and water rushes menacingly to the floor. Even worse, on the road by car, a pipe fell off in the interior heating system or in the engine cooling system. A mounting clamp among the tools is missing.
How to be in such cases? Is it possible to make a collar with your own hands? What is needed for this?
Putting on a pipe is easy
Often in our homes, metal pipes rust and leak. These areas require repair or replacement. However, our home craftsmen solve the problem quickly and efficiently with the help of clamps that “decorate” the interiors of our apartments for many years.
How to quickly make a pipe clamp with your own hands? What will be needed for this?
Tools needed for making:
- hammer, pliers, drill;
- drills with a diameter of 6 or 8 mm;
- metal scissors or grinder;
- caliper, ruler;
- spanners.
In addition, you will need the following materials:
- a metal strip up to a millimeter thick (for example, stainless steel, galvanized sheet);
- a strip of rubber 3 mm thick;
- bolts, nuts 6-8 mm, washers for them.
How to make a pipe clamp
Making collars requires certain skills. Experienced plumbers advise to carry out work in the following sequence:
- depending on the damage, a strip of metal of the required width is cut;
- the circumference of the pipe is determined;
- the length of the workpiece is determined (4-5 cm must be added to the circumference);
- holes are drilled from one and the other edge of the strip at the same distance;
- with the help of pliers or a vice, the fastener ears are bent at a right angle to the strip;
- a rubber strip is cut along the width of the device and along a length slightly less than the circumference of the pipe.
It should be noted that a small clamp is pulled together with one bolt. It is advisable to tighten fasteners up to 6 cm with two bolts. Products with a width of more than 6 cm must be fixed with three bolts.
Installation
A do-it-yourself fixture should be carefully bent and adjusted around the circumference of the pipe so that the holes in its ears coincide coaxially.
Bending of clamps can be carried out on a piece of pipe of equal diameter with the repaired pipe. Then, when installed in place, the clamp unbends a little and is installed with little effort on the surface to be repaired.
Previously harvested rubber is put on the place of leakage under fasteners.
True, it must be remembered that a do-it-yourself device is a tool designed to temporarily eliminate the problem of sealing. It should not be delayed with the repair or replacement of corroding pipes, as the corrosion process will continue under it, and over time the problem will “come out” again.
Making a wire clamp
Very often, home craftsmen need to fasten rubber pipes or pipes tightly and securely. This can be while working in the garden, in the country or in the garage. In such cases, do-it-yourself wire clamp is made.
To make it, you must have on hand pliers and a screwdriver, preferably a Phillips one. It is best to take a special wire - knitting (it is soft and strong enough).
Fold the wire in half and throw it on the hose, thereby determining how much it will be needed for fasteners, taking into account 40-50 mm for twists. Then cut off the desired piece and fold it in half again. Use a screwdriver to make an eyelet at the bend and turn it half a turn. Spread the ends of the wire and wrap them around the tube.


With the help of pliers, the ends must be rolled clockwise for several turns. Finally, the do-it-yourself wire clamp is tightened with a screwdriver. In this case, it is necessary to ensure that the tightening force is sufficient for sealing and does not lead to a rupture of the wire.
With some skill and practice, the manufacture and installation of clamps does not cause difficulties. Wire homemade devices can serve without problems for a very long time. Replacing them with store ones is a matter of the aesthetic taste of the owner.
Now you know how to make a collar with your own hands. We hope that for every owner, home problems with repairing pipes, pipes and hoses will become an easy and easy practice.
Your gratitude for my article is a click on any button below. Thank you!
Plumbing pipe clamp - how to fix communications?
When it is necessary to connect pipes, and also not to disturb the design, the designer must think about the fact that they need to be hidden in those places where these communications will not be visible to the residents, and will not create inconvenience to the people working there. Using a steel pipe clamp, you can achieve a strong fixation, while easily obtaining a completely tight fastening. The standard design consists of a ring secured with a screw and nut.
To avoid corrosion, a special material with an anti-corrosion coating is used for the clamp. Inside, a layer made of durable microporous rubber is applied to the surface of the ring, it is needed to reduce vibration, which can destroy pipes. The most important indicators for the device can be called such characteristics as steel tape data, maximum tightening limit, clamp ring diameter. When choosing, we do not forget about the load under which we purchase a plumbing pipe clamp, and determine whether it will withstand it.
Reliability of fastening is also important, otherwise the clamp may break off the pipe. Various varieties, specially created for difficult working conditions, are able to withstand a fairly strong impact and pressure from the outside, while not stretching or deforming. Such pipe clamps can be used many times, because their characteristics are preserved after operation, which allows them to be used further for fastening.
The quality, reliability and manufacturer also determine how effective the fastening will be, how long the pipeline and the clamp itself will last. Not worth saving. We should not forget also that the goods market today is flooded with fakes - for example, a Chinese-made collar will cost an order of magnitude cheaper, but also have the appropriate quality, which will soon make itself felt. And by purchasing products from trusted companies operating in large cities and countries, you can save yourself from fakes.
Installation instructions
The installation of dowel-clamps is almost the same as the installation of ordinary dowels - the slight difference is that first a clamp is put on the cable, and then it is carefully hammered into the prepared recess. The drilled hole should fit the diameter of the fastener, but the depth is made 10 mm more than the length of the dowel. The maximum distance between the installed fasteners should not exceed 25 cm, on turns - no more than 10 cm.
Each type of fitting has its own installation method. The determination of fixation points takes into account the parameters of the fence, the horizontal and vertical directions of the wiring, the number and radius of corners, the weight of the cable, and the environment.These data are decisive for the optimal choice of how to fix the hardware, their required quantity, installation technology, as well as wiring and installation schemes.
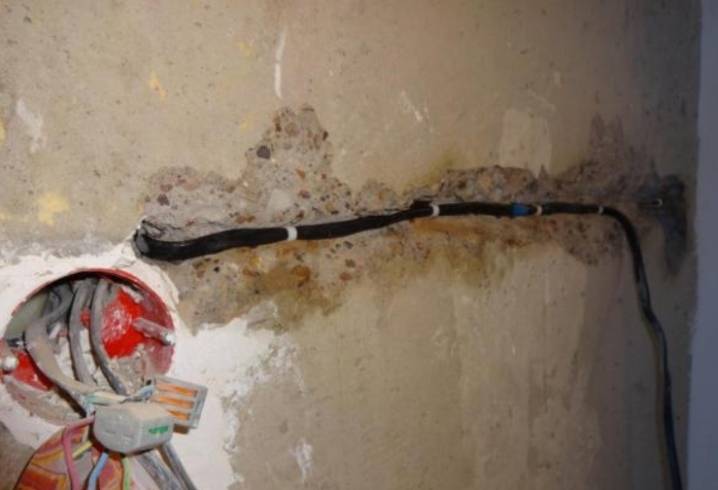
Hidden
The hidden method of main laying is used in residential premises, if the material of the supporting base allows you to lay strobes. For laying the wire in strobes or prepared cable channels, it is possible to additionally install dowel clamps. A single cable is most often fixed with alabaster, but this method is inefficient when it comes to a large specific gravity or a lot of wires. Alabaster successfully replaces clamps that crush many wires into a system group. Often, electricians mark wiring using tags mounted on a screed. Cables installed in special boxes are fixed in the same way.
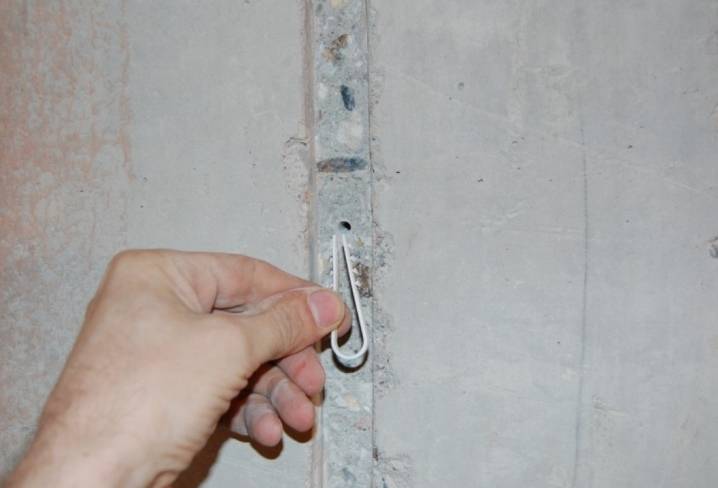
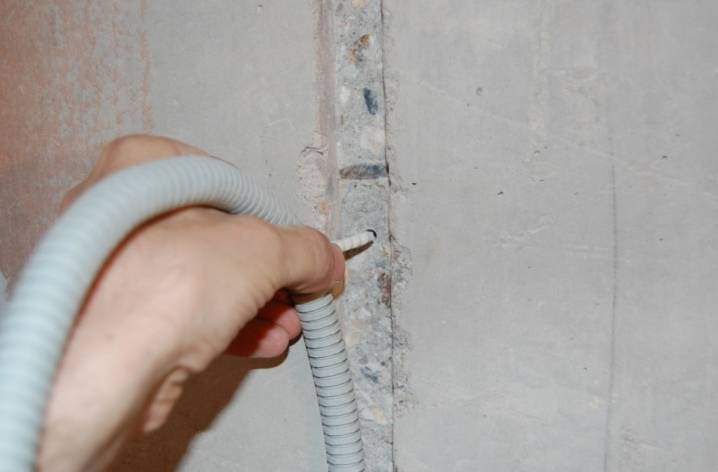
Installation of a flat cable using a dowel-clamp
Using a level and such an auxiliary tool as a cord, points are marked on the wall for fixing hardware. Pre-drill holes for dowels with an electric drill.
Clamps are fixed in place. The cable body is threaded through the clamp frame, pulling in such a way that there is no sagging.
Fixation on a self-adhesive pad
On painted or varnished surfaces, covered with plastic facades, pasted over with wallpaper, you have to use a self-adhesive pad. The base of such a platform is double-sided tape. It must be remembered that the adhesive composition will “flow” at temperatures above 450 degrees, and at low humidity it will lose elasticity, the base will dry out, harden and fall off the wall. Self-adhesive pad is the fastest installation method.A protective film is removed from the back side, the platform itself is pressed against the surface of the supporting base with force. A tie is inserted into the grooves of the fastener, which fixes the wires and cables.
- Cable clamps. For such fixation, a general installation plan is drawn up, attachment points are marked on the surface. Mounting holes are drilled for dowel fixing points. Depending on the selected type, clamps are installed. They can be fixed with self-tapping screws or screws in the fixture, inserted into the holes with serrated ends. Anchors are screwed into wooden surfaces.
- The dowel "helicopter" is pre-assembled from two halves, waiting for the final click. The assembled "helicopter" is inserted into the prepared hole, the spacer wedge is carefully driven in. After that, the line is fixed with a clamp loop.
Open
A similar method of laying backbone networks is used in non-residential buildings intended for production or storage.
Fixing a thin cable
In such cases, it is customary to use clamps with a nail. Thin TV and Internet wires are lightweight and do not require a reinforced structure. With this, small carnations installed in clamps do an excellent job.


Clip-on styling
Clips are used for mounting low-voltage cables on the soft surface of wooden walls. Hardware is fixed on the surface with self-tapping screws, each product has a pair of holes. The cable is pressed into the bracket until it is firmly fixed.
- The metal dowel “bug” grabs the pipeline or cable with a single-legged bracket, fixes it to the surface, then is screwed into a clean drilled hole.
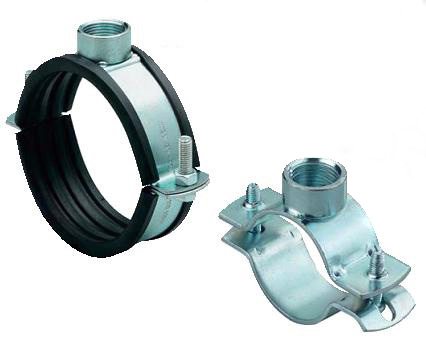
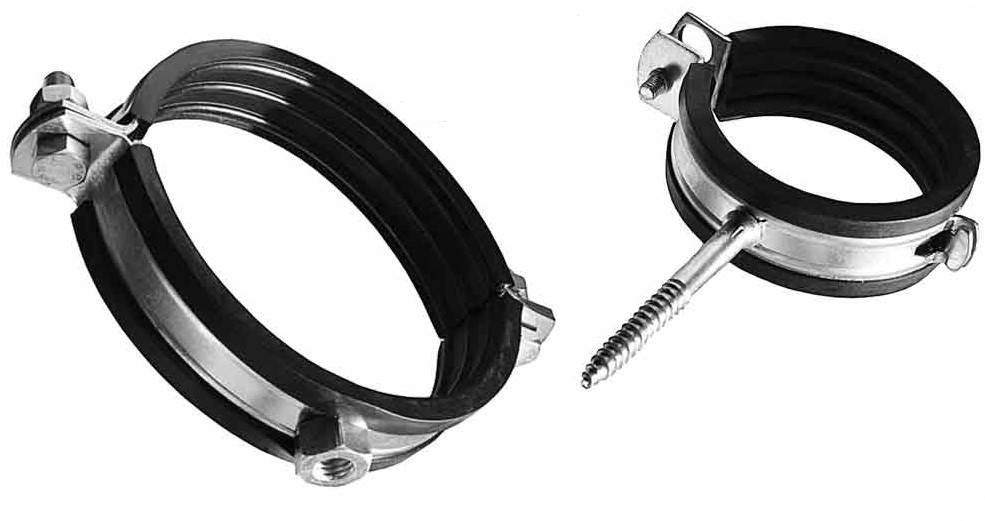
- The plumbing screw-on clamp with rubber pads is pre-disassembled. The dowel is mounted on the wall, after which the bracket is screwed onto the stud, a pipe is inserted into it and fixed with a second bracket.
- Dowel-clamp with tape. Mounting such hardware to the wall is quite simple - a loop is made from the tape, wires are inserted into it, after which the tape is fixed on the supporting support, the excess ends are cut off.
The following video tells about the installation of dowels-clamps.
How to make a wire clamp - step by step diagram
Step 1: Measure the required length of wire
First of all, let's bite off the wires as much as the diameter of our connection requires. We do not need measuring instruments, it is enough to wrap the edge of the wire around the pipe section
and think about the tips for twisting by eye, in most cases 50-60 millimeters is enough. After we fold the wire in half and bite off the excess with pliers. We bring the tips together so that they are at the same level.
Step 2: Proper Clamp Assembly
Now, when you have a wire bent twice in your hands, you need to make the correct “eye” at the place of the bend, and the diameter of the “eye” should be the same as the screwdriver, which must freely enter it. To maintain a similar size, it is enough to straighten the tips, insert a screwdriver between them and bring them together again. Of course, a Phillips screwdriver is best suited for this purpose, it is even along its entire length and does not have an increase, unlike a flat one. Next, you need to bend the resulting "eye" to the side, relative to the length of the wire, it will play the role of a lock.
Step 3: Detailed installation of a homemade clamp
You just made a wire clamp with your own hands, nothing if it is not attractive in appearance, the main thing is that it performs its own functions well. It remains to install it in its own main place and tightly twist it. To do this, go around it around the pipe section
, first of all in the form in which it is, and specifically doubly, and cross the tips together. After we put a screwdriver in the “eye”, we hook the second end and turn it clockwise a couple of times until a tight connection occurs. Do not forget that during the clamp you should not be very zealous, you must feel when you need to stop so that the wire does not burst. If there are very long tips left on the newly installed clamp, we advise you to bite them off with wire cutters.
It is very likely that the first time you will not be able to install a wire clamp made by yourself, maybe you will not be able to twist it, or you will overtighten it, but do not despair, you need to repeat the procedure for making the fastener again. We are sure that after several attempts you will get a good and tight connection, and this simple technique will always help you out in a difficult moment. Perseverance and work will grind everything! But still, for the future, keep in use a few clamps of various diameters, they will come in handy first of all!
It is literally impossible to do it with your own hands.
A handy standard tool is also of little help.
You need to use either a specialized tool, or make something similar.
At the dawn of my career, I made hand tools for crimping hydraulic hoses with my own hands. In those days, there were no professional tools.
First you need to figure out how a hose is pressed under high pressure.
Here it is with the tip pressed in:
The photo shows the working part with a thread and already on the hose there is a sleeve (coupling) that it is that is crimped in a circle.
In the context of a fitting with an already pressed coupling, it looks like this:
The pressing process is as follows:
- the hose is cut so that the end is even.
- a coupling is put on top of the hose and sinks further.
- a nut is mounted on the nipple with the thread outward.
- the nipple is inserted into the inner part of the hose until it stops at the end of the hose.
- the coupling also returns to the stop or end of the hose.
- a special crimp is put on the coupling and squeezes it in a circle 360 degrees
All processes, with the exception of the last, are done by hand and only the last is used with the use of a tool.
There are two ways to crimp the coupling without special equipment (during crimping, strong pressure must be created, since the coupling is made of a rather strong and thick material), such a coupling cannot be pulled off with clamps, and different types of pliers have an uneven shape and do not press evenly on the coupling.


Specifications of plastic clamps
Plastic options are inferior in strength to steel ones, but have increased elasticity and the ability to withstand high vibration. Suitable for creating movable supports, can be used to fix channels to a wall, ceiling or floor.
The main characteristic of plastic clamps is the diameter of the fastener ring.The largest diameter of the plastic model allows you to work with bends with a cross section of 110 mm
It is important to remember that the inner section of the plastic fastener must be equal to or slightly less than the outer diameter of the pipe.
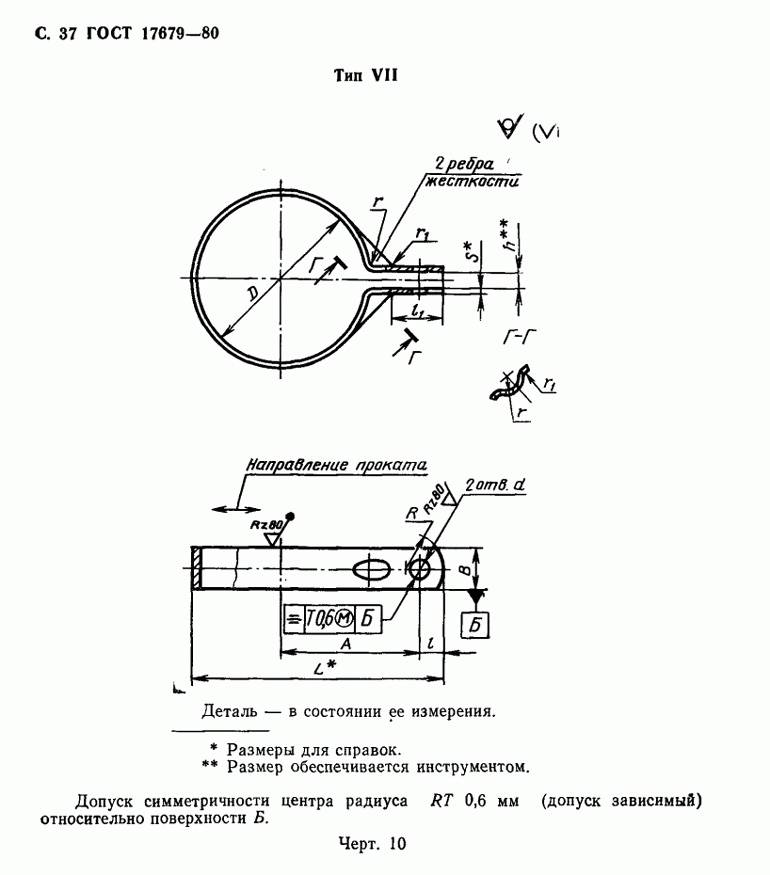
The main parameters for the design and dimensions of polymer clamps are set out in GOST 17679-80.
How to make and put a clamp on the pipe.
If you still have a piece of galvanized sheet ebb after installing windows, and old cameras are lying around in the garage, then you can make a clamp yourself. To do this, you will need the following
Materials:
- A piece of galvanized sheet 0.5-1 mm thick.
- A piece of rubber 1.5-3 mm thick, as a rule, this piece is cut from an old car inner tube, but any rubber can be used.
- 2 or 3 bolts M6 or M8 or M10 with washers and nuts, engravers are not required
Tools:
- Scissors for metal, or a jigsaw with a nail file for metal, or a grinder with a cutting wheel for metal.
- Drill with drill M7 or M9 (M10) or M12.
- Pliers or vise.
- A hammer.
- Spanners.
The principle of operation of the clamp is as follows:
- The rubber is tightly pressed against the defect on the pipe and does not allow water to flow out of the pipe, the more uneven the surface of the pipe, the thicker the rubber should be.
- In order to tightly hold the rubber on the pipe, tin is needed - this is the frame of the clamp, the more uneven the surface of the pipe and the denser the rubber, the thicker the tin should be.
- The bolts tightly tighten the tin frame and provide the necessary tightness of the adjoining rubber to the pipe. The more uneven the surface of the pipe, the denser the rubber, and the thicker the tin, the larger the diameter of the bolts. The thicker and softer the rubber, the longer the bolts will be needed.
The collar looks like this:
The sequence for making the clamp is as follows:
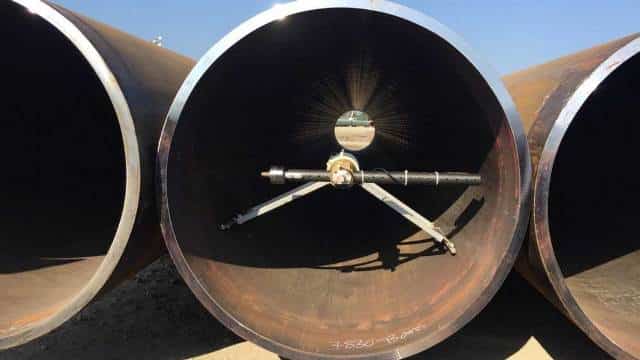
- Determine the diameter of the pipe using a caliper (or a square and a ruler for large pipe diameters).
- Cut out the tin frame of the clamp with a width of 4-8 cm and a length equal to the circumference of the pipe + 3-4 cm for the ears. The larger the diameter of the pipe, the wider the clamp becomes. The circumference of the pipe is equal to the diameter multiplied by the number P = 3.14. Marking can be done with a marker, a children's felt-tip pen and even a sharp screwdriver if there is no special scriber.
- Mark and drill holes for the fixing bolts on the ears, the more accurately you do this, the easier it will be to install the clamp. If you use wide washers, then the holes can be drilled 2-3 mm larger than the diameter of the bolts, this will simplify the installation of the clamp. For clamps with a width of more than 6 cm, it is advisable to drill holes for 3 bolts.
- Mark the ears and bend them 90 about. holding a piece of tin in a vise, or with the help of pliers.
- Go around the tin around the pipe, on which you will put the clamp on, so that the ears connect and the drilled holes match. If necessary, tap the tin with a hammer, but this is usually not required.
- Cut a rubber gasket with a width equal to the width of the clamp and a length equal to the circumference of the pipe - 0.5-1 cm.
- Insert the rubber gasket into the clamp.
The clamp installation sequence is as follows:
- Separate the ears of the clamp so that the clamp can be put on the pipe.
- Put the clamp on the pipe so that the rubber gasket covers the pipe defect well. Ideally, the pipe defect should be in the center of the rubber gasket. If you did everything correctly, then there will be a distance of 1 - 3 cm between the ears. When tightened with bolts, it will decrease
- Insert the bolts with washers and wrenches or a wrench and pliers, tighten the bolts so that the rubber gasket is pressed against the pipe as much as possible.
Almost always, clamps are placed on a leaking pipe without shutting off the water supply or wastewater, so you can immediately evaluate the quality of the clamp installation. Wipe the clamp and pipe dry and wait 5-10 minutes, if water does not ooze from under the clamp, then everything is fine.
The clamp can stand for years and even decades, but it is still better to weld a pipe, especially a plumbing or heating pipe.
If, when installing the clamp, you used too long bolts and they annoy you or your wife with their sharpening appearance, they can be cut with a hacksaw or a grinder.
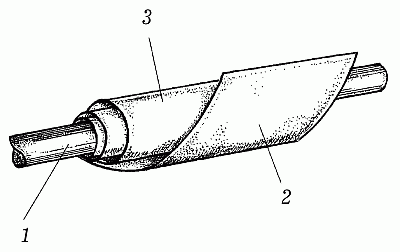
A simpler clamp is made from a strip of rubber tube and a piece of copper wire. Rubber is wound with tension on the pipe at the point of damage to the pipe. The rubber is fixed with the first turn. Winding is necessarily overlapped. The end of the rubber is fixed / fixed / with a wire winding also with tension. Such a collar on the heating pipe serves for 5 years without problems.
2 or 3 bolts M6 or M8 or M10 with washers and nuts, engravers are not required
Note: Perhaps your comment, especially if it concerns the calculation of structures, will not appear in the general list. Why, is explained in sufficient detail in the article Make an appointment with a doctor (link in the header of the site).


