- Efficient infrared emitter
- Thermal gas gun
- 4 Use of boiler equipment
- Advantages of homemade devices
- Working with pipes
- Gas heaters
- How to make your own heat gun
- Making a desktop fan heater
- Selection of necessary materials
- Assembly of body parts
- Installation of heating elements
- heating elements
- Step by step assembly diagrams
- oil battery
- Mini Garage Heater
- Infrared panel for heating
- fiery
- Video: portable oil filter heaters
- DIY gas fireplace
- Pipe heater construction
Efficient infrared emitter
Any infrared emitter that is used to heat a room is distinguished by its efficiency and high efficiency. All this is achieved thanks to the unique principle of operation. Waves in the infrared spectrum do not interact with the air, but increase the surface temperature of objects in the room.
Those subsequently transfer heat energy to the air. Thus, the maximum of radiant energy transforms into thermal energy. It is precisely because of the high efficiency and efficiency, and also because of the low cost of structural elements, that infrared heaters are increasingly being made independently by ordinary people.
IR emitter based on graphite dust. Homemade room heaters,
Epoxy adhesive.
operating in the infrared spectrum, can be made from the following elements:
- powdered graphite;
- epoxy adhesive;
- two pieces of transparent plastic or glass of the same size;
- wire with a plug;
- copper terminals;
- thermostat (optional)
- wooden frame, commensurate with pieces of plastic;
- tassel.
crushed graphite.
First, prepare the work surface. For this, two pieces of glass of the same size are taken, for example, 1 m by 1 m. The material is cleaned of contaminants: paint residue, greasy hand marks. This is where alcohol comes in handy. After drying, the surfaces proceed to the preparation of the heating element.
The heating element here is graphite dust. It is a conductor of electric current with high resistance. When connected to the mains, graphite dust will begin to heat up. Having gained a sufficient temperature, it will begin to emit infrared waves and we get a do-it-yourself IR heater for the house. But first, our conductor needs to be fixed on the work surface. To do this, mix the carbon powder with the adhesive until a homogeneous mass is formed.
Homemade room heater.
Using a brush, we make paths from a mixture of graphite and epoxy onto the surface of previously cleaned glasses. This is done in a zigzag pattern. The loops of each zigzag should not reach the edge of the glass by 5 cm, while the graphite strip should end and begin on one side. In this case, it is not necessary to make indents from the edge of the glass. Terminals for connecting electricity will be attached to these places.
We put the glasses on top of each other with those sides on which graphite is applied, and fasten them with glue.For greater reliability, the resulting workpiece is placed in a wooden frame. Copper terminals and a wire are attached to the exit points of the graphite conductor on different sides of the glass to connect the device to the mains. Next, home-made heaters for the room must be dried for 1 day. You can connect a thermostat in a chain. This will simplify the operation of the equipment.
What are the advantages of the resulting device? It is made from improvised means, and therefore, it has a low cost. It heats up no higher than 60 ° C, and therefore it is impossible to burn yourself on its surface. The glass surface can be decorated at your discretion with a film with a variety of patterns, which will not violate the integrity of the interior composition. Do you want to make homemade gas heaters for your home? The video will help solve this problem.
Film infrared heating device. For full heating of a medium-sized room, it is recommended to use ready-made film materials capable of emitting IR waves. They are present in abundance in today's market.
Required structural elements:
- IR film 500 mm by 1250 mm (two sheets); Homemade film heater for the apartment.
- foil, foamed, self-adhesive polystyrene;
- decorative corner;
- two-core wire with a plug;
- polymer adhesive for wall tiles;
- decorative material, preferably natural fabric;
- decorative corners 15 cm by 15 cm.
Preparing the wall surface for a home-made heater for an apartment begins with fixing the thermal insulation. Its thickness should be at least 5 cm. To do this, the protective film is removed from the self-adhesive layer and the polystyrene is attached to the surface with the foil up.In this case, the material must be pressed tightly against the wall. An hour after the end of work, you can proceed to the next step.
IR Film Sheets connected to each other in series. Glue is applied to the back of the material with a spatula. All this is attached to the previously mounted polystyrene. It will take 2 hours to securely fix the heater. Next, a cord with a plug and a thermostat are attached to the film. The final step is decoration. To do this, the prepared fabric is attached over the film using decorative corners.
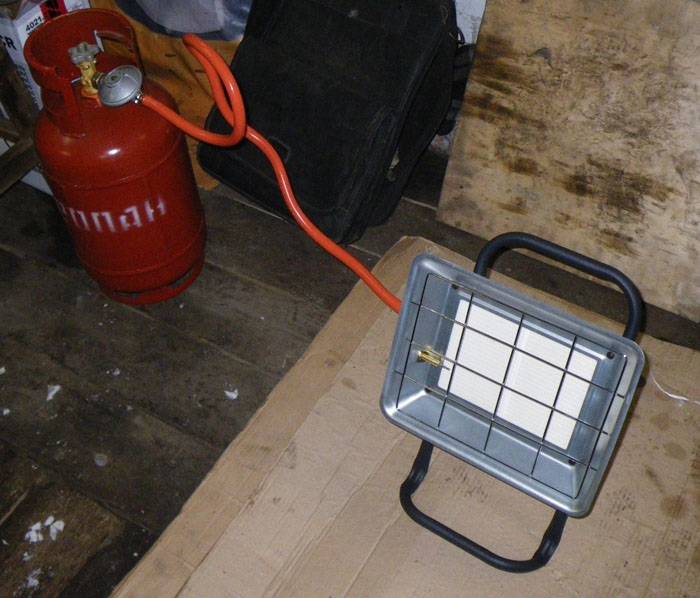
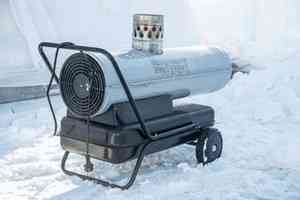
Thermal gas gun
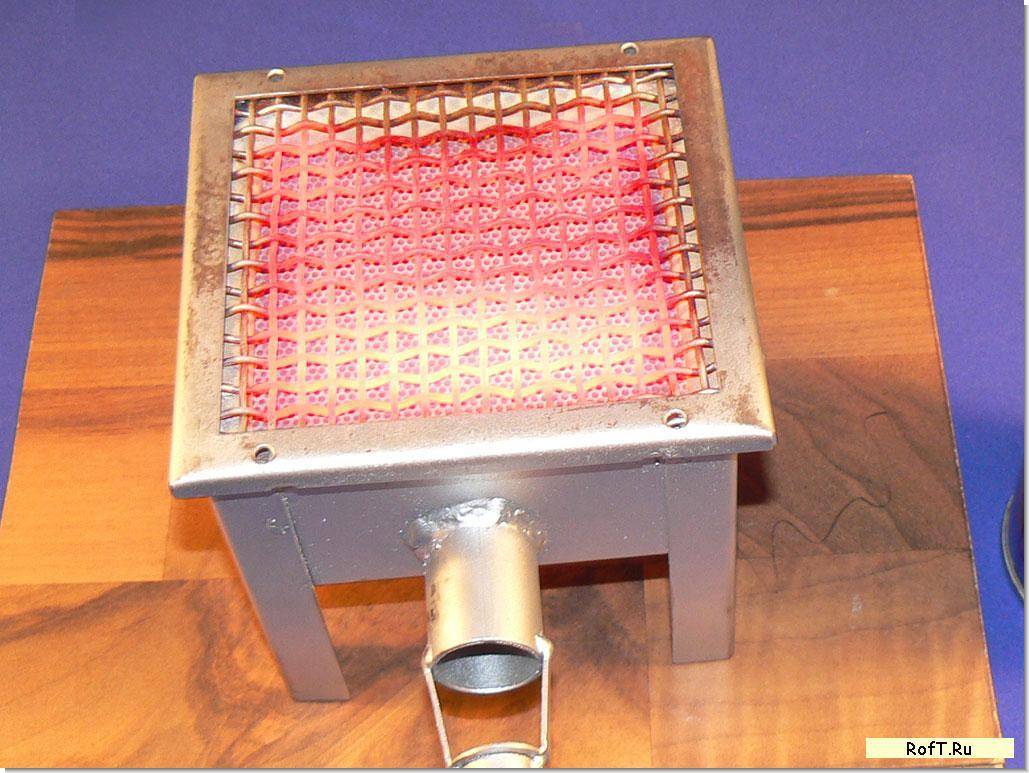
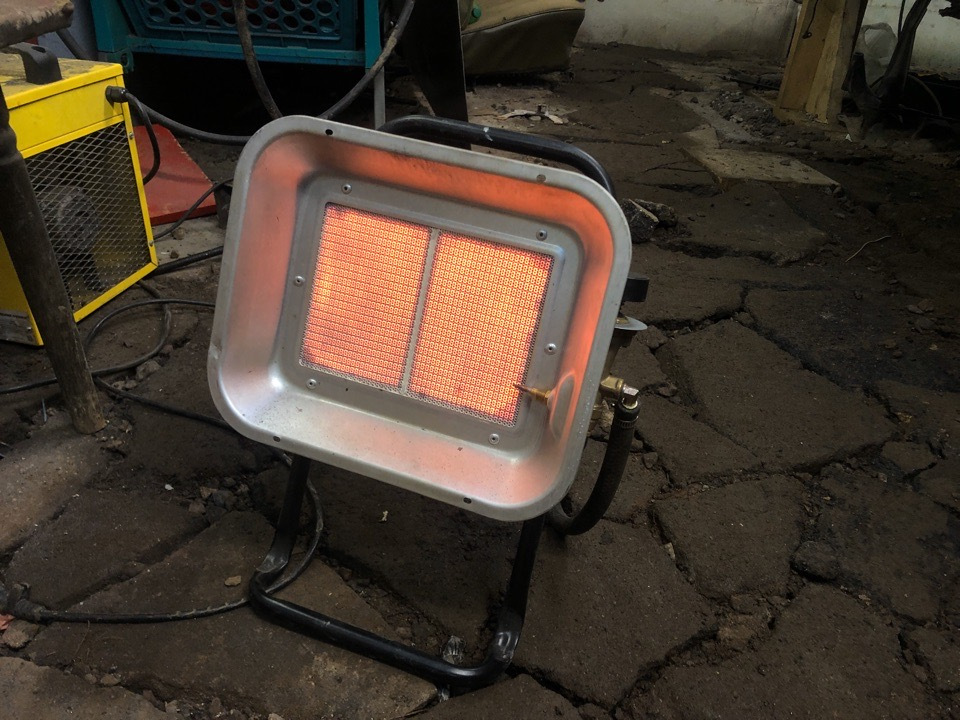
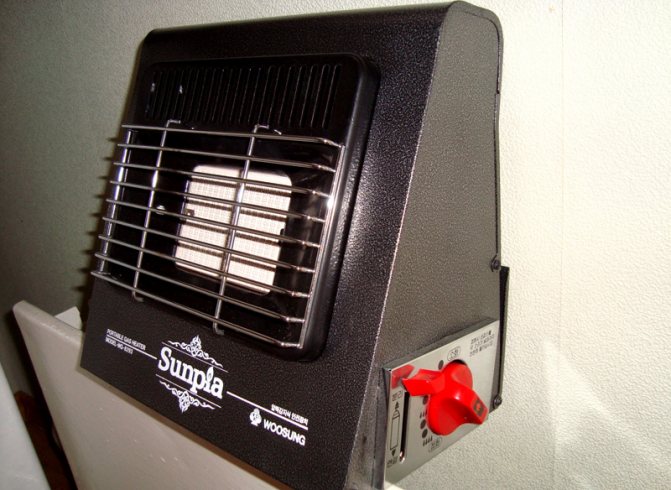
When choosing a homemade heater, be sure to pay attention to the safety of operation in a closed room and comply with certain requirements. Infrared heaters use ceramic honeycomb burners. During the combustion process, ceramic elements are heated, then the heat is transferred to the surrounding air in front of the burner
Then the heated air rises and spreads throughout the garage. The power of this type of heaters is up to 6.2 kW, they are much more efficient than electric ones. Disadvantage: substances spent during the combustion of fuel remain in the garage, therefore, mandatory ventilation is required
During the combustion process, ceramic elements are heated, then the heat is transferred to the surrounding air in front of the burner. Then the heated air rises and spreads throughout the garage. The power of this type of heaters is up to 6.2 kW, they are much more efficient than electric ones. Disadvantage: substances spent during the combustion of fuel remain in the garage, therefore, mandatory ventilation is required
Infrared heaters use ceramic honeycomb burners.During the combustion process, ceramic elements are heated, then the heat is transferred to the surrounding air in front of the burner. Then the heated air rises and spreads throughout the garage. The power of this type of heaters is up to 6.2 kW, they are much more efficient than electric ones. Disadvantage: the substances used during the combustion process remain in the garage, so ventilation is required.
Catalytic gas heaters do not have such disadvantages. The process of gas combustion takes place in special cells with a catalyst and almost all combustion products are neutralized. The power of such devices is 3.3 kW.
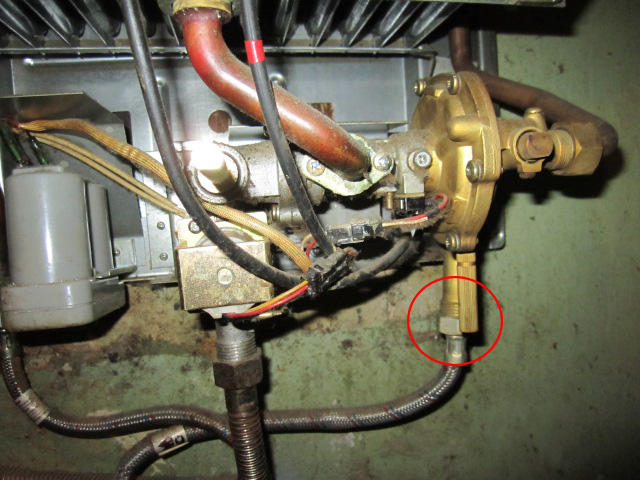
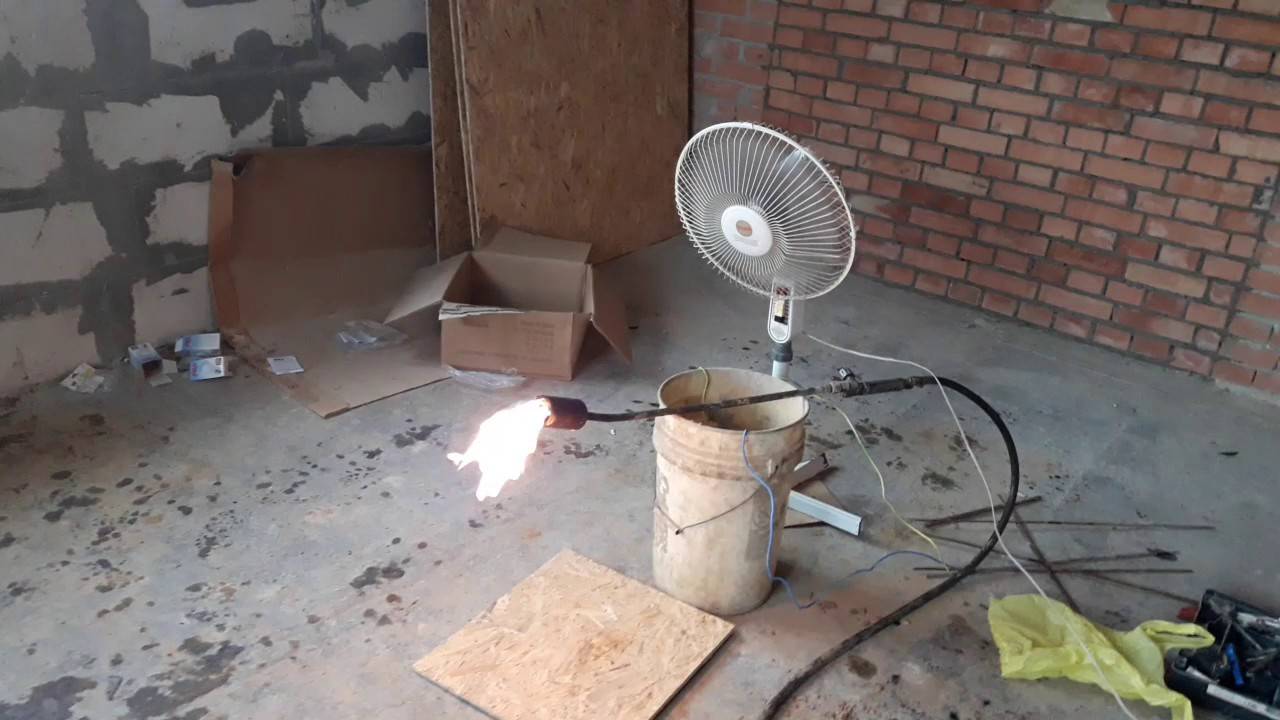
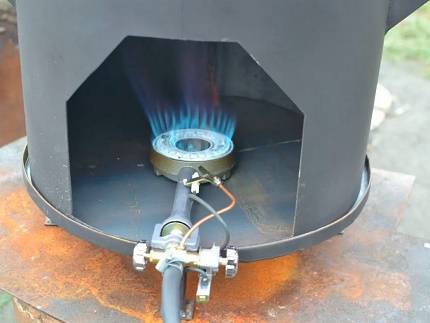
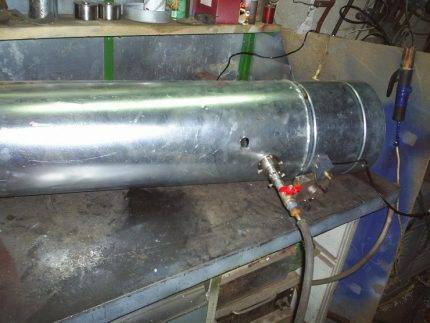
A thermal gas gun is often used to heat the garage. Its main drawback is that the emission of burnt fuel and a warm air stream are not separated, but pass into the room. Such a device can be made independently and so that it does not suffocate and burn. As a basis for the design, you can take a gas burner with a small canister made in China. First, a gas supply pipe is sawn in the middle, then a suitable piece of pipe with a diameter of 80 mm is welded to lengthen it. Next, holes for air with a diameter of 5 mm are drilled and the diameter of the burner jet increases to 2 mm.


Gas gun scheme:
- fan;
- gas-burner;
- burner extension (pipe d 80 mm);
- heat exchanger housing (pipe d 180 mm);
- hot air outlet.
Upgraded version of the gun:
- gas burner extension;
- plates to increase the heat exchange area;
- gas-burner;
- fan;
- air damper with lever;
- heat exchanger housing.
4 Use of boiler equipment
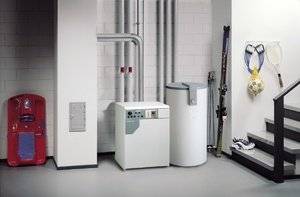
A more fundamental and long-term way to heat a garage is to install a gas boiler. This method is good when the garage is used daily, it can be used as workshops.
- 1. It must be a non-freezing room with a height of at least 2 m and a total area of 4 m².
- 2. The presence of supply and exhaust ventilation.
- 3. Walls must be of non-combustible material.
- 4. The front door is at least 0.8 m wide and opens outwards.
In order not to use additional electrical equipment in the piping system, it is possible to organize the supply of coolant by gravity. This fact is especially important when operating detached garages, where there is no electrical supply.
The whole system is a closed circuit of the boiler, pipelines and heating devices. Gas boilers can be conventional or condensing. In the first designs, the formed steam is removed through the chimney, and part of the heat also leaves with it.
In condensing boilers, steam is used to additionally heat the coolant, which makes them more economical. If the garage is heated intermittently, then antifreeze must be poured into the system, especially in winter.
Advantages of homemade devices
Home-made appliances for heating a city apartment, a country house or a summer residence have significant advantages over factory products. They are as follows:
- Possibility of manufacturing from affordable and cheap materials, which leads to a reduction in the cost of the finished device.
- Simple and compact design that can be used in a variety of environments.
- Ease of use and transportation.
- High efficiency with silent operation of structural elements.
- Self build quality.
Today, infrared heaters are available for self-manufacturing, which are the safest and most efficient in operation. If more powerful equipment is required, then you can assemble an oil cooler, an alcohol heater, a heat gun, a battery and gas device.
Working with pipes
After the scheme of the oil heater is selected, it is necessary to manufacture its body. We make a drawing, determine the dimensions and start working as a grinder. Pipes are cut to length in the right quantity. After stripping the ends, they are carefully and carefully brewed. The operation of the entire heater as a whole will depend on the quality of welding. A leaking seam is not only a nuisance, but also a possible cause of a fire. When welding the ends of the pipes, leave one (on the lowest pipe) free. Subsequently, a heating element will be inserted into it. This means that the stub will have a different configuration.
Finished pipes are tied together. The piping is done with pipes, only of a smaller diameter. On the uppermost pipe, it is necessary to provide a place where the filler plug will be located. Structurally, it can be made in the form of a welded short run with a coupling, one side of which will be welded. Using your locksmith and mechanical experience, the heater configuration can be made more aesthetic, unlike the one in the photo. By the way, the case can be not only tubular. For this purpose, radiators from cars, old cast-iron radiators and other closed containers are well suited.
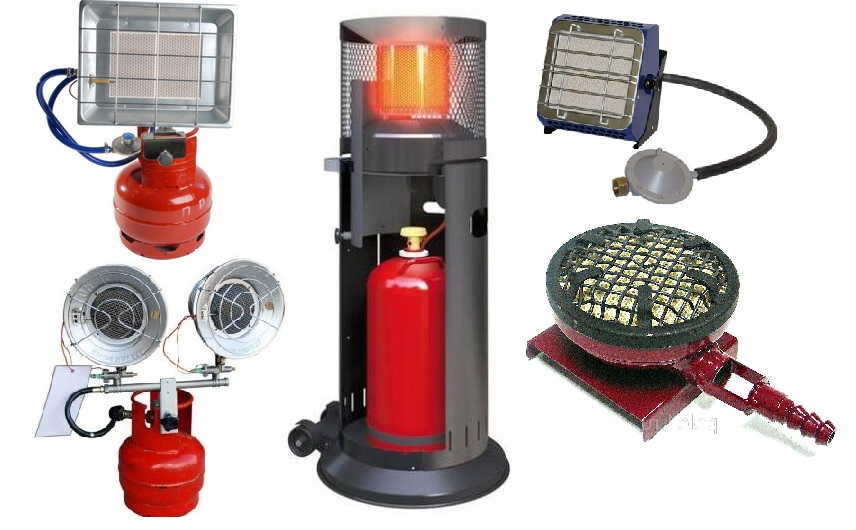
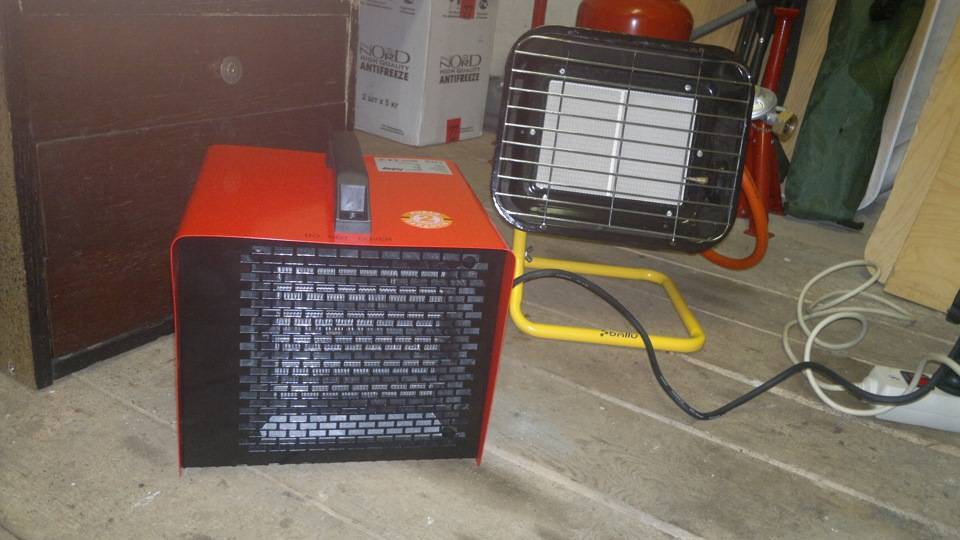
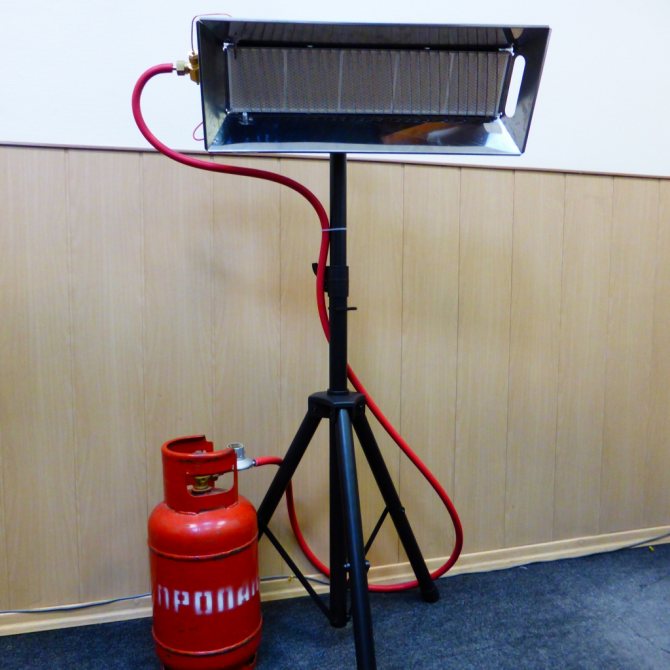
Gas heaters
- saving electricity;
- compactness;
- high power;
- rapid heating of the building;
- gas cylinders are inexpensive and also widely available.
Mobile heaters are convenient not only because they can be placed anywhere, but also because they can be taken to another place.
Increasingly, gas burners are chosen for intermittent heating, because these devices are small and economical. According to their design, such heaters are divided into 2 types:
- open-type combustion chamber - safety valves and air analyzers are installed in them to block gas leakage;
- closed camera - such devices are more safe and reliable, because harmful substances do not enter the room.
To operate gas stoves, you will need a separate boiler room at a regulated distance from the garage, since gas equipment in the same room with the machine is prohibited! And also be sure to need special permission from the relevant services.
If the goal is to warm up the motorhome from time to time, you can use gas cylinders. Calculate the volume of gas required based on the intended mode of use and the power of the operating unit. You need to keep the cylinders in a metal cabinet, preferably insulated, which is located above the floor level.
Gas units are of several types:
- heat guns;
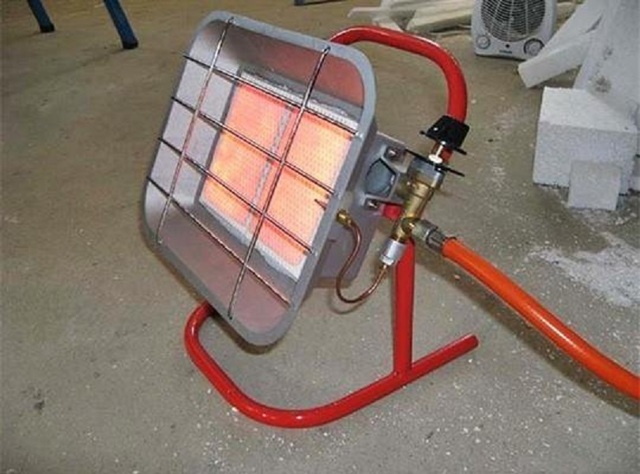
- infrared burners;
- gas convectors;
- catalytic devices.
As for the latter, their work process takes place without a flame - a chemical reaction, the result of which is the oxidation of gas with oxygen, generates heat. The catalyst here is platinum or other elements of a similar group. These heaters are lightweight, easy to operate, but there is one drawback - they are quite dangerous to handle.
A few words about the convector - it burns the gas-air mixture in a tank, which is separated from the room by hermetic walls. A prerequisite is the prevention of drafts. Often, oxygen is taken from the outside of the garage, and combustion products are thrown there, so you can not be afraid of carbon monoxide poisoning.
Infrared burners do not heat the air, but nearby objects. This method of warming up is also very efficient and affordable for the garage space.
Heating the garage with a heat gun is the most effective way to heat the air. The device will instantly raise the temperature to the required value. Often, a gas gun is used in large garage complexes and service stations. The principle of operation is the combustion of gas and the operation of the fan, as a result, warm air is blown.
When choosing a gas gun, you should consider the following nuances:
- quadrature of the garage;
- how much time people spend in a heated room;
- what is the level of thermal insulation of the building.
An important point - these heat guns are contraindicated at facilities where people spend a lot of time, because a lot of decay products accumulate in the air. The advantage of the device is mobility, the disadvantage is the exhaust of harmful substances.


How to make your own heat gun
The base will be a gas burner and a cylinder that lighters fill. We cut the gas tube in half, and then solder the desired piece of pipe with a diameter of no more than 90 mm. Then we mark the pipe into which the burner is inserted and make holes - about 5 mm - for air circulation. And the exit of the burner jet itself is drilled up to 3 mm.
Compliance with all safety standards and regulations when working with a gas gun is mandatory!
What you need to consider when collecting a gun with your own hands:
- it is necessary to exclude the possibility of ignition and explosion of the device;
- heating elements should not emit toxic substances and dry the air;
- there must be an ability to quickly heat the garage;
- the unit should occupy a minimum of space;
- the cost of a home-made device should not exceed purchased counterparts;
- it is necessary to equip the equipment with thermostats to maintain a comfortable temperature in the building.
What is forbidden to do with a working heat gun:
- direct a hot stream of air at flammable substances;
- use the unit as a dryer for things;
- fill the balloons yourself.
Making a desktop fan heater
This type of device is a heater and a fan in one person. If desired, a homemade fan heater can be used as an impromptu air conditioner.
This type of heater is convenient because it allows you to adjust the heating temperature and the speed of rotation of the cooler.
Selection of necessary materials
To create a fan heater, you will need the following materials:
- rheostat;
- switch;
- power connector;
- electric wire;
- LED Strip Light;
- 12 volt computer cooler;
- three-ampere power supply for 12 volts;
To fix the heating element, you will also need two ten-centimeter bars of copper wiring with a cross section of 1.5 sq. mm.
From the tools you need to prepare:
- jigsaw;
- perforator or drill;
- soldering iron;
- hole saw;
- glue for woodworking;
- "moment" or superglue;
To clean wooden blanks, eliminating burrs along the edges, you will also need fine-grained sandpaper.
Assembly of body parts
The future heater will have the shape of a cube.The body of the device is assembled from wooden boards 9 mm thick.
- two square blanks measuring 12 * 12 cm;
- 3 parts measuring 10.2 * 10.2 cm;
- two rectangular blanks 12 * 10.2 cm;
- four small rectangles measuring 1 * 1.5 cm.
To make the legs of the structure, 2 blanks 3 cm long are sawn off from a wooden stick D12 mm.
To simplify your task, make paper patterns, the dimensions of which correspond to the dimensions of the blanks 12x12 cm. The markings for the location of the holes are applied directly to the patterns. They are applied to each side and drilled through.
In a workpiece 10.2 * 10.2 cm, maintaining a distance of 2.5 cm from the edge, a hole D7 mm is made. On the second blank, two of the same holes are made, keeping a distance of 2.5 cm between them. On the third blank, 10.2 * 10.2 cm, a through hole D9 cm is made in the center.
Holes D5 mm are made in each of the four rectangular blanks 1 * 1.5 mm in size.
On the long side of a rectangle measuring 12 * 10.2 cm, stepping back from the edge by 1.2 cm, two holes D12 mm are made, maintaining a distance between them of 7 cm.
A square blank with a drilled hole of 9 cm is installed inside the body. After that, the last rectangular part is attached, closing the body of the structure. At the final stage, the legs are glued.
Installation of heating elements
A spring stretched between two copper rods will act as a heating element. To determine if a spring is suitable, you need to connect it to a 12-volt power source and measure it with a multimeter.


So, to create a warm flow, it is quite enough if the multimeter readings are 2.5 A. With such parameters, with a power supply of 12 W, about 30 V of heat will be generated.
The selected spring is soldered to copper rods, the ends of which are fixed to blanks measuring 1x1.5 cm. The assembled structure is glued to the corners of the case. Bare "tails" of the electric cable are soldered to the ends of the rods. After that, a bar equipped with holes is attached.
Having fixed the cooler inside the case, the same manipulations are performed with the rheostat, switch and power connector.
If all structural elements are connected correctly, then at the moment the rheostat is turned on on LED strip blue light will turn on. At the moment the switch is turned on, the LED strip will acquire a red tint, which, against the background of the main blue, will create a purple color. After that, the heater spring will begin to heat up.
The assembled structure from the outside can only be sanded and treated with wood wax, or varnished in 2-3 layers.
Due to its presentable appearance, such a heater can be safely used not only for heating the garage, but also for arranging living rooms.
Alternative options for economical garage heating are described in this article.
heating elements
For heaters. types you will have to buy a heating element: 220 V electrical appliances with open heaters are extremely dangerous. Here, pardon the expression, you need to think first of all about your own skin with property, whether there is a formal ban or not. With 12-volt devices it is easier: according to statistics, the degree of danger decreases in proportion to the square of the ratio of supply voltages.
If you already have an electric fireplace, but it does not heat well, it makes sense to replace a simple air heating element with a smooth surface in it (pos. 1 in the figure) with a ribbed one, pos. 2. The nature of the convection will then change significantly (see below) and the heating will improve when the power of the finned heating element is 80-85% of the smooth one.

Types of heating elements
A cartridge heater in a stainless steel case (pos. 3) can heat both water and oil in a tank made of any structural material. If you take one, be sure to check that the kit includes gaskets made of oil-thermo-petrol-resistant rubber or silicone.
The copper water heating element for the boiler is supplied with a tube for the temperature sensor and a magnesium protector, pos. 4 which is good. But they can only heat water and only in a stainless steel or enameled tank. The heat capacity of oil is much less than that of water, and the body of the copper heating element will soon burn out in oil. The consequences are severe and fatal. If the tank is made of aluminum or ordinary structural steel, then electrocorrosion due to the presence of a contact potential difference between metals will very quickly eat the protector, and after that it will eat through the body of the heating element.
T. naz. dry heating elements (pos. 5), like cartridge heating elements, are capable of heating both oil and water without additional protection measures. In addition, their heating element can be changed without opening the tank and without draining the liquid from there. The only drawback is that they are very expensive.
Step by step assembly diagrams
The choice of an economical and effective option is given enough time so that later you do not have to be disappointed. Do-it-yourself assembly of an electric heater is not so complicated that a novice master could not handle it. The assembly principle of almost all structures is similar, therefore, having mastered the manufacture of one device, it is easy to switch to another.
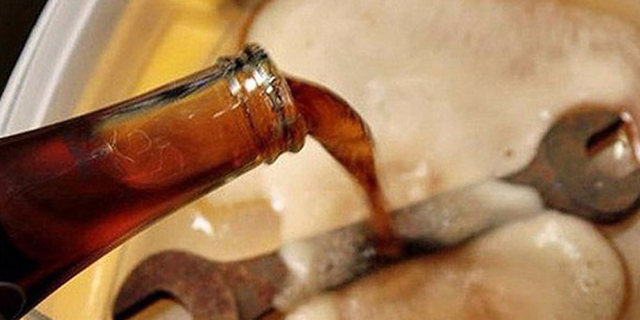
oil battery
Oil heaters are very popular. Their principle of operation is very simple: the oil inside the pipes is heated by a heating element inserted inside. Such a device is very simple to manufacture, has good efficiency and safety indicators.
Making your own oil heater is easy, you just need to follow the instructions
They do it like this:
- They take a heating element (power - 1 kW) and an electrical wire with a plug for an outlet. Some craftsmen install a thermal relay for automatic control. It is also purchased in the store.
- The body is being prepared. An old water heating battery or a car radiator will do for this. You can weld the body of the apparatus from pipes yourself, if you have the skills of a welder.
- Two holes are made in the body: at the bottom - for inserting a heating element, at the top - for filling oil and replacing it.
- Insert the heating element into the lower part of the body and seal the attachment point well.
- Oil is poured at the rate of 85% of the internal volume of the housing.
- Connect control and automation devices, well isolate electrical connections.
Do-it-yourself infrared heater;
Mini Garage Heater
Sometimes a very compact heater is required for certain purposes. In such situations, a mini fan heater made from an ordinary tin can can help out.


To make it, do the following steps:
- They prepare a large can of coffee or other products, a fan from a computer, a 12 W transformer, 1 mm nichrome wire, a diode rectifier.
- A frame is cut out of the textolite according to the diameter of the can and two small holes are made in it to tension the incandescent spiral.
- Insert the ends of the nichrome spiral into the holes and solder them to the stripped electrical wiring. For variability of modes and reliability, several spirals are connected in parallel and a power regulator is installed.
- Assemble the electrical equipment of the heater. Solder well and isolate all connections.
- Mount the fan inside the can with bolts and a bracket.
- The electrical wires are well fixed so that they do not overheat and do not fall into the cavity of the fan when the heater is moved.
- For air access, about 30 holes are drilled in the bottom of the jar.
- For safety, a metal grill or a lid with holes is put on in front.
- For stability, a special stand is made of thick wire.
- Connect to the network and check the device.
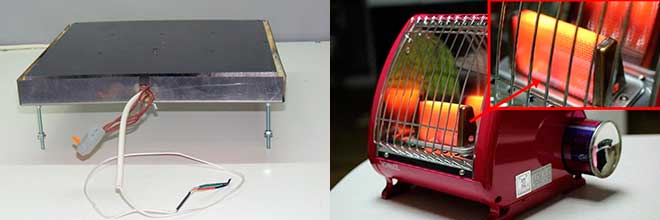
Infrared panel for heating
Recently, infrared ceramic heaters have become increasingly popular. It is much more difficult to make such a device with your own hands if you do not buy ready-made thermal panels, but it is quite possible.
You can make a similar modern infrared heater at home
To do this, do the following:
- Materials are prepared: fine graphite powder, epoxy glue, 2 metal-plastic or ceramic plates of 1 m² each, 2 copper terminals, wooden blanks for the frame, electrical wires and a switch, there may be a power regulator with a more complex version.
- Draw on both plates a mirror arrangement of spirals on the inside. The distance from the edge is about 20 mm, between the turns and the terminals - at least 10 mm.
- Graphite is mixed with epoxy resin 1 to 2.
- Lay the plates with the pattern on the table, smooth side down.
- A mixture of graphite and glue is applied in a thin layer according to the scheme.
- One of the sheets is placed on top of the second sheet, with the smooth side facing you. Hold them tightly to each other.
- Insert the terminals in the pre-designated output points.
- Let dry.
- Connect electrical wires and check operation.
- Make a wooden frame for stability.
- Equip the device with a thermostat.
DIY homemade heater;
2 id="flamennye">Fiery
Powerful gas heaters for large rooms with catalytic afterburning are expensive, but record-breaking economical and efficient. It is impossible to reproduce them in amateur conditions: you need a microperforated ceramic plate with platinum coating in the pores and a special burner made of precision-made parts. At retail, one or the other will cost more than a new heater with a guarantee.

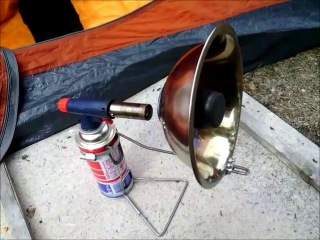
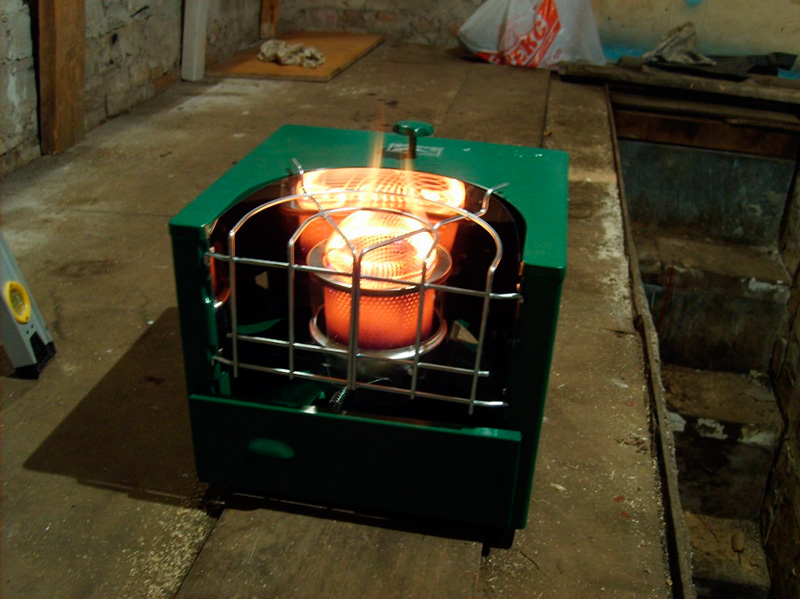
Camping mini-heaters on gas
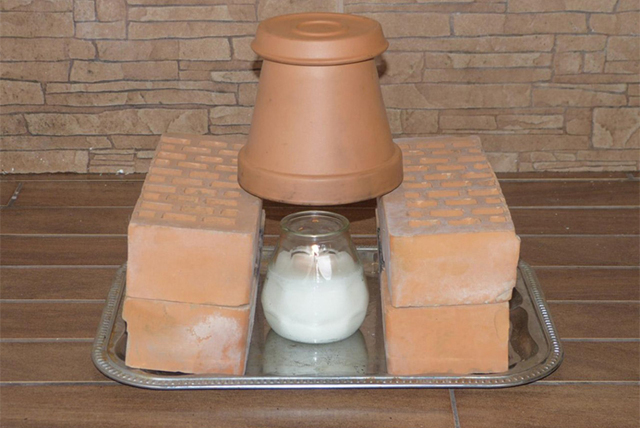
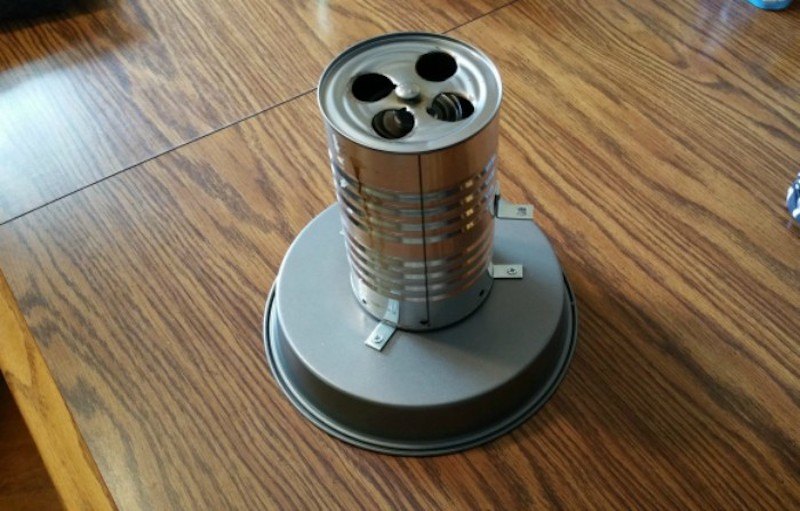
Tourists, hunters and fishermen have long come up with low-power afterburner heaters in the form of an attachment to a camp stove. These are also produced on an industrial scale, pos. 1 in fig. Their efficiency is not so hot, but it is enough to heat the tent until lights out in sleeping bags. The design of the afterburner is rather complicated (pos. 2), which is why factory tent heaters are not cheap. Fans of these also make a lot, from tin cans or, for example. from automotive oil filters. In this case, the heater can work both from a gas flame and from a candle, see video:
Video: portable oil filter heaters
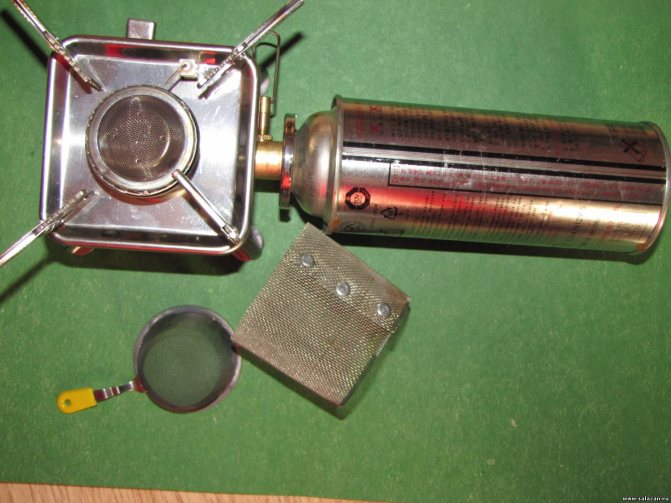
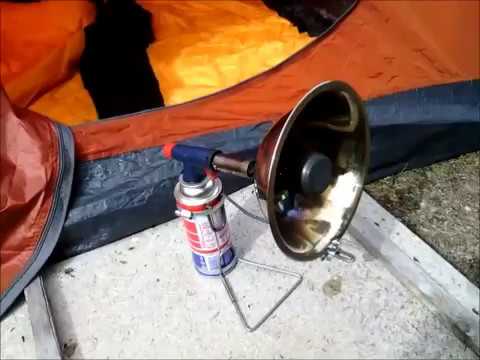
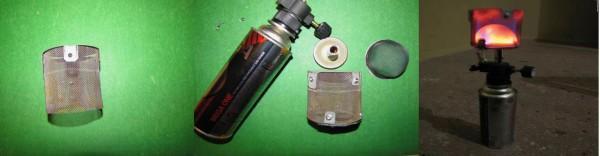
With the advent of heat-resistant and heat-resistant steels in wide use, lovers of outdoor activities increasingly prefer gas camping heaters with afterburning on a grid, pos. 3 and 4 - they are more economical and heat better. And again, amateur creativity combined both options into a combined type mini-heater, pos. 5., able to work both from a gas burner and from a candle.
Drawing of a mini-heater from improvised materials for a summer residence
A drawing of a home-made mini-heater for afterburning is shown in fig. on right. If it is used occasionally or temporarily, it can be made entirely from cans. For an enlarged version for giving, jars of tomato paste, etc. will go. Replacing the perforated mesh cover significantly reduces warm-up time and fuel consumption. A larger and very durable option can be assembled from car rims, see next. video clip. This is already considered a stove, because. you can cook on it.
DIY gas fireplace
Another convenient option for space heating is a gas fireplace. The purchase of such a device will cost a tidy sum, although the most savvy can independently assemble and equip a fireplace in their box without particularly large financial investments.
This kind of fireplace can be powered both directly from a gas pipe and from a gas cylinder.

On the Internet you can find a wide variety of drawings of gas fireplaces. Also, some users can purchase prefabricated structures, independently lay out brickwork and assemble a fireplace from pre-prepared parts.
The design consists of the following main elements:
- ordinary fireplace insert or decorative, decorating the room;
- a fireplace body made of refractory metals - cast iron or other alloys;
- a burner that supplies gas;
- gas supply system.
After determining the place where the structure will be installed, it is necessary to prepare it for the start of the construction of brickwork. There must be a solid foundation. You also need to install the chimney. After the erection of the fireplace, it can be decorated with a variety of decorative elements to the taste of the owners.
The fireplace is laid only from refractory bricks. When erecting a structure, care should be taken to ensure passage to the gas valve. After the internal elements of the masonry are installed, and communication is connected to the gas burner, you should make sure that the entire system is tight.
With the help of a valve, in the future it will be possible to regulate the force of gas supply and, consequently, the amount of heat generated. Gas workers advise turning the burners down with holes - this will protect them from contamination and moisture.


Also, the burner should be strengthened with protective mesh elements. This will reduce the load on the burner from the decorative material.
A gas supply pipe covered with refractory materials is supplied to the fireplace insert. The gas burner is installed with holes down and masked with artificial refractory material
The introduction of some modern devices will slightly automate the operation of the fireplace. So you can connect a gas supply control system that depends on the level of heat generated or a system for automatically shutting off the gas supply. All modifications are freely available on the market, and their purchase depends on the desire and ability of the owners.
A beautiful decoration of the fireplace bowl is made using a variety of stones, glass, and ceramics. In addition to the interior decoration outside, the fireplace can be decorated with tiles or in another way. The main thing is that it be a refractory material.
It is easy to assemble a gas oven yourself with your own hands. To do this, you must adhere to the design scheme and safety precautions.
Subject to all the requirements and recommendations, the assembly of the furnace will be an exciting and inexpensive task. Self-assembly of such a design will save significant funds
First of all, before installing a gas stove for heating a room, it is worthwhile to carry out a number of preparatory measures. If you do not insulate the room, then even the most powerful equipment will not give a serious result.
Therefore, it is important to carry out procedures for external and internal insulation, as well as equip reflective surfaces.
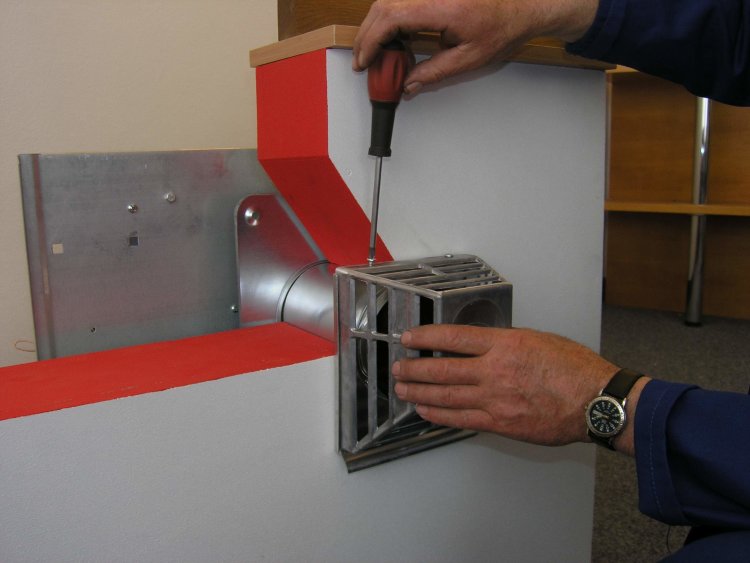
Pipe heater construction
The scheme will acquaint you with the principle of operation and design features of a gas heat gun. The heat flow generated by the device is distributed by means of a fan
To assemble the heater yourself, you need to collect the following material:
- three meter pipes of various diameters (two 8 cm and one 18 cm);
- steel plates with which the fastening will be carried out;
- Metal sheet;
- gas burner with piezo ignition;
- axial fan.
You will also need a variety of tools: a drill, a welding machine, a tape measure, a level, a grinder, metal shears. Pipes can be replaced with cylinders or fire extinguishers of suitable diameters. A grinder will be needed to cut the bottom and top, as well as shortening the workpieces.
Working in intensive mode for heating a room of 15 square meters, a forty-liter cylinder is enough for about a week. When working, the gun dries the air, so you need to moisten it
Two holes of different diameters are drilled in a pipe with a diameter of 18 cm: 1 cm and 8 cm. You need to drill them opposite each other.
A 30 cm segment is cut from a pipe with a diameter of 8 cm, which will be a combustion chamber. Fasteners are welded to this pipe and a hole with a diameter of 1 cm is drilled in it. Then this pipe is inserted into the first pipe.
From a sheet of metal you need to cut a plug. It will close the gap between the heater body and the combustion chamber. A combustion chamber is welded to the body, and a pipe for the outlet of hot air is welded to a hole with a diameter of 8 cm. After that, the plug is welded. After making sure that the gas burner is firmly attached to the combustion chamber, you can push the hose through the centimeter holes.
A fan is installed at the back of the device, and a chimney is installed on top. In order for the heater to stand steadily on the surface, the legs should be welded. The gas heat gun effectively heats rooms, economically consumes gas. However, when using it, you should follow safety precautions.