- Other design changes
- How to make a barbecue
- How to improve the grill
- Conclusion on the topic
- How to make a grill from a balloon with your own hands?
- Tools and materials
- Preparation of parts, drawing and installation
- General design device
- Table: advantages and disadvantages of a classic grill
- What is the difference between a grill and a barbecue
- Getting Started
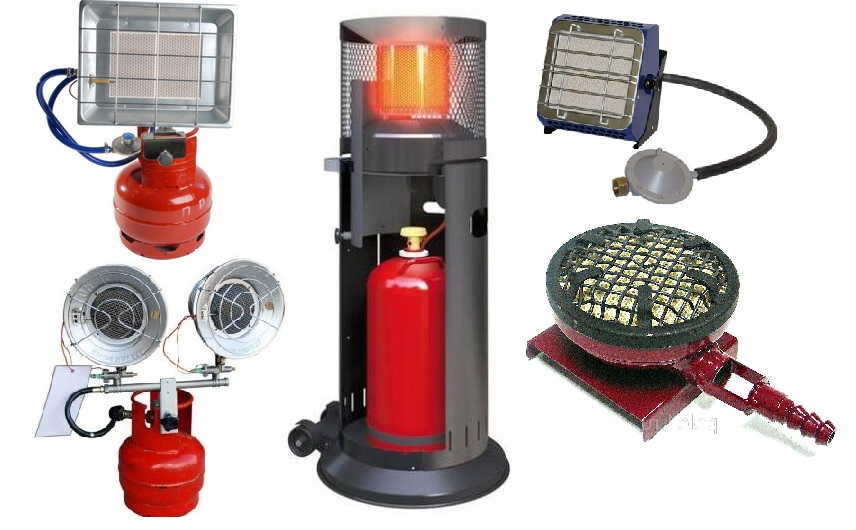
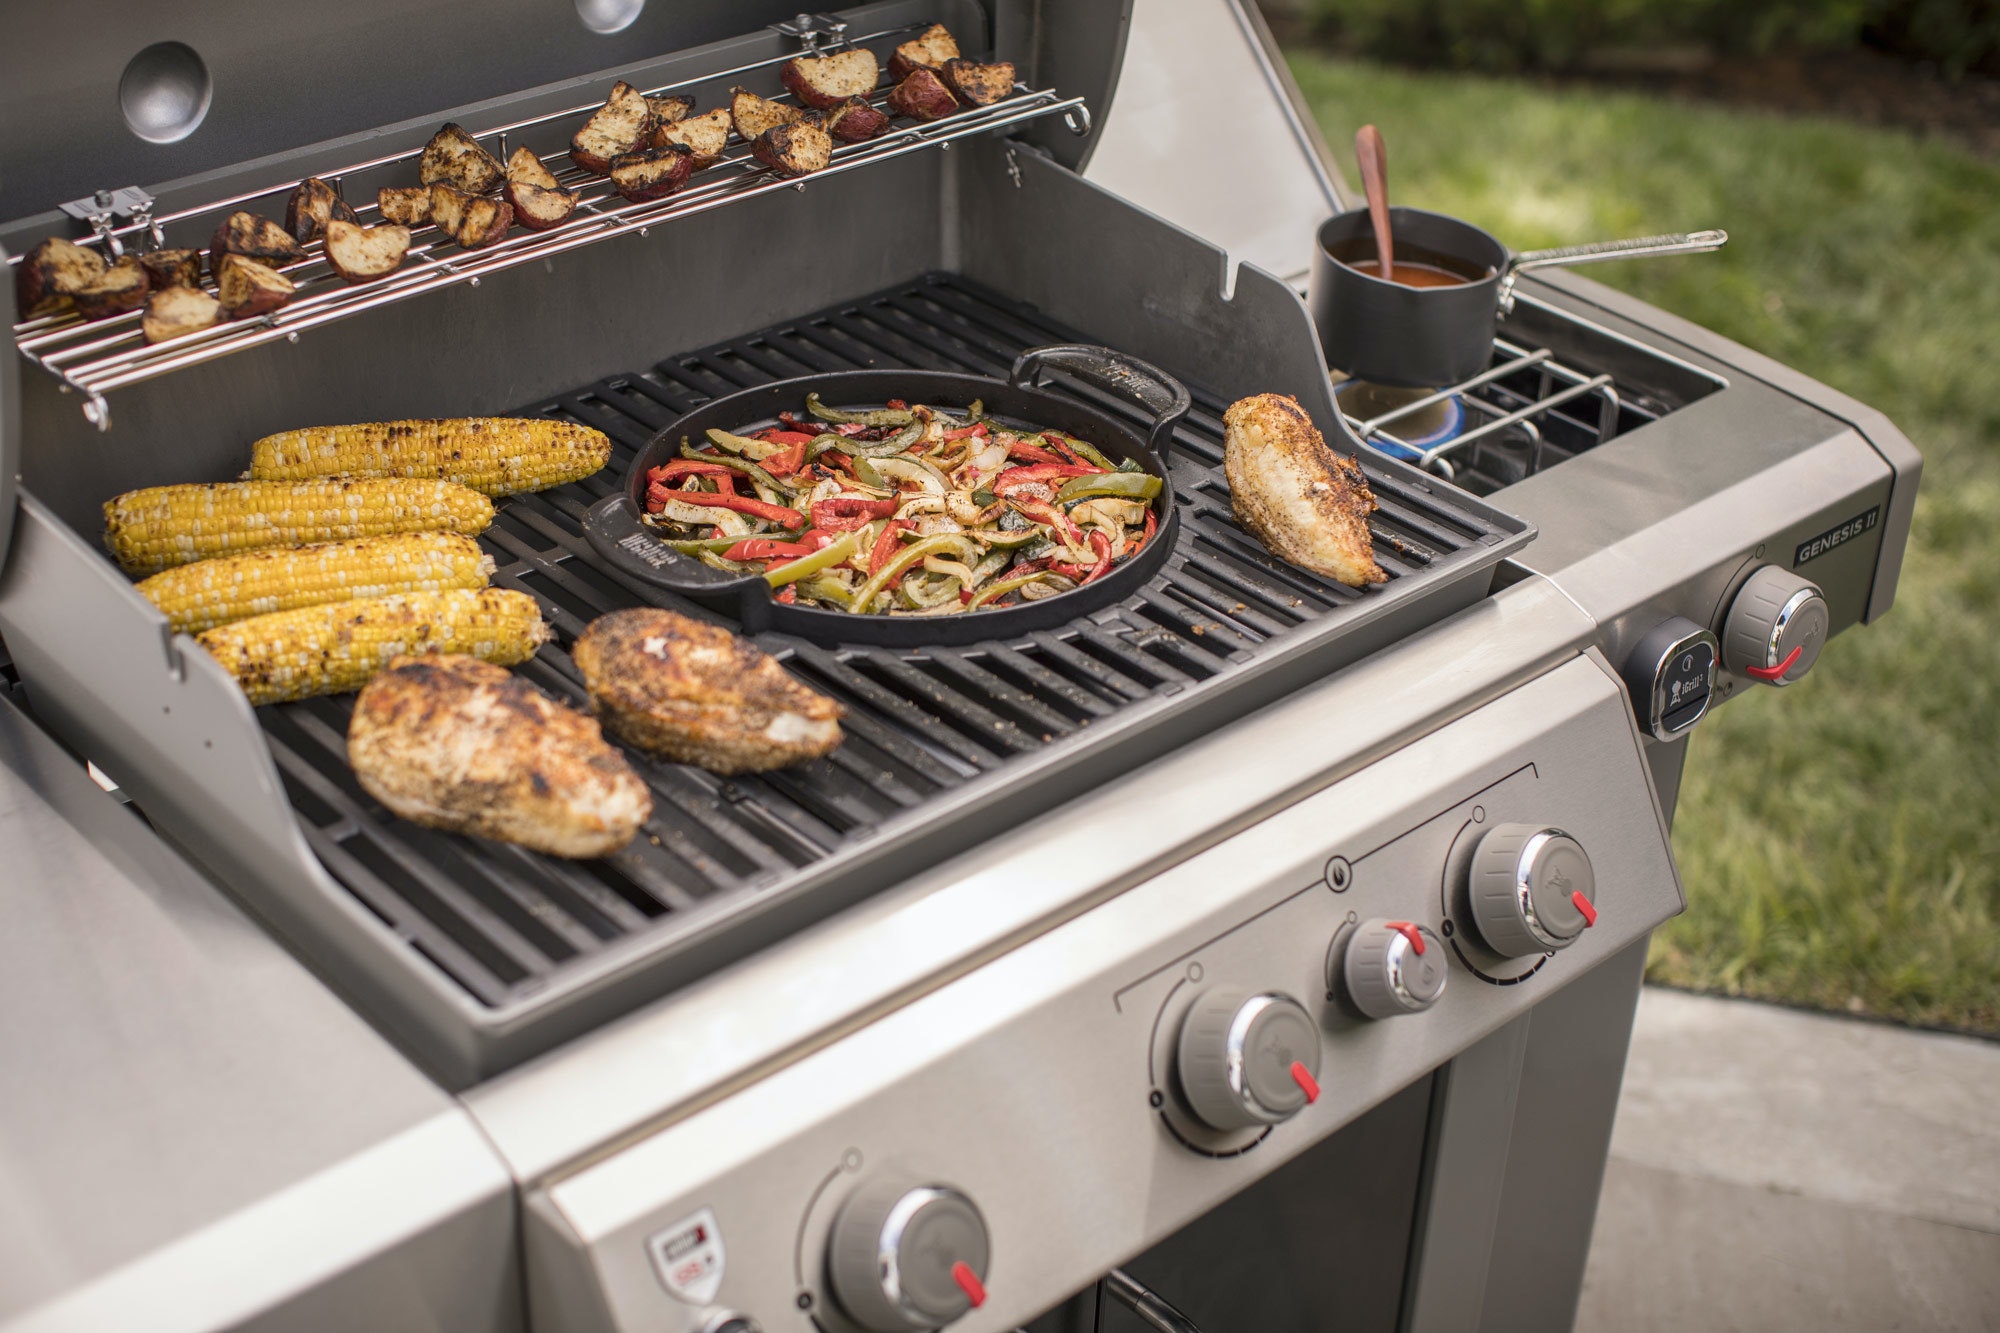
- Which grill to choose for a house or apartment
- Shape and dimensions
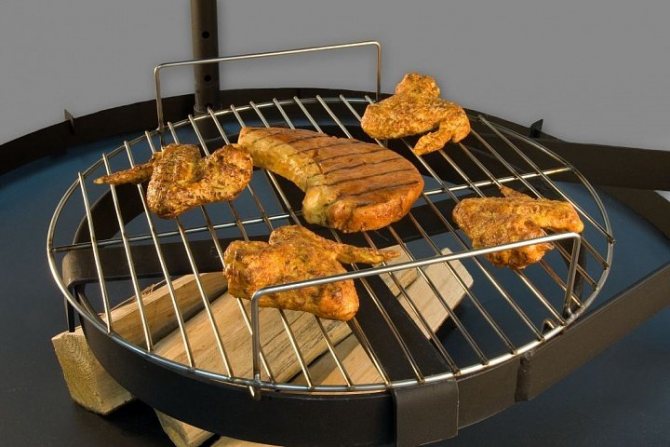
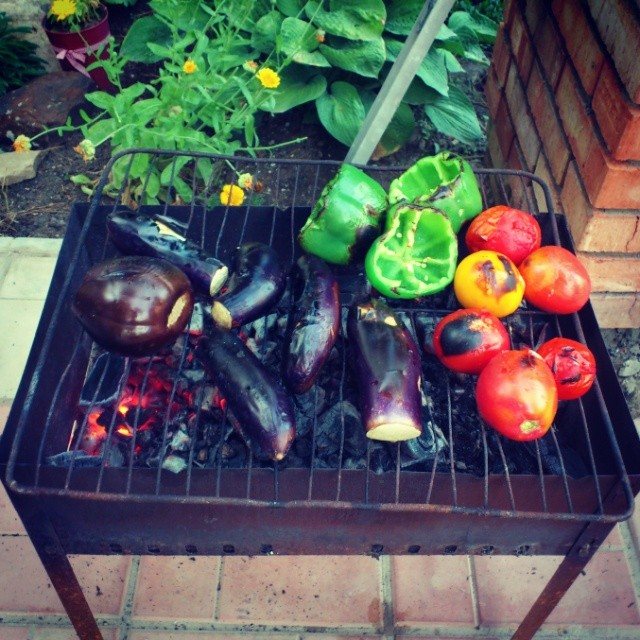
- Food
- Additional functions: with auto ignition or smokehouse
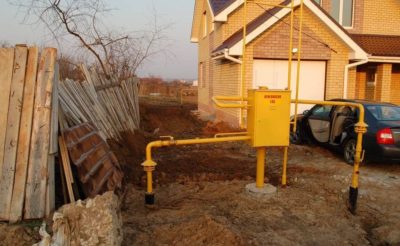
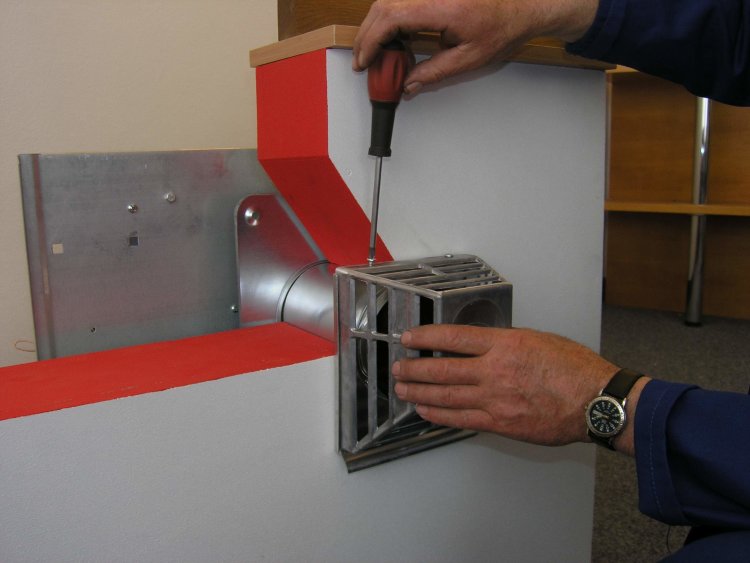
- Marking the gas cylinder for barbecue
- How to make a barbecue smokehouse from a gas cylinder: tips and steps
- Brazier from a gas cylinder: cons
- How to cut a gas cylinder for a barbecue: the initial stage of work
- Brazier from a gas cylinder Steam locomotive: manufacturing features
- Instructions: how to make a brazier from a gas cylinder
- We make the bottom of the furnace
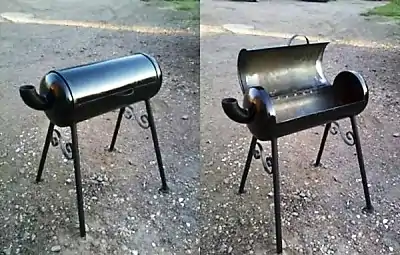
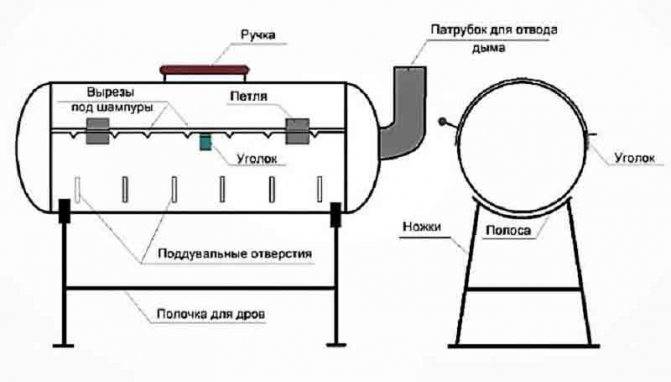
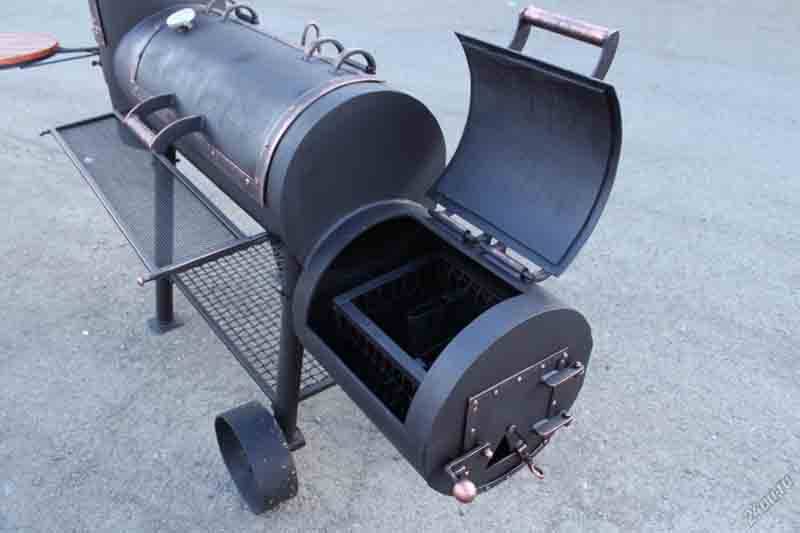
- The design of the brazier from the cylinder
- What to make supports for the barbecue from a gas cylinder
- The production process of a brazier from a gas cylinder
- Tools and materials that will be needed in the production process
- Manufacturing instructions
- How to make a cover?
- Assembly of the top
- Strengthening and fixation
- Barbecue legs
Other design changes
In principle, the brazier from the gas cylinder is almost ready.It remains only to weld the legs and make holes in the cylinder itself for installing skewers and supplying air to the coal combustion zone. Start with holes for skewers.
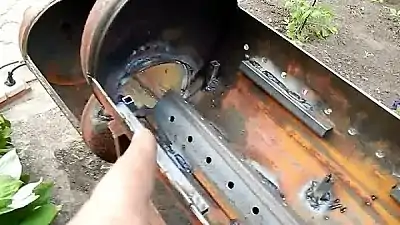
One of the applied longitudinal lines remained unused. It is necessary to apply additional marks along it, dividing the lines evenly into several segments. The length of the last 8 cm. At their ends, through holes with a diameter of 10 mm are made using a drill and a drill.
On the opposite side of the opening made on the welded steel strip, it is necessary to make grooves for skewers. They should be located exactly opposite the holes made. The grooves are made with a grinder and a cutting disc.
Now you need to make holes for air supply inside the barbecue. To do this, 10 and 20 cm must be set aside from the weld of the cylindrical part of the cylinder in two directions. Longitudinal lines are drawn along them, in general there will be four of them, two on each side of the seam. They also share marks with a distance of 5 cm. After that, the marks on two paired lines are connected to each other. Through them, a grinder and a cutting disc make through slots.
Holes and slots for skewers, slots for air in the barbecue from a gas cylinder
It remains to plug the hole into which the faucet was screwed. Here they simply take a plate 2-3 mm thick, which is welded to the hole, scalded with a continuous seam on all sides.
The video shows the sequence of operations for making a brazier from a gas cylinder:
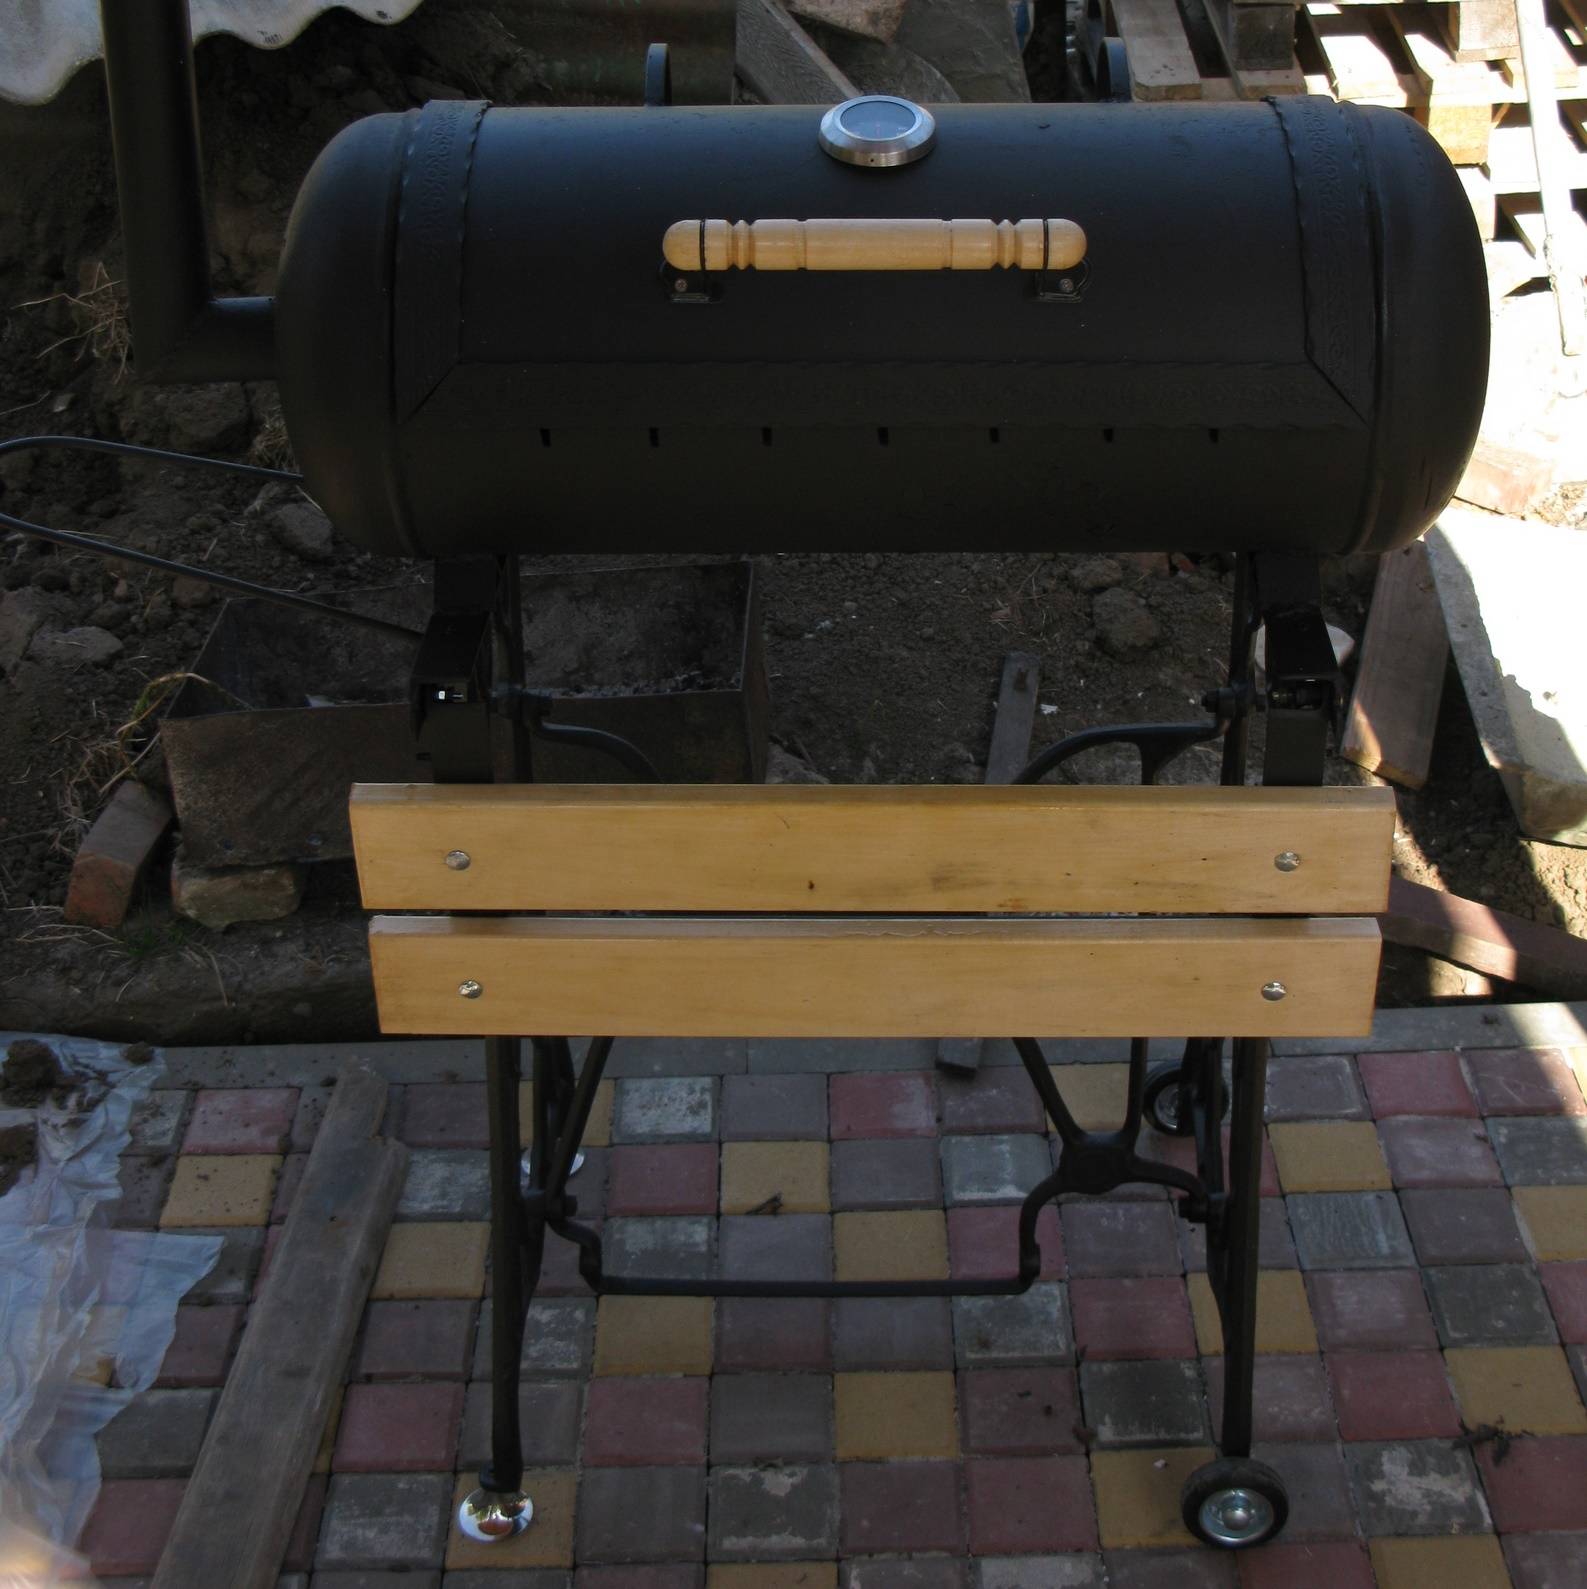
As for the legs, there are a huge number of options. The simplest - legs from a steel corner. The main thing is to accurately choose the height of the installation of the gas grill. It is optimally considered from 60 to 80 cm, that is, convenient for the growth of an adult. Although there are low modifications.
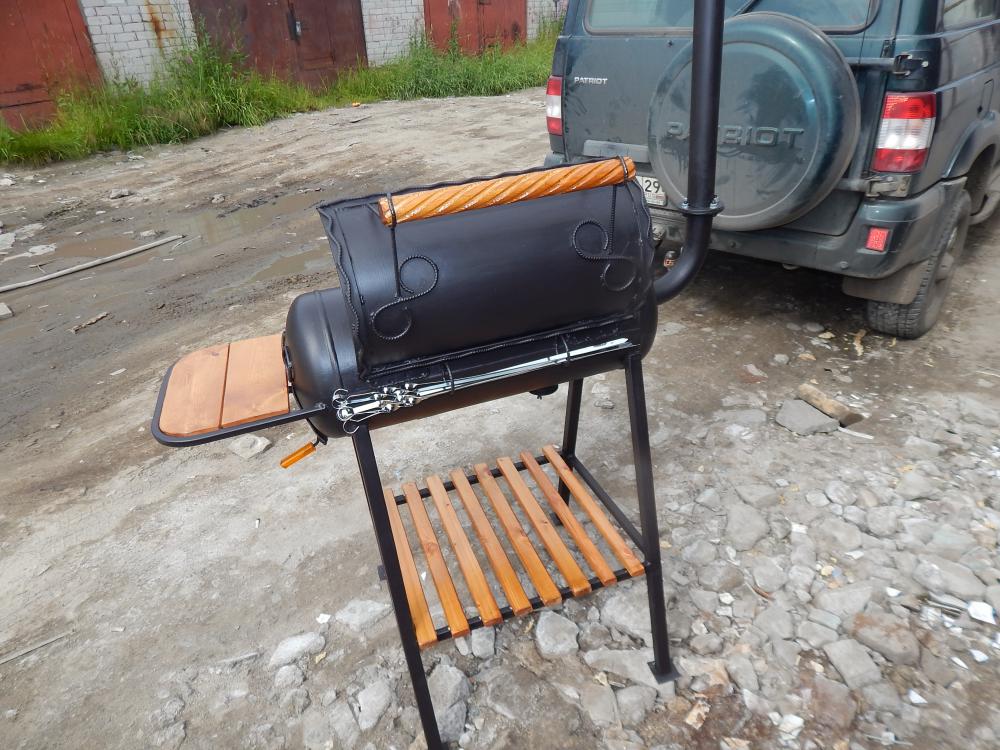
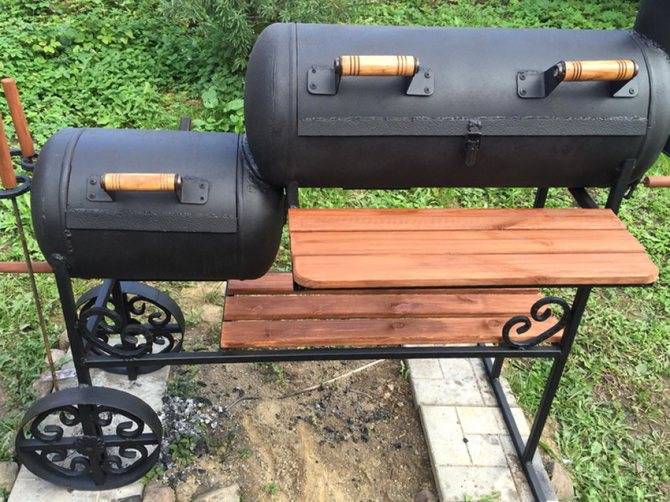
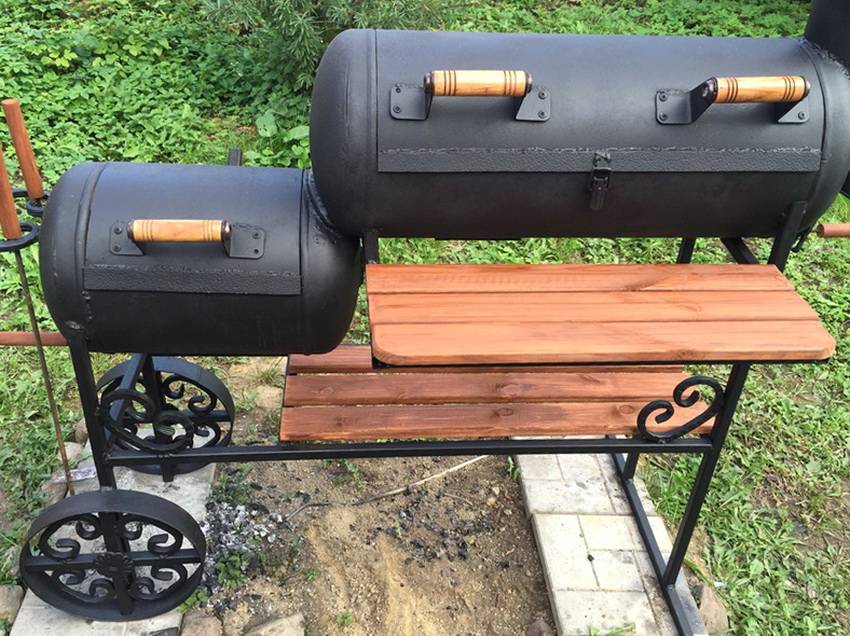
You can show your imagination and make the legs of the original shape, decorated with patterns. You can attach legs to them, make the device mobile, mobile, as shown in the photo below.
Grandma's sewing machine plus a gas cylinder = a "rare" brazier with original legs
How to make a barbecue
In principle, a barbecue from a gas cylinder is made in exactly the same way as a brazier, with only minor additions. First, a grill is installed inside. It is removable, but for it it is necessary to install support shelves inside the cylinder. They are made from a steel corner 25x25 or 32x32 mm. The length of each shelf is 10 cm, they are welded on two opposite sides of the opening, three pieces at the same distance from each other. Location in height - under the holes for the skewer. Accordingly, and from the opposite side at this height.
Secondly, you need to install a chimney. There are quite a few options here:
- on the lid;
- on the side, with a tie-in hole for a tap;
- next to the lid in the cylindrical part.
Barbecue from a gas bottle with a side chimney
How to improve the grill
There are many additional little things that will make the process of cooking meat, poultry or fish on a barbecue grill a convenient and easy process. Here are a few of those little things:
- A nut is welded to the cover of the device or to its cylindrical part, into which a thermometer is inserted. Now you can monitor at what temperature the meat dish is cooked.
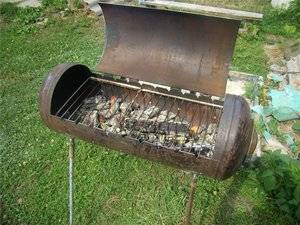
- A tank can be installed on the chimney. Lattices are installed on top of each other. This accessory is an excellent smokehouse design.
- You can install a grill inside the brazier, for its entire length. This will be the grate.Its task is to hold the coals, but let the ash through itself so that it does not interfere with the burning of firewood.
As for the decorative design, there is also a huge field of activity. What the masters just do not invent. For example, here is such an option in the form of a steam locomotive, as in the photo below. Definitely, such a design will decorate the territory of the cottage.
Brazier-barbecue from a gas cylinder in the form of a steam locomotive
From the video you can learn how to create a brazier from a gas cylinder:
Conclusion on the topic
Today, finding barbecue grills from a gas cylinder with drawings and exact dimensions on the Internet is not a problem. All sorts of options are offered with simple designs and with additional convenient options. But the main thing, as practice has shown, is the exact observance of the height of the skewers above the coals. The distance is small - the meat will burn, the distance is increased - the dish will be cooked for a long time.
How to make a grill from a balloon with your own hands?
The work consists of the following stages:
- corps preparation;
- balloon cutting;
- blowing devices, other openings;
- cover manufacturing;
- stand mounting.
Over time, the grill will acquire an even black color, but if desired, the structure is painted.
Tools and materials
The following kit is required to convert a gas bottle into a grill:
- Bulgarian;
- welding machine;
- electric drill;
- door hinges;
- a hammer;
- wrench;
- chisel;
- corner;
- metal pipe.
The grate for the grill is made independently or bought in a store.
Preparation of parts, drawing and installation
After you have found the desired freon or propane cylinder, it must be adapted for the grill.
Photo 1. An approximate drawing of a barbecue grill from an old gas cylinder, front and side view.


It is impossible to cut the container right away, this is extremely dangerous, since liquefied gas or condensate often remains inside. The balloon is opened, then turned upside down. To make sure that there are no extra impurities inside, soap suds are applied to the open valve. Now disconnect the faucet with a wrench and a hammer or saw.
Attention! If you decide to cut the faucet, pour water over the cut while you work so that the remaining gas does not flare up from a spark!
Then the workpiece is poured with water from a hose and allowed to settle for three to four days. Only under this condition is further work safe.
Holes are drilled at the base of the grill, then, with the help of rivets and welding, door hinges are attached and a cover is attached to them. The latter is often made not folding, but completely removable. After that, a handle made of non-heated material is fastened with bolts.
From the inside, the body is reinforced with a corner around the entire perimeter. If this is not done, the grill will deform very quickly under the influence of high temperature. Attachments for the net and skewers are built on the corner.
After that, a stand with legs is mounted to the body. For the latter, an iron pipe cut into four equal pieces is suitable. It is attached to the bottom with welding and bolts.
Important. If after that the grill has not gained stability, make an additional corner at the bottom
At the end of the work, drill several holes in the bottom of the brazier. They are designed for burnt coals.
General design device
A grill is a special portable or stationary installation for preparing various culinary dishes on an open fire.The classic form of this design is a deep metal container in which grates are installed at different levels: the lower one is for arranging coals, the second one is for cooking.
The grill is equipped with a lid, but some models are made without it. The first option is more functional, as it allows you to cook in three ways:
- direct;
- indirect;
- combined.
There are three types of grill:
Classical.
Connected to the mains. Grills of this type are used as additional equipment for professional and home kitchens.
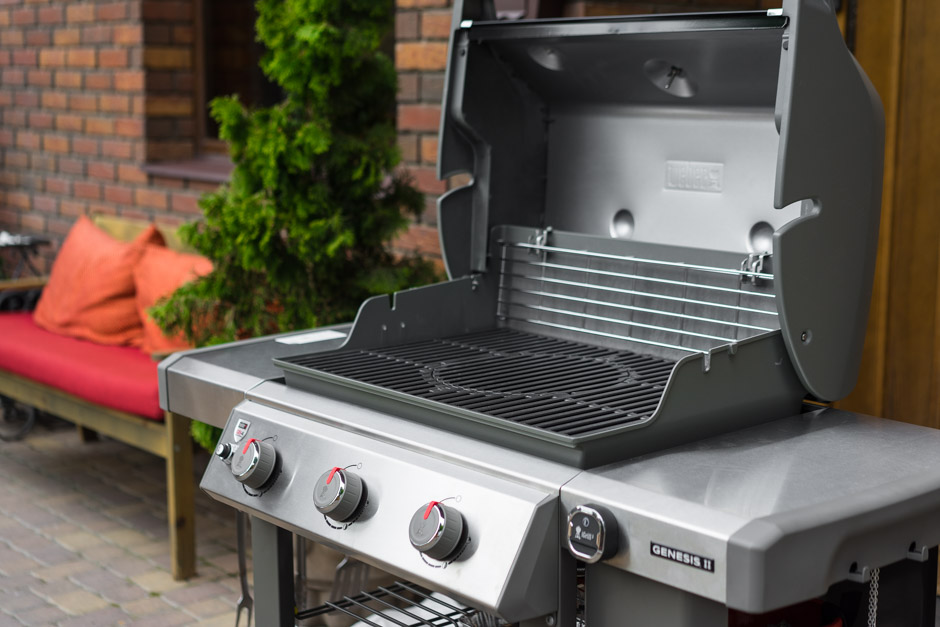
Operating on gas.
Options that run on gas and electricity are more functional, but for a summer vacation, many prefer a charcoal grill.
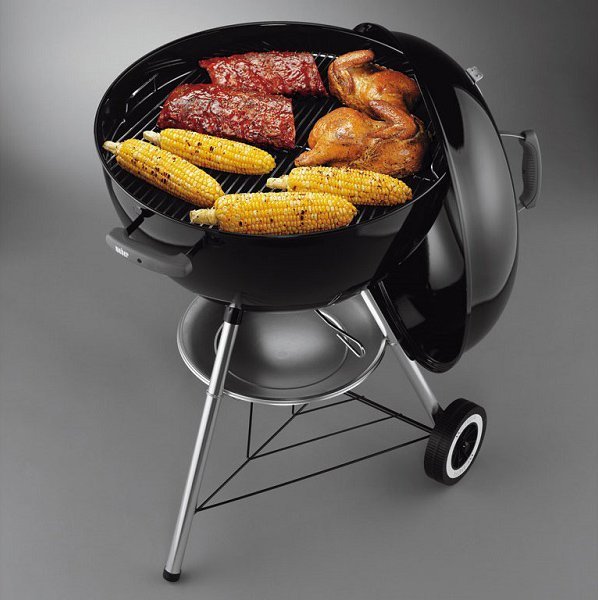 Classic grill involves the use of coal
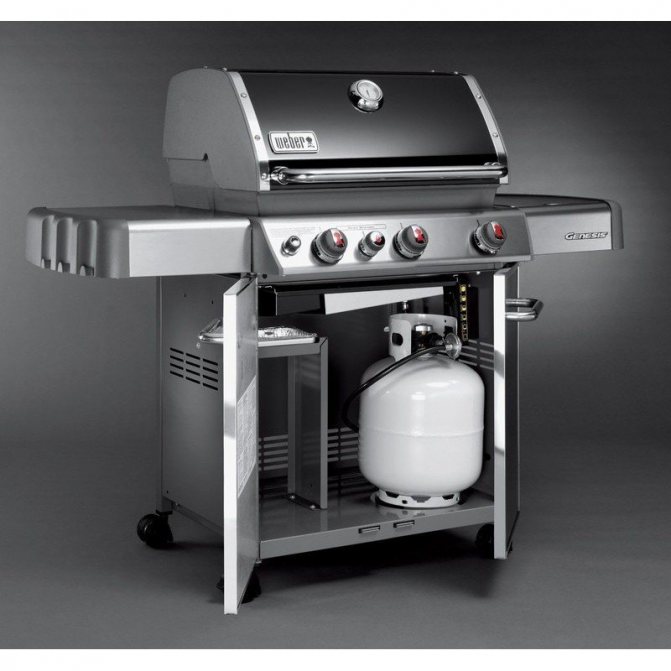 For a gas grill, a small cylinder is enough
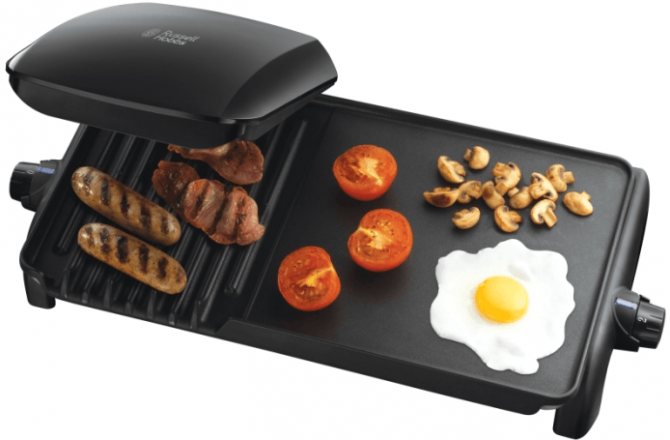 Electric grill is convenient to use at home
Table: advantages and disadvantages of a classic grill
| pros | Minuses |
|
|
 Grill briquettes are more economical
What is the difference between a grill and a barbecue
Quite often, people do not find differences between a grill, barbecue and barbecue. Each of the braziers has individual characteristics, despite the fact that they are used for cooking food on coals.
The brazier has the simplest design. This device is a metal box. Food is cooked on metal skewers. Hot coals are located at the bottom of the box.
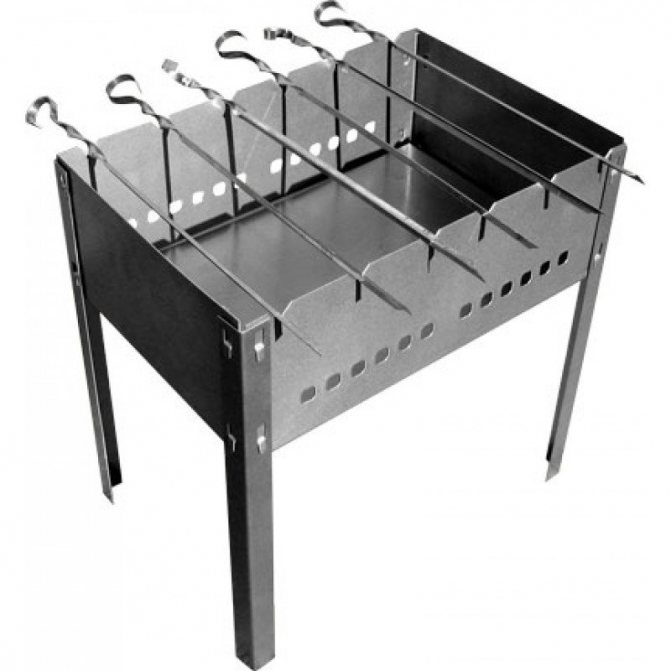 High design legs create comfort during frying
The difference between a grill and a barbecue is only that the first one does not have a lid, while the second one is equipped with a skewer and lockable hatches for air supply.
 Barbecue does not have a lid in its design
Getting Started
On the Internet you can find many schemes and methods for making a collapsible brazier. In this article, we will consider one simple option. It is as follows:
- Take a sheet of paper. On it, mark the height of the legs, the size of the walls of the device, as well as the distance between the slots in the side elements and the holes for the skewers.
- Choose a sheet of steel: the thicker the metal, the longer the product will last. Transfer to it a drawing of a collapsible brazier.
- Take the steel sheets and cut them with a grinder, stepping back from the 3-4 cm mark.
- Drill holes in the walls.
- Using a hacksaw, it is necessary to make guides for skewers along the upper edges of the side structural elements.
- Cut the walls and make folds so that the corners can be joined.
- Lay the bottom.
- Drill holes for the bolts in the side folds. This is necessary so that the parts do not crumble.
- Take four rods and proceed to the manufacture of supports, which should be threaded in the future. The design will be with unscrewing legs.They can also be made from metal corners. To do this, you need to drill holes for the bolts. In order for the supports of the resulting structure to easily enter the ground, it is necessary to sharpen them from below.
- Weld nuts to the bottom of the box.
With the help of this instruction, you can easily make a brazier at home.
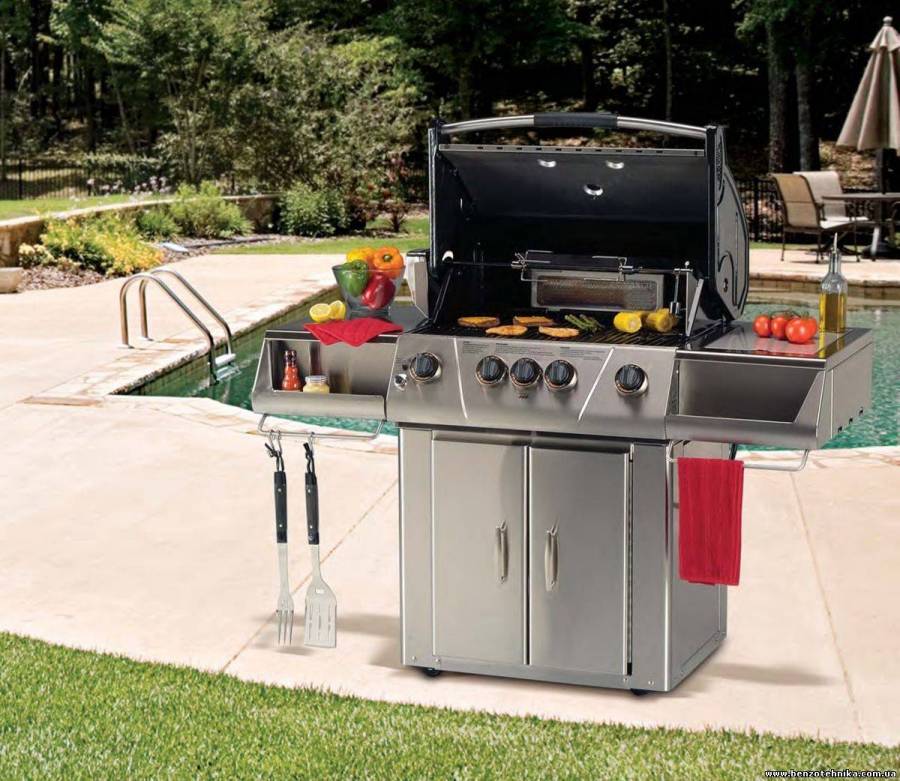
Which grill to choose for a house or apartment
What they pay attention to:
- Choice of frying surface. A smooth surface is suitable for cooking fish, poultry or lean meats. Seafood is also fried on it. For fatty meat, the best option is a corrugated surface that allows the fat to run off. The combined option is universal, but it costs more.
- Fuel. The most common is liquefied gas and methane. Less common are models that work with any type of raw material. It is better to determine the fuel that will be used in the future before purchasing the device.
- Grill grates. The choice is between price and reliability. Steel gratings are durable, strong, easy to maintain. However, they are not very economical in terms of finances. Cast iron grates are cheaper, retain heat longer, but are more difficult to maintain.
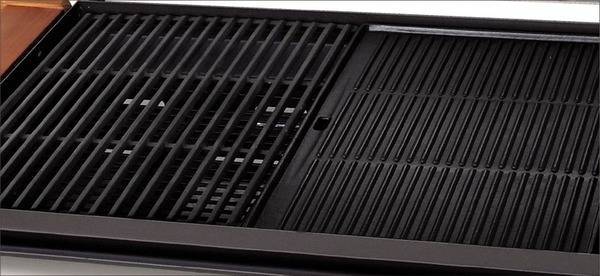
Photo 1. Two types of cast-iron grates for the Master 2 gas grill from Sunday. They are more difficult to maintain, but stronger.


- Safety. Some models have built-in options such as shutting off the gas in case of flame failure, and auto-ignition. However, if you do not plan to use the grill more than twice a week, then auto-ignition is completely optional.
- The burner must match the dimensions. Even if a large casing is placed inside the body, there is only one burner. Because of this, the fire burns unevenly. The fire distributor, available on some models, will help correct the situation.
- Flame cutters. To prevent grease and dirt from clogging the burner, the grill is equipped with plates that are on top and cover it all. The plates must be free of rust.
- The best case is double-walled stainless steel. Grilles are sometimes made of steel or cast iron with porcelain enamel. The latter are not recommended to be cleaned while they are hot: porcelain becomes brittle and may crack or crumble. In this case, the iron will quickly become unusable.
- If the grill is under warranty for only one year, then the repair will most likely be paid.
Shape and dimensions
Dimensions are for the following models:
- Napoleon Rouge 425-SIB;
- Napoleon Rouge 425-SB;
- Napoleon LE-3;
- Fervor IC310;
- Fervor CL410.
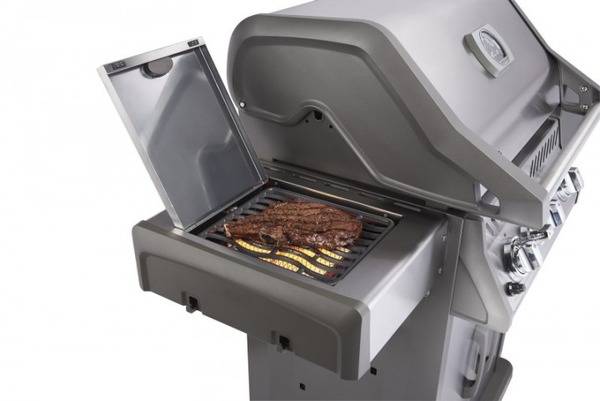
Photo 2. Gas grill model Napoleon Rouge 425-SIB. Multifunctional device in steel color.
Externally, the installation itself is made in the form of a parallelepiped. Simply put, it's a tall box. Sizes vary by brand and model. On average, a grill is 120-160 cm high, 60-70 cm deep and 115-155 cm wide.
Food
If we are not talking about liquefied gas, then there are several options. In the first case, the grill can be powered by an outlet pipe or a hose connected to a natural gas stove pipe.
Separate gas cylinders act as a second possible source. They are usually charged with propane. It is somewhat safer than conventional methane, because it is less sensitive to heat or shock, and also has a characteristic specific and rather pungent odor, due to which a gas leak is detected quickly. The cylinder in this case is located near the grill, in isolation from direct contact with very hot objects or open flames.
Additional functions: with auto ignition or smokehouse
A necessary addition to the gas grill will be auto-ignition and gas shut-off. This will save you from gas poisoning or fire. If the burner goes out, then the grill will either set it on fire by itself, or the gas supply will simply stop.
Of the optional, separated thermal zones and a smokehouse are noted. All options affect the cost of the product, so it is advisable to think about how much these functions are needed and how often they will be used.
Marking the gas cylinder for barbecue
The fact is that the so-called gasoline is used in the admixture of natural gas, which is designed to distinguish the smell of gas. Gasoline, in itself, is the same combustible gas that is absorbed into the metal, and even if the cylinder is empty during the check, gasoline vapors are still present in it
Therefore, I repeat once again, you need to work with a gas cylinder very carefully, without neglecting the safety rules
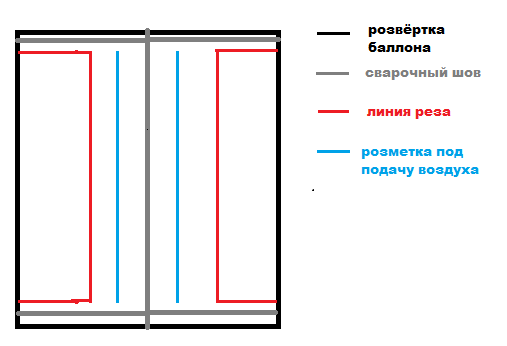
Let's get back to our markup. If you look at the cylinder, you can see that a welding seam runs along its entire height. We take this seam as the first line of the beginning of our markup. If you take a tape measure and measure the circumference of the balloon (the circumference is the length of the outer or inner line of the circle.) It will be equal to 96 cm. From this line - the seam, with the help of a tape measure we mark 24 cm in each direction. and draw a line with chalk. Then we retreat from this seam line in each direction by 10 cm. and also draw a line with chalk - this is our line for the air supply holes.
The next step: we determine where we will have the front side of the brazier and add to the back line that we marked, retreating 24 cm another 10 cm. This will be our cutting line.There are also welded seams on the bottom and top of the cylinder, which go around the circle of the cylinder. The distance between them is standard 61 cm. We retreat from these seams 3 cm, put two points each and draw a line. The fact is that in the middle of the balloon along the circumferential seams there is a seam reinforcement tape and we need not to damage it.
Thus, we have drawn a cover for the future barbecue, the width of which will be 38 cm (96-24-24-10), and the length - 55 cm (61-3-3) as indicated in the drawing.
How to make a barbecue smokehouse from a gas cylinder: tips and steps
Important! Braziers from this raw material have another significant plus - they have a stationary or removable cover: this design will not allow the barbecue to get wet during bad weather.
A home-made unit is perfect for use in the country, for a suburban area, and also as a mobile brazier - if you use a small container, then you can take the structure with you to nature.
Brazier from a gas cylinder: cons
Many people refuse such an undertaking due to certain factors. They prefer to find complex solutions using galvanized steel sheets to make the device themselves. This attitude is formed by minuses:
- large dimensions - not every family needs such a huge barbecue;
- a large brazier cannot be moved or taken away with you;
- the impossibility of using firewood - only coal is used.
The first two minuses are solved by using smaller diameter devices, for example, a 5 liter product
When working, it is worth taking precautions, because gas was previously pumped into here, so there is a risk of fire
How to cut a gas cylinder for a barbecue: the initial stage of work
The cutting process must be accompanied by full compliance with safety rules. You can buy the design by ad on the sites. After the purchase, you can start performing tasks:
- Drain the remaining propane mixture - the smell of the mass is not the most pleasant, so it is better to work away from the living quarters. Open the valve and place the product on the ground.
- Fill the device with water from a hose connected to a tap and leave for 1 day.
- After the specified time, cut off the tap with a hacksaw and rinse the product again with water.
- Before sawing, make a markup according to the drawing.
- Cuts are made on 3 sides, and on the fourth side leave room for loops.
- Weld the hinges and saw through the fourth side - the door is ready.
Weld loops “with ears” on the future cover, then attach a convenient handle.
Brazier from a gas cylinder Steam locomotive: manufacturing features
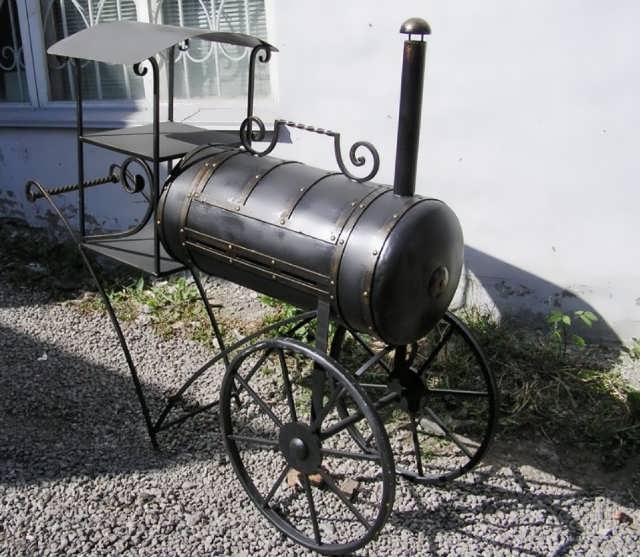
Barbecue brazier and at the same time a smokehouse for cauldrons in the form of a steam locomotive look original and stylish. The product perfectly complements the exterior of the house and decorates the site. An empty propane tank is ideal for the design - it will serve as the main part of the model.


Important! The design will perform several functions at once: the ability to cook kebabs, fry over an open fire, cook under a lid and smoke meat.
You can make a universal steam locomotive with your own hands. Before you independently make a brazier from a gas cylinder according to step-by-step instructions, you must additionally prepare steel pipes of different diameters, sheet metal, a profile pipe, fittings, rods, corners and fasteners.Of the tools, a grinder, a file, a welding machine, a drill and a hammer are useful. The work goes in the following sequence:
- Frame assembly. Use welding to make a base for a locomotive from profile pipes, and simulated wheels from scraps.
- Frame. It is made from a propane tank: first saw through the door, weld on the hinges and handles. If the locomotive will have several compartments, make several doors.
- Sector for smoking. A drawing of a brazier with a cauldron is made of metal - it is located in the back and is designed to accommodate a container. This is where galvanized steel comes in handy.
- The final step will be the decor. Provide a small canopy above the smokehouse. Copper curls can be welded on the front. Additionally, you can build forged elements on the sides of the locomotive.
If there is a smoking oven in the design, then a chimney must be thought out in front of the locomotive. It is made of ordinary galvanized pipe and at the same time serves as an additional decorative element.
Instructions: how to make a brazier from a gas cylinder
To make a brazier for a summer residence from a gas cylinder with your own hands, you do not need to have special skills. It is enough to be able to use a grinder and a welding machine
We will consider step-by-step manufacturing instructions below, but for now we will pay attention to the features of such a home-made design and present its pros and cons
 Figure 1. Design options from old cylinders
The used gas cylinder is considered an ideal basis not only for the barbecue, but also for other structures that involve heating. They are made of durable steel that is resistant to high temperatures, and you can find such a cylinder in the garage or buy it cheap on the market (Figure 1).
The main advantages of a homemade brazier from a cylinder are:
- Versatility: all cylinders are approximately the same size and have a similar design. Therefore, even if the first time you fail to make a brazier, you can easily repeat the attempt, taking into account previous mistakes.
- Heat resistance: thick high-quality steel from which the cylinders are made has increased heat resistance. Accordingly, even with prolonged and constant use of the brazier, the metal does not deform and does not burn out.
- Extended functionality: on the basis of an old gas cylinder, you can make not only an ordinary grill for frying kebabs, but also a barbecue for vegetables or a smokehouse for fish and meat.
- Availability: used cylinders are inexpensive, and a minimum of tools is required to convert them to a barbecue.
In addition, such designs are considered safe. After frying, the fire does not need to be extinguished specially. It is enough just to close the lid to block the access of oxygen, and the fire will go out by itself.
There are some disadvantages of a brazier made from an old cylinder. There are few of them, but these nuances should still be taken into account before starting work. For example, in the cold season, the metal will cool down very quickly, so to fry meat inside, you will have to constantly add firewood or coal.
In addition, homemade designs do not look very attractive. The only option is to buy a special heat-resistant paint, but given its high cost, not all barbecue lovers are ready for such expenses.
Also, do not forget that after prolonged use, dirt and rot could accumulate inside the cylinder.It must be removed by carefully opening the cylinder and calcining all its parts over an open fire.
We make the bottom of the furnace
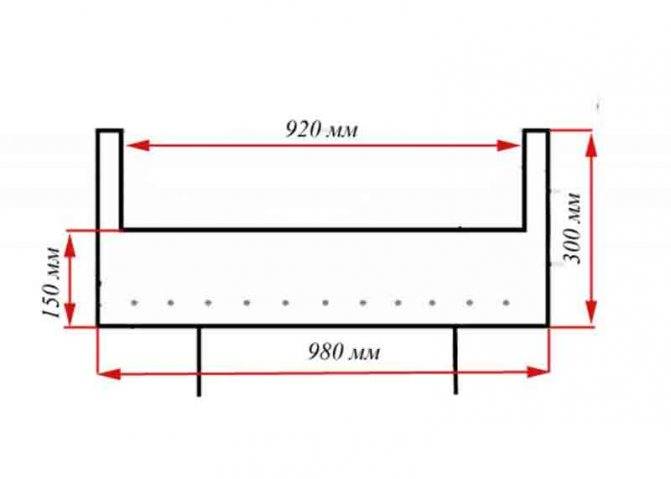
The base for the brazier is a rectangle made of sheet steel, with air openings, grooves for attaching the sides, holes for screwing to the frame.
The procedure for manufacturing the bottom of the hearth consists of the following steps:
- A rectangle measuring 300x600 mm is cut out of sheet iron. Its edges are aligned and rounded so as not to get hurt on them during assembly and disassembly.
- Holes with a diameter of 20 mm are drilled in the base. The optimal distance is 5 cm between the holes. If this turns out to be a lot (with strong wind and high pressure), then the holes can always be plugged with bolts. Through holes are made to fasten the base and frame.
- Along the edges of the plate, grooves are cut for the installation of longitudinal and transverse sides. For this, a drill, a grinder and a jigsaw are used. For a reliable connection, 3 grooves are made along the length and 2 along the width.
- The grooves are turned with a file to get perfectly even edges with the correct shape. Steel is treated with anti-corrosion impregnation.
When the impregnation dries, the base is screwed to the frame. Bolts are inserted from above, and nuts are screwed from below, so they do not stick to the threads.
The design of the brazier from the cylinder
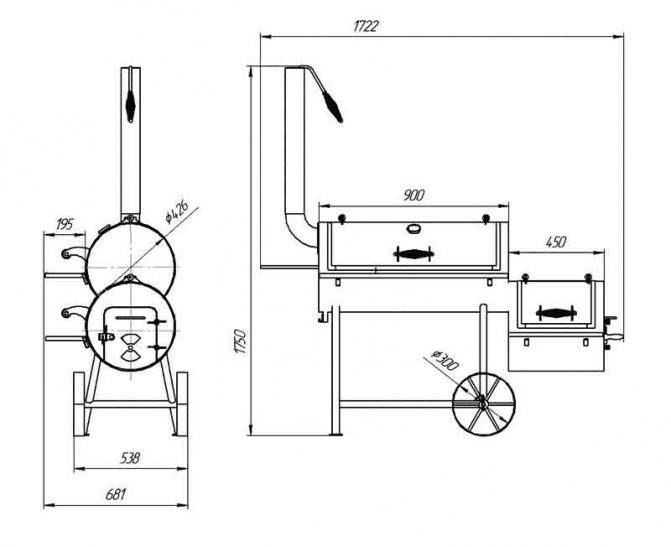
Before starting work, you need to develop a drawing of the future product. The design provides for:
- swivel cover, part of the shell will be used for its manufacture;
- You will need a handle to open and close the lid during use. In order to prevent burns, a wooden handle is put on from the outside;
- loops will be needed to rotate the lid when opening and closing.It is not advisable to use rivets, they can melt, since inside during the combustion process, the temperature may rise above 700 ... 800 ⁰С;
- the edges of the cut shell must be reinforced with a corner. It will additionally seal the joint between the parts;
- to remove combustion products, it is necessary to weld a branch pipe with a knee;
- the entire device must be placed on legs, the height of which will help to operate the barbecue without bending over when cooking;
- under the cylinder itself, it is advisable to place a shelf for solid fuel;
- In order for firewood or coal to burn normally, you need to organize an air flow. To do this, it is enough to cut the transverse grooves. A more advanced option is also possible with the use of pipelines for forced air supply.
Sketch drawing of the future barbecue
During the manufacturing process, additions or some changes may be made to the project. Their goal is to optimize the installation design.
The main cuts of the workpiece before welding
The most common are cylinders, the volume of which is 50 liters. They are easier to get. They are sold at gas stations where propane is refueled. There are always containers unsuitable for further use.
Creative design of a garden barbecue from a cylinder
Some masters create quite interesting designs. They provide for the installation of auxiliary shelves for installing dishes, semi-finished products and ready meals.
You can find home-made structures where they arrange canopies from the rain. Then cooking can be done even in bad weather.


The presence of a closing chamber turns the brazier into a barbecue from a gas cylinder.Here food is cooked in a closed space. From burning coals, the heat flux of radiation is directed to the inner cylindrical surface, and then reflected from it and falls on the food being cooked. A barbecue is being created in which it is convenient to cook dishes of oriental cuisine.
Attention! You can hear the opinion that inside such barbecues, the heating of the product occurs unevenly. In fact, the presence of reflective surfaces made of thick metal allows you to maintain a high temperature throughout the volume.
Thermal radiation spreads in all directions, and then reflected on the products placed on the grate.
A possible continuation could be a small smokehouse for hot smoking meat and fish products.
Drawing of a smokehouse from two gas cylinders
The real performance of the smokehouse
What to make supports for the barbecue from a gas cylinder
You can’t put such a brazier on the ground, respectively, support is needed. At the same time, it must withstand high temperatures - after all, the body of the cylinder during the combustion of firewood and coals heats up to 600 ... 700 degrees Celsius. Accordingly, the choice falls on the metal.
The easiest way is to weld the legs from a pipe, angle or strip, connecting them with jumpers and braces into a rigid structure.
This is one of the easiest options. Two pieces of a strip, curved along the diameter of the balloon, connecting the corner and the legs from a square pipe. For strengthening and greater rigidity at the bottom, the legs are fastened in pairs with fragments of the same square pipe, a longer piece connects the sides.
Here the design is more complex - in addition to the main frame with a grate at the bottom (for firewood), there is a frame for the side panel.The entire stand is welded from a pipe with a section of 20x20 or 25x25 mm. To prevent the cylinder from shifting on a flat stand, corners are welded onto the upper part of the frame.
A similar stand, but the auxiliary panel is moved forward.
And this option is more interesting - a pedestal from an old sewing machine was used as a stand. The weight of such a product turns out to be very solid, it will not be easy to transfer it from place to place, therefore, in this case, wheels are added.
A bed from a sewing machine is also used here, but the side parts are moved apart along the length of the cylinder, next to the pedal, now a firewood stand, there is a second cylinder. Thus, the barbecue can be used for hot smoking. The model is complemented by forged details - a holder for towels, cooking utensils, brushes and other things.
The production process of a brazier from a gas cylinder
suitable gas bottle
I would like to warn you right away that the manufactured brazier and smokehouse will not have a presentable appearance. However, this will not affect the quality of cooking. It's a matter of taste. Of course, you can specially equip it so that it looks neat.
It is also worth knowing that if you do not have a welding machine, as well as the ability to use it, then you will not succeed. In this case, the only way out is to contact a specialist in this industry. In principle, this cannot be called a significant drawback of the manufacturing process, since it will not be difficult to find a competent welder who has his own welding machine.
Tools and materials that will be needed in the production process
So, in order to make a brazier from a gas cylinder with your own hands, you will need the following tools:
- Bulgarian;
- two door hinges for the cover;
- a set of tools that includes:
- a hammer;
- screwdriver;
- wrench;
- chisel;
- drill;
- corner;
- metal pipe.
Manufacturing instructions
exactly empty and free of gas
When cutting the cylinder into 2 parts, be extremely careful, because if there is even a little gas left in the cylinder, it can ignite freely and bring a lot of problems.
new entries
Chainsaw or electric saw - what to choose for the garden? 4 mistakes when growing tomatoes in pots that almost all housewives makeSecrets of growing seedlings from the Japanese, who are very sensitive to the land
So, when the cylinder is cut into 2 parts, you need to wait until all the remaining gas has evaporated. After that, you need to turn the cylinder upside down in order to drain all the condensate.


In order to remove an unnecessary tap on the surface of the cylinder, you can use a hammer or grinder. In the first case, it can simply be beaten off from the balloon, in the second, it can be completely cut off. The second case is less secure, so we recommend a hammer.
After you have done all the above steps, you must completely fill the balloon with water and leave it for several days in this form. After that, working with such a design will become absolutely safe and you can do whatever you want with it.
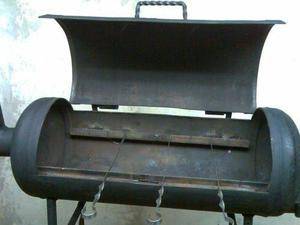
How to make a cover?
As you might have guessed, the top cover of the barbecue is an indispensable attribute. First, it is rain protection. Secondly, this is the introduction of the smokehouse function, without which your barbecue will not be so functional.
So, we will make a lid for the barbecue from the already cut off part of the balloon. The cap must be cut off from the cylinder from the upper part of the body along the middle.It is necessary to cut it from the middle to the edge. After that, it is attached to the main part of the brazier using the door hinges that we prepared earlier. The side walls must be left.
Assembly of the top

attach it to the main part of the brazier
First of all, using a drill, we drill holes for the hinges, after which we fix the latter with rivets and weld them. Again, if you do not have a welding machine or the ability to use it, contact a specialist who, for a small fee, will solve all your problems.
Here you can get a little creative. You can attach additional accessories to your brazier, such as a lid handle. You can also build a removable cover by directing the hinge axes to one of the sides.
Strengthening and fixation
In order to avoid the possibility of deformation of your future barbecue due to high temperatures, it is necessary to strengthen the base of the smoker.
To do this, a metal corner must be welded around the entire perimeter. It is best to do this inside the barbecue. Thus, you will kill two birds with one stone: strengthen the base and create a convenient support for the net or a skewer from a regular corner.
It is also best to make incisions so that the skewer fits perfectly into its place and holds steady there.
Barbecue legs
metal pipes
To fix them, it is necessary to drill holes in the corners of the bottom, after which we fasten the legs with nuts. If after this the legs of your brazier turned out to be insufficiently stable, weld additional hijackings from below.
On top of all the work - drill a few holes in the bottom of the brazier for burnt coals.