- Supplement 2
- Boiler manufacturing
- General recommendations for creating devices
- A simple version of a potbelly stove from a can
- The use of capillary technology in the manufacture of the furnace
- Addition 1
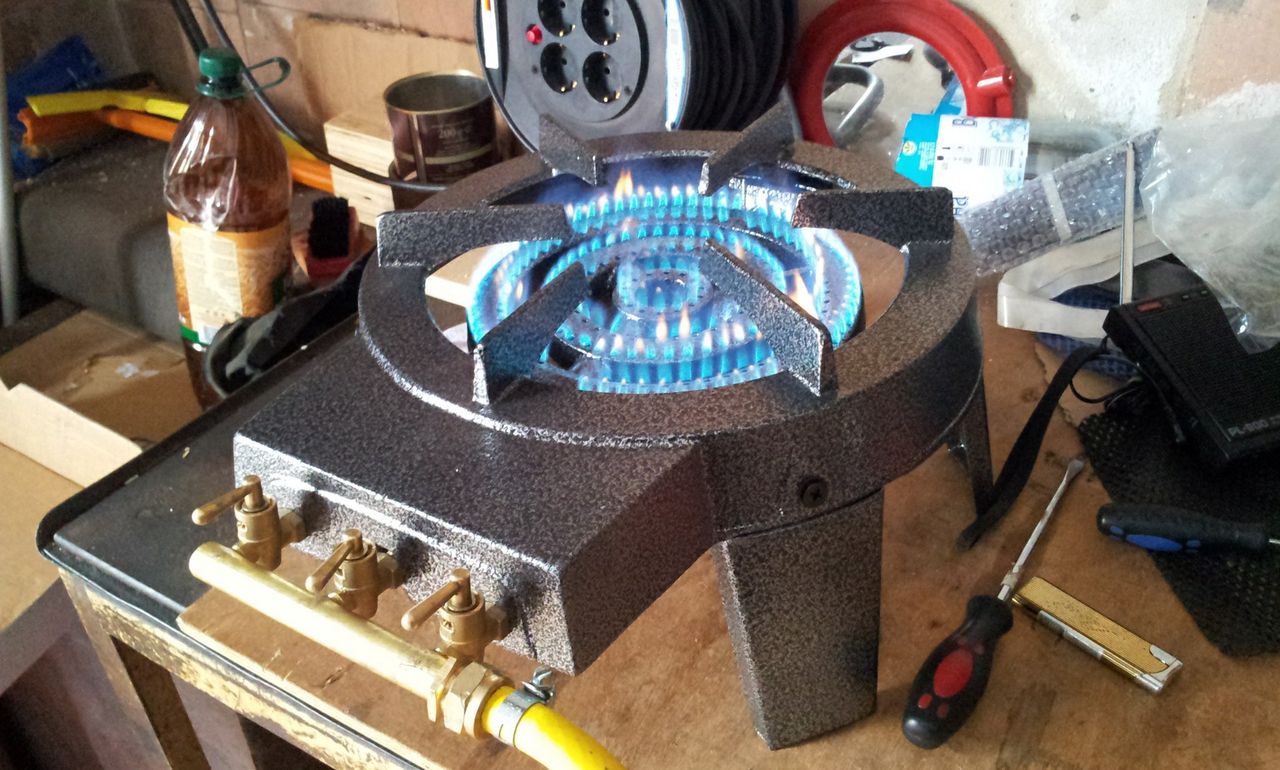
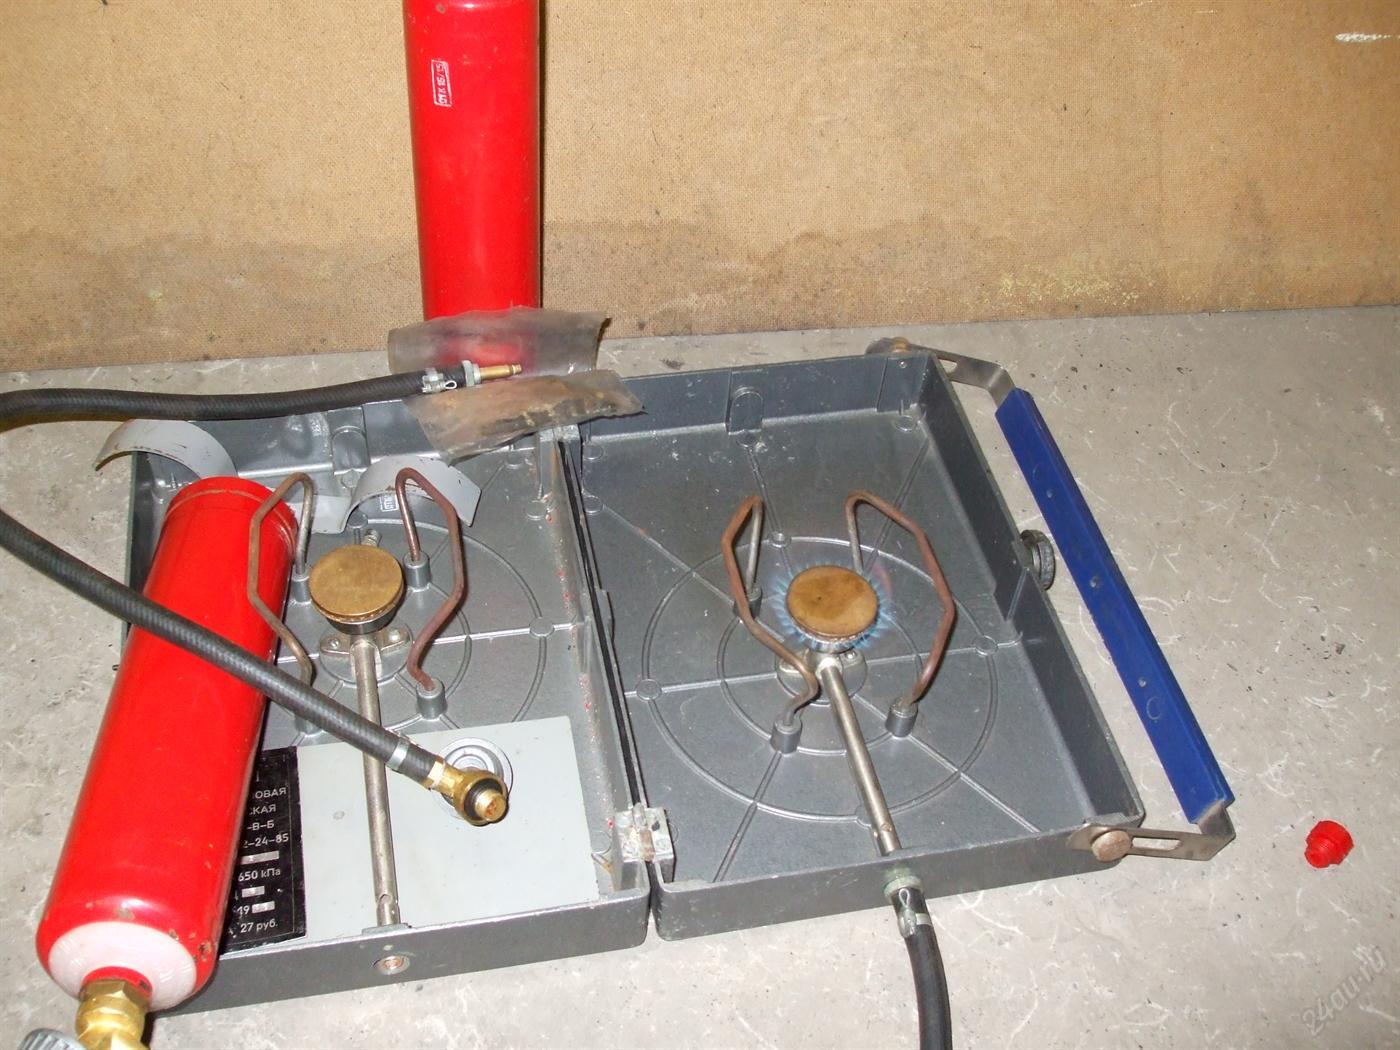
- Alteration of the gas unit
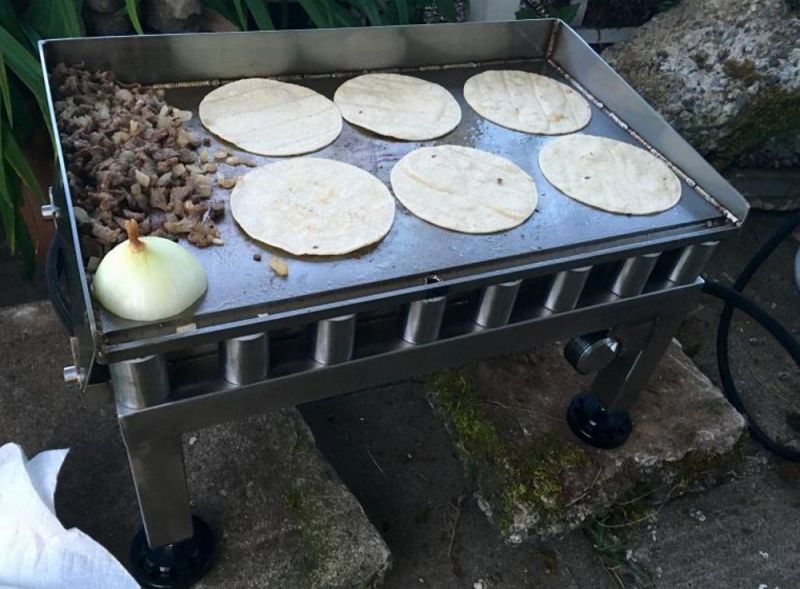
- DIY gas fireplace
- Features of homemade gas ovens
- Gas supply of residential buildings
- The best solution for temporary heating
- The use of improvised materials for arranging the working area
- Briefly about the requirements
- Pipe heater construction
- General recommendations for creating devices
- Option number 2. Making a pot stove
Supplement 2
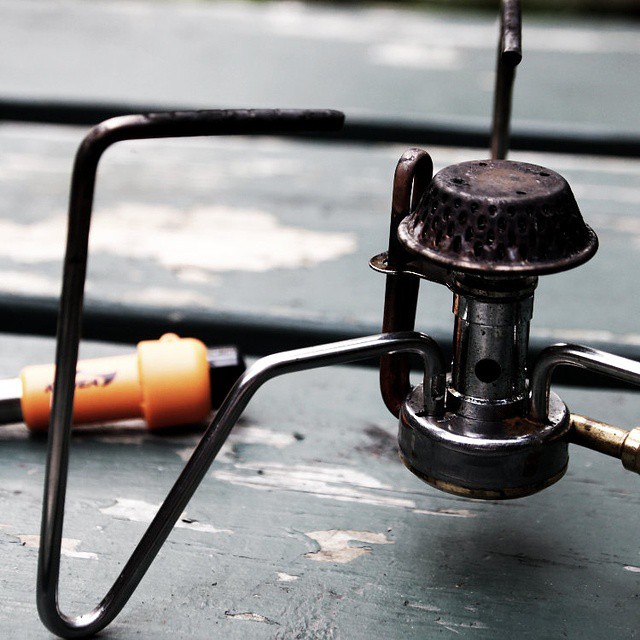
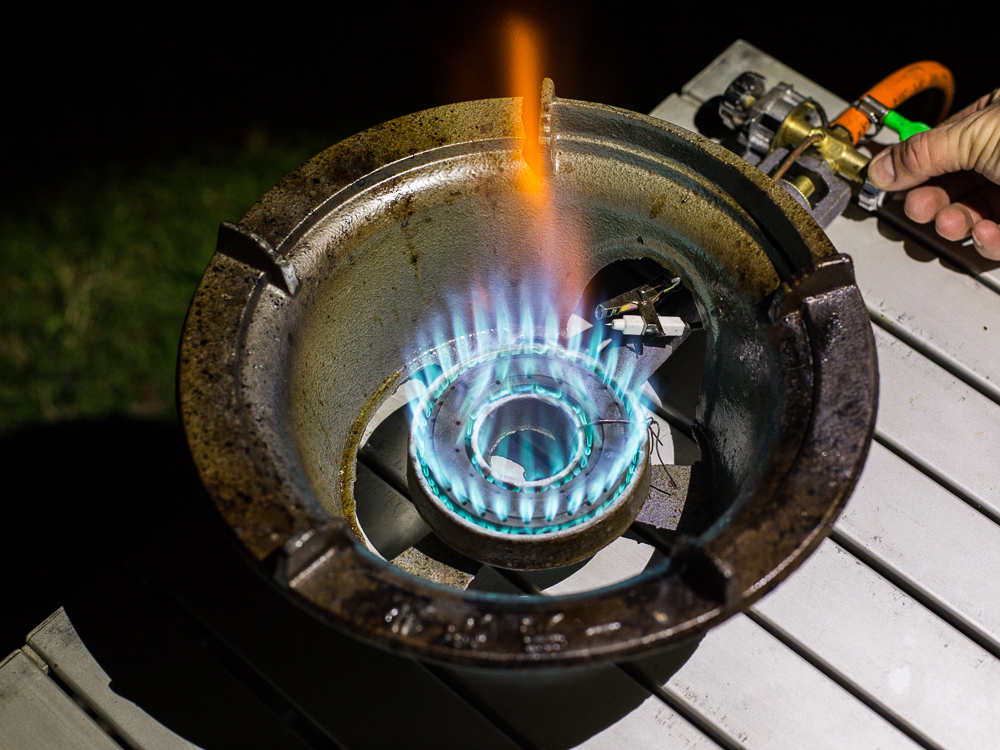
Sometimes workers complain that the burner does not work or works somehow wrong. Only working designs are laid out here, there are no theoretical ones. It means that they did not see or did not understand the principle of operation of the burners. Now I will try to explain using the example of a mini-burner. To do this, I will give a simplified diagram of this particular design.
1. Verify that the supply gas pressure is within the acceptable range of 0.2-4 kg/cm2. And the most working range is from 0.5 to 2.5 kg / cm2. And the nozzle hole diameter is 0.12 +/-0.02 mm. 2. The air intake holes are not closed. 3. In the picture. The diameter of the tube with the supplied gas-air mixture is 3.5 mm. And the central hole in the divider with a diameter of 3 mm. That is, 0.5 mm less.Therefore, part of the flow of the gas-air mixture diverges to the sides into small holes. The flow velocity through these holes is less than the main flow. These small holes are just designed to ignite the main stream. And because of the low speed of the gas-air mixture, they burn stably through them and do not allow the flame of the main stream to be blown off. This is true for all burners of this type, as shown on this page, with flame spreaders. 4. Based on the above, check if there is a gap of 2 mm between both parts of the burner head. With proper manufacture according to the drawings, this gap will be. Otherwise, you will observe only the central torch, without side lights, which is easily blown away when the pressure of the gas entering the nozzle increases.
On the left is a broken burner. On the right, as it should be. 5. And a few words about the position of the nozzle. The section of the capillary from which the gas comes out, you need to choose its position already with the burner running in the area opposite the air intake holes, or up to these holes. And, of course, the tube with the capillary should not block the air holes.
Boiler manufacturing
From all of the above, it follows that gas-generating type boilers are considered the most economical and high-quality elements of the heating system.
The main problem in the acquisition and use of such a boiler is the cost of this product. For example, the simplest model of such a boiler, which is manufactured by domestic companies, costs about $1,000.
If you opt for imported manufacturers and improved models of such boilers, then the price can increase by 5 times. It follows from this that gas-generating boilers cannot be called publicly available.But there is a more economical option for purchasing such a boiler. In this way is a wood-fired boiler made with your own hands. For the manufacture of such a boiler, it is necessary to use special drawings that are developed and posted on the Internet by masters.
Gas-generating boilers developed by craftsmen have not only a low manufacturing price, but also other positive aspects. The use of a home-made boiler, made according to ready-made drawings, provides for a significantly longer boiler operation time on one load of fuel into the combustion chamber. Due to the fact that special nozzles are installed in factory boilers under the combustion chamber, through which air injected by forced systems enters, the combustion process of solid fuel is almost doubled. In addition, the direct dependence of such a boiler on the electrical network provides for the correct operation of the system only when the boiler is connected to the network. Homemade boilers are devoid of such elements, which allows them to work better and longer.
Some homemade boilers are equipped with two solid fuel combustion chambers. This allows you to burn the fuel in the next order. When one chamber is lit, the fire in the other chamber is automatically extinguished. This helps to achieve the highest efficiency with the maximum burning time of the fuel in the boiler. Some design features of home-made boilers make it quite easy to control the process of fuel combustion in the boiler. This is achieved with the help of the correct location of the grate under the fuel bunker.
Almost all homemade boilers, the drawings of which can be easily found on the net, burn all polluted particles, such as essential oils, various resins and alcohol. This became possible due to the fact that in such boilers there is a separate zone of additional combustion. Polluted air from the combustion chamber enters this zone. It is in this air that polluted particles are contained, which are burned in a separate order. It follows from this that the minimum amount of harmful particles enters the atmosphere, which can enter the heated room through the cracks and pores of the building material.

Solid fuel boiler drawing
A homemade wood-fired boiler is designed not only for the use of wood fuel. In such boilers, sawdust, peat briquettes or coal can be used as fuel.
The use of such fuel materials provides for the appearance of slag, which must be drilled. This is necessary in order for the combustion process to be carried out correctly. In order to make shovka, the boilers are equipped with a special hole under the combustion chamber. It is through this hole that you can stick the poker and destroy the slag crust. This opening is closed by a small door that blocks the flow of excess air into the combustion chamber.
Drawings of home-made boilers are developed on the basis of finished factory products. The main difference is the changes made in the design and production plan. The positive side of such boilers is the ability to heat a larger amount of air coolant with the same volume of the combustion chamber.
As practice shows, the use of air as a heat carrier allows you to create a more comfortable microclimate in a heated room. When using such a heat carrier, it is possible to heat the air in the room in a short time. In addition, heat losses in such a heating system are minimal. Do not forget about the significant savings in money that must be spent on the purchase of a special coolant. In addition, complete tightness of the heating system with air coolant is optional.
General recommendations for creating devices
In an effort to save an expense item, many owners, choosing among heater options, are in no hurry to purchase ready-made factory models.
After all, having a desire and having the appropriate skills, a heating device can always be designed on its own.
Image gallery
Photo from
An ordinary radiator connected to a mini-system with hot water circulation will perfectly cope with heating tasks.
Home craftsmen who own the skills of a welder and have a device are quite capable of making a buleryan furnace
Those who wish to quickly build a device with minimal effort and labor will need a register left after the dismantling of the old heating system

The register welded from pipes, as well as the device remaining after dismantling, is filled with either just water or technical oil. As a heating element, a conventional boiler or heating element from unnecessary household appliances is used.
A self-made heater only works in the presence of the owners of the garage. Energy consumption due to short stay is usually low
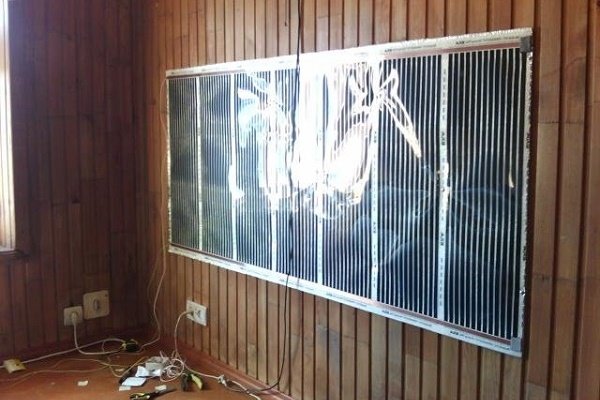
The IR film system works efficiently and most economically compared to other electrical appliances
If it is not rational to spend electricity for temporary heating of a room, it is better to build a mini-stove that runs on solid fuel
Homemade heat gun
Ingenious solution with a heatsink
Stove buleryan for arranging a garage
Using the old register
Homemade electric type
Garage Electric Heater Option
Infrared film on garage wall
Solid fuel stove-potbelly stove from a pipe
When choosing a garage heater option that you can do yourself, many are guided by two parameters:
- The heating device should be easily activated, quickly warming up the room.
- The device should have a simple design, devoid of complex parts and elements.
- The operation of the device should be carried out at minimal financial cost.
All these requirements are met by three options for the home-made heaters described below, which operate from different energy sources: gas, solid fuel and electricity.

The safety of the device is also important. Therefore, regardless of the method of heating in the garage, it is necessary to equip a heating system. After all, a decrease in the amount of oxygen and the accumulation of combustion products carries a risk to human life.
After all, a decrease in the amount of oxygen and the accumulation of combustion products carries a risk to human life.
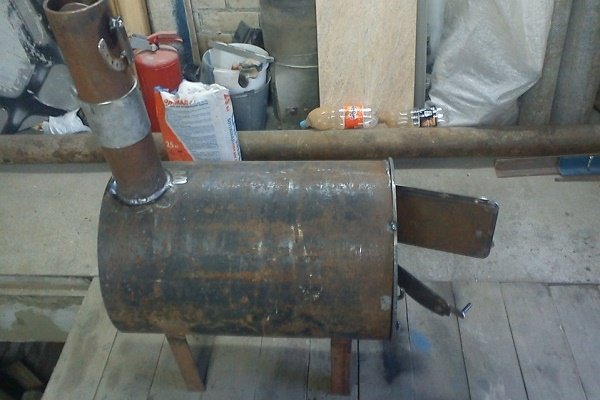
A simple version of a potbelly stove from a can
The simplest do-it-yourself potbelly stove can be made from an ordinary canister.Of course, such a design is not very durable, but it is quickly assembled, easy to build and gives off a lot of heat to the surrounding space.


Actually, the whole manufacturing process consists in the fact that you need to weld the legs, the grate and equip the chimney pipe. To get started you will need:
- directly iron can;
- welding machine;
- chimney pipe;
- wire for the grate;
- tools;
- drawing.
The sequence of actions on how to make a simple potbelly stove in the garage with your own hands from an old can or iron barrel:
- Set the can in a horizontal position and under the lid mark a place for a blower in the form of a sickle or a small rectangle.
- In the bottom or wall of the tank, cut a hole for the smoke outlet pipe according to its diameter.
- To make a grate, bend the steel wire and pull it inside the can through the lid and carefully unbend it so that the zigzag is in the desired position, while leaving room for convenient loading of firewood.
- Then weld the legs from pipes or corners and the chimney.
- Such a stove can be equipped with several useful accessories. To make the generated heat escape less, you can fix the reflector on the outside of the can. And if you weld handles on the sides, then the tank will be easy to carry from place to place.
Photo of a potbelly stove from a can:
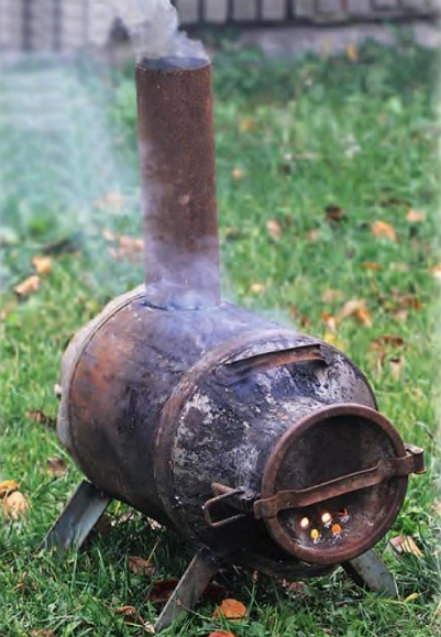
With the same example, you can also do potbelly stove from an iron barrel.
But there are other, more complex options with greater efficiency.
The use of capillary technology in the manufacture of the furnace
In addition to the simplest method for manufacturing an oil furnace described above, more advanced options are also used. One of them is a capillary furnace in development.Doing it with your own hands is also within the power of anyone who knows how to handle metal and tools.
Oil in this design is not just poured into the combustion chamber, where it is in large quantities, but it is done gradually by a drip system. This method allows the oil to burn out with greater efficiency, and its consumption is reduced to a minimum. Separately from the furnace, an oil tank is installed in the upper part, which is connected by a pipe to the combustion chamber of the furnace. A control valve is installed in the branch pipe, with the help of which the flow of oil into the furnace is metered. Otherwise, the design is no different from the simplest working furnace. With your own hands, the drawings below will help you make such a unit without difficulty.
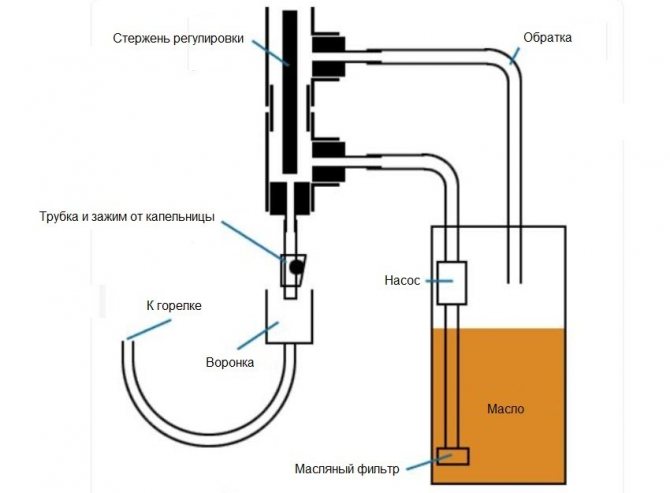
Scheme of drip fuel supply for a homemade stove
Addition 1
Today I received another letter with a request to explain where to get capillaries and how to make a nozzle in general. It was even proposed to use electroerosion. I didn't even think it would be a problem. So, this is how I do it. First of all, I got used to using M3 screws for injectors (a regular screw with a 3 mm diameter thread, metric). So, take your box of M3 screws, dump it out and spread it out in an even layer. Then take the magnet and pull out all the attracting screws. You end up with screws that don't attract. The fact that they look the same as the rest should not deceive you. These are galvanized brass screws. In the photo under the number 1. If there is no M3 brass, nothing prevents you from doing this with M4.
Then there are five ways in front of you: - immediately drill a hole with the desired drill diameter.But this is for fairly large holes and with a precision drill. - drill on both sides of the screw with a large drill, but not completely. Then pierce this jumper with a needle or drill with a small drill. - drill with a large drill and then fill the hole with POS solder, and then work with it, which is much easier. - drill with a large drill, and then solder a stainless wire of the appropriate diameter coaxially into the screw with POS solder. And then pull out the wire. And, finally, you can solder the POS with a low-melting solder into a drilled hole in a capillary of the appropriate diameter. So, capillaries, that is, thin tubes. Under number 2 are capillaries from instrument recorders. It is unlikely that you feel better from such advice. But under the number 3 is the most realistic option. When the doctor gives you an injection, do not groan, do not feel sorry for yourself, but gather your will into a fist and ask the doctor to give you a needle as a keepsake. He will give, he does not mind. Thus, for your sick life and your loved ones, you will collect an extensive collection of capillaries. And if you are lucky enough to make injections with imported syringes, then the assortment will become much richer. They also have very thin needles, for example, for vaccinations. Do not forget to also collect a collection of steel elastic wires for cleaning capillaries - number 4. Number 5 - my new gas stove came with a whole set of nozzles with different hole diameters. And finally, 6-terminal clamps for the installation of stranded electrical wires. A whole bunch of different sizes.
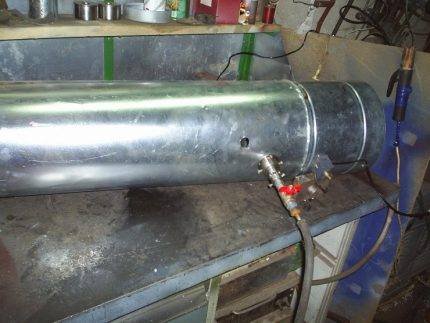
Alteration of the gas unit
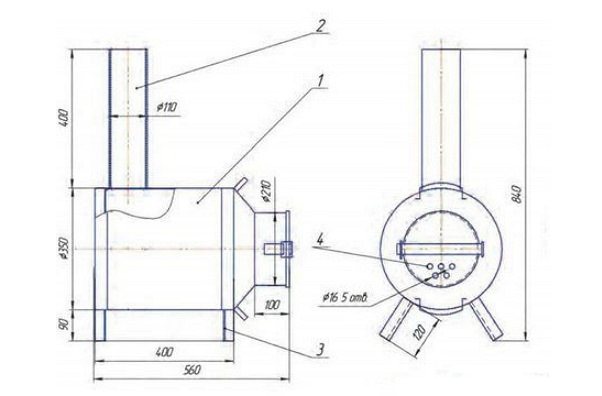
Do-it-yourself wood-fired boilers can be made not only from scratch. In the vast expanses of the Internet, you can find not only schemes for home-made boilers.If you have an old gas boiler left, do not throw it away or dispose of it.
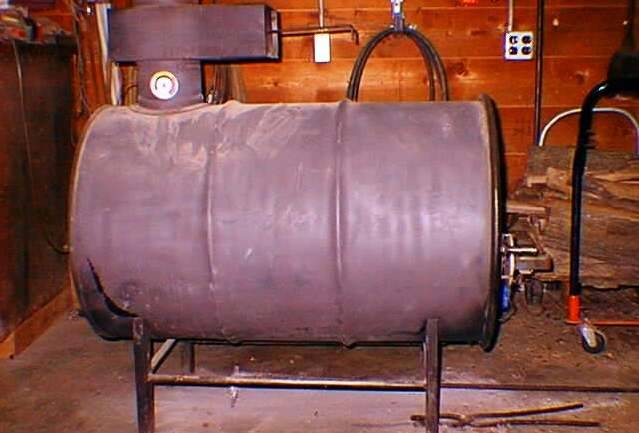
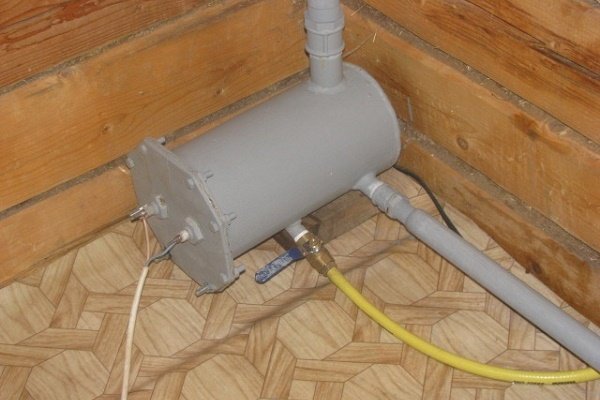
To do this, the boiler must be disassembled and removed from it all the elements that must be connected to the gas system. Next, you should turn to the scheme of a homemade boiler. There is nothing complicated in such a scheme. The converted gas boiler system looks like an old steam locomotive.
Such a boiler consists of a metal barrel, which is filled with water. Pipes are laid inside the barrel and brought out. Through these pipes, heated air enters the heating system. Air circulation is carried out in two ways: natural and forced. The use of forced air circulation in the garage heating system is irrelevant. Such heating schemes are suitable for two-story residential buildings. For a garage, it is quite enough to perform a simple heating system with natural circulation of the coolant inside the system.
To those pipes that depart from the water tank, the heating system itself and radiators are mounted. To heat a garage of the usual size, it is enough to equip the heating system with only two radiators of 4 sections. Given the fact that this room will be heated periodically, you should not use water as a coolant. The best option for such heating systems is air or antifreeze. Antifreeze is quite expensive, so it is better to focus on the organization of an air heating system.
As fuel in such boilers, you can use any solid fuel, the moisture content of which does not exceed 20%. The most common and inexpensive fuel is wood. At enterprises that are engaged in sawing wood, you can buy cutting boards or formwork for a small price.Thus, an old gas boiler can turn into a rather useful tool for heating a garage space.
DIY gas fireplace
Another convenient option for space heating is a gas fireplace. The purchase of such a device will cost a tidy sum, although the most savvy can independently assemble and equip a fireplace in their box without particularly large financial investments.
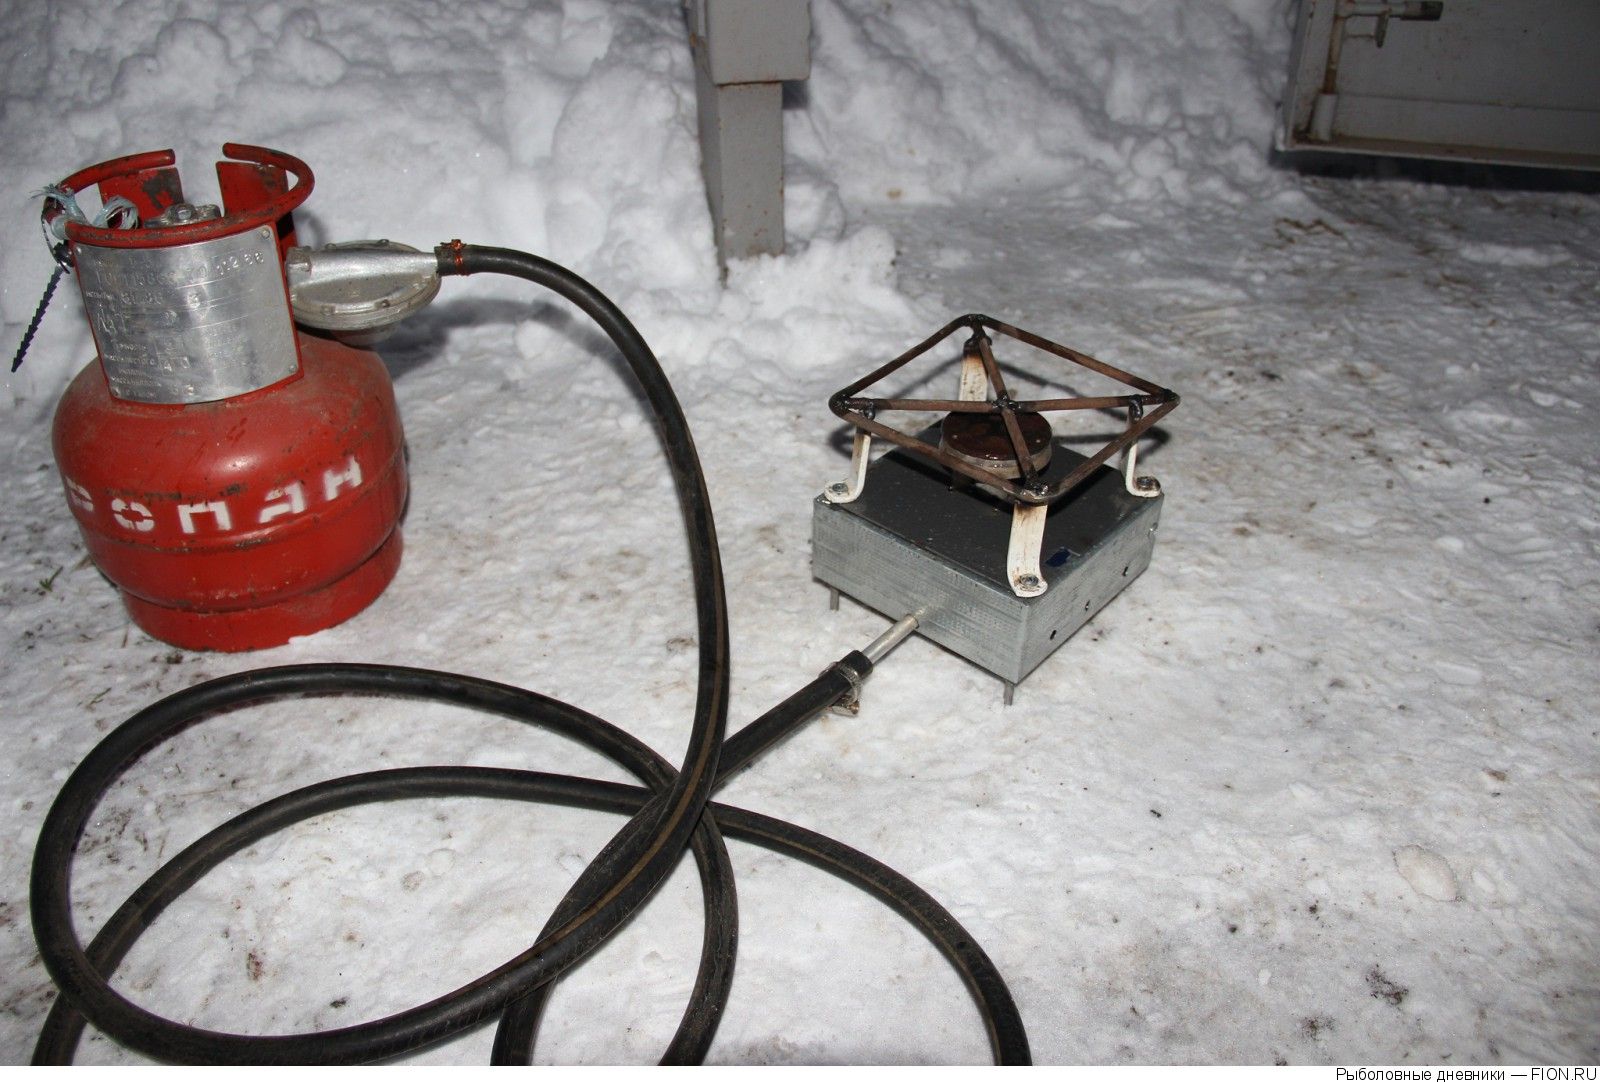
This kind of fireplace can be powered both directly from a gas pipe and from a gas cylinder.
On the Internet you can find a wide variety of drawings of gas fireplaces. Also, some users can purchase prefabricated structures, independently lay out brickwork and assemble a fireplace from pre-prepared parts.
The design consists of the following main elements:
- ordinary fireplace insert or decorative, decorating the room;
- a fireplace body made of refractory metals - cast iron or other alloys;
- a burner that supplies gas;
- gas supply system.
After determining the place where the structure will be installed, it is necessary to prepare it for the start of the construction of brickwork. There must be a solid foundation. You also need to install the chimney. After the erection of the fireplace, it can be decorated with a variety of decorative elements to the taste of the owners.
The fireplace is laid only from refractory bricks. When erecting a structure, care should be taken to ensure passage to the gas valve. After the internal elements of the masonry are installed, and communication is connected to the gas burner, you should make sure that the entire system is tight.
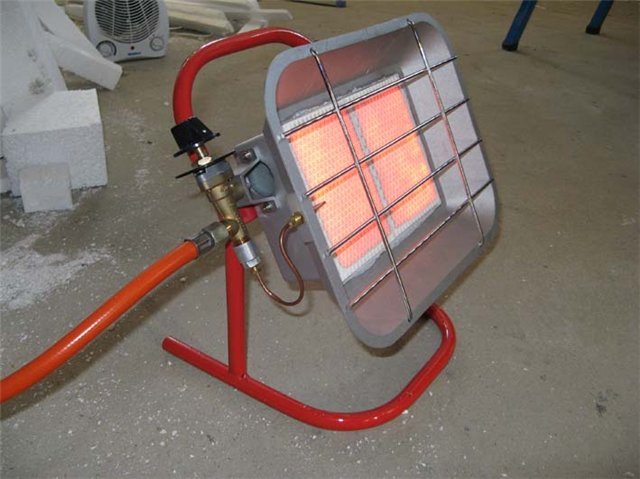
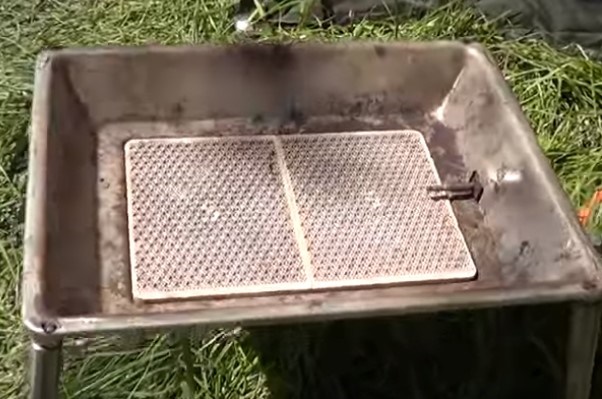
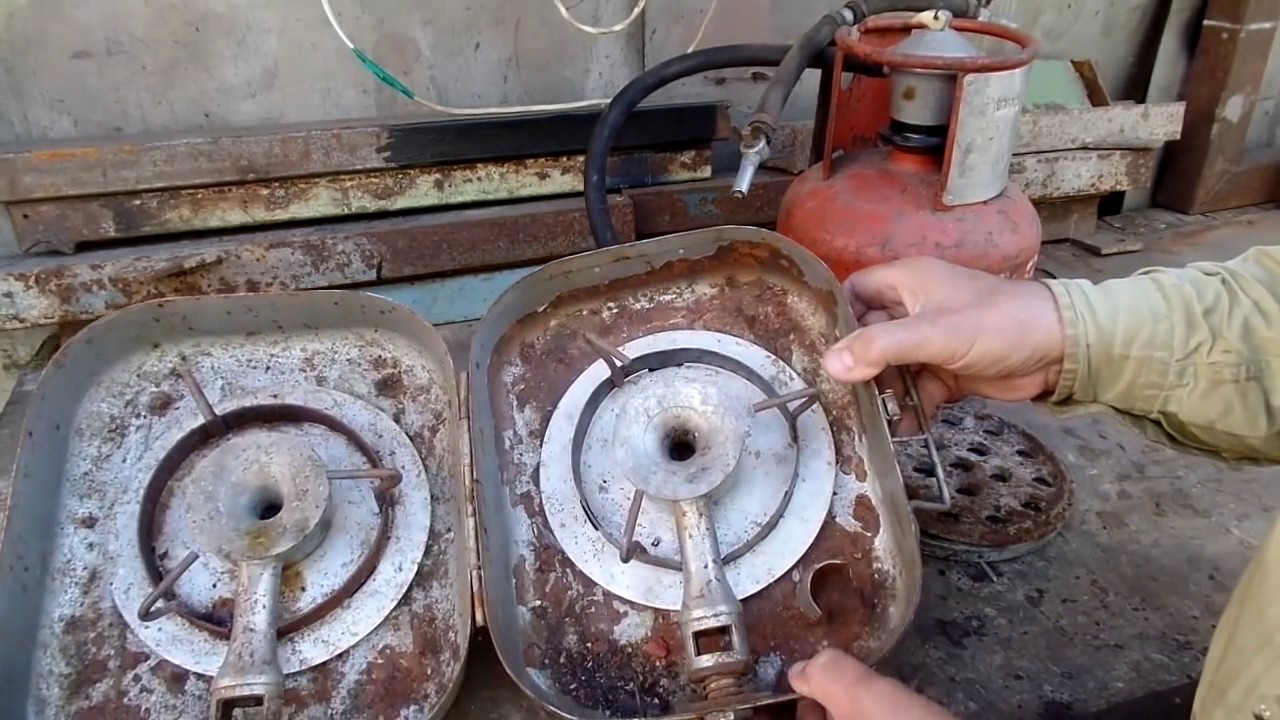
With the help of a valve, in the future it will be possible to regulate the force of gas supply and, consequently, the amount of heat generated. Gas workers advise turning the burners down with holes - this will protect them from contamination and moisture.


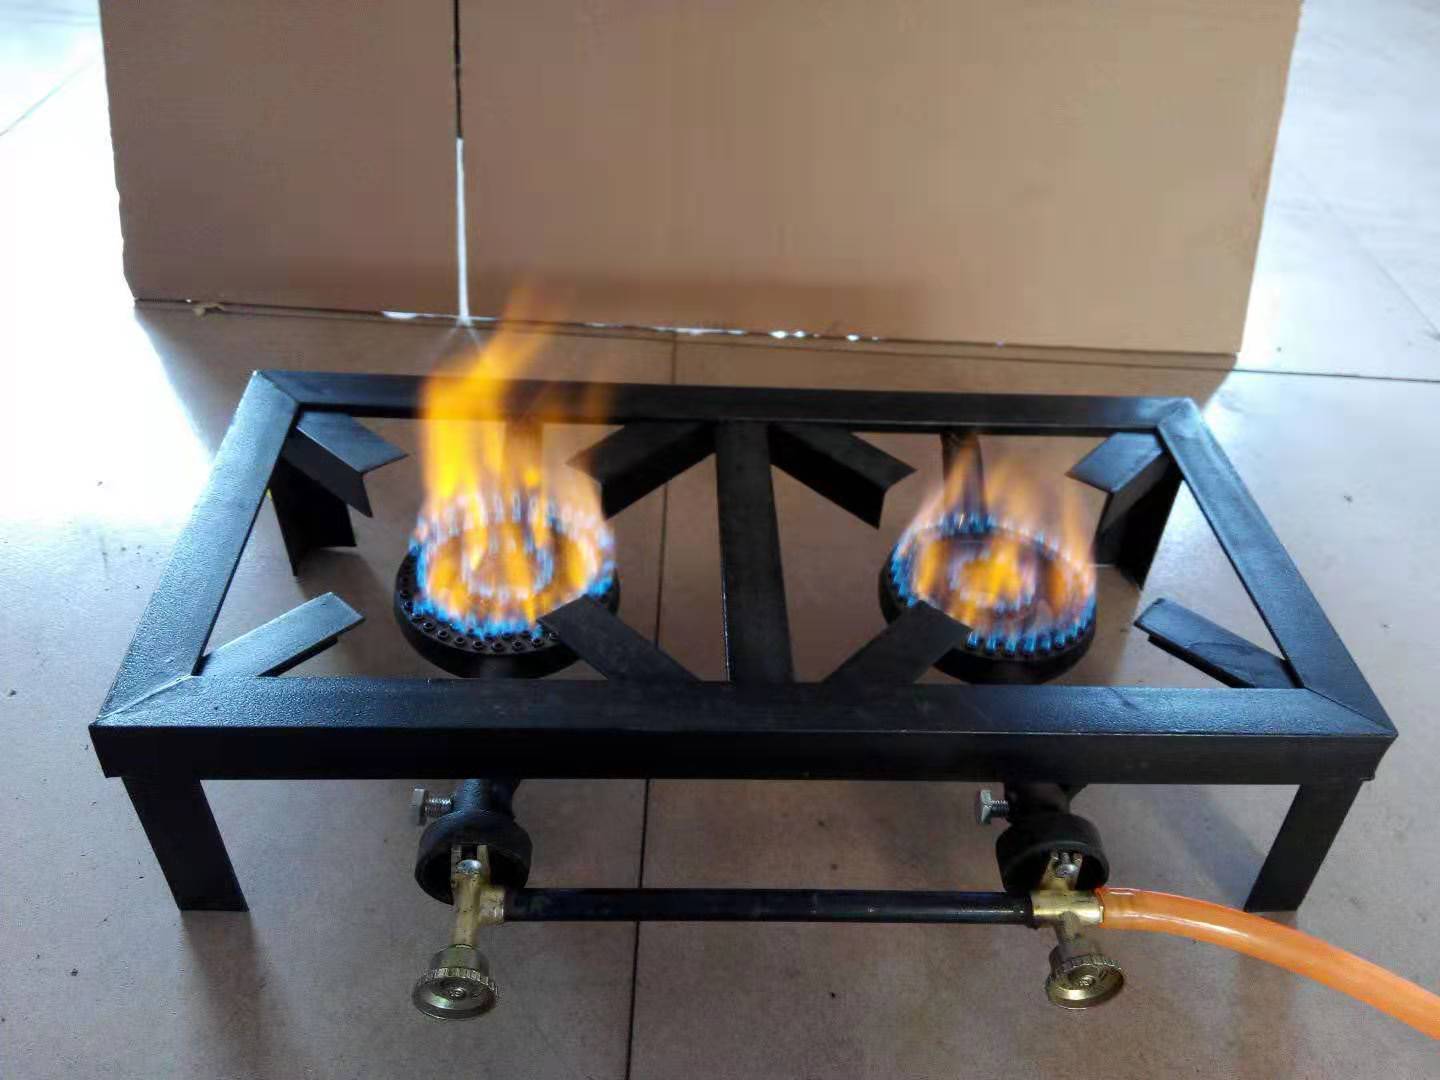
Also, the burner should be strengthened with protective mesh elements. This will reduce the load on the burner from the decorative material.
A gas supply pipe covered with refractory materials is supplied to the fireplace insert. The gas burner is installed with holes down and masked with artificial refractory material
The introduction of some modern devices will slightly automate the operation of the fireplace. So you can connect a gas supply control system that depends on the level of heat generated or a system for automatically shutting off the gas supply. All modifications are freely available on the market, and their purchase depends on the desire and ability of the owners.
A beautiful decoration of the fireplace bowl is made using a variety of stones, glass, and ceramics. In addition to the interior decoration outside, the fireplace can be decorated with tiles or in another way. The main thing is that it be a refractory material.
It is easy to assemble a gas oven yourself with your own hands. To do this, you must adhere to the design scheme and safety precautions.
Subject to all the requirements and recommendations, the assembly of the furnace will be an exciting and inexpensive task. Self-assembly of such a design will save significant funds
First of all, before installing a gas stove for heating a room, it is worthwhile to carry out a number of preparatory measures. If you do not insulate the room, then even the most powerful equipment will not give a serious result.
Therefore, it is important to carry out procedures for external and internal insulation, as well as equip reflective surfaces.
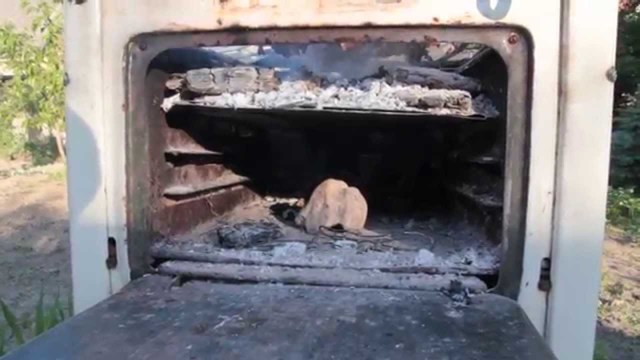
Features of homemade gas ovens
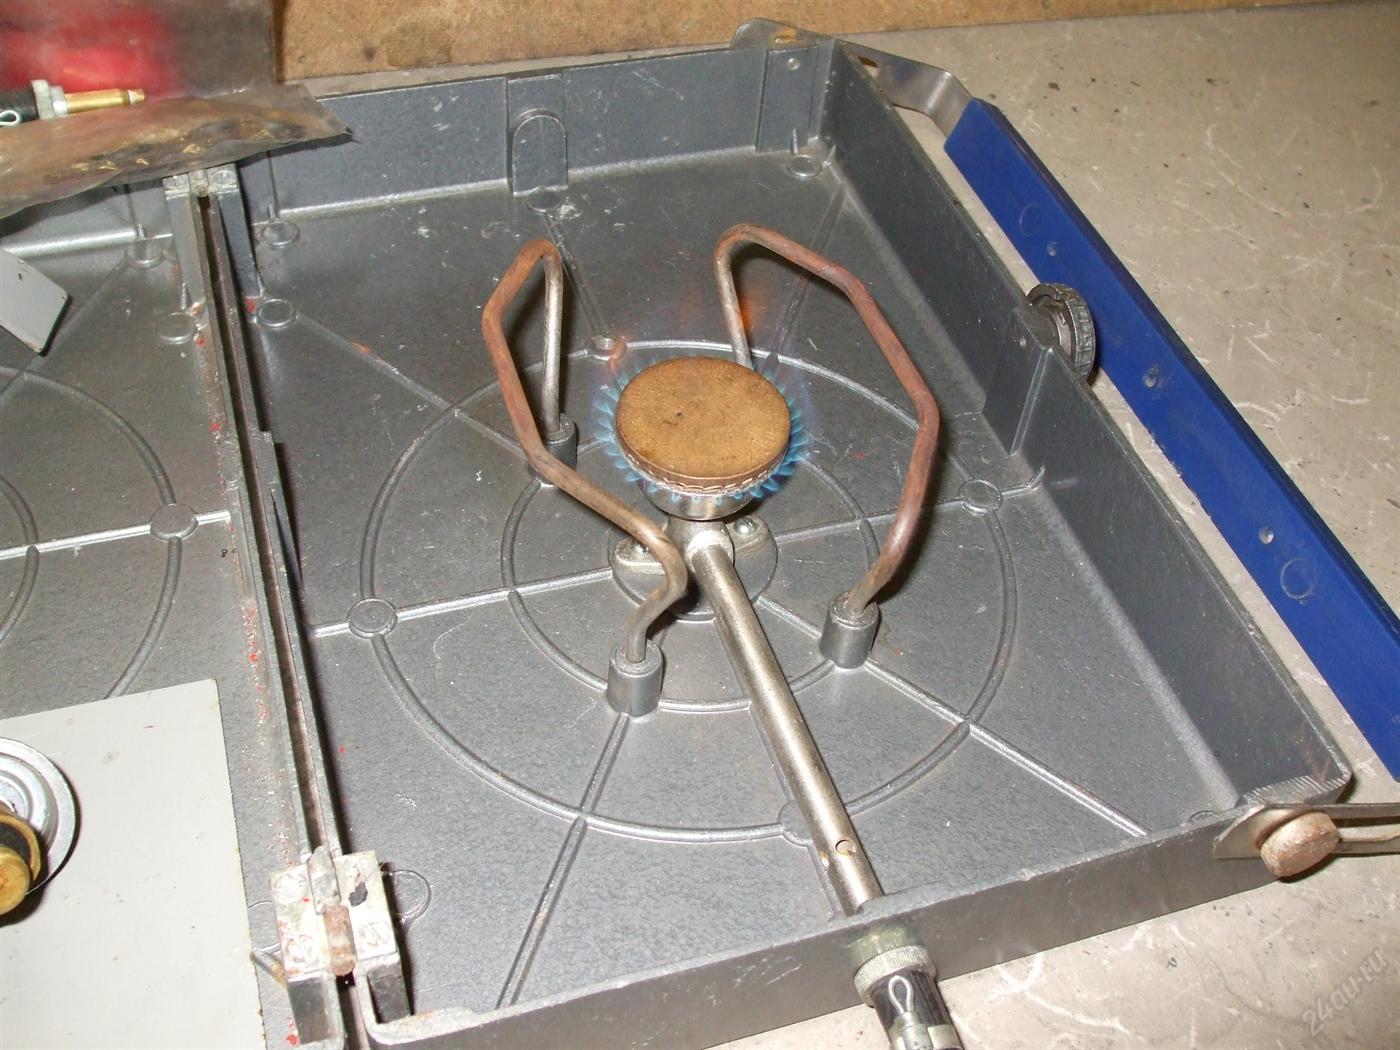
A gas stove differs from a wood stove in that it uses gas for kindling. Therefore, in such a device, instead of a window for laying firewood, a cavity for the burner is mounted. However, you can also make a gas-fired oven with your own hands.
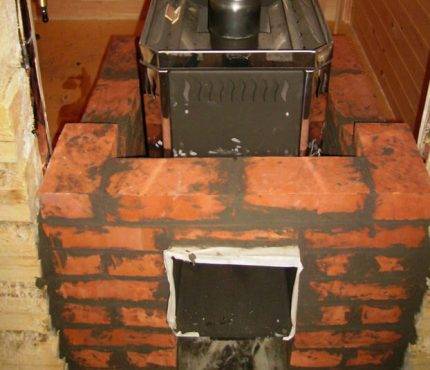
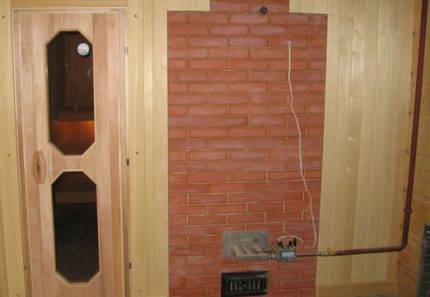
A metal bath stove is often lined with bricks. The lining is made in order to increase heat transfer. In addition, a metal structure with a brick casing cools down much more slowly.
Most gas ovens have the following design. A pressurized or atmospheric gas burner is mounted in the body of the device. Fuel supply is carried out through a hermetically attached gas hose or pipe.
At the top of a homemade gas stove there is a closed heater or an open pan with stones that are heated by a burner, as well as a device that removes combustion products.
When self-assembling, be sure to take care of installing a thermostat and a fuse that cuts off the gas supply if the burner goes out. The gas chamber containing the combustible gas is usually located under the stone tray.
The advantages of homemade gas stoves for a bath include:
- compact size, because gas stoves do not have a firebox and an ash pan;
- rapid heating to the required temperatures;
- economical resource consumption;
- there is no need for constant maintenance of the device;
- when installing a water tank, you can also heat water.
The disadvantages include the need for a source of gas.For example, if the bathhouse is located outside the city in a non-gasified area, some owners will have to buy gas cylinders or install a mini-gas tank. However, there is a plus in this - there is no need to obtain permits.
It is worth remembering that when working with gas, you must always follow safety precautions.
When choosing a gas burner for a sauna stove, it should be borne in mind that the efficiency of atmospheric burners does not exceed 90%, and the efficiency of pressurized burners is more than 95%. However, the first option wins in terms of independence from electricity.
When installing an open-burning stove, it is necessary to design and install a ventilation system and a chimney. Also, when oxygen is burned, the air becomes drier, so you need to take care of air humidification.
Gas supply of residential buildings
The gas facilities must be equipped in full compliance with the requirements of the approved "Rules for the Construction and Operation of Gas Equipment in Residential Buildings". Installation of gas networks, gas equipment and household gas stoves of a residential building is carried out by a special organization according to an approved project. The project includes the development of an entrance to the building (yard gas networks), as well as gas distribution inside the house.
For domestic needs, it is allowed to use low-pressure gas (not more than 100 mm of water column). In order to be able to maintain a constant pressure in front of the appliances (stove, stove, water heater), an apartment regulator-stabilizer is installed.
The depth of the gas pipeline in the area, which ranges from 1.2 to 1.7 m, is taken depending on the climatic region and the depth of soil freezing.
The water vapor contained in the gas cools in winter and creates ice plugs in the gas pipeline, thereby blocking the access of gas to consumers. Therefore, in the projects of yard gas networks, the issue of condensate drainage from the network must be provided for and correctly resolved.
In cases where the main gas networks are located at a great distance from the village and it is impractical to lay transit expensive gas pipelines, gas supply is carried out using imported liquid gas. As a combustible gas, a product of the secondary distillation of oil, propane-butane, is used.
For a stove designed for one family, at low gas consumption, two cylinders are needed, one of them is working, the other is spare. The capacity of the cylinder is 50 or 80 liters, which is enough to provide a family of 4-6 people for one week. Cylinders are installed in special metal cabinets at each house. Gas pipelines from cabinets with cylinders to the place of gas consumption are laid by a special organization.
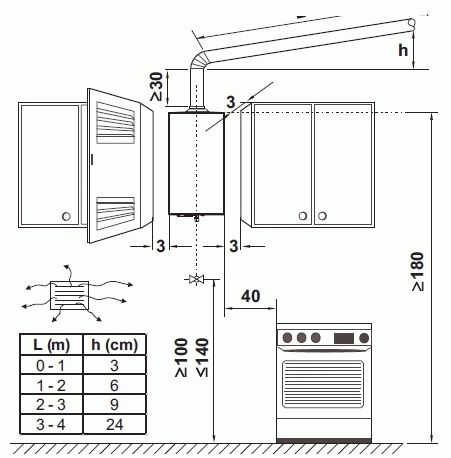
Gas stoves and tagans are installed in kitchens with a height of at least 2.2 m. At the same time, the kitchen must have an exhaust ventilation duct measuring 130 × 130 mm, a window or an opening transom in the window. In kitchens without windows, it is allowed to install gas stoves or tagans if there is a ventilation duct and a direct exit to a non-residential premises, which has a window with a window or an opening transom. In kitchens with a height of 2 to 2.2 m, as well as in kitchens without windows, each burner must have at least 4 m3 of space.
There is no kitchen in the house and it is impossible to allocate a separate room for it, it is allowed to install gas stoves and tagans in a corridor with a height of at least 2.2 m, which has a window and a ventilation duct. In this case, the width of the free passage between the installed slab or tagan and the opposite wall must be at least 1 m.


The internal volume of kitchens or corridors equipped with gas stoves or tagans without exhaust hoods must be at least: for a stove or tagan for 2 burners - 8 m3, for a stove for 4 burners - 16 m3.
When installing exhaust hoods over stoves or tagans, it is allowed to reduce the volume of the room: with a stove for 2 burners - up to 6 m3, with a stove for 4 burners - 12 m3.
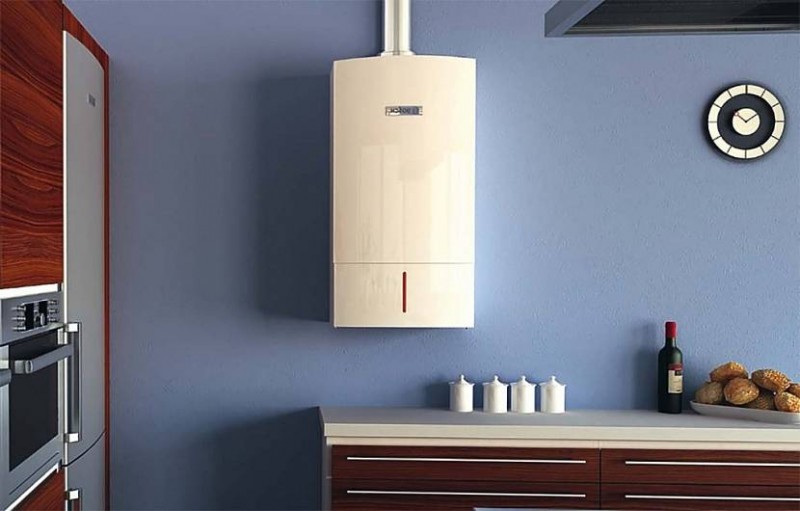
Gas water heaters are installed in bathrooms or combined bathrooms, the internal volume of which is at least 7.5 m3, equipped with ventilation ducts and having a grate near the floor with an area of at least 0.02 m2 or a gap between the door and the floor of at least 3 cm to ensure air flow. The doors of these rooms should open outwards.
Heating stoves and cookers run on gas if they are connected to separate chimneys. Burners installed in furnaces and stoves must be of the ejection type and ensure complete combustion of the gas.
Ejection burners provide (unlike diffusion) due to the energy of the gas jet, the suction of ambient air into the burner, as a result of which a mixture of gas and air burns in the burner.
In views or valves of gas-fired stoves, holes with a diameter of 15, 20 mm must be made for constant exhaust from the firebox.
The best solution for temporary heating
Now the scope of bourgeoisie is quite diverse:
- garage heating,
- cottage heating,
- building heating,
- heating of other premises where centralized heating is not possible or not connected.
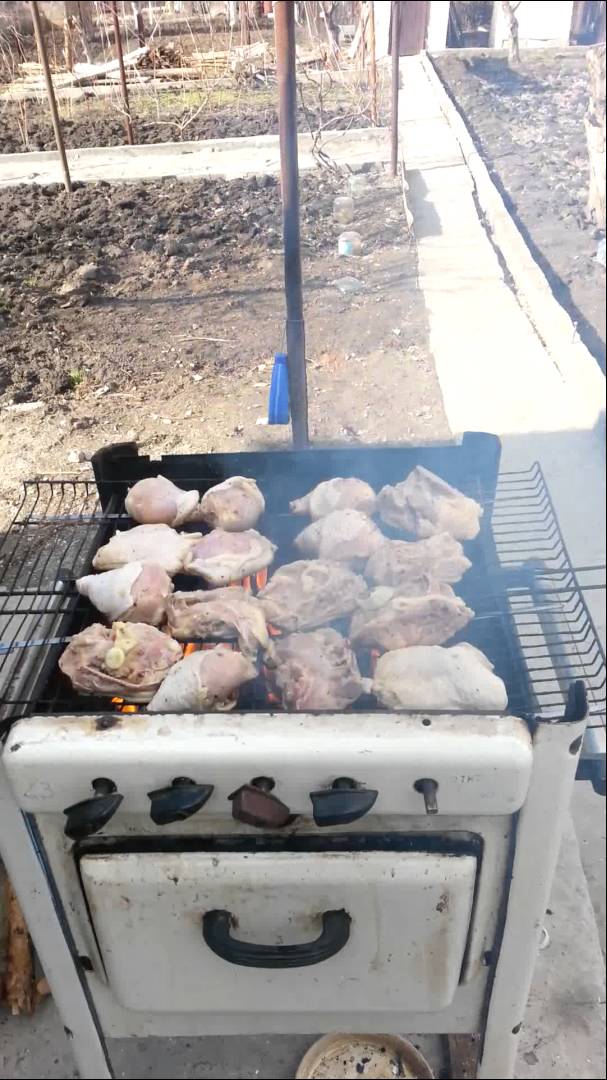
With its help, you can heat the room and cook food. A big plus is the ability to make a potbelly stove with your own hands from any old milk flask, barrel, gas cylinder, several pieces of sheet iron and pipe scraps.
It almost instantly picks up temperature and quickly releases it into the surrounding space, however, the latter fact has little effect with sufficient thermal insulation of the room.
The use of improvised materials for arranging the working area
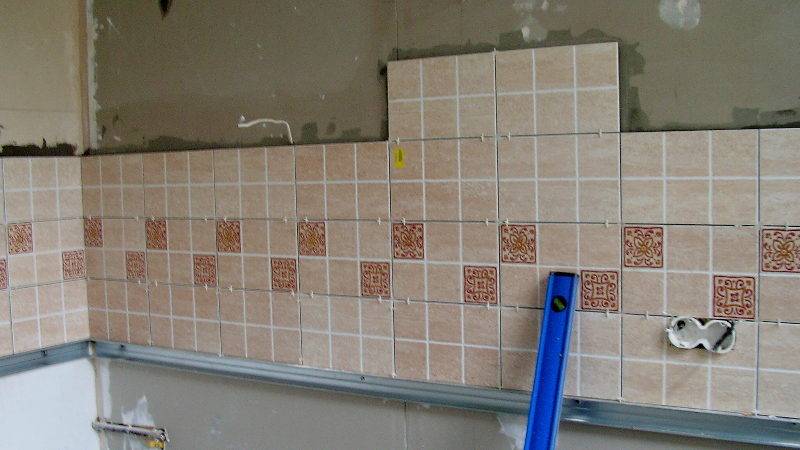
Consider the options for making a kitchen apron with your own hands from improvised materials:
- To create a unique floral ornament, a vintage tablecloth with a floral pattern will help. Such an apron will transform the kitchen, it will become cozy and comfortable.
- You can decorate the work area with photo wallpapers or a world map. In the latter case, a sheet of plywood is cut out according to the size of the apron and a card is glued onto it, then the surface is covered with a transparent layer of varnish so that high temperatures and humid air do not damage the paper. After the varnish has dried, attach the plywood to the base surface.
- Old beaten dishes will help transform the design of the room. Pieces of ceramics are glued to the wall like a mosaic tile.
Briefly about the requirements
When taking on a particular project, it is important to remember that the main thing is your own safety.That is why there are very specific requirements for garage ovens - made of metal, a gas cylinder, and indeed from any material, ignoring which entails an equally specific threat to your life.
We have collected the main ones - remember:
- when arranging the chimney, take care of the tightness of its channel;
- place the oven at a solid distance from flammable objects and liquids;
- do not use suspicious substances as fuel, as the vapors released during combustion can be harmful to your health;
- the exhaust valve must be no less than 10 cm in diameter;
- the recommended dimensions for standard potbelly stoves are 70x50x35 cm, while the volume of the structure should not exceed 12 liters.
Pipe heater construction
This homemade design is also called a thermal gas gun. It generates significantly more heat than previous heaters and absorbs more energy resource. Also, such structures are often equipped with chimneys, which makes them bulky and difficult to carry.
The scheme will acquaint you with the principle of operation and design features of a gas heat gun. The heat flow generated by the device is distributed by means of a fan
To assemble the heater yourself, you need to collect the following material:
- three meter pipes of various diameters (two 8 cm and one 18 cm);
- steel plates with which the fastening will be carried out;
- Metal sheet;
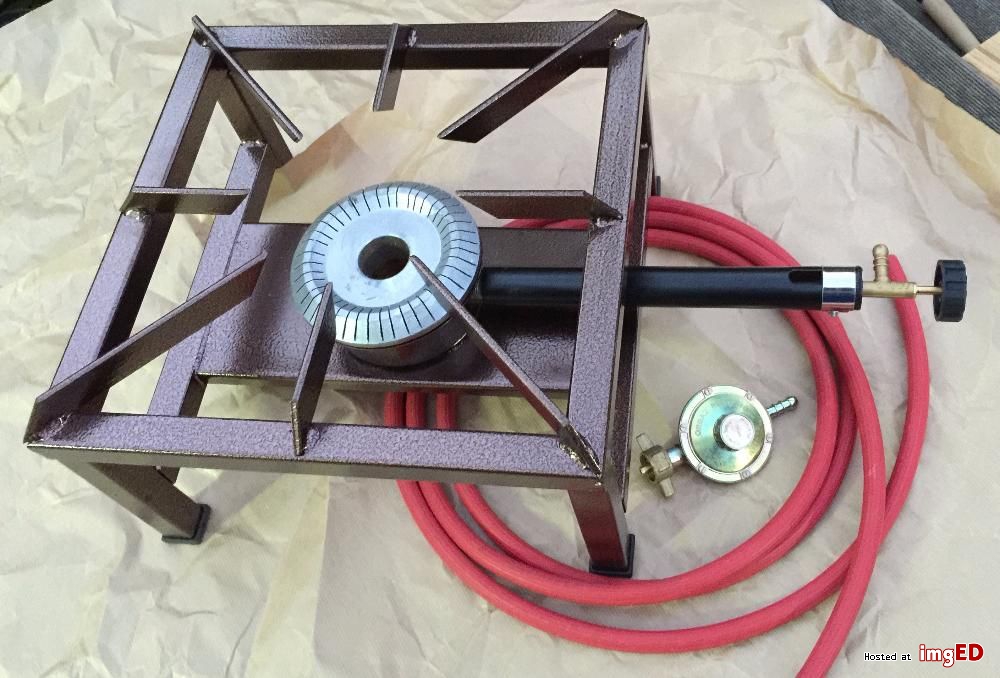
- gas burner with piezo ignition;
- axial fan.
You will also need a variety of tools: a drill, a welding machine, a tape measure, a level, a grinder, metal shears. Pipes can be replaced with cylinders or fire extinguishers of suitable diameters.A grinder will be needed to cut the bottom and top, as well as shortening the workpieces.
Working in intensive mode for heating a room of 15 square meters, a forty-liter cylinder is enough for about a week. When working, the gun dries the air, so you need to moisten it
Two holes of different diameters are drilled in a pipe with a diameter of 18 cm: 1 cm and 8 cm. You need to drill them opposite each other.
A 30 cm segment is cut from a pipe with a diameter of 8 cm, which will be a combustion chamber. Fasteners are welded to this pipe and a hole with a diameter of 1 cm is drilled in it. Then this pipe is inserted into the first pipe.
From a sheet of metal you need to cut a plug. It will close the gap between the heater body and the combustion chamber. A combustion chamber is welded to the body, and a pipe for the outlet of hot air is welded to a hole with a diameter of 8 cm. After that, the plug is welded. After making sure that the gas burner is firmly attached to the combustion chamber, you can push the hose through the centimeter holes.
A fan is installed at the back of the device, and a chimney is installed on top. In order for the heater to stand steadily on the surface, the legs should be welded. The gas heat gun effectively heats rooms, economically consumes gas. However, when using it, you should follow safety precautions.
General recommendations for creating devices
In an effort to save an expense item, many owners, choosing among heater options, are in no hurry to purchase ready-made factory models.
After all, having a desire and having the appropriate skills, a heating device can always be designed on its own.
When choosing a heater for a garage that you can do yourself, many are guided by two parameters:
- The heating device should be easily activated, quickly warming up the room.
- The device should have a simple design, devoid of complex parts and elements.
- The operation of the device should be carried out at minimal financial cost.
All these requirements are met by three options for the home-made heaters described below, which operate from different energy sources: gas, solid fuel and electricity.
The safety of the device is also important. Therefore, regardless of the method of heating in the garage, it is necessary to equip a ventilation system
After all, a decrease in the amount of oxygen and the accumulation of combustion products carries a risk to human life.
Option number 2. Making a pot stove
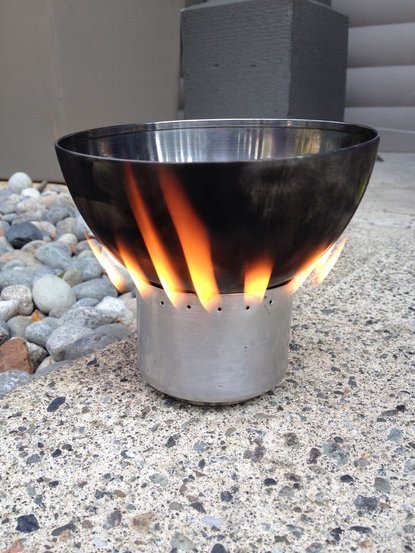
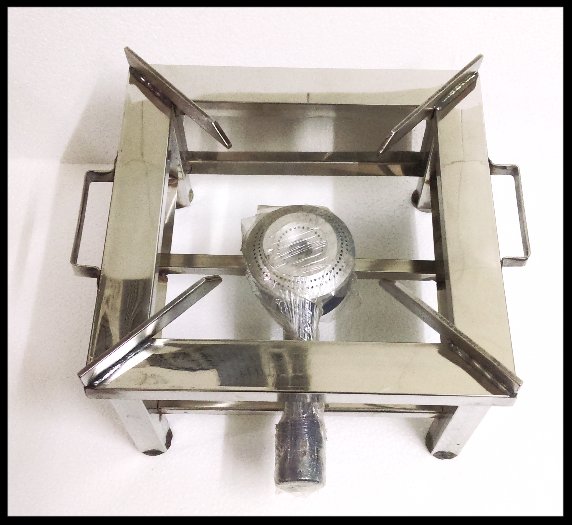
If you plan to make a two-layer oven, you can use "stainless steel" pans, also called tanks with lids (they are quite cheap). This design is perfect for a hike, as a budget and easy to implement. The costs for her are practically zero, she will effectively replace the fire, and the fuel for her work can be found in any forest.

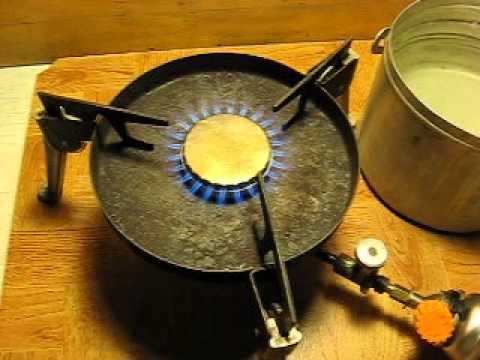


From a constructive point of view, a two-layer oven is two pans of different sizes inserted into each other. An opening was cut in the side wall of the outer pan approximately ? height in order to load fuel. But at the bottom there are parallel grate slots with rotating bridges or ordinary holes.
A stand is placed on this grate. Then the stand is loaded with firewood, and a second smaller container is placed on top of all this - it will be heated by the flame.The second pot will be surrounded by fire and heated walls of a larger capacity, thereby minimizing fuel consumption and saving heat generated.
Note! The bow for the bowler must be made in the form of a separate removable element. The described design of the camping stove is extremely simple, and therefore it is compact and mobile.
You can easily pick it up along with burning firewood and move it to another place (if, for example, it started to rain and the fire needs to be moved under a canopy)
The described design of the camping stove is extremely simple, and therefore it is compact and mobile. You can easily pick it up along with burning firewood and move it to another place (if, for example, it started to rain and the fire needs to be moved under a canopy).