- Preliminary preparation of the room before pasting
- The process of pasting the walls with your own hands
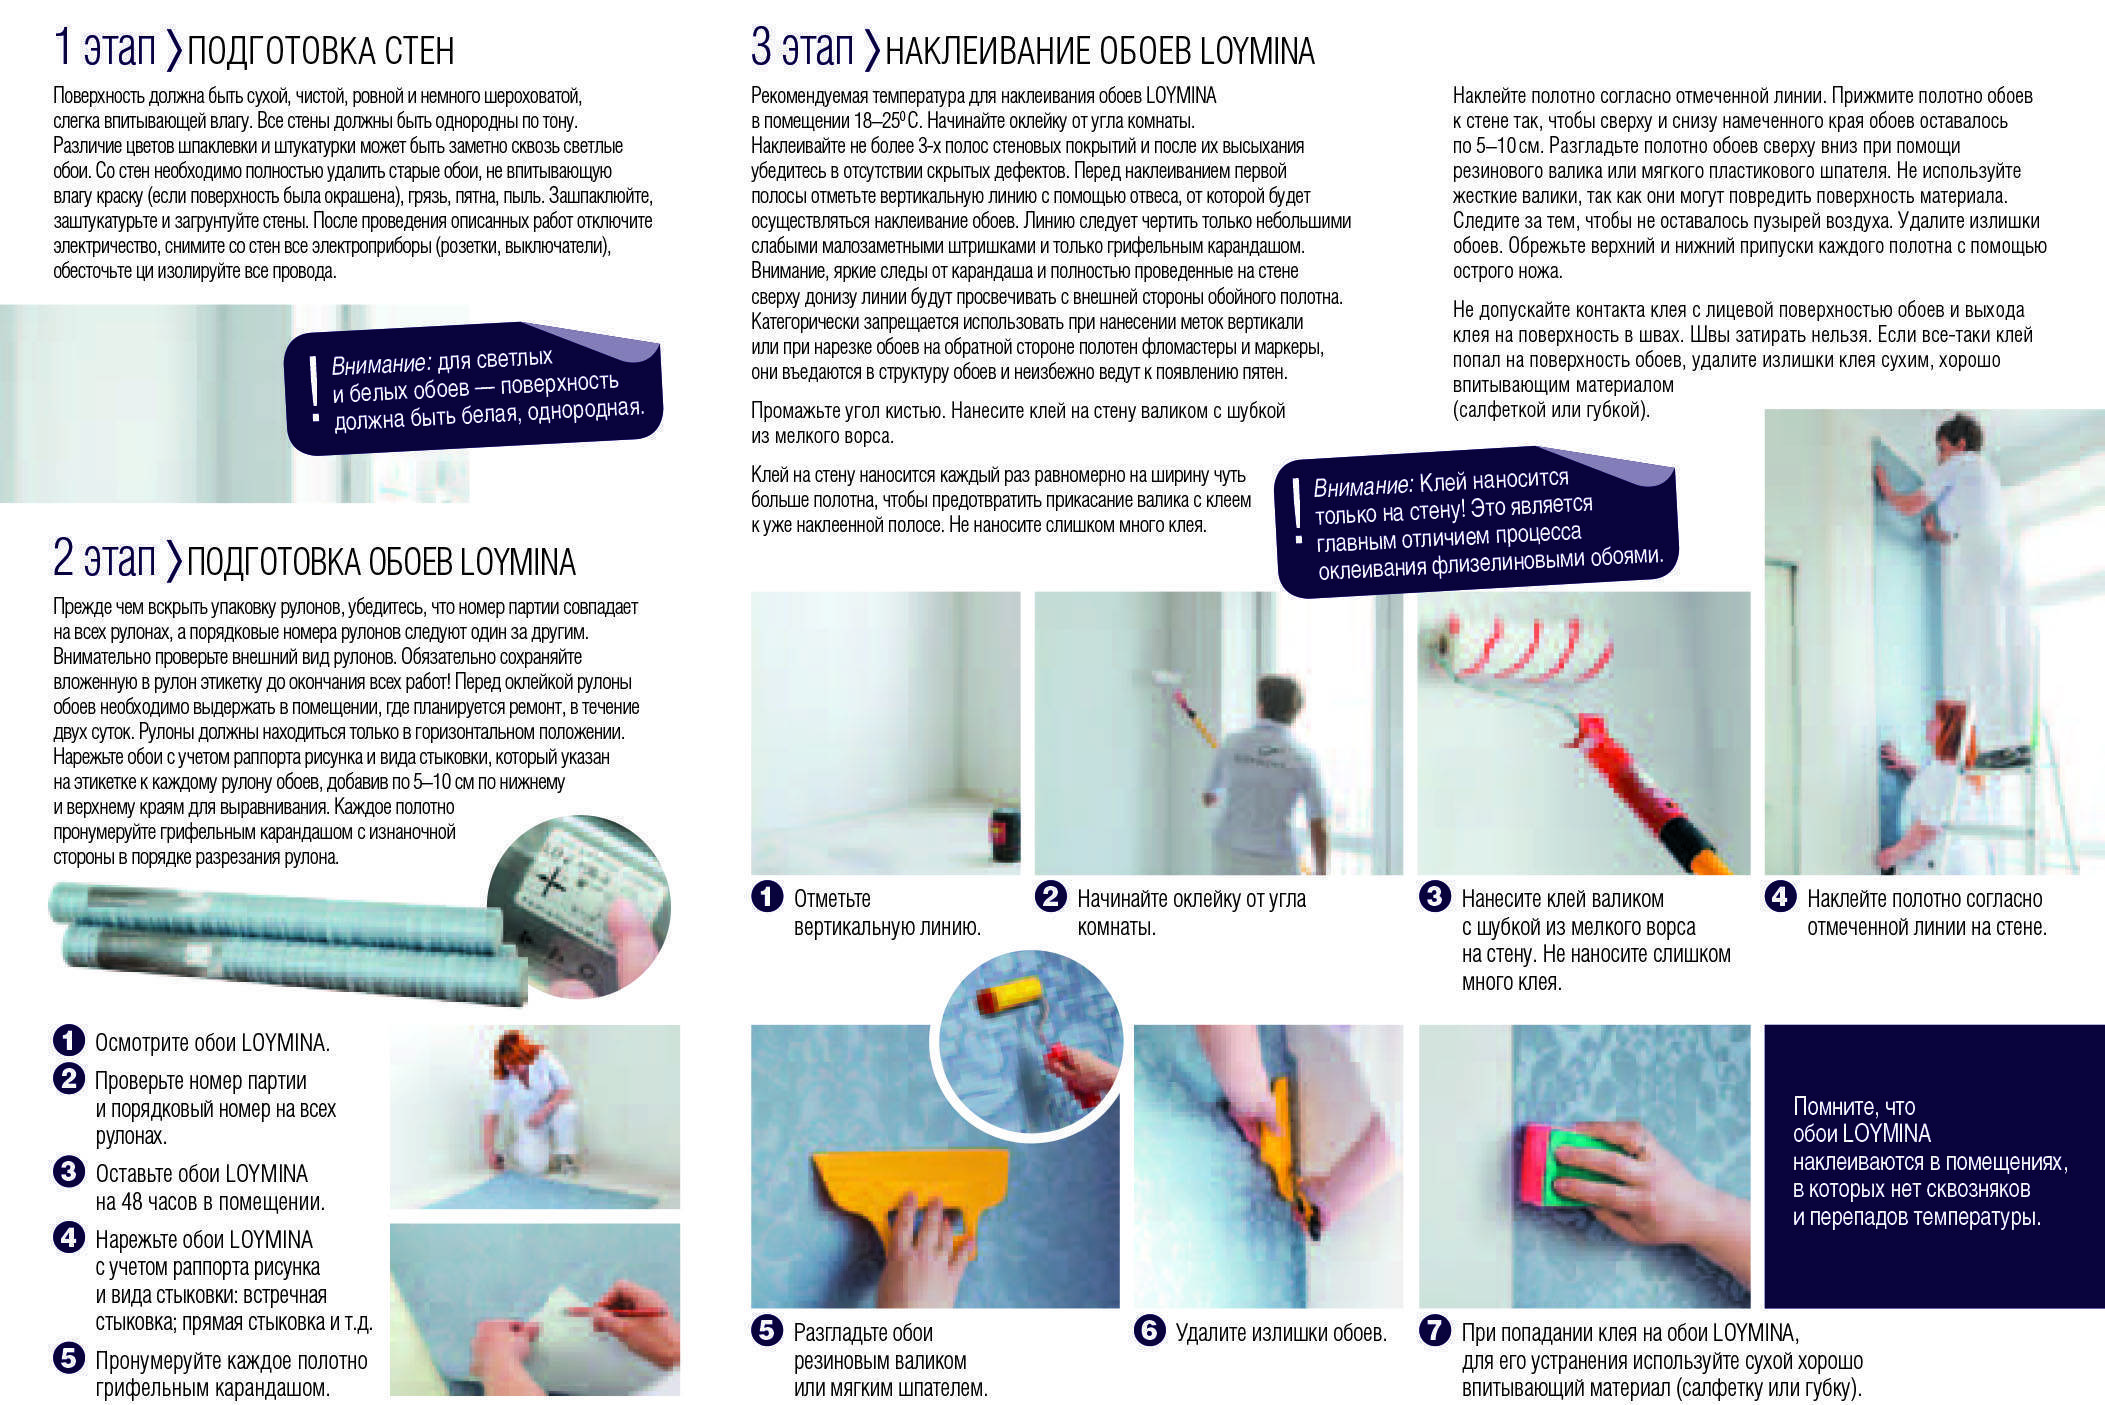
- Stage number 1. Wall marking
- Stage number 2. Preparing the site and cutting the wallpaper
- Stage number 3. Glue preparation
- Stage number 4. Applying glue and wallpapering the walls
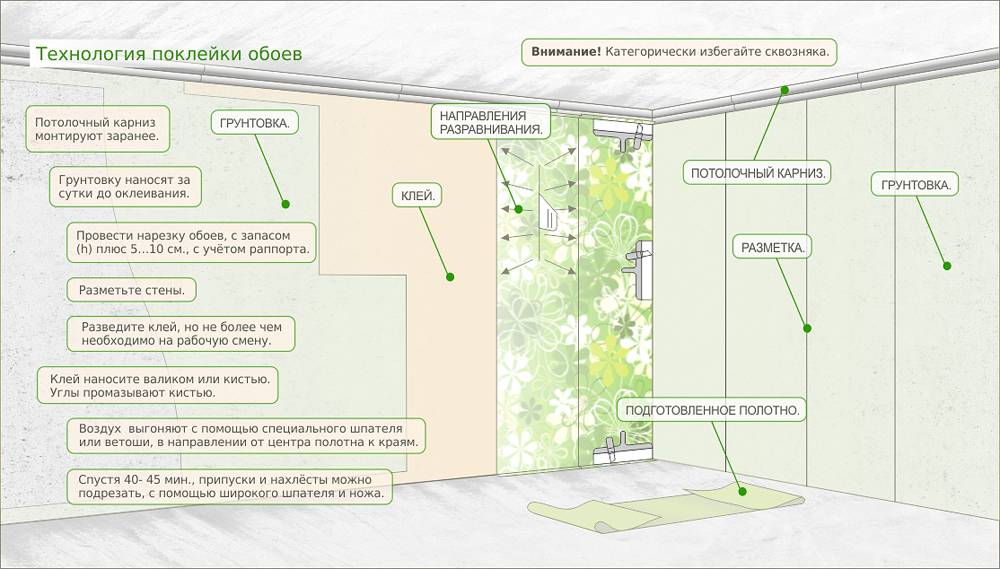
- pasting technology
- Step 1 - mixing the adhesive
- Step 2 - cutting the canvases
- Step 3 - marking on the wall and applying the adhesive
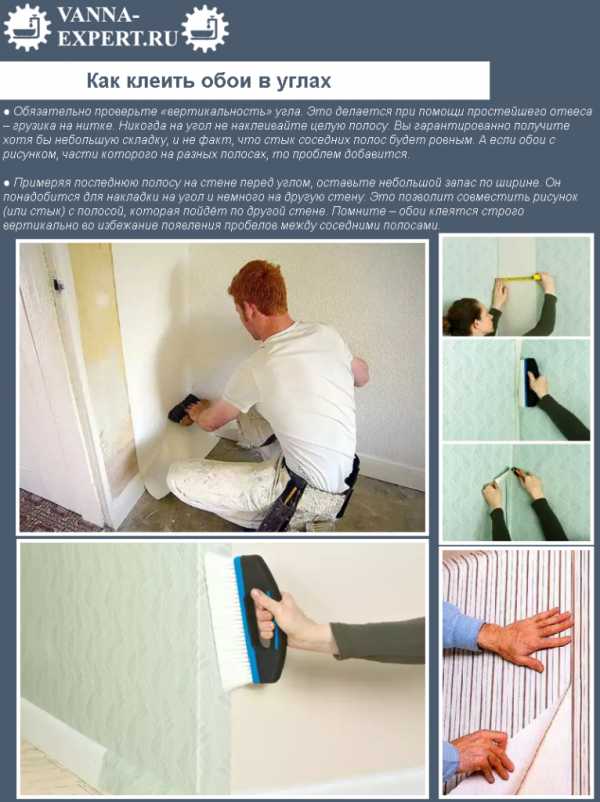
- Step 4 - work with corners - correct docking
- Step 5 - gluing around the doorway
- How to stick wallpaper of different types
- How to glue paper wallpaper
- How to glue vinyl and non-woven wallpaper
- How to glue wallpaper
- The direct process of gluing non-woven wallpaper
- Disadvantages in working with non-woven wallpaper
- How to glue peeled wallpaper.
- Why is the wallpaper lagging behind the wall?
- Necessary tools and materials
- Sticking in problem areas
- Proper preparation for bonding
- How to properly dilute the glue?
- Surface preparation
- 3 Wall gluing
- Gluing features
- Helpful Hints
- Sticking order
- Algorithm for sticking on the walls with your own hands
- Stage 1: scheme and wall markings
- Stage 2: wallpaper preparation
- Stage 3: gluing
- Stage 4: final
Preliminary preparation of the room before pasting
At the preliminary stage, it is important to correctly calculate the required number of rolls.To do this, on each side of the room, you need to measure the width and height.
When calculating the required number of rolls, it is important to add several centimeters to the length of the required web.
Note! You should buy wallpaper from only one batch number. This number is usually found on the roll label.
Only rolls from the same batch number will definitely have the same shade and pattern texture.
Before wallpapering, the walls must be leveled, wallpapers wider than 50 cm are very sensitive to unevenness
Preliminary preparation of the room before wallpapering consists in leveling the walls. This fact is especially important for wide wallpapers, which are extremely intolerant of irregularities, especially at the joints.
Sockets and switches must be dismantled, wires isolated. Treat the walls with primer and be sure to dry. Protect the remaining furniture in the room, the floor and unused areas of space with plastic wrap.
The process of pasting the walls with your own hands
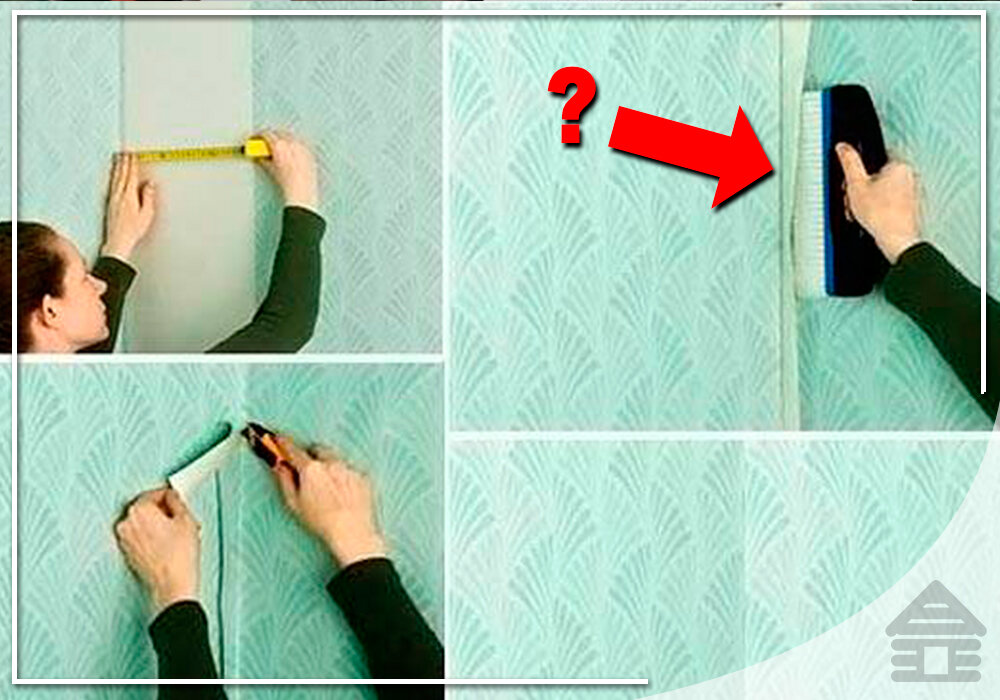
Stage number 1. Wall marking
When working with non-woven wallpaper, marking is necessary because the sticker is butt
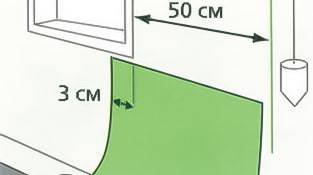
Markup is recommended to start from scratch. Wallpaper on this basis has an excellent edge, the butt pasting method is used. Overlapped panels are glued in the corners. This is done in order to enable good further processing. If the width of the roll is 1.06 meters, then a meter must be set aside on both sides of the corner.
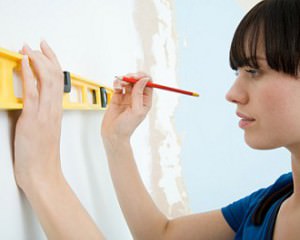
Initially, a vertical line is drawn with a pencil using a level or plumb line. From the drawn line with a tape measure, 1.06 meters are marked. So it is necessary to draw all the walls that are being prepared for pasting.
Stage number 2. Preparing the site and cutting the wallpaper
Make sure that the pattern fits together, flaws will be very noticeable with large ornaments
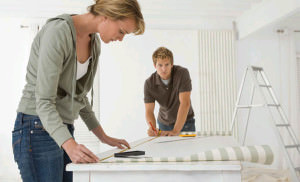
After marking the walls on the floor, you need to spread a clean plastic wrap. It will be needed as a place for rolling rolls. This is done by laying the wallpaper face down.
When trimming the panel, it is important to take into account the pattern on the wallpaper.
If there is no drawing, then the place where the first piece will be glued is measured with a tape measure. Another ten centimeters are added. The roll is folded over the rolled part so that the edges match. First, the bend is carried out by hand, and then it is cut with a knife. Prepare wallpaper for pasting the entire room.
Prepared panels are folded into loose rolls face down. Non-woven wallpaper is tolerant of such manipulations.
Stage number 3. Glue preparation
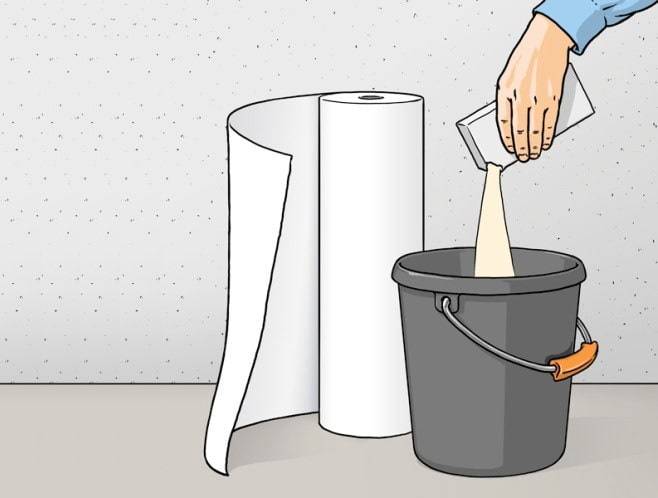
When diluting the glue, lumps should not be allowed to appear, they negatively affect the quality of the sticker
Wallpaper glue should be bought specifically for non-woven wallpaper. It should be diluted according to the instructions that are indicated on the package. Usually, glue is diluted according to this technology: water is poured into a bucket, glue is poured into it in a thin stream, it is constantly stirred. There should be no lumps, otherwise they will interfere with high-quality gluing. In order for the glue to become suitable, you need to let it stand for a while. It will be useful to insert a special plastic mesh into the bucket, which will help remove excess glue.
If you already have non-woven wallpaper, learn how to remove them, saving you time and effort.
You decide to paint the wallpaper, then you will be interested in some of the features of this process.
Stage number 4. Applying glue and wallpapering the walls
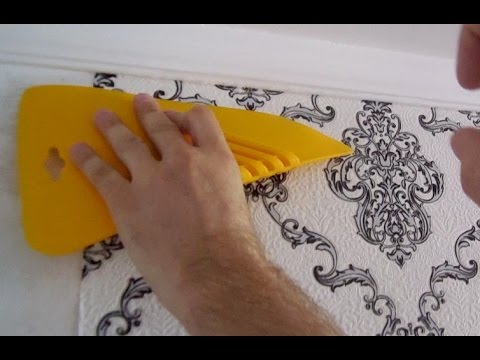
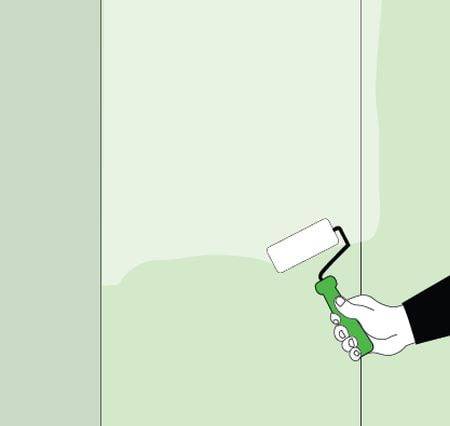
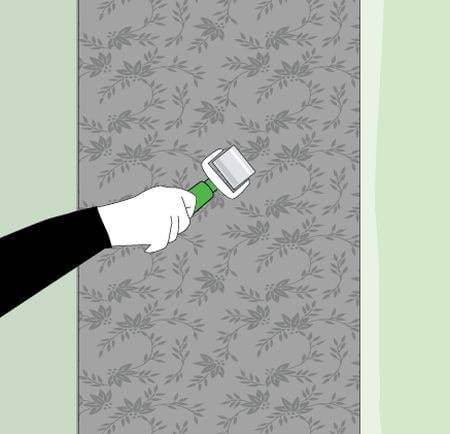
Dip the roller in a bucket of glue, run along the grid, and then apply glue to the wall.Apply glue only at the rate of pasting one panel. The cloth should be glued on top. The canvas is taken by the edge and applied to the wall. Gradually lower the roll down, smoothing the wallpaper from the middle to the edges with a special brush or roller. You can also use a plastic spatula, but be careful not to damage the wallpaper.
Note! Wallpaper should be firmly pressed against the wall, there should be no bubbles inside or wrinkles.
Wallpaper always starts to glue from above, moving down, from the middle to the edges of the panel
When several canvases have already been pasted, then each subsequent seam of the wallpaper will have to be additionally rolled with a roller. The piece of wallpaper that remains below should be carefully cut off. It is recommended to do this after the wallpaper has dried. By the way, estimate that the plinth completely covers the place where the wallpaper is cut.


It is important! Many hardware stores today sell wallpaper in a meter width, which is non-standard for us. But the meter width has its advantages, because it simplifies the pasting process.
pasting technology
Before you start gluing meter-long non-woven wallpaper, you need to prepare the surface, which is pre-cleaned of the old coating and dirt, defects are eliminated, the wires are insulated so that the composition does not get on them, the switches and sockets are unscrewed.
After applying the adhesive composition to the wall, the canvas must be applied from the top of the wall, and, pressing against it, go down. After that, a plastic spatula or a rag is taken, with the help of which the air is “expelled”, and the wallpaper is leveled, which helps to avoid wrinkles in the future. You need to do this from the middle of the canvas to the edges.In addition to the basic process of gluing the material, you should know and apply the following 5 steps.
Step 1 - mixing the adhesive
As mentioned earlier, wallpaper glue must be bought at a hardware store. We advise you to purchase a special tool created for gluing this particular non-woven material. The instructions are written on the packaging, which should be strictly observed, without experimenting with proportions.
Step 2 - cutting the canvases
Before you get down to business, you need to measure the height of the walls from floor to ceiling in 4-5 different places. This should be done because this indicator can turn out with different results even in new homes. When cutting canvases, it is worth taking the maximum height of the wall, while adding a few centimeters for safety. If the material is a solid color or without a pattern that does not require customization, then this simplifies things.
For cutting, it is worth unwinding the roll, draw a horizontal line with a pencil using the obtained indicator, cut it off with a sharp knife or scissors.
Step 3 - marking on the wall and applying the adhesive
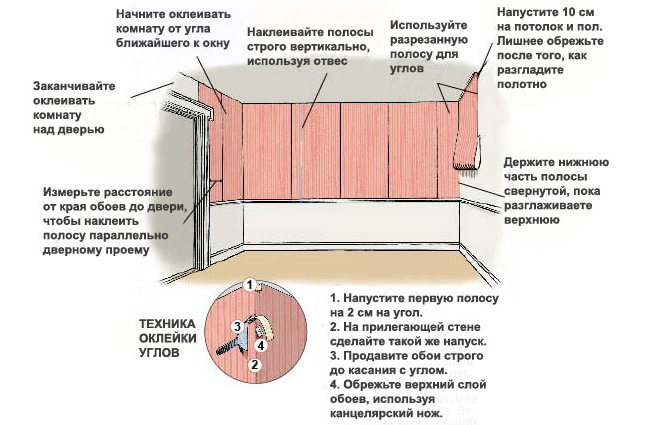
One of the important rules when gluing rolls is to maintain a straight vertical line. When applying the first strip to the wall, you need to be especially careful, because, focusing on it, the rest of the canvases will be glued.
Start marking the wall from the corner. Using a level, smooth vertical lines are applied along the entire wall with an indent of 1 meter. The standard width of meter rolls is 106 cm, so 6 cm is left in stock.
Some manufacturers require you to apply glue only to the wall, while others advise you to also lubricate the wallpaper. Therefore, in order to avoid misunderstandings, you should first read the factory instructions.The next step is a thick application of special glue with a roller on the wall, in which the entire surface is thoroughly smeared. For hard-to-reach places, use a small brush. The adhesive strip should be 5–10 cm larger than the width of the roll.
Step 4 - work with corners - correct docking
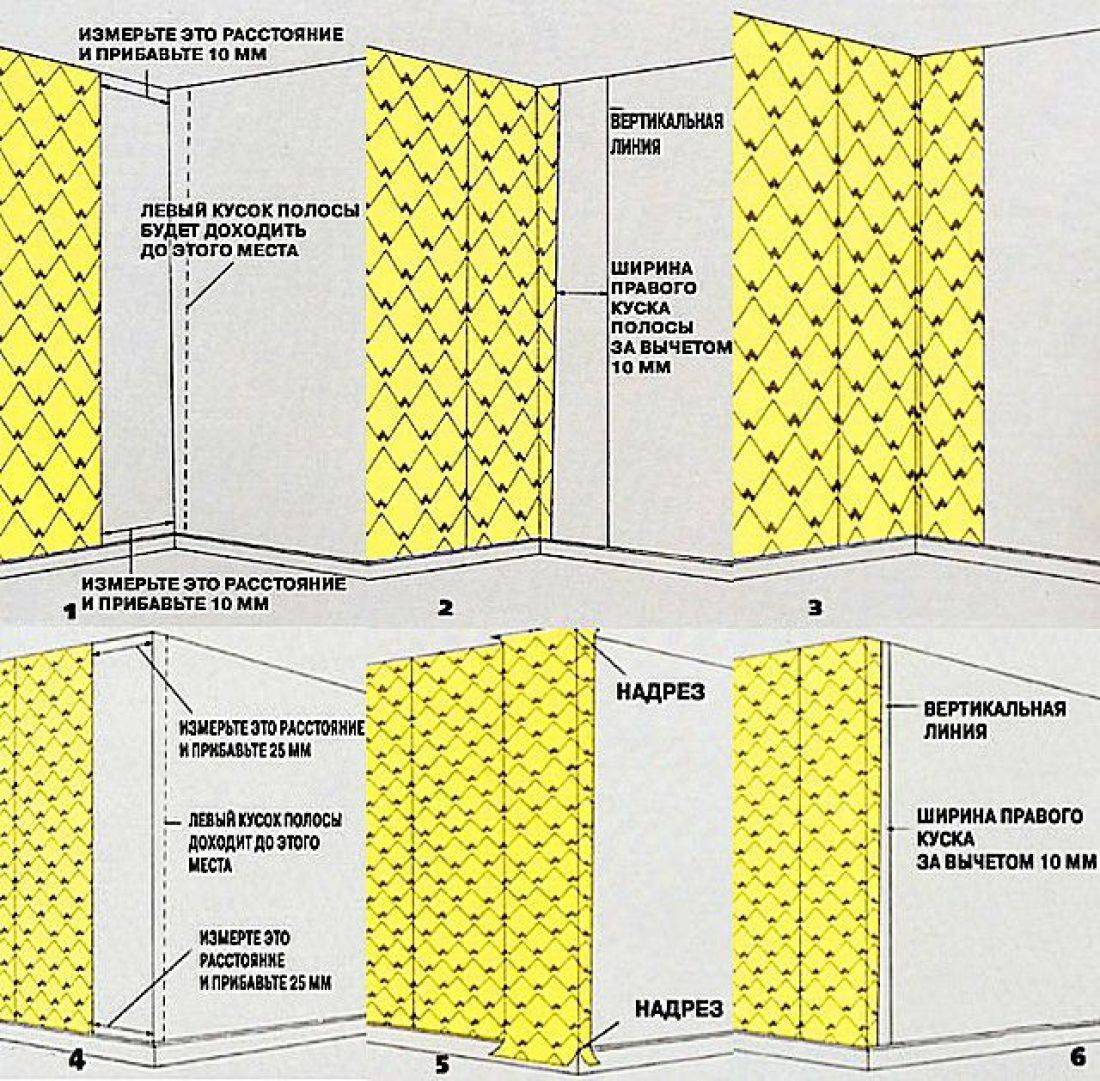
It is not advised to glue non-woven meter-long wallpapers in the corners in solid strips, there is a high probability that they will lie unevenly. In this case, both at the inner and outer corners, you should act in a proven way. It is necessary to measure the distance from the last glued strip to the corner, adding 1.5–2 cm to it. After that, a piece of wallpaper is cut off, glue is applied and glued. The next strip should be applied with an overlap on the existing ledge.
Non-woven wallpaper should be glued close to each other. It's not scary if at first the joint does not work out. When straightening the wallpaper, due to the large amount of glue, they will glide well, so they can easily be “moved” to another strip.
Step 5 - gluing around the doorway
Gluing around a doorway is not as difficult as it might seem. If the wallpaper is plain, then the wall is glued on the sides first, leaving space above the door. After that, it is worth measuring and cutting off the strip that needs to be joined with the adjacent one. If it overlaps, then the excess is cut off and only after the work has been done can the space above the door be filled.
With patterned wallpaper, skipping the space will not work, you will have to do everything sequentially, adjusting the pattern.
How to stick wallpaper of different types
We looked at the basic techniques for wallpapering. But they can be of different types - paper, vinyl, non-woven, photo wallpapers, self-adhesives
In working with them, there are some nuances and features that are important to consider. Different types use different glue, different time to impregnate after applying the glue, different way to stick on the wall, etc.
How to glue paper wallpaper
 Paper wallpaper - a "lifeline" for inexpensive cosmetic repairs
Paper wallpapers are good for their breathability, environmental friendliness and price. Therefore, many choose them. Sticking algorithm:
- We cut the roll into strips with a length equal to the height of the wall, not forgetting the reserve, depending on the pattern.
- With the help of a plumb line and a ruler, we mark the wall.
- We apply glue to the wallpaper and wait 5 minutes, it’s not worth it anymore, as the paper wallpaper is soaked quickly and can be damaged.
- We press the canvas against the wall from the ceiling with a wallpaper spatula and smooth it from the center to the edges to remove air bubbles.
How to glue paper wallpaper with your own hands is described in detail in the video.
 Watch this video on YouTube
How to glue vinyl and non-woven wallpaper
 How to stick vinyl wallpaper in the corners
Rolls of vinyl wallpaper are cut in the same way as paper ones. The following steps follow:
- The wall is smeared with a thin layer of glue, which dries for 15-20 minutes.
- Glue is applied to the strip for 8-10 minutes.
- We press the canvas against the wall from the ceiling with a spatula and smooth it from the center to the edges.
- Vinyl wallpaper is glued end to end.
The process of gluing non-woven wallpaper is the same as for vinyl. Only in this case, the adhesive is applied exclusively to the wall, since the underside of the canvas is covered with a special binder polymer.The same technology answers the question of how to properly glue vinyl wallpaper on non-woven base.
 Watch this video on YouTube
How to glue wallpaper
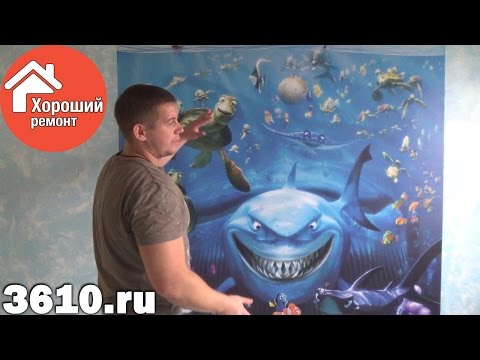
Wall murals are very popular in the decoration of apartments and houses. With their help, you can create a unique interior and visually expand the space of the room. What you need to remember when sticking such wallpaper:


- You should use a special glue for wallpaper.
- First lay out the fragments on the floor so that you understand how to properly attach them to the wall for the integrity of the picture.
- The surface of the walls under the photo wallpaper should be perfectly flat.
Consider how the photo wallpaper is glued.
Illustration
Action Description
We apply glue both on the wall and on the first sheet of photo wallpaper. We fold them in half so that the glue is well saturated, but not more than a couple of minutes.
Expanding.
Carefully smooth out the wallpaper with a rubber spatula. We pass the joints with a rubber roller
In no case do not use different fabric scraps.
We apply the second part of the wallpaper and carefully, literally up to 1 mm, we dock the picture. Smooth it all out with a rubber spatula.
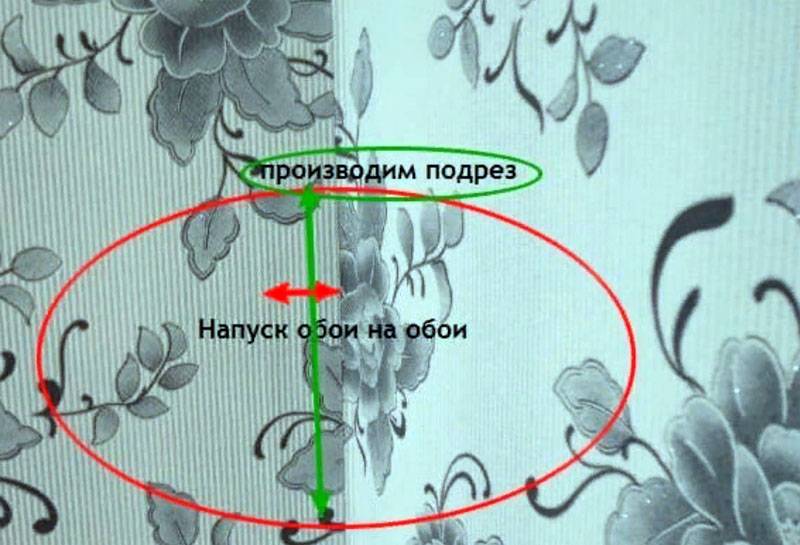
Please note that many wallpapers are trimmed between the joints.
When the wallpaper is glued, you need to cut the joint and remove the unnecessary strip.
Once again, we look at the joints, trying to fit them as close as possible. Lubricate with glue and pass with a roller.
Now you need a whole palette of pencils to retouch the picture
We select the desired color for the drawing, crumble the stylus with a blade.
We take a crumbled stylus and gently cover the joints and the resulting scratches with a finger.
How to glue wallpaper correctly, the video below will tell.
 Watch this video on YouTube
Related article:
The direct process of gluing non-woven wallpaper
Modern wide canvases of such wallpapers make it possible to stick them without noticeable seams. Glue must be diluted with water in strict accordance with the instructions on the package.
How to glue non-woven wallpaper on the walls to avoid marriage in work? Authoritative masters insist that the reverse side of the wallpaper is not smeared with glue, but is applied exclusively to the wall. It is best to apply the glue with a wallpaper brush or roller, but you need to be careful, otherwise excess glue will lead to the formation of streaks and "wrinkles" on the wallpaper.
The panel is straightened from top to bottom, in strict accordance with the vertical markings, from the center to the edges
At the time of applying the cloth, we advise you not to focus on the “wrinkles” found, just smooth them until they are completely smoothed. When the panel is glued, cut off the excess wallpaper from the top and bottom and wipe the excess glue from the walls with a clean sponge.
Glue should not get on the front side of the wallpaper. In this case, it is necessary to remove it as quickly as possible with a damp cloth or sponge.
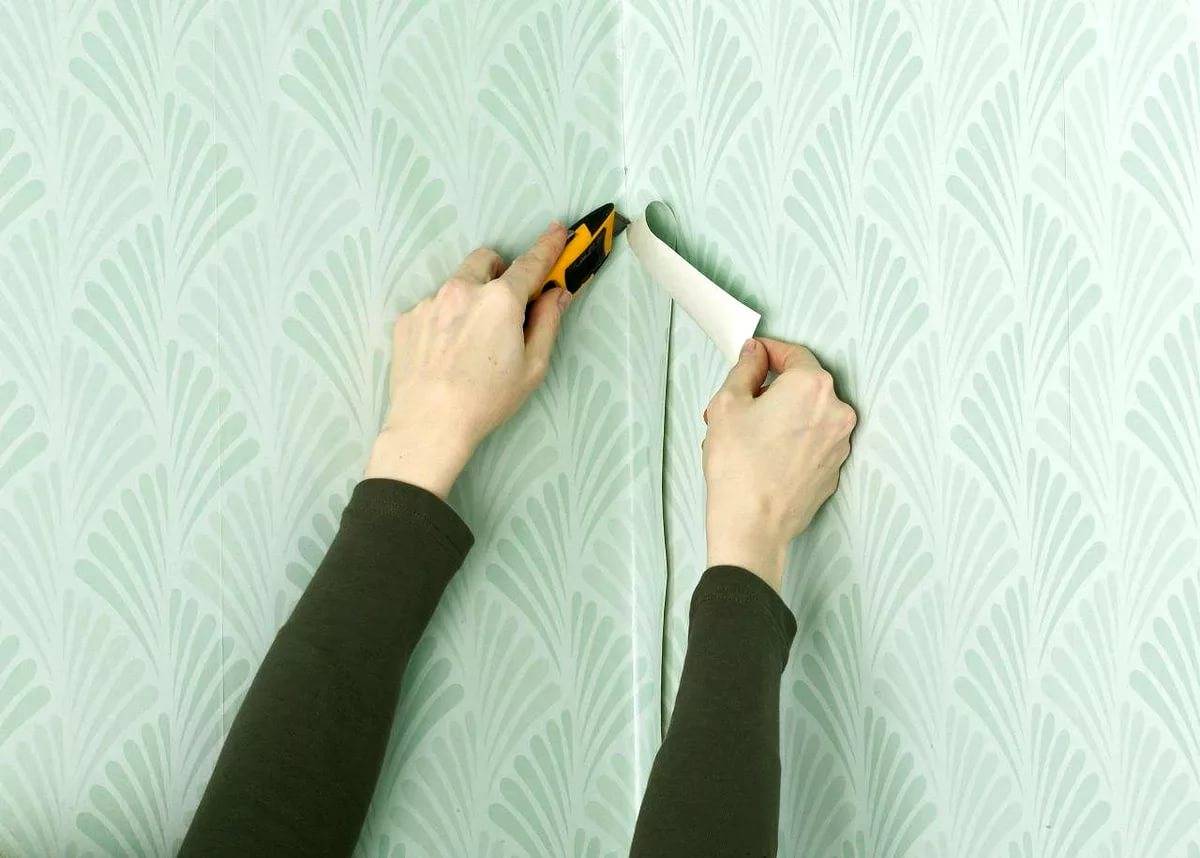
There are several controversial issues, one of which is how to glue the corners correctly? Using the building level, we make a mark in the form of a line at a height of one meter. It is best to glue non-woven wallpaper in the corners with an overlap of 3-4 cm, using the double cutting method. It lies in the fact that you need to impose one canvas on another, and then cut them through a special metal construction ruler (you can use a spatula or a rigid profile) with a paper knife.
Do-it-yourself sticking of non-woven wallpaper video master class
A pleasant difference between gluing such canvases among other finishing materials is that they do not need a long time of impregnation with glue. After a couple of hours, these wallpapers can be used for painting.
Disadvantages in working with non-woven wallpaper
As you already understood from the table above, there are no particularly significant disadvantages for non-woven wallpaper. In order to get walls with a perfectly even coating at the end of the repair, you need to prepare the walls for this process. To do this, you must first level the surface of the walls (in case there are defects and large flaws, the product will hide minor flaws), and then putty and sand the walls.
But even such a seemingly simple job has several disadvantages that significantly complicate the process of gluing the material. These include:
- the need for a preparatory stage before wallpapering. The quality of the surface of the walls will determine how well the canvases will stick, and how they will look;
- you will have to have at least one roll of the same wallpaper in stock. Such foresight will save you if suddenly there is not enough product or the strip breaks during gluing to the wall. The spare roll must be taken with the same batch number as the rest;
- the presence of an assistant for high-quality wallpapering. This is necessary when you use wide, meter-long materials. The second person must hold the edge of the strip so that the canvas does not stick to the wall on its own, distorting the whole picture;
- immediately after gluing, you need to expel the air from under the wallpaper. Otherwise, in these places, over time, the canvases will swell even more, and then they will begin to peel off.
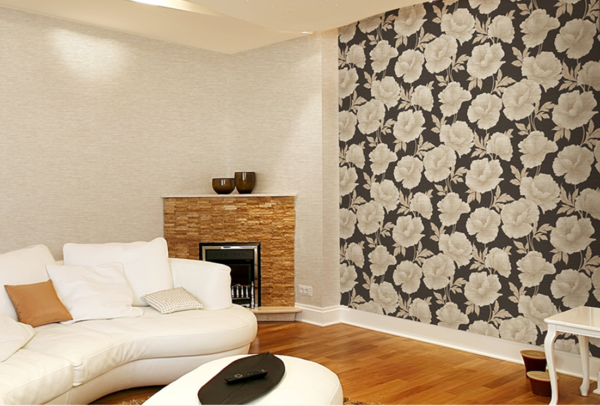 Living room design, complemented by non-woven wallpaper of different textures
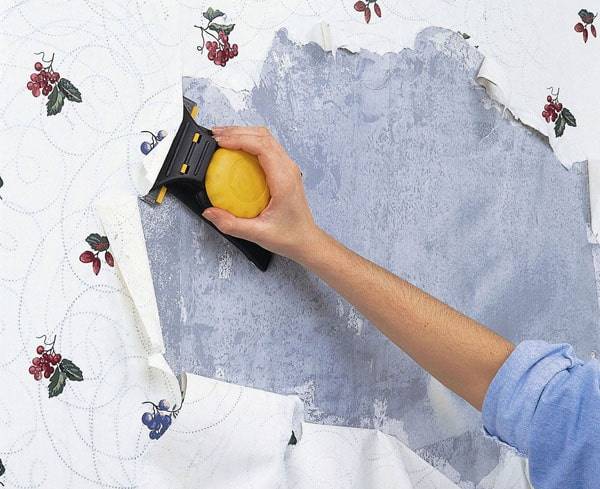
How to glue peeled wallpaper.
If the wallpaper has peeled off and partially torn off the whitewash, paint or putty from the wall, then they must be cleaned with warm water. Do this carefully so as not to damage the canvas. If there is nothing on the canvas, immediately proceed to gluing them.
To do this, apply glue with a brush on the wallpaper, which has peeled off and on the wall. The canvas should soften for 1-2 minutes, after which proceed to smoothing with a wallpaper spatula. When applying glue, do not spare it. Better to have the glue come out of the seam than not enough.
Glue for gluing is used the same as for gluing wallpaper. Therefore, after gluing the wallpaper, you need to leave the glue. When cooked, it can stand for a relatively long time. As practice shows, most often the wallpaper peels off the next day or every other day. During this time, nothing will happen to the prepared glue.
If the wallpaper peeled off in you after a few months or years and there is no wallpaper paste left in you, with which you glued the wallpaper, do not rush to buy a new pack. You do not use it completely, but it is better to glue it with PVA glue. This glue can be glued to all types of wallpaper.
In order for you to clearly see that there is nothing heavy in gluing, I will give you this video.
Often, after a while, ours ceases to look as attractive as at the very beginning. Sprinkled, wallpaper peeled off in places. But this is not a reason to start a new repair, you can simply fix the old one and extend its life for a few more years.
Why is the wallpaper lagging behind the wall?
Most often, the reason is inaccurate observance of the instructions for gluing. This is especially true for heavy types of wallpaper that require special glue and additional materials, such as paper strips at the joints.
Also, the reason may lie in insufficient surface preparation or uneven application of glue. The departure of wallpaper is sometimes due to the dampness of the room. In bathrooms and kitchens, the wallpaper peels off often and thickly. And what to do if the wallpaper has peeled off and we are not planning repairs yet?
Timely restored wallpaper joints can save time and money
It is important to choose the right glue and tools. So, how to glue peeled wallpaper: you need a special glue, it is preferable to choose a well-known manufacturer
You will also need a small roller specifically for rolling joints.
We also prepare a sponge to remove excess glue, a vacuum cleaner and a household hair dryer. How to fix the wallpaper at the junction, if they have peeled off: first, carefully separate the separated sheets, vacuum the wall and the wallpaper itself in order to remove dust and putty crumbs. We apply glue from a tube or with a brush (depending on the area of the peeled off wallpaper).


Next, we roll sheets of wallpaper with a roller in the direction from the glued part to the joint. We remove the glue that has come out with a damp sponge. If you glue PVA, dry the seams with an additional hairdryer and then go over the roller again.
Let the wallpaper dry, while avoiding drafts. Mini repair completed!
Some time after the repair, many apartment owners are faced with minor troubles: the wallpaper is moving away or bubbling.
Wallpaper is peeling off: what should I do? As a rule, such defects can be corrected independently without the help of professionals.
Hardware stores offer ready-made mixtures with which you can glue wallpaper. In addition, you can get by with improvised means by preparing the composition with your own hands.
Most often, the wallpaper peels off if the base was prepared incorrectly.
To avoid trouble in the future, before starting finishing work, apartment owners should understand why the wallpaper is peeling off at the joints. The most common cause is a poorly prepared surface. Regardless of the age of the building, the walls continue to sag and deform, resulting in cracks.
Before starting gluing, it is worth carefully checking the walls, removing fragile plaster and repairing cracks.
Other reasons why wallpaper peels off the ceiling or wall may be:
- non-observance of technology during the installation of gypsum boards or improper processing of joints;
- poor cleaning of the surface from the old finish;
- savings on primer;
- gluing wallpaper on wet plaster.
Master finishers get into trouble because of the great confidence in their own experience. Before starting any work, you should carefully read the manufacturer's instructions. The application of the adhesive solution may have certain nuances.
Necessary tools and materials
It all depends on the finish option - without painting or with the subsequent painting of the wallpaper, for each option it is necessary to prepare materials. The simplest and most affordable option for decorating the walls of a room can be considered the choice of wallpaper and paint: water-based, water-dispersion, acrylic.If the wallpaper is not planned to be painted, then it is recommended to test the material, because the interlining is a transparent base through which the ugly wall pattern will be clearly visible. In order to carry out testing in the room, you should turn on the light, attach a piece of material to the wall, and look from afar at the visual effect, whether or not the wall is visible through the piece of wallpaper. Dark spots that show through are a good reason to make one of the difficult decisions: paint the wallpaper or paint the wall. Correctly sticking non-woven wallpaper on your own is possible only with the proper preparation of not only the required material, but also the necessary tools:
- Roulette, ruler;
- Calculator, simple pencil;
- Spatula, roller, scraper;
- Net large capacity;
- Special roller, brushes;
- Rubber brush or roller, rubber spatula;
- Clean rag, sponge;
- Plumb, spirit level;
- Hammer, nails;
- Ladder.
For uniform application of glue, use a roller specially designed for this purpose. To apply the adhesive composition to hard-to-reach places, you need a brush, and to thoroughly coat the edges of the sheet after cutting it. Do not forget that it is necessary to apply glue only on the walls. With this technology, the usual bubbles and wrinkles do not happen. And therefore, you can choose which device is better to smooth the wallpaper, with a rubber spatula, brush, or just a roller, according to your individual preferences.
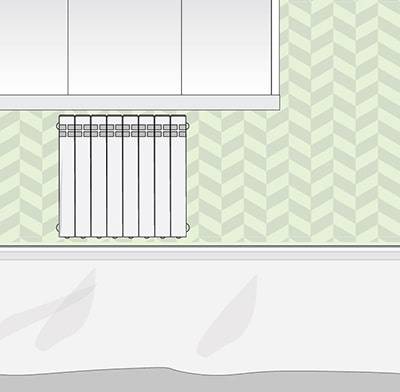
Sticking in problem areas
There are places where it is quite difficult to glue the wallpaper. This applies not only to the corners of the room, but also to the space behind the radiator and places above the openings (how to glue wallpaper in the corners of the room?).Even ceilings can be a problem if you try to glue alone and / or use too narrow strips.
Advice
To glue the wallpaper in hard-to-reach places, you will have to cut the sheet into several parts. It is best to use the same strip for this - this way there will be no error with the dimensions.
Another problem with pasting problem areas is the mismatch of the print (how to fit the wallpaper according to the pattern?). To achieve an exact match, you will have to tinker a lot, and apply all your design skills. Most of the time it doesn't work the first time.
To facilitate the procedure, you should resort to the use of non-woven wallpaper. They can be moved along the wall without problems within ten minutes after gluing. For rooms with a large number of hard-to-reach places, this will be most welcome. But in this case, when buying glue, you need to make sure that it does not contain substances that accelerate drying.
Proper preparation for bonding
General requirements state that before gluing non-woven wallpaper, you must:
- Wash the floor, and even better lay cellophane on it. This will save time on cleaning.
- All wiring outlets are isolated.
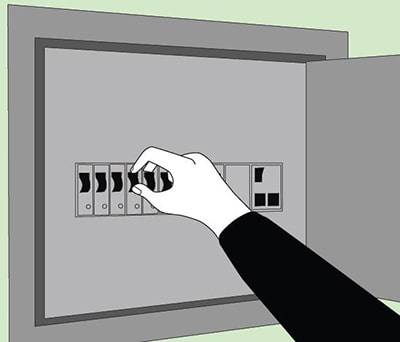
- Removing the covers of sockets and switches, the room is de-energized.
- If there is not enough natural light in the room, the "glasses" with sockets and switches are sealed with masking tape, which is then removed.
All necessary equipment must be serviceable, clean, and preferably new.
How to properly dilute the glue?
Cooking is best done immediately before gluing non-woven wallpaper. Strips of the required length are cut in advance. Dry granular mixture is poured into a dry container.Then it is filled with the required amount of water. In this case, it is necessary to continuously stir the resulting mass until the granules are completely dissolved, monitoring the consistency.
IMPORTANT! The recipe indicated on the packaging of wallpaper glue is designed for the entire pack, and it is not advisable to dilute the glue in advance. Over time it thickens
The optimal amount is 4-5 lanes.
Surface preparation
Non-woven wallpaper can be glued on:
- concrete panels;
- plastered brick walls;
- plywood or OSB;
- drywall or other prepared surface.
Laminated chipboard surfaces are not suitable, since such a surface does not absorb glue, and there will not be sufficient adhesion to non-woven elements
It is important to remove the remnants of the previous coating:
- paints;
- decorative plaster;
- dry plaster;
- lime whitewash;
- old wallpaper.
The surface is cleaned of dirt, oily stains and dust, leveled (plastered) and primed. Only after that you can start gluing non-woven wallpaper.


3 Wall gluing
After closing all the windows, proceed to wallpapering. It is recommended to start from the most uneven corner or from the window opening. Glue is abundantly applied to the selected section of the wall using a paint roller. If the wall quickly absorbs the composition, the edges of the wallpaper along the perimeter are also lubricated for safety. Problem areas and corners are smeared twice.
The wallpaper is applied to the wall perpendicular to the floor and pressed in the central part. Having fixed it in this position, using a plumb line, they check whether the strip is located correctly. Then the wallpaper is smoothed with a rubber roller, moving from the center to the periphery.
The excess edges from the bottom and top are carefully removed with a knife, holding them with a spatula. The second strip is glued in a similar way butt-to-butt to the first. The joints are carefully rolled with a barrel-shaped rubber roller.
In the event of a small gap, it is easy to eliminate it by creating tension, but it is better not to skew, but to immediately correctly guide each subsequent sheet in relation to the previous one.
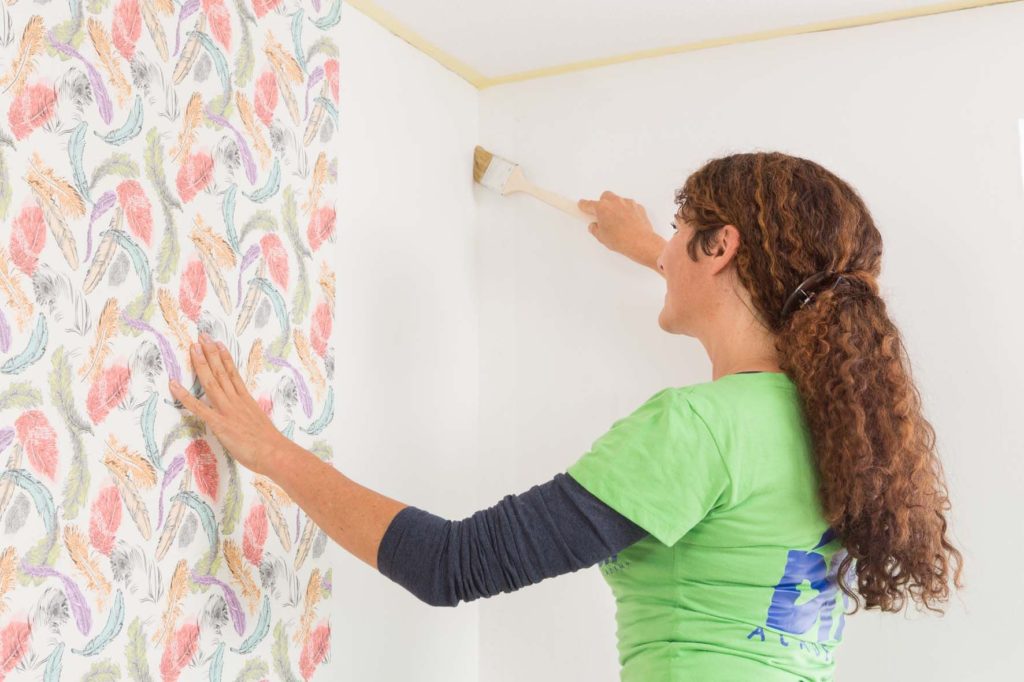
For the first time undertaking such work, you need to know how to glue non-woven vinyl wallpaper at the junction of the canvas with ceiling moldings. To prevent the sheets from moving away, their upper part is pressed with a spatula right into the corner.
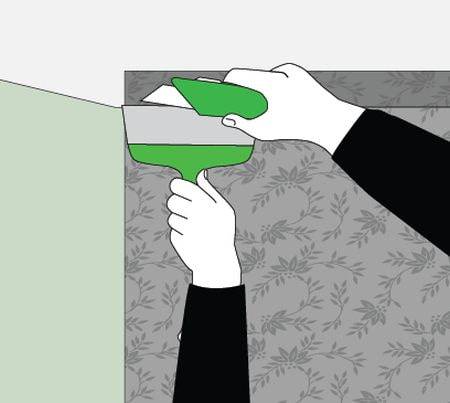
When selecting a pattern, it sometimes happens that the upper surplus is very large. In this case, after the formation of the bend, the edge is cut with a clerical knife, holding the canvas with a metal ruler or a spatula blade.
Gluing features
The technique of such wallpapering walls requires skills, skills, and experience. Therefore, you should practice in advance and study the rules for pasting with roll material end-to-end. Method features:
There are no visible gaps or irregularities on the connection lines of individual strips of wallpaper if the work is done correctly. The method requires eliminating the slightest adhesive protrusions or gaps.
In addition to a soft plastic or rubber spatula, a certain type of wallpaper may require a low or medium hardness roller, a clean towel or diaper, and other additional accessories.
It is very difficult to perform work in rooms with complex geometry, which contain many corners, niches, and other elements; they need to be glued properly.
It is important to provide the walls with a flat surface without the slightest flaws, defects, which can greatly affect the complexity of joining the canvases.
If materials or devices are chosen incorrectly, violations of technology or other inaccuracies were made, then as a result of gluing, peeling areas or gaps may appear between the wallpaper strips.
Advice
Butt gluing requires compliance with humidity and temperature conditions so that the material does not shrink, straighten out or change its shape in any other way.
When gluing rolled material, you need to turn off all available heating system devices, provide a closed space without the slightest drafts.
Helpful Hints
 Before sticking interlining with your own hands, it is recommended that you read the instructions that come with them. This will help you avoid a lot of problems. Some types of such wallpapers require smearing not only the walls, but also the material itself. In order for them to better adhere to the wall, or rather their edges, it is necessary to coat an area larger than the width of the canvas. The adhesive must be applied evenly to prevent the formation of lumps and irregularities on the coating.
When working with this type of wallpaper, the mixture is best applied with a roller. This will simplify the whole task and help to avoid the accumulation of air and glue under the material. You need to use only new glue, left over from previous repairs is not recommended. Remember, the final result depends on the quality of work. Gluing non-woven wallpaper on a paper basis is even easier. This process is no different from the usual with paper wallpaper. In this case, it may be necessary to apply an adhesive solution to the material itself.Usually such nuances are indicated by the manufacturer on the roll label.
The main thing when pasting is to correctly fix the first sheet, strictly vertically. Then there will be no problems with other canvases. All excess glue should be squeezed out in the direction where there is no wallpaper. A wallpaper roller is well suited for smoothing bulky material. When cutting off the remains from below, it must be remembered that the plinth will not cover more than 4 cm of the void, so do not cut too much. The same applies to the ceiling.
Sticking order
After all the necessary tools have been prepared and preparatory work has been carried out, you can begin pasting the walls. This process occurs in this order:
- At a short distance from the corner of the room, an extreme vertical line is found on the wall, and an adhesive composition is applied to its section. A cut off strip of wallpaper is pressed against it so that its edge is strictly on the line.
- Starting from the top, the segment is smoothed with a roller and leveled with a spatula. This is necessary to remove excess glue from under the canvas, which is then wiped with a clean cloth.
- Excess, if any, in the upper or lower part, must be cut off. The second piece of wallpaper is fixed end-to-end with the previous strip. In a similar order, the subsequent elements are fixed.
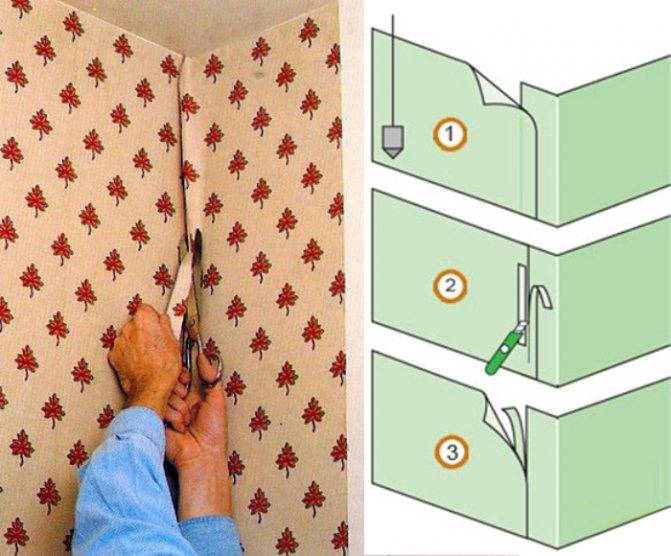
- In the corners, non-woven wallpaper is fixed to the wall so that one edge extends a few centimeters onto the other wall. After that, another segment is glued on top of the previous cut. Further, an incision is made along the corner, excess elements are removed and the canvases are joined.
Now you know how to properly glue non-woven wallpaper on the wall.If you follow the tips and instructions, this process will not seem difficult to you, and the wallpaper itself will delight you with aesthetics and durability.
Algorithm for sticking on the walls with your own hands
First, the wall is smeared with glue. The width of the processed surface is greater than the width of the roll. You need to lubricate with a special soft roller or a wide thick brush. When preparing the strips, take into account the need to customize the pattern. To glue non-woven wallpaper you need to butt-to-butt.
Stage 1: scheme and wall markings
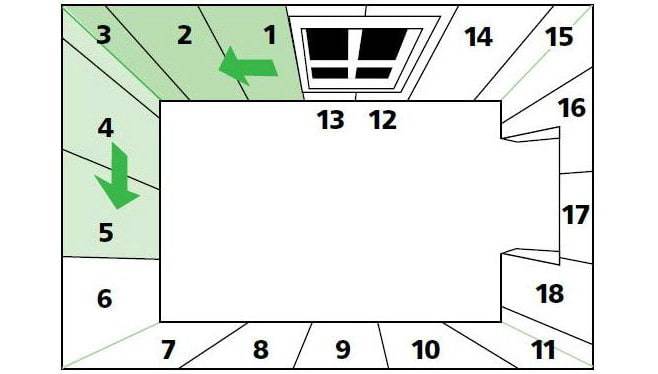
The width of the roll is measured from the window, and a vertical strip is drawn along the level or plumb. This is a guideline so that the fragments and joints are even. By marking the wall along its entire length, you can determine the required number of solid strips that should be cut in advance.
Stage 2: wallpaper preparation
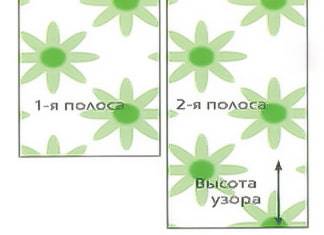
If non-woven wallpaper is glued without matching the pattern, the fragments are cut off with a small margin in length (5-7 cm more than the height of the ceiling). When it is required to adjust the pattern, the stock is increased by the amount indicated on the packaging of non-woven wallpaper opposite the corresponding symbol.
Stage 3: gluing
The gluing process starts from the window. When applying fragments, it is necessary to ensure that they are vertical. To do this, markup is applied to the wall.


When sticking non-woven wallpaper, only the wall is covered with glue. If the canvases are heavy (vinyl-coated), it may be necessary to apply glue to both the wall and the wallpaper.
Rolling with a roller or smoothing with a rag, they press the middle of the strip along the entire length, having previously unfolded the wallpaper.
Residual air and excess glue are expelled from the axis to the edges, which are rolled with a narrow special roller for tight adhesion. There should be no overlaps.
Stage 4: final
All protruding parts of the fragment are cut off with a wallpaper knife. To make the cut even, a wide metal spatula is applied to the cut line. Below, you can leave the wallpaper as it is, since after gluing a plinth is installed that hides defects.