- Part 2: Applying acrylic to the surface of the bath
- Preparation of acrylic enamel: everything should be done according to the instructions
- Application of liquid acrylic: the nuances of the production of work
- Recommendations for further care of the coating
- What are the benefits of acrylic?
- Epoxy enamel painting
- Recovery steps
- Drying
- Enamel restoration: work options
- Option one
- Option two
- Option three
- Option four
- Classification
- Materials and tools
- Mistakes and how to avoid them
- Bulk acrylic
- Liquid acrylic bathroom coating
- Advantages of the method
- Arguments in favor of a bulk bath
- Why choose this restoration method?
- Preparatory work for the restoration of the bath
- Conclusions and useful video on the topic
Part 2: Applying acrylic to the surface of the bath
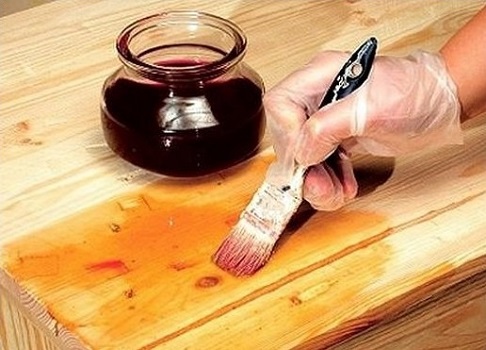
Here, the work began with the fact that a cut-off bottle was substituted under the open drain, into which excess acrylic would drain. The fact is that, in a state ready for work, the enamel is not too thick, therefore, it readily flows down along the steep walls of the bath.
Plastic bottle cut to fit between floor and drain
Preparation of acrylic enamel: everything should be done according to the instructions
Further work was already associated with the application of the acrylic layer. To do this, it was necessary to mix the base with a hardener.I must say right away that if someone decides to use an ordinary stick for this, they can get a very bad result. Such work will take a lot of time, which, after pouring the hardener into the base, works against the master. That is why you should use a drill with a mixer nozzle
You need to mix thoroughly, paying special attention to the lower corners of the bucket - in them the base may remain without hardener. This will lead to the fact that all work will be reduced to zero - in some places there will be dry areas
The hardener is completely poured into the bucket - the required amount has already been calculated at the factoryIt is necessary to mix the base with the hardener very carefully
The thoroughly mixed composition was left for 10 minutes, as required by the instructions. At this time, the hardener bottle was cut off and wiped dry. I used it as a container for pouring acrylic on the bath. Although a plastic disposable cup with a volume of 0.5 liters may well come up here. After 10 minutes, the composition was mixed again, after which it was possible to proceed with its application to the surface.
Application of liquid acrylic: the nuances of the production of work
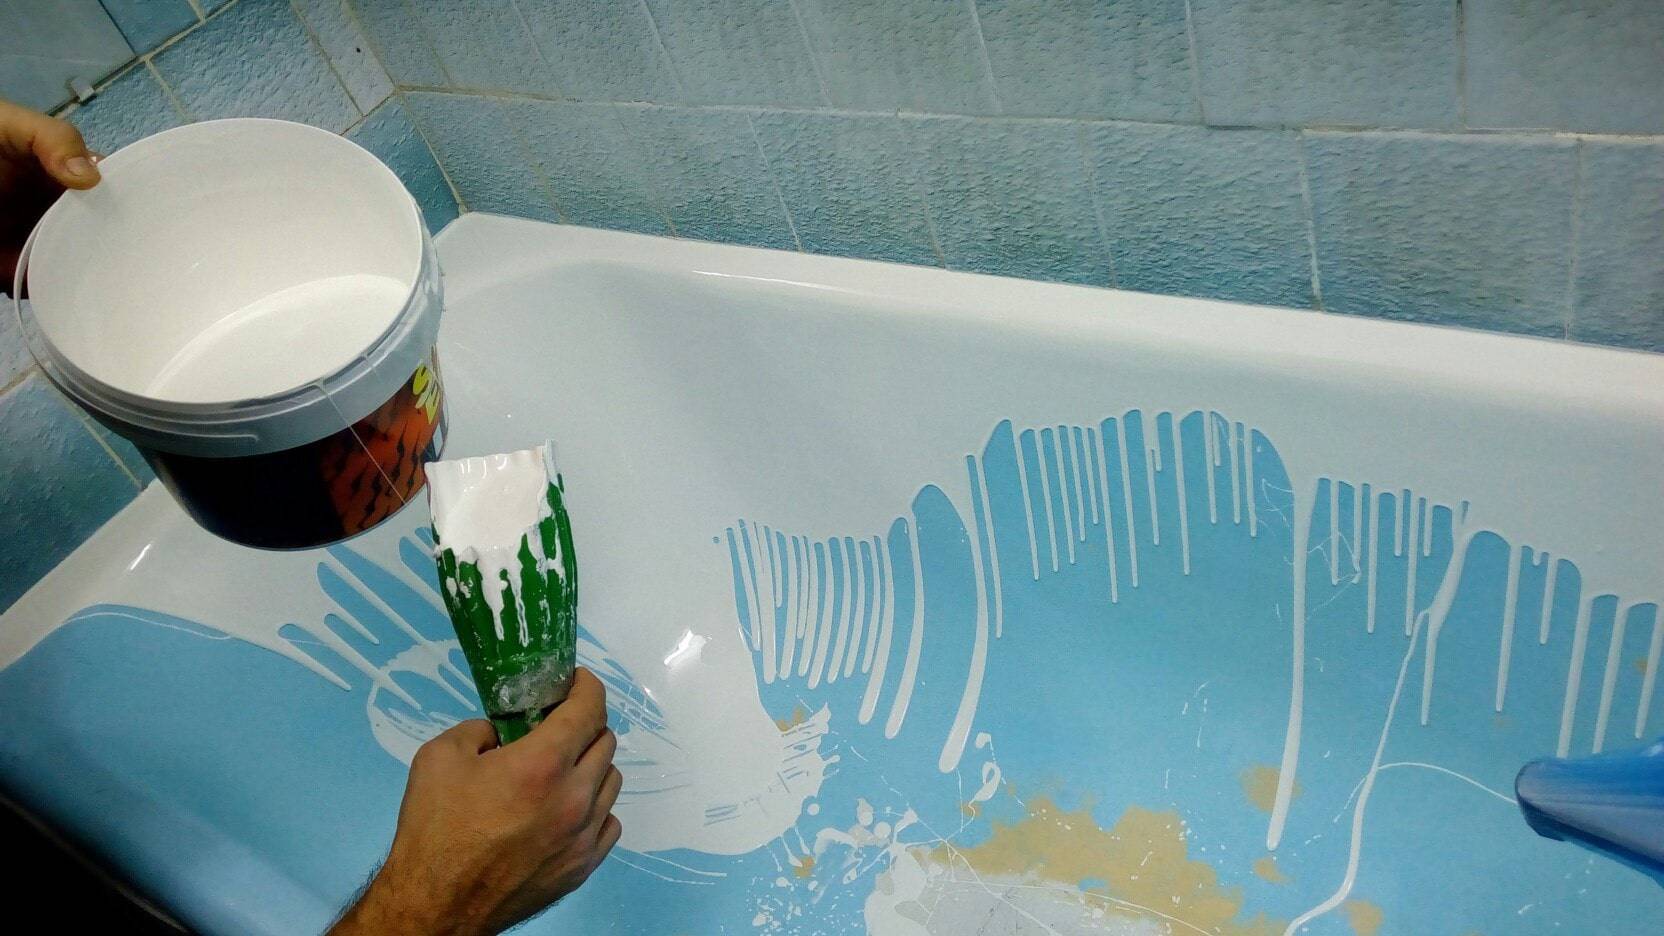
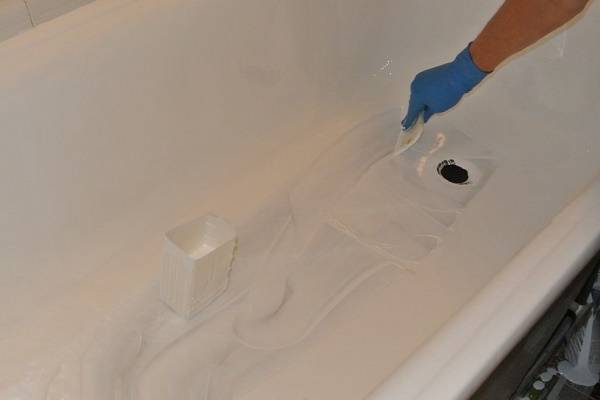
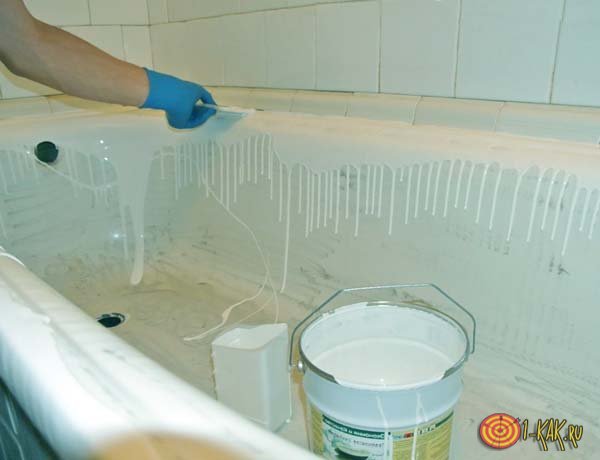
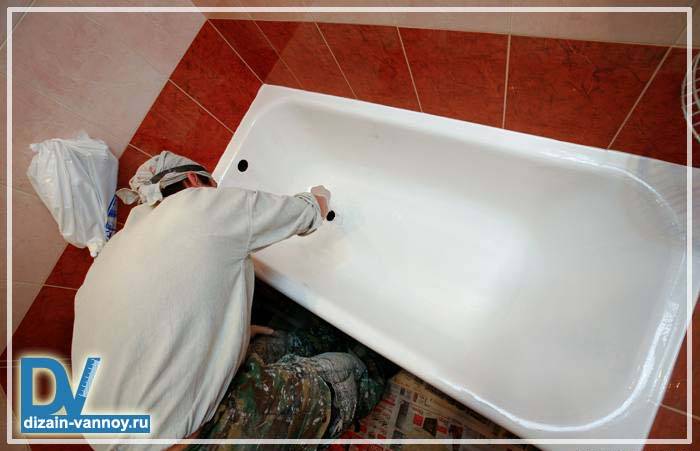
Pouring liquid acrylic from a bucket onto the sides of the bath will be very inconvenient. That's why I used a cut-off can of hardener. The composition should be applied from above, starting to pour it on the horizontal sides along the edge of the bath.
Acrylic work has begun
Then we move in a circle, continuing to pour the composition in such a way that the layer is not interrupted from above, moving down to the drain neck.
We continue to fill the walls of the bath, moving from top to bottom
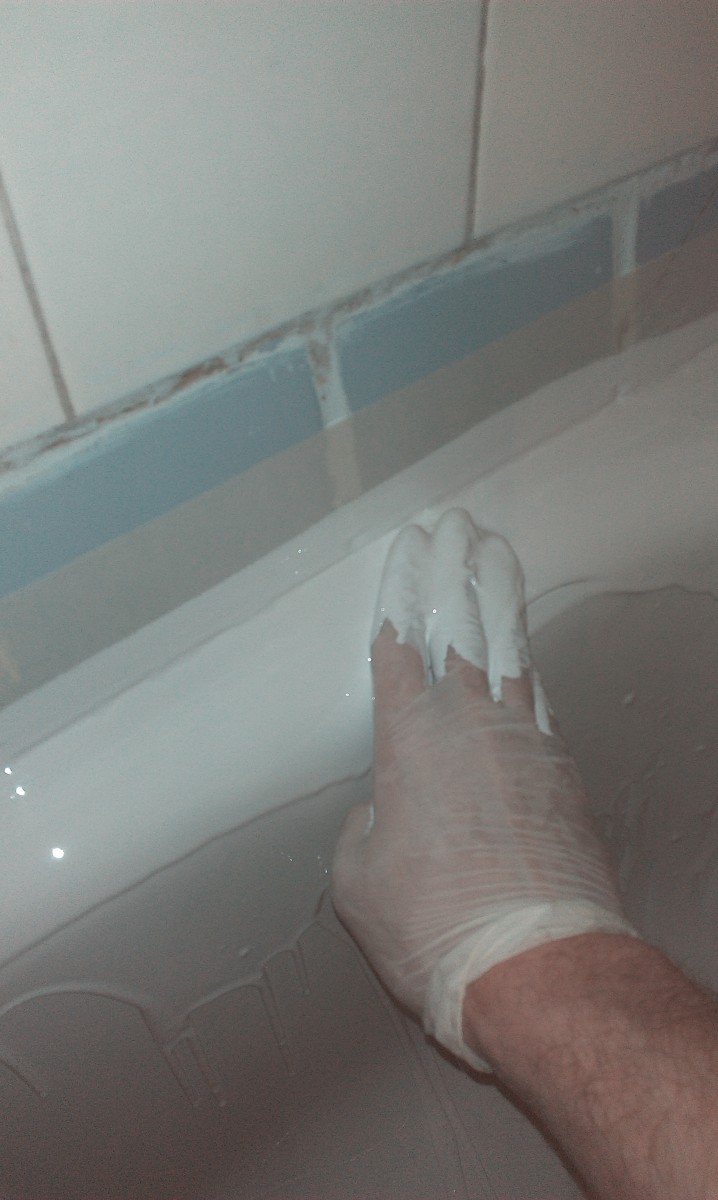
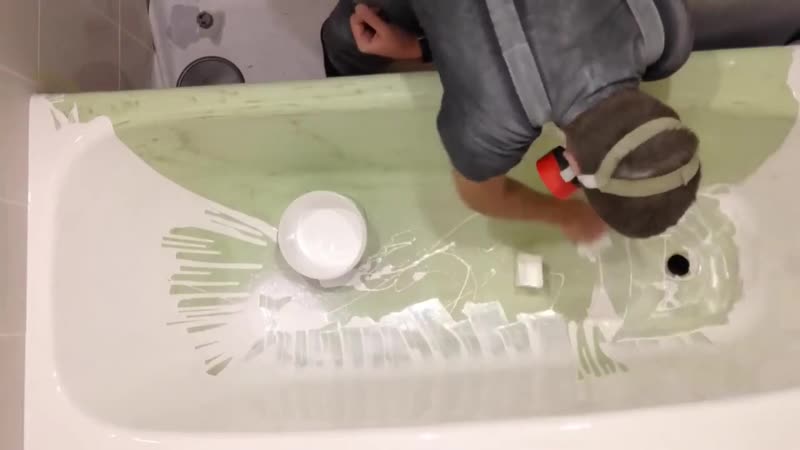
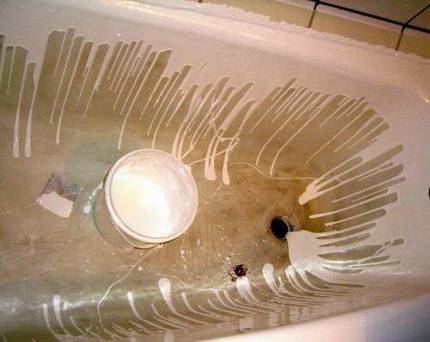
My composition is over, but there is an unfilled area below.However, first it was necessary to make sure that the ideal layer was on the sides. Therefore, the enamel flowing down, with the help of a spatula, rose back to insufficiently spilled places. Only after the sides became visually even, I began to disperse the composition along the bottom of the bath.
Acrylic is lifted with a silicone spatula from the bottom up for even distribution along the sides. After all the acrylic has been evenly dispersed over the surface of the bath, its excess is carefully driven to the drain, from where it enters the container placed in advance
After that, the bath was left for 5 minutes so that the acrylic layer could level out. It seems to me that for me it was the most exciting stage in the whole work. After the allotted time, the bathroom light was turned off - it was time to work in the twilight with a flashlight. The fact is that irregularities that are not visible in bright light, under the light of a lantern, begin to stand out clearly. This is how the acrylic manufacturer advises looking for flaws in the work. Before it's too late, they can be fixed with the same silicone spatula.
Under the lantern you can see what you can't see in the light
Surprisingly, in my case everything turned out to be at a high level, I did not find any flaws, and therefore, with a calm soul, I closed the door and went to rest. The next day I had to make sure that I was not mistaken.
Recommendations for further care of the coating
For some reason, it is generally accepted that the care of acrylic applied by the bulk method should be careful. In other words, it is dangerous to breathe on such a cup. In fact, the voiced point of view is erroneous - you can and should clean the bath in the same way as a new one made of acrylic.
Recall the main points:
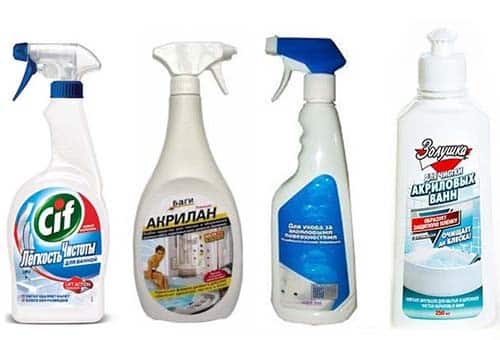
You can take care of the surface not only with laundry soap, but also with special products: Sanoks, Akrilan, Domestos, Cif, Cillit, Sarma, etc.;
- it is forbidden to use different powders and pastes with abrasives;
- do not wash freshly dyed hair in the bathroom, use hairspray to fix hair, cut varnished nails, soak linen, etc. - the acrylic layer may turn yellow or change color;
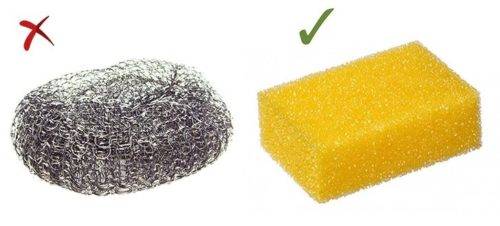
- to wash the surface, you need to use soft sponges, which are always in the kitchen of a good housewife. Different brushes and brushes leave scratches;
after taking a bath, it must be rinsed. You need to wash 1-2 times a week, depending on the frequency of taking water procedures.


If during operation a part of the coating is swollen or a through hole appears, urgent measures must be taken and the defect repaired. For this you will need:
- liquid detergent;
- lemon juice or 9% vinegar;
- sandpaper with fine grain (P60);
- paste or emulsion polishing agent (polish);
- foam sponge or soft cloth.
The repair process is simple:
- damaged areas are washed with a soft cloth or sponge. Stubborn stains are treated with lemon juice or table vinegar;
- scratches and holes are polished with sandpaper. Blisters are cut off with a knife and cleaned in the same way;
- degreasing of damaged areas is carried out;
- scratches and cracks are sealed with polish, liquid acrylic prepared for work is applied to the cut places.
Details about the care of an acrylic bathtub are described in the article "Care of an acrylic bathtub", which contains not only the rules for cleaning the bowl, but also ways to get rid of emerging stains from various sources of pollution.
What are the benefits of acrylic?
Enameling the bathtub with liquid acrylic helps to quickly and efficiently restore damaged plumbing. Experienced specialists highlight positive qualities when working with this type of material. These include:
- does not require preliminary work to remove the old coating;
- fast application;
- amenable to further processing.

For restoration, you will need several tools and materials:
- sandpaper of medium abrasiveness;
- liquid composition of acrylic paste;
- soda;
- thin spatula;
- water.


The working process on average lasts from 1 to 3 hours. At the end of the restoration, a number of positive changes are noted. They include:
- glossy surface;
- snow-white shade;
- durable surface;
- affordable cost. The price of liquid acrylic directly depends on the composition and the manufacturer.

Epoxy enamel painting
The industrial method of coating a bathtub with enamel involves coating the hot surface of the container. At home, this method is not possible. For these purposes, either coating the surface of the bath with a brush or roller, or applying enamel from a spray gun is used.
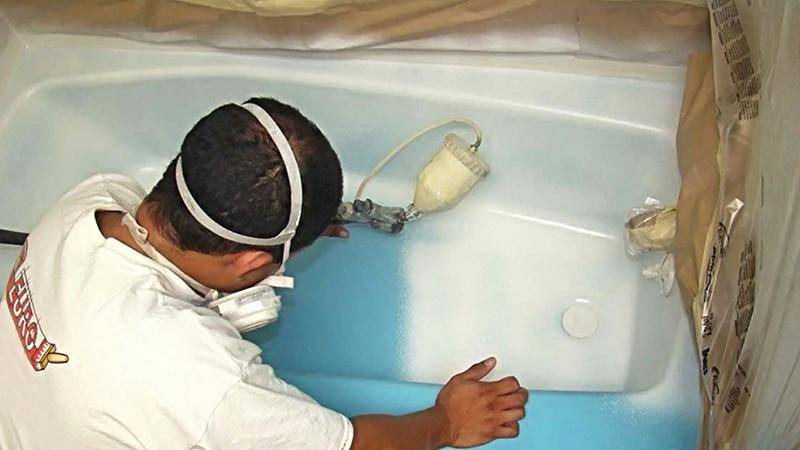 Applying an enamel coating from a spray gun will help achieve a smooth and even surface.
It is worth noting that there is no consensus on which of the restoration options is better. Each of them has its own positive and negative features, as well as nuances.
Painting the bathtub with a spray gun will allow you to get a smooth surface with minimal enamel consumption. However, it is worth remembering that paint in ready-made aerosol cans is not suitable for such purposes.You need to use only a professional tool and dilute the paint to the required proportion yourself. In addition, you need to protect the walls, floor and plumbing from accidental splashes of enamel with plastic wrap.
Painting the bathtub with a roller or brush will fill all the cracks and chips in the surface much better than restoration with a spray gun. However, with this coating method, the surface will not be perfectly flat.
According to the technology, enamel paint is applied in several layers. Each of them must dry completely before the previous one is applied. Typically, each layer takes at least two hours to cure.
The final coating of enamel dries for about six hours, but you should be aware that you can only use the bath after forty-eight hours from the moment the top coat was applied. During this time, the layer will be able to harden and acquire the necessary strength.
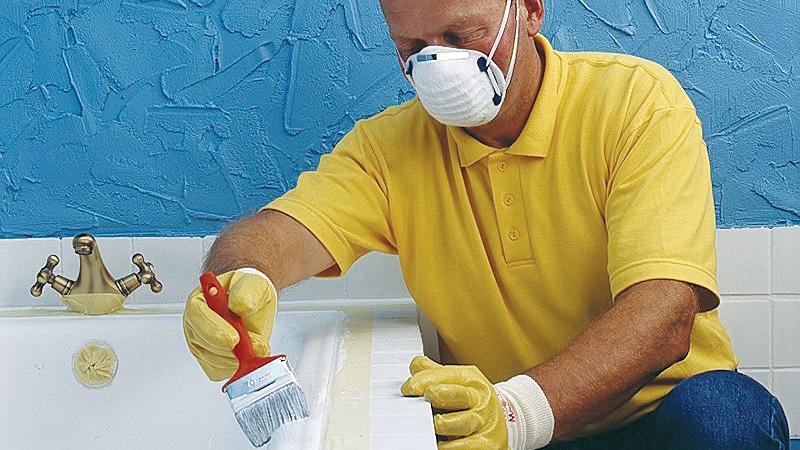 You need to work with gloves and a respirator, as enamels are very toxic
Competently carried out preparatory work and compliance with all technologies during the restoration process guarantees a successful result. Such restoration of the bathtub with enamel leaves generally positive feedback on itself, since a new coating will last from three to five years, and the financial costs of updating the product are minimal.
Recovery steps
The work process for restoring a damaged surface is divided into several stages. They include:
- the first step is to remove all decorative elements;
- further, the surface of the bathroom is cleaned of dirt and soap deposits. To do this, use chemical compositions based on fine abrasiveness;
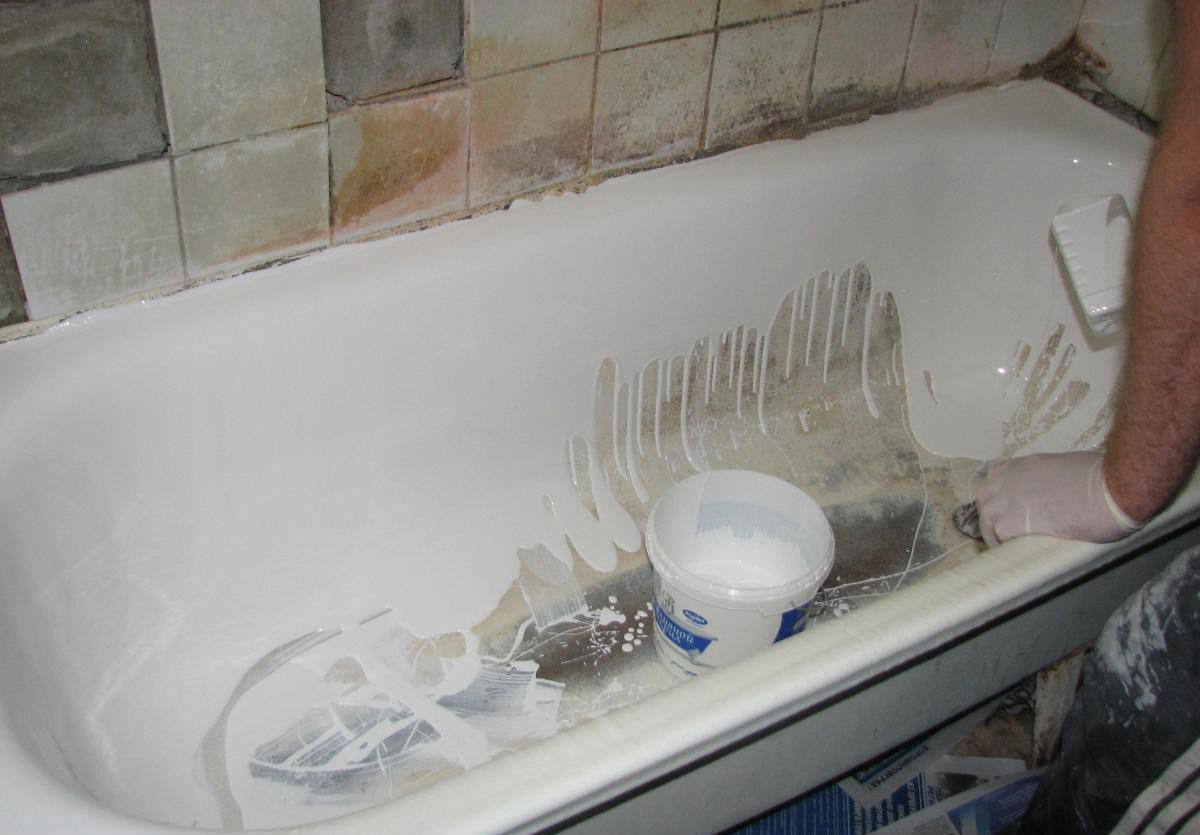
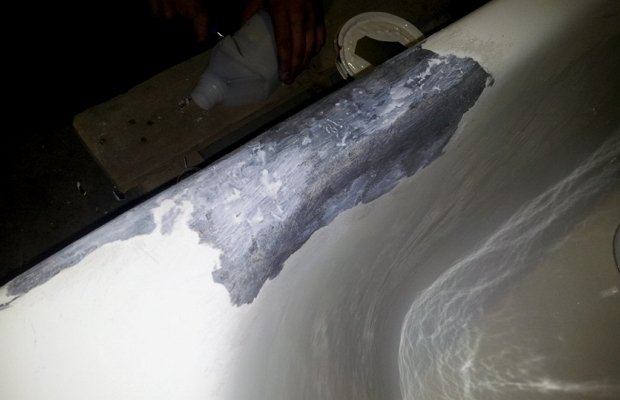
- after that, they begin to grout large chips. To do this, use automotive putty.The thickness of the applied layer should not exceed 1 cm;
- excess hardened mixture is removed with sandpaper;
- then the container with liquid acrylic is thoroughly mixed;
- a small amount of the composition is poured along the border of the bathroom. Do not make sudden movements. The jet should be evenly distributed along the border of the side wall.
Drying
After the process of applying and leveling the liquid acrylic material to the walls and bottom of the bath is completed, the bulk of the work can be considered completed. Now acrylic needs time to complete the polymerization process. Usually this time is indicated on the original packaging of the material and averages up to 3 hours. To determine the quality of work and eliminate the villi or particles that accidentally fell on the treated surface, you need to turn off the electric lighting and use a lamp with an ultraviolet radiation spectrum: all foreign objects on the acrylic material are very clearly visible in ultraviolet rays. They must be carefully removed before the end of the polymerization process.


The end of the drying process in some cases takes up to 96 hours, so you need to be prepared for the fact that it will be possible to use the bath for its intended purpose no earlier than this period. The polymer material dries depending on its layer thickness: the thinner the layer, the faster polymer reactions occur in it and the material hardens. During the drying process, it is recommended to close the door to the bathroom tightly and do not open it until the material is ready for use.Under such conditions, the acrylic material is better fixed on the surface of the bath, and the possibility of foreign inclusions in the form of hair, wool, dust, water drops on the treated surfaces is excluded.


Enamel restoration: work options
Whether you're refurbishing a steel bath or cast iron, the job is no different.
Option one
Restoration with enamel and primer
- Apply primer. It smells, but if you choose an aerosol, then the aroma is quite tolerable. But remember: you need to shake the balloon until the knock of the ball becomes constant, uniform and distinct. The primer is applied to the entire surface inside the bowl. After coating, you need to give the primer time to dry well.
- Enamel. You can take funds to restore the enamel of the bath, or you can buy ordinary canned enamel. Stir or combine the components in accordance with the instructions and with a small swab (can be replaced with a small roller), apply a bathroom enamel restorer or the enamel itself.
But how to restore the shine of the bath? Everything is quite simple: 1-2 hours after applying the last layer of enamel and drying, the surface must be wiped with a solvent so that the top level becomes smooth and pleases with gloss. It is also a good idea to polish the new surface with GOI paste, but this can only be done after 2-3 days.
Option two
Elimination of small chips with glue and whitewash
This method is suitable for removing small chips. Mix BF-2 glue and dry whitewash, arm yourself with a brush and apply the composition in several layers, after drying the previous one
Importantly, such repair and restoration of bathtubs is as simple as it is operational.But remember: the last layer of the overlay should be flush with the enamel coating of the entire part of the bath, no pits or bumps.
Option three
Repair of large chips with supercement and enamel
This is a restoration of enameled bathtubs with deeper scratches. You need to stock up on Supercement glue and nitro enamel of the same color as the inner surface of the bath bowl.
- Mix the ingredients in equal proportions.
- Apply the mixture to the chip with a small brush.
- There should be as many layers as needed to level the level.
- If there is no glue at hand, but there is epoxy resin, take it and whitewash. By the way, they can also be replaced with powdered remains of real porcelain (mug, plate). The components are mixed in a ratio of 2/1. First resin, then porcelain powder. The advantage of this composition is its excellent strength after drying and it can be applied by collecting it in a lump, and then removing the excess with a blade. Such a mass dries for at least 5 days, but with a properly made composition, it lasts 5-6 years.
Option four
Repair by rubbing paint into damaged enamel
Restoration of enameled bathtubs with increased enamel porosity is the most popular question. Regular nitro paint will help to cope with this. Pour a few drops of paint onto the bottom of the bath and rub the composition into the surface with a very good effort. The composition will perfectly fill all the pores and microcracks. You need to repeat this procedure 4-5 times, applying each subsequent layer to the completely dried previous one.
Classification
To paint the bath yourself to restore the whiteness, shine and smoothness of the product, various types of specialized enamel are used, which are developed taking into account the conditions of use. The quality of re-enamelling plumbing fixtures depends on 3 factors: the correct choice of the coloring composition, the quality of the enamel and the correct preparation of the surface for application.
 Bulk acrylic
Bath enamels differ according to the following criteria:
- Compound. To paint the bowl with your own hands, use enamels based on epoxy resins or acrylic. Acrylic products are more expensive, but they have a longer service life, and are also odorless.
-
Application. You can use a brush with natural bristles, a soft roller or the pouring method. It is convenient to seal small chips and cracks with epoxy paint in spray cans.
- Completeness. To qualitatively paint the washing container, it is easiest to use a ready-made repair kit, which includes a base, hardener, tinting paste, chipping putty, and sandpaper.
- Color. White is considered the most common color, but with the help of tinting paste, you can get bathroom enamel of almost any shade.
- Price. The cheapest option for painting a bathtub is epoxy paint. A little more expensive is a special paint in spray cans. The most expensive composition is acrylic.
-
Life time. Aerosol enamels have the shortest service life, which is only 1-2 years. Compositions based on epoxy resin serve 5-7 years, and acrylic - up to 15 years.
Materials and tools
Restoring a bathtub with liquid acrylic requires the purchase of basic and auxiliary materials, as well as the acquisition of a set of tools.From the materials you will need:
- liquid acrylic;
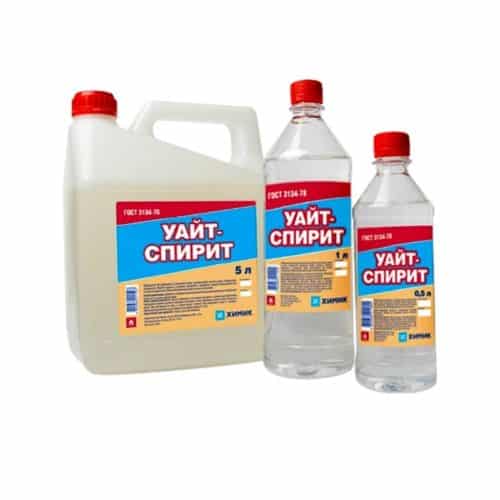
- degreaser ("White spirit", "Solvent No. 646", acetone, kerosene, etc.);
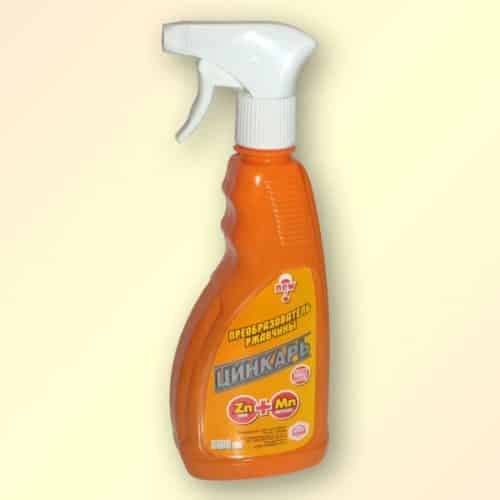
rust converter ("Tsinkar", "Ferum-3");
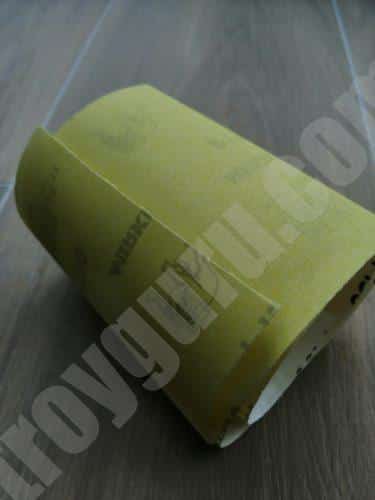
sandpaper P60 - 5 pcs.;
- masking tape (paper);
- scotch.
Of the tools and fixtures you need:
electric drill or screwdriver with nozzle grinding;
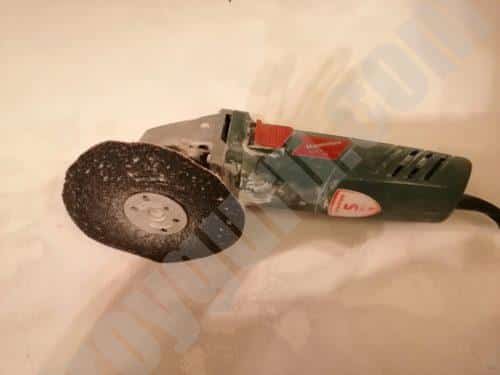 Electric drill with a special nozzle for grinding.
a small square or rectangular container for pouring acrylic (you can use a cropped detergent bottle);
 When pouring acrylic, it is better to work with a rectangular container of small volume.
- container for mixing acrylic components;
- wooden or plastic spatula for stirring the composition;
- metal spatula, about 10 cm wide, new, free of dirt and rust;
- rubber spatula - used to adjust the poured coating;
- construction knife for adhesive tape and masking tape;
- screwdrivers: cross-shaped and slotted - are necessary for disassembling the siphon;
- gas key;
- soft rags for working with solvent and rust converter;
- a wide brush or roller, if liquid acrylic is planned not to be poured, but applied with painting tools;
- tweezers from a cosmetic set to remove brush hairs or roller villi that have fallen into the applied acrylic.
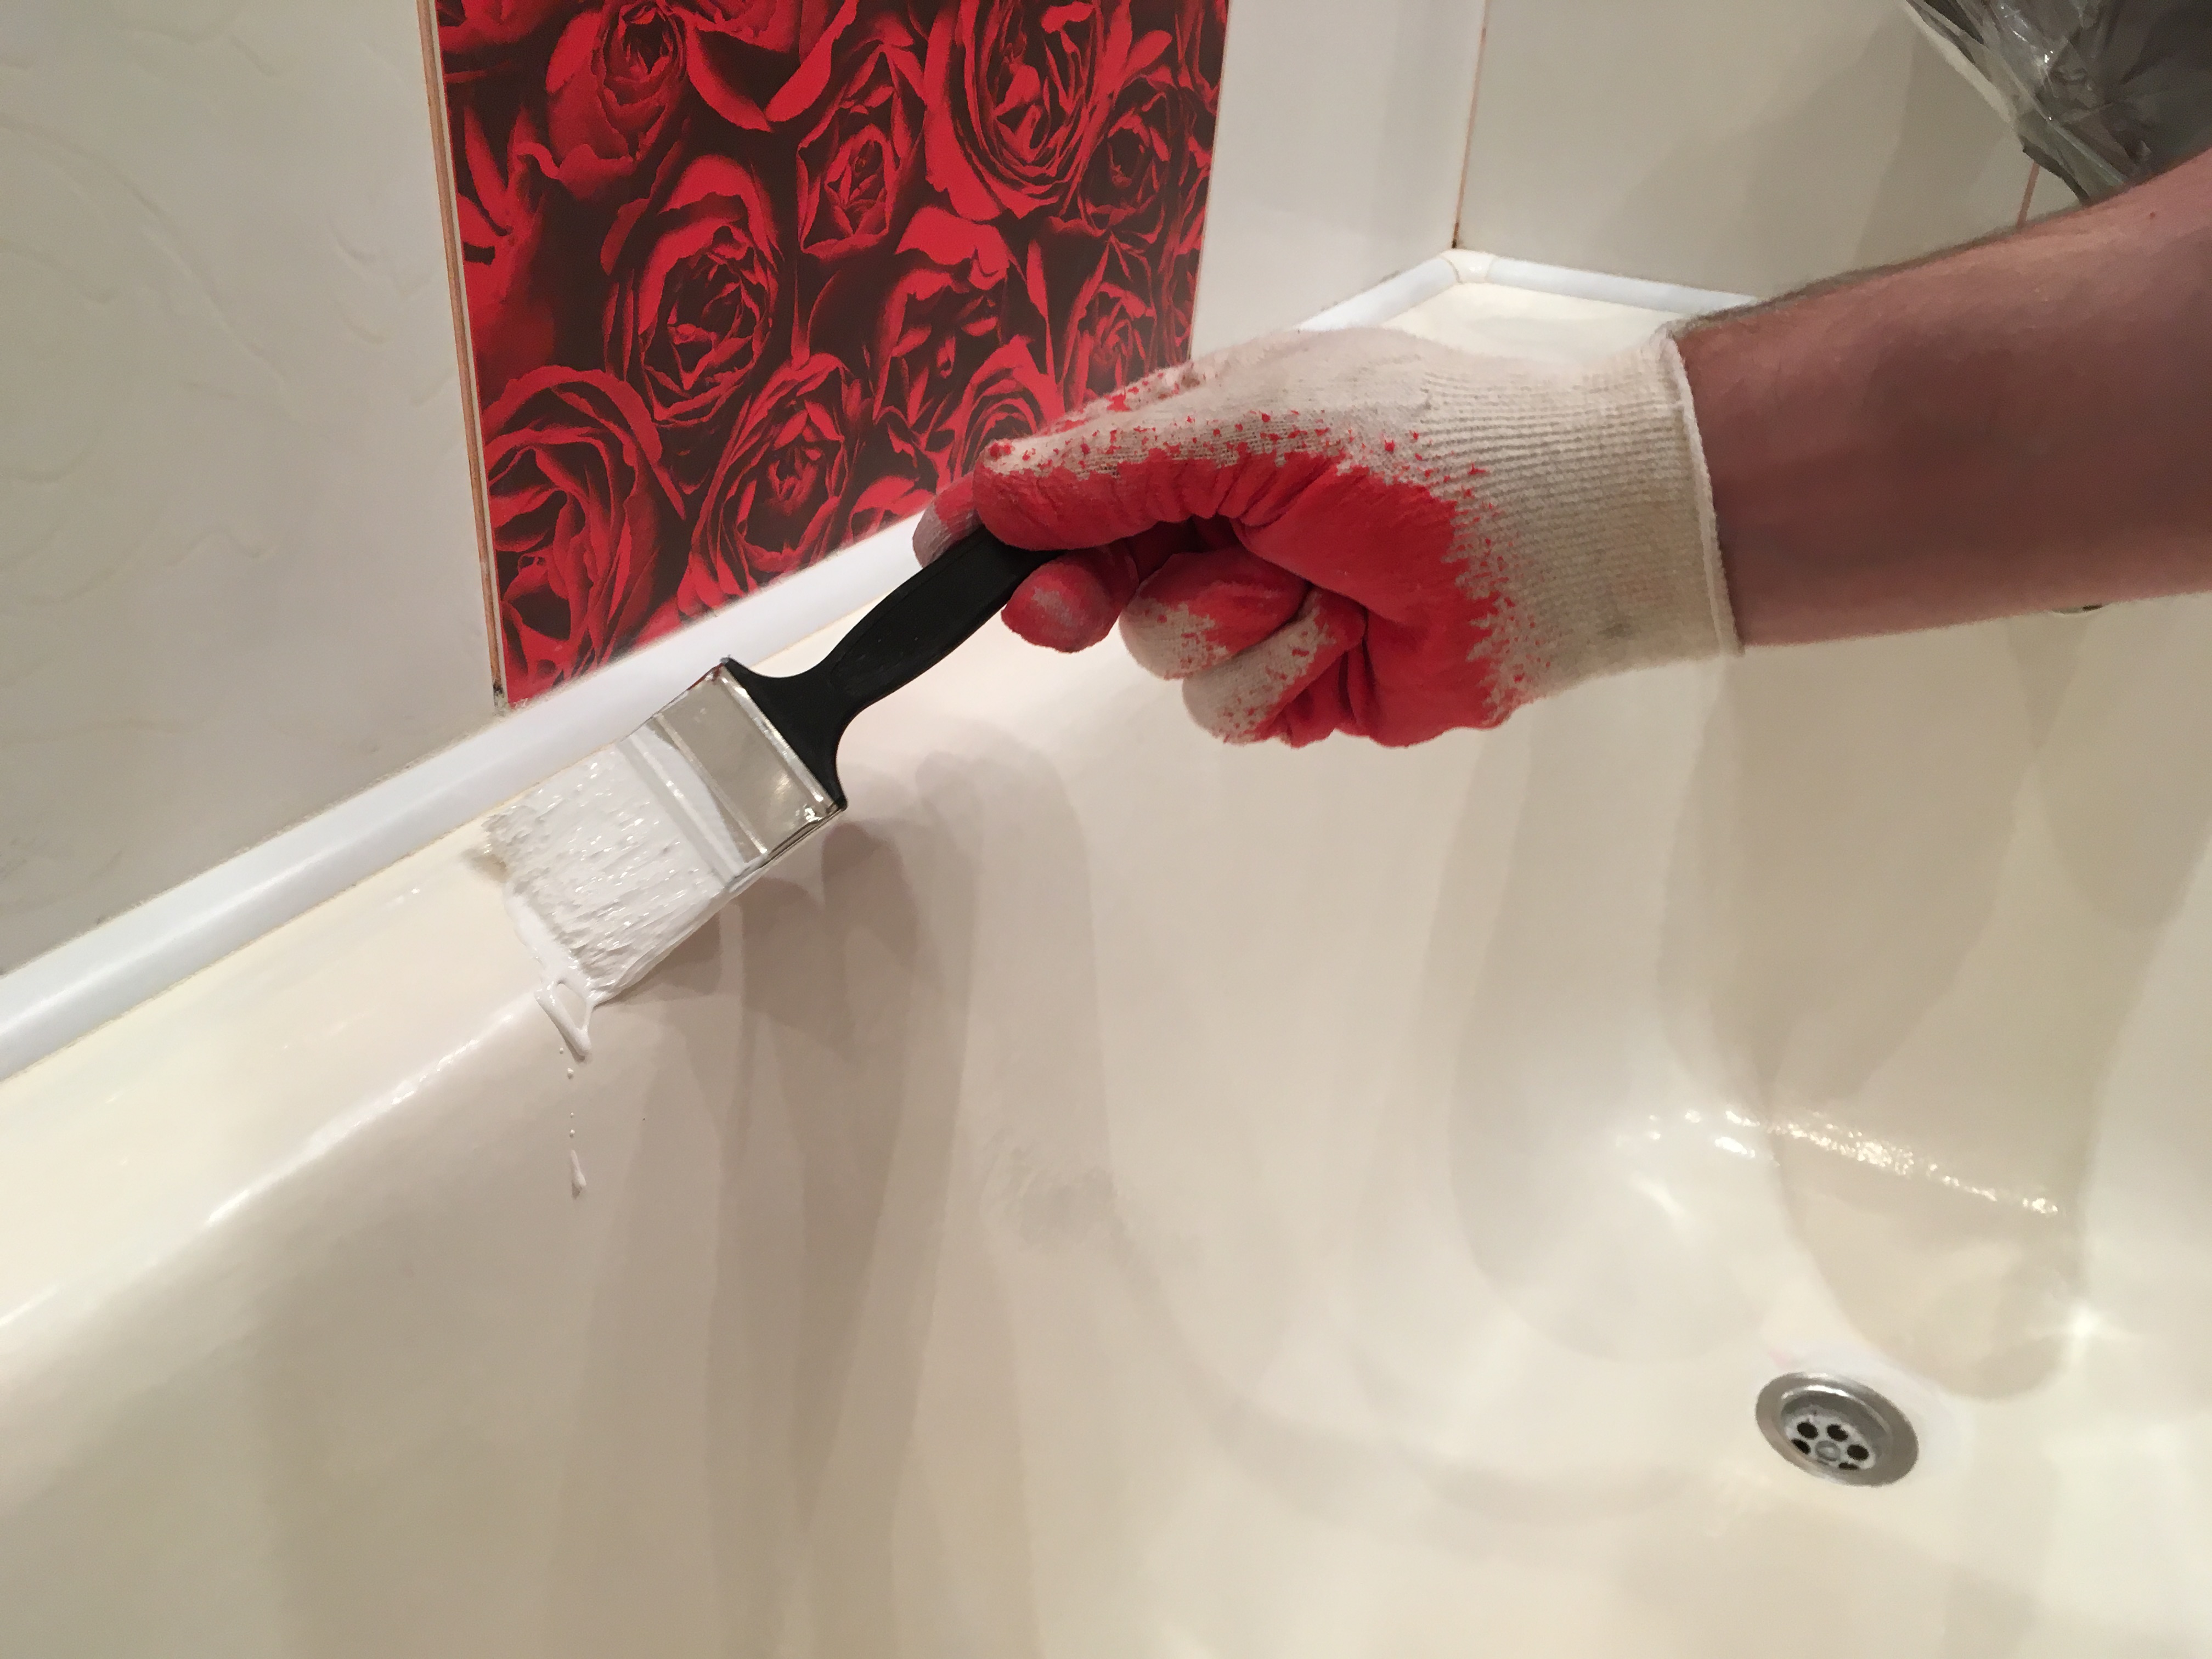
You also need to stock up on protective clothing. You will need:
- headdress (scarf) - to prevent hair from getting on the treated surface;
- pants with a shirt to protect the body from splashes of acrylic. The substance is safe, but laundered with great difficulty;
- respirator - necessary when carrying out grinding work (a lot of the smallest dust);
- disposable gloves.
Mistakes and how to avoid them
When covering the bathtub with acrylic, it is easy to make mistakes that lead to the appearance of streaks, layers, bald spots, and rapid damage to the surface:
- If the tub has not been thoroughly dried, sanded, or cleaned before applying the acrylic, it will quickly flake off in problem areas. It is necessary to remove rust, dirt and degrease the bath.
- If the components are poorly mixed or the composition is left after mixing for a long time, then it will be difficult to work with it. There will be streaks and bald spots. It is no longer possible to remove them due to the reduced fluidity of the material.
- The optimum temperature for restoration is 16-25 degrees. At a different temperature, the properties of acrylic change, it becomes too fluid, or, conversely, it freezes.
Bulk acrylic
This method uses the same material as the acrylic liner, but is applied in a liquid form, which solves most of the problems of the bath insert. Suitable for all common types of bathtubs and shower trays. The price of restoration depends on the size of the bathtub and the material: acrylics are more durable, quick-drying and Western manufacturers will have a higher price.


The master works for about two hours: he prepares a bath, and then pours the composition from the sides. Acrylic flows down, creating a thin uniform layer. If the acrylic is quick-drying, then after 16 hours the bath can be used, other types of acrylic dry in 24-48 hours.
Pros:
- impact resistance;
- average price;
- high degree of restoration;
- high service life of 15-20 years;
- warm to the touch coating;
- no need to dismantle anything: neither drain nor tile;
- does not smell;
- does not turn yellow over time.
Minuses:
- with inaccurate work, the surface may turn out to be uneven;
- if the bath is initially deformed, acrylic will repeat this shape, and not remove it.
Liquid acrylic bathroom coating
Liquid acrylic bathroom coating
Liquid acrylic is a special composition of a polymer base (acrylic semi-finished product) and a hardener for the restoration of cast iron, steel, acrylic bathtubs by applying a 6 mm thick layer on their surface. After hardening, it forms a solid, durable surface that is not subject to mechanical stress, temperature extremes, and bacteria growth.
Liquid acrylic bathroom coating has a lot of advantages:
- With proper care, the operation of the coating is at least 15 years.
- No smell during the application process, as well as the formation of bubbles.
- The liquid does not form irregularities during application, the surface is uniform in all places of the bath.
- A cast iron or steel bathtub coated with liquid acrylic will cool more slowly because it has poor thermal conductivity.
- Liquid acrylic fills all the cracks and roughness of the old bath, forms a smooth, glossy surface that can be washed with detergents.
- Liquid acrylic can be tinted in any color you wish, creating a harmonious interior in combination with bathroom decoration.
Among the shortcomings, it can be noted that the process of hardening of acrylic lasts at least 36 hours, while it is absolutely impossible to allow water to get on its surface. After the bath is filled with acrylic, it will need to be looked after in the same way as regular acrylic - do not allow too frequent use of detergents, do not scratch, do not leave water inside it to prevent rust.In case of poor-quality filling work, defects may form on the surface, which will have low strength.
 Transformation of the bath after applying liquid acrylic
To date, Lux and Stakryl are considered popular compositions for pouring a bath. The first consists of base and hardener packaged in containers designed for bathtubs of various sizes. "Lux" is plastic, spreads well, does not leave gaps and bubbles, has high adhesion. It mixes well, unlike Stakril, which is very difficult to achieve complete uniformity. "Stakryl" is one of the first materials on the market intended for the restoration of bathtubs. It has a sharp unpleasant odor during application, but at the same time forms a strong, durable coating, has good hiding power. There is another material - "Plastol", which is well suited for self-restoration of the bath due to its properties. It has high adhesion with any bath material, plasticity, good hiding power, forms a snow-white smooth surface.
This is interesting: Properties and use of gum turpentine (video)
Advantages of the method
For some 10-15 years, the restoration of old cast iron bathtubs was carried out exclusively with the help of polyester enamel, which gave a short-lived, long-drying and brittle coating. Now, to update the enamel layer, liquid acrylic is used, a composition that is unique in its properties.
It is a thick, but fluid and elastic compound, consisting of 2 components: a base and a hardener. Liquid acrylic is applied to the surface of the bath by pouring or using a roller, and it dries for 2-5 days. Restoration of the washing container by this method has the following advantages:
- Smoothness and appearance of the coating. Acrylic is smoother, shinier, more even and whiter than factory enamel. There are practically no pores on it, so it has the effect of "self-cleaning", that is, it repels pollution, remaining clean for a long time.
- Durability. The service life of the acrylic coating is, subject to the recommendations for the care and operation of the product, 10-15 years, which is 2 times longer than that of epoxy enamel.
- Wear resistance. If the restoration of enamel is carried out by pouring, the acrylic layer has a thickness of more than 6 mm, so the coating lasts a long time.
- Safety. Liquid acrylic does not have a pungent odor, does not emit toxic fumes, so you can work with it even if there are children in the room.
- Fast drying. Unlike epoxy enamel, acrylic coating dries in just 3-5 days.
- Variety of colors. If you introduce tinting paste into the acrylic compound, you can get a mixture of any shade suitable for the interior of the room.
Arguments in favor of a bulk bath
 This recovery method has many more advantages than disadvantages.
Like any other restoration method, the pouring method has its drawbacks, but the advantages of this method clearly prevail:
- Due to the fact that liquid acrylic lays down in a thick layer on the surface, it is able to even out minor irregularities in the bathtub, as well as smooth out production defects;
- This method of coating does not leave stripes and other defects on the surface of products;
- To carry out the restoration, you do not need to tear off the tiles from the walls, as is necessary in the case of an acrylic liner;
- Technologically, the process takes less time compared to enamelling;
- In the preparatory work, there is no stage of applying a primer;
- The bulk method of bath restoration does not require special skills and abilities from a person;
- This coating is also distinguished by maintainability;
- Plumbing does not absorb plaque and dirt.
Why choose this restoration method?
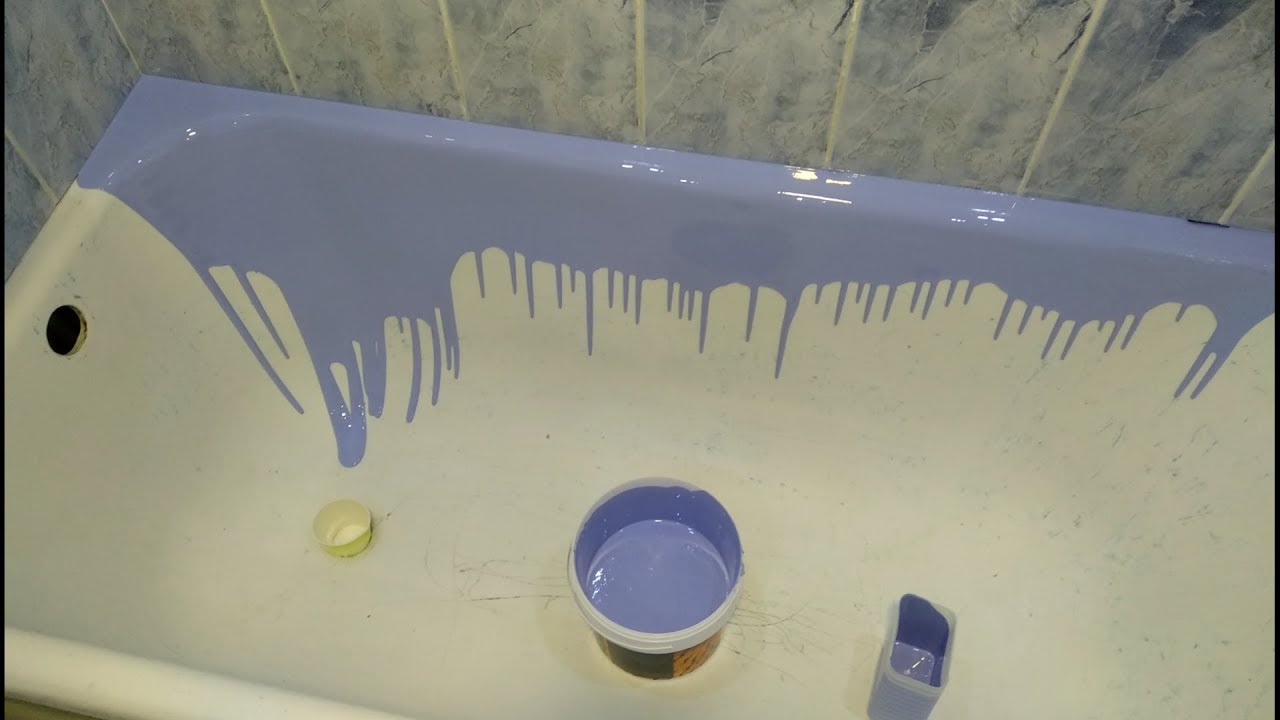
The method of "bulk bath", as it is called, is quite simple. The prepared composition is poured in a circle on the edge of the bowl, after which it slowly flows down and solidifies, forming a 2-8 mm layer.
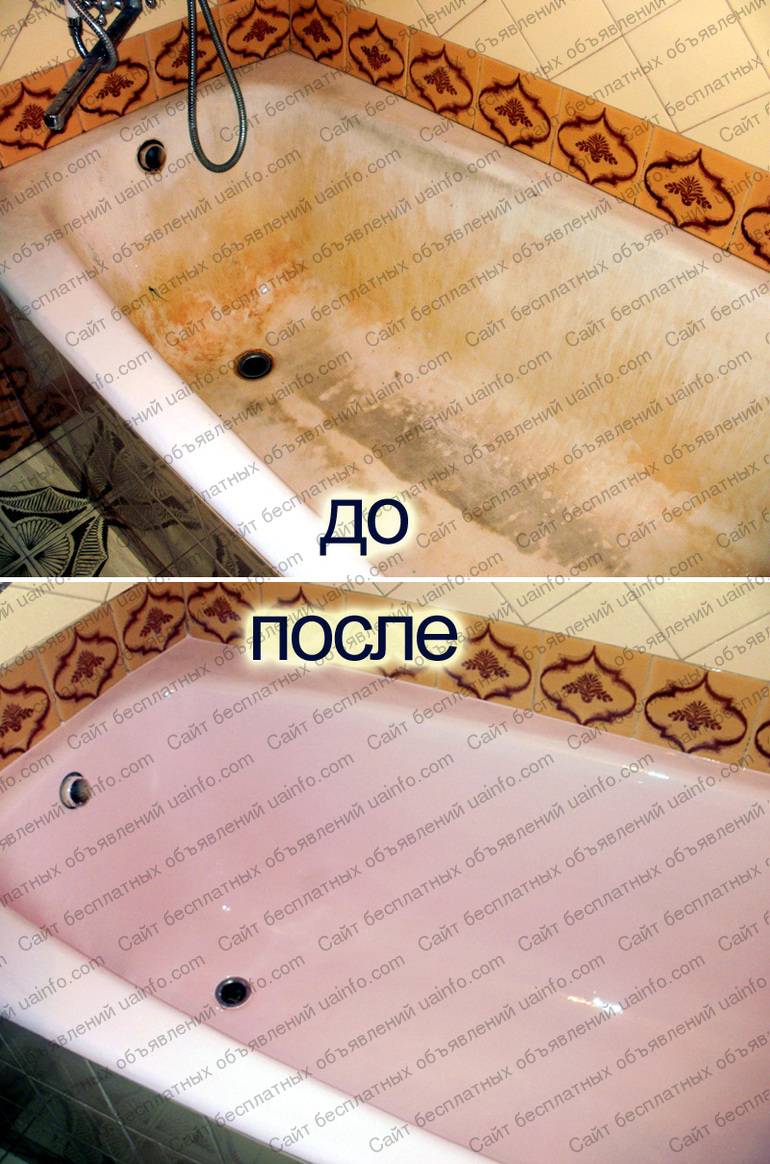
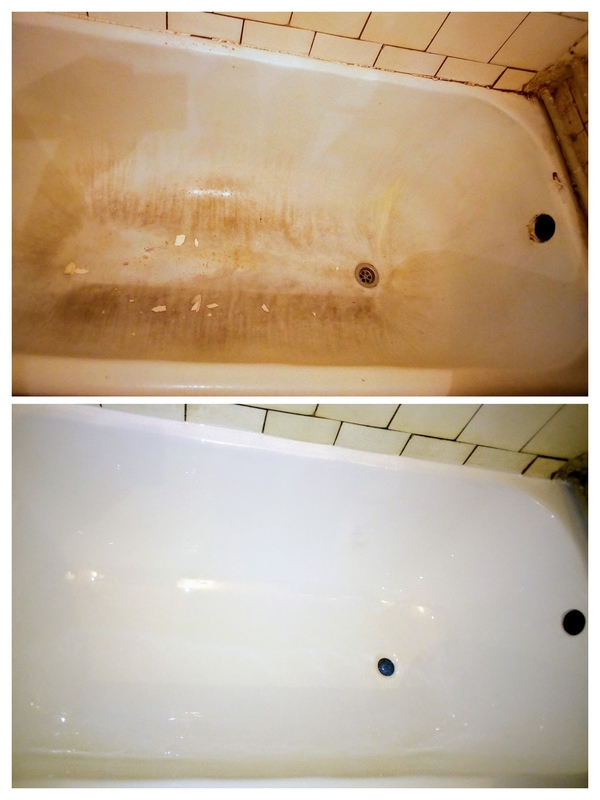
The surface of the bowl becomes smooth and shiny.
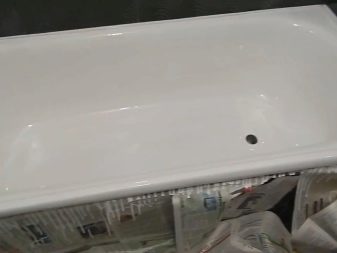
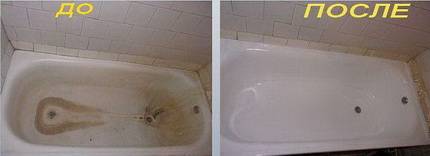 This is how the bath looks like before restoration with liquid acrylic and after. The difference is very noticeable
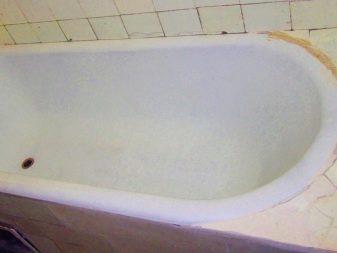
The new coating masks small to medium defects in the old tub, such as rust spots, chips, scratches, cracks and other changes in color and texture.
Filling with liquid acrylic is considered one of the most popular ways to restore a bathtub, and this is no coincidence, because it has a number of advantages:
The liquid material fills in irregularities and gaps on the surface of the tub.
Acrylic is very pleasant to the touch, does not slip, which is very important for plumbing. In addition, it retains heat well.
Acrylic coating is wear-resistant, resistant to mechanical damage, prevents the development and growth of pathogenic bacteria.
The restored surface is very easy to maintain
It does not turn yellow and does not absorb dirt. To remove dirt, it is enough to wash the bath with any mild detergent.
Liquid acrylic at the request of the owner of the bath can be tinted in any color.
Significant savings in the family budget.According to the most conservative estimates, restoring a bathtub with liquid acrylic will cost about 20% of the amount that would have to be spent on replacing equipment.


The technology for applying liquid acrylic is quite simple. The work can be done independently.
 Liquid acrylic flows down the walls of the bath and forms a new durable coating that is resistant to mechanical damage.
Preparatory work for the restoration of the bath
In order for the restoration of the bathtub at home to be as efficient as possible, remember the following sequence:
- wash the bath well;
- dry the surface thoroughly;
- prepare a solution.
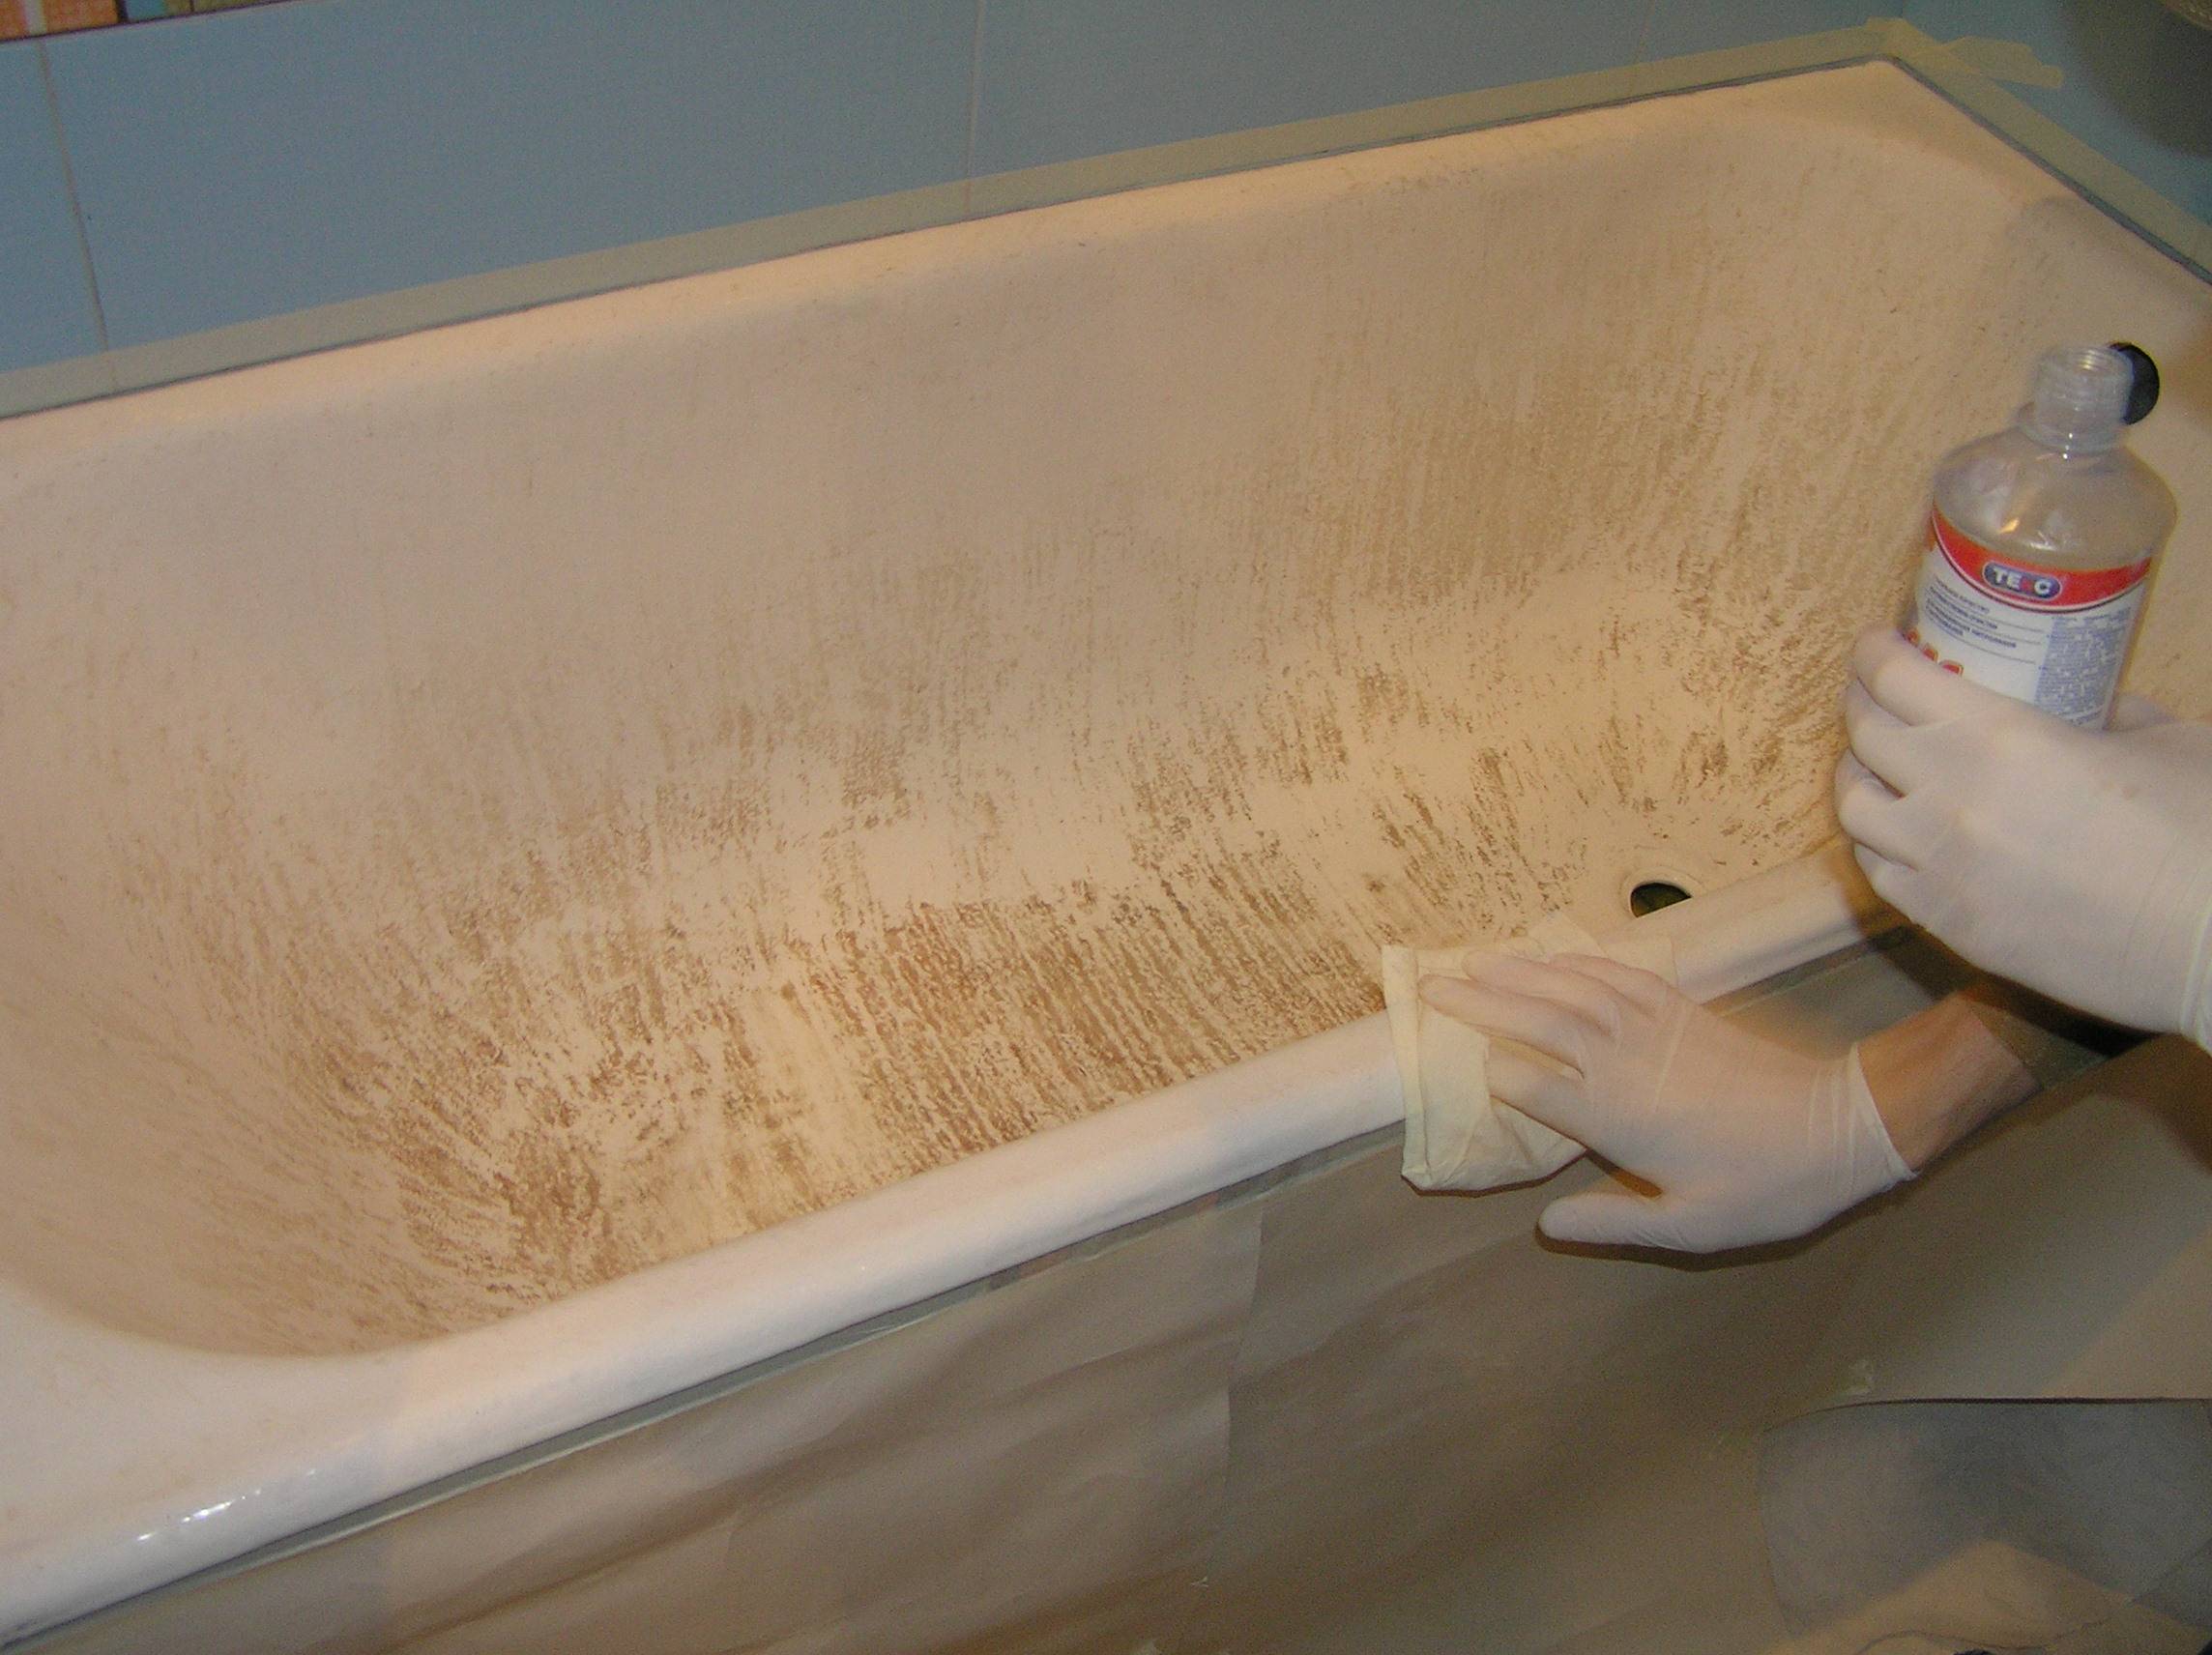
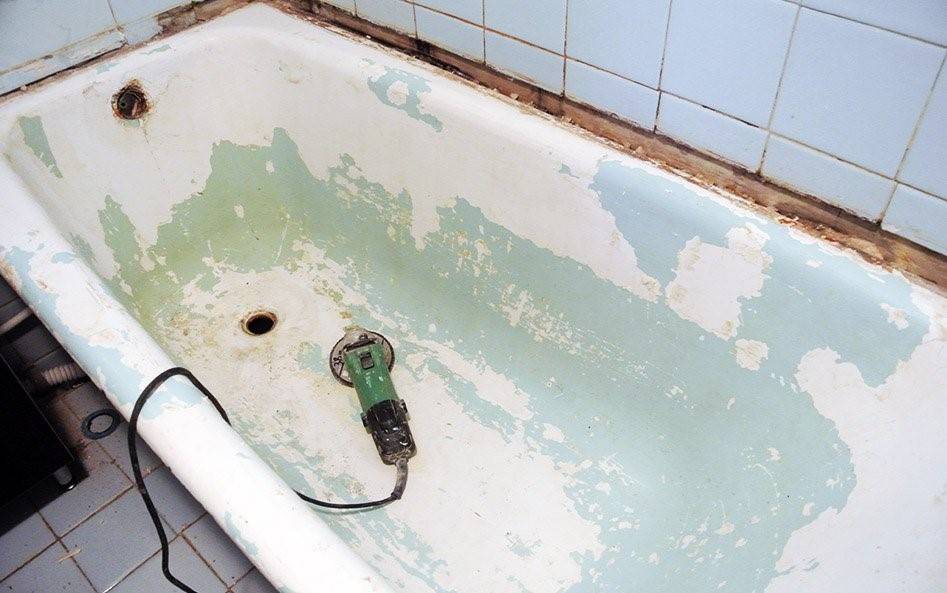
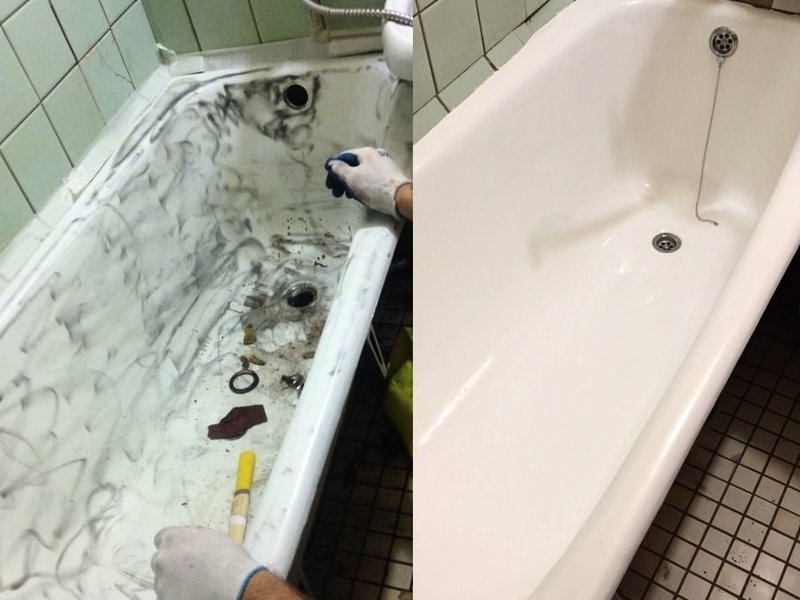
The most important step is preparation. If you do not clean the old coating, then the bulk bath will quickly lose its shape and quality. First of all, you need to purchase tools that will help clean the bath: soda, a metal brush, sandpaper with a grit of 60. First, fill the bath with some warm water and moisten the entire surface. Then sprinkle baking soda around the edges of the tub and scrub the surfaces thoroughly with a brush to remove stubborn dirt and grime. Rinse the bath again and repeat the procedure, replacing the sponge with sandpaper. After you have cleaned the tub, drain the water. On average, cleaning will take you half an hour.
Cleaning old plumbing
But that's not all! In order for the acrylic coating of the bathtub not to deteriorate, you need to completely dry the product. In this case, simply drying the surface with a dry rag will not work. It is best to use an industrial hair dryer. If the drying is carried out poorly, the bulk bath, after the composition dries, may become covered with yellow stains. The minimum drying temperature is 650 ˚С.There is nothing complicated in the work: we wipe the bath from top to bottom with a dry cloth, and then we warm the surface with a hairdryer.
The last stage is the puttying of potholes and sealing irregularities with the help of automotive putty. 30 minutes after application, when the mixture hardens, it must be wiped, achieving the same level with the surface of the bath. Do not forget to remove the drain and clean the hole with an antistatic cloth before restoring. The drain itself can be covered with paper or a plastic cup placed inside, and a small container is placed under the bath, where excess acrylic will go. If you can't remove the drain, insulate it with construction tape.
Conclusions and useful video on the topic
Practical recommendations for restoring the coating of the bath with epoxy enamel are presented in the following video:
Useful information on the use of PlastAll Liquid Acrylic is contained in this video:
Restoring a bathtub with epoxy enamel or liquid acrylic is not a simple or easy task. To get a really reliable result, you should carefully prepare the surface, and then strictly observe the technology of work and the conditions for their implementation.
Tell us about how you restored the enamel of your own bath. It is possible that you know an effective way to repair plumbing that is not listed in the article. Please write comments in the block below, share useful information and photos on the topic.


