- Features of the use of acrylic insert
- Do-it-yourself bath restoration: new enamel application technology
- How to distinguish a fake
- Signs of the original
- How to paint a bath What paint and how is the bath painted
- What color to paint the bath?
- How to paint a bath with your own hands?
- acrylic coating
- Acrylic pouring method
- Cons of acrylic coating
- Bath restoration methods
- Currently, there are the following ways to restore bathtubs:
- Advantages and disadvantages of using chemical enamel
- Which is better, acrylic or enamel
- Method 1: ordinary enameling
- Why does enamel usually wear out?
- Restoration of the enameled surface
- What will be needed for work?
- Preliminary step: surface preparation
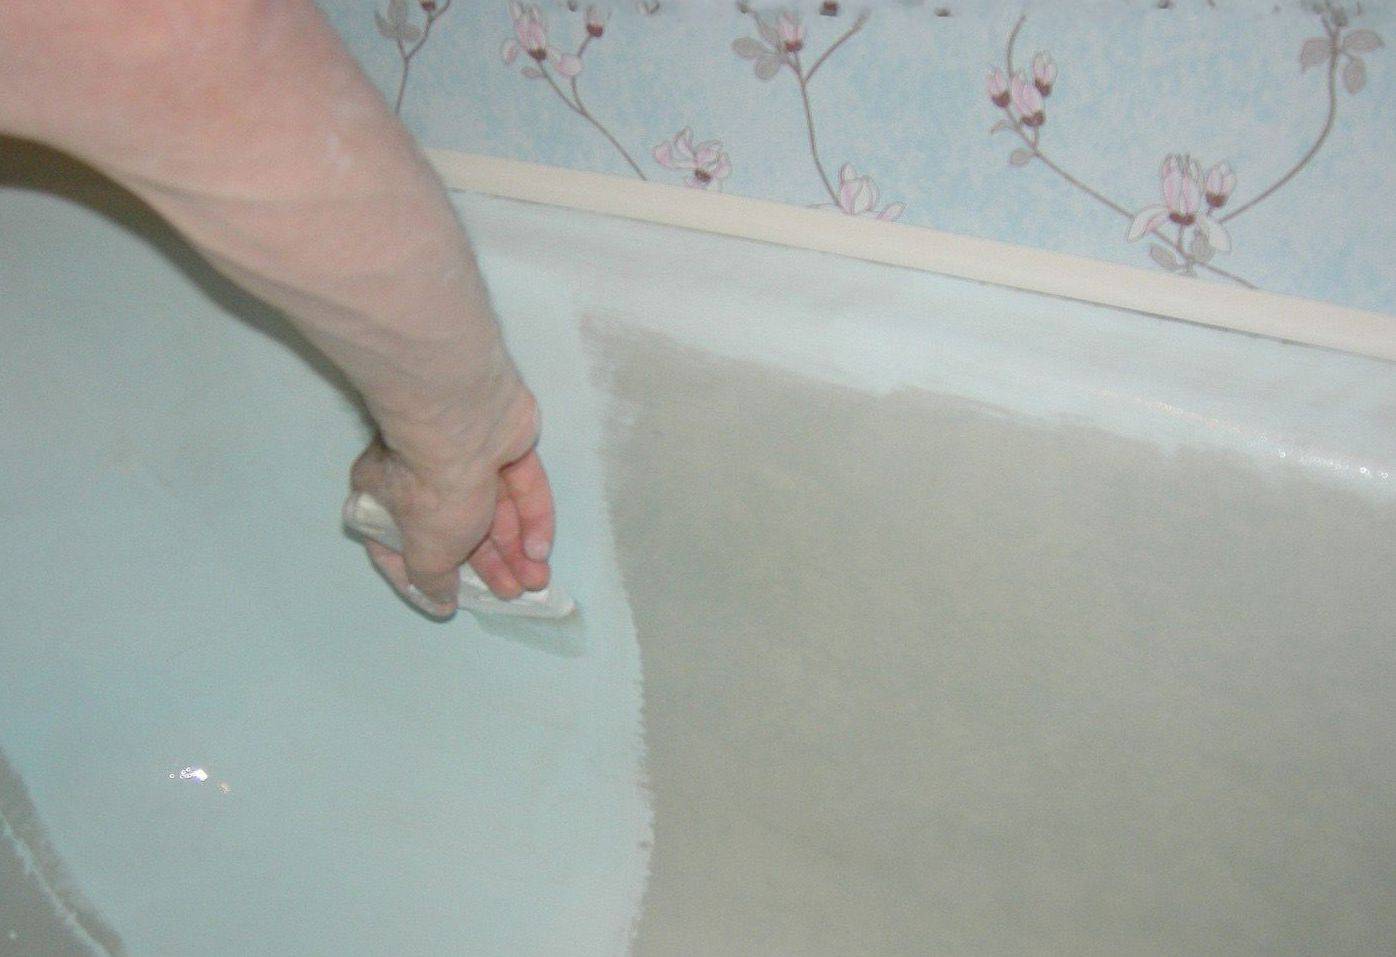
- The main stage: applying enamel
- Pros and cons of painting
- What you need to know about enamels
- Coating Requirements
- Enameling at home: pros and cons
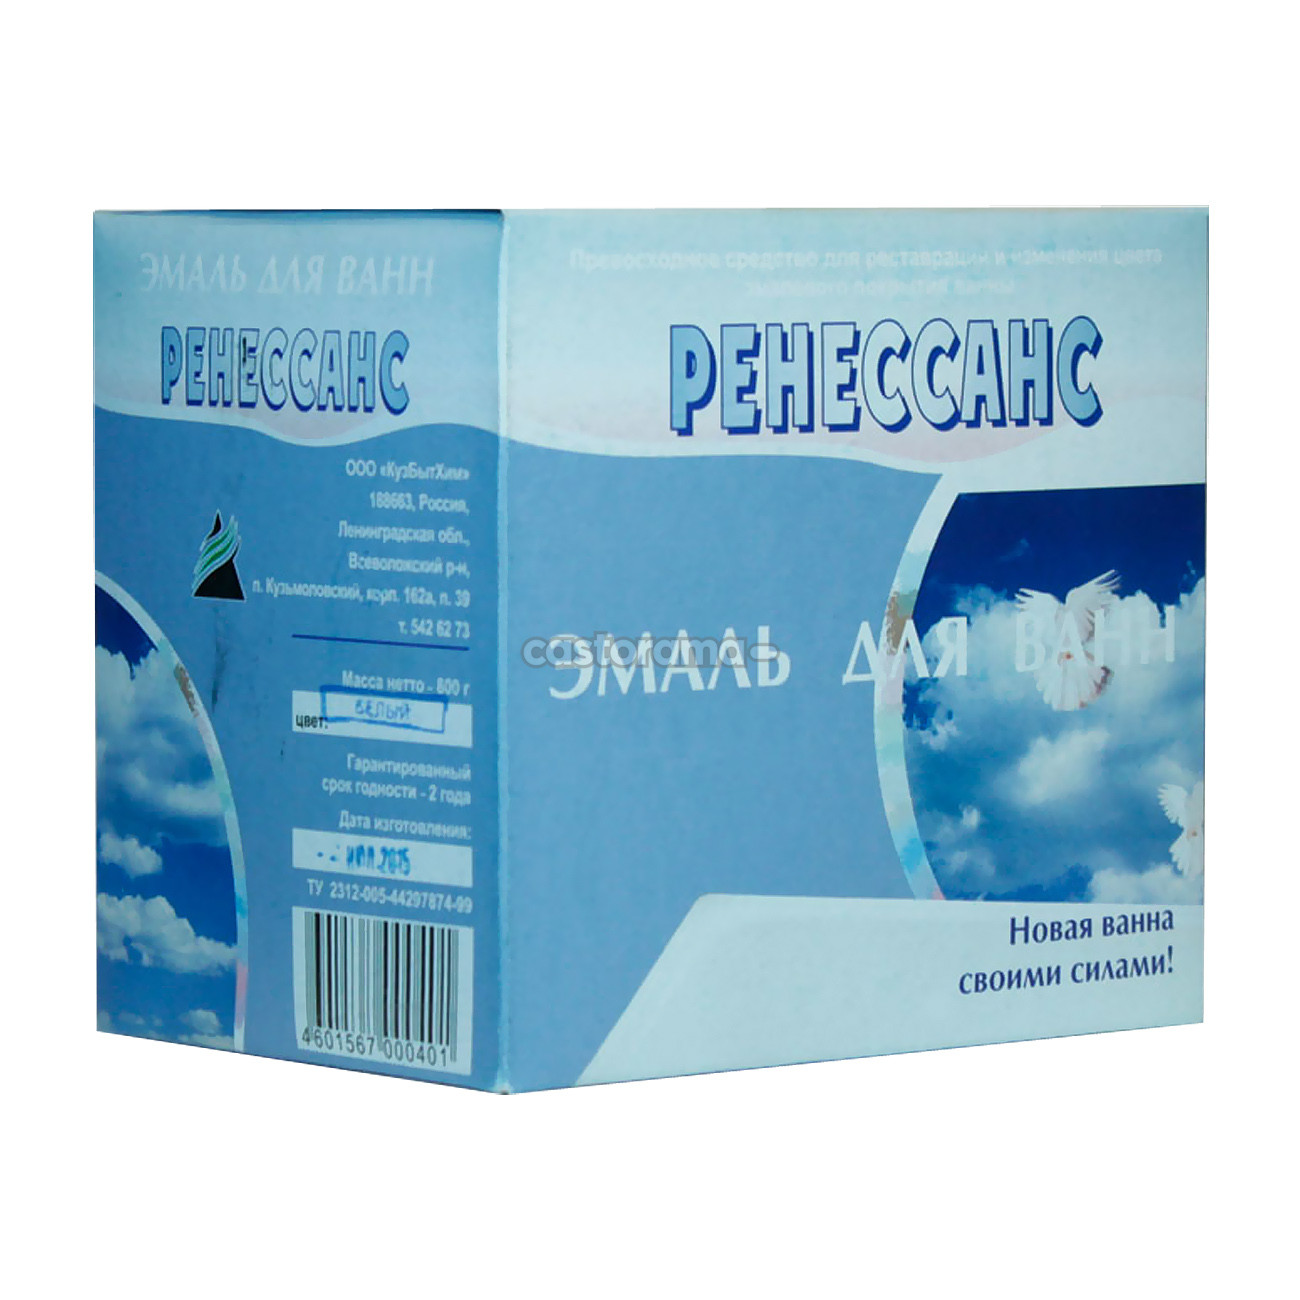
- Enamel "Epoksin-51" and "Epoksin-51C"
- Pros and cons of acrylic
- Further care
- "Bath to bath" or acrylic liner
- Restoration methods, their advantages and disadvantages
- Enamel painting
- liquid acrylic
- Acrylic insert
- Results
Features of the use of acrylic insert
It has the following advantages:
- can be used to update different types of bathtubs with different shapes, sizes and materials;
- the resulting coating does not turn yellow during operation and is resistant to rust and dirt settling;
- the cost of this product is at a low level;
- after the work done, you can use the bathroom literally the next day;
- the liner has excellent thermal and sound insulation parameters;
- the new coating is easy to clean and with the help of different detergents;
- there is no need to dismantle the old product or subject it to a complex and expensive overhaul;
- High-quality acrylic inlay will last more than 20 years.
The negative parameters of this method include the fact that for baths of non-standard sizes, you will have to order an insert, so it will have a higher cost.
Do-it-yourself bath restoration: new enamel application technology
This method of restoring a cast-iron bath is not suitable for every situation - it can only be used in cases where the old enamel has lost its former beauty and is covered with rust spots, turned pale, turned yellow and became rough. But if there are chips, deep scratches on the surface of the bath, or the enamel generally peels off in pieces, then this method will not work.
So, having figured out the possibilities of this method of solving the issue of how to restore a bath with your own hands, you can safely get down to business. As always, for a better understanding of the essence of the issue, we will consider the entire technology of restoration work in stages, but first we will deal with the enamel itself.
Restoration of a bathtub with enamel photo
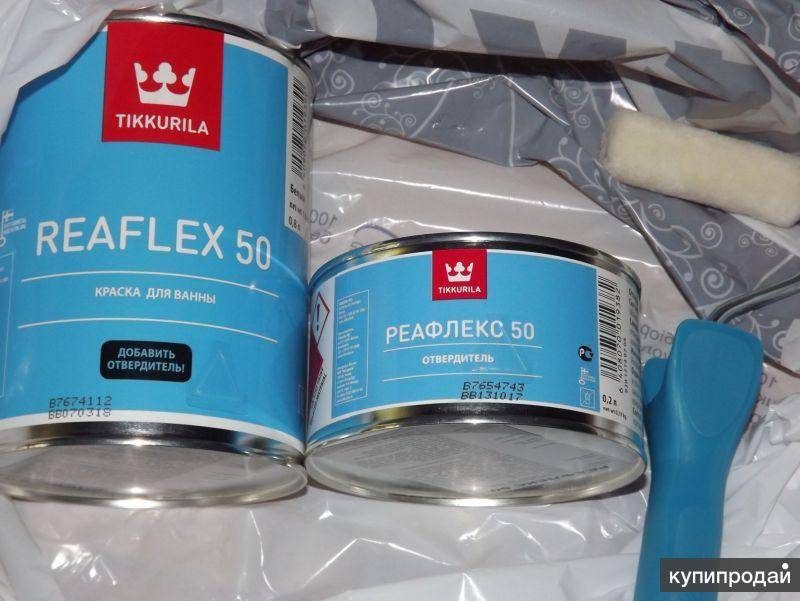
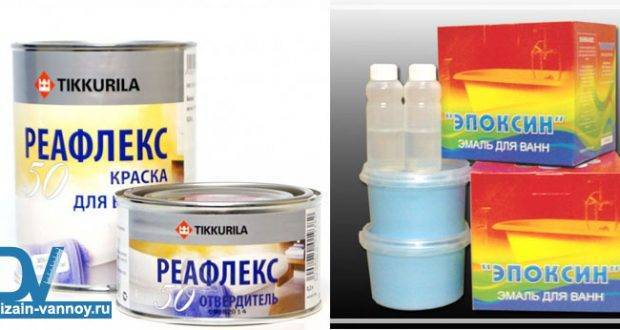
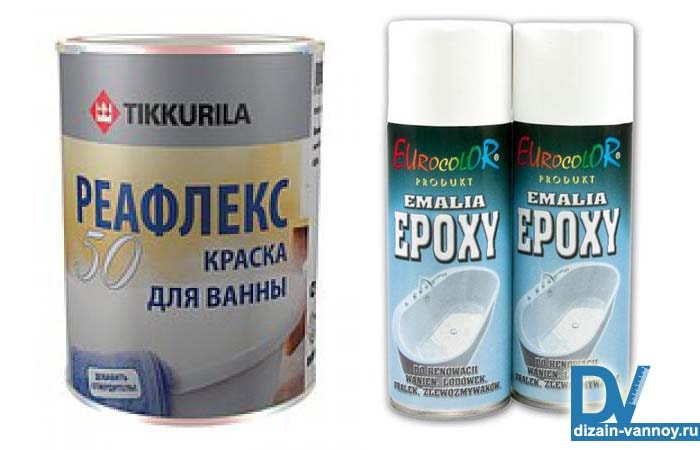
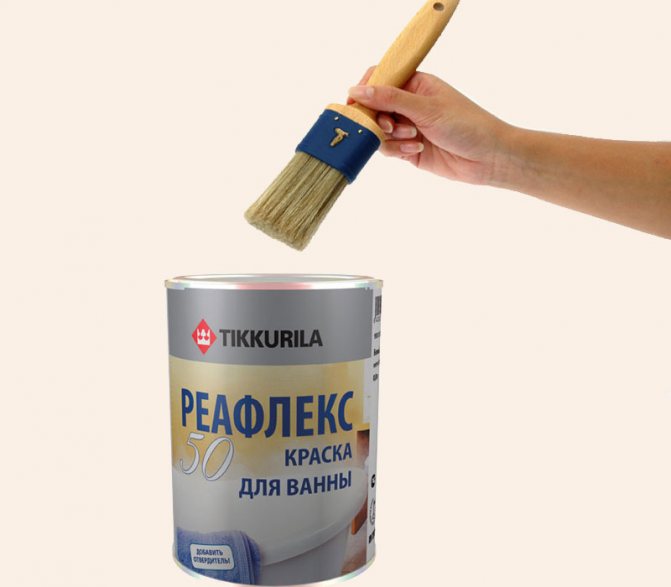
Undoubtedly, it is better to give preference to imported products, the composition of which is thoroughly thought out and selected.Working with Reaflex enamels from TIKKURILA is much more pleasant and easier, besides, this bath paint dries pretty quickly. If someone finds such enamel too expensive, then you can opt for domestic products Epoksin or Epovin. Using these bath paints, you need to be prepared for a long drying process - usually up to 4 days.
With the enamel seems to be sorted out, now you can get to work.
-
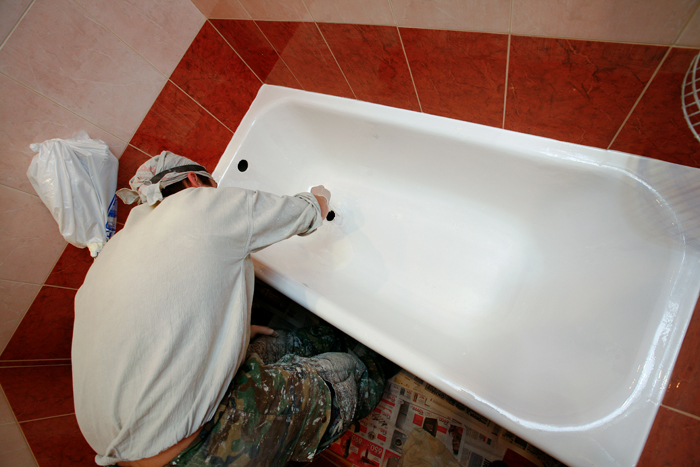
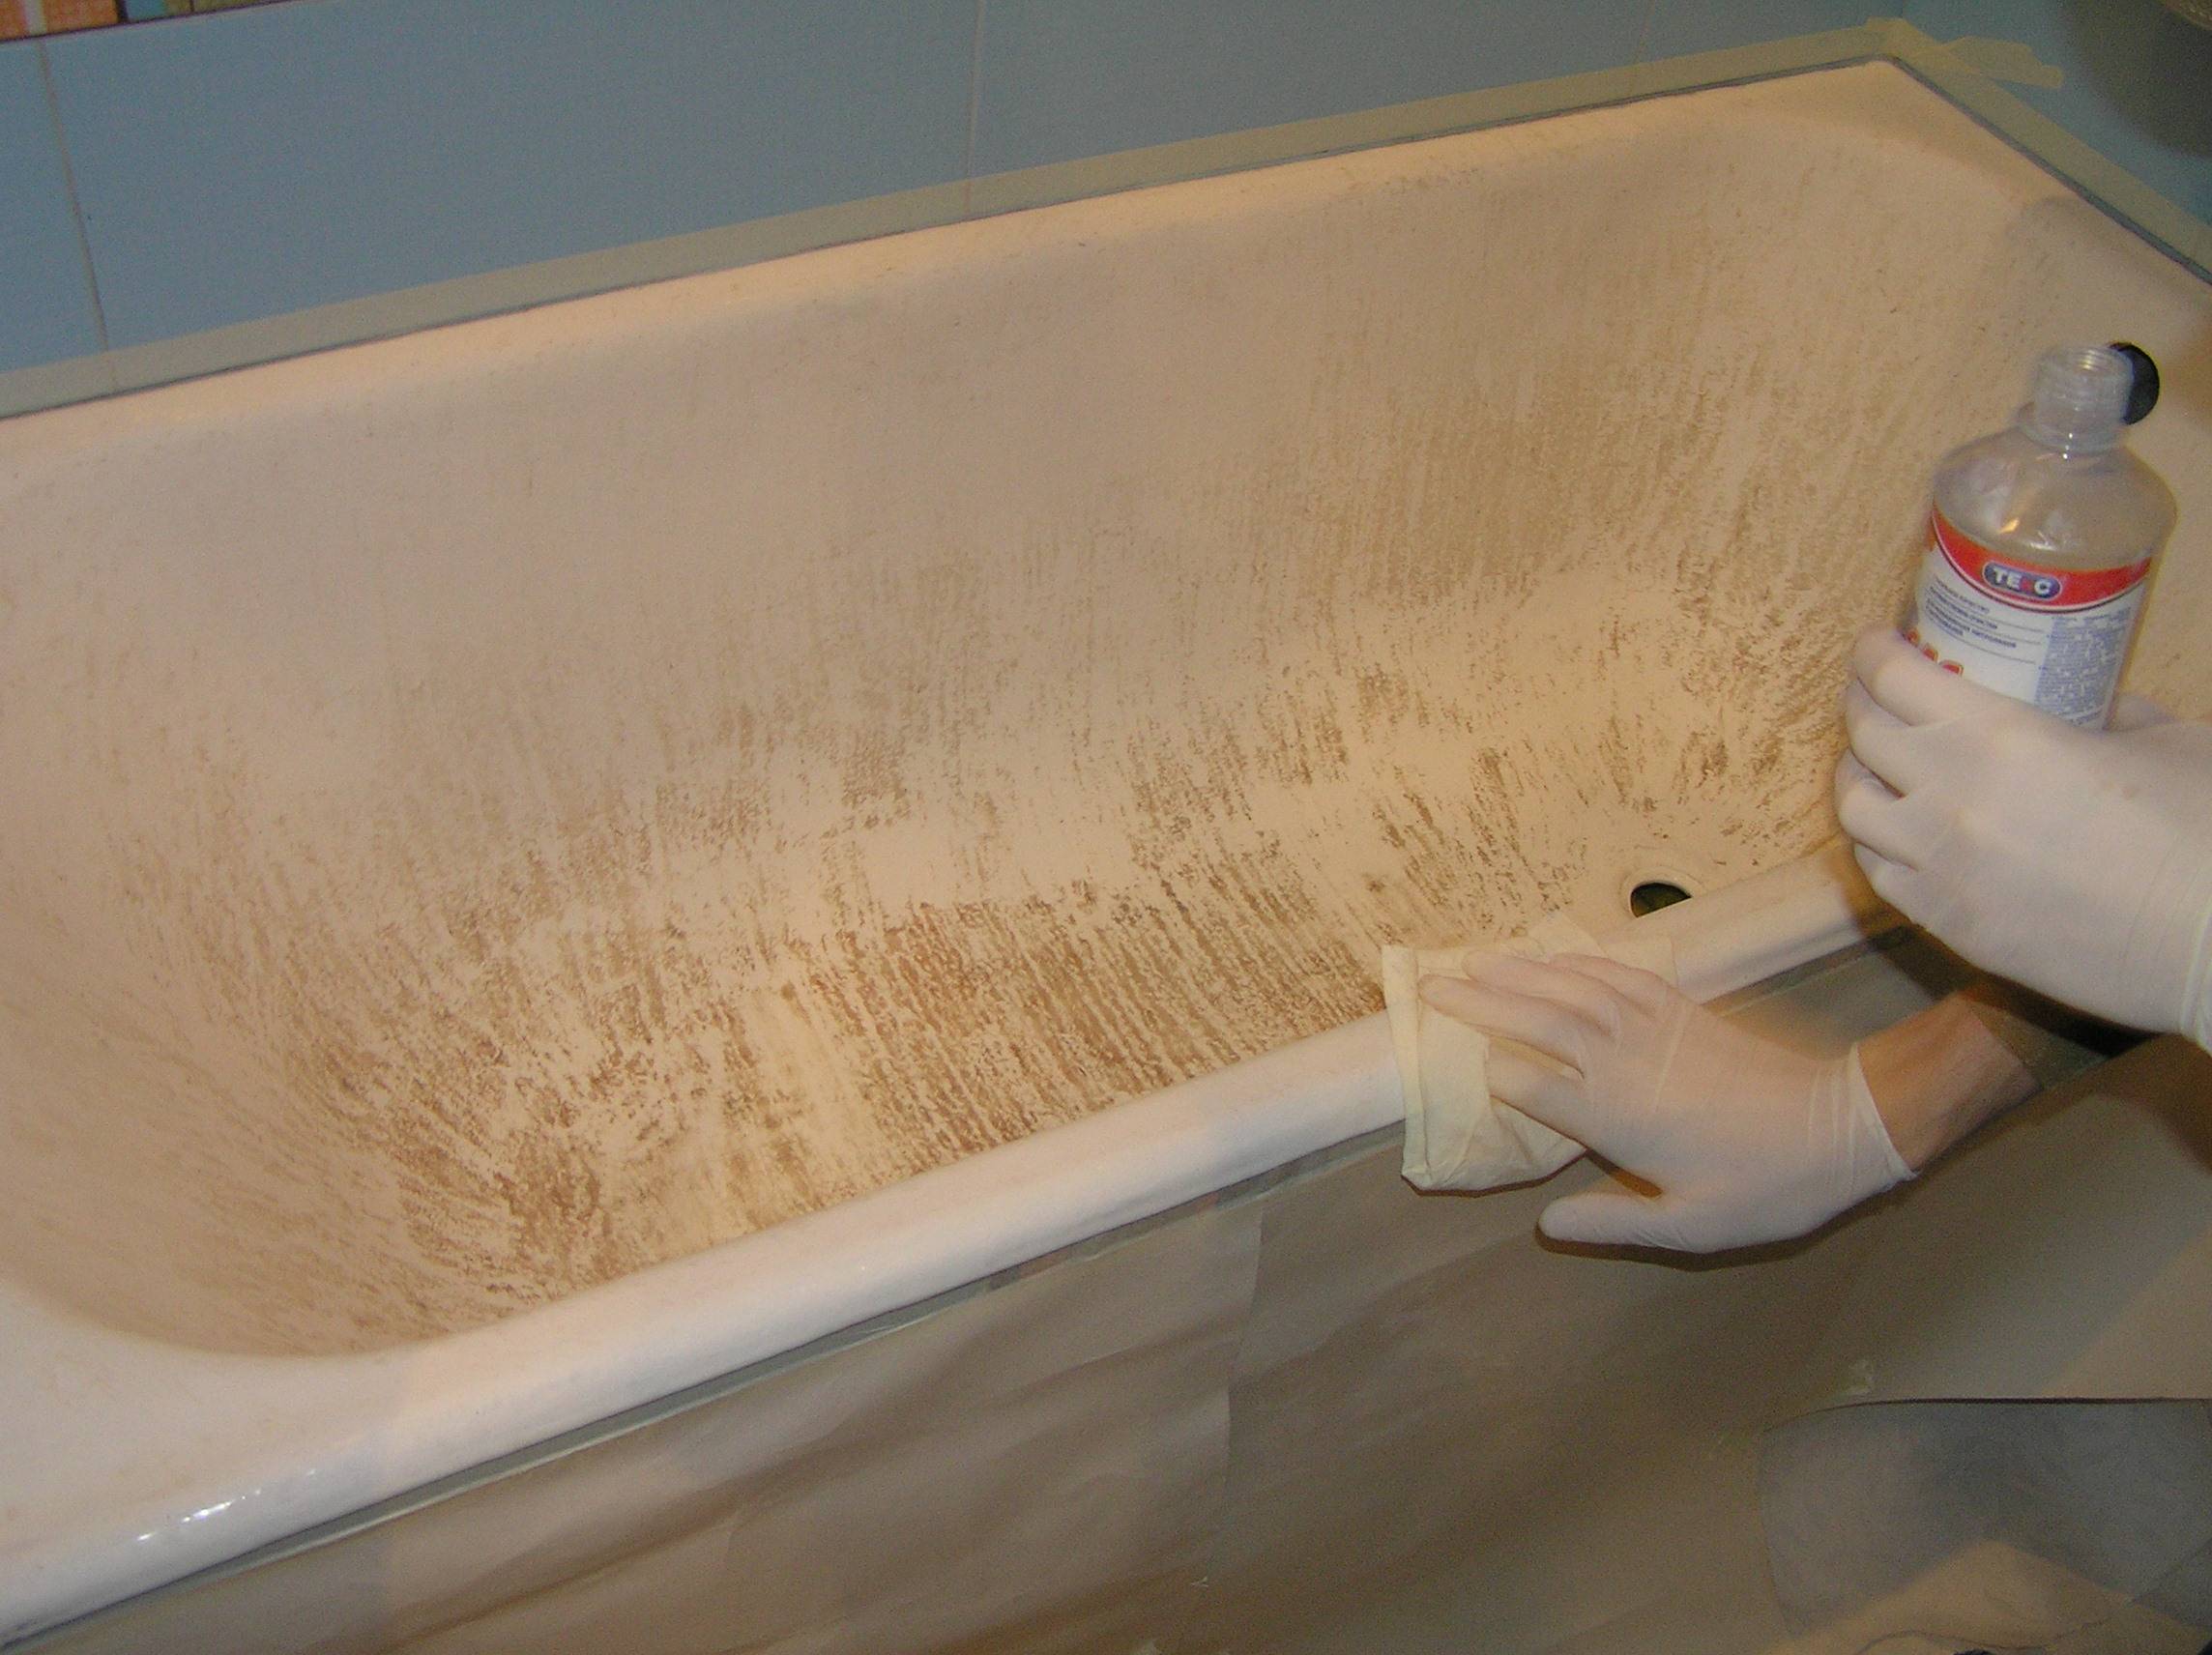
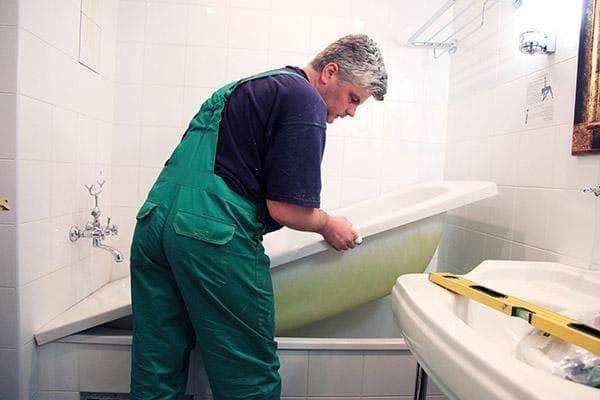
Preparing the bath for enamelling. To begin with, the inner surface of the bath must be thoroughly rinsed using aggressive household chemicals, such as Pemolux. The essence of such cleansing is to rid the surface of the bath of fatty layers that have eaten into the old enamel over a long period of operation of the bath. Then we arm ourselves with a grinder or a drill equipped with grinding nozzles. I want to warn you right away, if you are new to this business, then it is better to refuse the grinder. One wrong move - and a cavity that will not be hidden by enamel is guaranteed to you. You need to grind the bath until it becomes relatively smooth. At the end of grinding, the bath is thoroughly washed with water using aggressive detergents. At the same time, it is necessary to ensure that the water flowing down the walls of the bath does not descend in droplets, since this is a sure sign that the fat from the old enamel has not been completely removed. Then leave the bath to dry for at least 24 hours. We remove the siphon from the dry bath and vacuum it to remove the smallest particles of dust - this work must be done immediately before applying the enamel.
-
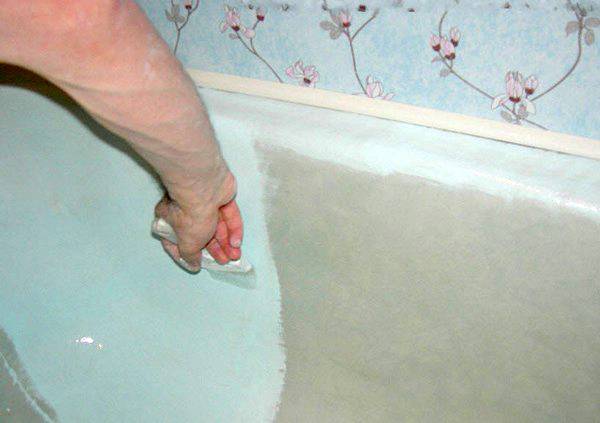
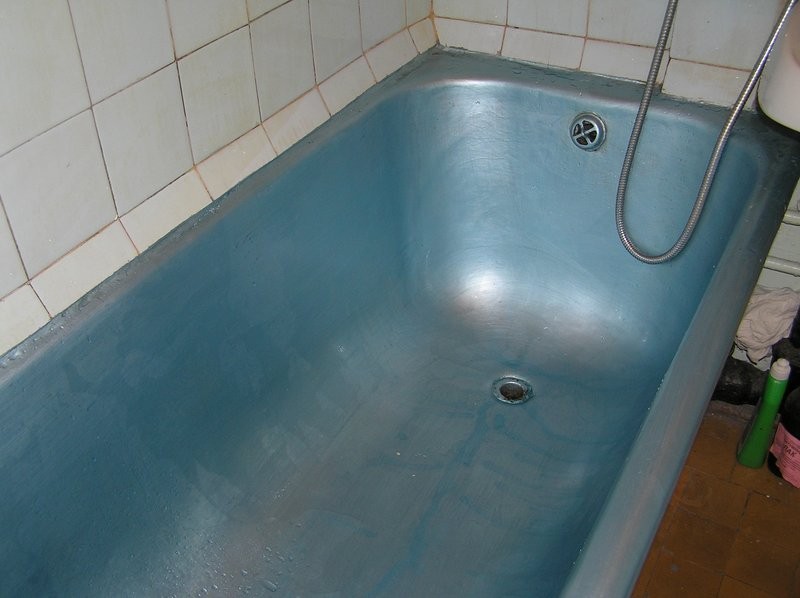
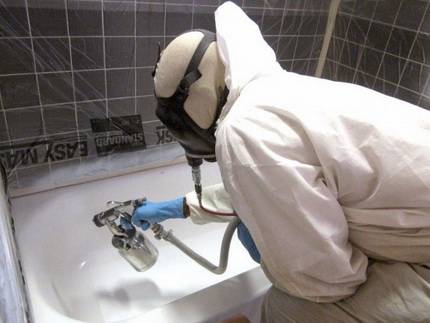
Applying enamel is the most important stage of work.Restoration of bathtubs with enamel, depending on the composition used, may have some differences in technology - as a rule, all the necessary nuances can be read on the packaging. When starting to apply enamel, the first thing to do is to divide the acquired paint into two equal parts - the first will be used as a starting coating, and the second as a finishing layer. The first (base) layer is applied with a wide brush in a very thin layer. The task is to fill all the pores of the old coating with new enamel. You need to start applying enamel from the edges of the bath and gradually go down. In this case, the paint must be smeared very high quality, and most importantly evenly. It’s not worth waiting until the base layer dries - it can fall into dust, and then all the work will go down the drain. The top coat is applied immediately after the bath is covered with the start coat. The enamel is applied with the same brush, and the direction of strokes should be from the middle of the bath to the top. After the final layer of enamel is applied, leave the bath alone for 15 minutes. After this time, we return to the bath and eliminate streaks (they are almost always formed even by experienced craftsmen). The streaks are removed with a brush in the same direction (from the middle to the edges). This work must be done until the enamel has lost its fluidity. All! Leave the bath to dry completely. And just before installing the siphon, it will be necessary to cut off the hanging drops of enamel in the hole.
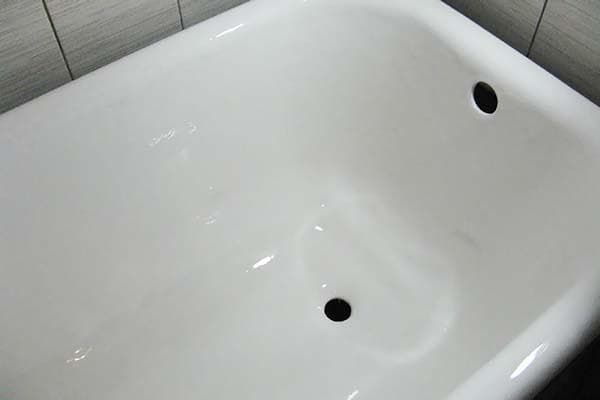
If everything was done correctly, then after drying you will get an almost new bath that will delight your eyes for a long time.
How to distinguish a fake
Store consultants and repairmen often hear about Stakryl from customers.It is believed that this is the name of the bulk material for restoration. In fact, this is a brand of coating produced by the company "Ecolor" - a high-quality polymer that gives a good result. Its name has become a household name. Along with Stakryl, the Ecovanna and Plastol brands are in demand. They are the ones most often faked.
Signs of the original
- The color of the lids of the packages of the two-component mixture exactly matches.
- Cover markings. Stakril and Ecovanna have stickers with batch numbers, Plastol has laser lithography.
- Brand logo. On the side surfaces of the containers there are stickers with the correct brand logo.
- Sticker quality. In production, flow-machine gluing is used, where there are no distortions, creases, etc. If they are, this indicates that the elements were glued manually.
- Fillings. They must be present and intact. There are fuses on the can of paste and on the bottle of hardener.
Before visiting the store, it is advisable to find out what the current packaging design of the mixture you like looks like. Manufacturers change it from time to time to make life harder for those who counterfeit their products. Having met last year's version of packaging on the counter, you can safely pass by. The seller's assurances that this is the last batch in this design are hardly true.
How to paint a bath What paint and how is the bath painted
How to paint a bath with your own hands
Sometimes, in order to update the bath, it is not necessary to change it to a new product. old cast iron bath you can safely paint and give it a "second life". How to paint a bath with your own hands, how to paint a bath and the choice of paint for this will be discussed in the article.
Painting a bathtub at home is a simple procedure. Nevertheless, a good result can only be obtained with certain knowledge of how to paint the bathtub correctly, as well as what kind of paint and tool is best to use for this.
What color to paint the bath?
Everything must start, of course, with the choice of paint. First of all, it must have moisture resistance, and secondly, it must adhere perfectly to any surface, otherwise it will begin to peel off over time. Professionals recommend compositions consisting of three components, which are kneaded immediately before painting.
Before starting work, the container must be prepared. To do this, it needs to be cleaned and degreased. It is not recommended to use products containing chlorine. On a well-cleaned and degreased bathtub, drops and trickles of water are completely absent when the surface is wetted, and the glossy enamel layer is also removed.
Then the bath dries well. To do this, you can use, for example, a hair dryer. And then pour hot water into the tank, which must be drained after about 15 minutes, then wipe the tank dry and apply a primer.
How to paint a bath with your own hands?
Then the process of painting the bath at home begins. In order to protect the bath from dust, it is necessary to tightly close all windows - doors and do not open them for some time after the bath is painted. It depends on how long the paint will dry.
For the painting itself, it is advisable to use a brush with a natural bristle of a flat shape.It is better to dilute the paint in such a way that about half of the prepared volume of the coloring matter goes to the first layer.
It is necessary to start painting the bath from the edges, gradually descending to its bottom. After the first layer dries, you need to apply the second. Bath paint, during painting, must be diluted in several parts, and not all at once, otherwise it may dry out before it is used.
You can use the bathroom no earlier than a week and a half after painting it.
acrylic coating
A simpler, but at the same time relatively expensive option for reconstructing a finished bathing tank. Here, certain skills and knowledge will be required without fail, otherwise it will not be possible to make a high-quality result that will function for a long time.
Acrylic pouring method
In order to restore a solid surface coating, you will need the following:
- existing rust is removed;
- the surface is leveled with putty;
- hot water is poured for 15 minutes, after which it is drained;
- the drain and overflow are completely dismantled;
- at the end, a composition is poured from the edges, forming a thin and durable film;
- the next step is to start pouring the composition from the center.
The preparatory work here is no different from the use of enamel, only the process of applying the composition differs.
Cons of acrylic coating
Despite the relatively simple design, this reconstruction option has the following disadvantages:
- serious consumption per square meter;
- relatively high cost of material for reconstruction;
- care should be taken not to spill the substance;
- certain skills are required;
- it is first necessary to completely restore the surface;
- subsequent polishing of the surface is required.
An additional disadvantage is that pouring acrylic can form small irregularities, which will later be difficult to eliminate.
Bath restoration methods
In order for the bath to shine white again, it is not at all necessary to replace the old plumbing fixture with a new one. Replacing a bathtub is associated with certain difficulties, not to mention the fact that restoration will be much cheaper than replacement. In the event of a bathtub replacement, most likely, it will be necessary to dismantle part of the floor or wall tiles, it may be necessary to replace the front door. In other words, the replacement is associated with overcoming a number of difficulties.


Another thing is the restoration of the enamel coating, which every home master can do with his own hands. Restoration of the enamel coating is a labor-intensive and uncomplicated process. In order for the repaired bathtub to shine again with cleanliness, the master will need patience and strict adherence to all instructions.
Currently, there are the following ways to restore bathtubs:
- Bulk bath. Restoration in this way is performed using liquid acrylic. It is used for the restoration of metal and acrylic bathtubs.
- Acrylic insert. During the implementation of this method, a new acrylic one is inserted inside the old bathtub. The liner is attached to the body of the old bathtub with mounting foam. This method is used for the restoration of cast iron and acrylic bathtubs.
- Restoration of the bath during the application of a new enamel coating. This method is used for cast iron baths.Compared to the first two methods, this one is the simplest and least expensive.
The choice of one or another method depends on many reasons, among which one of the most important is the area of the damaged surface. Before proceeding with the restoration, the surface of the sanitary ware must be very carefully examined. Enamel restoration only those bathtubs that do not have through cracks and holes are subject to. Only bathtubs are subjected to restoration, on the inner surface of which there are scuffs, rusty spots, scratches, and small enamel chips.
In the factory, the enamel coating is applied at a high temperature, during the firing of the finished bath. Of course, this cannot be done at home, so epoxy-based enamels are used to restore the coating, which harden during the cold drying process. As a rule, bathtubs restored in this way serve their owners faithfully for more than a dozen years.
Advantages and disadvantages of using chemical enamel
Bathtub restoration with enamel helps to quickly get rid of mechanical and cosmetic damage. This manipulation has a number of advantages, which include:
- The minimum cost of consumables. Ready-made formulations have a low price, which makes them available to absolutely every consumer.
- Restoring bathtub enamel helps to significantly save budget funds.
- Modern chemical compositions allow you to get a perfectly even coating without any effort. To give the desired shade using special colors.
- Long-term operation of the new coating.

In addition to the advantages, there are some disadvantages.These include:
The new enamel coating is unable to cope with mechanical damage. To maintain the original result, it is recommended to avoid bumps and falling of any objects inside the tub.

High cost of restoration. It is calculated based on the area of the plumbing and the presence of any protrusions on its surface.


Which is better, acrylic or enamel
Acrylic and enamel are the main compositions for the restoration of the bath. Therefore, many are lost and do not know what is better to choose. It is difficult to clearly understand which composition is preferable. It is necessary to rely on your own painting skills, the condition of the product, and so on. It should be noted the advantages and disadvantages of each type of paint, so that it is clearer when and what is better to use.
The cost of liquid epoxy enamels, in comparison with the same acrylic paints, is low.
Advantages of enamel:
- Reliability;
- Long service life;
- Economic consumption of funds;
- Fast application method;
- Resistant to chemical detergents.
Cons of enamel:
- Pungent odor;
- Long drying process. Takes an average of a week;
- Poor thermal conductivity. The collected water will quickly cool down.
 Enamels for domestic use are thicker and applied in two layers, they are suitable for self-application at home.
The advantages of acrylic include:
- Simple application. No roller required;
- Retains heat well. Therefore, the water stays hot for a long time;
- Long service life;
- a perfectly smooth surface is created;
- Wide choice of shades;
- Less prone to delamination.
Among the disadvantages of the composition:
- The high cost of funds;
- The surface absorbs hair dye;
- Over time, the color may fade.
 It is possible to update the bath on your own with a relatively small financial investment.
Choosing one of the compositions is based on personal preferences and features of the bath, as well as the effect that you want to get. There are options that dry quickly, and there are products that create a unique design of the bath.
 It is recommended for beginners who decide to paint the bath for the first time, to make their choice in favor of acrylic. Enamel requires experience.
Method 1: ordinary enameling
Cast iron and steel enameled bathtubs are the most common types of bathtubs in our apartments. They are produced in accordance with GOST 18297-96, which has been in force since 1997. According to this GOST, the guarantee for bathtubs is 2 years. But as practice shows, the enamel on them lasts no more than 10 years of use.
Enamel on baths in the factory is applied quite simply. First, the outer surface is red-hot, then enamel powder is sifted onto the inner surface and held for some time to sinter the powder with the metal. Heat the outer surface again until the powder is melted. The result is a smooth, glossy enamel finish. It is clear that at home this method of restoring a cast-iron bath, as well as a steel one, is not suitable.
Why does enamel usually wear out?
The wear of the enameled surface occurs as a result of two factors:
- The use of cleaning products containing abrasive powders or substances with chlorine inclusions.
- The use of chemical reagents in the cleaning of water supply networks.
As a result of many years of exposure to these factors, the enameled surface of the bath becomes thinner, rougher and begins to rust.
Restoration of the enameled surface
Do-it-yourself enamel restoration is a fairly simple process. It consists of two stages: surface preparation and application of a new layer of enamel.


What will be needed for work?
You will need the following tools and materials:
- electric drill with a nozzle in the form of a grinding wheel;
- abrasive powder;
- sandpaper;
- rust converter (for example, "Tsinkar");
- degreaser (for example, "Nefras");
- lint-free napkin;
- natural bristle brushes or spray;
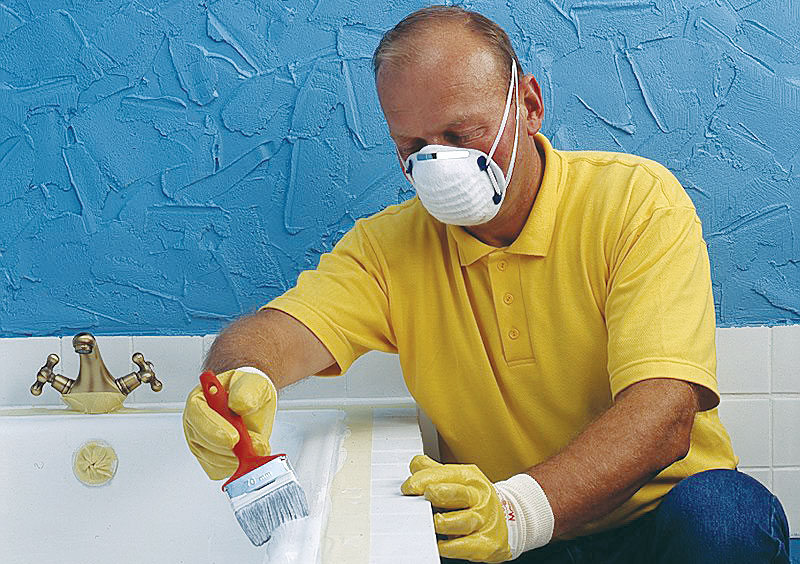
- respirator and gloves;
- enamel, preferably two-component (enamel plus hardener).
Preliminary step: surface preparation
A very important step. The more thoroughly the surface of the bathtub is cleaned, the better the new enamel layer will be.
- sprinkle the old enamel with abrasive powder and clean it off with sandpaper or a grinding wheel mounted on an electric drill;
- treat areas affected by corrosion with a rust converter, hold for half an hour, then clean with sandpaper;
- wash off the enamel and crumbs with water;
- thoroughly treat the bath with a degreaser using a lint-free cloth;
- fill the bath with hot water and let it warm up for 10 minutes;
- drain the water and wipe dry with a lint-free cloth; make sure that there are no lint or other foreign elements on the surface.
The main stage: applying enamel
- according to the manufacturer's instructions, enamel and hardener are mixed in a certain proportion and mixed thoroughly;
- apply the first layer of enamel with a brush or spray;
- withstand a certain period of time according to the instructions;
- apply a second layer of enamel.
This completes the process of restoring an enamelled bath with your own hands. It is advisable to withstand at least a week before the start of the operation of the bath. This is how long it takes for the enamel to fully polymerize.
The service life of the new enamel will be about 6-8 years.
Pros and cons of painting
For painting, it is necessary to choose only a dye for metal structures.
This method has a number of advantages:
- Large selection of tones of paint and varnish coatings;
- The price of the dye saves a lot of money;
- The ability to paint a cast-iron bath without calling specialists;
- Saving time and effort, fast execution;
- No unpleasant odor after the dye dries;
- Nice glossy finish.
However, this method of updating the surface has disadvantages:
- The outer coating must be treated with a grinder before applying the composition, and after that with a soil mixture;
- It is necessary to apply a dye for an old cast iron product only after treating the coating with an antifungal compound;
- There are acrylic solutions that dry for a long time - three days.
How can you paint a cast iron bath? First you need to find the appropriate paint, only then begin work on the surface treatment of cast iron.
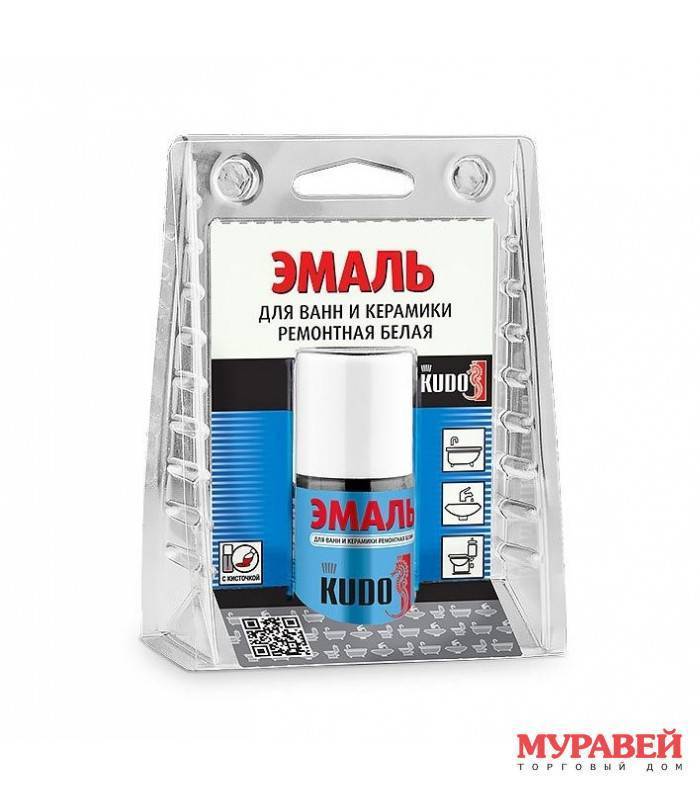
What you need to know about enamels
There are a lot of enamel restorers for baths. They differ not only in composition, but also in the method of application.
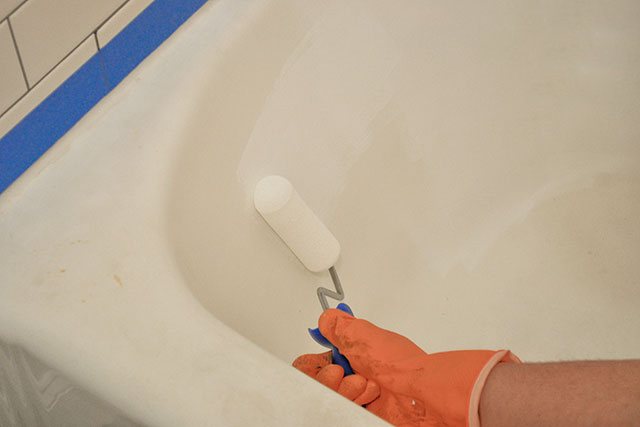
Enamel can be laid on the base brush or roller. In this case, the composition should be thick enough. It is best to take a hard brush to make it easier to rub the enamel over the base. It is desirable that the bristles do not come out of the brush, this will spoil the attractive appearance of the bowl.
Applying enamel is easier with a roller.It distributes the composition as evenly as possible, but it is impossible to completely process the entire bowl with a roller. Where it bends, you need a brush.
Another way to apply enamel is by spraying. Professionals in their work most often use a spray gun. A liquid composition is poured into it, which is applied in several layers. For non-professionals, this option is often unacceptable due to complexity.
You can use an aerosol can with special enamel. With proper application, a sufficiently strong and uniform coating is obtained. If the work is done incorrectly, the color may be uneven and spots of different shades will appear on the surface of the bowl. Some experts believe that aerosol enamel is best used to mask small defects, but not to restore the entire bathtub.
When buying a product, you should pay attention to its packaging. It's best if it includes a bowl pre-treater, perhaps even with a special application tool. It is desirable that the kit includes tinting compounds that allow you to get any desired shade.
If a two-component enamel is purchased, it is worth looking at the color of the hardener. Dark colors are not recommended. They can give an undesirable shade to the finished product.
It is desirable that the kit includes tinting compounds that allow you to get any desired shade. If a two-component enamel is purchased, it is worth looking at the color of the hardener. Dark colors are not recommended. They can give an undesirable shade to the finished product.
Coating Requirements
There are many types of paint and varnish coatings (LKM) on the market and there is something you can paint a bathtub with.There are restrictions that prohibit painting the bath:
- The composition of the paintwork materials should not contain toxic substances that can interact with water, detergents and oxygen;
- The texture of the paint should be dense and firm, with a glossy effect. This paint fits perfectly on the surface of the old cast iron.
Paintwork - that's what you can paint the bath. But you need to test in advance for color. To do this, it is worth applying one coat of paint before painting the cast-iron bowl, on a clear glass and allow to dry. You can evaluate the quality of the tone like this: look from the back of the glass.
Enameling at home: pros and cons
Initially, the enamel on the bath bowl is applied at the factory. The enameling procedure is carried out under conditions of strong heating of a metal bath, on the surface of which a protective coating is applied. After cooling, it is ready for use.
At home, it is impossible to perform such enameling. However, there are special formulations designed for applying enamel without heating the bowl. As a result, you can simply and quickly restore the coating of the bath.
Home enameling is an alternative to replacing plumbing. Many people prefer to restore the bowl, since this procedure is less expensive. Let's try to calculate the costs of replacing the bath. We will have to spend some money to buy new equipment.


To these costs we add the cost of transportation and delivery to the floor. In addition, a certain amount will be spent on the dismantling of the bathtub that has served its purpose. This includes the cost of the service and the costs of repairs, partial or complete, which are inevitable during dismantling. Another expense item is the installation and connection of a new bath.
As a result, we get an impressive amount. It is clear that the cost of restoration is incomparable with it. In addition, home enameling takes less time and is less labor intensive. All this makes the procedure very attractive for those who are looking for a worthy alternative to replacing the bath.
However, you need to understand that the coating applied at home will be different from the one that was originally. In order not to be disappointed, you need to know that the new enamel:
Less durable, but maintainable. This means that defects that appear during operation are easily removed using special repair kits.
Sensitive to mechanical damage. Heavy or sharp objects falling even from a small height can damage the coating.
Can change color under the influence of various chemicals. Bleaches, photoreagents and dyes are especially dangerous for her.
Allows you to choose the shade when applying. With the help of tinting paste, you can choose any tone
It is important to remember that the thickness of the new coating layer must be sufficient to completely hide the old enamel. Otherwise, the original color, seen through a thin coating, may give an unpleasant tint.
Does not tolerate abrasive cleaners
Only soapy water can be used to clean the surface of the bowl.
Among the obvious shortcomings of the enamel obtained as a result of home restoration, many include the fragility of the coating and its fragility. This is not true. The operational characteristics of the new coating depend on the composition with which the bowl is enameled and the correctness of the work on its application.
If everything is done correctly and all the instructions are followed, the enamel coating will last a long time.
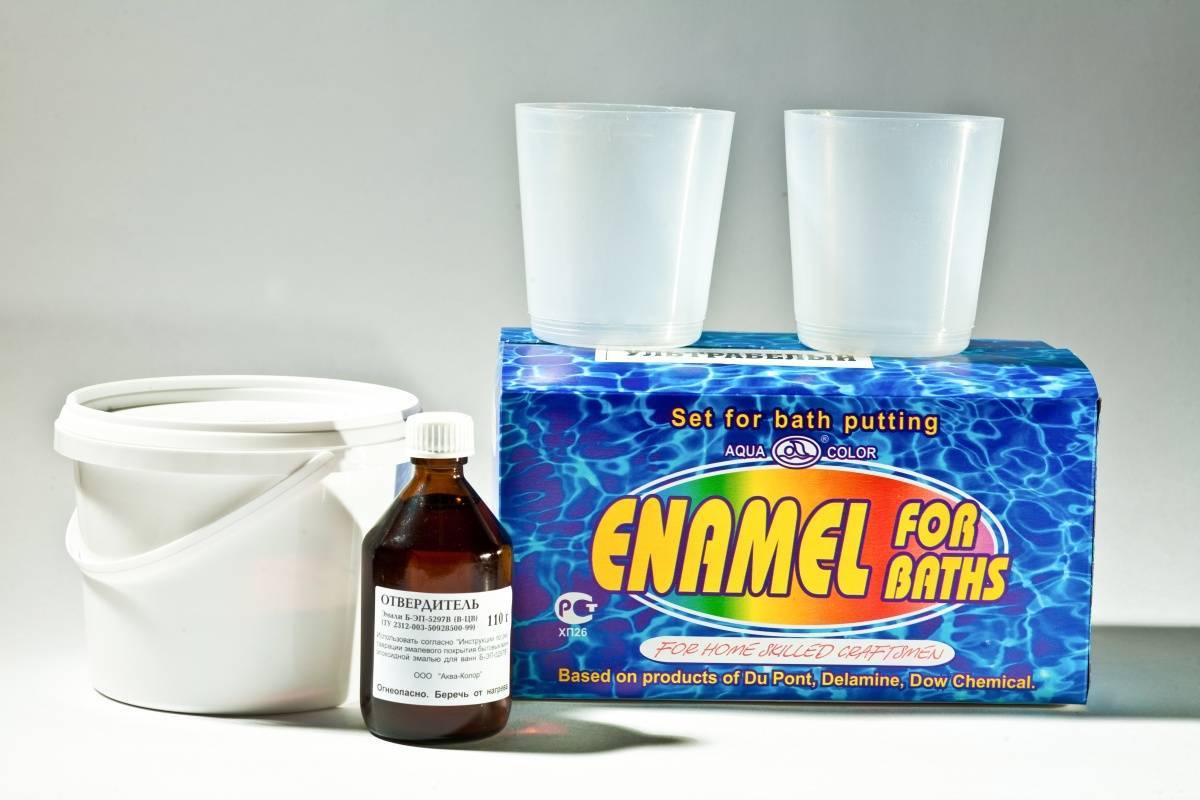
Enamel "Epoksin-51" and "Epoksin-51C"
"Epoksin-51 (51C)" belongs to the class of two-component enamels. Produced by us, but based on German components. The kit includes a hardener. After applying such an enamel, the bath can be cleaned using products that have disinfectant properties.
"Epoksin-51"
The enamel coating obtained with these products can last up to 9 years. To do this, the enamel must be applied in even layers, strictly observing the technological process. The appearance of a yellow tint is prevented by special ingredients that make up the composition. The use of tinting paste allows you to expand the color options for your updated bath. A mixture of enamel and hardener will reliably smooth out small irregularities in the old enamel, filling in cracks and chips.
Colors for enamel
Enamel "Epoksin-51C"
Epoksin-51 enamel can be diluted with a solution of ethyl alcohol and acetone (1:1) for thinning and ease of application. In this case, the proportion of diluent should be no more than 10% of the volume of the entire mixture.
Unlike a fellow, "Epoksin-51C" cannot be diluted, and this is its drawback. By itself, it is quite thick, so it is difficult to apply it to the surface.
If you are renovating a bathtub yourself using these brands of bathtub enamels, then you need to consider the speed of the repair work. After an hour, the mixture of enamel and hardener becomes unusable. This is due to the chemical reactions taking place in it, as a result of which it becomes harder. Therefore, the enamel must be applied to the surface of the bath in an hour.
The scheme of the restoration of the bath with poured enamel
Pros and cons of acrylic
Painting a bathtub with acrylic is the easiest way. Its advantages:
- Easy to apply - no brush or roller needed.
- Low thermal conductivity - water slowly cools in the bath.
- Smooth surface.
- Durability.
- Acrylic is less prone to delamination than enamel.
- Large selection of colors.
Due to these properties, acrylic is often chosen for restoration. It is easy to work with it, it does not require much time or special knowledge.
But acrylic coating has its drawbacks:
- High cost - the price is higher than for enamel.
- Absorbs hair dye.
- Easily scratched.
- The white finish may fade over time.
This coating is easy to scratch, and then microbes accumulate in the cracks. I don't want to take this bath. But with careful handling, the acrylic coating does not wear out.
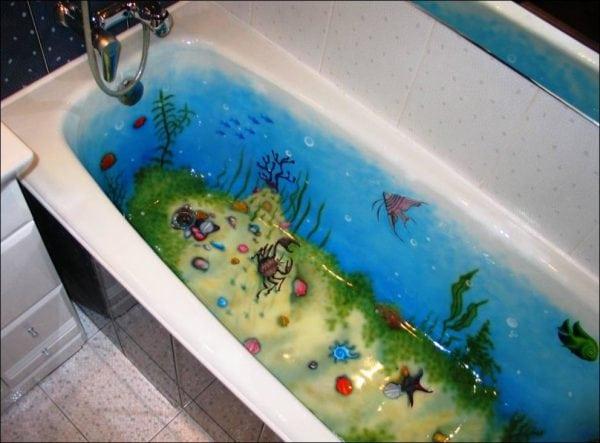
Acrylic is often used to create an unusual color bath in designer interiors. If you spend a little more money on it than on enamel, you can get an author's bath that will be different from everyone else.
Acrylic paints have different characteristics. You can choose a paint that dries quickly so that you can use the bathroom the very next day after painting. And you can give preference to a look that dries longer, but forms a thicker and more reliable layer.
Further care
Acrylic is softer than enamel and therefore requires special care. Do not use abrasive products or metal sponges for cleaning. A soft sponge and dishwashing detergent are ideal. On sale there are specialized products for the care of acrylic surfaces.
In order not to damage the surface made of liquid acrylic, when bathing pets, you need to lay a rubber mat on the bottom.
If you strictly follow the instructions, then even a non-professional can perform high-quality restoration of a bathtub with acrylic. Specialists involved in the renovation of structures advise not to be afraid of the increased consumption of acrylic. It is always enough, since a layer of about 2 cm accumulates at the bottom.


"Bath to bath" or acrylic liner
Acrylic liners
If you do not want to carry out hygiene procedures for several days, using a basin or visiting a bath, then the method of inserting an acrylic liner will suit you perfectly. The process of self-restoration in this way takes no more than three hours, and you can use the bathroom the very next day.
In addition, the liner made of durable sanitary acrylic significantly reduces the thermal conductivity of the bath, as a result, the water cools very slowly.
For the best result, it is important not only to choose the right size liner, but also to correctly distribute the adhesive composition (foam and sealant from Henkel). bath measurements bath measurements bath measurements
bath measurements bath measurements bath measurements
Step 1. Armed with a screwdriver and a grinder, we dismantle the strapping elements.
Dismantling the strapping
Step 2. Preparing the bath to install the liner. We clean the entire surface with sandpaper, a grinder, remove debris with a vacuum cleaner and degrease the surface. Wipe any drops of water dry. This measure is necessary to improve the adhesion of the adhesive foam to the plumbing.
Step 3. The liners are transported with a technological edge, which we carefully cut with a grinder before installation.
Step 4. After the edge is cut, insert the liner into the bath and mark the technological holes. To do this, draw circles with a marker, sticking your hand under the bathtub and circling the drain and overflow holes.
Acrylic insert in the bath
Step 5. According to the marking, we drill technological holes.
Step 6. Apply two-component foam and sealant. We insert a bottle of sealant into the gun and distribute it around the drain and overflow holes. Next, we take the foam, we introduce a special composition into the balloon with a syringe, which will not allow it to swell excessively. From bottom to top, we apply foam in stripes to the bottom, walls, sides of the vessel being restored.
Foam application
Step 7. We insert the acrylic liner into the bath, gently press it with our hands, leveling it. Remove excess sealant and foam.
Installing the liner
Step 8. We make the installation of the siphon (strapping).
Step 9. We fill the bath with water so that the foam, while solidifying, does not force out the light liner. The next day, you can drain the water and use the updated bathroom.
Fill the bath with water and leave for a day
In your free time, you can install a decorative screen under the restored bath, as well as protective bumpers on the edges that come into contact with the walls.
Before starting hygiene procedures, do not forget to remove the protective film from the insert.
Restoration methods, their advantages and disadvantages
The work on the restoration of the inner enamel layer of the bath is carried out in three ways:
- enameling;
- application of liquid acrylic (glass);
- installation of a special insert.
Each method has both positive and negative sides.

Enamel painting
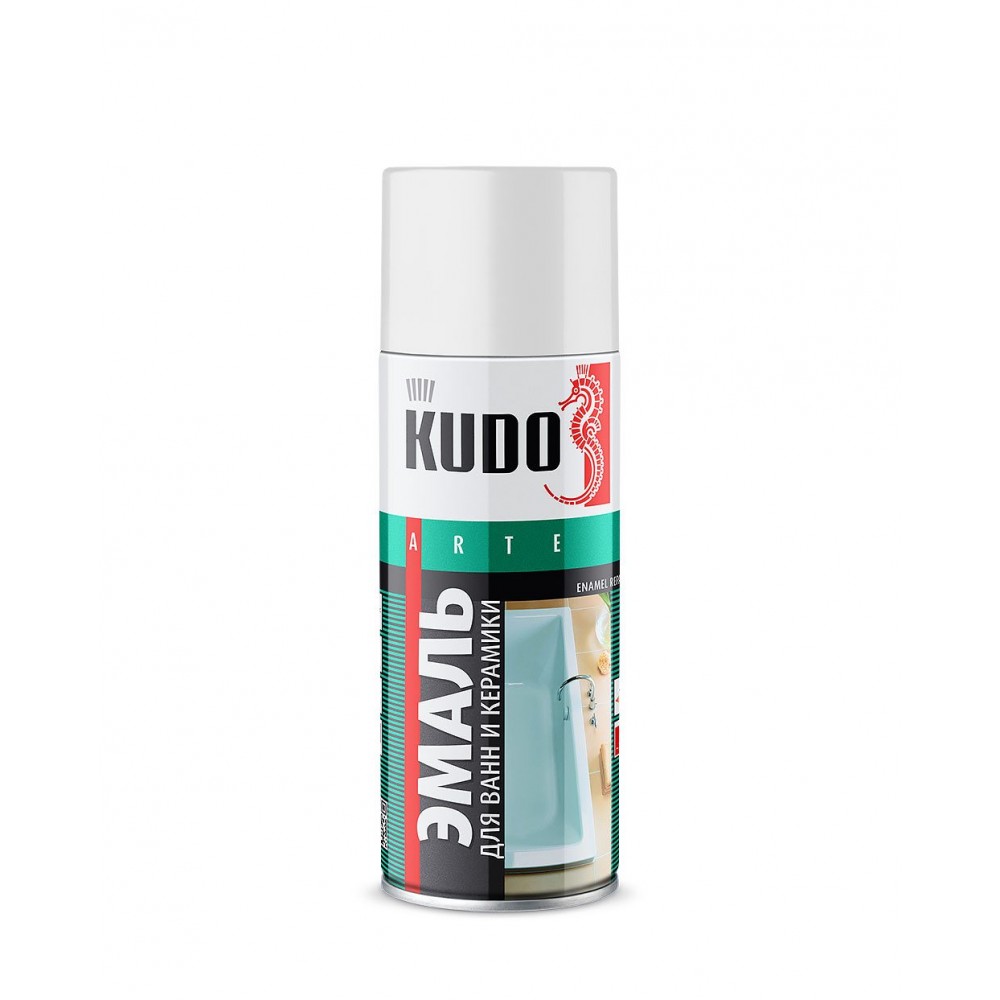
Enameling is usually carried out at the manufacturing stage under industrial production conditions - the process begins with a sharp heating of the metal workpiece and the application of a protective coating of enamel. You cannot do this on your own. However, there are special formulations that allow you to work without heating.For example, "Random House", "Epoksin-51" or "Epoksin-51C", "Reaflex-50" and others.


Pros:
- low cost;
- the ability to choose a shade;
- maintainability of the new layer.
Minuses:
- change in the original color from exposure to cleaning products;
- the coating is short-lived, will last no more than 5 years;
- the restored coating does not tolerate processing with abrasive substances.
How the coating will show itself in operation depends on the observance of the instructions of the manufacturer of the mixture and the accuracy of the work.
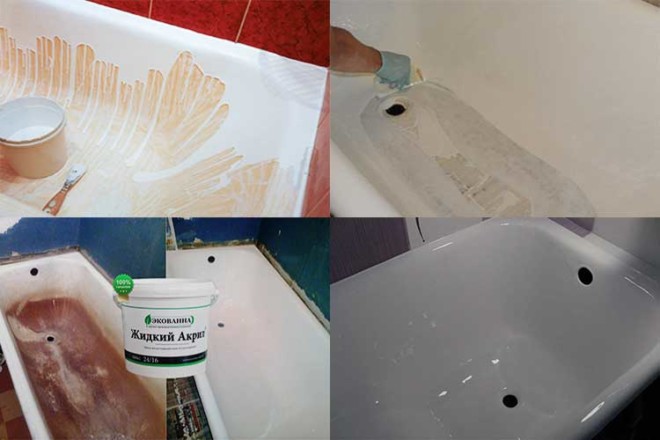
liquid acrylic
The technology based on the use of liquid acrylic is known as the "filling bath". It consists in processing the old worn surface, cleaned in a special way, with a layer of glass.
Pros:
- the composition dries quickly (24 hours);
- the new layer does not change color;
- no strong odor;
- small cost.
Minuses:
- you will have to remove the siphon before pouring;
- stakryl does not hide irregularities;
- special skills are required.
A coloring composition called STACRYL is applied in a uniform layer to the damaged bath coating. the work is very difficult and requires experience and special skills.
Acrylic insert
This technique involves placing an acrylic tab inside the bath. Such a restoration will cost a pretty penny, because the price of the insert is slightly less than the cost of a new product. In addition, it is almost impossible to buy an insert of non-standard sizes.
Pros:
- fast installation;
- long service life (20 years);
- smooth, rough surface.
Minuses:
- high price;
- the internal volume of the product is reduced.
Results
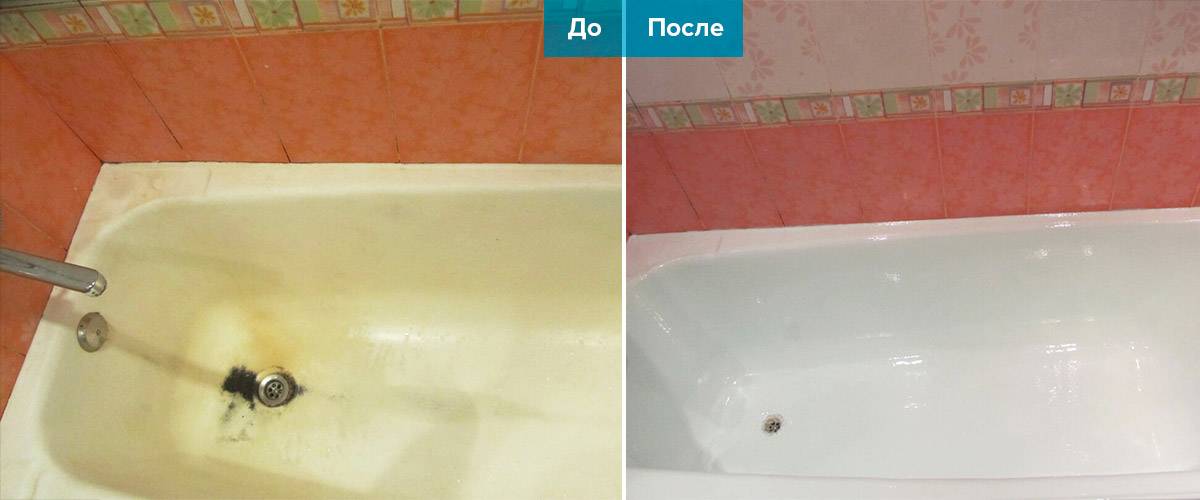
Based on the above materials for the restoration of equipment, everyone will independently decide which paint is better plumbing in his case.If your sanitary ware has become unusable only because of peeling enamel on the inner surface, it is worth determining how you can paint the bath. Restoration will cost much less than buying a new plumbing fixture. After all, then you will need to dismantle the old equipment and make a full repair in the bathroom, and this is a very serious expense item.
Based on their financial capabilities and preferences, any person who wants to update their plumbing can easily determine the best way to paint a bath. If you want the coating of the product to last for a long time, then two-component bathroom paint is right for you, because its durability surpasses many similar paints and varnishes. If you are more interested in the question: is it possible to paint the bathroom without special equipment and in a short time, purchase aerosol enamel, it does not need to be diluted with a hardener or solvent, besides, it dries quickly and is easy to apply.
In any case, before throwing away old plumbing, think carefully about whether it can be restored. This procedure will not take you much time and effort, and most importantly, it will not ruin you financially.


