- "islands of order" on trays - practical ideas
- Crafts from tin and aluminum cans
- 1. Pots and vases
- 2. Organizers for storage from cans
- 3. Candlesticks and lanterns
- 4. Cutters for cutting out figures from cookies, vegetables and fruits
- Wooden coffee table
- Necessary materials and tools
- How to do it yourself?
- Step 2
- Step 3
- Step 4
- Unusual performance: do it yourself
- From an old painting
- Small side table
- Master class number 1. A tray from a photo frame for 1 evening
- Advantages and disadvantages of the product
- Idea 8. Universal knife holder
- Table base
- The main criteria for choosing
- Conclusion
"islands of order" on trays - practical ideas
This section is about compact storage of small things in different rooms, including possibilities that you may not have known about.
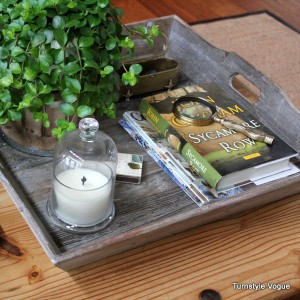
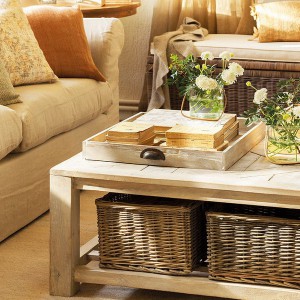
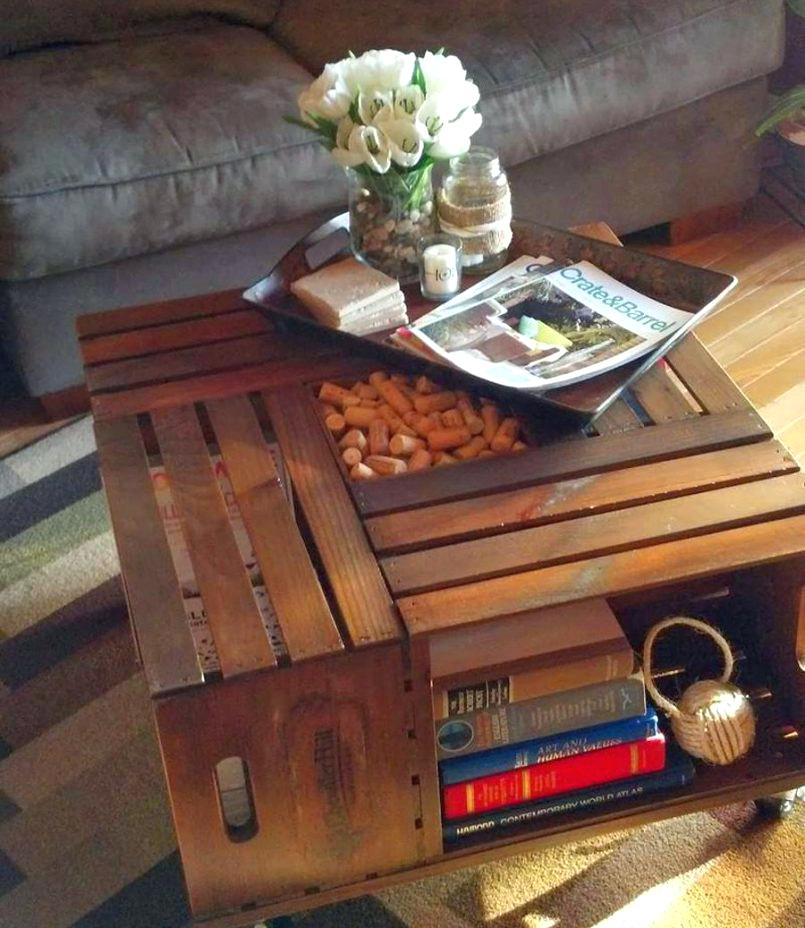
8. For magazines and books.
Convenient for those who like to read a lot of books or watch different albums at the same time. And, in the living room. Tray with books always at hand, they lie in order, and if necessary, they are easily removed from the table. It is better to use wooden or wicker trays with high sides.
 |  |
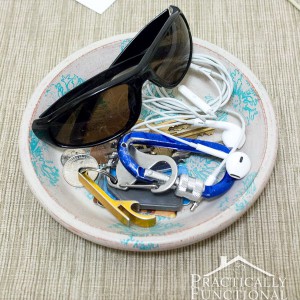
9. For storing various small things.
Flat or with sides, such a tray is useful for the hallway, living room or bedroom. The main thing is that it be compact.
 |  |
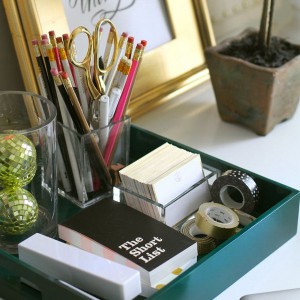
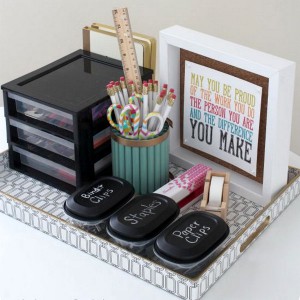
10. For order on the desktop.
Rectangular trays with high sides will finally bring order to your table. Size - depending on the area of the countertop. It remains only to maintain order on the tray itself ;=)
 |  |
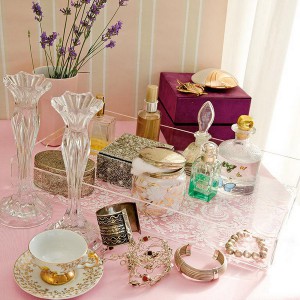
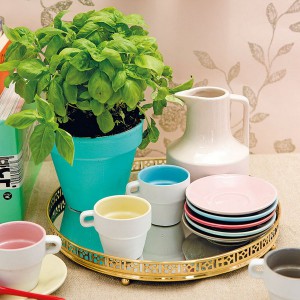
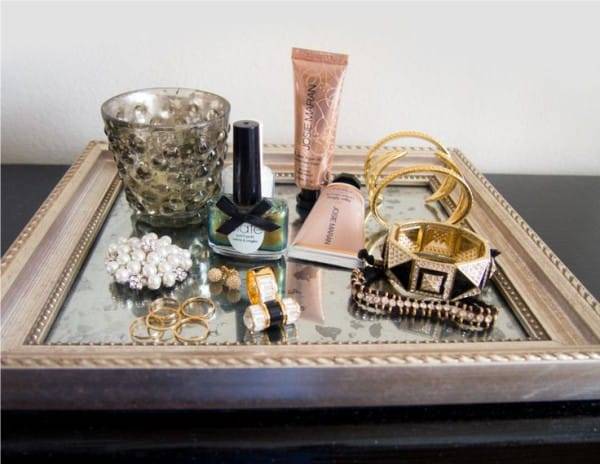
11. For cosmetics and perfumery.
In principle, any, even the simplest tray, will cope with this role. But it is especially impressive to place your “beauty arsenal” on a transparent acrylic or metal tray with a mirror finish. Idea for bedroom or bathroom.
 |  |
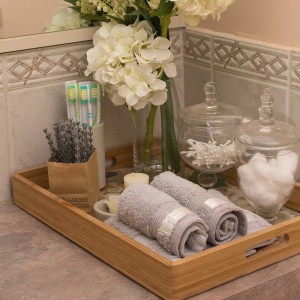
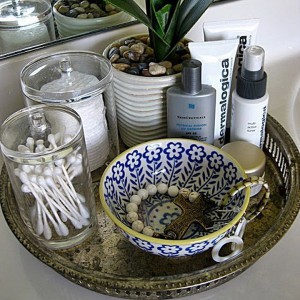
12. For storing bath accessories.
Another idea for a bathroom is if there is a large enough counter top around the sink. On the tray you can store everything that should be at hand or rotate (depending on what procedure you are doing).
 |  |
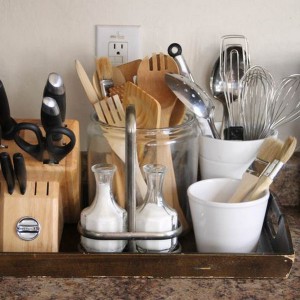
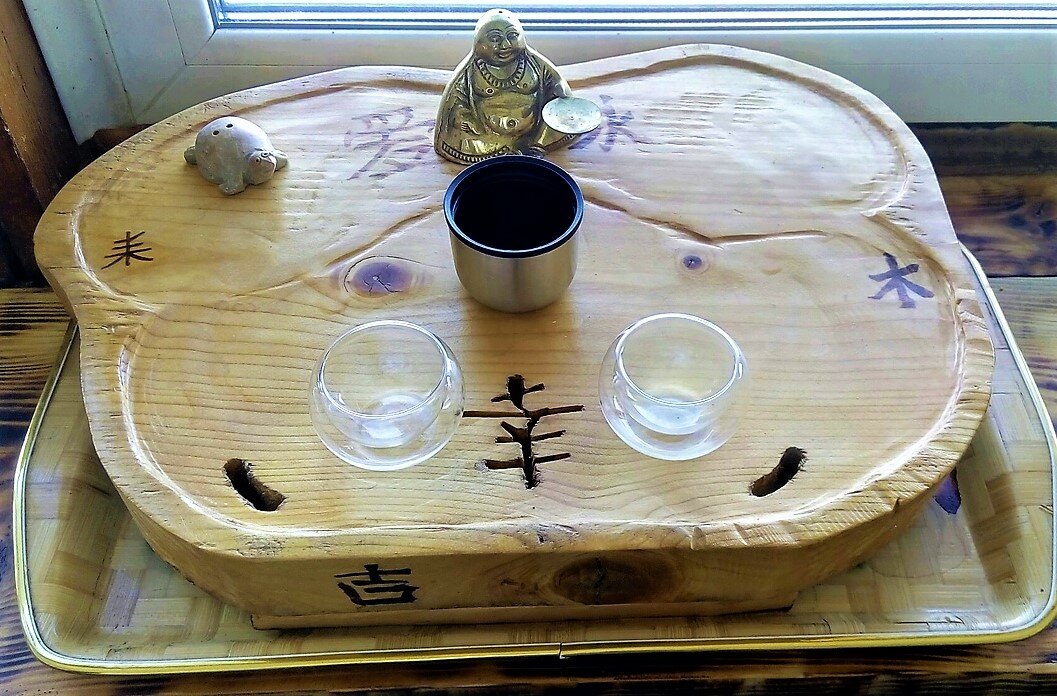
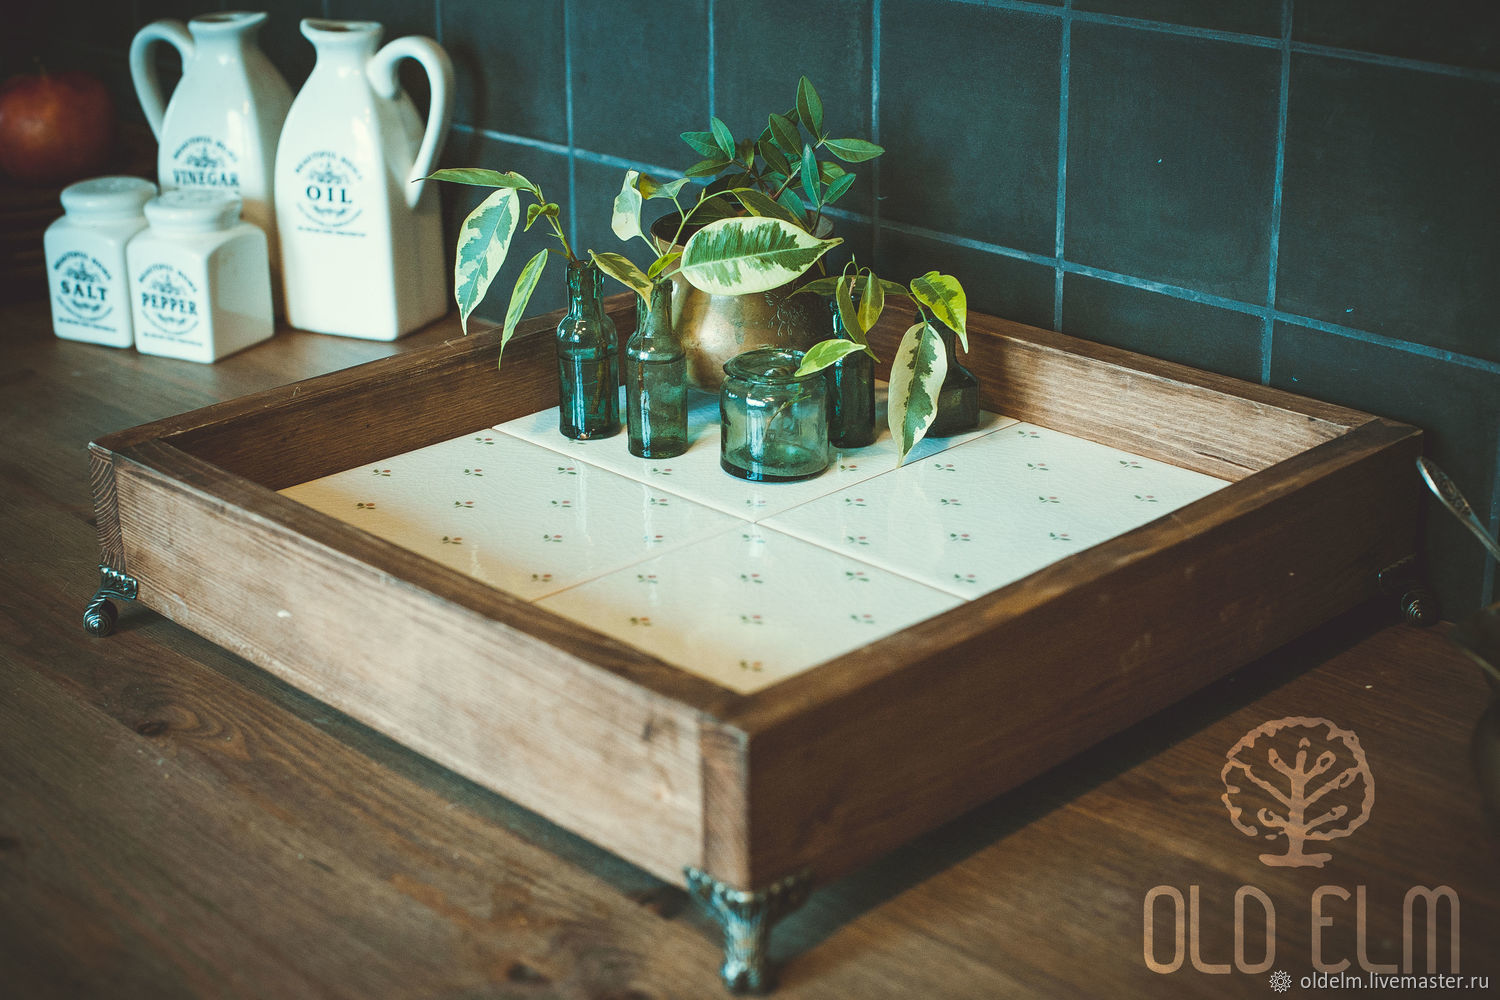
13. For kitchen tools.
Just like on a desktop, in the kitchen, trays help keep things organized and are also easy to move around for cleaning. If the tray is large and there are few kitchen appliances, add a bit of decor, for example, a small pot with a houseplant.
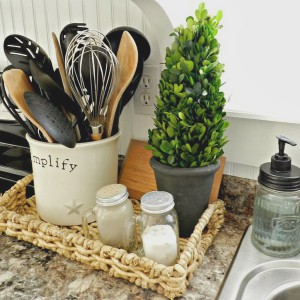 |  |
14. For storing spices.
Jars-bottles with seasonings, and, if desired, also a salt shaker and a sugar bowl. It is better to use a tray that can be washed and cleaned frequently.
 | 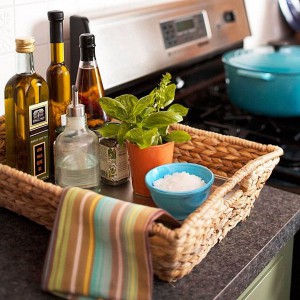 |
16. For bottles and small cans.
Including detergents. And also - for everything in the kitchen that I would like to organize and keep on the countertop (example - in the photo below, on the right).
 |  |
__________________________
Crafts from tin and aluminum cans
Let's start with crafts from tin cans. What can be made of them?
1. Pots and vases
If you properly decorate tin and aluminum cans, then you can not only grow seedlings in them, but also contain indoor plants and flowers.
So, you can paint the jars with unusual paint, for example, in pastel colors or in gold, silver, copper, as in the photo below.
Tips:
- Before staining, the jars must be degreased with any alcohol-containing agent;
- For painting, acrylic paints with a nylon brush or spray paints are suitable;
- Don't forget to make drainage holes in the bottom of the jar with a hammer and nail.
Using tape as a stencil, you can draw even stripes, zigzags, rhombuses and other geometric shapes on a tin. For example, the pots in the photo below were first painted with gold spray paint, waited for it to dry completely, and then using masking tape, colored stripes were painted with acrylic paints.
For large houseplants, aluminum paint cans are perfect.
And small tin cans make very cute pots for succulents and cacti. Due to their small size, they can be wrapped with birch bark and then you will get an eco-style decor.
What other natural materials are useful for decorating a jar with your own hands? From dry branches cut to the same length and tied with twine, you can make just such a beautiful vase.
And here is a master class on how to make it.
Another natural material that can decorate a jar is leather. The photo below shows vases wrapped with metallic leather braid, planted on a glue gun.
The decorating tutorial is very simple. The main thing here is not to burn yourself and not to squeeze out too much glue so that its excess does not get on the skin.
You can also give jars a second life with fabric, paper, ribbons, lace and appliqués.
You can make vases from tin cans and decorate a wedding with them.
2. Organizers for storage from cans
In addition to vases and pots, you can make a functional organizer for storing small items, stationery, cutlery, etc. with your own hands.
Here's a cookie jar you can store tea bags in.
You can see how to make such a box with your own hands in the next photo master class (scroll to the right).
And here is a master class on reworking an aluminum paint can.
3. Candlesticks and lanterns
A master class on turning a jar into a candlestick with your own hands, see the next video.


And here is a selection of decor ideas with applications, decoupage and holes.
You can make holes with a drill with a small drill or a nail with a hammer, after marking the drilling places as shown in the photo below.
4. Cutters for cutting out figures from cookies, vegetables and fruits
From aluminum cans from beer or Coca-Cola, as well as from cans you can do it yourself make a variety of molds for cutting out figures from dough, cheese, vegetables and fruits. To do this, you need to cut the cans into even strips, then form a figure according to a pre-prepared template. At this stage, you may need pens, markers or needles to round the mold and round nose pliers to create the corners. The ends with a slight overlap need to be glued with super glue.
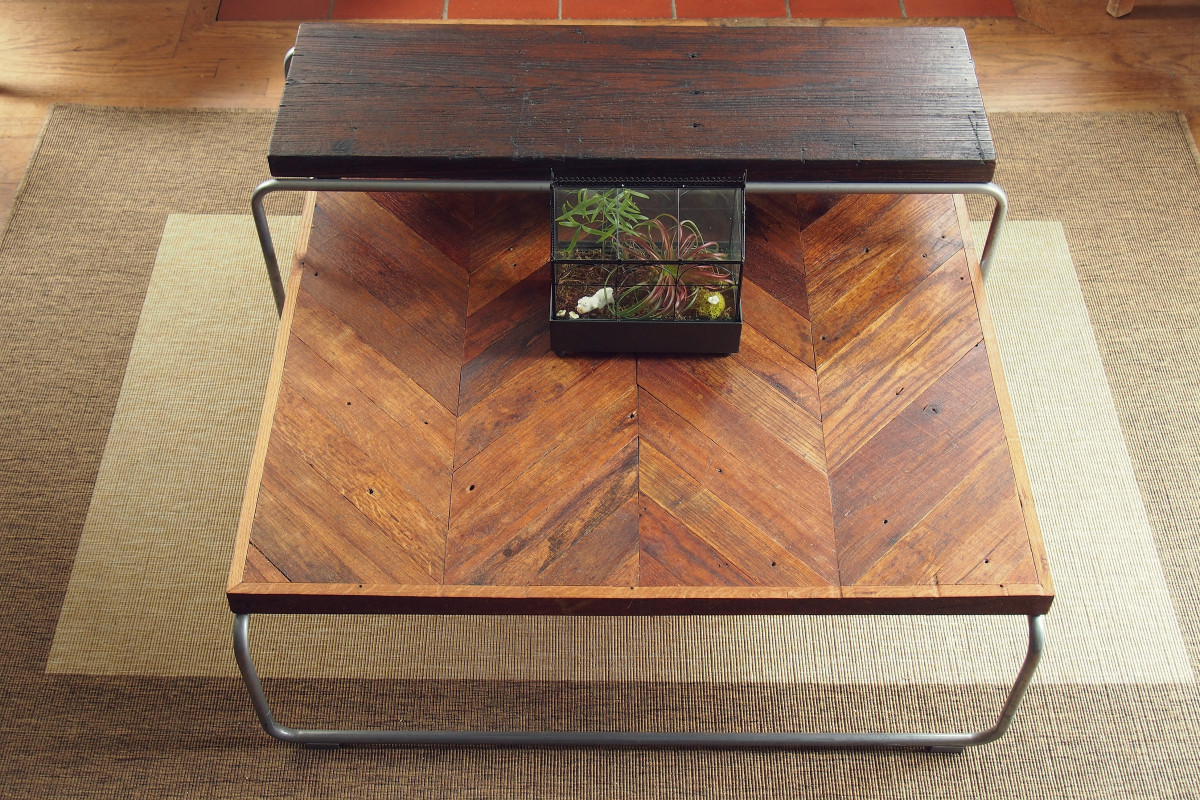
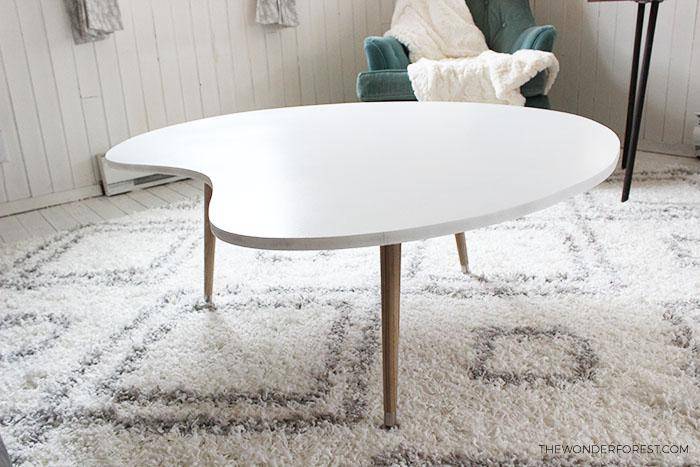
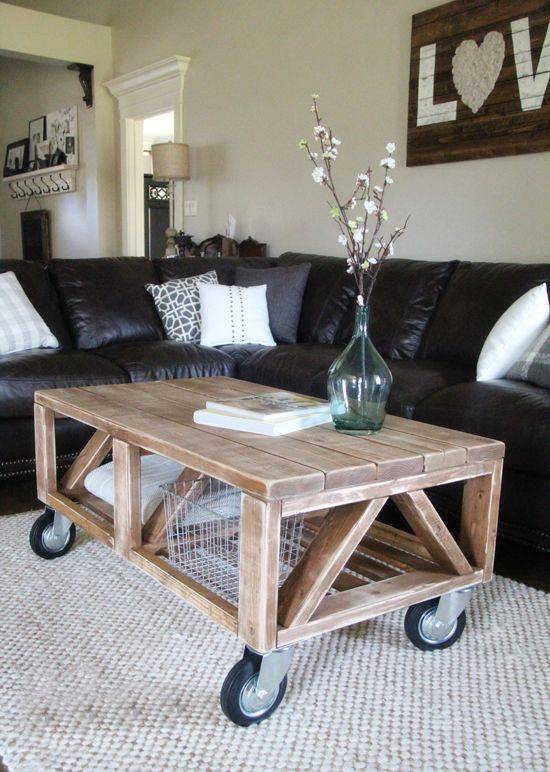
Wooden coffee table
For those who like wooden objects in the interior, we offer you to pay attention to unusual coffee tables. They look really luxurious despite the fact that they are made by hand.
Necessary materials:
- logs;
- wood knife;
- sandpaper;
- Sander;
- screws;
- drill;
- small wheels - 4 pcs.;
- wrench;
- primer;
- roller;
- brush;
- pencil;
- parquet varnish.

To begin with, it is worth noting that the tree must be dried before work. After that, using a knife, we separate the bark.


Since there are always quite a lot of roughness on the tree, it must be processed. To do this, use sandpaper and a grinder. Remove sawdust and dust with a damp cloth.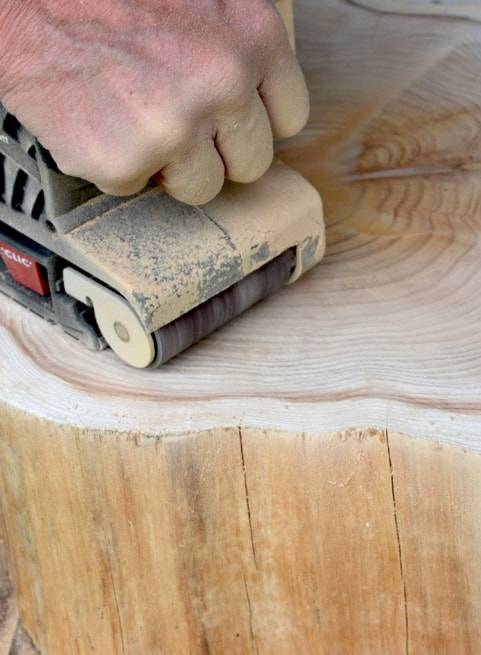
Flip the log upside down. We evenly distribute the wheels and make marks in those places where the screws should be.

We select a drill that is suitable in size and make holes according to the marks. 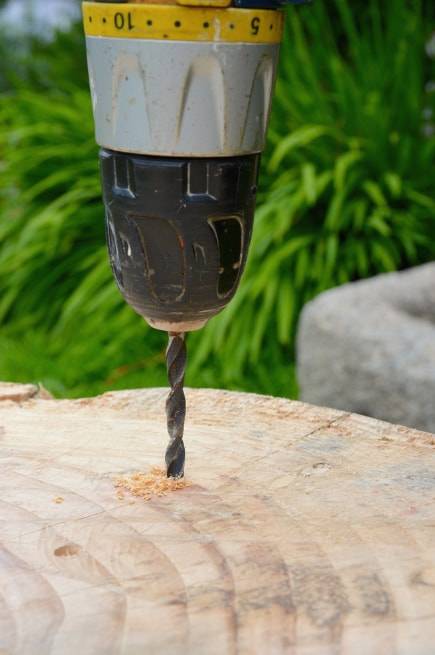
We distribute the wheels and all the screws. After that, we fix each of them with a wrench.


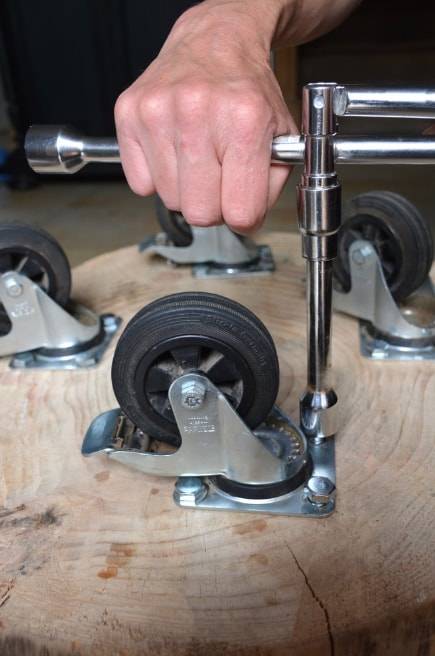
We turn the wooden table over and check its stability. 
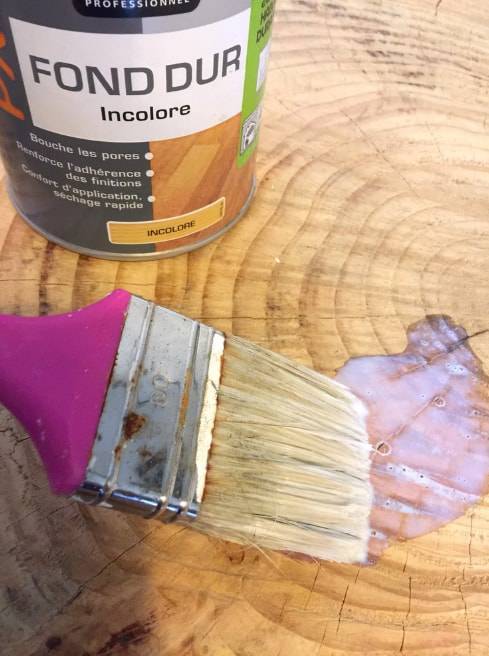
We cover the surface of the tree with a primer.
Apply parquet varnish with a roller and leave to dry completely. 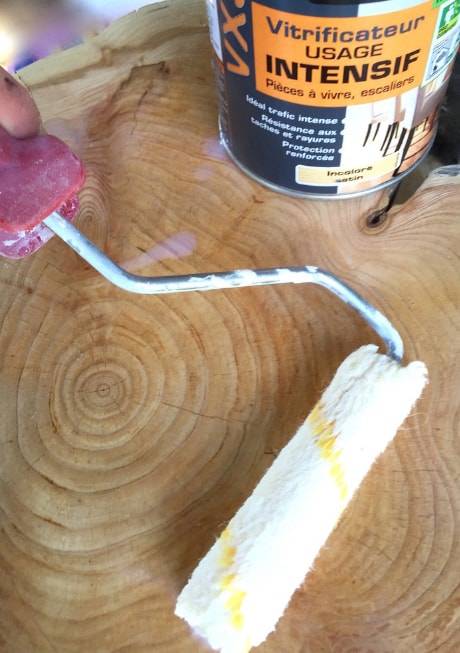
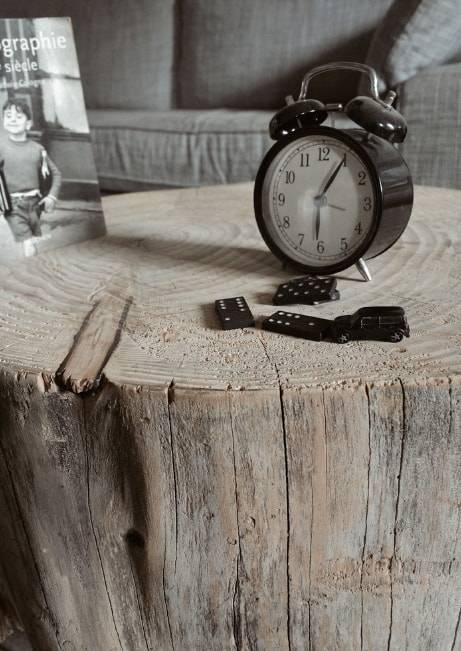
A beautiful wooden table is ready.


If desired, it can be painted in any shade.
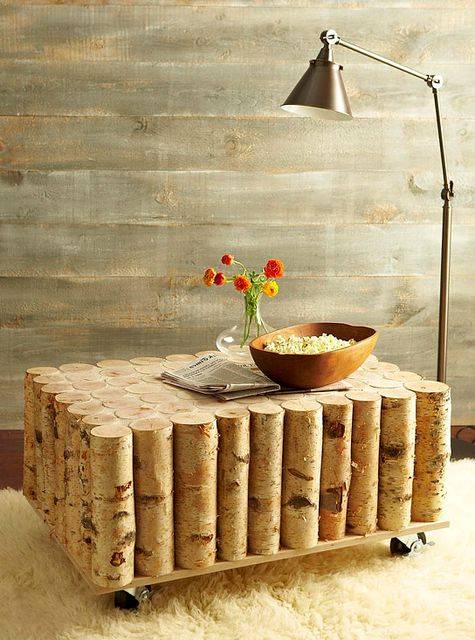
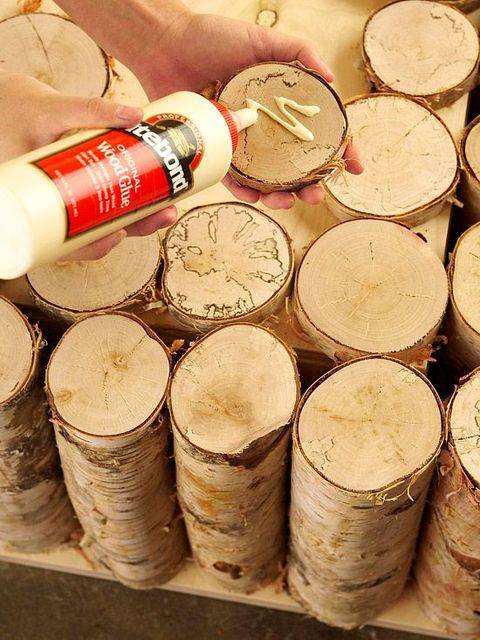
If this option seems too cumbersome to you, then we offer another master class. With it, you can make a beautiful birch coffee table.
We will prepare the following materials:
- plywood sheets;
- birch logs;
- wood glue;
- saw;
- putty knife;
- screws;
- screwdriver;
- wheels;
- plaster.
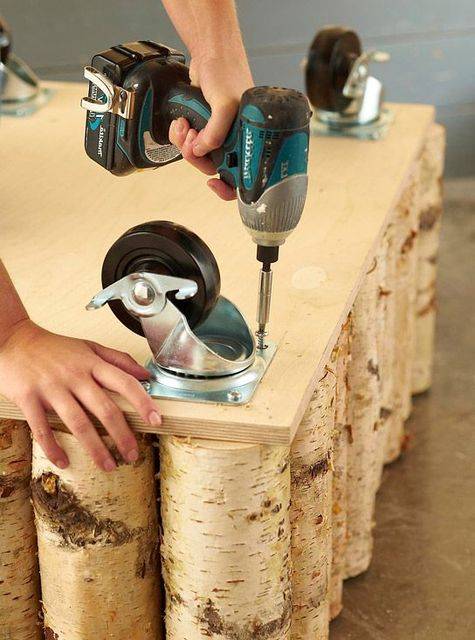
From plywood we cut out the base for the table, as well as the sides and the table top. We collect the sides and install them in the center of the base. Keep in mind that the base must necessarily protrude, since it is to it that the logs will be attached.
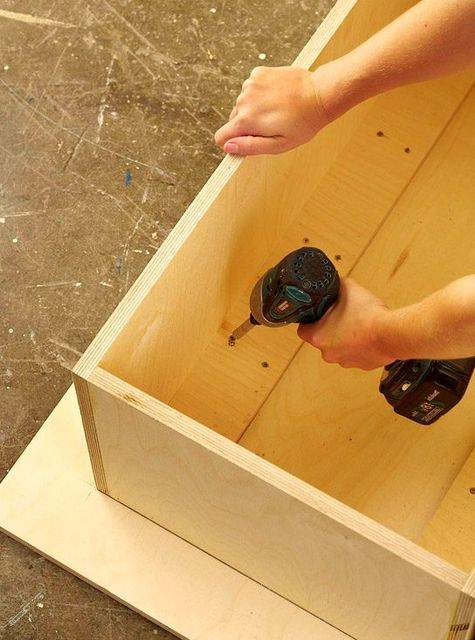
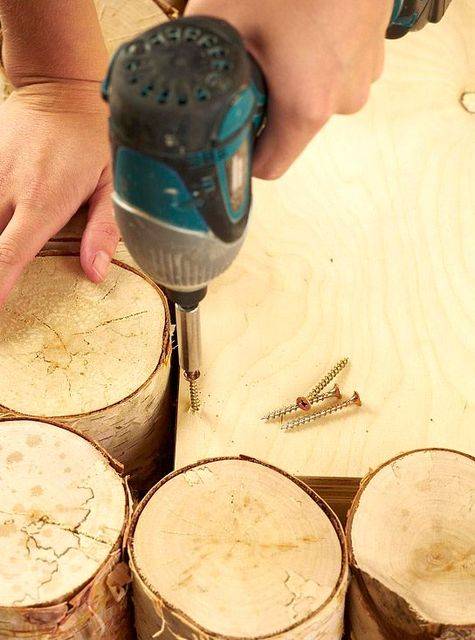
Prepared logs are glued to a wooden blank using wood glue. For reliability, you can additionally fix them from the inside of the box with screws.

Attach the table top to the drawer.
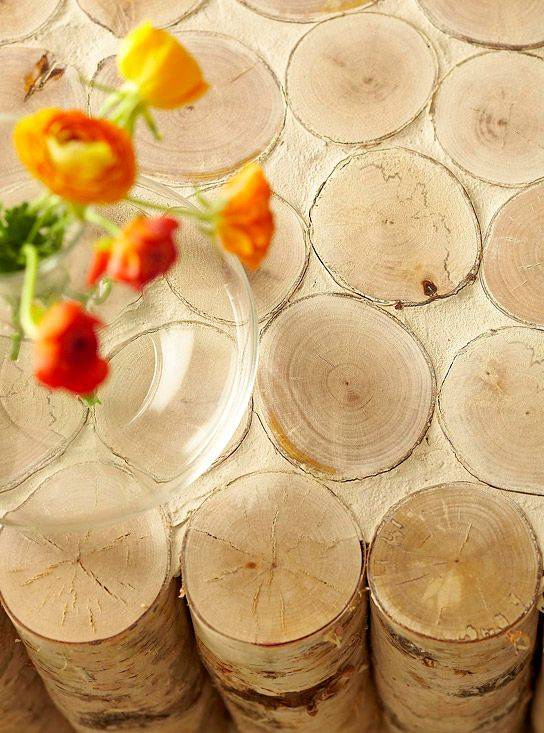
We cut several logs into pieces of small thickness. Glue them to the countertop with wood glue.


We fill the empty space with plaster. Remove excess and leave to dry.

We attach wheels to the bottom of the table and turn the structures back. Stylish coffee table is ready!
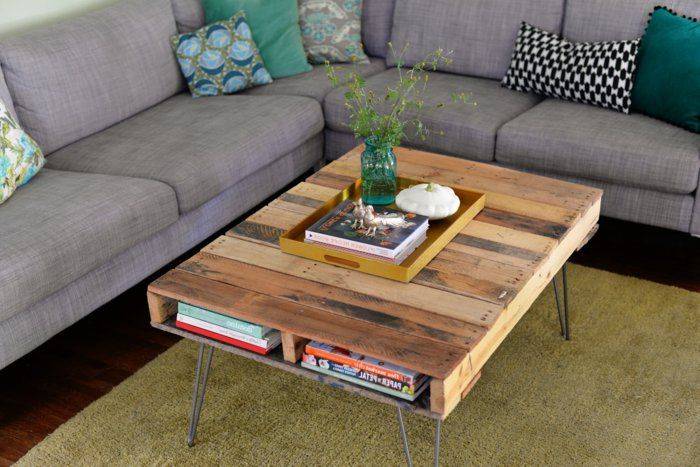
In fact, there are many options for a coffee table made of wood.


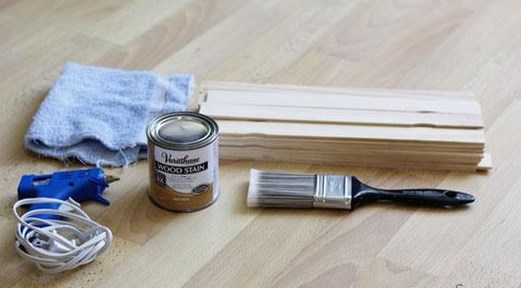
Necessary materials and tools
You can make a homemade tray from wood, plywood, glass and decorative elements. It should be understood that not every type of wood is suitable for making kitchen trays. Masters recommend using:
- birch;
- linden;
- cherry;
- mulberry;
- alder;
- maple;
- oak.
The tray is a fairly simple design. A flat bottom, framed on four sides by sides, is easy to make from old things, for example:
- picture frames;
- doors from a broken kitchen table;
- ordinary thick board and slats.
Using plywood to make a tray is not always rational. On the one hand, the material is extremely malleable, making it easy to implement almost any idea, on the other hand, a plywood tray will turn out to be not very durable, and therefore impractical. Therefore, it is only suitable for interior decoration.
To make an accessory, you need to select the appropriate inventory. The number of tools depends on the complexity of the product. Before starting all the manipulations to create a tray, you need to prepare:
- jigsaw;
- screwdriver;
- glue gun with plastic rods;
- furniture stapler;
- sandpaper;
- simple pencil;
- grinder saw;
- ruler.
All the necessary tools are conditionally divided into groups. Some are designed for taking measurements and drawing.Others are needed for drilling, sawing material. The third group of fixtures is required for fastening parts.
How to do it yourself?
How about making a table yourself? This activity will be much more profitable than buying a new one, and using a table that you made yourself is much more pleasant. Making it seems like a daunting task, but it's much easier than you think. For maximum convenience, find the nearest wood workshop and make all the blanks in it - probably one of them is located next to the house (or not far from the nearest market).
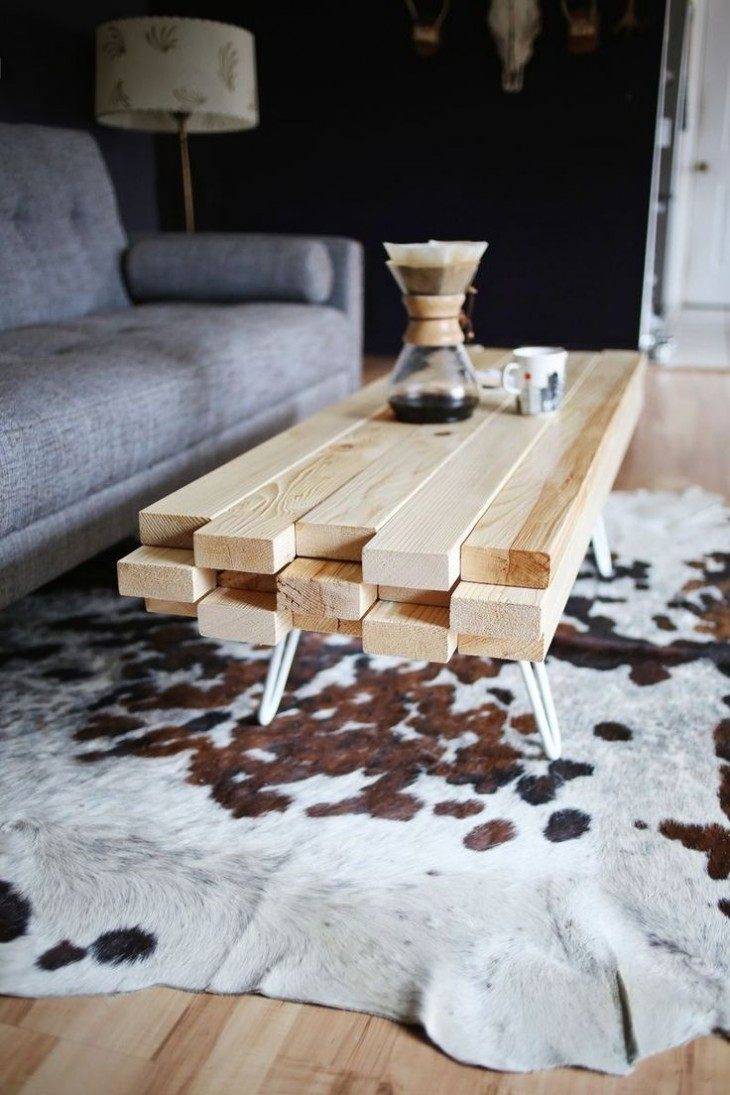
You can do it yourself
This table is made from a single board measuring 2.5 meters and 20 cm wide in black walnut wood:
List of materials:
- 1 board 2.5m 8x8 cm;
- 4 eurobolts 21" (long);
- 4 connecting caps 13 "(short);
- 1.1/4” screws in pocket holes (for legs);
- wood glue.
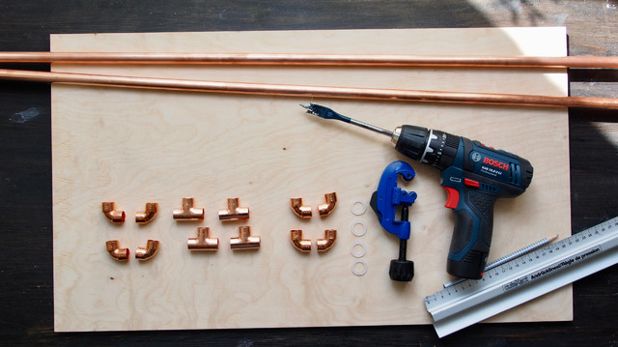
Tool:
- roulette;
- drill;
- table saw;
- jigsaw;
- protective glasses;
- protective headphones;
- glue.
Step 2
I cut out the curves for the handles with a saw. Drilled ¾" pocket holes in the aprons and attached them to the top with 1-1/4" pocket screws and wood glue.
Step 3
I cut the legs to the specified length, then rounded the top. Cut off the bottom of them at an angle of 15º. I drilled a hole at the top for the connecting bolts in the next step. I drilled ¾" holes for the stretcher pocket and attached them to the legs with 1-1/4" pocket hole screws and wood glue. I made a crossbar at a distance of 2 inches from the bottom.
Step 4
Drilled holes for the connecting caps. I attached the legs to the connecting bolts with caps.
Tip Do not overtighten to allow the legs to bend.
To connect the two top boards, you can use glue and flat gaskets:
I made sure all surfaces were properly aligned, then glued and clamped the pieces together with a parallel clamp. Waited for complete drying.
I sanded the legs with 180-, 220-, and 320-grit sandpaper, then rubbed each layer with a soft cloth, sanding 400-grit sandpaper between each layer. Covered with linseed oil. Legs fold neatly for easy and compact storage.

Modern design Hallway in the apartment and in a private house with their own hands. 175+ Photo Ideas with a window, stairs and other Design options
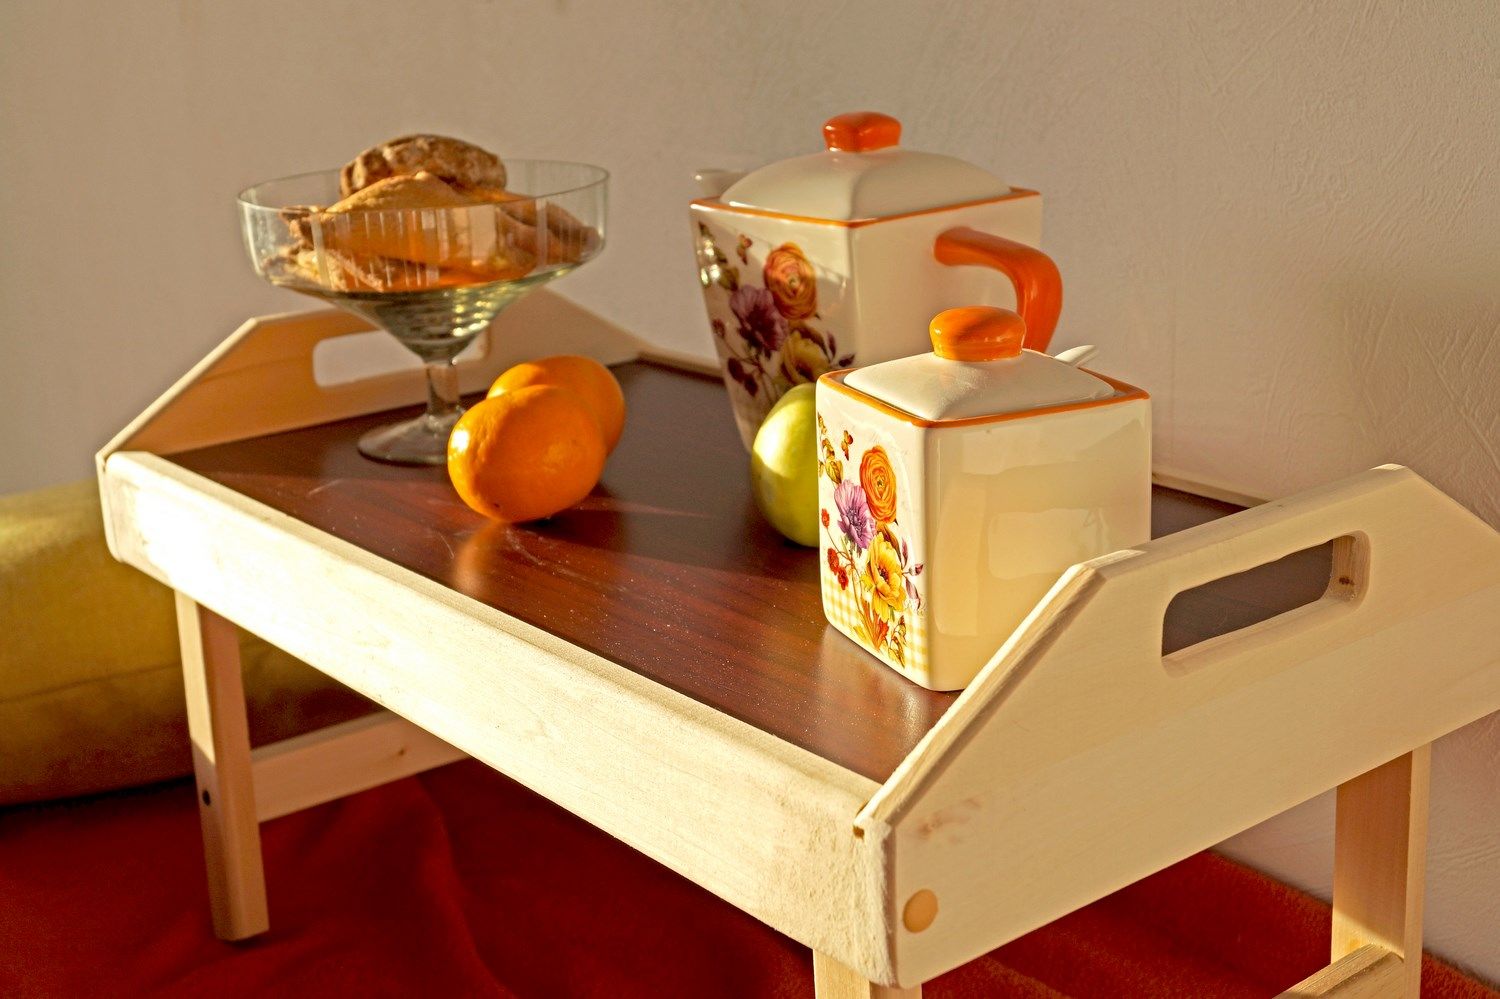
Unusual performance: do it yourself
breakfast table easy create with your own hands (or you can order a designer one to be sure: no one else will have this!). Here are some fun, creative and a bit weird solutions:

Take a part of an unnecessary cork board, put together a simple side from unnecessary boards: an authentic table is ready to please the eye every day.

Buy a wooden blank at any market: the simplest version of the table, which at first glance seems somehow rough and nondescript. And then - everything is decided by your imagination.
- imagine yourself as a painter or make an application;
- sheathe around the perimeter with a cloth or burn out patterns on the surface;
- paint the wood in pastel colors and sand it down with sandpaper to give the countertop an antique look - perfect for those looking for something that fits in with the vintage style of the interior.

You can also use a plastic blank, then it is best to draw with the help of special stained glass paints or multi-colored enamels. Create the comfort of your home!

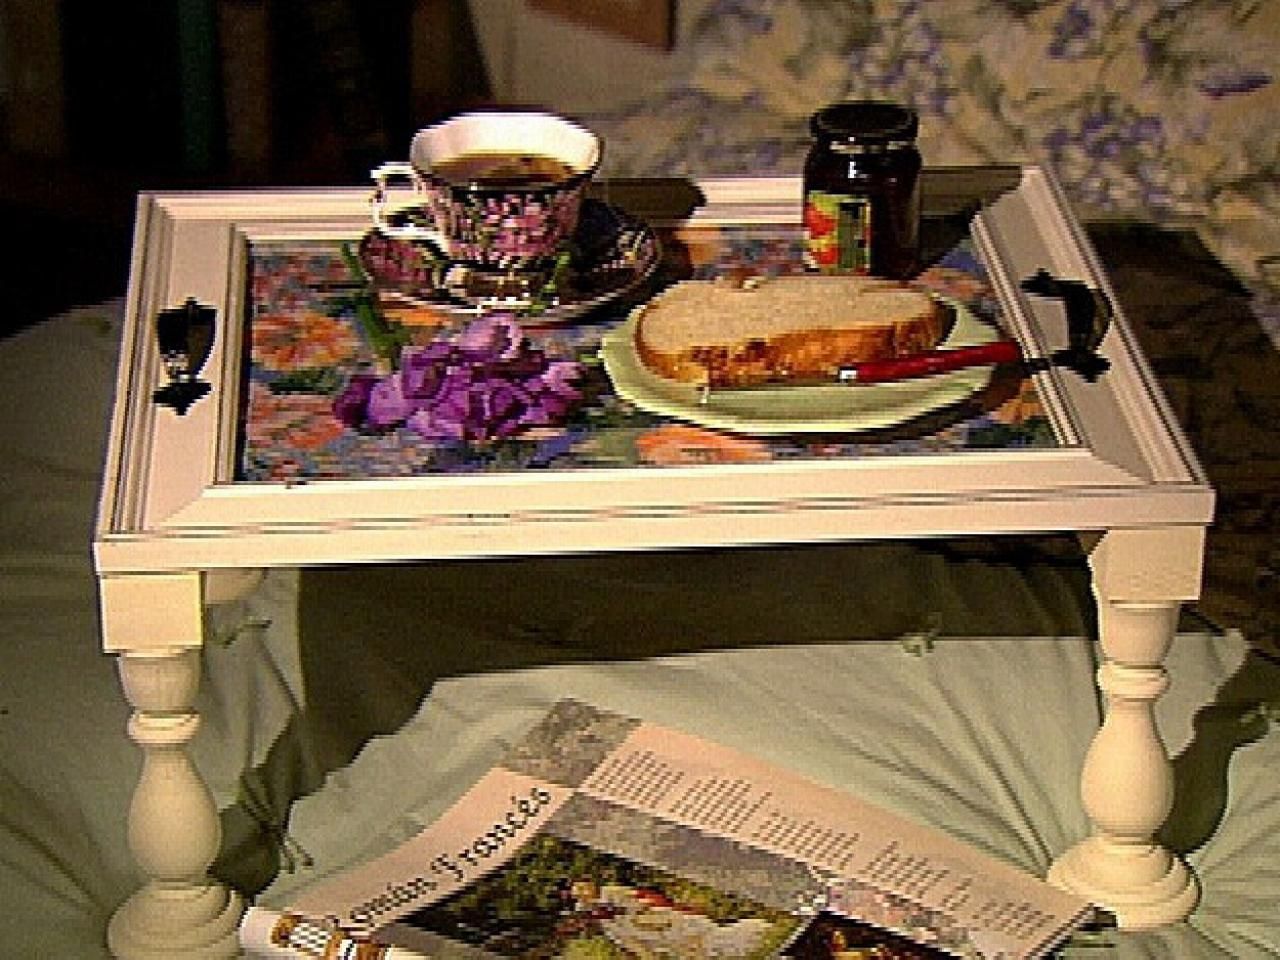
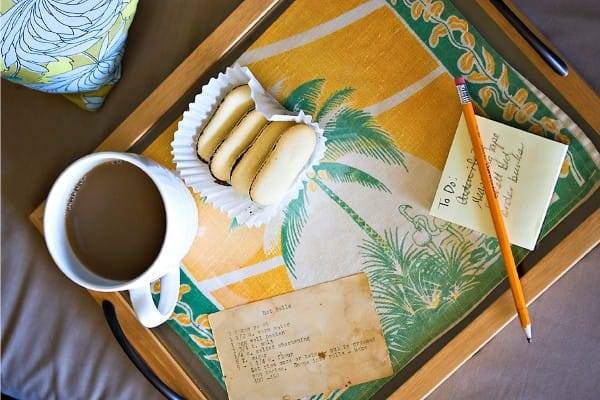
From an old painting
Another fun idea is to make a tray out of a ruined picture frame that looks amazing. For this we need some things: fabric; stain, varnish; brush, glass, stained glass handles, hot glue, picture frame.


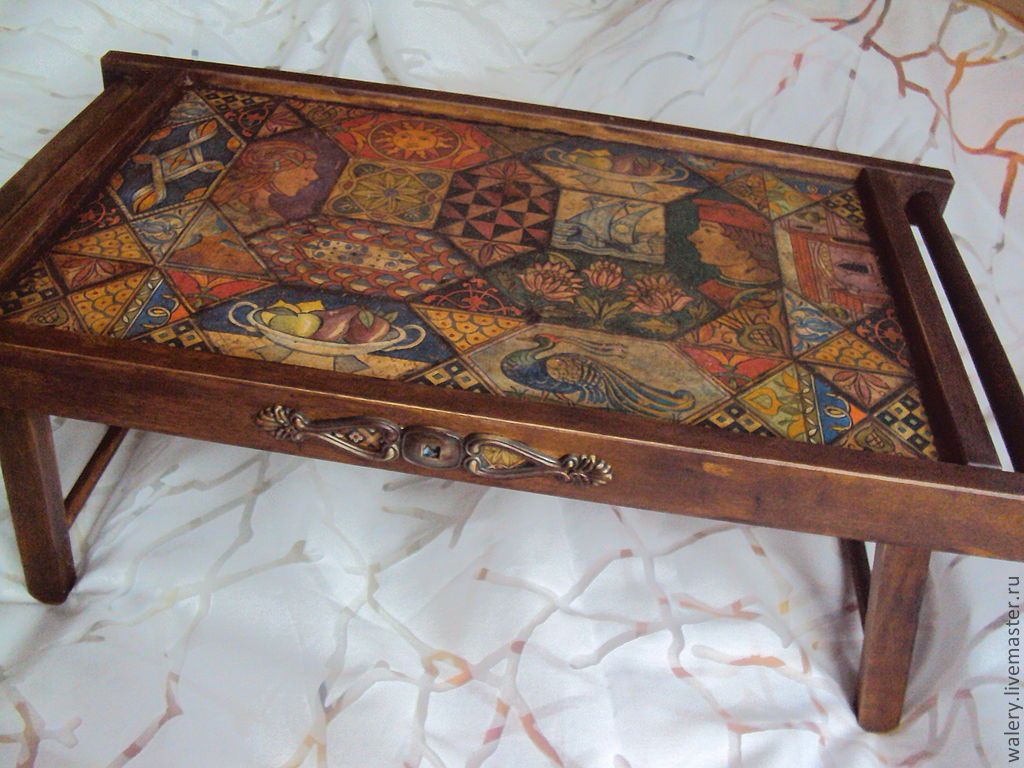


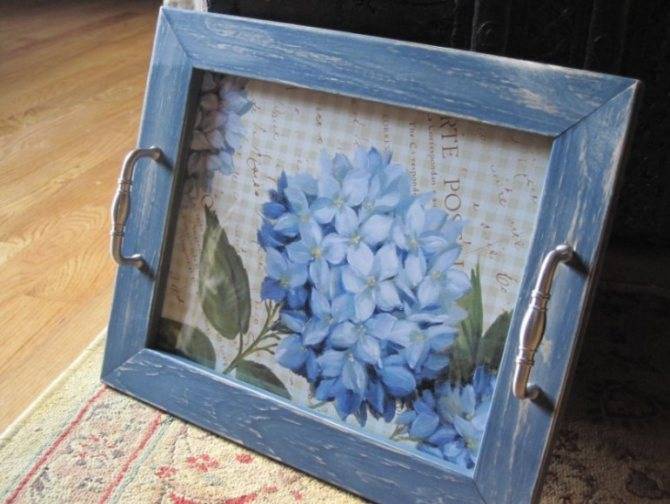
First, we lubricate the frame with stain, a paint that is pleasing to your eye. Then, with self-tapping screws, we fasten the selected handles on the sides of the planned tray, and the protruding screw heads also need to be painted to match the homemade work.
The next step is to wrap the frame with the selected piece of fabric and fix it with glue.
The last step is to protect the fabric from wear.
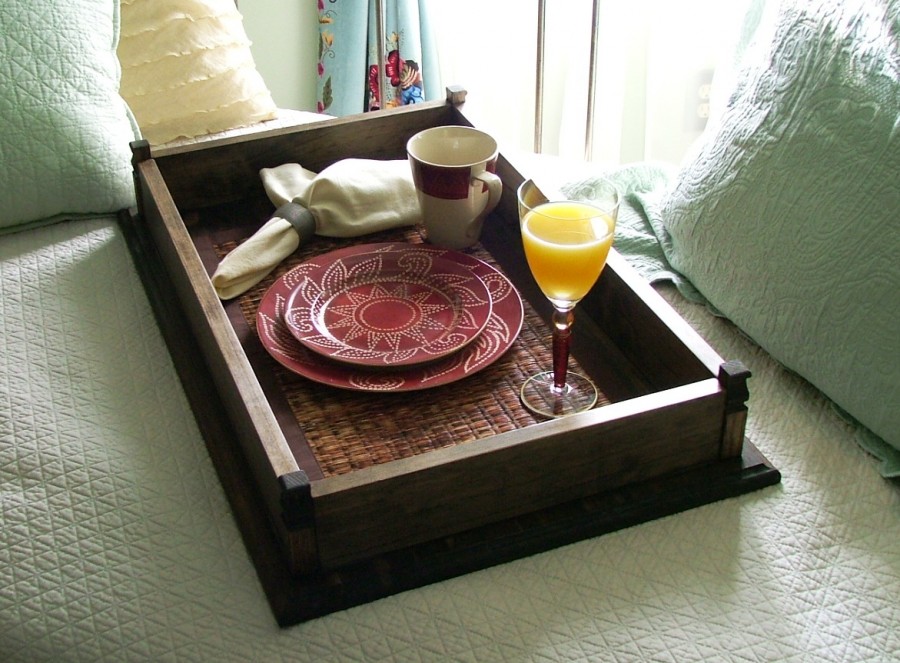
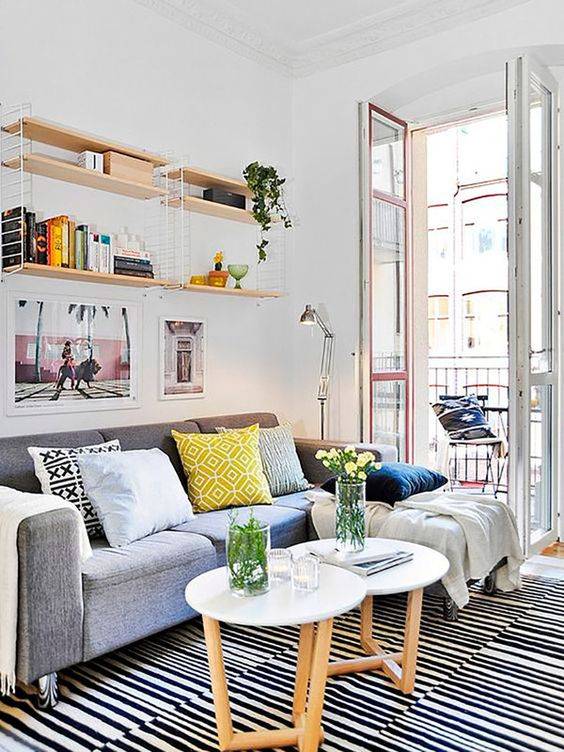
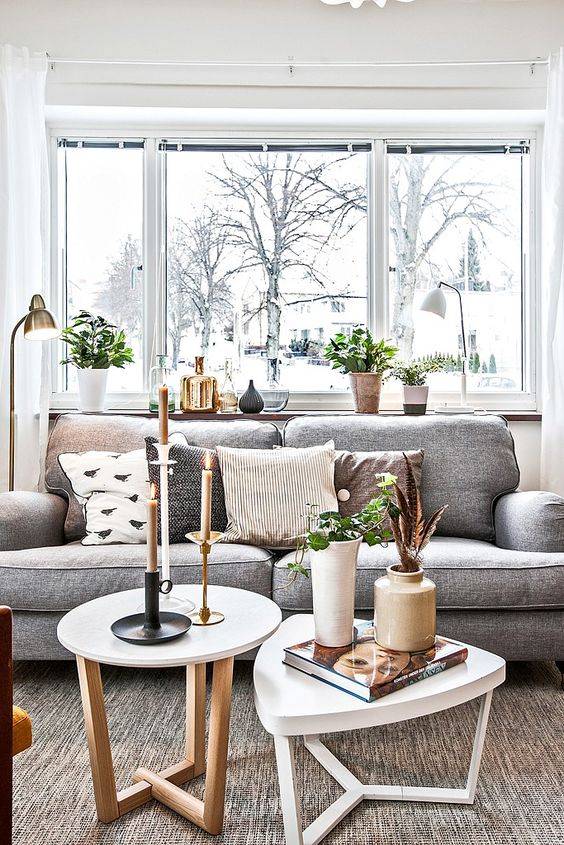
Small side table
Do you want to make such a small side table with your own hands? It is very easy. First, assemble a simple side tabletop. Apply some glue to the edges between the boards, then glue and fasten. Alternatively, you can use pocket holes, but gluing is easier. Then clamp the tabletop. While the glue dries, you can work on assembling the frame. Find the center of the 33 cm board and mark 2 cm on each side. Then mark 2 cm in the board from the edge. Use a jigsaw and chisel to cut out the notch as shown in the photo.
Apply some glue to the notches and connect to get two identical intersections. This is called a semi-circular connection. To secure the connection, you can screw the screw into the bottom side. Then assemble the side table base. Drill one pocket hole in each leg using a clamp and a drill. Then cut off the legs and make a mark on the bottom of the legs about 5cm up. Align the bottom of one of the legs with the mark and attach with a wood screw through the pocket hole.So attach all the legs. Do the same with the other X joints along the top of the legs. Attach the base and top. After cutting and sanding the top and base, flip the base on top. Using 5cm wood screws, attach the legs of the top of the X-joint to the top as shown in the photo. Finally, get creative to decorate the table.
Source /simple-diy-side-table/
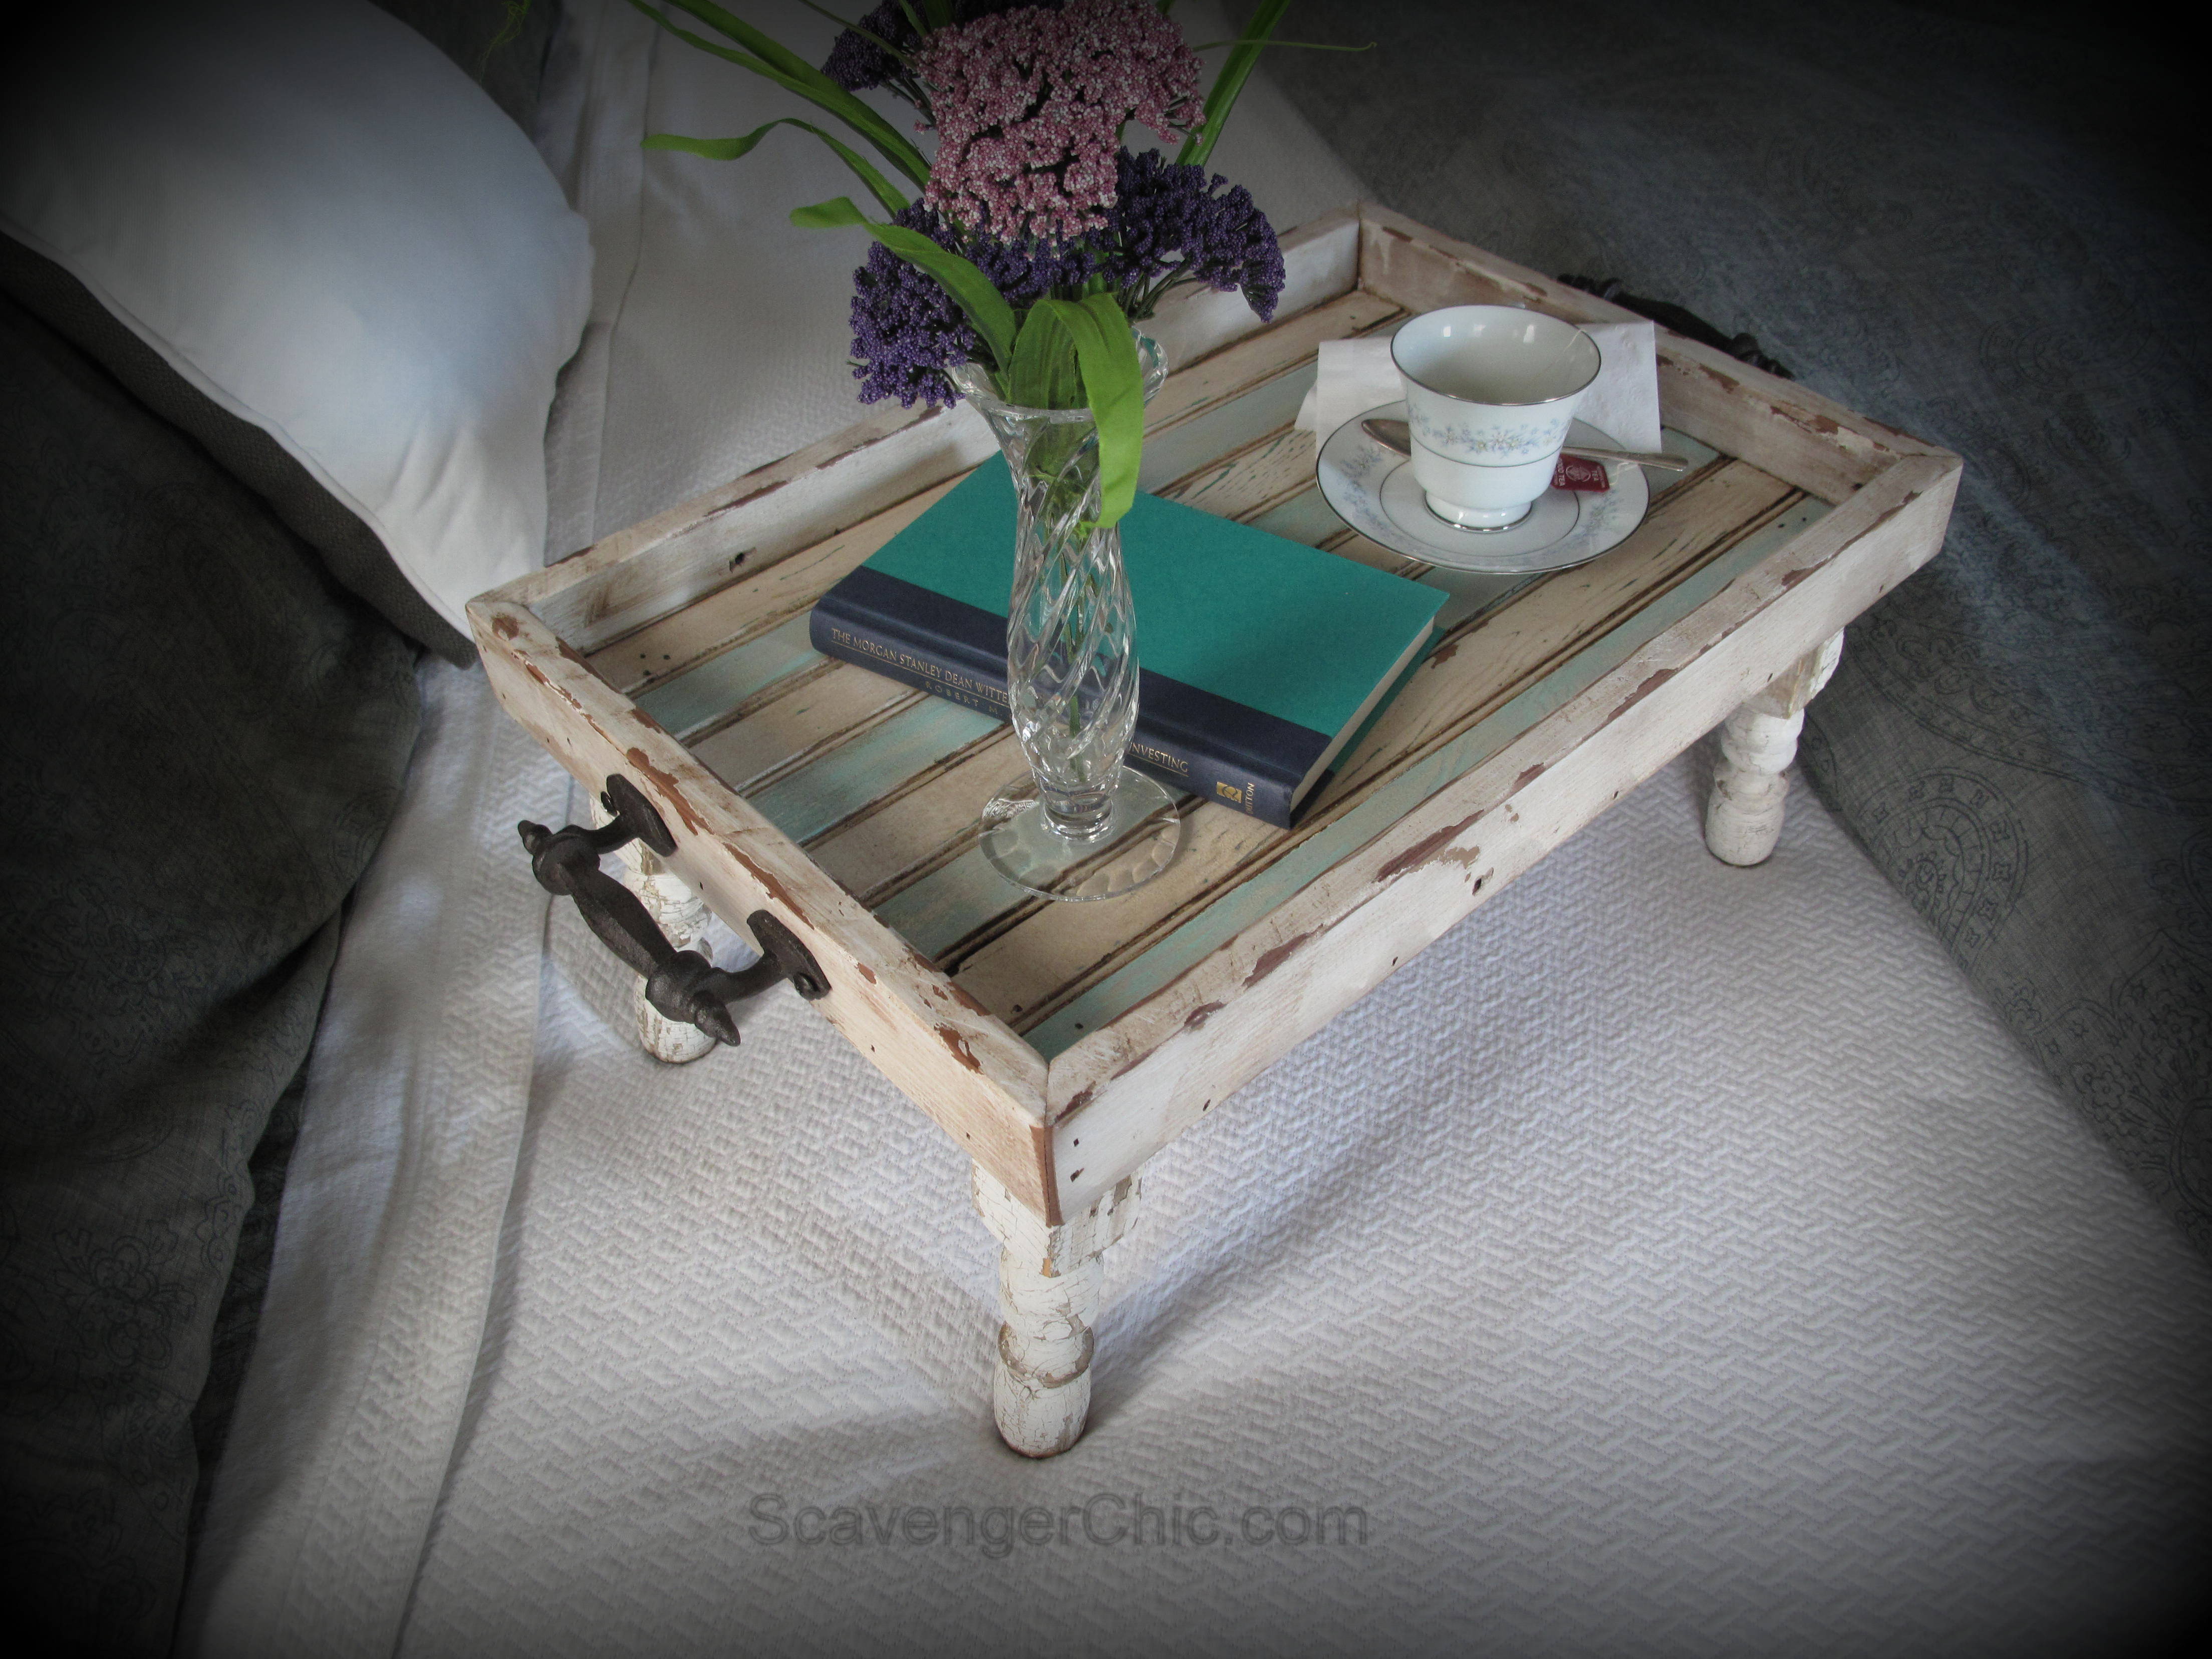
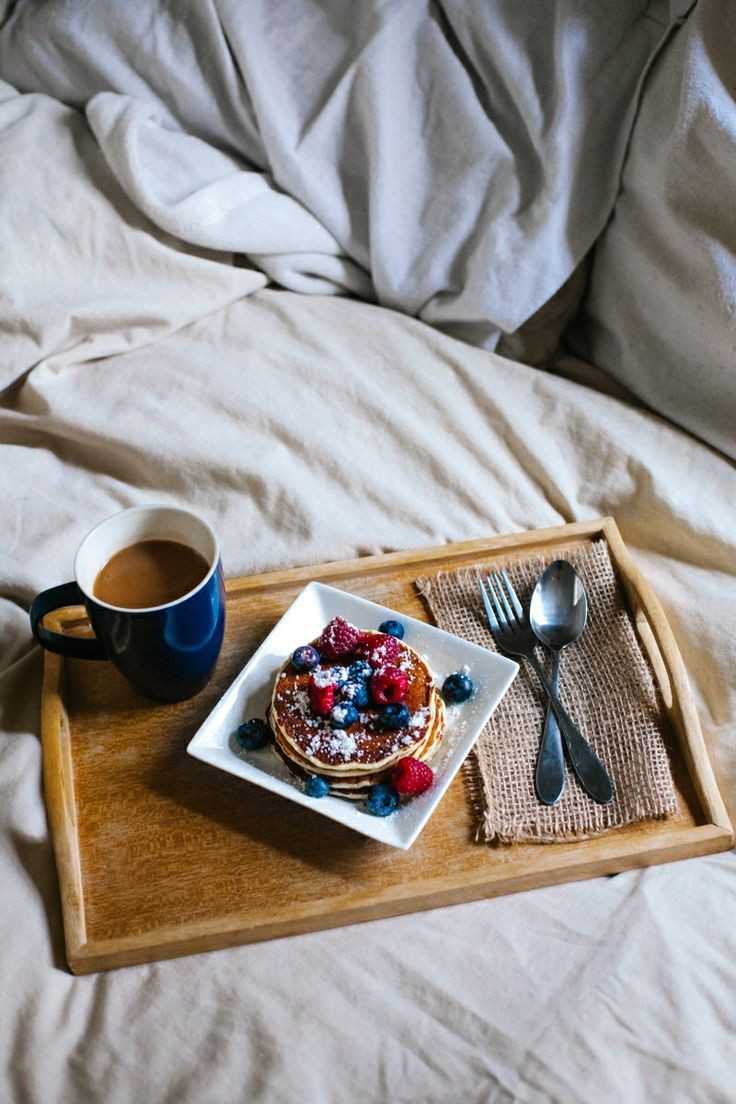
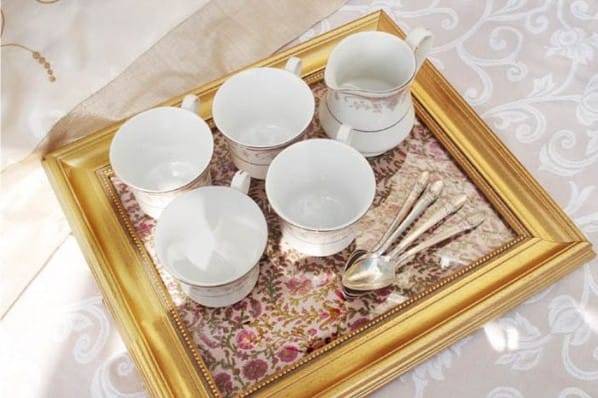
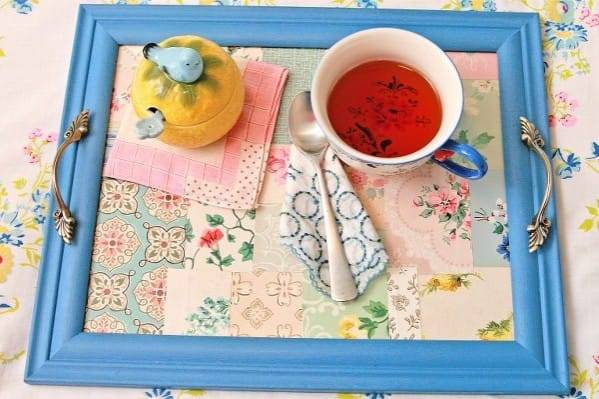
Master class number 1. A tray from a photo frame for 1 evening
The easiest way to make a tray with your own hands is to convert an ordinary photo frame into it.
Buy or remove a wooden photo frame of the right size from the wall. Well, if you can find a frame with a strong bottom and secure fasteners, then you won't have to change the backing and you can update the decor of the tray according to your mood.
So let's get started. Remove the cardboard backing, remove all unnecessary and put the glass in place.
Now the cardboard from the photo frame needs to be decorated as you like. You can glue or simply apply decor from various materials. It can be: a bright fabric, a piece of wallpaper, postcards, yellowed pages, a herbarium, etc. In our master class, the substrate is simply covered with fabric and glued with a glue gun. Instead, you can use PVA or any other glue. After the decor is ready, put the substrate on the glass and fix it (scroll the photo to the right).
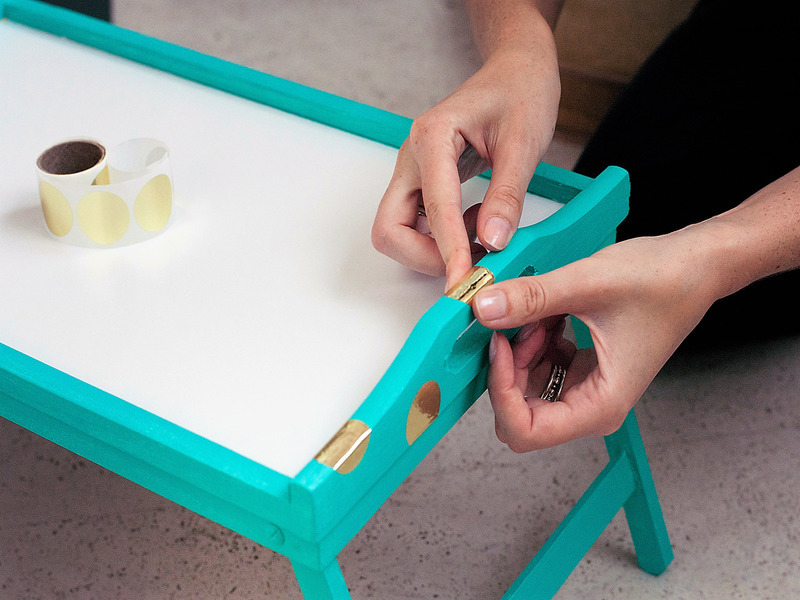
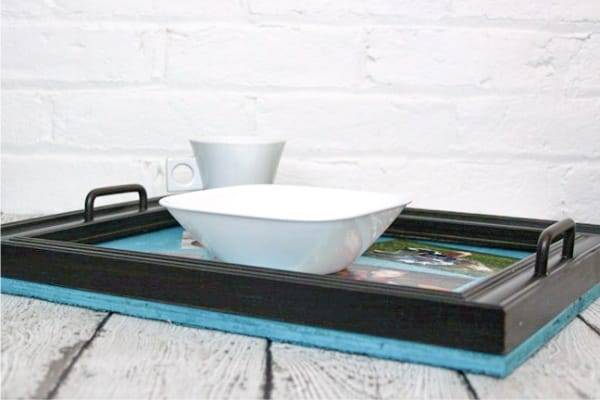
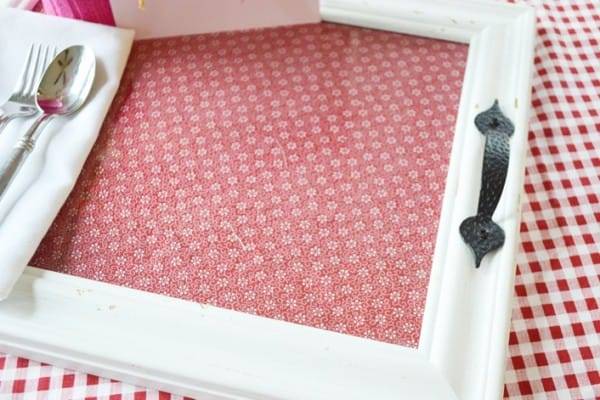
And now you need to fasten beautiful furniture handles of a suitable size. You can screw them either on the side or on top of the frame. To do this, you will need the actual handles, 4 screws, a drill with a small drill and, of course, a screwdriver.First you need to attach the handles to the frame, align them, then mark the holes with a pencil, drill them with a drill with a suitable drill bit and finally screw the handles onto the screws with a screwdriver as shown in the photo below.
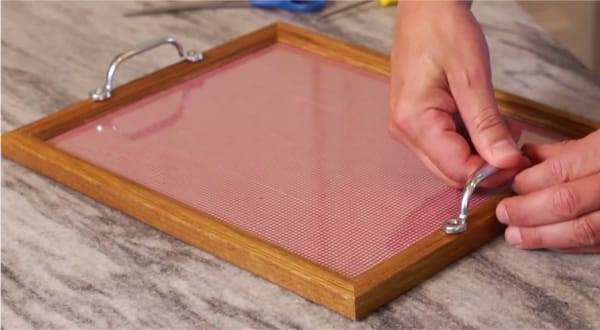
Well, that's it, your serving tray is ready! Or… almost ready.
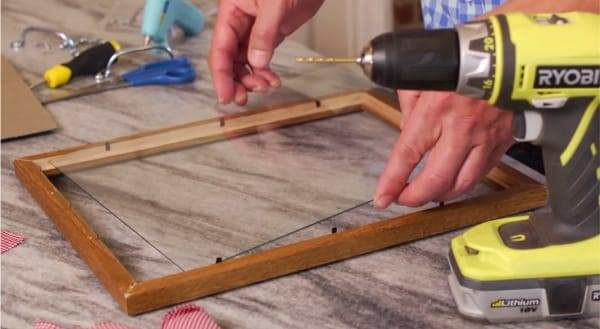
For reliability and giving weight to our tray (so that it stands exactly on a soft surface), it is better to additionally strengthen it from below. To do this, you need to take plywood, attach a frame to it, circle it along the contour and cut it out with a jigsaw. The resulting workpiece must be sanded around the edges, and then painted in a suitable color (previously primed). Once the plywood is dry, all you have to do is attach the plywood to the frame with small screws, nails, self-tapping screws, or a furniture stapler. Such a tray will withstand even the heaviest breakfast in bed.
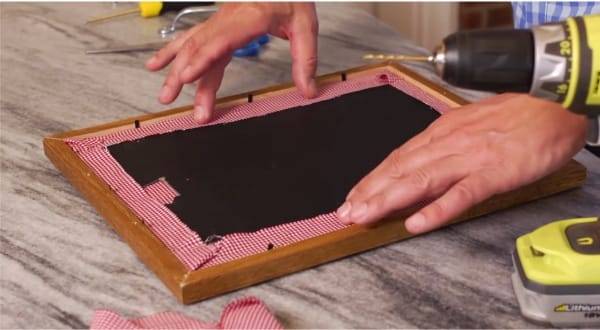
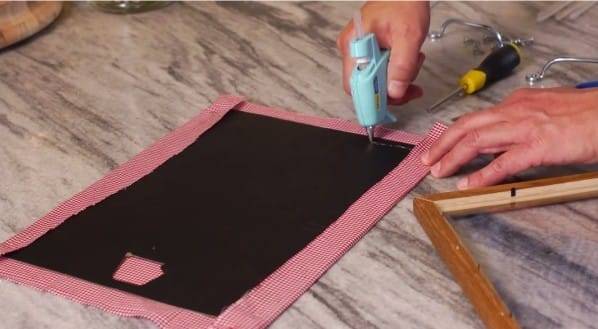
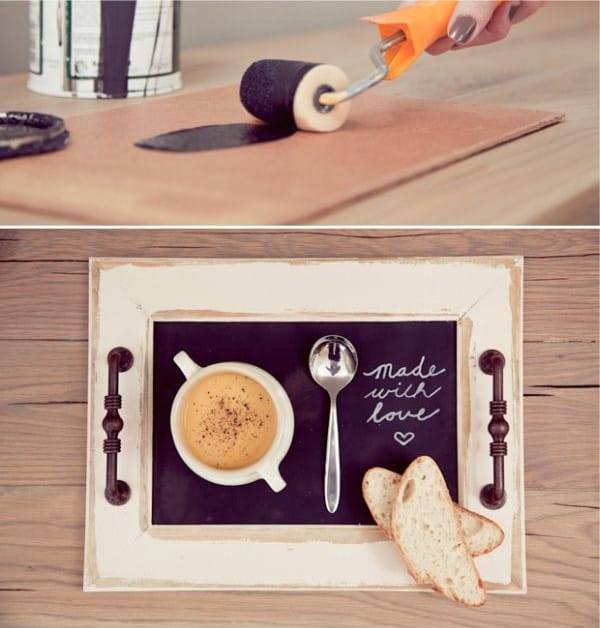
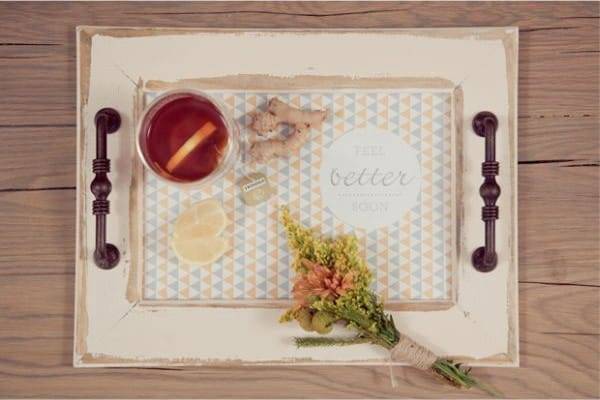
Based on this master class, you can make beautiful trays with a variety of decor. For example, you can make such a serving tray with a slate bottom, on which you can write romantic notes with chalk.
The substrate can be painted with either slate paint or pasted over with chalk wallpaper.
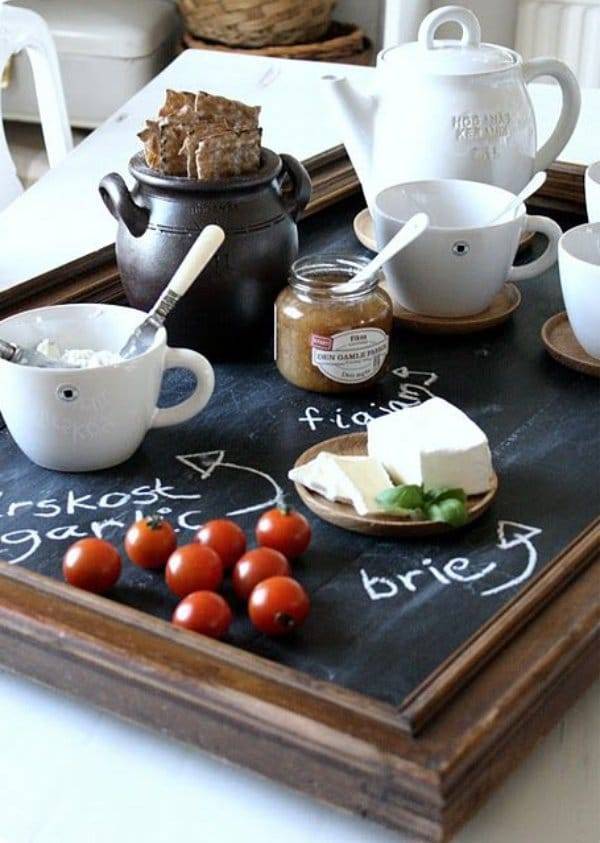
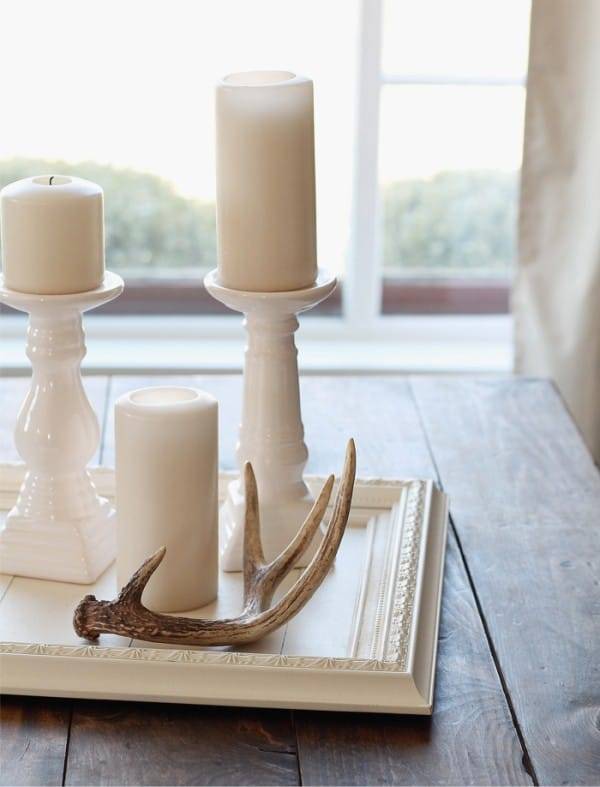
And here are other decor ideas for both the frame itself and the substrate. As you can see, you can come up with a variety of designs - in a vintage style like Provence or Shabby Chic, in a classic style or in a modern one, using fabric, photographs, colored paper, wallpaper, pages from books (swipe the photo to the right).

Also, this master class will come in handy for making interior trays for coffee or dressing tables, where candles and books, or jewelry, cosmetics and perfumes can find their place.
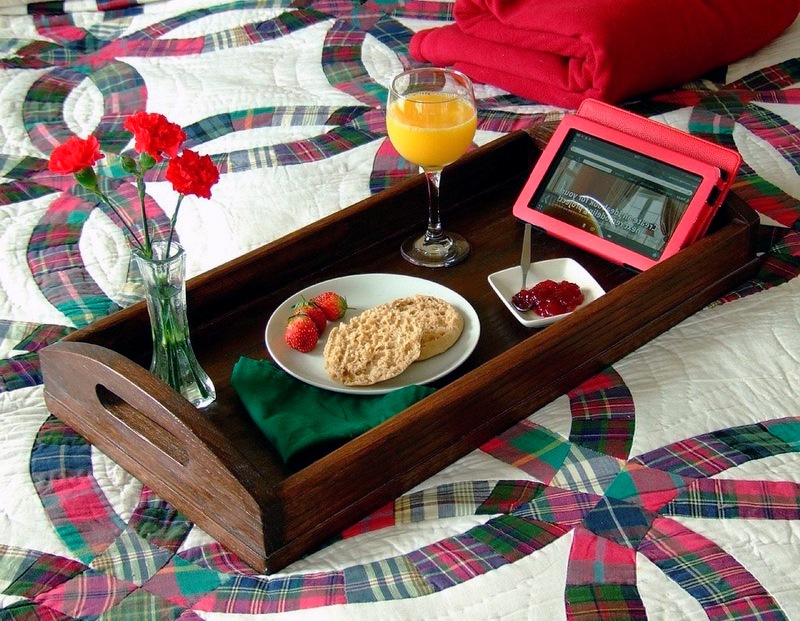
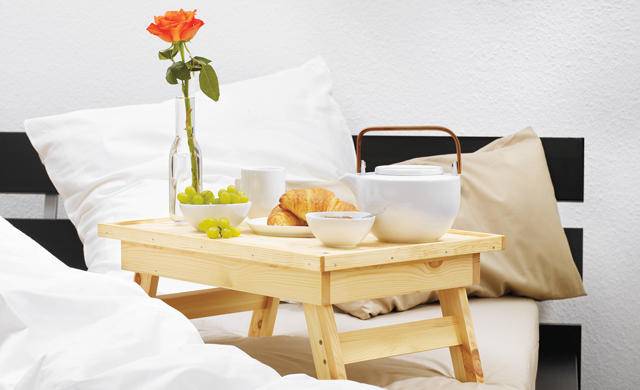
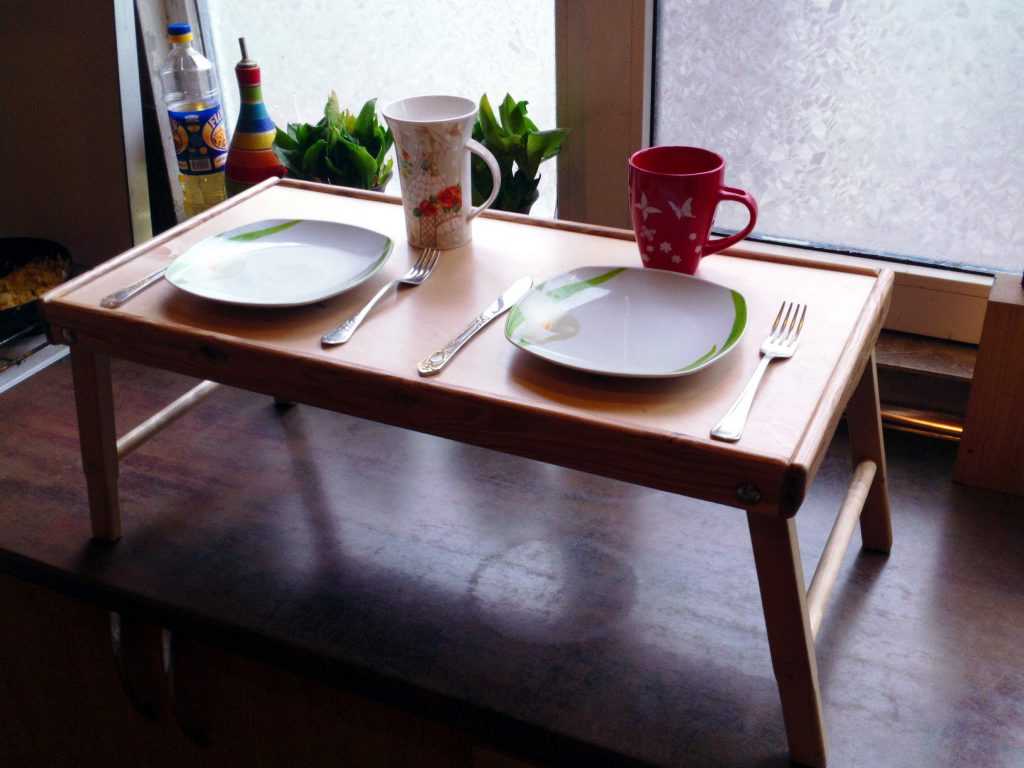
Advantages and disadvantages of the product
When choosing a table for breakfast in bed, you should focus on some of the characteristic features of this design. The main advantages of such products are the possibility of eating right in bed. In addition to eating, you can work with a laptop or watch interesting films at the table.


 Manufacturers of such an accessory are made from different materials.
However, the use of such a device may be associated with a number of disadvantages:
- The tabletop will not allow you to put a large number of objects on the table plane.
- Some models, which include a variety of adjustment mechanisms, do not differ in strength and durability.
- There are large tables, the dimensions of which do not allow them to be placed in a small bedroom.
- Working on a laptop while lying down is an extremely difficult test for the back. Incorrect body position, adopted for a long time, can adversely affect human health.
 The design of the bedside table is quite simple - the tabletop, enclosed in the edging of the sides, and the legs.
Also, do not forget that even the most durable and comfortable countertops can simply roll over. One awkward move and your whole breakfast ends up on clean bedding.
That is why it is important to choose or make a product, the dimensions of which will ideally fit the dimensions of the bed used.
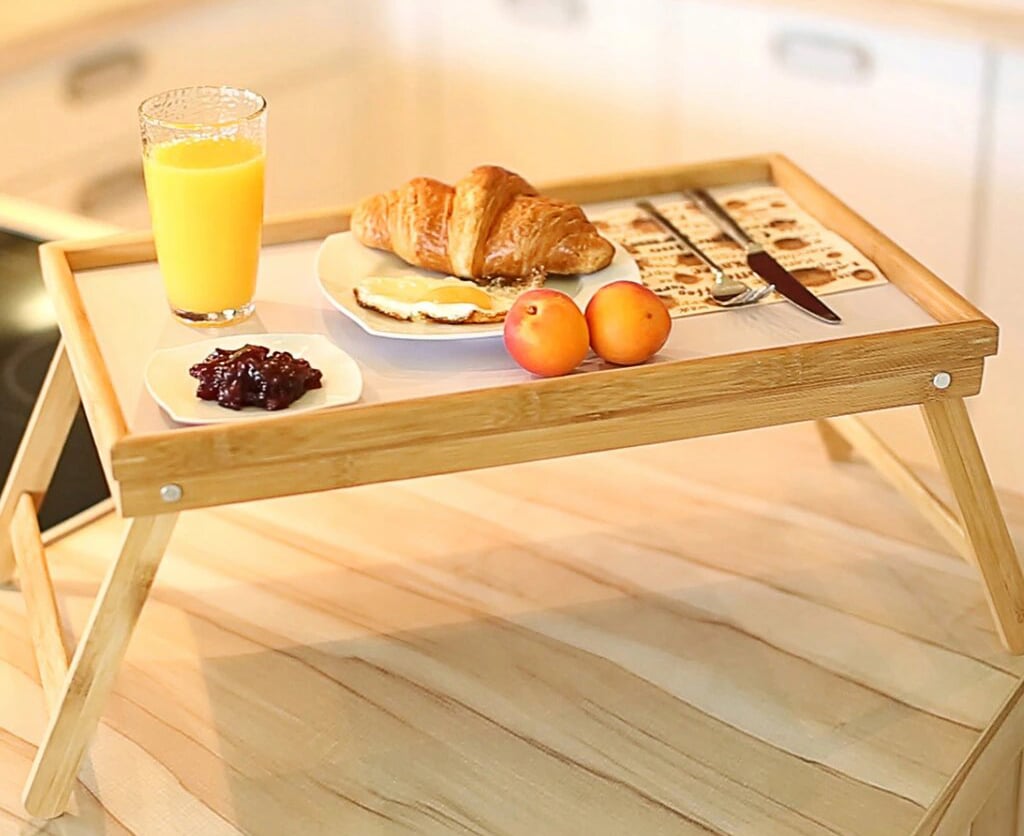
 A breakfast table in bed can fulfill not only its intended purpose, being a tray for dishes, but also serve additional purposes.
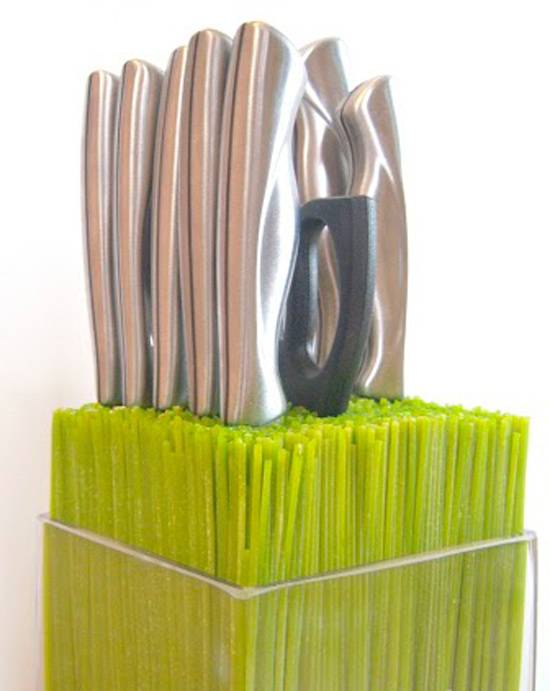
Idea 8. Universal knife holder
A knife holder is a very useful tool in the kitchen that helps keep your workspace tidy and keeps your knife blades sharp longer.
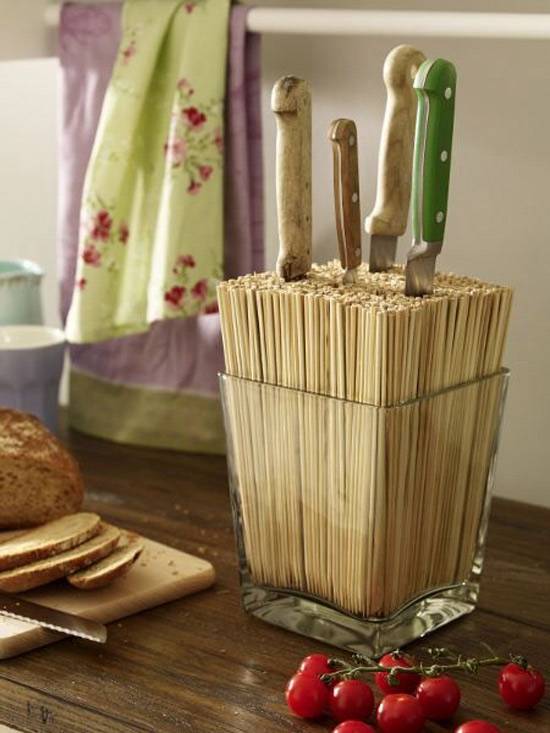
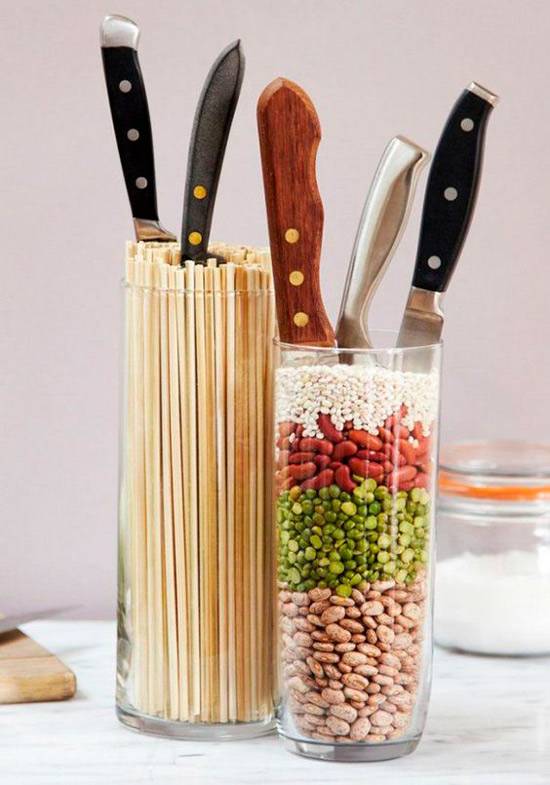
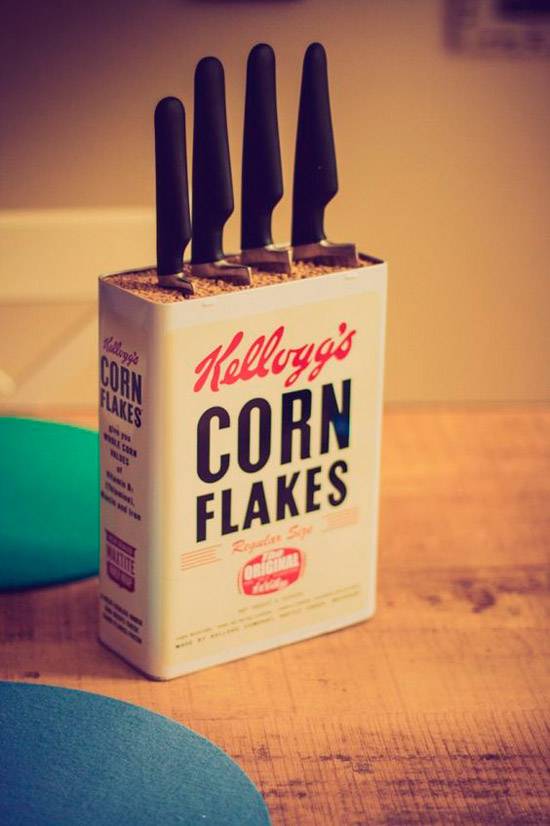
Making a knife holder with your own hands is very easy - just pick up a small vase and fill it tightly with bamboo / wooden skewers, colored beans or ... colored spaghetti, as in our master class.
To make a knife stand, prepare:
- A container or vase is the height of the blade of your largest knife. The shape of the container can be any, but without any bends;
- Spaghetti, lots and lots of spaghetti;
- Several large ziplock bags (or just large bags that can be tightly tied into a knot);
- Alcohol (for example, vodka);
- Liquid food coloring in your desired color (or multiple colors if you want to make a multi-color filling)
- baking sheets;
- Aluminum foil or an old oilcloth tablecloth;
- Paper towels;
- Kitchen scissors.
Instruction:
- Make sure your container is clean and dry, then fill it tightly with spaghetti. When the container is full, take out the spaghetti and add a couple more bunches of pasta to this pile as a spare (in case of replenishing broken sticks).
- Divide the spaghetti evenly among the bags and pour enough alcohol into them so that it can wet all the sticks. Next, add 10-40 drops of food coloring to each bag.
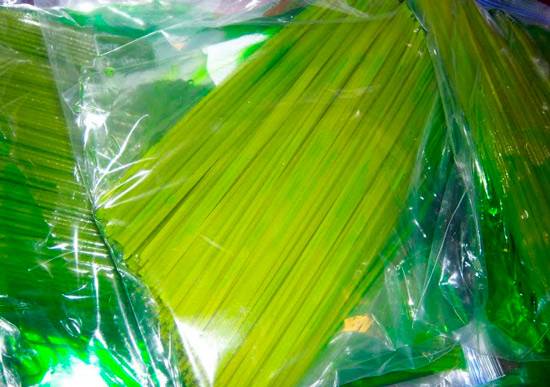
- Seal or tie your bags, then put them in additional bags to avoid leaks. Slowly shake and turn the bags to mix the dye into the alcohol and pasta.Next, lay the bag on one side and leave for 30 minutes, then turn the bag over again and leave it for another half hour. Continue soaking the spaghetti in this way (no more than 3 hours) until it reaches the desired color.
- Cover your baking sheet with aluminum foil, then a layer of paper towels (or oilcloth). It is advisable to wear gloves to protect your hands from staining. Remove the spaghetti from the bags, after draining all the liquid, lay them out on a baking sheet in a single layer and leave to dry. From time to time, spaghetti needs to be sorted out to dry them evenly.

Once your spaghetti is COMPLETELY dry, start putting them in the container.
Shake the filled container and flatten the spaghetti. Insert your knives to determine the optimum filling density, add pasta or remove excess if necessary.
Now, using kitchen scissors or other very sharp scissors, cut the spaghetti to the desired length without removing it from the container (best done over the sink)
It is important that spaghetti does not exceed the height of the container by more than 2-3 cm, otherwise they will break quickly.
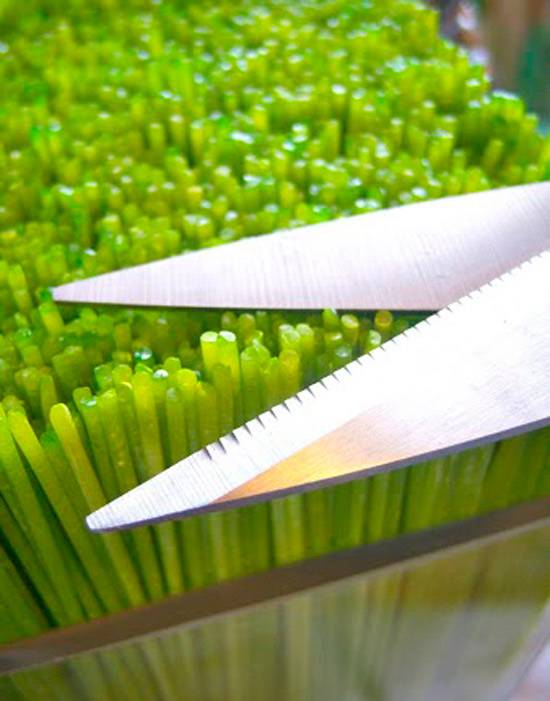
Table base
The table consists of two parts - a cover and a base. I started by making the base. It is a set of legs and aprons connected in a groove / spike. Legs A with a section of 50 × 50 mm are made of glued blanks 32 mm thick (Fig. 1).
Grooves.
Having cut the legs to size, it is necessary to mark the grooves. As seen in fig. 1a and fig. 1b to get a small step between the leg and the apron, the grooves are slightly offset (fig. 1b).
I selected the grooves on a drilling machine with a 010 mm Forstner drill. First, I made holes at the beginning and end of the groove (Fig.2), and then drilled out the excess wood with overlapping holes. Left the corners of the grooves rounded (Fig. 2a). On fig. 1b shows that the grooves are slightly deeper than the length of the tenons. This gap is for excess glue.
spikes.
Having finished the legs, I began to make long and short aprons B and C.
First I cut the aprons to size.
Then, in order to make spikes at the ends of the aprons, I installed a groove disk on the circular (Fig. 3).
After that, I made gashes on both sides and checked the fit. I sawed out the shoulders of the spikes - raised the disk and formed the spikes with 12 mm saws (Fig. For).
In the manufacture of spikes, their ends must be rounded to fit into the grooves. I used a file for this (Fig. 3b).
The last step is to round off some of the edges on the legs and aprons (Fig. 1). I did this on a router with an R3 round cutter and then glued the base together.
The main criteria for choosing
When planning to purchase a kitchen attribute, pay attention to:
- Reliability;
- The quality of the material (it must be hypoallergenic and hygienic);
- Persistence.
Decide on the shape of the baked product, focus on the appropriate diameter. The wider the plate, the more convenient it is for the pastry chef to act. In specialized markets, you can find models with a width of 10 to 40 cm. Many consider the diameter 28 - 30 cm to be optimal.


Don't forget about the stability of the turntable. This is an important selection criterion.
When choosing a rotating cake platform, check if it has markings. This is a great help when decorating: decor elements can be distributed at the required angles, and the edges of the cake can be made as even as possible.
It is worth paying attention to the possibility of disassembling the structure: if the bearing breaks in the rotational mechanism, the non-collapsible stand will have to be thrown out. In such a situation, it does not stop functioning, but simply does not rotate normally.
When you run a spatula along the side of the cake, it only twitches occasionally. This prevents the complete design of the product.
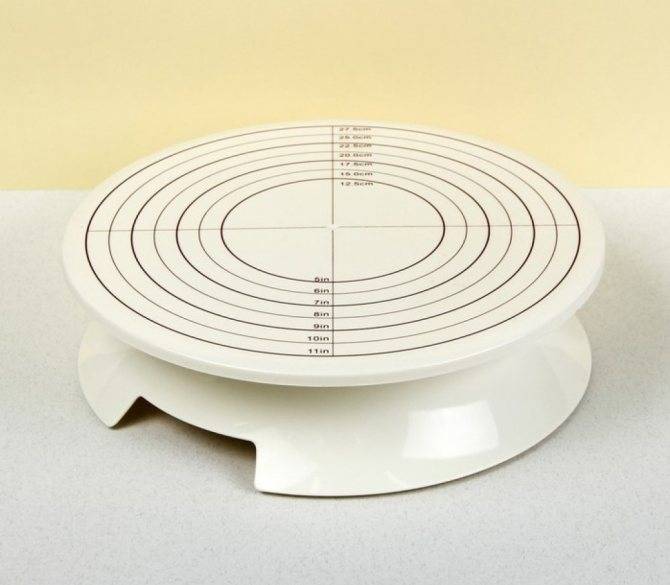
When choosing a rotating cake platform, check if it has markings.
Often, for most confectioners, the decisive condition for the purchase of such a cake maker is the presence of a transparent coating. It is ideal for serving purposes.
Popular with experienced craftsmen and additional mesh. It often comes as an accessory to a swivel stand. With this accessory it is convenient to cut cakes into beautiful pieces. It ensures accuracy in work: impeccable lines, symmetry, a layer of mastic or glaze after cutting is not smeared.
It is useful to buy a rotating platform on a leg for decorating cakes because today it is the most convenient inventory for decorating and subsequent presentations of sweet products.
The swivel tray is useful for banquet events and as a "showcase" for restaurants, cafes, confectioneries. You can purchase both an inexpensive plastic product and a six-tiered stand.
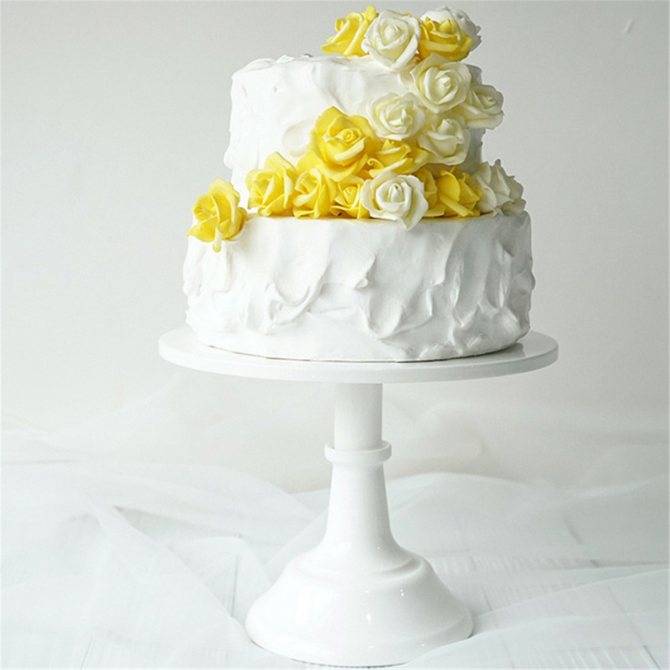
The swivel tray is useful for banquet events and as a "showcase" for restaurants, cafes, pastry shops.
Conclusion
Agree that a breakfast table is a very convenient accessory that should be in every home. It can be used for work, needlework or just watching the news on a laptop or tablet.Manufacturers produce a huge variety of models, which are easy to choose for any need. If desired, it can be made with your own hands from improvised materials, the main thing is to determine the size.
And finally, we offer you to watch another video of the simple manufacture of a breakfast table in bed:
 Watch this video on YouTube
Previous FurnitureUnexpected solutions for odnushki - chest of drawers: types, models, features
Next Furniture Modular living room furniture in a modern style: photo in the interior


