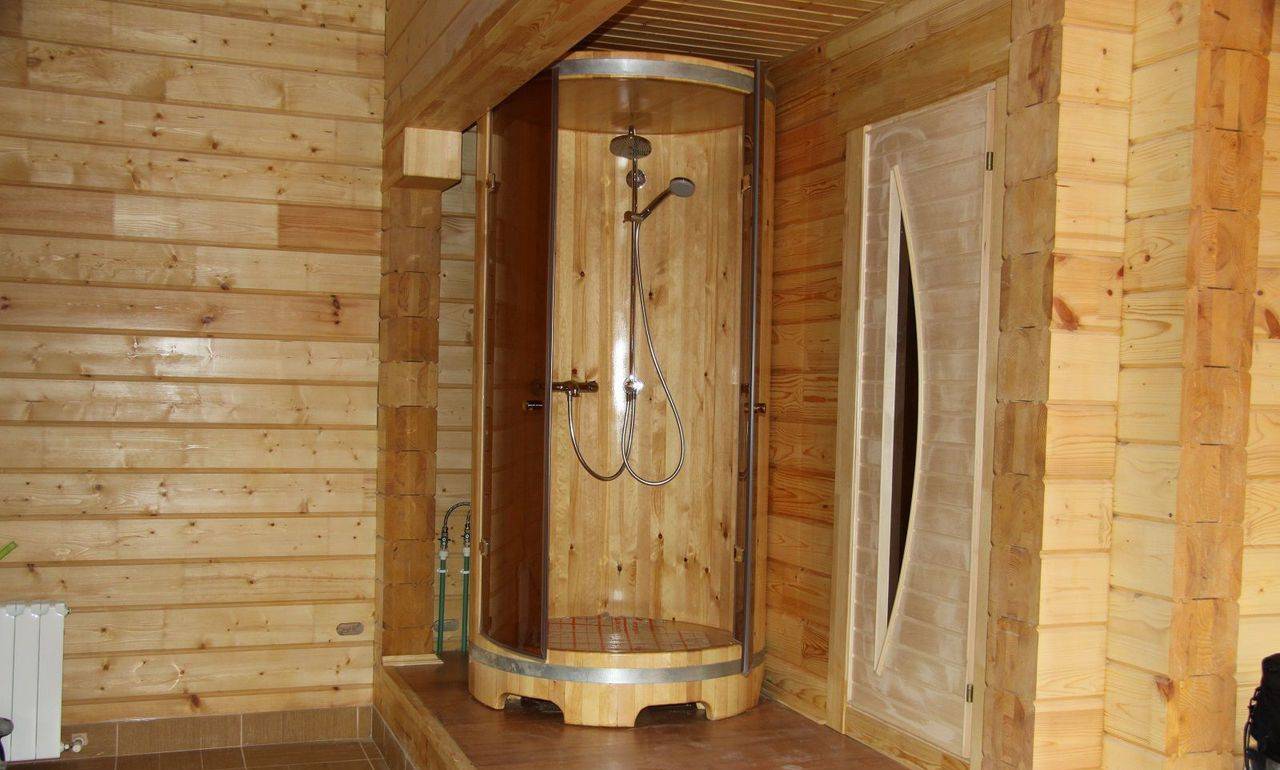
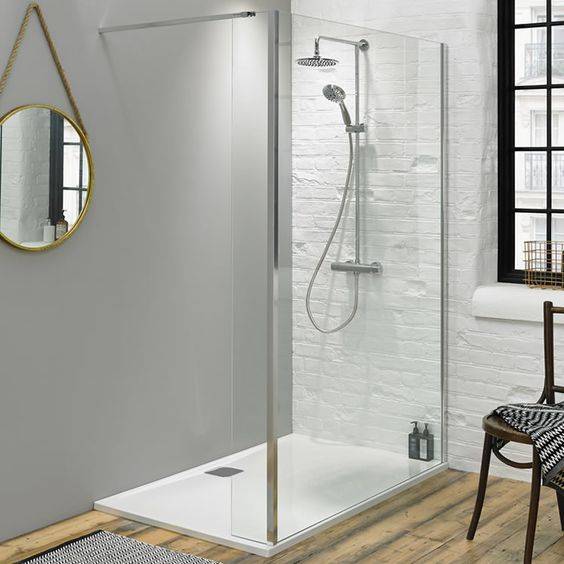
- DIY shower cabin examples
- Tank filling and water heating
- How to auto-fill a tank
- Organization of heating
- 7. Country shower from corrugated board
- Partitions
- Dimensioning and material selection
- Ways to organize a drain in a shower stall
- Types of pallets
- Dimensions and shape: choose
- Organization of the drain
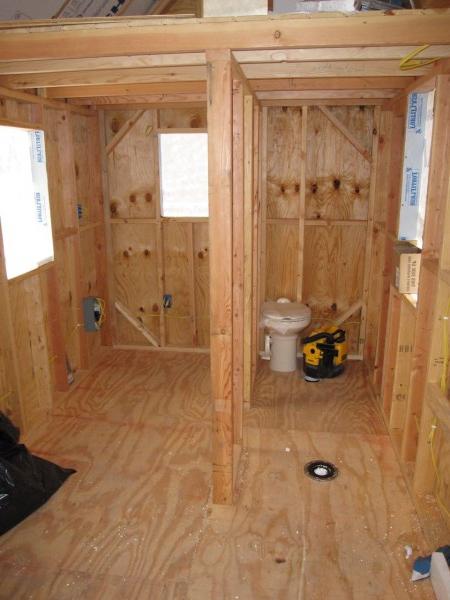
- Preparing for technical work
- Laying plumbing communications
- Siphon selection
- Stages of work
- Fixing the siphon
- How to fix panels
- How to put doors
- Cabin assembly and connection
- Shower box installation
- Pallet installation
- Pallet manufacturing
- Wall, floor and ceiling decoration
- What floor to make in the bathroom?
- Features of wall decoration
- The subtleties of the arrangement of the ceiling
- Pallet materials
DIY shower cabin examples
Where to start work on creating your own shower cabin? Yes, it is probably better to study the experience of those people who have already passed this stage and are now enjoying the fruits of their own efforts.
If we talk about a shower cabin in a private house, then it can be placed anywhere. Or rather, where does she go?
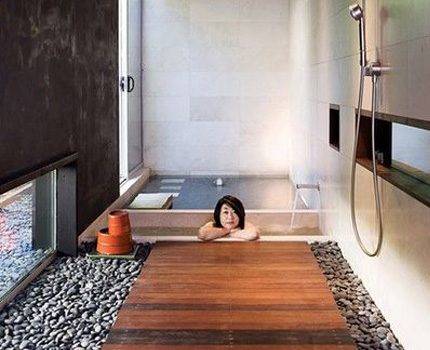
If you pay attention to the photographs, then on them the booth is comfortably located in the space between the wall and the stove, in an ordinary kitchen.This creation of engineering thought does not have a steel pallet, it is replaced by a tile, which was laid out at a slight angle to the gutter. Cabin floor raised above kitchen floor
In this case, this is a necessary measure so as not to dismantle the floor to install a drainage funnel. So that water from the cabin does not get into the kitchen, it was separated by a threshold with two degrees
The floor in the cab is raised above the floor in the kitchen. In this case, this is a necessary measure so as not to dismantle the floor to install a drainage funnel. So that water from the cabin does not get into the kitchen, it was separated by a threshold with two degrees.
The craftsman needed brick, tile, and damp-resistant drywall to create his booth. Plastic seamless panels are installed on the ceiling. Even the kitchen stove looks harmoniously combined with a shower cabin, as they are finished together in the same style.
Water is supplied by a pumping station from a well. There is a compact size water heater. All this made it possible to obtain a small shower cabin with cold and hot water.
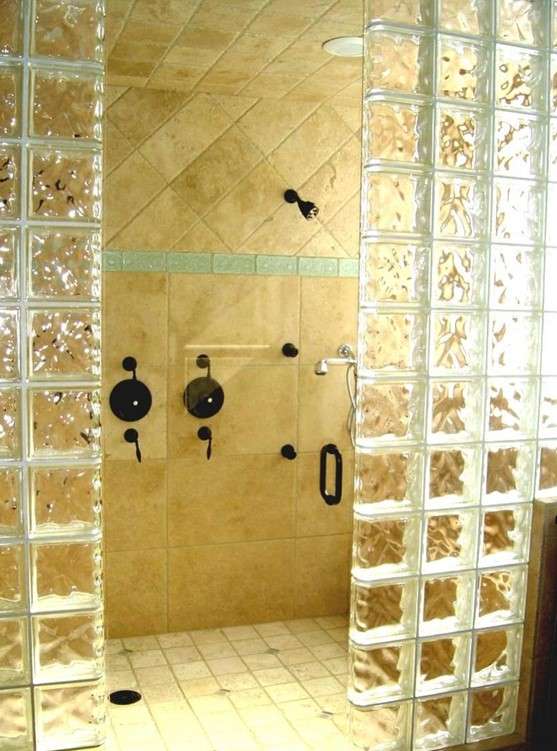
A shower stall will look very good and unusual if you assemble it yourself from glass blocks. This material is no less durable than brick, but at the same time it looks very decorative. You can learn how to lay glass blocks very quickly, and you can make the most unusual forms from it. If you look at the photo, you can see how stylish the glass block looks paired with natural stone tiles.
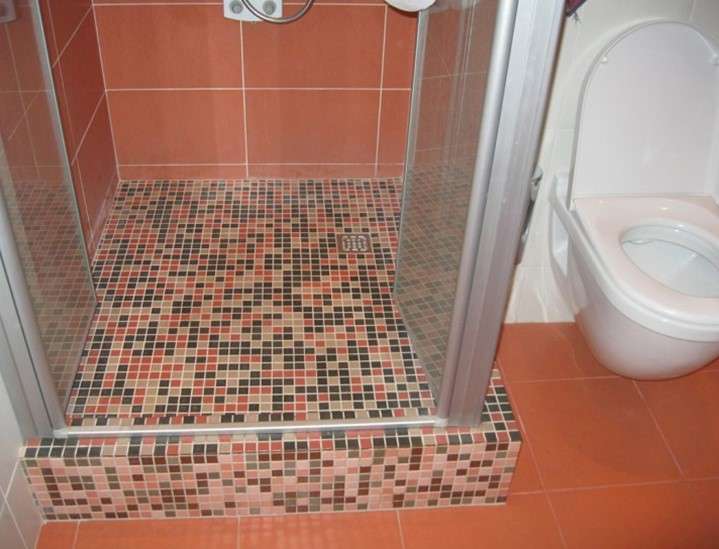
On the floor of the cabin there is a concrete screed, on top of which there are porcelain tiles. The walls are also ceramic tiles.
Not everyone likes the option of replacing a transparent screen with a film curtain, but in this case it looks very good.
Mosaic cladding and waterproof fabric suspended from a chrome-plated bow. The whole composition looks like a work of a real designer.
When choosing material to create your soul, you should pay attention to cellular polycarbonate. It is quite durable, not afraid of water and looks beautiful. On its basis, you will get nice transparent cabin walls and a door.
On its basis, nice transparent cabin walls and a door will turn out.
The edging for it is made on the basis of aluminum or plastic. The door itself can be hinged, but you can also put a sliding door. This is easy to do if you fix the wheels from the cabinet on the underside of the polycarbonate and insert them into the guide.
Due to its flexibility, polycarbonate allows you to create a wide variety of shapes.
No less popular for creating showers and plexiglass. It is not as strong as polycarbonate, so it will have to be framed with stainless steel corners.
On the basis of glass, simple and airy home-made structures are obtained.
It is easy to combine with tiles.
Quite a good option for facing - plastic lining. It can be easily and quickly connected into a single panel that is not afraid of moisture. It sticks to absolutely any surface.
The walls can be made on the basis of a homogeneous material, or they can be assembled from different ones.
Turning on the fantasy, and from durable plastic, you can create a cozy corner of relaxation. As if in an oasis, you can not only bathe here, but also relax under the jets of warm water and meditate.


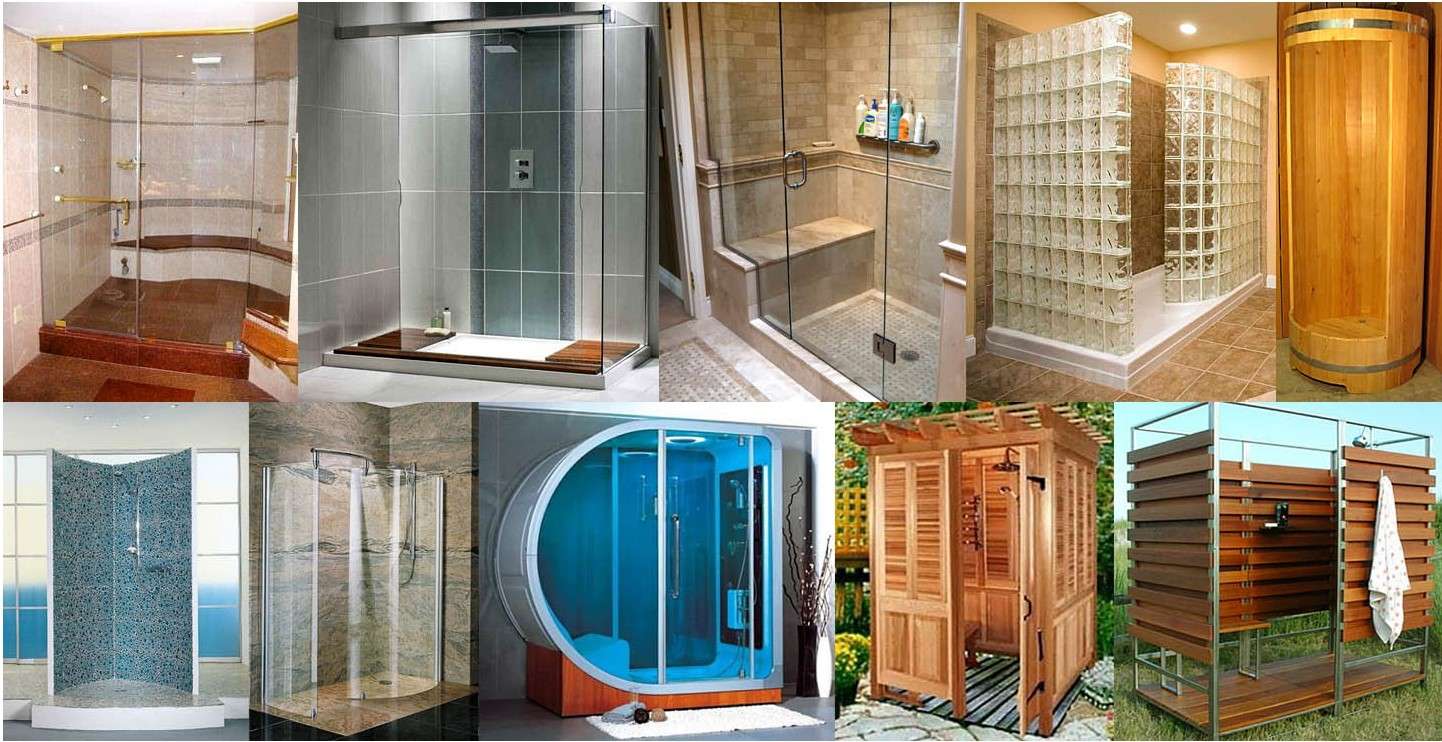


Quite easily and quickly, you can make a cabin frame out of drywall, then finish it with moisture-proof material and tile it. The design will be inexpensive and easy to install.
Tank filling and water heating
with filling shower tank water is usually not a problem. Sometimes they carry water in buckets - if you want to wash, you will carry it. Not very convenient, of course, but it happens ... If there is water supply in the country, they fill it with a hose, install a supply pipe with a valve. It is necessary to add water - open the tap, the tank is full - closed.
How to auto-fill a tank
The most advanced do automatic filling. Then the water supply is opened / closed by a float system similar to the one in the tank. Only in the event of a breakdown, it is necessary to provide for the drainage of excess water. And, preferably, when leaving the cottage, shut off the supply tap. And then you can turn your own and neighbor's cottage into a swamp.
Water tank device with automatic level control
An exemplary scheme for the implementation of auto-filling the tank is shown in the figure above.
Please note: water is taken into the shower close to the surface: this is usually where the warmest water is located. Only this pipe is placed at the opposite end from the cold water inlet, otherwise the water will still be cold
Two pipes go to the sewer: one overflow (mustard color). With its help, the tank will not overflow in the event of a breakdown of the float mechanism. The second drain into the sewer for a complete drain (brown). Useful for system conservation - draining for the winter because a faucet is installed.
Organization of heating
The easiest option is to use solar energy. Yes, it heats water through the walls of the tank.But the water column is too large for it to warm up quickly. Because people come up with different installations for solar water heating.
As mentioned above, in the tank the warmest water is at the top. And the traditional feed comes from the bottom. That is, we take the coldest water. In order for the warmest water to enter the watering can, a hose is attached to it, and it is attached to a piece of foam that I let float. So the water intake is from above.
To speed up the heating of the water, they make a “coil” (in the photo above, this is the right figure). At the bottom of the water tank and above, two pipes are welded in one of its walls. A black rubber hose is connected to them, which is folded in rings in the sun. If there is no air from the hose, the movement of water will be quite active.
If the sun is not enough for you, but you can bring electricity to the soul, you can use heating elements (wet). We need them with a thermostat so that you can set the desired temperature. They are usually used in storage water heaters, so you can find them.
Scheme of the device for heating water with a heating element in an outdoor shower
When you pull the power line to the shower, do not forget to install an automatic device with an RCD. This is the minimum that will ensure your safety.
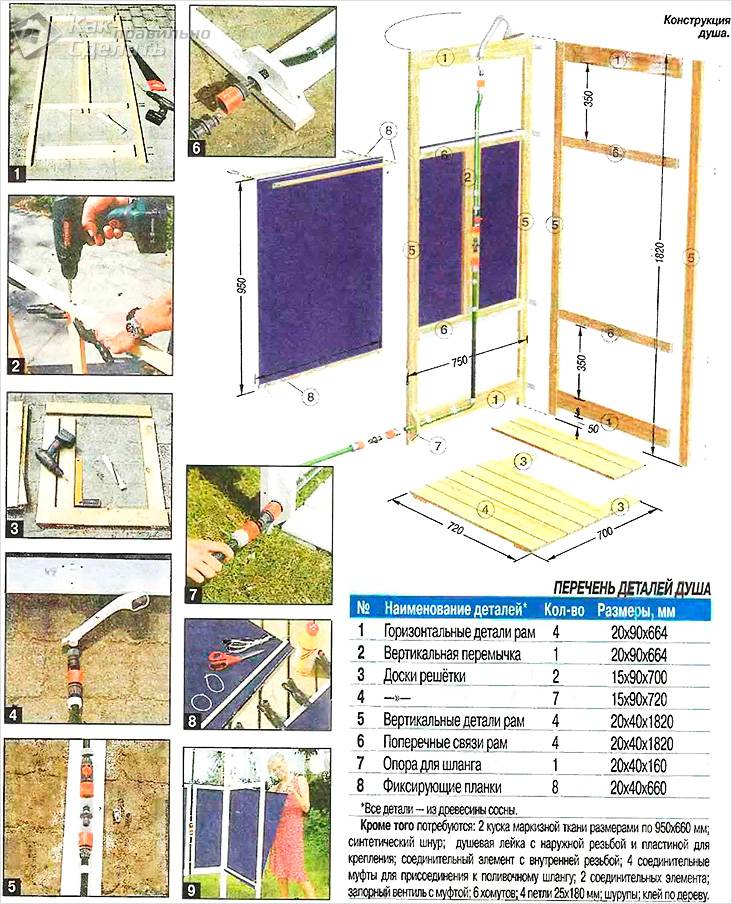
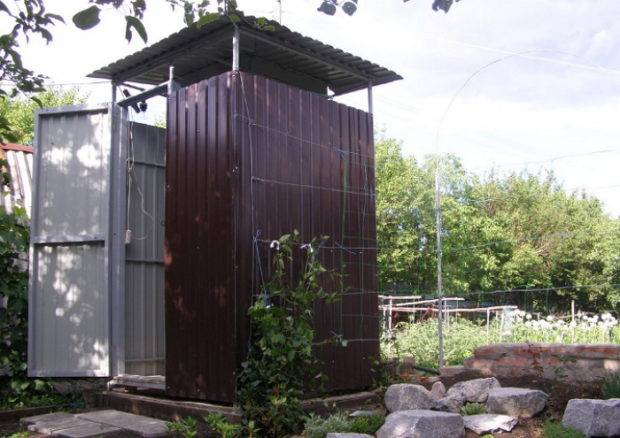
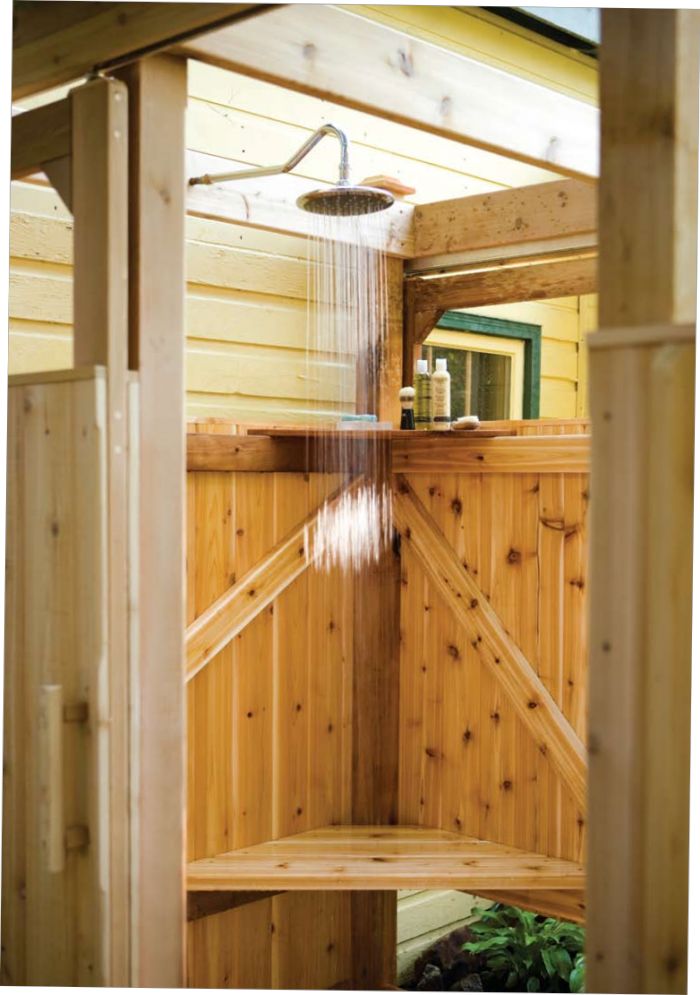
7. Country shower from corrugated board
Another good material for covering a summer shower is corrugated board. This material is characterized by high strength and durability combined with lightness. It is windproof. And when its walls heat up throughout the day, it will be comfortable to take a shower in it. Both wooden beams and metal profiles can be used as a frame. Metal, of course, is more durable.Therefore, if you still need to purchase materials, give preference to it.
The manufacture of the frame is similar to the examples from points 5 and 6. The only difference is that more crossbeams must be added. This is necessary to securely fix the sheets and give the structure rigidity, since the corrugated board itself is considered a soft material. Fasten sheets with self-tapping screws. Be sure to use spacers to avoid damaging the sheet. You can cut the corrugated board with scissors for metal or using a grinder and a disk with teeth. Other circles are not recommended. During cutting, the polymer coating can burn through, which protects the coating from corrosion. The roof is also covered with corrugated board, and the tank is located under it. The gap between the walls and the tank will provide natural ventilation in the cabin and prevent the formation of mold and unpleasant odors. An unheated tank can be placed on top of the frame. Then the need to build a roof is eliminated.
Partitions
To highlight the zones use plastic, drywall, glass. Each material has advantages and disadvantages:
- drywall allows you to build a fence of any configuration with internal shelves. The main disadvantage is the thickness of the partitions (at least 5 cm), and this is a significant drawback for small bathrooms in Khrushchev;
- glass is the best option that allows you to effectively divide the room into zones, without compromising its visual perception. Individual decor will give the room originality and originality;
- plastic (plexiglas) is also very practical - easy to clean, does not take up much space. The disadvantage is that the material is easily damaged, scratched.
Shower design without tray with wood effect tiles
Glass shower without tray in the bathroom
Shower design without tray with sloping floor
Shower without a tray in a black and beige bathroom
Glass shower without tray in the bathroom
Shower without tray with wooden floor
Dimensioning and material selection
After everything has been decided with the cabin installation site, you can begin to calculate the dimensions of the future structure. The main thing is that the cabin does not take up all the available space for itself, but also does not lose functionality due to its small size.


According to the standard, the shower cabin has dimensions of 900 by 900 millimeters. If the pallet is low, then the height is 2000 millimeters, and if it is deep, then the height of the structure will be 200 millimeters more.
For the construction of the cabin, you can choose materials that are available in a wide range on the market. Widely used:
- cellular polycarbonate;
- plastic panels;
- glass.
The most inexpensive way to fix these materials is aluminum profiles. For the construction of the fence, it is quite possible to take moisture-resistant drywall, which then remains only to be tiled.
It will be budgetary and beautiful to make a fence based on glass blocks.
Ways to organize a drain in a shower stall
Despite outwardly almost the same appearance - the walls and floor are tiled, some doors, home-made showers have many options for internal arrangement. There really is plenty to choose from.
From the outside, there isn't much difference.
Types of pallets
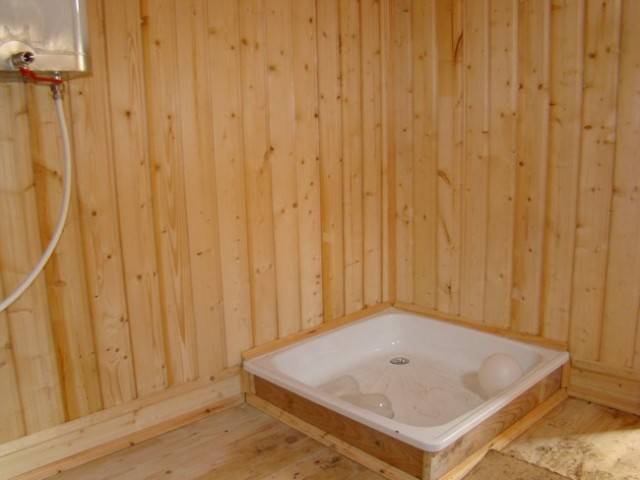
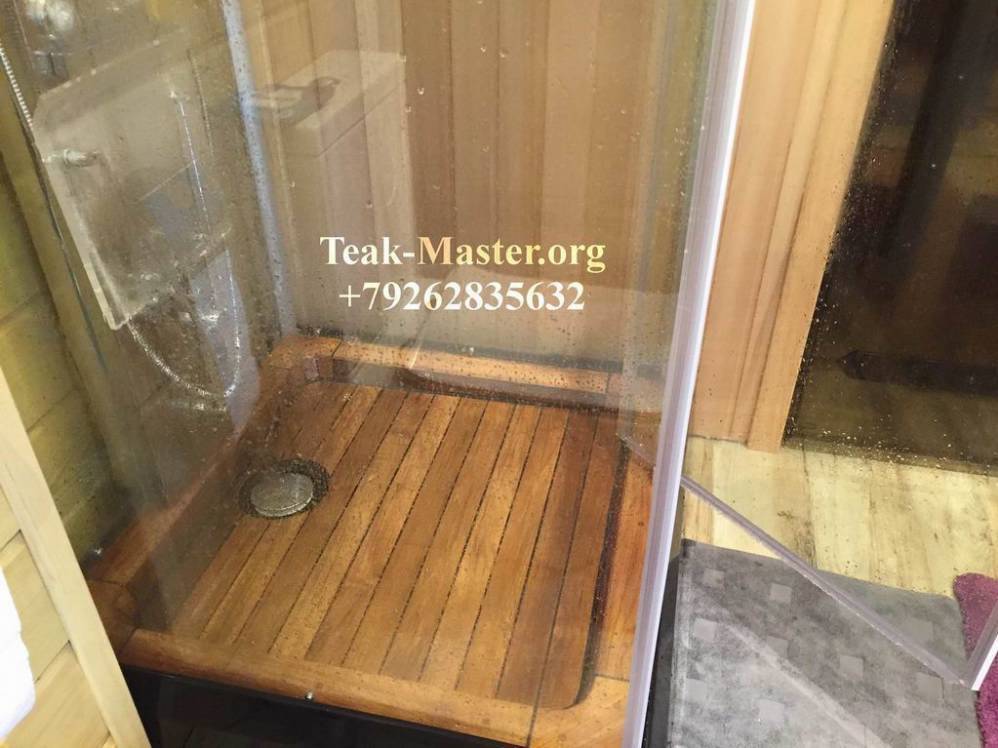
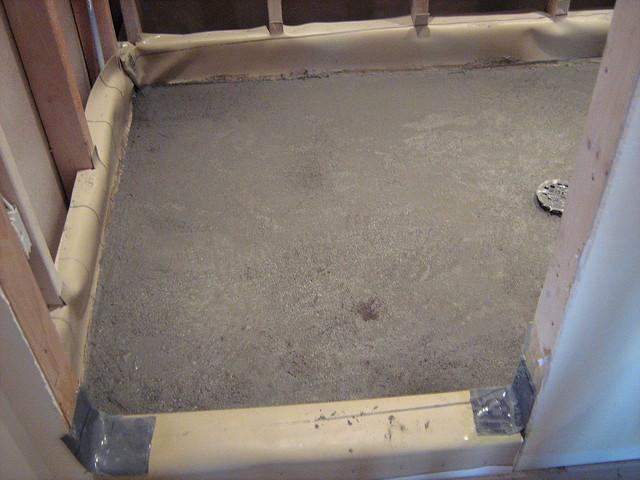
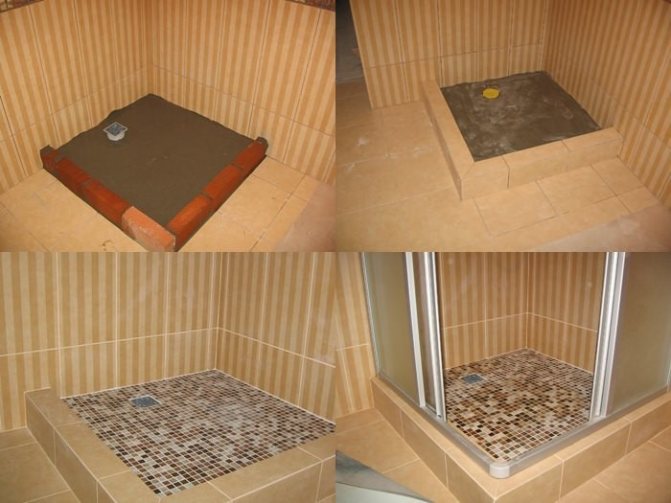
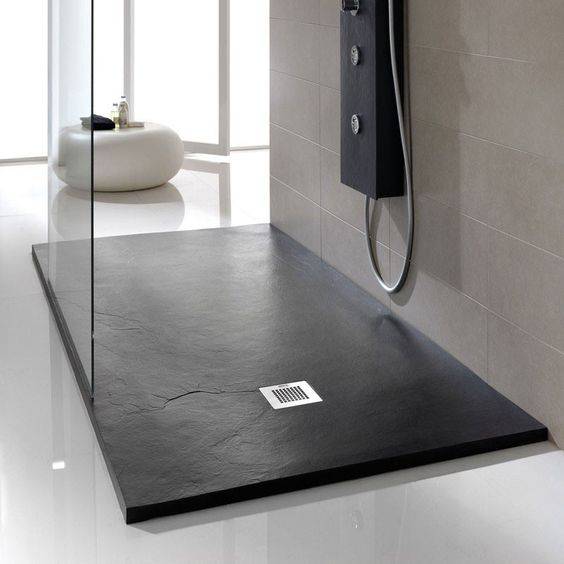
The easiest and most reliable option to make a waterproof floor in the shower cabin is to put a ready-made pallet. It can be installed on bricks or made of foam blocks. By "ready-made pallet" we mean two types: acrylic and enamel.Acrylic is light and non-slip, but yellows over time. Enameled - not bad in operation, but slippery when wet: you have to put a rubber mat. The advantage of acrylic is that it is not so cold - it feels like.
If both options are not suitable, a pallet is made of brick or cast-in-place concrete, which is then tiled - ordinary, for the floor, or mosaic. This is a capital solution, but difficult to implement. If you decide to make a shower tray from tiles, and you live in an apartment building, you will need a very good multi-layer waterproofing: so that there are no problems with neighbors from below and from the side. This does not mean that in a private house there is a shower do-it-yourself cabin done without waterproofing. It's just that if you "screw up" you will suffer yourself.
Half finished brick shower tray
There is another option - an intermediate one. A “trough” of suitable sizes is brewed from metal, it is well treated with anti-corrosion materials. They are installed on a podium made of bricks or foam blocks (a drain is also needed), if necessary, they are covered with bricks from the outside, forming a side or a step. A mosaic is glued on the inside.
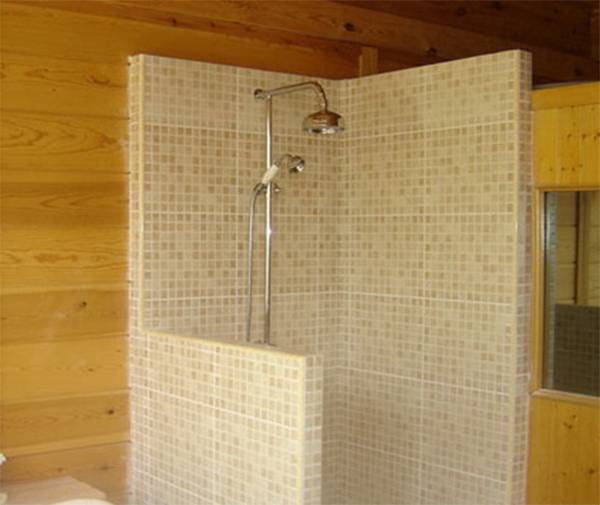
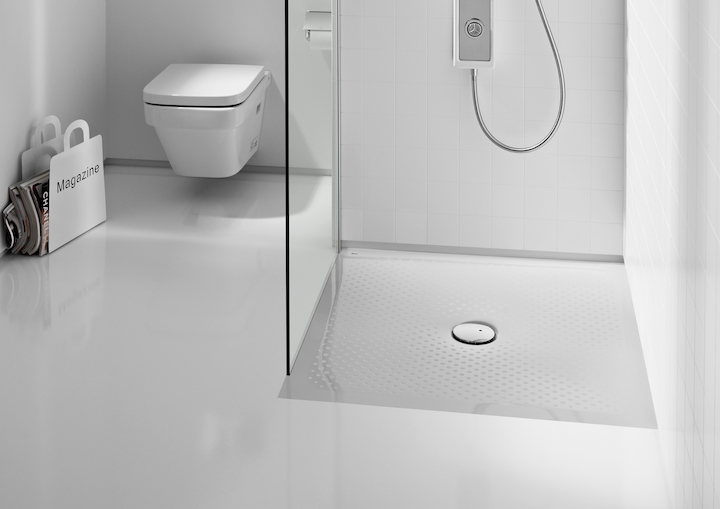
These options are usually chosen. There is also a device without a visible pallet at all, and the drain can be made into the wall, but then in the entire bathroom it is necessary to raise the floor level and form a slope towards the drain.
Dimensions and shape: choose
Now about the dimensions of showers and trays in particular:
- 70 * 70 cm - this is very small, it is difficult to bend down even for a slender person, you constantly touch the walls;
- 80 * 80 cm - somewhat better, but still cramped;
- 90 * 90 cm - can be considered optimal for a medium-sized person;
-
100 cm and more - you already feel normal, you can sit down without any problems.
It makes sense to make a homemade shower cabin rectangular
If you want comfort, make at least a meter gap from wall to wall, but if the dimensions are very limited, try to leave at least 90 cm. One note: a square is not the best shape for a shower. A rectangle is more practical in this regard. With a cabin “depth” of 80 cm and a width of 100 cm, you already feel at ease. And if the width is 110-120 cm, this is already complete freedom.
Organization of the drain
Next, you need to choose how the drain will be arranged. There are two devices: a siphon and a ladder. The ladder is more expensive, but it is usually smaller in height and more reliable. Its margin of safety is enough for a decent period and it can be poured into concrete, which is usually done.
Ladder installation
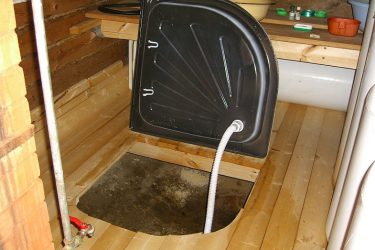
The siphon is cheaper, but when installing a pallet, you will have to provide for the possibility of replacing it. Just monolithing it is not a good idea, because if there is a repair issue, you will have to work with a hammer drill to get to it. You present the results. Therefore, when using a siphon, leave an inspection passage that is closed by a hatch or a small door.
Shower cabin hands: how to make an inspection hatch
In any case, the drain must be serviceable. This means that the upper part - the mesh can be removed and the pipe cleaned with a cable. And to make this possible, lay the drain pipe so that the maximum angle of rotation to the sewer is 45 °, but it is better not to do more than 30 °.
Now for the slopes. So that the water in the pipes does not stagnate, the pipe from the ladder to the sewer outlet is laid with a slope of at least 4-5%.This means that for one meter of length, the height difference is 4-5 cm. The floor should have approximately the same bevel: water should drain to the drain point.
This is interesting: Materials that are not suitable for the bathroom
Preparing for technical work
First choose the type of floor. Possible options:
- inclined;
- with a pallet below the level or with a closed side;
- finished production model.
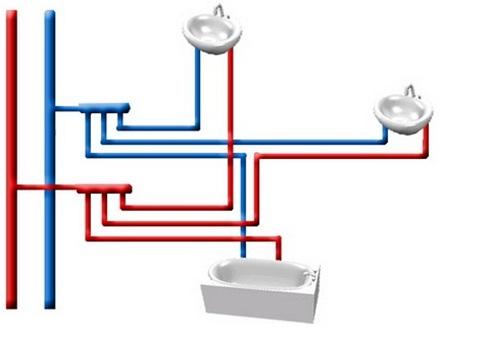
Laying plumbing communications
There are two types of piping:
- consistent,
- collector.
Serial (tee) is considered a simple wiring method. Drainage connections are made through tees mounted at each point.

The advantages of this type include:
- ease of planning;
- ease of installation;
- minimum consumption of pipes and accessories.
The only drawback: in the case of repairing one of the plumbing fixtures, it is necessary to turn off the entire water supply system.
Collector. This type of wiring is connected to the main line through a device - a collector, which distributes water to plumbing objects: washbasin, toilet, shower, bidet, bath. It is carried out only by a specialist in the presence or after a separate line to the consumer.
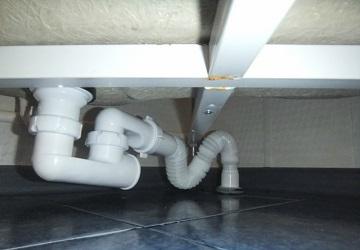
Siphon selection
An important factor in uninterrupted operation is the siphon, which is selected taking into account the design features of the installed pallet.
Device types:
- Bottled - the siphon flask is connected to the drain and to the sewer pipe. This type is rarely used when installing a shower, as it requires regular cleaning and takes up a lot of space.
- Pipe - is a U-shaped tube made of corrugated or rigid plastic.
- Dry - the latest modification, equipped with a silicone membrane that acts as a valve. The model is called "dry" because the water goes directly into the drain, without lingering in the device itself. This improves the performance of the entire shower box.
- With overflow - such a siphon is provided for drain systems of the same type with it. It is part of the drain block and must comply with all structural elements.
Stages of work
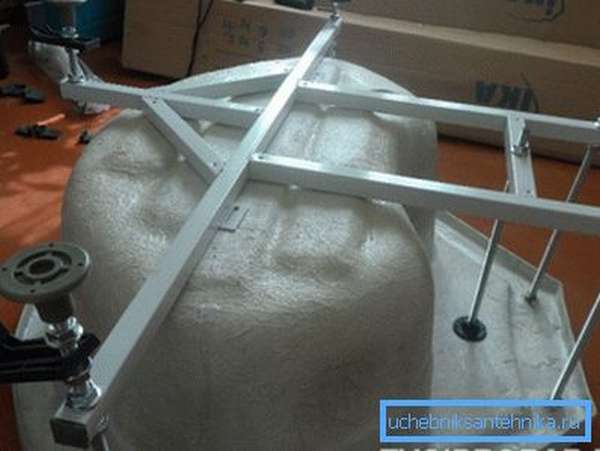
Pallet assembly:
- We turn the pallet over, fasten 4 stud legs into the seats.
- We fix the pallet only after we put nuts and washers on the legs.
- We find a pre-soldered nut on a short support, fasten the central leg into it.
- To secure the legs, we tighten the nut more strongly, string the washer, locknut on top and twist it to the limit.
- To avoid distortion, do not tighten the bolts to the limit.
- We level the legs with a lock nut.
- Now, install the brackets for the pallet screen.
- We fix the pallet according to the level.
- The pallet is ready.
Fixing the siphon
The next important part is the fastening of the siphon
Its design and material may vary significantly, so read the instructions carefully at this stage! By the way, if you do not pay due attention to this point, install the air valve incorrectly, then you will enjoy the ambrosia of sewer pipes.
We mount the siphon to the bottom of the cabin. It is better to tighten the outlet with a water and gas wrench.


![[instruction] do-it-yourself shower in the country: dimensions and drawings](https://fix.housecope.com/wp-content/uploads/7/a/3/7a3a96f5d728fd184b06a19304d72b32.jpeg)


How to fix panels
Fixing is carried out in steps:
- We check the compliance of the panels in advance by placing them side by side. Where there are more holes for self-tapping screws - there is a top. Bottom edges are rounded.We set the glass in the guides;
- Raising the panel, we smear the bottom of the frame with sealant, wipe off excess glue;
- After installing the glass, tighten the screws on the clamping feet;
- We use self-tapping screws, attach the arch from above and below;
- We put the silicone sealant on the glass panels with the “petal inward”;
- We smear silicone under the lower parts of the guides and the rim of the pallet. We fasten. Do not touch the screws!
- We coat the joints of the side panels with silicone sealant for complete insulation;
- We apply a little silicone around the rim of the pallet. Be careful not to touch the water outlet! Then, we attach the side panels to small self-tapping screws with washers;
- We attach one of the side panels to the pallet, in the latter there are special holes for the screws;
- In the same way we fix the second panel;
- The place where the back skin is connected to the side skins is smeared with glue;
- We check the coincidence of the holes for fixing the back panel with screws, after that, insert the back panel and screw in the screws;
If you are not sure of the correct location of the screws and bolts, then do not tighten them to the limit. You can always go back and correct. The main thing - do not forget.
Many cabin models require a separate complete panel assembly. You don’t have to alternately glue arches, etc. with sealant.
How to put doors
Now most often they use sliding doors on rollers, so we will consider the option of fixing them:
- screw the rollers into the upper and lower parts. First to failure. The second - we delay during installation;
- we pull the seal with the “petal” outward onto the door;
- we check whether the door leaves are tightly closed, tighten the bolts if necessary;
- we attach plastic plugs to the screws for the door rollers.
How to mount the top:
- We connect the roof with a watering can, a fan, a backlight and a speaker. The assembly of the upper part in almost every model is peculiar, so read the instructions carefully. for convenience, we fix the speaker with hermetic glue;
- We fix the hose from the shower head from the outside;
- We install additional parts: mirrors, glass shelves, etc.
When the external finishing is finished, we check the correct operation of the cabin, and close the pallet with a screen.
Cabin assembly and connection
Most of the presented models of shower boxes have a tray. It is from him that the installation of the booth should begin. Connect the drain hose of the product to the waste system. Be sure to seal the connection with a rubber ring and treat the outside with sanitary silicone. Next, you should fix the decorative screen and install the container on the prepared platform
It is very important to use the level in this case in order to avoid distortions of the structure. Even a slight difference can cause sliding doors to jam.
Remember to make sure the system is tight.
 You need to connect the pallet to the drain system, and then put a decorative screen on it
On the installed pallet, the side and rear walls are fixed, and the product is also equipped with guide rails for the sashes. All areas of panel junction should be covered with a layer of silicone sealant. It would be useful to process the joint of the box with the main walls of the room.
After mounting the frame, the product must be left for a day to dry. When the silicone has completely hardened, you can proceed with the installation of sliding doors.After assembling the cabin, it will be useful to check the operation of the plumbing, drain and electrical systems of the product.
If you wish, you can test additional boxing functionality, if any. Completed in compliance with all conditions, a do-it-yourself shower cabin in a private house will be used for a long time without the risk of emergencies. In addition, if you have taken into account all the recommendations and tips, then using the box will become a comfortable and enjoyable bathing experience.
It is very important to level the pallet to avoid distortions of the sliding doors.
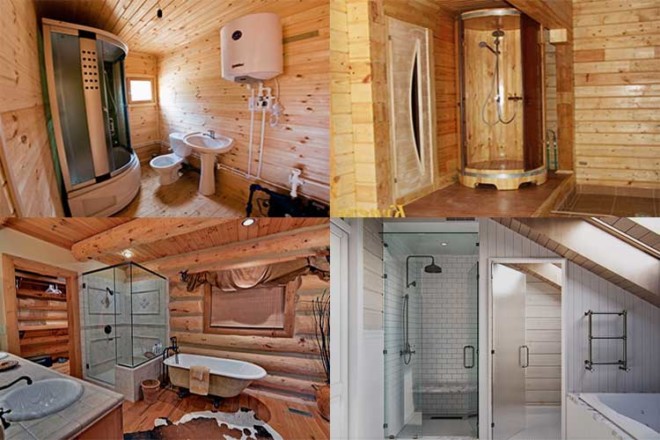
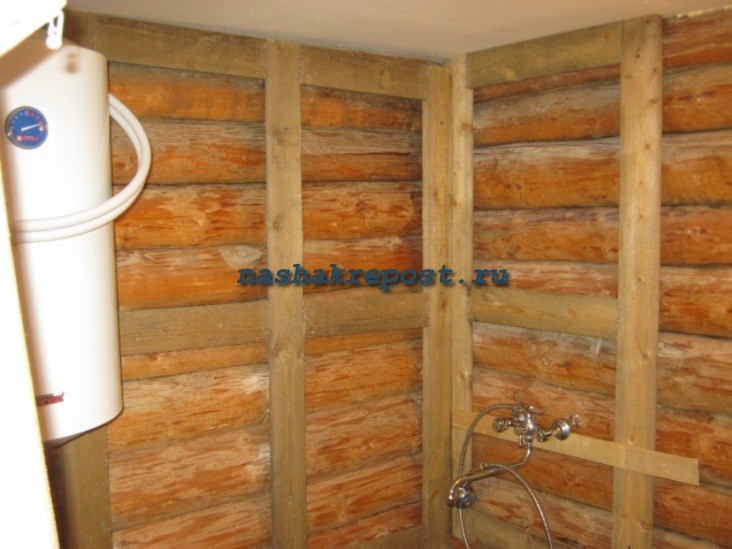
Having established all the nuances of installing shower structures in log buildings, you can successfully try to bring all design plans to life. The only thing I would like to mention is that the performance of such work still requires certain knowledge and experience. Therefore, if you are unfamiliar with the construction business, it is better to entrust the installation to a professional craftsman.
Shower box installation
This is the name of models closed on all sides with sliding or accordion-made doors. They can be mounted anywhere in the bathroom, to which it is convenient to bring water and sewerage, do not require waterproofing walls and floors, additional finishing. Instructions are attached to the purchased set of shower cabins, and with its help even a novice repairman can install the model.
It should be remembered: different boxes have very different configurations and the assembly sequence may differ from the one suggested.
For this model, the instructions indicate the main installation parameters, namely:
- location of hot and cold water outlet points for connecting the booth, pipe diameter;
- size and location of the fan (drain) pipe;
- outlet placement and requirements for it;
- acceptable options for mounting the booth in the room.
The second part of the instruction contains information on the order and rules for assembling parts.
The first stage of installation is the installation of a pallet with the simultaneous connection of a sewer. To do this, a flexible hose (corrugated pipe) is connected to the insertion point in the drain communications, the inlet of which is located directly under the drain of the pallet. The legs of the pallet are adjustable, with the help of adjustable supports, the container is leveled so as to ensure normal water flow - that is, the drain hole should be located below any other points on the bottom.
Shower cabin 80 80 cm (or other dimensions) has fixed and movable walls. The fixed ones are fixed to the pallet using the fasteners provided for in the instructions (self-tapping screws, latches, etc.), the movable ones are installed in the guides. The joints between the pallet and the fixed enclosing elements are sealed. At the same stage, water is supplied to the shower using flexible hoses.
The last stage is the installation of the ceiling plate (if it is provided for by the design) and the installation of the finish. Usually these are panels that cover the bottom of the pallet. Finishing also includes fittings (handles, holders for bath accessories, shelves, mirrors), lighting, ventilation, etc.
Checking the functioning of all elements of the cab is the final part of the work.
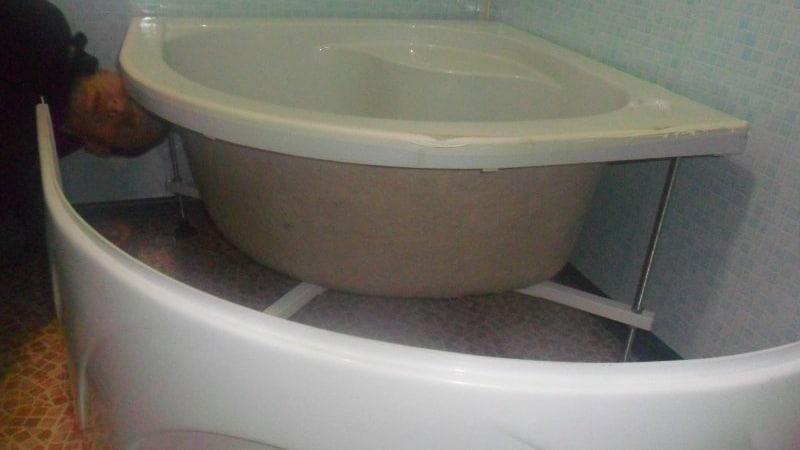
Pallet installation
Now about how the shower tray is installed on a wooden floor.
it is better if the device is equipped with height-adjustable legs, brackets for easy fixation and a support frame.
To adjust the legs, you need a wrench and a bubble level. With their help, the pallet is installed in the correct horizontal plane relative to the floor.


Fixtures made of steel, fiberglass and acrylic have one disadvantage: there is often no support under their middle part. It can be corrected by placing the bowl on a stable podium or support made of any durable and waterproof material.
Then it is possible to put the shower tray with your own hands on the wooden floor.
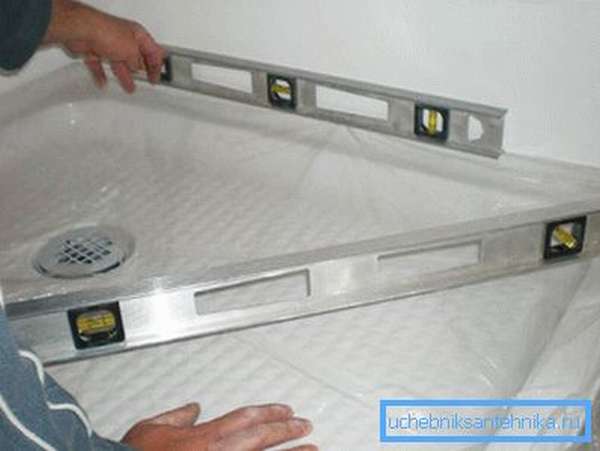
- First go to markup. The bowl is placed horizontally using a bubble level. Then, with a marker on the walls, marking lines for the profile are marked, and on the floor - for the drain hole.
- Then go to remove the pan, remove the outlet from it, connect the siphon to the outlet, and connect the corrugated drain pipe to the sewer socket.
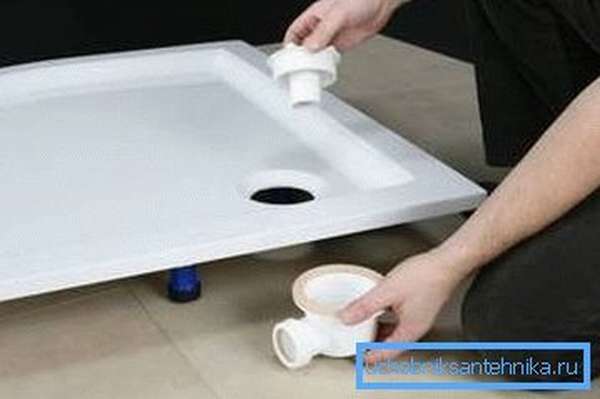
- The pallet is again installed in place - already completely.
- Plans to drain: the outlet grate is attracted through the gasket to the outlet wound from below. The assembly is spilled with water to check for leaks.
- Then it is possible to fix the enclosing structures of the booth and connect it to all the necessary communications.
- At the time when the structure is installed, the final touch will remain. Below, along the perimeter of the entire booth, it is closed with a screen - decorative plastic panels.
- All joints between the elements of the booth should be scrupulously insulated with silicone sealant.
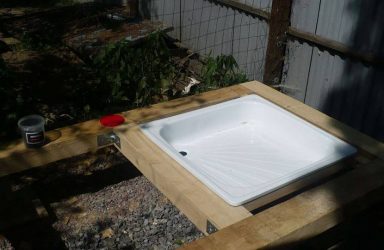
Pallet manufacturing
Work should begin from the bottom of the cabin - the pallet.If you use a ready-made base, this will reduce the complexity and installation time.
When making a pallet yourself, you must take care in advance to protect the room from moisture. To do this, you need to use roll waterproofing.
It all depends on what material the floor is made of. The surface that has been treated must not allow moisture to pass through. The same applies to the bottom of the walls.
Next is the pouring of concrete. In this case, the surface should be inclined in the direction of the drain by 2-3 cm per meter. Before pouring, drainage pipes are laid and a drain ladder is fixed.
Wall, floor and ceiling decoration
After the reliable waterproofing is ready and completely dry, the turn of finishing works comes. When choosing materials, you should take into account the features of the room, which is located in a wooden house.
What floor to make in the bathroom?
The basis for floor finishing a concrete screed will be poured over the waterproofing layer. It should have a slight slope, thanks to which an emergency drain is equipped in the floor.
All materials purchased for finishing the bathroom must meet the main requirement for any finishing material for a wooden house - moisture resistance
This is the first thing you need to pay attention to when buying. For finishing the floor most often used:
For finishing the floor most often used:
- laminate;
- porcelain stoneware/ceramic tiles;
- linoleum;
- moisture resistant wood.
An elementary and far from the worst cladding option is ceramic tile. The wooden floor looks beautiful and organic in the bathroom. If you want to save money, you can get by with linoleum.
The laying of hard types of coatings on the floor in wooden houses is carried out according to a floating pattern. That is, they are not fixed rigidly to the base and between the walls of the building and the screed, together with the tiles laid on it, for example, leave a gap of 1.5 - 2 cm.
A “floating floor” is needed to compensate for the linear movements of timber structures. From above, the gap is closed with a plinth, which is fixed exclusively on the wall.
Features of wall decoration
When decorating walls, you need to take into account the characteristic features of natural wood. Under the influence of moisture and temperature fluctuations, it shrinks and cracks.
To avoid deformation, the surfaces are prepared for subsequent finishing by installing a crate and fixing a false wall on top. This design is erected from moisture-resistant drywall or a sliding frame made of a metal profile in compliance with the ventilation gap.
Such preparation will allow you to perform almost any type of finishing. But if it is planned to use wood for cladding, then there is no need to build false structures.
Bathroom tiles can be combined with wood or special paint to create beautiful combinations.
Now the following finishing materials for walls in the bathroom are in demand:
- Wooden lining. It is polished and additionally processed with paints and varnishes. It is better that it be made of moisture-resistant teak or larch;
- Tile. It is presented in a huge assortment: smooth and embossed, plain, with an ornament, large or mosaic. It is attached with waterproof glue, and the seams are treated with polyurethane elastic sealant;
- Wall panels. It can be plastic plates or aquapanels. Under them, a crate for a ventilation gap must be installed.
A variety of materials for finishing allows you to realize any design fantasy. You can combine several types of materials, create color compositions, play with textures.
Tiling is the perfect solution for bathrooms. It is durable, water resistant and easy to care for.
Those who want to tile walls made of logs or timber with ceramic tiles will have much more work to do. To do this, a frame is first built along the walls, allowing the decoration to move separately. A plasterboard base is arranged along the frame, tiles are laid on it.
The subtleties of the arrangement of the ceiling
The ceilings of bathrooms located in private wooden houses are usually finished with suspended or tension structures made of glossy PVC panels, moisture-resistant drywall.
Suspended ceilings are valued for numerous benefits. They are a powerful shield against moist air, under them it is easy to disguise elements of the electrical and ventilation systems.


If the choice fell on drywall, then the profile for it should be treated with zinc and coated with additional corrosion protection. In order for the plasterboard ceiling to retain its original attractiveness longer, it is pasted over with glass wallpaper.
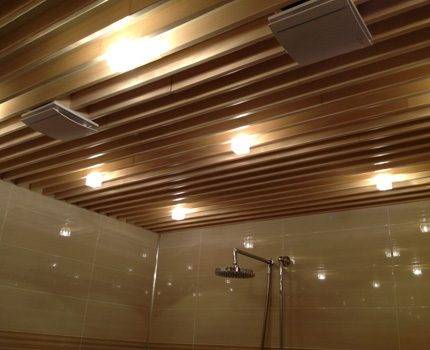
Stretch, suspended and rack ceiling structures will allow you to realize any ideas for lighting
Pallet materials
“The steel shower tray is extremely durable, heats up quickly and is not too expensive.”
For the manufacture of shower trays, various types of materials are used, including acrylic, ceramic, stainless and enameled steel.All materials used for the manufacture of pallets must have such characteristics as resistance to mechanical damage and wear, sound and heat insulation, as well as ease of use and ease of maintenance of the product.
Acrylic shower trays are the most popular. They may differ in size and shape, but at the same time, their cost is affordable for most consumers. Acrylic pallets are very light, they have excellent heat and sound insulation, and are also very easy to maintain. Minor damage to the pallet that may occur during operation can be easily repaired with a special polishing paste.
Acrylic shower trays are very easy to maintain
The steel shower tray is particularly durable, it can heat up quickly and is not too expensive. Pallets made of enamelled steel are more susceptible to mechanical stress. During operation, chips may appear on the enamel, and then corrosion. Stainless pallets are more practical, they are more stable and durable, but manufacturers make such products in only a few versions, so their choice is extremely limited.
The steel pallet is particularly durable
The cast iron shower tray is rightfully considered the most durable. This is a very durable product that has the ability to warm up well and retain heat for a long time.
Due to its high cost, a ceramic shower tray is not available to all consumers, but due to its impeccable appearance and excellent design, many people prefer this product and purchase it for their bathrooms.

Elegant ceramic shower tray
For the manufacture of an elite series of shower trays, natural stone, such as marble, is used. Such exquisite products can only be purchased by very wealthy people. Stone pallets are usually installed in luxurious mansions with designer renovations in all rooms.
Natural stone shower tray


