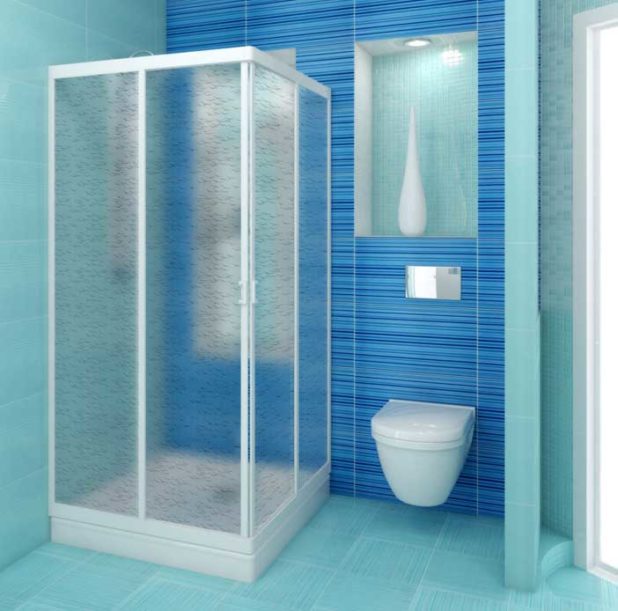
- The design of the shower cabin for the apartment
- Types of shower cabins available for installation in a wooden house
- Necessary materials and tools
- Benefits of polycarbonate
- Stages of work
- Fixing the siphon
- How to fix panels
- Installation Tips
- How to put doors
- Cabin base selection
- Fixing polycarbonate sheets
- Shower types
- Do you need shower doors?
- Tools and materials. Structural design
- The right place for the shower
- Soul Requirements
- Selecting an installation site
- Preparation for construction
- Choice of frame material
- Wood
- Rolled metal
- Calculation of the dimensions of the shower
- Choosing a waste disposal method
- How to check the quality of parts?
- Tank installation
- Conclusion
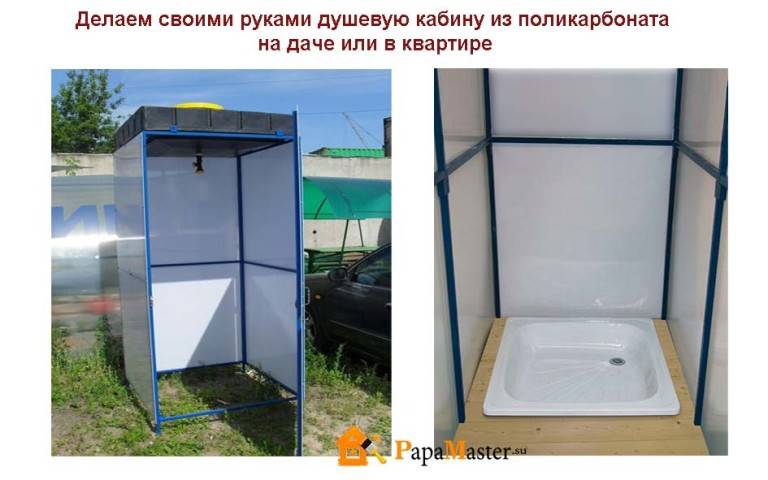
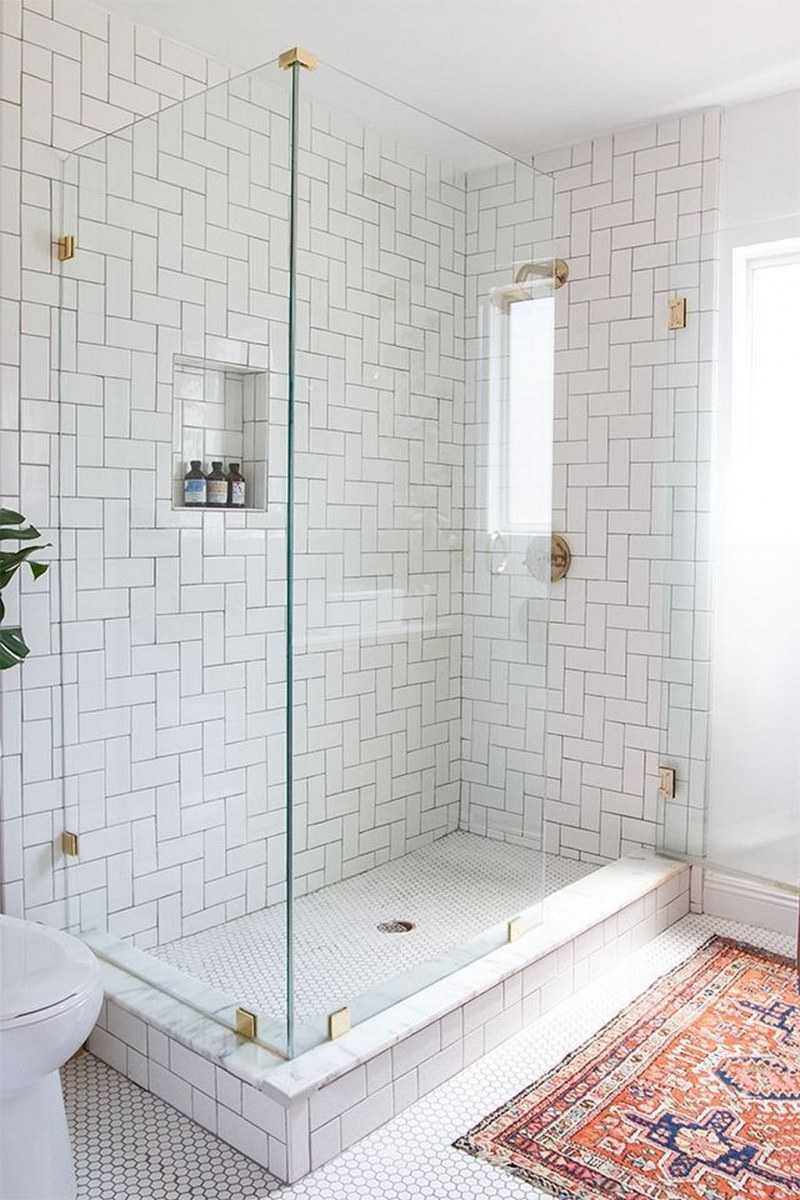
The design of the shower cabin for the apartment
At the first stage, it is necessary to analyze the possibility of installing the structure. A classic shower cabin consists of a water collection tray, frame and enclosing material. As the latter, it is recommended to use polycarbonate, as it has sufficient flexibility and can be processed at home. It is best to use monolithic models, since cellular polycarbonate is characterized by fragility.
Before calculating and purchasing material, you should consider the following points:
Sewer pipe and water supply. They need to be set up in advance.
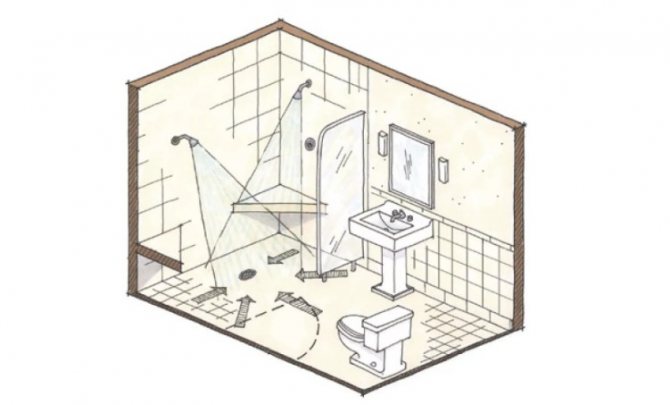
Choose the best place for installing a shower cabin. Usually this is the corner of the bathroom - in this way you can save material and assembly time, since only two building envelopes are required.
Cabin dimensions. The determining factor is the size of the pallet. It is recommended to buy ready-made. Standard sizes - from 90*70 to 170*90 cm
It is important that after installation of the structure, the entrance and exit from it is free.
You can make your own shower tray - read here.
Types of shower cabins available for installation in a wooden house
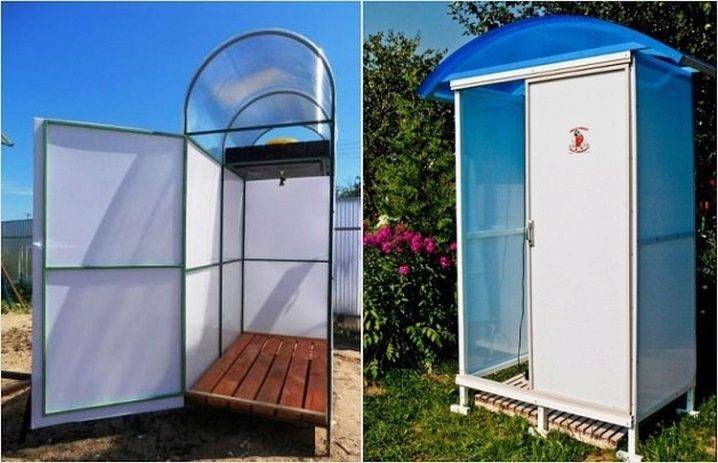
Open. Boxes of the first type captivate with their simplicity of construction, design aesthetics and low cost. Few elements of shower enclosures are easy and compact to install, but at the same time offer users a minimum of comfort and functionality. Open cabins are devoid of a roof, and often their own walls - they are successfully replaced by (moisture-proof and tiled) walls in a bathroom in a wooden house.
Similar designs with a matte, transparent and tinted fence are installed on a pallet or on a specially prepared floor. On the one hand, they are simple and reliable, economical in terms of water consumption and do not require any special skills from installers. On the other hand, they do not provide freedom of access to engineering communications. Mounted in a niche, in a corner or against a bathroom wall, such systems can decorate any interior.
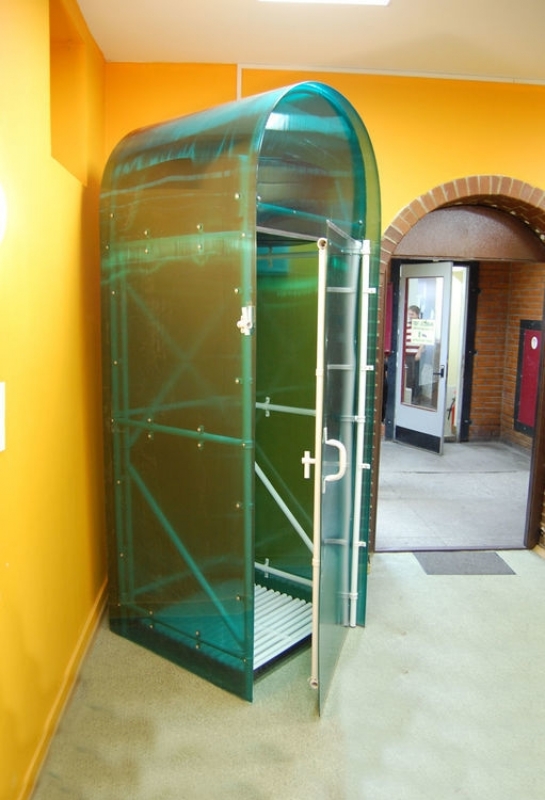
Closed. A closed shower room in a wooden house has an isolated design, mobility and a wide range of models. Their shape can be round, semicircular, square, rectangular or angular. Collapsible boxes consist of tightly fitted walls, hinged or sliding doors, a roof and a pallet.Unlike open models, they are sealed, which allows them to maintain an internal microclimate and protect the box from external noise.
The shower device of this row is much more complicated. They are equipped with a set of adjustable nozzles and a hydromassage function. Multifunctional boxes, in addition to the shower, are equipped with a couple of additional functions. More expensive models with rich technical equipment offer their users a whole range of hygiene procedures and additional features: Turkish bath, tropical shower, hydromassage, aromatherapy, color therapy, electronic, touch or voice control, radio, backlight, telephone and other things.
Those who want to take a steam bath in such a box, massage a tired body in it, and finally, buy a shower cabin, you need to make sure that the pressure in the pipes is at least 2-3 atmospheres (does not fall below the operating pressure declared by the cabin manufacturer). If these parameters do not match, you will have to spend money - purchase and install a booster pump. The same applies to combination boxes with a deep tray or bathtub.
Installation of a shower cabin in a private wooden house is complicated by the supply of electricity, the installation of pumps, complex equipment - all that requires special skills from installers. Therefore, we will focus on the assembly and installation of the most popular closed-type model. Your task is to capture the essence. Models may differ from each other in shape, size, filling, design finds, but the basic assembly principle is the same for everyone.
So, to install a shower cabin in a wooden house with our own hands and protect the bathroom from moisture, we need the following tools and materials:
- open end wrenches;
- crosshead screwdriver;
- construction stapler;
- knife;
- two-meter building level;
- rubber spatula;
- drill with a crown for wood (with extension and shank);
- moisture resistant plywood or DSP;
- anti-corrosion paint (for painting support beams);
- silicone sealant;
- cement mortar;
- expanded clay;
- pads for sleeves (made of foamed polymer);
- waterproofing membrane;
- fiberglass reinforcing mesh;
- waterproofing primer;
- antiseptic;
- bituminous mastic (for gluing waterproofing);
- membrane film;
- moisture resistant drywall;
- polymer mastic;
- primer for drywall;
- scotch;
- wooden bars;
- plastic panels for walls and ceilings;
- ceramic tile;
- waterproof grout;
- tile adhesive.
When installing a shower in a wooden house with your own hands, the set of tools can vary significantly. There are many different designs, including those for special keys, but they are usually supplied with the products. With the above set, you can install almost all running showers on the market.
Necessary materials and tools
What material to choose? This is not an easy task
It is necessary to take into account not only the style of the room, but also the options in which the shower cabin will be decorated.
It is extremely important that the color scheme is in harmony with the overall design of the room. Also, do not forget about the little things, the importance of which is difficult to overestimate.
 To create the necessary design, craftsmen prefer to use polycarbonate.
It is the best fit in terms of price / quality.
Working with him is easy and simple.
Over a long period of time, polycarbonate retains its performance.
And he looks pretty cute.
Benefits of polycarbonate
This modern material belongs to the group of synthetic polymers. It is easy to give any shape to the products made from it. It is easy to fix.


The advantages of the polymer are as follows.
Great durability resource. Its impact resistance is several times greater than that of glass. It is able to withstand fairly large loads.
A light weight. A structure made of polycarbonate weighs five times less than the same structure made of glass. This greatly simplifies the installation process. Therefore, you can do all the work yourself, without outside help.
Compliance. Thanks to this quality, it is easy to create a product of any shape and type from sheets.
It has excellent heat and sound insulation characteristics.
Reliability. The material is not afraid of even severe mechanical damage. When struck, it does not disintegrate into a great many tiny particles. It's almost impossible to break it.
It is not affected by various detergents and other chemicals. It is easy to clean from dirt.
It can be cut without effort.
Withstands large temperature fluctuations (from -30 to + 100 degrees Celsius).
Despite the fact that this is a product of chemical production, the environmental indicators of purity are normal.
High fireproof properties and low flammability coefficient.
It has good dielectric properties.
The material has only one, insignificant minus - with a careless attitude, scratches remain on it.
Dirt gets into the resulting small furrow and as a result, the integrity of the surface is lost.
Positive points:
- The development easily "fits" into any, even atypical room.
- The result is a low-budget product.
- In order to carry out installation work, you do not need any special knowledge and skills.
- The polymer product is not subject to rotting and corrosion processes, it is not afraid of moisture.
- The polymer plumbing fixture is lightweight and has good hygienic properties.
- To install a polycarbonate cabin, you will not need special tools. All work can be done with the help of improvised means.
Negative aspects can only appear if the shower room is used outside.
 Here is what you may need from materials and tools:
- pipes or corners made of metal,
- wooden bars,
- base material (depending on your preferences),
- a hammer,
- level,
- hacksaw,
- spanners.
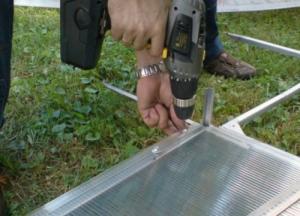
Stages of work
- We turn the pallet over, fasten 4 stud legs into the seats.
- We fix the pallet only after we put nuts and washers on the legs.
- We find a pre-soldered nut on a short support, fasten the central leg into it.
- To secure the legs, we tighten the nut more strongly, string the washer, locknut on top and twist it to the limit.
- To avoid distortion, do not tighten the bolts to the limit.
- We level the legs with a lock nut.
- Now, install the brackets for the pallet screen.
- We fix the pallet according to the level.
- The pallet is ready.
Procedure for installing a surface pump.
Fixing the siphon
The next important part is the fastening of the siphon
Its design and material may vary significantly, so read the instructions carefully at this stage! By the way, if you do not pay due attention to this point, install the air valve incorrectly, then you will enjoy the ambrosia of sewer pipes.
We mount the siphon to the bottom of the cabin. It is better to tighten the outlet with a water and gas wrench.
For tightness, use a little adhesive sealant or waterproofing paste.
How to fix panels
Fixing is carried out in steps:
- We check the compliance of the panels in advance by placing them side by side. Where there are more holes for self-tapping screws - there is a top. Bottom edges are rounded. We set the glass in the guides;
- Raising the panel, we smear the bottom of the frame with sealant, wipe off excess glue;
- After installing the glass, tighten the screws on the clamping feet;
- We use self-tapping screws, attach the arch from above and below;
- We put the silicone sealant on the glass panels with the “petal inward”;
- We smear silicone under the lower parts of the guides and the rim of the pallet. We fasten. Do not touch the screws!
- We coat the joints of the side panels with silicone sealant for complete insulation;
- We apply a little silicone around the rim of the pallet. Be careful not to touch the water outlet! Then, we attach the side panels to small self-tapping screws with washers;
- We attach one of the side panels to the pallet, in the latter there are special holes for the screws;
- In the same way we fix the second panel;
- The place where the back skin is connected to the side skins is smeared with glue;
- We check the coincidence of the holes for fixing the back panel with screws, after that, insert the back panel and screw in the screws;
We recommend that you familiarize yourself with the video, which shows in detail the process of installing a shower cabin with your own hands:
Installation Tips
If you are not sure of the correct location of the screws and bolts, then do not tighten them to the limit. You can always go back and correct. The main thing - do not forget.


Many cabin models require a separate complete panel assembly. You don’t have to alternately glue arches, etc. with sealant.
The place between the finished panels and the pallet is highly recommended to coat with sealant. Especially if the gasket is not provided for this.
How to put doors
Now most often they use sliding doors on rollers, so we will consider the option of fixing them:
- screw the rollers into the upper and lower parts. First to failure. The second - we delay during installation;
- we pull the seal with the “petal” outward onto the door;
- we check whether the door leaves are tightly closed, tighten the bolts if necessary;
- we attach plastic plugs to the screws for the door rollers.
How to mount the top:
- We connect the roof with a watering can, a fan, a backlight and a speaker. The assembly of the upper part in almost every model is peculiar, so read the instructions carefully. for convenience, we fix the speaker with hermetic glue;
- We fix the hose from the shower head from the outside;
- We install additional parts: mirrors, glass shelves, etc.
When the external finishing is finished, we check the correct operation of the cabin, and close the pallet with a screen.
Cabin base selection
Another important criterion for independent work is the installation of the base or shower tray. Ready-made pallets can be purchased at a hardware or plumbing store.


However, the original shower trays can be made by hand. To do this, prepare materials for work:
- Cement, sand and gravel for pouring a concrete base.
- Trowels, building level and materials for creating formwork.
- Tiles for facing.
- Old metal pallet or sheet iron.
- Compositions for surface treatment against corrosion.

Instructions on how to do it yourself shower tray:
- Make measurements of the future installation.
- On the selected area make markings.
- The formwork is formed and the cement mortar is prepared.
- If necessary (if the shower room is being built in a new place), communications are brought in and a drain is formed.
- A concrete base is poured, forming ledges and sides for subsequent cladding or installation of a metal pallet.

After the cement mortar has hardened, they begin to install a metal platform or cover the thresholds with ceramic tiles.

Fixing polycarbonate sheets
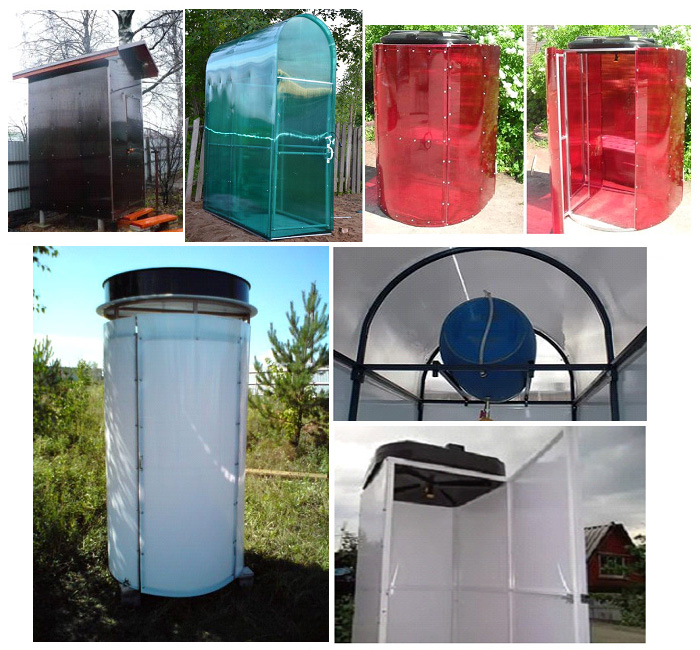
For the construction of a shower, both monolithic and cellular polycarbonate can be used. The monolithic material is beautiful and more durable, but its use for this purpose is hindered by a high price. The honeycomb material 12 mm thick also has an excellent appearance and a sufficient margin of safety.
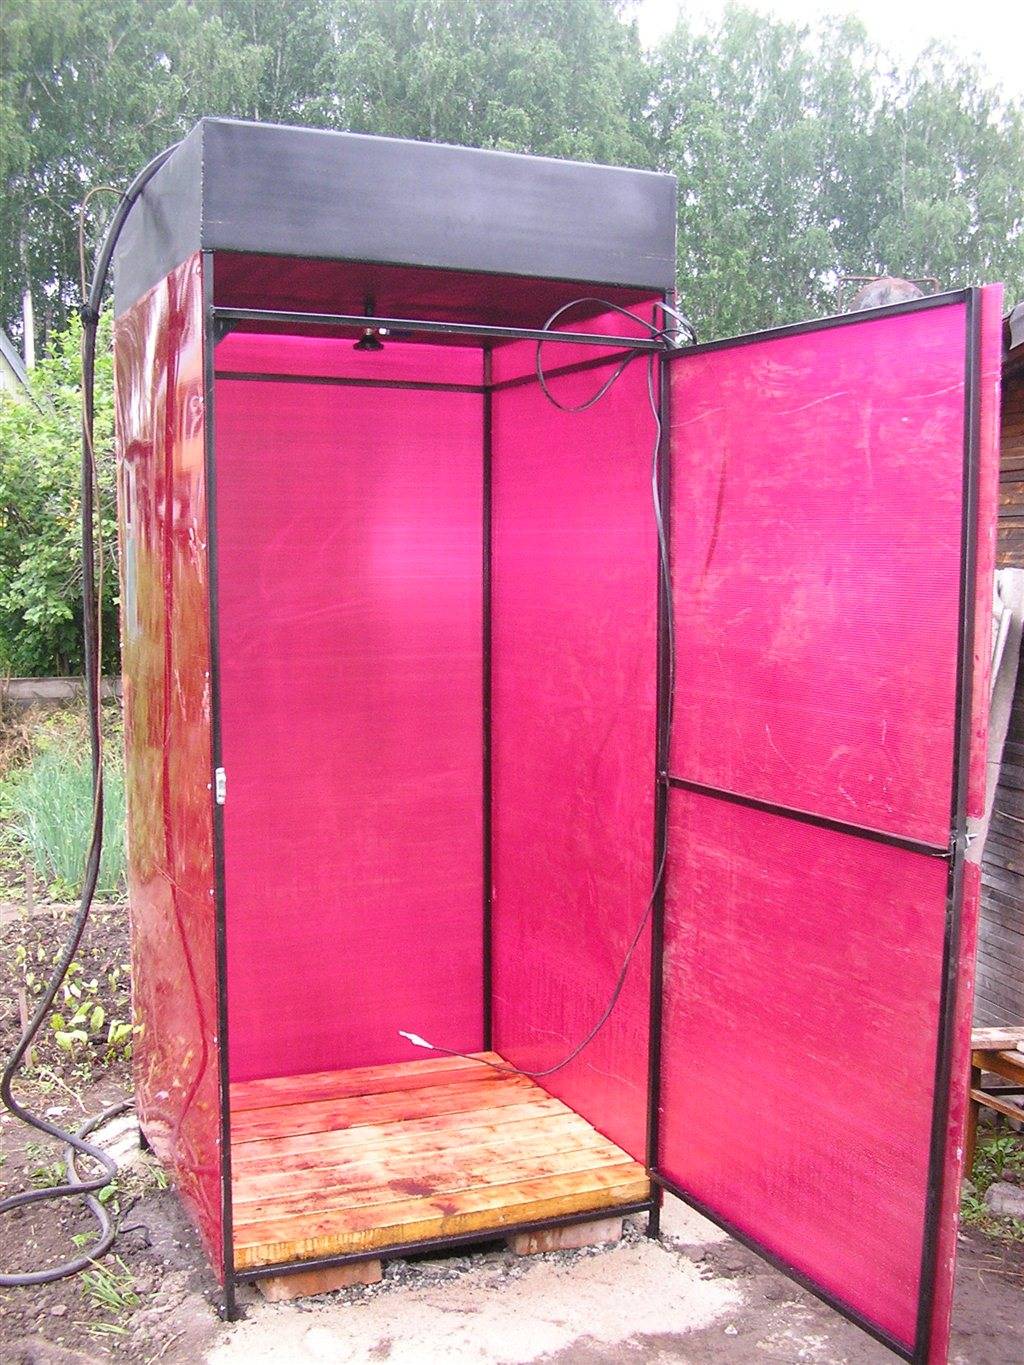
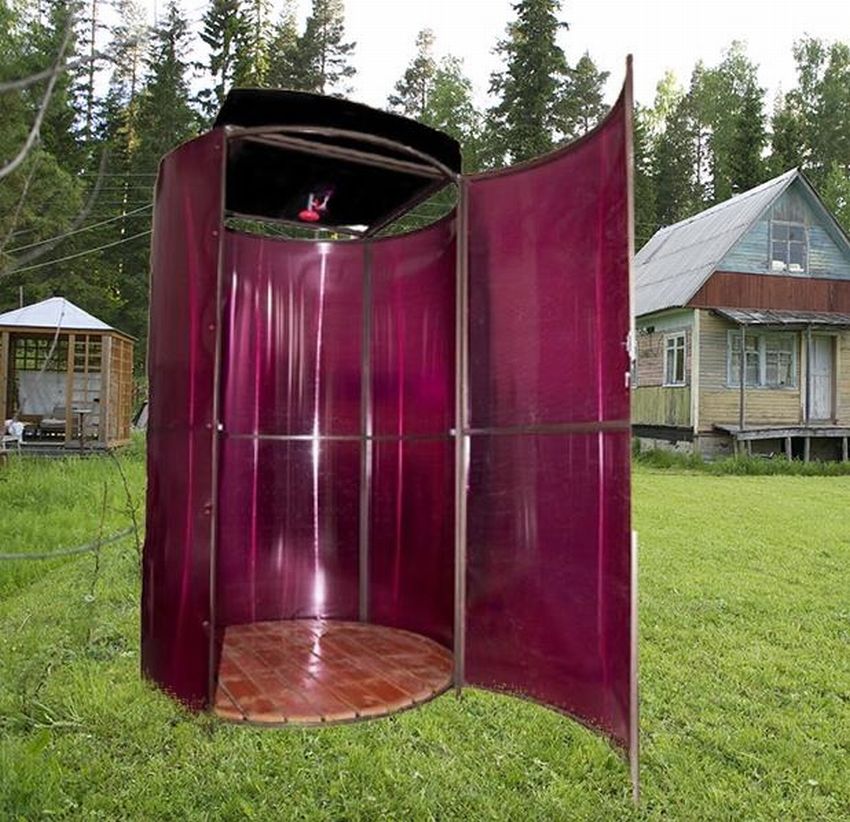
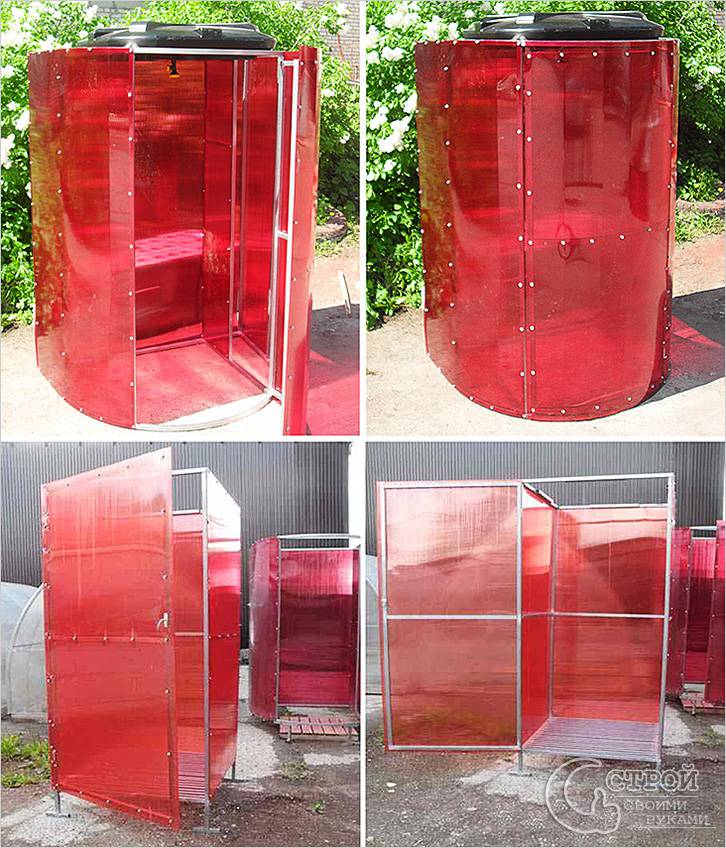
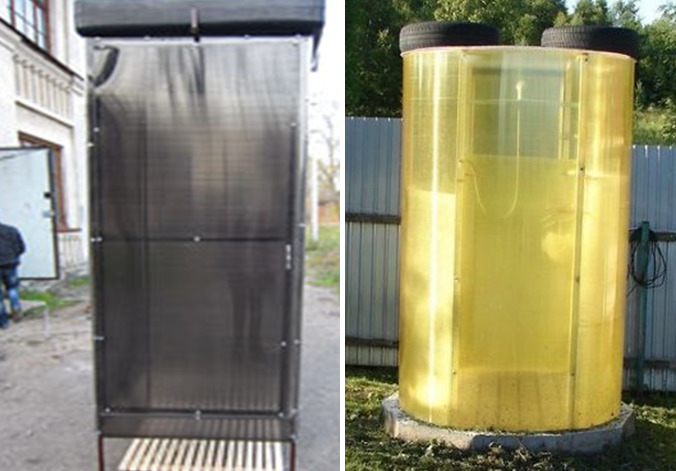
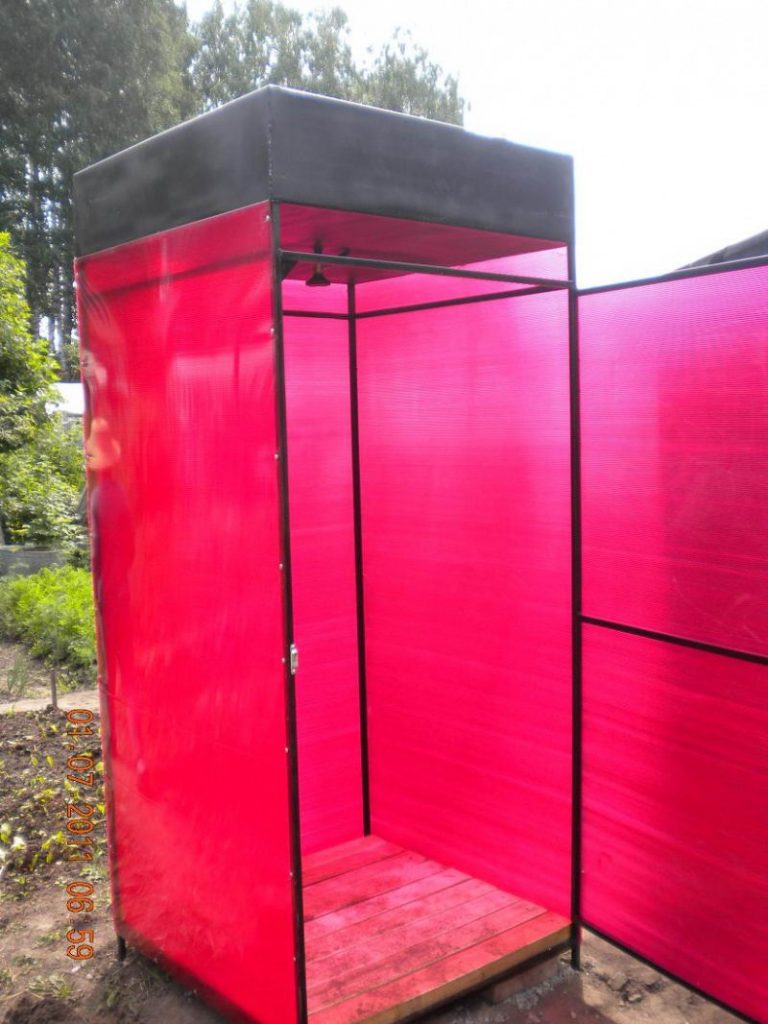
If the arrangement of a transparent shower is unacceptable, frosted sheets can be purchased. Green or red material will give efficiency to the soul, golden, yellow, orange will turn it into a sunny building, and blue, blue or purple will bring notes of coolness and tranquility.
When mounting sheets using profiles and a specially designed aluminum tape, complete insulation of the air channels is mandatory. Suitable for this purpose and a transparent sealant.In the event that the insulation is not performed, over time the surface will change its color and lose its original appearance.
Shower types
Depending on how the cabin (compartment) is located, there are several options:
- corner - the most common due to its compactness and ease of placement. It can be square, rectangular, polygonal, with a circular segment;
- wall-mounted - a rectangular structure adjacent to the wall on one side;
- with one wall - is placed so that the main walls (partitions) of the bathroom serve as walls on three sides. Often one or two partitions are erected specifically to limit the shower compartment;
- without walls - a niche or area between walls that has a separate drain into the sewer.
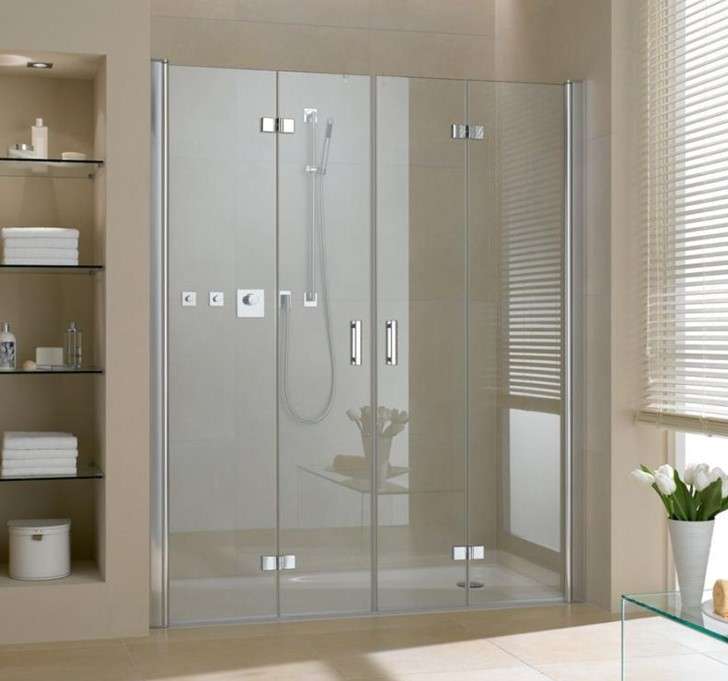
Industrial shower cabins have straight or convex (Fig. 5) doors, home-made ones are most often supplied with straight ones, since this greatly simplifies installation and use.
According to the type of base, a do-it-yourself shower in an apartment can be:
- with a more or less high tray (applies to both finished booths and built-in shower enclosures);
- on the podium;
- with a floor at the level of the common floor of the bathroom.
In all three cases, draining into the sewer is provided by a shower drain and sewer pipes laid either under the common floor or under the podium (tray). If the floor level of the shower enclosure and the entire bathroom are the same, it is advisable to add a common ladder to the drain of the shower cubicle (the so-called shower drain) - this will help to avoid flooding the apartment and neighbors in case of accidental clogging or insufficiently fast flow through the main drain.
According to the complexity, all types of plumbing structures of this type are divided according to how many finished elements are used in the installation.
The easiest way to make a shower in the apartment, using ready-made prefabricated kits. The installation of separately purchased tray and doors, as well as a mixer, requires great skills in construction and decoration. Finally, the most complex - and at the same time economical - option: with a home-made pallet or podium (or alteration of the floor), independent water supply and sewerage, finishing, and so on.
Do you need shower doors?
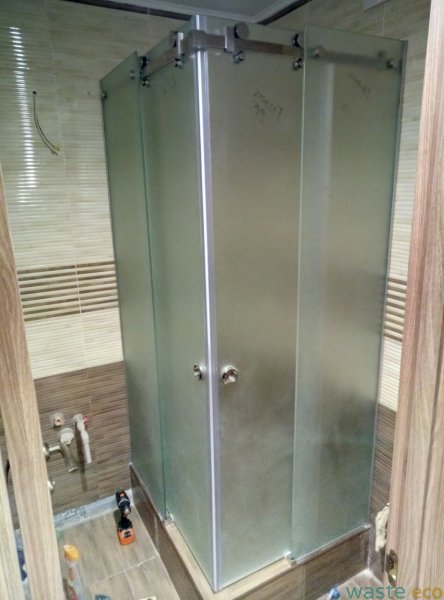
The easiest, but not the cheapest option is to put glass doors in a homemade shower cabin
The problem with doors is most simply solved when the cubicle is rectangular. In this case, you can simply cut the doors out of glass, depending on the size. It is not problematic to choose canopies for such doors, since there is a considerable choice in hardware stores. The most important thing is that such doors will have to be ordered, since they will have to drill holes for awnings, and oh, how difficult it is to do it yourself.


No less important, ordinary glass is not suitable for such purposes. Suitable for tempered glass
If it breaks, the fragments do not have sharp edges, like ordinary glass, so it is impossible to get hurt. The only drawback of such glass is its high cost. You can save significant money if you order ordinary glass, and then paste over it on both sides with a translucent polymer film. Naturally, this will take a lot of effort and time, but the effect will be the same as in the case of tempered glass.
It is very important to stick the film correctly, adhering to the technology, but this is a topic for a completely different conversation.There are other options: as an option, it is permissible to adapt sheet polycarbonate for these purposes
Firstly, you get a translucent door, and secondly, it is easy to install, and it will turn out to be lighter than glass. It is enough to use a suitable furniture profile to make the frame of the desired size. After that, the polycarbonate sheet is planted on the sealant or simply fastened with screws.
There are other options: as an option, it is permissible to adapt sheet polycarbonate for these purposes. Firstly, you get a translucent door, and secondly, it is easy to install, and it will turn out to be lighter than glass. It is enough to use a suitable furniture profile to make the frame of the desired size. After that, the polycarbonate sheet is planted on a sealant or simply fastened with screws.
In extreme cases, if you don’t want to mess around, you can buy ready-made, factory-made. Alternatively, you can adapt the plastic doors "accordion", as shown in the video.
do-it-yourself shower stall
Watch this video on YouTube
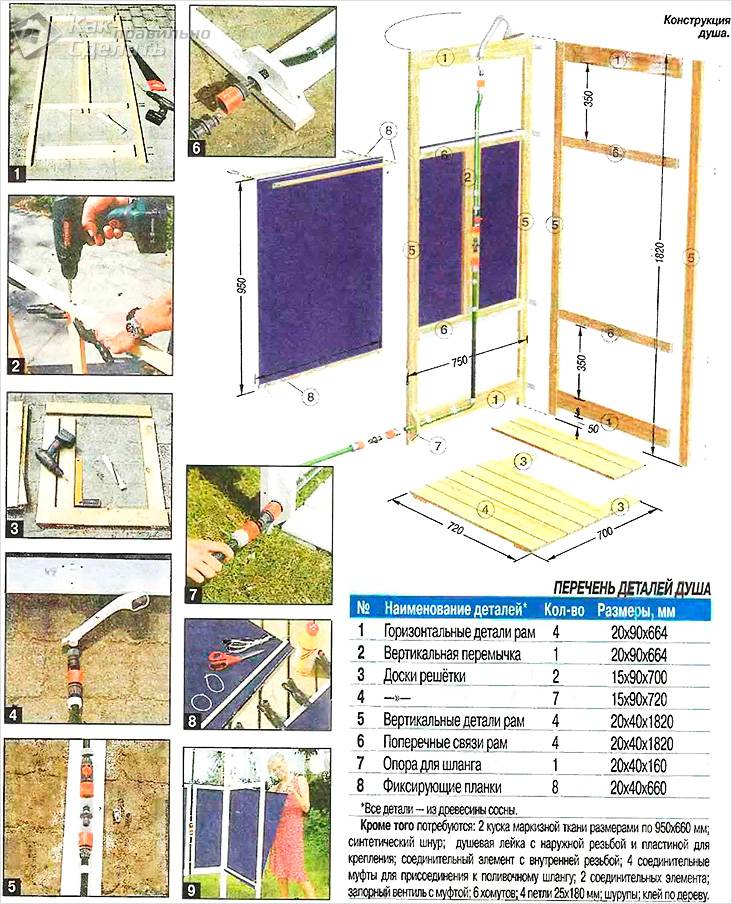
Tools and materials. Structural design
The construction of a polycarbonate shower enclosure does not require professional tools and rare materials that are sometimes impossible to find even from specialists. For work you will need:
- Metal profiled pipes, corners.
- Wooden bars.
- Base material such as brick.
- If you plan to build a major shower stall with the arrangement of the foundation, you will need all the ingredients necessary for this: sand, cement, water, crushed stone.
- Water tank.
- Of the tools you will need a hacksaw, a hammer, a building level, a set of wrenches, a welding machine with a set of electrodes.
When designing a booth, care must be taken that it is not too cramped. Ideally, a tall person should be free to raise their arms or bend over. In most cases, the internal size of the washing chamber is limited to 1 square meter, the height is about 2.5 meters. The dimensions of the locker room (if any) are 1*0.6m.
Cabins may differ in the way waste water is removed, heating and other points.
Each project involves many individual features related both to the wishes of the owner and to the features of the area. So, when planning a structure, a drain system should be foreseen in advance. To avoid odors in the shower stall, the drain pit is located at some distance from the main structure. Waste is discharged through a pipe.
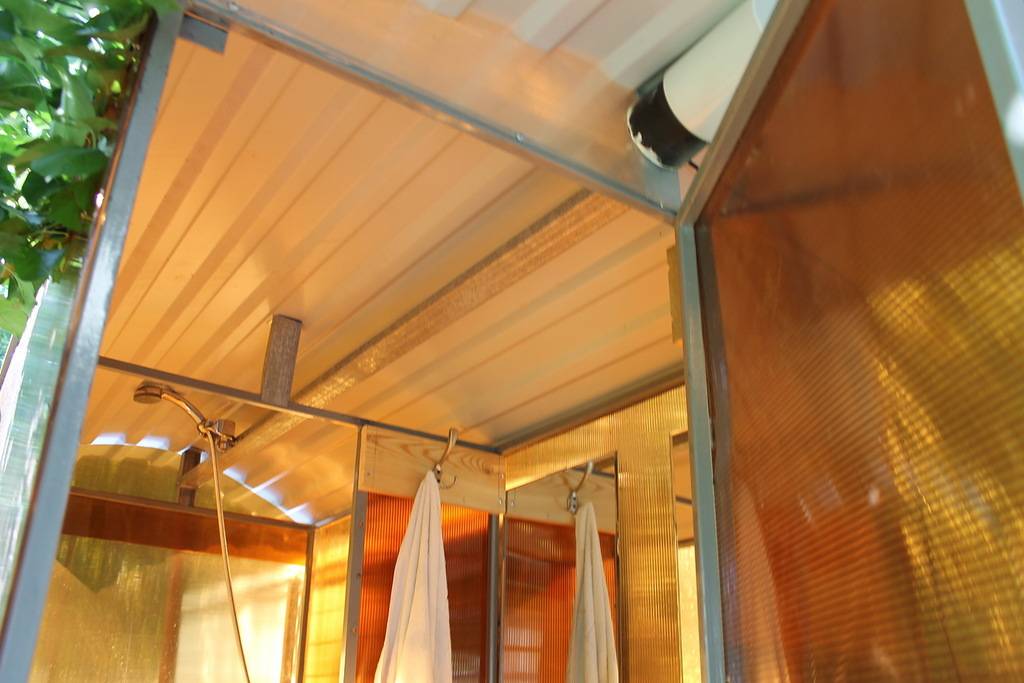
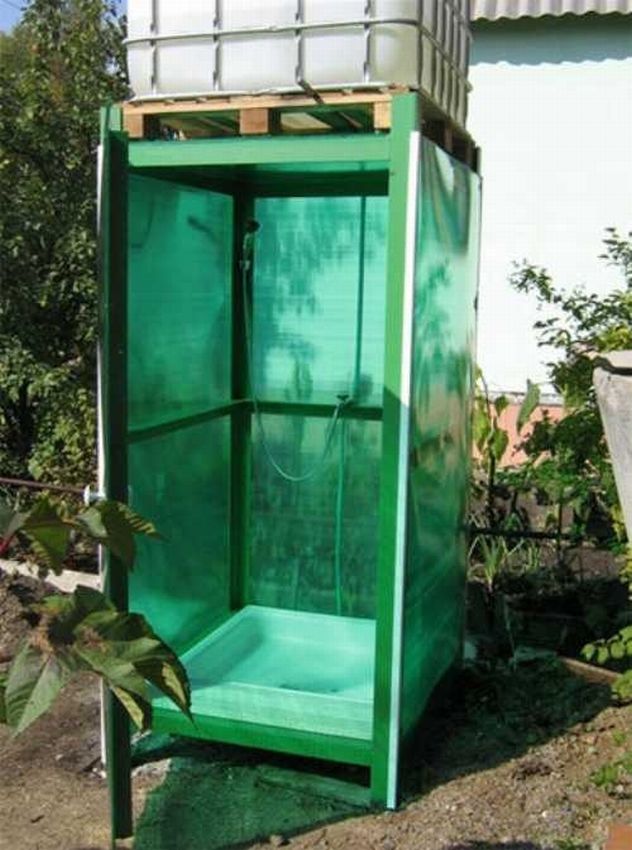
The roof of the structure can also be made of polycarbonate. For the construction of the walls of the shower stall, matte polycarbonate with a thickness of 8–16 mm is suitable. The roof is made of honeycomb (transparent) material of the same dimensions.
All sizes are selected individually, based on the dimensions of the most massive member of the family
The right place for the shower
The main limitation that is imposed on the place for installing a shower cabin is the size of the room and, of course, the presence of communications for draining and supplying water.
First of all, before you start making your dream a reality, you need to carry out preparatory work:
Check the plumbing and sewer system. Make sure there are no leaks, rusted areas. Evaluate the quality of connections and seals.If something is of inadequate quality, these elements should be updated.
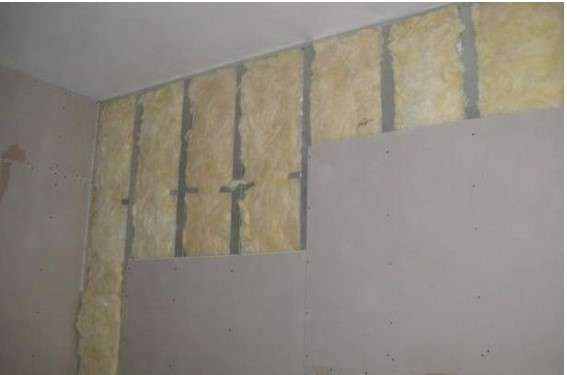
Be sure to check the condition of the partitions: walls, ceiling and floor
Particular attention should be paid to the part of the floor in the place where it is planned to put the booth. If required, level the floor, ensure good waterproofing.
Soul Requirements
A shower cubicle should not only be stylish in its design, but also be safe for a person. When carrying out construction work, it is necessary to follow a number of requirements:
- Compactness. The installation should not occupy more than 1 / 2 of the area in the room.
- The strength of all materials used.
- Resistant to moisture, high temperatures.
- Compliance of the new structure with the characteristics of GOST. A do-it-yourself shower cabin in a private house and apartment must fully comply with the safety parameters.
- The surface of consumables must be resistant to the development of a pathogenic fungus that prefers to develop in damp, warm rooms.
- When using ceramics for interior decoration, a system of handrails should be considered that will prevent injuries and falls.
- The floor must have a non-slip mat.

The booth should have shelves, holders, hooks and organizers made of durable, moisture-resistant materials. Separately, you should deal with the issues of summing up communications, supplying warm and cold water, drainage and ventilation directly in the booth itself.


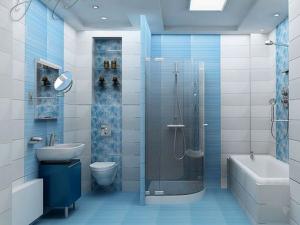
Selecting an installation site
For large apartments and private houses, there are no problems with choosing a place. The main requirements for placement are compliance with the interior design, the possibility of supplying communications.They are installed, except for bathrooms, in other rooms. When designing a house, provide for the possibility of installing a cabin.
Do-it-yourself shower cabin project.
It is more difficult to choose a place in small apartments. In addition to the bathroom, there is nowhere else to install, and even then it is a small area. They clean the bath, otherwise it will not work to place the shower. There is more space for a washing machine, washbasin, changing clothes. For rational placement, a drawing is made indicating the dimensions of the room and equipment.
Preparation for construction
Next, we will consider the process of building an all-weather shower, as the most in demand in most of our country.
Choice of frame material
Before starting construction, you need to choose the frame material. As it was said, plastic pipes disappear due to insufficient strength, so there are two options to choose from: wood or rolled metal.
Wood
Positive sides:
- low cost;
- ease of processing.
The disadvantage is a short service life, explained by susceptibility to decay and drying out.
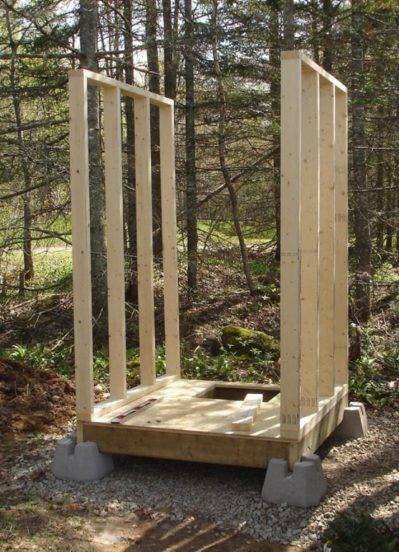
Bars of a certain section are suitable for the frame
Specifically, you will need the following lumber:
- for the lower harness: insulated shower - timber with a section of 150x150 mm, light - from 60x60 mm (optimal - 100x100 mm);
- for racks, oblique connections and top trim: board with a section of 100x40 mm.
Rolled metal
It is important to understand that in this case we are not talking about galvanized metal profiles with a thickness of 1.5–2.5 mm - this material is not suitable for such tasks.A channel with a height of 50–80 mm is used as the lower trim, racks and other frame elements are made of a square pipe from 25x25 mm with a wall of 1.5 mm to 40x40 mm with a wall of 2 mm
A shower room with such a frame will cost much more than a wooden one, and it’s more difficult to build it - steel is more difficult to process, and electric welding will be needed to connect the parts. But on the other hand, the gain will be significant: the frame will be stronger and more durable.
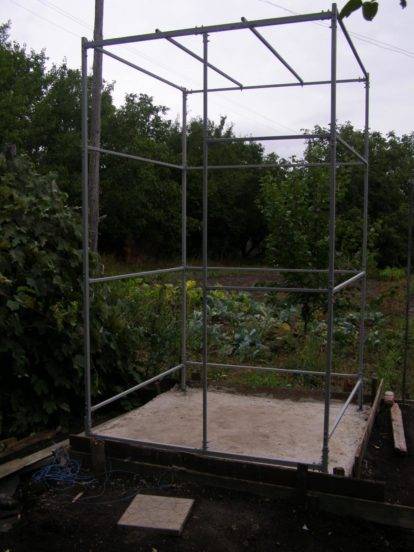
Metal construction is more durable
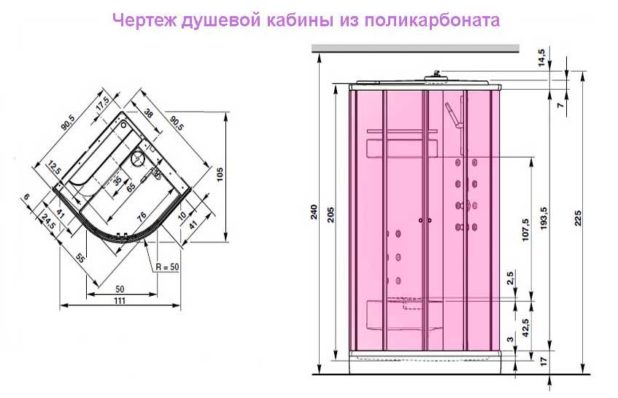
Calculation of the dimensions of the shower
A building with dimensions in terms of 2x1.2 m can be considered optimal. The height can be taken equal to from 2 to 3 m. It must be remembered that the higher the water tank is, the stronger the water pressure in the watering can.
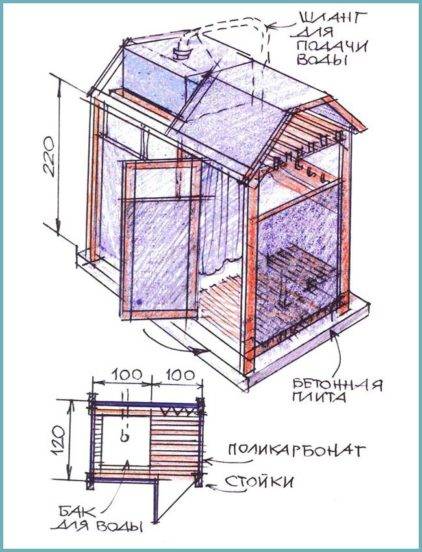
The drawing shows the dimensions of the shower
Choosing a waste disposal method
Even if a cesspool or a septic tank for a toilet has already been built on the site, the shower room must be equipped with a separate structure. This is due to the presence of a large amount of alkali and surfactants in the shower drains, which can destroy the beneficial microflora in the septic tank.
Another important question is to what depth sewage can be dumped into the ground so that the chemistry contained in them does not poison the fertile layer. With a volley discharge of up to 50 l or a gradual discharge of up to 100 l / h, the safe depth is two thicknesses of the fertile layer. The country shower in these figures quite keeps within.
Therefore, instead of full cesspool can be made drainage a well made of a metal barrel with a height of 0.85 mm and a volume of 200 liters. It can be guaranteed that such a height will be enough for sure, since a fertile layer over 40 cm thick is quite rare in summer cottages.
With a small thickness of humus, you can also use a smaller plastic barrel, the main thing is that it should not be smaller in volume than a shower tank for water.
You can build such a well directly under the shower.
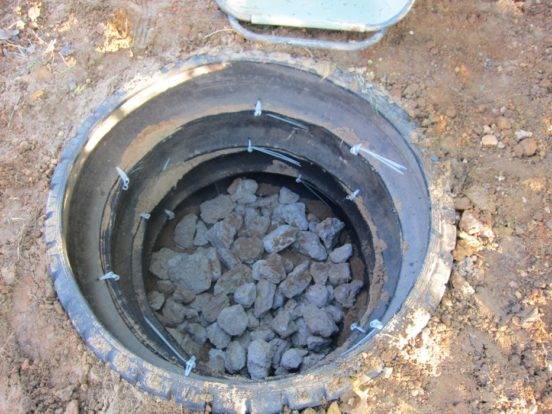
The wastewater receiver must be at least as large as the storage tank
If you decide, as is often advised, to make a drainage well from old tires, then do not forget to periodically disinfect it with bleach: water will stagnate in the interior of the tires.
- pegs and a skein of twine - for marking the territory;
- garden drill;
- shovel and bayonet shovels;
- bubble and water (hose) levels;
- plumb;
- roulette;
- wood saw;
- grinder with a cutting disc for metal;
- drill;
- hammer, screwdriver (or screwdriver);
- marker, chalk or pencil for marking materials.
How to check the quality of parts?
Before installing the cabin in the bathroom, you need to make sure the quality of the components. For this, the product is pre-assembled in a spacious room and without the use of sealant. Cabins with a ceramic pallet are mounted using a jigsaw.


Pallet: ceramic, steel or cast iron, acrylic (the latter is at the peak of popularity).
- Thin sanitary ware has a lot of chances to crack or break - look at the thickness.
- The steel trays are supplied on adjustable feet, with a bottom treated with polyurethane foam and rubber pads underneath (so that water jets do not create a rumble when they meet the surface). If there is no such protection, it will be inconvenient to use the shower.
- Acrylic needs additional support in the form of a support system, a metal frame or fiberglass bottom reinforcement. Check for the presence of parts that give rigidity to the structure.
Scratches and chips on the frame, and even more so broken parts, are unacceptable. Test fine details for geometric conformity.
The glass is in the package, and in the box it is not clear whether it remained intact after transportation. According to the standards for booths, tempered glass with a thickness of at least 6 mm is used, which is enough to withstand many mechanical stresses. But to check, shake the box - if there is no characteristic noise of broken glass, then everything is fine. It is better to order sliding glass doors at Almetagroup.
Tank installation
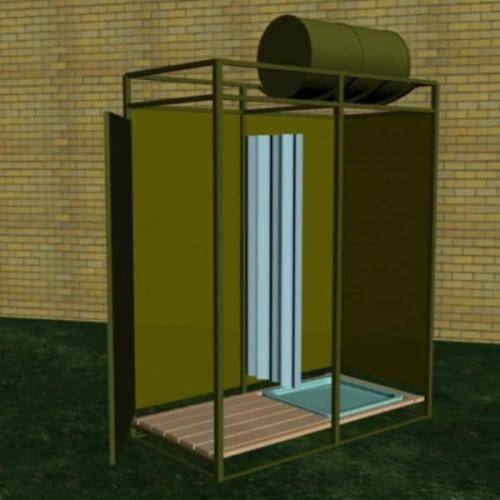
It is clear that the main element is the water tank, so it needs to be given special attention. Or rather, not the tank itself, but its installation
To do this, it is necessary to provide fasteners in the ceiling of the structure, the main requirements for which are sufficient strength, the ceiling must withstand the weight of a tank filled to the top with water. It is also necessary to rigidly tie the ceiling itself with anchors embedded in the brickwork or fasten it to the frame.
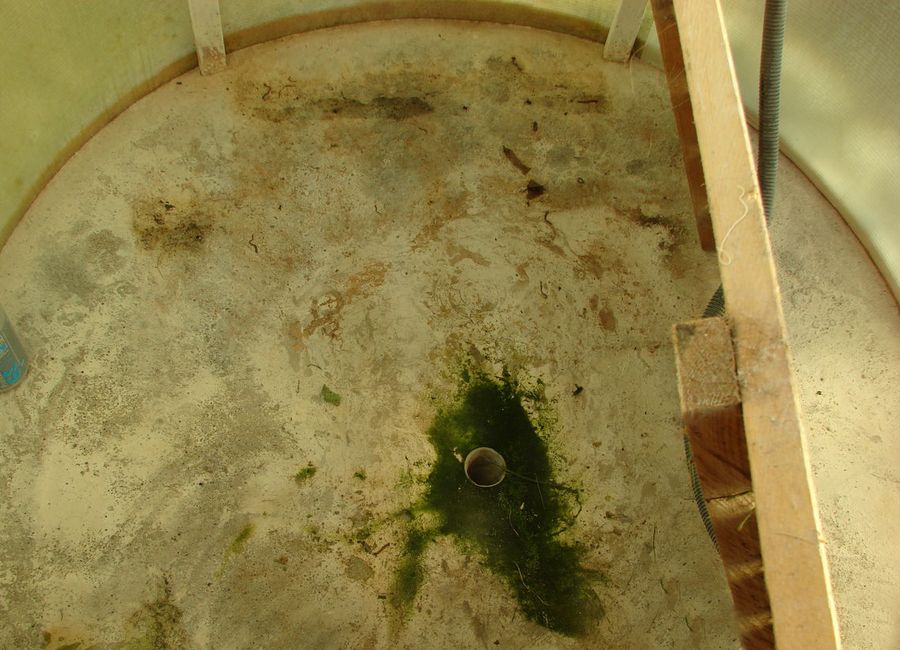
At the end of summer or cloudy days, one sun is not always enough. In order to reduce the heating time of water, it is possible to build a simple structure from rails and polyethylene under the tank, the so-called greenhouse. Its presence will raise the water temperature by 8-12 degrees. You can also install a water heater: just 10 minutes, and the water is heated to 45 degrees.
It would be useful to use a float. The fact is that warm water is usually on top. With the help of a float, warm water will be taken in, while cool water will heat up and rise. And finally, the tank itself. The best thing for a summer shower choose flat models.Firstly, the water in such containers warms up faster, and secondly, the higher the design, the lower its stability. A flat tank will not add much height to the structure, which means that the shower will stand firmly on the ground.
Conclusion
Now our readers know how to assemble a shower cabin for a summer residence, garage, house, apartment with their own hands. In nature, cellular polycarbonate is not the best solution, because it is brittle. You need to take a solid (solid). Some of its forms are no different from corrugated board, but do not rot and rust. Do not store up treasures for yourselves on earth, where moths and rust destroy, and thieves break in and steal... About thefts. For summer cottages, this is true, unscrew the screws for the winter, and take the carbonate corrugated board (GR76) to a barn, cellar or house. The material is not afraid of mold, but it is still recommended to keep away from rodents, as well as the harvest from the dacha ...


