- Detailed installation instructions
- Stage 1 - preparatory work
- Stage 2 - assembly and connection of parts
- Stage 3 - installation of the lever and siphon
- Stage 4 - checking the tightness of the plug
- Safety valve classification
- Inlet valve mechanism
- Check valves for submersible pumps
- Installation procedure for the drain system
- Varieties and device
- Causes of valve actuation
- Materials, markings, dimensions
- What is indicated in the label
- Dimensions of check valves for water
- How to check
- Valve classification
- What are the options for plugs?
- Station connection options
- Installation procedure for the drain system
- Conclusions and useful video on the topic
Detailed installation instructions
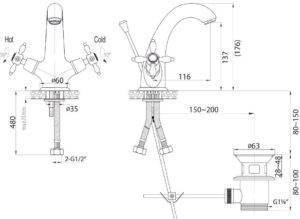
The bottom valve, which is included with the mixer, is installed in stages. To install it, you will need the simplest tools and plumbing sealant, which is used to seal joints when installing plumbing. All work can be done independently.
The only caveat: in the standard set, all tools with sharp edges that can damage the shell coating. It is advisable to prepare the gaskets in advance and press the metal elements through them to protect the plumbing.
Stage 1 - preparatory work
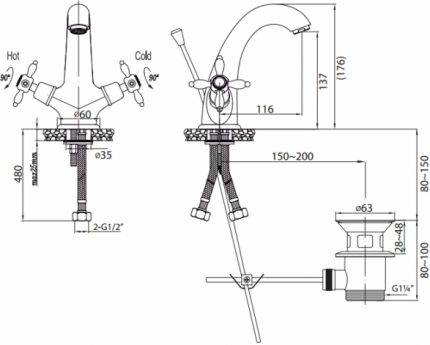
The lever and hoses lead down through the hole, under the sink.Typically, mixers are equipped with flexible tubes. If the model comes with rigid hoses, you will have to bend them yourself.
It is important to do the work very carefully so as not to damage the walls of the pipes, otherwise they will quickly rot and leak. It is highly undesirable to file products, because
chips can easily get into the faucet mechanism. During operation, problems will arise that will lead to premature abrasion and wear of parts.
It is highly undesirable to file products, because. chips can easily get into the faucet mechanism. During operation, problems will arise that will lead to premature abrasion and wear of parts.
If it is impossible to do without cutting hard tubes, after finishing work, thoroughly rinse all structural elements with a powerful jet of running water.
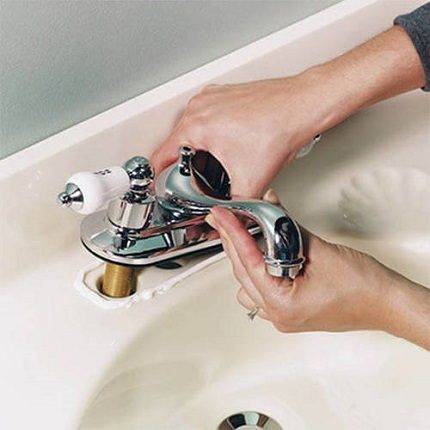
In order for the mixer to be securely attached to the sink, it is put on a sealant. You should choose a moisture-resistant composition with antiseptics (sanitary) to prevent the appearance of fungus and mold
The valve is fixed with a clamping nut. If there is any doubt about the reliability of the installation, sealant can be used as an additional method of fixation.
Stage 2 - assembly and connection of parts
Using nuts with rubber gaskets, the hoses are connected to the inlet pipes. You need to follow the shape of the bend. If it turns out in the shape of the letter U, everything is fine: the water will pass freely.
But the S-shaped bend is undesirable. Unnecessary obstacles will create conditions for an uneven increase in pressure in the system, which will lead to leaks at the joints within a year or two.

Any model should include a plastic connector for spokes. When buying a valve, make sure the part is available.If you have to buy it separately, it may be difficult to select sizes.
The shut-off valve is placed in the drain hole of the sink and the knitting needles are assembled. They are laid crosswise using a special plastic connector.
The clamp itself is twisted with a screwdriver. You get a simple but reliable cruciform design.
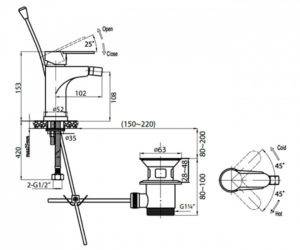
Stage 3 - installation of the lever and siphon
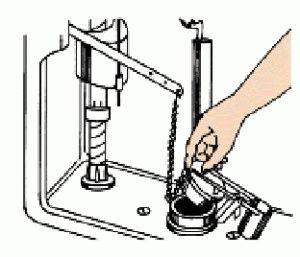
The needle must be connected to the lever and attached to the ear of the device, as shown in the diagram below.
 After doing this work, you should immediately make sure that when moving up and down, the lever easily raises and lowers the spoke. Sometimes you have to adjust the mount (+)
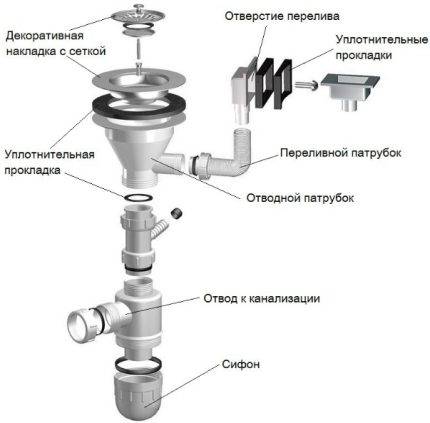
It remains only to bring the corrugation from below and fix the siphon
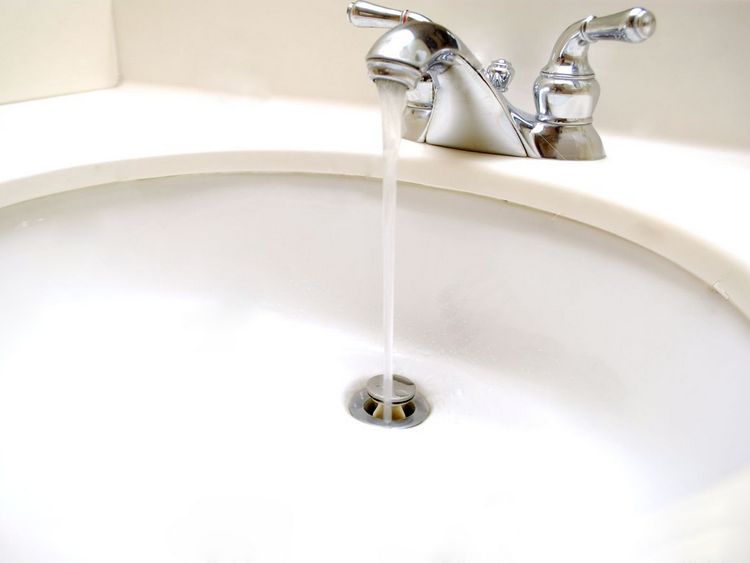
It is important that the plug tightly closes the drain hole, so they immediately check the build quality of the system
It is necessary to open the tap and observe how the plumbing works for 3-5 minutes.
 A sink with a bottom valve, but without an overflow hole, can be improved. To do this, simply buy and install the right siphon (+)
If the water passes well into the sewer, and the joints remain dry, everything is in order. If there are signs of leakage, tighten the nuts.
If even after that the joints are wet, you will have to completely disassemble the system and redo the work, since the installation is clearly not done correctly. Sealing tape can fix the situation, but not for long.
Stage 4 - checking the tightness of the plug
The work can be considered completed if the siphon does not leak, and the shut-off valve tightly closes the drain hole. They check it like this: lower the plug, draw the maximum amount of water into the sink and leave it for half an hour or an hour.


A leaky plug won't do much good.If the water quickly leaves the sink into the sewer, it is better to redo the work - disassemble the valve and reassemble
The indicator of the correct operation of the device is a constant level. It is better not to rely on your own eye and make a mark on the sink with a marker.
If after an hour the water remains at the same level, the shut-off valve is installed perfectly. Minor changes are a reason to check the tightness of the lid to the bottom of the sink.
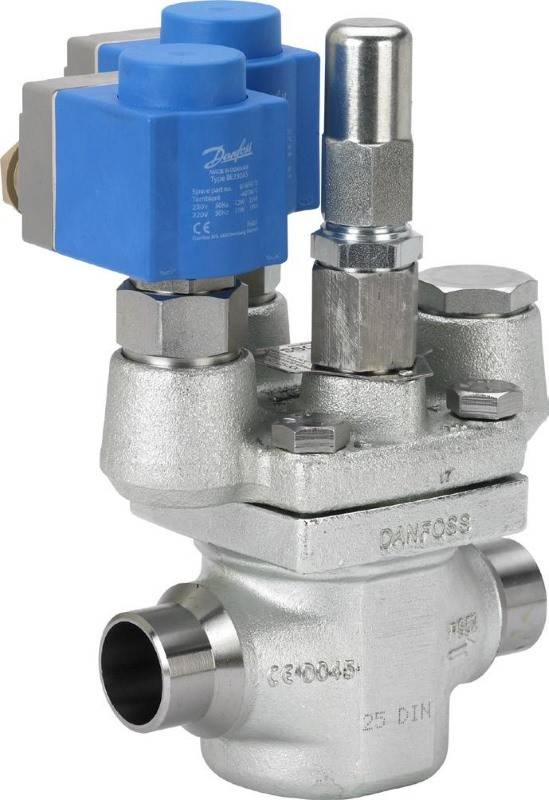
Safety valve classification
Experts classify devices according to various parameters.
According to the principle of action:
- Direct. This is a classic mechanical safety valve.
- Indirect. A pressure sensor, automatic control, a remotely controlled valve are used. The sensor with the valve can be placed in different places of the structure.
- proportional (for low-compressible working media);
- two-stage (for gases).
According to the method of loading the spool:
- spring;
- lever-cargo;
- magnetic spring.
There are other types of emergency relief valves used in special industrial installations.
Inlet valve mechanism
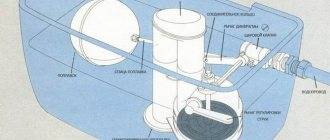
The inlet fitting in the tank has its own principle of operation, which should be understood before proceeding with its replacement or repair. Consider the phases that replace each other in the process of moving water to the tank.
So, the first phase is characterized by the fact that the valve is in the open position. At this time, water is drawn into the tank. The membrane, following the direction of the water flow, moves away. This means that water can freely enter the tank.
The mechanism of the drain devices
Initially, water fills only the preliminary compartment.For water to enter the tank itself, a special hole is provided in this compartment. This process is very similar to what happens in devices equipped with valves with a stem, but here there is a membrane that is stretched over the piston. The membrane has a gap through which a plastic rod passes, which also has a gap of 1 mm in diameter. Due to this, some of the water enters the filling compartment. It is formed by the membrane itself and the piston.
If the float is lowered, then a small hole opens in the piston, only about 0.5 mm. Through it, a small part of the water can enter the tank. Thanks to this mechanism of action of the membrane valve, the same pressure is ensured in the preliminary compartment, in the filling compartment and behind it. This is the difference between this design and the one with a stem valve.
The second phase is when water splashes into the tank and at the same time lifts the float up. Together with it, the level of the stem with a rubber seal rises. The seal covers the hole. With further movement of the rod, both the piston and the diaphragm will be pressed against the seat. From this, the filling compartment is sealed.
Due to the fact that the pressure from the water in the filling compartment is added to the pressure of the float, which rises, the membrane is tightly compressed with the seats. And this, in turn, stops the supply of water to the tank.
Flushing the toilet
The third phase is the descent of water. When the water leaves the tank and splashes into the bowl, the pressure of the float on the rod stops.The hole in the piston is no longer closed by the rod, so the pressure in the filling chamber is reduced. It remains only from the water supply network, it is it that acts on the membrane and on the piston, moving them to the side. As a result, the mechanism goes back to the first phase.
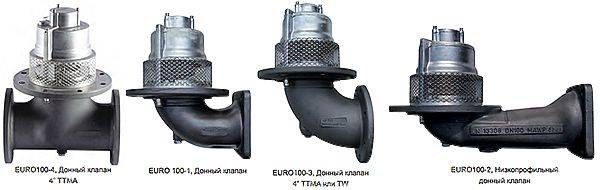
Check valves for submersible pumps
To organize uninterrupted water supply in private homes using a submersible pump, it is especially important to install a check valve immediately after the pump. This will prevent water from flowing back into the well when the pump is turned off and eliminate the need to refill the system with water each time.
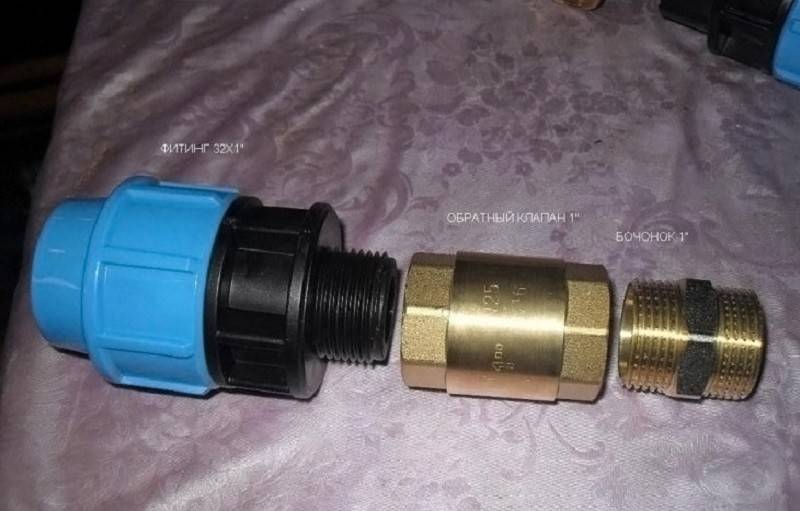
Check valve for submersible pumps
With a well of great depth, a sufficient diameter of the pipeline and the remoteness of the well from the house, we can talk about tens of liters of water. In many models of submersible pumps, such a valve is installed at the factory. If it is not there, then, as a rule, a brass device with axial movement of the spool and a return spring is chosen. The lumen of the shutter must be no less than the internal diameter of the pipeline, so as not to create additional resistance to flow.


Installation procedure for the drain system
You can install the bottom valve yourself, and you do not need to have special plumbing skills.
Since the installation of the valve is inextricably linked with the installation of the mixer, the necessary sequence of actions should be observed:
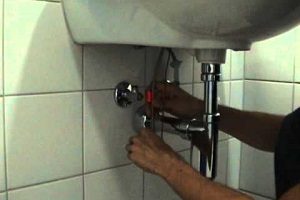
First of all, hoses are laid connecting the mixer and the bottom valve.
The faucet is fixed on the sink, for the purpose of sealing it is necessary to have a rubber gasket of the appropriate size (usually comes with a faucet).
Next, you should check the identity of the diameters of pipes and hoses at the joints.If necessary, boring connections are made
This procedure must be done carefully, pieces of metal can get inside the drain mechanism and lead to its premature failure.
Next, the pipes and hoses must be connected to each other, for this special nuts with rubber seals are used.
A valve is inserted into the drain hole, the mounting needles must be fixed parallel to each other.
Lastly, the spokes are connected to the valve and lever.
It is important to know: before using the installed system, you need to check the reliability of the tubes that ensure the flow of water into the sewer. When choosing a sink or bidet, it will be useful to have a so-called "drain-overflow" system
When installing a bottom valve, such a system is especially necessary. The fact is that when the drain is blocked, the risk of flooding the bathroom increases (they simply forgot to turn off the tap)
When choosing a sink or bidet, it will be useful to have a so-called "drain-overflow" system. When installing a bottom valve, such a system is especially necessary. The fact is that when the drain is blocked, the risk of flooding the bathroom increases (they simply forgot to close the tap).
To avoid trouble, there should be a hole in the top of the sink where excess water will enter. Often such a hole spoils the appearance of designer plumbing. In this case, the presence of gutters around the perimeter of the washbasin, disguised with decorative borders, is provided.
After completing the installation work and starting the water, you need to carefully inspect all connections for possible leaks.If leaks are found, they must be eliminated, otherwise over time this can lead to more serious leaks.
Watch the video, which clearly shows how to properly mount the bottom valve with a mixer on the overhead bathroom sink:
Varieties and device
There are two main types of bottom valves:
- valve coupled with a mixer, with a lever for control;
- push open system valve sold without mixer.
The first variety is the most popular. When buying a mixer, a bottom valve is also included with it. The device is actuated by a special lever, located directly behind the base of the crane.
A number of manufacturers prefer to place the lever on the side; there is no fundamental difference during operation. The drain hole is blocked by changing the position of the lever.
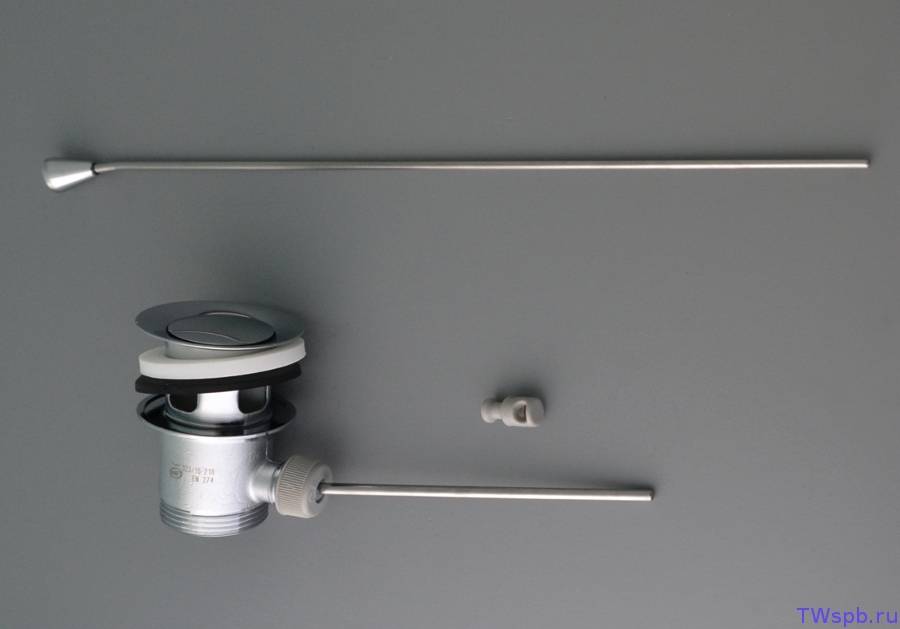
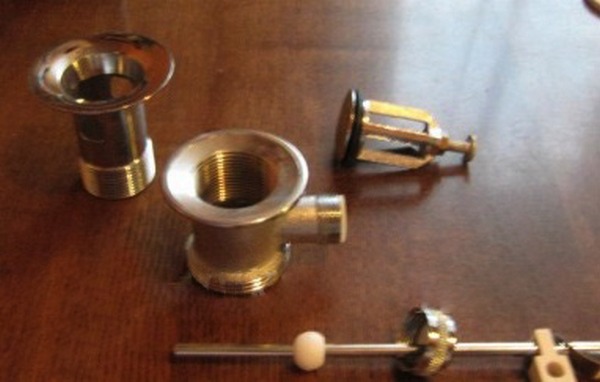
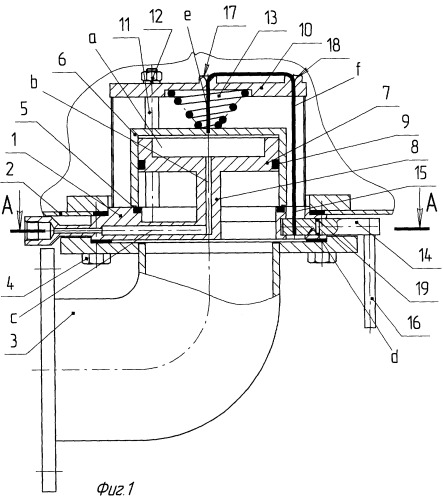
The classic foot valve with a lever control system consists of the following parts:
- plug blocking the drain hole;
- the lever by which the valve is controlled;
- a rod for connecting the lever and the valve;
- threaded connection for mounting the siphon;
- siphon directly.
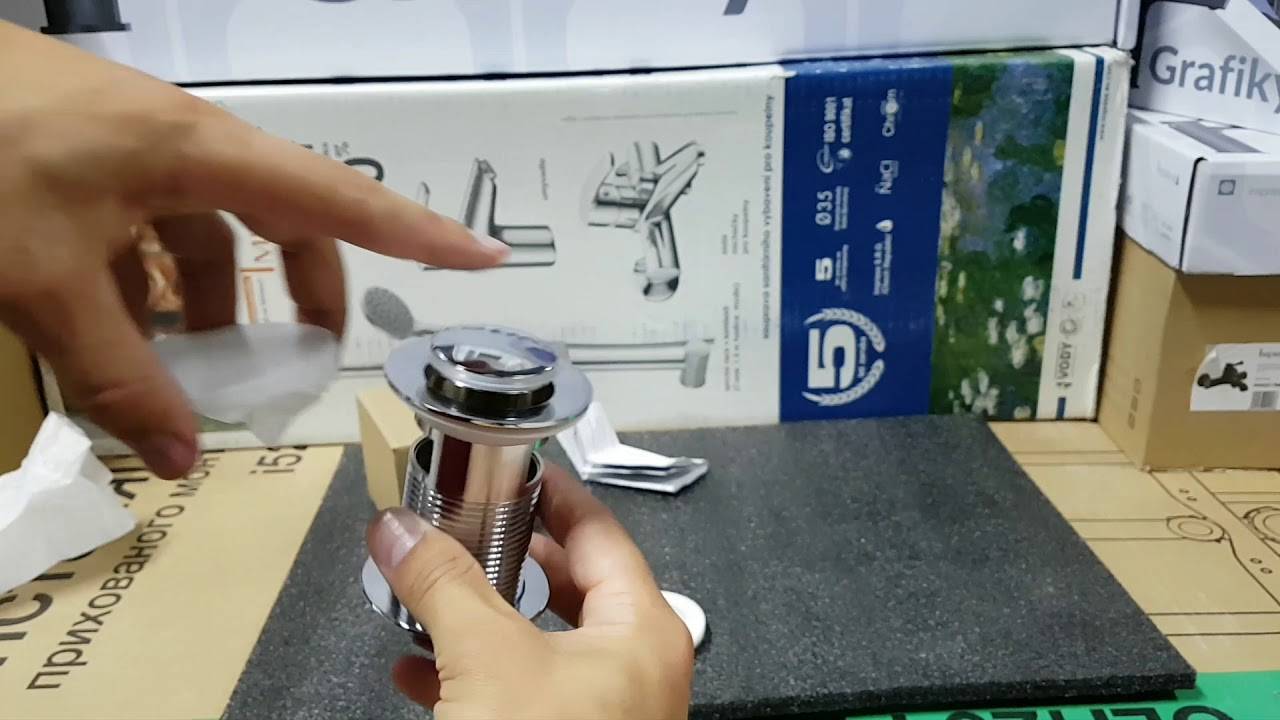
The device of the Push Open system is used less frequently, in this case the drain blocking process is performed by clicking the valve cover. The built-in spring controls the valve, preventing water from flowing out.
Please note: it is believed that this design is less hygienic, since if you need to drain the water, you have to put your hand into the sink with dirty water. On the other hand, the spring-type bottom valve looks more aesthetically pleasing due to the lack of leverage.
On the other hand, the spring-type bottom valve looks more aesthetically pleasing due to the lack of levers.
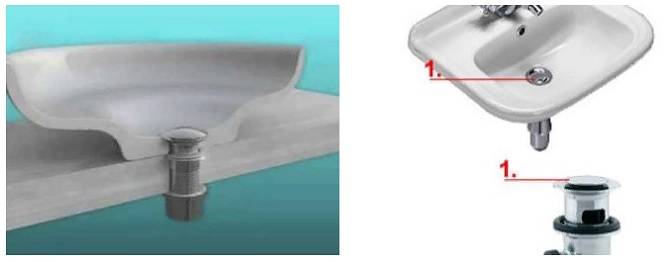
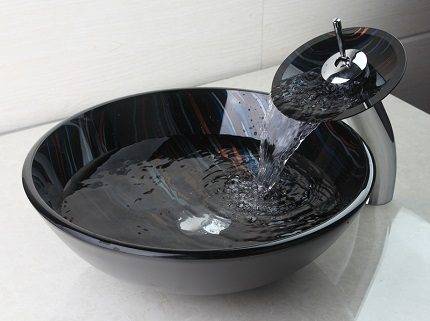
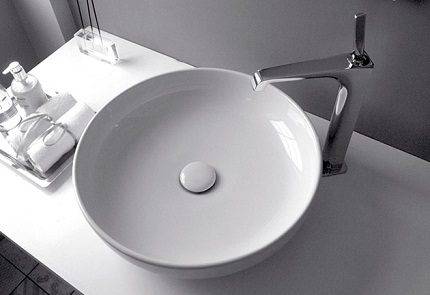
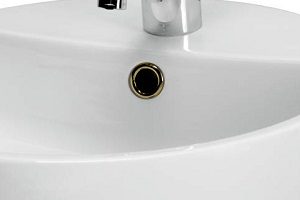
Bottom valves for sinks are available in several styles. In general, the range of shapes and colors is small, since most of the fixture is located under the sink. Only a round metal cap remains in sight. The shape of the cap is due to the design of the drain hole, which, as a rule, also has the shape of a circle.
In some designer sinks, valves of a more original design can be used, this does not affect functionality.
Much more often, various color coating options are used - from standard silver to exquisite gold. The choice depends on the color design of the rest of the plumbing and the bathroom set as a whole.
In addition to household bottom valves, there are devices of a more complex design - saddle valves. Such equipment is used for the production of food products and household chemicals and allows you to control the movement of substances through pipelines, reliably separating them if necessary.
Valves of this type are single-seated and double-seated. The first option is designed to change the direction of the fluid flow and block it. The second option is used where increased reliability of blocking substances is needed (chemical and pharmaceutical industries).


Causes of valve actuation
A well-functioning protective device will never work without a reason. Each actuation of the valve must be investigated to determine the precipitating factor. There may be several. Although they are not always serious, everyone is subject to verification.
- Unstable operation or failure of the thermoregulation system of the heating boiler.Operations are usually frequent, water spills are plentiful.
- Expansion tank problems. This may be the initial setting. Hidden causes: nipple malfunction, membrane breakage. In such cases, sudden pressure surges occur in the system, which leads to short and frequent valve openings.
- Limit value of pressure in the heating system. The defense mechanism leaks a little. Such manifestations are present, since the accuracy of the spring device is ± 20%. To avoid such situations, you should more accurately configure the system and select the appropriate equipment.
- Valve wear. After several trips, the performance of the protective device is degraded. Therefore, it is better to replace it with a new one or repair it.
- Spring failure. This happens over time, even if there are no triggers. Sometimes undermining appears as a result of leakage of coolant around the stem. Under such circumstances, repair or replacement cannot be avoided either.
You can check the serviceability of the protective valve using the red handle. If it is turned in a clockwise direction, water should appear on the normal valve. The flow stops immediately after the rotation of the handle stops. If this does not happen, you need to twist again. When this does not help, the protective device will need to be replaced.
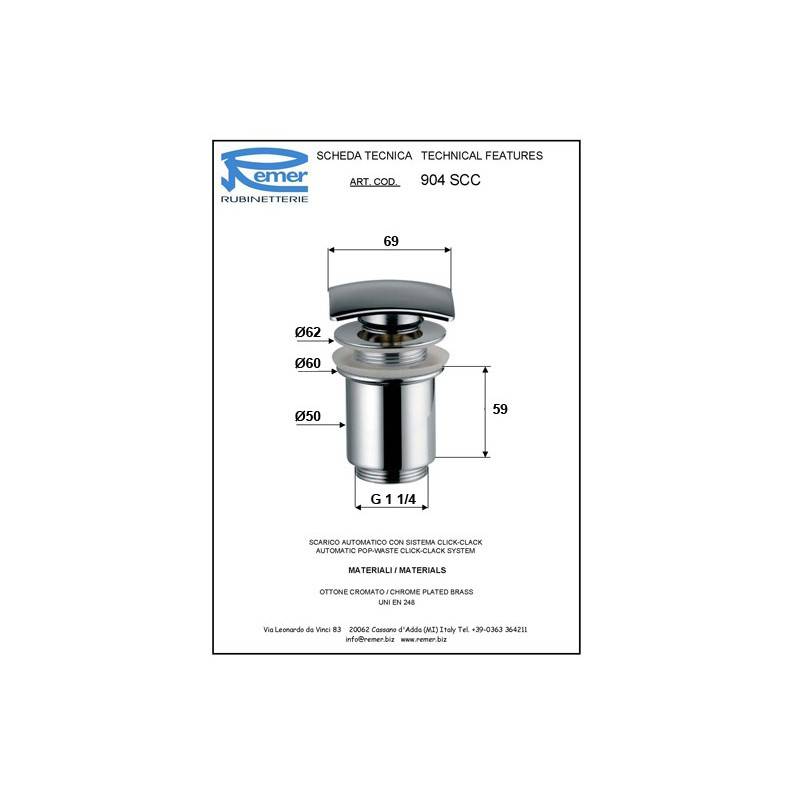
Materials, markings, dimensions
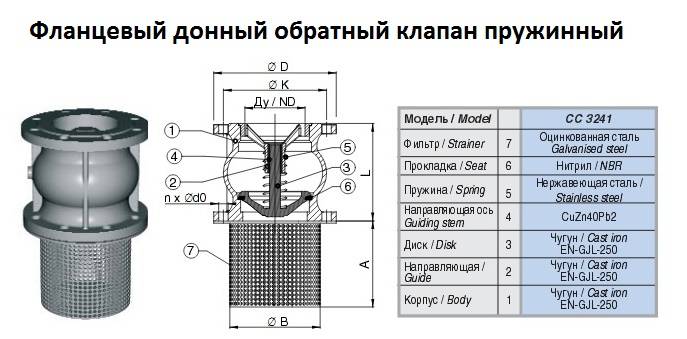
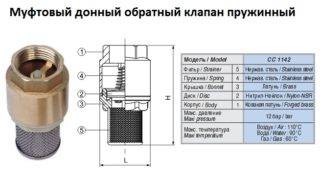
The check valve for water is made of stainless steel, brass, large sizes of cast iron. For household networks, they usually take brass - not too expensive and durable. Stainless steel is certainly better, but it is usually not the body that fails, but the locking element. That's his choice and should be approached carefully.
For plastic plumbing systems, check valves are made from the same material. They are polypropylene, plastic (for HDPE and PVD). The latter can be welded / glued or threaded. You can, of course, solder adapters to brass, put a brass valve, then again an adapter from brass to PPR or plastic. But such a node is more expensive. And the more connection points, the lower the reliability of the system.
For plastic and polypropylene systems there are non-return valves made of the same material
The material of the locking element is brass, stainless steel or plastic. Here, by the way, it's hard to say which is better. Steel and brass are more durable, but if a grain of sand gets between the edge of the disk and the body, the valve jams and it is not always possible to return it to work. Plastic wears out faster, but it does not wedge. In this regard, it is more reliable. No wonder some manufacturers of pumping stations put check valves with plastic discs. And as a rule, everything works for 5-8 years without failures. Then the check valve begins to "poison" and it is changed.
What is indicated in the label
A few words about the marking of the check valve. It states:
- Type of
- Conditional pass
- Nominal pressure
-
GOST according to which it is made. For Russia, this is GOST 27477-87, but not only domestic products are on the market.
Conditional pass is designated as DU or DN. When choosing this parameter, it is necessary to focus on other fittings or the diameter of the pipeline. They must match. For example, you will install a water check valve after a submersible pump, and a filter to it. All three components must have the same nominal size. For example, all should be written DN 32 or DN 32.
A few words about conditional pressure.This is the pressure in the system at which the valves remain operational. You need to take it exactly no less than your working pressure. In the case of apartments - no less than a test one. According to the standard, it exceeds the working one by 50%, and in real conditions it can be much higher. The pressure for your home can be obtained from the management company or plumbers.
What else to pay attention to
Each product must come with a passport or description. It indicates the temperature of the working environment. Not all valves can work with hot water or in a heating system. In addition, it indicates in what position they can work. Some should only stand horizontally, others only vertically. There are also universal ones, for example, disk ones. Therefore, they are popular.
The opening pressure characterizes the “sensitivity” of the valve. For private networks, it rarely matters. Unless on the supply lines close to the critical length.
Also pay attention to the connecting thread - it can be internal or external. Choose based on ease of installation
Do not forget about the arrow that indicates the direction of water movement.
Dimensions of check valves for water
The size of the check valve for water is calculated according to the nominal bore and they are released for everything - even the smallest or largest pipeline diameters. The smallest is DN 10 (10 mm nominal bore), the largest is DN 400. They are of the same size as all other shutoff valves: taps, valves, spurs, etc. Another "size" can be attributed conditional pressure. The lowest is 0.25 MPa, the highest is 250 MPa.
Each company produces check valves for water in several sizes.
This does not mean that any of the valves will be in any variant. The most popular sizes are up to DN 40. Then there are the main ones, and they are usually purchased by enterprises. You won't find them in retail stores.
And yet, please note that for different companies with the same conditional passage, the external dimensions of the device may differ. Length is clear
Here the chamber in which the locking plate is located can be larger or smaller. The chamber diameters also differ. But the difference in the area of the connecting thread can only be due to the wall thickness. For private houses, this is not so scary. Here the maximum working pressure is 4-6 atm. And for high-rise buildings it can be critical.


How to check
The easiest way to test a check valve is to blow into it in the direction that is blocking it. Air must not pass. Generally. No way. Also try pressing the plate. The rod should move smoothly. No clicks, friction, distortions.
How to test a non-return valve: blow into it and check for smoothness
Valve classification
 Equipment differs in design, material, size. Each has its own characteristics during installation.
According to the design features of the device are as follows:
- With locking element of lifting type. The valve is equipped with a gate that rises or falls to block the water flow. When liquid enters, the locking part goes up and passes it. When the pressure decreases, the shutter goes down and blocks the return flow of the water jet. The movement of the mechanism occurs with the help of a spring.
- With ball valve. Under pressure, the ball moves, and water flows through the system.After the pressure drops, the blocking element returns to its place.
- With discal constipation. The disc blocks the reverse flow thanks to a spring device.
- With two shutters. They fold under pressure, and when the pressure decreases, they return back.
In everyday life, equipment with a lifting type mechanism is most often used. It is easy to repair by replacing the spring.
Devices are made from various materials. Brass elements are not subject to corrosion, are easy to maintain, and are installed on all types of pipes. Locking devices in a cast-iron case are not used so often. This material rusts, deposits settle on it rather quickly. These valves are only suitable for wide lines.
Most of the elements are mounted using a coupling connection. To do this, you will need two threaded adapters, selected according to the cross section of the pipeline system. Bolted flange connections can also be used. This type of fastening is used for small devices when there is not enough space on the pipes for another fixation. They are usually equipped with large-section cast iron valves.
The price of the product depends on the combination of these parameters, as well as the brand. The average cost is 700 rubles.
What are the options for plugs?
The first thing you need to do is figure out the price. It is necessary to understand well what the consumer receives for his own money - the quality of materials and workmanship, design or added convenience.

An essential indicator of choice is the quality of the metal and the fastener in the form of a thread. To understand how reliable the selected model is, make sure the strength of the material. It will be better to check how the plug is assembled and disassembled
Consider several distinctive characteristics of the design, the price depends on them:
- the presence of overflow;
- type of management;
- design;
- brand.
The model must be chosen depending on the type of sink. If it does not have the ability to remove excess water, install a bottom valve without overflow. An option is to replace the water seal with a much more practical one.
As for the management mechanism, it is necessary to clearly form the goals. If water is drawn into the sink for washing by hand, then after use it is unlikely to be excessively polluted. Difficulties with lowering the hand to the spring valve will not appear.
But if you plan to wash contaminated shoes or greasy items, it is better to give in to natural disgust and purchase a lever device.
The design affects the price of the product. Given the range of prices, the overpayment for the excellent design of the bottom valve is small. Thanks to this, do not deny yourself the pleasure of putting a beautiful plug on the sink
The role of the brand is hard to overestimate when choosing fittings. The reputation of a trading company is not only, but also an indicator of the true quality of goods. Before purchasing, it will be better to get acquainted with customer reviews, provide for their claims to different manufacturers.
The bottom shut-off valve is a small detail, but it can deliver unpleasant minutes if it fails quickly. It is better to pay a couple of hundred rubles more and get a good, beautiful plug that will last a couple of years without malfunctions.
Station connection options
There are two ways to connect the pumping station to the pipeline:
- Through borehole adapter.This is a device that is a kind of adapter between the water intake pipe in the source shaft and the water pipes outside. Thanks to the borehole adapter, it is possible to draw the line out of the hydraulic structure immediately below the freezing point of the soil and at the same time save on the construction of the caisson.
- Through the head. In this case, you will have to take care of high-quality insulation of the upper part of the source. Otherwise, ice will form here in sub-zero temperatures. The system will stop working or break in one of the places.
Installation procedure for the drain system
Since the installation of the valve is inextricably linked with the installation of the mixer, the necessary sequence of actions should be observed:
First of all, hoses are laid connecting the mixer and the bottom valve.
The faucet is fixed on the sink, for the purpose of sealing it is necessary to have a rubber gasket of the appropriate size (usually comes with a faucet).
Next, you should check the identity of the diameters of pipes and hoses at the joints. If necessary, boring connections are made


This procedure must be done carefully, pieces of metal can get inside the drain mechanism and lead to its premature failure.
Next, the pipes and hoses must be connected to each other, for this special nuts with rubber seals are used.
A valve is inserted into the drain hole, the mounting needles must be fixed parallel to each other.
Lastly, the spokes are connected to the valve and lever.
It is important to know: before using the installed system, you need to check the reliability of the tubes that ensure the flow of water into the sewer.
When choosing a sink or bidet, it will be useful to have a so-called "drain-overflow" system. When installing a bottom valve, such a system is especially necessary. The fact is that when the drain is blocked, the risk of flooding the bathroom increases (they simply forgot to close the tap).
After completing the installation work and starting the water, you need to carefully inspect all connections for possible leaks. If leaks are found, they must be eliminated, otherwise over time this can lead to more serious leaks.
Watch the video, which clearly shows how to properly mount the bottom valve with a mixer on the overhead bathroom sink:
Conclusions and useful video on the topic
Recommendations for the selection and installation of a check valve for a submersible pump:
More about the design and purpose:
About the nuances of installing the valve in the following video:
You should not talk about the need to install check valves - this device is mandatory for the stable operation of the water supply system. It is used with both submersible and surface pumps to extend the life of the equipment and protect the system from accidents.
Do you have experience installing a check valve? Or would you like to ask our experts or more experienced users for advice? Ask your questions, share your own opinion in the comment block below this article.


