
- DIY dimmer
- No. 10. The choice of LED strip at the installation site
- Source control features
- We assemble a dimmer with our own hands
- Circuit on triacs:
- Dimmer on the N555 chip
- Dimmer on thyristors and dinistors
- Dimmer for LED strip
- Control Features
- Good and bad LED strips on the printed circuit board
- Reliability
- Dimmer classification for LED lamps
- Place and method of installation
- According to the principle of management
- Mechanics
- Sensor
- "Remote"
- Main conclusions
DIY dimmer
The cost of the regulator is not high and the easiest way is to buy ready-made in the store. For those who want to make a dimmer with their own hands for any reason, we provide a small instruction.
This is not a difficult task, but it still requires certain knowledge. We assume that the reader knows how to use a soldering iron and knows how to read elementary electronic circuits.
First of all, study the LED dimmer circuit:
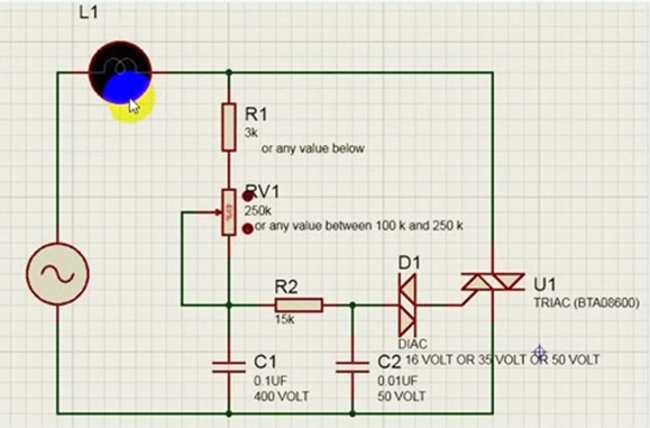
From the diagram it can be seen that the following parts will be needed for the manufacture of a dimmer switch:
- Triac.
- Dinistor.
- Two capacitors.
- Three resistances (one of which is a tuning 250 kOhm).
- Textolite
Required material:
- Textolite.
- Copper wire with a cross section of 0.5 square meters. mm. (if surface mounting is intended, without board etching).
- Solder.
After assembling a homemade regulator according to the scheme, for safety reasons, it is best to install it in a box. To be able to adjust the brightness, the tuning resistor must be fixed in the box body
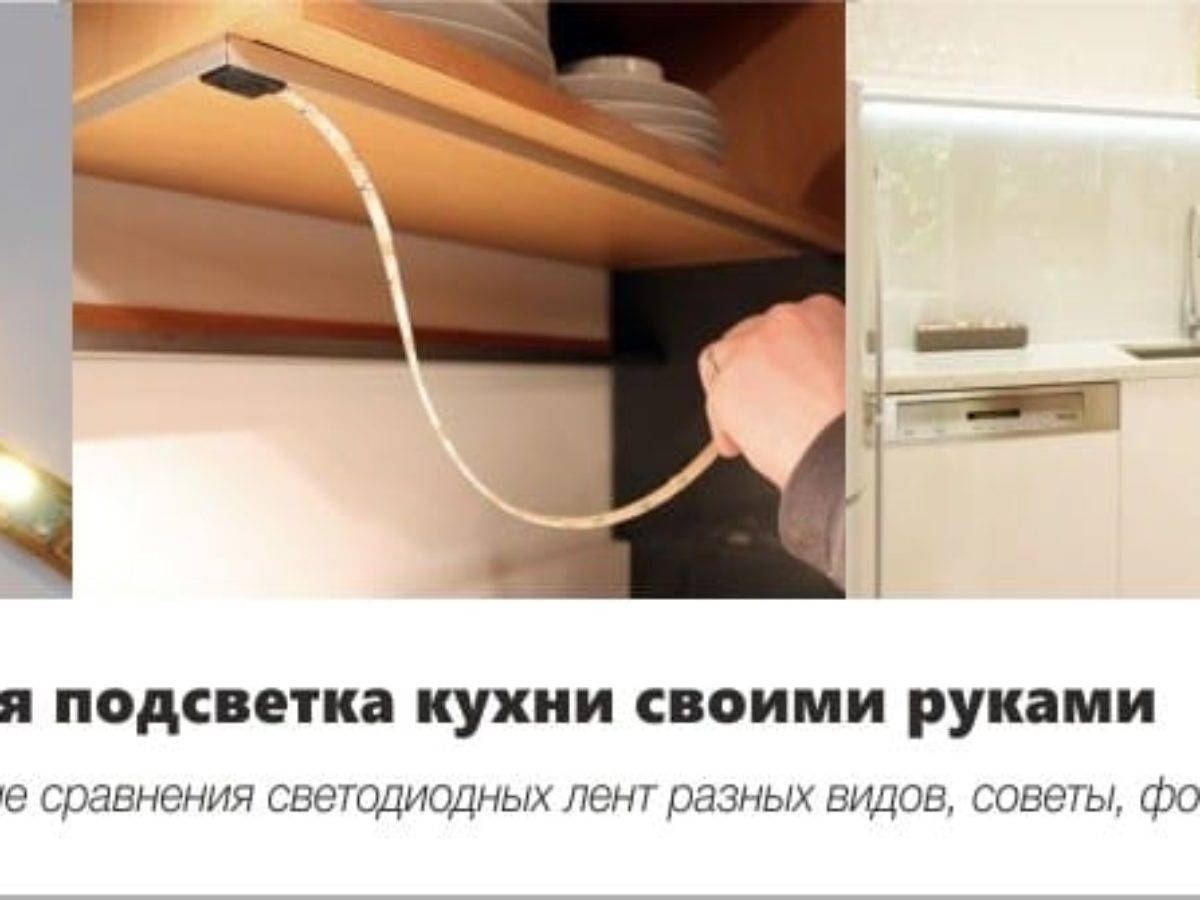
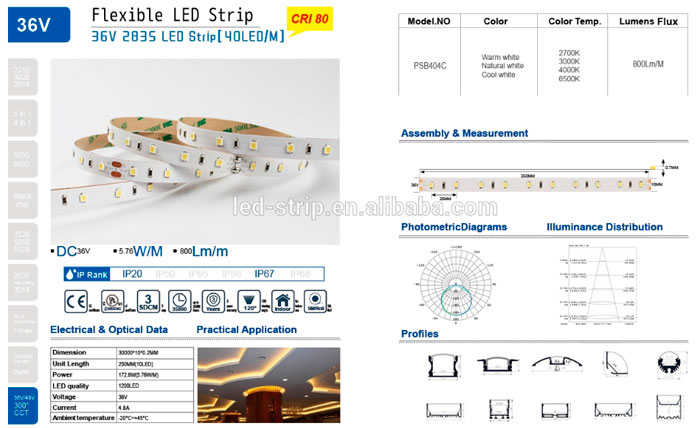
No. 10. The choice of LED strip at the installation site
Consider the functions that are assigned to the LED strip (decorative lighting or main light), as well as the specifics of the installation site (humidity, temperature, etc.).
Experts recommend when choosing an LED strip to be guided by the following tips:
- to illuminate the working area in the kitchen, a single-color white light tape is perfect, bright enough with a protection level of IP43 / 44;
- a bright white tape is also used to illuminate the garage, protection from moisture and dust will be very useful;
- to illuminate a bedroom or hall, you can take a single-color dim or multi-color tape. Protection from water is not required - it is much more important that the glow is pleasing to the eye;
- for the main lighting of a stretch or suspended ceiling, a bright one-color tape is chosen, the calculation of the luminous flux is required;
- for bathrooms, only the protected version of the tape, IP43/44, is used. A white one-color tape is suitable for the ceiling, and a color or RGB tape is suitable for illuminating mirrors, niches, bathtubs;
- in the children's room, too bright light is inappropriate. It is better to use LED strip only in the play area, to decorate the interior. Choose a product with a soft, muted glow;
- to illuminate the shelves of cabinets, the simplest tape without protection is suitable;
- to illuminate the arches, special tapes are used that can easily bend even at an angle of 90 degrees;
- for street lighting, they take a tape with IP 54/55 protection and a voltage of 220 V, a power supply is not needed, a voltage rectifier is used instead. You can decorate with such illumination the facade of the house, shop windows, garden paths, etc.;
- underwater lighting requires tape in a PVC box. Choose the color yourself - the effect in any case will be fabulous.
LED strip can illuminate niches, podiums, ceiling and floor plinths, bar counters, cornices, stairs and even furniture (the outline of a bed or shelves in cabinets) - the scope for creativity knows no bounds. The main thing is to choose the right LED strip, and our advice should help you figure this out.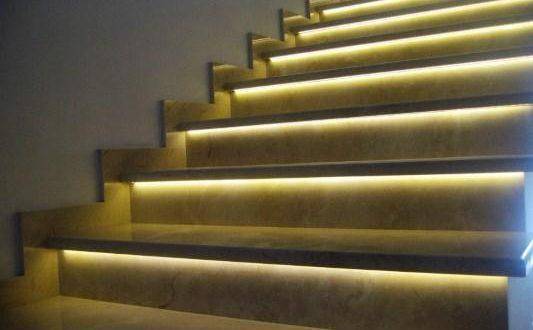
Source
Source control features
The LED strip will not work properly without additional equipment, the function of which is to limit the amount of current that flows through the strip. As such devices, a 12/24 volt power supply is used.
Taking into account the features of the lighting system and the requirements of the owner of the home, a dimmer is added to the scheme
With its help, the intensity of the glow and the power of the device change up or down.
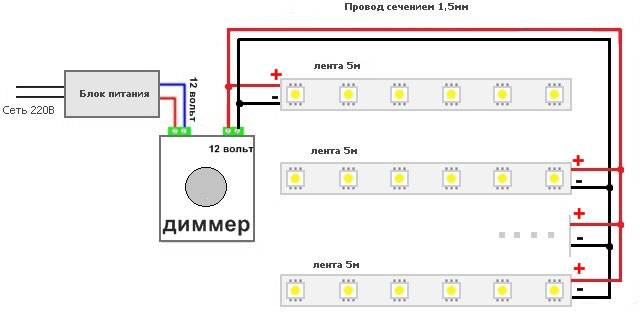

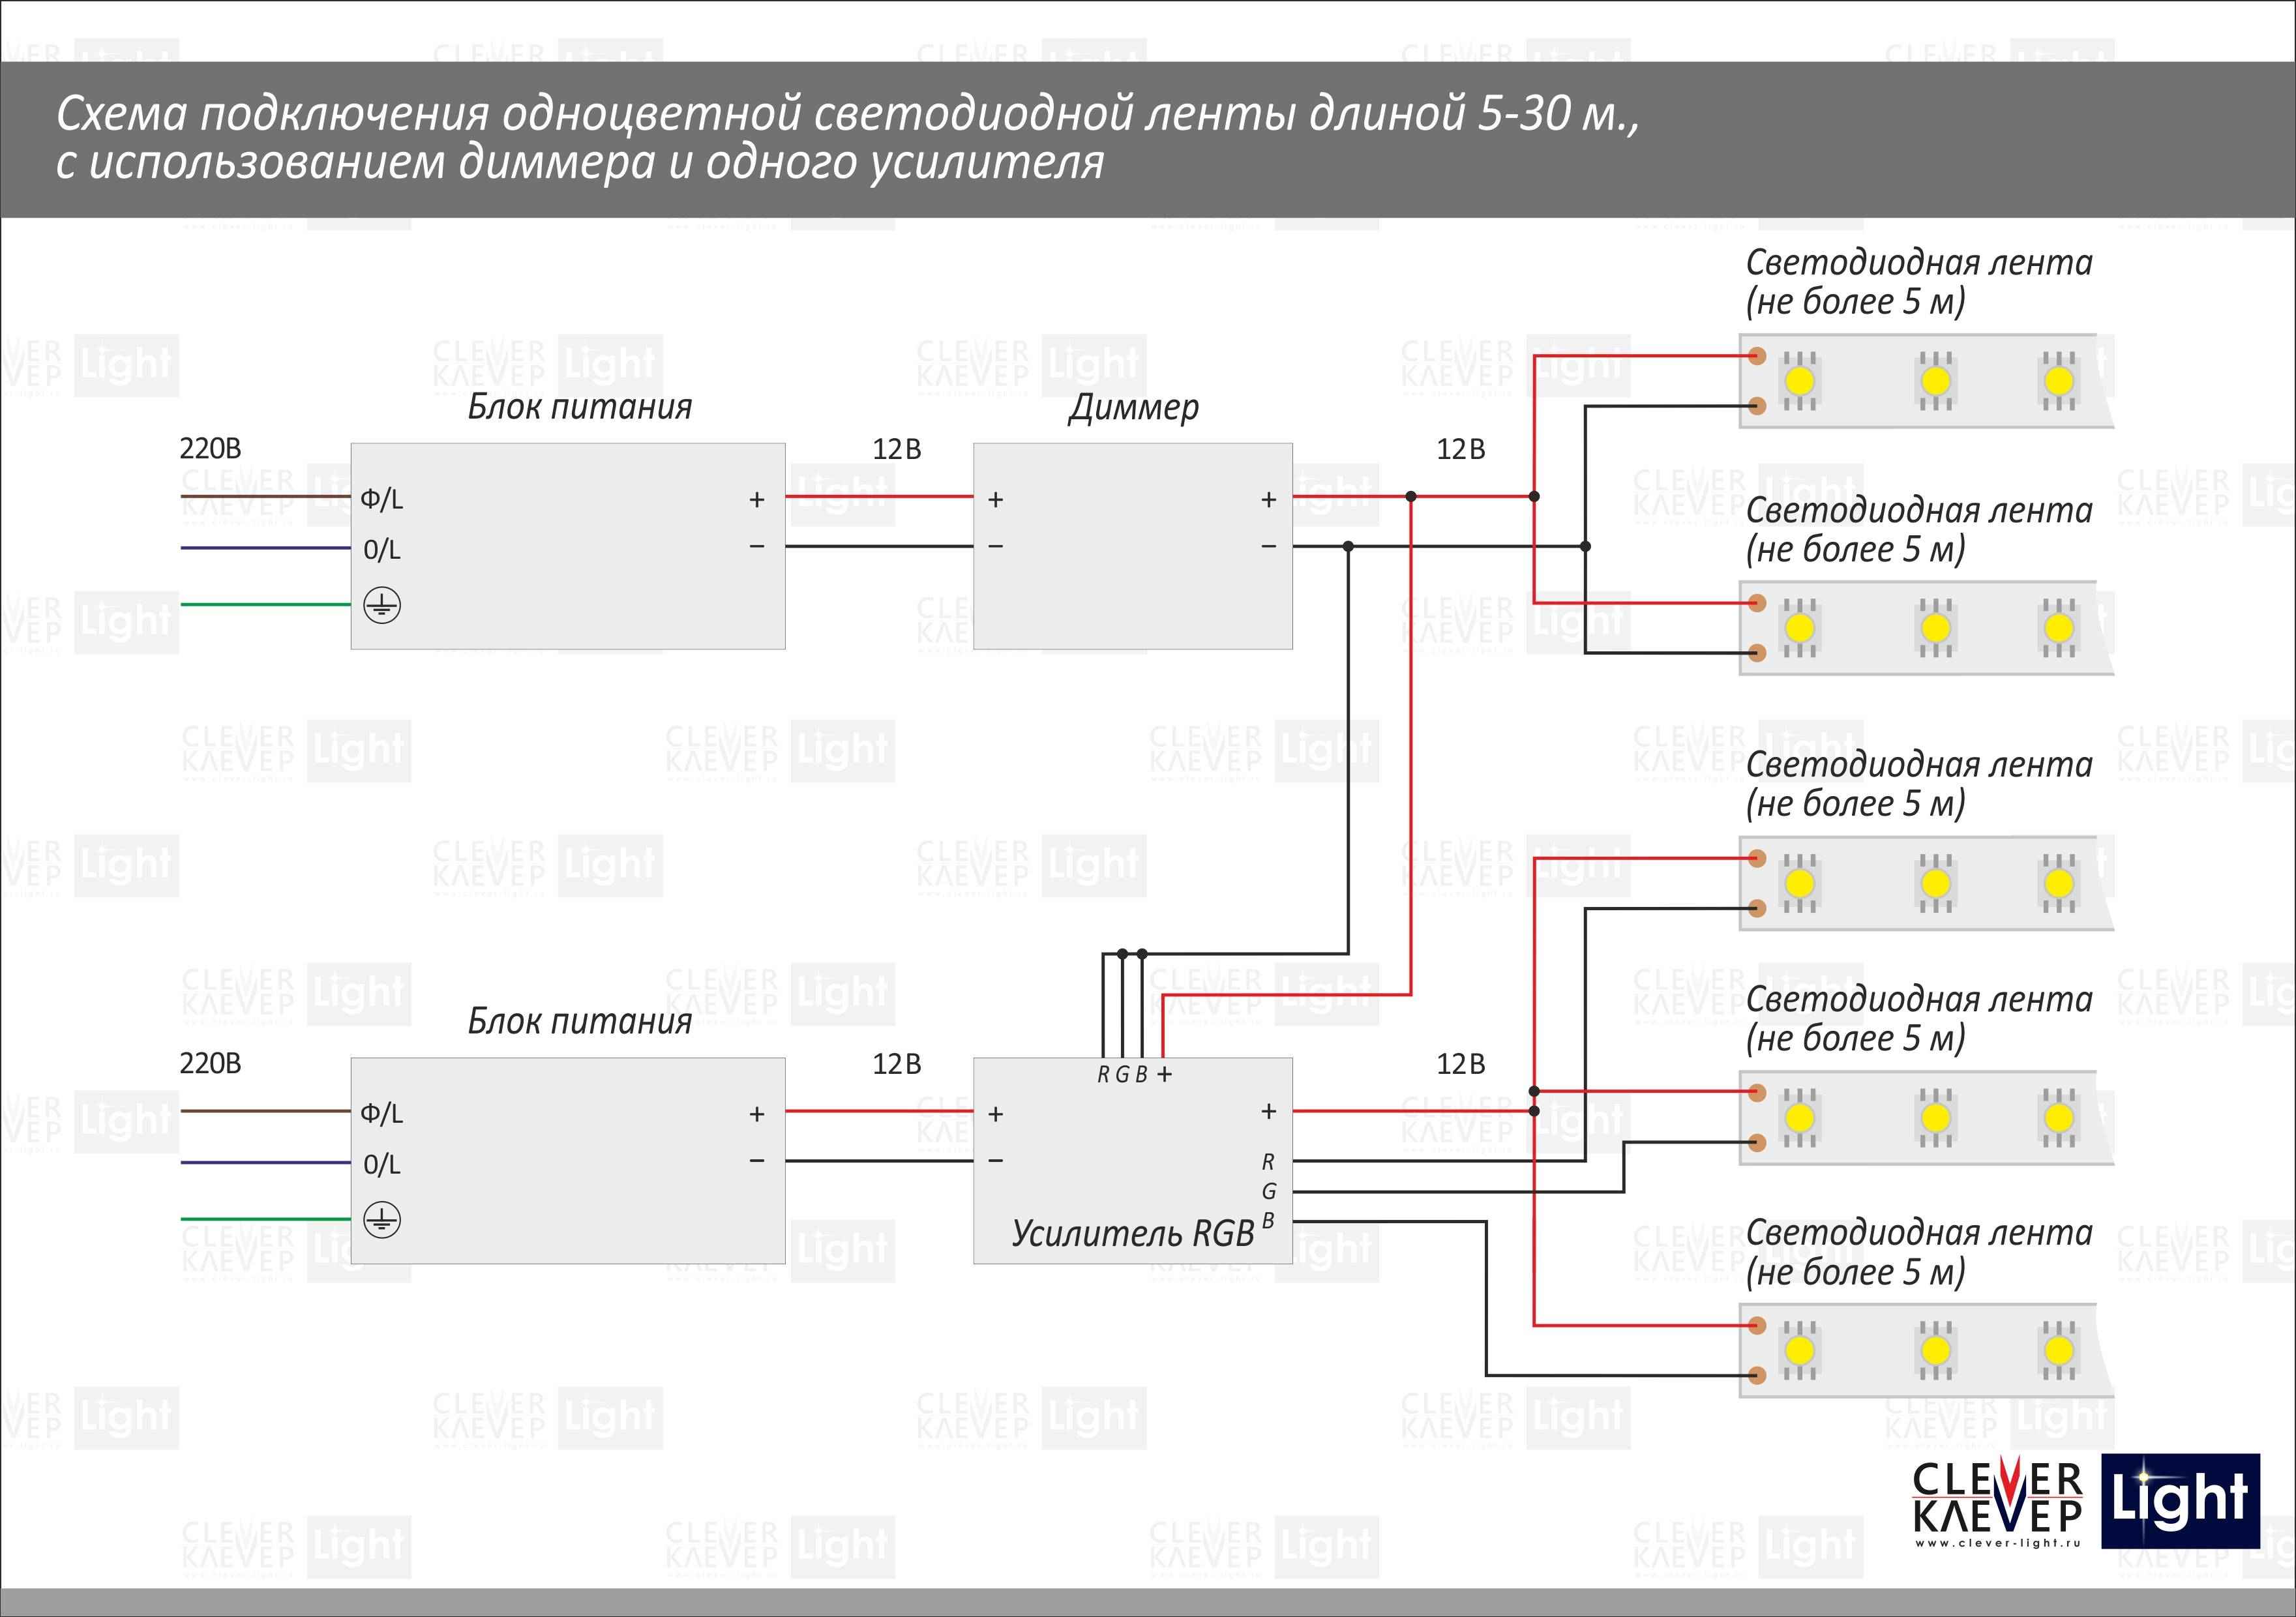


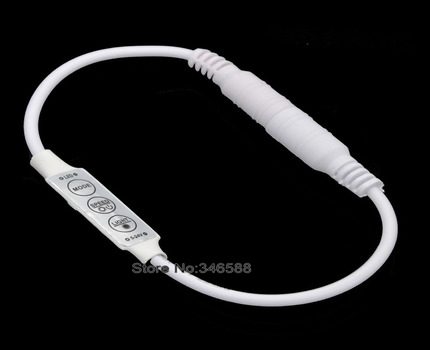
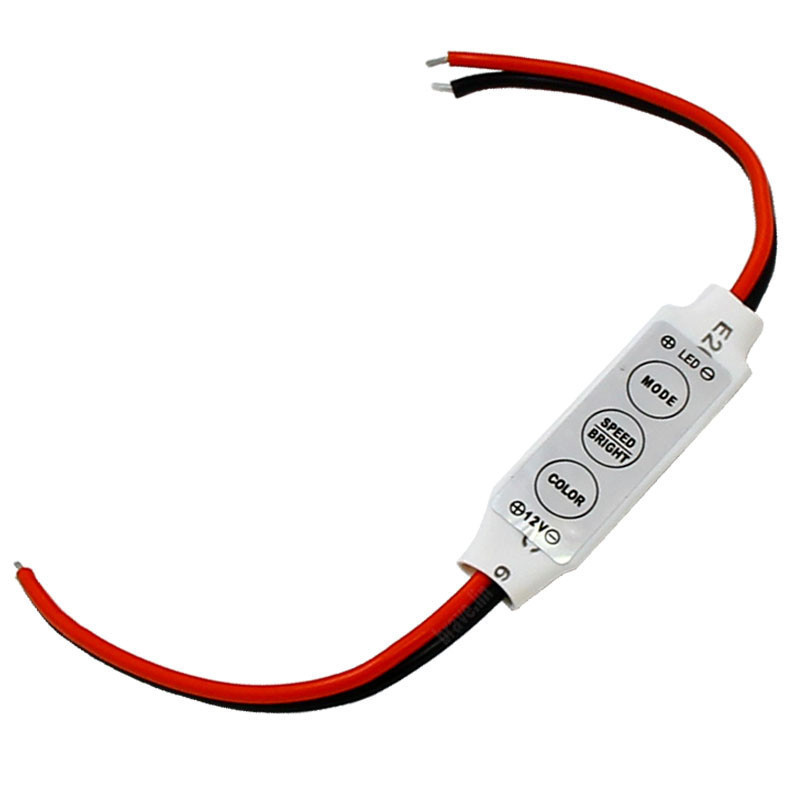
already contains a low-voltage source in its design, through which the device is connected to the network, while in the case of a tape device based on diodes, the 12-volt power supply and dimmer is a remote module that is connected separately.
Device device
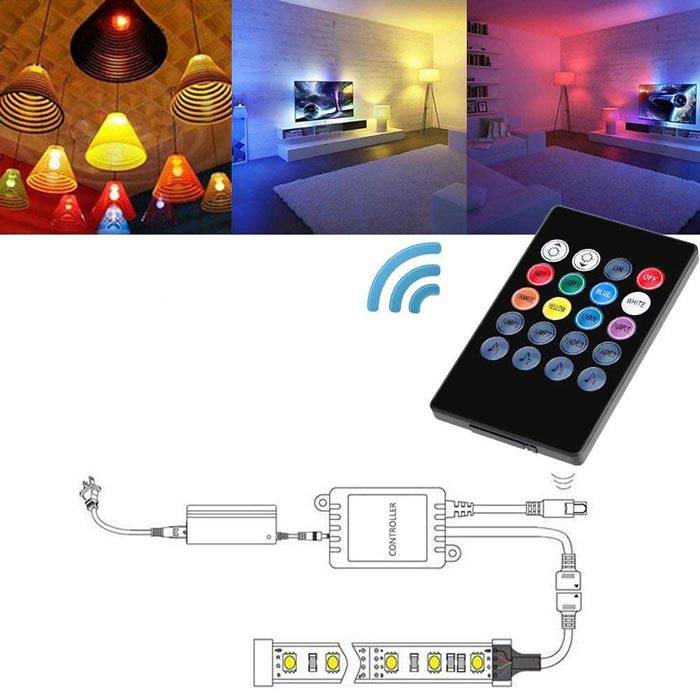
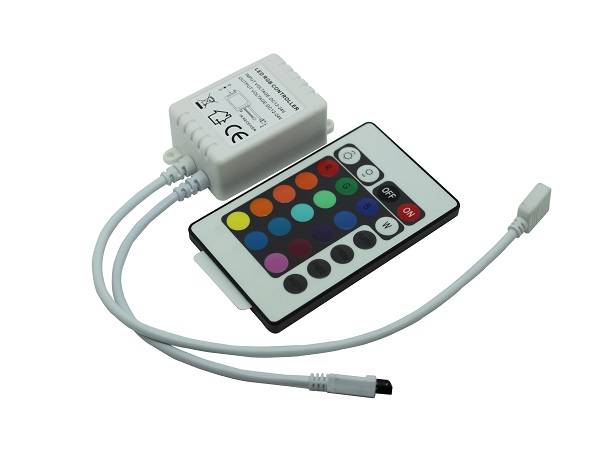
The dimmer and power element must match the power of the LED strip. Depending on what type of lighting device is used, the operation can be controlled by a special remote control.

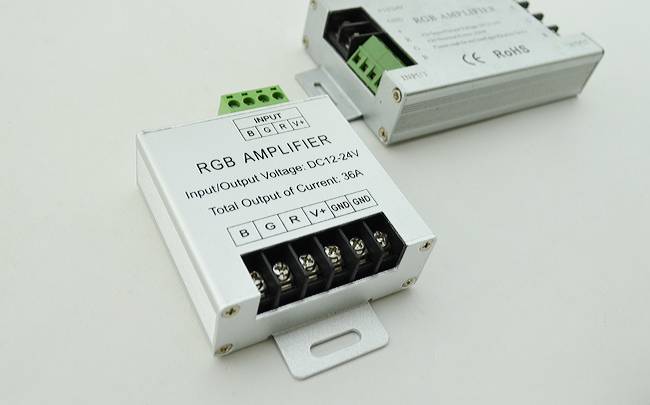
Dimmer device, purpose of terminal blocks
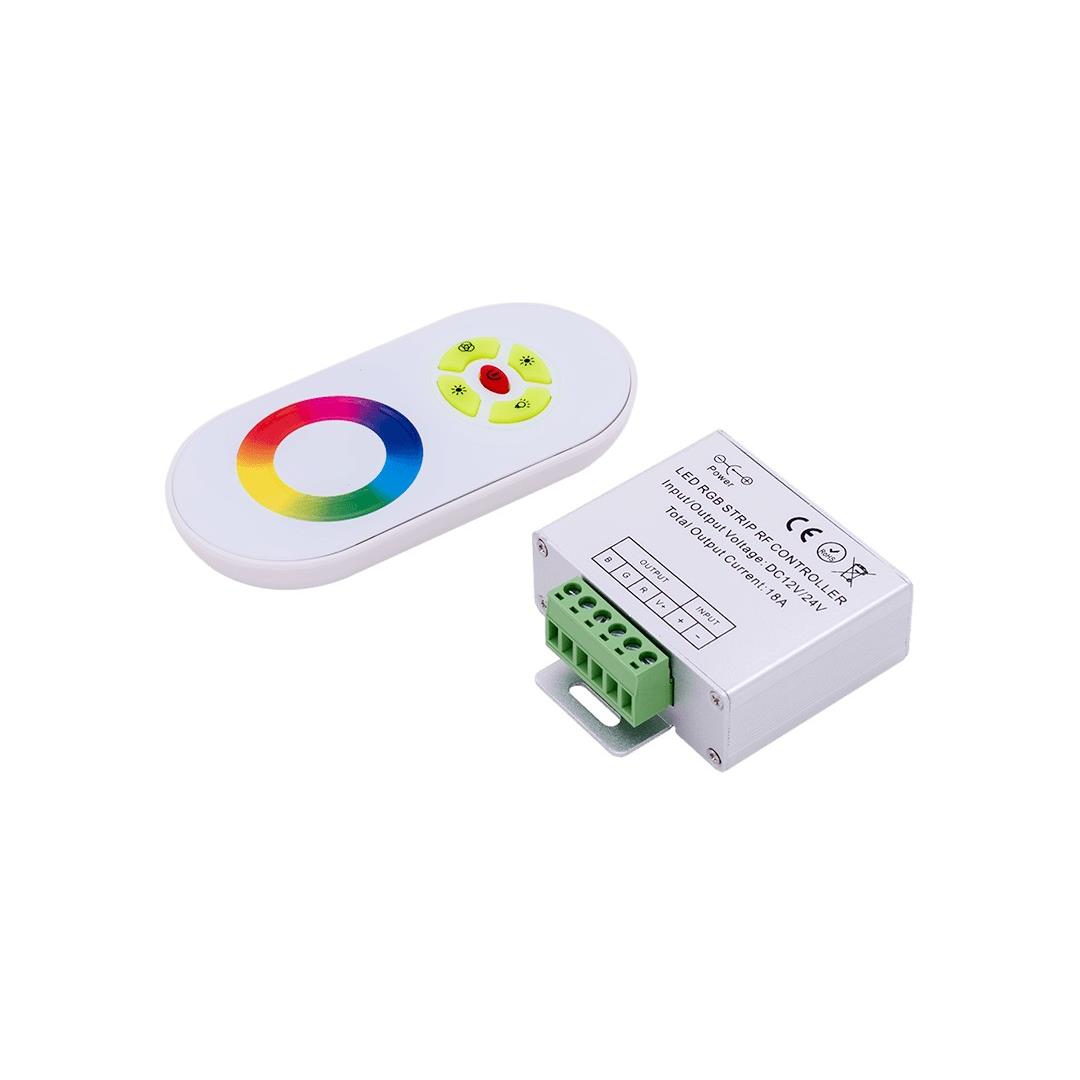
To do this, another device is introduced into the circuit - a controller, it is used solely for the purpose of regulating RGB tapes.
We assemble a dimmer with our own hands
Circuit on triacs:
In this circuit, the master oscillator is built on two triacs, a triac VS1 and a diac VS2. After turning on the circuit, the capacitors begin to charge through the resistor chain. When the voltage on the capacitor reaches the opening voltage of the triac, current begins to flow through them, and the capacitor is discharged.
The lower the resistance of the resistor, the faster the capacitor charges, the lower the duty cycle
Changing the resistance of the variable resistor controls the depth of gating over a wide range. Such a scheme can be used not only for LEDs, but also for any network load.
AC connection diagram:
Dimmer on the N555 chip
The N555 chip is an analog-to-digital timer. Its most important advantage is the ability to work in a wide range of supply voltage. Ordinary microcircuits with TTL logic operate from 5V, and their logical unit is 2.4V. CMOS series are higher voltage.
But the generator circuit with the ability to change the duty cycle turns out to be quite cumbersome. Also, for microcircuits with standard logic, increasing the frequency reduces the voltage of the output signal, which makes it impossible to switch powerful field-effect transistors and is only suitable for loads of small power. The timer on the N555 chip is ideal for PWM controllers, since it simultaneously allows you to adjust both the frequency and the duty cycle of the pulses
The output voltage is about 70% of the supply voltage, due to which it can even be controlled by Mosfets field effect transistors with a current of up to 9A
The timer on the N555 chip is ideal for PWM controllers, since it simultaneously allows you to adjust both the frequency and the duty cycle of the pulses. The output voltage is about 70% of the supply voltage, due to which it can even be controlled by Mosfets field effect transistors with a current of up to 9A. With an extremely low cost of parts used, assembly costs will amount to 40-50 rubles
With the extremely low cost of the parts used, the assembly costs will amount to 40-50 rubles.
And this scheme will allow you to control the load at 220V with a power of up to 30 W:
The ICEA2A microcircuit, after a little refinement, can be painlessly replaced by the less scarce N555. Difficulty may cause the need for self-winding of the transformer. You can wind the windings on a conventional W-shaped frame from an old burned-out 50-100W transformer. The first winding is 100 turns of enameled wire with a diameter of 0.224mm. The second winding - 34 turns with 0.75mm wire (the cross-sectional area can be reduced to 0.5mm), the third winding - 8 turns with 0.224 - 0.3mm wire.


Dimmer on thyristors and dinistors
LED dimmer 220V with load up to 2A:
This two-bridge half-wave circuit consists of two mirror stages. Each half-wave of voltage passes through its own thyristor-dinistor circuit.
Depth of duty cycle is regulated by a variable resistor and a capacitor
When a certain charge is reached on the capacitor, it opens the dinistor, through which current flows to the control thyristor. When the polarity of the half-wave is reversed, the process is repeated in the second chain.
Dimmer for LED strip
Dimmer circuit for the LED strip on the integral stabilizer of the KREN series.
In the classic voltage stabilizer connection scheme, the stabilization value is set by a resistor connected to the control input. Adding capacitor C2 and a variable resistor to the circuit turns the stabilizer into a kind of comparator.
The advantage of the circuit is that it combines both the power driver and the dimmer at once, so the connection does not require additional circuits. The disadvantage is that with a large number of LEDs on the stabilizer there will be significant heat dissipation, which requires the installation of a powerful radiator.
How to connect a dimmer to an LED strip depends on the dimming tasks. Connecting in front of the LED power driver will allow you to adjust only the general illumination, and if you assemble several dimmers for the LED with your own hands and install them on each section of the LED strip after the power supply, it will be possible to adjust the zone lighting.
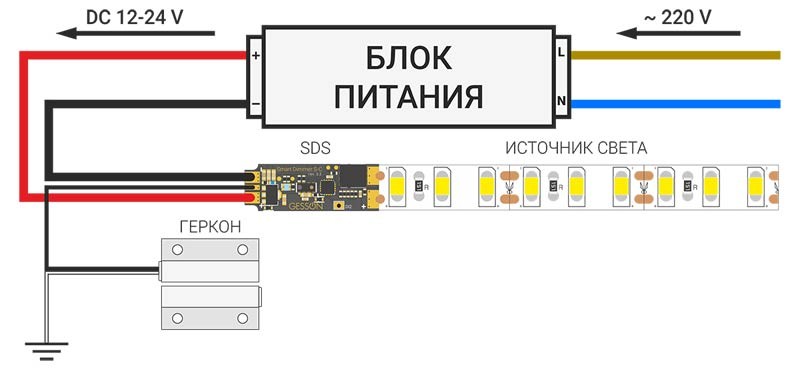
Control Features
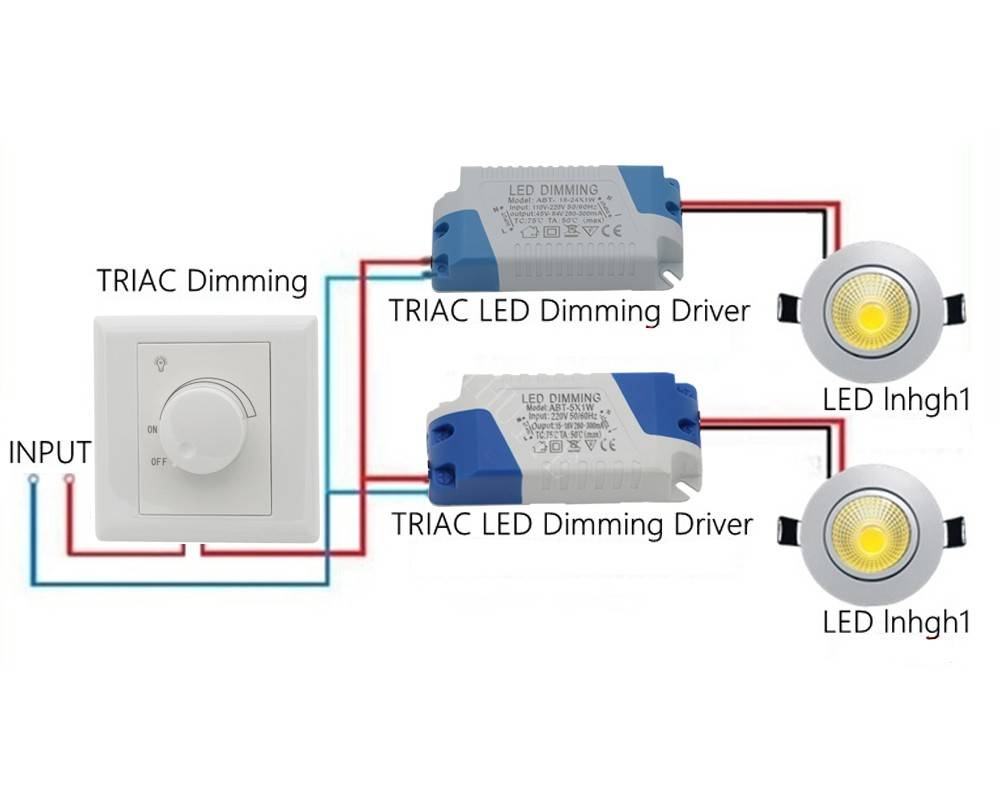
The power supply for LEDs must have special properties. A special device is used in the form of a separate module, which is called a driver. This is a buck stage rectifier that supplies 12 volts DC to the tape. They plug into a standard 220 volt supply and convert it to 12V (or 24V) DC.
A dimmer, or dimmer, is connected between the driver and the tape. It produces a voltage change that is applied to the tape. The result of this is a decrease (or increase) in the brightness of the glow of the elements, from zero to the maximum value.
The first dimmers were rheostats or autotransformers. Modern devices are more complex, have increased efficiency and quality. Dimmable LEDs have non-linear characteristics and require very precise exposure within certain limits. If traditional designs are used, the working area will occupy only a small part of the entire range. Therefore, special universal-type controllers are produced that can work with any LED devices - strips, lamps, individual elements or entire groups. The main condition is the correspondence of the characteristics of the dimmer and consumers.
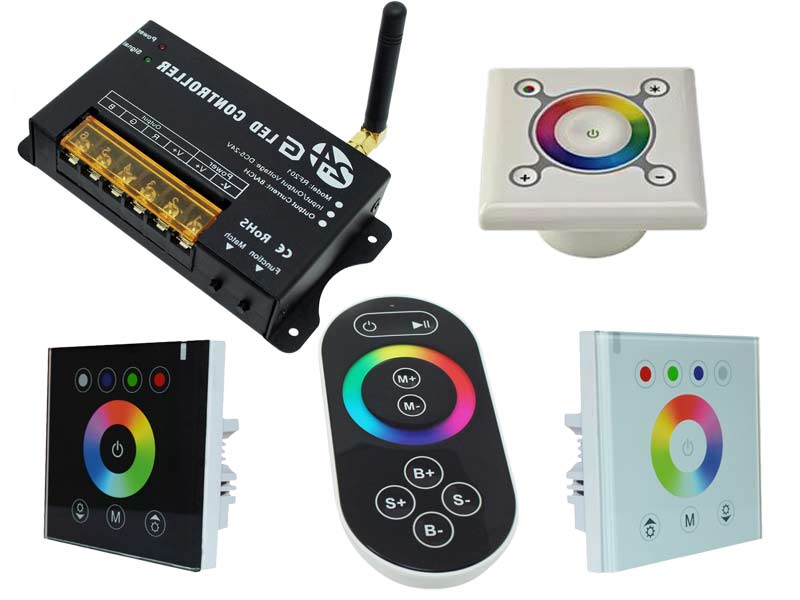
There are several varieties that differ in the way they are controlled:
- pressure;
- rotary-push;
- rotary;
- electronic;
- sound;
- remote.
The first types are mechanical devices in which the command to change the mode is given using a conventional regulator. They are relatively cheap, but do not differ in particular smoothness and accuracy.


Electronic models most often use a touch control method, where the command is displayed on the display.
Remote dimmers work in conjunction with the control panel. They are a little more expensive, but allow you to expand the adjustment options and get a set of lighting effects.
Schemes for changing power parameters also differ from each other. Are used:
- controlled power supplies. They are able to change the parameters of voltage and current at the input of the tape in a small range, which allows you to smoothly adjust the intensity of light. The disadvantage of this type is the noticeable heating of the LEDs, which negatively affects the durability of the backlight, accelerating the degradation of the elements;
- pulse regulators of the glow mode.These devices use pulse-width modulation (PWM), which completely eliminates the shortcomings of previous designs. They do not change the parameters of the power supply, but supply voltage intermittently. The shorter the pause between the peaks, the brighter the LEDs burn, and vice versa.
Good and bad LED strips on the printed circuit board
Types and types of tapes go off scale in their diversity. Printed circuit boards on which LEDs are placed can also be made in various versions. The flexible printed circuit board (FPC) is very popular. And first of all, a simple buyer can easily determine and understand how bad the tape is - look at it closely. Many believe that the quality of the diode tape is determined by the color of the mask. Where this assertion came from, I don't know.
The quality of an FPC board is determined only by the thickness and method of applying copper conductors. Good boards have rolled copper, which can be seen on regular boards. FPC must be double sided. Such a tape has a low resistivity, the voltage drop is the same along its entire length, and all chips shine in the same way. This is clearly visible when the tape is connected twice (on both sides).
In poor boards, copper is applied by spraying. I won’t tell you what diffuse spraying is, but you don’t need it. The main thing is to understand and assimilate that such copper has a small thickness and a heterogeneous structure. Diode degradation can reach up to 90 percent.
Therefore, to check the tape, ask the seller for a piece of tape. They have special samples for this. Detach the sticky layer and look at the underside. If a copper conductor is visible, then the board is double-sided and the tape is of good quality.No one will bother and release a tape with a good board and bad LEDs. If it is not clear whether it is a double board or not, expose the area with the copper conductor on the front. And scratch it with your fingernail. The sprayed copper is easily erased. In this case, you can safely turn around and leave the store. Well, or look at another copy. But I don’t think that if a store has at least one cheap, low-quality product, then it will have a good one.
Well, in general, that's all. We have looked at a number of principles for identifying good quality LED strips. I have already talked about the best. One tape for one room will be considered the best, and the second, despite the fact that it is made with high quality, will not be the best application.
Reliability
Based
practical use cases, it can be stated that the LED ribbon
for 24 volts more reliable than 12V.
Explained
this is not some kind of improved parameters. They have nothing to do with it.
The thing is that these types are most often supplied by normal, well-established manufacturers.
More budgetary suppliers either do not have them in stock, or this line is limited to only one or two copies.
Curious
the user will wonder, what about 36 or 48 volts? After all, here the currents
will be even less, which means that the benefits and advantages should increase many times over.
Everything is like
true, however:
firstly, such tension, under a combination of adverse circumstances, can already be dangerous for a person
secondly, a very large cutting ratio (up to 20 cm!)
That's why
such models are not widely used in everyday life.
Dimmer classification for LED lamps
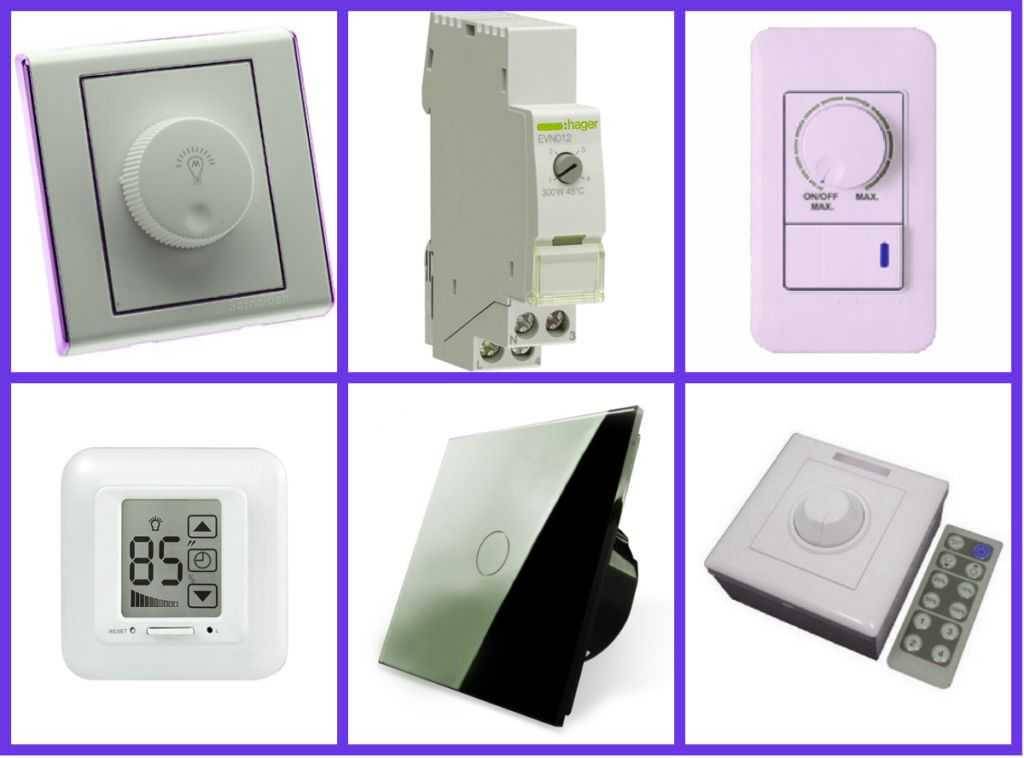
When buying dimmers, you need to take into account that variators for energy-saving, LED and conventional incandescent lamps have certain differences and classification. Dimmers are divided according to design features, method and place of installation, control principle and other characteristics.


A variety of dimmers makes it easy to choose the right device
Place and method of installation
According to the place of installation, dimmers are divided into remote, modular and wall-mounted.
- Modular. This type of dimmer is mounted on a DIN rail in a distribution board together with an RCD. Such variators can be easily installed or replaced at any time, but for this device it is necessary to provide for the laying of a separate wire during repair or construction. Modular dimmers are perfect for home improvement according to the "smart home" system.
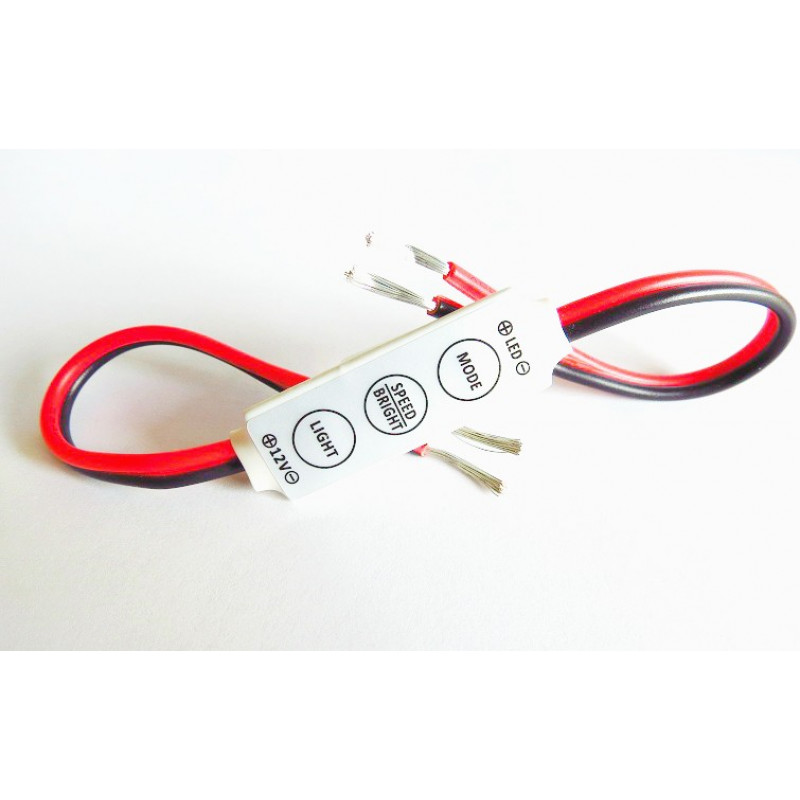
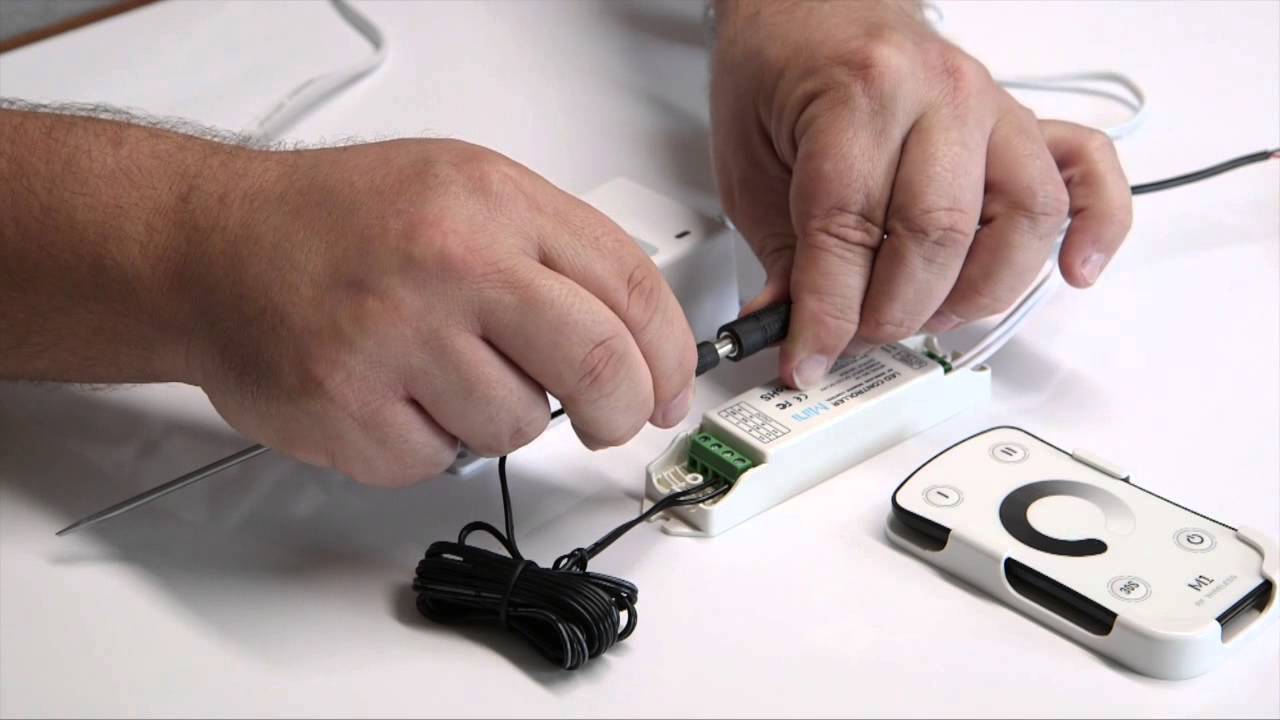
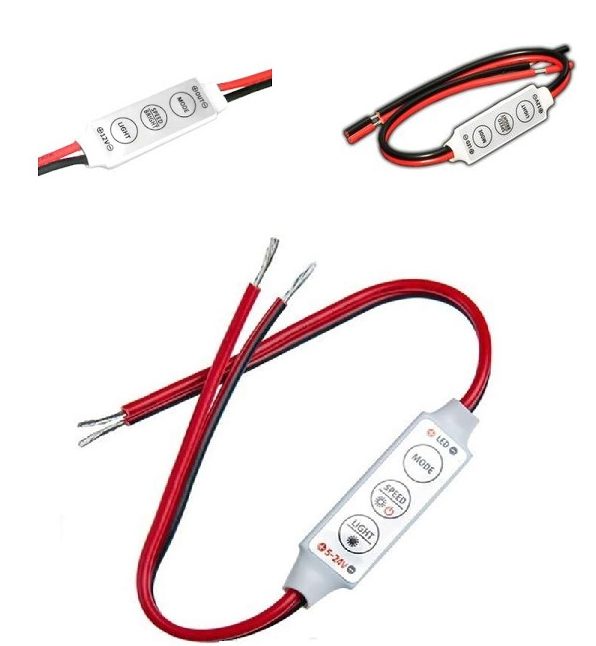
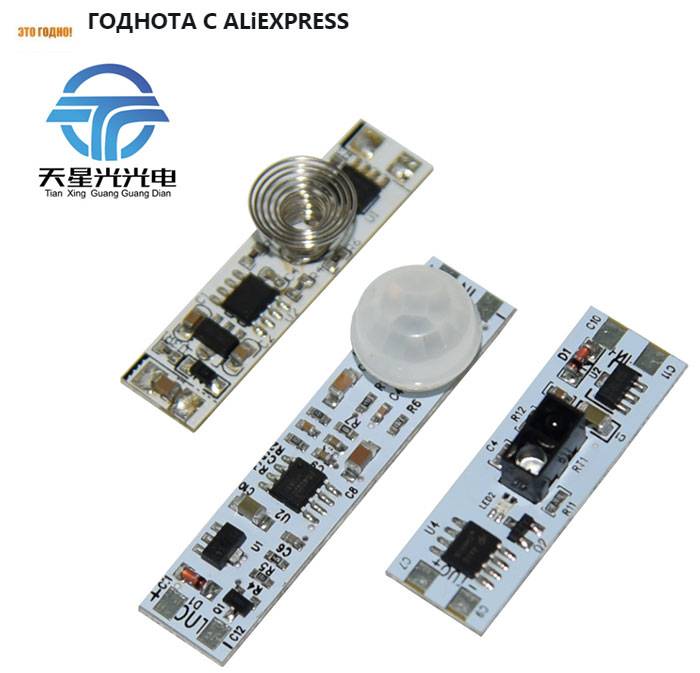
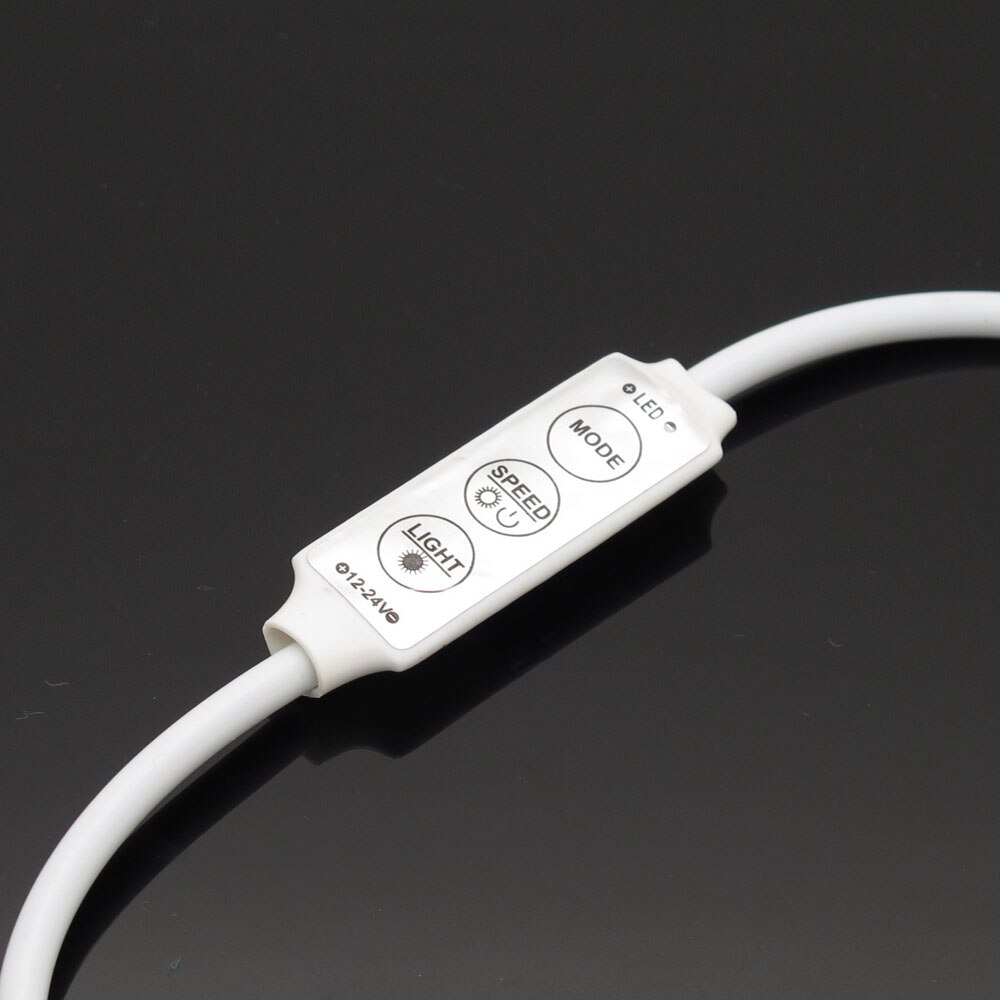
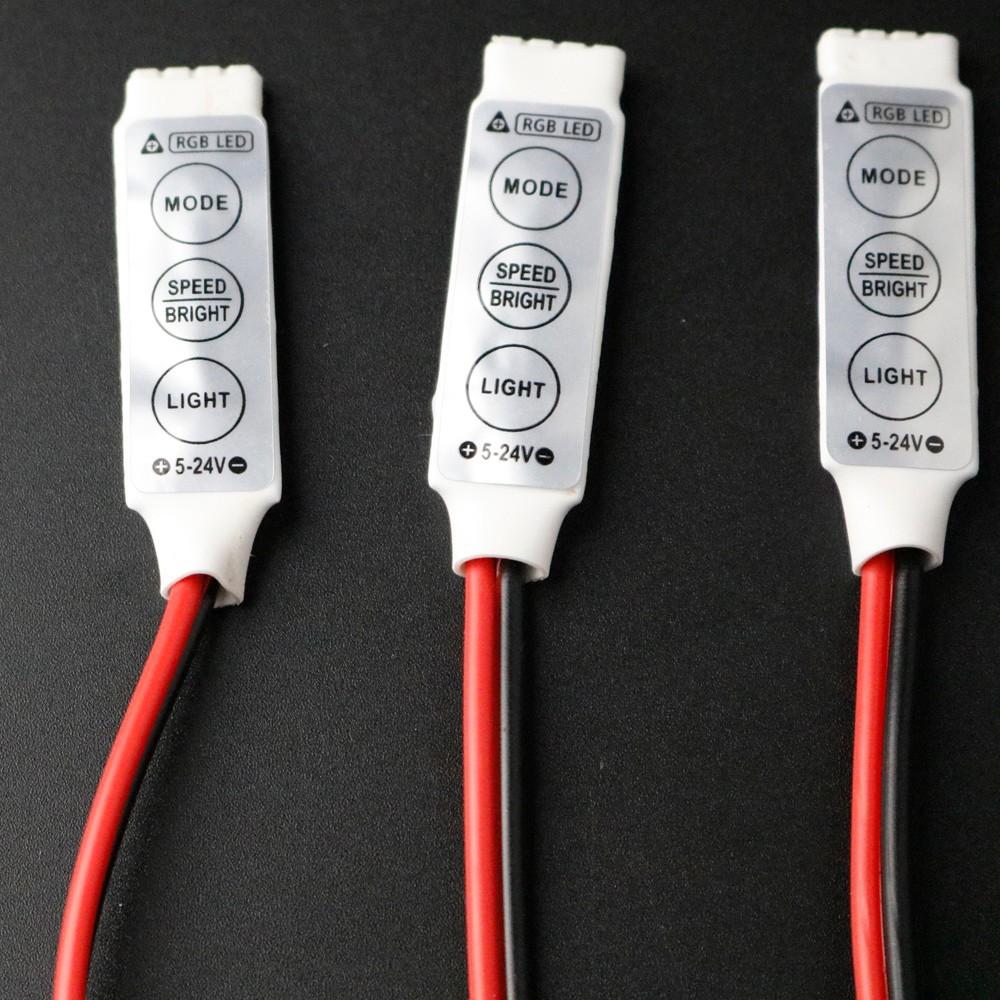
- Remote. These are small devices 20÷30 mm long and having three control sensors. Since they provide for remote control, such dimmers can be mounted next to the lamp or directly in the lighting fixture itself. The dimmer can be installed simultaneously with the chandelier and does not require chasing the walls or ceiling. An ideal option if it is decided to install variators for lighting, and the repair has already been done.
Remote control of the dimmer is quite convenient
Wall. Such dimmers are mounted in the same way as sockets and switches directly in the room where the dimmable LED lamps are located.The installation of such a dimmer must be carried out before the repair and application of the finish coating, since the installation requires chasing the walls or ceiling.
According to the principle of management
If we talk about the principle of controlling the dimmer and, then they, in turn, are divided into mechanical, sensory and remote.
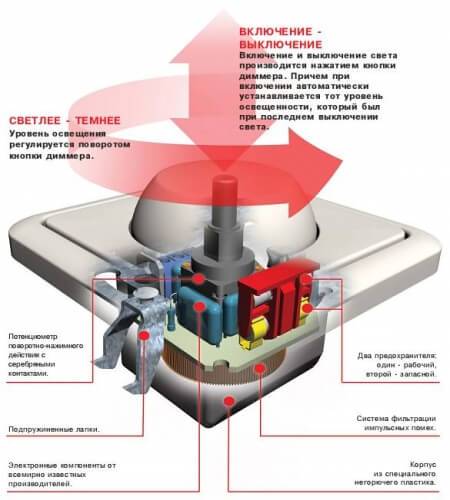
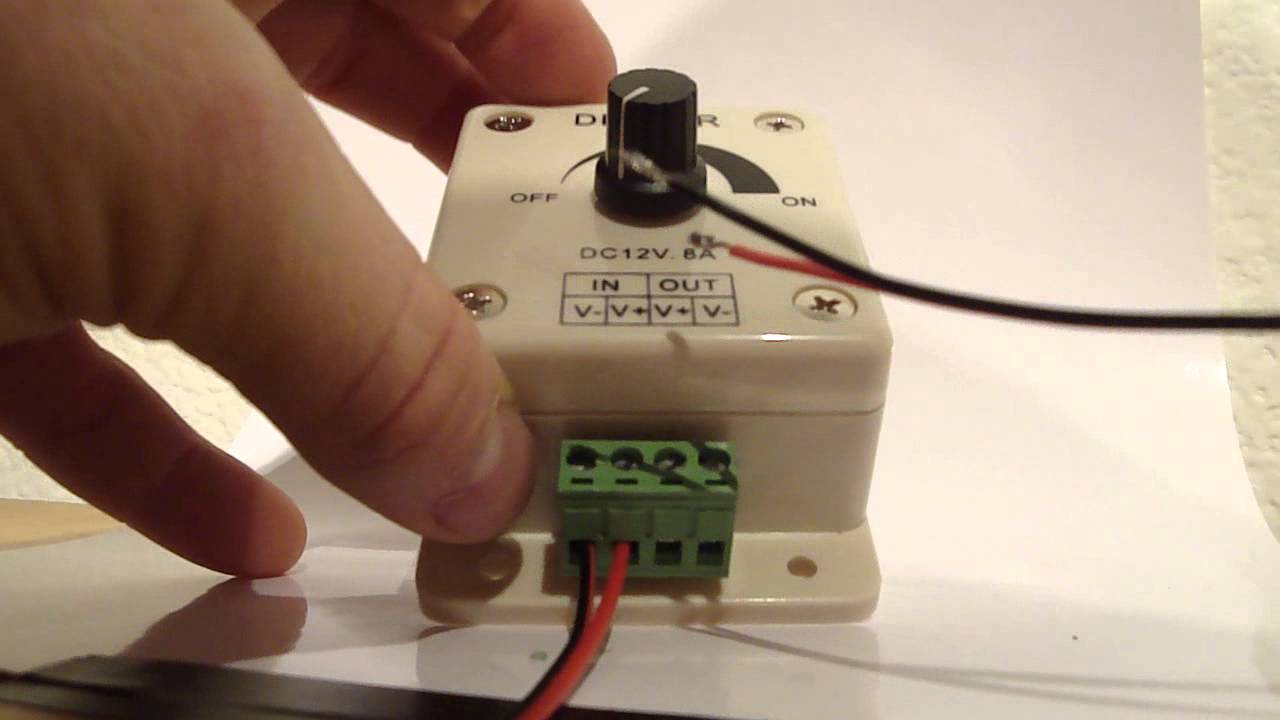
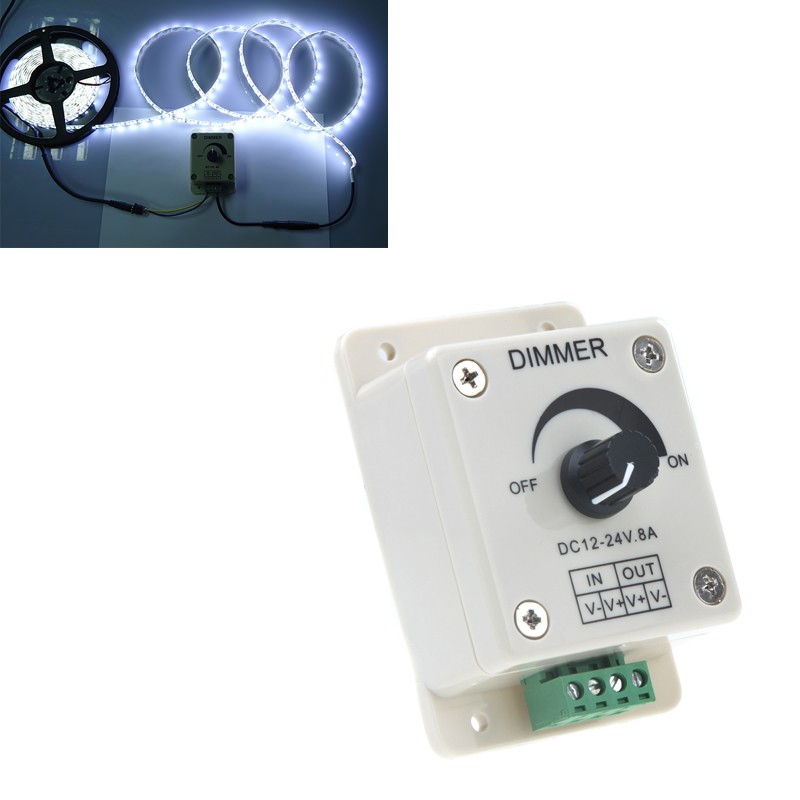
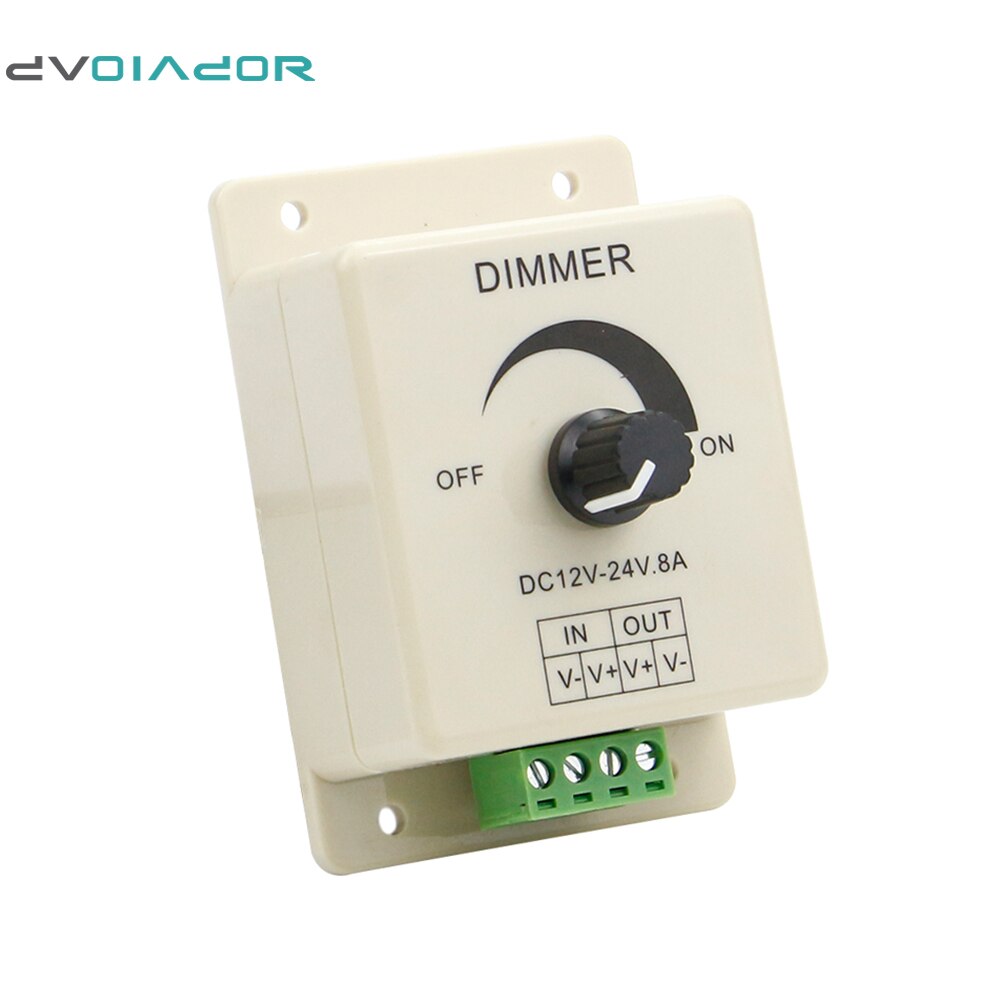
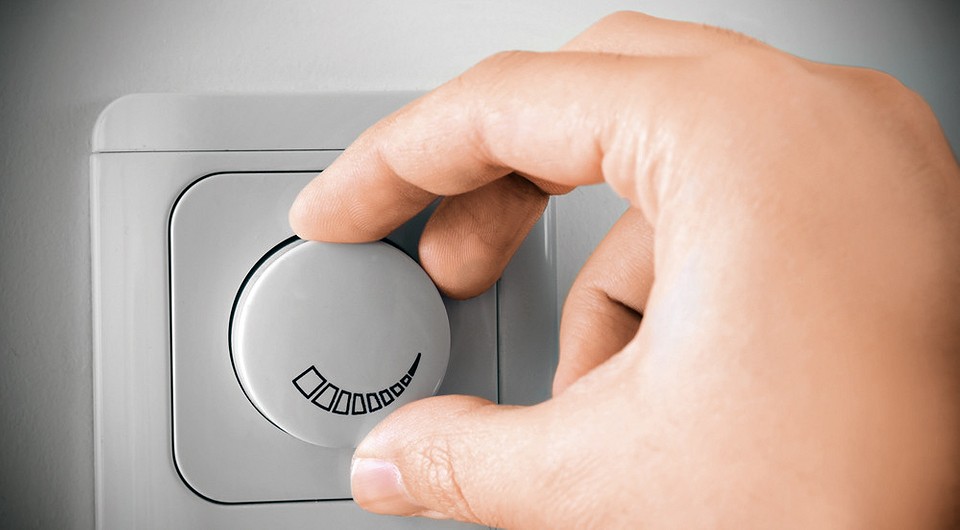
Mechanics
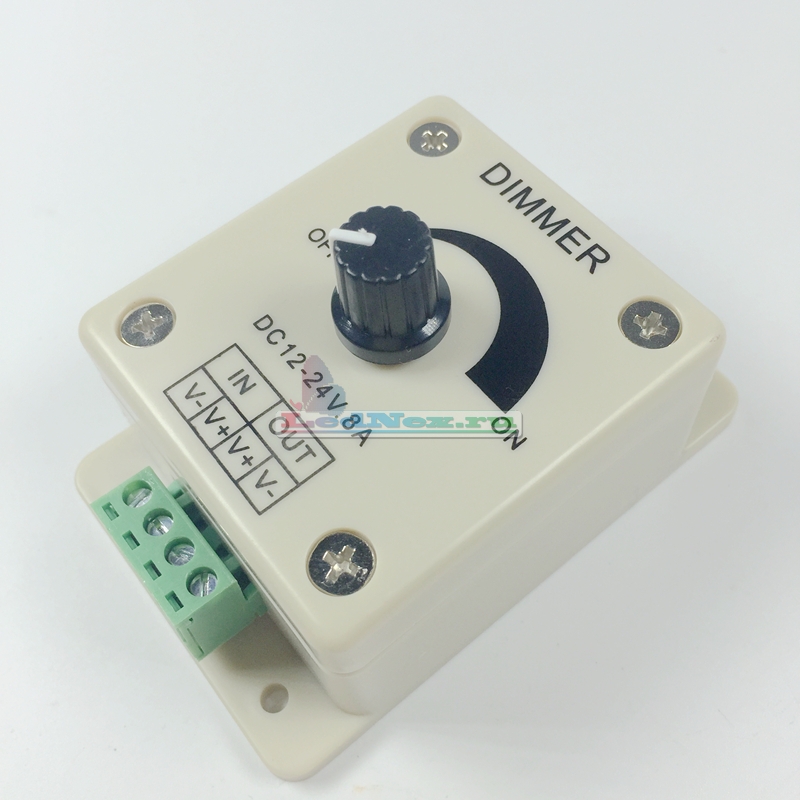
Mechanically controlled lighting variators are the earliest and simplest devices for adjusting the intensity of the luminous flux of lamps. On the body of the dimmer there is a rotating round knob, through which the variable resistor is controlled and, accordingly, the lamps are turned on and off.
Good old and trouble-free mechanical dimmer
Among mechanical dimmers there are push-button and keyboard models. Such devices, as well as conventional switches, have a key to turn off the lighting fixture from the mains.
Sensor
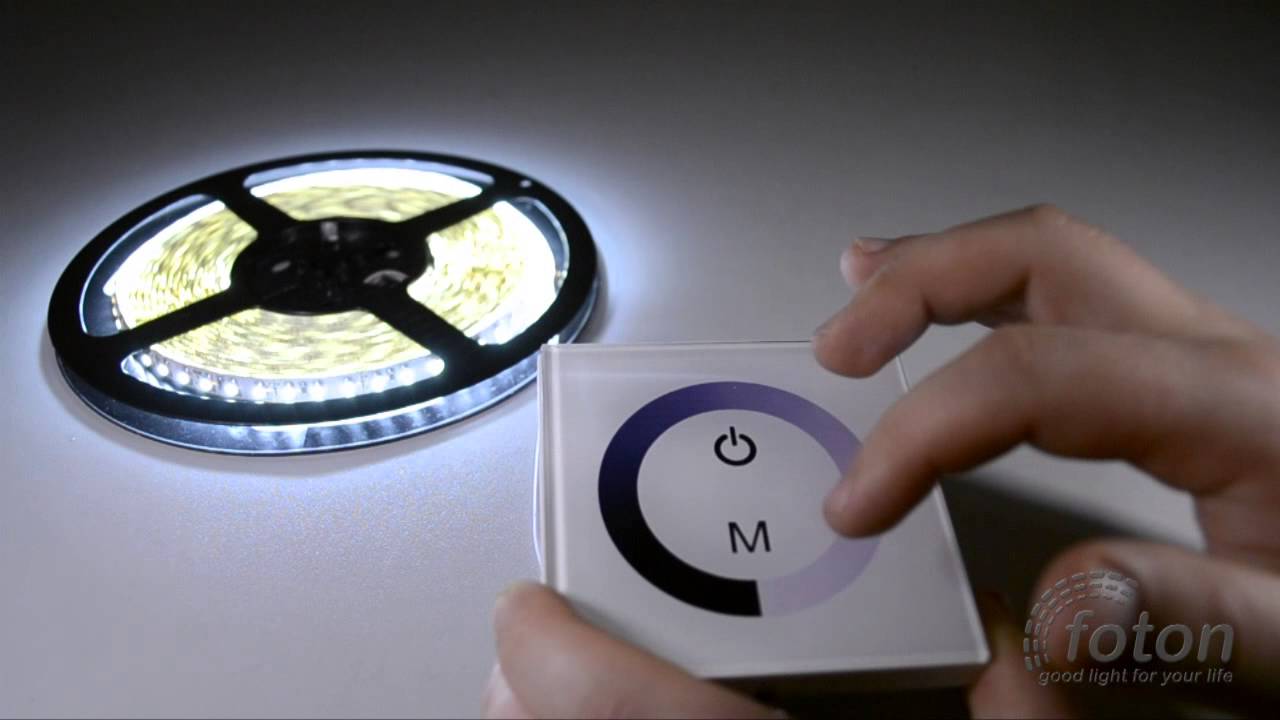
Touch control dimmers have a more solid and modern look. To dim LED lamps, you just need to lightly touch the touch screen. However, these dimmers are more expensive than their mechanical counterparts.
Such a touch dimmer will not leave anyone indifferent
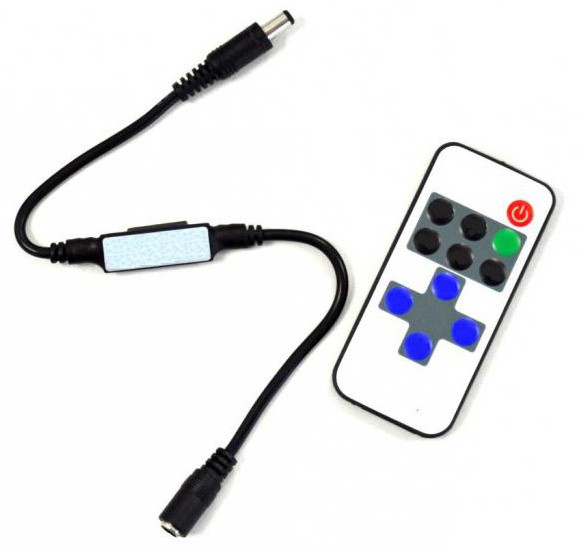
"Remote"
Technology enhances comfort
Remote control dimmers are equipped with a remote control, with which the optimal level of luminous intensity of the lamps is adjusted via a radio channel or via an infrared port. Radio control is possible even from the street, while the remote control with an infrared port can only perform settings when pointing it directly at the dimmer.
Dimmer with radio remote control
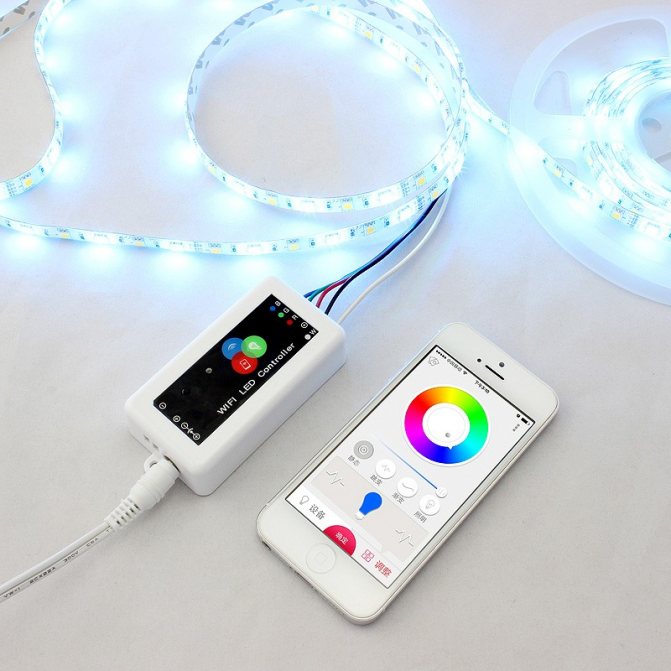
There are also models of dimmers that allow you to control lighting via Wi-Fi, and they are mainly used in smart home systems.
One of the varieties of dimmers are acoustic dimmers that respond to claps or voice commands.
Main conclusions
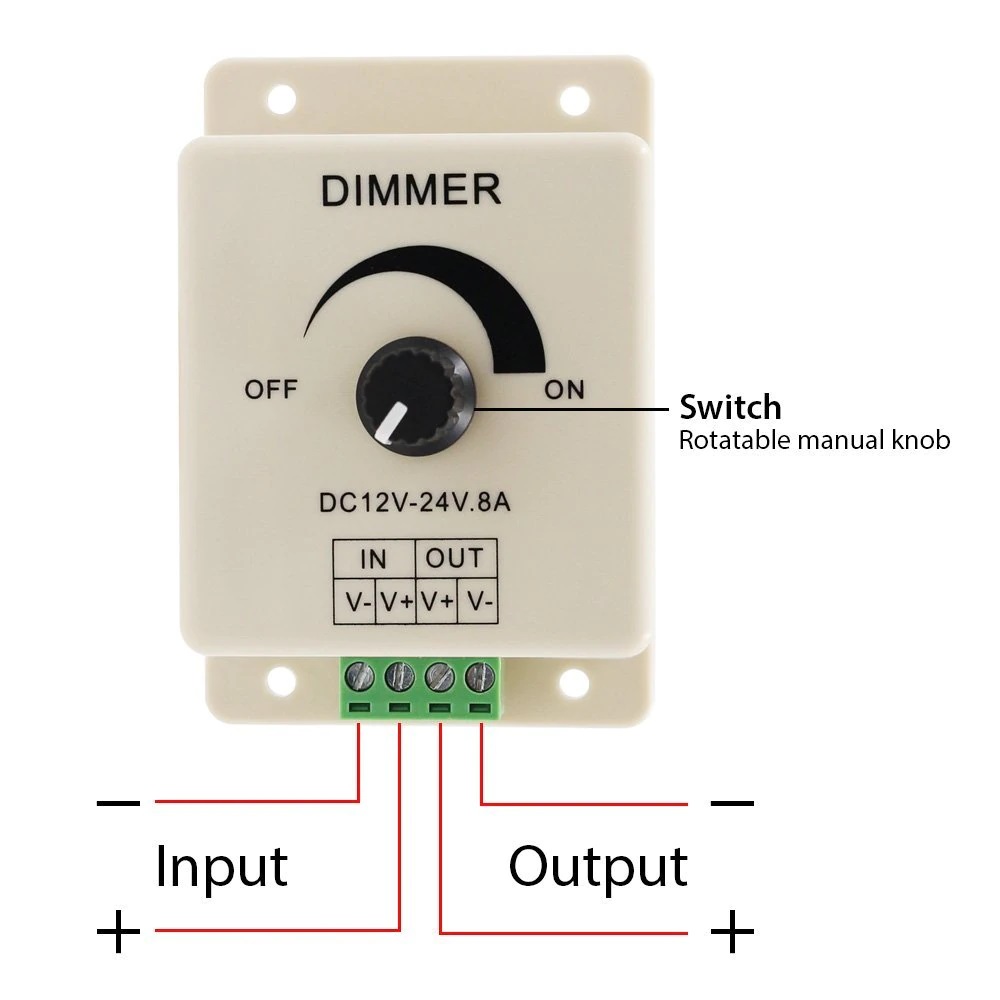
The dimmer for LED strip is a practical and useful device that expands the possibilities of backlighting. It is universal, suitable for all tapes with the same parameters. Connecting the device does not pose significant difficulties:


- connection to the power supply (for
multi-color ribbons - to the controller output); - connecting the dimmer output to the appropriate
contacts of the LED strip; - checking the polarity and correct connections;
- test lighting connection.
Previous
LEDsAppointment and power supply circuit for 12 V LED strip
Next
LEDs Why the LED strip heats up: the main causes and solutions


