- Self-repair of a valve valve
- Replacing the rubber gasket
- Water oozing from under the stem
- Water does not shut off
- Shower Troubleshooting
- Weak water dispersion
- Hose leak and drain
- "Narrow" places of taps and mixers
- Reducing the water pressure from the spout
- faucet leaking
- Leakage at the point of connection of the water pipe (hose) to the faucet or faucet
- How to fix a faucet in the bathroom if the junction of the spout and body is leaking
- How to fix a kitchen faucet with a flexible spout
- What to do if the faucet is leaking. Repair instructions
- Causes of failure of a two-valve crane
- Gasket wear
- The reason is the sealing insert of the stuffing box
- Shower hose leak
- Cranbox replacement
- Main reasons
- Poor quality device
- Mounting errors
- Violation of the rules of operation
- Wear of the main parts
- Clogged aerator filter
- What do you need to repair a faucet?
- Water from the faucet
- Tap water
- Water between faucet and spout
- Water oozing at the pipe connection
- Water seeps out of the body
- Mixer leak and its diagnostics
- How to repair a ball valve
- Why is the faucet leaking?
- How to replace the gasket inside the faucet
- Video - How to put a rubber gasket
- Video - Replace the gaskets correctly on the lever
Self-repair of a valve valve
Valve taps can be called classics of water supply.And, although they are gradually being replaced by new designs, there are still plenty of them. Their internal structure has not changed over the decades. Only the design has changed - it has become more diverse and refined. Today you can find both the most common models and very exotic ones.
The structure of valve valves
Water taps of this type are still in use, as they are simple and reliable, they serve not for years, but for decades. If all the “stuffing” is of good quality, all that can fail during this time is gaskets. Replacing them is the main way to repair a valve valve.
Replacing the rubber gasket
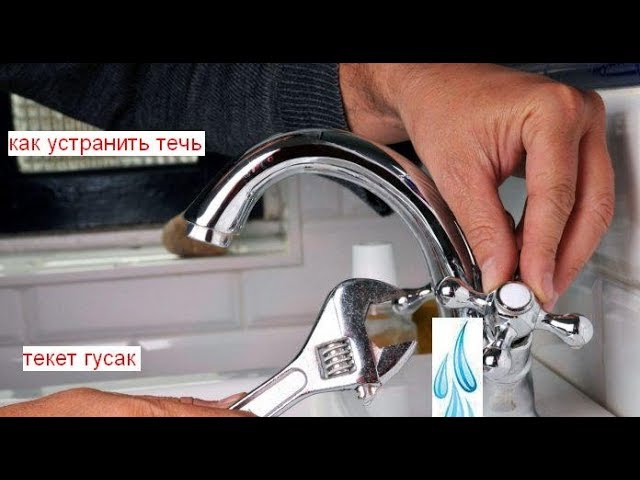
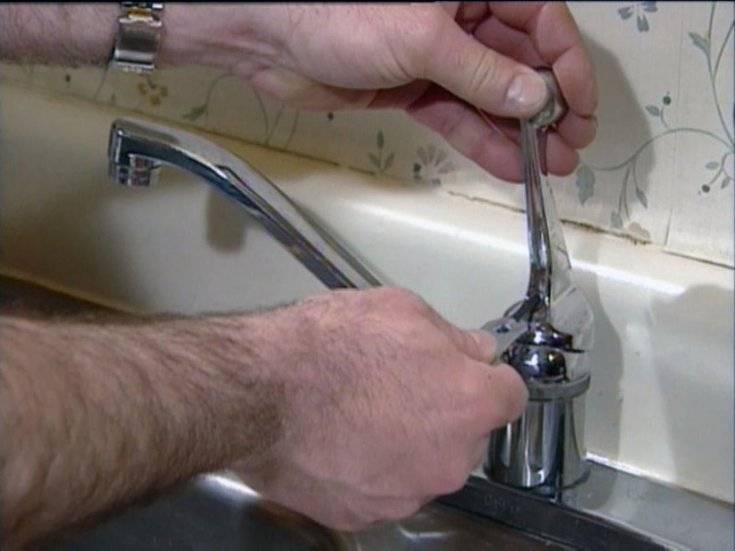
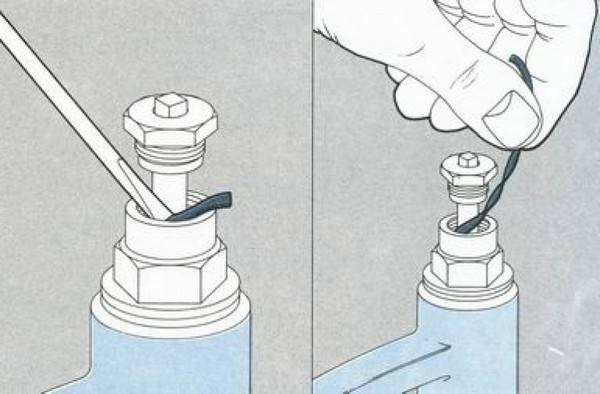
If, with the valve completely closed, the faucet in the kitchen or bathroom continues to drip, most likely the reason is the gasket on the valve that has lost its elasticity (see photo in the next paragraph). She no longer clings tightly to the saddle, which is why the water continues to flow and sometimes the tap does not just drip, but even flows. Repair the faucet in this case - replace the gasket. To do this, you need a wrench, or better - an adjustable wrench and a set of gaskets.
Before you fix a dripping faucet, turn off the water supply (you can completely, you can only in this branch, if possible). Next, it is useful to make sure that the water is still blocked. Water does not flow - we begin repairs. You will need a wrench or adjustable wrench. They will need to unscrew the head housing (the upper part of the housing).
It is better to work with a wrench. In order not to damage the surface during the operation, wrap it with a soft cloth, and then apply the key. Unscrew the head, remove the valve. Now you can replace the gasket or install a new valve. You pry the old one with something sharp - you can use a screwdriver with a flat blade, you can - with an awl, etc.
When choosing a gasket, please note that its edges must be beveled at about 45 °, otherwise the plumbing will make noise during operation. If this is not in your arsenal, you can trim the edge with something sharp - a knife or scissors
Replacing the gasket in the tap in pictures
If there is no suitable gasket, it can be cut from a sheet of dense rubber (porous is not suitable). The thickness of the rubber sheet or gasket is 3.5 mm, the inner diameter is slightly less than the diameter of the rod, the outer one should not protrude. Don't forget the 45° beveled edges.
After installing the gasket, put the valve in place, twist the head. The new models do not require a winding on the thread. Moreover, winding is contraindicated - it can cause a crack in the body. If an old crane from the times of the USSR is being repaired, tow is placed on the thread, lubricated with packing paste, then twisted. After that, you can gradually turn on the water.
Sometimes the opposite story happens with this gasket on the valve - water does not flow or barely oozes. In this case, the gasket flew off the stem and blocked the flow of water. First, you can try to open / close the tap a couple of times, and if it doesn’t help, you need to repeat the operation described above, that is, repair the tap by replacing the gasket. Just remember to remove the old one stuck to the saddle.
Water oozing from under the stem
If water drips from under the valve, the seals are most likely worn out. There are two ways to fix a faucet with a leak from under the stem. To begin with, you can try to twist the head housing more tightly. They do it again with a wrench. It is undesirable to use pliers, as traces remain after them. Tighten the head as far as possible (just don't overdo it).
The structure of the valve
If the thread is tightened to the maximum, and water continues to ooze, it is necessary to replace the gaskets on the stuffing box. To do this, first tighten the tap to the limit, then remove the tap head again, pry something sharp and remove both rubber rings, replacing them with new ones.
Water does not shut off
If the gasket is changed, and the water does not shut off, when the tap is rotated, the thread is torn off, it is necessary to change the stem - the thread on it has worn off. There are two options here - replace the stem itself or completely the entire valve head.
There may be a hole in the saddle
If the threads are not worn, the gasket is new, but the faucet is leaking, inspect the seat. It may have a hole in it. It is formed gradually - it is washed out by water supplied with high pressure. If the gasket is not pressed tightly in some place, a sink will form in this place. Sometimes water undermines the entire circumference, forming sharp edges, which quickly damage the gasket. The gully and sharp edge must be removed. Take a regular screwdriver and run it along the edge to dull the sharp edge. The same operation can be done with a nut file or a piece of fine-grained sandpaper. The main thing is to achieve a smooth (as far as possible) and non-sharp edge.
Shower Troubleshooting
Troubles can happen due to wear of individual parts, breakage of the shower hose, watering can, poor quality tap water.
Weak water dispersion
As a rule, water does not flow well through the shower screen due to clogging. The mesh needs to be removed. Clean it with a needle, awl. Screw back. To remove plaque and stains, wipe the rest of the shower parts with an vinegar solution.


Hose leak and drain
If the winding or the inside is worn out, then there is no point in repairing them. They need to be changed. If there is a simultaneous leakage of the shower and the drain, the joint between the body and the plug may be loosened. First you need to unscrew the locking screw. Tighten the union nut. In this case, the leak will be eliminated, but it will become difficult to switch the tap from the drain to the shower. It is necessary to grind the cork to the mixer body with special lapping pastes.
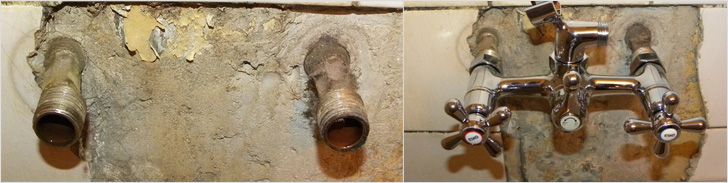
"Narrow" places of taps and mixers
As in any mechanism, in plumbing, first of all, problems arise at the junctions of individual parts. Since the main purpose of a tap or faucet is to supply water at the right time and stop its supply outside the moments of use, all major equipment breakdowns can be divided into two groups.
- There is water where it shouldn't be. This includes leakage of seals, malfunction of locking elements. Liquid may drip from the spout, from the joints between the spout and the housing, from under the control elements, from the connection of the device to the water pipe(s).
- There is no water when it is needed. This group includes insufficient jet pressure when the passage holes are clogged or the mechanism malfunctions, lack of supply, improper mixing.
If it becomes necessary to repair the current mixer, you must first find out the cause of the breakdown and solve the problem in accordance with the recommendations of the masters.
We will deal separately with violations of the equipment, characteristic of all types of taps and mixers, and separately by type.
Reducing the water pressure from the spout
If, with sufficient supply in the pipes, the jet from the spout comes out with extraneous sounds (hissing, whistling, wheezing), thin streams hitting the sides appear, the pressure does not change when the position of the regulator is changed, most likely the problem is in the aerator.
This detail is a wire or plastic mesh (a disk with holes) through which water passes. In the process of seeping through small holes, the whole jet breaks into many thin streams, softening the pressure and increasing the content of air bubbles in the water. That is why the part is called an aerator - from the Greek ἀήρ - "air".
If the aerator is built into the spout, it should be removed and washed, cleaned of lime deposits. This can be done in a slightly acidic solution of vinegar or specialized plaque removers. Screw-on heads with an aerator are removed from the spout, disassembled and washed.
After installing a cleaned - or a new, if sufficient cleaning is not possible - aerator in place, the water supply usually enters normal mode.
The process is discussed in more detail in the video for a single-lever compact mixer.
faucet leaking
With constant leakage of water from the spout (without leaks in other places), we can talk about a violation of the locking mechanism. This usually occurs when a foreign object enters or plaque (deposits) accumulates. It may also be due to the fact that the locking mechanism does not completely block the water supply hole.
In any case of failure, it is necessary to remove the locking device, check for foreign objects and the condition of the mechanism as a whole.
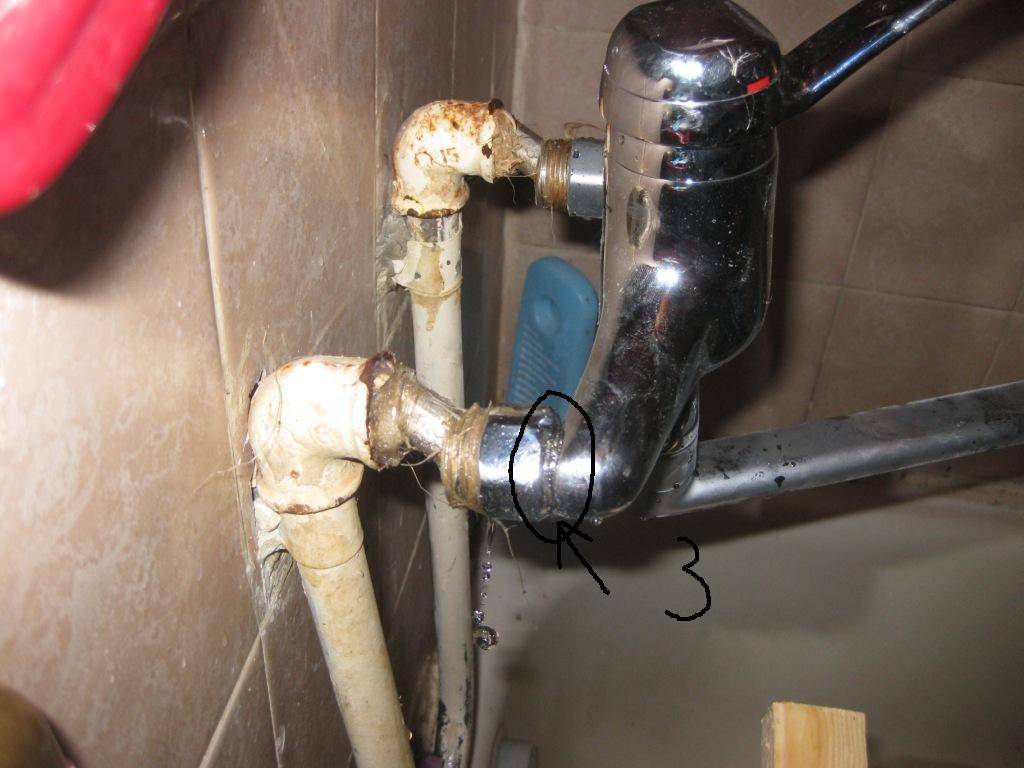
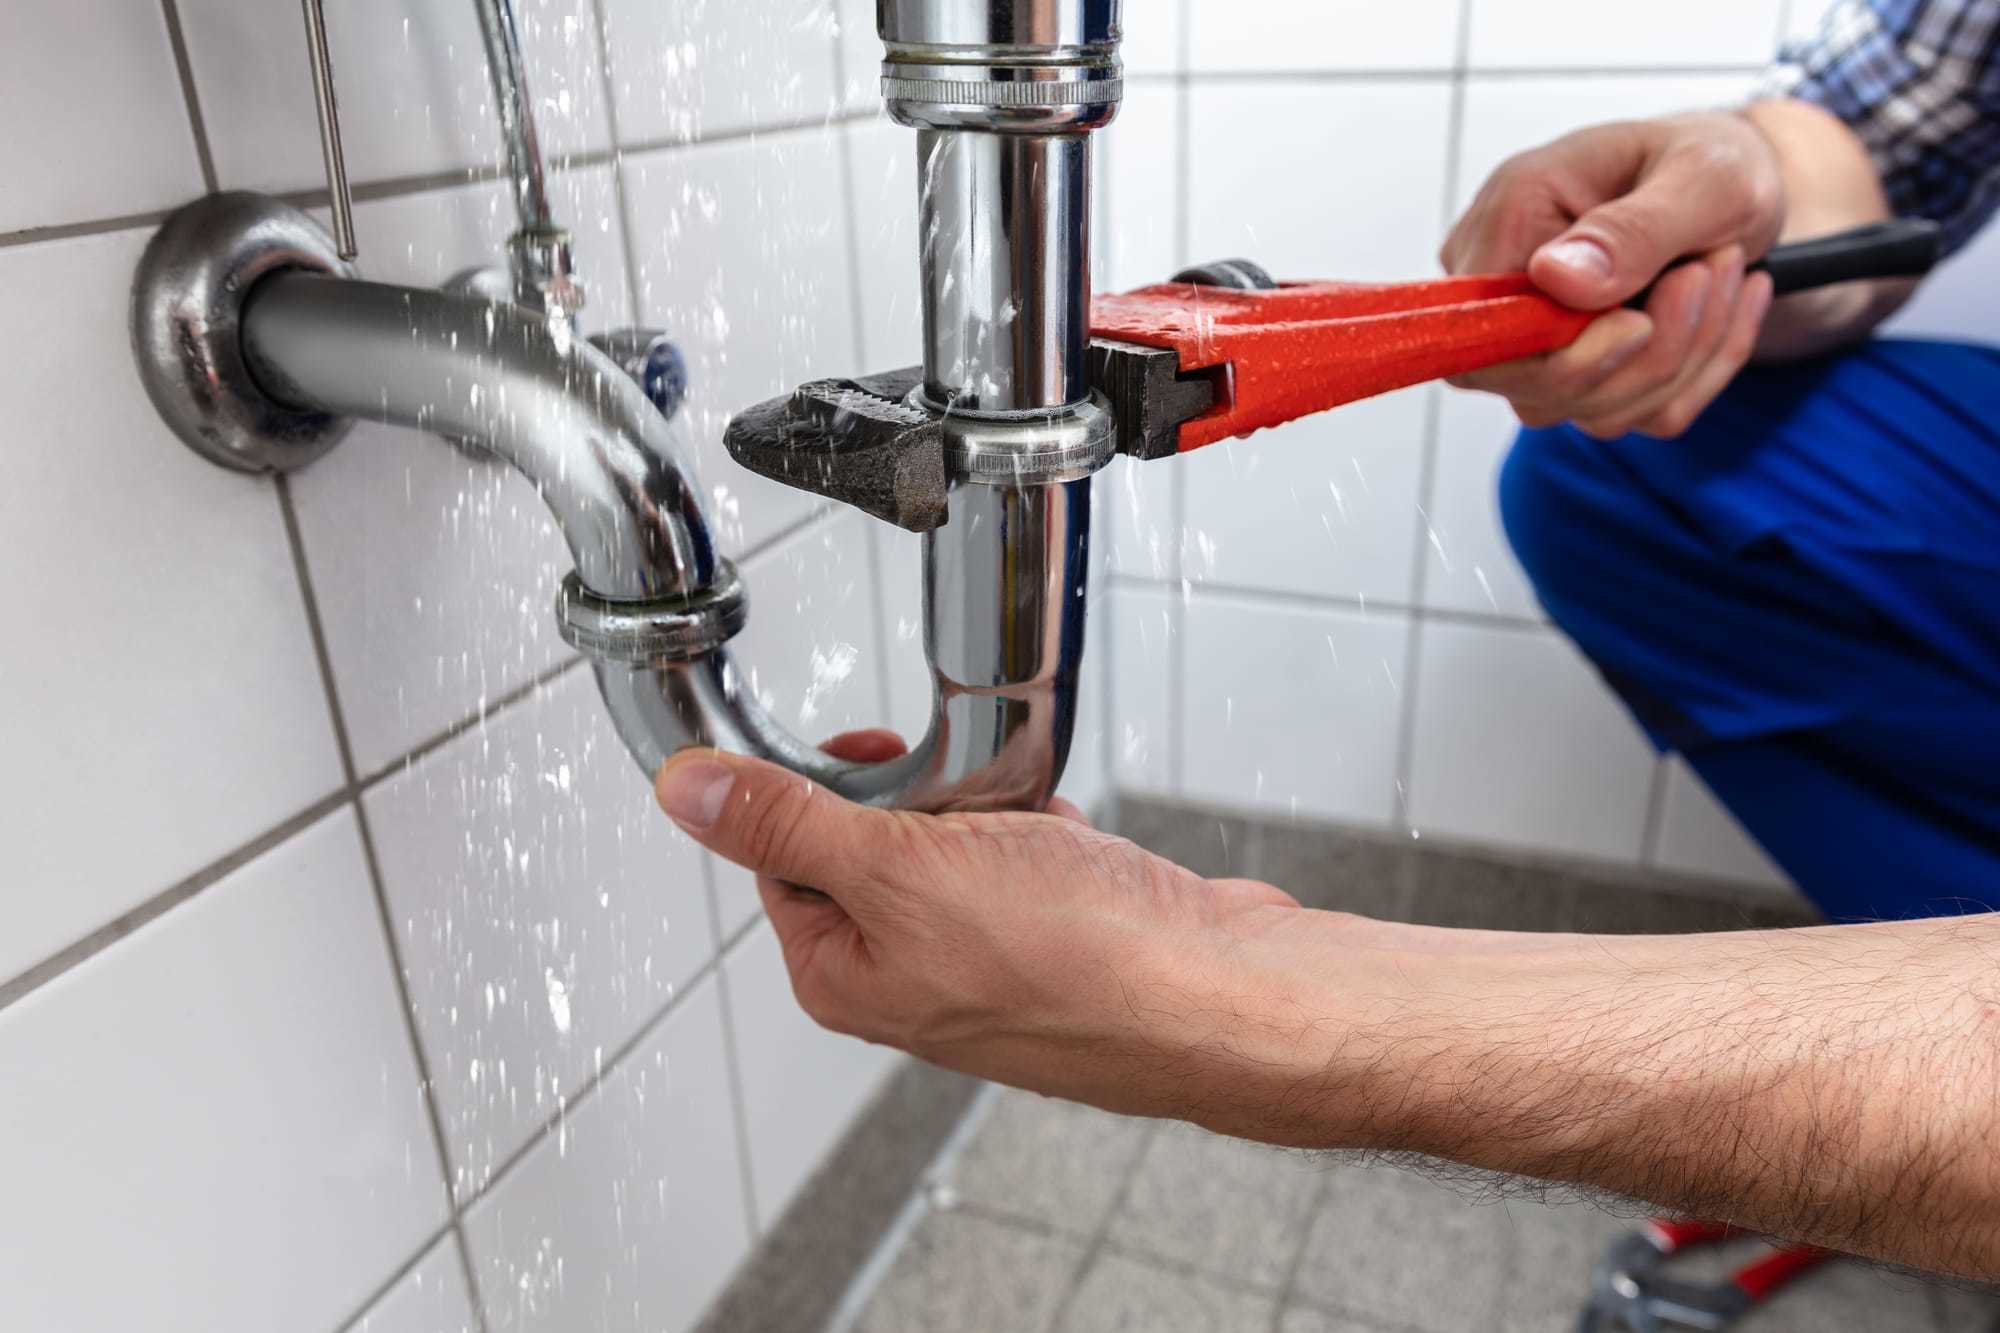
Leakage at the point of connection of the water pipe (hose) to the faucet or faucet
This problem occurs when the connection of the mixer nozzles with hoses or pipes is not tight enough. It is necessary to check whether the thread is sufficiently tightened, whether the sealing elements are in order. With frequent vibration (for example, the sink is installed above the washing machine), the threaded connection becomes loose, with poor water quality or unsuccessful initial installation, the seal must be replaced.
Similarly, the tightness of the connection for a wall tap or mixer is checked.
If the hose itself is leaking, there is only one repair option - replacing the hose.
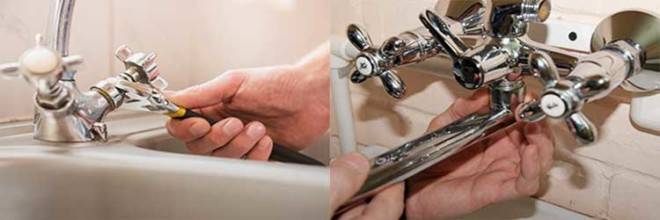
How to fix a faucet in the bathroom if the junction of the spout and body is leaking
Such a breakdown is typical for all taps and mixers with a swivel spout. Since a seal is installed at the junction of the spout and the body, it inevitably wears out and / or breaks with constant turns.
The solution to the problem is to replace the gasket at the junction. If there are burrs, protrusions, other metal defects at the installation site of the seal, it is advisable to eliminate them. If the thread of the clamping nut is damaged, it must be replaced, the same applies to the expandable plastic ring that is present in this assembly.
How to fix a kitchen faucet with a flexible spout
In the case of installing a flexible spout, a problem may arise both at the place of its attachment to the body (the repair of the breakdown is discussed above), and in the hose itself. Most often, the flexible tube located inside the corrugated metal hose is damaged. It cannot be repaired, you can only replace the element. If the corrugated hose itself is damaged, either the entire flexible spout or the hose together with the inner tube must be replaced.


What to do if the faucet is leaking. Repair instructions
Who among us has not encountered leakage of faucets in the apartment or other taps? It’s good if you have a plumbing repair skill, but what if you don’t? In this case, the question “the tap is flowing - what to do” may be quite relevant. Let's deal with this not tricky science.
First of all, you need to decide where the faucet is leaking from. This can be either a faucet box, then water flows from the mixer spout, or a gander seal, then it will flow from under the moving part of the gander.
Attention! Do not forget to turn off the water supply to the mixer before repairing, otherwise you risk flooding the room. Let's consider how to eliminate a tap leak in case of a leak from the spout
Stock up on new rubber pads and tools
Let's consider how to eliminate a tap leak in the event of a leak from the spout. Stock up on new rubber gaskets and tools.
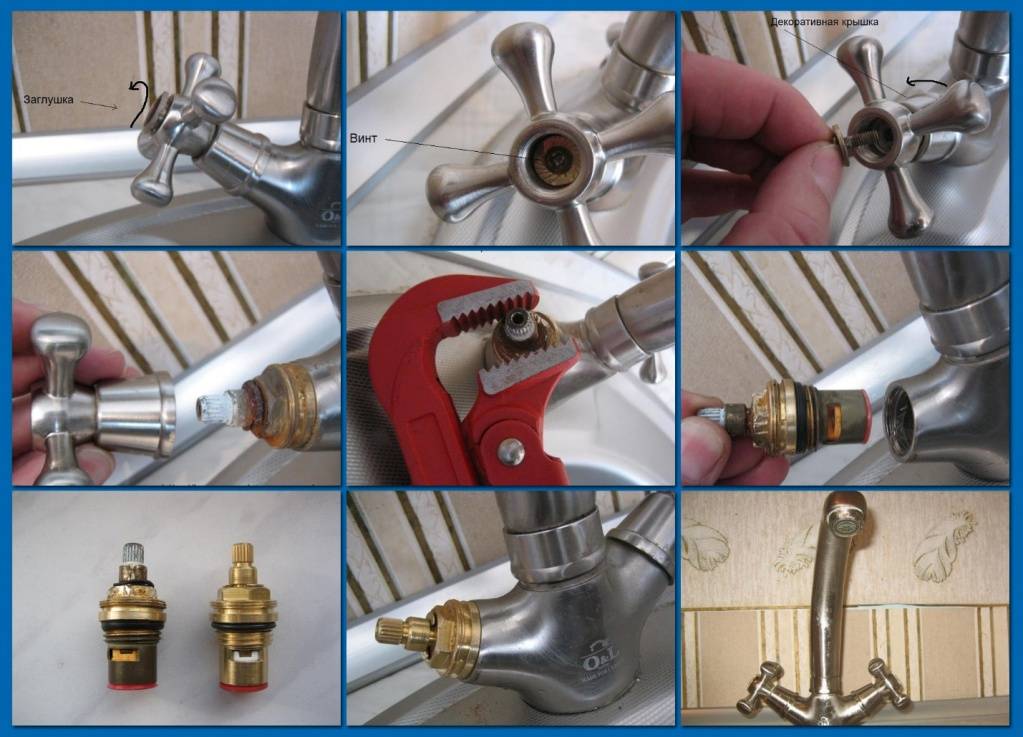
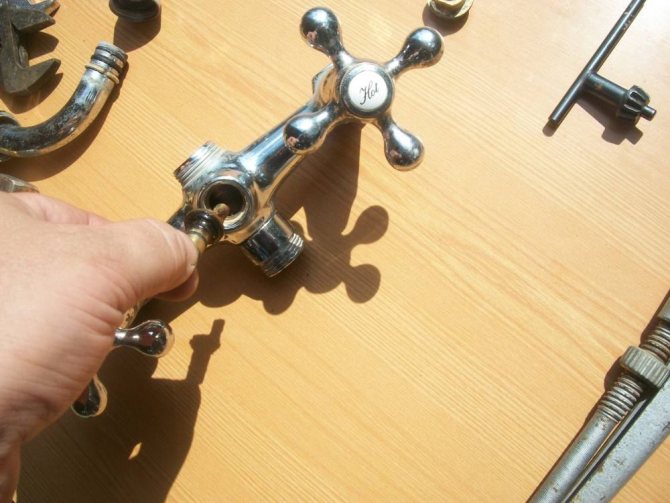
- Remove the plug from the faucet valve with a screwdriver or an awl.
- Loosen the set screw holding the flywheel to the crane box.
- Now, using an open-end or adjustable wrench, unscrew the axle box.
- It has a rubber gasket that has worn out and needs to be replaced. It is either inserted and held by elasticity, or fixed with a screw.
- We change the gasket to a new one, fix it in the box.
- Install everything in reverse order.
Tip: mount the axle box back with the mechanism open. Open it all the way.
faucet repairs completed.
Tip: mount the axle box back with the mechanism open. Open it all the way.
Water mixer
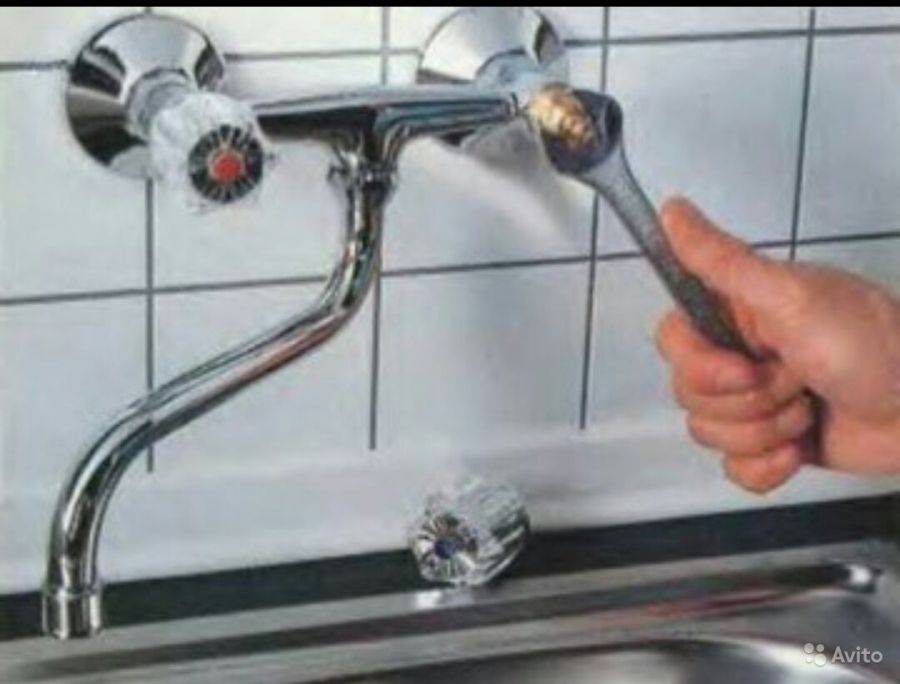
Now we will eliminate the leak from under the gander:
- Unscrew the fixing nut, releasing the gander.
- Pull it out of the mixer body.
- There are one or two rubber pads on the base, which are worn out and do not hold water pressure.
- It is necessary to replace these rubber rings, after winding the thread under them. This will seal the connection.
- We put the structure in place.
It happens that water does not flow from the tap. This is a sign that the faucet locking mechanism is jammed and needs to be replaced completely. Usually this situation is typical for cartridges.
The cartridge is very easy to use. An increasing percentage of all manufactured mixers are of this design.
They are simple and reliable, break down much less frequently than their predecessors. One minus - the cartridge dripped - you have to change it entirely.
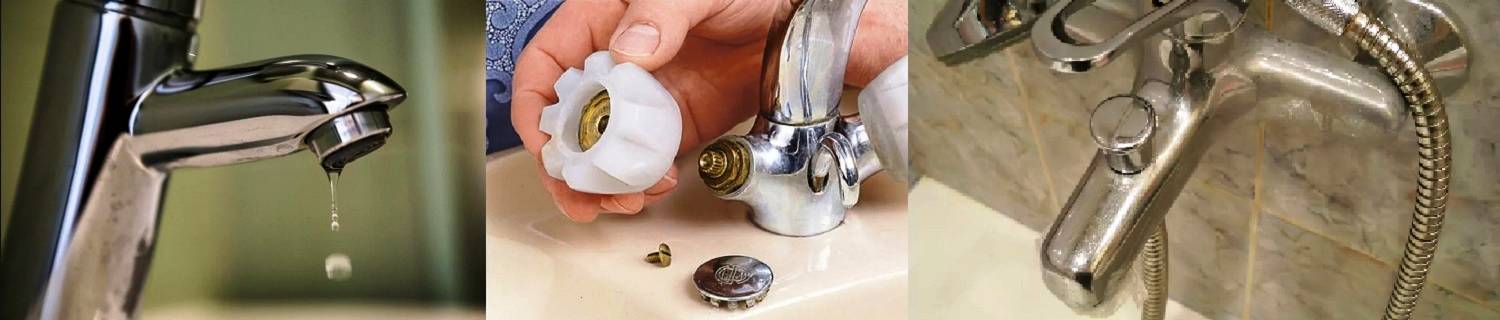
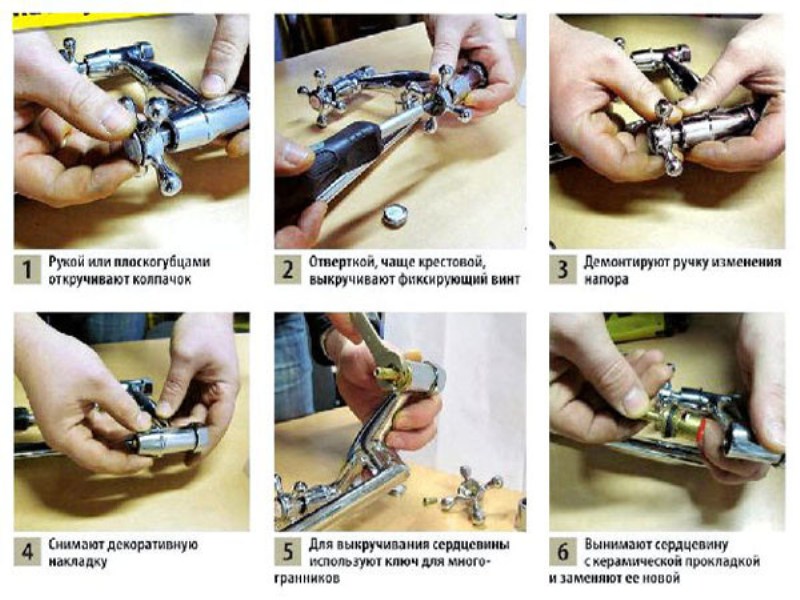
Let us consider in more detail the repair process if the faucet in the bathroom is leaking.
- Open the plastic cap on the faucet handle. It will open a hole through which you will find the fixing screw.
Removing the faucet handle
- Unscrew it and remove the faucet handle.
- Next, remove the decorative parts of the mixer, the nut holding the cartridge will open. Unscrew it.
Unscrewing the nut holding the cartridge
- Pull out the cartridge and check the condition of the seals on the end. If you can replace them, do it. The faucet will most likely stop dripping. Or replace the entire cartridge.
Seals on the cartridge
- Reassemble the mixer in reverse order.
There is another type of locking mechanism - a crane box with ceramic plates. In this case, it is quite easy to answer the question “how to make a crane with your own hands”, because. this design is easy to maintain.
Crane box with ceramic plates
device tap" width="640" allowfullscreen="" frameborder="0">
A mixer with such an axle box in its design does not outwardly differ in any way from a mixer with a crane axle box on rubber gaskets.
The ceramic design is reliable, rarely fails, but the disadvantage is, again, the need to replace the entire axle box in case of failure.
If you have a faucet with such a design, try replacing the rubber seal at the end in the plumbing faucet before changing the entire axle box. It serves to press the ceramic rings against each other, and when it is worn, the rings begin to let water through.


Tip: install coarse filters on the water pipes at the entrance to the apartment. This will prolong the life of the ceramic faucet and cartridge, as they often fail when a large solid particle in the water gets between the plates.
The main thing when the faucet is flowing is to determine what type of water shut-off mechanism your faucet has. After that, the repair will become a matter of technology.
Causes of failure of a two-valve crane
The reasons for the leakage of a two-valve faucet and a single-lever faucet can be completely different. Each model has "standard" breakdowns. So for a two-valve model, the most common failure is gasket wear. Their replacement will be the answer to what to do if the tap in the bathroom is dripping and the result of repair work.

Gasket wear
If, with a tight twist, the faucet in the bathroom still flows, then the reason is precisely in the old gaskets. To carry out work on replacing and repairing a faucet in the bathroom is not very difficult.
- If you turn the valve body against the movement of the clock hand, you can dismantle it.
- Gets the old shabby gasket.
- Using the old gasket as a template, a new gasket is cut from a piece of rubber. As rubber, you can use a bicycle tire.
- The new rubber gasket is in place.
- The seal is wound on the edge of the stop.
- In order to put the valve body in place, it must now be rotated in the direction of the clock.
- For strength, the valve is tightened with a wrench.
Ready-made gaskets can also be purchased on sale, but self-made rubber or leather ones are quite suitable. Especially if the replacement was carried out urgently in a short period of time (the mixer was already dripping more) and it was not possible to go to the hardware store.
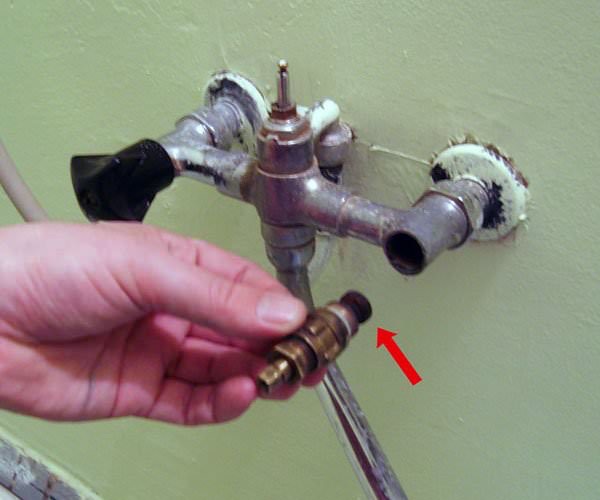
The reason is the sealing insert of the stuffing box
A worn-out stuffing box liner acting as a sealant can cause the valve to leak. Faucet leaking when open. A jet of water flows between the valve stem and gland nut.
- The gland nut is unscrewed with a screwdriver.
- Using a fluoroplastic sealing tape, a sealing insert is made.
- The old insert is removed.
- The valve stem is tightly wrapped with a new insert.
- Screw the nut back into its original position.
The result of quality work and the answer to how to repair a faucet in the bathroom will be a smoothly turning valve and the elimination of water leakage.
Shower hose leak
The O-ring must be replaced if water is flowing at the junction of the faucet with the shower hose. This indicates wear on that part. How to fix a dripping faucet in the bathroom:
- The shower hose is unscrewed with an adjustable wrench. The movements must be smooth so as not to strip the hose threads.
- The old seal is removed.
- The silicone O-ring is installed. The wear resistance of such a ring is higher than that of rubber. You can also use a rubber ring, but it is changed much more often.
- Using the wrench, the hose is installed in its original position.
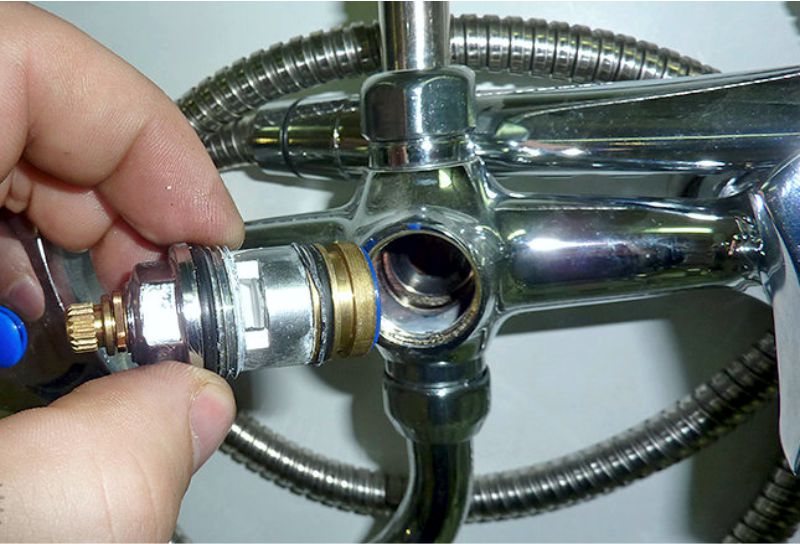
Cranbox replacement
The faucet in the bathroom leaked even at the moment the water supply was transferred to the shower hose - the reason was the breakdown of the locking elements. They are located in the handles of the mixer. Plumbers call them kranbuks.
In order to eliminate the cause of the breakdown, you need to buy new crane boxes in the plumbing department. They should be identical to the old broken ones. Before going to the store, you need to get them. But before that, check why the faucet in the bathroom is flowing, it may be enough to tighten the nut more and the leak will be eliminated.
Breakage of the locking elements can occur due to forceful hand pressure on the adjustment lever.
Main reasons
Depending on the cause of the breakdown, appropriate plumbing repairs are carried out. A leaky faucet can be caused by human error or problems with equipment components.
Poor quality device
The purchase of a cheap mixer in order to save money often leads to the fact that the device is of poor quality and quickly fails. The result is a leaking faucet or an accident. The constant repair of a low-quality mixer requires a lot of financial and time costs, so it’s easier to immediately supply good equipment from trusted manufacturers.
Mounting errors
Self-installation and neglect of the installation instructions lead to violations in the functioning of plumbing. Mistakes made provoke not only leaks, but also more serious breakdowns.
Violation of the rules of operation
Incorrect use of the crane impairs its performance. Common violations include the following:
- high pressure on the mixer;
- valve twisting;
- fixing the mixer at the wrong angle.
These violations negatively affect any plumbing equipment. For similar reasons, a faucet in the kitchen may begin to leak.
Wear of the main parts
With use, the main components of the equipment wear out. To prevent leakage due to wear parts, it is recommended to periodically check the condition of the faucet and update obsolete components.
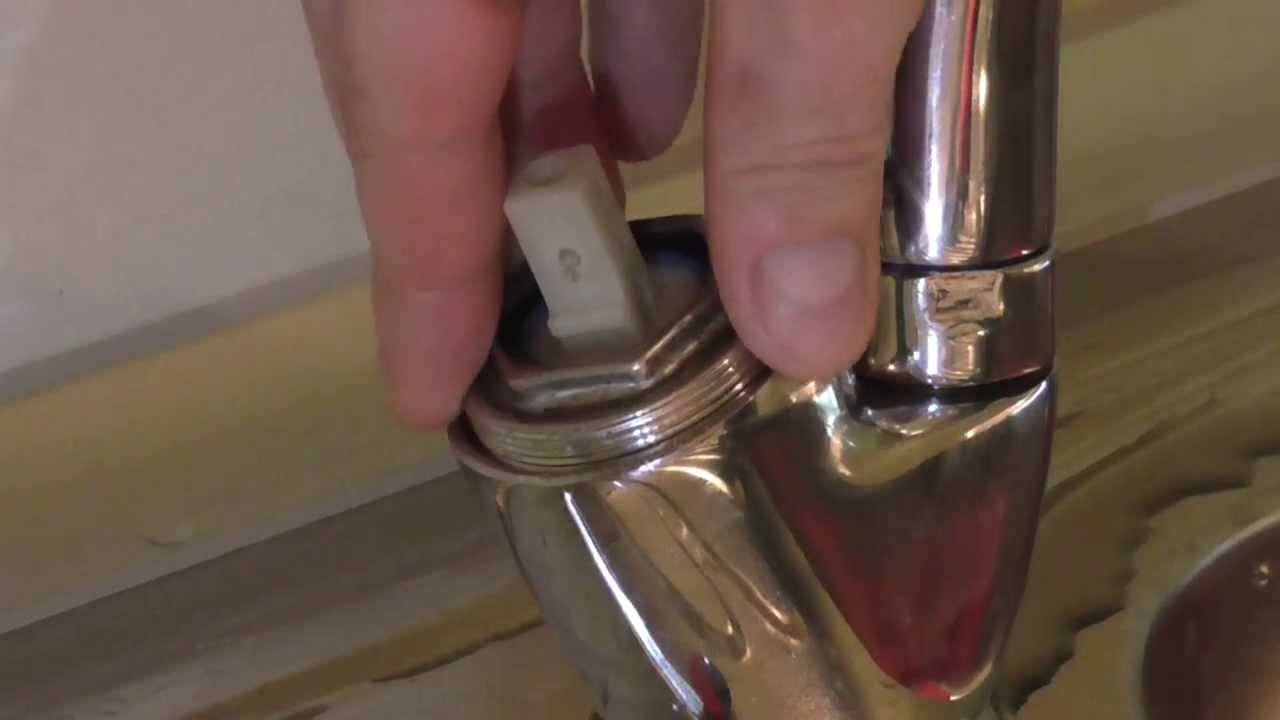
Clogged aerator filter
The accumulation of small debris causes leakage and a weak uneven jet from the fluid supply tap. In addition to debris, salt deposits and rust form on the strainer. The clogged filter must be unscrewed, held in an acetic solution and returned to its original place. If the filter is held securely in place due to rust, pour the cleaning solution into a bag and hang it from the faucet so that the area to be cleaned is submerged in the liquid.
What do you need to repair a faucet?
First you need to find the source of the problem. They are in different places:
- Valve. Drops appear on the element that opens and closes the water.
- The faucet itself. Here the liquid flows in a small stream or drips. Naturally, water leaks even when the lever is off.
- Joint mixer and spout.
- A hole in the mixer, from this hole you can see the liquid.
- The joint of the tap with plumbing systems or at attachment to the countertop.
Water sometimes oozes from different sources
Before repairing the faucet, be sure to close the water supply of both temperatures. Then proceed to repair work. Moreover, many masters advise to completely change the tap.


Water from the faucet
Often the liquid is seen right under the valve. Here the problem lies in a worn-out crane box.
To organize the solution, see if space has formed at the faucet box and the mixer itself. Replace the gaskets (they may not be worn, but should be changed), a preventive action will help to improve the performance of the product.
Often water appears in the place of the branch
Tap water
This situation proves that the crane box is no longer suitable. Often this appears in economical models that are not of particular quality.
Tips for choosing a quality faucet
To remedy the situation, install another crane box and directly replace the valve itself.
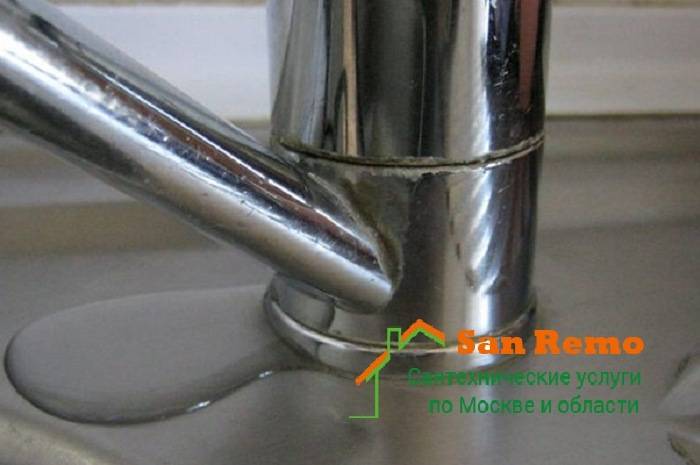
Water between faucet and spout
This is not difficult to fix - you just need to put other gaskets. Another reason is sometimes the untwisted part, which appears during the long operation of the product. However, in the second case, the replacement of gaskets does not hurt.
Water oozing at the pipe connection
This occurs when the product is installed incorrectly. Especially if the worker, tightening the nuts, applies a lot of force, after which he tightens them. Hoses made from poor materials can also be affected. The latter case requires their replacement, and at the same time the replacement of gaskets.
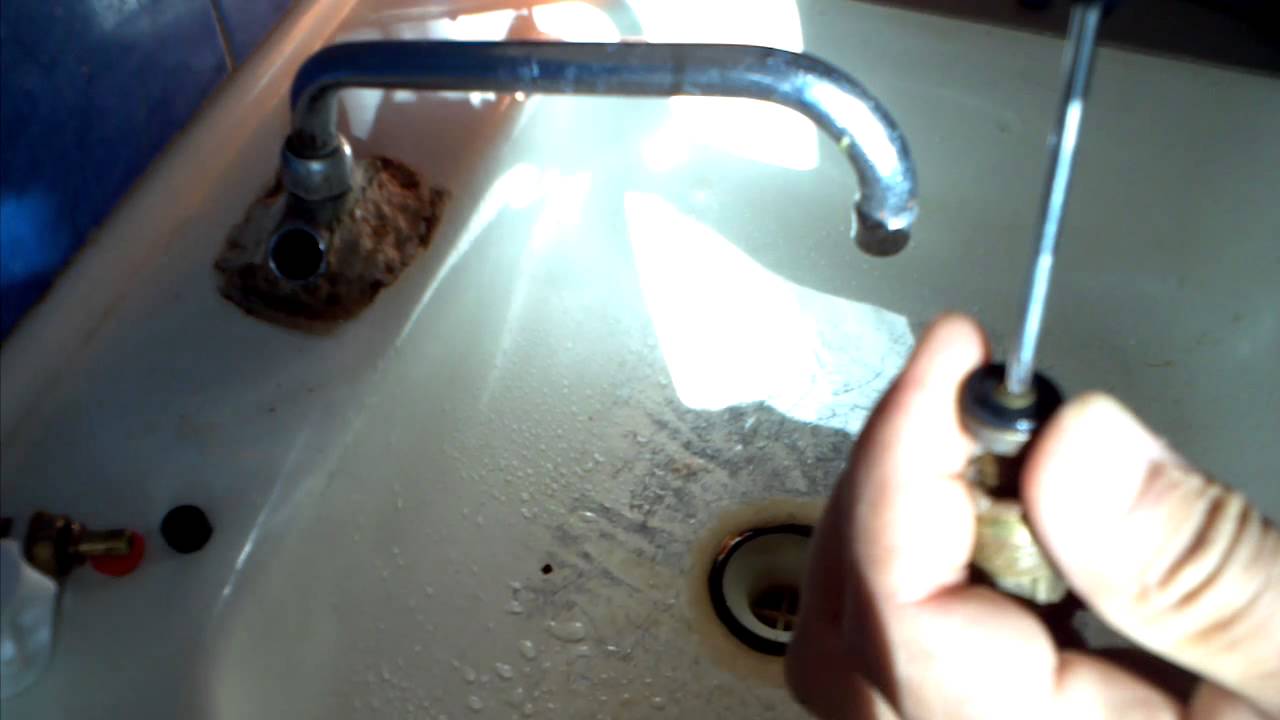
Water seeps out of the body
The repair process in such a situation is difficult, you will have to remove the entire body. Below we offer step-by-step instructions for repairing a faucet when water leaks from its body
Step 1. Shut off the water supply in the house (if you live in the private sector), apartment or one branch.
You can turn off the water supply in the entire room or one branch
Step 2. Unscrew the hoses, all fastenings of the product to the countertop.
A wrench will help you in the work
Step 3. Remove the retaining ring.
Removing an element
Step 4Take new o-rings, firmly plant them in the grooves.
Photo of sealing parts
Step 5. Put the gander in its original place, secure the ring.
Ring installation
Step 6. Reinstall the hose. Don't touch the case itself. Turn on the water supply, make sure everything works. If yes, install the case. If not, then you made a mistake in the above points.
Mixer fixing process
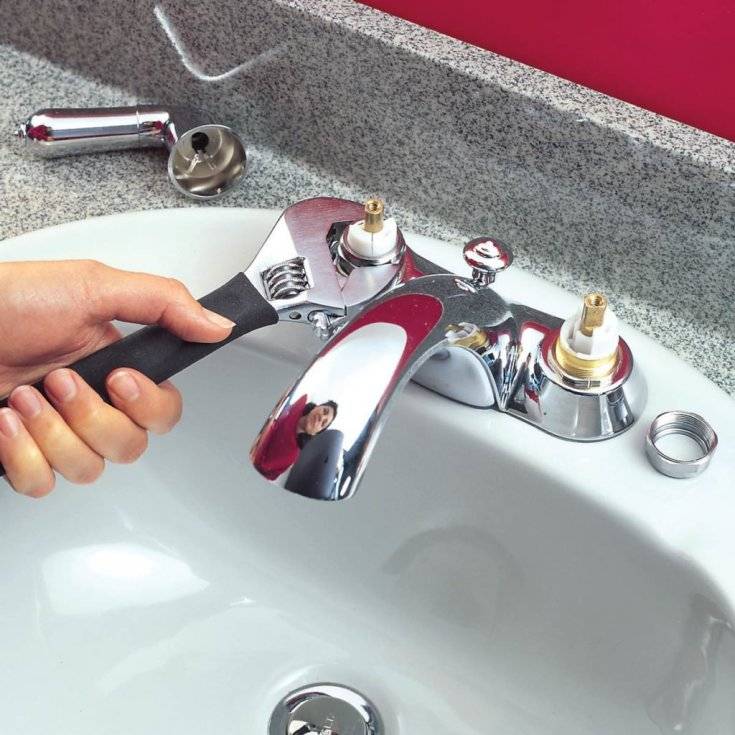
Mixer leak and its diagnostics
First, you should find out the exact place that needs to be “treated”. You should also take into account the properties of the structure. As a rule, there are quite a few reasons why a bathroom faucet leaks, and the most common of them is the wear of the gasket, the task of which is actually to prevent water from flowing from extra holes.
In rare cases, the cause of leakage is corrosion of the parts of the mixer itself, from old age or poor operating conditions (damp, unventilated room).
Since options 3 to 6 are complex electromechanical mixers (their repair seems almost impossible for an average person without special education and tools), and the first two are the most common, we will talk about them further. If you have a leaking bathroom faucet, there is no need for special repair skills or complicated tools. The cost of its repair is no more than 100 rubles. You will need a medium-sized Phillips screwdriver, an adjustable wrench, small or regular pliers and half an hour to an hour of time.


How to repair a ball valve
The central component of the design is a ball with several holes. Turning the lever causes the ball to rotate and allows you to control the pressure of the liquid.If the faucet is leaking, follow these steps in sequence:
- unscrew the plug to gain access to the fasteners on the case;
- remove the lever and cap;
- check the condition of the seals and replace if worn;
- assemble the structure in reverse order.
After the repair is completed, it is worth turning on the water and making sure there is no leakage. If the problem persists, a complete hardware replacement will be required.
Why is the faucet leaking?
When a faucet in a kitchen or bathroom suddenly starts to leak or drip, or water seeps out of the connections, you need to take action. The leak itself is dangerous, so the sooner you find it and fix it, the better. The most common causes of leaks include:
- Manufacturing defects. If you just installed a faucet or faucet and immediately noticed a problem, you probably got a defective copy. Go to the store and replace the device.
- Wear pads. Rubber gaskets are used for hermetic connection between the parts of the crane. They gradually wear out under the influence of friction and due to contact with fine grains of sand. As a result, they stop doing their basic tasks properly.
- Cracks in the hull. Sometimes cracks appear on the mixer. This happens mainly with low-quality plumbing equipment, that is, the reason is the low quality of the material of manufacture.
- Blockage of the cartridge in the lever mixer. If it drips from the spout, the cold/hot water mixing device is probably clogged. In our country, this is usually due to poor quality water, so it is better to use filters at the inlet.
When detecting leaks in a faucet, it is important to identify their nature.If the water leaks strongly, this is an emergency situation requiring an urgent shutdown of the water, followed by replacement of the mixer
If it doesn’t leak much, it may be possible to limit yourself to replacing the gasket in the tap.
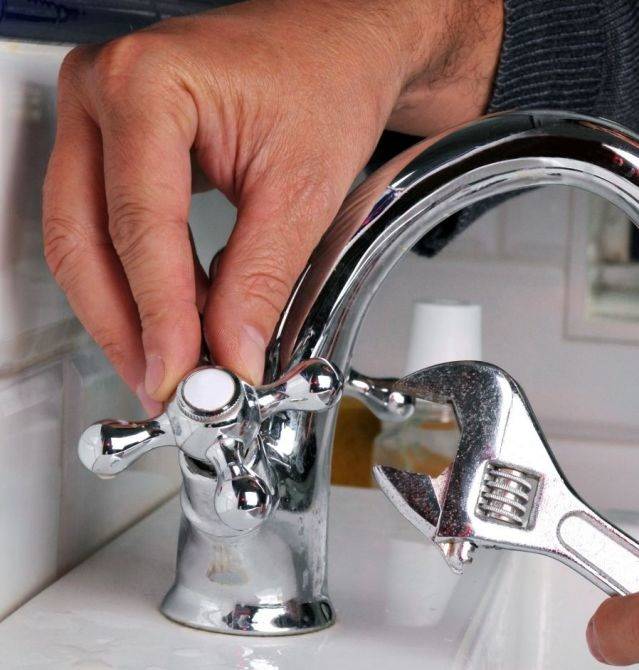
How to replace the gasket inside the faucet
If liquid is leaking from a closed mixer, the source of this situation is usually element wear. With prolonged use, the gasket loses its elasticity, begins to lag behind the seat somewhat, and liquid can flow even from the switched off mixer, because it finds other penetration paths. In advanced situations, water not only drips, but pours in a trickle.
However, you do not need to be afraid of this, because it is easy to return the mixer to the correct operation - you just need to buy a rubber gasket, install it instead of the old, worn one. For this, a maximum of a specific key of the right size, a pair of gaskets, can be useful.
Crane structure
It has already been noted many times that before starting any work, you need to turn off the water in the entire room. After that, it will not be superfluous to check whether the water is exactly turned off by turning on the tap, only then get to work.
Remove the faucet using the available wrench. It is recommended to wrap the crane with a cloth so as not to damage it. When you cover it with a rag, you can attach the key and unscrew it. After removing the head, remove the valve and remove the old gasket or valve, replacing the worn element with a new one. In this case, the valve can be pry off with a knife, screwdriver, awl - anything.
When choosing gaskets, you need to pay attention to their size and other important components. For example, the edges must be beveled at an angle of about 45 degrees.
If the slope is different, the faucet will make loud noises during water supply.In the absence of such a gasket in the store - buy a regular one and cut it yourself.
Video - How to put a rubber gasket
Screw the case to the tabletop. Modern products do not require winding. Moreover, it is even contraindicated in these mixers, because cracks often appear because of it. The situation is different with cranes purchased back in the USSR. Here you need to put a tow on the thread, grease with a special paste and twist. Only after all these procedures can you try to turn on the water.
Often a different situation occurs - the liquid does not flow at all or flows in a thin stream. Here the decision is not difficult. The reason for this is often the same - the gasket has left the stem and does not allow water supply. You can try turning the tap on and off 10-15 times, thereby trying to move the gasket. If it does not work, you need to remove the tap and put the rubber element in place. It is also recommended to put only purchased.
Video - Replace the gaskets correctly on the lever
The faucet drips for many reasons and in many places. However, often the reason is one of two things: either you have a poor-quality product, or the gasket has already worn out. In the second case, you need to replace with a new one. You can contact a plumber who will quickly fix the leak. To prevent this, you need to use only mixers that are published by common manufacturers, and not save on this.


