- What to do to avoid leaks
- Signs of depressurization
- Repair methods
- Delivered poor quality packaging
- What to do if the reason is in the container
- Steps to fix leaks with liquid sealant
- Preparing the heating system
- Sealant preparation
- Pouring sealant
- Faulty drainage system
- How to fix different types of leaks
- Pipeline leak
- 4 Self-repair
- Seam sealing
- The device and principle of operation of humidifiers
- How to find a fault?
- Corrective action
- Conclusions and useful video on the topic
What to do to avoid leaks
Problems with cabin leakage appear not only as a result of its long use, but also improper installation of its parts will also lead to leakage. For example, failure to meet all requirements during the installation of the pallet
It is important to follow the installation instructions
- The pallet must be firmly attached to the wall.
- The coincidence of the socket of the sewer drain and the drain of the pallet is a strictly prerequisite.
- The angle between the walls of the shower and the room is 90o. Therefore, the walls at the height of the cabin are aligned.
When the pallet is installed, the following steps are performed:
- The legs for adjusting the height of the pallet are strengthened.
- Connected to drain.
- The horizontal position of the structure is maintained.
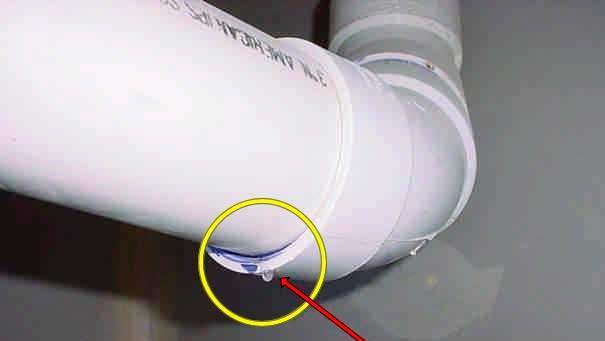
After installing the pallet, the seams are sealed. For this, a special sealing cord is used. It comes with a shower cabin. It is inserted between the glass and the cabin body.
Lubrication of the connecting elements with sealant is carried out from their inside. When the elements are already in place, a thin layer of sealant is applied on the front side. Excess is removed before drying. All structural gaskets must be treated with sealant.
Signs of depressurization
Heating systems are all built according to the same scheme - boiler - supply pipes - appliances - return pipes - boiler. It is looped. The pressure and circulation of the coolant in central heating systems are supported by pumps. In houses of the private sector with an autonomous open heating system, pressure and circulation are provided by the boiler when heated. In cottages, the heating system is autonomous closed, the coolant is always under pressure.
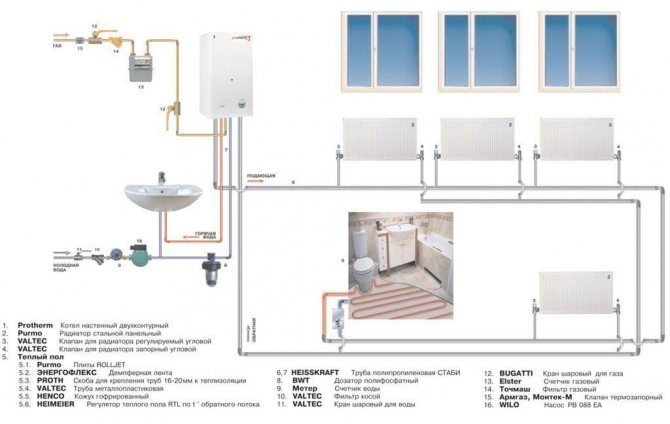
In heating systems, pressure control occurs by instruments, but it is still difficult to fix small leaks, automatic equipment equalizes a slight pressure drop. In private houses, pressure gauges are not installed. Therefore, in both cases, residents have only one way to control tightness - visual.
When inspecting heating appliances and pipes suitable for them, pay attention to damp places. In places of obvious leaks, water will drip or stream, leaving traces of rust
But those who hid the metal risers in the boxes that one of them is leaking, most likely, will learn from the neighbors, to whom the water flowed
Repair methods
There are many ways to repair a washing machine, but they all depend on what was the cause of the breakdown.That is why we will give the main ways to eliminate the causes of leakage of this household appliance, which can be dealt with without the help of a master:
- When the hose of the washing machine flows, a rubber patch and high-quality waterproof glue will help get rid of cracks. If such materials were not at hand, ordinary electrical tape will do (although it will not be able to hold water for a long time).
This repair is more acceptable for the drain hose. As for the hose responsible for the water supply, it is better to replace it immediately in order to avoid trouble in the future.
- If a leak is found in the area of the drain filter, then it is completely unscrewed, and then screwed well until it stops. It should be remembered that you do not need to put a lot of effort, otherwise you can break the thread.
- In case of problems with the dispenser, it is removed from the machine, well cleaned of the dirt accumulated on it and returned to its original place. It will be possible to check the health of the entire device when the machine starts washing again. If it turns out that water still flows out, you will have to call a specialist.
- A damaged inlet valve must be replaced. To do this, remove the upper part of the household appliance and dismantle it.
If there is a problem with the pipe responsible for collecting water, it is disconnected from the surface, lubricated with good glue and the pipe is installed back. The area around the adhesion of these two materials is treated with a sealant. After waiting for the glue to dry completely, they begin to wash again.
To prevent water from flowing out of the hatch, you need to disassemble it, remove the cuff and replace it. If the crack in it is not too big, you can try to seal it with a good waterproof glue.
Cases when the washing machine tank is leaking are considered the most serious, since the problem can be fixed only with the help of a master who will either fix the tank or recommend where you can order a new one. As for the drain pump, it cannot be repaired. Will have to buy a new one.
If water leaks out while spinning the laundry, try replacing the seal or reduce the water pressure (maybe it's too high, causing a leak).
Having considered all the reasons due to which the washing machine flows from below, and the main ways to eliminate them, we can conclude that you need to pay attention to any malfunctions in time. When you can’t fix the problem yourself, contact a professional
Delivered poor quality packaging

Your dispenser can be whole and in complete safety. those. he does not need any repairs, and the existing leak appeared due to a small, often invisible, crack in the water cylinder itself. It is quite difficult to determine during a visual inspection whether or not there is a microcrack in the bottle. And this is the first reason that you need to think about and which you can eliminate yourself. If a water cooler leaks, the cause in 95% of cases is damage to the bottle.


A poor-quality container may be cracked due to rough transportation, or it may leak due to a leaky lid.
What to do if the reason is in the container
If you have a spare bottle of clean water, replace it. If the leak stops, then return the cracked container to the seller, he is obliged to replace it.
If there is no spare full bottle, then you need to perform the following algorithm of actions to eliminate this, the most common, cause of cooler leakage.
- Turn off heating and cooling.The switches are located on the back of the device.
- Turn off the dispenser completely, i.e. pull the plug out of the socket.
- Carefully pull out the polyethylene bottle from the butele receiver socket.
- Look into the nest - if there is water in it, then the bottle cap is not airtight. Then you can not look for reasons.
- Unscrew the bottle receptacle clockwise.
- Look at the storage tank, if it is full, then the bottle is cracked and not tight. You don’t have to search further. If the tank is not full, then manually fill it with water, up to half the volume.
- Connect the machine to the network and check if it works. If the leak persists, it means that the cause is still in the cooler itself.
Steps to fix leaks with liquid sealant

Before you start sealing possible leaks in the heating system, you need to make sure that the expansion tank is working.
The procedure for using liquid sealants to repair a home heating system can seem quite complicated. In some cases, clots of sealing fluid cause partial blockage and prevent the movement of the coolant. Therefore, in order not to harm the heating equipment due to your inexperience, it is better to invite a specialist. In any case, you need to study the instructions for using a particular type of sealant for radiators and strictly follow it.
Deciding to use liquid sealant to fix a problem in the system heating, make sure that:
- the cause of the pressure drop is precisely the leakage of the coolant, and is not associated with a malfunction of the expansion tank;
- the selected type of sealant for heating systems corresponds to the type of coolant in this system;
- the sealant is suitable for this heating boiler.
German sealant liquid type BCG-24 is used to eliminate leaks in heating systems
When using liquid sealant for pipes and radiators, it is important to maintain the correct concentration. On average, its values range from 1:50 to 1:100, but it is desirable to determine the concentration more accurately, since factors such as:
- coolant leakage rate (up to 30 liters per day or more);
- the total volume of water in the heating system.
If the volume does not exceed 80 liters, 1 liter of sealant will be enough to fill the heating system. But how to more accurately calculate the volume of water in the system? You need to calculate how many meters of pipes and what diameter were laid in the house, and then enter this data into one of the online calculators. To the resulting volume of pipelines, you must also add the passport characteristics of the volumes of all radiators and the boiler.
Preparing the heating system
- Dismantle or cut off all filters with taps so that they are not clogged with a viscous solution of sealant for heating systems;
- Unscrew the Mayevsky tap from one radiator (the first in the direction of the coolant) and connect a pump to it (such as "Kid");
- Start the heating system and let it warm up for an hour to a temperature of 50–60 ° C at a pressure of at least 1 bar;
- Open all valves on pipelines and radiators for free passage of sealant through them;
- Remove air from the entire system, including radiators and circulation pump.
Sealant preparation
- It is possible to pour liquid sealant into the heating system, including using a manual pressure pump. Drain about 10 liters of hot water from the system into a large bucket, most of which should be used to prepare the sealant solution, and leave a few liters for subsequent flushing of the pump;
- Shake the canister (bottle) with sealant for radiators and heating pipes, then pour its contents into a bucket;
- Rinse the canister thoroughly with hot water so that all the sediment remaining in it gets into the prepared solution.
Sealant solutions for heating systems must be prepared immediately before use so that the liquid does not come into contact with atmospheric air for too long.
Pouring sealant
Liquid sealant for heating systems must have time to mix with the coolant before it reaches the boiler, so it is more expedient to fill it into the supply:
- Introduce a solution of liquid sealant into the system using a pump;
- Pump the remaining hot water through the pump so that absolutely all of the sealant residue enters the system;
- Release the air from the system again;
- Raise the pressure to 1.2–1.5 bar and maintain the system operating cycle for 7–8 hours at a temperature of 45–60°C. This period is needed for the complete dissolution of the sealant in the coolant.
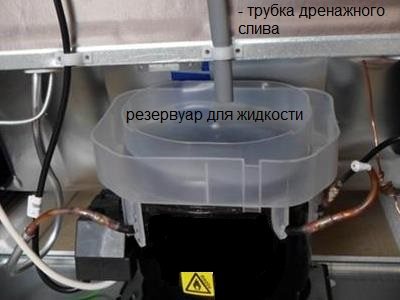
Faulty drainage system
On the back of the refrigerator, at the bottom is a reservoir into which accumulations of moisture enter through the tube. Often, with careless transportation, movement of the refrigerator, this unit can be damaged and cause leaks. At the same time, the interior will be dry, there will be no excess frost and ice in the freezer, but a small puddle of water will periodically form on the floor.
Let's figure out why in this case the refrigerator flows and how to fix it:
|
| If the drain pipe is damaged or dislodged, water will begin to flow to the floor instead of into a special reservoir. The fault is corrected by correcting the tube and placing it at a point above the container. |
| If the liquid reservoir is broken (deformed), then, first of all, you need to try to carefully remove it without damaging the compressor. The container is usually connected to the compressor with fasteners (latches). If it is impossible to repair the tank on your own, it should be replaced with a new one. |
How to fix different types of leaks
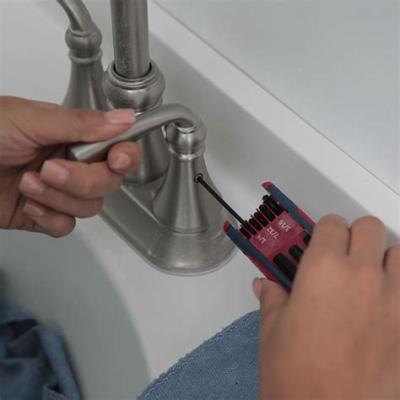
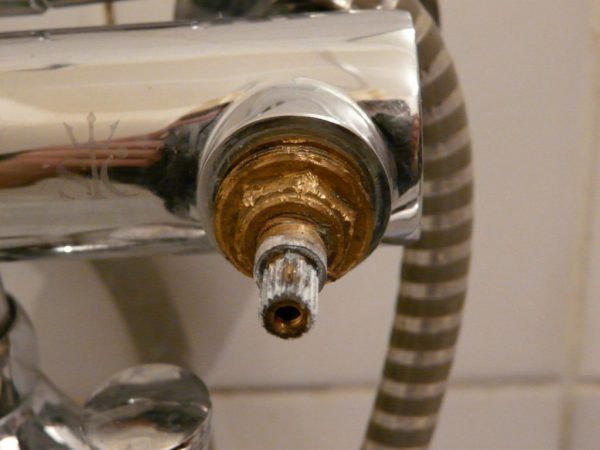
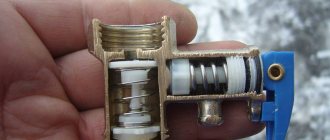
The reason for the leakage of the mixer may be a foreign body stuck in the shutter discs or at the location of the ball sleeve.
The shutter supplies water and blocks it, and the foreign body contributes to the flow of water into the gander even when the shutter is closed.
Troubleshooting requires disassembly of the valve body. It is necessary to inspect the springs, seal and other parts of the device, remove blockages, replace the deformed parts with new ones.


Leakage of water from under the valve occurs as a result of the protrusion of the pin from the stem. This happens if the pin was immediately inserted loosely into the stem or the wound hemp was worn out.
To eliminate such a leak, turn off the water, remove the flywheel located on the valve head, remove the fallen pin. Remove the worn hemp and replace with a new one. If hemp is not provided, then firmly insert the pin into the stem.
A leakage of a faucet box with a ceramic mixer is easily eliminated.It is necessary to tighten the lock nut located on the body of the axle box with a wrench, and the flow will stop. If the service life of the crane box has expired, then it is replaced with a new one.
The occurrence of leakage in the place of fixation of the swivel spout can be eliminated as follows:
- Unscrew the union nut with an adjustable wrench and remove the gooseneck.
- Take out the rubber seal.
- Insert new gasket.
- Install the spout in its original place, fixing it with the union nut.
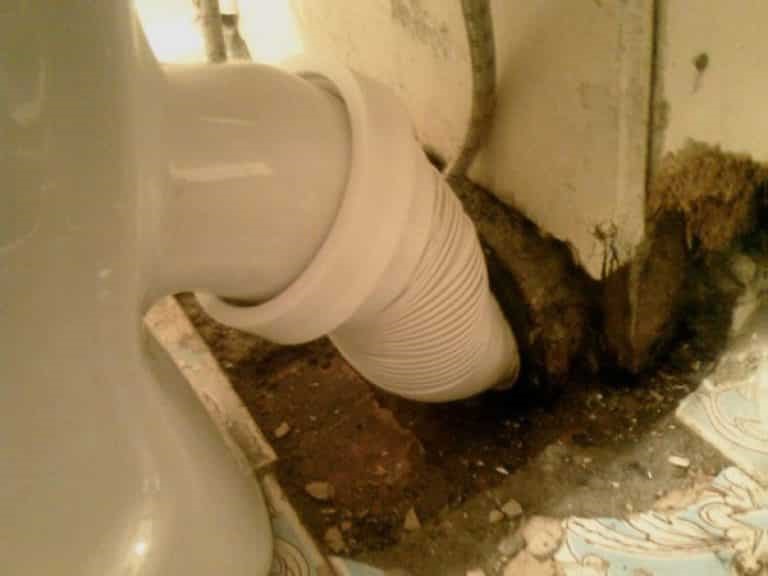
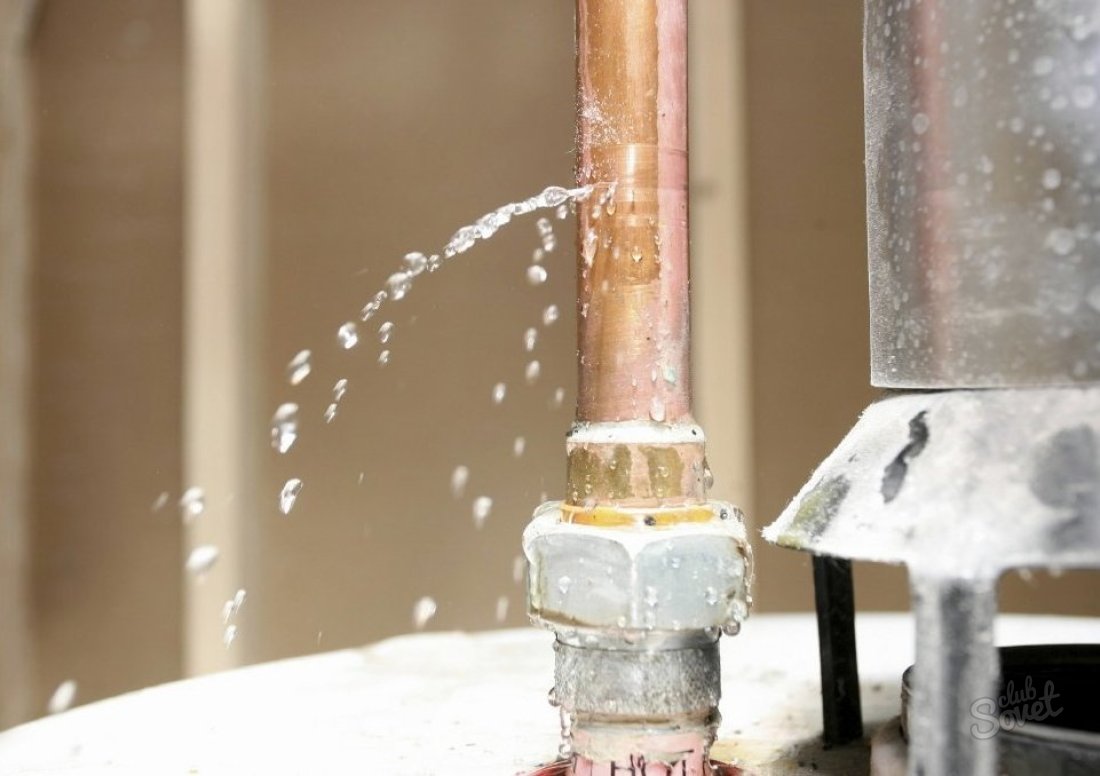
Pipeline leak
In some cases, a gas column leaks as a result of the formation of holes in copper pipes. A thorough inspection of the heat exchanger when the water is shut off will allow you to find the place of the leak. Liquid is released from large holes, small damage is detected by rust around and green spots.
What to do to fix the leak:
Cold welding
It is important that the welding compound used can withstand high temperatures. Similar information can be found on the product packaging.
You will need to get a piece of cold welding from the package, knead it with your hands (in gloves) until it starts to harden. Then apply the composition to the pipe and smooth until the final hardening.
Soldering holes. You can eliminate the reason why the geyser is flowing by soldering the place of damage. First, it will need to be cleaned, degreased and covered with flux. A powerful soldering iron or torch should be used to cover the damage on the pipe with solder (the solder layer should be approximately 1-2 mm thick). Several holes located close to each other are recommended to be soldered with a piece of copper plate. It is not advisable to solder Chinese inexpensive heat exchangers, since very often they are painted on top.The paint in this case is used by manufacturers in order to hide the uneven color of low-quality copper (it contains impurities). In this case, the tubes burn out during the soldering process, as they are too thin.
Installation of a clamp with a rubber gasket. The easiest way to fix a leak without damaging the structure. Such a measure is especially effective in the case of a loose fit of the tube to the casing and if there is enough space.
In some cases, it is too late to find the reason why the column is flowing, and the pipe has time to rot to such an extent that only its replacement can save the situation. Finding the right part is not easy even in specialized stores. Using a flexible water line or corrugated stainless steel hose to replace a rotten tube will help solve the problem.
It is easy to replace a worn stem O-ring, as well as rubber gaskets.
Fix leak in gas column is quite possible on its own, special skills and knowledge are not required for this. But, nevertheless, when repairing such equipment, one should not forget about safety. If there is no self-confidence, then it is advisable to seek help from specialists.
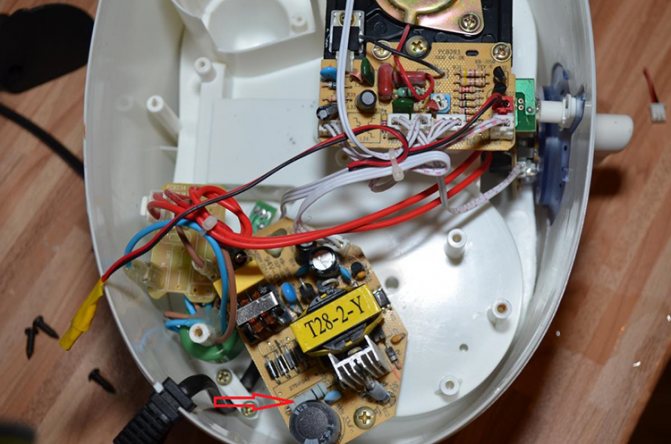
4 Self-repair
Determination of the cause of the breakdown must be carried out as each element located inside the electrical unit is checked. You need to perform actions in the following sequence:
- 1. Connect the plug to the mains and check the operation of the fan and cooler.
- 2. After the device has been running for 2-3 minutes, you need to check the temperature of the transistor heatsink. If it is cold, then this indicates a breakdown of the generator.For this, you do not need to use special equipment, you can check by touch.
- 3. If no sounds are heard from the membrane, then the emitter is out of order and must be replaced.
- 4. Using a tester, check all contacts and wires.
The methods used to descale humidifiers are the same as for kettles. For example, you can pour a concentrate of water with citric acid. Replacement of filters is one of the main sanitary preventive methods of cleaning the air humidifier.
When disinfecting, it is necessary not only to rinse the device, but to remove the bacteria that have settled on it. For this use:
- citric acid - concentration 10−20%;
- hydrogen peroxide - no need to dilute;
- chlorine-based bleach - diluted by prescription.
Any of the proposed mixtures is poured into a humidifier and aged for several hours. The device must then be thoroughly rinsed with water. Otherwise, subsequent use may harm the health of others. Finally, wipe the container with a damp cloth.


Seam sealing
Laying the sealing cord
When the pallet is installed and all components are pre-fixed, it is necessary to make a test run of water into the cabin.
It happens that the shower is leaking, and this result must be corrected.
Leakage is often caused by leaky seams.
The fixes are as follows:
- to seal the connections, use a sealing cord from the set of elements supplied with the cabin;
- the cord of the required thickness is inserted into the junction of the cabin frame and glass;
- the rest of the elements are sealed with a sealant.
Colorless or white sealant can be used depending on cabin design.
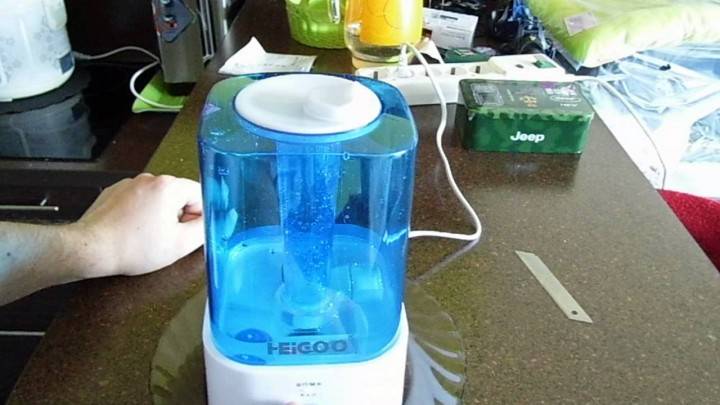
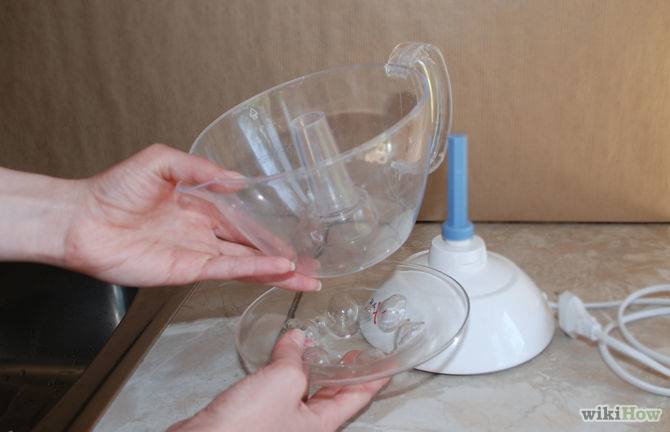
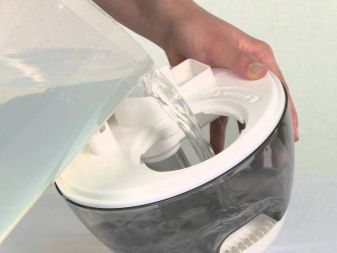
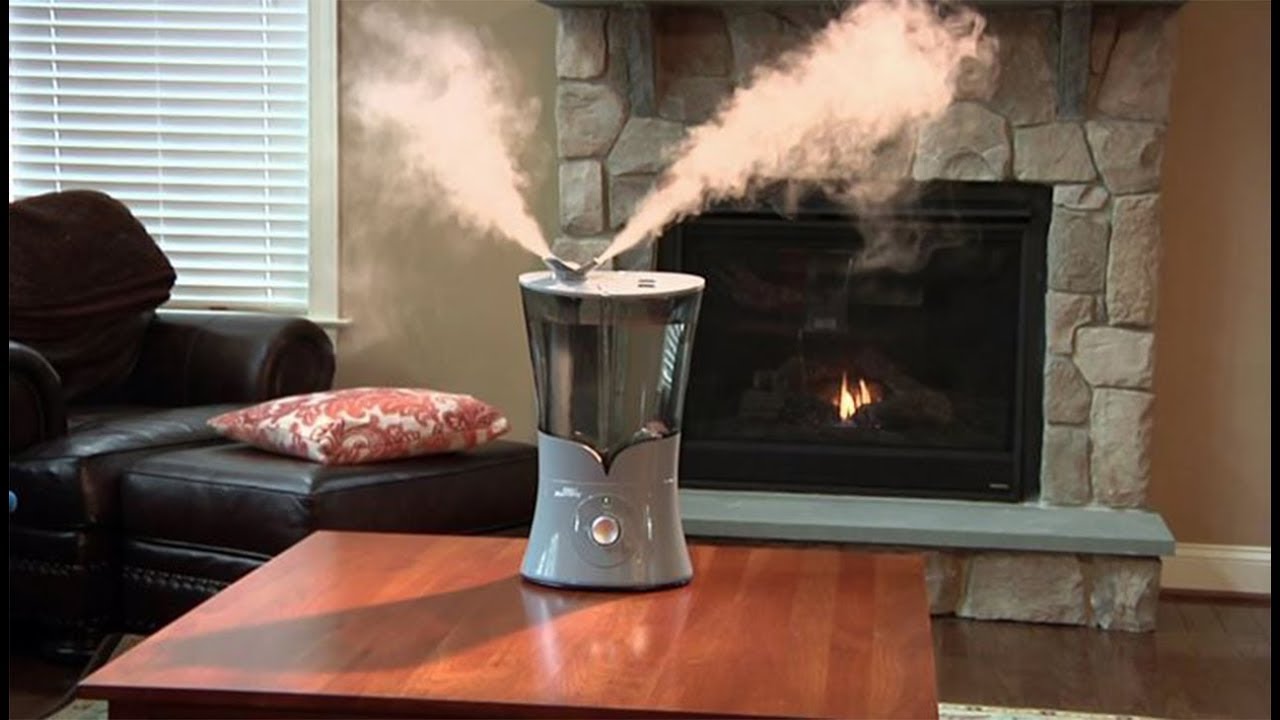
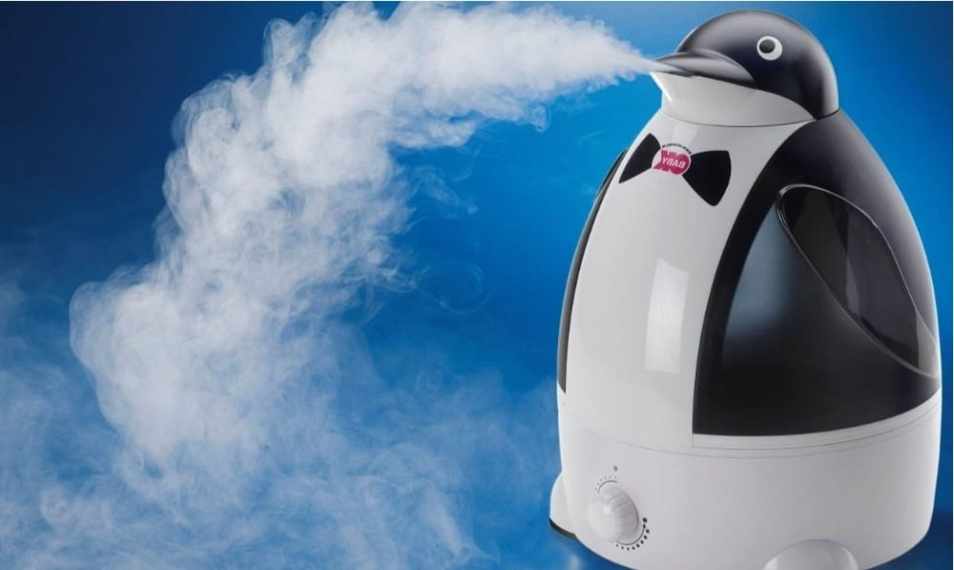
The device and principle of operation of humidifiers
Humidifiers, depending on the method of saturating the air with moisture, are divided into several main types:
- Classic (cold steam).
- Steam.
- Ultrasonic.
Each of them has its own fundamental features of the device. Classic-looking devices consist of the following main parts:
- housing and control panel;
- fan and electric motor;
- liquid tray;
- humidification disks;
- humidity control sensor;
- possible additional elements - aromacapsule, filter, ionizing rod with silver in the tray.
Schematic diagram of a classic humidifier
The steam humidifier consists of the following parts:
- housing and control panel;
- liquid container with level indicator;
- filter;
- water tray;
- heating element;
- steam chamber;
- humidity sensor;
- possible additional elements: a replaceable aromatic capsule in the atomizer.
Scheme of the device of the steam humidifier
Water from the tank is dosed through the filter into the pan. From there, it is discharged into the vaporization unit, where, under the influence of high temperature, it passes from the heating element into a gaseous state. This makes it possible to saturate the air that is here with moisture.
The ultrasonic humidifier has the following parts diagram:
- housing and control panel;
- liquid tank;
- a cartridge with a filter containing silver ions;
- fan with electric motor;
- steam chamber;
- humidity sensor;
- ultrasonic membrane (similar to a regular sound speaker, only works in the ultrasonic range);
generator; - piezoelectric element (converter of electrical energy into mechanical energy);
- water level control sensor in the steam generation chamber;
- rotary atomizer;
- possible additional elements: an ultraviolet lamp in the area between the vaporization chamber and the steam outlet channel to the atomizer, a pasteurization (heating) block in front of the vaporization chamber.
Schematic diagram of the ultrasonic humidifier
Water, moving to the steam generation unit, is passed through the filter. Humidified air, rising to the atomizer, is treated with ultraviolet light. Thus, there is a double processing of the medium before removing it to the room.


How to find a fault?
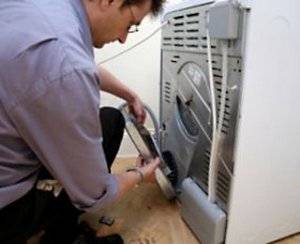
The first thing to do when starting to search for the cause of water leakage is to turn off the power to the washing machine. Check if the water drain filter is clogged. Perhaps the reason is that it is poorly closed, so the water flows out. Typically, the drain filter is located at the bottom of the machine body, under the front bar. Often manufacturers build it under a special cover that opens easily. If there is no such cover, you will have to completely unscrew the bottom plastic panel.
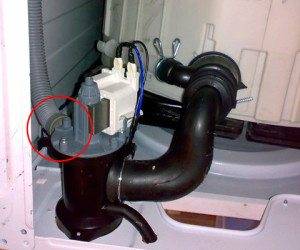 You can then inspect the drain hose and where it connects to the machine's drain pump. For most well-known brands of washing machines (LG, Samsung, Indesit, Ariston, Whirpool, Candy, Beko, Ardo,) you can get to the hose connection through the bottom of the machine. It is enough to put it on its side, and see how tightly and hermetically the hose is screwed to the pump.
In machines under the brands Electrolux and Zanussi, to check the connection, you will have to remove the back cover of the case.The connection of the drain hose and the drain pump in machines under the Bosch and Siemens brands is difficult to access. You will have to disassemble the front of the machine, after removing the powder tray and cuff.
Having excluded the drain hose from the reasons for the leakage of the washing machine from below during the spin cycle, we proceed to inspect the seals and bearings. When the seals are worn, water streaks appear on the back of the drum of the machine. To see all this, you will have to remove the back cover of the case. As for the bearings, their failure is accompanied by a rattle during the rotation of the drum.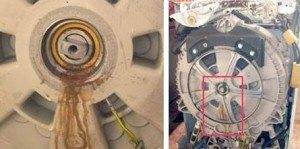
If the above reasons were excluded during the inspection, one thing remains - the drain pump has broken. However, we remind you that only a specialist can accurately diagnose the reasons why water flows from the machine during the spin cycle.
Corrective action
The most solvable problem is a defective drain filter. If the filter is clean, but it cannot be tightened tightly, as the thread has been broken, then it must be replaced. You buy a similar filter in the store and install it in place.
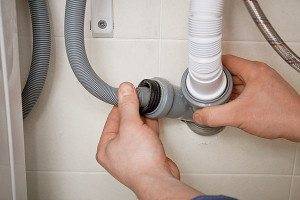 With simple plumbing skills, you can replace the drain hose yourself if the cause of water leakage is in it. How to get to the place where the hose is connected to the machine, we described above, then you need:
- pull the drain hose out of the sewer outlet;
- using a screwdriver, loosen the clamp that secures the hose to the pump;
- remove the drain hose from the drain pump;
- remove all fixing hose fasteners;
- take a new hose and connect it to the pump, and then to the outlet of the drain pipe.
You can read the entire process in detail for different brands of washing machines in the article about replacing the drain hose.
If you need to replace seals or bearings in the washing machine, you need to almost completely disassemble the machine itself, because you won’t be able to get to them otherwise. Few people decide on such repair work at home. For those who still set the goal of fixing such a malfunction on their own, there is an article on our website “How to replace the tank seal?”
In addition, you can watch a video recording that will help you repair the car, as well as assess the complexity of such a repair.
If the reason that the washing machine is leaking during the spin cycle turned out to be a breakdown of the drain pump, then in this case you will also have to do some serious work, not to mention the cost of buying a new similar part.
In conclusion, we note that if water leaked from the washing machine during the spinning process, this may indicate a serious malfunction. So the malfunction makes itself felt precisely in the process of spinning, when the machine is running at full power, at high speeds. Whatever the problem, it must be solved as soon as possible, otherwise it will lead to the most adverse consequences.
Conclusions and useful video on the topic
The solution to the problem of the lack of steam in the humidifier is discussed in detail in the story:
A step-by-step instruction for checking piezoelectric elements for humidifiers can be viewed in the following video:
How to fix an ultrasonic humidifier at home:


In most cases, you can repair the humidifier yourself. It is much more difficult to find the real cause of the malfunction. It is quite difficult to do this in some situations without special devices, so it is better to contact specialists.Competent operation of the equipment, timely replacement of filters, cleaning and disinfection will help to avoid serious damage.
If you have encountered problems with the operation of the humidifier, please share your experience. Block for comments and questions below the text - here you can ask questions to our experts and other users about the poor performance of the device and possible breakdowns.


