- We glue the toilet
- Scenario 1
- Scenario 2
- Scenario 3
- Scenario 4
- Design features of the device
- Toilet Crack Repair Technology
- Bonding of marble surfaces
- Drilling a hole in the toilet to prevent water from freezing in winter
- Additional Tips and Tricks
- Adhesive recipes
- Filling a crack with epoxy
- Bonding cracks with silicone sealant or cold welding
- What to do if the tank is leaking
- We eliminate the crack
- Damage to plumbing and prevention of their occurrence
- How to avoid cracks
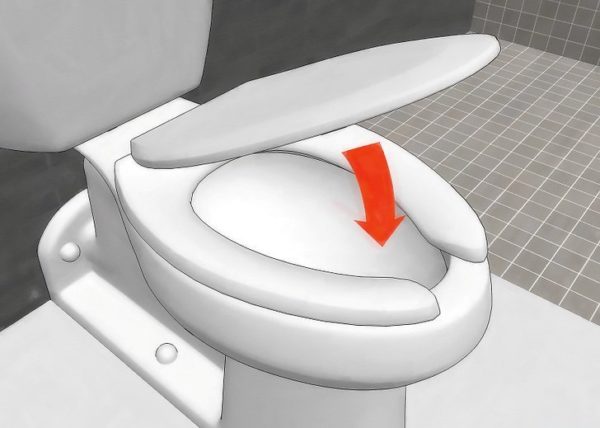
- close the lid
- Do not pour hot liquids down the toilet
- Avoid heavy forces and distortions when assembling
- Microlift - what kind of device?
- Conclusion
We glue the toilet
Scenario 1
For example, an eyelet for attaching a shelf or a piece of the base?
- For gluing, any universal glue from a decent manufacturer is used. Henkel's "Super Moment" is fine.
- We clean the chipped surface from dust and crumbs.
- Let the faience or porcelain dry completely.
- Degrease surfaces with acetone or gasoline. The stage can be skipped only if the chip is completely fresh: grease and soot from the kitchen will pollute the surface in just a few days.
- We apply glue and press the broken fragment. We fix in any way for the time specified in the instructions for the glue.
The simplest case.
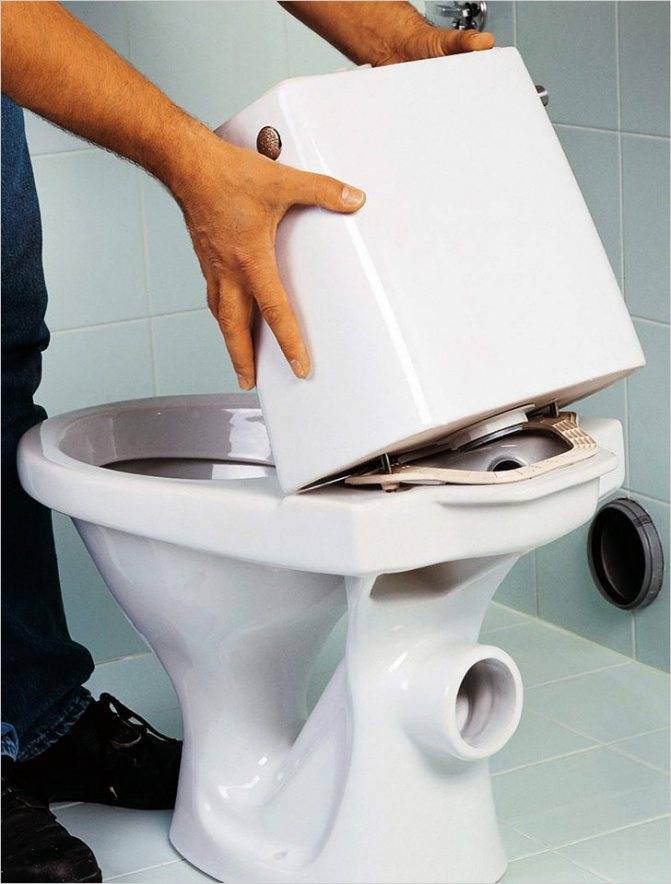
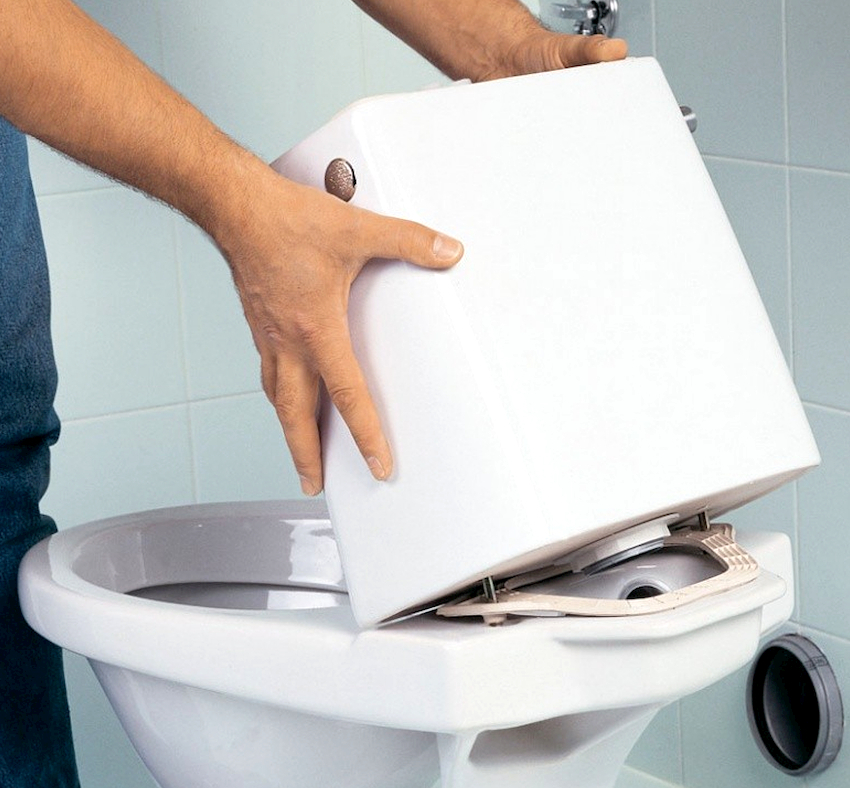
Scenario 2
How to seal the toilet if a piece of faience is beaten off where water collects?
This often happens when foreign objects fall into the bowl.
- Here it is better to use not universal adhesives, but a two-component epoxy resin. Prepare the resin itself and the hardener, as well as the container in which you mix them.
- Dry the surfaces to be bonded completely. Shut off the water on the tank, put the fan, wipe all the drops and splashes. The bonding area must be absolutely dry.
- Again, if at least a couple of days have passed since the toilet was split, degrease the surfaces.
- Mix resin with hardener according to instructions. Apply the resulting adhesive to the surfaces to be glued.
- Fix the place of gluing in any way. Ordinary tape glued on the outside of the bowl is perfect.
- After the resin has dried, carefully sand the adhesive seams where they are visible: first with sandpaper - zero, then with felt. Otherwise, unappetizing-looking contaminants will collect on them.
Here the situation is more complicated. But epoxy will help.
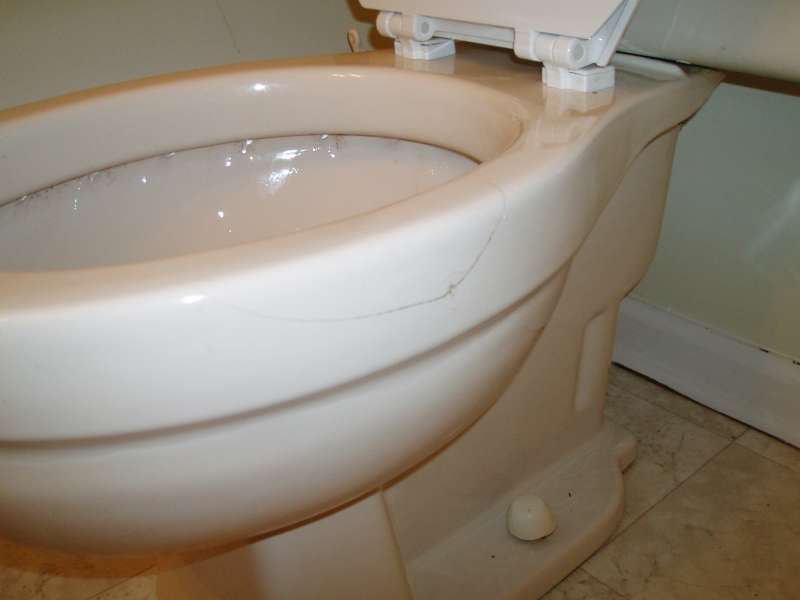
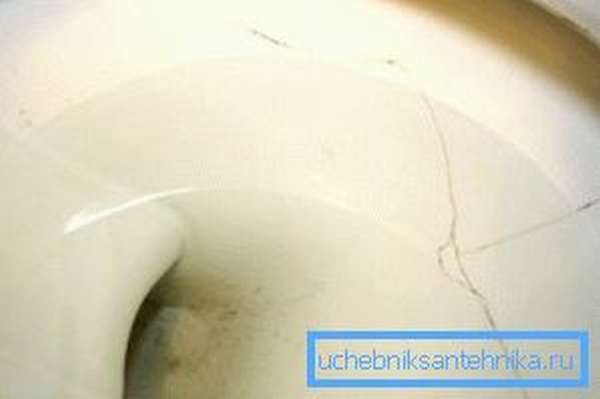
Scenario 3
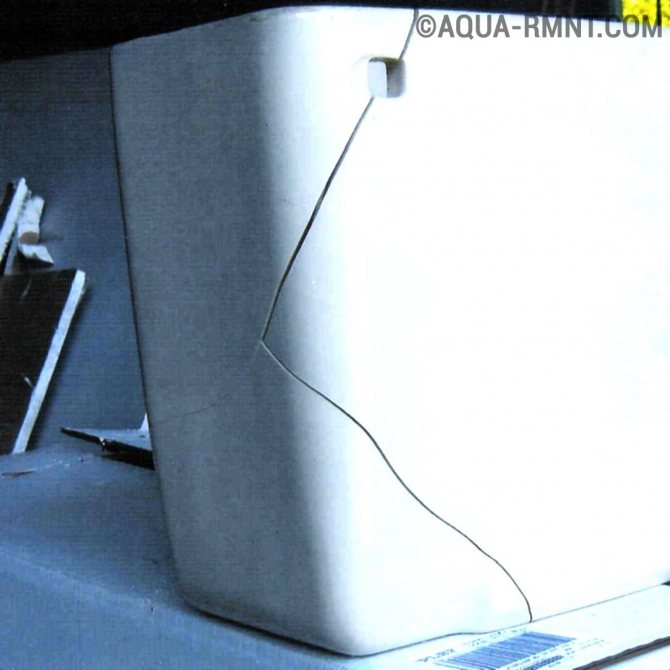
How to close a crack in the toilet if it is visible on both sides of the bowl? It is necessary to ensure tightness and prevent the expansion of the crack.
We will need:
- Epoxy resin with hardener. And in this case, she is the best glue for the toilet;
- Drill and thin drill bit for tiles;
- Bulgarian with a disk on a stone;
- Sandpaper and felt for polishing the gluing area.
The main operations will be as follows:
- At the ends of the crack, we drill two thin through holes. They will not allow the crack to lengthen.
- With a turbine, we select a recess along the entire crack by about half the thickness of the faience.Be careful: overheating the earthenware will exacerbate the situation, causing it to crack in new places. From the inside or outside of the bowl you do it - it doesn't matter: the crack will be noticeable in any case.
- We fill the prepared recess with epoxy mixed with a hardener. Holes are also filled; remove excess resin immediately. This will shorten our work with sandpaper.
- The hardened resin is ground in the manner described above.
In some cases, alas, there is simply no way to get close to the problem area.
Scenario 4
Alas, no way. All attempts to drown the base in concrete will only lead to one thing: when upset neighbors from below come to you and begin to complain about the fungus, you will spend much more energy on dismantling the old toilet when replacing it.
If the base is cracked and water is flowing, you can go for a new toilet.
We start with cleaning. Thoroughly clean the damaged surface or chip with a sandpaper, then wipe it, freeing it from small particles. After that, we degrease it with acetone or gasoline and warm it up thoroughly with a hair dryer to evaporate all the moisture from the area of \u200b\u200bthe future seam. If the damage has a complex fault topography, the preparation will be somewhat different.
In this case, sanding can damage. If it is used to excessively trim the bulges, voids may form during the gluing process, the presence of which will adversely affect the strength of the seam. Therefore, we process such a fault only slightly, blow out small fragments with a hairdryer, degrease, dry and lubricate with a thin layer of glue.
We take glue, carefully read the instructions and then act in accordance with the recommendations. Most often, you will need to carefully apply a layer of adhesive and wait for a while.After that, we press the surfaces to be glued with force. The result will largely depend on the pressing force - the larger it is, the stronger the seam will be.
It is necessary to carefully read the instructions for the glue and in the process of work be guided only by it.
The seam inside the toilet needs to be reinforced. We clean it again with a sandpaper, degrease it and dry it well with a hairdryer. Then we coat the seam with glue, on which we lay a strip of thin plastic or soft metal, which will act as an amplifier. Glued external damage is treated with a special grout designed for ceramic tile joints.
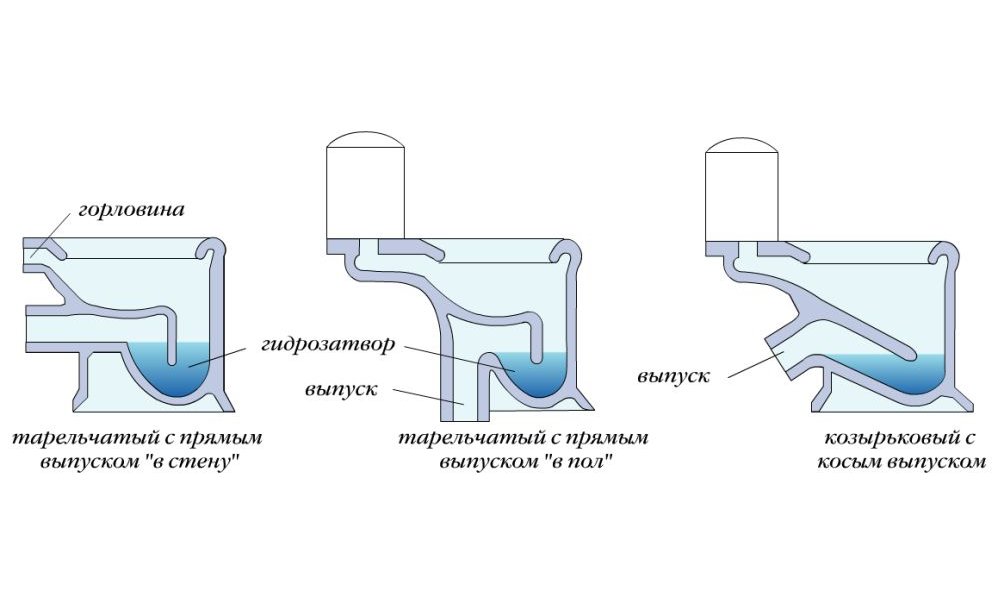
Design features of the device
The microlift is sold with the toilet lid, but it can also be purchased separately. Covers equipped with closers are made of plastic or its modern version - duroplast. This polymer, although outwardly it looks like plastic, is closer to ceramics in terms of quality.
Fix the device to the toilet in a rigid way. The main structural elements of the microlift:
- A rod that securely fixes a rigid plastic installation.
- Spring to balance the weight of the structure.
- Hinged micro-lift mechanism that provides a change in the position of the cover.
In more expensive functional systems, the basis of the mechanism is not springs and rods, but pistons and cylinders. Structures of this type are classified as non-separable.
Functional systems, in which seats and covers are complemented by a built-in microlift, are produced by many manufacturers of sanitary equipment. If desired, you can purchase and install a universal system that includes, in addition to the microlift, other devices.
They are able to provide several functions at once:
- adjusting the temperature of the incoming water;
- the possibility of heating the seat;
- high-quality washing, enema and massage;
- extraction of an unpleasant odor, followed by deodorization.
Many models are often equipped with a convenient self-cleaning function, thereby minimizing the participation of households in the process of using a plumbing fixture. The presence of a microlift is just one of the ways to make living conditions more comfortable.
Toilet Crack Repair Technology
If it was not possible to avoid the appearance of chips and defects on the surface of the structure, and it is not possible to purchase a new device, you can fix a small crack yourself.
For work, it is necessary to prepare waterproof glue, silicone sealant or epoxy resin, as well as alcohol, acetone, thinner, spatula, sandpaper, rags. Only after the implementation of these measures, they begin to eliminate the problem.
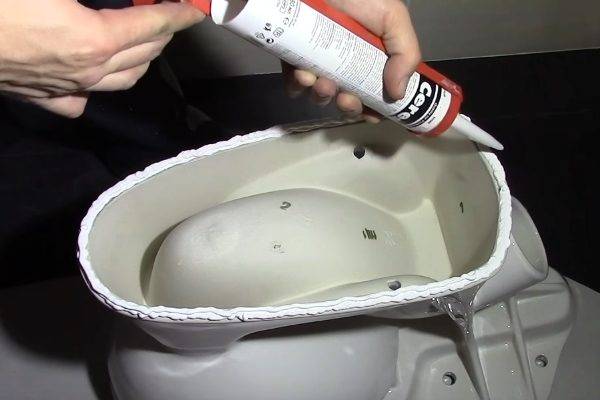
Silicone sealant is the best option for eliminating a design flaw.
Steps to repair a cracked toilet.
- Clean the area to be patched with alcohol or acetone and dry.
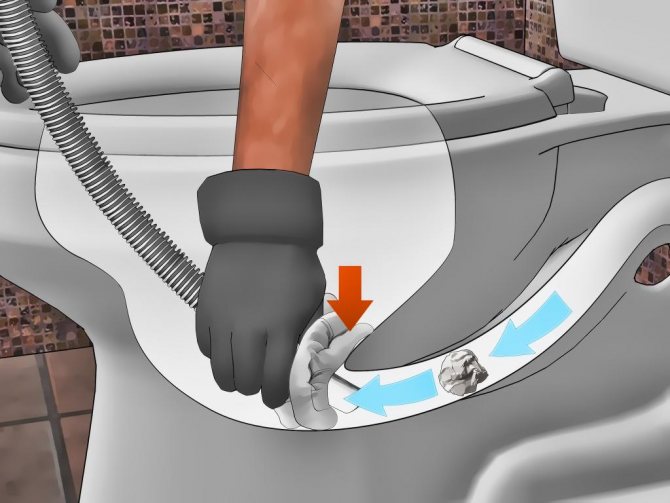
- Shut off the water supply with a valve.
- Squeeze out the required amount of sealant onto the surface of the toilet bowl, followed by leveling the material over the entire area of the seam. For this purpose, use a spatula pre-moistened with water.
Remember, it is advisable to use sanitary silicone as a sealant, which prevents the formation of fungus and mold, and also has high resistance to ultraviolet radiation and chemical compounds.
To avoid increased consumption of material, the edge of the package is cut off in accordance with the size of the crack.
- Apply a soapy composition to the surface of the silicone and carefully smooth it with your own hands. Due to the fact that after applying the material for 15 minutes it is characterized by slight deformation, it is necessary to polish the surface of the cracked area during this period.
- Remove excess sealant using a rag. In this case, hardened areas outside the crack can be removed with a solvent.
After carrying out repair work, it is necessary to clean the area near the toilet from unnecessary material residues, as well as wash the tools.
Remember, during the restoration of the device, air circulation in the lavatory should be maintained. This is due to the release of toxic substances during the hardening of silicone, which have a negative effect on the human respiratory system, as well as the mucous membrane of the eyes.


In addition to the use of this "connecting" component, the use of glue, epoxy resin is allowed.
Self-made adhesives
You can make an adhesive for restoring a cracked toilet bowl yourself.
Consider the basic recipes for preparing this mixture.
To glue a ceramic, faience device, you need to mix: 10 parts of casein, 2 parts of water, 1 part of borax, mixed in 2 parts of liquid.
To create a waterproof joint that hardens within two hours, a few drops of formalin are added to the resulting mixture.
To adhere a porcelain toilet bowl, glue should be prepared from the following components: 1 part crushed glass, 6 parts silicate glue, 2 parts sifted river sand.
The resulting mixture has high strength parameters, however, given its consistency, it is almost impossible to make a seam inconspicuous.
- Universal adhesive composition is made from 1 part of quicklime, 2.5 parts of liquid glass, 10 parts of chalk. Due to the rapid hardening of the material, this mixture is applied to the surface immediately after its preparation.
- To quickly glue the cracks of the toilet, mix 1 part of turpentine, 2 parts of shellac. The resulting solution is melted over low heat, followed by cooling. This adhesive has a long shelf life. Before using it, the mixture should be warmed up, applied to the surface with a thin layer, then ensure a strong contact of the damaged elements. Performing this action will improve the adhesion of cracked parts of the device.
Thus, after the discovery of a crack on the surface of the toilet it is necessary to determine its location, analyze the feasibility of restoring the device, and also identify the cause of the defect.
In the event of a chip on the sump or bowl of the product, appropriate measures must be taken to quickly “glue” the structure. In this case, silicone, an epoxy mixture or glue, which can be prepared by hand, is used as the active substance.
Bonding of marble surfaces
Some faucet designs: a - kitchen faucet, b - kitchen faucet with shower screen, c - washbasin faucet with controlled outlet.
For gluing marble sanitary ware (toilet shelf, faucet body, sink, cistern), very different adhesives are used, which require a certain application. Consider some adhesive compositions.
Related article: Oval and round carpets in the interior (30 photos)
Universal and familiar to many universal adhesive BF-2 is used in almost any plumbing repair. It is suitable both for gluing plastic pipes, siphons, thermoplastics, fittings and other similar equipment, as well as for repairing and gluing sanitary ware. And gluing with BF-2 glue accelerates with subsequent heating of the gluing site.
It is for this purpose that faience items, cracked ceramic-coated faucets, toilet bowl lids, after gluing, are heated over an electric stove or in an oven heated to 100 ° C. Faience and ceramics are quite reliably glued together with ready-made adhesives: EPD, EPO, MTs-1, Mars, Unicum, Rapid and the like.
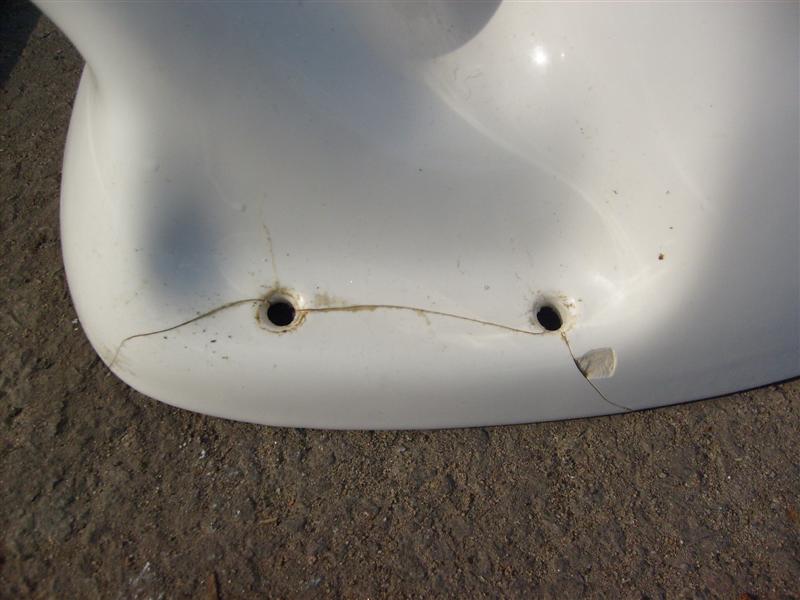
Drilling a hole in the toilet to prevent water from freezing in winter
Drilling a hole in the bottom of the toilet bowl will help solve the problem of freezing water in the water seal in winter. This method is relevant for summer residents who spend every day on their site, so they need comfortable living conditions. In the lower part of the water seal, using a drill, you need to drill a small hole into which a transparent flexible tube or hose of small diameter is inserted. It is this impromptu pipeline element that will be responsible for removing the liquid.
When performing such work, it is necessary to act as carefully as possible, especially at the drilling stage, so that the toilet does not crack.For this, special drills are used, designed for drilling tiles, and a funnel for processing ceramics of a minimum diameter. Fragile faience requires slow work, so the drill should be used at minimum speed.
Once you have drilled a hole in the water seal, you can proceed to the following steps:
- Insert a fitting into the hole made, which will help to securely fix the tube or hose.
- Reinforce the fitting at the point of contact with the toilet bowl with two gaskets.
- Pull the hose or tube over the fitting and leave it in this state until frost sets in.
It is noteworthy that such a plumbing element will not interfere with the use of equipment in spring, autumn and summer. It is enough to pinch the hose with a rope and roll it up, placing it in a secluded corner of the street bathroom. As soon as the cold sets in, you can safely remove the overlap from the tube. An effective mechanism quickly copes with the descent of water from the water seal of the toilet bowl, it is enough to point the hose down so that the liquid comes out into the container reserved for it. The advantage of the method is that you do not have to get your hands dirty and make special efforts, and the water simply will not freeze, preventing the descent of waste. The main thing is to drain the water in time so that the toilet does not start to crack in the knee and bowl area.
Additional Tips and Tricks
When choosing an adhesive, you should be guided by what materials such compositions are suitable for. Universal products are not able to provide a sufficient level of hitch. Therefore, for ceramics, it is recommended to take a separate glue, and a porcelain toilet bowl should be restored using the appropriate composition.
Modern faiences are made of sufficiently high quality, therefore they serve for many years, but the well-known property of ceramics is great fragility. With a certain mechanical impact or impact, plumbing can be damaged, so we all sometimes face the question of how to close a crack in the toilet. In this article, we will try to deal with this issue in detail.
Adhesive recipes
Now the market has a sufficient number of professional materials and ready-made glue for the restoration of ceramics.
You should not invent a bicycle if you can buy a ready-made product that is optimally suited to the given adhesion parameters - resistant to water, vibrations and other mechanical stresses.
You can glue the toilet bowl with epoxy resin, seal the seam with silicone sealant or liquid welding, attach the broken part using industrial-type BF 2 glue. Using a ready-made adhesive composition, you will save your time and get a high-quality result.
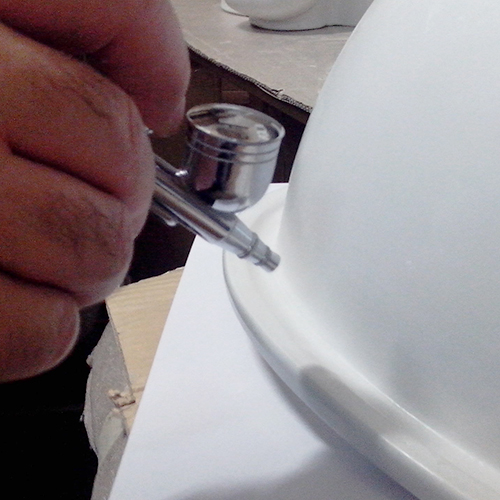
Filling a crack with epoxy
Epoxy resin is one of the most effective and reliable joint sealing compounds. As a rule, a two-component polymer epoxy is on sale - two containers are included in the kit, which contain a hardener and a filler.
For preparation, it is necessary to mix both components in one, clean glass, ceramic or metal container. Mixing is carried out in accordance with the recipe indicated by the manufacturer on the product packaging. After mixing, the composition needs to brew for some time.
The gluing process itself is carried out as follows:
- The crack is thoroughly cleaned of debris and contaminants;
- If the chip is large or deep, you can try to process it with sandpaper folded in half using the edge of the bent sheet for this, after which it is necessary to clean the surface again with a brush;
- The gap is treated with acetone or alcohol to remove fats and other chemical contaminants, dried with a napkin;
- Next, you need to cover the clean gap with epoxy. When applied, excess epoxy protruding outward is best removed immediately with a napkin;
- After drying, which can take from 30 minutes to 4 hours depending on the type of material, the surface should be sanded with the finest grit sandpaper.
If the work is done correctly, the adhesive will withstand contact with water, and the toilet will last for a long time without leaks. In this case, the seam will not be noticeable as much as when processing with other materials.


Bonding cracks with silicone sealant or cold welding
Silicone sealant can be found at hardware stores. It is sold in flexible tubes of various sizes, including small tubes. It is this sealant that we will need to save the budget for materials. Cold welding can also be found at hardware stores. In appearance, it is an elastic material of a metallic color.
If you are in doubt about which is better to seal the toilet, then both of these materials have the same efficiency and bond strength. Cold welding is more noticeable on a white surface and, after its application, it may be necessary to tint the treated area with acrylic moisture-resistant paint or moisture-resistant varnish to match the faience.
Bonding of cracks and chips is carried out as follows:
- The surface is carefully sanded and cleaned of small fragments;
- Degreasing is carried out;
- Silicone sealant is applied - for work it is better to use a flat plastic spatula, which can be used to carefully apply and level the paste. Excess is removed with a napkin;
- After drying, the treatment site is polished with sandpaper.
If cold welding is used, then the preparation for fixing is carried out in the same way as with the sealant. A piece of cold welding must be well washed before application so that it becomes soft like plasticine. It is better to do this with gloves, as it gets your hands dirty.
After the cold welding is ready, it is applied to the seam by crushing it with your fingers so as to fill in possible voids. The excess is cut off with a flat knife. After 4-5 hours, the surface can be sanded for leveling and covered with white paint to hide visible defects.
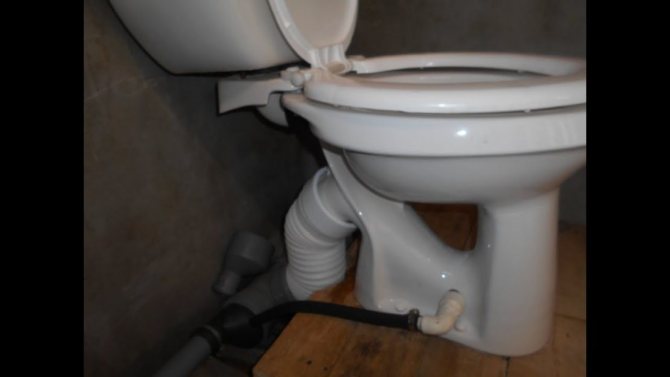
What to do if the tank is leaking
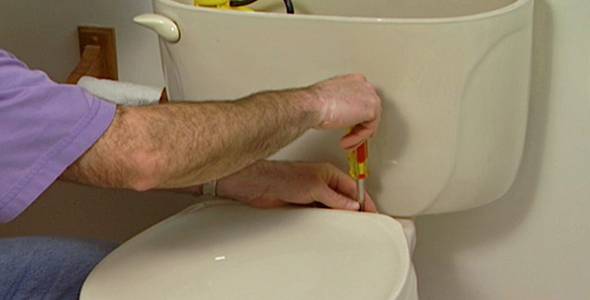
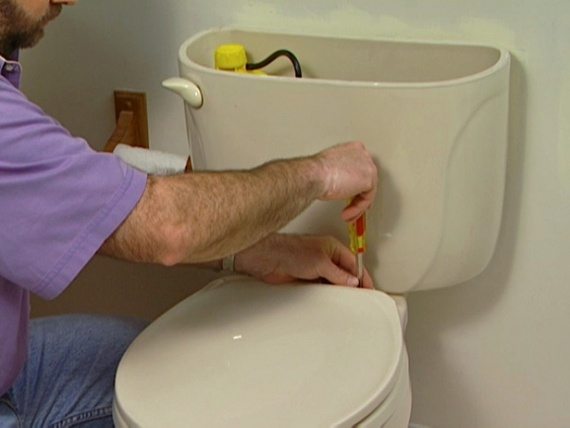
We carry out a certain sequence of actions. It lies in the fact that you must first diagnose the source of the malfunction, and then eliminate it.
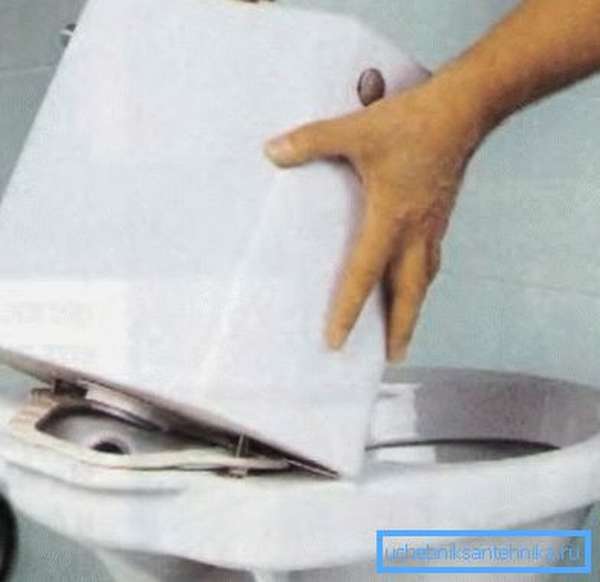
We remove the lid of the tank. Raise the float element by hand. If the problem lies in it, the flow will immediately stop. This means that the displacer arm is at the wrong angle and cannot block the leak.
To restore the performance of the part, slightly bend the lever. When the water reaches a certain level, it will begin to block its flow.
If the water still runs, examine the valve for external damage to the pin. Located inside the gate, the device controls the valve circuit, stopping its operation at the right time.Additionally, we look at the state of the opening in which the stud is placed - it must be without deformation.

You can correct the defect that has arisen by changing the hairpin to a copper wire of identical diameter. The problem with the hole is solved by installing a new shutter.
Pay attention to the cuff for wear or a gap between it and the valve. Press the part more tightly against the valve, and if the leak has stopped, you need to restore the weakened contact
If the adjustment does not help, just change the gasket
Press the part more tightly against the valve, and if the leak has stopped, you need to restore the weakened contact. If the adjustment does not help, just change the gasket.
Let's examine the bolts connecting the tank to the toilet. In cases where at least one of them is rusty, we recommend that you completely replace the kit so that after a while you do not have to do this repair again. Whether to change both plastic clips - decide for yourself. Look at the bolt that remains intact: if it has no visible violations, then it can last a long time.
Fasteners that are loose, tighten with a wrench and a screwdriver.
Make sure the pear retains its shape.
This element cannot be repaired; in case of a defect, you will have to buy a new part.
Let's explore the float. If there is a hole in it, you can close it with a piece polyethylene or a heated piece of plastic. However, this is a temporary measure, it is better to change the product to a better analogue.
Next, let's move on to sealing. between toilet and cistern. A gasket that has lost its functionality will need to be replaced.
Let's work with the release valve. It can be disassembled, the pressure on the drain tube can be adjusted by cutting the end slightly.However, these procedures require a lot of time, effort and do not always give the desired result. The best solution here is to buy a new node.
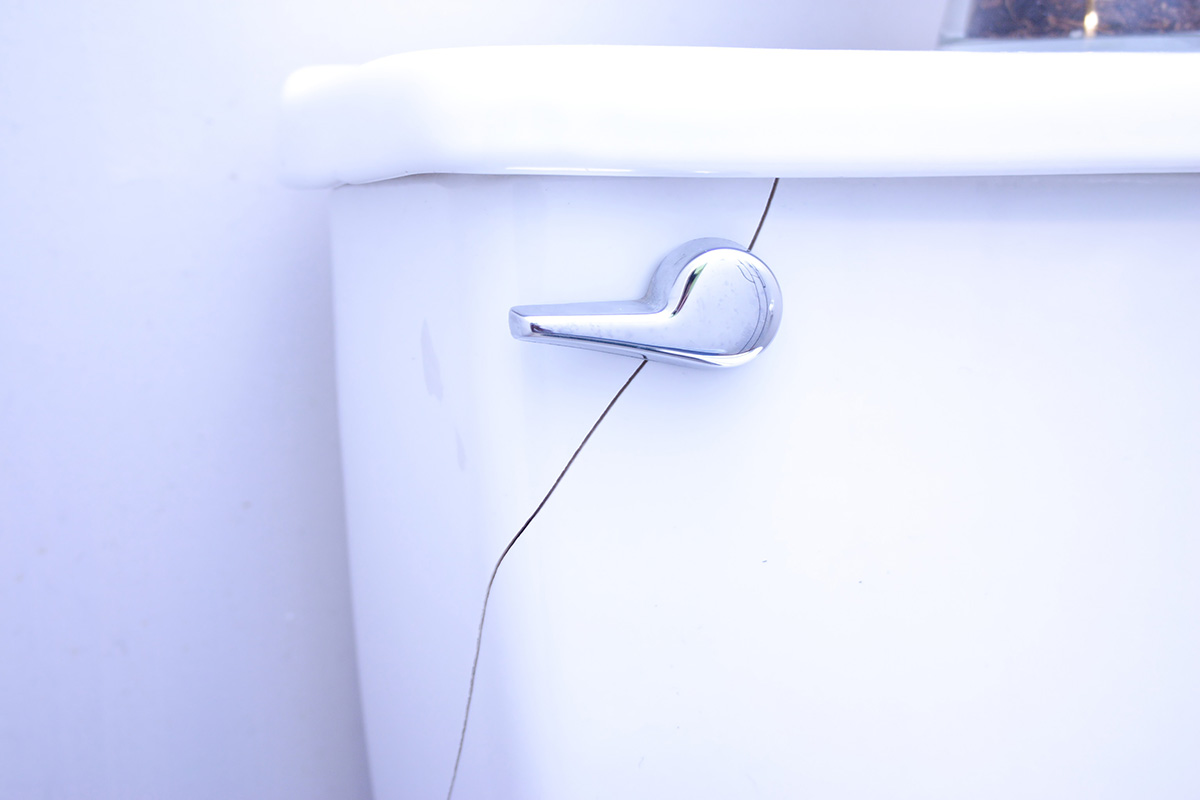
Check the tank for cracks.
To correct the identified defects, remove the tank from the toilet and leave it to dry completely. We carefully treat all chips with high quality sealant and wait for the seams to dry.
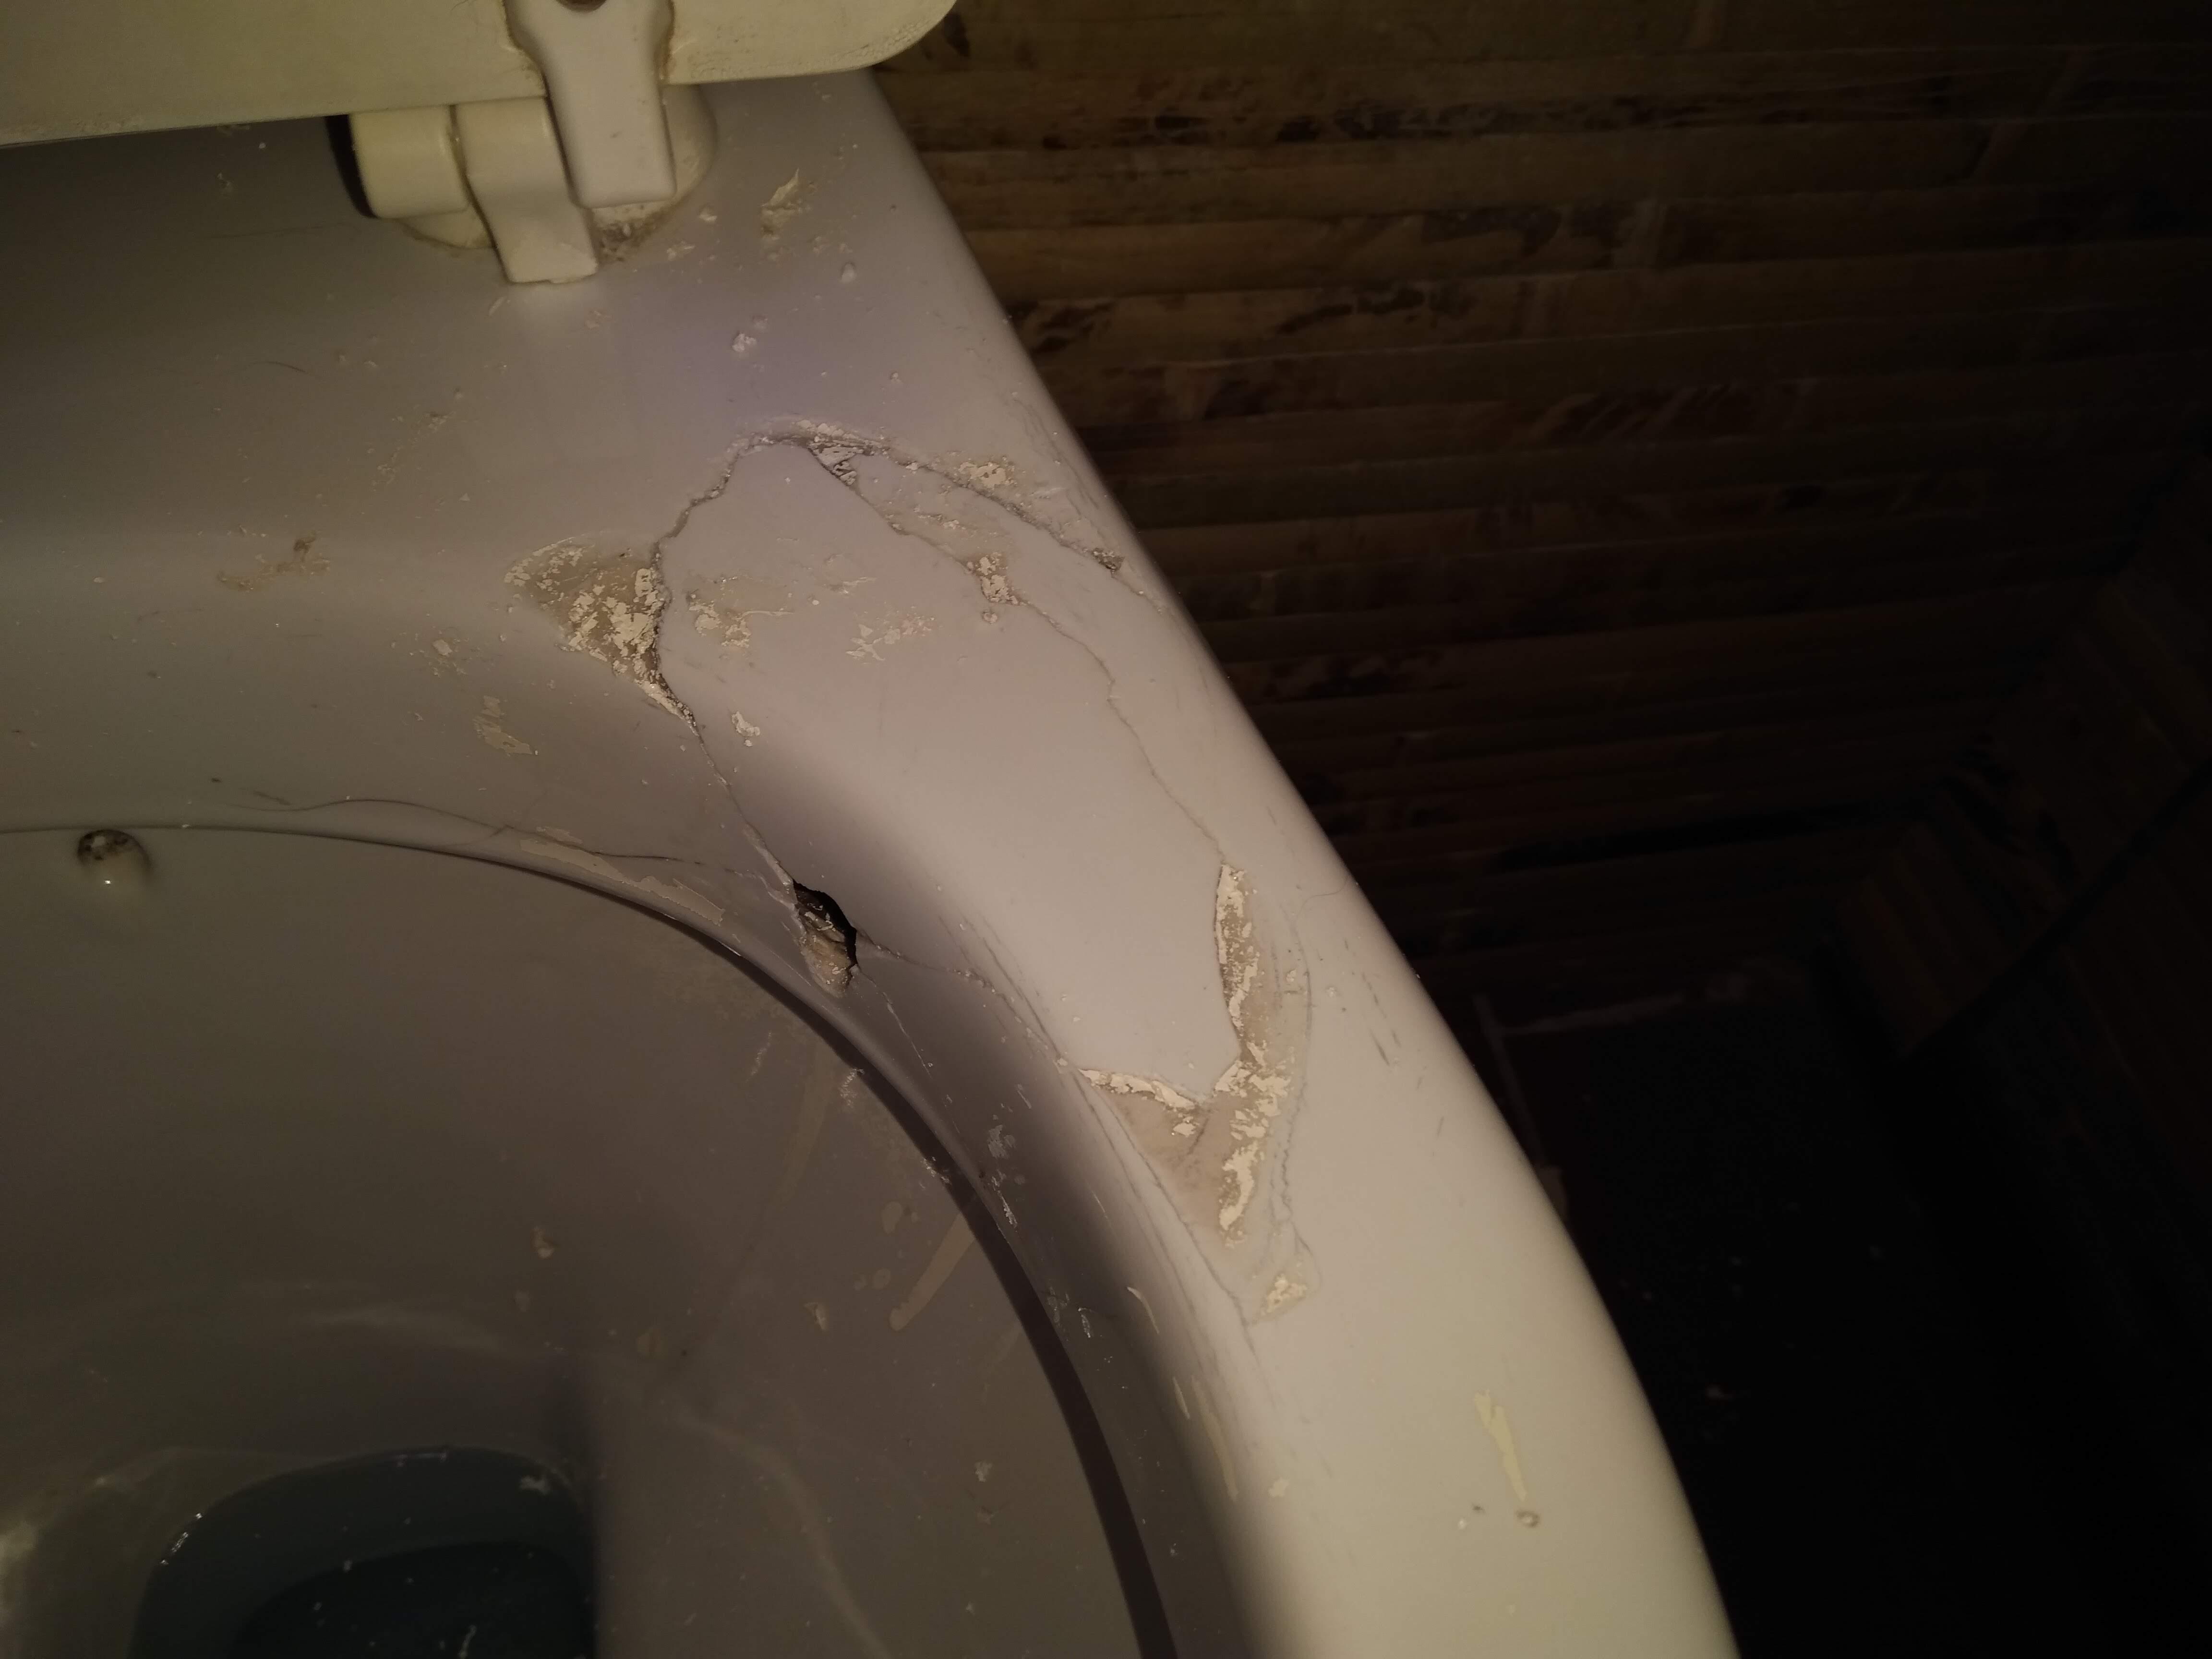
We eliminate the crack
Most plumbing fixture damage can be repaired locally. But first you need to eliminate the key factor.
Namely:
- Avoid falling items from the wall cabinet onto the toilet bowl by installing limiters on its shelves and hanging an additional organizer.
- Do not pour hot water into the appliance. If, nevertheless, such a need arose, for example, when draining water from radiators, use a rigid hose, leading it deep into the sewer pipe.
- If the device is installed incorrectly, it must be reinstalled.
Consider a step-by-step instruction for fixing a crack on the toilet.
Step 1. We wipe the chipped area from dust and debris.


Step 2. We carefully clean the faience with fine-grained sandpaper and degrease the surface. For more complex damage, it is better to thoroughly blow out the chipped area with a hairdryer, without using sandpaper.
Step 3. Apply prepared glue to the chipped surface, according to the instructions on the package. We give the composition a little grip and connect the elements. How strongly you press the elements to be joined together in the first minutes, the fixation will be so strong. It is better to fix the junction with a tight tourniquet or clamp for a couple of hours.
Step 4. When the seam hardens a little, it needs to be strengthened. We clean the joint, degrease the surface, dry it and coat it with glue.Lay a piece of foil over the seam.
When the glue is completely dry, remove the remaining substance from the surface of the device.
Damage to the toilet bowl can be completely avoided by using the space of the bathroom ergonomically. For example, if there is a cabinet hanging over the toilet, when you open the doors of which something constantly falls out, put things in order in it, set limiters, or even re-hang the item to another place. It also does not hurt to keep the lid of the device closed at all times.
Damage to plumbing and prevention of their occurrence
As you can see from practice, the first place among the reasons why cracks and chips appear on faience sanitary items can be safely considered damage to it by various objects that we drop into the toilet.
It can be heavy cans of household chemicals that we use to clean sanitary equipment, various tools and other items. Due to the tightness that characterizes city apartments, we have to use all the available square centimeters as efficiently as possible.
Many apartment owners install special spacious cabinets under or above the plumbing storage equipment necessary little things
At the slightest negligence, you can drop any object and damage the toilet bowl
Therefore, try to take this into account and try to position the locker so that objects cannot accidentally fall out of it and fall on fragile faience equipment. If this is not possible, keep the cabinet doors tightly closed at all times.
Faience can be detrimental to frequent and sudden changes in temperature.They provoke the occurrence of internal stress in the material, leading to its uneven expansion. Together, these factors cause the appearance of cracks. To avoid this, remember just one simple rule: do not pour hot liquid into the toilet.
The same applies to washing batteries. The coolant in heating radiators in severe frosts sometimes has a temperature of 80-90C. You should not send a liquid of this temperature directly to plumbing fixtures - this is wrong. If you haven't found another option for draining the battery, take a stiff hose and push it through the drain. toilet bowl to the sewer pipe itself.
There is another reason why damage appears on plumbing faience appliances. It's about misassembly. If you tightened the bolts incorrectly, or applied excessive force when installing them, this will lead to cracks in the faience toilet.
Cracks will appear either immediately or after a certain period of time, which can be quite long. Therefore, when installing plumbing equipment, try to avoid distortions and do not use excessive force.
During installation, tighten the paired bolts alternately, performing two turns, avoid distortion when tightening the bolts
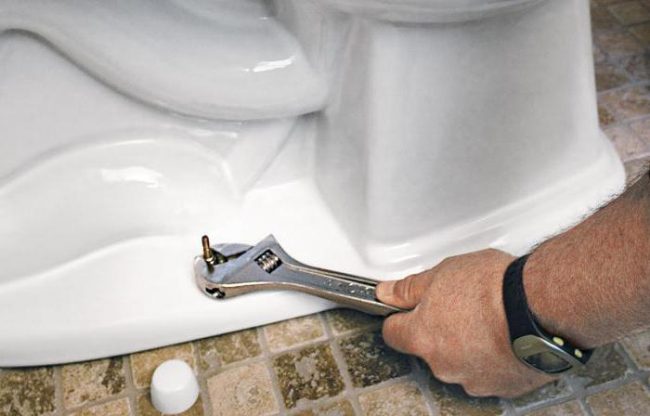
Take the greatest care when tightening the brass wrench bolts.
This is interesting: How to adjust or change float for toilet: walkthrough
How to avoid cracks
close the lid
This simple operation will help prevent foreign objects from falling into the toilet bowl.A closed lid will not only save the toilet from cracks and chips, but also save many valuable items from unplanned bathing.
Do not pour hot liquids down the toilet
Have you boiled a burnt pot of baking soda? Is she bright again? Awesome! Now, before pouring its contents into the toilet, let it cool. A new toilet is obviously more expensive than an old pan. Even if she is very beautiful.
Think about the possibility of cracks when washing batteries in winter. The water temperature in radiators in cold regions can reach up to 80-90 degrees. Directing a hose with such water into the toilet is clearly not a good idea.
Tip: as a last resort, if there is no other way to drain the water from the battery, push the hose through the toilet into the sewer riser. Of course, the hose must be sufficiently rigid so that it does not twist during this operation.

Flushing batteries is a must. But pouring boiling water into the toilet is not worth it.
Avoid heavy forces and distortions when assembling
- If you undertook to repair or change the toilet flush tank, during installation, tighten the paired bolts a couple of turns alternately, avoiding distortions. Faience is fragile, and gaskets are sometimes quite rigid. First of all, this applies to old domestic cisterns with a separate shelf.
- The notorious tank with a separate shelf must necessarily have a support from the side of the wall. If it hangs only on the mounting bolts that pull it to the ears of the toilet, sooner or later a chip cannot be avoided. The ear of the toilet bowl and a piece of the shelf can break off.
- Large forces are especially unacceptable for tightening brass bolts that are tightened with a wrench.Don't forget: the lever arm of any adjustable wrench multiplies the force with which you pull the nut. A little overtightened - the toilet cistern cracked.
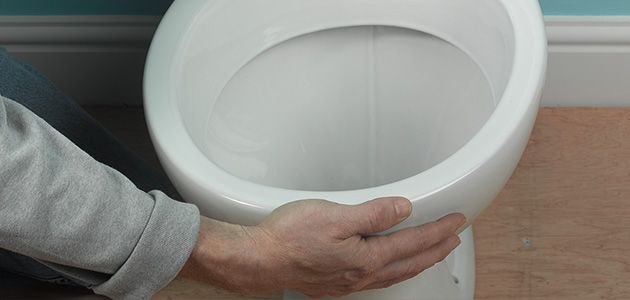
- When installing the toilet bowl, it is attracted to the floor exactly until the moment when it stops staggering.
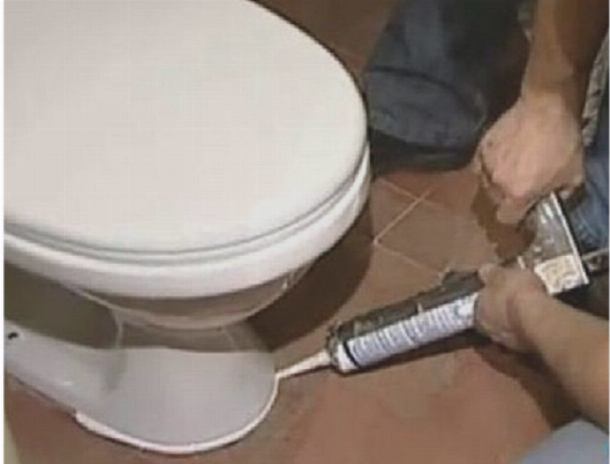
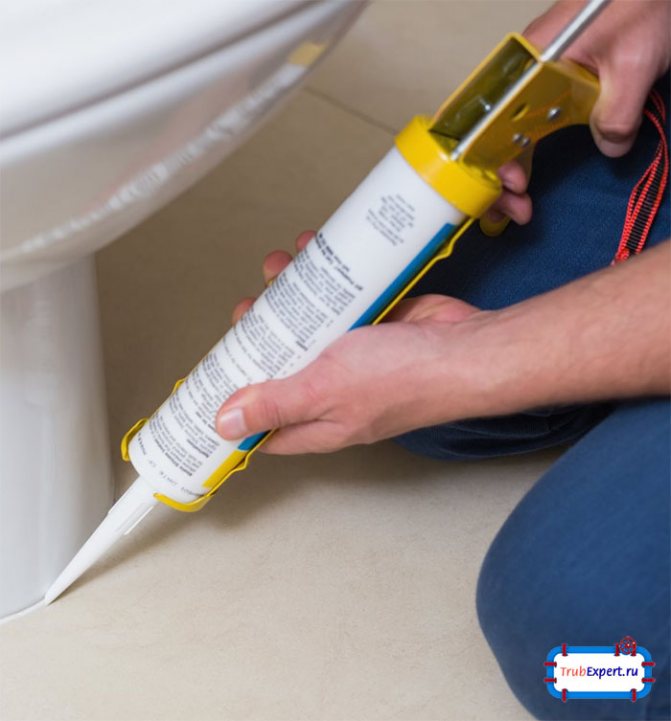
- During installation, gaps remain between the toilet bowl and the tile, which it is desirable to cover with any building mixture or cement mortar. This will give the toilet a larger footprint. It is much less likely that its base will crack under uneven load.
Paired bolts are pulled together in turn, without distortions and great effort.
Microlift - what kind of device?
The main purpose of the mirolift is to provide a smooth lowering of the lid in order to prevent it from falling onto the glazed sanitary ware with a loud popping sound. Such devices appeared on the market a long time ago and have already gained popularity among connoisseurs of comfort.


The principle of operation of the microlift in terms of functional purpose is very similar to a door closer, but only made in miniature, which is why it is often called a “soft lowering device”.
The installed device helps to solve three problems at once:
- prevents the lid from falling off;
- prevents the spread of unpleasant odors;
- eliminates the formation of cracks and chips on the decorative coating of plumbing.
In a product that is simple at first glance, a solution is implemented that greatly simplifies the use of a plumbing fixture and increases comfort. Due to the fact that the mechanism operates silently, it is not audible when using plumbing even at night, when all households are sleeping.
On sale there are both budget options and more expensive ones installed on smart toilets with electronic control. Mechanisms from the expensive category are equipped with a presence sensor, which automatically raises the lid at the moment a person approaches, and returns to its original position after using the toilet.
Conclusion
Any glue is supposed to be a temporary measure for plumbing cracks
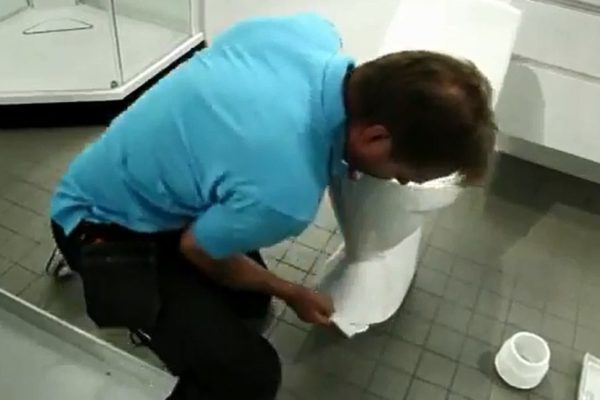
But, if you can ignore the aesthetic side of things, an epoxy-repaired toilet can last a long time. The video in this article will provide an opportunity to find additional information on the above topic. In general, I will do it for the 3rd time .......
In general, I will do it for the 3rd time ...... ..
burned a hole with a muffler. with a diameter of 5 millimeters, he closed them through cold welding, inserted a piston into the hole and covered it with welding. everything was normal until the tank was loaded. those are a full tank, or if you scratch the tank, then because the welding is tough and bounces.
actually interested in how to fix it. something flexible...
Godfather
You take poxypol and a bandage ... You cover the hole with a large radius around it with poxypol abundantly, glue the bandage tightly drowning it in poxypol, then poxypol again and bandage again .. 3-4 layers and let it dry .. it should be elastic enough ..
Godfatherhow does poxypol with polymers contact? let's say epoxy will not roll. right now that's thinking to take and repair as well as the bumper. reinforce and solder. I just don't know what?
Godfather
DoH, excellent contact ...
Godfather, I will eliminate the cause while it is temporarily eliminated
the thing was that my silencer krpelnie fell off and he pressed against the tank and burned a hole. I have a muffler assembled from what was. and nothing good was at hand. in the near future I will put a normal one, and by design it goes far from the tank.
isn't poxypol hard? just if it is not elastic, then it will be the same with cold welding
here I think to pack something to come today and think about soldering or sealing
Godfather
Poxipol has more flexibility than cold welding, so give it a try..
Godfather, Zhenya, you are a specialist in tanks
I'll try because I have nothing to solder
the diameter of the hollow of the hair dryer is such that there the floor of the tank can be charred
What plastic is the tank made of? If polyethylene - figs what will stick to it
Two options come to mind: 1. brew. (this is probably the most correct option, but I don’t know where and how) 2. cultivate the hole (so that it turns out to be the correct shape, without sagging, then take two pieces of benzo / oil-resistant rubber, cut out two washers from them so that they overlap the diameter of the hole with a large margin. next, find / make two thick metal washers according to the diameter of the rubber washers and bolt of suitable diameter and length.


well, then, I think, everything is clear - from the inside: bolt_head> met_washer> rubber_washer> tank_wall> rubber_washer> met_washer> nut and we tighten this whole sandwich. On the threaded end of the bolt (which will stick out from the outside) you can make a slot to make it more convenient to tighten it.
not very pretty, but should hold.
Godfather
DoH, sand the place of pasting with a rough sandpaper so that it sticks well and degrease!
Godfather, it was done that way, it’s just that yesterday I flew along a country road in a slut od 70 and maybe I hit the tank. and cold welding, it doesn’t bend, so it burst again
it is difficult to offer without seeing the design of the tank / neck / location of the_hole, but here is an option that can turn out: we put on the bolt everything that should be inside the tank (i.e.we put a washer and an elastic band), then through a hole in the neck we bring out a wire (for example, copper or aluminum, so that it is not very rigid) then, to the wire, behind the threaded end, we fasten (for example, with tape, or you can drill a transverse hole) a bolt with already mounted washers. well, then, if all of the above succeeds, we tighten the bolt from the inside into the hole with a wire.
seeing the design live, maybe something more convenient will come to mind, but for now, just this.
pavor, savvy Or experience?
pavorI don't want to remove the tank
in my case, it doesn’t work out because the tank is curved and the hole is in the most inconvenient place and farthest from the neck
although the drain plugs can be unscrewed ... ..
I will glue today
by the way, polyethylene melts and sticks to it, everything sticks to it, you just need to try to solder not plastic
rather the first.
alternatively, you can throw a bolt with mounted washers into the tank and bring it to the hole with some powerful magnet through the tank wall. Yes, if you decide to do this, then tie a rope to the bolt just in case, so that in case of failure, pull it back out.
at the expense of melting - I know, but at the expense of "sticking" ... I have never managed to achieve a reliable and tight seam on polyethylene.
from "soldering" you can try a glue gun, but there are no guarantees of the durability of such a connection.
ps: by the way, I would not advise you to carry out any thermal procedures with the tank without dismantling and steaming it! otherwise it may end very badly ... or do you have a diesel engine? .. (although ... I wouldn’t joke even with a solarium, because a tank, especially an empty one, is very explosive)