- Why is concrete floor hard to paint?
- Stages of work
- Preparing the stove and its accessories for painting
- Painting surfaces and details
- When can you use the stove?
- How to make plywood moisture resistant with your own hands
- Painting with nitro enamel
- Drying oil impregnation
- Coating with PVA glue
- Expert advice
- Phased technology
- Defect Actions
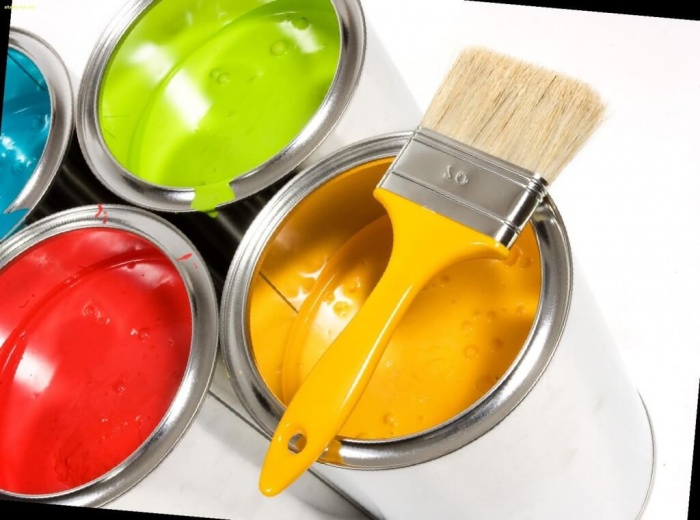
- Creating paint material with your own hands
- How to paint the walls in the apartment with your own hands: video
- Positive and negative properties of enamel
- Creating paint material with your own hands
- What is used today
- natural drying oil
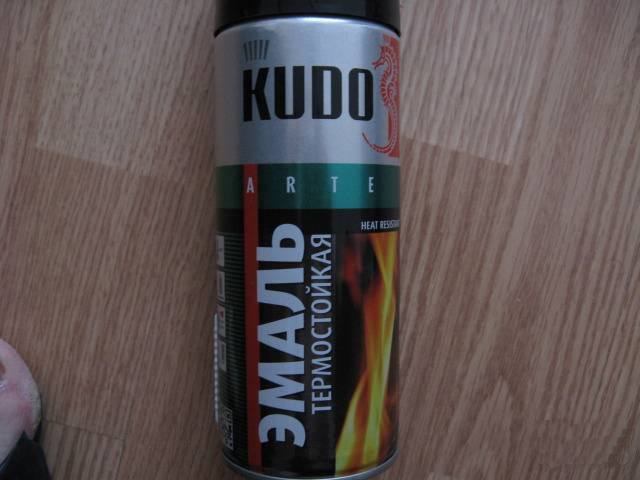
- heat resistant paint
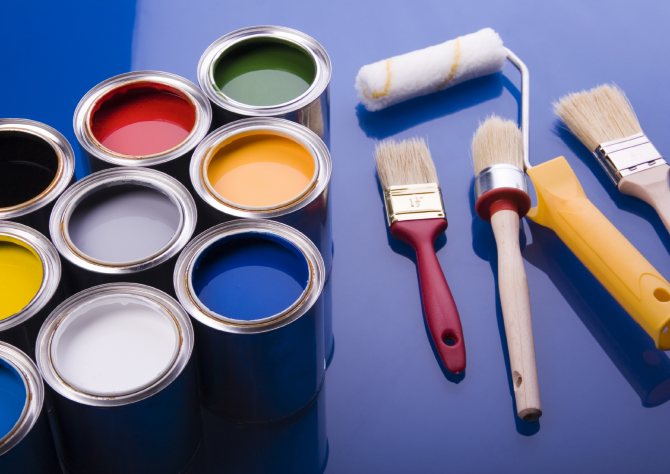
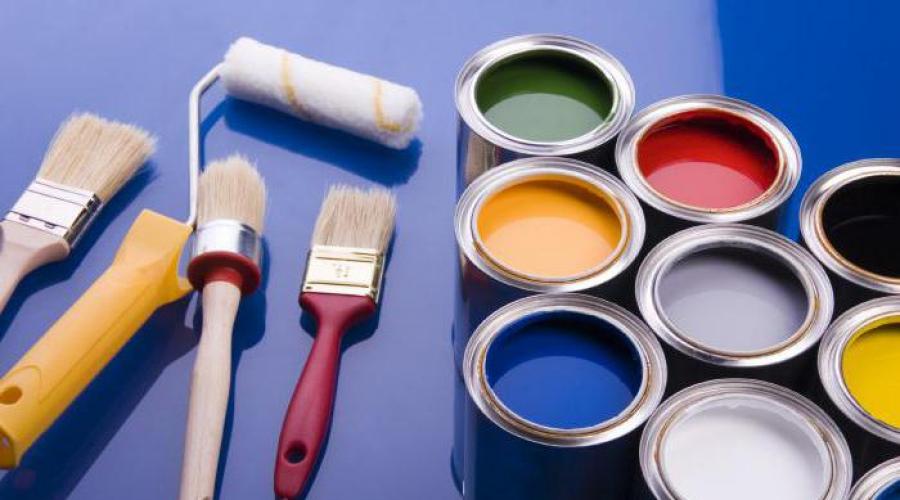
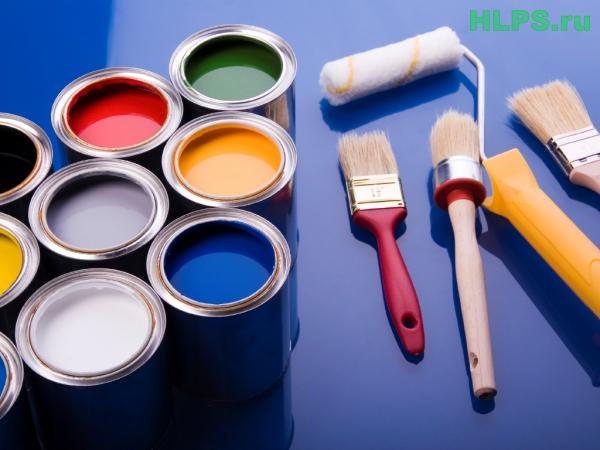
- Tools and materials for painting
- Slab grate question
- Defect Actions
- Paint Tips
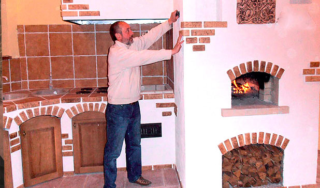
- Furnace painting
- Additional decoration
- Divorces
- white surface
- Create a drawing
Why is concrete floor hard to paint?
Paint the concrete floor on your own, really. difficult. The answer lies in the porous structure of the material. Concrete (especially in a garage or basement, where operating conditions leave much to be desired) actively dusts, wears out and cracks. The paint on its inhomogeneous surface lies unevenly, with lumps and other defects, which does not allow it to fully cope with its protective functions.
Does this mean that painting concrete is useless? Of course no! The main thing is to approach the choice of paints and varnishes for work with all responsibility. So, preference should be given to a product that has proven its high adhesion to concrete. Then we can hope that due to good adhesion to the floor, the coating will lie flat and will not peel off or peel off at the slightest impact from the outside. However, this is only possible if the concrete is properly prepared for painting.
Stages of work
The result of the restoration depends not only on the type of plate and brand of paint. Remains of grease or rust can nullify all efforts. Success can only be achieved if all stages of work are completed and the instructions attached to the material used for staining are followed.
Before starting painting work, you should stock up on protective equipment for the skin, respiratory organs and eyes: rubber gloves, goggles and a mask. In addition, measures must be taken to prevent paint from getting on kitchen furniture, walls and floors. Ideally, the slab intended for repainting is dismantled and transferred to a more convenient place for painting. If this is difficult to do, then the surrounding surfaces are protected with plastic wrap and masking tape.
Stages of work:
- preparation of the plate for painting (dismantling, removal of contaminants, removal of the old layer of enamel, washing, drying, degreasing);
- applying paint (layered or single, depending on the instructions);
- final drying;
- fixing the paint by heating (if necessary);
- assembly and installation of stoves in the kitchen.
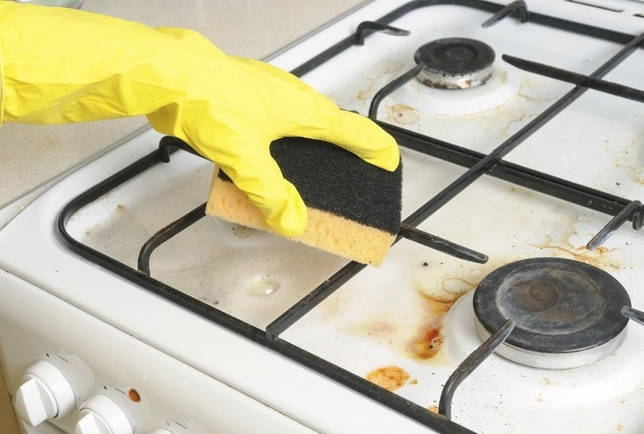
Preparing the stove and its accessories for painting
Preparation consists of the following steps:
- purchase of suitable paint and related equipment;
- elimination of technical malfunctions, if any;
- dismantling of all removable elements (handles, burners);
- removal of fatty contaminants and soot;
- removal of exfoliated enamel, reduction of dents, polishing in the place of deep scratches;
- sanding to a matte surface;
- treatment of corrosion areas with a rust solvent;
- degreasing with acetone.
Painting surfaces and details
The paint is sprayed in thin translucent layers in several stages from a distance of about 30 cm. Between sprayings, the interval necessary for the drying of the applied layer must be observed. On average, this period is 10–20 minutes, but it may deviate from this value for various brands of thermal enamels. The paint is applied until a uniform, glossy, fully dyed surface is obtained. After applying the last layer, the plate must be left to dry completely. The final drying time is from 4 to 12 hours.
When can you use the stove?
Most heat-resistant enamels are quick-drying. This means that the parts of the plate covered with them can be taken in hand without the risk of getting dirty. However, the complete hardening of the enamel film occurs within 12 hours, after which the slab is collected and returned to its place. Experts recommend starting to use it only a day after the end of the restoration work.
How to make plywood moisture resistant with your own hands
To give the desired characteristics, various methods are used, involving the use of special impregnations.
Painting with nitro enamel
This is an effective way to obtain a surface that is resistant even to direct contact with water.
Process diagram:
- Grinding of all sides of the sheet is carried out with an abrasive with a large and medium structure.
- The surface is completely covered with drying oil, it is especially necessary to impregnate the ends.
- The paint is diluted to a liquid state and is laid evenly on the dried slab. The composition plays the role of a primer, creating a reliable basis for future work. It is recommended to paint in 2-3 layers. It is taken into account that the last coating should have the smallest thickness.
- As an additional protection, fiberglass impregnated with nitro solvents is used. The canvas is glued to the entire area of the panel, but only after the first layer of paint.
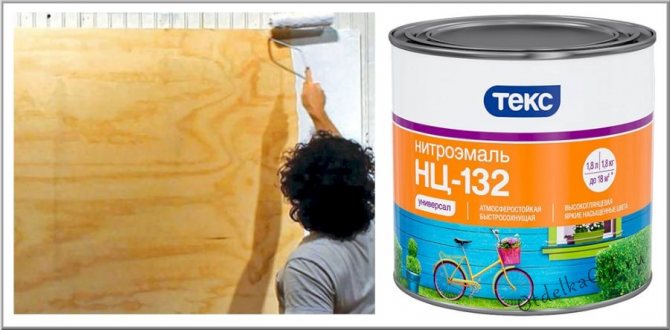
Nitroenamel dries completely in a couple of hours, but this paint has a strong and pungent smell of a solvent, and besides, it must be applied at least 2 to 3 times, since the composition is highly absorbed. The technology allows the use of similar compositions marked with moisture resistance.
Drying oil impregnation
This solution is one of the most common and most affordable. At home, the oil is used as an antiseptic and increases the durability of the product. Processing is carried out according to the following algorithm:
A suitable container, roller and brushes are being prepared. Drying oil is well stirred and poured into a container
The composition is heated to a temperature of 60 degrees Care must be taken, because the material is flammable
All plywood sheets must be treated with a ready-made solution. It is important to thoroughly impregnate each section, special attention is paid to the edges. Forced drying of the surface is performed. To do this, it is advisable to use a building hair dryer with power control.
Drying oil is heated, the entire processing cycle is repeated. The mixture must be applied until it ceases to be absorbed.
To do this, it is advisable to use a building hair dryer with power control.Drying oil is heated, the entire processing cycle is repeated. The mixture must be applied until it ceases to be absorbed.
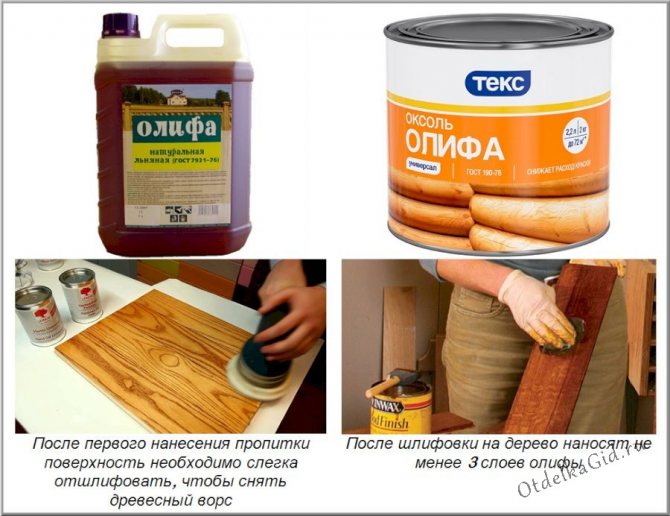
Natural types of drying oil have a high price, therefore, most often plywood is processed with semi-natural compounds, which are called oxols
The resulting coating is not only resistant to moisture, but also destroys mold and fungus.
Coating with PVA glue
Such impregnation for plywood is recommended to be used if additional protection against decay is required, which is especially important for floor coverings.
The plates are treated with a polyvinyl acetate composition in a similar way: the application is carried out sequentially on both sides, until the surface stops absorbing the solution, special attention is paid to the ends. The main difference from the previous method is that forced drying cannot be performed. In addition, the whole complex of works will require at least 7 days, since the film takes a long time to form.
In addition, the whole complex of works will require at least 7 days, since the film takes a long time to form.
The main difference from the previous method is that forced drying cannot be performed. In addition, the whole complex of works will require at least 7 days, since the film is formed for quite a long time.


It is not necessary to use glue to process plywood in order to protect it from rotting; dispersion compositions based on PVA with the addition of an antiseptic work much better
Expert advice
The main task of the paint is to create an attractive appearance to the brick and protect the surface. Whatever the quality of the product, cracks appear on the dyed layers over time.This is a common decomposition reaction of a substance, but the period can be extended if the painting is carried out correctly and the advice of experts is taken into account:
The correct choice of what paint to paint the brick oven in the house is the main point that will eliminate minor nuances in the future. Don't buy cheap products. Such savings will require double the cost in the future.

One way to dilute paint in a separate bowl
If the paint is too thick, then it must be diluted only with a solvent.
The density of the fresh substance should be a kefir mass. Such a composition will not require dilution, and will not spread during application.
To increase the strength of the mixture at home, it is recommended to add 40-50 g of table salt per jar
It is important to first dilute it in a warm liquid.
If there are old layers of paint or lime on the stove, they should be removed. The lime composition is easily removed with water, and a soft sandpaper can be used to remove the paint.
Buying brushes, do not save money on them
It is better to buy a wide tool with natural bristles. When purchasing them, you should check them, touch the villi. They should be soft but elastic.
If it is decided to use a roller, then it should be made of foam rubber or short-haired fur.
Many paint manufacturers write on the packaging that it is enough to apply one layer of paint, but experts advise working in three stages. First, a “rough” layer is applied, then the main one, and only after that the finishing one.

Applying the first layer
- Do not mix several types of enamels.It is forbidden to apply a paint and varnish substance without preliminary surface preparation.
- Before buying paint, it is best to calculate the area of the oven in order to find out how much colorant to purchase. This will save money.
After completion of work, it is better to close the room for a day and, if possible, do not go there. After 24 hours, you can already go into the room to check the condition of the stove and open the windows for ventilation
When choosing how to cover a brick oven and with what tools, pay attention to all types of paints in cans or bottles, except for those in aerosol cans. The composition sprayed with their help lies unevenly on the surface of the furnace, and additional layers will lead to tint differences.

The result of staining after applying the third layer
Phased technology
Initially, plywood sheets should be well dried, especially if the material was stored in a closed and unventilated warehouse.
To do this, the purchase is placed in a warm, dry room for several days. After drying is complete, the material is carefully sanded with coarse sandpaper in two stages.
Grinding is done manually or using a special machine strictly perpendicular to the texture. During processing, the sheets must be cleaned of dust and wood debris.
Then proceed to re-sanding along the wood grain pattern, using a finer sandpaper. We must not forget about the edges of plywood.
Before painting, the edges of the material are well sanded and covered with several layers of putty.
As a result of priming, reliable protection against cracking and drying is provided, the surface is leveled and the service life of the finished product is increased.
On sale you can find prepared plywood products that do not need the first stages of preparation. The item has already been treated with the necessary layers that protect the plywood from cracks.
The disadvantage of such a product is a significant cost.
After the primer has dried, they begin to process the plywood sheet with special antiseptics. These products protect the material from fire and from the appearance of mold and fungus.
Watch a video on the topic:
In the case of plywood stained with transparent paint, antiseptic treatment is especially necessary from biological irritants.
Defect Actions
If the surface of the gas stove loses its elegant appearance, it has various defects, you need to take action. The following are solutions for some specific situations:
- How to whiten enamel on a gas stove? This is especially true when the enamel has turned yellow on the stove. This category also includes cases when the enamel on the stove has darkened. Action Variations:
A. Clean up. You can "Miracle stove" or "Parma".


B. Degrease. For example, Antifat.
B. Paint with a suitable paint (their list was discussed earlier).
- How to fix a chip on a gas stove? Similar operations are used here, as in the case of decoupage of the plate cover. That is, restoration activities are carried out:
A. Cleaning, Degreasing. Drying. Sandpaper, acetone is used. The chipped area is drying.
B. A coating is made of a phosphate layer. Drying.
B. Priming. Drying.
D. Coating with suitable paint. Drying at +100 C.
E. Repeat point D. The number of layers depends on the level of the chip.For example, if the chip is 3 cm, you need 4-5 layers.
- How to remove scratches on a gas stove? Essentially the same operations appear here as in paragraph 2. Paint layers can be less: 2-3.
More often, the owners are interested in whether it is possible to paint a gas stove with hammer paint? It is not desirable, since such paints, despite their many advantages, are not suitable for working with such a plate. They are not heat resistant.
Creating paint material with your own hands

If it is impossible to buy a professional coloring agent, you can independently manufacture it. There are different recipes for creating paint for a brick oven.
- A solution of chalk or lime. To create it, you need water and lime. You can buy them at a hardware store. The difference in these two types is only in the duration of complete drying. If chalk is used, the waiting time will be longer. The mixture consists of 1 kg of lime or chalk and 1.5 liters of water. For strength, 300 g of salt per 2 kg of the mixture is added to the solution. It turns out the composition is white. The advantages include minimal financial costs, ease of application, covering defects and resistance to the formation of fungi. Disadvantages - poor coverage, gets dirty quickly and requires periodic updating.
- Natural varnish. It is made of brick dust, egg whites and milk, which are taken in a 1:1 ratio. To process 1 sq.m. you will need ¼ liter of milk and 8 chicken proteins. To prepare the varnish, beaten egg whites and milk are added to the brick dust. They need to be mixed until a thick consistency is formed. Lacquer is applied with a brush on the heated surface of the brick wall of the stove. The result is an even red finish with good temperature shock resistance.For a dull surface, work out with drying oil on top. Contact with a painted surface may leave traces. Also, during operation, the smell of baked milk is emitted.
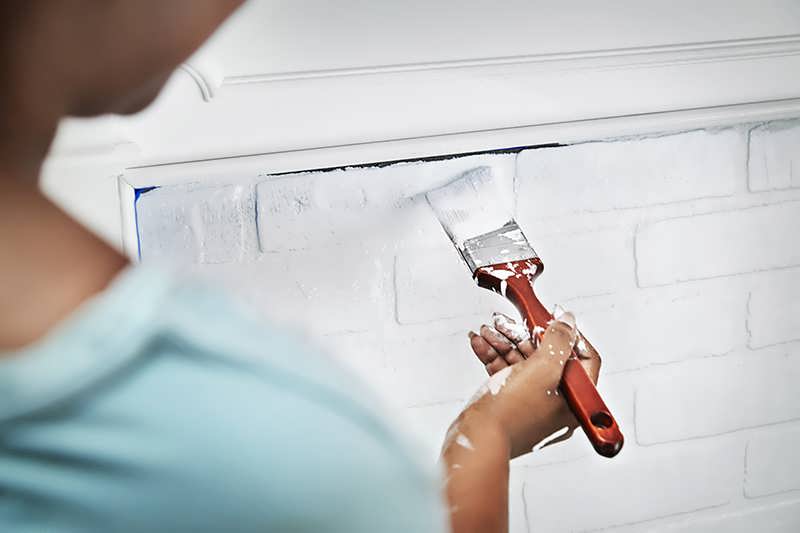
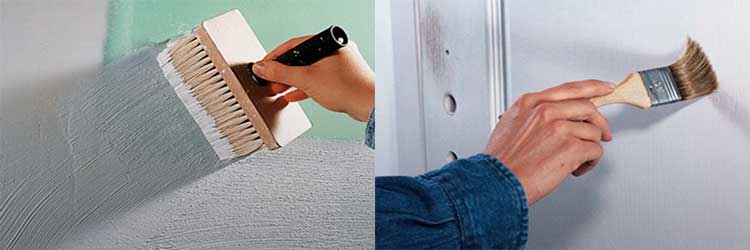
How to paint the walls in the apartment with your own hands: video
Choosing the type of paint is good, but you also need to know how to work with it. Each of the paints has its own characteristics of application and surface preparation. But in general, the following steps are almost always present:
- Removal of the old coating, if any. The thoroughness of this stage depends on the compatibility of the old finish and the new layer. If they are compatible, only detached or poorly adhering fragments need to be removed. If the coatings are incompatible, you will have to clean everything completely.
- Wall putty. The technology is standard: they take a suitable composition and apply it with a spatula, covering up cracks and irregularities.
- Surface grinding. Use either sandpaper or a special mesh mounted on a holder or a wooden block. In a circular motion, remove all unnecessary, leveling the walls.
- Dusting of the polished surface. It is better to carry out with a vacuum cleaner, but you can wipe everything with a dry cloth several times, but each time it is clean.
- Primer. Primer for each surface and paint must be selected separately. It is advisable to purchase it along with paint. Priming performs two tasks: it improves the adhesion of paint to the surface (it will not flake off) and reduces paint consumption.
- Painting. Painting usually in several layers, applying the composition in different directions. if we talk about the walls, then from top to bottom, and then from right to left. Each layer is applied after the first has dried. The instructions usually indicate this time and it is desirable to withstand it.
That's all. Painting of the walls in the apartment is completed. But a verbal description cannot convey some of the features of working with paints or putties. Watch the video tutorial, some subtleties will become more clear. After viewing it, painting the walls with water-based paint with your own hands will not be a problem.
How to create the effect of decorative paint on the walls with simple means, see the video.
Positive and negative properties of enamel
Before proceeding with the restoration work, you need to find out all the positive and negative sides of the enamel coating.
Let's look at what are the pros and cons of the enameled surface of the gas stove:
- high degree of resistance to high temperatures;
- variety of colors;
- acceptable cost of paint;
- protection from various contaminants.
All these advantages allow you to use this type of coating for a gas stove with confidence.
With prolonged use of a gas stove, chips, scratches and cracks can form on its surface. In the future, particles of grease, dust, cleaning agents and other contaminants get into these gaps. Such conditions adversely affect the metal surface of the case.
But, despite all the positive qualities of the material, it is worth paying attention to the shortcomings. Among them, the following are the most significant:
Among them, the following are the most significant:
- Often there are problems with cleaning the surface from carbon deposits.
- Weak resistance to mechanical stress - the material is very fragile, so there is a high probability of chips on the surface.
In general, such a coating is very reliable, retains color saturation and original shine for a long time.
Creating paint material with your own hands
 Homemade paint will leave marks when touched
If it is impossible to buy a professional coloring agent, you can independently manufacture it. There are different recipes for creating paint for a brick oven.


- A solution of chalk or lime. To create it, you need water and lime. You can buy them at a hardware store. The difference in these two types is only in the duration of complete drying. If chalk is used, the waiting time will be longer. The mixture consists of 1 kg of lime or chalk and 1.5 liters of water. For strength, 300 g of salt per 2 kg of the mixture is added to the solution. It turns out the composition is white. The advantages include minimal financial costs, ease of application, covering defects and resistance to the formation of fungi. Disadvantages - poor coverage, gets dirty quickly and requires periodic updating.
- Natural varnish. It is made of brick dust, egg whites and milk, which are taken in a 1:1 ratio. To process 1 sq.m. you will need ¼ liter of milk and 8 chicken proteins. To prepare the varnish, beaten egg whites and milk are added to the brick dust. They need to be mixed until a thick consistency is formed. Lacquer is applied with a brush on the heated surface of the brick wall of the stove. The result is an even red finish with good temperature shock resistance. For a dull surface, work out with drying oil on top. Contact with a painted surface may leave traces. Also, during operation, the smell of baked milk is emitted.
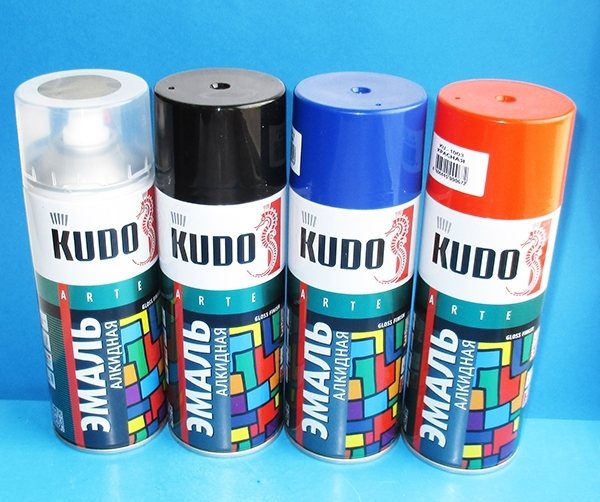
What is used today
Heat-resistant paints help prevent deterioration of various materials. They are used for painting household heating appliances and in industry. Heat-resistant enamels and paints are painted with:
- stoves and fireplaces from any material;
- heating batteries;
- chimneys;
- dampers and doors at furnaces;
- barbecues;
- brake calipers;
- electric motors;
- steam pipelines;
- transformers;
- hot parts of industrial machines.
When choosing paint, pay attention to the following important parameters:
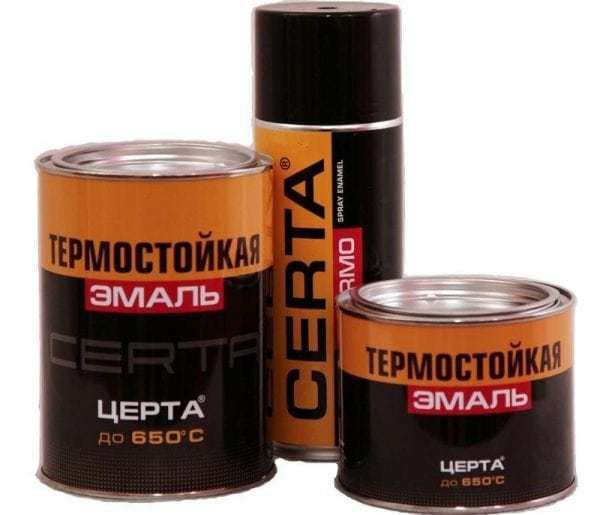
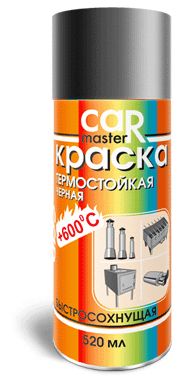
- Maximum temperature. Standard paint withstands up to 450°C. Please note that it is impossible to do with one paint for the stove, for the metal parts of the stove it is better to choose enamels that can withstand 600 ° C and above.
- Anti-corrosion. For painting stoves and boilers in baths and saunas (high humidity conditions), anti-corrosion paints are needed, they protect the painted surface from rust. This paint is also suitable for outdoor barbecues.
- The foundation. Choose water-based or non-toxic solvent-based paints to avoid poisoning by the toxins released. Refractory non-combustible components with the composition will retain the properties of the coating with strong heating.
- Fillers. The composition of heat-resistant paints that can withstand temperatures above 500 ° C should include zinc or aluminum powder.
On sale there is also a universal thermal paint for all types of surfaces. When applied, it forms a thin film, under which moisture and air do not penetrate. In order not to make a mistake when choosing a paint, study the description, information about the purpose and reviews on the forums, and also consult with the seller, specify for use in what temperature conditions and for what surfaces it is designed - dry heat, fire, steam - metal, brick or concrete.Labeling can tell you a lot.
We suggest you familiarize yourself with: Thermal insulation of walls from the furnace
Modern paint and varnish compositions, which are subjected to thermal action, withstand heating up to 350 ... 400 ºС. The temperature of the flame in the firebox where firewood burns reaches 450 ºС. When the fuel is coal, it rises to 1000 ºС.
The outer surface of the stove does not heat up like a firebox. However, to cover it, you should choose a heat-resistant paint or varnish that can withstand heating up to 400 ... 550 ºС. Heat-resistant paints and varnishes are made for different purposes and different surfaces. Manufacturers indicate on the packaging the temperature resistance of the coating, as well as the type of surface for which it is intended: brick or metal.
natural drying oil
Coating with natural drying oil does not change the natural shade of the brick, but makes it darker. The peculiarity of drying oil is that the heating device coated with this composition can only be heated for a limited time. Therefore, it is not suitable for stoves located in residential premises, and is used to cover heaters installed in a bathhouse.
Organic resins form the basis for the production of organosilicon coatings for stoves or fireplaces. These paints and varnishes have good adhesion to surfaces of various textures. They form a durable moisture-resistant coating that can withstand up to 250 heating-cooling cycles. The disadvantage of organosilicon compositions is the poverty of color solutions, which is due to the chemical properties of these coatings.

Natural drying oil for ovens.
Alkyd paints and varnishes can be used for brick surfaces that do not heat up above 100 ºС.Manufacturers of compositions introduce marble or granite dust into them, components with antifungal and fire-fighting properties. The disadvantage of alkyd compounds is their low elasticity.
heat resistant paint
Brick or plastered stoves, chimneys and fireplaces are painted with heat-resistant paint that can withstand heat up to 200 ... 400 ºС. Varnishes withstanding high-temperature exposure should also be included in this category. Their operating temperature is 250 ... 450 ºС.
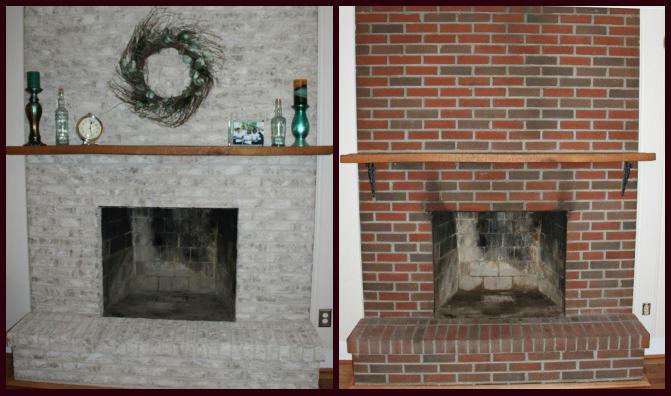
Oven before and after painting.
Tools and materials for painting
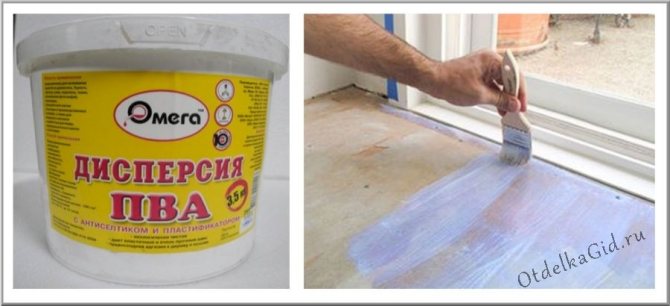
The choice of paint is only part of the preparation for painting work. In addition to it, other materials will be required. Putty is used to seal cracks and cracks. It can be oil-adhesive, acrylic or oil. The paste is selected based on the composition of the coating with which you will have to work. For wooden floors, a homemade product made from wood glue mixed with sawdust is suitable.
You will also need a primer. This is a preparation designed to prepare the base for painting. It closes pores, improves adhesion. There are primers with special properties: antiseptics, flame retardants, etc. The choice of primer is determined by the material of the floor covering. It is desirable that its color, and it is usually white or gray, be close to the tone of the coloring mixture. Then it won't shine through.
Of the tools for painting, a roller is most often used. You definitely need a tray into which the coloring paste is poured in portions. You need brushes of different sizes. They paint over complex areas, baseboards, all small fragments.You will need masking tape, which will cover areas that cannot be painted over, a spatula and a chisel for preparatory operations.
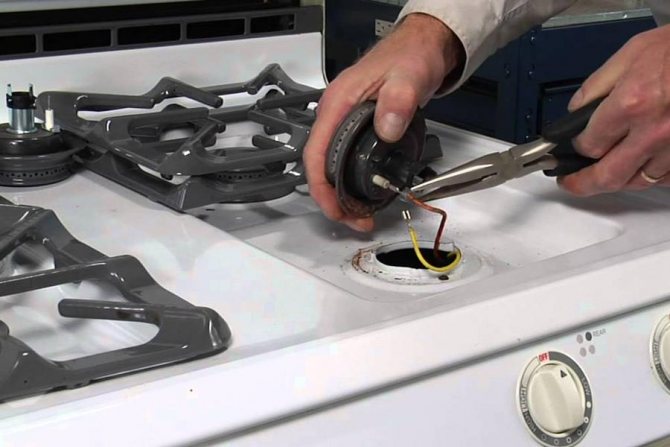
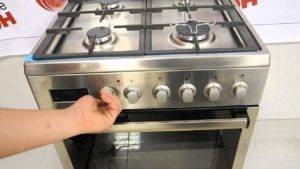
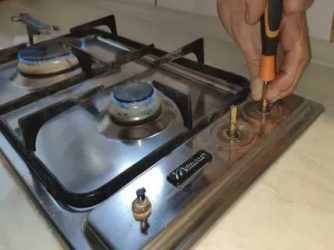
Slab grate question
Usually this component is not painted. But with such a need, the question arises - how to paint the gas stove grate? The most popular and easiest option is to purchase the right paint, such as Hi-Temp, Choose the black or glossy black version.
As a rule, the grate of such a plate is made of cast iron. Variations from other metals are less common. Although stainless steel is gaining more and more popularity. And yet, most stove owners are interested in how to paint the cast-iron grate of a gas stove? The answer is all the same specified types of paints. They perfectly ennoble the look of a cast iron product and protect it from various influences. In order not to burn the created coating, you can cover the product for reliability with another layer of such paint.
There is a folk remedy for restoring the enamel of the stove grate. This is linseed oil. A Chinese gas burner is used for the operation. With it, the grate is partially heated. The smell turns out unimportant, but the color is restored.
Defect Actions
If the surface of the gas stove loses its elegant appearance, it has various defects, you need to take action. The following are solutions for some specific situations:
- How to whiten enamel on a gas stove? This is especially true when the enamel has turned yellow on the stove. This category also includes cases when the enamel on the stove has darkened. Action Variations:
A. Clean up. You can "Miracle stove" or "Parma".
B. Degrease. For example, Antifat.


B. Paint with a suitable paint (their list was discussed earlier).
- How to fix a chip on a gas stove? Similar operations are used here, as in the case of decoupage of the plate cover. That is, restoration activities are carried out:
A. Cleaning, Degreasing. Drying. Sandpaper, acetone is used. The chipped area is drying.
B. A coating is made of a phosphate layer. Drying.
B. Priming. Drying.
D. Coating with suitable paint. Drying at +100 C.
E. Repeat point D. The number of layers depends on the level of the chip. For example, if the chip is 3 cm, you need 4-5 layers.
- How to remove scratches on a gas stove? Essentially the same operations appear here as in paragraph 2. Paint layers can be less: 2-3.
More often, the owners are interested in whether it is possible to paint a gas stove with hammer paint? It is not desirable, since such paints, despite their many advantages, are not suitable for working with such a plate. They are not heat resistant.
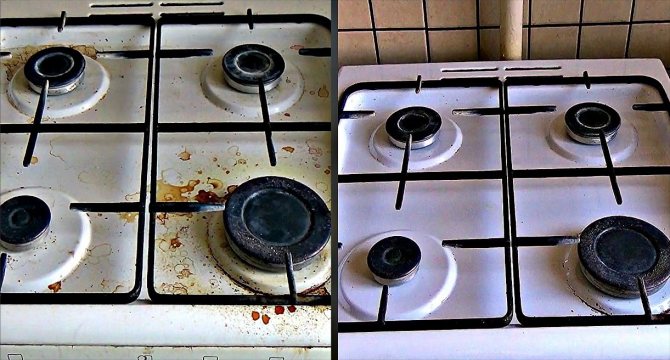
Paint Tips
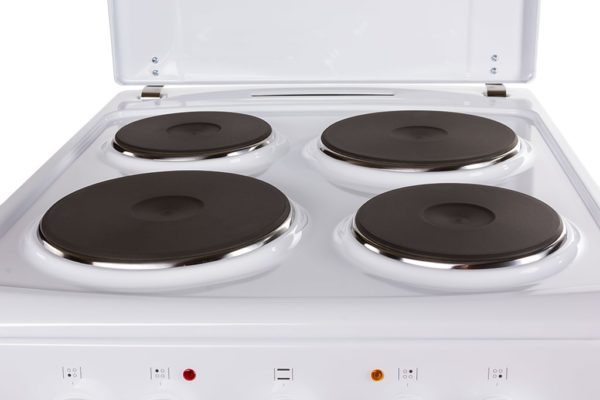
Daily impacts and loads damage the surface of any household appliances, while the equipment can continue to function without changes. It's time to decide how you can paint a gas stove or electric stove, based on the material to achieve the desired result.
To restore the old look of kitchen appliances, it is important to follow some tips:
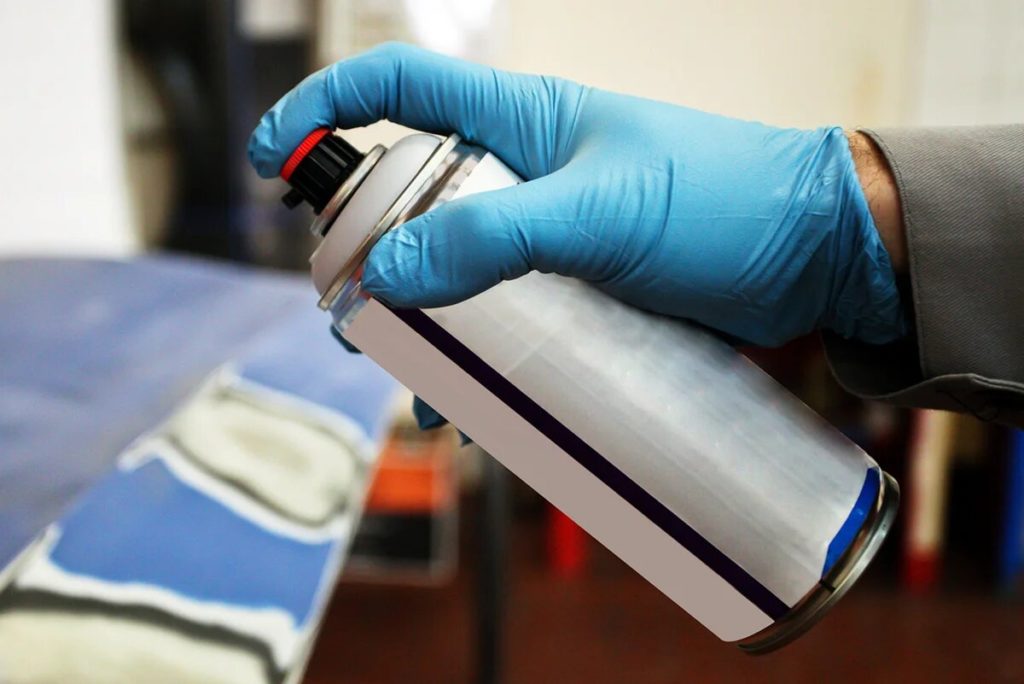
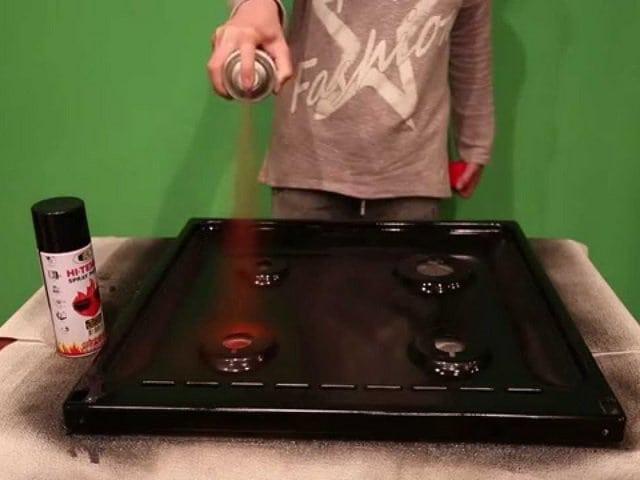
Choose heat-resistant compounds, such as fire-retardant paints for metal. Apply such materials mainly with a spray can, and not with a sprayer, which is explained by the small cultivated area.
You should not choose a paint with a maximum fire resistance index, since the hob, when heated, reaches a value of no more than 70 ° C
The grate is heated to a high temperature, but this part of the technique is not painted.
Before applying, it is important to read the instructions for use of the selected aerosol, and paint, following the recommendations indicated on it.
Heat-resistant coloring compositions are used only for parts that are subjected to constant temperature loads. For all other parts, you can use other materials, such as electrically conductive paint.
On the video: the benefits of heat-resistant spray paint.
Furnace painting
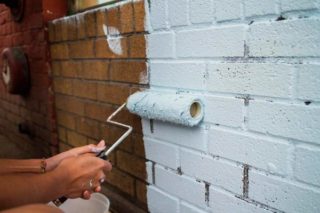 For painting it is convenient to use a roller
You can start painting only after studying the instructions and carrying out preparatory work. Otherwise, the efficiency will deteriorate, the service life will be shortened.
For work you will need:
- Capacity. It will contain the dye solution.
- Dye.
- Brush and roller.
The solution must be prepared and poured into a container. Then it is applied to the surface in several layers (two-layer laying is recommended). The work is done with a brush and a roller. The brush gives texture, and the roller - uniformity.
Additional decoration
There are several other types of plexiglass decoration.
Divorces
To decorate the plate with bright stains in the style of abstract painting, you will need several colors of nitro paint.
The coloring process is as follows:
Pour paint onto the landscape sheet, which should serve as a background. If the plexiglass plate is large, use whatman paper.
Apply drops of other shades to the background. There may be many or few - it all depends on the imagination. You can choose any color for painting the plexiglass you want.
Set the plexiglass at a slight angle


Grabbing the sheet by the edges, carefully pour the paint onto the plate. Their surplus will go away by gravity.
If you do not like the result, clean the glass with a cloth or cotton swab with solvent.
If the resulting "picture" suits you, leave the plate to dry.
white surface
Plexiglas can be made white with sulfuric acid. Do not forget that this liquid is extremely dangerous and leaves severe chemical burns if it comes into contact with the skin. Be sure to use thick gloves and goggles! Prepare in advance a strong solution of soda or a solution of ammonia (10%).

Plexiglas can be easily made white by treating with sulfuric acid. The work is carried out as follows:
- Pour sulfuric acid into the cuvette.
- Using tweezers, place a Plexiglas plate into the container. The longer the part is in contact with the acid, the deeper and richer the milky color will be. If the exposure time is no more than 3 minutes, the surface will remain smooth and glossy. After 15 minutes, it will become matte. A longer exposure is not recommended, otherwise the material will begin to wrinkle and collapse.
- Remove the plate and wash it with water. Remember that sulfuric acid will splatter when it comes into contact with water. The pressure should be moderate: a soft plate after processing is easy to damage.
Create a drawing
Plexiglas is great for painting. You can use one of the listed dyes, as well as stained glass paints. A relatively short-lived, but bright drawing will turn out from gouache with the addition of PVA - this type of creativity can be offered to a child.
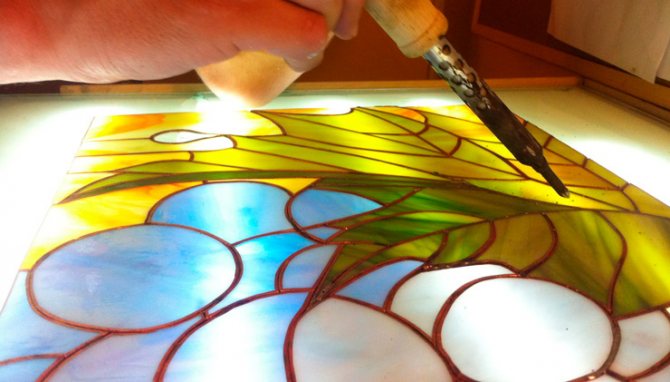
A beautiful pattern on plexiglass will perfectly decorate the interior of the room
Finally, a drawing or inscription can be etched with sulfuric acid. To do this, the plate must be covered with paraffin and the corresponding image scratched in it.
Patience and accuracy will help you create a real little masterpiece from plexiglass!