- Primary requirements
- No. 2. Ceramic tiles: timeless classics
- Triplex or tempered glass
- Kitchen set
- Stove lid features
- Laminated MDF or chipboard
- Care Tips
- Insulation options
- Other options
- Where to apply?
- Plastic panels on the ceiling in the kitchen
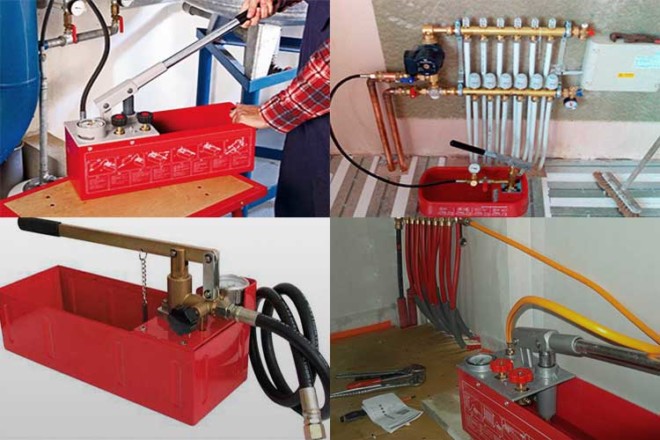
- 2.7.2 Requirements for the installation of heating equipment
- Making an apron in the kitchen in a wooden house: photo
- Kitchen set
- What are the requirements for the premises?
- Device overview
- Types of household appliances
- Communications
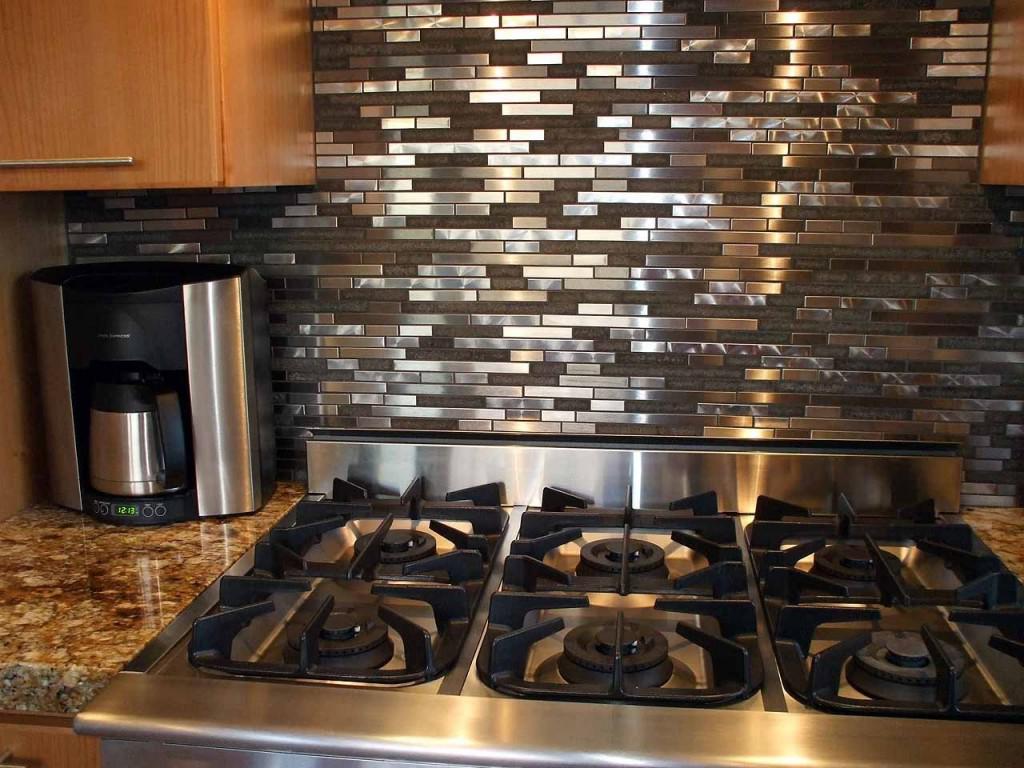
- Metal
- Stages of installation of a geyser
- Where to go when connecting a gas stove?
- Prices for popular models of gas stoves
Primary requirements
Since the functions are the same, it means that the requirements for the surface of the kitchen screen will not differ from the characteristics of a reliable apron. Among them:
- Resistant to high temperatures and humidity;
- wear resistance;
- Easy to clean;
- Attractive appearance.
However, some screens today are made in the form of a simple PVC film with a decorative pattern. You can buy such stickers for only 100-200 rubles, and it is assumed that as damage appears on the surface of the film, the owners will immediately be able to replace it with a new one.However, those who are used to doing everything soundly should choose a screen made of more serious material.
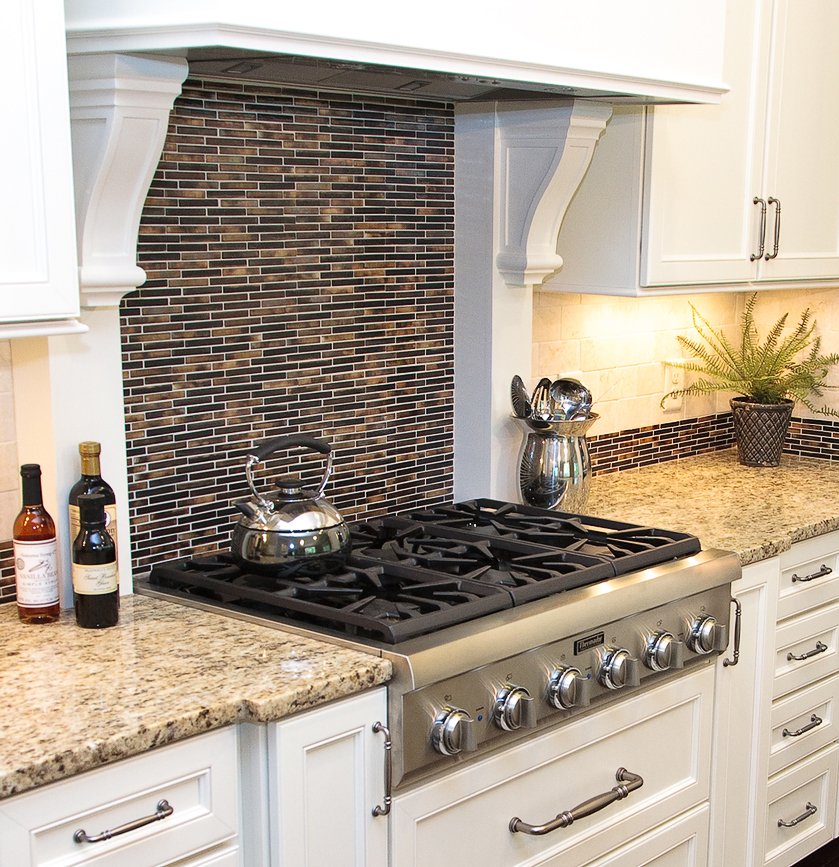
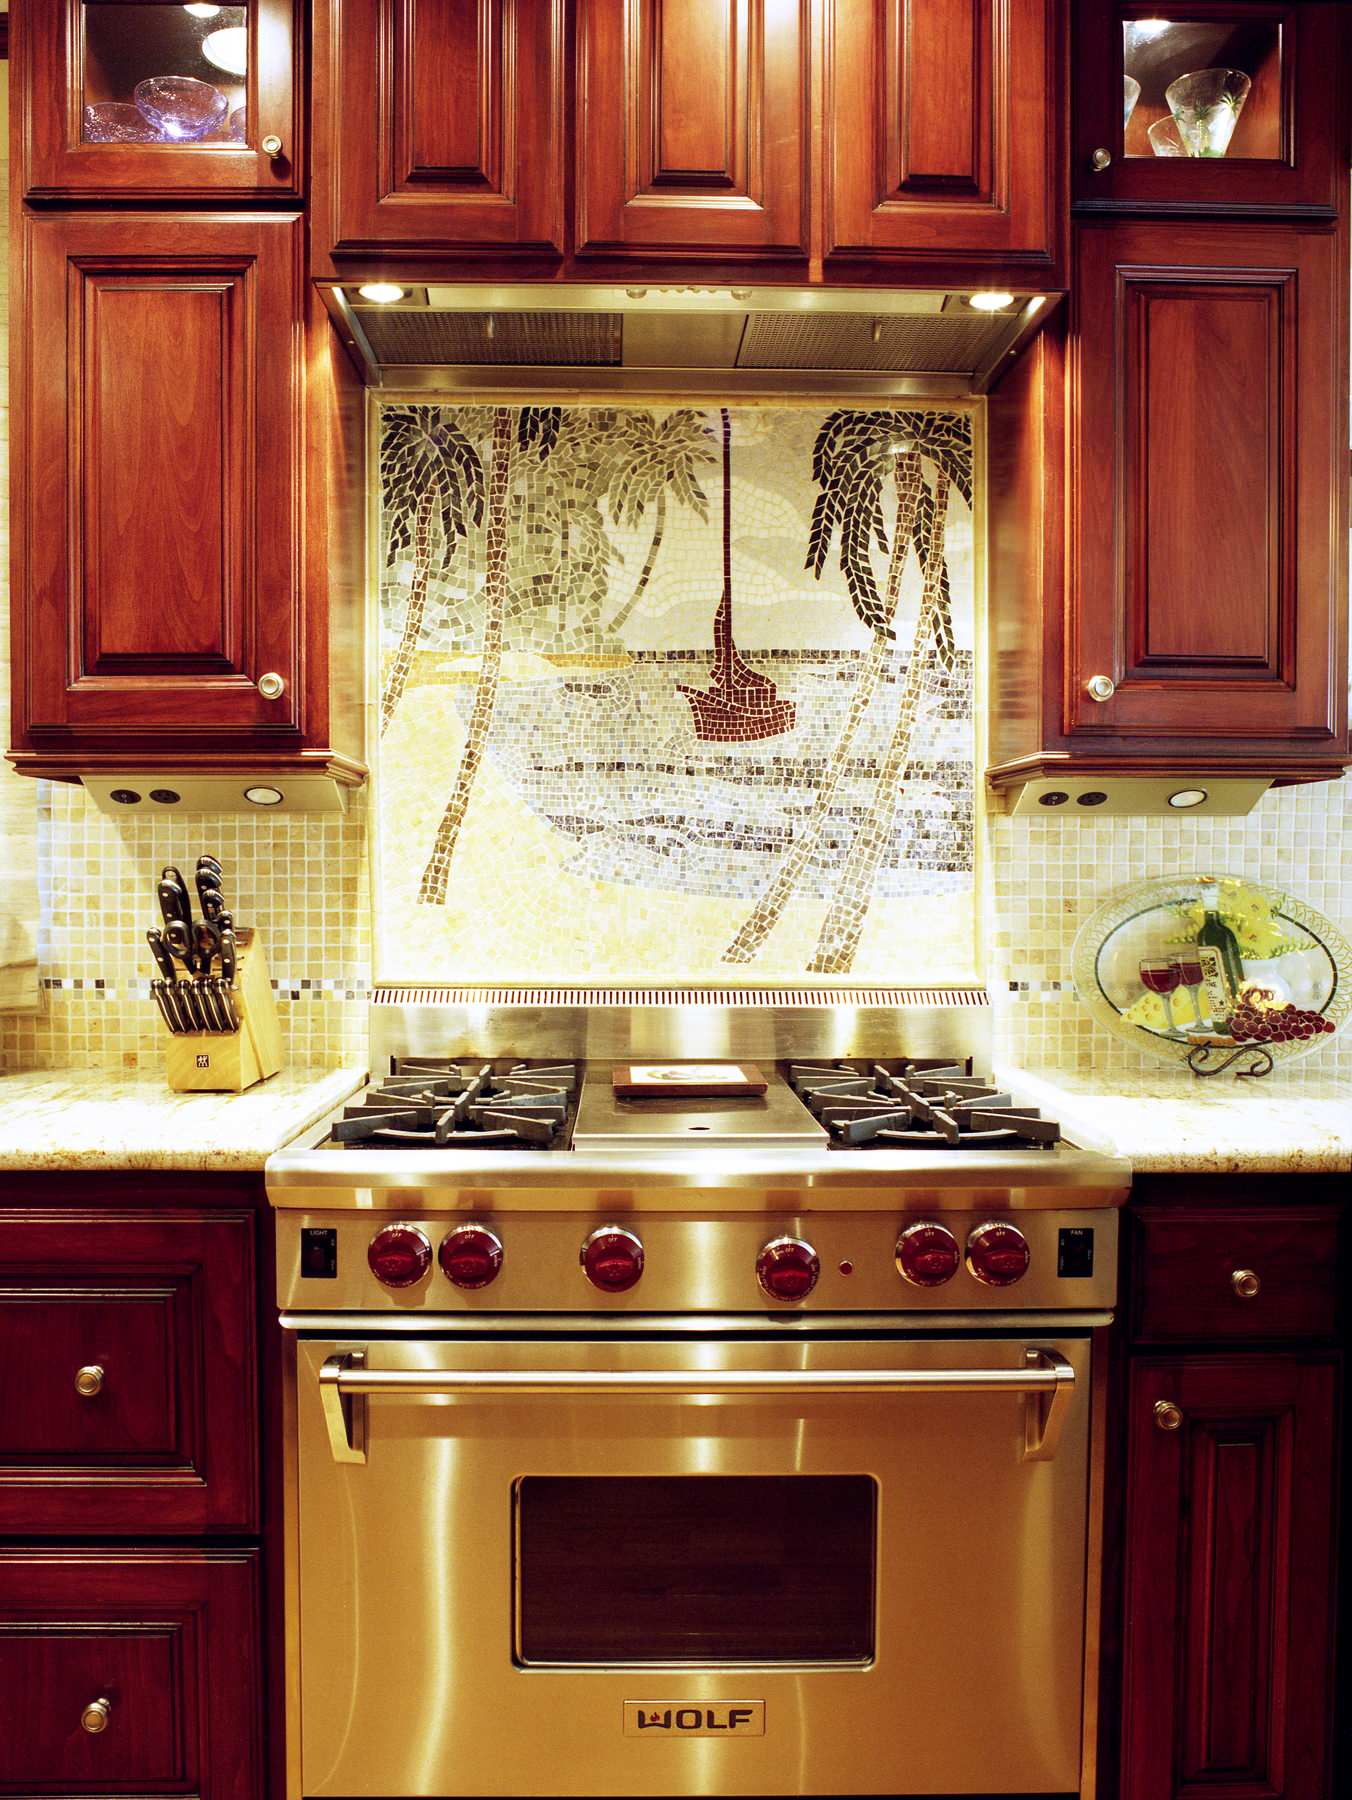
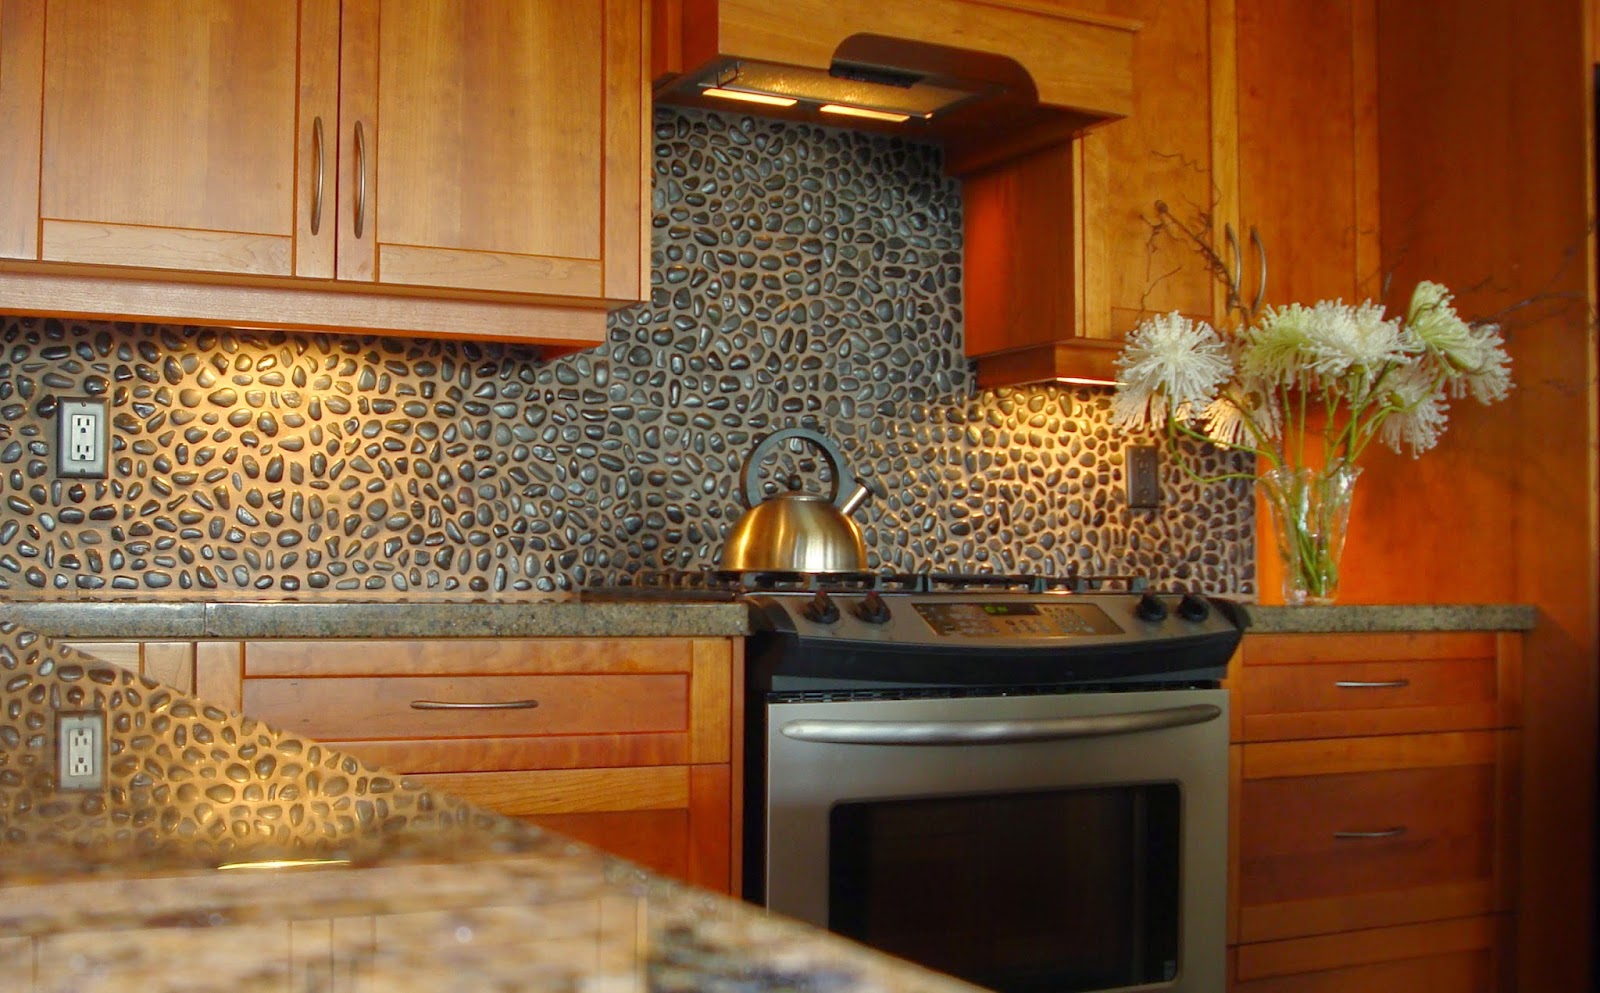
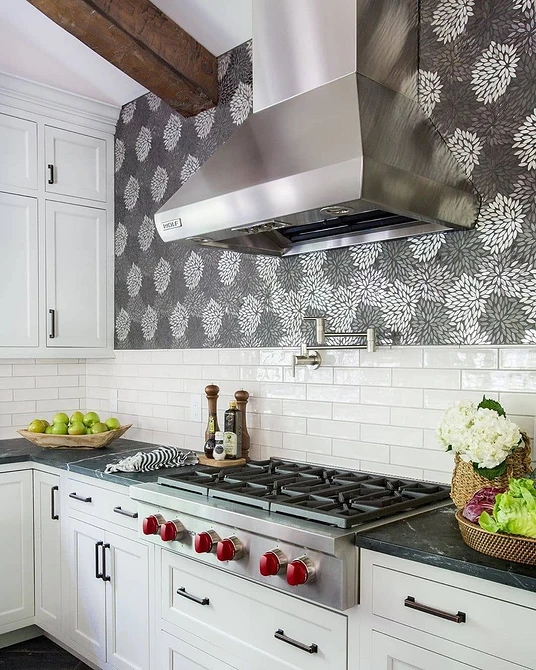
No. 2. Ceramic tiles: timeless classics
Most of us still choose ceramic tiles to finish our backsplash, and for good reason. This is one of the best and most practical options, and it has a lot of advantages:
- high strength;
- heat resistance;
- ease of care;
- a huge assortment: you can choose a tile of any size, color and with any pattern;
- relatively simple installation, which, with a certain skill, can even be done independently.
With the help of tiles, you can create a variety of effects, for example, highlight some area using a material of a certain color: you can select a zone near the stove or sink with decorative tiles, and lay out the rest with simpler tiles. It is worth noting that dirt can accumulate in embossed ceramic tiles and in tile joints, so it is better to choose the most smooth material, and make the joints thin or varnish them. When combining tiles above the work area and other types of finishes in the rest of the kitchen, it is better not to stop at one color. It is better to separate the working area with color from the dining area in the kitchen, thus performing spectacular zoning.

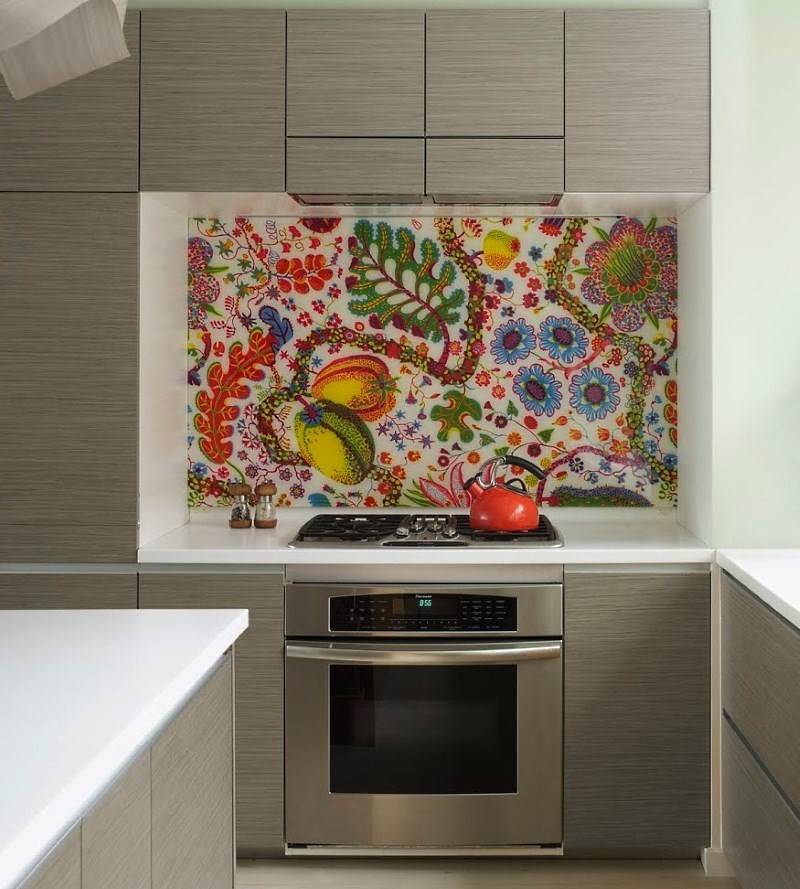
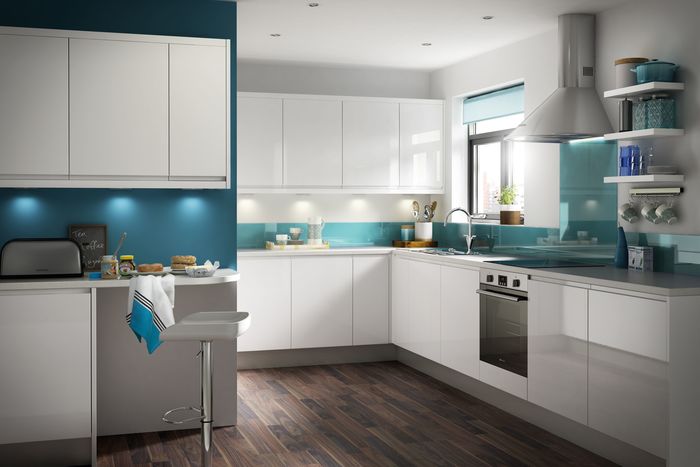
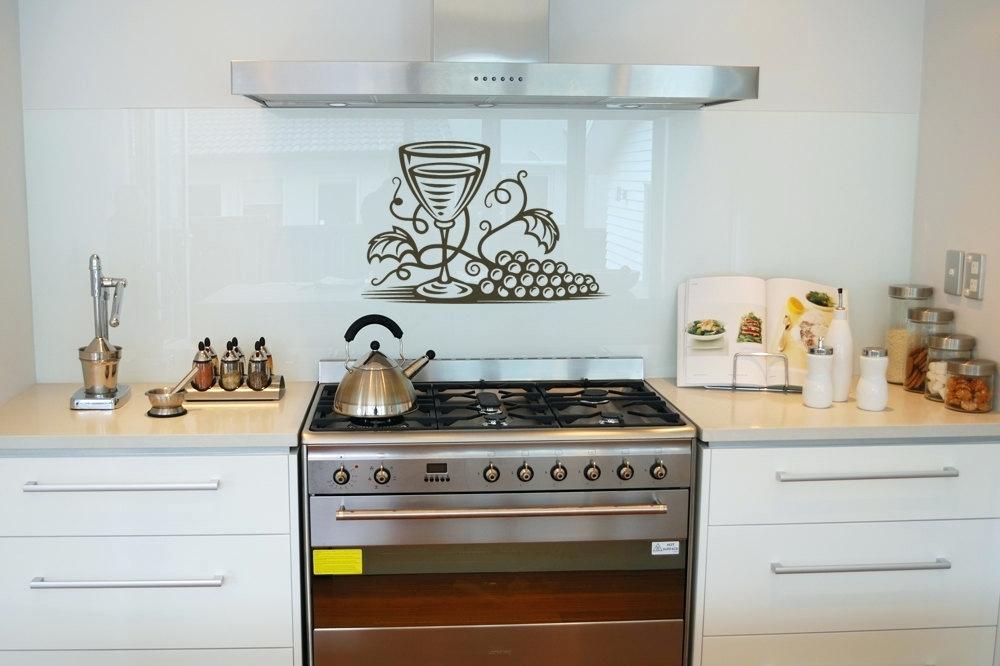
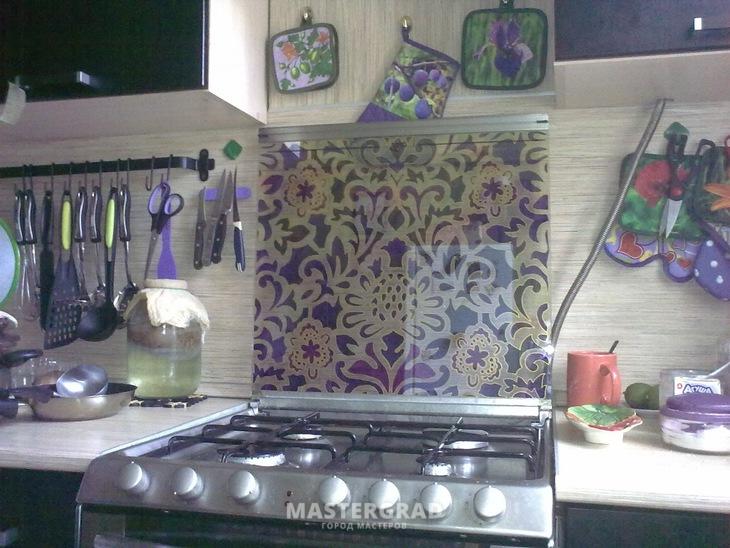
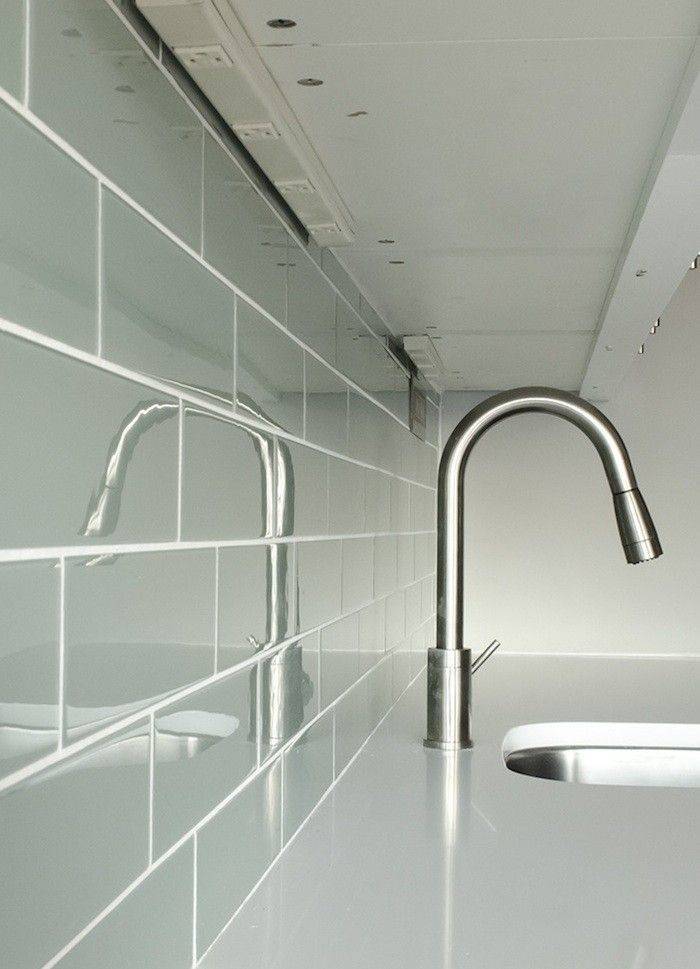
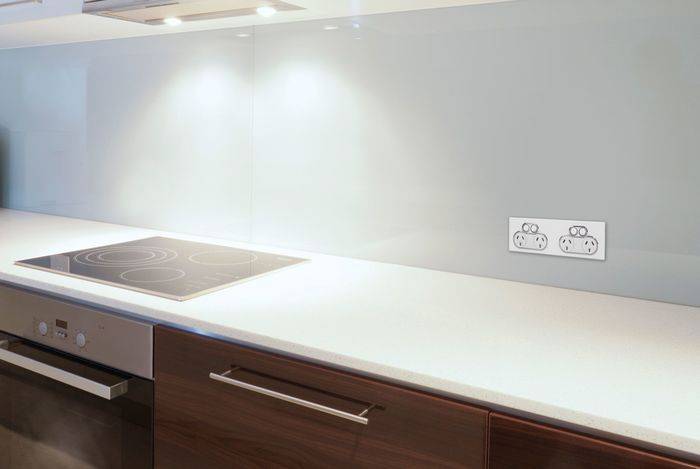
Triplex or tempered glass
The other extreme is a stylish and expensive glass screen, which in the kitchen can last longer than the furniture itself. Its manufacture will have to be ordered individually according to your size if you want to assemble a large full-fledged apron. But for a compact screen, only for a section of the wall above the stove, it may be possible to buy small standard panels with lugs for fastening. But in general, the cost remains the same - 6-7 thousand per square.But in terms of practicality, such a finish has no equal.
It seems small, but at such dimensions, the glass is already starting to cast green. If this shade is not suitable for the chosen style of kitchen interior, you will have to buy clarified or, on the contrary, tinted panels. But more often, customers prefer glass screens with a beautiful pattern applied to the back.
And their price in comparison with durability will no longer seem to you a serious drawback and an unjustified waste of money.
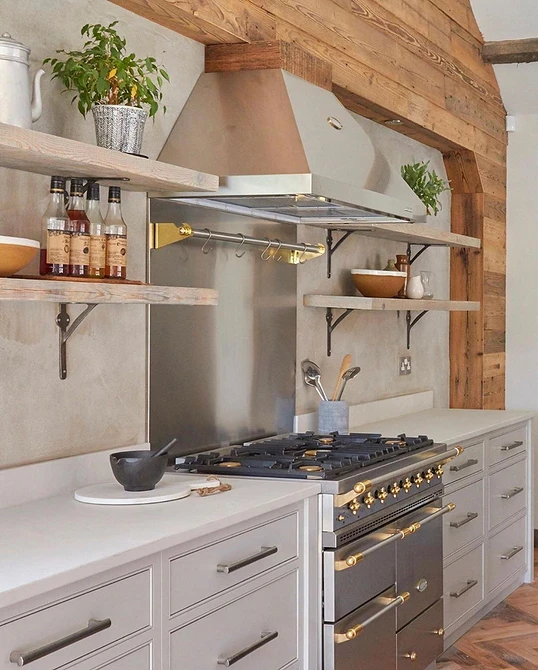
Kitchen set
When planning a kitchen set, the minimum allowable distances between electrical appliances and water sources must be observed. If you make the kitchen to order, the specialist will have to take them into account. If you are planning a purchase, for example, at IKEA and use their kitchen planner, there are text prompts there. Read my personal experience of planning a kitchen at IKEA here.
Basic principles: Do not put a stove and a refrigerator in the immediate vicinity, as well as a stove and a sink. It is also recommended to make a spacer between the oven and the dishwasher.
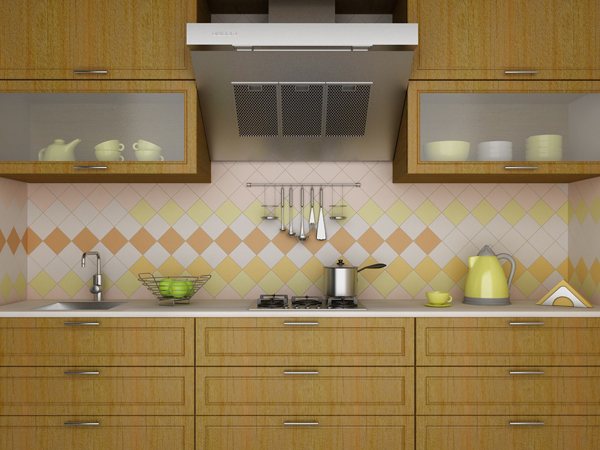
Cabinets should not be hung above the stove, unless they contain a built-in hood. For effective operation of the hood, it must be placed at a distance of 70–75 cm (electric stove) and 75–80 cm (gas stove). It is not desirable that the corners of the hood protrude in front of wall cabinets; there is a risk of constantly hitting your head against them.
If you are attaching wall cabinets to modern solid walls, use the fasteners recommended by the manufacturer and there will be no problems. Old walls of stalinkas and Khrushchevs may need additional fastening
Pay due attention to fasteners, even if you hang open shelves - each of them has a maximum weight that they are ready to support.When overloaded or not strong enough, the shelves can collapse and well, if not on someone's head
The height of the hanging cabinets depends on their depth and the height of the one who will cook. The optimal distance is 45-55 cm from the countertop. A lower placement will cover part of the countertop. Deep cabinets all the more need to be hung higher, but in sight, so as not to bang your head against them when tilted over the work surface.
Before ordering a custom kitchen, for reliability, draw all future elements directly on the wall. Applying cardboard of the desired width, see what the depth of the elements will be and whether it will be convenient for you. Because in this case, it is comfort that ensures safety.
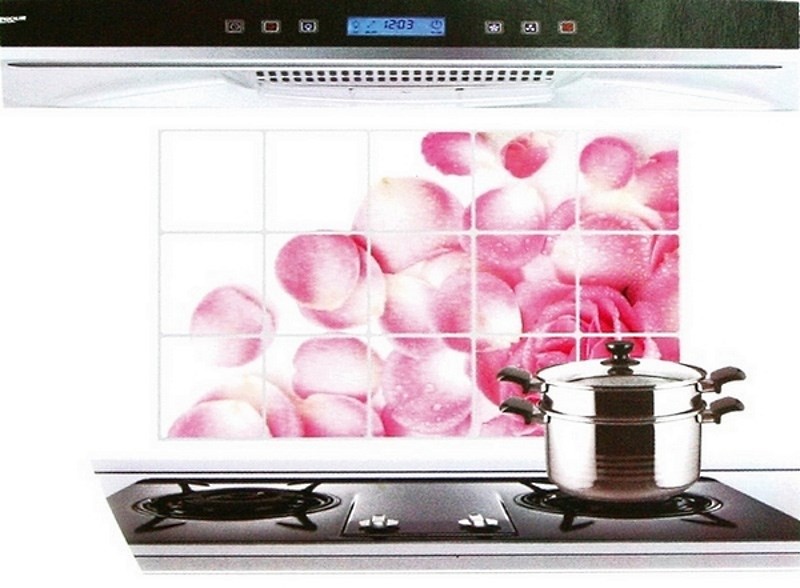
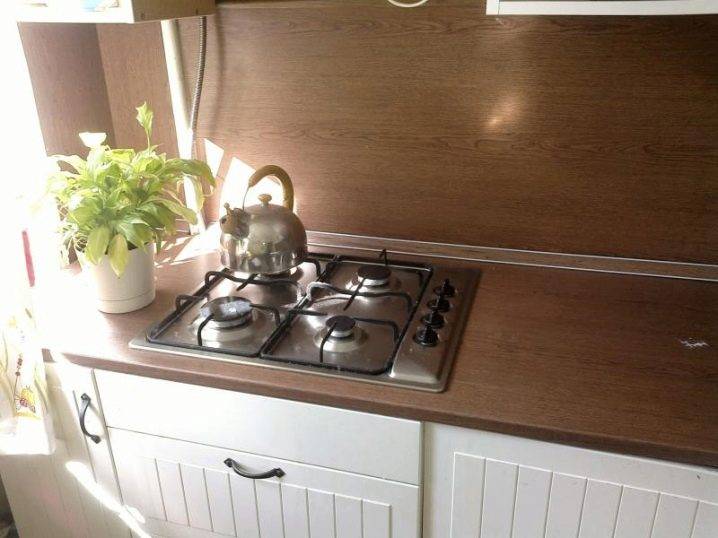
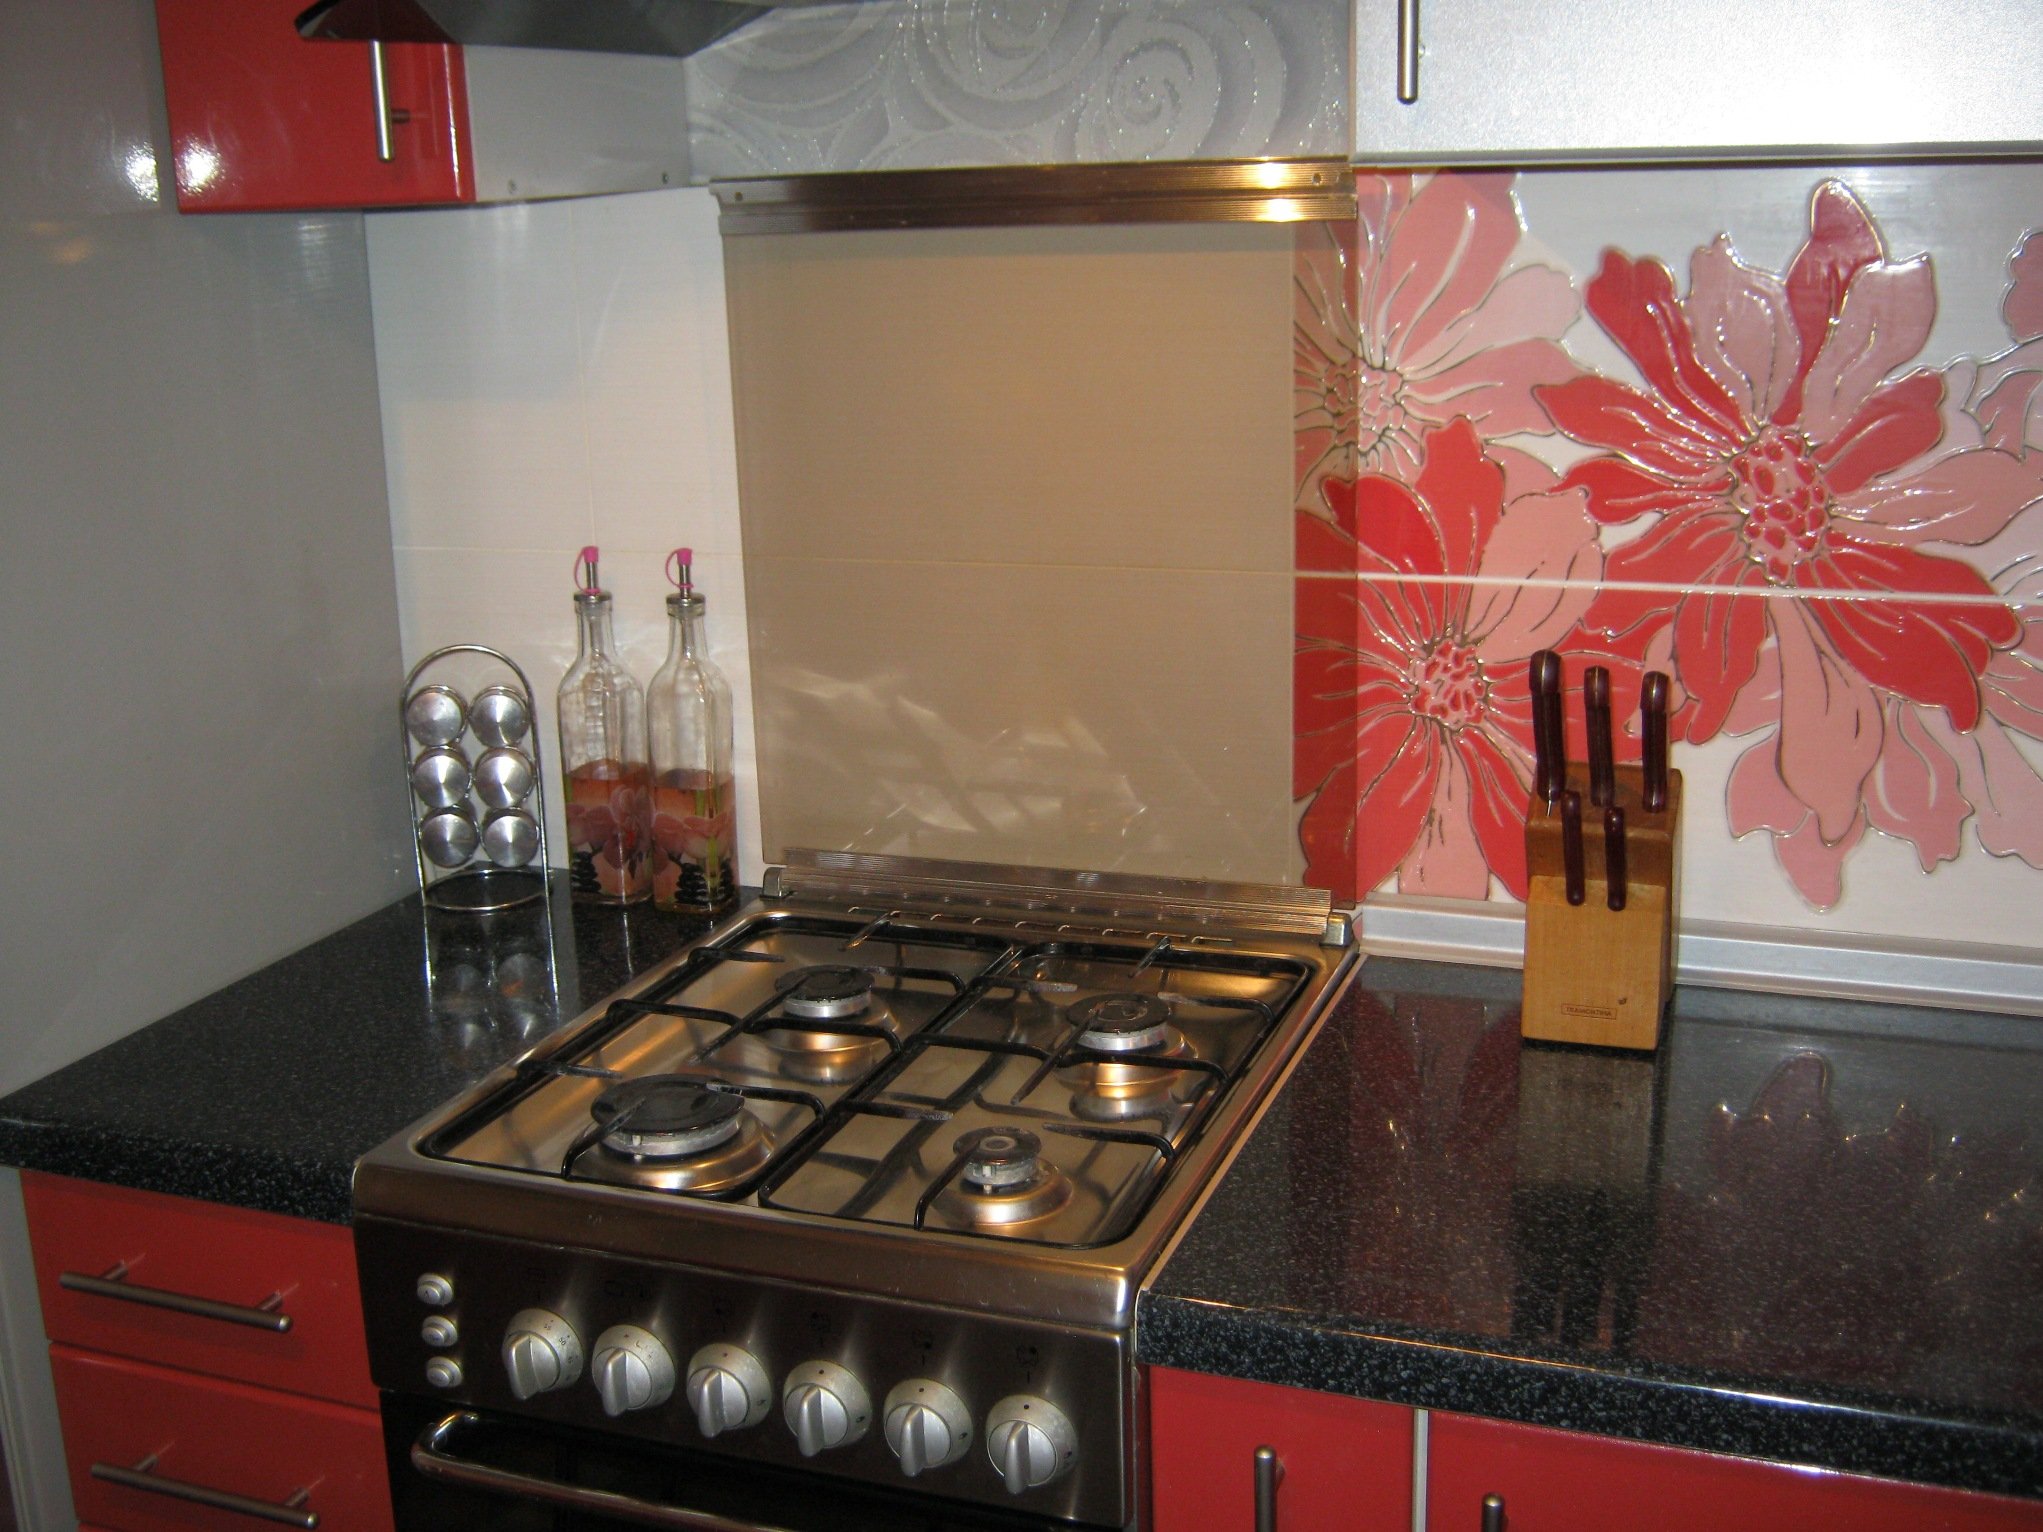
Stove lid features
Many housewives believe that the cover for the gas stove is an important part of the kitchen set. It can protect the walls from splashes and dirt.
Iron and glass lids are often used. Iron ones are distinguished by their wear resistance, withstand high temperatures, they can be cleaned with various detergents, even hard ones. Glass lids are less resistant to high temperatures, but you can stick interesting pictures on the glass, change them more often. You can make your own glass lid. To do this, you need an aluminum corner, two curtains under glass, you can buy them in furniture stores. Glass needs to be cut to fit the lid and sanded. Then we temper the glass, the lid is ready.
Laminated MDF or chipboard
A budget way to close the kitchen wall behind the sink and hob, but also short-lived. The life of such a plate barely reaches five years, and the protective film does not have sufficient wear resistance.But you can buy a panel 6 mm thick with a pattern already applied to it for only 1900 rubles / m 2.
However, an alternative option is now available: look for a workshop for the production of entrance doors, where you can apply an anti-vandal decorative coating on a regular MDF sheet. It is fire resistant, easy to clean from tough dirt and certainly not scratched by a kitchen scraper. Don't expect any special artistic frills, but in some kitchens a plain screen or a skillful imitation of wood looks quite worthy.


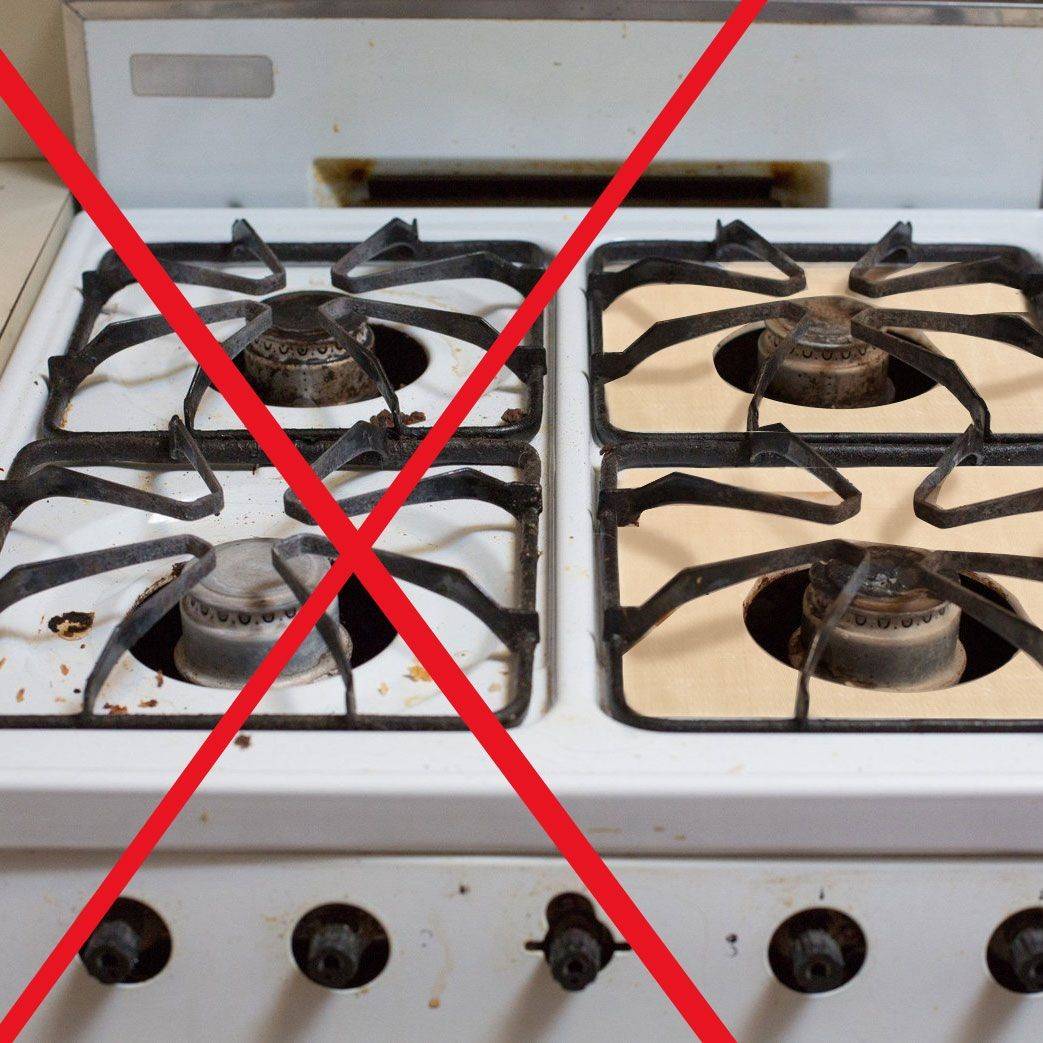
Care Tips
In houses with stove heating, maintaining the stove and fences that protect the combustible structures of the house from overheating in good condition is the key to a trouble-free living for its owners. They don’t joke with fire, but there are no trifles in observing fire safety rules! If it is said in them that a sheet of metal measuring 500x700 mm is needed in front of the furnace loading door, it should be there!
Every year, before the start of the heating season, you should check the condition of the heating devices at home. It is necessary to check if the heat-resistant plaster of the stove is damaged, if there are cracks in the chimney, if the facing tiles have fallen off. All identified defects must be corrected in a timely manner.
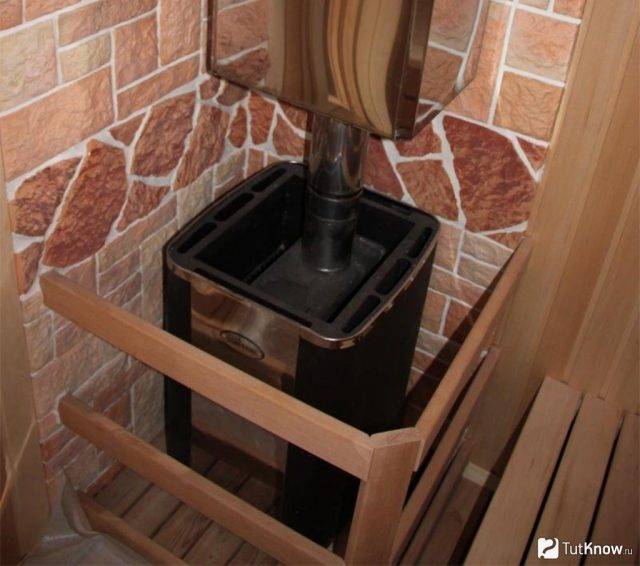
Insulation options
There are many non-combustible materials that can be used in this case. The easiest way to protect all surfaces from heat is to lay a protective box around the red brick heat source. It is able to protect structures from heating and easily tolerates thermal effects.However, such a wall decoration around the stove in the house looks a bit unaesthetic and you can pick up other materials:
- Stoneware and tiles.
- Fiber cement boards.
- Protective screens of factory production.
- Metal sheets.
- Artificial or natural stone.
The easiest way to work with a ready-made protective screen - you just need to choose the size and mount it on site. This option is also good because such wall decoration near the stove or fireplace is carried out as soon as possible and without “dirty” or “wet” finishing work. The remaining options are more laborious and have some nuances. Therefore, they need to be considered in more detail.
Other options
You can go the other way and build a protective screen around the heat source of stone or brick. However, such structures are quite cumbersome, require some bricklayer skills for construction and quite a lot of time for installation. Therefore, much more often, any non-combustible sheet material from those discussed above is used to finish the walls behind the stove.
A sufficient degree of insulation and a very beautiful appearance can also be ensured by the design of the surface with terracotta or ceramic tiles. However, in this case, the firebox will have to be placed at a distance of at least 30 centimeters from the walls. This is not particularly large, but in some situations it can be a problem. If aesthetics are still important, in such a situation, you can create a mixed protection: collect a surface from non-combustible drywall or mineralite and finish it with terracotta tiles.
Where to apply?
To officially change the stove to a more modern model, you will need to:
- buy a unit;
- contact a gas company that has an SRO certificate, that is, permission to install gas equipment in a residential building.
Private gas services offer their services most often at affordable prices. After installing a new stove, it will be necessary to register it with Gosgaz. Employees from licensed companies are also authorized to make entries in the passport of a new gas unit
It is most rational to call a gasman from a municipal gas organization, because the fewer intermediaries in this important matter, the better
There is a certain procedure for replacing stoves in private households. In megacities, there are city programs, according to which all gas stoves must be modernized. Quite often such operations are implemented at the expense of municipal budgets (Moscow, St. Petersburg, Nizhny Novgorod).
- if the stove is on the balance sheet of municipal or state organizations;
- if the homeowner has benefits, being a hero of Russia or the Soviet Union, a participant in the Great Patriotic War;
- stoves are also changed for elderly people who do not receive any subsidies;
- poor citizens whose income is below the minimum wage;
- citizens who live in non-privatized households under a social contract of employment.
Before starting the operation of the stove, a document “On technical inspection” should be drawn up. It is also called "defective statement". It is compiled, as a rule, in several copies. It should contain entries:
- about existing malfunctions;
- operating time of this device.
After analyzing the annual preventive checks of the slab, a final document is drawn up. Then an application is made to the DEZ, which indicates a request for a replacement. The DEZ worker must put the homeowner in line to replace the gas appliance.
To make a replacement yourself, you need to take the following steps:
- submit an application to the REU of the city gas service, where you should indicate the request to replace the unit;
- a specialist will arrive from this organization who will assess the amount of work to be done and issue an invoice;
- in the event that the homeowner installed the stove on his own, he is obliged to write a request for permission to connect it;
- after the invoice is received, it should be paid and agreed on the time when the master will come and do his job;
- after installation, a corresponding mark must be made in the passport of the gas stove.
Plastic panels on the ceiling in the kitchen
Let's mention the other advantages of using plastic for finishing the ceiling in the kitchen:
- elementary and quick installation
- usability
- structural durability
- environmental Safety
- a large number of variations in length and width
- immunity to high humidity
- easy care with non-abrasive products
A common version of plastic panels is rack type. These are narrow and long panels that create a pleasant atmosphere in your room and easily fit into even the most complex interior.
Also, white plastic has one significant disadvantage - this is a fairly quick appearance of yellowness as a result of prolonged and regular exposure to ultraviolet rays. Correct such a color deformation, alas, will not work.
Otherwise, it is an up-to-date, inexpensive and very reliable option for the kitchen.
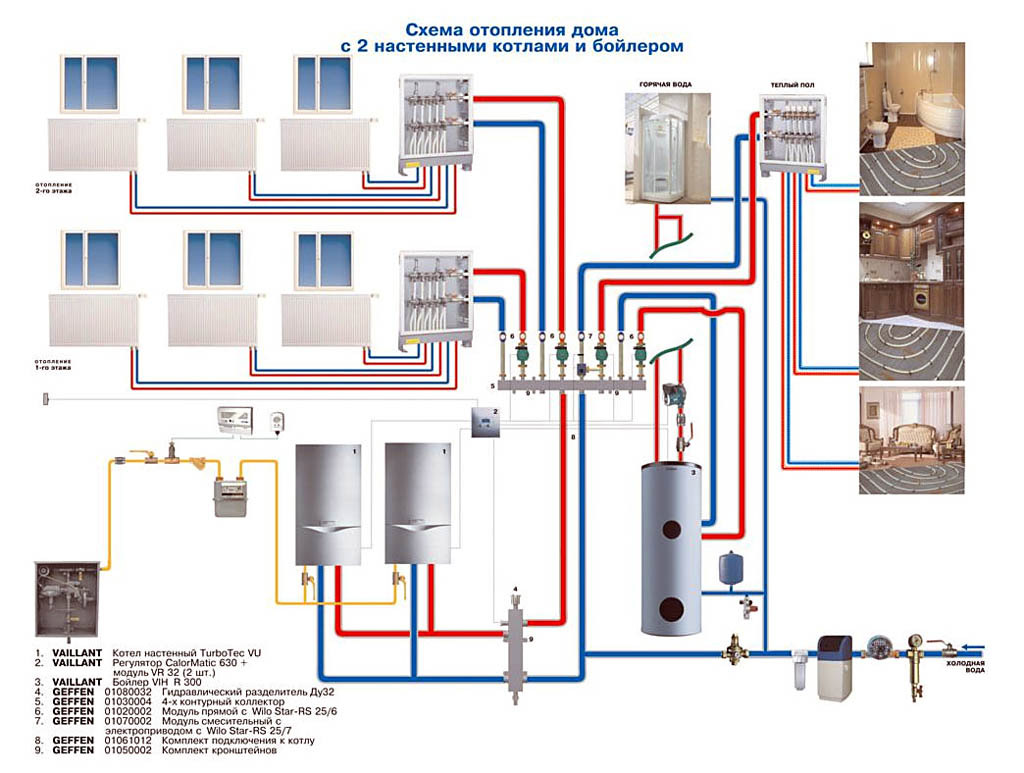
2.7.2 Requirements for the installation of heating equipment
For
heating and hot water supply
provide heating boilers
designed to operate on gas
fuel.
According to
DBN
B.2.5-20-2001
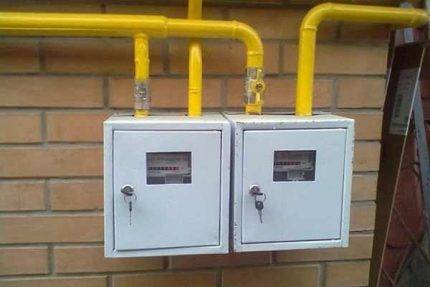
in one room of residential buildings
allowed to install
more than two DHW storage tanks
or two small heating
boilers or two other types of heating
gas equipment.


Gas burners
heating gas devices
equipment to be installed
in residential buildings are equipped with automation
security and regulation, which
meets the requirements of section 11
DBN V.2.5-20-2001 .
Installation
gas heating equipment
total heat output up to 30
kW is allowed to be provided in
kitchen area (regardless of availability
stove and tankless water heater)
or in a separate room
internal volume of the kitchen during installation
heating equipment with outlet
combustion products into the chimney
be on 6 m3
more,
provided in 2.7.1.
Withdrawal
combustion products from heating
boilers with heat output up to 30 kW
allowed to produce through the chimney
or through the outer wall of the building.
At
installation of heating boilers
comply with the following requirements:
– distances
from the building structures of the premises
to household gas stoves and heating
gas equipment should
provide in accordance with
manufacturer's passports,
fire safety requirements
security, ease of installation,
operation and maintenance and in accordance
with the requirements of DBN
B.2.5-20-2001 .
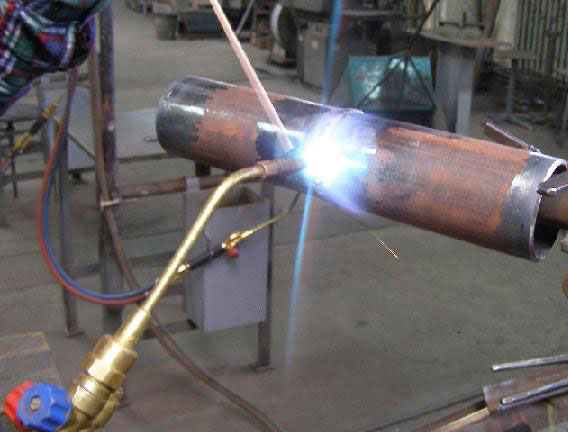
Installation
wall-mounted gas equipment for
heating and hot water supply
should provide for:
—
on non-combustible walls
distance of at least 2 cm from the wall (including
number from the side wall);
—
on walls made of slow-burning and combustible
materials insulated with non-combustible
materials (roofing steel on sheet
asbestos with a thickness of at least 3 mm, plaster
etc.) at a distance of at least 3 cm from
walls (including from the side wall).
Insulation
should protrude beyond the dimensions of the body
equipment 10 cm and 70 cm from above.
Distance
in the light from the protruding parts of the gas
equipment along the front and in places of passage
must be at least 1 m.
At
resolving issues of accession
gas appliances with product outlet
combustion to the chimney, as well as
combustion products through the outer wall
buildings should be guided
data given in the application
J DBN
B.2.5-20-2001 .
AT
this project we choose heating
sealed chamber equipment
combustion, in which the air intake
for combustion and removal of combustion products
gas is produced through the outer wall
building.
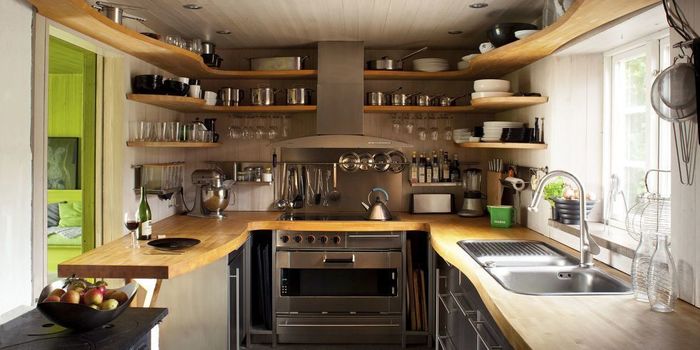
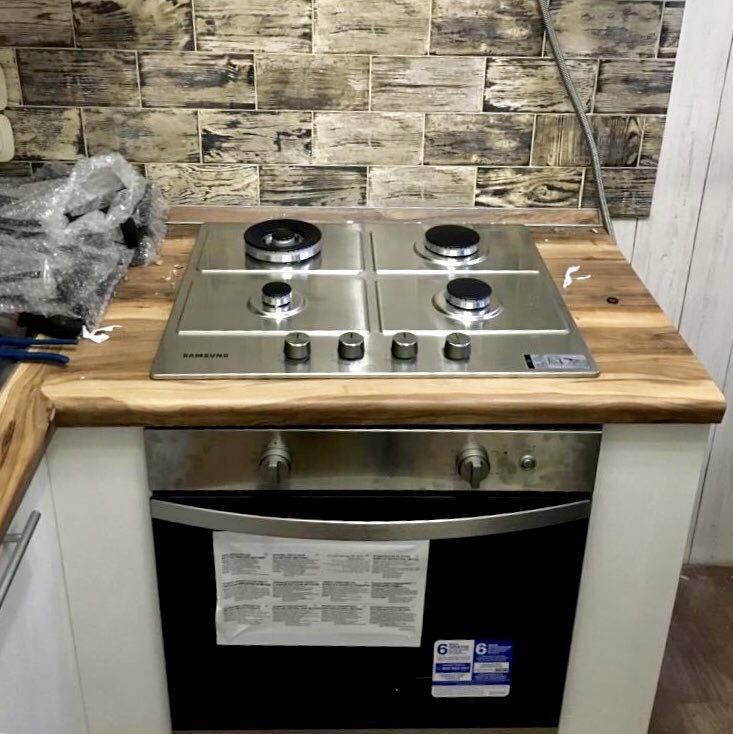
Making an apron in the kitchen in a wooden house: photo

If the house is made of wood, the work area should be designed in accordance with the interior. Some interesting ideas are easy to implement on your own:
- Leave the wall as it is, just treat the space above the work area with a special moisture-repellent composition that will not allow oil to be absorbed and ensure ease of cleaning.
- Cover the surface with clear glass. Use the shatterproof option, think about how to secure it in advance to ensure reliability.
- Fix an imitation of a bar or a block house on the surface. Then the apron will look like a wooden wall and create a unique atmosphere of a log house. Be sure to treat the elements with a protective compound.
Wooden surfaces can be covered with artificial stone slabs, they blend perfectly and are ideal for use in the work area. You can cover only the areas near the stove and sink, there is no special need to protect the rest.
You can decorate a kitchen apron in a modern and inexpensive way, even without using ceramic tiles. Use the recommendations from the review or come up with your own options based on ready-made examples.
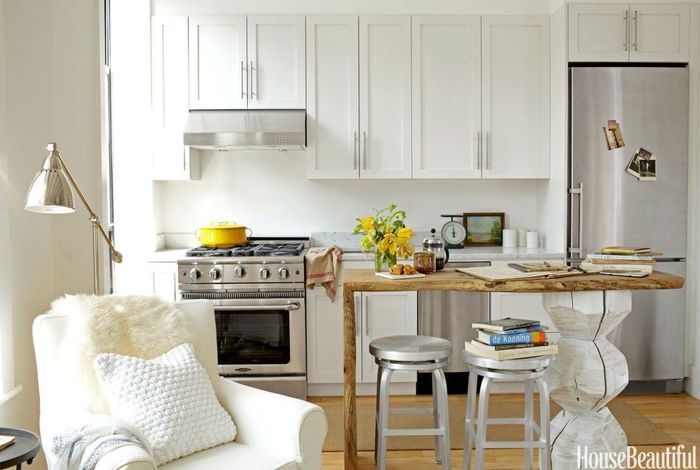
Kitchen set
When planning a kitchen set, the minimum allowable distances between electrical appliances and water sources must be observed. If you make the kitchen to order, the specialist will have to take them into account. If you are planning a purchase, for example, at IKEA and use their kitchen planner, there are text prompts there. Read my personal experience of planning a kitchen at IKEA here.
Basic principles: Do not put a stove and a refrigerator in the immediate vicinity, as well as a stove and a sink. It is also recommended to make a spacer between the oven and the dishwasher.


Cabinets should not be hung above the stove, unless they contain a built-in hood. For effective operation of the hood, it must be placed at a distance of 70–75 cm (electric stove) and 75–80 cm (gas stove). It is not desirable that the corners of the hood protrude in front of wall cabinets; there is a risk of constantly hitting your head against them.
If you are attaching wall cabinets to modern solid walls, use the fasteners recommended by the manufacturer and there will be no problems. Old walls of stalinkas and Khrushchevs may need additional fastening
Pay due attention to fasteners, even if you hang open shelves - each of them has a maximum weight that they are ready to support.When overloaded or not strong enough, the shelves can collapse and well, if not on someone's head
The height of the hanging cabinets depends on their depth and the height of the one who will cook. The optimal distance is 45-55 cm from the countertop. A lower placement will cover part of the countertop. Deep cabinets all the more need to be hung higher, but in sight, so as not to bang your head against them when tilted over the work surface.


Before ordering a custom kitchen, for reliability, draw all future elements directly on the wall. Applying cardboard of the desired width, see what the depth of the elements will be and whether it will be convenient for you. Because in this case, it is comfort that ensures safety.
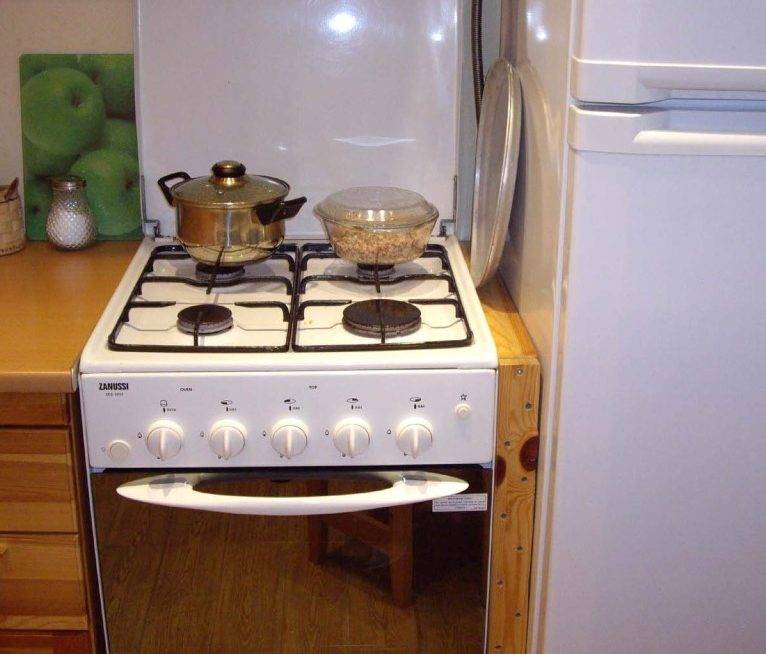
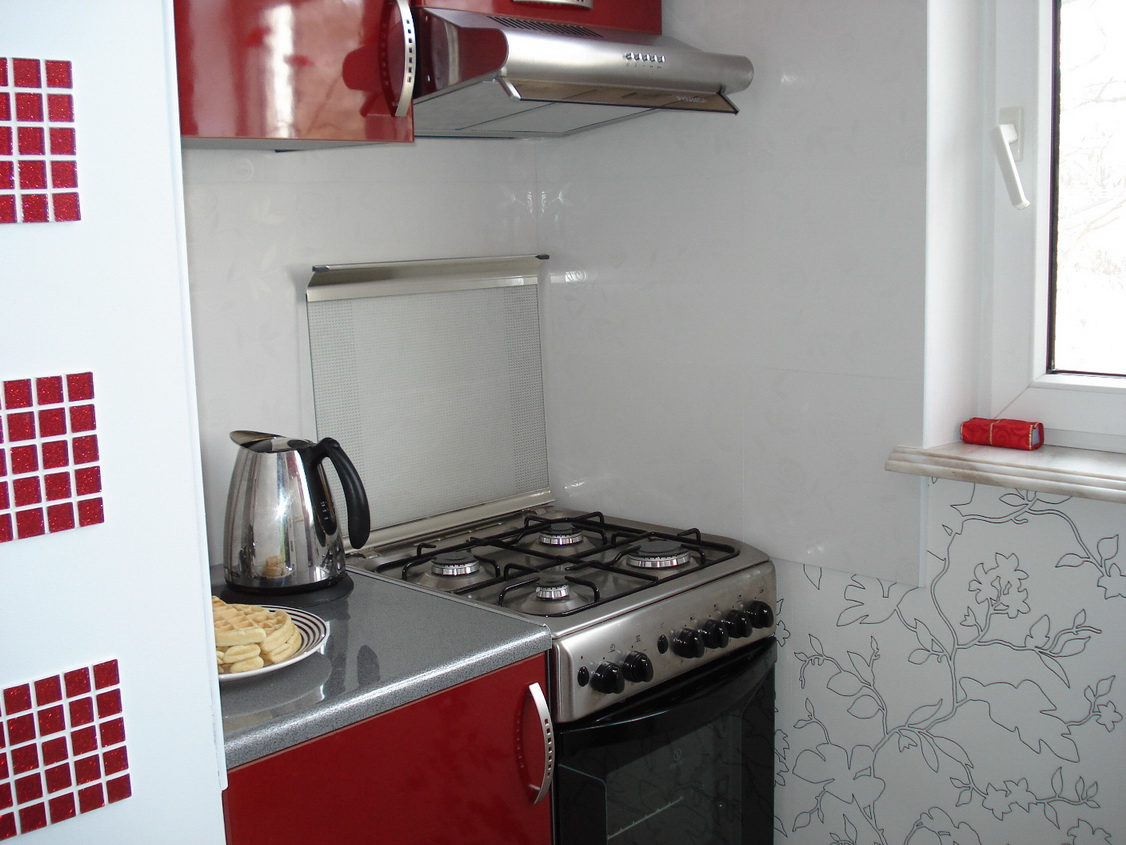
What are the requirements for the premises?
According to the rules, it is allowed to install a gas stove in a room whose height is at least 220 centimeters. At the same time, the room must have at least one window with an opening sash.
If there is no window, then a hood is installed above the hob. The exhaust system pipe should go to the roof and rise by about 50 centimeters, so this can only be done if you have a private house.
In addition, according to the norms, for the installation of a gas stove with two burners, a room of at least eight square meters is required. Accordingly, if you plan to supply a device with three or four burners, then an area of \u200b\u200babout 13-14 square meters is already required.
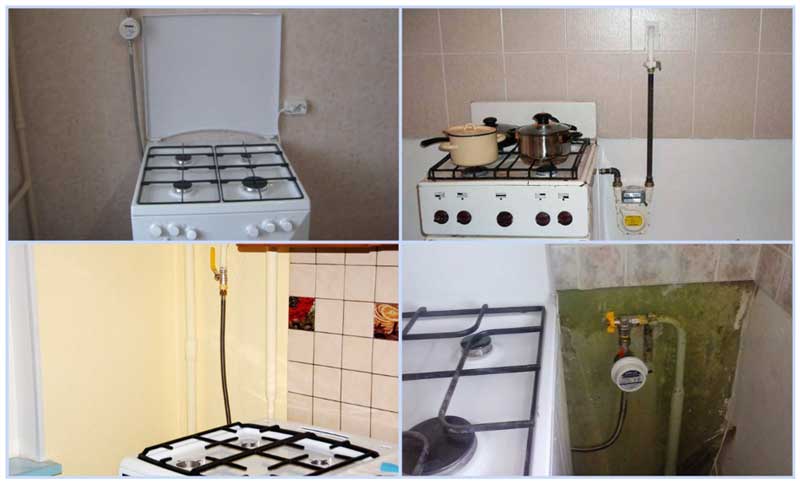
Installing a gas stove in the kitchen
In private buildings, it is allowed to install a stove in a room with a ceiling height of about 200 centimeters, but here it will be necessary to organize high-quality ventilation.However, even with deviations from some requirements, residents manage to obtain permission for installation, but only after the kitchen has been inspected by a specialist.
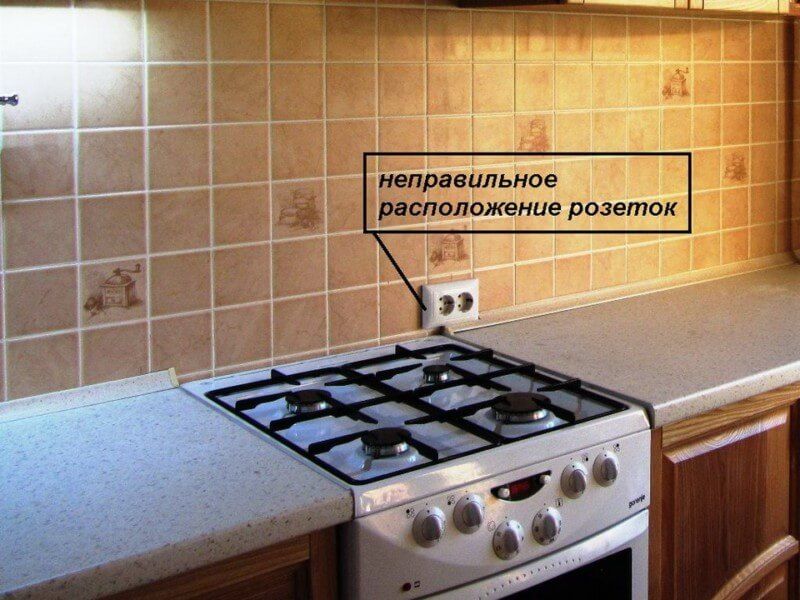
The plate is installed near the wall, but the ceiling should not be made of flammable materials (plastic panels, natural wood). The gap between the device and the wall should not exceed 55 millimeters.
Scheme of arrangement of the room for the installation of the hood
Finishing of floors with the following materials is allowed:
- metal sheets;
- plaster.
The insulation should be ten centimeters larger than the gas equipment on each side. In the absence of insulation, it is necessary to maintain a distance of at least 20 centimeters between the device and other objects.
Floor finishing options
Device overview
In modern new buildings, gas panels are rarely installed, mainly because the houses are built high, and in such cases gas is not supplied to the building. But even in five-story buildings, gas has been replaced by electric. Let's say more, many residents of Khrushchev and apartments of the old fund refuse gas in favor of electricians. And not only for the sake of design, but also to coordinate redevelopment, and for security purposes.
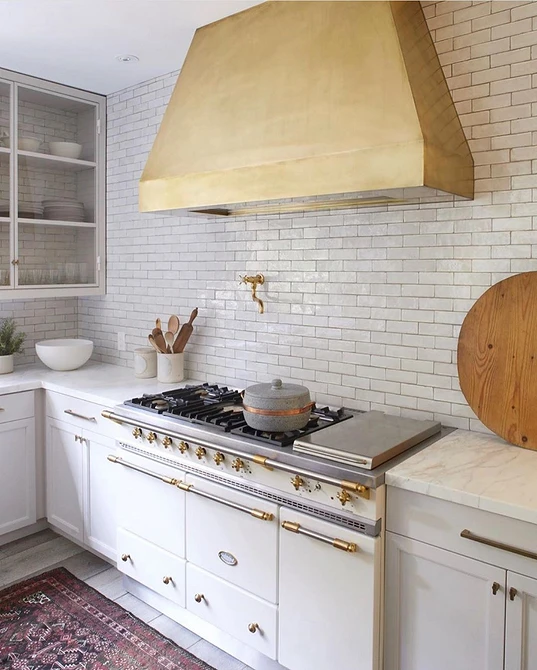
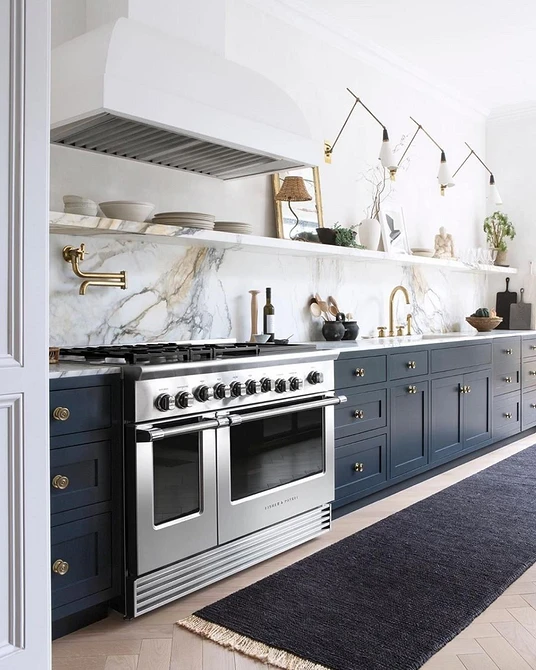
Instagram @lacanche_us
Instagram @awelldressedhomellc
Instagram @marieflaniganinteriors
Instagram @_vprostranstve_
Instagram @lacanche_us
Instagram @enjoy_home
Instagram @marieflaniganinteriors
Instagram @katiedavisdesign
Instagram @lacanche_us
Instagram @lacanche_us
Instagram @reviving_no37
Instagram @lacanche_us
Instagram @lacanche_us
Instagram @lacanche_us
Instagram @berg.interior
However, modern models can still compete with electrical counterparts in ease of use and design.Especially when there are so many different devices in stores.


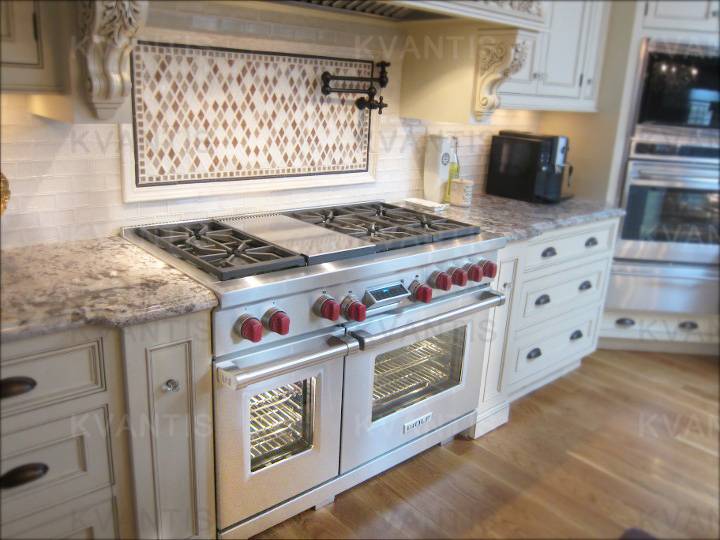
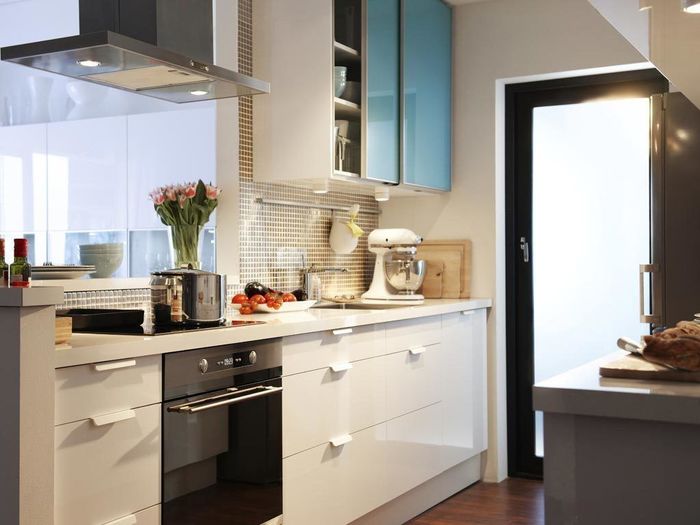
Types of household appliances
- Floor - a free-standing stove, a single design: the hob is connected to the oven.
- Desktop - small size, mobile. It is often used in country houses.
- Embedded is the most popular. The hob and oven, which are built into the countertop and set, they can most often be seen in the photo of the design of the kitchen with a gas stove.
In addition, the devices differ in the number of burners. Minimum two, maximum six. The choice depends on the lifestyle of the family and the area of \u200b\u200bthe room, since the recommended standards apply here. So, the requirements of SNiP-87 indicate the norms of internal volumes of premises for the installation of 2-, 3- and 4-burner panels: 8 m3, 12 m3 and 15 m3, respectively. And a design project with a wide hob in a typical apartment may not be agreed upon.
Instagram @_designtales_
Brainstorm Buro
Instagram @dom_w_bieli
Instagram @buildcom
Instagram @rokhardware
Instagram @sad.fat.cat
Instagram @lacanche_us
Instagram @lacanche_us
Instagram @lacanche_us
Instagram @lacanche_us
Instagram @lacanche_us
In addition to technical characteristics, an important point is the design of equipment. The choice is not limited to faceless enamel models from the past.
Communications
New and high-quality laid pipes and good plumbing are the key to the absence of breakthroughs. In any case, make it possible to easily and quickly access the communications under the sink and mount additional valves there so that the water can be quickly shut off in this area in case of emergency.
If the apartment uses gas, entrust the replacement of the hose and the connection of the stove to a professional. If you decide to replace it yourself, lubricate the joints with soapy water to make sure that bubbles do not inflate and there is no leakage.
Electricity is also very important. It is ideal to bring the entire kitchen to a separate machine, that is, to isolate it from the rest of the wiring in the apartment
Many appliances such as electric stoves and ovens, dishwashers, some microwaves and even kettles need a power cable. Be sure to consult with an electrician to understand which devices can be combined into one network, and which ones will lead to overload and traffic jams will constantly knock out. Place external sockets away from the sink and stove.
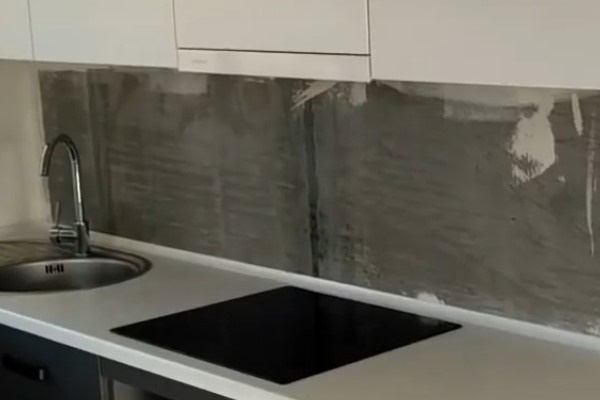
Metal
This is really reliable protection of walls from fire, especially if you have a gas stove. However, in all other respects, the practicality of metal screens tends to zero. Firstly, they are too thin and without a perfectly even base they are easily pressed through and deformed. Secondly, if it is an absolutely smooth surface without relief, the slightest traces of water and fat drops will be very clearly visible, just like on glass.
As a rule, the sheets are attached directly to the FB moisture-resistant plywood boards and hung on the wall in this form. The problem is that the bakelite substrate itself is not an environmentally friendly material and releases harmful formaldehydes into the air.
Stages of installation of a geyser
You need to hang the column at a high enough height so that children do not reach out. However, you don’t need to “lift” too much, because you will need to regulate the temperature of the water heating.
You can find more information about installing a chimney here:
- Mark on the wall with a pencil the places where the device will be attached to the wall. Next, use a drill to drill holes in them and drive the dowels there. Now, using self-tapping screws, you can securely fix the equipment.
- The column is securely fixed. Now we take the corrugation and connect it with one end to the outlet of the unit, and with the other - into the chimney opening. Now the products of combustion will be removed to the outside.
- This is one of the most crucial moments - gas supply. It is worth noting again - only employees of the gas service should carry out the gas supply
! They will cut the tee into the gas supply pipe. After that, a gas valve must be connected to the tee. - Now we dance from this crane. Follow from it all the way of "following" up to the supply to the column. So you will know exactly the required footage of pipes, as well as the exact number of valves (fittings). Drill holes along the future path of its installation (every 1 meter) and install fixing clips there, into which then enclose the gas pipe. It must be connected to the water heater using a fitting and a union nut. All. From now on, the column is connected to gas.
- Now you need to connect the water. Inspect the water pipes in the apartment and find a place where it is better to insert a tee. To do this, you will need a pipe cutter and a soldering iron for metal-plastic pipes. If the pipe is made of metal, then you will need a compression fitting.
- Install a water faucet.
- Next, follow the same steps for marking the path of the water pipes. This will also help determine the correct length of pipes and the required number of fittings.Also drill holes at a distance of a meter from each other and insert clips to hold the pipe. By soldering, connect the pipes into a single pipeline going to the column. Install a filter at the entrance to it.
- Mount the Mayevsky crane - it will help increase the operating time of your water heater. It is also connected to the water supply using a fitting and a union nut.
- The last step is to connect the column to the hot water supply system.
- Check all hose connections for gas leaks!
It is quite simple to do this - open the gas valve and turn on the column. Apply soapy water to all gas pipe connections. If bubbles form, then the connection is loose and needs to be finalized.
Now you know all the most important nuances - from the documents that will be required for the installation of a gas water heater, to its phased installation. We hope this article will help you mount the equipment correctly.


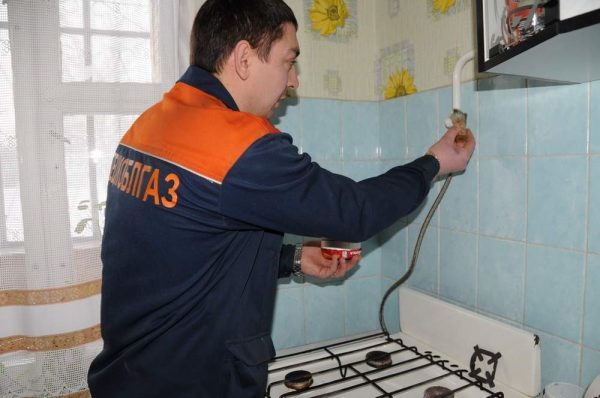


Where to go when connecting a gas stove?
If during repairs in the kitchen or for other reasons it was necessary to change the old stove to another model, then you will have to do the following:
- purchase a device
- call the company's specialists, who must have a permit for the installation of gas equipment in residential facilities.
If desired, you can call a private master or an employee of a gas supply company. But after the installation is completed, it will be necessary to enter new equipment into the State Gas register. At the same time, employees of private organizations that work under an official license also have the right to make entries in the technical passport of the device. Nevertheless, it would be advisable to call a Gosgaz employee, because this will simplify the process.
Installation of gas equipment is carried out only by qualified craftsmen
Note that there are state programs, thanks to which in some regions of our country a gradual replacement of gas stoves is carried out. This is necessary for the complete modernization of equipment and the safety of residents, so programs are often sponsored from the budget.
In what cases should you count on preferential or free replacement of gas equipment:
- if the stove does not belong to the owners of the apartment, but is owned by the relevant organization;
- when the owner of the apartment has the title of a hero or is a participant in the Second World War;
- stoves are sometimes changed for pensioners who do not have additional preferential payments;
- can partially or fully pay for the installation of stoves to low-income families who have an income below the subsistence level;
- equipment is installed for residents of apartments owned by the state.
In order to get a free stove, you need to contact Gosgaz with a package of documents confirming the right to a benefit.
Prices for popular models of gas stoves
Gas stove
For each device, a special sheet is compiled, where the following will be displayed:
- breakdowns;
- period of use of the equipment.
After studying the preventive checks for the past years, the specialist proceeds to the preparation of documentation. Then you will need to send an application for the installation of equipment to the relevant authorities, where, after approval of the request, they will put it in a queue.
This is how the documentation that the master fills out after the installation looks like
If you plan to replace the equipment yourself, then you must do the following:
- Send a request to the city gas service with a request for permission to replace the stove. After that, the employees of the organization will send to the address of the master, who will estimate the complexity and cost of installation in advance.
- After receiving the invoice, you must pay for the services of a specialist and agree with him on a convenient time.
- If you plan to connect the stove yourself, then you will also need to obtain permission for such actions.
After installation, marks are left in the passport