- Orthophosphoric acid for flux
- Schematic diagram of the device
- What is rosin for?
- Battery soldering device
- Powers and tasks
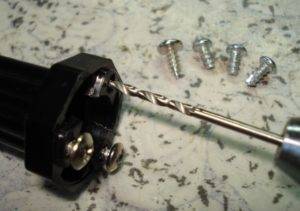
- First steps: preparing the handle-body of the future soldering iron
- Preparation of grooves for the supply wire
- Flux selection
- What can replace soldering acid?
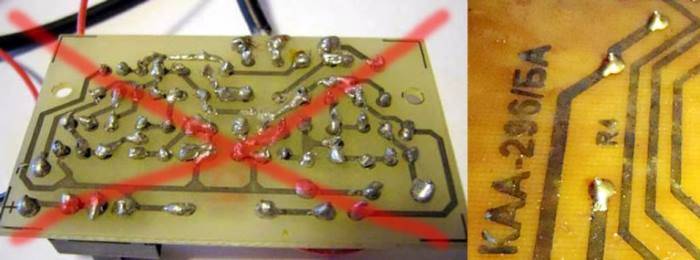
- Instructions for sealing small holes
- Basic Operating Procedures
- Features of soldering metals
- Possible malfunctions
- An important detail is the soldering iron tip
- Soldering Capabilities
- Final Assembly of the 12V Soldering Iron
- Training
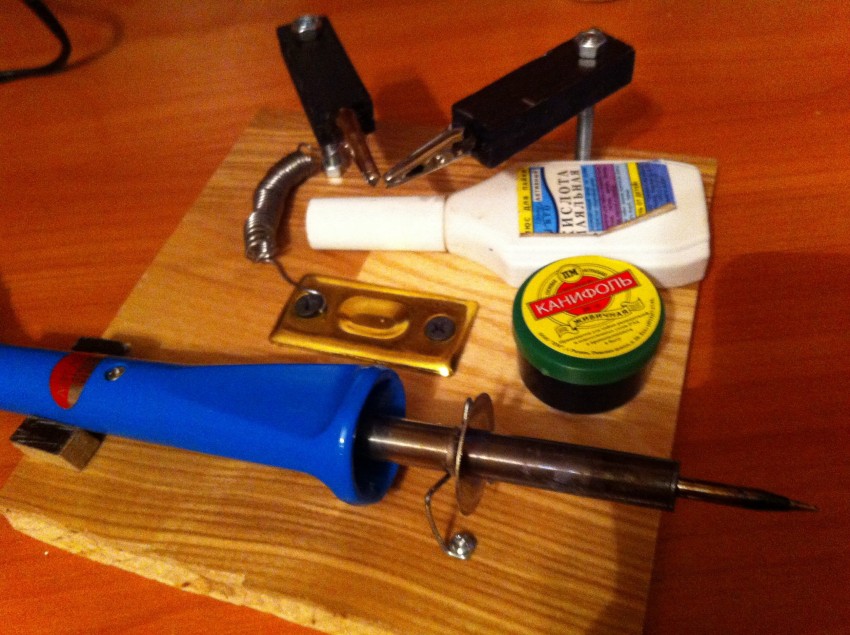
- workplace
- Choosing a soldering iron by power
- Soldering iron to work
- Parts for soldering
- Soldering acid phosphoric
- Preparatory stage
- Types of soldering operations
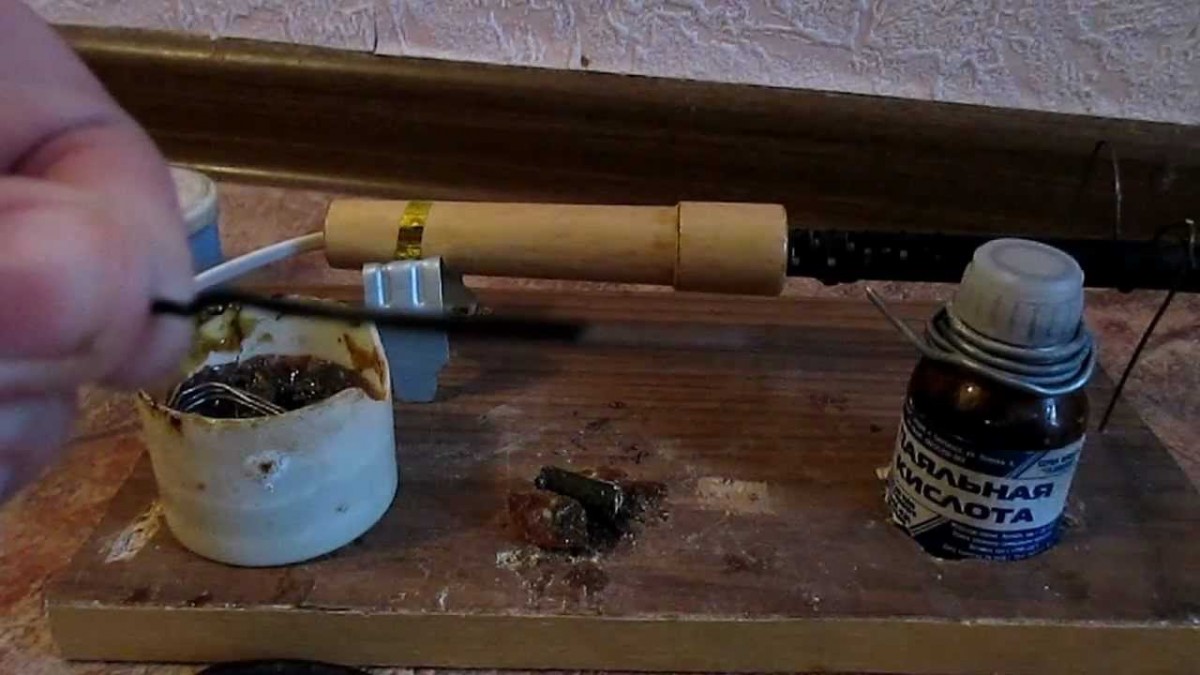
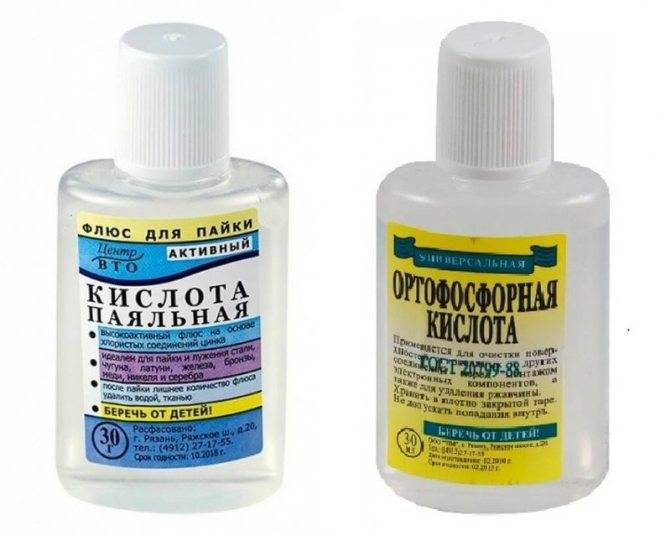
Orthophosphoric acid for flux
The second common type of soldering acid is phosphoric acid, H3PO4. It also ideally removes the oxide film from metal surfaces and prevents its renewal.
Reference: H3PO4 (orthophosphoric acid) is a component of many anti-corrosion compounds for metal processing.
To carry out high-quality soldering of nickel or chromium elements, such an acid is used undiluted. At the same time, the composition prepared with its use includes 1/3 of ethanol or ethyl alcohol.
IMPORTANT TO KNOW: Technology and features of titanium welding
The share of phosphoric acid is taken 32%, and 6% falls on rosin.
Very often, H3PO4 is combined with zinc chloride, while its mass in the finished flux can reach 50%.
The use of phosphoric acid is not limited to brazing nickel alloys, it is used to connect elements made of stainless steel, copper, aluminum and low alloy steel.
Orthophosphoric acid is a component of the classic active flux "F-38 N", the use of which makes it possible to solder copper alloys and pure copper, various steels and chromium-nickel alloys.
"F-38 N" is an excellent option for carrying out the workflow in hard-to-reach places, it has the ability to protect soldered elements from corrosion.
Video:
The constituent components of "F-38 N" are: hydrochloric acid diethylamine and 25% phosphoric acid.
Orthophosphoric soldering composition is characterized as fire and explosion-proof
At the same time, it is recommended to store and use the product with all precautions.
In case of contact with skin, wash it for at least 10 minutes under running water.
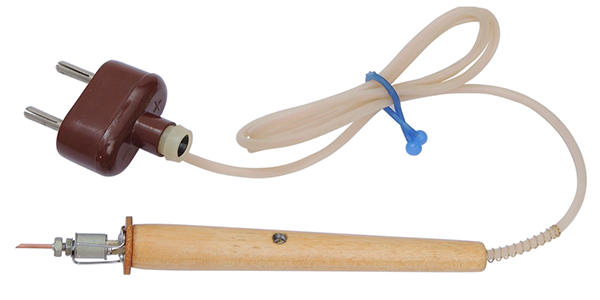
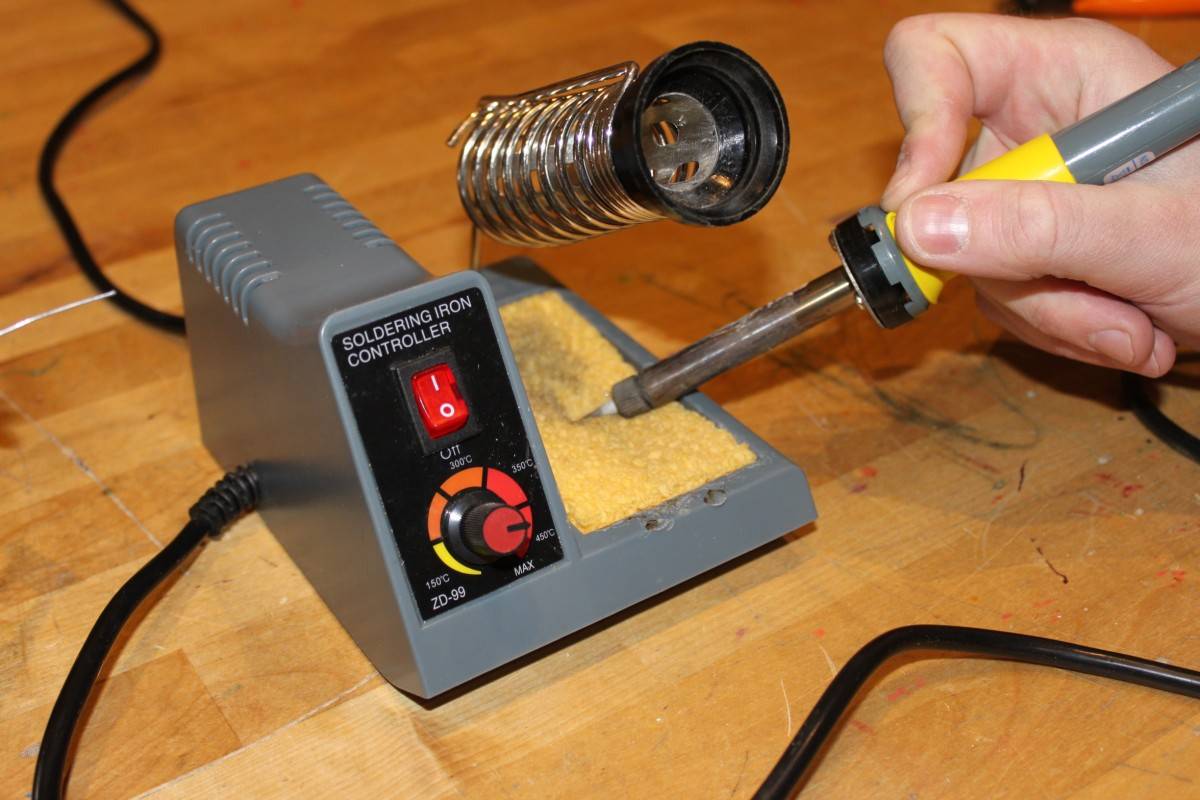
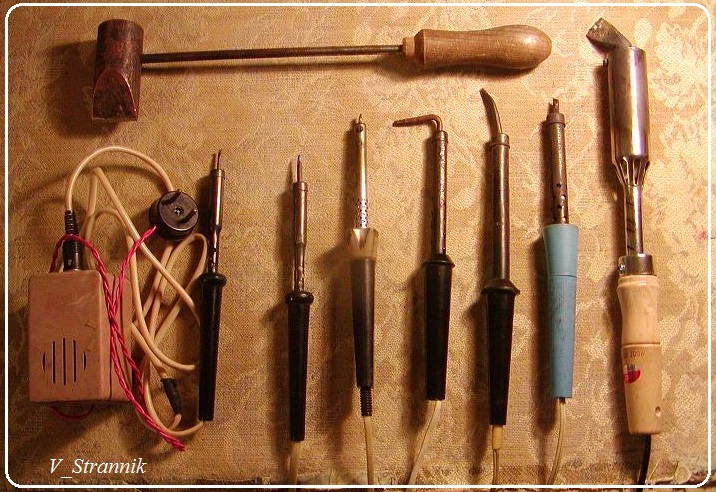
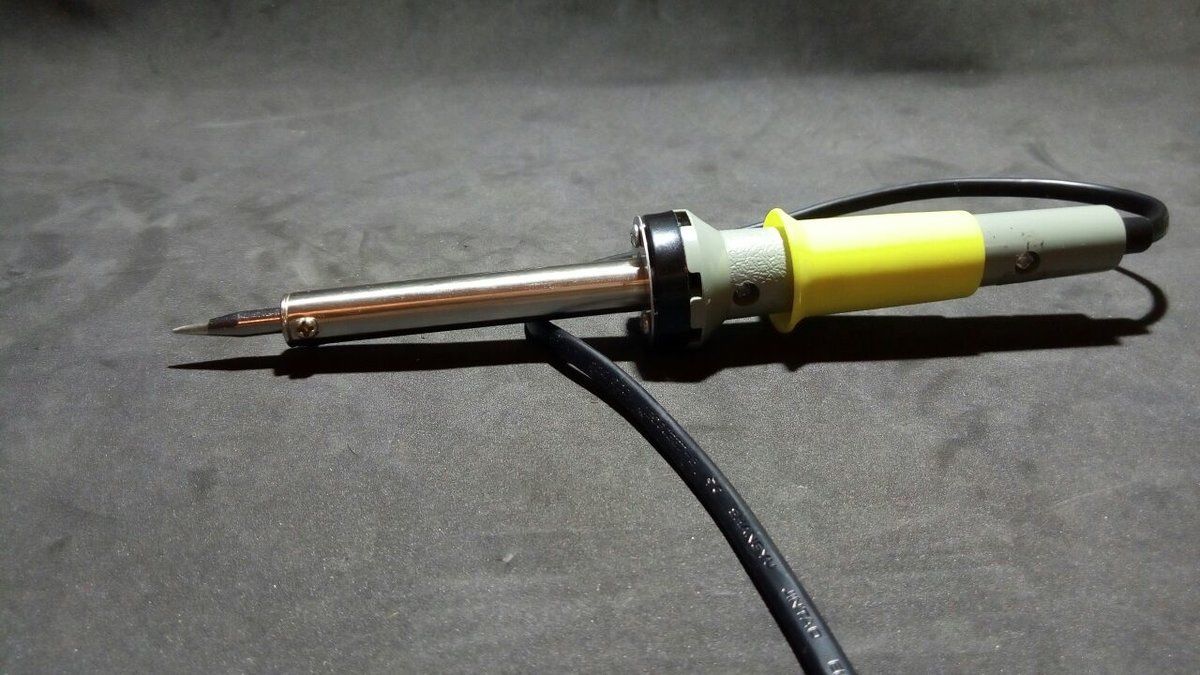
Schematic diagram of the device
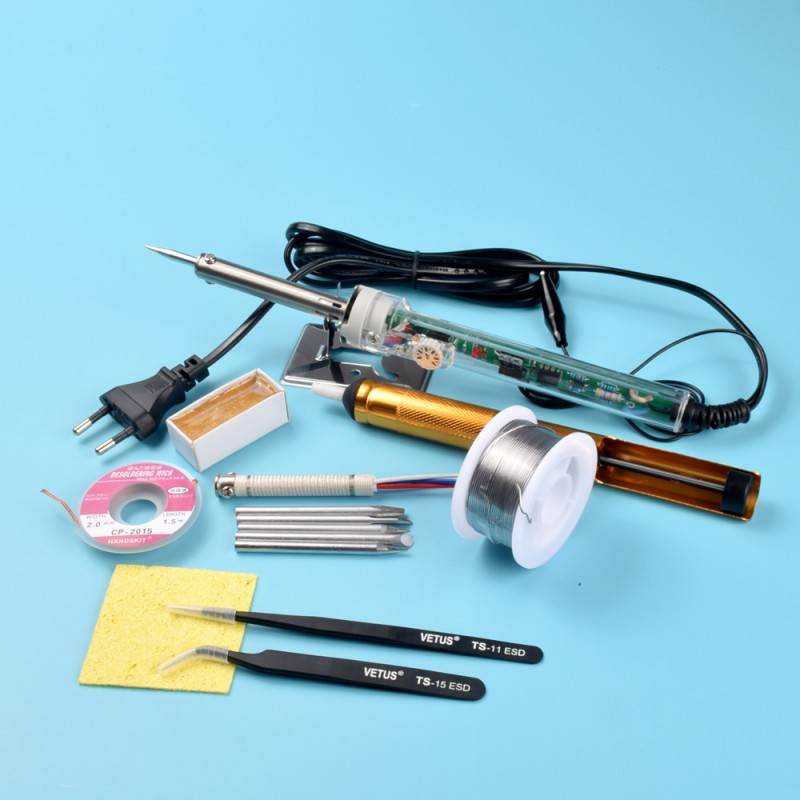
The device does not have complex structures and technical details. The circuit diagram is quite clear and you can easily assemble a powerful soldering iron with your own hands. The complete set of the device includes:
- Rod made of copper material.
- Metal casing.
- Metal tube.
- heating component.
- Insulating handle.
- Fork.
- Wire (power supply element).
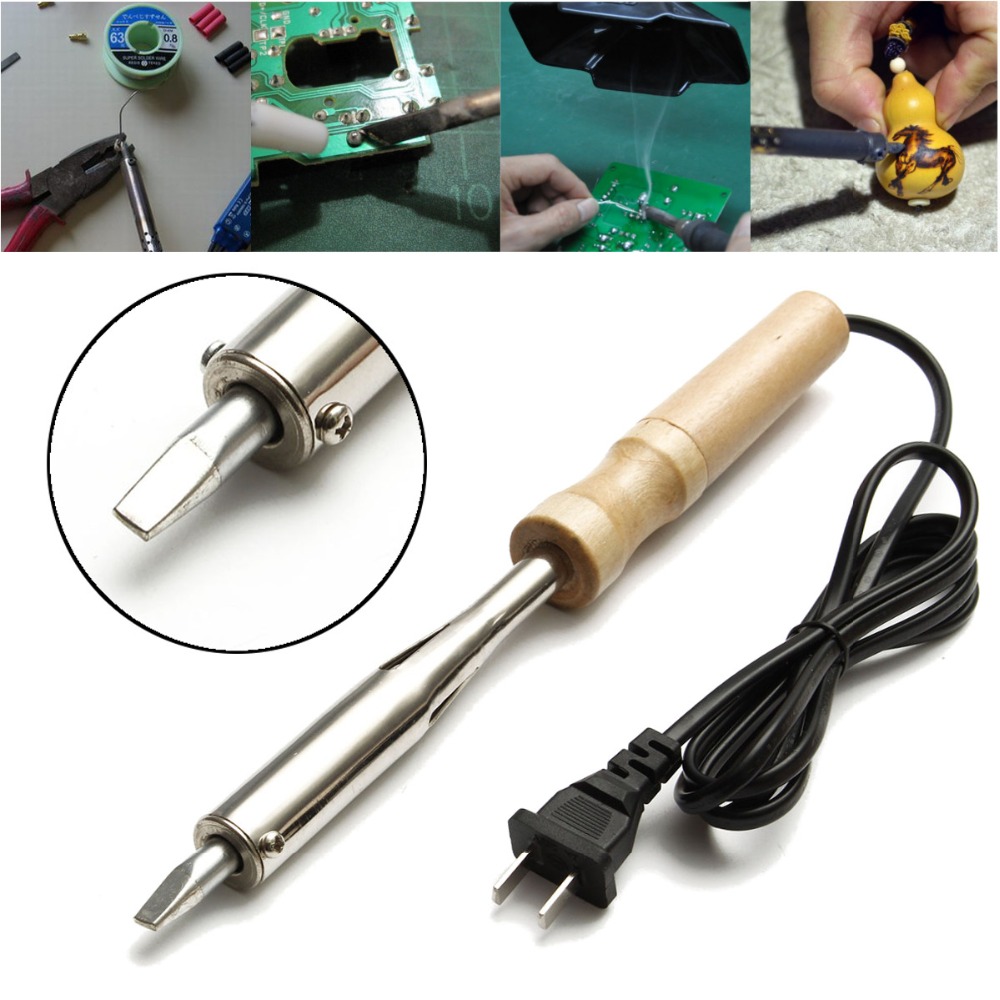
Low voltage soldering iron
What do you need to make a homemade 220 volt soldering iron? For electrical safety purposes, we recommend making a low-voltage soldering iron for 12-14 Volts, although the assembly principle does not differ in fundamental characteristics. For work you will need the following materials, tools:
- Rechargeable Li-Ion battery You can use old batteries from a laptop or a screwdriver.
- A small piece of copper wire, preferably up to 2 mm in diameter. The length is not more than 6 cm, we will need this segment as a winding of the spiral.
- Tubes made of heat-resistant fiberglass. The diameter of the tubes is preferably 3.8 mm and 1 mm. Such a tube is intended as a casing for a metal case for a heating component. Alternatively, you can use the insulating material of a non-working electric kettle.
- The wire is nichrome, it is recommended to take a wire with a diameter of 0.3 mm. Look for material in an old, broken hair dryer. We will select the length of such a wire empirically, taking into account all the main structural capacities of the device, including the battery, if you plan to install it on a soldering iron instead of an electric wire.
- A small segment from a telescopic antenna with a diameter of 4 mm, the length of such a part is about 3 cm.
- For the sting, we take a small piece of single-core type copper wire. The diameter is best taken at the rate of 3.8 mm.
- A wire designed to connect a power source to a soldering iron.
- For the handle, we select a wooden or plastic pipe with good electrical insulation characteristics.
In principle, this is the basis of a set of materials designed to begin the task of how to make a soldering iron with your own hands.
What is rosin for?
Not many people know why rosin is needed when soldering. To answer this question, you need to understand that this is a resinous substance, which is a flux. During the connection of parts with a soldering iron, an oxide film forms on the surface to be treated. It does not allow solder to connect the parts. To remove this film, you need to use flux or rosin. The resinous substance effectively copes with this task at a temperature of more than 150 degrees.


Rosin is used in soldering to improve joint parameters. It will help to cope with the problems associated with insufficient solder flow. It can slowly fill the seam and reduce the strength of the joint. Resin is mainly used for home renovations. Serious compositions with enhanced characteristics and properties are used in production.
Resin can be used not only for soldering radio components and wires. Based on it, varnishes and paints are made. It is one of the components in the manufacture of plastics. With its help, the strings on musical instruments are processed. In the film industry, rosin is used to create effects.
Rosin, rosin properties and soldering features
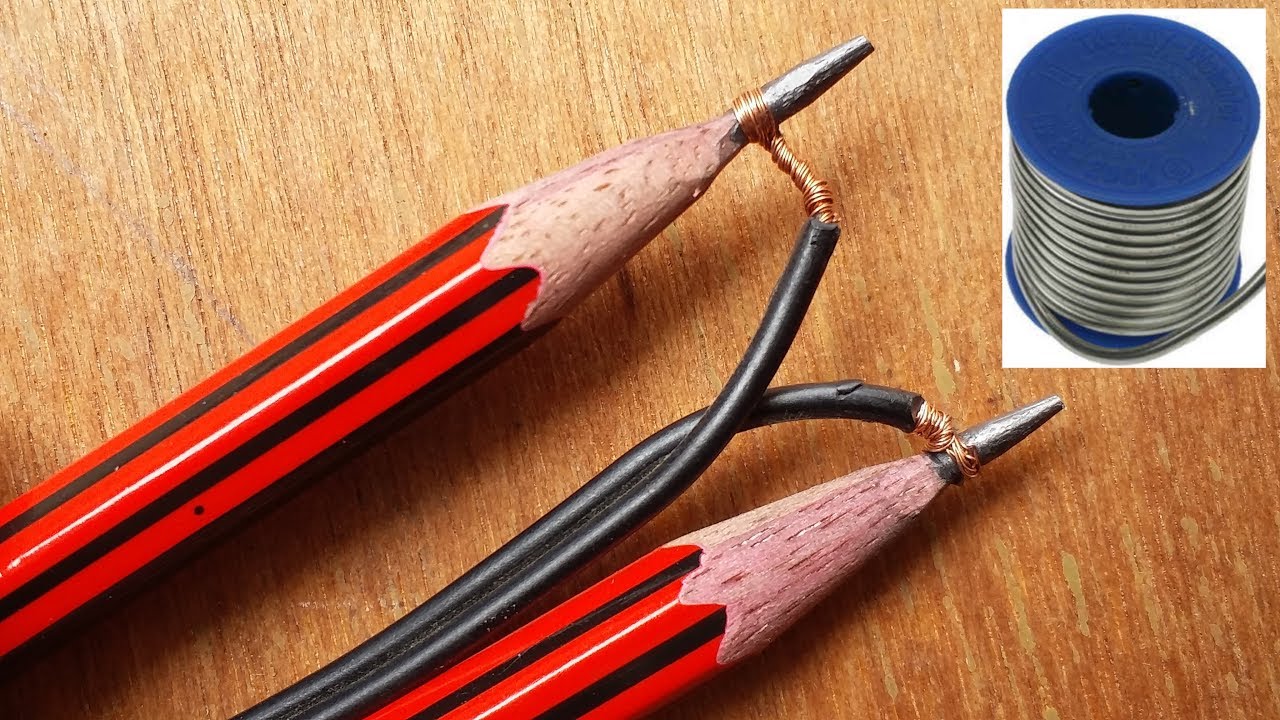
Battery soldering device
Understanding how to replace a conventional soldering iron, it is recommended that you first of all pay attention to this particular device. With it, it will be possible to solder even in the most inaccessible places without access to electricity, at height, etc.
To assemble such a homemade soldering iron, you will need the following:
- Battery.
- Solder with rosin.
- A couple of wires.
- Graphite pencil.
- Crocodile clip.
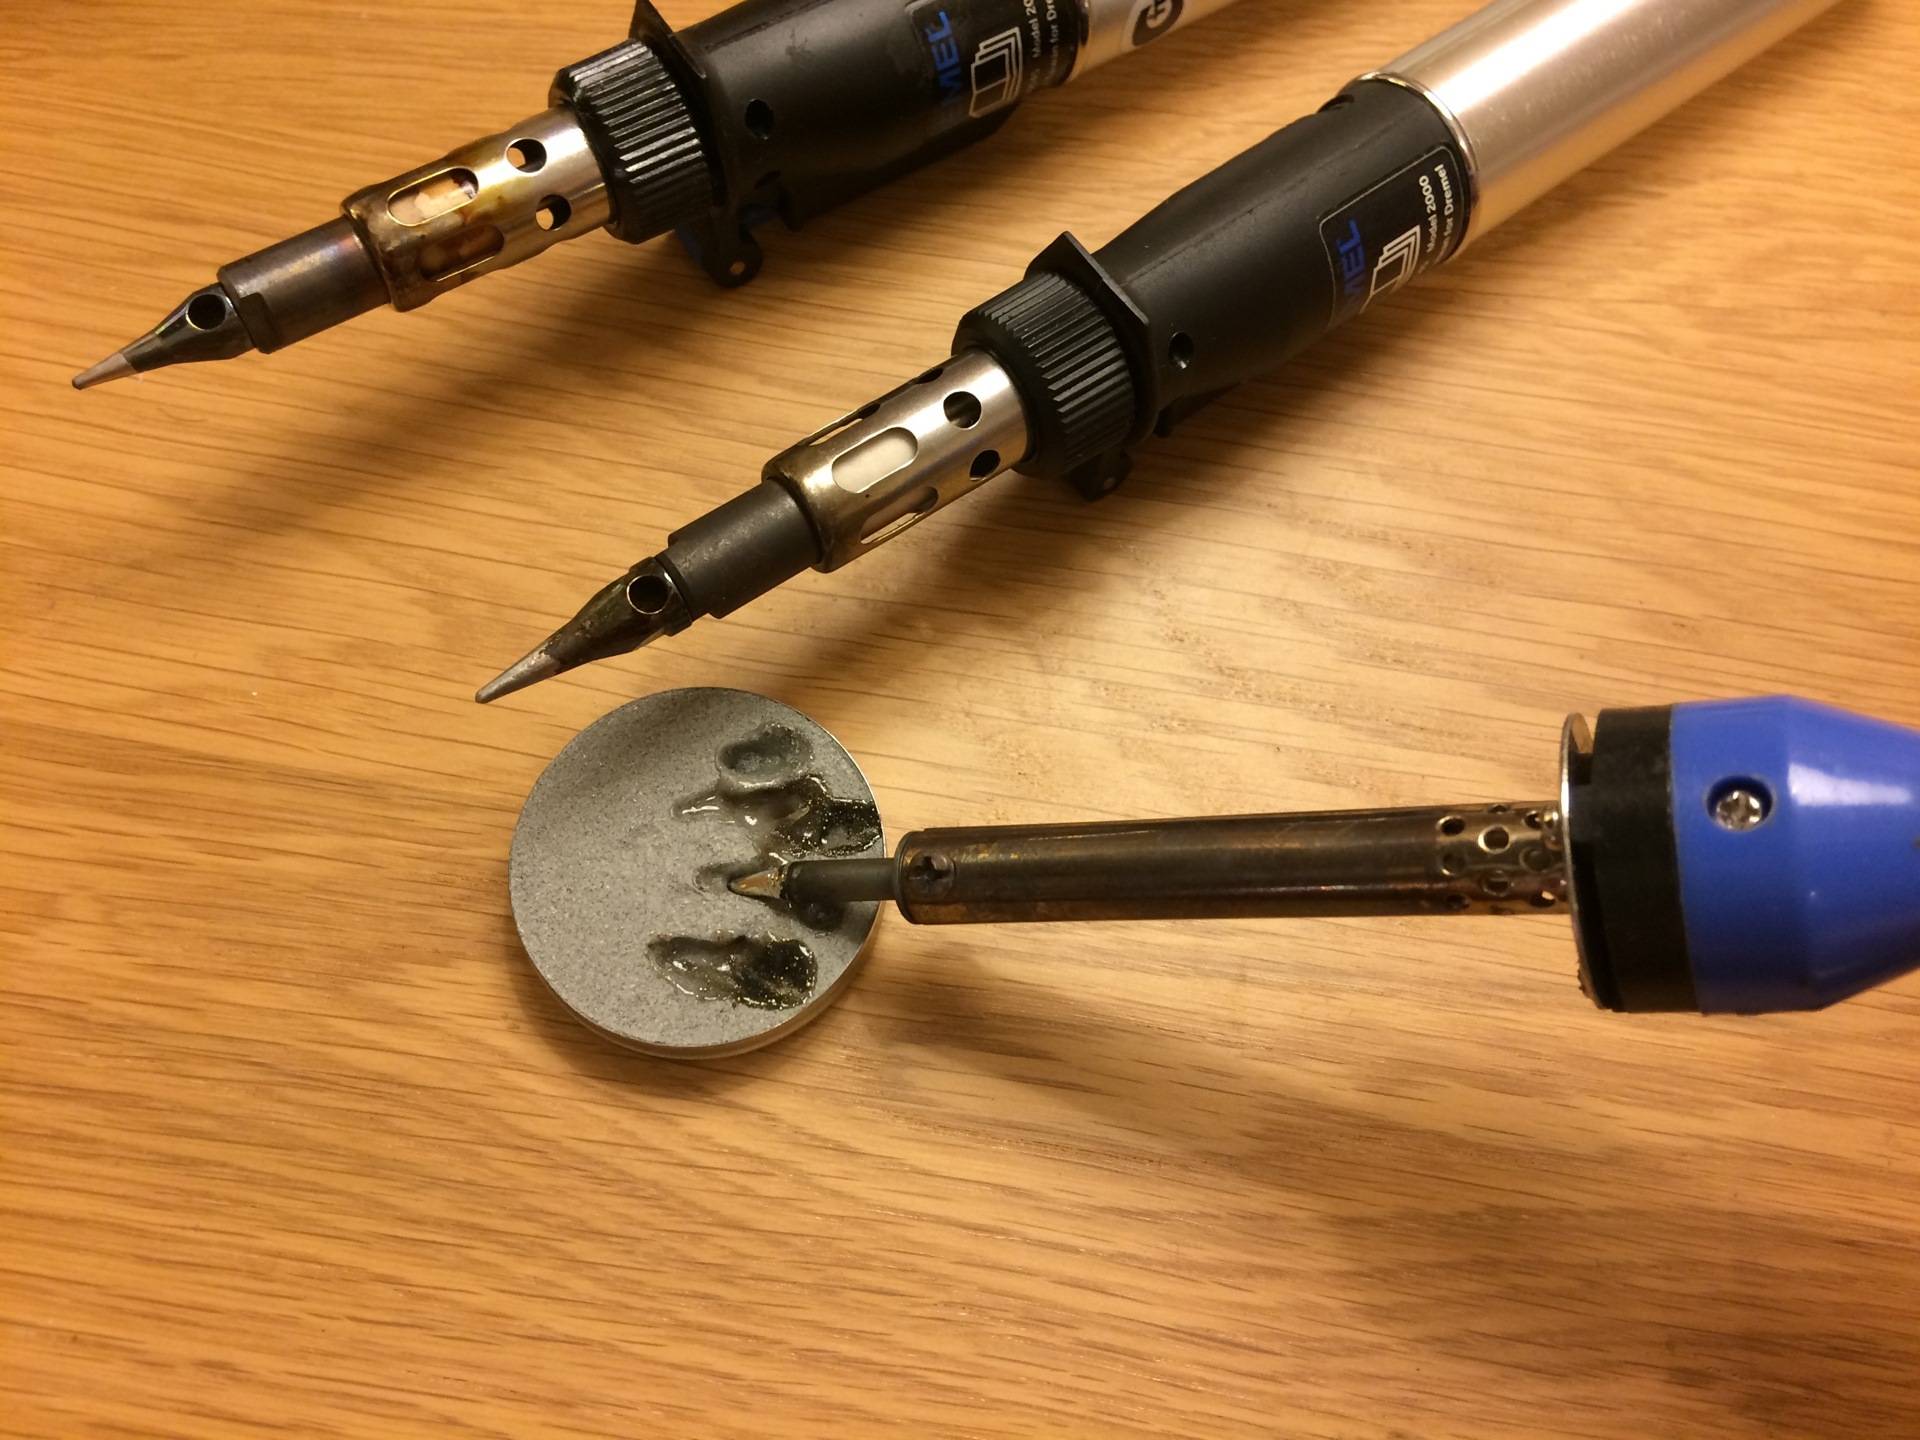
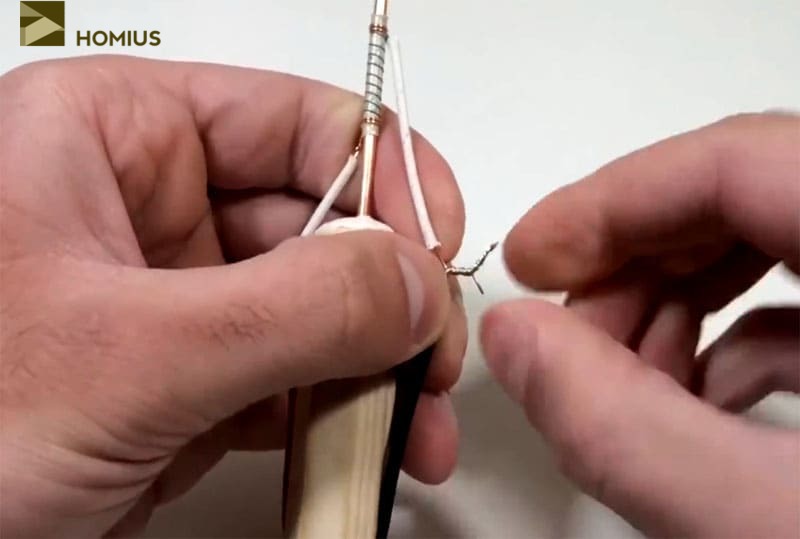
In fact, the process performed using such a homemade soldering iron is not soldering, but welding. Everything is done as follows. You take 2 wires and wind a couple of turns of solder on top with rosin inside. Next, you need to connect any battery electrode to the products to be soldered. Connect the second electrode to the graphite lead of the pencil. It needs to be cleaned first. Next, you need to touch the solder rod for a split second. An arc will appear, under the influence of high temperature, the solder will instantly melt, which will provide a very reliable soldering.
This method is suitable for connecting wires with a diameter of not more than 1 mm. If you hold the graphite rod on the tip of the wires a little longer, you can get copper wires welded. Before using such a soldering iron, it is recommended to practice a little on unnecessary products.
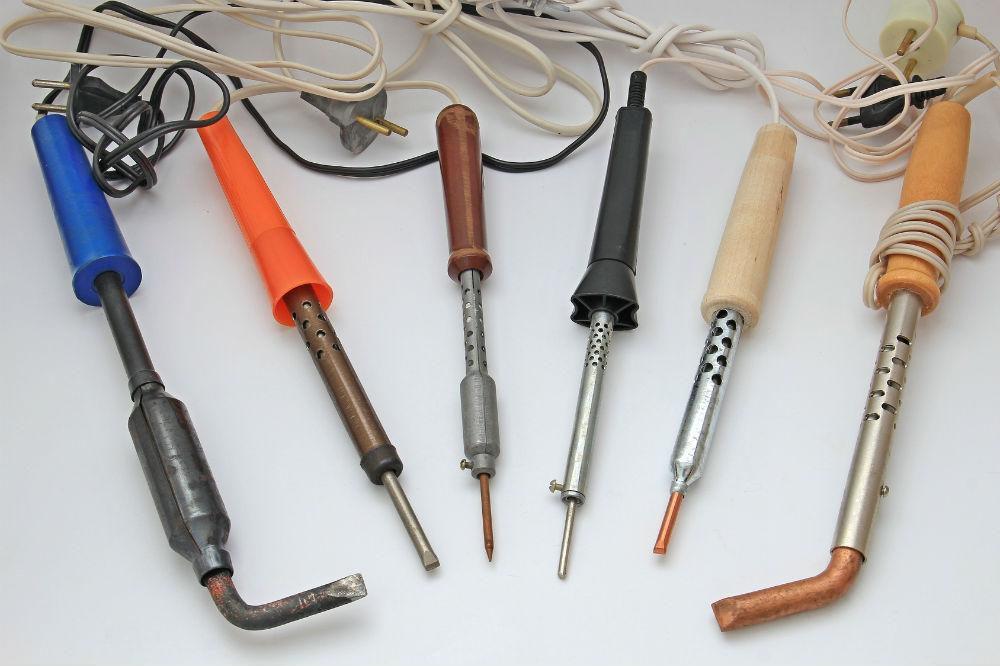
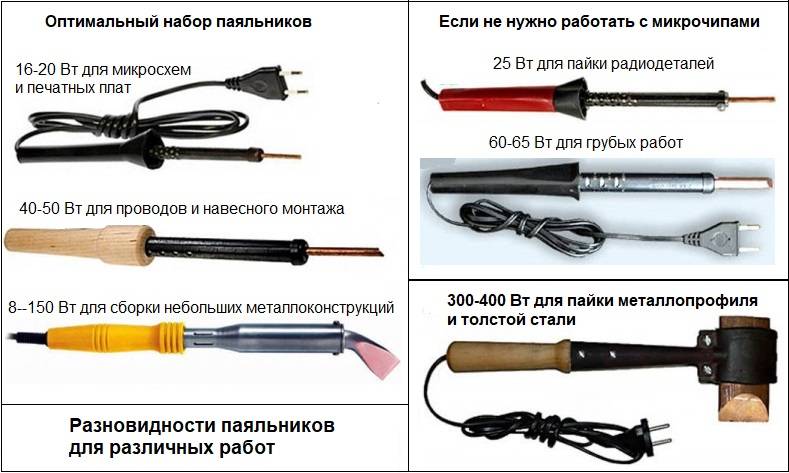
Powers and tasks
- Soldering iron for microcircuits - power 10-20 W
- Soldering iron for radio components - power 30-40 W
- Universal soldering iron - 60 W
- Soldering iron for thick wires and large parts - 80-100 W
On sale you can also find more powerful soldering irons - from 100 W, which are used for rough repair of hull structures in outdoor conditions. But for these purposes, in our opinion, it is better to use a special hair dryer or a blowtorch.
Answering the question of which soldering iron to choose for microcircuits, we immediately emphasize that in this case the main difficulty lies in the simultaneous melting of the soldering points of all the legs of the microcircuit. Therefore, it is for microcircuits (memory chips, controllers, etc.) that you need to carefully use either a soldering dryer or a soldering iron to melt the place of each contact and use a special tool (either a copper wire braid or a desoldering pump) to select tin from it. For these purposes, a soldering iron with a power of 20-30 watts is suitable.
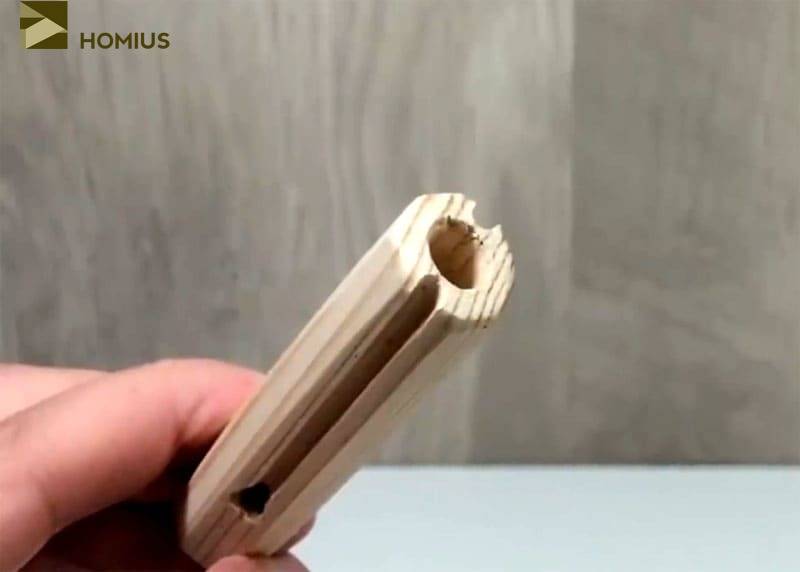
First steps: preparing the handle-body of the future soldering iron
To begin with, a wooden handle was taken (it is better to take a birch or maple), turned "under the arm" and sanded. Any form can be given to it, but for the first time I did not do extra work. It should also not be made too long, although this is a matter of taste.
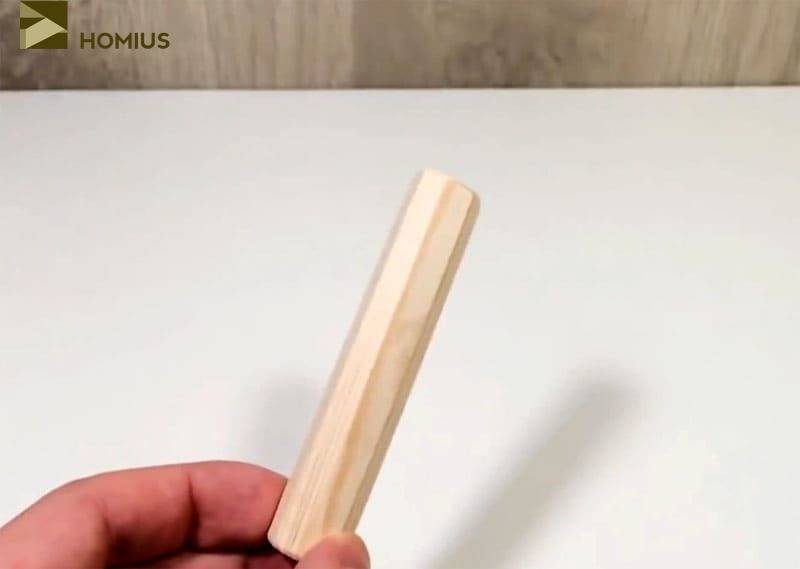 Wooden handle to be used as a handle
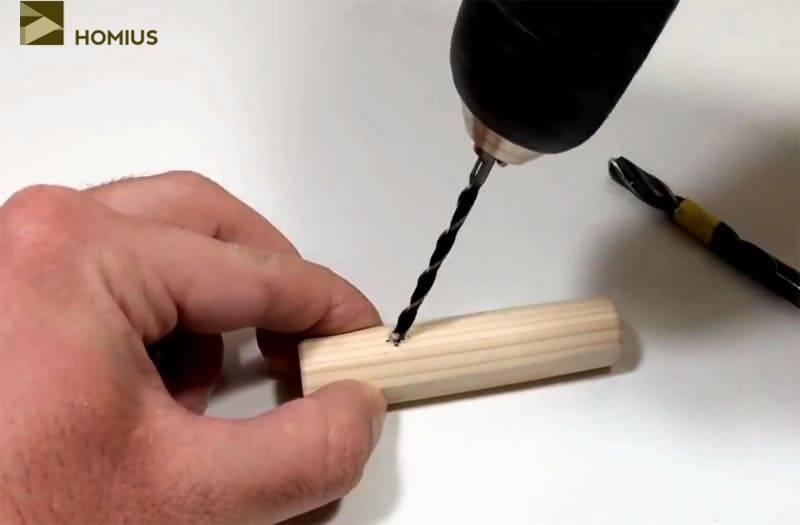
Next, a drill with a thick drill entered the work, on which, with the help of electrical tape, I marked the hole limiter. A depth of 2-3 cm for a 12 V mini-soldering iron was quite enough. A hole made in the center of the handle from the end will serve to install the power socket and pull wires to the heating element.
An identical hole was drilled on the reverse side, which will serve to install the soldering iron tip.
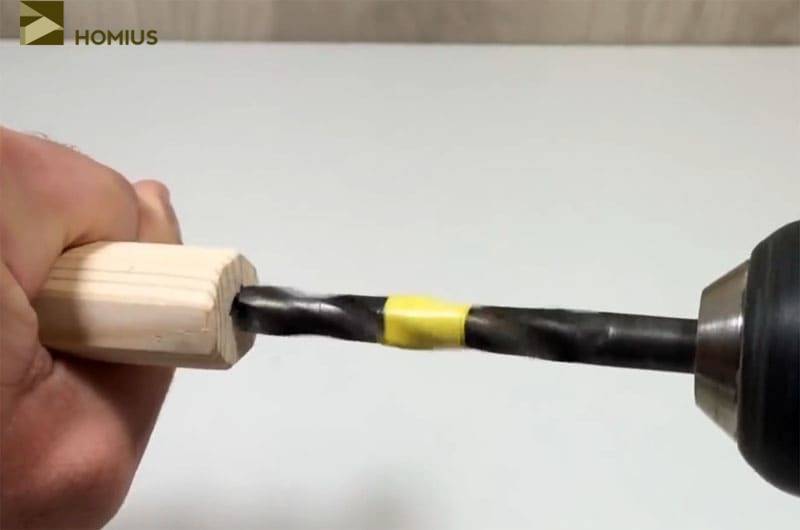 We drill the same holes on both sides of the soldering iron handle
Preparation of grooves for the supply wire
At a distance of 2-3 cm from the edge where it is planned to install a socket for the power plug, we make markings for two holes (on opposite sides). For the convenience of measuring the distance, you can use the same drill with a depth marked with electrical tape.Having determined the location of the holes with a marker, we again take up the drill, but with an already thinner drill.
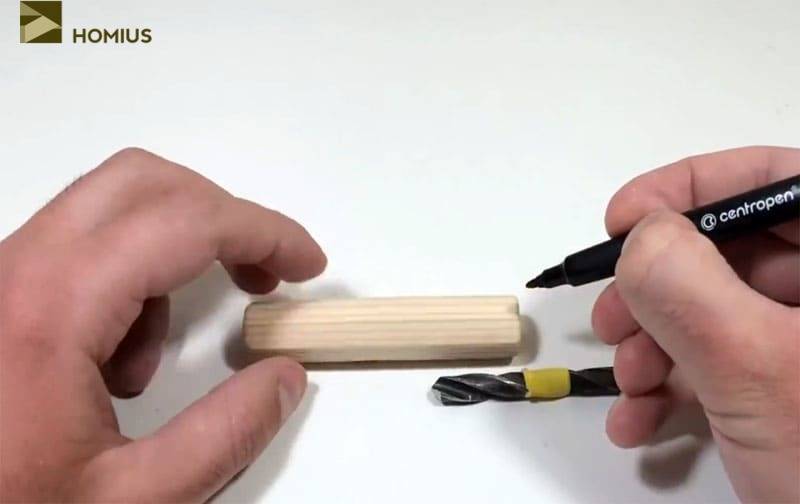 We mark the points of drilling holes for the wires
Drilling under the wires should be done at a slight angle - so it will be easier to stretch them later. As a result, it should turn out so that the wire enters from the end and, under a slight kink, is laid further, to the opposite end of the handle, on which the soldering iron tip will be located.
 Drilling thinner holes at an angle for easier wire routing
Now you need to make sure that the wires stretching from the power socket along the handle do not interfere when working with the soldering iron. To do this, from the holes to the edge where the sting will be located, I cut grooves. This is easy to do with a regular clerical knife. Of course, if the handle was made of pine, it would be much easier to cut through the fibers, but such material was “marked” immediately. The reason for this was that an additional coating of the handle was not planned, which means that there was a possibility that hands could get dirty in resin during work.
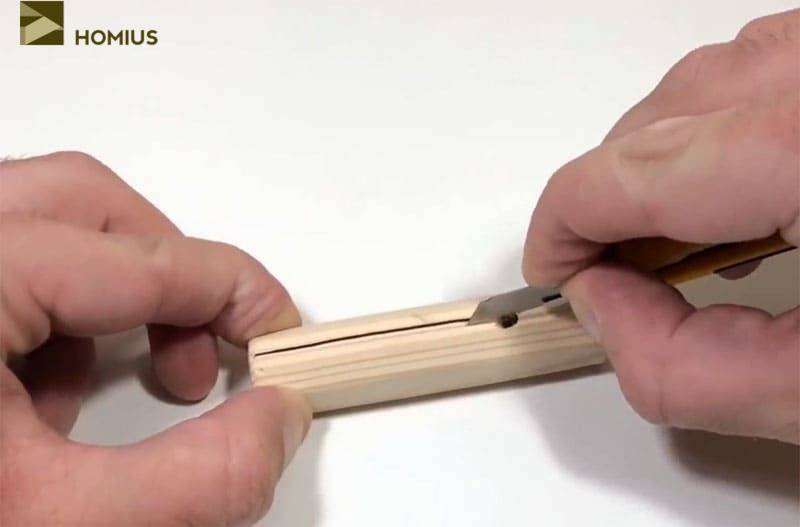 We cut the grooves into which the wire will subsequently be laid
When the grooves are cut, it is advisable to work them out a little with a regular round needle file. Indeed, despite the handicraft production of a 12 V soldering iron, they are supposed to work, which means that accuracy here will not be superfluous at all. As a result, we got a handle with holes on both sides and grooves for the wire, which is ready for further work - assembling the filling of the device for soldering wires.


 The handle is ready, you can start assembling
Flux selection
It's about soldering copper parts.For iron and aluminum, there are special acid compositions, this is a topic for a separate material.
In fact, it's everyone's personal preference. You just need to try different compositions, and determine the best for yourself. Someone likes solder fat (consistency like grease), some like liquid flux. We will talk about traditional rosin.
More precisely - how to properly solder with it.
This pine resin based flux has excellent cleaning properties. It provides mechanical and chemical cleaning, in addition, it protects the surface well from oxidation when heated. There is only one drawback: in its pure form, rosin is solid. This means that it cannot be pre-applied to the parts to be joined. However, the technology is
- touching the rosin with a soldering iron tip, we pick up solder on it;
- we immerse the legs of the part or the wire into the flux using a soldering iron (it melts), while the surface is covered with a thin layer of solder;
- similarly apply solder to the place of soldering;
- we dock the tinned part (wire) with the place of soldering;
- touch the flux with a soldering iron, then pick up solder, dip it in rosin again;
- immediately transfer the sting to the soldering area.
Parts have been soldered this way for decades. With a certain skill, restrictions by choice of materials no connection. This technique is ideal for training. If you master it, the rest of the methods will seem even easier.
What can replace soldering acid?
There are not many substances that can be considered as an alternative to this acid. Some of them are easily prepared at home, although it is not always possible to obtain the desired properties.
One of the simplest and most affordable substances that can be used instead of soldering acid is an aqueous solution of ordinary aspirin. To obtain it, you just need to take a tablet, crush it for faster dissolution, pour it into a container of water and mix thoroughly until there is not a single solid particle left. The use of the resulting solution is similar to other types of flux. The undoubted advantage of such a substance is its absolute harmlessness and safety.
You can also use citric or acetic acid, but they are not as effective as soldering. They are already sold in a diluted form, so no additional manipulations with them are required.
Another option is concentrated hydrochloric acid. It is one of the main components of the original flux, but can also be used to make soldering acid at home. Due to its high aggressiveness, it allows you to qualitatively get rid of a wide variety of types of pollution and guarantees reliable protection. However, it is hazardous to health and can corrode delicate parts, so these aspects should be taken into account when soldering.
Active soldering fat has proven itself well, which copes well with pollution. Also, its undoubted advantage is ease of use and ease of placement on the surface of the product. However, like soldering acid, it is a highly aggressive substance that poses a risk to human health and is not recommended for use with thin metal products.
A worthy alternative to soldering acid is phosphoric acid.It is easy to use, affordable, copes well with oxide, grease and other films and deposits, but at the same time it is gentle on metals.
In the absence of the original soldering acid at hand, you can independently prepare a replacement for it at home. Of course, she will not have such a rich composition, but she will still perfectly cope with the tasks assigned to her.
Instructions for sealing small holes
This method is suitable for sealing small holes. diameter up to 5-7 mm, for example, in leaky dishes. First you need to carefully clean the area around the hole. Do this with sandpaper, a file or grated brick. If you are going to solder enameled products, you must first remove the enamel by about 5 mm around the hole. To do this, attach the corner of some metal object to the edge of the hole and beat off the enamel by lightly tapping with a hammer.
Thoroughly clean bare metal. Take finely chopped rosin and fill it with a place to solder. In the presence of etched hydrochloric acid, coat the product with it. On the inside of the product, put a piece of tin or, even better, tretnik, on the hole. Next, you need to heat the product. This can be done over a kerosene or alcohol lamp, a primus stove, even an electric stove will do. In the case of enamelware, a spirit stove is the most preferred. It will provide heating of a small part of the product and will not damage the rest of the enamel. Wait for the tin to melt and remove the dishes from the heat. Molten tin will provide strong and reliable soldering.
Basic Operating Procedures
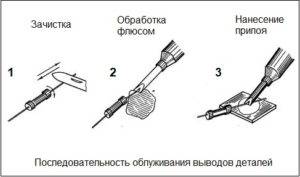 A technological map or a diagram of “correct” soldering with a soldering iron suggests the following procedure for carrying out operations.
Before directly soldering, the surfaces of the objects to be soldered are cleaned of heavy dirt and corrosion deposits, after which they should be cleaned to a characteristic shine.
After this, the soldering points of the parts are treated with a previously prepared flux, through which it is possible to improve the conditions for the spreading of the solder over the contact surface.
Then the pad or soldering area is subjected to protective tinning, the essence of which is to apply solder molten to a liquid state on them. At the same time, the consumable material spreads evenly over the surface of the parts to be soldered, and ensures the formation of a reliable thermal connection.
When preparing parts for tinning, preference is given to pasty fluxes, which are conveniently applied and easily washed off. Before processing and soldering, the parts are pre-connected by mechanical twisting or compression with pliers.
After fixing, flux is again applied to them, and then the contact point is heated with the simultaneous introduction of a solder rod into it (its composition may differ from that of the material that was used for tinning).
It is impossible to learn how to properly solder with your own hands if you do not learn how to tin a soldering iron tip. For tinning, after the soldering iron is fully warmed up, the working tip should be pressed firmly against any surface covered with foil and rubbed with it over the molten rosin with solder.


This operation should be repeated until a characteristic film of solder appears on the edges of the copper point, providing good adhesion to any metal.
The question of how to properly solder comes along with an interest in why soldering is needed and what can be done with it. It used to be mostly pots and samovars that were soldered, but today high-tech things can also be soldered.
Features of soldering metals
For a quality connection, it is important to follow certain instructions, the work is different from soldering with ordinary solder. Soldering acid is used in many cases, it is important to follow the steps before work:
Soldering acid is used in many cases, it is important to follow the steps before work:
- Rough dirt, metal oxidation are cleaned with sandpaper or a file.
- The flux is carefully applied with a brush or a special dispenser, the solution is in a liquid state, so it spreads easily over the surface.
- Tinning occurs with the application of solder, the products are fastened together.
After the end of the process, it is necessary to remove the remaining solution. You can do this with ordinary soapy water or a solution of soda.
If you find an error, please select a piece of text and press Ctrl+Enter.
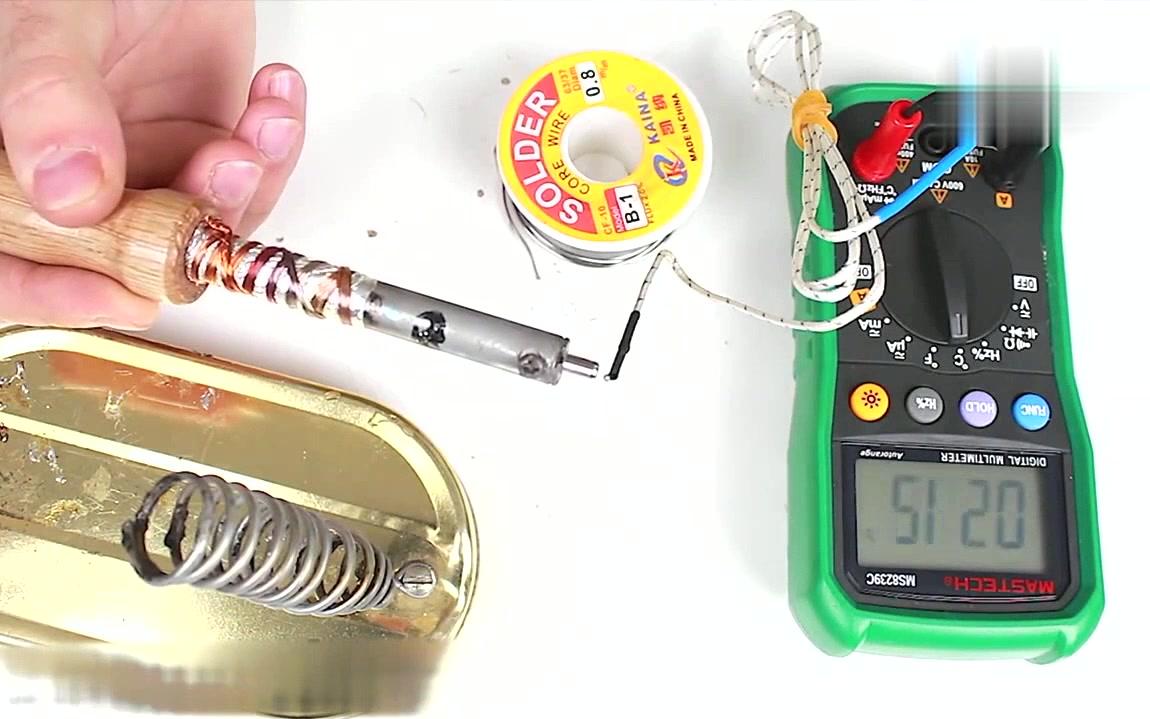
Possible malfunctions
 The most common malfunction of soldering irons (regardless of type and power) is the burnout of the heater winding or partial interturn circuit.
It manifests itself in the fact that the soldering iron does not heat up at all, that is, it loses its efficiency.
As a rule, the closing of individual turns over time also leads to the burning of the entire spiral, when ordinary repairs no longer help, and the spiral must be completely rewound. Under the most favorable conditions, the lack of heating of the soldering iron can be due to the following reasons:
- poor contact at the junction of the voltage supply wire and the ends of the winding (spiral);
- network plug failure;
- breakage of one of the cores in the cord itself.
All these malfunctions are detected through visual inspection, or with the help of a tester turned on in the "Continuity" mode, after which repairs are made.
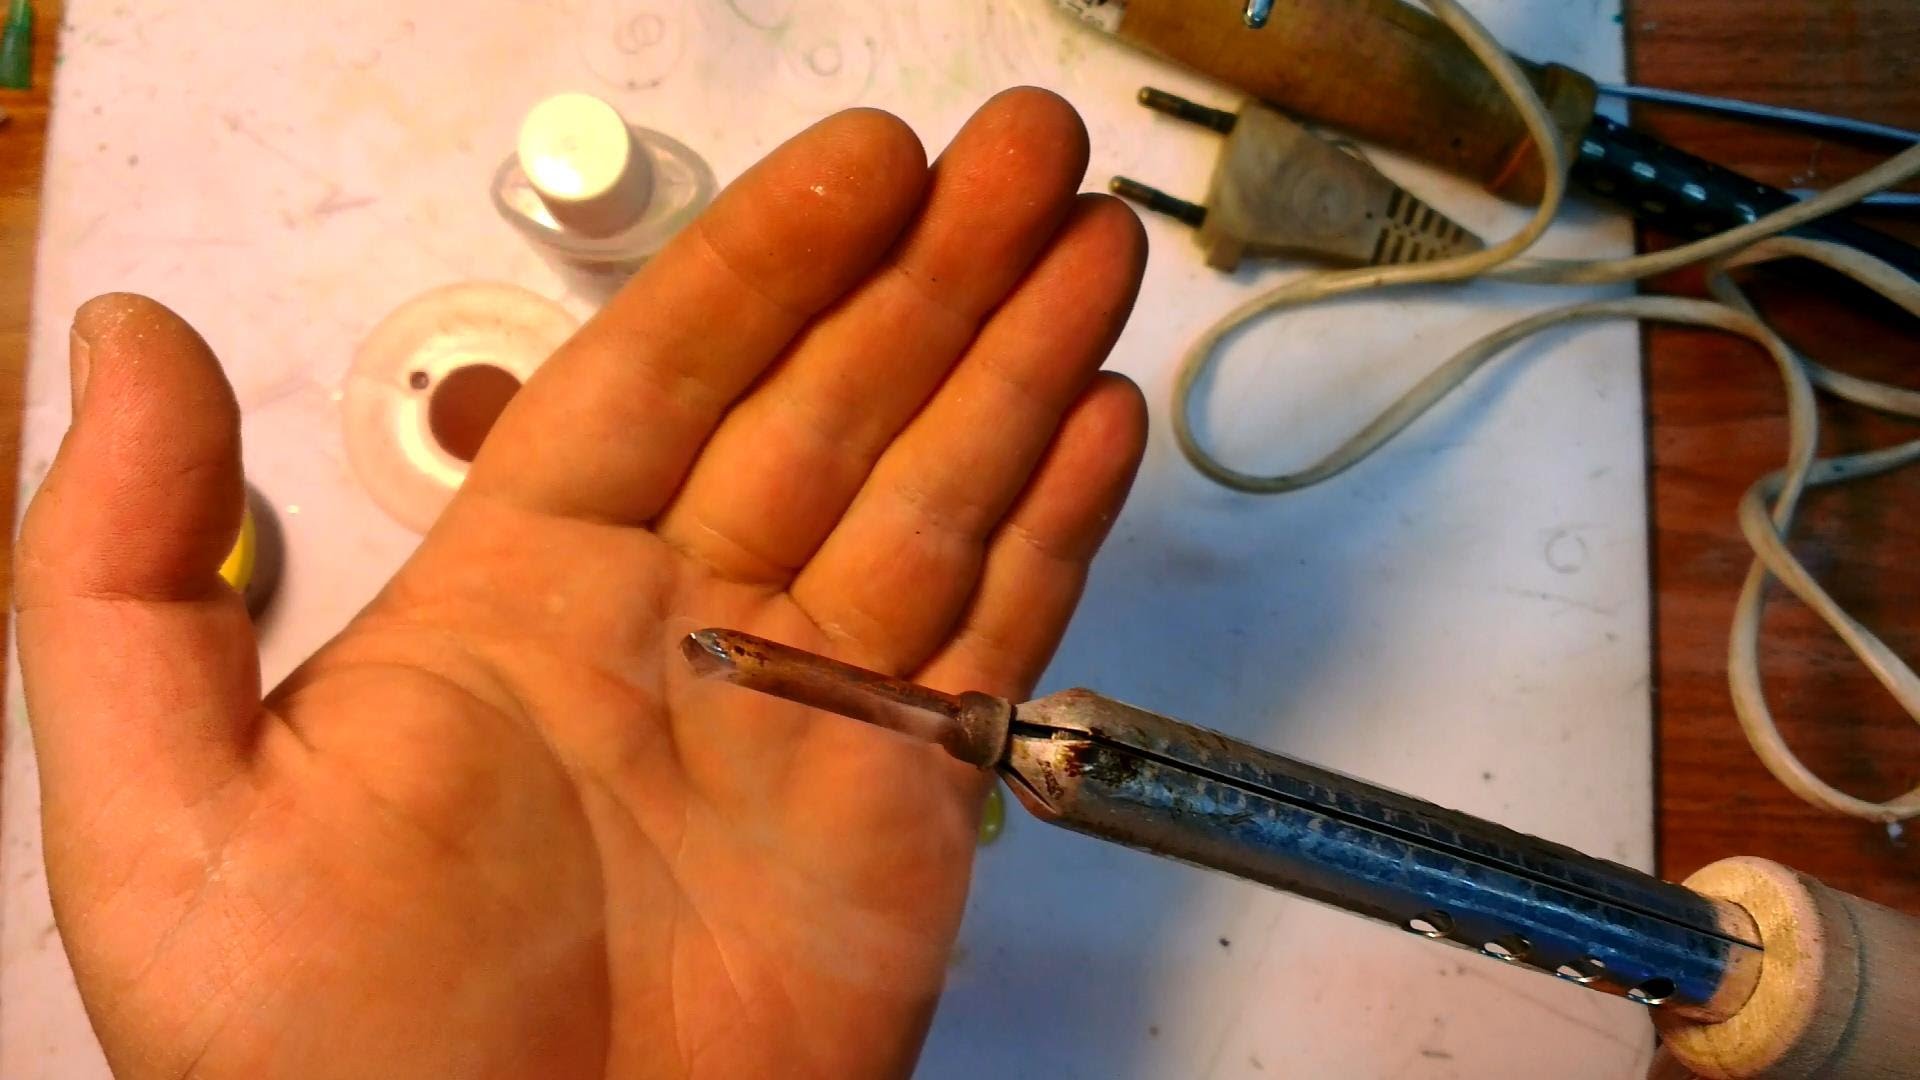
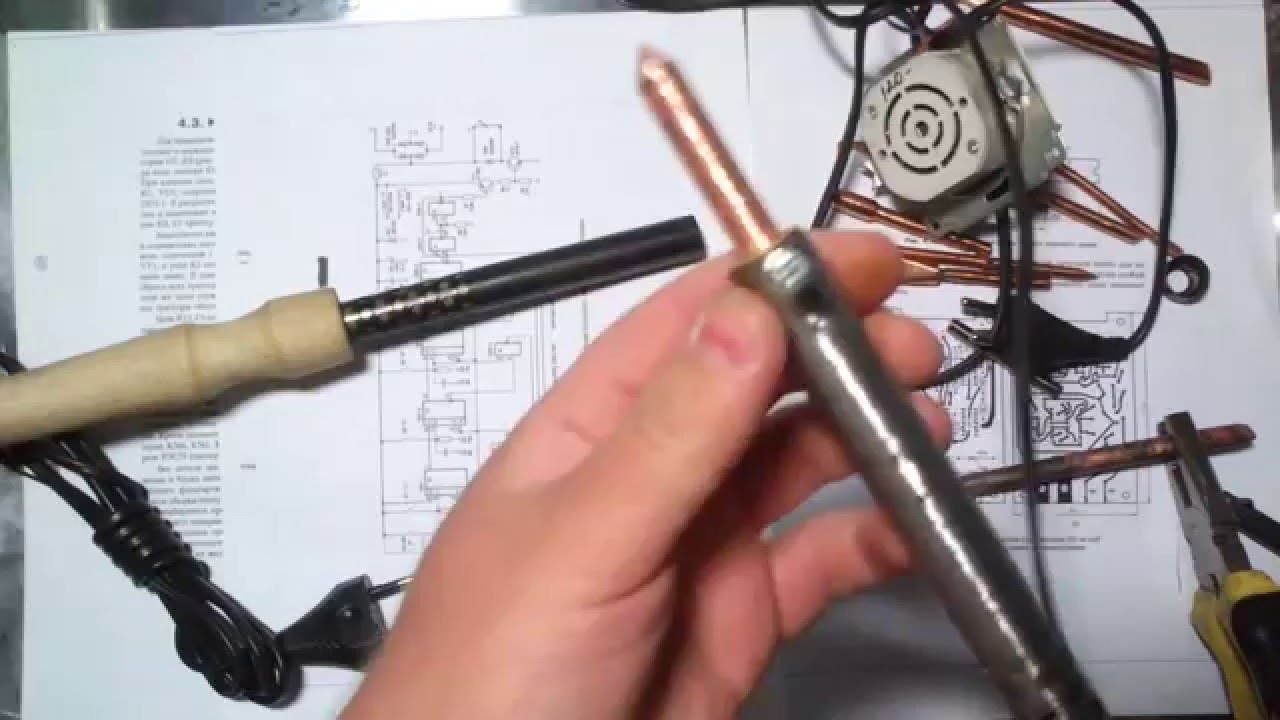
An important detail is the soldering iron tip
The quality of soldering and comfort in use is highly dependent on the tip used in the soldering iron. A sting made of a copper rod conducts heat well and solder adheres to it perfectly. But when heated, such a sting is constantly covered with oxides and charred, as a result of which it requires constant cleaning.
Another type of tip is a nickel-plated metal rod. It is distinguished by the absence of unpleasant scale formation and is convenient in jewelry work with small details. But it cannot be cleaned, because. this can lead to stripping of the coating and loss of adhesive properties for the solder.
Most modern soldering irons have a sharp conical tip. It allows you to safely touch the adjacent wire to get close to the leg of the radio component and process it.
Soldering iron kits can also come with flat tips. This shape better transfers heat to a massive part and allows you to quickly heat it up and solder it or, conversely, solder it.
Soldering Capabilities
There are more than enough opportunities to use your ability to properly solder metal parts and products. In this way, many assembly and repair operations are carried out. Here are a few of the most important ones:
- it is possible to solder copper tubes that are part of the internal lines of heat exchangers and refrigeration units;
- solder elements of various electronic circuits;
- carry out repairs, soldering jewelry, glasses;
- fix carbide cutting inserts on metalworking tool holders;
- in everyday life, soldering is also often used when it is necessary to fasten flat copper parts on metallized surfaces of sheet blanks;
- the ability to qualitatively tin surfaces can be useful for protecting metal structures from corrosion.
In addition, through the process under consideration, it is possible to solder parts made of metals of dissimilar structure, as well as seal various types of rigid joints.
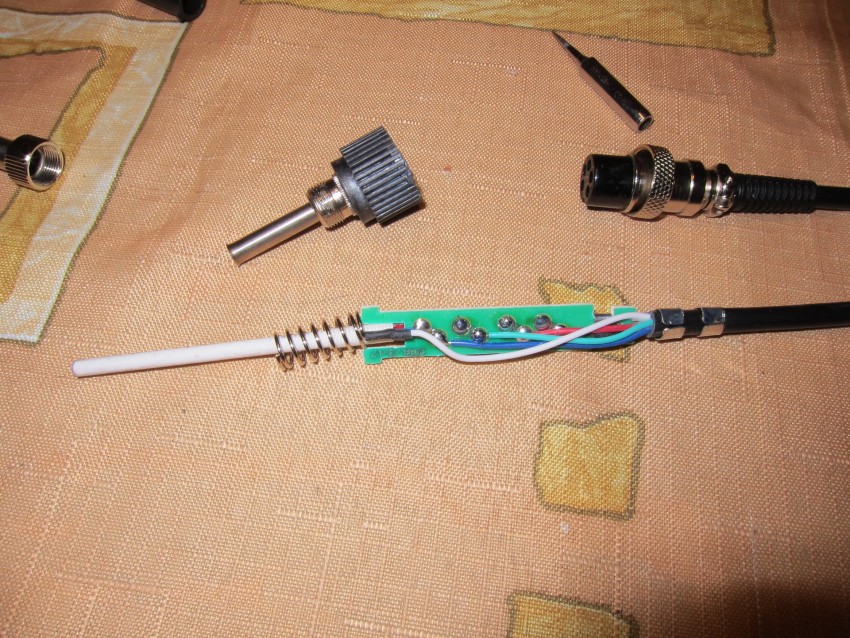
Final Assembly of the 12V Soldering Iron
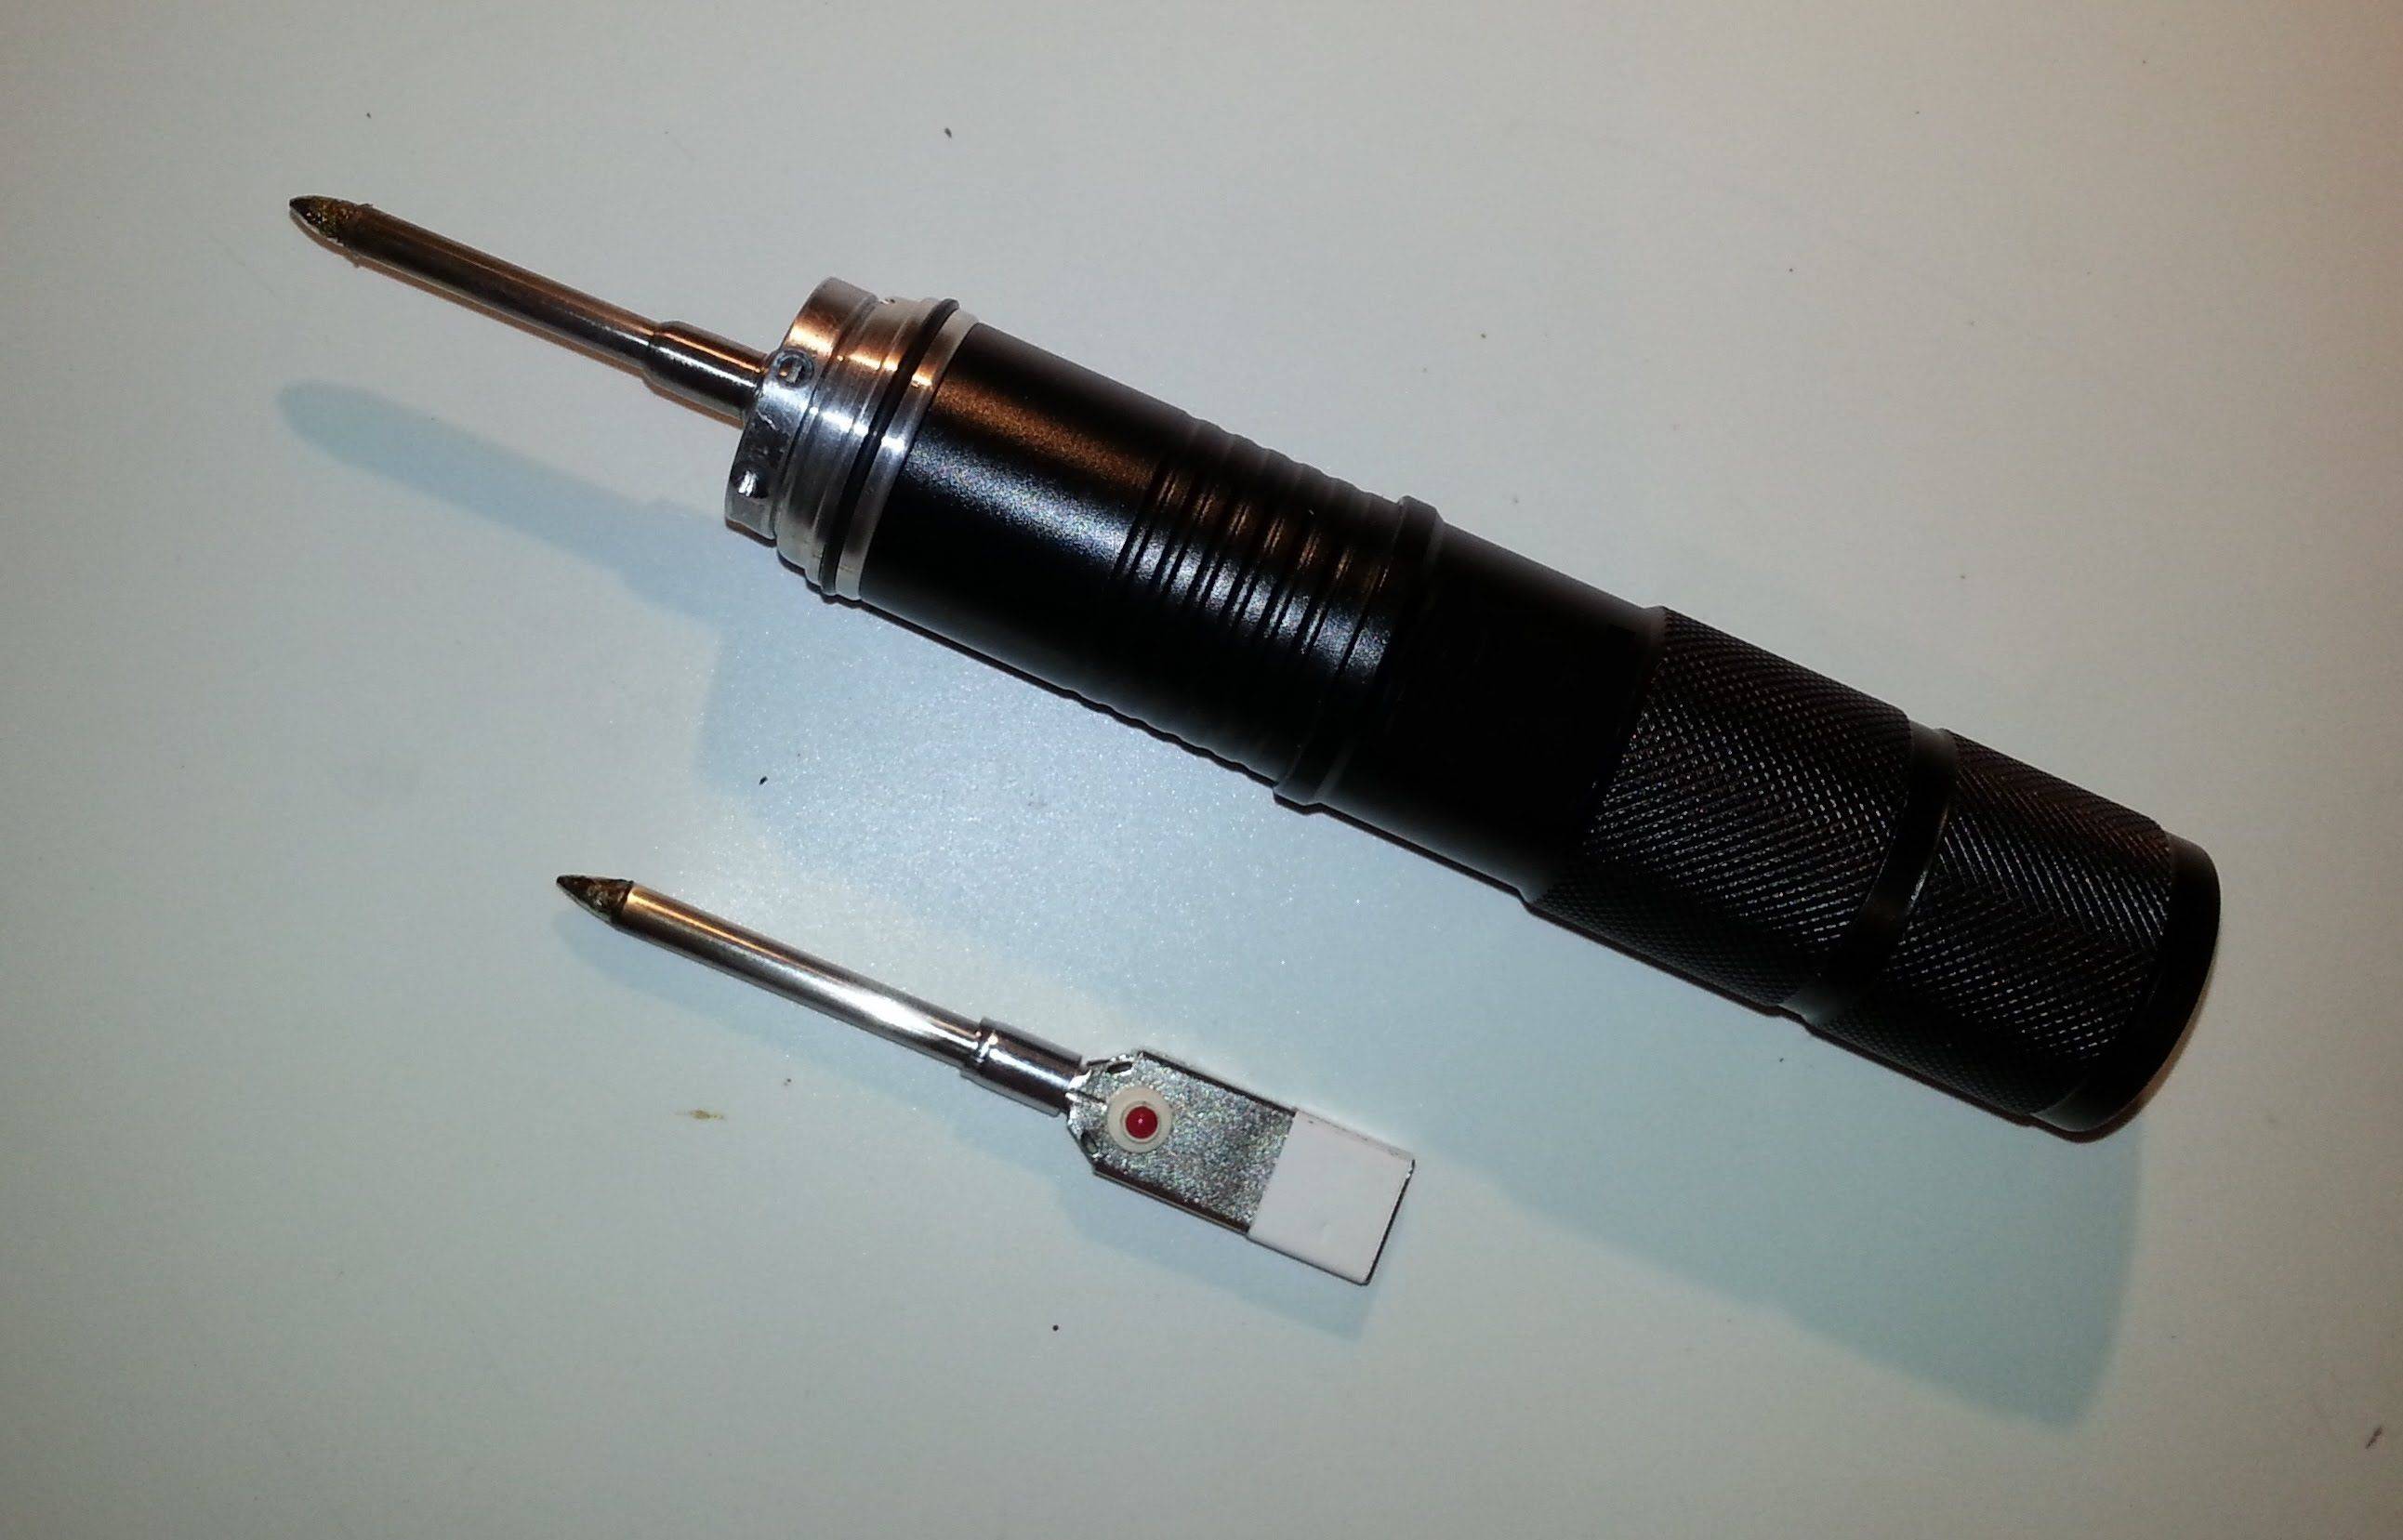
For the final stage of assembly, 2 more pieces of thin heat-resistant cambric were needed. They were dressed on "whiskers" of thin copper wires, to which a heating element was attached. Their free ends were twisted with wires coming from the power socket. After that, I thought that it would be nice to install a small toggle switch on the handle, which will allow you to turn off the voltage supply to the heater without pulling out the power supply from the socket or socket in the soldering iron handle. But this is particular. If any of the readers will collect such a device, it is worth bearing in mind this possibility.


 We twist the wires as tightly as possible - the contact should be good
Training
workplace
They always solder in normal general lighting (not worse than 500 lux), if necessary, create more comfortable conditions, use a source of local lighting.
Good ventilation should be taken care of. The best results are obtained by the hood, in its absence, they are soldered intermittently to ventilate the room from rosin vapors (every hour with intensive work).
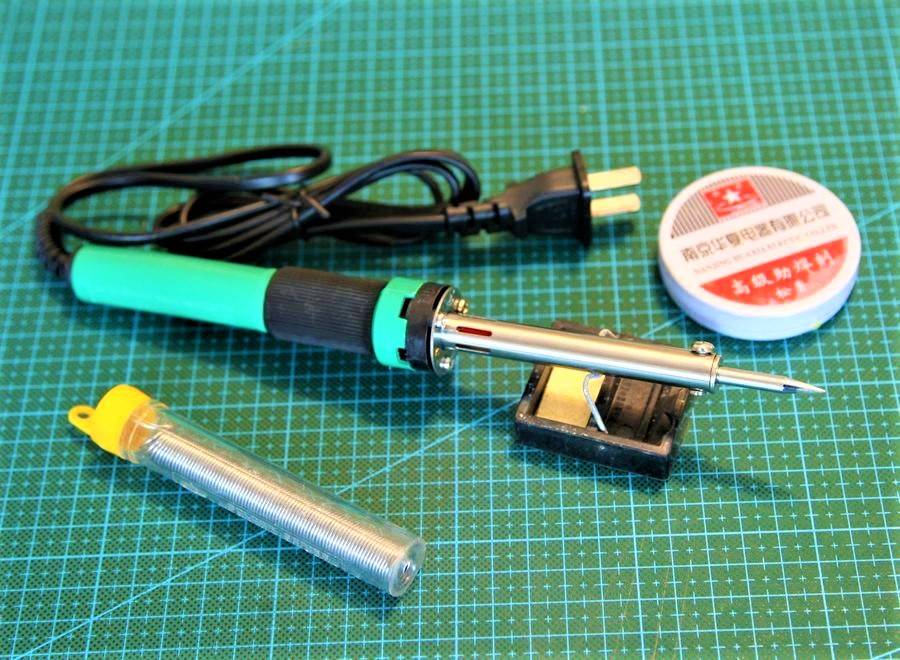
Choosing a soldering iron by power
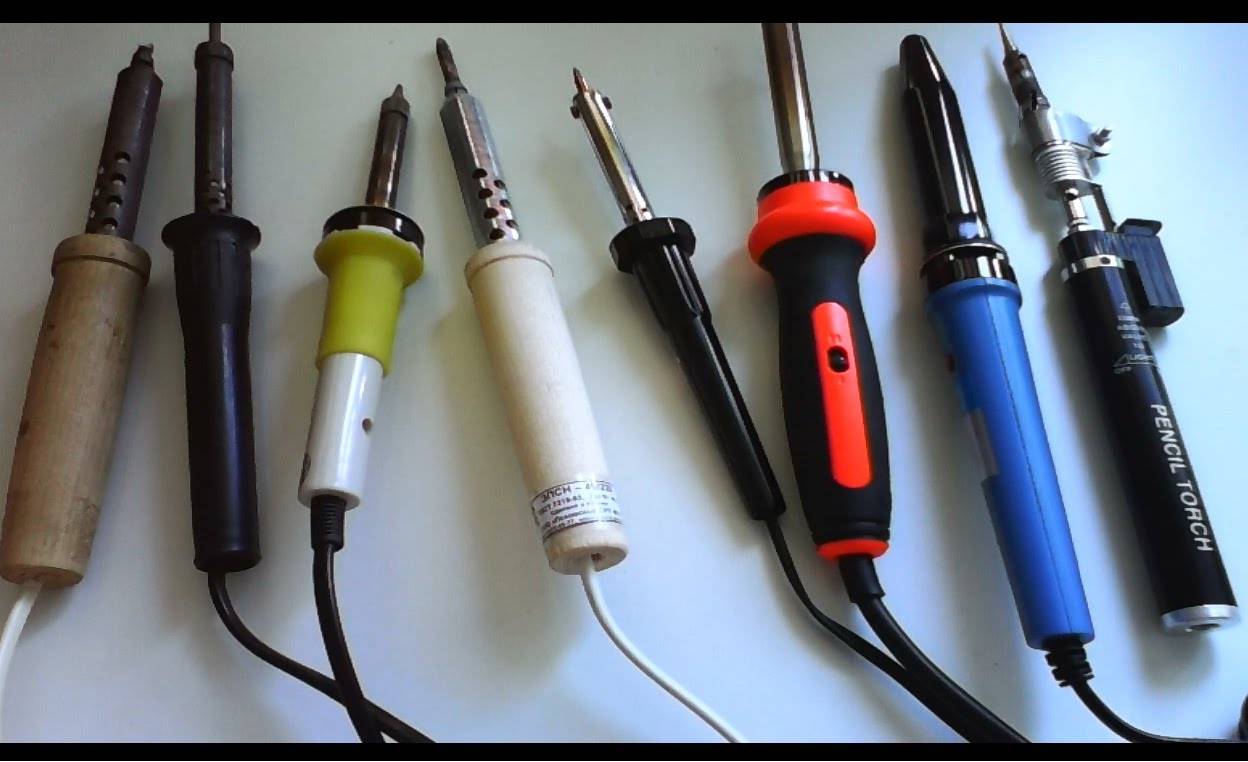
Solder with soldering irons of various capacities. It is usually assumed that:
- low-power soldering irons (20 - 50 W) are convenient for working with electronics, allow you to solder thin wires;
- With a 100-watt tool, copper layers with a thickness of not more than 1 mm are soldered;
- 200 W or more allows you to solder such massive parts that initially require the use of powerful soldering irons.
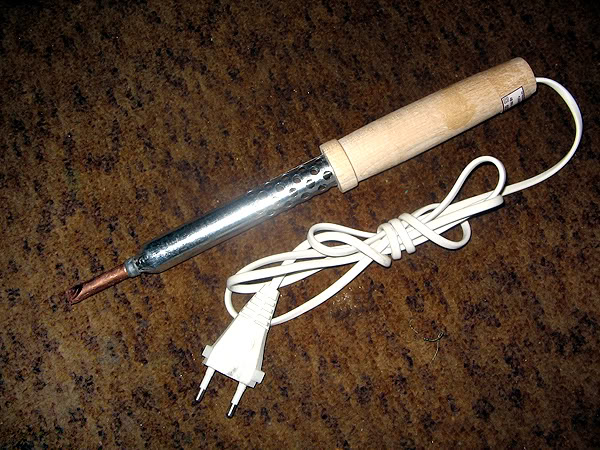
It is easy to judge the power of the device visually: a 50-watt soldering iron turns out to be slightly larger than a fountain pen, while a 200-watt soldering iron has a total length of about 35-40 cm.
Soldering iron to work
Before first use Remains of factory grease must be removed from the housing. Burning out leads to the appearance of smoke and an unpleasant odor. Therefore, the soldering iron is turned on through an extension cord, exposing it to the street through the window for a quarter of an hour.
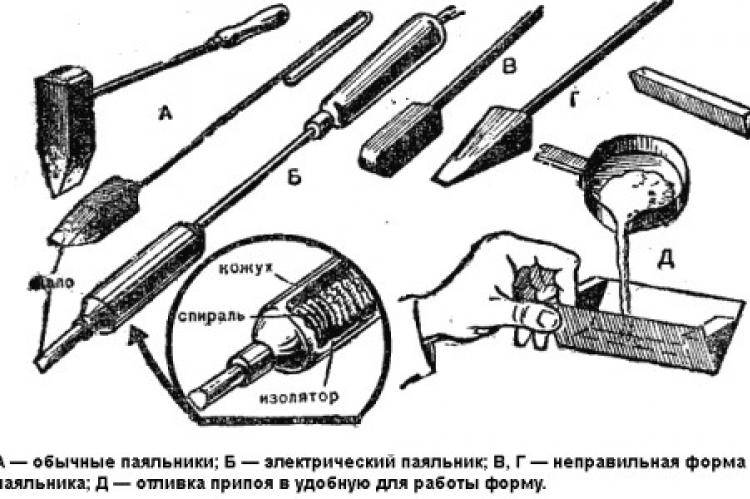
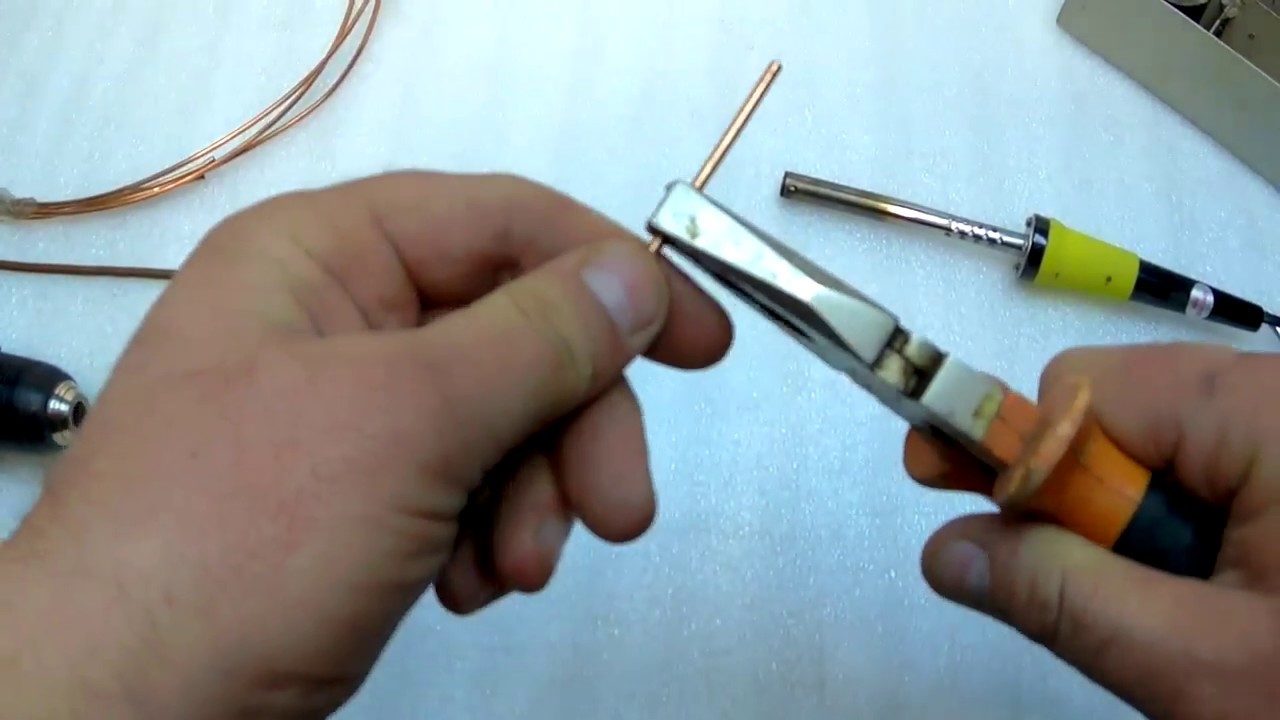
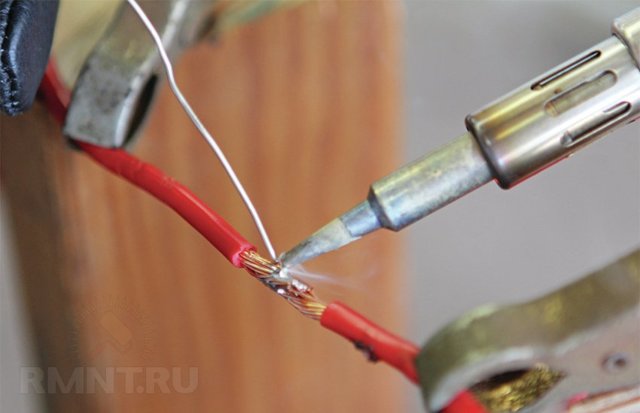
Then the soldering iron tip is forged with a hammer: the copper seal increases the service life. The tip of the sting is shaped:
- at an angle or on a cut - for spot work (an example is shown in Figure 5);
- knife-shaped - with such a sting several contacts are simultaneously soldered (typical for microcircuits);
- special - they solder some types of radio components.
Figure 5. An example of a universal sharpening of a soldering iron tip and proper tinning of its working area
Before you start soldering, you should clean the tip from the oxide film. This procedure is performed with fine-grained sandpaper or a velvet file, as well as chemically: immersion in rosin. The cleaned sting is tinned with solder.
If necessary, you can solder at the point with a powerful soldering iron. To do this, a copper wire with a diameter of 0.5 - 1 mm is wound onto its tip, using its free end to heat the solder.
Parts for soldering
Solder always in several stages. First prepare the surface of the metal conductor:
- removal of the oxide film followed by degreasing;
- tinning (deposition of a layer of tin on the surfaces in contact).
Then you can connect the parts.
Be sure to clean the wires that were in use.
The oxide film is removed with a file, sandpaper, a knife blade. In the case of flexible wires, each wire is processed.
The insulation of the enameled wire is removed by dragging it over the surface of the PVC tube, to which it is pressed with a heated sting.
A sign of readiness is a uniformly shiny surface without oxide film residues.
They are always soldered with degreasing, i.e. wipe the surface with a lint-free cloth or a cloth moistened with acetone or white spirit.
New wires have no oxide film. They are serviced immediately after the removal of insulation.
It is necessary to tin the copper conductor under a flux; after heating, the solder should cover the metal surface with a thin layer. In the presence of sags, soldering is not recommended, the wire is placed vertically, passing the soldering iron from top to bottom. The excess molten solder then flows to the sting.
If it is necessary to solder aluminum, then the cleaning and tinning procedures are combined. To do this, place the wire covered with rosin in sandpaper, heat it with simultaneous rotation.
The quality of the flux of some types decreases during long-term storage, as well as under the influence of atmospheric moisture. Therefore, such fluxes are soldered with additional control of the expiration date.
This is interesting: How to weld vertical weld for beginners: consider from all sides
Soldering acid phosphoric
Experienced craftsmen - electronics engineers and home radio amateurs know that for a quality connection, you will need not only a soldering iron, but also additional accessories. For soldering, flux and solder are used, the latter is made on the basis of lead and tin, often offered in the form of wire. Characteristics of the ratio of wire, flux may differ in parameters depending on the type of product.


Flux acts as the second component, a common form is used in the form of rosin. It helps to qualitatively, quickly solder parts of the copper composition, wires and other materials. Soldering acid can work with brass, nickel, stainless steel, etc. materials.
Preparatory stage
 Before you learn the correct techniques for handling solder and a soldering iron at home, you should take a special course that involves learning how to solder and everything that precedes this procedure. You can learn on your own, but when mastering work with jewelry, complex electronic circuits, you cannot do without an experienced mentor.
From the point of view of the organization of the process, soldering metals using special solders is a set of operations that are quite simple in content. However, despite the apparent ease, not everyone can solder correctly the first time. At the first acquaintance, there are some difficulties associated with the lack of a clear idea of what and in what sequence to do.
It is recommended to follow certain rules for preparing for soldering operations, the essence of which is as follows:
- it is necessary to choose the right main working tool to be soldered;
- you should worry about making a convenient and functional stand, prepare a place where you have to solder most of the time;
- the student must stock up on suitable consumables, without which no such procedure can do (solder, liquid or paste flux).
And, finally, a novice user must master the basic technological methods of soldering, which involve a certain sequence of targeted actions.
You can solder with an electric soldering iron, gas torch or soldering iron lamp. Boards, microcircuits are usually soldered with special hair dryers, thermal stations that provide uniform heating. The choice of one or another type of tool and a stand or holder for it is determined by the temperature conditions under which it is supposed to carry out work operations.
The next requirement involves the preparation of mandatory components that allow you to properly solder any metal connection. These include various types of solder, flux additives and special soldering fluids necessary to improve its quality (rosin and alcohol compositions for tinning).
Types of soldering operations
The variety of soldering methods is explained by many different factors that determine the quality and efficiency of soldering. Such factors include not only the type of soldering device and the type of solder that is used in the process, but also the technological features of the formation of the seam. To surface mount parts on a board, you need to learn how to properly use a solder mask.
In any case, in order to solder correctly, you need to know the melting point of the metal you are working with.It affects the choice of soldering tool, as well as fluxes and solder. In accordance with the specified parameter, solder materials are divided into fusible (up to 450 degrees) and refractory (more than 450 degrees).


